
Метод 1: Редактирование системного реестра
Рассматриваемый сбой появляется сначала из-за неверной работы механизма выдачи прав доступа одному из компонент Майкрософт Кабинет, что почти всегда можно убрать удалением определённой ветки реестра.
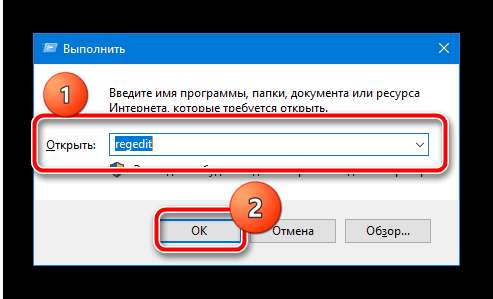
- Вызовите «Редактор реестра» – проще всего это сделать при помощи средства «Выполнить», запустив его сочетанием Win+R. Дальше введите в окно запрос
regeditи нажмите «ОК».
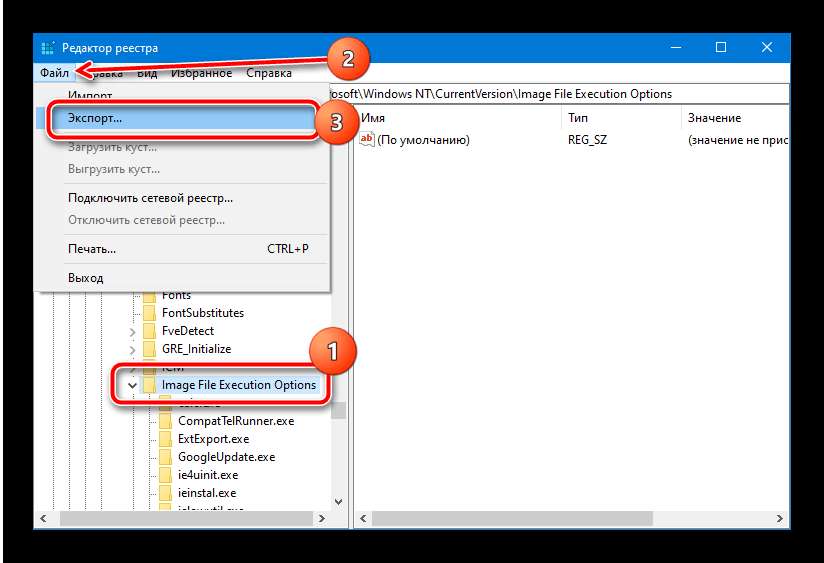
Перейдите по адресу:
HKEY_LOCAL_MACHINESOFTWAREMicrosoftWindows NTCurrentVersionImage File Execution OptionsOSPPSVC.EXEНа всякий случай советуем сделать запасную копию раздела – выделите папку Image File Execution, потом воспользуйтесь пт «Файл» – «Экспорт».
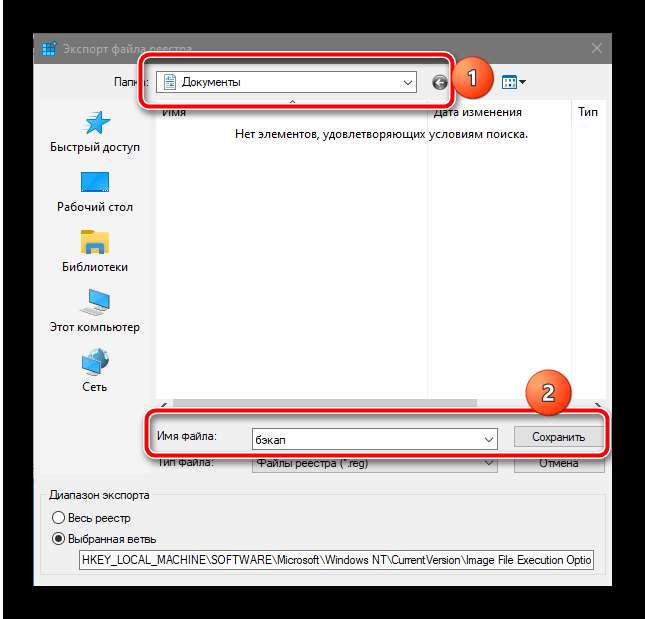
Изберите положение, куда желаете выгрузить бэкап, задайте ему имя и кликните «Сохранить».
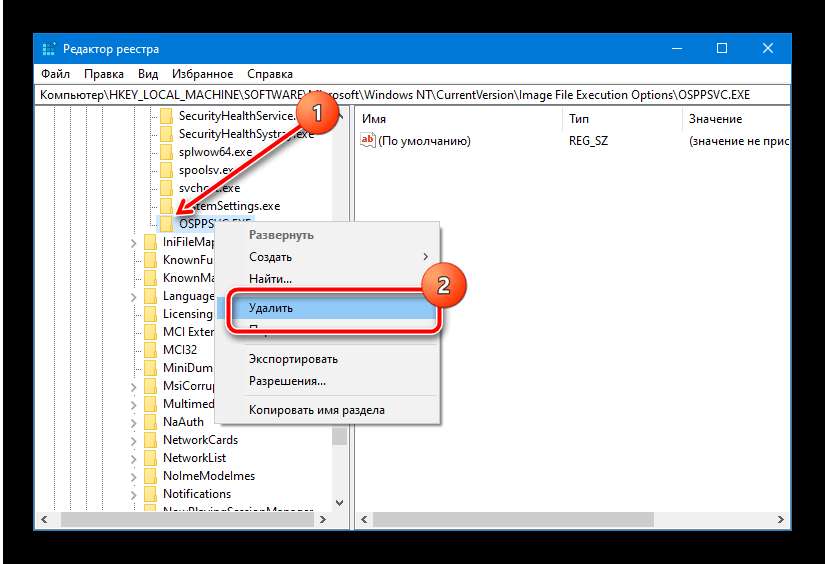
Сейчас выделите запись OSPPSVC.EXE, щёлкните по ней правой кнопкой мыши и изберите пункт «Удалить».
Подтвердите своё намерение.

Перезагрузите компьютер.
После пуска ОС проверьте наличие трудности. Если она будет устранена, воспользуйтесь одним из последующих способов.
Метод 2: Настройка доступа к папкам
2-ой способ устранения заморочек с доступом заключается в выполнении определенных манипуляций с файловой системой компьютера при установки MS Office. Шаги последующие:
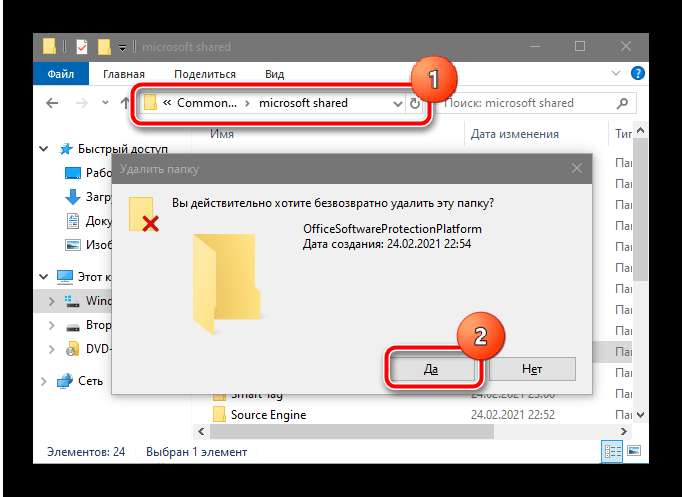
- После получения ошибки закройте «Мастер по установке…» и перейдите по такому адресу:
C:Program FilesCommon FilesMicrosoft SharedНа сто процентов (средством сочетания Shift+Del) удалите директорию OfficeSoftwareProtectionPlatform.
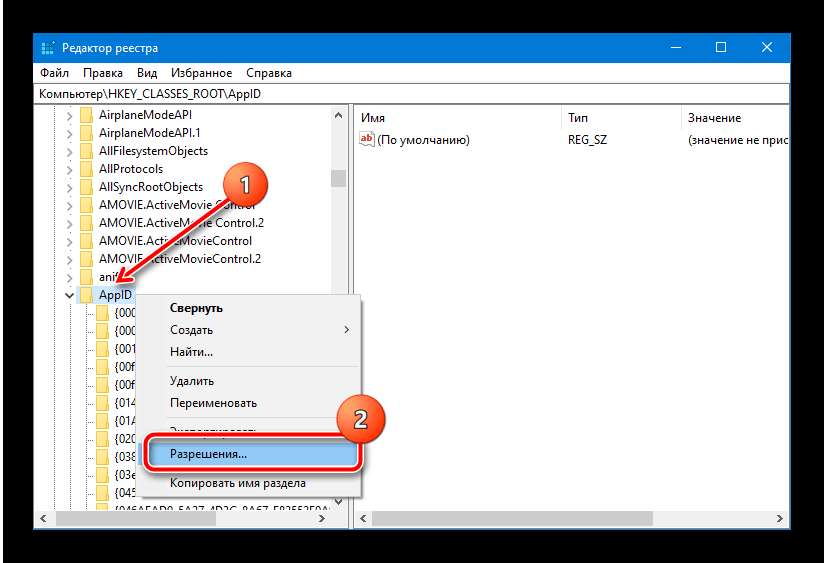
Опять запустите «Редактор реестра» (см. Метод 1) и перейдите по пути
HKEY_CLASSES_ROOTAppID, кликните по последнему каталогу ПКМ и изберите «Разрешения».
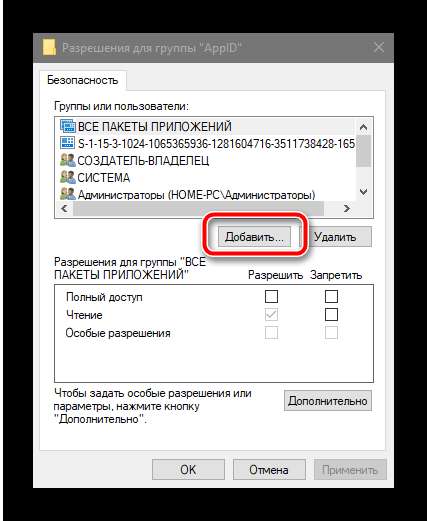
В этом окне нажмите «Добавить».
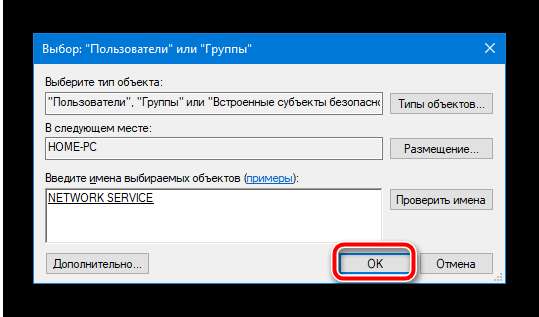
Введите имя юзера
NETWORK SERVICEи нажмите «Проверить».
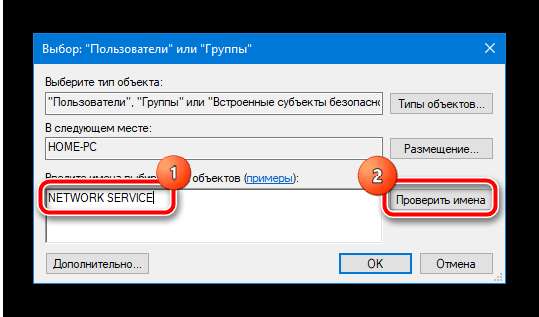
После проверки воспользуйтесь кнопкой «ОК».
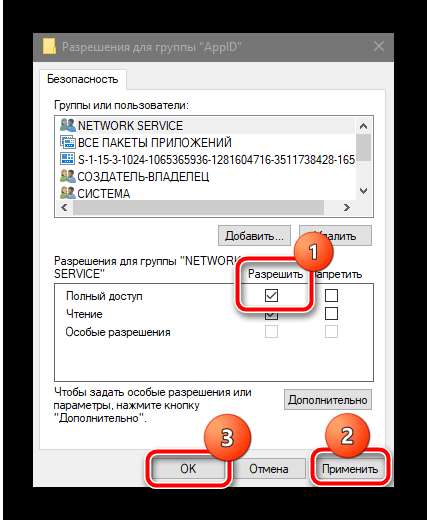
В столбце «Разрешить» отметьте пункт «Полный доступ», после этого нажмите «Применить» и «ОК».
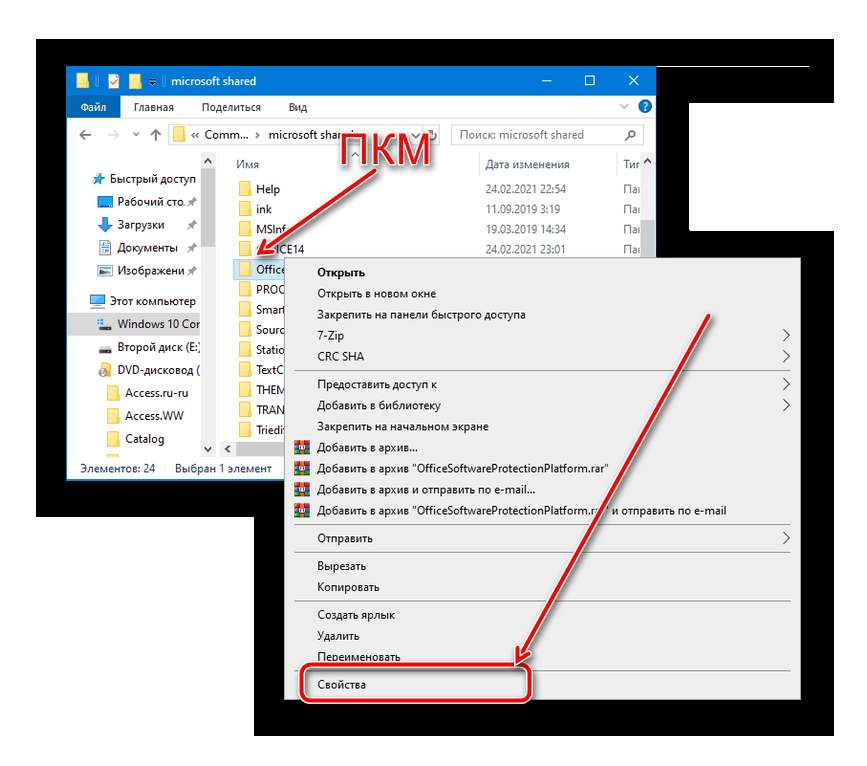
Запустите повторно установщик пакета приложений и начните установку. Не волнуйтесь, если ошибка опять появится, это тоже часть процедуры. Не закрывая «Мастер по установке…», перейдите по адресу из шага 1, и изберите каталог OfficeSoftwareProtectionPlatform, щёлкните по нему ПКМ и перейдите в «Свойства».
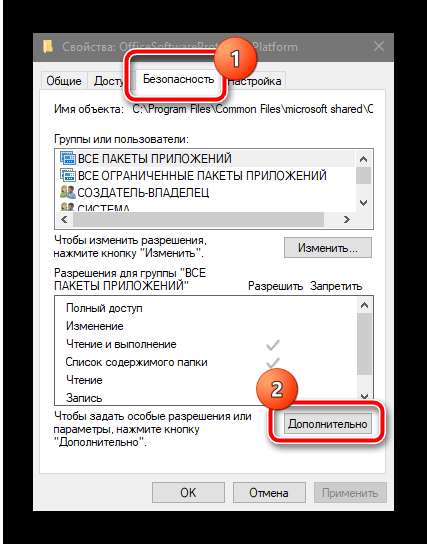
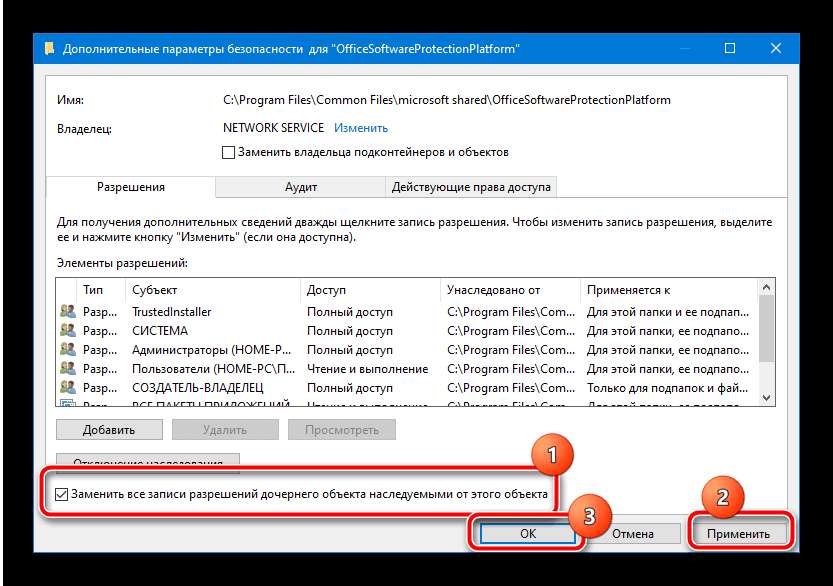
Тут откройте «Безопасность» и воспользуйтесь кнопкой «Дополнительно».
Повторите деяния по выдаче разрешений юзеру NETWORK SERVICE из шага 3, они ничем не отличаются. Единственное дополнение – отметьте опцию «Заменить разрешения для всех дочерних объектов…».
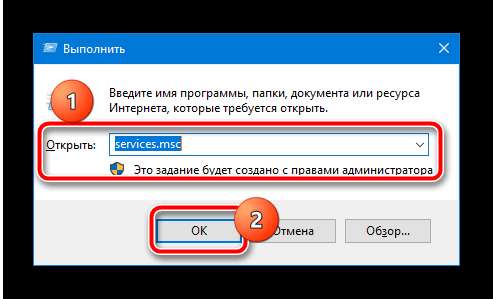
На данный момент будет нужно открыть службы – подходящую оснастку можно запустить через уже упомянутое тут средство «Выполнить», запрос
services.msc.
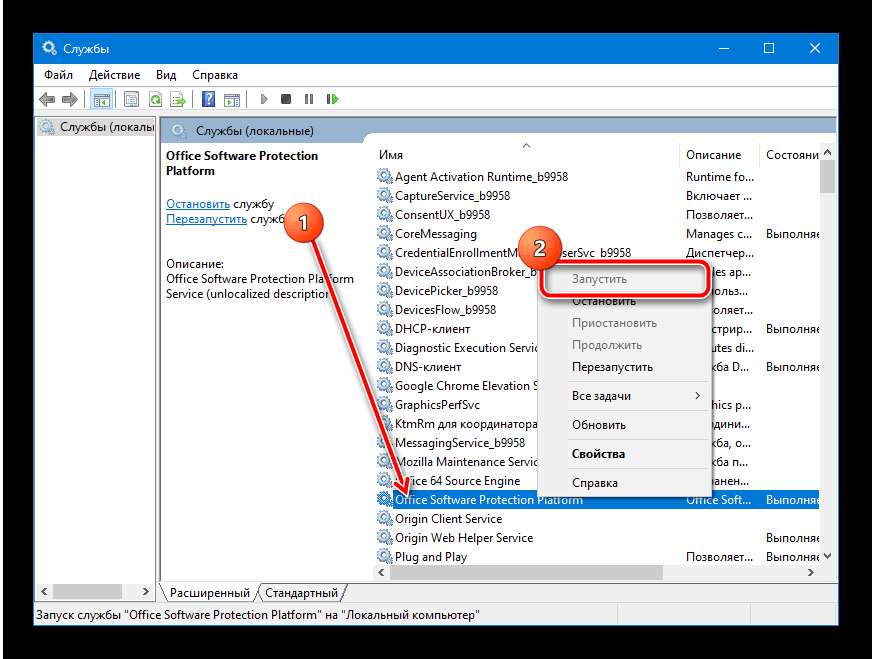
Найдите в списке позицию с именованием Office Software Protection Platform, кликните по ней ПКМ и изберите «Запустить».
Вернитесь к окну инсталлятора и нажмите на кнопку «Повторить» — сейчас процесс должен пройти без заморочек.
Метод 3: Внедрение других установочных данных
Время от времени рассматриваемая неувязка возникает в случаях, когда содержимое инсталлятора повреждено, к примеру, в процессе скачки. Если ни 1-ый, ни 2-ой из приведённых способов не помогают, вероятнее всего, вы столкнулись конкретно со сбойным установщиком. В таком случае будет нужно загрузить или скопировать его поновой, и лучше из другого источника.
Источник: lumpics.ru
- 0
- 1
- 2
- 3
- 4
- 5
Hi tronixmart, the problem is not a bad key. . .
First of all, if you are using Win 7 Home Premium (as I am), Home Basic, or Starter, you will not have a Local Users and Groups option. It is only for Win 7 Ultimate, Professional, or Enterprise.
Jennifer Zhan’s second suggestion regarding the changing of ‘This account’ to ‘Local system account’ under the «Log on» tab in the properties window of Office Software Protection Platform is better, but still not adequate. If you try this, as I
did, and then manually start Office Software Protection Platform before continuing the Office 2010 installation from the point of error, you will receive a new surprise. The Error 1920 message goes away, but then it is replaced with an oh-so-descriptive dialogue
box telling you that «Microsoft Office 2010 installation encountered an error.» Nice.
Changing ‘This account’ to ‘Local system account’ is useless, because after the error described above, the system somehow reverts the log on selection for Office Software Protection Platform back to ‘This account,’ with ‘Network service’ selected by default.
The better solution is to give the user account called ‘Network service’ full permissions for the appropriate folders and registry entries. Simply follow these instructions I found on another forum:
In Windows Explorer:
Right Click on the folder OfficeSoftwareProtection Platform
from C:\Program Files\Common Files\Microsoft Shared and Microsoft from
C:Program data(hidden folder) Properties > Security > Edit > Add > Type Network Service > OK > Check the Full control box > Apply and OK.
In Registry Editor (regedit.exe):
Go to HKEY_CLASSES_ROOT\AppID registry >Right Click on the folder > Permissions > Add > TypeNETWORK SERVICE > OK > Check Full Control > Apply > OK
This worked for me and many others with the same problem, and took mere minutes to do.
-
Marked as answer by
Thursday, November 18, 2010 7:14 AM
You may encounter the office error code 1920 when trying to install MS Office 2010 on your PC. However, this error is not bounded with only MS Office and you may get this error also when adding or removing any program from your Windows-based pc like Windows Server 2008, 2012, Windows 7, 8, 8.1, and Windows 10.
Error 1920. Service ‘Office Software Protection Platform’ (osppsvc) failed to start. Verify that you have sufficient privileges to start system services.
-or-
Error 1920 service failed to start. Verify that you have sufficient privileges to start system services
-or-
Office 2013 Error 1920. Service Windows Font Cache Service (FontCache) failed to start
Above error mostly appears when,
1. When trying to install MS Office 2010
2. When trying to install MS Office 2013
3. When trying to upgrade from Office 2010 to 2013
4. When trying to install LogMeIn
5. When trying to add or remove any program from Windows-based PC.
Cause:
This issue occurs when the Network Service account does not have the correct permissions on C:\Program Files\Common Files\Microsoft Shared\OfficeSoftwareProtectionPlatform.
How to Fix Windows installer error 1920?
Method 1: Fix Using Advanced System Repair Tool
The most of the common reason behind program install failed is corrupted or damaged system files like DLL files, EXE files, sys files etc. There are thousands of tiny system files are there that work specific task. If one of the files gets replaced, deleted or damaged then you may get windows installer error 1723.
Windows is made with huge number of dll files, exe files, sys files, various types of services, databases, etc so, it is not possible to keep monitoring all the files always. A brilliant PC Optimizer tool repairs damages, fix errors, update windows and drivers, and eliminate various types of errors silently.
Outbyte PC Repair Tool does all the above task easily and provides you an errorfree and smooth Windows environment to work so that you can focus on your business only.
![]()
3 Steps to Fix this Error
Step 1. Download Outbyte PC Repair Tool [File Size: 16.4 MB]
Step 2. SCAN your Windows PC
Step 3. Click Fix button to Repair Error
Download and Install Advanced System Repair Tool and scan your PC. It has the large database with 25 million of files. It will find all the damaged or deleted system files and reinstall them with the fresh one. After, optimizing with Advanced System Repair Tool, try to install software again.
Method 2:
To resolve this issue, you must give the Network Service account full control on the ‘OfficeSoftwareProtectionPlatform’ folder.
For Windows XP and Windows Server 2003
Open Run command by pressing Windows Key + R and paste following code and then click OK.
cacls “C:\Program Files\Common Files\Microsoft Shared\OfficeSoftwareProtectionPlatform” /t /e /p “Network Service”:F
For Windows Vista
Execute following command in Run Dialog Box.
icacls “C:\Program Files\Common Files\Microsoft Shared\OfficeSoftwareProtectionPlatform” /grant “Network Service:F” /t
For Windows 7,8 and 10
Execute following command in Run Dialog Box.
icacls “C:\Program Files\Common Files\Microsoft Shared\OfficeSoftwareProtectionPlatform” /grant “Network Service:F” /t
Video
Method 3:
This method works when you are getting error 1920: font cache service unable to start or failed.
Step 1: Open Run Dialog Box.
Step 2: Type Services.msc and click OK. It will open Service Dialog box.
Step 3: Find Windows Font Cache Services
Step 4: Double click on it and set the startup type to automatic.
Step 5: Click apply and exit from services windows.
Summary
This article helps you to fix Windows Installer Error 1920 in following conditions:
Error 1920. Service ‘Office Software Protection Platform’ (osppsvc) failed to start. Verify that you have sufficient privileges to start system services.
-or-
Error 1920 service failed to start. Verify that you have sufficient privileges to start system services
-or-
Office 2013 Error 1920. Service Windows Font Cache Service (FontCache) failed to start