A programming language like Java is more than just a way to write programs; game and app developers use it too. However, it’s very common to experience Java crashes. If you are having trouble when trying to launch an application that is built around Java, then this guide will help you fix the problem.
Not all Java virtual machine errors are the same. They can occur for many different reasons. In this article, we will explain the most common causes of Java virtual machine launcher error – Could not create the Java Virtual Machine and how to fix it.

What is Java in simple words?
Java is a popular programming language that can run on a variety of different operating systems and devices. It has many different uses, including in web development, mobile applications, desktop applications, and server-side programming. Java generates a virtual machine (VM) that executes the code written in Java. A Java virtual machine launcher error can occur if something goes wrong with the data or code that’s being processed by the Java virtual machine.
What is a Java virtual machine error?
A Java virtual machine error, also known as a JVM error, is classified as an error generated by the Java Virtual Machine. When this type of error occurs, it usually means that the computer cannot read or understand the code. This can happen for a number of reasons, such as when the computer isn’t updated with required patches or if it’s not compatible with Java. If you come across a JVM error while using your computer, it’s important to know how to recover from this problem. Here are some steps to take in order to fix this issue and continue using your computer.
Over the past couple of days, we have come to understand that some users have been experiencing an error known as Could not create the Java Virtual Machine. From what we’ve gathered, the error tends to pop up when a user is attempting to launch an application that was built using Java.
In order to resolve this issue, first, make sure that you have all of the necessary updates and that the program is installed correctly. After that, you can start looking for possible solutions to fix Java virtual machine launcher error on Windows 11/10:
- Add a new system variable for Java
- Run Java.exe as administrator
- Uninstall & Reinstall the Java application.
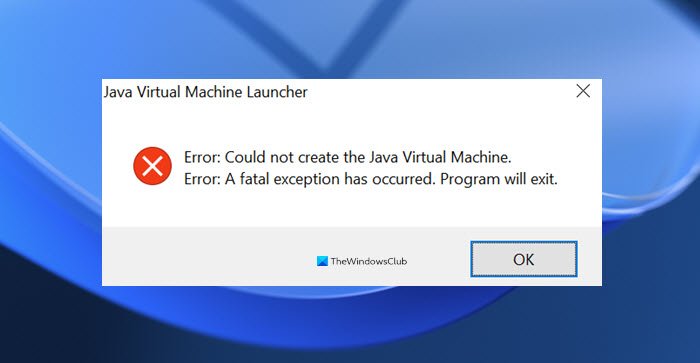
Could not create the Java Virtual Machine
Now let’s take a closer look at them:
1] Add a new system variable for Java
To fix this error, you must add a new variable to Java’s system and see if it solves the error. Please follow the steps below to resolve this issue:
- Right-click on the Start menu and select Run from the menu list.
- Type sysdm.cpl in the search box and click the OK button.
- Go to the Advanced tab and select Environment Variables at the bottom.
- Under the System variables section, click on the New button.
- On the next screen, type _JAVA_OPTIONS in the Variable name field.
- You will then need to input –Xmx512M in the Variable value box.
- Now click on the OK button to apply the changes.
Below you can find a detailed explanation of the above steps:
To get it started, open the System Properties window first. This can either be done through the Run dialog box or the File Explorer.
So, press the Windows + R keyboard shortcut to launch the Run command. Then type sysdm.cpl in the search box and click the OK button.
Alternatively, open File Explorer using Windows + E keyboard shortcut. Then right-click on This PC and select the Properties option from the context menu.

Inside the System Properties window, select Environment Variables at the bottom of the Advanced tab.

Then click on the New button in the System variables section.

You will now need to type _JAVA_OPTIONS in the Variable name field. To set a variable, you will need to enter –Xmx512M in the Variable value text box. By doing this, the RAM allocation will increase to 512 megabytes.
Once you have made your changes, click OK to save them. Also, click OK on the Environmental window.
2] Run the program as an administrator
According to the reports, some users could able to solve this error when they open the Java executable file with administrative privileges. The following steps will guide you through doing this:
- Press Windows key + Q keyboard shortcut.
- Type Java in the search box.
- Right-click on Java and select Open file location from the context menu.
- On the next page, right-click on Java executable file and select the Properties option.
- When the Java Properties window opens, switch to the Compatibility tab.
- Under the Settings section, mark the checkbox next to the Run the program as an administrator.
- Click on Apply and then hit the OK button to save changes.
- Now close the File Explorer window.
When you have finished all the steps above, restart your computer and see if the problem has been resolved now.
3] Uninstall & Reinstall the Java application
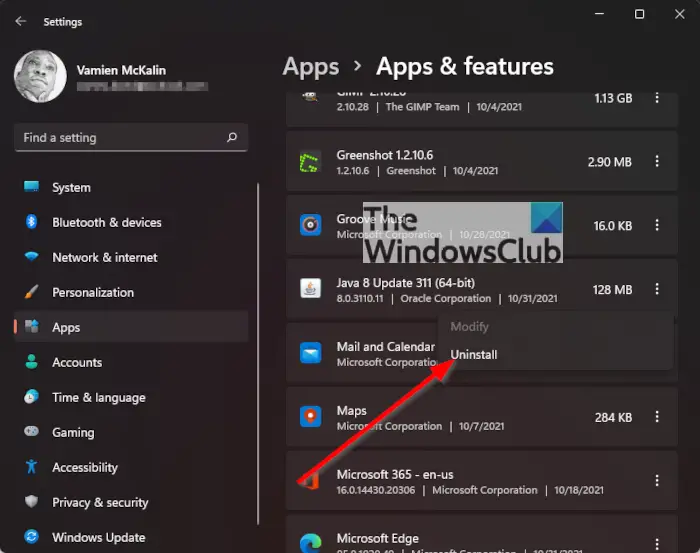
You could reinstall the Java JRE application. However, before we go down that road, it makes a lot of sense to uninstall the program first. Do this by pressing the Windows key + I to fire up the Settings menu, then go to Apps > Apps & Features. Scroll down until you’ve come across the Java program, then click on the three-dotted button, and be sure to select Uninstall to remove it.
In terms of reinstalling the app, you must visit the official Jave Runtime Environment page and download it for your Windows 11 computer. Once you’re done, install the tool, then restart your computer. From there, go ahead and check if Could Not Create The Java Virtual Machine is still showing up.
That’s it. Hopefully, one of these solutions will work for you!
What is the cause behind the Could not create the Java Virtual Machine error?
The cause for this error on Windows 11/10 varies quite a lot. For example, if you are running a homebrew Java application, then maybe it is being invoked by the wrong options. Alternatively, the Java application you’re trying to open could fail if the heap memory size is larger than the System Variable size.
What is Virtual Machine error in Java?
This error indicates that the Java Virtual Machine is not working properly or no longer has enough resources for it to continue operating.
Related:
- How to manually enable the latest Java version on Windows systems
- Java Install or Update did not complete – Error Code 1603.
- Подробности
- марта 18, 2016
- Просмотров: 100647
Если ваша система частенько выдает сообщения об ошибках запуска Java Virtual Machine «виртуальной машины Java», вам не нужно беспокоиться, эти ошибки очень легко устранить.
Функции JVM (Java Virtual Machine)
Виртуальная машина java отвечает за выделение памяти и сбор мусора, наряду с интерпретацией байт-кода в машинный код.
Среда выполнения Java (JRE) является обязательным для установки на вашем компьютере для некоторых приложений, чтобы работать должным образом. Основным компонентом JRE является виртуальная машина Java (JVM), которая помогает запускать Java-приложения. Java-файл, при компиляции, производит ‘.класс’ файл, а не исполняемый файл. Этот класс файл содержит байт-код java, который в jvm интерпретируется в машиночитаемые инструкции. Jvm — независит от платформы, поскольку он обеспечивает машинный интерфейс, который не зависит от базовой операционной системы и аппаратной архитектуры.
Могут быть случаи, когда вы можете получить сообщения об ошибках при запуске jvm, в таких ситуациях, как загрузка в компьютер, игра в игры, такие как minecraft, или открытие определенных Java-приложений. В этой статье я собрал несколько решений, которые могут помочь вам исправить ошибки запуска виртуальной машины Java для Windows.

Сообщение об ошибке #1: не удалось создать виртуальную машину java.
Это сообщение об ошибке обычно возникает при попытке запуска Java-игр, таких как minecraft.
➦Откройте панель управления.
➦Зайти в систему.
➦Перейти к расширенным свойствам системы.
➦Нажмите кнопку ‘переменные среды’.
➦В системных переменных, нажмите кнопку ‘новый’.
➦Поставьте новое имя переменной: _JAVA_OPTIONS
➦Вбейте новое значение переменной: -Xmx512M
➦Нажмите кнопку ‘ОК’.
-Xmx/S-это параметр конфигурации, который управляет количеством памяти которое использует java.
- Xmx — это максимальный размер памяти, которая может быть выделена.
- Xms — это минимальный размер памяти, которая может быть выделена.
Сообщение об ошибке #2: ошибка при открытии раздела реестра.
Эта ошибка может возникнуть при работе с Java в командной строке.
➦Открываем папку WINDOWS\system32.
➦Удаляем исполняемый файл java файлов, в том числе java.exe, javaw.exe и javaws.exe.
➦Далее переустанавливаем среду JRE.
 Сообщение об ошибке #3: Виртуальная машина java лаунчер не может найти основной класс: программа завершает работу
➦Нажмите кнопку «Пуск» в главном меню.
➦В окне поиска введите «mrt» и нажмите клавишу Enter. Будет запущена утилита Windows под названием ‘Средство удаления вредоносных программ Microsoft Windows ‘.
➦Нажмите кнопку «Далее» и выберите «полное сканирование».
➦Перезагрузите компьютер после завершения сканирования.
➦Нажмите кнопку «Пуск» и запустить программу настройки системы, набрав команду «msconfig» в поле поиска.
➦ Перейдите на вкладку «запуска» и снимите галочку рядом с ‘WJView.exe’ и ‘javaw.exe’.
➦Перезагрузитесь при запросе.
Сообщение об ошибке #4: не удалось открыть jarфайл.
Эта ошибка может возникнуть при попытке открыть приложение.
➦Нажмите кнопку ‘Пуск’ и перейдите к ‘программам по умолчанию’.
➦Выберите «сопоставление типа файла или протокола программе’.
➦Нажмите на расширения (.jar) для просмотра программы, которая открывает его по умолчанию.
➦Нажмите кнопку «изменить программу» и выбрите программу по умолчанию «виртуальная машина java лаунчер».
➦Нажмите кнопку «закрыть» и проверьте, устранена ли проблема.
➦Если нет, попробуйте удалить и переустановить Java.
➦Если проблема не устранена, обратитесь в техническую поддержку приложения, которое дает вам ошибку.
Если вы столкнулись с еще какими-либо ошибками Java Virtual Machine напишите о них в комментариях, постараюсь помочь.
Ссылки:
Загрузить Java бесплатно с официального сайта
Читайте также

Java is a versatile, machine-independent programming language that is used to write a variety of different applications. Unlike most other applications, you can run java applications equally well in Windows, Mac, or Linux, provided you have installed Java Virtual Machine (JVM) in your system. However, if JVM breaks, then none of your java applications run.
One recent impact having a broken JVM launcher was felt by users of Minecraft. A recent update brought new features, but also required Java 16 to set up a server. Those with older version of JVM were greeted with a Java Native Interface (JNI) error.
There are other examples where a malfunctioning JVM launcher caused an application to not work, and it could probably happen again in the future. We have this article prepared, so that you can be prepared when your JVM launcher has an error.
Table of Contents
What Causes Java Virtual Machine Launcher Errors
When there is a JVM launcher error in your system, the following are the most common reasons:
- JVM needs to be updated.
- Default app has not been set to Java.
- Insufficient global maximum heap memory.
- Application needs administrative rights to run.
You can somewhat diagnose what is wrong with your JVM and attempt a corresponding fix based upon the type of error message that you see when you JVM does not work.
Reinstall/Update Java
If the error message you see is “Java Virtual Machine Launcher Could Not Find The Main Class,” then Java has been incorrectly installed or Java installation has been corrupted in your machine.
JNI errors can be caused by outdated version of Java.
To fix this, you need to reinstall Java Runtime Environment.
Windows 10
- Launch Settings (Press Win + I), then navigate to Apps.
- Scroll to find Java and select Uninstall.
- Download and install the latest version of Java.
- Restart your computer.
Windows 11
- Launch Settings, navigate to Apps > Apps & features.
- Scroll to find Java.
- Click on the kebab button to its right, then select Uninstall.
- Download and install the latest version of Java.
- Restart the computer.
Increase System Memory for Java
You will get a “Could not create the Java virtual machine” error if Java is trying to use more memory than has been assigned to it.
You can fix this by increasing the amount of memory allotted to Java.
Note: The variable value -Xmx512M sets memory available to Java to 512 MB. You can change this value depending upon how much memory your Java was utilizing before. For instance, setting this to -Xmx1024M assigns 1024 MB system memory to Java.
Run as Administrator
Sometimes JVM errors can occur because you do not have sufficient user privilege to run the application.
You can fix this by configuring Java to run as administrator.
- Press Win + E to launch Windows Explorer, then navigate to Java installation folder. (Usually located at “
…/Program Files(x86)/Common Files/Oracle/Java/javapath”) - Find
java.exeand right-click on it. - Select Properties.
- Switch to Compatibility tab and put a tick mark on Run this program as an administrator.

- Click Apply, then click OK.

Set File Type Association to Java
If your error message is “Unable to access Jar file,” then one of the reasons for this issue is that your jar file association is not set to Java.
Windows 10
- Launch Settings (Press Win + I)
- Navigate to Apps > Default apps.
- Click on Default apps by file type.
- Scroll to find
.jarfrom the list of file types. - Click on the currently set default application next to it.
- Click on Java(TM) Platform SE binary.

- Close Default apps setting.

Windows 11
- Press Win + I to launch Settings.
- Navigate to Apps > Default apps.
- Enter
.jarfile type in the box under Set a default for a file type of link type. - Click on the application that is currently selected to open .jar files, then click on Java under Other options.
- Close settings.
Frequently Asked Questions
What is Java Exception Error?
And exception is an unexpected event which occurs during program execution. Java has methods to catch and handle exceptions.
An application that has implemented exception handling methods will create an exception object when it runs into an exception during execution.
The object contains information such as name and description of the exception, as well as the state of the application when the exception was caught.
What is the Maximum Java Heap Size for Windows?
The maximum allowable heap size for Java in Windows is 16 EB (exabyte). For 32 bit of Windows, maximum heap size is 4 GB.
How Do I Install Java on Mac?
Please follow the steps below if you want to install Java on your MacOS:
- Download
jre-8u65-macosx-x64.pkgfrom the official site. - Launch the file by double clicking on it.
- Double click the package icon to launch Install Wizard.
- Follow on-screen instructions.
Please note that you need a macbook with Intel processor to install Java. Oracle does not officially support Java on M1/M2 processors yet.
Skip to content
На чтение 3 мин. Просмотров 4.5k. Опубликовано
Неустранимая ошибка исключения виртуальной машины Java появляется у некоторых пользователей, когда они пытаются запустить программное обеспечение, построенное на Java. Полное сообщение об ошибке гласит: « Не удалось создать виртуальную машину Java. Ошибка: произошла фатальная исключительная ситуация. »Следовательно, Java-программа не запускается. Это несколько потенциальных исправлений для фатальной ошибки виртуальной машины Java.
Содержание
- Решения для исправления ошибок виртуальной машины Java
- 1. Установите новую системную переменную для Java
- 2. Выберите опцию Запуск от имени администратора для Java
- 3. Переустановите Java
Решения для исправления ошибок виртуальной машины Java
1. Установите новую системную переменную для Java
Ошибка виртуальной машины Java часто возникает, когда Java требуется больший глобальный максимальный размер кучи памяти. Пользователи исправили проблему, увеличив максимальный объем оперативной памяти, выделенной для Java. Пользователи могут сделать это, установив новую системную переменную Java следующим образом.
- Откройте «Выполнить» с помощью сочетания клавиш Windows + R.
- Введите «sysdm.cpl» в «Выполнить» и нажмите ОК , чтобы открыть окно на изображении непосредственно ниже.

- Выберите вкладку Advanced в этом окне.
- Нажмите кнопку Переменные среды , чтобы открыть окно ниже.

- Нажмите кнопку Создать под полем Системные переменные.
- Введите «_JAVA_OPTIONS» в текстовое поле «Имя переменной».

- Затем введите «–Xmx512M» в текстовом поле «Значение переменной», что увеличит объем оперативной памяти до 512 мегабайт.

- Нажмите кнопку ОК , чтобы закрыть окно.
- Затем нажмите кнопку ОК в окнах среды.
– СВЯЗАННО: Как удалить всплывающее окно «Обновление Java доступно»
2. Выберите опцию Запуск от имени администратора для Java
Ошибка виртуальной машины Java также может быть связана с недостаточными правами администратора. Таким образом, некоторым пользователям может потребоваться назначить права администратора для Java. Пользователи могут назначать права администратора для Java в Windows 10 следующим образом.
- Откройте Cortana с помощью сочетания клавиш Windows + Q.
- Введите «Java» в поле поиска.
- Затем щелкните правой кнопкой мыши Java и выберите Открыть местоположение файла , чтобы открыть папку Java в проводнике.

- Теперь пользователи могут щелкнуть правой кнопкой мыши файл java.exe и выбрать Свойства .

- Выберите вкладку «Совместимость».

- Выберите Запустить эту программу от имени администратора .
- Выберите параметр Применить .
- Нажмите ОК , чтобы закрыть окно.
3. Переустановите Java
- Переустановка Java может также исправить ошибку виртуальной машины Java для некоторых пользователей. Сначала удалите установленную версию Java, введя «appwiz.cpl» в «Выполнить» и нажав ОК .

- Введите «Java» в поле поиска.
- Выберите Java и нажмите Удалить .
- Нажмите Да в любом открывшемся окне подтверждения.
- После этого перезапустите Windows.
- Затем откройте страницу загрузки Java в браузере.

- Пользователям нужна 32-битная Java для 32-битных программ и 64-битная Java для 64-битного программного обеспечения. В случае сомнений лучше всего загрузить и установить обе версии Java, нажав Windows Offline и Windows Offline 64-bit .
- После этого откройте мастер установки Java.
- Нажмите кнопку Установить в мастере настройки.

Таким образом, пользователи могут исправить фатальную ошибку виртуальной машины Java. Эти разрешения обычно исправляют фатальную ошибку виртуальной машины Java, чтобы пользователи могли запускать необходимое программное обеспечение Java.
Over the years, computers have gotten relatively better at providing useful error messages. However, due to the complexity of modern software, sometimes you need a degree to even understand what you’re being told.
In this article, we’ll explain what the most common Java Virtual Machine errors mean and how you can resolve the underlying issues. Before we get to that, though, we first have to understand what a virtual machine is. Shall we begin?
What Is A Virtual Machine?
In layman’s term, a virtual machine allows your computer to simulate an entirely separate system. This makes it possible to run programs that otherwise wouldn’t be compatible with your system architecture – for instance, Android apps on a Windows PC. So what does this have to do with Java?

When a Java file is executed, it’s run through a version of the Java Virtual Machine before the code is interpreted. This means that if there’s a problem with the virtual machine, you won’t even be able to run Java programs until it’s been resolved.
“Java Virtual Machine Launcher Could Not Find The Main Class”
This sounds like a pretty serious error but in actuality, it’s one of the easiest to fix. Generally, if you’re seeing this, something has gone wrong with your Java installation. All you have to do is reinstall it. To do this:
- Uninstall your previous Java installation. For Windows users, this is done in the Control Panel’s Programs and Features submenu.

- Next, go to Java’s site and select the correct version for your operating system.
- Restart your computer and try running the Java file again.
“Could Not Create The Java Virtual Machine”
Here’s another example of a vague error message that doesn’t actually help you in any way. The good news is that this error usually has one specific cause: Java is trying to use more memory than your system actually has. So how do you fix this?
- Begin by opening the Control Panel.
- Click System, then Advanced Systems Properties, then Environment Variables

- Click the Add button
- Set the New Variable Name to “_JAVA_OPTIONS” without the quotation marks.
- Set the value to “-Xmx512M” without the quotation marks. The digits before the M refer to the maximum amount of RAM allocated to Java. For instance, you could also use “-Xmx1024M” or “-Xmx256M”, if you had more or less memory to spare.
Fixes To Avoid
There are a few solutions that users on internet forums LOVE to suggest, but while they mean well, you are highly unlikely to see your problem resolved by:
- Running an anti-malware scan (a virus that only messes with your Java Runtime Environment? For what purpose?).
- Clearing your cache. This has nothing to do with Java, whatsoever.

- Changing registry values. While this has the potential to resolve very specific problems, it can have catastrophic effects on your operating system and you’re more likely to break something than fix it.
- Reinstalling your operating system. This is like amputating an arm because of a broken fingernail! Problems with a single software package can be easily resolved and won’t lead to you losing all your files, as with a fresh installation.
Do you need to update Javascript? We have an easy and helpful guide on how to update it. Read it here!
Conclusion
Java Virtual Machine errors are rarely as serious as they appear. In fact, we’ve shown that the most common errors can be resolved in a few steps. Even though the exact options you’ll need will differ from one operating system to another, at least you now know what you have to do.
Now that you’ve read on how to fix Java Virtual Machine Launcher Error, take time to read on how to log into Kronos Timekeeper from home.