WII U USB HELPER GUIDE
HOW TO INSTALL WII U, WII AND GAMECUBE GAMES
Wii U USB helper will let you download Wii U games directly to your PC and even copy them over to your SD / Micro SD card. Wii U USB Helper acts pretty much as a mirror of the current eShop, however, it does also allow you to create custom games to install directly to your Wii U or Wii U’s attached HDD (Recommended).
In this guide, I will be showing you to install and set up Wii U USB Helper and the installation of a Wii U game, A Wii game and a GameCube game. To follow this guide I will be assuming you already have a soft modded Wii U and can run homebrew, If not I’ve put together an easy to follow guide on modding your Wii U here, It’s a fun project and doesn’t take that long to do.
How to Install WII U USB Helper
To install Wii U USB Helper we need to head over to FailShack’s GitHub and download the latest release which you can do here: –
https://github.com/FailedShack/USBHelperInstaller/releases/tag/1.2
Once USBHelperInstaller.exe has been download double click on it to start the installation.
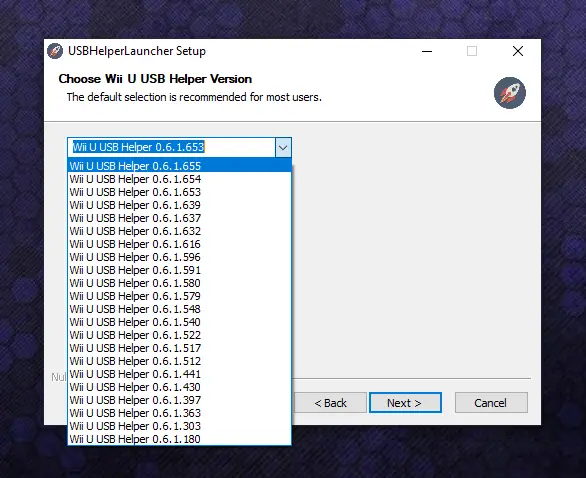
Click next and have a quick look at the GNU license before clicking ‘I Agree’. On the next window, you’ll want to click the drop-down menu and select the latest version, at the time of writing this the current version is ‘Wii U Helper 0.6.1.655’ but may be different for you.
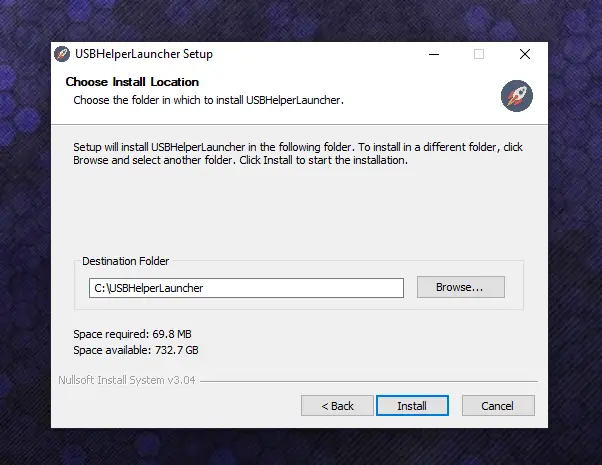
Click next and choose where to install Wii U USB Helper, for the sake of simplicity I am going to install it at ‘C:USBHelperLauncher’ but feel free to save it wherever you want.
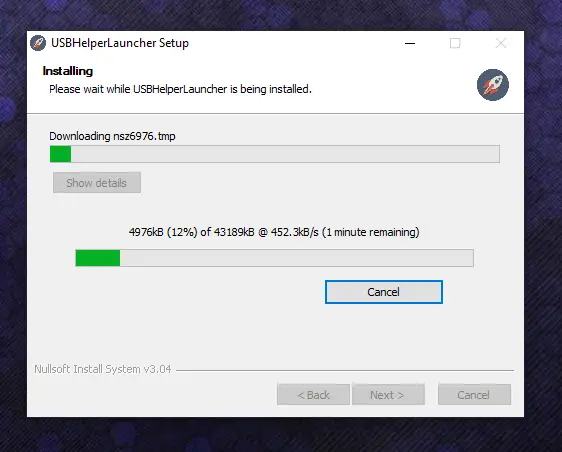
Click ‘Install’ and the launcher will automatically download the latest version, if for any reason the download does not start, please check that the program is allowed through your firewall. Download and installation may take a couple of minutes
Once complete, make sure ‘Run USBHelperLauncher’ has its box ticked and click Finish.
After a few seconds, the program will finish injecting and you will be at this screen:
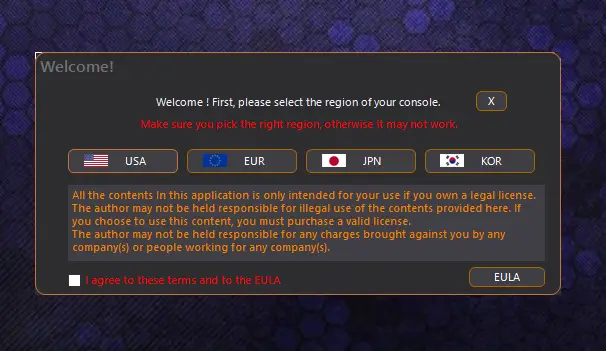
From here you need to pick what region your system is, mine is European so I ticked the box in the bottom left-hand corner and then selected EUR. (You can change your region later, so don’t worry too much about this for now!)
Read the Disclaimer and click OK, you will now get to select the location of where your games will download. As the message says, avoid folders that require Admin privileges as this could cause issues when trying to download to them. Once again for the sake of this guide, I will be saving mine to my C: drive. Click OK and choose where you want to your downloaded games to be stored.
Next, we will be greeted with this screen: –
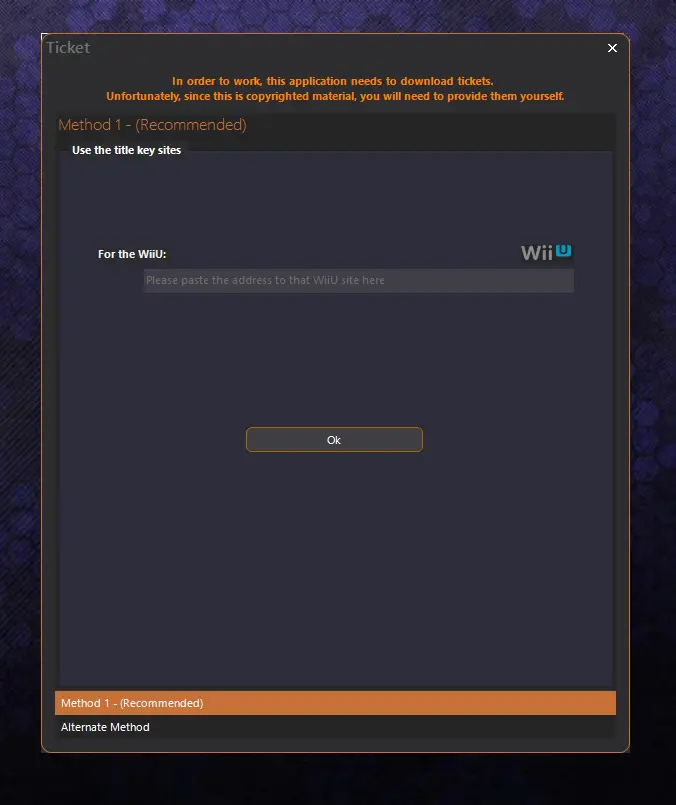
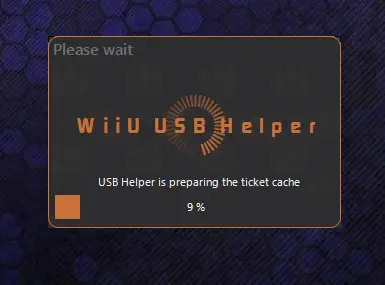
As it says, Wii U USB Helper will need to download tickets and they are copyrighted, this means I won’t be able to help you either, however, I’m sure googling ‘That WiiU Site’ will point you in the right direction. We need to copy and paste the URL of this site into here, once done click OK and WII U USB Helper will begin to build the ticket cache, this might take a few moments.
And here we are! This is the main area of WII U USB Helper: –

How to use WII U USB Helper
As you can see there are quite a few options, but I promise you, it’s pretty easy to use. First thing we want to do is filter the games to just the ones we want, Wii U USB Helper also has the ability to download Wii games & 3DS games, but we won’t be going over that here.
Click the tab filters on the left-hand side to come to this screen: –
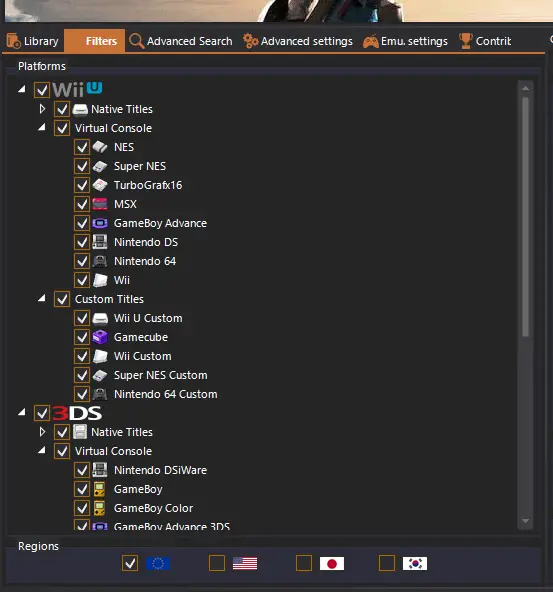
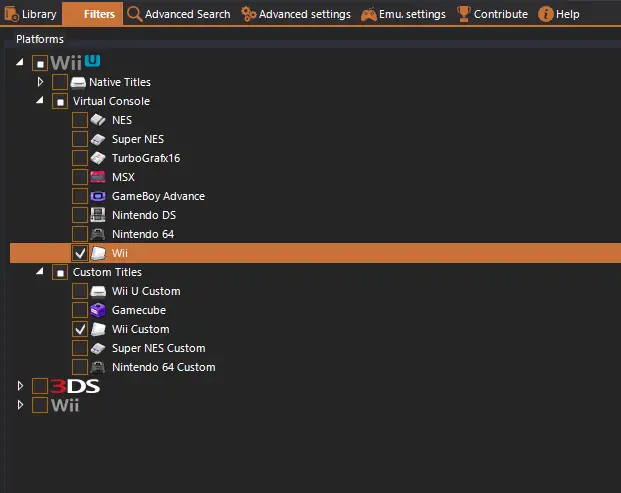
From here, we can see all the platforms Wii U USB Helper is currently set to display. You’ll want to untick and collapse the 3DS Section and Wii section, so your screen ends up looking like the image below: –
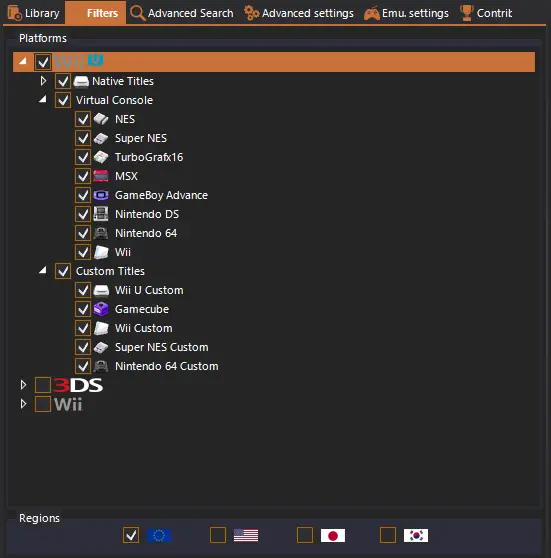
The reason we have done this is so its easier to search for the games we want. Click back on the library tab to be returned to the main menu. You’ll notice only Wii U and Custom games are now showing.
Let’s try downloading a Wii U Game first.
How to download Wii U games with WII U USB Helper
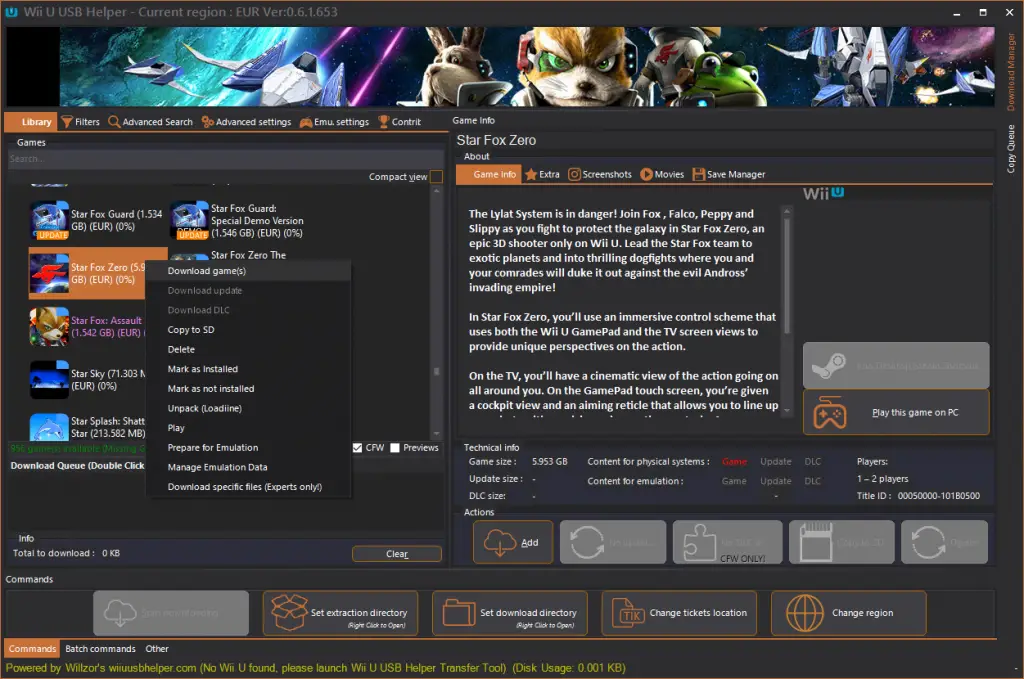
At the main menu of the Wii U USB Helper, you’ll be able to search for the game you want by typing it in or look through the games available, which are sorted in alphabetical order.
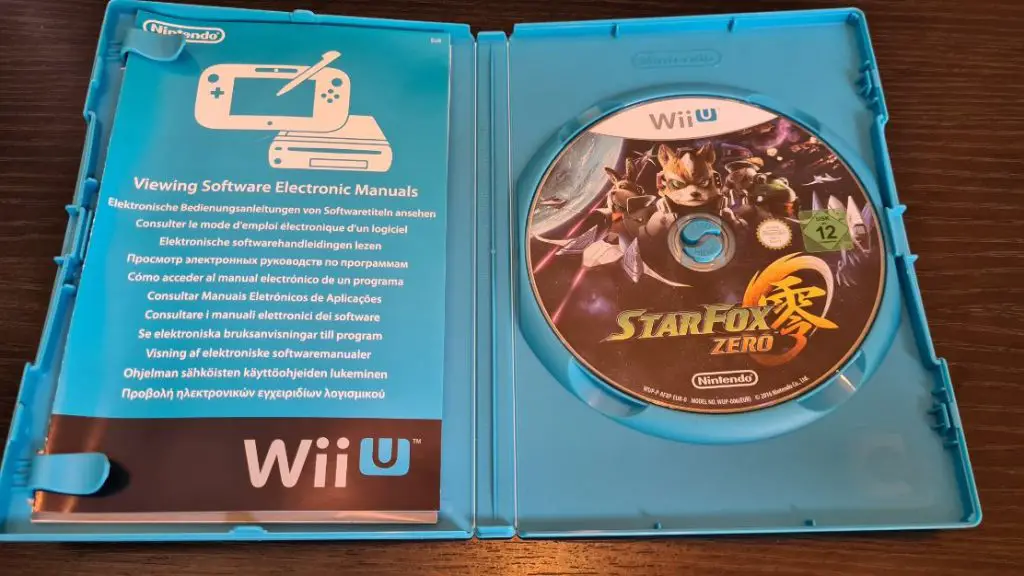
Here’s my copy of Starfox Zero: –
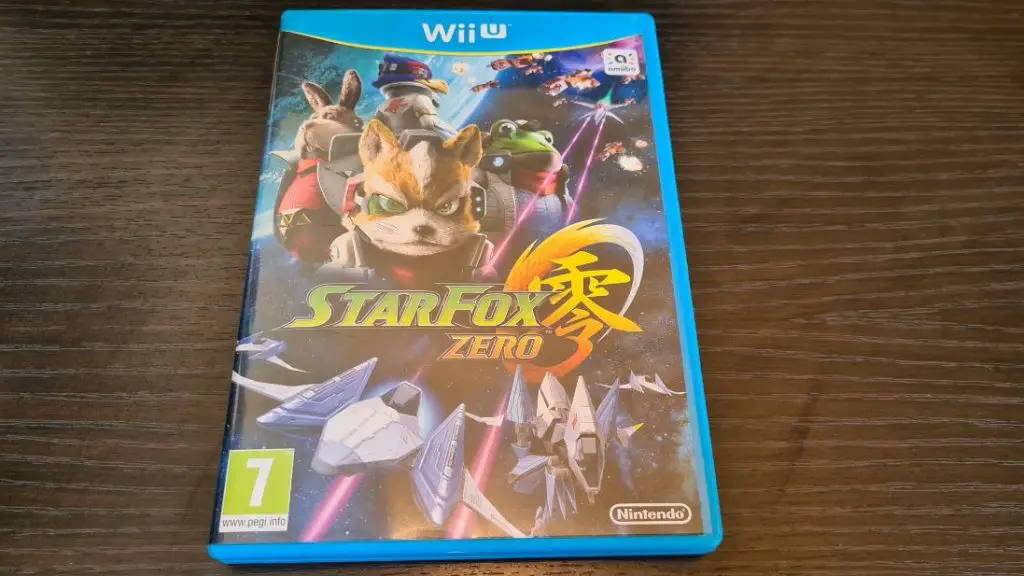
I want to be able to play this game from my Wii’s external hard drive, So I scroll down to Star Fox Zero, right-click and choose download. If the game had any updates or DLC, I could have also click on them to add them to the download queue.
I now have Star Fox Zero added to my queue, I could at this point, add more games I want and have them download all together but for now, I’m going to click on the flashing ‘Start downloading’ button.
The game will now start to download, you can access the download manager by clicking over at the top left corner, this will show you how far your download has progressed and a rough ETA of when the game will be downloaded.

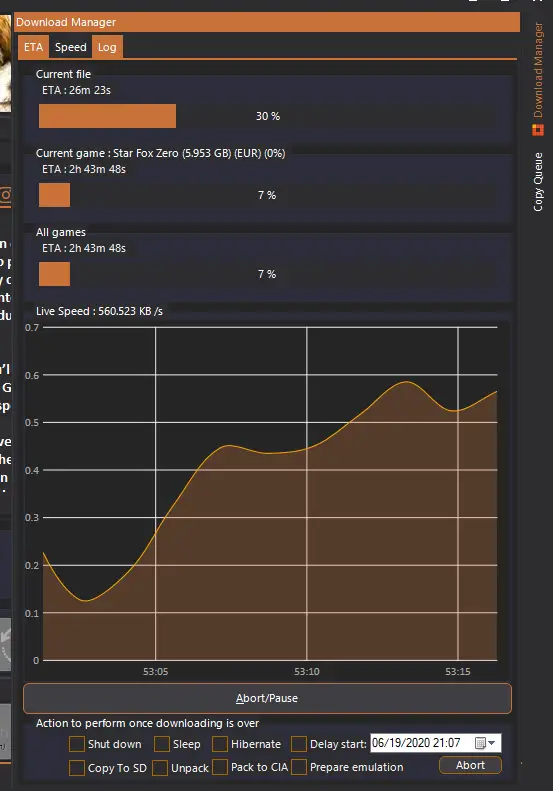
Now, you must wait for the game to be downloaded, once that is done, we will look at getting the game installed.
Wii U USB Helper download slow?
If you find your game is downloading slow head over to the download manager and click on the speed tab: –
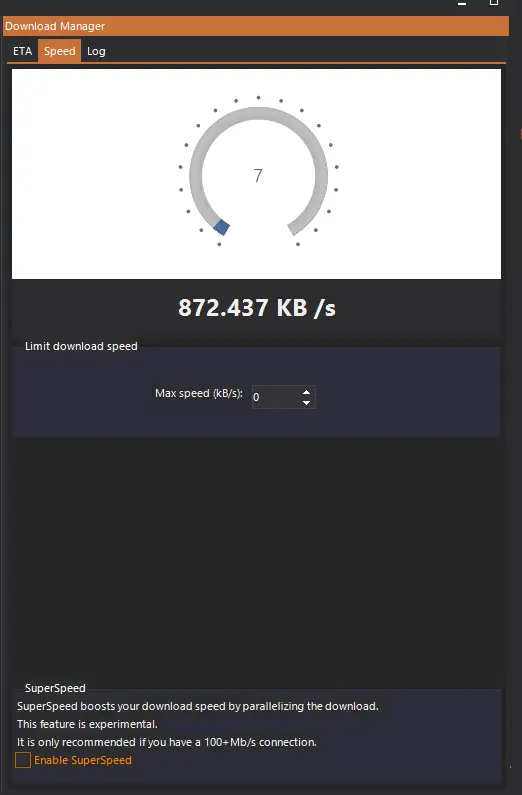
At the bottom, you will find the option to ‘Enable SuperSpeed’. Check this box and your download should speed should pick up dramatically!

Installing a Wii U game to your Wii U
Now you have your game downloaded we will need to transfer it over to our SD card. Insert your SD card and on the main screen of Wii U USB Helper you will see the game we downloaded earlier

You can either do this via Wii U USB Helper by right-clicking on ‘set download directory’ or via windows by navigating to where we set it earlier.
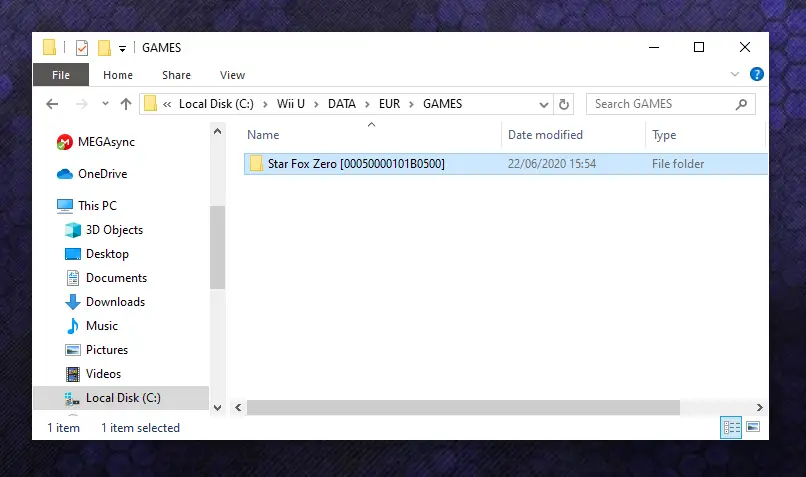
Once in the directory navigate through DATA – EUR (or chosen Region) – GAMES. In this folder, we will find our game folder.
On our SD card, we will be copying our game folder to the ‘install’ file on the root of our SD card. So it will be SD card Root /install/”game folder”, In my case, the SD card is drive F so will be F:/install/Star Fox Zero [00050000101b0500].
Copy your folder over, this will take a little while to copy over and depends on how big the game is and how fast your SD card is. Once copied, put your SD card back into your Wii U and boot up.
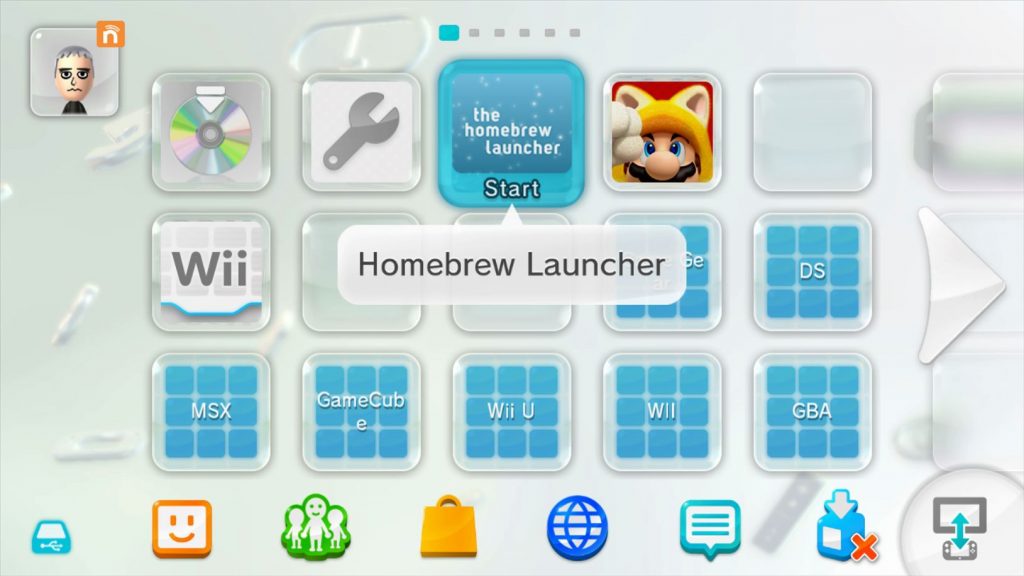
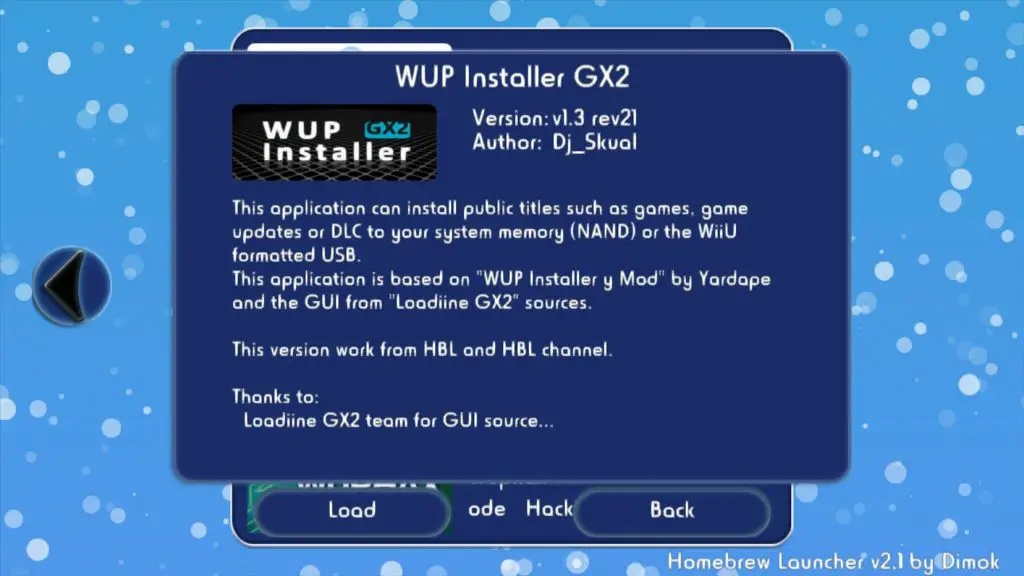
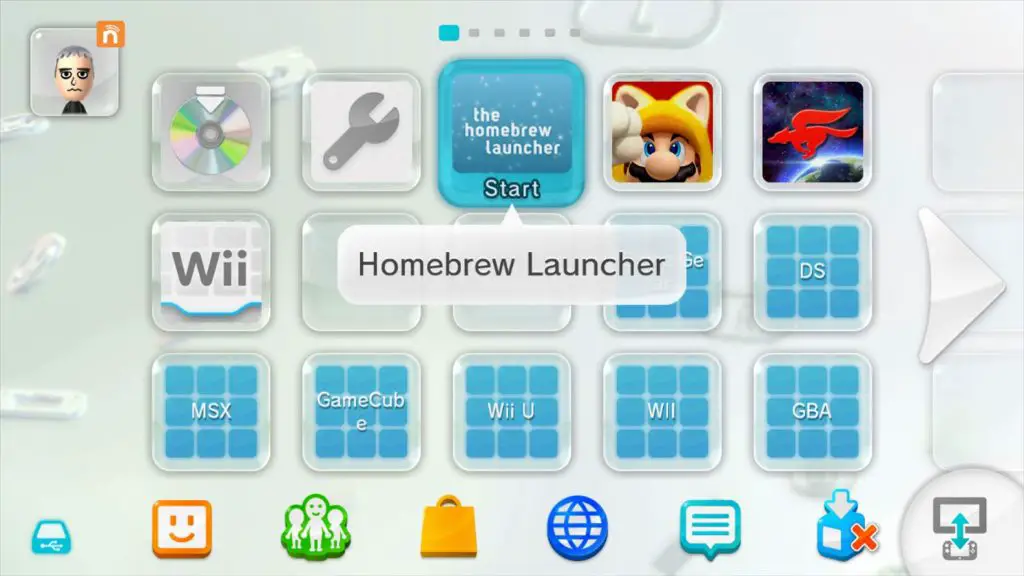
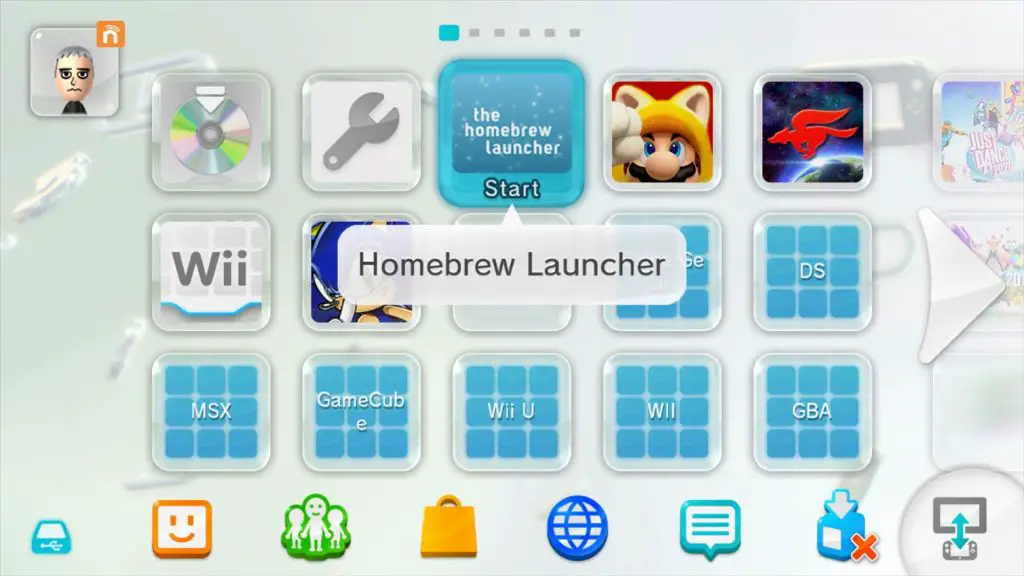
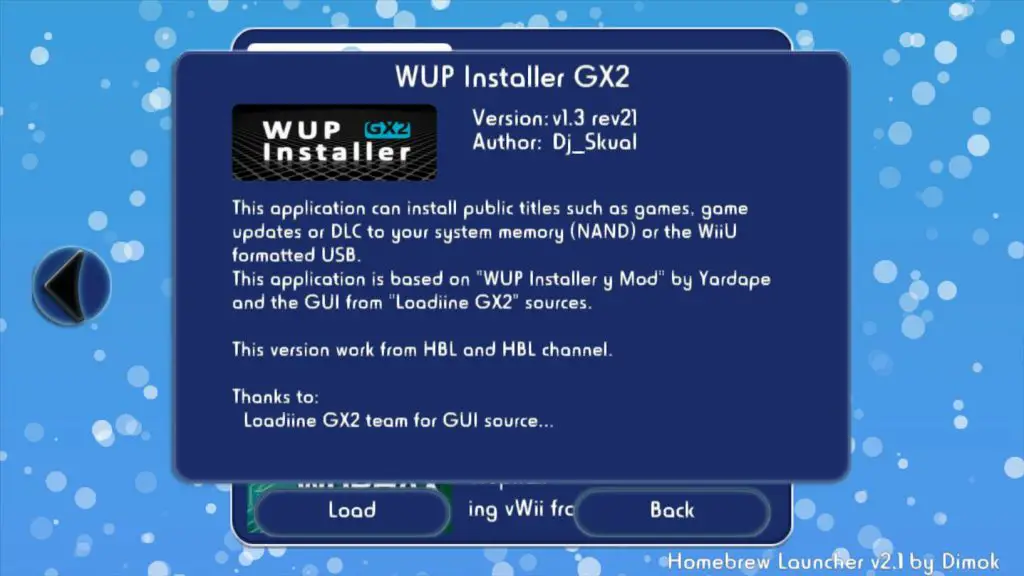
From the Wii U home screen, head over to the Homebrew Channel and launch it. The head over to WUP Installer GX2, if you don’t have WUP Installer installed you can find out how in my Wii U modding guide.
Once WUP Installer GX2 has loaded you will see your game on the gamepad, from here tap the game name and tap install, tap ‘Yes’ and choose where you want to install the game. I recommend installing your game onto an external HDD.
The Wii U does not have a lot of storage and some of these games can be quite big. The base Wii U only has 8GB of internal storage, so this one game I’m going to install would take up nearly all of it!
Another reason would be safety, If the game somehow becomes corrupt you could risk losing some space on your Wii U’s internal NAND memory.
You can always move across your game later using the Wii U’s inbuilt transfer feature once you verified the game works correctly.
After you selected your location the game will begin to install.
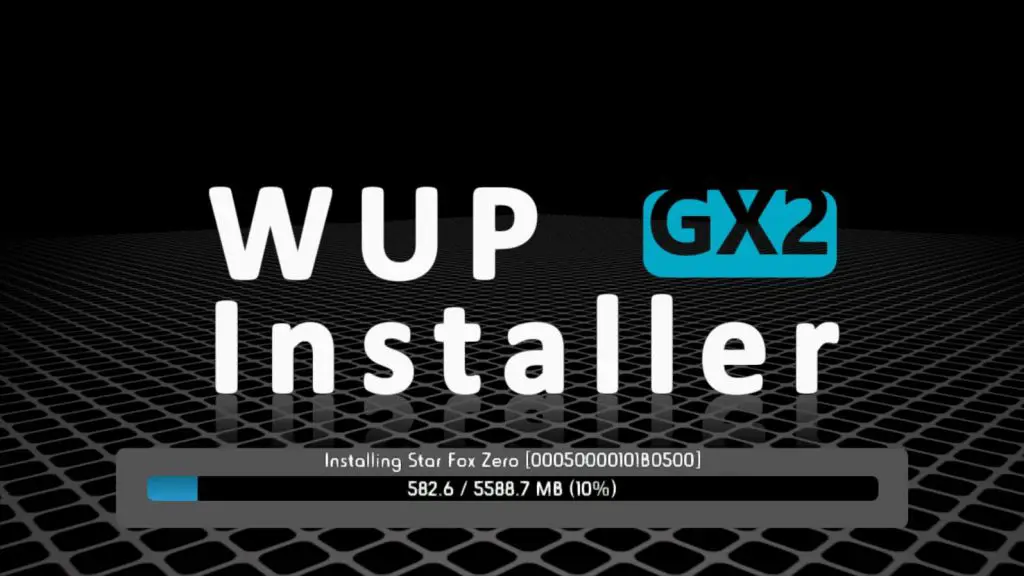
The amount of time this will take depends on how big the game is, but once complete press ok and then the home button a few times and close the application to head back the Wii U’s main menu.
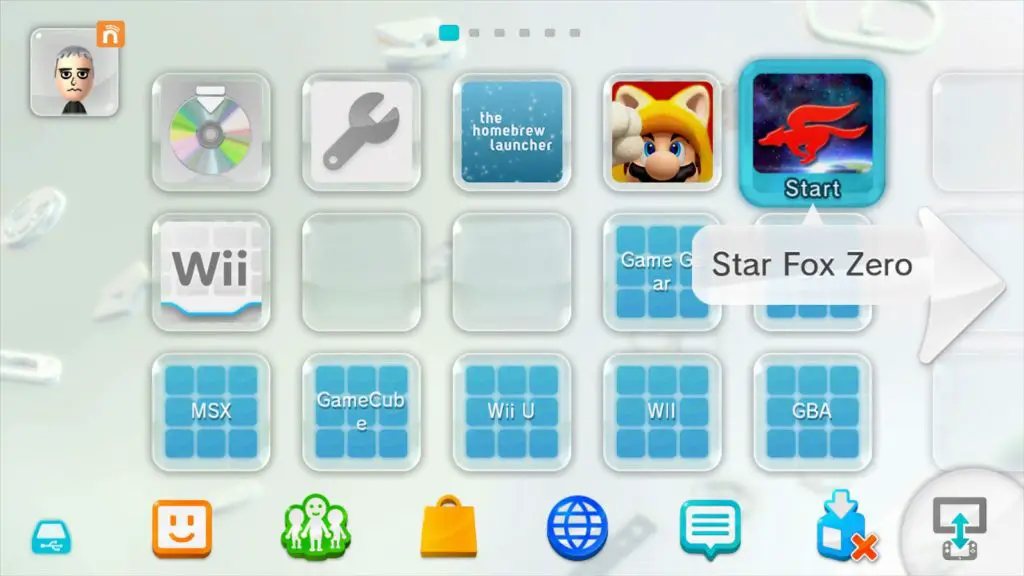
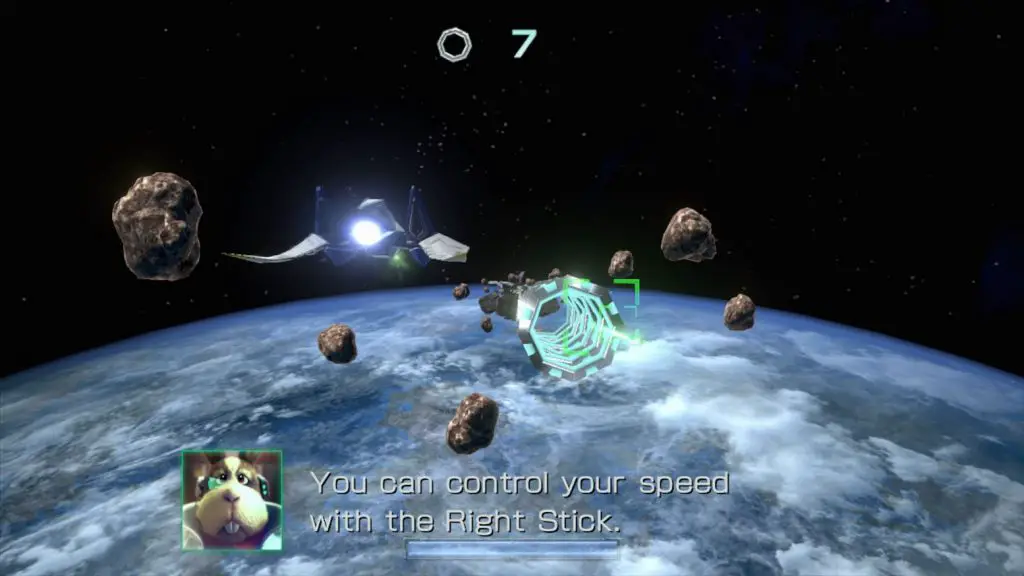
You will now find your installed game on the Wii U’s main menu and it will work just like any digital game download. Give the game a quick test to make sure everything is working.
Congratulations, you now know how to download your Wii U games and install them to your Wii U.
Next up, let’s look at installing a GameCube game to your Wii U.
Install GameCube Games to your Wii U with USB Helper
Installing GameCube games are a little different than the Wii U games, you will have to provide your own .iso image of the game. You can do this using the homebrew Cleanrip if you have access to a modded Wii, unfortunately, Cleanrip will not work on Wii U for backing up GameCube games as the Wii U cannot read the discs.
The easiest way to backup your games from PC is to use free software like ImgBurn and make a DVD back up of your GameCube Disc.
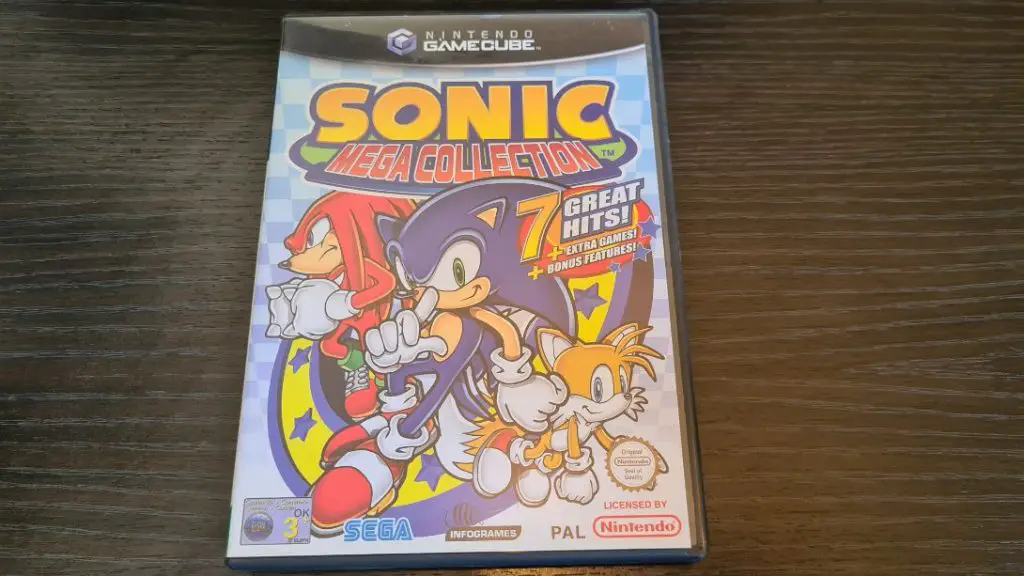
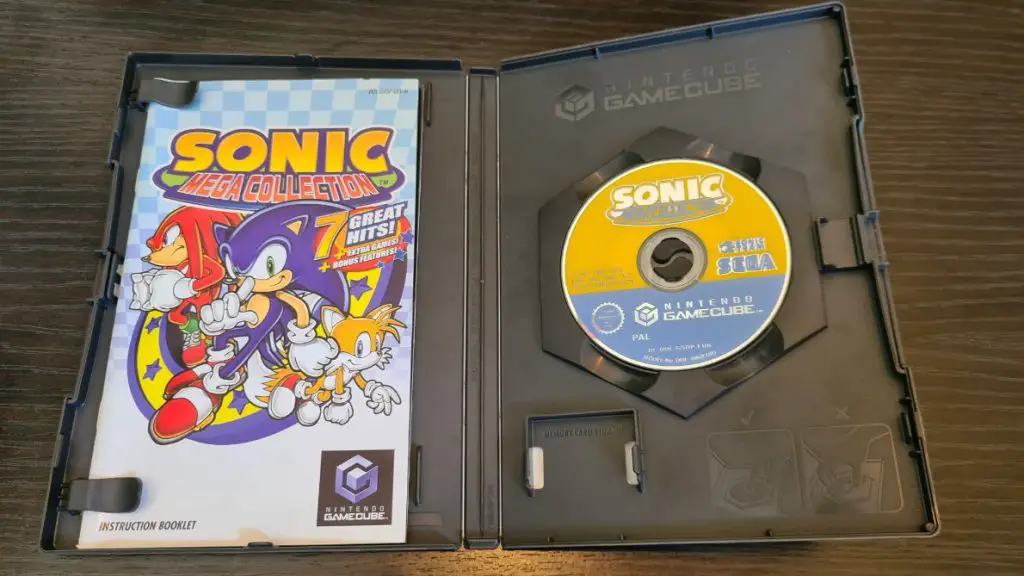
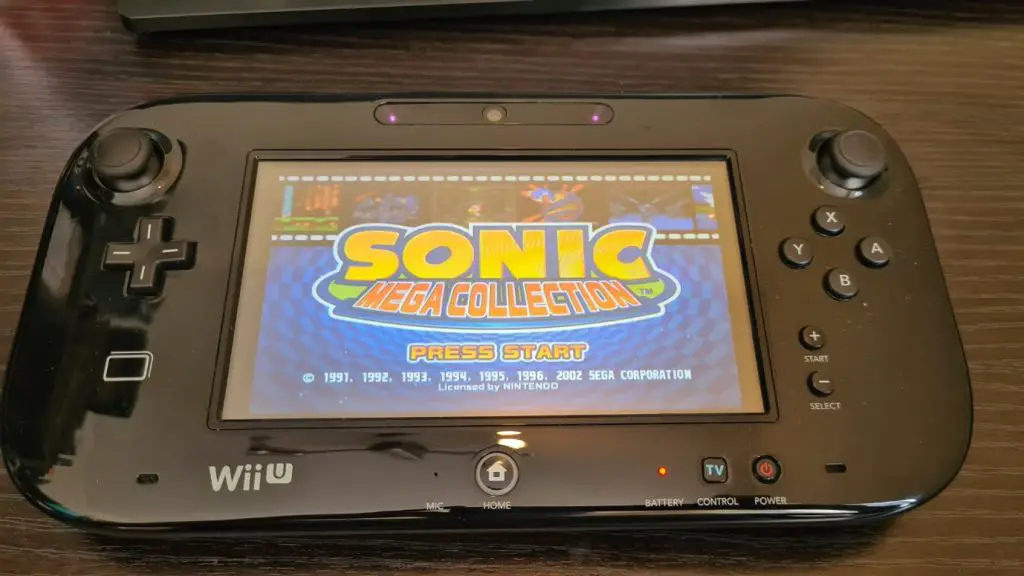
The game I shall be installing is Sonic Mega Collection, I have already ripped my disc and have the copy on my PC.
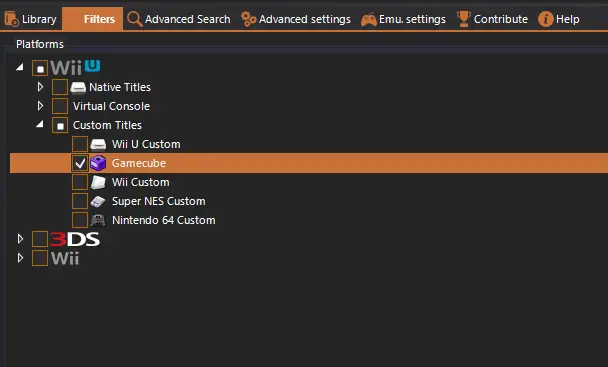
Load up USB helper and head over the to filter section. From here, uncheck everything besides ‘Gamecube’ under Wii U – Custom Titles.
The head back to the main menu. The list will now be filtered by GameCube games only. The list is not the biggest, but it does contain some of the best games on the console. If you want to try out other GameCube games follow my guide going over GameCube game injection here, this guide also tells you how to inject and play Wii games directly from your Wii U.
Select the game you want to install on your Wii U, I have selected Sonic Mega Collection. Right-click on the game and select download, this will add the game to your queue.
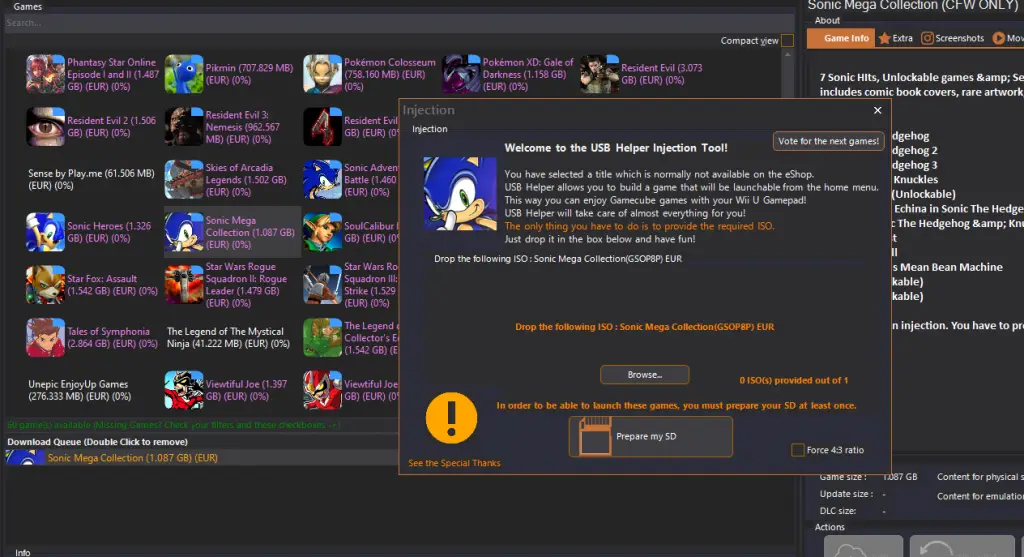
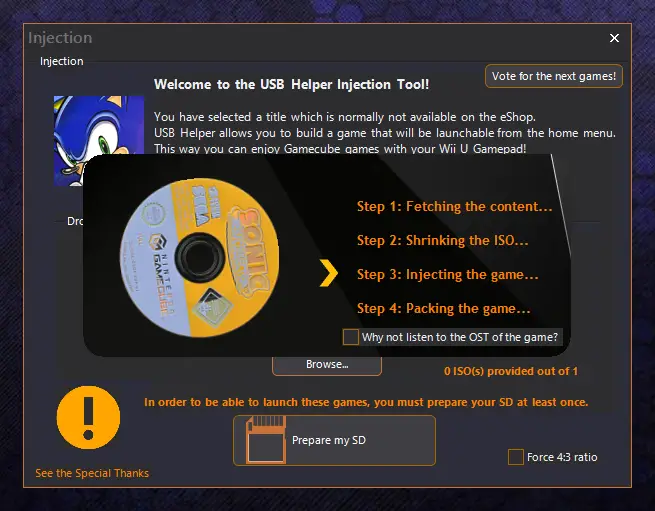
Click ‘Start Download’ and you will be prompted to provide the .ISO image, once selected Wii U USB Helper will start to prepare your game for injection, sit back as this will take a few minutes depending on the size of the game.
Once you GameCube game is injected, head to the main menu and right-click on ‘Set download directory’, this will open where our GameCube injection is.

With GameCube injections, they are classed as eShop games by Wii U USB Helper. Your game will be put in the folder DATA – EUR (or selected region) – ESHOP. Inside you will find the folder of the game you just created.
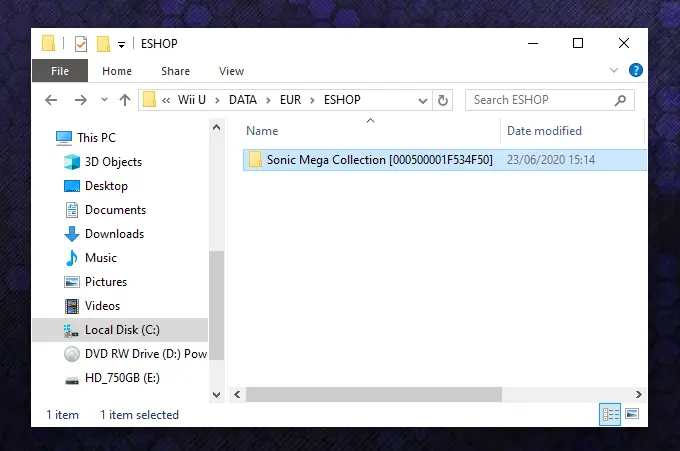
Insert your Wii U’s SD card and navigate to the folder ‘Install’ which should be on the root of your SD card. We need to copy the game folder over to the install folder, so mine looks like F:/install/Sonic Mega Collection [000500001F534F50]. With this copied over, insert your SD card into your Wii U and turn the console on.
With your Wii U on, launch the Homebrew launcher and find WUP Installer GX2.
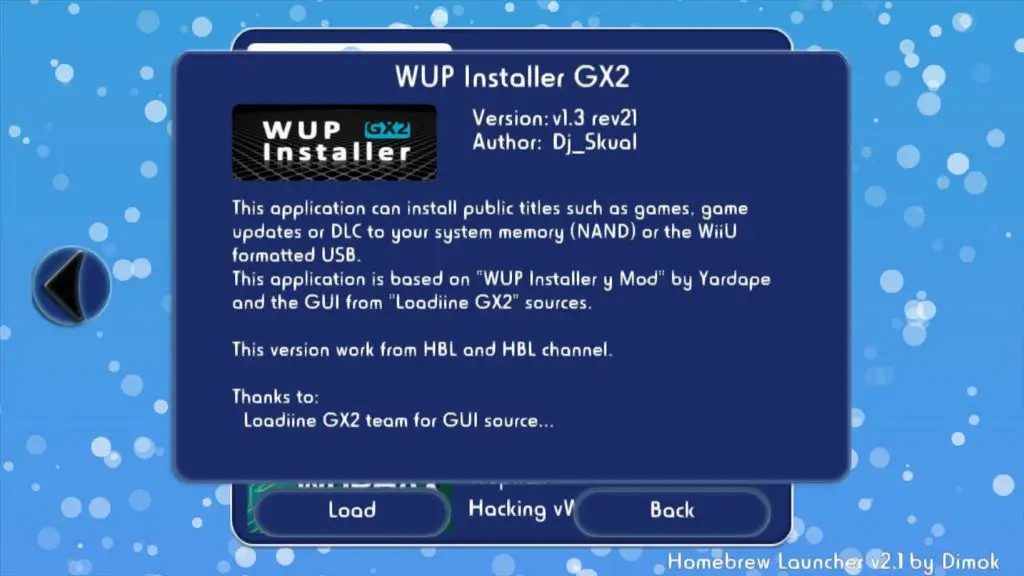
Once launched you should see your game on the gamepad. Tap the title and tap ‘install’, tap ‘yes’ and choose between ‘Nand’ or ‘USB (Recommended)’. The game will then start to install.

Once your GameCube game is installed press ‘ok’ and then the home button a couple of times and close the software to return to the Wii U’s menu. You will now see your installed GameCube title as an app. Click on the app to test if everything is working.

As the game loads, we will be prompted if we want to use the Wii U gamepad as a controller. Select yes and you’ll be able to enjoy your GameCube games on both your TV and Wii U gamepad.


Remember, if you want to install other titles that are not on Wii U USB Helper you should follow my injection guide here.
Install Wii games with WII U USB Helper
The installation of Wii games with USB Helper is very similar to GameCube game installation, except some of the games can be downloaded as they are on the Wii U’s virtual console.
Head over to the filters tab once more and select Wii under the Wii U Virtual Console’s section, you can also Enable Wii Custom under the Custom Titles section (For custom titles you will need to provide your own Wii .ISO image of the game!).
Click back on the library tab and choose your game, for purposes of this guide I will be using Skyward Sword, as I already own this game. Remember, if the game you want is not listed here, you can follow my injection guide which lets you inject any custom Wii game here.
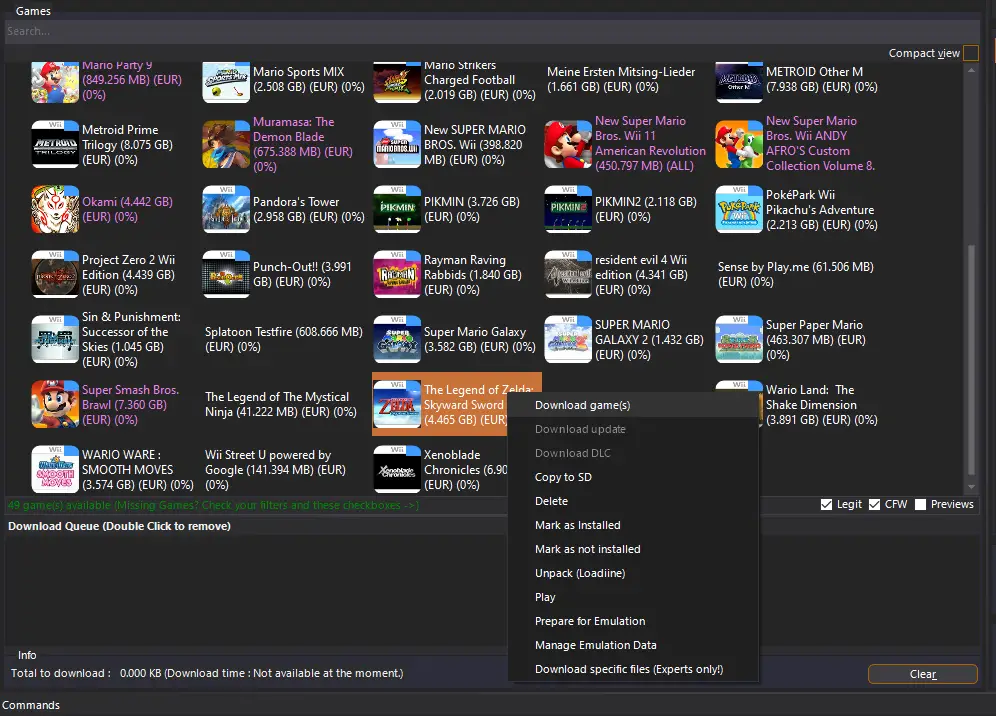
Right-click on the game you want and choose ‘download’ to add it to your queue. Then click ‘start downloading’ which will get the game files for you. The amount of time this takes will depend on the size of the game and your internet speed.
Once your chosen game has downloaded, right-click on ‘Set download directory’, this will open where the downloaded game is. Wii games are treated as eShop games, so we will want to navigate to DATA – EUR (or selected region) – ESHOP. In this folder, we will find our game folder.
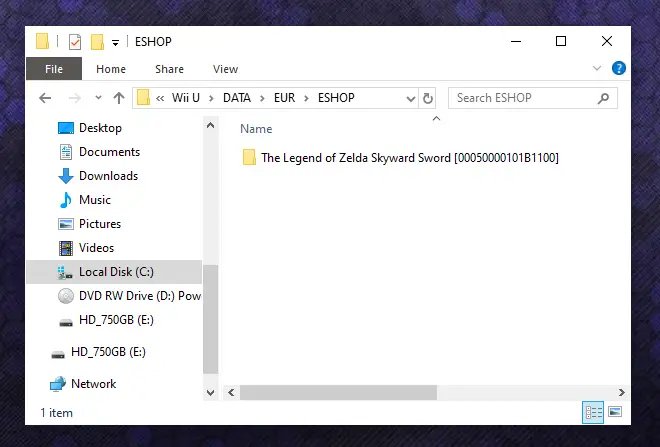
Insert your SD card into your PC and copy the game folder over to your ‘install’ folder on the root of your SD card. Mine looks like this: F:/install/The Legend of Zelda Skyward Sword [00050000101B1100]. Once this is copied, we can put the SD card back into the Wii U.
Boot up your Wii U and launch the Homebrew Launcher. Once in the Homebrew Launcher, choose WUP Installer GX2.
With WUP Installer launched your game will appear on the gamepad. Tap the Game and select ‘install’ after select ‘yes’ and choose where you want to install your game. I would recommend ‘USB’ but you can use ‘Nand’ if you want. Your Wii game will now begin to install to your Wii U.

Once your game is installed, tap ‘OK’ and press the home button and close software to return to Wii U’s main menu. We now have our game installed an application.
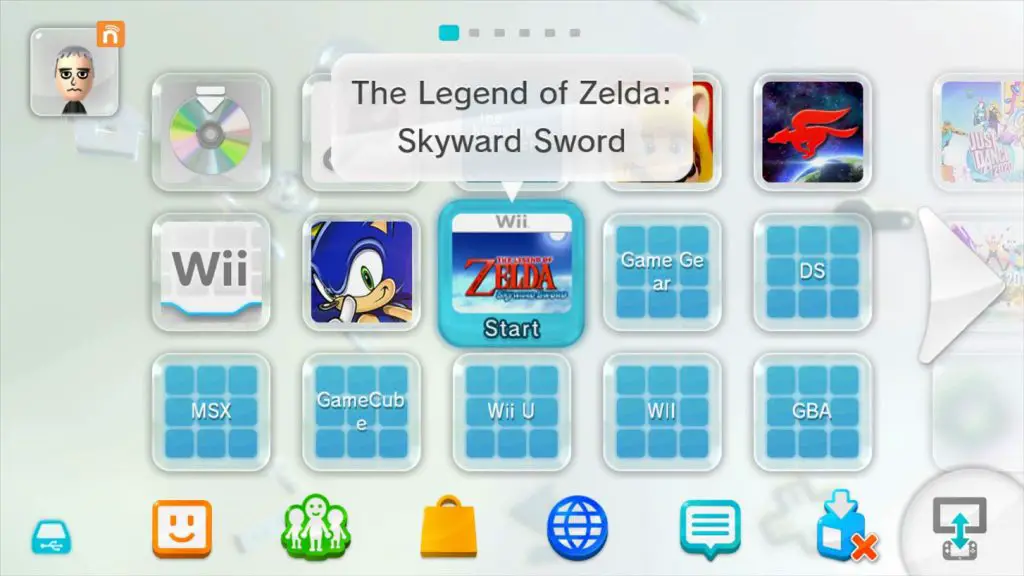
Click on our newly installed Wii game to see if it works.
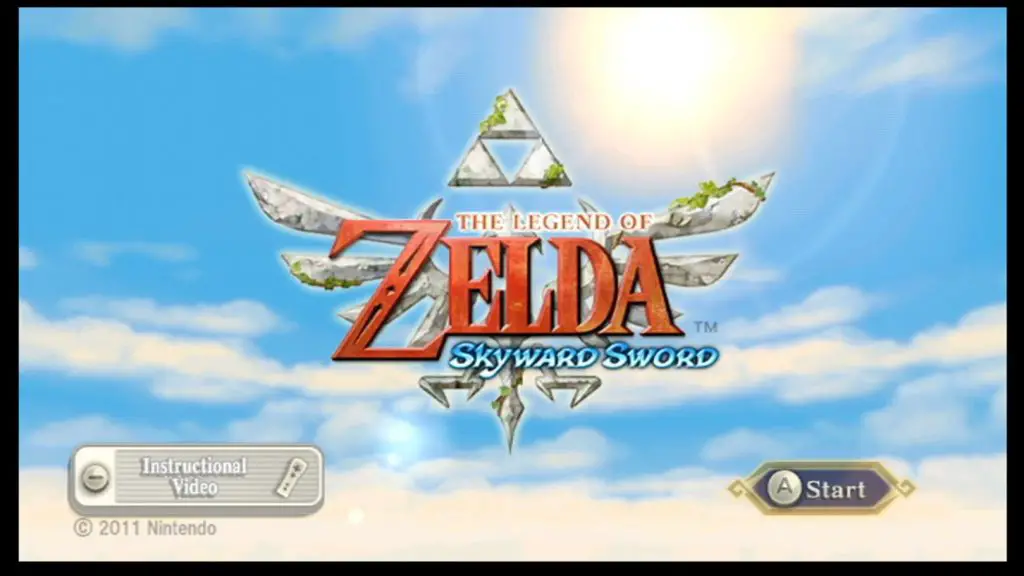
As you can see, everything is working great! You now know how to enjoy your Wii games on your Wii U without having to use your disc.
I hope this guide helped you and if you have any questions regarding anything feel free to leave a comment and I will get back to you!
Страницы: Назад 1 … 67 68 69 70 [71] 72 73 74 75 … 143 Далее Вниз

Тема: Cemu — Эмулятор Wii U (Прочитано 507583 раз)
0 Пользователей и 1 Гость просматривают эту тему.

Всю необходимую информацию можно найти под спойлером ниже:
« Последнее редактирование: 29 Декабрь 2018, 00:06:12 от pedro »

EliteSchatten, в ЛС напишу.
Народ, вопрос конечно боянистый но, куда все-таки нужно копировать картинки, что бы они отображались в игре?
Поясню:
В интернете много инструкций «как починить отображение фотографий в Зельде». И во всех разный путь!
Может кто-нибудь написать точный путь по которому нужно кидать фотки из /content/UI/Album/ и /content/UI/PictureBook/?
Только пожалуйста, с соблюдением правильного регистра…
Vochatrak, в директорию сохранения игрыpict_book.
конкретно сейчас у меня оно в Cemu 1.8.0mlc01emulatorSave042b7a3apict_book
042b7a3a — директория сохранения игры, может меняться в зависимости от региона и версии игры.
Ogr
Спасибо.
P.S. У тебя на i5-2500 3.3ггц, сколько выжимает? В комнате в которой просыпается Линк (самое начало)?
Помогите кто сможет, ждал 1.8.0 специально что бы протестировать зельду, до этого не качал этот эмуль)
Система Вин10х64
Проц i5-2300 (3.1 ггц)
Озу 10гб ддр3 (15гб файл подкачки)
Видео ati radeon hd 6570 (2gb)
Defoz, поздравляю с первым днем регистрации )
для AMD карт нет пока решение , да и сама карта очень очень слабая не годиться да же марио 8 запустить.
« Последнее редактирование: 02 Июнь 2017, 07:59:17 от CCCP1982 »
CCCP1982, хочешь сказать что прям только в карте проблема? почему то все игры (не эмульные) тянет
хочешь сказать что прям только в карте проблема?
да в зельде именно в AMD картах проблема . Я дал для сравнение на nvidia фото.
CCCP1982, видел, еще у меня что то не получается качать игры через WiiU_USB_Helper… оно скачивает игру,обновление но не распаковывает
Defoz,
игры лучше искать на торрент трекере, если ты не селен в WiiU_USB_Helper.
обновление игр лучше на MapleSeed2.
« Последнее редактирование: 02 Июнь 2017, 08:16:36 от CCCP1982 »
CCCP1982, не видит его, только зельду… SUPER MARIO 3D WORLD [0005000010145D00] папка скачанная через WiiU_USB_Helper
SUPER MARIO 3D WORLD [0005000010145D00]
Прежде чем скачивать игру , галку поставь на Unpack ! тогда все распакует сама .
« Последнее редактирование: 02 Июнь 2017, 08:50:47 от CCCP1982 »
CCCP1982, Ошибка msvcr120.dll отсутствует на компьютере
CCCP1982, Ошибка msvcr120.dll отсутствует на компьютере
msvcr120-dll
« Последнее редактирование: 02 Июнь 2017, 10:00:51 от CCCP1982 »
CCCP1982, слушай а что значит CFW ?
слушай а что значит CFW ?
Кастомная прошивка (взломана) , OFW официальная прошивка.
CCCP1982, ну а для эмуля пофиг же? можно качать и cfw?
блин марио на заставке повис (музыка играет + жрет 55% проца) )))
« Последнее редактирование: 02 Июнь 2017, 09:43:46 от Defoz »
ну а для эмуля пофиг же? можно качать и cfw?
Для CEMU не нужен cfw .
Добавлено позже:
блин марио на заставке повис (музыка играет + жрет 55% проца) )))
для роликов скачай файл dbghelp.rar
ссылка
CCCP1982, оно у меня есть, я устанавливал по инструкции разраба… оно просто зависло на картинке и все .. такое было и с зельдой, не помню что сделал но потом в зельде перестало так зависать
оно просто зависло на картинке и все .. такое было и с зельдой, не помню что сделал но потом в зельде перестало так зависать
Зависать будет так как в CEMU реализован shaderCache для других игр не критичен, а вот для зельды да ) , поиграешь часика 4-6 потом фризов таких не будет , о карте я говорил , она слабенькая не для CEMU и для зелды AMD плоховато , ждите новую версию когда разраб исправят этот баг с тенями и в шумах текстур.
CCCP1982, не не… тут ты не совсем прав, интересно то что у меня фризов в игре нет (практически никаких) просто почему то только что запустил в 3й раз варио ворлд и запустил в полный экран и игра перестала виснуть на одном и том же месте
только вот с музыкой не очень хорошо (она искажена как то)
не не… тут ты не совсем прав, интересно то что у меня фризов в игре нет (практически никаких) просто почему то только что запустил в 3й раз варио ворлд и запустил в полный экран и игра перестала виснуть на одном и том же месте
ну если ты поставил галку на Medium и GX2SetGPUFence skip hack для зельды то да она ускоряет рендер , а так карточка для NES GC эмуляция игр на CEMU идет отлично .
Если ты не в курсе, то зельда самая требовательная игра , она идет хорошо с i7 4-6 поколении процессоров и с примером карточек на уровне nvidia GTX 960 и 1060-70-80 .
CCCP1982, я сейчас говорил не про зельду а про марио) у меня нет скип хака… я только вчера скачал этот эмуль (точнее сегодня ночью) и не со всем еще разобрался
Добрый день. Есть проблема с запуском двух игр: Paper Mario Color Splash [CNFP01] (Запускается начальная картинка, без цвета и дальше не идет) и Super Smash Bros Wii U [AXFP01] (просто черный экран)
Видел что обе эти игры на эмуляторе работают (в превью новых версий эмулятора, да и так просто на youtube)
Конфигурация системы : проц — i5 4670, ОЗУ — 16gb, Видео — Nvidia GTX750Ti 2gb
Версия эмулятора 1.8.0b, дрова на видео обновил, спидхак стоит, закинул общий файл с ключами из форума.
p.s Та же зельда и марио карт идут без проблем с конфигом 1080p.
Заранее спасибо за ответ.
откатывайтесь на пару версий эмулятора назад и пробуйте.. 1.8.0 под зельду заточена, много других игр переломалось..
С марио вопрос решился. Дело было в том что в настройках ввода стоял pro controller, а надо было Gamepad, после смены марио пошла загрузка (картинка стала цветной) Но после старта черный экран. Смэш брос выдал какие то пустые сообщения (такие же у меня были в марио карт 8, когда открываешь персонажей или новые элементы транспорта). После этих сообщений опять черный экран и все. Проверил на эмулях от 1.7.3 -1.8.0
p.s. Марио запустиля на версии 1.7.1 Но вместо видео заставки зеленый экран.
« Последнее редактирование: 02 Июнь 2017, 12:50:27 от Prabel »
да там еще зависит от консролера , так что есть и такое игра тупа не запуститься если не настроить гемпад .
1.8.0b заточена на 7-10 игр от wiiu и мелкие nes snes n64 , на большее не рассчитывайте 1.8.0b упор делают на ZELDA и точка.
да там еще зависит от консролера , так что есть и такое игра тупа не запуститься если не настроить гемпад .
1.8.0b заточена на 7-10 игр от wiiu и мелкие nes snes n64 , на большее не рассчитывайте 1.8.0b упор делают на ZELDA и точка.
Тогда вопрос такого плана. На каких версиях эмулятора лучше играть в Paper Mario Color Splash и Super Smash Bros Wii U ?
Тогда вопрос такого плана. На каких версиях эмулятора лучше играть в Paper Mario Color Splash и Super Smash Bros Wii U ?
Paper Mario Color Splash на 1.7.5 , а на 1.8.0 не запустит  вернее эмулирует плохо с багами.
Super Smash Bros на 1.8.0
Сколько новеньких вчера и сегодня зарегистрировались  , все из за CEMU эмулятора.
« Последнее редактирование: 02 Июнь 2017, 13:30:32 от CCCP1982 »
Что-тоне могу понять как активировать GX2SetGPUFence skip hack ?
Страницы: Назад 1 … 67 68 69 70 [71] 72 73 74 75 … 143 Далее Вверх
Аккаунт удален
4.01.2022
Комментарий недоступен
Ответить
Развернуть ветку
Аккаунт удален
4.01.2022
Комментарий недоступен
Ответить
Развернуть ветку
Аккаунт удален
4.01.2022
Комментарий недоступен
Ответить
Развернуть ветку
Аккаунт удален
4.01.2022
Комментарий недоступен
Ответить
Развернуть ветку
Аккаунт удален
4.01.2022
Комментарий недоступен
Ответить
Развернуть ветку
wolfbil
4.01.2022
Автор
спасибо, перезапустил прогу и поехало
Ответить
Развернуть ветку
wolfbil
3.09.2022
Автор
Ссылку на ключи дали. Где то тут помощи. Но принялись они только после перезапуска проги. Но я не знаю, состарились эти ключи или ещё годны
Ответить
Развернуть ветку
Аккаунт удален
4.01.2022
Комментарий недоступен
Ответить
Развернуть ветку
Комментарий удален модератором
Развернуть ветку
Аккаунт удален
4.01.2022
Комментарий недоступен
Ответить
Развернуть ветку
Ferris MacWheel
4.01.2022
в гайдах этот момент обычно упускается, и говорят самим найти ссылку
Ответить
Развернуть ветку
Лунный спрей
4.01.2022
Комментарий недоступен
Ответить
Развернуть ветку
Читать все 18 комментариев
You are using an out of date browser. It may not display this or other websites correctly.
You should upgrade or use an alternative browser.
- Joined
- Jun 5, 2014
- Messages
- 95
- Trophies
- 0
- Age
- 50
- XP
-
364
- Country
-

-
#1
usb helper today giving me a microsoft .net error (Data error (cyclic redundancy check )
its stuck at 60,% and gives me an error and give me 3 options to continue or quit and details which i have posted below
any help how to get this working again
thanks
See the end of this message for details on invoking
just-in-time (JIT) debugging instead of this dialog box.
************** Exception Text **************
System.IO.IOException: Data error (cyclic redundancy check).
at System.IO.__Error.WinIOError(Int32 errorCode, String maybeFullPath)
at System.IO.FileStream.ReadCore(Byte[] buffer, Int32 offset, Int32 count)
at System.IO.FileStream.Read(Byte[] array, Int32 offset, Int32 count)
at System.IO.File.InternalReadAllBytes(String path, Boolean checkHost)
at A.cbcbdbfc95367bfec4c11b371d883aa2d.cca035b5773e1c7bd4eb2ebb87879807e(String ce29a958ba9520b3308a8bc42d9dcf137, ceee61848167c1ade885c85db30acc060 cd6f1966a966a6f1dabeb755aded4df42)
at A.c6114b34ba4893a53ebb4b599e0e2e3fc.c958787bfab27c1e592e8bcf275a4254e()
at A.c6114b34ba4893a53ebb4b599e0e2e3fc.get_ca435006c85356cb7385a782de8889a0a()
at A.cb6cc9a5b122137bc5f2718f61ab49e59.c3b8d58494a1935b104c4727552adea4e(c5409344e1c2b74fa8c9a4d620ccb8d48 c6b7fbe462f43433d64916e9273f7e5d1)
at A.cb6cc9a5b122137bc5f2718f61ab49e59.cddf0b14fb7ade8f11695210af254e750(c5409344e1c2b74fa8c9a4d620ccb8d48 c6b7fbe462f43433d64916e9273f7e5d1, RadListView c82dd34236c6c1a53878feade40e0b3a1)
at A.cb6cc9a5b122137bc5f2718f61ab49e59.cc3ddcea0d3be09242a6a70c83078277f_Encrypted$(cb6cc9a5b122137bc5f2718f61ab49e59 , Byte[] , Byte[] )
at A.cb6cc9a5b122137bc5f2718f61ab49e59.c15bca37ae5115bafce5fc70ebfd7dcd4(Object cd7b28952603b35a45c555982e677363a, EventArgs cdf15457ee4816989343b6e6e96dd4cfe)
at System.EventHandler.Invoke(Object sender, EventArgs e)
at System.Windows.Forms.Form.OnLoad(EventArgs e)
at Telerik.WinControls.UI.RadFormControlBase.OnLoad(EventArgs e)
at System.Windows.Forms.Form.OnCreateControl()
at Telerik.WinControls.UI.RadFormControlBase.OnCreateControl()
at System.Windows.Forms.Control.CreateControl(Boolean fIgnoreVisible)
at System.Windows.Forms.Control.CreateControl()
at System.Windows.Forms.Control.WmShowWindow(Message& m)
at System.Windows.Forms.Control.WndProc(Message& m)
at System.Windows.Forms.Form.WmShowWindow(Message& m)
at Telerik.WinControls.UI.RadFormControlBase.WndProc(Message& m)
at System.Windows.Forms.NativeWindow.Callback(IntPtr hWnd, Int32 msg, IntPtr wparam, IntPtr lparam)
************** Loaded Assemblies **************
mscorlib
Assembly Version: 4.0.0.0
Win32 Version: 4.7.2600.0 built by: NET471REL1LAST
CodeBase: file:///C:/Windows/Microsoft.NET/Framework64/v4.0.30319/mscorlib.dll
—————————————-
WiiU_USB_Helper
Assembly Version: 1.0.0.0
Win32 Version: 1.0.0.0
CodeBase: file:///C:/Users/xxxxx/Desktop/games/WiiU_USB_Helper.exe
—————————————-
System
Assembly Version: 4.0.0.0
Win32 Version: 4.7.2556.0 built by: NET471REL1
CodeBase: file:///C:/WINDOWS/Microsoft.Net/assembly/GAC_MSIL/System/v4.0_4.0.0.0__b77a5c561934e089/System.dll
—————————————-
System.Deployment
Assembly Version: 4.0.0.0
Win32 Version: 4.7.2556.0 built by: NET471REL1
CodeBase: file:///C:/WINDOWS/Microsoft.Net/assembly/GAC_MSIL/System.Deployment/v4.0_4.0.0.0__b03f5f7f11d50a3a/System.Deployment.dll
—————————————-
System.Core
Assembly Version: 4.0.0.0
Win32 Version: 4.7.2600.0 built by: NET471REL1LAST
CodeBase: file:///C:/WINDOWS/Microsoft.Net/assembly/GAC_MSIL/System.Core/v4.0_4.0.0.0__b77a5c561934e089/System.Core.dll
—————————————-
Telerik.WinControls
Assembly Version: 2017.2.502.40
Win32 Version: 2017.2.502.40
CodeBase: file:///C:/Users/xxxxxx/Desktop/games/Telerik.WinControls.DLL
—————————————-
System.Windows.Forms
Assembly Version: 4.0.0.0
Win32 Version: 4.7.2556.0 built by: NET471REL1
CodeBase: file:///C:/WINDOWS/Microsoft.Net/assembly/GAC_MSIL/System.Windows.Forms/v4.0_4.0.0.0__b77a5c561934e089/System.Windows.Forms.dll
—————————————-
System.Drawing
Assembly Version: 4.0.0.0
Win32 Version: 4.7.2556.0 built by: NET471REL1
CodeBase: file:///C:/WINDOWS/Microsoft.Net/assembly/GAC_MSIL/System.Drawing/v4.0_4.0.0.0__b03f5f7f11d50a3a/System.Drawing.dll
—————————————-
Telerik.WinControls.UI
Assembly Version: 2017.2.502.40
Win32 Version: 2017.2.502.40
CodeBase: file:///C:/Users/xxxxxx/Desktop/games/Telerik.WinControls.UI.DLL
—————————————-
System.Configuration
Assembly Version: 4.0.0.0
Win32 Version: 4.7.2556.0 built by: NET471REL1
CodeBase: file:///C:/WINDOWS/Microsoft.Net/assembly/GAC_MSIL/System.Configuration/v4.0_4.0.0.0__b03f5f7f11d50a3a/System.Configuration.dll
—————————————-
WindowsBase
Assembly Version: 4.0.0.0
Win32 Version: 4.7.2600.0 built by: NET471REL1LAST
CodeBase: file:///C:/WINDOWS/Microsoft.Net/assembly/GAC_MSIL/WindowsBase/v4.0_4.0.0.0__31bf3856ad364e35/WindowsBase.dll
—————————————-
System.Xml
Assembly Version: 4.0.0.0
Win32 Version: 4.7.2556.0 built by: NET471REL1
CodeBase: file:///C:/WINDOWS/Microsoft.Net/assembly/GAC_MSIL/System.Xml/v4.0_4.0.0.0__b77a5c561934e089/System.Xml.dll
—————————————-
TelerikCommon
Assembly Version: 2017.2.502.40
Win32 Version: 2017.2.502.40
CodeBase: file:///C:/Users/xxxxx/Desktop/games/TelerikCommon.DLL
—————————————-
Microsoft.GeneratedCode
Assembly Version: 1.0.0.0
Win32 Version: 4.7.2556.0 built by: NET471REL1
CodeBase: file:///C:/WINDOWS/Microsoft.Net/assembly/GAC_MSIL/System.Xml/v4.0_4.0.0.0__b77a5c561934e089/System.Xml.dll
—————————————-
Telerik.WinControls.RadDock
Assembly Version: 2017.2.502.40
Win32 Version: 2017.2.502.40
CodeBase: file:///C:/Users/xxxxxx/Desktop/games/Telerik.WinControls.RadDock.DLL
—————————————-
WiiU_USB_Helper.resources
Assembly Version: 1.0.0.0
Win32 Version: 1.0.0.0
CodeBase: file:///C:/Users/xxxxx/Desktop/games/en-US/WiiU_USB_Helper.resources.DLL
—————————————-
System.Data
Assembly Version: 4.0.0.0
Win32 Version: 4.7.2556.0 built by: NET471REL1
CodeBase: file:///C:/WINDOWS/Microsoft.Net/assembly/GAC_64/System.Data/v4.0_4.0.0.0__b77a5c561934e089/System.Data.dll
—————————————-
System.IO.Compression
Assembly Version: 4.0.0.0
Win32 Version: 4.7.2556.0
CodeBase: file:///C:/WINDOWS/Microsoft.Net/assembly/GAC_MSIL/System.IO.Compression/v4.0_4.0.0.0__b77a5c561934e089/System.IO.Compression.dll
—————————————-
Microsoft.VisualBasic
Assembly Version: 10.0.0.0
Win32 Version: 14.7.2556.0 built by: NET471REL1
CodeBase: file:///C:/WINDOWS/Microsoft.Net/assembly/GAC_MSIL/Microsoft.VisualBasic/v4.0_10.0.0.0__b03f5f7f11d50a3a/Microsoft.VisualBasic.dll
—————————————-
System.Management
Assembly Version: 4.0.0.0
Win32 Version: 4.7.2556.0 built by: NET471REL1
CodeBase: file:///C:/WINDOWS/Microsoft.Net/assembly/GAC_MSIL/System.Management/v4.0_4.0.0.0__b03f5f7f11d50a3a/System.Management.dll
—————————————-
Newtonsoft.Json
Assembly Version: 10.0.0.0
Win32 Version: 10.0.3.21018
CodeBase: file:///C:/Users/xxxxx/Desktop/games/Newtonsoft.Json.DLL
—————————————-
System.Numerics
Assembly Version: 4.0.0.0
Win32 Version: 4.7.2556.0 built by: NET471REL1
CodeBase: file:///C:/WINDOWS/Microsoft.Net/assembly/GAC_MSIL/System.Numerics/v4.0_4.0.0.0__b77a5c561934e089/System.Numerics.dll
—————————————-
System.Runtime.Serialization
Assembly Version: 4.0.0.0
Win32 Version: 4.7.2556.0 built by: NET471REL1
CodeBase: file:///C:/WINDOWS/Microsoft.Net/assembly/GAC_MSIL/System.Runtime.Serialization/v4.0_4.0.0.0__b77a5c561934e089/System.Runtime.Serialization.dll
—————————————-
System.Web
Assembly Version: 4.0.0.0
Win32 Version: 4.7.2556.0 built by: NET471REL1
CodeBase: file:///C:/WINDOWS/Microsoft.Net/assembly/GAC_64/System.Web/v4.0_4.0.0.0__b03f5f7f11d50a3a/System.Web.dll
—————————————-
************** JIT Debugging **************
To enable just-in-time (JIT) debugging, the .config file for this
application or computer (machine.config) must have the
jitDebugging value set in the system.windows.forms section.
The application must also be compiled with debugging
enabled.
For example:
<configuration>
<system.windows.forms jitDebugging=»true» />
</configuration>
When JIT debugging is enabled, any unhandled exception
will be sent to the JIT debugger registered on the computer
rather than be handled by this dialog box.
Last edited by boxer29,
Jan 14, 2018
- Joined
- Jun 5, 2014
- Messages
- 95
- Trophies
- 0
- Age
- 50
- XP
-
364
- Country
-
-
#2
Ayone please help me to fix this
-
#3
same thing here
——————— MERGED —————————
SOLVED:
just change the game’s storage folder and
in the bottom right corner of the desktop click in the Launcher Icon:
Advanced>Clear The Install
DONE
Similar threads
![]()
You may also like…
- No one is chatting at the moment.
Как правило, ошибки TMD.HLP вызваны повреждением или отсутствием файла связанного Microsoft Visual Studio 97 Professional Edition, а иногда — заражением вредоносным ПО. Как правило, любую проблему, связанную с файлом HLP, можно решить посредством замены файла на новую копию. В некоторых случаях реестр Windows пытается загрузить файл TMD.HLP, который больше не существует; в таких ситуациях рекомендуется запустить сканирование реестра, чтобы исправить любые недопустимые ссылки на пути к файлам.
Наша коллекция файлов TMD.HLP для %%os%% представлена в списках ниже. Для скачивания доступны не все версии TMD.HLP, однако вы можете запросить необходимых файл, нажав на кнопку Request (Запрос) ниже. Если ниже отсутствует необходимая вам версия, мы рекомендуем обратиться непосредственно к Microsoft Corporation.
Если вы успешно заменили соответствующий файл в соответствующем месте, у вас больше не должно возникать проблем, связанных с TMD.HLP. Однако мы рекомендуем выполнить быструю проверку, чтобы окончательно в этом убедиться. Чтобы убедиться в том, что удалось решить проблему, попробуйте запустить Microsoft Visual Studio 97 Professional Edition, и посмотреть выведется ли ошибка.
| TMD.HLP Описание файла | |
|---|---|
| Ext: | HLP |
| Категория: | Program development,Programming |
| Program: | Microsoft Visual Studio 97 Professional Edition |
| Версия: | 1997 |
| Программист: | Microsoft Corporation |
| Имя: | TMD.HLP |
| KB: | 42861 |
| SHA-1: | 54614e0797ec4a2d8a89bda07d402ba0d92d5a2d |
| MD5: | 73d65671b69520aad736d8eda48476a8 |
| CRC32: | 61e55b89 |
Продукт Solvusoft
Загрузка
WinThruster 2023 — Сканировать ваш компьютер на наличие ошибок реестра в TMD.HLP
Windows
11/10/8/7/Vista/XP
Установить необязательные продукты — WinThruster (Solvusoft) | Лицензия | Политика защиты личных сведений | Условия | Удаление
HLP
TMD.HLP
Идентификатор статьи: 503946
TMD.HLP
| Имя файла | MD5 | Размер | Загрузить | |||||||||||||||
|---|---|---|---|---|---|---|---|---|---|---|---|---|---|---|---|---|---|---|
| + TMD.HLP | 73d65671b69520aad736d8eda48476a8 | 41.86 KB | ||||||||||||||||
|
||||||||||||||||||
| + TMD.HLP | 73d65671b69520aad736d8eda48476a8 | 41.86 KB | ||||||||||||||||
|
Распространенные сообщения об ошибках в TMD.HLP
Наиболее распространенные ошибки TMD.HLP, которые могут возникнуть на компьютере под управлением Windows, перечислены ниже:
- «Ошибка в файле TMD.HLP.»
- «TMD.HLP перемещен или отсутствует. «
- «TMD.HLP не найден.»
- «Не удалось загрузить файл TMD.HLP. «
- «Ошибка регистрации: TMD.HLP. «
- «Ошибка времени выполнения Microsoft Visual Studio 97 Professional Edition: TMD.HLP»
- «Ошибка загрузки: TMD.HLP. «
Обычно ошибки TMD.HLP с Microsoft Visual Studio 97 Professional Edition возникают во время запуска или завершения работы, в то время как приложения, связанные с TMD.HLP, выполняются, или редко во время последовательности обновления ОС. Важно не учитывать, когда возникают проблемы с TMD.HLP, так как это помогает устранять ошибки, связанные с Microsoft Visual Studio 97 Professional Editions, и сообщать о них в Microsoft Corporation.
TMD.HLP Истоки проблем
Проблемы Microsoft Visual Studio 97 Professional Edition и TMD.HLP возникают из отсутствующих или поврежденных файлов, недействительных записей реестра Windows и вредоносных инфекций.
В частности, проблемы TMD.HLP возникают с:
- Недопустимый раздел реестра TMD.HLP (или поврежденный).
- Вирус или вредоносное ПО, повреждающее TMD.HLP.
- Другая программа злонамеренно или по ошибке удалила файлы, связанные с TMD.HLP.
- Другая программа, конфликтующая с TMD.HLP или другой общей ссылкой Microsoft Visual Studio 97 Professional Edition.
- Поврежденная загрузка или неполная установка программного обеспечения Microsoft Visual Studio 97 Professional Edition.
You should upgrade or use an alternative browser.
-
Thread starterwoody565
-
Start date -
Views
3,421 -
Replies
9
- Joined
- Apr 18, 2009
- Messages
- 93
- Trophies
- 1
- XP
-
340
- Country
-
#1
I a trying to use wii usb helper for 3ds roms, i haved added the .gq site for tickets but get a tmd error in download manager. Is there a fix? is it possible to use Wii usb helper for 3ds roms?
Thanks
Dan

-
#3
Hi all,I a trying to use wii usb helper for 3ds roms, i haved added the .gq site for tickets but get a tmd error in download manager. Is there a fix? is it possible to use Wii usb helper for 3ds roms?
Thanks
Dan
Try http://3ds.***.com
Or http://3ds.***.xyz

AmandaRose
Do what I do. Hold tight and pretend it’s a plan
-
#4
How the fuck is it impossible??? you have been able to download 3ds games using wiiu USB download helper for months now. In the future if you don’t know the correct answer to something then don’t post a stupid and inaccurate answer.
-
#5
How the fuck is it impossible??? you have been able to download 3ds games using wiiu USB download helper for months now. In the future if you don’t know the correct answer to something then don’t post a stupid and inaccurate answer.
I thought it was impossible, please take a chill pill or something.
- Joined
- Jan 30, 2014
- Messages
- 823
- Trophies
- 0
- Age
- 42
- XP
-
699
- Country

-
#6
-
#7
I thought it was impossible, please take a chill pill or something.
Yeah but you didn’t post it as «you thought». Your post was wrong and could mislead. Just think and research a bit if you’re going post a definitive statement like that.
If I’m not 100% I always preface my statements as such
- Joined
- Apr 18, 2009
- Messages
- 93
- Trophies
- 1
- XP
-
340
- Country
-
#8
Are u blocking nintendo servers on your network?
Thanks mate, I was blocking all Nintendo sites in the router. Removed all keywords and its working fine now.
Cheers all for your input
-
#9
Yeah but you didn’t post it as «you thought». Your post was wrong and could mislead. Just think and research a bit if you’re going post a definitive statement like that.If I’m not 100% I always preface my statements as such
Alright, sorry it was late last night & I thought since it is Wii USB helper it would be impossible
- Joined
- Jan 30, 2014
- Messages
- 823
- Trophies
- 0
- Age
- 42
- XP
-
699
- Country
-
#10
Thanks mate, I was blocking all Nintendo sites in the router. Removed all keywords and its working fine now.Cheers all for your input
Make sure to block em again after lol
Similar threads
USB Helper — это полезная программа для загрузки и установки игр на консоли Wii U. Однако, некоторые пользователи могут столкнуться с ошибкой «tmd не найден», которая мешает им использовать программу. В этой статье мы расскажем о причинах этой ошибки и предложим несколько способов ее исправить.
Ошибка «tmd не найден» может возникнуть по нескольким причинам. Возможно, у вас отсутствует или испорчен файл tmd, который необходим для установки игр. Также, возможно, у вас есть устаревшая версия USB Helper, которая не совместима с последней версией Wii U.
Использование самой свежей версии USB Helper может помочь устранить ошибку «tmd не найден». Вы можете загрузить последнюю версию программы с веб-сайта официального разработчика. Если вы уже установили последнюю версию, попробуйте переустановить программу, чтобы убедиться, что все файлы на месте.
Если обновление USB Helper не решает проблему, попробуйте проверить файл tmd. Убедитесь, что файл существует и находится в правильном расположении. Если файл отсутствует, попробуйте скачать его заново. Если файл уже на месте, попробуйте переименовать его или переместить его в другую директорию.
Если все вышеперечисленные способы не помогли исправить ошибку «tmd не найден», возможно, проблема заключается в самой консоли Wii U. Попробуйте перезагрузить консоль или выполнить полную переустановку системы. Если ничего из этого не помогло, обратитесь за помощью к надежным источникам поддержки Wii U или разработчикам программы USB Helper.
Содержание
- USB Helper: устранение ошибки «tmd не найден»
- Что такое USB Helper?
- Возможные причины ошибки «tmd не найден»
- Как исправить ошибку «tmd не найден»?
- Переустановка USB Helper
- Обновление USB Helper до последней версии
- Связь с технической поддержкой USB Helper
USB Helper: устранение ошибки «tmd не найден»
Ошибка «tmd не найден» в программе USB Helper обычно возникает при попытке загрузить или скачать игру для игровой приставки Nintendo Wii U или 3DS. Эта ошибка означает, что не удалось найти файл с метаданными для запрашиваемой игры.
Чтобы устранить ошибку «tmd не найден», можно попробовать следующие решения:
- Обновите USB Helper: Убедитесь, что у вас установлена последняя версия программы USB Helper. Вы можете проверить наличие обновлений на официальном сайте USB Helper или в самой программе.
- Проверьте соединение с Интернетом: Убедитесь, что у вас есть стабильное подключение к Интернету. Проверьте вашу сеть и убедитесь, что USB Helper может получить доступ к необходимым серверам для загрузки метаданных игры.
- Очистите кэш и временные файлы: Попробуйте очистить кэш и временные файлы USB Helper. Для этого найдите папку, в которой хранятся временные файлы программы, и удалите все файлы из этой папки.
- Проверьте наличие файлов игры: Проверьте, есть ли на вашем компьютере файлы игры, которые вы пытаетесь загрузить. Убедитесь, что все необходимые файлы присутствуют и находятся в правильной папке.
- Перезапустите программу USB Helper: Попробуйте перезапустить программу USB Helper и повторите попытку загрузки игры.
Если ни одно из этих решений не помогло устранить ошибку «tmd не найден», возможно, проблема связана с сервером или самими файлами игры. В таком случае, вам следует обратиться за поддержкой к разработчикам программы USB Helper или попробовать использовать альтернативные методы загрузки и установки игр для Nintendo Wii U или 3DS.
Что такое USB Helper?
USB Helper – это программный инструмент, который позволяет загружать и устанавливать игры и приложения на игровые консоли Nintendo Wii U и 3DS с помощью компьютера и USB-подключения.
USB Helper обеспечивает пользователю простой и удобный способ получить доступ к широкому выбору игр и приложений для Nintendo Wii U и 3DS. Программа позволяет загружать игры и обновления, а затем устанавливать их на вашу консоль с помощью USB-подключения.
USB Helper также предоставляет возможность создавать резервные копии игр и приложений, а также управлять загрузками и установками. Этот инструмент может быть особенно полезен, если вы хотите играть в игры, которые не доступны в вашем регионе, или если вы хотите сэкономить деньги на покупке игр, загружая их бесплатно.
Однако стоит отметить, что использование USB Helper для загрузки и установки пиратского контента незаконно и нарушает авторские права. Поэтому рекомендуется использовать программу только для законных целей и загружать только те игры и приложения, на которые у вас есть лицензия или право использования.
В целом, USB Helper является полезным инструментом для владельцев консолей Nintendo Wii U и 3DS, позволяющим получить доступ к большому количеству игрового контента и управлять его установкой и обновлением с помощью компьютера и USB-подключения.
Возможные причины ошибки «tmd не найден»
Ошибка «tmd не найден» может возникать при использовании программы USB Helper. Такая ошибка указывает на проблему с загрузкой или отсутствием файла «tmd» необходимого для обработки информации о файле.
Вот некоторые возможные причины ошибки:
-
Неправильное подключение устройства USB: Проверьте, что ваше устройство USB правильно подключено к компьютеру. Убедитесь, что кабель и разъемы в порядке и не повреждены.
-
Отсутствие файла «tmd» на сервере: Проверьте, что файл «tmd» действительно существует на сервере, с которого вы пытаетесь загрузить данные. Если файл отсутствует, необходимо проверить, что вы используете правильный и актуальный URL для загрузки данных.
-
Проблемы с сетевым подключением: Возможно, у вас неправильно настроено сетевое подключение или проблемы с интернет-соединением. Убедитесь, что у вас есть стабильное и рабочее подключение к интернету.
-
Ошибка в программе или браузере: Проверьте, что ваша версия программы USB Helper обновлена и совместима с вашим операционной системой. Также, возможно, проблема связана с веб-браузером, который вы используете для загрузки данных. Попробуйте обновить браузер или попробовать другой браузер.
Если вы все проверили, но ошибка «tmd не найден» все равно возникает, рекомендуется обратиться к разработчикам программы USB Helper для получения дополнительной поддержки и помощи.
Как исправить ошибку «tmd не найден»?
Ошибка «tmd не найден» может возникнуть при использовании программы USB Helper, которая служит для установки игр на Nintendo Wii U. Эта ошибка возникает, когда программа не может найти файл .tmd, который необходим для установки игры.
Чтобы исправить эту ошибку, вы можете выполнить следующие шаги:
- Перезапустите программу USB Helper. Иногда ошибка может возникнуть из-за временного сбоя в программе.
- Убедитесь, что у вас есть полное и правильное имя файла .tmd. Если имя файла содержит ошибки или неправильные символы, программа не сможет его найти.
- Проверьте, правильно ли вы указали путь к файлу .tmd. В некоторых случаях ошибка может возникнуть из-за неправильного пути к файлу.
- Если у вас есть резервная копия файла .tmd, вы можете попробовать восстановить его из нее. Для этого найдите резервную копию файла и замените текущий файл .tmd на него.
- Если ничего из вышеперечисленного не сработало, попробуйте переустановить программу USB Helper. Возможно, в вашей установке программы есть ошибки или неправильные настройки, которые вызывают ошибку «tmd не найден».
Если ни один из этих шагов не помог вам исправить ошибку «tmd не найден», вы можете обратиться за помощью к разработчикам программы USB Helper или обратиться к сообществу пользователей для получения дальнейших рекомендаций и поддержки.
Переустановка USB Helper
Ошибка «tmd не найден» может возникать в программе USB Helper из-за неправильно установленной или поврежденной версии программы. Для исправления этой ошибки рекомендуется переустановить USB Helper следующим образом:
- Закройте все запущенные экземпляры программы USB Helper.
- Удалите текущую установленную версию USB Helper с вашего компьютера.
- Загрузите последнюю версию USB Helper с официального сайта разработчика.
- Установите загруженную версию программы на вашем компьютере, следуя указаниям инсталлятора.
- Запустите USB Helper и проверьте, исчезла ли ошибка «tmd не найден».
Если ошибка «tmd не найден» продолжает появляться после переустановки USB Helper, можно попробовать выполнить следующие дополнительные действия:
- Очистить кэш программы, если такая опция имеется.
- Проверить наличие обновлений для вашей операционной системы и установить их, если это необходимо.
- Проверить наличие обновлений для всех установленных на вашем компьютере программ и установить их, если это необходимо.
- Проверить наличие обновлений для USB Helper и установить их, если это необходимо.
- Обратиться за поддержкой к разработчикам USB Helper, предоставив им информацию об ошибке и действиях, предпринятых для ее исправления.
Если ни одно из перечисленных выше действий не помогло решить проблему с ошибкой «tmd не найден» в USB Helper, может быть необходимо обратиться за помощью к опытным пользователям или специалистам, которые могут помочь вам разобраться с этой проблемой.
Обновление USB Helper до последней версии
USB Helper – это программное обеспечение, разработанное для загрузки и установки игр на консоли Nintendo Wii U и 3DS. Возможно, в процессе использования USB Helper вы столкнулись с ошибкой «tmd не найден». Чтобы ее исправить, рекомендуется обновить USB Helper до последней версии. В этой статье мы расскажем, как это сделать.
- Перейдите на официальный сайт USB Helper.
- Найдите раздел загрузки и выберите соответствующую версию программы для вашей операционной системы.
- После скачивания установочного файла запустите его и следуйте инструкциям мастера установки.
- После завершения установки запустите USB Helper.
- В меню программы найдите раздел «Обновление» или «Проверить наличие обновлений».
- Если обновление доступно, установите его, следуя указанным инструкциям.
- После завершения обновления перезапустите USB Helper.
После обновления программы рекомендуется очистить кэш USB Helper. Для этого выполните следующие действия:
- Закройте USB Helper.
- Найдите папку, в которой установлена программа USB Helper.
- Удалите содержимое папки с кэшем или саму папку.
- Запустите USB Helper снова.
В большинстве случаев после обновления и очищения кэша ошибка «tmd не найден» должна быть исправлена. Если проблема не устранена, попробуйте повторить процесс обновления и очистки кэша еще раз.
Если ошибка «tmd не найден» по-прежнему возникает, свяжитесь с разработчиком USB Helper для получения дополнительной поддержки и инструкций.
Связь с технической поддержкой USB Helper
Если вы столкнулись с ошибкой «tmd не найден» при использовании программы USB Helper, вам следует обратиться в техническую поддержку для получения помощи. В данной статье мы расскажем вам, как связаться с поддержкой, чтобы решить вашу проблему.
Перед тем как обращаться в техническую поддержку, убедитесь, что вы имеете последнюю версию программы USB Helper. Зачастую, проблема может быть вызвана устаревшей версией софта.
- Проверьте наличие обновлений. Зайдите на официальный сайт USB Helper и скачайте самую последнюю версию программы.
- Проверьте, правильно ли вы ввели ссылку на игру в USB Helper. Убедитесь, что ссылка полностью скопирована и вставлена без ошибок.
- Попробуйте скачать другую игру, чтобы проверить, возникает ли ошибка «tmd не найден» только с этой конкретной игрой.
- Если проблема повторяется с разными играми, возможно, ваш файл TMD поврежден или отсутствует. В таком случае, вам следует обратиться в техническую поддержку USB Helper.
Для связи с технической поддержкой USB Helper вы можете воспользоваться несколькими способами:
- Официальный форум USB Helper. Посетите форум USB Helper и создайте новую тему, описав вашу проблему подробно. Возможно, другие пользователи или представители технической поддержки смогут вам помочь.
- Электронная почта. Найдите контактный адрес электронной почты технической поддержки USB Helper на официальном сайте программы и отправьте им письмо с описанием вашей проблемы.
- Социальные сети. Проверьте, есть ли официальная страница USB Helper в популярных социальных сетях (например, Facebook или Twitter). Оставьте комментарий под последними обновлениями или отправьте личное сообщение с описанием вашей проблемы.
При обращении в техническую поддержку важно указывать максимально подробную информацию о вашей проблеме. Укажите версию программы, операционную систему, детали ошибки и шаги, которые вы предприняли до возникновения проблемы. Это поможет технической поддержке USB Helper быстрее и точнее определить причину ошибки и предложить вам решение.
Надеемся, что эта информация поможет вам связаться с технической поддержкой USB Helper для решения проблемы с ошибкой «tmd не найден». Удачи в использовании программы и приятной игры!
WII U USB HELPER GUIDE
HOW TO INSTALL WII U, WII AND GAMECUBE GAMES
Wii U USB helper will let you download Wii U games directly to your PC and even copy them over to your SD / Micro SD card. Wii U USB Helper acts pretty much as a mirror of the current eShop, however, it does also allow you to create custom games to install directly to your Wii U or Wii U’s attached HDD (Recommended).
In this guide, I will be showing you to install and set up Wii U USB Helper and the installation of a Wii U game, A Wii game and a GameCube game. To follow this guide I will be assuming you already have a soft modded Wii U and can run homebrew, If not I’ve put together an easy to follow guide on modding your Wii U here, It’s a fun project and doesn’t take that long to do.
How to Install WII U USB Helper
To install Wii U USB Helper we need to head over to FailShack’s GitHub and download the latest release which you can do here: –
https://github.com/FailedShack/USBHelperInstaller/releases/tag/1.2
Once USBHelperInstaller.exe has been download double click on it to start the installation.
Click next and have a quick look at the GNU license before clicking ‘I Agree’. On the next window, you’ll want to click the drop-down menu and select the latest version, at the time of writing this the current version is ‘Wii U Helper 0.6.1.655’ but may be different for you.
Click next and choose where to install Wii U USB Helper, for the sake of simplicity I am going to install it at ‘C:\USBHelperLauncher’ but feel free to save it wherever you want.
Click ‘Install’ and the launcher will automatically download the latest version, if for any reason the download does not start, please check that the program is allowed through your firewall. Download and installation may take a couple of minutes
Once complete, make sure ‘Run USBHelperLauncher’ has its box ticked and click Finish.
After a few seconds, the program will finish injecting and you will be at this screen:
From here you need to pick what region your system is, mine is European so I ticked the box in the bottom left-hand corner and then selected EUR. (You can change your region later, so don’t worry too much about this for now!)
Read the Disclaimer and click OK, you will now get to select the location of where your games will download. As the message says, avoid folders that require Admin privileges as this could cause issues when trying to download to them. Once again for the sake of this guide, I will be saving mine to my C:\ drive. Click OK and choose where you want to your downloaded games to be stored.
Next, we will be greeted with this screen: –
As it says, Wii U USB Helper will need to download tickets and they are copyrighted, this means I won’t be able to help you either, however, I’m sure googling ‘That WiiU Site’ will point you in the right direction. We need to copy and paste the URL of this site into here, once done click OK and WII U USB Helper will begin to build the ticket cache, this might take a few moments.
And here we are! This is the main area of WII U USB Helper: –
How to use WII U USB Helper
As you can see there are quite a few options, but I promise you, it’s pretty easy to use. First thing we want to do is filter the games to just the ones we want, Wii U USB Helper also has the ability to download Wii games & 3DS games, but we won’t be going over that here.
Click the tab filters on the left-hand side to come to this screen: –
From here, we can see all the platforms Wii U USB Helper is currently set to display. You’ll want to untick and collapse the 3DS Section and Wii section, so your screen ends up looking like the image below: –
The reason we have done this is so its easier to search for the games we want. Click back on the library tab to be returned to the main menu. You’ll notice only Wii U and Custom games are now showing.
Let’s try downloading a Wii U Game first.
How to download Wii U games with WII U USB Helper
At the main menu of the Wii U USB Helper, you’ll be able to search for the game you want by typing it in or look through the games available, which are sorted in alphabetical order.
Here’s my copy of Starfox Zero: –
I want to be able to play this game from my Wii’s external hard drive, So I scroll down to Star Fox Zero, right-click and choose download. If the game had any updates or DLC, I could have also click on them to add them to the download queue.
I now have Star Fox Zero added to my queue, I could at this point, add more games I want and have them download all together but for now, I’m going to click on the flashing ‘Start downloading’ button.
The game will now start to download, you can access the download manager by clicking over at the top left corner, this will show you how far your download has progressed and a rough ETA of when the game will be downloaded.
Now, you must wait for the game to be downloaded, once that is done, we will look at getting the game installed.
Wii U USB Helper download slow?
If you find your game is downloading slow head over to the download manager and click on the speed tab: –
At the bottom, you will find the option to ‘Enable SuperSpeed’. Check this box and your download should speed should pick up dramatically!
Installing a Wii U game to your Wii U
Now you have your game downloaded we will need to transfer it over to our SD card. Insert your SD card and on the main screen of Wii U USB Helper you will see the game we downloaded earlier
You can either do this via Wii U USB Helper by right-clicking on ‘set download directory’ or via windows by navigating to where we set it earlier.
Once in the directory navigate through DATA – EUR (or chosen Region) – GAMES. In this folder, we will find our game folder.
On our SD card, we will be copying our game folder to the ‘install’ file on the root of our SD card. So it will be SD card Root /install/”game folder”, In my case, the SD card is drive F so will be F:/install/Star Fox Zero [00050000101b0500].
Copy your folder over, this will take a little while to copy over and depends on how big the game is and how fast your SD card is. Once copied, put your SD card back into your Wii U and boot up.
From the Wii U home screen, head over to the Homebrew Channel and launch it. The head over to WUP Installer GX2, if you don’t have WUP Installer installed you can find out how in my Wii U modding guide.
Once WUP Installer GX2 has loaded you will see your game on the gamepad, from here tap the game name and tap install, tap ‘Yes’ and choose where you want to install the game. I recommend installing your game onto an external HDD.
The Wii U does not have a lot of storage and some of these games can be quite big. The base Wii U only has 8GB of internal storage, so this one game I’m going to install would take up nearly all of it!
Another reason would be safety, If the game somehow becomes corrupt you could risk losing some space on your Wii U’s internal NAND memory.
You can always move across your game later using the Wii U’s inbuilt transfer feature once you verified the game works correctly.
After you selected your location the game will begin to install.
The amount of time this will take depends on how big the game is, but once complete press ok and then the home button a few times and close the application to head back the Wii U’s main menu.
You will now find your installed game on the Wii U’s main menu and it will work just like any digital game download. Give the game a quick test to make sure everything is working.
Congratulations, you now know how to download your Wii U games and install them to your Wii U.
Next up, let’s look at installing a GameCube game to your Wii U.
Install GameCube Games to your Wii U with USB Helper
Installing GameCube games are a little different than the Wii U games, you will have to provide your own .iso image of the game. You can do this using the homebrew Cleanrip if you have access to a modded Wii, unfortunately, Cleanrip will not work on Wii U for backing up GameCube games as the Wii U cannot read the discs.
The easiest way to backup your games from PC is to use free software like ImgBurn and make a DVD back up of your GameCube Disc.
The game I shall be installing is Sonic Mega Collection, I have already ripped my disc and have the copy on my PC.
Load up USB helper and head over the to filter section. From here, uncheck everything besides ‘Gamecube’ under Wii U – Custom Titles.
The head back to the main menu. The list will now be filtered by GameCube games only. The list is not the biggest, but it does contain some of the best games on the console. If you want to try out other GameCube games follow my guide going over GameCube game injection here, this guide also tells you how to inject and play Wii games directly from your Wii U.
Select the game you want to install on your Wii U, I have selected Sonic Mega Collection. Right-click on the game and select download, this will add the game to your queue.
Click ‘Start Download’ and you will be prompted to provide the .ISO image, once selected Wii U USB Helper will start to prepare your game for injection, sit back as this will take a few minutes depending on the size of the game.
Once you GameCube game is injected, head to the main menu and right-click on ‘Set download directory’, this will open where our GameCube injection is.
With GameCube injections, they are classed as eShop games by Wii U USB Helper. Your game will be put in the folder DATA – EUR (or selected region) – ESHOP. Inside you will find the folder of the game you just created.
Insert your Wii U’s SD card and navigate to the folder ‘Install’ which should be on the root of your SD card. We need to copy the game folder over to the install folder, so mine looks like F:/install/Sonic Mega Collection [000500001F534F50]. With this copied over, insert your SD card into your Wii U and turn the console on.
With your Wii U on, launch the Homebrew launcher and find WUP Installer GX2.
Once launched you should see your game on the gamepad. Tap the title and tap ‘install’, tap ‘yes’ and choose between ‘Nand’ or ‘USB (Recommended)’. The game will then start to install.
Once your GameCube game is installed press ‘ok’ and then the home button a couple of times and close the software to return to the Wii U’s menu. You will now see your installed GameCube title as an app. Click on the app to test if everything is working.
As the game loads, we will be prompted if we want to use the Wii U gamepad as a controller. Select yes and you’ll be able to enjoy your GameCube games on both your TV and Wii U gamepad.
Remember, if you want to install other titles that are not on Wii U USB Helper you should follow my injection guide here.
Install Wii games with WII U USB Helper
The installation of Wii games with USB Helper is very similar to GameCube game installation, except some of the games can be downloaded as they are on the Wii U’s virtual console.
Head over to the filters tab once more and select Wii under the Wii U Virtual Console’s section, you can also Enable Wii Custom under the Custom Titles section (For custom titles you will need to provide your own Wii .ISO image of the game!).
Click back on the library tab and choose your game, for purposes of this guide I will be using Skyward Sword, as I already own this game. Remember, if the game you want is not listed here, you can follow my injection guide which lets you inject any custom Wii game here.
Right-click on the game you want and choose ‘download’ to add it to your queue. Then click ‘start downloading’ which will get the game files for you. The amount of time this takes will depend on the size of the game and your internet speed.
Once your chosen game has downloaded, right-click on ‘Set download directory’, this will open where the downloaded game is. Wii games are treated as eShop games, so we will want to navigate to DATA – EUR (or selected region) – ESHOP. In this folder, we will find our game folder.
Insert your SD card into your PC and copy the game folder over to your ‘install’ folder on the root of your SD card. Mine looks like this: F:/install/The Legend of Zelda Skyward Sword [00050000101B1100]. Once this is copied, we can put the SD card back into the Wii U.
Boot up your Wii U and launch the Homebrew Launcher. Once in the Homebrew Launcher, choose WUP Installer GX2.
With WUP Installer launched your game will appear on the gamepad. Tap the Game and select ‘install’ after select ‘yes’ and choose where you want to install your game. I would recommend ‘USB’ but you can use ‘Nand’ if you want. Your Wii game will now begin to install to your Wii U.
Once your game is installed, tap ‘OK’ and press the home button and close software to return to Wii U’s main menu. We now have our game installed an application.
Click on our newly installed Wii game to see if it works.
As you can see, everything is working great! You now know how to enjoy your Wii games on your Wii U without having to use your disc.
I hope this guide helped you and if you have any questions regarding anything feel free to leave a comment and I will get back to you!
As you may already know, Wii U USB Helper has been discontinued, however, this shouldn’t mean we’re not allowed to use it anymore.
So I’ve made a launcher which makes it work again. Hooray!
Here’s how to set it up:
Step 1 — Download the launcher.
Step 2 — Download a compatible version of Wii U USB Helper.
-
Wii U USB Helper 0.6.1.653
-
Wii U USB Helper 0.6.1.616 (RECOMMENDED)
-
Wii U USB Helper 0.6.1.596
-
View all preserved versions
If you have a version earlier than 0.6.1.653 that is not listed here, please PM me.
Step 3 — Extract Wii U USB Helper, then extract the launcher in the same folder.
Step 4 — Download MakeHostsJson.exe to the same folder, run it and follow the instructions.
Step 5 — Run USBHelperLauncher.exe and follow the on-screen instructions. Then make a shortcut of it on the desktop and you’re all set!
Help! The title key site is down!
Check if it’s not just you by clicking here.
If it’s indeed down, run USBHelperLauncher, right click its tray icon and go to Advanced -> Clear Install. Then run it again, when asked use this title key site: http://web.archive.org/web/20180512025652id_/http://wiiu.titlekeys.gq/
If you have the time, please send feedback!
You may find it easier to follow this video guide.
Now on GitHub!
News
Nintendo is patching the 3DS endpoint, which will result in 3DS titles not being downloadable anymore.
Press F to pay respects.
Wii U titles are still downloadable as per usual, though.
Version 0.9 fixes downloading 3DS content and removed the necessity for modifying proxy settings or trusting an SSL certificate.
You can now generate your own donation key at no cost! This will allow you to access all premium features.
Version 0.7 will now automatically patch Wii U USB Helper and allow you to generate a valid donation key, all you need to do is right click the launcher’s tray icon and select «Generate Donation Key».
Then simply go to the helper and activate it.
Known issues
-
Some images will not display properly, this has to do with HTTPS proxying which is still a work in progress. (Fixed in 0.3)
-
The launcher will not work with versions of Wii U USB Helper newer than 0.6.1.653. (Fixed in 0.3)
-
Error while attempting to install emulator prerequisites: «The specified executable is not a valid application for this OS platform.» (Fixed in 0.4)
-
Certain virtual console platforms’ channels are not extracted properly, resulting in corrupted roms. This is Wii U USB Helper’s fault and there’s not much that can be done.
-
A significant amount of 3DS titles will fail to download with a 403 error. Nintendo is patching the 3DS CDN. Wii U titles are unaffected.
Troubleshooting
Wii U USB Helper gets stuck at ‘Preparing ticket cache’
Make sure you’ve used MakeHostsJson, check above if you haven’t.
If you have, then right click the launcher’s tray icon in the taskbar and go to Advanced -> Clear Install. Then restart your computer and try again.
Error when trying to change the title keys site
For technical reasons it’s not possible to change the title key site from the button in Wii U USB Helper itself, if you’ve done this unknowingly, simply force close Wii U USB Helper from the task manager. Then start it from the launcher again.
Why does Wii U USB Helper still say ‘Wii U USB Helper has been discontinued’?
To avoid overwriting an already exisiting install, Wii U USB Helper will only apply the workaround required for Wii U USB Helper to run if no previous install is found.
To fix this, while the launcher it’s still open, find the notification icon for the launcher in the task bar, right click it and go to Advanced -> Clear Install.
I have an issue that’s not listed here!
While the launcher is still open, right click its notification icon on the taskbar and select ‘Report Issue’.
This will generate a debug message and save a link to it in your clipboard, PM it to me.
FAQ
Why is the launcher being detected as a threat?
It appears the launcher is now being flagged as a trojan in Microsoft Defender and other antivirus software due to bad heuristics. I’ve already submitted it as a false positive. Exclude the Launcher for the time being.
Please read this article for more information.
This is a nuisance to other small developers as well.
Why do we need this? My Wii U USB Helper is working fine.
Newer ‘discontinued’ versions of USB Helper will allow you to continue using them as long as it finds files of a previously available install. So, for all intents and purposes, they are a ticking time bomb, because if you move to another computer, or your install gets removed, you’ll not be able to launch them anymore.
You can download a patched version of Wii U USB Helper Go! for Android here. Updated on 11/24/2018.
You can download a copy of the latest Wii U USB Transfer Tool here. Mirrored GitHub repo.
The writeup I promised when I first released the launcher is finally out!
We now have an official Discord server for assistance and discussion!