Эта ошибка — unrecognised disk label преследует меня уже 8-ой час. Я пытаюсь установить ubuntu, хоть как нибудь. Попытался на нескольких разных жестких дисках установить ubuntu, что на одном, что на другом одна и та же проблема, тут явно я делаю что то не так. Я загружаюсь с liveCD ubuntu. Если полностью освободить диск, чтобы вся его память была не распределена, то система не может сама установить ему label. Через gdisk пытался создать таблицу разделов(опцией w) — пишет, что успешно все создано, но только ничего не поменялось в gparted. Через fdisk пытался создать также таблицу разделов, тоже самое. Через parted с опцией mklable gpt, пишу команду, parted принимает ее, но эффекта опять же никакого. Как с этим бороться?
Если просто без всяких созданий разделов запустить инсталяцию убунту, то вот, что выскакивает в ответ — the efi file system creation in partition #1 of SCSI1 (0,0,0) failed. Материнская плата с UEFI, на BIOS таких проблем ни разу не было.
Если пытаюсь через gparted формат раздела поменять с ntfs на ext4, такая ошибка выскакивает — The file /dev/sda does not exist and no size was specified

When working with Linux, particularly Kubuntu, you might encounter an “Unrecognised Disk Label” error while trying to partition your drives. This error is often a result of a corrupted or unrecognized disk label. In this article, we will walk you through the steps to fix this error.
To fix the «Unrecognised Disk Label» error when partitioning drives in Kubuntu, you can check the disk label using the fdisk command, create a new disk label using the parted command, create partitions using GParted or the parted command, format the partitions using GParted or the mkfs command, and mount the drives using the mount command or by modifying the /etc/fstab file.
- Understanding the Issue
- Checking the Disk Label
- Creating a New Disk Label
- Creating Partitions
- Formatting the Drives
- Mounting the Drives
- Conclusion
Understanding the Issue
In Linux, a disk label refers to the metadata stored at the beginning of a storage device that contains information about the partitions on the device. When this label becomes corrupted or is not recognized by the system, errors can occur when attempting to partition or format the drive.
Checking the Disk Label
The first step in diagnosing this issue is to check the disk label. This can be done using the fdisk command in the terminal. The command sudo fdisk -l /dev/sda will list the disk information for the specified drive (/dev/sda in this case).
The -l parameter in the fdisk command tells the system to list the partition tables for the specified drives. Replace /dev/sda with the appropriate device name for your drive.
In the output, look for the “Disklabel type”. If it shows “dos” or “gpt”, your disk label is recognized. If it shows “unrecognised”, your disk label might be corrupted.
Creating a New Disk Label
If your disk label is unrecognized, you will need to create a new one. This can be done using the parted command. The command sudo parted /dev/sda mklabel gpt will create a new GPT disk label on the drive.
The mklabel parameter in the parted command tells the system to create a new disk label, and gpt specifies the type of disk label to create. Replace /dev/sda with the appropriate device name for your drive.
Please note that this command will erase all data on the specified drive. Make sure to back up any important data before proceeding.
Creating Partitions
Once you have a recognized disk label, you can proceed to create partitions on the drive. This can be done using the GParted GUI tool or the parted command in the terminal.
In GParted, select the appropriate drive, click on the “Device” menu, choose “Create Partition Table”, select “gpt” as the partition table type, and click “Apply”.
If you prefer using the terminal, you can use the parted command again with the mkpart parameter to create a new partition. For example, sudo parted /dev/sda mkpart primary ext4 1MiB 100% will create a new ext4 partition that spans the entire drive.
Formatting the Drives
After creating the partitions, you can format them to the desired file system. In GParted, right-click on each partition, select “Format to”, and choose the desired file system (e.g., ext4).
If you prefer using the terminal, you can use the mkfs command. For example, sudo mkfs.ext4 /dev/sda1 will format the specified partition (/dev/sda1 in this case) to the ext4 file system.
The mkfs command stands for “make file system”, and ext4 specifies the type of file system to create. Replace /dev/sda1 with the appropriate partition name.
Mounting the Drives
After formatting, you can mount the drives. This can be done using the mount command in the terminal or by modifying the /etc/fstab file for automatic mounting at boot.
To mount a drive using the terminal, first, create a mount point using the mkdir command (e.g., sudo mkdir /mnt/mydrive), then use the mount command to mount the drive (e.g., sudo mount /dev/sda1 /mnt/mydrive).
To mount a drive automatically at boot, you will need to add an entry to the /etc/fstab file. The syntax for this file can be complex, so it is recommended to consult the fstab documentation for more information.
Conclusion
The “Unrecognised Disk Label” error can be a roadblock when trying to partition drives in Kubuntu, but with the right commands and steps, it can be resolved. Always remember to back up your data before making any major changes to your drives. If you continue to experience issues, don’t hesitate to seek help from the Linux community or consult the documentation for your specific Linux distribution.
Unfortunately, creating a new disk label will erase all data on the specified drive. It is important to back up any important data before proceeding with the fix.
You can back up your data by copying it to an external storage device, such as a USB drive or an external hard drive. Alternatively, you can use cloud storage services or network backups to store your data securely.
Yes, you can use a different disk label type if you prefer. In the parted command, replace gpt with msdos to create a new DOS disk label. However, GPT is recommended for modern systems as it supports larger drives and more partitions.
If the disk label is unrecognized, it typically means that the partition information is lost or corrupted. In such cases, data recovery can be challenging. It is recommended to consult professional data recovery services for assistance.
Yes, after creating a recognized disk label, you can create multiple partitions on the drive. Use the GParted GUI tool or the parted command with the mkpart parameter to create additional partitions.
Unrecognised Disk Label When Creating Partition
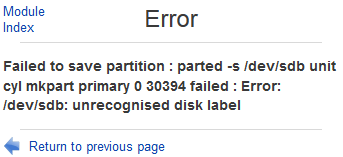
Failed to save partition : parted -s /dev/sdb unit cyl mkpart primary 0 30394 failed : Error: /dev/sdb: unrecognised disk label
If you list the partition layout and all block devices information using “parted -l” command, it will give you similar error too:
Error: /dev/sdb: unrecognised disk label
Apparently Webmin cannot manage a new drive without any existing partition table. The resolution is to make a label on the disk first, with “parted” command.
Login to the server’s terminal which you want to install the new disk via console or SSH if remotely, and run the following command (replace the name of the disk with actual one assigned by Linux to the new disk):
$ sudo parted /dev/sdb
(parted) mklabel msdos
(parted) quit
(parted) mklabel gpt
Steps above create a blank table on the hard disk. Then, you can continue to add new partition using Webmin’s “Partitions on Local Disks” module.
Alternatively, you can continue to manually create the filesystem on the new partition created with parted, mkfs, and other commands. For example:
mkfs -t ext4 -q /dev/sdb1
Then, create a mount point for the new filesystem and mount the new file system:
mkdir /newdisk
mount /dev/sdb1 /newdisk
Ensure that the entry for the new filesystem and hard disk is recorded inside /etc/fstab so that it will mount automatically on system startup.
/dev/sdb1 /newdisk ext4 defaults 0 2
Where you can modify the parameters according to your need, with explanation below:
/dev/sdb1: Name for the partition
/newdisk: Mount point
ext4: Filesystem (fs) type
defaults : Mount options
0: Zero indicates to exclude this filesystem from dump command backup.
2: Second indicates the order which fsck filesystem check at boot. Only the root (/) filesystem should be specified with 1, all others should be 2.
About the Author: LK

Page load link
Summary
When installing GlusterFS IBM Cloud Private, you have «unrecognised disk label» error message.
This article describes how to fix this issue.
Steps
You can manually add the disk label to fix this issue. Here is the example of adding disk label for /dev/sdb:
——————————————-
# sudo parted /dev/sub
(parted) mklabel dos
(parted) quit
——————————————-
[{«Business Unit»:{«code»:»BU053″,»label»:»Cloud & Data Platform»},»Product»:{«code»:»SSBS6K»,»label»:»IBM Cloud Private»},»Component»:»»,»Platform»:[{«code»:»PF016″,»label»:»Linux»}],»Version»:»2.1.0.2;2.1.0.3″,»Edition»:»»,»Line of Business»:{«code»:»LOB45″,»label»:»Automation»}}]
GParted forum → GParted → [solved]»unrecognized disk label» — typical resolutions not successful
Pages 1
You must login or register to post a reply
1 2014-09-20 23:44:39 (edited by notorious.dds 2014-09-23 11:29:49)
- notorious.dds
- New member
- Offline
- Registered: 2014-09-20
- Posts: 3
Topic: [solved]»unrecognized disk label» — typical resolutions not successful
I have a 320 GB HD that was originally formatted using a Windows Vista x64 installation disk utilizing an MSDOS partition table. It was formatted into 2 partitions per the default Vista installation. Following the installation of Vista, the disk appeared normally when viewed with Gparted (Live CD or via Parted Magic).
All was normal until I decided to clone the Windows 8.1 partition (/dev/sda5) from my Microsoft surface over the Vista parition (/dev/sda2) on the HD mentioned above. The /dev/sda5 partition was roughly 100 GB and came from a disk that had a GPT partition table. It was cloned to a 300 GB partition (/dev/sda2) on the 320 GB drive mentioned above with the MSDOS partition table. This HD only has 2 partitions.
After cloning, I boot the windows 8.1 install disk and ran the following commands on the 320GB drive:
bootrec /fixmbr
bootrec /fixboot
bootrec /scanos
bootrec /rebuildbcd
At this point, the computer will boot the OS without issue and all seems well and good. That is, until I try to access either partition from linux OS. I can’t mount either parition in linux and when I view the drive in Gparted, I get the «unrecognized disk label» error. The drive essentially appears as though it has no partition table within Gparted.
Following
sudo fdisk -l -u /dev/sdaIt does not appear that there is any overlap of the two partitions.
Following
sudo parted /dev/sdb unit s printThere is no error about a partition being outside of the disk.
Following
There’s nothing about lingering GPT data
At any rate, I’m not sure where to go from here. I’ve tried Gparted 0.19.1 Live as well as earlier versions with no success.
Any ideas are appreciated. Thanks!
2 Reply by mfleetwo 2014-09-21 12:51:19
- mfleetwo
- Developer
- Offline
- Registered: 2012-05-18
- Posts: 460
Re: [solved]»unrecognized disk label» — typical resolutions not successful
Hi,
GParted uses libparted to query the hard drive and show the partitions, so what «parted /dev/MYDISK unit s print» shows is what GParted should show.
Please show the output of the fdisk and parted commands. (Was that a typo saying «parted /dev/sdb» instead of sda?) Also the output from «blkid» and if available «lsblk».
How did you clone Windows 8.1 partition to the 320 GB HD?
Thanks,
Mike
3 Reply by notorious.dds 2014-09-21 15:00:59 (edited by notorious.dds 2014-09-21 15:45:28)
- notorious.dds
- New member
- Offline
- Registered: 2014-09-20
- Posts: 3
Re: [solved]»unrecognized disk label» — typical resolutions not successful
Thanks Mike,
Here’s the output:
Welcome - Parted Magic (Linux 3.5.6-pmagic)

root@PartedMagic:~# fdisk -l -u /dev/sda

Disk /dev/sda: 320.1 GB, 320072933376 bytes
255 heads, 63 sectors/track, 38913 cylinders, total 625142448 sectors
Units = sectors of 1 * 512 = 512 bytes
Sector size (logical/physical): 512 bytes / 512 bytes
I/O size (minimum/optimal): 512 bytes / 512 bytes
Disk identifier: 0x0b8fdec7

This doesn't look like a partition table
Probably you selected the wrong device.

   Device Boot      Start         End      Blocks   Id  System
/dev/sda1   ?        2048      718847      358400    7  HPFS/NTFS/exFAT
/dev/sda2          718848   625139711   312210432    7  HPFS/NTFS/exFAT


root@PartedMagic:~# parted /dev/sda unit s print
Error: /dev/sda: unrecognised disk label
Model: ATA Hitachi HTS54323 (scsi)
Disk /dev/sda: 625142448s
Sector size (logical/physical): 512B/512B
Partition Table: unknown
Disk Flags:


root@PartedMagic:~# fixparts /dev/sda
FixParts 0.8.5

Loading MBR data from /dev/sda

MBR command (? for help): p

** NOTE: Partition numbers do NOT indicate final primary/logical status,
** unlike in most MBR partitioning tools!

** Extended partitions are not displayed, but will be generated as required.

Disk size is 625142448 sectors (298.1 GiB)
MBR disk identifier: 0x0B8FDEC7
MBR partitions:

                                                   Can Be   Can Be
Number  Boot  Start Sector   End Sector   Status   Logical  Primary   Code
   1      *           2048       718847   primary     Y        Y      0x07
   2                718848    625139711   primary              Y      0x07


root@PartedMagic:~# blkid
/dev/sdb1: LABEL="Parted Magic" UUID="2671-BF4E" TYPE="vfat"
/dev/sdb2: LABEL="Data" UUID="d9ab5edb-07ab-4418-bb25-8b1df42b6efc" TYPE="ext2"
/dev/loop0: TYPE="squashfs"
/dev/loop1: TYPE="squashfs"


root@PartedMagic:~# lsblk
NAME   MAJ:MIN RM   SIZE RO TYPE MOUNTPOINT
sda      8:0    0 298.1G  0 disk
└─sda2   8:2    0   7.3G  0 part
sdb      8:16   1   3.8G  0 disk
├─sdb1   8:17   1   656M  0 part
└─sdb2   8:18   1   3.1G  0 part
sr0     11:0    1  1024M  0 rom
loop0    7:0    0  39.3M  1 loop
loop1    7:1    0 184.1M  1 loop
Yes, the sdb was a typo. And, I think I used that typo when originally running my parted command. It’s corrected in the commands above.
I cloned the windows partition using clonezilla. I used sda5 as the source and cloned it to an image. I then changed all of the sda5’s to sda2’s in the image and cloned the image to sda2 on the 320GB disk.
4 Reply by mfleetwo 2014-09-21 19:35:53
- mfleetwo
- Developer
- Offline
- Registered: 2012-05-18
- Posts: 460
Re: [solved]»unrecognized disk label» — typical resolutions not successful
Hi,
The partition table on your 320 GB HD appears to have been partitially corrupted.
Assuming the partition table printed by fdisk is correct …
Re-write the partition table using fdisk:
1) Write down the details of the 2 partitions: start, end sectors and partition type and boot flag.
2) Run «fdisk /dev/sda».
2a) Delete both partitions.
2b) Recreate two new partitions with the exact same start and end sectors, restore partition type, boot flag and write the partition table back to the disk.
It is a possiblilty that the MBR boot code is corrupted too. You may need to follow this FAQ: 15: What are the commands for repairing Windows Vista or Windows 7 boot problems?
Thanks,
Mike
5 Reply by notorious.dds 2014-09-23 11:29:16 (edited by notorious.dds 2014-09-23 15:43:22)
- notorious.dds
- New member
- Offline
- Registered: 2014-09-20
- Posts: 3
Re: [solved]»unrecognized disk label» — typical resolutions not successful
Thanks again Mike!
Deleting and recreating the partitions with fdisk did it. However, upon booting into Windows, I noticed that the disk usage was constantly hovering around 100% and some programs were not opening properly even with a reboot. I decided to run chkdsk (with the /f /r options).
For whatever reason, the chkdsk stopped at 12% complete and stayed there for hours. I decided to let it go and went to bed. When I woke up, I was pleasantly surprised to find that all was well. ![]()
Thanks.
As a side note to anyone reading this in the same situation, I would normally use Clonezilla to back up a drive before playing with the partition table in this way. However, given it’s issue as described above, Clonezilla was a no go as well. In lieu of using Clonezilla, I was able to successfully create a disk image using Macrium Reflect.
Pages 1
You must login or register to post a reply
GParted forum → GParted → [solved]»unrecognized disk label» — typical resolutions not successful