August 4, 2020
| by Dominique St-Amand
|
1 min read
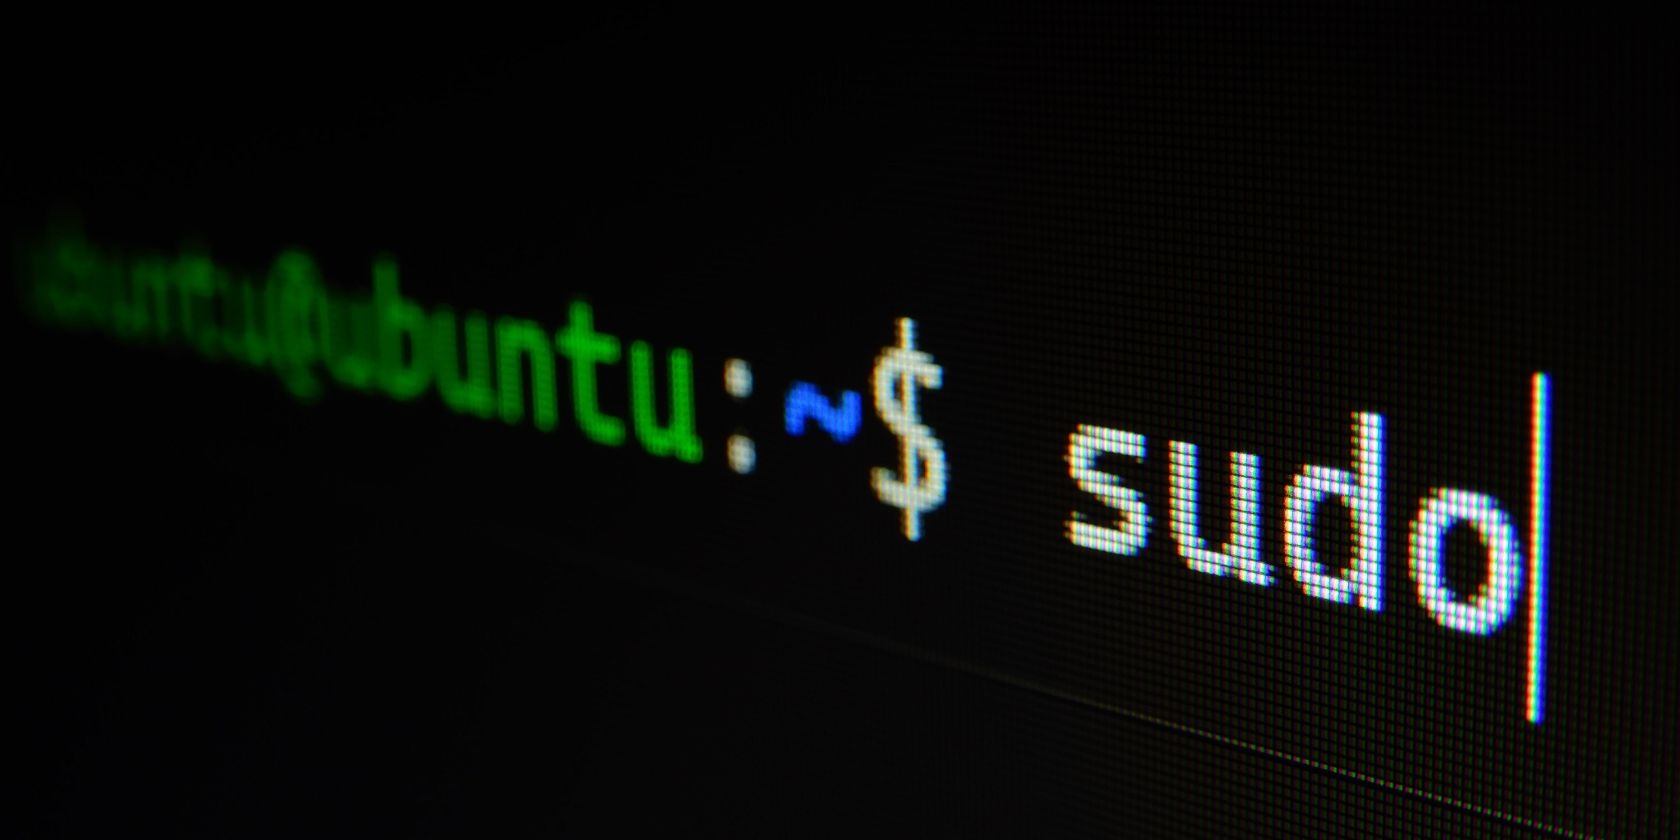
As you all know, I’ve been playing around with the Azure Active Directory login extensions for both Linux and Windows. I came across a problem where the first sudo worked (after re-authenticating) and the second, with the same command, failed with
sudo: PAM account management error: System error
Trying to debug this was tricky. Along with a support engineer we were able to enable enough log to get to the bottom of the problem.
First, edit /etc/pam.d/system-auth-aad and add the debug keyword whenever you see pam_aad.so. Adding “debug” will switch to verbose logging.
For example:
|
1 2 3 4 5 6 7 8 9 10 11 12 13 14 15 16 17 18 19 20 21 22 |
auth required pam_env.so auth sufficient pam_fprintd.so auth [success=done ignore=ignore default=die] pam_aad.so debug auth sufficient pam_unix.so nullok try_first_pass auth requisite pam_succeed_if.so uid >= 1000 quiet_success auth required pam_deny.so account [success=done ignore=ignore default=die] pam_aad.so debug account required pam_unix.so account sufficient pam_localuser.so account sufficient pam_succeed_if.so uid < 1000 quiet account required pam_permit.so password requisite pam_pwquality.so try_first_pass local_users_only retry=3 authtok_type= ucredit=—1 lcredit=—1 dcredit=—1 ocredit=—1 password sufficient pam_unix.so sha512 shadow nullok try_first_pass use_authtok remember=5 password required pam_deny.so session optional pam_keyinit.so revoke session required pam_limits.so —session optional pam_systemd.so session [success=1 default=ignore] pam_succeed_if.so service in crond quiet use_uid session required pam_unix.so |
Once that is done, execute in one terminal the following command tail -f /var/log/secure. Execute the sudo that you know will fail (that is the second one after re-authenticating) in a second terminal.
You should see some output like
|
1 2 3 4 5 6 7 8 9 10 11 12 13 14 15 16 17 18 |
Aug 4 17:36:34 machine_hostname sudo: pam_aad(sudo:account): pam_sm_acct_mgmt was called for user user@contoso.com with flags 32768 Aug 4 17:36:34 machine_hostname sudo: pam_aad(sudo:account): AadAuthorize, Version: 1.0.013000003; CorrelationId: <hidden> Aug 4 17:36:34 machine_hostname sudo: pam_aad(sudo:account): Getting the VM metadata Aug 4 17:36:34 machine_hostname sudo: pam_aad(sudo:account): Calling http://169.254.169.254/metadata/instance/compute?api-version=2019-03-11 Aug 4 17:36:34 machine_hostname sudo: pam_aad(sudo:account): HttpResponse 200: <hidden> Aug 4 17:36:34 machine_hostname sudo: pam_aad(sudo:account): ResourceId:/subscriptions/<subscription_id>/resourceGroups/<resourcegroup_name>/prov iders/Microsoft.Compute/virtualMachines/<vm_name>#012Type:Linux Aug 4 17:36:34 machine_hostname sudo: pam_aad(sudo:account): Calling AadLogin endpoint Aug 4 17:36:34 machine_hostname sudo: pam_aad(sudo:account): Calling http://169.254.169.254/metadata/identity/oauth2/token?resource=https://pas.windows.net/Check MyAccess/Linux&api—version=2019—03—11 Aug 4 17:36:35 machine_hostname sudo: pam_aad(sudo:account): HttpResponse 400: {«error»:«invalid_request»,«error_description»:«Identity not found»} Aug 4 17:36:35 machine_hostname sudo: pam_aad(sudo:account): Running in silent mode. The following message was not sent to the user: Managed System Identity is n ot enabled for this VM. Turn it on and try again. Aug 4 17:36:35 machine_hostname sudo: pam_aad(sudo:account): pam_sm_acct_mgmt returned 4 Aug 4 17:36:35 machine_hostname sudo: user@contoso.com : PAM account management error: System error ; TTY=pts/1 ; PWD=/home/user ; U SER=root ; COMMAND=/bin/ls —l /var/lib/waagent Aug 4 17:37:01 machine_hostname crond[73242]: pam_aad(crond:account): pam_sm_acct_mgmt was called for user root with flags 32768 Aug 4 17:37:01 machine_hostname crond[73242]: pam_aad(crond:account): pam_sm_acct_mgmt returned 25 |
As you can see from the logs, Managed Identity needs to be enabled on the virtual machine for the extension to work properly. Unfortunately, this is not documented in the official documentation. I’ve opened a GitHub issue for them to update it.
UPDATE 2021-06-01: The AADLoginForLinux is being deprecated on 2021-08-15. Please use the new extension, SSH based, AADSSHLoginForLinux.
Views: 4,419
azure active directorylinux
You can’t run any command as the superuser if the Linux terminal throws the «sudo password not working» error. Fortunately, it’s easy to fix.
Sometimes, your Linux system may throw an incorrect password error even after typing in the correct sudo password. This can be both surprising and annoying when you’re trying to get stuff done.
Let’s look at a few quick fixes you can try when your correct sudo password does not work on Linux.
1. Log Out and Log Into a New Session
Restarting your Linux system is one of the most popular and easy solutions to fixing any temporary system glitches. The sudo password not working error is, in the best case scenario, just a temporary glitch within Linux that should be magically fixed by simply doing a quick logout-login or a system reboot.
You can manually log out and log back into your Linux system either using the logout command or by using the corresponding buttons on the desktop environment you’re running.
In case that doesn’t work for you, simply perform a reboot by typing reboot. Still not fixed? Move on to the next solution!
2. Change the sudo Password From a Virtual Console Session
If the first, and easiest solution did not quite do the job for you, you can try resetting the sudo password for the user from a Linux virtual console session. Here are the steps to follow:
- Switch to a new virtual console session by pressing Ctrl + Alt + F1/F2/F3/F4. You should be greeted by a new TTYx session.
- Switch to the root user with the sudo su command.
- Using the passwd command, change the sudo password for the user:
passwd username
That’s all the steps required to fix the correct sudo password not working for your user. Your problem should now be fixed. In case the issue persists, try the last solution.
3. Restart the systemd-homed Service
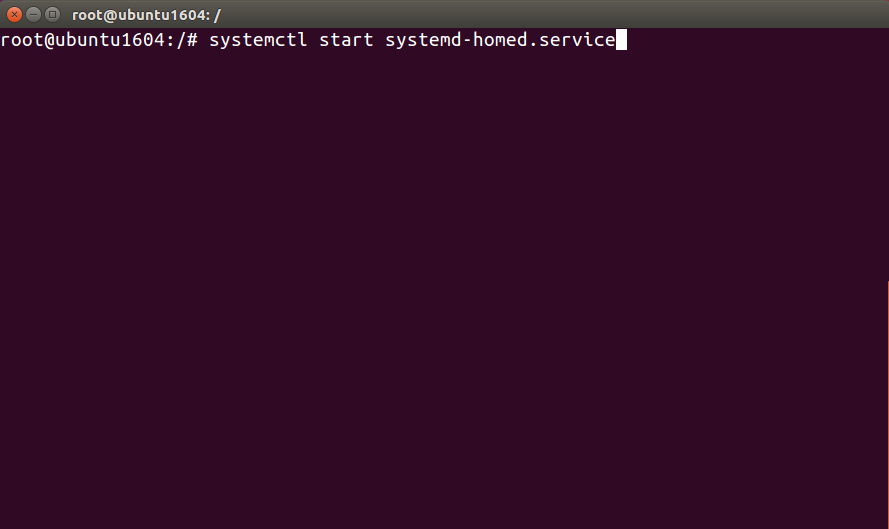
systemd-homed is a core systemd service responsible for providing support to the home directories of users. Restarting it may fix the issue because it resets the authentication mechanism and potentially fixes any temporary system glitches.
Here are the steps to restart the systemd-homed service:
- Fire up a new terminal.
- Switch to root using the sudo su command.
- Use the systemctl command to start or restart the systemd-homed service:
 systemctl start systemd-homed.service
systemctl restart systemd-homed.service
That’s all the steps required to start and restart the systemd-homed service. This should finally fix the sudo password not working issue for you.
Fixing the «sudo Password Not Working» Error
Although it’s an annoying issue, it’s quite easy to resolve. Either of the three provided solutions is bound to fix the sudo password not working problem.
If you still can’t seem to get it working or, often have to deal with sudo’s time-consuming and work-disrupting antics, it might be time to switch to a better alternative.
Когда вы работаете в Linux, то нередко встречаетесь с такой ошибкой: «sudo: PAM account management error: Permission denied». Эта ошибка может возникнуть в результате нескольких причин. В данной статье мы подробно рассмотрим, что означает это сообщение, какие проблемы оно может вызывать и каким образом его можно исправить.
Что такое sudo?
Sudo — это популярная команда в Linux, которая позволяет пользователю выполнить команду с правами администратора, не входя в систему под именем root. Это гарантирует большую безопасность, поскольку пользователь может выполнять только те действия, которые разрешены в файле sudoers.
Однако, если во время использования sudo возникнет какая-либо проблема, то это может привести к ошибке «sudo: PAM account management error: Permission denied».
Причины возникновения ошибки
Сама ошибка «sudo: PAM account management error: Permission denied» указывает на проблему с доступом. То есть, пользователь не имеет нужных прав для выполнения запрошенной операции. Однако, причина возникновения этой ошибки может быть разной. Рассмотрим некоторые из самых распространенных причин:
1. Неправильный ввод пароля
Если вы ввели неверный пароль для sudo, то система не даст вам прав на выполнение нужной операции. В этом случае в консоли вы увидите сообщение «sudo: PAM account management error: Permission denied».
2. Неправильно настроен файл sudoers
В файле sudoers задаются права доступа к командам, которые может выполнять пользователь с правами администратора. Таким образом, неправильно настроенный файл sudoers может привести к ошибке «sudo: PAM account management error: Permission denied».
3. Проблемы с PAM
Модули PAM (Pluggable Authentication Modules) обеспечивают аутентификацию и авторизацию пользователей в Linux. Если произошла какая-либо проблема с модулями PAM, то это может вызвать ошибку «sudo: PAM account management error: Permission denied».
Решение проблемы
Итак, вы столкнулись с ошибкой «sudo: PAM account management error: Permission denied». Что же делать?
1. Проверьте правильность ввода пароля
Самый простой и очевидный способ исправить ошибку — это проверить правильность ввода пароля. Если пароль введен неправильно, то вам нужно ввести его еще раз.
2. Проверьте настройки файла sudoers
Если проблема связана с файлом sudoers, то вам нужно проверить его настройки. Откройте файл sudoers и убедитесь, что нужные команды заданы для пользователя с правами администратора. Если нужных настроек нет, то вы можете добавить их в этот файл.
3. Проверьте модули PAM
Если проблема связана с модулями PAM, то вам нужно проверить их конфигурацию и настройки. Попробуйте запустить команду «sudo su», чтобы убедиться, что модули PAM работают должным образом.
4. Проверьте SELinux
Если SELinux включен на вашем компьютере, то это может вызвать ошибку «sudo: PAM account management error: Permission denied». Убедитесь в том, что SELinux позволяет выполнить запрошенную операцию.
Заключение
Как видите, ошибки «sudo: PAM account management error: Permission denied» может быть вызвано несколькими причинами. Тем не менее, помня простые шаги, которые описаны выше, вы сможете легко ее исправить. Главное, не паниковать и не делать поспешных выводов. Если проблема не решается, то лучше обратиться за помощью к системному администратору.

In the world of Ubuntu, encountering errors like “sudo: command not found” and “su login not working” after a system crash can be quite frustrating. This article aims to provide a detailed guide on how to fix these issues and get your system back on track.
To fix the «sudo: command not found» and «su login not working» errors in Ubuntu after a system crash, you need to check and modify the permissions of the /usr and /usr/bin directories. If the permissions are incorrect, you can change them using the chmod command. After modifying the permissions, restart your system and try running the commands again. If the issues persist, further troubleshooting may be required.
- Understanding the Problem
- Checking Directory Permissions
- Modifying Directory Permissions
- Testing the Solution
- Conclusion
Understanding the Problem
Before diving into the solution, it’s important to understand the problem. The sudo command stands for “superuser do”. It allows you to run programs with the security privileges of another user (by default, the superuser). If the system can’t find sudo, it means that the system is unable to locate the binary that the sudo command points to.
On the other hand, su stands for “substitute user”. It’s used to switch to another user account on your system. If su login isn’t working, it means that the system is having problems authenticating the user you’re trying to switch to.
Checking Directory Permissions
The first step in resolving these issues is to check the permissions of the /usr and /usr/bin directories. These directories contain most of the binary files that your system uses, including sudo and su.
To check the permissions, open your terminal and run the following commands:
ls -ld /usr
ls -ld /usr/bin
The -l option tells ls to use a long listing format to display the file or directory information. The -d option tells ls to treat the argument as a directory, not a file.
The permissions should be drwxr-xr-x. The d signifies it’s a directory. The rwx means the owner has read, write, and execute permissions. The next r-x means the group has read and execute permissions. The final r-x means others have read and execute permissions.
Modifying Directory Permissions
If the permissions are not set correctly, you’ll need to modify them. However, if you’re unable to use sudo from your current installation, you’ll need to boot into recovery mode or use a live CD to correct the errors.
To boot into recovery mode, restart your system and hold down the Shift key as it boots up. This will bring up the GRUB menu. Select the ‘Advanced options for Ubuntu’ option, then select the ‘Recovery mode’ option.
Once you’re in recovery mode, you’ll have root access and can change the permissions. To do this, run the following commands:
chmod 755 /usr
chmod 755 /usr/bin
The chmod command changes the permissions of a file or directory. The 755 sets the permissions to rwxr-xr-x.
Testing the Solution
After modifying the permissions, restart your system and try running a sudo command again. If you still encounter the “Command not found” error, try running sudo with the full path:
/usr/bin/sudo YOUR_COMMANDFor the su login issue, try logging in again with the correct user credentials.
If these steps do not resolve the issues, there may be other underlying problems causing the authentication failure. In that case, further troubleshooting may be necessary. You can refer to the Ubuntu community help forums for more assistance.
Conclusion
Dealing with system crashes and subsequent errors can be daunting, but with a little patience and the right knowledge, you can get your system back up and running. Remember to always keep a regular backup of your important files and configurations to minimize data loss in case of a system crash.
The permissions of the /usr and /usr/bin directories should be drwxr-xr-x. The d signifies it’s a directory. The rwx means the owner has read, write, and execute permissions. The next r-x means the group has read and execute permissions. The final r-x means others have read and execute permissions.
If you are experiencing issues with su login not working, double-check the user credentials you are using. Make sure you are entering the correct username and password for the user you want to switch to. If the issue persists, there may be other underlying problems causing the authentication failure. In that case, further troubleshooting may be necessary. You can refer to the Ubuntu community help forums for more assistance.
We have a CentOS 7.7 system which is joined to a Microsoft AD domain using realmd/sssd. Sudo does work perfectly fine for local system users, however when we attempt to use sudo as an Active Directory user (ocftest) we get the following error:
sudo: PAM account management error: Permission denied
We are using the following version of sudo: sudo-1.8.23-9.el7.x86_64.rpm
The user can «ssh» perfectly fine to the system using their password. This issue comes up a few times after a bit of Googling, and commonly refers to adding the following to the «/etc/security/access.conf» file:
+ : ocftest : ALL
- : ALL : ALL
The users group with the same name (although I have tried the user) is present in the «/etc/sudoers.d/salt» file:
%ocftest@ad.domain.org ALL=(ALL) ALL
And just for completeness:
cat /etc/pam.d/sudo
#%PAM-1.0
auth       include      system-auth
account    include      system-auth
password   include      system-auth
session    optional     pam_keyinit.so revoke
session    include      system-auth

cat /etc/pam.d/sudo-i
#%PAM-1.0
auth       include      sudo
account    include      sudo
password   include      sudo
session    optional     pam_keyinit.so force revoke
session    include      sudo

cat /etc/pam.d/password-auth-ac
#%PAM-1.0
# This file is auto-generated.
# User changes will be destroyed the next time authconfig is run.
auth        required      pam_env.so
auth        required      pam_faildelay.so delay=2000000
auth        [default=1 ignore=ignore success=ok] pam_succeed_if.so uid >= 1000 quiet
auth        [default=1 ignore=ignore success=ok] pam_localuser.so
auth        sufficient    pam_unix.so nullok try_first_pass
auth        requisite     pam_succeed_if.so uid >= 1000 quiet_success
auth        sufficient    pam_sss.so forward_pass
auth        sufficient    pam_krb5.so use_first_pass
auth        required      pam_deny.so

account     required      pam_access.so
account     required      pam_unix.so broken_shadow
account     sufficient    pam_localuser.so
account     sufficient    pam_succeed_if.so uid < 1000 quiet
account     [default=bad success=ok user_unknown=ignore] pam_sss.so
account     [default=bad success=ok user_unknown=ignore] pam_krb5.so
account     required      pam_permit.so

password    requisite     pam_pwquality.so try_first_pass local_users_only retry=3 authtok_type=
password    sufficient    pam_unix.so md5 shadow nullok try_first_pass use_authtok
password    sufficient    pam_sss.so use_authtok
password    sufficient    pam_krb5.so use_authtok


password    required      pam_deny.so

session     optional      pam_keyinit.so revoke
session     required      pam_limits.so
-session     optional      pam_systemd.so
session     optional      pam_oddjob_mkhomedir.so umask=0077
session     [success=1 default=ignore] pam_succeed_if.so service in crond quiet use_uid
session     required      pam_unix.so
session     optional      pam_sss.so
session     optional      pam_krb5.so

cat /etc/sssd/sssd.conf
[sssd]
domains = ad.domain.org
config_file_version = 2
services = nss, pam

[domain/ad.domain.org]
ad_domain = ad.domain.org
krb5_realm = AD.DOMAIN.ORG
realmd_tags = manages-system joined-with-samba
cache_credentials = True
id_provider = ad
krb5_store_password_if_offline = True
default_shell = /bin/bash
ldap_id_mapping = True
ignore_group_members = False
use_fully_qualified_names = False
fallback_homedir = /home/%u
access_provider = ad
enumerate = True
dyndns_update = False
auto_private_groups = true
ad_access_filter = (&(memberOf=OU=Users,OU=REDACTED,DC=redacted,DC=org))

[pam]