При отправке документа на печать можно столкнуться с ошибкой «Не был произведен вызов Startdocprinter». Во многих случаях проблема возникает с принтерами, подключенными к сети. Сообщение об ошибке появляется при печати с Word, Acrobat Reader и даже Блокнота в Windows 7, 8.1, 10.

Сообщение об ошибке Startdocprinter может отобразится по ряду причин:
Сбой очереди печати. Проблема возникает из-за прерывания, когда диспетчер печати подготовил к отправке файл на принтер. Есть несколько причин, которые препятствуют выводу на печать. В этом случае самый простой способ решения — запустить средство устранения неполадок.
Сбой диспетчера печати. Проблема появляется, когда служба неисправна и не может задействовать операцию вывода на печатающее устройство.
Проблема управления доступом. Эта ошибка также возникает из-за проблемы с тем, каким образом операционная система распознает список управления доступом службы. Решается запуском утилиты cacls.exe из окна командной строки.
Неправильные приглашения принтера. Вызов функции может быть не произведен из-за несогласованных портов принтера. Решить ее можно путем переустановки каждого порта.
Запуск средства устранения неполадок принтера
Прежде чем перейти к более сложным способам решения, рекомендуется начать поиск неисправностей запуском утилиты, способной автоматически решить большинство проблем.
Воспользуйтесь инструментом устранения неполадок принтера, чтобы проанализировать текущую ситуацию с драйверами и посмотреть, эффективность его предустановленных способов восстановления. Инструмент ищет несоответствия, которые приводят к ошибкам печатающего устройства. Если ему удастся найти способ восстановления, он порекомендует исправление, которое разрешит ошибку.
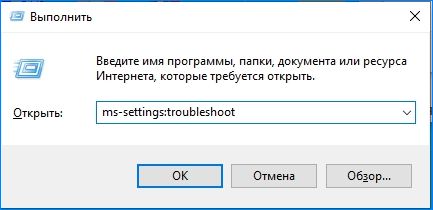
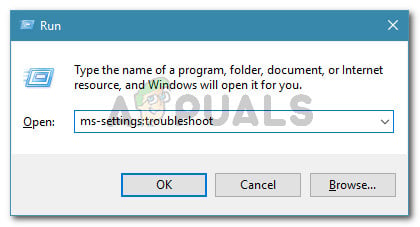
Откройте вкладку Устранения неполадок командой ms-settings:troubleshoot из окна «Выполнить» (Win + R).
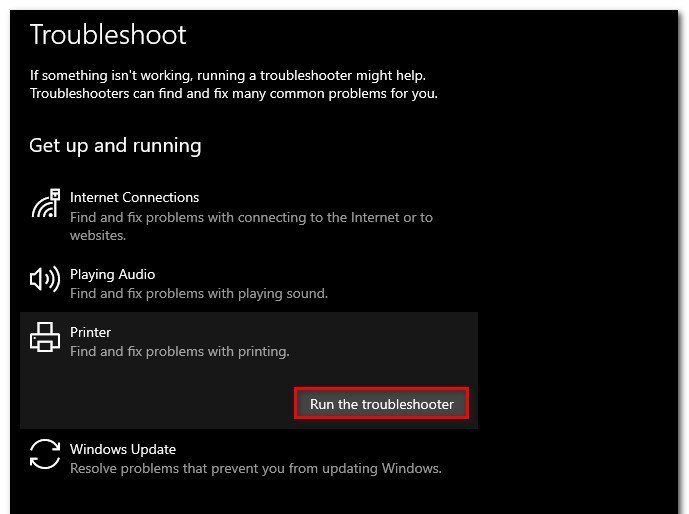
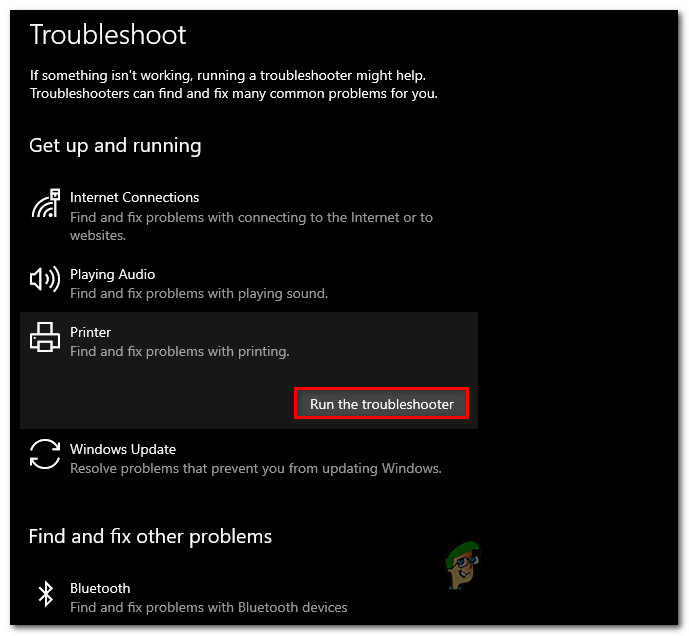
В правой части окна прокрутите вниз до раздела «Запустить диагностику и устранить неисправность». Затем выберите принтер и кликните на кнопку «Запустить средство устранения неполадок».

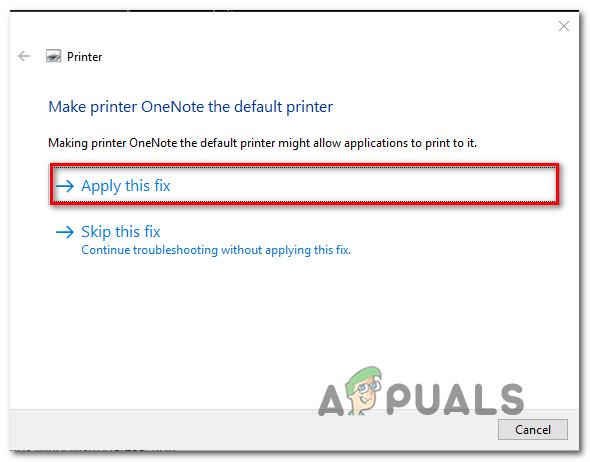
Дождитесь завершения начального сканирования, а затем нажмите «Применить это исправление», если средство определило вариант восстановления.
После успешного применения исправления перезагрузите компьютер и проверьте, возникает ли ошибка, повторив то действие, при котором она возникала. Если продолжаете сталкиваться с ошибкой, из-за которой не произведен вызов функции Startdocprinter или инструмент не нашел никаких проблем с конфигурацией принтера, перейдите к следующему методу.
Перезапуск диспетчера печати
Сообщение также может возникнуть при сбое службы, вследствие которого не может быть произведена операция отправки задания на принтер. Решается путем ее перезапуска.
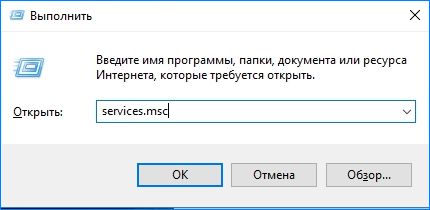
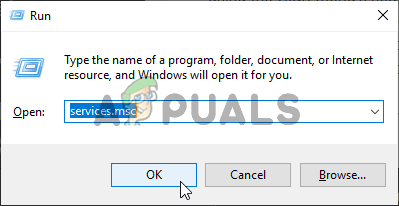
Откройте Службы командой services.msc из окна «Выполнить» (Win + R).
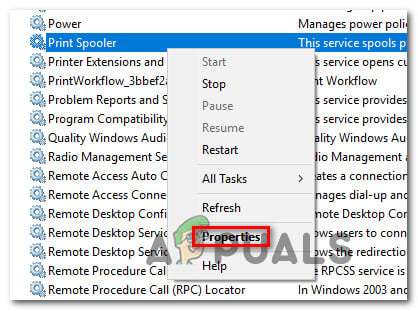
Прокрутите список вниз и найдите службу Диспетчера печати. Щелкните правой кнопкой мыши на ней и выберите «Свойства».
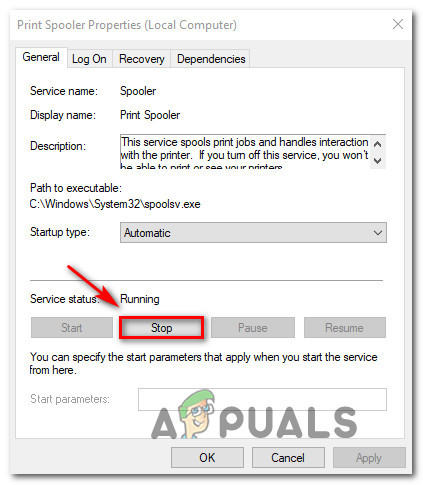
Установите тип запуска на автоматический, затем нажмите «Остановить».
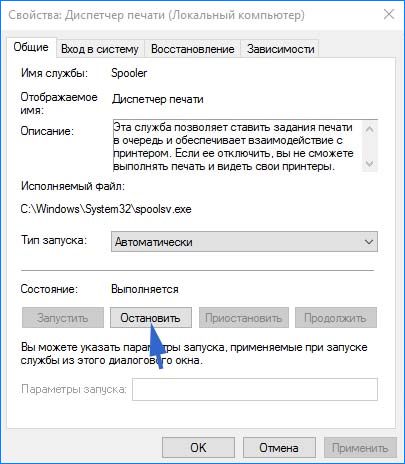
После остановки нажмите на кнопку «Запустить».
Когда успешно запустится перезагрузите компьютер и посмотрите, удалось ли исправить ошибку вызова Startdocprinter.
Исправление службы через командную строку
Вызов Startdocprinter не может быть произведен при нарушении работы диспетчера. В этом случае попробуйте устранить проблему путем изменения списка управления доступом службы.
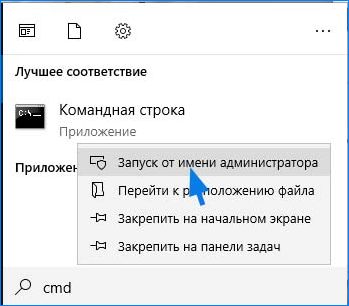
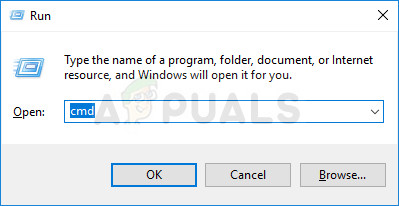
Откройте строку системного поиска клавишами Win + S, наберите «cmd» и под найденным результатом нажмите на «Запуск от имени администратора».
В консоли наберите команду:
cd \Windows\System32\spool
Теперь выполните следующую команду, чтобы изменить управление доступом:
cacls.exe PRINTERS /E /G администратор:C

После успешной обработки команды перезагрузите ПК и проверьте, устранен ли сбой при вызове Startdocprinter.
Переустановка всех портов принтера
Наиболее эффективным способом является простая переустановка всех портов. Это исправление считается эффективным в версиях Windows 7, 8 и 10. Для исправления сначала удалим все порты, а затем переустановим драйвера этого печатающего устройства.
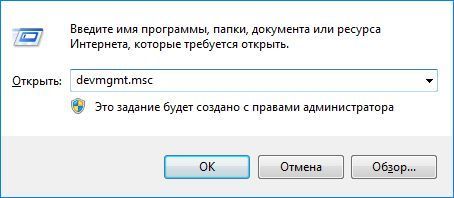
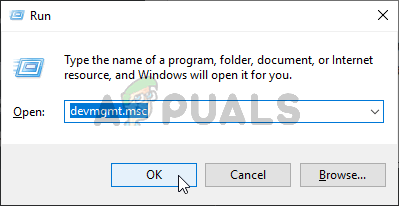
Откройте «Диспетчер устройств» командой devmgmt.msc из окна «Выполнить» (Win + R).
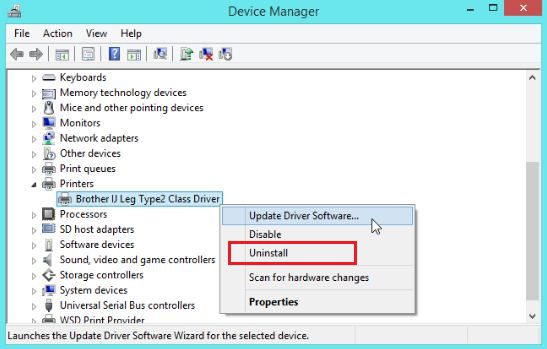
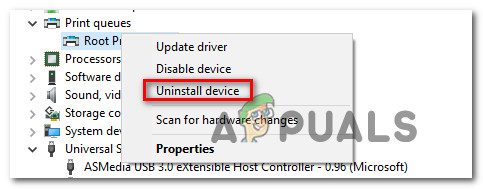
Прокрутите список установленных устройств и разверните вкладку «Очереди печати». Затем щелкните правой кнопкой мыши на каждом драйвере и нажмите кнопку «Удалить».

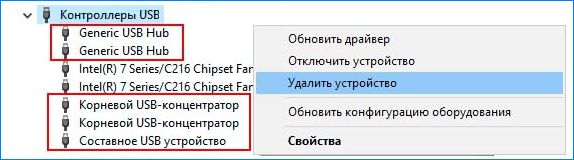
После удаления всех драйверов разверните вкладку контроллеров USB. Удалите каждый порт USB, к которому может быть подключено печатающее устройство, правым щелчком мыши.
После перезагрузите ПК. При следующем запуске Windows автоматически установит набор универсальных драйверов и портов.
Примечание: Если сбой при вызове функции Startdocprinter не возникает, то можно оставить универсальные драйвера или установите оригинальные (совместимые), загруженные с сайта производителя.
Some HP Printer users are unable to print as when they try to do the same, an error message that says A StartDocPrinter call was not issued pops up. This issue is obviously annoying and requires fixing, that is what, we are going to do in this article. We will be seeing some simple solutions to get rid of the issue and make your Printer start printing again.

Win32Exception was unhandled by user code, A StartDocPrinter call was not issued
What causes the StartDocPrinter issue?
There are various reasons why you can see the error code in question. Usually, the issue is nothing but a mere glitch that can occur due to numerous reasons. This glitch, sometimes, can be resolved automatically, whereas, in some instances, it requires some tweaking. Also, misconfiguration is another reason that can create this issue. This thing can be resolved by using the built-in troubleshooter. But, we wouldn’t recommend you just by reading the causes, instead, go to the troubleshooting guide and resolve the issue.
If you are seeing A StartDocPrinter call was not issued message on Windows PC, try the following solutions.
- Run Printer Troubleshooter
- Restart Print Spooler
- Repair Printer Spooler
- Remove and Re-add Printer
- Reinstall Printer Driver
Let us talk about them in detail.
1] Run Printer Troubleshooter
Let us first see if the built-in Windows utility, the troubleshooter, can identify and resolve the issue for you. To deploy it, follow the prescribed steps.
Windows 11
- Open Settings from the Start Menu.
- Click System > Troubleshoot > Other troubleshooters.
- Look for the Printer troubleshooter, and click on the Run button.
Windows 10
- Open Settings.
- Go to Update & Security > Additional troubleshooter.
- Click Printer > Run the troubleshooter.
Then, follow the on-screen instructions to run the troubleshooter and then see if the issue persists.
2] Restart Print Spooler
If running the troubleshooter doesn’t work for you, then we need to restart the Print Spooler Service. This is a great option if your issue is caused by a glitch. Follow the given steps to do the same.
- Open Services from the Start Menu.
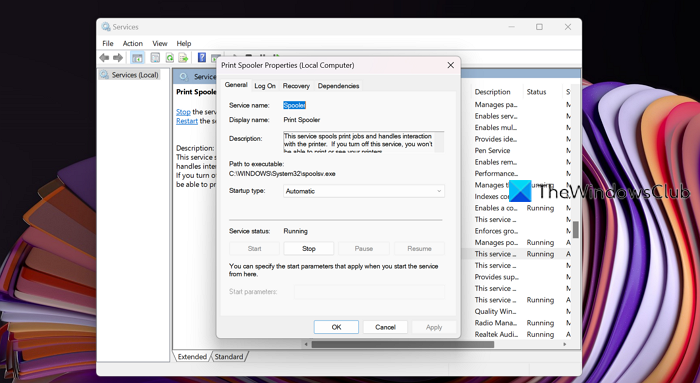
- Right-click on Print Spooler and select Properties.
- Click on Stop.
- Wait for 10 seconds, right-click on Properties, click on Start, and select Automatic from the drop-down menu.
Hopefully, this will do the job for you.
3] Repair Print Spooler
You may also see the error code in question if the Print Spooler is broken. However, the good news is, that you can easily repair the Print Spooler using Command Prompt.
To do the same, open Command Prompt as an administrator and then run the following commands.
cd\Windows\System32\spool
cacls.exe PRINTERS /E /G administrator:C
After executing these commands, restart your computer and check if the issue persists.
Also Read: How to enable or disable Print Spooler Service on Windows 11/10
4] Remove and Re-add Printer
Next up, we need to remove and then re-add your Printers and see if that works. This is meant to resolve any glitch that your printer may have. We are going to remove all the third-party printers and then add your current one, this should do the job for you.
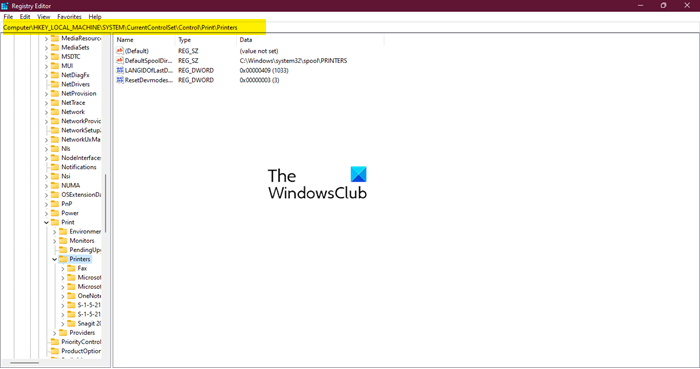
First of all, open Registry Editor and navigate to the following location.
Computer\HKEY_LOCAL_MACHINE\SYSTEM\CurrentControlSet\Control\Print\Printers
Now, delete all the third-party keys except the following keys.
- Fax
- Microsoft Print to PDF
- Microsoft XPS Documents Writer
- OneNote
- Send To OneNote2016
These are the Microsoft Printers keys that are important for your computer.
Now, go to Settings > Bluetooth & devices > Printers & scanner > Printer server properties. Now, remove all the third-party printers. Then, uninstall the program related to the Printer that you have removed.
Again open the Registry Editor and move to the following location.
Computer\HKEY_LOCAL_MACHINE\SYSTEM\CurrentControlSet\Control\Print\Monitor
Delete third-party Printer Monitor except for the following.
- AppMon (released RS1/RS2 timeframe)
- Local Port, LPR Port, Microsoft Shared Fax Monitor, Standard TCP/IP Port, USB Monitor & WSD Port
After removing everything, restart your computer, reattach the Printer and see if the issue persists.
5] Reinstall Printer Driver
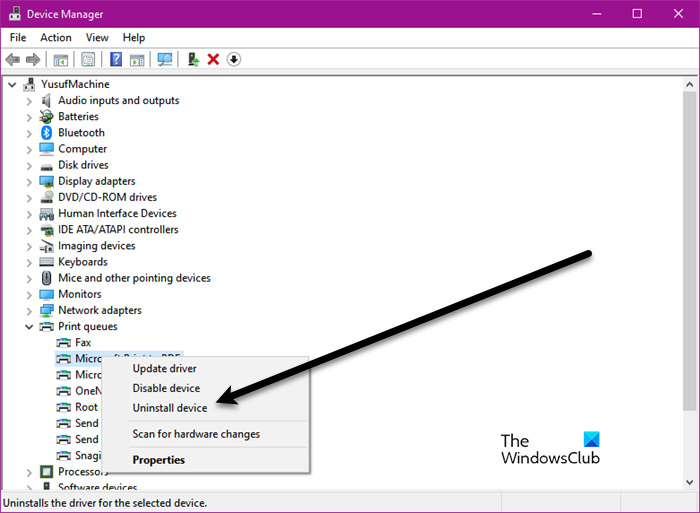
Finally, we are going to reinstall the Driver of the Printer that is giving you trouble. To do the same, first, remove the Printer from your computer, then open Device Manager, expand Printer Queues, right-click on the Printer and select Uninstall device.
Finally, reattach the Printer, its drivers will automatically get installed.
What is a StartDocPrinter?
StartDocPrinter is a function that notifies Print Spooler that there is a document that needs to be spooled for printing. So, you can clearly see that the error is caused if the Print Spooler is broken or has some issues.
Print Spooler can be resolved by restarting the service or repairing the feature. You can check the second and third solutions mentioned in this article to resolve the issue. However, it would be better if you check our guide to repairing Print Spooler.
That’s it!
Read Next: Print Spooler Service not running, Windows can’t Add or Connect to printer.

Содержание
- Что вызывает Ошибка «Не был выполнен вызов Startdocprinter»?
Несколько пользователей Windows обращались к нам с вопросами после того, как их ноутбук HP больше не печатал. Появляется сообщение об ошибке «Звонок в Startdocprinter не поступал» всякий раз, когда они пытаются что-то напечатать. Наиболее затронутые пользователи сообщают, что проблема возникает для каждого принтера, подключенного к сети. Другие варианты этой проблемы возникают, если они пытаются печатать из других программ, таких как Word, Acrobat Reader и даже Блокнот. Сообщается, что проблема возникает в Windows 7, Windows 8.1 и Windows 10.

Мы исследовали эту конкретную проблему, изучив различные пользовательские отчеты и стратегии восстановления, которые наиболее часто используются для исправления этого конкретного сообщения об ошибке. Как выясняется, известно несколько различных сценариев, ведущих к появлению «Звонок в Startdocprinter не был осуществлен‘ ошибка. Вот краткий список потенциальных виновников, которые могут вызвать это сообщение об ошибке:
- Очередь принтера дает сбой — В определенных ситуациях эта проблема может возникать из-за прерывания, когда служба буферизации готовилась отправить файл на принтер. В этом случае проблема может быть создана несколькими различными зависимостями, которые вносят вклад в рутинную печать. В этом случае самый простой способ решить проблему — запустить средство устранения неполадок принтера.
- Служба диспетчера очереди печати с ошибками — Эта проблема также может возникать в ситуации, когда служба диспетчера очереди печати дает сбой и не может облегчить операцию печати. Если этот сценарий применим, вы можете решить проблему, перезапустив службу диспетчера очереди печати с экрана «Службы».
- Проблемы контроля доступа — Как оказалось, эта конкретная ошибка также может возникать из-за проблемы с тем, как ваша операционная система распознает список управления доступом службы диспетчера очереди печати. В этом случае вам удастся решить проблему с помощью служебной программы cacls.exe в командной строке CMD с повышенными правами.
- Неправильный принтер подсказывает — Как подтвердили некоторые пользователи, эта проблема также может возникать из-за несовместимости портов принтера. Некоторым пользователям, пытающимся решить ту же проблему, наконец удалось восстановить возможности печати, переустановив каждый порт принтера с помощью диспетчера устройств.
Если вы в настоящее время ищете исправление, которое позволит вам решить «Звонок в Startdocprinter не был осуществлен‘Эта статья предоставит вам несколько потенциальных стратегий восстановления, которые другие затронутые пользователи успешно использовали для решения проблемы. Эффективность каждого из возможных исправлений, представленных ниже, подтверждается как минимум одним использованием.
Для достижения наилучших результатов мы советуем вам следовать приведенным ниже методам в том же порядке, в котором мы их заказывали (по эффективности и серьезности). В конце концов, вы должны найти исправление, которое устранит проблему, независимо от причины, вызвавшей проблему.
Метод 1: запуск средства устранения неполадок принтера
Прежде чем мы перейдем к более продвинутой стратегии ремонта, мы рекомендуем начать поиски неисправностей, запустив утилиту, способную автоматически решать большинство проблем, связанных с принтером, путем применения стратегий автоматического ремонта.
Имея это в виду, используйте Средство устранения неполадок принтера чтобы проанализировать текущую ситуацию с драйвером принтера и посмотреть, есть ли в инструменте ремонта некоторые заранее определенные стратегии ремонта, применимые в вашей ситуации.
Как только вы запустите этот инструмент, он начнет искать несоответствия, которые могут привести к ошибкам принтера. Если ему удастся найти применимую стратегию ремонта, он порекомендует исправление, которое может просто решить «Звонок в Startdocprinter не был осуществлен‘ ошибка.
Вот краткое руководство по запуску Средство устранения неполадок принтера:
- Откройте Бегать диалоговое окно, нажав Клавиша Windows + R. Затем введите ‘ms-settings: Troubleshoot ’ внутри текстового поля и нажмите Войти для запуска откройте вкладку Устранение неполадок в приложении настроек.

- Как только вы окажетесь внутри Исправление проблем вкладку, перейдите на правую панель и прокрутите вниз до Вставай и работай раздел. Как только вы доберетесь туда, нажмите Принтер, затем нажмите на Запустите средство устранения неполадок для запуска утилиты.
- После запуска утилиты дождитесь завершения первоначального сканирования, затем нажмите Применить это исправление если рекомендуется стратегия ремонта.
- После успешного применения исправления перезагрузите компьютер и посмотрите, решена ли проблема, повторив действие, которое вызывало проблему, после завершения следующей последовательности запуска.


Если вы все еще сталкиваетесь с «Звонок в Startdocprinter не был осуществлен«Ошибка после применения рекомендованного исправления или средство устранения неполадок не обнаружило проблем с конфигурацией вашего принтера, перейдите к следующему способу ниже.
Метод 2: перезапуск службы диспетчера очереди печати
Как оказалось, эта конкретная проблема также может возникнуть в ситуациях, когда Диспетчер очереди печати служба перестала работать, и она не может облегчить операцию печати. В этом случае вы сможете вернуться к поведению по умолчанию, только если сбросите службу диспетчера очереди печати.
Несколько затронутых пользователей сообщили, что им удалось решить проблему с помощью Сервисы экран, чтобы перезапустить службу диспетчера очереди печати. После этого и попытки распечатать тот же документ большинство затронутых пользователей сообщили, что «Звонок в Startdocprinter не был осуществлен«Ошибка больше не возникала.
Вот краткое руководство по перезапуску Служба диспетчера очереди печати на экране «Службы»:
- Нажмите Клавиша Windows + R открыть Бегать диалоговое окно. Затем введите «Services.msc» и ударил Войти открыть Сервисы экран. Если вам будет предложено UAC (Контроль учетных записей пользователей), щелкнуть да для предоставления административных привилегий.
- Как только вы окажетесь внутри Сервисы экрана, перейдите к правой панели и прокрутите список Услуги (местные) и найдите Служба диспетчера очереди печати.
- Как только вы его увидите, щелкните правой кнопкой мыши на Служба диспетчера очереди печати, щелкните его правой кнопкой мыши и выберите Свойства из появившегося контекстного меню.
- Как только вы окажетесь внутри Свойства диспетчера очереди печатиs экрана, сначала убедитесь, что вы находитесь внутри Общее таб. Убедившись, что вы находитесь в правом меню, установите Тип запуска к Автомат, затем нажмите на Стоп (под обслуживание положение дел)
- Подождите пару секунд, затем нажмите Начало по существу перезапустить Диспетчер очереди печати служба.
- После того, как вам удастся перезапустить службу, перезагрузите компьютер и посмотрите, решена ли проблема.


Если та же проблема все еще возникает, перейдите к следующему потенциальному исправлению ниже, чтобы получить другой подход к восстановлению службы диспетчера очереди печати.
Метод 3: восстановление службы диспетчера очереди печати через CMD
Как выясняется, другая возможность, которая вызовет «Звонок в Startdocprinter не был осуществлен«Ошибка — это сценарий, в котором Диспетчер очереди печати сервис фактически сломан. В этом случае вы можете решить проблему, используя командную строку с повышенными привилегиями, чтобы изменить список управления доступом службы диспетчера очереди печати.
Несколько затронутых пользователей сообщили, что им удалось полностью решить проблему после использования командной строки с повышенными привилегиями для изменения контроля доступа к службе диспетчера очереди печати. Это решение также рекомендуется специалистами MS для устранения различных проблем с диспетчером очереди печати.
Вот краткое руководство по ремонту Диспетчер очереди печати сервис с использованием командной строки с повышенными привилегиями:
- Нажмите Клавиша Windows + R открыть Бегать диалоговое окно. Затем введите «Cmd» и нажмите Ctrl + Shift + Enter , чтобы открыть командную строку с повышенными привилегиями. Когда вы видите UAC (Контроль учетных записей пользователей)нажмите да чтобы предоставить доступ администратора.
- Оказавшись в командной строке с повышенными привилегиями, введите следующую команду и нажмите Enter, чтобы указать расположение службы буферизации:
компакт-диск Windows System32 спул
- Теперь, когда вы находитесь в правильном месте, введите следующую команду и нажмите Войти чтобы изменить контроль доступа к службе буферизации:
cacls.exe ПРИНТЕРЫ / E / G администратор: C
- После успешной обработки команды перезагрузите компьютер и посмотрите, будет ли проблема решена при следующем запуске системы.

Если этот метод не позволил вам разрешить «Звонок в Startdocprinter не был осуществлен‘Ошибка, перейдите к следующему способу ниже.
Метод 4: переустановка всех портов принтера
Самым популярным решением этой конкретной проблемы является простая переустановка всех портов принтера, участвующих в операции. Сообщается, что это исправление успешно работает во всех последних версиях Windows, включая Windows 7, Windows 8.1 и Windows 10.
Большинству пользователей, столкнувшихся с этой проблемой, удалось ее исправить после того, как с помощью диспетчера устройств удалили все порты, созданные для этого принтера, а затем переустановили драйверы принтера (общие или выделенные).
Вот краткое руководство по переустановке всех портов принтера, чтобы решить «Звонок в Startdocprinter не был осуществлен‘ ошибка:
- Нажмите Клавиша Windows + R открыть Бегать диалоговое окно. Затем введите «Devmgmt.msc» внутри текстового поля и нажмите Войти открыться Диспетчер устройств. Когда вам будет предложено UAC (Контроль учетных записей пользователей)нажмите да для предоставления административных привилегий.
- Внутри Диспетчер устройств, прокрутите список установленных устройств и раскройте меню, связанное с Очереди печати.
- Затем щелкните правой кнопкой мыши каждую установку Принтер драйвер, который вы там нашли, и нажмите Удалить из появившегося контекстного меню.
- После удаления всех драйверов принтера разверните раскрывающееся меню, связанное с Контроллеры универсальной последовательной шины. Затем прокрутите список установленных элементов и удалите каждые Принтер порт, щелкнув каждый из них правой кнопкой мыши и выбрав Удалить из контекстного меню.
- Как только все драйверы принтера будут удалены, перезагрузите компьютер. При следующем запуске ваша операционная система автоматически установит набор общих драйверов и портов, чтобы принтер можно было использовать.
Примечание: Вы можете попробовать напечатать что-нибудь с помощью общих драйверов и придерживаться их, если «Звонок в Startdocprinter не был осуществлен«Ошибка больше не возникает, либо вы можете установить специальные драйверы, зайдя на веб-сайт производителя вашего принтера и загрузив совместимые драйверы.


Usually error A StartDocPrinter call was not issued windows are faced by the user when trying to print anything over the network. Ther error is basically related to system issues instead of any particular applications like acrobat reader, notepad, ms word, etc. The problem has been seen in various versions of the windows. Now certainly, there are some causes why this error occurs. Reasons include stopped print spooler service, issues with the print queue, access control issue and sometimes invalid prompts can also cause this error. Fortunately, we have troubleshooting guidelines through which you can certainly remove this error from your system.

Error A StartDocPrinter Call was Not Issued Windows
Causes of A StartDocPrinter Call Was Not Issued Error Problem:
Error A StartDocPrinter call was not issued windows error occurs because of multiple issues. If the print spooler service fails to respond or is stopped, then this error occurs. Furthermore, inconsistent or invalid prompts to the print service may lead to this error. The error occurs due to miscommunication between the command and the service. Sometimes multiple or failed print requests also result in this error.
- Issues with the Printer Queue
- Stopped or some other issues with print spooler service
- Invalid Prompts
- Issues with ports
Similar Types of A StartDocPrinter Call Was Not Issued Error Issue:
- Sage 100
- Cacls.exe printers /e /g administrator:c
- Could not start print job windows 10
- Nicelabel
- A StartDocPrinter Call was Not Issued Windows 10 1903
- Remote desktop
- Epson
- Autocad
How to Fix & Solve A StartDocPrinter Call Was Not Issued Error
To fix error A StartDocPrinter Call Was Not Issued windows Error theses are the following methods that will be helpful for you. In the first method, we will try to eliminate the error using the windows troubleshooter. The second method will be all about manually starting the print spooler service. If somehow, the second method fails in the third method, we will use some useful commands to repair the print spooler service. The final resolution will be reinstalling the printer driver. Now lets got through all the steps in detail.
1. Using the Windows Troubleshooter –
In the first method, we will follow the easy way. Instead of jumping right onto other little complex methods, we request you to go through this method first. We will run the windows troubleshooter for fixing A StartDocPrinter Call was Not Issued remote desktop issue.
- STEP 1. Open up a Run window by pressing Windows key + R simultaneously
- STEP 2. Now, type ms-settings:troubleshoot in the search field and hit Enter
- STEP 3. in the Troubleshooting app on the right click on Get up and running section
- STEP 4. Now click on Printer, finally hit on Run the troubleshooter to start the troubleshooting process
- STEP 5. After the process completes, a new window will open up and click on Apply this fix
- STEP 6. Now check if A StartDocPrinter Call was Not Issued windows 10 error still occurs
2. Starting the Print Spooler Service –
In this A StartDocPrinter Call was Not Issued windows 8 method, we will make sure that the print spooler is up and running fine. Sometimes due to some system changes, the services get stopped, or maybe it is not responding. Follow the steps to ensure the service is running fine.
- STEP 1. Simultaneously hold Windows key + R to open the Run window
- STEP 2. Now, in the search field type services.msc and hit Enter
- STEP 3. If UAC (User Account Control) admin permission click Yes
- STEP 4. In the Services screen, locate the Print Spooler Service
- STEP 5. Right-click on the Print Spooler Service, and click on Properties
- STEP 6. In the General tab, firstly put Startup type to Automatic
- STEP 7. Now If the service status is Stopped, hit the Start Button
- STEP 8. If not, Stop the service, wait for a few minutes then again hit the Start button

- STEP 9. Finally, reboot your system and see if A StartDocPrinter Call was Not Issued windows 7 error is now resolved
3. Repairing the Print Spooler Service using the Command –
If the above method fails to work, the chances are that service needs repairing. Follow this A StartDocPrinter Call was Not Issued windows method. In this method, we will repair the print spooler service using the command.
- STEP 1. In the start menu type cmd, now select run as administrator
- STEP 2. You will be asked for administrator permissions click on yes
- STEP 3. In the command prompt window, type the following command and press Enter
cd\Windows\System32\spool
- STEP 4. Now type the following command and press Enter
cacls.exe PRINTERS /E /G administrator:C
- STEP 5. After performing both the commands, restart your system
- STEP 6. Finally, check if A StartDocPrinter Call was Not Issued windows 10 error still persists
4. Reinstalling the Printer Driver –
If all of the above methods fail to work, maybe A StartDocPrinter Call was Not Issued windows 8 problem is with your printer driver. Either the driver is corrupted or outdated. Reinstalling will fix the issue.
- STEP 1. Click on Start menu, type Run and then hit enter
- STEP 2. Then, type devmgmt.msc inside the text box and press Enter
- STEP 3. Give the UAC (User Account Control) permission if asked
- STEP 4. In the Device Manager window, locate Printer and expand it
- STEP 5. Now right-click on installed Printer driver and click on Uninstall from the menu
- STEP 6. Uninstall the associated USB driver too
- STEP 7. Now restart your system and make sure it is connected to the internet
- STEP 8. Your system will automatically install the generic printer driver to solve this A StartDocPrinter Call was Not Issued windows 7 issue.
Conclusion:
In this troubleshooting guide, we have gone through four methods that will help you in resolving error A StartDocPrinter Call Was Not Issued windows. Furthermore, we have given a piece of brief information on the causes and effects of the error on the system. However, if you have some other methods to fix the issue, tell us in the comments.
We hope with the help of this error A StartDocPrinter Call was Not Issued windows guide you have fixed the problem. For more troubleshooting guides, follow us. Thank you!
Several Windows users have been reaching us with questions after their HP laptop no longer prints anything. The error message that comes up is ‘A Startdocprinter Call Was Not Issued’ whenever they try to print anything. Most affected users are reporting that the issue occurs for every printer that is connected to the network. Other variations of this issue occur if they try to print from within other programs like Word, Acrobat Reader, and even Notepad. The issue is reported to occur on Windows 7, Windows 8.1 and Windows 10.

What’s causing the ‘A Startdocprinter Call Was Not Issued’ Error?
We investigated this particular issue by looking into various user reports and at the repair strategies that are most commonly used to fix this particular error message. As it turns out, several different scenarios are known to lead to the apparition of the ‘A Startdocprinter Call Was Not Issued‘ error. Here’s a shortlist of potential culprits that might trigger this error message:
- Printer Queue is glitched – In certain situations, this issue can occur due to an interruption when the Spooling service was preparing to send the file to the printer. In this case, the problem might be created by several different dependencies that contribute to the printing chore. In this case, the easiest way to resolve the issue is to run the Printer Troubleshooter.
- Glitched Print Spooler Service – This problem can also occur in a situation where the Print Spooler service has become glitched and it’s unable to facilitate the printing operation. If this scenario is applicable, you can resolve the issue by restarting the Print Spooler service using the Services screen.
- Access Control issues – As it turns out, this particular error can also occur due to a problem with how your operating system recognizes the access control list of the Print Spooler service. In this case, you will be successful in resolving the issue by using the cacls.exe utility inside an elevated CMD prompt.
- The improper printer prompts – As some users have confirmed, this problem can also occur due to inconsistent printer ports. Several users struggling to resolve the same issue have finally managed to restore the printing capabilities by reinstalling every printer port using Device Manager.
If you’re currently looking for a fix that will allow you to resolve the ‘A Startdocprinter Call Was Not Issued‘, this article will provide you with several potential repair strategies that other affected users have successfully used to resolve the issue. Each of the potential fixes featured below is confirmed to be effective by at least one use.
For the best results, we advise you to follow the methods below in the same order that we ordered them in (arranged by efficiency and severity). Eventually, you should encounter a fix that will resolve the issue, regardless of the culprit that’s causing the issue.
Method 1: Running the Printer Troubleshooter
Before we get into more advanced repair strategy, our recommendation is to start the troubleshooting quest by running a utility capable of resolving most Printer-related issues automatically by applying automated repair strategies.
With this in mind, use the Printer Troubleshooter to analyze your current printer driver situation and see if the repair tool has some predetermined repair strategies that are applicable in your situation.
As soon as you start this tool, it will begin to look for inconsistencies that might lead to printer errors. If it manages to find an applicable repair strategy, it will recommend a fix that might just resolve the ‘A Startdocprinter Call Was Not Issued‘ error.
Here’s a quick guide on running the Printer Troubleshooter:
- Open up a Run dialog box by pressing Windows key + R. Next, type ‘ms-settings:troubleshoot’ inside the text box and press Enter to run open up the Troubleshooting tab of the settings app.

Accessing the Troubleshooting tab - Once you’re inside the Troubleshooting tab, move over to the right pane and scroll down to the Get up and running section. Once you get there, click on Printer, then click on Run the troubleshooter to launch the utility.

Running the Printer Troubleshooter - Once the utility is started, wait until the initial scan is complete, then click on Apply this fix if a repair strategy is recommended.

Applying the recommended Printer fix - After the fix is successfully applied, restart your computer and see if the issue is resolved by repeating the action that was causing the issue once the next startup sequence is complete.
If you’re still encountering the ‘A Startdocprinter Call Was Not Issued‘ error after applying the recommended fix or the troubleshooter didn’t find any issues with your printer configuration, move down to the next method below.
Method 2: Restarting the Print Spooler Service
As it turns out, this particular issue can also occur in situations where the Print Spooler service has become glitched and it’s unable to facilitate the printing operation. In this case, you’ll only be able to revert to the default behavior if you reset the Print Spooler Service.
Several affected users have reported that they managed to resolve the issue by using the Services screen to restart the Print Spooler service. After doing this and trying to print the same document, the majority of affected users have reported that the ‘A Startdocprinter Call Was Not Issued‘ error was no longer occurring.
Here’s a quick guide on restarting the Print Spooler Service from the Services screen:
- Press Windows key + R to open up a Run dialog box. Next, type “services.msc” and hit Enter to open up the Services screen. If you’re prompted by the UAC (User Account Control), click Yes to grant administrative privileges.

Running Services.msc - Once you’re inside the Services screen, move to the right-hand pane and scroll down through the list of Services (Local) and locate the Print Spooler Service.
- Once you see it, right-click on the Print Spooler Service, right-click on it and choose Properties from the newly appeared context menu.

Accessing the Properties screen of the Printer Spooler service - Once you’re inside the Printer Spooler Properties screen, start by making sure you’re inside the General tab. After you confirm that you’re in the right menu, set the Startup type to Automatic, then click on Stop (under Service status)

Restarting the Print Spooler service - Wait a couple of seconds, then click on Start to essentially restart the Print Spooler service.
- After you manage to restart the service, restart your computer and see if the issue is now resolved.
If the same issue is still occurring, move down to the next potential fix below for a different approach on repairing the Print Spooler service.
Method 3: Repairing the Print Spooler service via CMD
As it turns out, another possibility that will trigger the ‘A Startdocprinter Call Was Not Issued‘ error is a scenario in which the Print Spooler service is effectively broken. In this case, you can resolve the issue by using an elevated Command prompt to modify the access control list of the Print Spooler Service.
Several affected users have reported that they manage to fix the issue completely after using an elevated Command Prompt to modify the access control of the Print Spooler service. This solution is also recommended by MS specialists to fix various Print Spooler issues.
Here’s a quick guide on repairing the Print Spooler service using an elevated Command Prompt:
- Press Windows key + R to open up a Run dialog box. Then, type “cmd” and press Ctrl + Shift + Enter to open up an elevated Command Prompt. When you see the UAC (User Account Control), click Yes to grant admin access.
Running Command Prompt - Once you’re inside the elevated command prompt, type the following command and press Enter to the location of the Spooling service:
cd\Windows\System32\spool
- Now that you are in the correct location, type the following command and press Enter to modify the access control of the Spooling service:
cacls.exe PRINTERS /E /G administrator:C
- After the command is processed successfully, restart your computer and see if the issue is resolved at the next system startup.
If this method didn’t allow you to resolve the ‘A Startdocprinter Call Was Not Issued‘ error, move down to the next method below.
Method 4: Re-installing all printer ports
The most popular fix for this particular issue is to simply reinstall all printer ports involved in the operation. This fix is reported to be successful on all the recent Windows versions including Windows 7, Windows 8.1 and Windows 10.
The majority of users encountering this issue have managed to fix this after using Device Manager to delete all ports created for this printer, then reinstalling the printer drivers (either generic or dedicated).
Here’s a quick guide on reinstalling all printer ports to resolve the ‘A Startdocprinter Call Was Not Issued‘ error:
- Press Windows key + R to open up a Run dialog box. Then, type “devmgmt.msc” inside the text box and press Enter to open up Device Manager. When you’re prompted by the UAC (User Account Control), click Yes to grant administrative privileges.
Running Device Manager - Inside Device Manager, scroll through the list of installed devices and expand the menu associated with Print queues.
- Then, right-click on each install Printer driver that you found there and click on Uninstall from the newly appeared context menu.

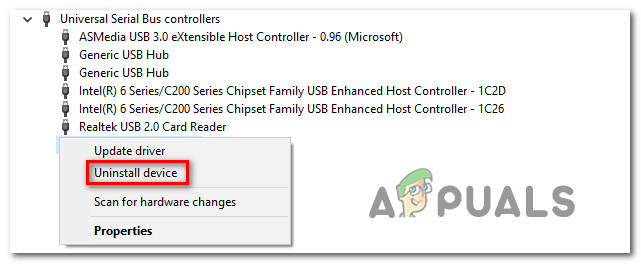
Uninstalling every printer driver - Once every printer driver has been uninstalled, expand the drop-down menu associated with Universal Serial Bus controllers. Next, scroll through the list of installed items and uninstall every Printer port by right-clicking on each one and choosing Uninstall from the context menu.

Uninstalling Print ports - As soon as every printer driver is uninstalled, restart your computer. At the next startup, your operating system will automatically install a set of generic drivers and ports to make the printer usable.
Note: You can try to print something with the generic drivers and stick with them if the ‘A Startdocprinter Call Was Not Issued‘ error is no longer occurring, or you can install the dedicated drivers by accessing your printer manufacturer website and downloading the compatible drivers.

Kevin Arrows
Kevin Arrows is a highly experienced and knowledgeable technology specialist with over a decade of industry experience. He holds a Microsoft Certified Technology Specialist (MCTS) certification and has a deep passion for staying up-to-date on the latest tech developments. Kevin has written extensively on a wide range of tech-related topics, showcasing his expertise and knowledge in areas such as software development, cybersecurity, and cloud computing. His contributions to the tech field have been widely recognized and respected by his peers, and he is highly regarded for his ability to explain complex technical concepts in a clear and concise manner.