|
|
Ремонт и ошибки SINAMICS
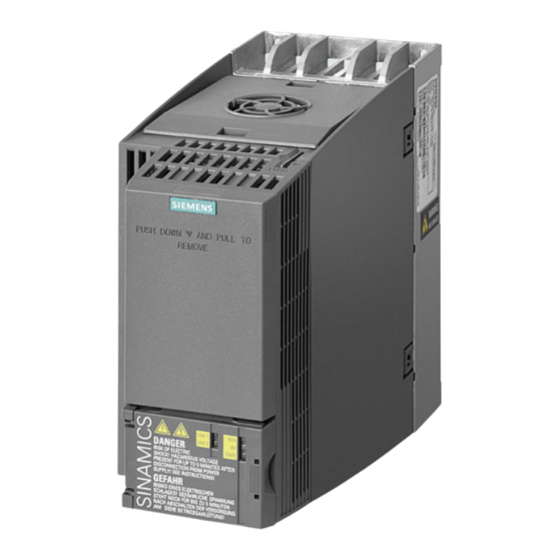
 Частотный преобразователь SINAMICS, как и другие его собратья оснащен информационной панелью, призванной сделать общение оператора и преобразователя максимально легким и комфортным. При вводе в эксплуатацию оборудования с помощью данной панели устройство программируется и настраивается, а в случае непредвиденной ситуации на панель частотного преобразователя выводится ошибка, вызвавшая аварийную остановку оборудования. Все возможные ошибки SINAMICS вы можете найти в руководстве пользователя (мануал) в формате PDF, скачать которые можно с нашего сайта. Устранение причины ошибки и ее сброс на преобразователе позволит в кратчайшие сроки возобновить работу. К сожалению не все ошибки можно исправить самостоятельно, некоторые ошибки SINAMICS возможно исправить только в специализированных сервисных центрах.
Если на вашем производстве появились проблемы с частотным преобразователем, от есть ошибка SINAMICS является критичной, и вы не можете сбросить ее самостоятельно, мы всегда рады вам помочь.  Обращайтесь в сервисный центр «Кернел». Специалисты нашей компании в минимальные сроки проведут глубокую диагностику преобразователя частоты и последующий ремонт SINAMICS в . Оставьте заказ на ремонт частотника используя форму на сайте.
Компания «Кернел» производит ремонт частотных преобразователей в с 2002 года. За это время мы накопили колоссальный опыт в том числе опыт в ремонте и сбросе ошибок SINAMICS такого известного производителя как SIEMENS. Ремонт подобной промышленной электроники ответственное и сложное занятие, требующие максимальной отдачи, профессионализма и максимально полной материальной базе.
Специалисты нашего сервисного центра уделяют максимальное внимание к качеству исполнения ремонта (сброс ошибок), программирования и настройке частотных преобразователей, не зависимо от производителя данного промышленного оборудования. Именно поэтому мы смело даем гарантию на ремонт SINAMICS и замененные в процессе ремонта компоненты шесть месяцев.
Ошибки SINAMICS S120
В таблице ниже приведены все возможные ошибки SINAMICS S120
|
Ошибка |
Причина |
|
F06010 Infeed: Power unit EP 24 V missing in operation |
Ошибка в блоке питания, проблема в том, что он не выдаёт сигнал разрешения. |
|
F06300 Infeed: Line voltage too high at power on |
Напряжение сети слишком высокое. Ошибка возникла в блоке питания. |
|
F07410 Drive: Current controller output limited |
Ошибка в измерении актуального тока. Возможные причины: неисправен привод, неисправен двигатель. |
|
F07412 Drive: Commutation angle incorrect (motor model) |
Движение вала двигателя отличается от ожидаемого. Возможно неисправен привод или двигатель. Существует вероятность что неисправен или не настроен энкодер. |
|
F07413 Drive: Commutation angle incorrect (pole position identification) |
Движение вала двигателя отличается от ожидаемого более чем на 45 градусов. Возможно неисправен привод или двигатель. А также, возможно неисправен или не настроен энкодер. |
|
F07452 (A) LR: Following error too high |
Различие между заданным и актуальным значением позиции вала электродвигателя. Необходима диагностика электродвигателя или ремонт SINAMICS S120. |
|
F07453 LR: Position actual value conditioning error |
Ошибка обработки актуального значения позиции. Возможно неисправен энкодер. Необходима диагностика или ремонт энкодера. |
|
F07490 EPOS: Enable signal withdrawn while traversing |
Привод находится в состоянии «запрет включения» (стандартное применение). Проверьте все разрешающие сигналы. |
|
F07900 (N, A) Drive: Motor locked/speed controller at its limit |
Электродвигатель работал на пределе крутящего момента дольше, чем указано в p2177, и ниже порога скорости, установленного в p2175. Проверьте инверсию фактического значения. Проверьте подключение датчика двигателя. |
|
F07901 Drive: Motor overspeed |
Превышено максимально допустимое значение скорости электродвигателя. Допустимые пороги можно настроить в параметрах. Возможна неисправность в приводе или электродвигателе SIMOTICS S. |
|
F07902 (N, A) Drive: Motor stalled |
Код ошибки означает что двигатель остановлен. Это могло произойти из-за некорректного параметрирования или неисправности электродвигателя, возможна проблема с силовой платой SINAMICS S120. |
|
F30002 Power unit: DC link overvoltage |
Превышение допустимого напряжения звена постоянного тока. Проверьте напряжение сети и корректность подключения входных фаз. Мотор регенерирует слишком много энергии, проверьте тормозной резистор. |
|
F30003 Power unit: DC link undervoltage |
Напряжение звена постоянного тока слишком мало. Необходимо проверить напряжение сети и правильность фазировки клемм. Возможна неисправность в модуле подачи. Необходима диагностика Infeed Module. |
|
F30004 Power unit: Over temperature heatsink AC inverter |
Температура радиатора блока питания превысила допустимое значение. Необходимо проверить систему охлаждения, возможно вышел из строя вентилятор. Также необходимо проверить нагрузку двигателя (механическую часть). |
|
F30021 Power unit: Ground fault |
Произошло замыкание на землю. Следует проверить силовые кабели и обмотки двигателя. Например, прозвонить на корпус при помощи мегомметра. |
|
A30031 Power unit: Hardware current limiting, phase U |
Аппаратное ограничение тока. Фаза «U». Достигнут аппаратный предел тока по этой фазе. Следует проверить положение энкодера, кабели двигателя и нагрузку на двигатель. |
|
A30032 Power unit: Hardware current limiting, phase V |
Аппаратное ограничение тока. Фаза «V». Достигнут аппаратный предел тока по этой фазе. Следует проверить положение энкодера, кабели двигателя и нагрузку на двигатель. |
|
A30033 Power unit: Hardware current limiting, phase W |
Аппаратное ограничение тока. Фаза «W». Достигнут аппаратный предел тока по этой фазе. Следует проверить положение энкодера, кабели двигателя и нагрузку на двигатель. |
|
F30035 Power unit: Air intake over temperature |
Перегрев. Температура воздуха на входе в блок питания превысила допустимое предельное значение. Для силовых установок с воздушным охлаждением предел составляет 55 градусов по Цельсию. Проверьте, находится ли температура окружающей среды в допустимом диапазоне. |
|
F30040 Power unit: Undervolt 24 V |
Сбой источника питания 24 В. Порог 16 Вольт опустился ниже более чем на 3 мс. Проверьте напряжение питания 24 В постоянного тока на блоке питания. |
|
F30045 Power unit: Supply undervoltage |
Пониженное напряжение питания. Контроль напряжения на плате ЦАП сигнализирует о сбое пониженного напряжения на модуле. Нужно измерить питание 24 В постоянного тока на питающих клеммах блока питания. |
|
F30885 CU DRIVE-CLiQ: Cyclic data transfer error |
Нет связи с одним из силовых модулей Drive-Cliq системы, хотя он сконфигурирован. Произошла ошибка связи DRIVE-CLiQ между управляющим модулем и задействованным силовым модулем. Проверьте питание на соответствующем модуле. |
|
F31115 (N, A) Encoder 1: Amplitude error track A or B (A^2 + B^2) |
Ошибка амплитуды сигнала A или B. Амплитуда (A ^ 2 + B ^ 2) не лежит в пределах допустимого диапазона (функция программного мониторинга). Возможно оборвана одна из обмоток резольвера. |
|
F31116 (N, A) Encoder 1: Amplitude error, monitoring track A + B |
Ошибка амплитуды контроля сигналов A + B. Амплитуда выпрямленных сигналов энкодера A и B не находится в пределах допустимого диапазона (аппаратный мониторинг). Возможно требуется ремонт энкодера. |
|
F31120 (N, A) Encoder 1: Power supply voltage |
Сбой напряжения питания энкодера. Измеренное напряжение питания энкодера слишком мало. Проверьте кабель энкодера. |
|
A31400 (F, N) Encoder 1: Alarm threshold, zero mark distance error |
Измеренное количество импульсов между нулевыми метками не соответствует правильному значению. Такая неисправность может проявиться, например, из-за загрязнённого стекла энкодера. |
|
A31411 (F, N) Encoder 1: EnDat encoder signals alarms |
Сигнал предупреждения EnDat энкодера. В принятом пакете от EnDat энкодера установлены биты ошибки. Энкодер неисправен. |
|
F31885 (N, A) CU DRIVE-CLiQ: Cyclic data transfer error |
Ошибка связи DRIVE-CLiQ между модулем управления и задействованным энкодером. Проверьте питание на соответствующем энкодере. |
Руководства по эксплуатации SINAMICS

- Скачать руководство по эксплуатации SINAMICS G 120 manual- PDF
- Скачать руководство по эксплуатации SINAMICS S 120 manual- PDF
- Скачать руководство по эксплуатации SINAMICS V 20 manual- PDF
- Скачать руководство по эксплуатации SINAMICS G 120c manual- PDF
- Скачать руководство по эксплуатации SINAMICS G 110 manual- PDF
- Скачать руководство по эксплуатации SINAMICS G 150 manual- PDF
- Скачать руководство по эксплуатации SINAMICS V 90 manual- PDF
- Скачать руководство по эксплуатации SINAMICS G 120p manual- PDF
- Скачать руководство по эксплуатации SINAMICS S 150 manual- PDF
- Скачать руководство по эксплуатации SINAMICS G 130 manual- PDF
- Скачать руководство по эксплуатации SINAMICS V 70 manual- PDF
- Скачать руководство по эксплуатации SINAMICS G 180 manual- PDF
- Скачать руководство по эксплуатации SINAMICS Gh180 manual- PDF
- Скачать руководство по эксплуатации SINAMICS G 120x manual- PDF
- Скачать руководство по эксплуатации SINAMICS G 110m manual- PDF
Специалисты сервисного центра исправляют ошибки SINAMICS как частотных преобразователей, так и сервоприводов (SERVODRIVE), силовых модулей (POWER MODULE) и модулей управления (CONTROL UNIT).
|
силовые модули (POWER MODULE) Sinamics |
модули управления (CONTROL UNIT) Sinamics |
|
SINAMICS POWER MODULE pm240 |
SINAMICS CONTROL UNIT CU240E |
Схемы соединений управляющих модулей CU230P для SINAMICS G120
|
Схема соединений управляющего модуля CU230P−2 HVAC |
Схема соединений управляющего модуля CU230P−2 DP |
|
|

|
|
Схема соединений управляющего модуля CU230P−2 CAN |
|
|
|


Ремонт SINAMICS
 Специалисты сервисного центра Кернел выполнят ремонт и сброс ошибок SINAMICS в максимально сжатые сроки. При ремонте преобразователя частоты SINAMICS вы гарантированно получаете:
- Глубокую диагностику неисправного преобразователя с выявлением неисправных компонентов;
- Замену неисправных компонентов на новые;
- Ремонт в максимально сжатые сроки;
- Сброс ошибок SINAMICS
- Проверку отремонтированного частотника на специальном стенде;
- Оригинальные запасные части;
- Гарантию на ремонт SINAMICS 6 месяцев;
- Гарантию на запасные части 6 месяцев.
Компания «Кернел» предлагает квалифицированный ремонт частотный преобразователей в сжатые сроки по цене 20% — 40% от стоимости нового частотника. За время существования компании, наши инженеры отремонтировали не одну тысячу единиц промышленного оборудования, постоянно повышая свою квалификацию.
Ремонт SINAMICS в производится исключительно с использованием оригинальных запасных частей, на компонентном уровне с применением высокотехнологичного оборудования, квалифицированным персоналом с инженерным образованием.
 К сожалению, от поломок дорогостоящего оборудования никто не застрахован. В зависимости от разных факторов, рано или поздно, любое, даже самое надежное промышленное оборудование выходит из строя, преобразователи частоты SINAMICS не исключение. В данной ситуации на помощь придет наша компания, и инженеры, профессионализм которых не ставится под сомнение.
Благодаря новейшему инновационному диагностическому оборудованию инженеры сервисного центра в кратчайшие сроки проведут глубокую диагностику вышедшего из строя частотного преобразователя SINAMICS найдут неисправный компонент и заменят его на новый.
Еще раз хочется подчеркнуть тот факт, что, производя ремонт и сбрасывая ошибку SINAMICS мы используем только оригинальные запасные части и даем гарантию не только на проведенные ремонтно-восстановительные работы, но и на запасные части, которые были заменены в процессе восстановления частотного преобразователя шесть месяцев.
Менеджеры и специалисты сервисного центра всегда стараются входить в положение заказчика и выполнить ремонт SINAMICS в максимально кратчайшие сроки тем самым минимизировать простой оборудования.
Мы ценим своих клиентов и делаем упор на качество выполненных работ, а также время его выполнения. Сберегите свой бюджет, обратитесь за ремонтом SINAMICS S120 в нашу компанию.
Оставить заявку на ремонт и сброс ошибок SINAMICS
Оставить заявку на ремонт и сброс ошибок SINAMICS в можно с помощью специальной формы, которая вызывается нажатием одноименной кнопки в верхней части страницы. Все вопросы, связанные с ремонтом и ошибками SINAMICS в , вы можете задать нашим менеджерам. Связаться с ними можно несколькими способами:

- Заказав обратный звонок (кнопка в правом нижнем углу сайта)
- Посредством чата (кнопка расположена с левой стороны сайта)
- Позвонив по номеру телефона:
- +7(8482) 79-78-54;
- +7(8482) 55-96-39;
- +7(917) 121-53-01
- Написав на электронную почту: 89171215301@mail.ru
Вот далеко не полный список производителей промышленной электроники и оборудования, ремонтируемой в нашей компании.
RIFLE писал(а): ↑30 июл 2020, 11:40
Добрый день!
Прошу помочь грамотно сбросить ошибки в S120 (CU320-2DP). Сперва появился А30042, на сл день прибавился А01699.
Из за них в DB для PLC взводится бит, который в PLC рвет цепь готовности к запуску привода. В PLC эту проблему обошли, привод теперь запускается и полностью работоспособен.
Пробовал прямо с кнопок на CU320 обнулить параметр Р0251 — не помогло!
Возможно ли без физической замены вентиляторов (стоят по 2 вентилятора в звене постоянного тока и в силе частотника) решить данную проблему? Заранее Спасибо!
610.PNG
Стоит попробовать сбросить данные параметры из Стартера, т.к. с кнопок что-то менять в s120 это то еще удовольствие. Помимо этого, надо иметь ввиду что параметр можно перезаписать в состоянии Ready To Run, т.е с поданным питанием, но не включенным.
Второе сообщение гласит о том что Вам необходимо провести тест STO, т.к. уже прошло время требуемое для проверки данной функции, у Вас в приводе установлен интервал на эту проверку(обычно 9000 часов).
Решение
«Select STO and then de-select again.»
Если перевести на человеческий, то необходимо нажать на грибок(ключ безопасности).
Правда возможно дополнительно потребуется активировать данную проверку, дополнительно…
8.3
Description of the LED states
The different states while booting are indicated by LEDs on the Control Unit.
● The duration of the individual states varies.
● If an error occurs, the booting procedure is terminated and the cause is indicated on the
LEDs.
● Once the unit has successfully booted, all the LEDs are briefly switched off.
● Once the unit has booted, the LEDs are controlled via the loaded software.
Behavior of the LEDs during booting
Table 8- 4
Red flash-
ing light
Red flash-
ing light
Red flash-
ing light
0.5 Hz
Table 8- 5
Orange
Cabinet Modules liquid cooled
Equipment Manual, 04/2020, A5E37067587A
Load software
LED
RDY
COM
Red
Orange
Red
Red
Red
2 Hz
Red flashing
light 2 Hz
2 Hz
Red
Orange flash-
ing light
Red
Off
Off
Red
Red flashing
light 0.5 Hz
Firmware
LED
RDY
COM
Off
Alternating
State
OPT
Orange
Reset
Off
BIOS loaded
Off
BIOS error
Off
File error
Off
FW loading
Off
Firmware load-
ed
Off
FW checked
(no CRC error)
Off
FW checked
(CRC error)
State
OPT
Off
Initializing
Running
8.3 LEDs on the CU320-2 PN Control Unit
Comments
Hardware reset
RDY LED lights up red, all other LEDs light
up orange
–
Error occurred while loading the BIOS
•
Memory card not inserted or faulty
•
Software on memory card not present
•
or corrupted
RDY LED lights up red, COM LED flashes
orange without fixed frequency
–
–
CRC error
•
Comments
–
See the table below
Diagnostics
311
-
Contents
-
Table of Contents
-
Bookmarks
Quick Links
Equipment Manual
Medium-voltage drives
SINAMICS
Supplementary component descriptions
Edition
06/2019
www.siemens.com/drives
Related Manuals for Siemens SINAMICS
Summary of Contents for Siemens SINAMICS
-
Page 1
Equipment Manual Medium-voltage drives SINAMICS Supplementary component descriptions Edition 06/2019 www.siemens.com/drives… -
Page 3: Introduction
Introduction Security information Control Units Medium-voltage converters Option Boards SINAMICS Supplementary component Terminal Modules descriptions Voltage Sensing Module VSM10 Manual Sensor Module Cabinet- Mounted SMC30 06/2019…
-
Page 4
Note the following: WARNING Siemens products may only be used for the applications described in the catalog and in the relevant technical documentation. If products and components from other manufacturers are used, these must be recommended or approved by Siemens. Proper transport, storage, installation, assembly, commissioning, operation and maintenance are required to ensure that the products operate safely and without any problems. -
Page 5: Table Of Contents
Table of contents Introduction…………………………7 Security information……………………….9 Control Units………………………….11 Control Unit CU320-2 PN (PROFINET) ……………..11 3.1.1 Description ……………………..11 3.1.2 Interface description…………………..12 3.1.2.1 Overview ……………………..12 3.1.2.2 X100-X103 DRIVE-CLiQ interfaces ………………14 3.1.2.3 X122 digital inputs/outputs …………………15 3.1.2.4 X132 digital inputs/outputs …………………17 3.1.2.5 X124 electronics power supply ………………..18 3.1.2.6 X127 LAN (Ethernet)………………….19 3.1.2.7…
-
Page 6
Table of contents 4.1.2 Interface description…………………..46 4.1.2.1 Overview ……………………..46 4.1.2.2 X451 CAN bus interface………………….47 4.1.2.3 X452 CAN bus interface………………….47 4.1.2.4 2-pin SMD DIL switch………………….48 4.1.3 Meaning of the LED …………………..49 Communication Board Ethernet CBE20……………..49 4.2.1 Interface description…………………..50 4.2.1.1 Overview ……………………..50 4.2.1.2 X1400 Ethernet interface …………………..50 4.2.2… -
Page 7
Table of contents Voltage Sensing Module VSM10……………………79 Description ……………………..79 Interface description…………………..80 6.2.1 Overview ……………………..80 6.2.2 X500 DRIVE-CLiQ interface………………..81 6.2.3 X520 analog inputs/temperature sensor …………….82 6.2.4 X521 three-phase voltage sensing up to 100 V 3-ph. AC …………83 6.2.5 X522 three-phase voltage sensing up to 690 V 3-ph. AC …………84 6.2.6 X524 Electronics power supply ………………..84 6.2.7… -
Page 8: Manual
Table of contents Supplementary component descriptions Manual, 06/2019…
-
Page 9: Introduction
Introduction These instructions supplement the Operating Instructions and include additional information on the converter’s components. Information is also included on optional components. You will find references that correspond to the further information contained in these instructions in the component and option descriptions given in the Operating Instructions. The information consists of interface descriptions and descriptions of the LED states.
-
Page 10
Introduction Supplementary component descriptions Manual, 06/2019… -
Page 11: Security Information
Siemens’ products and solutions undergo continuous development to make them more secure. Siemens strongly recommends that product updates are applied as soon as they are available and that the latest product versions are used. Use of product versions that are no longer supported, and failure to apply the latest updates may increase customer’s exposure to cyber…
-
Page 12
Security information Supplementary component descriptions Manual, 06/2019… -
Page 13: Control Units
Control Units Control Unit CU320-2 PN (PROFINET) 3.1.1 Description The Control Unit CU320-2 PN is a central control module in which the closed-loop and open- loop functions are implemented for one or more Line Modules and/or Motor Modules. It can be used with firmware version 4.4 or higher.
-
Page 14: Interface Description
Control Units 3.1 Control Unit CU320-2 PN (PROFINET) 3.1.2 Interface description 3.1.2.1 Overview Figure 3-1 Interface overview CU320-2 PN (without cover and blanking cover) Supplementary component descriptions Manual, 06/2019…
-
Page 15
Control Units 3.1 Control Unit CU320-2 PN (PROFINET) Figure 3-2 Interface X140 and measuring socket — CU320-2 PN (view from below) Supplementary component descriptions Manual, 06/2019… -
Page 16: X100-X103 Drive-Cliq Interfaces
Control Units 3.1 Control Unit CU320-2 PN (PROFINET) Measuring socket PCB connector Figure 3-3 Mounting a PC board connector (Phoenix Contact) in the measuring socket 3.1.2.2 X100-X103 DRIVE-CLiQ interfaces Table 3-2 X100-X103 DRIVE-CLiQ interfaces Signal name Technical data Transmit data + Transmit data — Receive data + Reserved, do not use…
-
Page 17: X122 Digital Inputs/Outputs
Control Units 3.1 Control Unit CU320-2 PN (PROFINET) 3.1.2.3 X122 digital inputs/outputs Table 3-3 X122 digital inputs/outputs Terminal Designation Technical data DI 0 Voltage: -3 … +30 V DC Electrical isolation: Yes DI 1 Reference potential: M1 DI 2 Input characteristic acc. to IEC 61131-2, type 1 DI 3 Input voltage (including ripple) DI 16…
-
Page 18
Control Units 3.1 Control Unit CU320-2 PN (PROFINET) Terminal Designation Technical data Switching frequency for ohmic load: Max. 100 Hz For inductive load: Max. 0.5 Hz For lamp load: max. 10 Hz Lamp load: max. 5 W Type: Spring-loaded terminal 3 DI: digital input;… -
Page 19: X132 Digital Inputs/Outputs
Control Units 3.1 Control Unit CU320-2 PN (PROFINET) 3.1.2.4 X132 digital inputs/outputs Table 3-4 X132 digital inputs/outputs Terminal Designation Technical data DI 4 Voltage: -3 … +30 V DC Electrical isolation: Yes DI 5 Reference potential: M2 DI 6 Input characteristic acc. to IEC 61131-2, type 1 DI 7 Input voltage (including ripple) DI 20…
-
Page 20: X124 Electronics Power Supply
Control Units 3.1 Control Unit CU320-2 PN (PROFINET) Terminal Designation Technical data Switching frequency for ohmic load: Max. 100 Hz For inductive load: Max. 0.5 Hz For lamp load: max. 10 Hz Lamp load: max. 5 W Type: Spring-loaded terminal 3 DI: digital input;…
-
Page 21: X127 Lan (Ethernet)
Control Units 3.1 Control Unit CU320-2 PN (PROFINET) The maximum cable length that can be connected is 30 m. Note The two «+» or «M» terminals are jumpered in the connector. This ensures that the supply voltage is looped through. Note The terminal block must be screwed on tightly using a flat-bladed screwdriver.
-
Page 22: X140 Serial Interface (Rs 232)
Control Units 3.1 Control Unit CU320-2 PN (PROFINET) For diagnostic purposes, the X127 LAN interface features a green and a yellow LED. These LEDs indicate the following status information: Table 3-7 LED statuses for the X127 LAN interface Color Status Description Link port Missing or faulty link…
-
Page 23: X150 P1/P2 Profinet
Control Units 3.1 Control Unit CU320-2 PN (PROFINET) 3.1.2.8 X150 P1/P2 PROFINET The PROFINET interfaces can be operated isochronously. Table 3-9 X150 P1 and X150 P2 PROFINET Signal name Technical data Receive data + Receive data — Transmit data + Reserved, do not use Reserved, do not use Transmit data -…
-
Page 24: Buttons
Control Units 3.1 Control Unit CU320-2 PN (PROFINET) Note Cable cross section The measuring terminals are only suitable for conductor cross-sections of 0.2 mm up to 1 mm Note Use of the measuring socket The measuring socket supports commissioning and diagnostic functions. It must not be connected for normal operation.
-
Page 25: Meaning Of The Leds
● Do not return the memory card as well, but keep it in a safe place so that it can be inserted in the replacement unit. Note Please note that only SIEMENS memory cards can be used to operate the Control Unit. 3.1.3 Meaning of the LEDs 3.1.3.1…
-
Page 26: Behavior Of The Leds During Booting
Control Units 3.1 Control Unit CU320-2 PN (PROFINET) 3.1.3.2 Behavior of the LEDs during booting Table 3-12 Load software Status Comment Orange Orange Reset Hardware reset RDY LED lights up red, all other LEDs light up orange BIOS loaded – Red flash‐…
-
Page 27: Behavior Of The Leds In The Operating State
2 Hz Flashing PROFIenergy energy saving mode is active – light For more detailed information see Function Manual 0.5 s on «SINAMICS S120 Drive Functions». 3 s off Flashing General error Check parameterization / con‐ light figuration 2 Hz…
-
Page 28
DCP = Discovery and Configuration Protocol DCP is used by PROFINET to determine PROFINET devices and allow basic settings. Further information can be found in the SINAMICS S120 Function Manual «Communication». Any individual behaviors of the LED OPT are described for the respective Option Board. -
Page 29: Control Unit Cu320-2 Dp (Profibus)
Control Units 3.2 Control Unit CU320-2 DP (PROFIBUS) Control Unit CU320-2 DP (PROFIBUS) 3.2.1 Description The Control Unit CU320-2 DP is a central control module in which the closed-loop and open- loop functions are implemented for one or more Line Modules and/or Motor Modules. It can be used with firmware version 4.3 or higher.
-
Page 30: Interface Description
Control Units 3.2 Control Unit CU320-2 DP (PROFIBUS) 3.2.2 Interface description 3.2.2.1 Overview Figure 3-5 Interface overview CU320-2 DP (without cover and blanking cover) Supplementary component descriptions Manual, 06/2019…
-
Page 31
Control Units 3.2 Control Unit CU320-2 DP (PROFIBUS) Figure 3-6 Interface X140 and measuring sockets T0 to T2 — CU320-2 DP (view from below) Supplementary component descriptions Manual, 06/2019… -
Page 32: X100-X103 Drive-Cliq Interfaces
Control Units 3.2 Control Unit CU320-2 DP (PROFIBUS) Measuring socket PCB connector Figure 3-7 Mounting a PC board connector (Phoenix Contact) in the measuring socket 3.2.2.2 X100-X103 DRIVE-CLiQ interfaces Table 3-16 X100-X103 DRIVE-CLiQ interfaces Signal name Technical data Transmit data + Transmit data — Receive data + Reserved, do not use…
-
Page 33: X122 Digital Inputs/Outputs
Control Units 3.2 Control Unit CU320-2 DP (PROFIBUS) 3.2.2.3 X122 digital inputs/outputs Table 3-17 X122 digital inputs/outputs Terminal Designation Technical data DI 0 Voltage: -3 … +30 V DC Electrical isolation: Yes DI 1 Reference potential: M1 DI 2 Input characteristic acc. to IEC 61131-2, type 1 DI 3 Input voltage (including ripple) DI 16…
-
Page 34
Control Units 3.2 Control Unit CU320-2 DP (PROFIBUS) Terminal Designation Technical data Switching frequency for ohmic load: Max. 100 Hz For inductive load: Max. 0.5 Hz For lamp load: max. 10 Hz Lamp load: max. 5 W Type: Spring-loaded terminal 3 DI: digital input;… -
Page 35: X132 Digital Inputs/Outputs
Control Units 3.2 Control Unit CU320-2 DP (PROFIBUS) 3.2.2.4 X132 digital inputs/outputs Table 3-18 X132 digital inputs/outputs Terminal Designation Technical data DI 4 Voltage: -3 … +30 V DC Electrical isolation: Yes DI 5 Reference potential: M2 DI 6 Input characteristic acc. to IEC 61131-2, type 1 DI 7 Input voltage (including ripple) DI 20…
-
Page 36: X124 Electronics Power Supply
Control Units 3.2 Control Unit CU320-2 DP (PROFIBUS) Terminal Designation Technical data Switching frequency for ohmic load: Max. 100 Hz For inductive load: Max. 0.5 Hz For lamp load: max. 10 Hz Lamp load: max. 5 W Type: Spring-loaded terminal 3 DI: digital input;…
-
Page 37: X126 Profibus
Control Units 3.2 Control Unit CU320-2 DP (PROFIBUS) The maximum cable length that can be connected is 30 m. Note The two «+» or «M» terminals are jumpered in the connector. This ensures that the supply voltage is looped through. Note The terminal block must be screwed on tightly using a flat-bladed screwdriver.
-
Page 38: Profibus Address Switch
Control Units 3.2 Control Unit CU320-2 DP (PROFIBUS) 3.2.2.7 PROFIBUS address switch On the CU320-2 DP, the PROFIBUS address is set as a hexadecimal value via two rotary coding switches. Values between 0 ) and 127 ) can be set as the address. The upper rotary coding switch (H) is used to set the hexadecimal value for 16 and the lower rotary coding switch (L) is used to set the hexadecimal value for 16…
-
Page 39: X127 Lan (Ethernet)
Control Units 3.2 Control Unit CU320-2 DP (PROFIBUS) 3.2.2.8 X127 LAN (Ethernet) Note Application Ethernet interface X127 is intended for commissioning and diagnostics, which means that it must always be accessible (e.g. for service). Furthermore, the following restrictions apply to X127: ●…
-
Page 40: X140 Serial Interface (Rs 232)
Control Units 3.2 Control Unit CU320-2 DP (PROFIBUS) 3.2.2.9 X140 serial interface (RS 232) The X140 serial interface is located on the underside of the Control Unit. An external display and operator device for operator control/parameterization can be connected via this interface. It also supports the USS protocol.
-
Page 41: Buttons
Control Units 3.2 Control Unit CU320-2 DP (PROFIBUS) 3.2.2.11 Buttons RESET button Pressing the RESET button restarts the device, just the same as after connecting the electronics power supply (cold restart). DIAG button The DIAG pushbutton is reserved for service functions. 3.2.2.12 Slot for memory card Figure 3-8…
-
Page 42: Meaning Of The Leds
● Do not return the memory card as well, but keep it in a safe place so that it can be inserted in the replacement unit. Note Please note that only SIEMENS memory cards can be used to operate the Control Unit. 3.2.3 Meaning of the LEDs 3.2.3.1…
-
Page 43
Control Units 3.2 Control Unit CU320-2 DP (PROFIBUS) Status Comment Red flash‐ Red flash‐ File error ● Memory card not inserted or defective ing light 2 ing light 2 ● Software on memory card not present or corrupted Orange FW loading RDY LED lights up red, COM LED flashes Flashing orange without fixed frequency… -
Page 44: Behavior Of The Leds In The Operating State
Only active if a CBE20 Communication Board is – light inserted: 0.5 s on PROFIenergy energy saving mode is active 3 s off For more detailed information see Function Manual «SINAMICS S120 Drive Functions». Flashing General error Check parameterization / con‐ light figuration data 2 Hz Red/ Flashing Control Unit is ready for operation.
-
Page 45
DCP is used by PROFINET to determine PROFINET devices and allow basic settings. Therefore this function is only available on the CU320-2 DP if the CBE20 Option Board is inserted. Further information can be found in the SINAMICS S120 Function Manual «Communication». Any individual behaviors of the LED OPT are described for the respective Option Board. -
Page 46
Control Units 3.2 Control Unit CU320-2 DP (PROFIBUS) Supplementary component descriptions Manual, 06/2019… -
Page 47: Option Boards
Option Boards Communication Board CAN CBC10 4.1.1 Description The Communication Board CAN CBC10 is a communication module for linking to the CAN bus. The Communication Board is inserted into the option slot on a Control Unit. Supplementary component descriptions Manual, 06/2019…
-
Page 48: Interface Description
Option Boards 4.1 Communication Board CAN CBC10 4.1.2 Interface description 4.1.2.1 Overview CBC10 X451 CAN socket X452 CAN pin Figure 4-1 Interface overview of the CBC10 Supplementary component descriptions Manual, 06/2019…
-
Page 49: X451 Can Bus Interface
Option Boards 4.1 Communication Board CAN CBC10 4.1.2.2 X451 CAN bus interface Table 4-1 X451: CAN bus interface Designation Technical data Reserved, do not use CAN_L CAN signal (dominant low) CAN_GND CAN ground Reserved, do not use CAN_SHLD Optional shield CAN ground CAN_H CAN signal…
-
Page 50: 2-Pin Smd Dil Switch
Option Boards 4.1 Communication Board CAN CBC10 4.1.2.4 2-pin SMD DIL switch ① Switch 1 ② Switch 2 Figure 4-2 2-pin SMD DIL switch 1 and 2 on the CBC10 Table 4-3 2-pin SMD DIL switch ID on the component Switch Function Switch position…
-
Page 51: Meaning Of The Led
Check baud rate The error counter for «error passive» has reached the Check cabling value 127. After the SINAMICS drive system was booted no further active CAN component was on the bus. Double flash Error Control Event, a Guard Event has occurred…
-
Page 52: Interface Description
Option Boards 4.2 Communication Board Ethernet CBE20 4.2.1 Interface description 4.2.1.1 Overview Link Port Port 1 Activity Port Port 2 X1400 Port 3 Port 4 Sync Fault Figure 4-3 Interface overview CBE20 4.2.1.2 X1400 Ethernet interface Table 4-5 X1400: Ethernet, ports 1-4 Signal name Technical data Receive data +…
-
Page 53: Meaning Of The Leds
Option Boards 4.2 Communication Board Ethernet CBE20 Note The Ethernet interfaces support Auto MDI(X). It is therefore possible to use both crossover and 1:1 cables to connect the devices. For diagnostic purposes, each port has one green and one yellow LED. You will find a detailed description in the Chapter «Meaning of LEDs»…
-
Page 54
Option Boards 4.2 Communication Board Ethernet CBE20 Table 4-7 Meaning of the Sync and Fault LEDs on the CBE20 Color Status Description Fault – If the link port LED is green: The CBE20 is operating error-free. Data is being exchanged with the configured IO controller. -
Page 55
Continu‐ Cyclic communication via PROFINET has not yet been es‐ – ous light tablished. However, non-cyclic communications are possible. SINAMICS is waiting for a parameterization/configuration telegram. Flashing The firmware update into the CBE20 has been completed with Replace the memory light an error. -
Page 56
Option Boards 4.2 Communication Board Ethernet CBE20 Supplementary component descriptions Manual, 06/2019… -
Page 57: Terminal Modules
Terminal Modules Terminal Module TM15 5.1.1 Description The Terminal Module TM15 is a terminal expansion for snapping on to an EN 60715 DIN rail. The TM15 can be used to increase the number of available digital inputs/outputs within a drive system.
-
Page 58: Interface Description
Terminal Modules 5.1 Terminal Module TM15 5.1.2 Interface description 5.1.2.1 Overview X501 DRIVE-CLiQ interfaces X500 X524 Electronics power supply X520 Digital inputs/outputs (one green status LED per X521 channel) X522 Shield connection PE conductor connection M4 / 1.8 Nm Figure 5-1 TM15 interface overview Supplementary component descriptions Manual, 06/2019…
-
Page 59: X500/X501 Drive-Cliq Interfaces
Terminal Modules 5.1 Terminal Module TM15 5.1.2.2 X500/X501 DRIVE-CLiQ interfaces Table 5-2 X500/X501 DRIVE-CLiQ interfaces Signal name Technical data Transmit data + Transmit data — Receive data + Reserved, do not use Reserved, do not use Receive data — Reserved, do not use Reserved, do not use + (24 V) Power supply…
-
Page 60: X521 Bidirectional Digital Inputs/Outputs
Terminal Modules 5.1 Terminal Module TM15 5.1.2.4 X521 bidirectional digital inputs/outputs Table 5-4 X521 digital inputs/outputs Terminal Designation Technical data See Chapter «Technical data». DI/DO 8 DI/DO 9 DI/DO 10 DI/DO 11 DI/DO 12 DI/DO 13 DI/DO 14 DI/DO 15 M2 (GND) Type: Screw terminal 1 L2+: The 24 V DC infeed for DI/DO 8 to 15 (second potential group) must always be connected if at…
-
Page 61: X524 Electronics Power Supply
Terminal Modules 5.1 Terminal Module TM15 5.1.2.6 X524 Electronics power supply Table 5-6 X524 electronics power supply Terminal Designation Technical data Electronics power supply Voltage: 24 V DC (20.4 … 28.8 V) Current consumption: max. 0.6 A Electronics power supply (including DRIVE-CLiQ and control of Electronics ground digital outputs)
-
Page 62: Technical Data
Terminal Modules 5.1 Terminal Module TM15 5.1.4 Technical data Table 5-8 Technical data 6SL3055-0AA00-3FAx Unit Value Electronics power supply Voltage 24 (20,4 … 28,8) Current (without DRIVE-CLiQ or digital outputs) 0,15 Power loss < 3 Ambient temperature up to an altitude of 2,000 m °C 0 ……
-
Page 63: Terminal Module Tm31
Terminal Modules 5.2 Terminal Module TM31 6SL3055-0AA00-3FAx Unit Value Leakage current in OFF state μA Max. 10 per channel Voltage drop, output (I/O power supply to the output) Max. total current of outputs (per group) up to 60°C up to 50°C up to 40°C Response time The response time of the digital inputs/outputs comprises the following:…
-
Page 64: Interface Description
Terminal Modules 5.2 Terminal Module TM31 5.2.2 Interface description 5.2.2.1 Overview DRIVE-CLiQ X501 interfaces X500 X524 Electronics power supply Voltage/ X540 current measurement Auxiliary power for Digital inputs X521 Analog inputs X541 Digital inputs/outputs X522 Analog outputs X520 Digital inputs X530 X542 Relay outputs…
-
Page 65: X500/X501 Drive-Cliq Interfaces
Terminal Modules 5.2 Terminal Module TM31 5.2.2.2 X500/X501 DRIVE-CLiQ interfaces Table 5-10 X500/X501 DRIVE-CLiQ interfaces Signal name Technical data Transmit data + Transmit data — Receive data + Reserved, do not use Reserved, do not use Receive data — Reserved, do not use Reserved, do not use + (24 V) Power supply…
-
Page 66: X521 Analog Inputs
Terminal Modules 5.2 Terminal Module TM31 Note Ensuring the function of digital inputs An open input is interpreted as «low». Terminal M1 must be connected so that the digital inputs (DI) can function. This is achieved by using one of the following measures: 1.
-
Page 67: S5 Current/Voltage Changeover Switch For Analog Inputs
Terminal Modules 5.2 Terminal Module TM31 Note The power supply for the analog inputs can be taken internally or from an external power supply unit 5.2.2.5 S5 current/voltage changeover switch for analog inputs Table 5-13 Current/voltage selector S5 Switch Function S5.0 Selector voltage (V)/current (I) Al0 S5.1…
-
Page 68: X524 Electronics Power Supply
Terminal Modules 5.2 Terminal Module TM31 NOTICE Damage to motor in the event of incorrectly connected KTY temperature sensor If a KTY temperature sensor is connected with incorrect polarity, it is not possible to detect when the motor overheats. Overheating can cause damage to the motor. ●…
-
Page 69: X530 Digital Inputs
Terminal Modules 5.2 Terminal Module TM31 5.2.2.8 X530 digital inputs Table 5-16 X530: Digital inputs Terminal Designation Technical data DI 4 Voltage: -3 … +30 V DC Electrical isolation: Yes DI 5 Reference potential: M2 DI 6 Input characteristic acc. to IEC 61131-2, type 1 DI 7 Input voltage (including ripple) «1»…
-
Page 70
Terminal Modules 5.2 Terminal Module TM31 Note This voltage supply is only for powering the digital inputs. Note If the 24 V supply is briefly interrupted, the auxiliary voltage for the digital inputs is deactivated for this time. Supplementary component descriptions Manual, 06/2019… -
Page 71: X541 Bidirectional Digital Inputs/Outputs
Terminal Modules 5.2 Terminal Module TM31 5.2.2.10 X541 bidirectional digital inputs/outputs Table 5-18 X541: Bidirectional digital inputs/outputs Terminal Designation Technical data As input: Voltage: -3 … +30 V DC DI/DO 11 Electrical isolation: no DI/DO 10 Reference potential: M DI/DO 9 Input characteristic acc.
-
Page 72: X542 Relay Outputs
Terminal Modules 5.2 Terminal Module TM31 Note If the 24 V supply is briefly interrupted, then the digital outputs are deactivated during this time. 5.2.2.11 X542 relay outputs Table 5-19 X542: Relay outputs Terminal Designation Technical data DO 0.NC Contact type: Two-way contact max. load current: 8 A Max.
-
Page 73: Meaning Of The Leds
Terminal Modules 5.2 Terminal Module TM31 5.2.3 Meaning of the LEDs Table 5-20 Meanings of the LEDs on the Terminal Module TM31 Color Status Description, cause Remedy READY The electronics power supply is missing or outside the per‐ – missible tolerance range. Green Continuous The component is ready for operation.
-
Page 74: Terminal Module Tm150
Terminal Modules 5.3 Terminal Module TM150 Terminal Module TM150 5.3.1 Description The terminal module TM150 is a DRIVE-CLiQ component for temperature evaluation. The temperature is measured in a temperature range from -99 °C to +250 °C for the following temperature sensors: ●…
-
Page 75: Interface Description
Terminal Modules 5.3 Terminal Module TM150 5.3.2 Interface description 5.3.2.1 Overview Figure 5-3 Interface overview of Terminal Module TM150 Supplementary component descriptions Manual, 06/2019…
-
Page 76: X500/X501 Drive-Cliq Interfaces
Terminal Modules 5.3 Terminal Module TM150 5.3.2.2 X500/X501 DRIVE-CLiQ interfaces Table 5-23 X500/X501: DRIVE-CLiQ interfaces Signal name Technical data Transmit data + Transmit data — Receive data + Reserved, do not use Reserved, do not use Receive data — Reserved, do not use Reserved, do not use + (24 V) Power supply, max.
-
Page 77: X531-X536 Temperature Sensor Inputs
Terminal Modules 5.3 Terminal Module TM150 5.3.2.4 X531-X536 temperature sensor inputs Table 5-25 X531-X536: Temperature sensor inputs Terminal Function Function Technical data 1×2- / 2×2-wire 3 and 4-wire +Temp Temperature sensor connection for sensors with (channel x) (Channel x) 1×2 wires Connection of the 2nd measurement cable for sensors with 4 wires -Temp…
-
Page 78
Terminal Modules 5.3 Terminal Module TM150 NOTICE Overheating of the motor through jumpering the temperature sensor connections Jumpering temperature sensor connections «+Temp» and «-Temp» results in incorrect measurement results. Damage to the motor can result if the overheating is not detected. ●… -
Page 79: Meaning Of The Leds
Terminal Modules 5.3 Terminal Module TM150 5.3.3 Meaning of the LEDs Table 5-27 Meaning of the LEDs at the Terminal Module TM150 Color State Description, cause Remedy – Electronic power supply is missing or outside permissible tol‐ Check power supply erance range.
-
Page 80
Terminal Modules 5.3 Terminal Module TM150 Supplementary component descriptions Manual, 06/2019… -
Page 81: Voltage Sensing Module Vsm10
Voltage Sensing Module VSM10 Description The Voltage Sensing Module VSM10 is an expansion module for snapping on to a standard mounting rail acc. to EN 60715. It is used to sense the actual value of a voltage. For example, it can be used to sense the three-phase line supply voltage, which is then provided to the closed-loop control.
-
Page 82: Interface Description
Voltage Sensing Module VSM10 6.2 Interface description Interface description 6.2.1 Overview Figure 6-1 Interface overview of the VSM10 Supplementary component descriptions Manual, 06/2019…
-
Page 83: X500 Drive-Cliq Interface
Voltage Sensing Module VSM10 6.2 Interface description PE conductor connection M4 / 1.8 Nm X530 Neutral point grounding Connector jumper Figure 6-2 X530 interface at the VSM10 (view from below) 6.2.2 X500 DRIVE-CLiQ interface Table 6-2 X500: DRIVE-CLiQ interface Signal name Technical data Transmit data + Transmit data -…
-
Page 84: X520 Analog Inputs/Temperature Sensor
Voltage Sensing Module VSM10 6.2 Interface description 6.2.3 X520 analog inputs/temperature sensor Table 6-3 X520: Analog inputs/temperature sensor Terminal Designation Technical data AI 0- 2 analog differential inputs Voltage: -10 … +10 V; Ri > 100 kΩ AI 0+ Resolution: 12 bits + sign AI 1- AI 1+ + Temp…
-
Page 85: X521 Three-Phase Voltage Sensing Up To 100 V 3-Ph. Ac
Voltage Sensing Module VSM10 6.2 Interface description WARNING Electric shock due to voltage flashovers on the temperature sensor cable Voltage flashovers in the signal electronics can occur in motors without safe electrical separation of the temperature sensors. ● Only use temperature sensors that fully comply with the specifications of the safety isolation.
-
Page 86: X522 Three-Phase Voltage Sensing Up To 690 V 3-Ph. Ac
Voltage Sensing Module VSM10 6.2 Interface description 6.2.5 X522 three-phase voltage sensing up to 690 V 3-ph. AC Table 6-5 X522: Voltage sensing 690 V Terminal Designation Technical data Phase voltage U Directly connected to the line voltage sensing Resistance to neutral point: ∼3500 kΩ Phase voltage V Insulation resistance, neutral point — ground Phase voltage W…
-
Page 87: X530 Neutral Point Grounding
Voltage Sensing Module VSM10 6.2 Interface description The maximum cable length that can be connected is 30 m. Note The two «+» and «M» terminals are jumpered in the connector. This ensures that the supply voltage is looped through. 6.2.7 X530 neutral point grounding Table 6-7 X530: Neutral point grounding…
-
Page 88: Meaning Of The Leds
Voltage Sensing Module VSM10 6.3 Meaning of the LEDs Meaning of the LEDs Table 6-8 Meanings of the LEDs on the Voltage Sensing Module VSM10 Color Status Description, cause Remedy READY – The electronics power supply is missing or outside the per‐ –…
-
Page 89: Sensor Module Cabinet-Mounted Smc30
Sensor Module Cabinet-Mounted SMC30 Description The Sensor Module Cabinet-Mounted SMC30 is an expansion module for snapping on to a standard mounting rail acc. to EN 60715. It evaluates encoder signals and transmits the speed, actual position, and, if applicable, the motor temperature and reference point via DRIVE-CLiQ to the Control Unit.
-
Page 90: Interface Description
Sensor Module Cabinet-Mounted SMC30 7.2 Interface description Interface description 7.2.1 Overview Figure 7-1 Interface description of the SMC30 Supplementary component descriptions Manual, 06/2019…
-
Page 91: X500 Drive-Cliq Interface
Sensor Module Cabinet-Mounted SMC30 7.2 Interface description 7.2.2 X500 DRIVE-CLiQ interface Table 7-1 X500: DRIVE-CLiQ interface Signal name Technical data Transmit data + Transmit data — Receive data + Reserved, do not use Reserved, do not use Receive data — Reserved, do not use Reserved, do not use Reserved, do not use…
-
Page 92
Sensor Module Cabinet-Mounted SMC30 7.2 Interface description Signal name Technical data Connector type: 15-pin Sub-D socket Measuring current via temperature sensor connection: 2 mA 1) Accuracy of temperature measurement: — KTY: ±7°C (including evaluation) — PTC: ±5℃ (including evaluation) NOTICE Damage to the encoder due to incorrect supply voltage The encoder supply can be parameterized to 5 V or 24 V. -
Page 93: X521 / X531 Alternative Encoder System Interface
Sensor Module Cabinet-Mounted SMC30 7.2 Interface description 7.2.4 X521 / X531 alternative encoder system interface Table 7-3 X521/X531: Alternative encoder system interface Designation Technical data X521 Incremental signal A Inverse incremental signal A Incremental signal B Inverse incremental signal B Reference signal R Inverse reference signal R CTRL…
-
Page 94: X524 Electronics Power Supply
Sensor Module Cabinet-Mounted SMC30 7.2 Interface description Temperature sensor connection NOTICE Damage to motor in the event of incorrectly connected KTY temperature sensor A KTY temperature sensor connected with incorrect polarity cannot detect if the motor overheats. Overheating can cause damage to the motor. ●…
-
Page 95: Meaning Of Leds
Sensor Module Cabinet-Mounted SMC30 7.3 Meaning of LEDs Meaning of LEDs Table 7-5 Meaning of LEDs on the Sensor Module Cabinet SMC30 Color Status Description, cause Remedy – The electronics power supply is missing or outside the per‐ – READY missible tolerance range.
-
Page 96: Technical Data
Sensor Module Cabinet-Mounted SMC30 7.4 Technical data Technical data Table 7-6 Technical data 6SL3055-0AA00-5CA2 Unit Value Electronics power supply Voltage 24 (20.4 … 28.8) Current (without encoder system) ≤ 0.20 Current (with encoder system) ≤ 0.55 Power loss ≤ 10 Encoder system power supply Voltage 5 (with or without remote sense)
-
Page 97
Sensor Module Cabinet-Mounted SMC30 7.4 Technical data Parameter Designation Threshold Min. Max. Unit «Zero pulse inactive time» ALo-BHi (before and after A=B=high) «Zero pulse active time» — 2*t ALo-BHi (while A=B=high and beyond) Other signal levels according to the RS 422 standard. The absolute level of the individual signals varies between 0 V and VCC of the encoder system. -
Page 98
Sensor Module Cabinet-Mounted SMC30 7.4 Technical data SSI encoder Figure 7-2 Maximum cable lengths depending on the SSI baud rate for SSI encoders Encoders with 5 V supply connected to X521/X531 For encoders with a 5 V supply at X521/X531, the cable length depends on the encoder current (for 0.5 mm cable cross-sections): Figure 7-3… -
Page 99
Sensor Module Cabinet-Mounted SMC30 7.4 Technical data Encoders without remote sense For encoders without Remote Sense, the permissible cable length is restricted to 100 m. Reason: The voltage drop depends on the cable length and the encoder current. Figure 7-4 Signal characteristic of track A and track B between two edges: Time between two edges with pulse encoders Figure 7-5… -
Page 100
Sensor Module Cabinet-Mounted SMC30 7.4 Technical data Supplementary component descriptions Manual, 06/2019… -
Page 101: Index
Index Sensor Module Cabinet SMC30, 88 Terminal Module TM15, Terminal Module TM150, 73 Terminal Module TM31, 62 Address Voltage Sensing Module VSM10, 80 Setting the PROFIBUS address, 36 LEDs CAN CBC10 Communication Board, 45 CAN CBC10 Communication Board, 49 Communication Board Ethernet CBE20, 49 CBE20 Ethernet Communication Board, 51 Components Control Unit CU320-2 DP, 42, 43…
-
Page 102
Index Supplementary component descriptions Manual, 06/2019… -
Page 104
Further Information www.siemens.com/drives Siemens AG Large Drives Applications Postfach 48 48 90026 NÜRNBERG DEUTSCHLAND…