Error Code
C9-1122
C9-1125
H1-1210
H1-1220
H1-1230
H1-1240
H1-1252
H1-1254
M1-1110
M1-1610
M1-5112
M1-5113
M1-5120
M1-5612
M1-5712
M2-1110
M2-2210
M3-1110
M3-2130
S1-2411
S1-4210
S2-3310
S2-3311
S2-3312
S2-3313
S2-3314
S2-3315
S2-3316
S2-3317
S2-3318
S2-4120
S3-3122
S4-2111
S4-2112
S6-3123
S6-3128
U1-2315
Copyright© 1995-2013 SAMSUNG. All rights reserved.
connection
Paper empty in tray 2 / Paper is empty in tray 2. Load paper
Paper empty in tray 1 / Paper is empty in tray 1. Load paper
Error: #S1-2411 / HDD System Failure: #S1-2411. Turn off then on. Call
for service if the problem persists
Error: #S1-4210 / Video System Failure: #S1-4210. Turn off then on. Call
for service if the problem persists
Error: #S2-3312 Turn off then on
Error: #S2-3313 Turn off then on
Error: #S2-3314 Turn off then on
Error: #S2-3315 Turn off then on
Error: #S2-3316 Turn off then on
Error: #S2-3317 Turn off then on
Error: #S2-3318 Turn off then on
IP Conflict / This IP address conflicts with that of other system
Error: #U1-2315 / Fuser Unit Failure: #U1-2315. Turn off then on. Call
for service if the problem persists
4. Alignment and Troubleshooting
Troubleshooting Page
P.4-50
P.4-50
P.4-51
P.4-52
P.4-53
P.4-54
P.4-55
P.4-55
P.4-56
P.4-57
P.4-58
P.4-58
P.4-58
P.4-59
P.4-59
P.4-60
P.4-61
P.4-61
P.4-62
P.4-63
P.4-63
P.4-63
P.4-63
P.4-63
P.4-63
P.4-63
P.4-63
P.4-63
P.4-63
P.4-63
P.4-64
P.4-65
P.4-65
P.4-65
P.4-66
P.4-66
P.4-67
4-40
Мастер по ремонту бытовой техники Сергей 8-926-228-53-20
В этой таблице собраны коды всех моделей СМ Samsung с дисплеем, поэтому практически для всех неисправностей указывается сразу по несколько кодов. В последующих разделах этой статьи для некоторых линеек СМ будут приведены именно их коды. Коды ошибок, начинающие с буквы «E», использовались в старых моделях СМ Samsung.
Обращаем также внимание на то, что для одной неисправности может быть указано несколько кодов в рамках одной системы нумерации ошибок: например, коды HE, HE1 и HE2 объединены в общую группу описания проблем с нагревом воды в баке, хотя их точные причины во много разные. Так сделано для сокращения описания большого числа кодов ошибок; кроме того, детали ошибок всё равно мало что значат для рядового пользователя СМ, а у мастера, которого вы, скорее всего, вызовите, имеются и более детальные технические описания.
| Код | Описание | Способ устранения |
|---|---|---|
| 5E (SE) 5C E2 |
Проблемы со сливом грязной воды: за требуемое время уровень воды в баке не опустился до определенного уровня |
К проблеме может привести следующее:
Как видите, причин появления этого кода ошибки немало, поэтому лучше вызвать квалифицированного специалиста. |
| H1, H2 HE, HE1, HE2 HC, HC1, HC2 E5, E6 |
Вода в баке медленно или вообще не нагревается, либо, наоборот, перегревается |
Причин много, вот некоторые из них:
|
| DE, DE1, DE2 DC, DC1, DC2 DOOR ED |
Нет сигнала о блокировке двери люка или, наоборот, дверь не получается открыть |
В результате электроника блокирует начало стирки. Возможные причины:
|
| 4E (ЧE) 4C E1 |
Проблемы с набором воды: бак не заполняется за требуемый промежуток времени |
Возможные причины:
|
| SUd 5d (Sd) |
При стирке в баке образуется слишком много пены |
Повышенное пенообразование может вызывать следующее:
|
| UE UB E4 |
Неверное положение барабана, нарушена его балансировка |
Возможные причины:
|
| LE, LE1 LC, LC1 E9 |
Обнаружена протечка воды из СМ или её самослив из бака |
Проблемы могут быть в следующих узлах СМ:
|
| 3E, 3E1, 3E2, 3E3, 3E4 3C, 3C1, 3C2, 3C3, 3C4 EA |
На управляющий электронный контроллер не поступает сигнал от тахогенератора приводного мотора |
|
| bE (6E) bE1, bE2, bE3 bC, bC2, b2 Eb |
СМ не включается или проблемы с симистором приводного мотора |
Вообще-то несколько странная группировка кодов ошибок: СМ может не включаться по множеству причин . Двигатель же может не вращать барабан как из-за неисправности симистора (надо проверить его цепь, сам датчик и контроллер), так и из-за проблем с тахогенератором (смотрите описание ошибки »3E») или внутренних поломок мотора. |
| tE, tE1, tE2, tE3 tC, tC1, tC2, tC3, tC4 Ec |
На управляющий контроллер не поступает сигнал от термодатчика (термостата) |
Возможные причины:
|
| 1E (IE) 1C (IC) E7 |
На управляющий контроллер не приходит сигнал от датчика уровня воды (прессостата) | Причины ошибки и действия обычные при предупреждении о неисправном датчике: сначала надо убедиться, что цепь между ним и контроллером в порядке, что все контакты закреплены и не окислились, проверить сам датчик (если испорчен — заменить), и завершить поиск неисправности на управляющем контроллере (для его диагностики и замены лучше обратиться к специалистам). |
| OE (0E) OF (0F) OC (0C) E3 |
В бак залилось слишком много воды |
Основные причины: плохой слив, поломка датчиков, неправильный порошок:
|
| Uc 9C 9E1, 9E2 |
Напряжения электросети не соответствует требованиям данном модели СМ | Вызовите электрика для проверки и ремонта электропроводки: если не помогло, значит проблемы внутри прибора, и на этот раз придется звонить в сервис. |
| 2H 3H 4Р |
Показывает время, оставшееся до конца стирки (это не ошибка!) | Подобный код могут наблюдать во время длительной стирки владельцы стиральных машин с небольшими двухсимвольными дисплеями, на которых не помещается 3-хначиное число оставшихся минут. Здесь «H» — От «Hour» («час» на английском), цифра — количество оставшихся часов: «2» — от 100 до 180 минут, «3» — 180-240 минут, «4» — более 240 минут; код пропадет, когда останется 99 минут. |
| AE AC ACb (AC6) 13E |
Возникла ошибка при обмене данными между модулем управления и платой информационного дисплея |
|
| FE FC |
Не работает вентилятор сушки |
Возможные причины:
|
| EE | Слишком высокая температура сушки |
|
| ddC | Открылась дверца «Add Door» для загрузки белья в ходе стирки, хотя кнопка паузы не была нажата | Чтобы продолжить стирку, закройте дверцу и нажмите кнопку «Пуск/Пауза» |
| dC3 | Не поступил сигнал о блокировке дверцы «Add Door»: люк не закрыт или не открывается | Смотрите описание ошибки »DE»— причины те же, что и при блокировке загрузочного люка |
| 8E, 8E1 8C, 8C1 |
Не работает датчик вибрации VRT+ |
Датчик устанавливается на модели 2013 года и позже, аналог таходатчика:
|
| PoF PF |
В ходе стирки было отключено электропитание | Просто возобновите стирку, нажав кнопку «Старт/Пауза» |
| Ao..A9 B0, C0 D0, E0 |
Не ошибка: вам просто сообщают, что СМ находится в тестовом режиме | Для выхода из тестового режима смотрите инструкцию к СМ |
| Hot | Высокая температура (выше 70 градусов) во время сушки | Это не ошибка, а просто информационное сообщение «на всякий случай», оно само пропадет после снижения температуры |
| CE, AC ACb (AC6) 4C2 |
В бак поступает слишком горячая вода |
СМ сразу начинает сливать воду и высвечивает код ошибки:
|
| 6C SdC (5dC) |
Не работает автоматический дозатор |
Только в моделях с поддержкой Wi-Fi:
|
Лазерный принтер Samsung M2070 выдает ошибку? Чтобы расшифровать код неисправности, воспользуйтесь рекомендациями специалистов сервисного центра MiraxPrint!
Будьте внимательны, если ошибки возникают на постоянной основе, обратитесь за квалифицированной помощью. Так вы обезопасите себя от дорогостоящего ремонта печатающего устройства.
Больше информации можно получить, позвонив по актуальным номерам телефонов или отправив запрос на электронную почту.
➦ Коды ошибок принтера Samsung M2070
Далее мы рассмотрим наиболее популярные ошибки Samsung M2070, которые даже неопытный пользователь может устранить своими руками.
| Номера ошибок | Инструкции по устранению ошибок |
| № 11-2T11 | Замените отработанные картриджи Samsung MLT-D111L | MLT-D111S на новые или заправьте их тонером. |
| № C2-1510 | C2-1711 | C2-1712 | Установленный вами картридж несовместим с принтером. Проблема может быть вызвана блокировкой счетчика из-за чипа. В таком случае замените микросхему или прошейте аппарат модифицированным ПО. |
| № М2-1110 | М2-1116 | Проконтролируйте наличие бумаги в лотке. Удалите замятые страницы. В сложнодоступных местах используйте пинцет. Перезагрузите принтер.
✓ Если замятие происходит регулярно, тогда следуйте алгоритму: |
| № S2-4110 | Закройте крышку принтера. Если ошибка не исчезла, перезакройте крышку. Возможно, произошла поломка датчика фиксации. |
| № S3-3121 | S3-3122 | Проверьте движение блока сканера. Если он не реагирует на задание, тогда обратитесь в сервисный центр. |
| № S6-3123 | Конфликт IP-адресов. Войдите в Samsung Easy Printer Manager: Настройка — Сеть — изменить IP-адрес. Если IP-адреса присваиваются динамическим способом, просто перезагрузите принтер. |
| № S6-3210 | Ошибка соединения контактов между материнской платой и сетевой картой. Вызовите специалиста! |
| № U1-2320 | U1-2330 | U1-2340 | Ошибка нагрева термоэлемента. Позаботьтесь о том, чтобы напряжение в электрической сети было на должном уровне. Также необходимо переставить аппарат в сухое проветриваемое помещение.
✓ Если перезагрузка не помогла, тогда предстоит частичный ремонт печи или ее замена. |
| № U2-1113 | U2-1112 | Привод работает с ошибками. Перезагрузите Samsung M2070. Проблема актуальна? Без помощи сервисного центра ее не решить. |
| № U3-3313 | U3-3314 | Устраните замятие бумаги в сканере. Проверьте работоспособность роликов захвата. |
| № U3-4110 | Закройте крышку сканера. Ошибка также может быть вызвана неисправностью датчика фиксации крышки. |

С 2007 года осуществляю заправку картриджей, экспертную диагностику и ремонт лазерной оргтехники для сервисного центра MiraxPrint. В свободное время делюсь своим опытом в блоге.
|
Что появляется на дисплее |
Код ошибки |
Что значит ошибка |
Почему появилась ошибка |
Как устранить ошибку |
|---|---|---|---|---|
|
|
5E |
Не сливается вода из машины. |
Засорился сливной шланг; Засор в канализации; Засорились шланги внутри машины; Засорился сливной фильтр; Согнут или сдавлен сливной шланг; Не работает сливной насос; Замерзла вода в машине (машину хранили при минусовой температуре). |
Инструкция |
|
|
5C |
|||
|
|
E2 |
|||
|
|
H1 |
Не нагревается вода. |
Неправильно подключили машину к электросети; Не работает нагреватель стирки; Не работает нагреватель сушки. |
Инструкция |
|
|
HC |
|||
|
|
E5 |
|||
|
|
E6 |
|||
|
|
4E |
Не заливается вода в машину. |
Закрыт кран подачи воды для машины или нет воды в доме; Согнут или сдавлен заливной шланг; Засорился заливной фильтр; Сработала защита заливного шланга «Аква стоп / Aqua Stop». |
Инструкция |
|
|
4C |
|||
|
|
E1 |
|||
|
|
4C2 |
В машину заливается горячая вода – выше 50 °С. |
Заливной шланг подключен к крану горячей воды. |
Инструкция |
|
|
SUD |
В баке слишком много пены. |
Положили слишком много порошка; Положили порошок, который не подходит для машины системы автомат; Положили некачественный или поддельный порошок. |
Инструкция |
|
|
5D (SD) |
|||
|
|
UE |
Машина не может равномерно распределить вещи в барабане. |
Белье сбилось в кучу или перекрутилось между собой; В машине мало вещей: одна или две; В машине слишком много белья. |
Инструкция |
|
|
UB |
|||
|
|
E4 |
|||
|
|
LE |
Из машины самопроизвольно сливается вода. |
Низко лежит сливной шланг; Сливной шланг неправильно подключили к канализации; Есть отверстие или трещина в баке, из которого вытекает вода. |
Инструкция |
|
|
LC |
|||
|
|
E9 |
|||
|
|
3E |
Мотор перегружен, заблокирован посторонним предметом или сломался. |
Перегрузка электродвигателя из-за большого количества белья; Не работает электродвигатель. |
Инструкция |
|
|
3C |
|||
|
|
EA |
|||
|
|
UC |
Нестабильное напряжение в электросети (слишком низкое или высокое). |
На машину подается напряжение меньше 200 +/- 4 Вольта, или выше 250 +/- 4 Вольта более 30 секунд. |
Инструкция |
|
|
9C |
|||
|
|
DE |
Дверца люка не закрыта. |
Неплотно закрыта дверца люка; Не работает механизм закрытия дверцы люка. |
Инструкция |
|
|
DC |
|||
|
|
ED |
|||
|
|
DС3 |
Дверца «Add Door» (для дополнительной загрузки белья в процессе стирки) не закрыта или не открывается. |
Перед запуском стирки не закрыли дверцу «Add Door»; Не работает блокировка / разблокировка дверцы «Add Door». |
Инструкция |
|
|
DDC |
Неправильно открыли дверцу «Add Door» (для дополнительной загрузки белья) во время стирки. |
Дверцу «Add Door» открыли во время стирки без нажатия кнопки «Пуск/Пауза». |
Инструкция |
|
|
LE1 |
На дно машины попала вода. |
Протекает сливной фильтр (неплотно закрыт или поврежден); Вытекает вода из контейнера для порошка; Протекают внутренние соединительные шланги или сливной шланг; Протекает вода из дверцы (повреждена манжета). |
Позвоните в службу поддержки. |
|
|
LC1 |
|||
|
|
TE |
Нет сигнала от датчика температуры. |
Поврежден датчик или его проводка. |
Инструкция |
|
|
TC |
|||
|
|
EC |
|||
|
|
0E |
В машине слишком много воды. |
Неправильно подключен сливной шланг к канализации; Клапан для залива воды заблокировался в открытом состоянии. |
Инструкция |
|
|
0F |
|||
|
|
0C |
|||
|
|
E3 |
|||
|
|
1Е |
Нет сигнала от датчика уровня воды. |
Поврежден датчик или его проводка. |
Инструкция |
|
|
1C |
|||
|
|
E7 |
|||
|
|
BE |
Не работают кнопки / кнопка на панели управления. |
Западают («залипают») пластиковые кнопки на панели управления. |
Инструкция |
|
|
BC2 |
|||
|
|
EB |
|||
|
|
AE |
Ошибка связи. |
Нет сигнала между платами управления. |
Инструкция |
|
|
AC |
|||
|
|
AC6 |
|||
|
|
CE |
Температура воды перед сливом выше или равна 55 °С. |
Заливной шланг подключен к крану горячей воды. |
Если заливной шланг подключен к крану холодной воды, то позвоните в службу поддержки. |
|
|
AC |
|||
|
|
AC6 |
|||
|
|
8E |
Не работает датчик вибрации «VRT+». |
Поврежден датчик или его проводка. |
Позвоните в службу поддержки. |
|
|
8C |
|||
|
|
EE |
Не работает датчик температуры сушки (появляется только у машин с функцией сушки белья). |
Поврежден датчик или его проводка. |
Позвоните в службу поддержки. |
|
|
FE |
Не работает вентилятор / фен сушки (появляется только у машин с функцией сушки белья). |
Не работает вентилятор / фен сушки. |
Позвоните в службу поддержки. |
|
|
FC |
|||
|
|
SDC |
Не работает автоматический дозатор (появляется только у машин с функцией Wi-Fi). |
Не работает автоматический дозатор. |
Позвоните в службу поддержки. |
|
|
6C |
Неисправен привод или проводка автоматического дозатора (появляется только у машин с функцией Wi-Fi). |
Не работает привод или проводка автоматического дозатора. |
Позвоните в службу поддержки. |
|
|
2H |
Оставшееся время до конца стирки. |
Более 99-ти минут до окончания стирки (2Н — 2 часа, 3Н — 3 часа и.т.д.). |
Инструкция |
|
|
3H |
|||
|
|
4H |
|||
|
|
Hot |
Высокая температура внутри барабана (появляется только у машин с функцией сушки белья). |
Температура внутри барабана выше 70 °C. |
Не отключайте стиральную машину. Подождите, пока температура понизится в барабане и сообщение «Hot» исчезнет. |
|
|
A0…A9 |
Включен заводской тестовый режим. |
Включен заводской тестовый режим. |
Инструкция |
|
|
PoF |
Во время стирки отключили электричество (ошибка появляется после подачи электричества). |
Во время стирки отключили электричество. |
Нажмите кнопку «Старт / Пауза», для продолжения стирки. |
|
|
BC |
Машина не может запустить мотор. |
Не работает триак (симистор) включения вращения мотора. |
Позвоните в службу поддержки. |


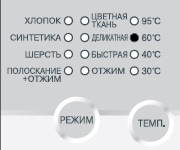
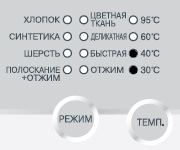
Коды ошибок стиральных машин Samsung без дисплея
|
Какие индикаторы загораются |
Код ошибки |
Что значит ошибка |
Почему появилась ошибка |
Как устранить ошибку |
|---|---|---|---|---|
Загораются индикаторы всех режимов стирки + нижний индикатор температуры. |
4E |
Не заливается вода в машину. |
Закрыт кран подачи воды для машины или нет воды в доме; Согнут или сдавлен заливной шланг; Засорился заливной фильтр-сеточка; Сработала защита заливного шланга «Аква стоп / Aqua Stop». |
Инструкция |
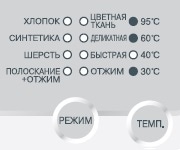
Загораются индикаторы всех режимов стирки + второй снизу индикатор температуры. |
5Е |
Не сливается вода из машины. |
Засорился сливной шланг; Засор в канализации; Засорились шланги внутри машины; Засорился фильтр сливного насоса (сливной фильтр); Согнут или сдавлен сливной шланг; Не работает сливной насос; Замерзла вода в машине (машину хранили при минусовой температуре). |
Инструкция |

Загораются индикаторы всех режимов стирки + два нижних индикатора температуры. |
0E |
В машине слишком много воды. |
Неправильно подключен сливной шланг к канализации; Клапан для залива воды заблокировался в открытом состоянии. |
Инструкция |

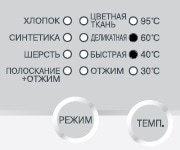
Загораются индикаторы всех режимов стирки + второй сверху индикатор температуры. |
UE |
Машина не может равномерно распределить вещи в барабане. |
Белье сбилось в кучу или перекрутилось между собой; В машине мало вещей: одна или две; В машине слишком много белья. |
Инструкция |
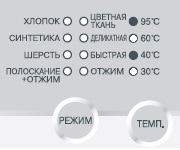
Загораются индикаторы всех режимов стирки + нижний и второй сверху индикатор температуры. |
HE |
Не нагревается вода. |
Неправильно подключили машину к электросети; Не работает нагреватель (ТЭН) стирки; Не работает нагреватель (ТЭН) сушки. |
Инструкция |

Загораются индикаторы всех режимов стирки + два центральных индикатора температуры. |
||||
Загораются индикаторы всех режимов стирки + все индикаторы температуры. |
DE |
Дверца люка не закрыта. |
Неплотно закрыта дверца люка; Не работает механизм закрытия дверцы люка. |
Инструкция |

Загораются индикаторы всех режимов стирки + три нижних индикатора температуры. |
1Е |
Нет сигнала от датчика уровня воды. |
Поврежден датчик или его проводка. |
Инструкция |

Загораются индикаторы всех режимов стирки + верхний индикатор температуры. |
4C2 |
В машину заливается горячая вода — выше 50 °С. |
Заливной шланг подключен к крану горячей воды. |
Инструкция |
Загораются индикаторы всех режимов стирки + нижний и верхний индикатор температуры. |
LE |
Из машины самопроизвольно сливается вода. |
Низко лежит сливной шланг; Сливной шланг неправильно подключили к канализации; Есть отверстие или трещина в баке, из которого вытекает вода; Вода вытекает из бункера (контейнера) для порошка или из сливного шланга (при его повреждении). |
Инструкция |

Загораются индикаторы всех режимов стирки + верхний и второй снизу индикатор температуры. |
Нет сигнала от таходатчика (измеряет частоту вращения барабана) |
Поврежден датчик или его проводка. |
Позвоните в службу поддержки. |
|
Загораются индикаторы всех режимов стирки + два нижних и верхний индикатор температуры. |
BE |
Не работают кнопки / кнопка на панели управления. |
Западают («залипают») пластиковые кнопки на панели управления. |
Позвоните в службу поддержки. |
Загораются индикаторы всех режимов стирки + два нижних и верхний индикатор температуры. |
TE |
Нет сигнала от датчика температуры. |
Поврежден датчик или его проводка. |
Инструкция |
SQL Server 2017 Developer on Windows SQL Server 2017 Enterprise on Windows SQL Server 2017 Enterprise Core on Windows SQL Server 2017 Standard on Windows Еще…Меньше
Проблемы
Предположим, что вы используете группы доступности AlwaysOn в SQL Server 2017. Может возникнуть нарушение прав доступа, и Перемещение данных приостановлено для баз данных в группе доступности. Кроме того, в журнале ошибок SQL Server могут выводиться сообщения об ошибках, аналогичные указанным ниже.
Данные групп доступности SPID = » Дата и время » для базы данных «SSISDB» приостановлены по следующей причине: «System» (идентификатор источника #; Строка источника: «#»). Чтобы возобновить движение данных в базе данных, необходимо возобновить базу данных вручную. Сведения о том, как возобновить работу базы данных доступности, можно найти в книге SQL Server Books Online.
Ошибка: 3313, серьезность: 21, состояние: 2.
Код SPID для даты и времени при выполнении операции с журналом в базе данных «SSISDB» произошла ошибка, связанная с идентификатором записи в журнал (638:319687:1). Как правило, в журнале ошибок операционной системы предварительно заносится сообщение об ошибке. Восстановите базу данных из полной резервной копии или восстановите базу данных.
Статус
Корпорация Майкрософт подтверждает наличие этой проблемы в своих продуктах, которые перечислены в разделе «Применяется к».
Решение
Эта проблема устранена в следующем накопительном обновлении SQL Server:
-
Накопительное обновление 14 для SQL Server 2017
Сведения о накопительных обновлениях для SQL Server.
Все новые накопительные обновления для SQL Server содержат все исправления и все исправления для системы безопасности, которые были включены в предыдущий накопительный пакет обновления. Ознакомьтесь с самыми последними накопительными обновлениями для SQL Server.
-
Последнее накопительное обновление для SQL Server 2017
Ссылки
Сведения о терминология , которую корпорация Майкрософт использует для описания обновлений программного обеспечения.
Нужна дополнительная помощь?
Нужны дополнительные параметры?
Изучите преимущества подписки, просмотрите учебные курсы, узнайте, как защитить свое устройство и т. д.
В сообществах можно задавать вопросы и отвечать на них, отправлять отзывы и консультироваться с экспертами разных профилей.
Error Messages appear on the control panel display to indicate the machine’s status or errors. Refer to the tables below to understand the messages and their meaning, and correct the problem, if necessary.
CLP Series Codes
| Error Message | Solution |
|---|---|
| [yyy] Cassette Out | The tray cassette is not properly closed. To close the tray, lower the rear edge align it with the slot, and slide it into the printer. |
| [yyy] Paper Empty | There is no paper in the tray. Load paper in the tray. |
| ADC Not Confirm Error | There is a problem in the ADC (Analog to Digital Converter) of your machine. Unplug the power cord and plug it back in. If the problem persists, contact the service representatives. |
| ADC Slope Error Cycle Power | The temperature slope for ADC (Analog to Digital Converter) shows the value out of the normal range. Unplug the power cord and plug it back in. If the problem persists, contact the service representatives. |
| Adjusting… Registration | The machine is adjusting the color registration. Please, wait a few minutes. |
| CTD Calibration Error | The CTD (Color Toner Density) Calibration has invalid value. Unplug the power cord and plug it back in. If the problem persists, contact the service representatives. |
| Deve Motor Locked | There is a problem with the deve motor which moves the toner supply device. Unplug the power cord and plug it back in. If the problem persists, contact the service representatives. |
| Door Open | The front cover or the top cover is not securely latched. Close the cover until it locks into place. |
| Duplex Jam 0 Check Inside | Paper has jammed during duplex printing. It is applicable only for the machine with this feature. Clear the jam. |
| Duplex Jam 1 Open/Close Door | Paper has jammed during duplex printing. It is applicable only for the machine with this feature. Clear the jam. |
| Duplex Jam 2 Check Inside | Paper has jammed during duplex printing. It is applicable only for the machine with this feature. Clear the jam. |
| Fuser Fan Locked | There is a problem with the fan for the fuser unit. Unplug the power cord and plug it back in. If the problem persists, contact the service representatives. |
| Humidity Open Cycle Power | The humidity exceeds the normal range. Unplug the power cord and plug it back in. If the problem persists, contact the service representatives. |
| Humidity Out Cycle Power | The humidity is fell under the normal range. Unplug the power cord and plug it back in. If the problem persists, contact the service representatives. |
| Inner Temp. Open Cycle Power | The inner temperature of the machine is over the normal range. |
| Inner Temp. Short Cycle Power | The inner temperature of the machine is under the normal range. Unplug the power cord and plug it back in. If the problem persists, contact the service representatives. |
| Install Transfer Belt | The transfer belt is not installed. Install a Samsung-genuine transfer belt. |
| Install Toner | The color toner cartridge which the arrow indicates is not installed. Install the corresponding toner cartridge with a Samsung-genuine cartridge. |
| Invalid Toner | The color toner cartridge which the arrow indecates is not suitable for your machine. Install the corresponding toner cartridge with a Samsung-genuine cartridge. |
| Invalid Transfer Belt | The transfer belt is not for your machine. Install the Samsung-Invalid genuine transfer belt for your machine. |
| IP Conflict | The network IP address you have set is being used by someone else. Check the IP address and reset it if necessary. |
| Load Manually Press Stop Key | The multi-purpose tray is empty in manual feed mode. |
| Load [xxx] In [yyy] | There is no correspondingpaper in the corresponding tray. Load corresponding paper in the corresponding tray. |
| Low Heat Error Cycle Power | The fuser unit is low-heated. Unplug the power cord and plug it back in. If the problem persists, contact the service representatives. |
| Low Power | The machine is in the previous stage of the power save mode. When data is received, it switches to on-line automatically. |
| LSU C-Hsync Err. Cycle Power | There is a problem in the laser beam detecting device of the LSU (Laser Scanning Unit). Unplug the power cord and plug it back in. If the problem persists, contact the service representatives. |
| LSU C-Motor Err. Cycle Power | There is a problem in the LSU (Laser Scanning Unit) motor. Unplug the power cord and plug it back in. If the problem persists, contact the service representatives. |
| LSU Hsync Error Cycle Power | There is a problem in the laser beam detecting device of the LSU (Laser Scanning Unit). Unplug the power cord and plug it back in. If the problem persists, contact the service representatives. |
| LSU M-Hsync Err. Cycle Power | There is a problem in the laser beam detecting device of the LSU (Laser Scanning Unit). Unplug the power cord and plug it back in. If the problem persists, contact the service representatives. |
| LSU M-Motor Err. Cycle Power | There is a problem in the LSU (Laser Scanning Unit) motor. Unplug the power cord and plug it back in. If the problem persists, contact the service representatives. |
| LSU Motor Error Cycle Power | There is a problem in the LSU (Laser Scanning Unit) motor. Unplug the power cord and plug it back in. If the problem persists, contact the service representatives. |
| LSU Y-Hsync Err. Cycle Power | There is a problem in the laser beam detecting device of the LSU (Laser Scanning Unit). Unplug the power cord and plug it back in. If the problem persists, contact the service representatives. |
| LSU Y-Motor Err. Cycle Power | There is a problem in the LSU (Laser Scanning Unit) motor. Unplug the power cord and plug it back in. If the problem persists, contact the service representatives. |
| Main Motor Locked | There is a problem with the main motor for the machine. Unplug the power cord and plug it back in. If the problem persists, contact the service representatives. |
| MP Tray Paper Jam 0 | Paper has jammed in the multi-purpose tray. Clear the jam. |
| New Fuser Error | The problem has occurred in the newly installed fuser unit. Unplug the power cord and plug it back in. If the problem persists, contact the service representatives. |
| Non Genuine Toner | The color toner cartridge which the arrow indecates may be recycled-toner. Install the corresponding toner cartridge with a Samsung-genuine cartridge. |
| Open Heat Error Cycle Power | The temperature for the fuser unit is over the normal range. Unplug the power cord and plug it back in. If the problem persists, contact the service representatives. |
| Outer Temp.Open Cycle Power | The outer temperature of the machine is over the normal range. Unplug the power cord and plug it back in. If the problem persists, contact the service representatives. |
| Outer Temp.Short Cycle Power | The outer temperature of the machine is under the normal range. Unplug the power cord and plug it back in. If the problem persists, contact the service representatives. |
| Over Heat Error Cycle Power | The fuser unit is overheated. Unplug the power cord and plug it back in. If the problem persists, contact the service representatives. |
| Paper Jam 1 Open/Close Door | Paper has jammed inside the machine. Clear the jam. |
| Paper Jam 2 Check Inside | Paper has jammed in the paper exit area. Clear the jam. |
| Remove Jam Open/Close Door | Paper has jammed in the fuser area. Clear the jam. |
| Replace Fuser | The life of the fuser unit is expired. Replace the fuser unit with a new one. Please, contact the service representatives. |
| Replace Fuser Soon | The life of the fuser unit will be expired soon. Replace the fuser unit with a new one. Please, contact the service representatives. |
| Replace Toner | This message appears between Toner Low and Toner Empty. Replace the corresponding toner cartridge with a Samsung-genuine cartridge. The arrow indicates which color toner cartridge has to be replaced. |
| Replace Transfer Belt | The life of the transfer belt is expired. Replace the fuser unit with a new one. Please, contact the service representatives |
| Replace Transfer Belt Soon | The life of the transfer belt will be expired soon. Replace the transfer belt with a new one. Please, contact the service representatives. |
| Replace tray Pick-Roller | The life of the tray pick-roller expired. Replace the fuser unit with a new one. Please, contact the service representatives. |
| Self Diagnostics LSU | The LSU (Laser Scanning Unit) in your machine is checking some problems detected. Please, wait a few minutes. |
| Self Diagnostics Temperature | The engine in your machine is checking some problemd detected. Please, wait a few minutes. |
| Sleeping… | The machine is in the power save mode. When data is received, it switches to on-line automatically. |
| System Fan Locked | There is a problem with the main fan for the machine. Unplug the power cord and plug it back in. If the problem persists, contact the service representatives. |
| Thermistor Open Cycle Power | There is a problem in the temperature sensing device for the fuser unit. This device detects value over the normal value range. Unplug the power cord and plug it back in. If the problem persists, contact the service representatives. |
| Thermistor Short Cycle Power | There is a problem in the temperature sensing device for the fuser unit. This device detects value under the normal value range. Unplug the power cord and plug it back in. If the problem persists, contact the service representatives. |
| Toner Empty | The color toner cartridge which the arrow indicates has run out. Replace the corresponding toner cartridge with a Samsung-genuine cartridge. |
| Toner Low | The color toner cartridge which the arrow indicates is almost empty. Take out the corresponding toner cartridge and thoroughly shake it. By doing this, you can temporarily reestablish printing operations. |
| Tray 2 Paper Jam 0 | Paper has jammed in the optional tray. Clear the jam. |
MFP CLX Series Codes
Some messages may not appear on the display depending on the options or models
| Error Codes | Error Message |
|---|---|
| A1-1210 | Actuator Motor Failure : #A1-1210. Call for service if the problem persists. |
| A1-2112 | Actuator Motor Failure : #A1-2112. Call for service if the problem persists. |
| A1-3612 | Actuator Motor Failure : #A1-3612. Call for service if the problem persists. |
| A1-4111 | Actuator Motor Failure : #A1-4111. Call for service if the problem persists. |
| A1-4112 | Actuator Motor Failure : #A1-4112. Call for service if the problem persists. |
| A1-4310 | Actuator Motor Failure : #A1-4310. Call for service if the problem persists. |
| A2-1210 | Actuator Fan Failure : #A2-1210. Call for service if the problem persists. |
| A2-2110 | Actuator Fan Failure : #A2-2110 . Call for service if the problem persists. |
| A3-3211 | Actuator Sensor Failure #A3-3211: Call for service if the problem persists. |
| A3-3212 | Actuator Sensor Failure #A3-3212: Call for service if the problem persists. |
| A3-3311 | Actuator Sensor Failure #A3-3311: Call for service if the problem persists. |
| A3-3312 | Actuator Sensor Failure #A3-3312: Call for service if the problem persists |
| A3-3320 | Not proper room temperature. Change room temperature. |
| C2-2110 | Prepare new yellow toner cartridge. |
| C2-2120 | Replace with new yellow toner cartridge. |
| C2-2150 | Replace with new yellow toner cartridge. |
| C2-2320 | Yellow Toner Failure: #C2-2320. Install yellow toner cartridge again. |
| C2-2410 | Install yellow toner cartridge. |
| C2-2512 | Yellow toner cartridge is not compatible. Check user’s guide. |
| C2-3110 | Prepare new magenta toner cartridge. |
| C2-3120 | Replace with new magenta toner cartridge. |
| C2-3150 | Replace with new magenta toner cartridge. |
| C2-3320 | Magenta Toner Failure: #C2-3320. Install magenta toner cartridge again. |
| C2-3410 | Install magenta toner cartridge. |
| C2-3512 | Magenta toner cartridge is not compatible. Check user’s guide |
| C2-4110 | Prepare new cyan toner cartridge. |
| C2-4120 | Replace with new cyan toner cartridge. |
| C2-4150 | Replace with new cyan toner cartridge. |
| C2-4320 | Cyan Toner Failure: #C2-4320. Install cyan toner cartridge again |
| C2-4410 | Install cyan toner cartridge. |
| C2-4512 | Cyan toner cartridge is not compatible. Check user’s guide. |
| C2-5110 | Prepare new black toner cartridge |
| C2-5120 | Replace with new black toner cartridge. |
| C2-5150 | Replace with new toner cartridge.Replace with black new toner cartridge. |
| C2-5320 | Black Toner Failure: #C2-5320. Install black toner cartridge again. |
| C2-5410 | Install black toner cartridge. |
| C2-5512 | Black toner cartridge is not compatible. Check user’s guide. |
| C5-1110 | Prepare new transfer belt unit. |
| C5-1120 | Replace new transfer belt unit |
| C5-1310 | Install image transfer belt unit |
| C5-1410 | Image transfer belt unit is not compatible. Check users guide |
| C5-1710 | Sensor Failure: #C5-1710. Turn off then on |
| C6-1110 | Prepare new fuser unit. |
| C6-1120 | Replace with new fuser unit. |
| C7-1110 | Waste toner container is almost full. Order new one. |
| C7-1311 | Waste toner containrt is not installed. Install it. |
| C9-1112 | Replace with new Tray1 pickup roller. |
| C9-1116 | End of life, Replace with new Tray1 retard roller. |
| M1-1110 | Paper jam in tray 1. |
| M1-5112 | Paper is empty in tray 1. Load paper. |
| M2-1110 | Paper jam inside of machine. |
| M2-1116 | Paper jam or empty in tray. |
| M3-1110 | Paper jam in exit area |
| M3-2130 | Too much paper in output bin tray. Remove printed paper |
| S2-4120 | Door is open. Close it. |
| S3-3121 | Scanner locked or another problem occurred.(No Switch Case)Scanner is locked |
| S4-2111 | Fax Memory is almost full. Print or remove received fax Job |
| S4-2112 | Fax memory is full. Print or remove received fax Job |
| S4-3111 | Fax System Failure: #S4-3111. Install fax modem card again. |
| S5-3110 | UI System Failure: #S5-3110. Call for service |
| S6-3123 | This IP address conflicts with that of other system. Check it. |
| S6-3128 | 802.1x authentication failed. Please Contact the System Administrator |
| U1-2132 | Fuser Unit Failure #U1-2132: Turn off then on. |
| U1-2315 | Fuser Unit Failure: #U1-2315.Turn off then on |
| U1-2320 | Fuser Unit Failure #U1-2320: Turn off then on. |
| U1-2330 | Fuser Unit Failure #U1-2330: Turn off then on. |
| U1-2334 | Fuser Unit Failure: #U1-2334. Turn off then on |
| U1-2340 | Fuser Unit Failure : #U1-2340.Turn off then on. |
| U1-234H | Fuser Unit Failure: #U1-234H. Please turn off then on |
| U2-6122 | LSU Failure: #U2-6122. Please turn off then on. |
| U2-6142 | LSU Failure: #U2-6142. Please turn off then on. |
| U3-3113 | Original paper jam in front of scanner |
| U3-3114 | Original paper jam in front of scanner |
| U3-3313 | Original paper jam inside of scanner. |
| U3-3314 | Original paper jam inside of scanner |
| U3-4110 | Door of scanner is open. |
Troubleshooting Checklist
Check: Check the power cord and the power switch.
Solution: Check the power source by plugging into another outlet.
Check: Make sure that the On Line/Error LED is on.
Solution: In the Ready mode, the On Line/Error LED lights green. If the On Line/Error LED lights red or blinks.
Check: Press and hold the Cancel button to print a demo page.
Solution:
- If a demo page does not print, check the paper supply in the input tray.
- If the paper jams in the printer, go to “Clearing Paper Jams”
Check: Print a short document from a software application to verify that the computer and printer are connected and are communicating correctly.
Solution:
- If the page does not print, check the cable connection between the printer and the computer.
- Check the print queue or print spooler to see if the printer has been paused.
- Check the software application to ensure you are using the proper printer driver and communication port.
Problem: The Printer does not print
Solution:
- The printer is not receiving power. Check the power cord connections. Check the power switch and the power source.
- The printer is not selected as the default printer. Select Samsung ML-1710 Series in the Printer folder in Windows as your default printer
- Check the printer for the following: • The printer cover is not closed. • Paper is jammed. • No paper is loaded. • The toner cartridge is not installed. If a printer system error occurs, contact your service representative.
- The printer may be in Manual Feed mode. Add paper to the manual feeder and press the Cancel button on the printer’s control panel to begin printing.
- The connection cable between the computer and the printer is not connected properly. Disconnect the printer cable and reconnect it.
- The connection cable between the computer and the printer is defective. If possible, attach the cable to another computer that is working properly and print a job. You can also try using a different printer cable.
- The port setting is incorrect. Check the Windows printer setting to make sure that the print job is sent to the correct port (for example, LTP1). If the computer has more than one port, make sure that the printer is attached to the correct one.
- The printer may be configured incorrectly. Check the printer properties to ensure that all print settings are correct.
- The printer driver may be incorrectly installed. Reinstall the printer driver.
- The printer is malfunctioning. Check the LEDs on the control panel to determine if the printer is indicating a system error.
Why is my Samsung printer in error state?
Problems with «printer in error state» are frequently resolved by restarting both computers and printers at the same time. Your printer and computer should be turned off completely. Wait a few minutes before turning them back on to see if the issue has been resolved.
What is error a1 411 on Samsung printer?
This problem is with the small blue solenoid in the upper left corner.
Manuals
Samsung Color Laser MFP CLX-8640/8650 series CLX-8640ND, CLX-8650ND Service Manual PDF
Samsung CLP-320 Series Printer Manual PDF
- Author
- Recent Posts

FindErrorCode.com is a reputable error code provider firm. The main challenges are fault code and a problem-solving blog. We’ve written articles to address your concerns. Do not forget to write to us the fault codes that you cannot find. Appliance Expert contact: dylanjoseph@finderrorcode.com Call: 916-954-2677

Samsung refrigerators are known for their reliability and cutting-edge technology, but like all appliances, they can sometimes experience issues. One way to troubleshoot and fix problems with your Samsung refrigerator is to check for error codes. Error codes are displayed on the refrigerator’s control panel and can indicate a variety of issues, from a faulty sensor to a problem with the main board.
In this article, we will go over the most common error codes for SAMSUNG RS, RH, and RF series refrigerators and provide some easy steps for troubleshooting and fixing the issue.
SAMSUNG Refrigerator SELF-DIAGNOSIS Mode
How to place the refrigerator into self-diagnosis:
Press and hold “Energy Saver” + “Lighting” Buttons for 8 seconds to enter the Self-Diagnosis Mode.
How to exit self-diagnosis:
- Method 1: After 30 seconds, the unit will exit Self-Diagnosis Mode automatically.
- Method 2: Unplug the appliance.
1C, 1E, 1: Freezer sensor error
Causes:
- This error code occurs:
- When the main board detects Sensor Open or Shorted.
- When the sensor pickup temp is over +122°F/+50°C or under -58F/-50°C.
- Misplaced Wires.
- Faulty freezer sensor.
- Faulty Main PCB.
Solutions:
Unplug the refrigerator and:
- Remove the connector from Main PCB and check sensor resistance, refer to sensor temperature chart.
- Replace the sensor If reading is out of range, the circuit is open or shorted.
- Check voltage of the freezer sensor at the Main PCB connector should be within 4.5 Vdc ~ 1.0 Vdc.
- If 0 Vdc occurs, replace the Main PCB.
| Electric part name | Temperature | Ohmic value | Voltage value |
|---|---|---|---|
| Freezer sensor | 25°C/77°F | ~5 KΩ | ~1.6 Vdc |
2C, 2E: Fridge Sensor error.
Causes:
- This error code occurs:
- When the main board detects Sensor Open or Shorted.
- When the sensor pickup temp is over +122°F/+50°C or under -58F/-50°C.
- Misplaced Wires.
- Faulty fridge Sensor.
- Faulty Main PCB.
Solutions:
Unplug the refrigerator and:
- Check Resistance at the Sensor.
- Replace the sensor If reading is out of range, the circuit is open or shorted.
- Check voltage of the fridge sensor at the Main PCB connector should be within 4.5 Vdc ~ 1.0 Vdc.
- If 0 Vdc occurs, replace the Main PCB.
| Electric part name | Temperature | Ohmic value | Voltage value |
|---|---|---|---|
| Fridge sensor | 20°C/68°F | ~6 KΩ | ~1.9 Vdc |
4C, 4E: Freezer defrost sensor error.
Causes:
- This error code occurs:
- When the main board detects Sensor Open or Shorted.
- When the sensor pickup temp is over +122°F/+50°C or under -58F/-50°C.
- Faulty freezer defrost sensor.
- Faulty main PCB.
Solutions:
Unplug the refrigerator and:
- Remove the connector from Main PCB and check sensor resistance, refer to the sensor table.
- Replace the sensor If reading is out of range, the circuit is open or shorted.
- Check voltage of the freezer defrost sensor at the Main PCB connector should be within 4.5 Vdc ~ 1.0 Vdc.
- If 0 Vdc occurs, replace the Main PCB.
| Electric part name | Temperature | Ohmic value | Voltage value |
|---|---|---|---|
| Freezer defrost sensor | 0°C/32°F | ~13 KΩ | ~3 Vdc |
5C, 5E: Fridge Defrost sensor error.
Causes:
- This error code occurs:
- When the main board detects Sensor Open or Shorted.
- When the sensor pickup temp is over +122°F/+50°C or under -58F/-50°C.
- Defective fridge Defrost Sensor
- Defective main PCB
Solutions:
Unplug the refrigerator and:
- Check Resistance at the sensor.
- Replace the sensor If reading is out of range, the circuit is open or shorted.
- Check voltage of the fridge defrost sensor at the Main PCB connector should be within 4.5 Vdc ~ 1.0 Vdc.
- If 0 Vdc occurs, replace the Main PCB.
| Electric part name | Temperature | Ohmic value | Voltage value |
|---|---|---|---|
| Fridge Defrost sensor | 10°C/50°F | ~8.9 KΩ | ~2.4 Vdc |
6C, 6E: Ambient sensor error.
Causes:
- This error code occurs when systems detect sensor open or shorted.
- Damaged ambient Sensor
- Damaged main PCB
Solutions:
Unplug the refrigerator and:
- Remove the connector from Main PCB and check sensor resistance.
- Replace the sensor If reading is out of range, the circuit is open or shorted.
- Check voltage of the ambient sensor at the Main PCB connector should be within 4.5 Vdc ~ 1.0 Vdc.
- If 0 Vdc occurs, replace the Main PCB.
| Electric part name | Temperature | Ohmic value | Voltage value |
|---|---|---|---|
| Ambient sensor | 28°C/82°F | ~4.5 KΩ | ~1.5 Vdc |
7C, 7E, 9C, 9E: Pantry sensor error (Flex Crisper / Flex room sensor error).
Causes:
- This error code occurs:
- When the main board detects Sensor Open or Shorted.
- When the sensor pickup temp is over +122°F/+50°C or under -58F/-50°C.
- Damaged pantry Sensor.
- Damaged main PCB.
Solutions:
Unplug the refrigerator and:
- Check resistance at the Pantry Sensor.
- Replace the sensor If reading is out of range, the circuit is open or shorted.
- Check voltage of the pantry sensor at the Main PCB connector should be within 4.5 Vdc ~ 1.0 Vdc.
- If 0 Vdc occurs, replace the Main PCB.
| Electric part name | Temperature | Ohmic value | Voltage value |
|---|---|---|---|
| Pantry sensor | 16°C/60°F | ~7 KΩ | ~2 Vdc |
8C, 8E: Ice maker sensor error.
Causes:
- This error code occurs:
- When the main board detects Sensor Open or Shorted.
- When the sensor pickup temp is over +122°F/+50°C or under -58F/-50°C.
- Defective ice Maker Sensor.
- Defective main PCB.
Solutions:
Unplug the refrigerator and:
- Check Resistance at the Ice maker sensor connector.
- Replace the sensor If reading is out of range, the circuit is open or shorted.
- Check voltage of the ice maker sensor at the Main PCB connector should be within 4.5 Vdc ~ 1.0 Vdc.
- If 0 Vdc occurs, replace the Main PCB.
| Electric part name | Temperature | Ohmic value | Voltage value |
|---|---|---|---|
| I.M sensor | -10°C/14°F | ~20.5 KΩ | ~3.3 Vdc |
11C, 11E: Flex room defrost sensor error.
Causes:
- This error code occurs:
- When the main board detects Sensor Open or Shorted.
- When the sensor pickup temp is over +122°F/+50°C or under -58F/-50°C.
- Faulty flex Room Defrost Sensor.
- Faulty main PCB.
Solutions:
Unplug the refrigerator and:
- Look for any ice buildup at the CV compartment.
- Check Flex room -DEF Heater Resistance at the Main PCB measuring resistance value:
- 0Ω: Short trouble.
- ∞Ω: Open (bimetal, heater).
| Electric part name | Temperature | Ohmic value |
|---|---|---|
| Flex room – Defrost Heater | – | ~63 Ω |
| Bimetal | 40°C/104°F | 0.1 Ω |
| Bimetal | 60°C/140°F | ∞ Ω/OL |
- Remove the connector from Main PCB and check sensor resistance, refer to the sensor table.
- Replace the sensor If reading is out of range, the circuit is open or shorted.
- Check voltage of the flex room defrost sensor at the Main PCB connector should be within 4.5 Vdc ~ 1.0 Vdc.
- If 0 Vdc occurs, replace the Main PCB.
| Electric part name | Temperature | Ohmic value | Voltage value |
|---|---|---|---|
| Flex room defrost sensor | 7°C/45°F | ~9.9 KΩ | ~2.5 Vdc |
13C, 13E: Humidity sensor error.
Causes:
- This error code occurs:
- When systems detect Sensor Open or Shorted.
- When the sensor pickup temp is over +50 °C or under -50 °C.
- Broken Humidity sensor.
- Defective Main PCB.
Solutions:
Unplug the refrigerator and:
- The voltage between the Main PCB should be within the 4.5V~1.0V range.
- If 0 Vdc occurs, replace the Main PCB.
- Check if the humidity sensor is normal and check the wire and housing connections.
- Checking Humidity Sensor Resistance: Comparison with the value of temperature table after measurement.
- Measuring point of resistance value according to Sensor.
- 0Ω: Short trouble.
- ∞Ω: Open trouble.
| Electric part name | Humidity temp. | Humidity RH | Voltage value |
|---|---|---|---|
| Humidity sensor | 23°C/73°F | 60 % | ~2.6 Vdc |
16C, 16E: Fridge humidity sensor error.
Causes:
- This error code occurs:
- When systems detect Sensor Open or Shorted.
- When the sensor pickup temp is over +50 °C or under -50 °C, Error occurs.
- Faulty fridge humidity sensor.
- Defective main PCB.
Solutions:
Unplug the refrigerator and:
- The voltage between the Main PCB should be within the 4.5V~1.0V range.
- If 0 Vdc occurs, replace the Main PCB.
- Check if the fridge humidity sensor is normal and check the wire and housing connections. Replace the PBA if necessary.
- Checking Fridge humidity sensor resistance: Comparison with the value of temperature table after measurement (Same method applied to other sensors).
- Measuring point of resistance value according to Sensor.
- 0Ω: Short trouble.
- ∞Ω: Open trouble.
| Electric part name | Room temp. | Humidity RH | Voltage value |
|---|---|---|---|
| Fridge humidity sensor | 23°C/73°F | 60 % | ~2.6 Vdc |
21C, 21E: Freezer fan error.
Causes:
- Moisture buildup can cause corrosion of the socket connector pins in the fan of the freezer compartment; As a result, it causes a lack of contact between the main board and freezer fan.
- Faulty freezer fan.
- Faulty main PCB.
Solutions:
Unplug the refrigerator and:
- Check the fan wire harness.
- Check voltage of the Freezer Fan motor at the Main PCB connector.
- If 0 Vdc occurs, replace the Main PCB.
- Check fan feedback voltage at main PCB.
- When 0 Vdc occurs, verify if the fan motor is blocked with any ice buildup, if the error still occurs replace the freezer fan motor.
| Electric part name | Main voltage value | Feedback Voltage value |
|---|---|---|
| Freezer fan | ~12 Vdc | ~2.6 Vdc |
22C, 22E: Fridge room fan error.
Causes:
- Moisture buildup can cause corrosion of the socket connector pins in the fan of the refrigerator compartment; As a result, it causes a lack of contact between the main board and fridge fan.
- Faulty fridge room fan.
- Faulty main PCB.
Solutions:
Unplug the refrigerator and:
- Check the wire harness connector between the fan and main PCB.
- Check voltage of the Fridge Room Fan motor at the Main PCB connector.
- If 0 Vdc occurs, replace the Main PCB.
- Check fan feedback voltage at main PCB.
- When 0 Vdc occurs, verify for some form of blockage at the fan, and remove the blockage, if the error still occurs replace the fridge room fan motor.
| Electric part name | Main voltage value | Feedback Voltage value |
|---|---|---|
| Fridge room fan | ~12 Vdc | ~2.6 Vdc |
23C, 23E: Condenser fan error.
Causes:
- Broken wire harness of the condenser fan.
- Faulty condenser fan.
- Faulty main PCB.
Solutions:
Unplug the refrigerator and:
- Check the wire harness connector between the fan and main PCB.
- Check voltage of the Condenser Fan motor at the Main PCB connector.
- If 0 Vdc occurs, replace the Main PCB.
- Check fan feedback voltage at main PCB.
- When 0 Vdc occurs, verify for some form of blockage at the fan, if the error still occurs replace the condenser fan motor.
| Electric part name | Main voltage value | Feedback Voltage value |
|---|---|---|
| Condenser fan | ~12 Vdc | ~2.6 Vdc |
24C, 24E: Freezer defrost error.
Causes:
- Damaged wire harness.
- FRZ Defrost Heater Circuit Open or Shorted.
- Faulty Main PCB.
Solutions:
Unplug the refrigerator and:
- Check for 120 Volts AC from Connector.
- If voltage is present, initiate a Forced Defrost (FD). Voltage should drop to 0 Vac
- If voltage drops to 0 Vac the defrost circuit operates normally when forced
- If defrost system has not worked (frost on evaporator) replace Main PCB
- If 120 VAC is not present, check the defrost circuit. Remove Power.
- At the Main PCB, check resistance from Connector to the short prong on the line cord. You are checking the heater, bimetal and thermo-fuse, normal reading is:
| Electric part name | Temperature | Ohmic value | Abnormal value |
|---|---|---|---|
| Freezer defrost heater | – | ~63 Ω | ~ 0.1 – 1.0 Ω/∞ Ω/OL |
| Bimetal | 40°C/104°F | ~ 0.1 – 1.0 Ω | ∞ Ω/OL |
| Bimetal | 60°C/140°F | ∞ Ω/OL | ~ 0.1 – 1.0 Ω |
| Thermal fuse | 100°C/212°F | 0.1 Ω | ∞ Ω/OL |
- If resistance is higher than normal or circuit is open, remove the FRE evaporator cover and check the heater and bimetal.
- Defrost heater should read ~61Ω. and the bimetal and thermo-fuse should read closed.
- Replace the defective component based on your readings.
- Replace main PCB.
25C, 25E: Fresh food defrost heater error / Fridge defrost heater error.
An error is displayed when the defrost sensor fails to terminate defrost after 1 hour, indicating a partial defrost cycle.
Causes:
- Faulty wire harness.
- Faulty thermal-fuse.
- Faulty bimetal.
- Faulty defrost heater.
- Faulty main PCB
Solutions:
Unplug the refrigerator and:
- Check the heater.
- Normal reading is ~120Ω.
- Check the bimetal.
- It should read closed.
- Check the Thermal-Fuse.
- It should read closed.
- Replace the defective component based on your readings.
- Check the main PCB, replace it if necessary.
26C, 26E: Cubed Ice Maker function error.
Causes:
- This code error occurs when systems detect faulty Ice Maker function more than 3 times.
- Samsung refrigerator Ice Maker Assembly.
Solutions:
Unplug the refrigerator and:
- Check the Ice Maker assembly for any Ice buildup or obstruction.
- Press the Ice maker test button to cycle the Ice Maker and test the functionality.
- Replace the Ice maker if necessary.
- After pressing the Ice Maker Test Switch button if the Ice Maker does not start turning. Check 12VDC on IM motor clock wise turn.
- If no voltage is detected check the wire harness and Main PCB.
29C, 29E: Flex Zone defrost control error.
Causes:
- Faulty Defrost Function.
- Faulty Flex Zone Defrost Heater.
- Misplaced Wire/Bimetal Defrost Thermostat.
- Defective Main PCB.
Solutions:
Unplug the refrigerator and:
- Run the Unit into the Forced Defrost Function (Fd).
- Check Heater voltage at the case Connector AC should be within 120VAC.
- If 0 VAC replace the Main PCB.
- Disconnect wire harness Red Connector to check Heater and check Resistance within 63Ω – 230 ohm.
- Measure the Freezer Wire/Bimetal Defrost Thermostat Continuity
- Measure the Heater Terminal Continuity.
- If Open or Shorted replace the complete Heater.
- Check the F-Def Heater Fuse PCB Box for Continuity if open replace the Fuse Board.
31C, 31E: Flex Zone Fan Motor error (CV-Fan error).
Causes:
- Moisture buildup can cause corrosion of the socket connector pins in the fan of the flex zone; As a result, it causes a lack of contact between the main board and CV-fan.
- This error code occurs when the systems lose feedback signal from the CV-Zone Evaporator Fan Motor.
- Faulty Flex Zone Fan Motor.
- Faulty Main PCB.
Solutions:
Unplug the refrigerator and:
- Measure resistance of the Fan Motor if open or shorted replace the Fan Motor.
- Check voltage of Fan Motor at the Hinge white Connector on top of refrigerator should be within 12 Vdc.
- If 0 Vdc occurs, replace the Main PCB.
- Check Fan Motor Feedback 2.5 Vdc.
- If 0 Vdc occurs, make sure the Fan blades can turn freely from Ice buildup or any obstruction, replace it if necessary.
33C, 33E: Ice Maker Heater error.
Causes:
- The System Display error when open connection is detected from heater. Separation of Ice pipe heater housing part, contact error, disconnection, short circuit.
- Faulty harness connector.
- Faulty Ice Maker Heater.
- Faulty main PCB.
Solutions:
Unplug the refrigerator and:
- Disconnect Case Connector and check resistance at wire should be 135Ω.
- if 0Ω Heater Short
- if ∞/OL Ohm Check the wire.
41C, 44E: Display Communication error.
Causes:
- The System Display error when open connection is detected from heater. Separation of Ice pipe heater housing part, contact error, disconnection, short circuit.
- Faulty harness connector.
- Faulty Display Control Panel.
- Faulty main PCB.
Solutions:
Unplug the refrigerator and:
- Check the Display conditions.
- Replace the Main PCB.
44C,44E, 45C, 45E: Communication error between Main PCB and Inverter PCB.
Causes:
- Loose communication between Main PCB and Inverter PCB.
- Error may be caused by defective Inverter board, Connection Wires or defective Main PCB.
Solutions:
Unplug the refrigerator and:
- Check for any disconnected or shorted wires between the main PCB and inverter PCB.
- Check Inverter PCB’s Fuse Continuity.
- Replace Main PCB or Inverter PCB.
- After replacing Inverter PCB Wait 5 minutes for compressor to restart.
46C,46E: Communication error between Main PCB and I/O expander.
Causes:
- Internal Main PCB communication error.
Solutions:
Unplug the refrigerator and:
- Replace the Main PCB.
52C, 52E: Main WIFI module communication error.
Causes:
- Faulty WIFI Module.
- Main PCB.
Solutions:
Unplug the refrigerator and:
- Check for any disconnected or shorted wires between the main PCB and WIFI PCB.
- Check 12VDC at the WIFI module if no 12vdc replace Main PCB.
- Replace WIFI Module.
62C, 62E: Pantry fan error.
Causes:
- Faulty Pantry FAN motor.
- Faulty main PCB.
Solutions:
Unplug the refrigerator and:
- Check the wire harness connector between the fan and main PCB.
- Check voltage of the Condenser Fan motor at the Main PCB connector.
- If 0 Vdc occurs, replace the Main PCB.
- Check fan feedback voltage at main PCB.
- When 0 Vdc occurs, verify for some form of blockage at the fan, and remove the blockage or replace the pantry fan motor.
| Electric part name | Main voltage value | Feedback Voltage value |
|---|---|---|
| Pantry fan | ~12 Vdc | ~2.6 Vdc |
71C, 71E: Abnormal high Freezer temperature error.
Causes:
- The freezer temperature rises abnormally or when the Freezer door remains open for a while.
- Dirty condenser coils.
- Faulty 3-way valve.
Solutions:
Unplug the refrigerator and:
- When its door remains open for an extended time or at a high temperature food is stored.
- Close the door or take out the hot food. Then, after a while, the error will disappear.
- Check the freezer Sensor resistance and compare with the sensor temperature chart.
- Clean the condenser coils.
- sealed system repair ” freon leak, restricted capillary tube, 3-way valve….”
72C, 72E: Abnormal high fridge temperature error.
Causes:
- The Fridge temperature rises abnormally when the Refrigerator door remains open for a while.
- Dirty condenser coils.
- Faulty 3-way valve.
Solutions:
Unplug the refrigerator and:
- When its door remains open for an extended time or high temperature food is stored, close the door or take out the hot food. Then, after a while, the error will disappear.
- Check if the door is closing properly.
- Check the fridge Sensor and compare with the temperature chart.
- Clean the condenser coils.
- sealed system repair ” freon leak, restricted capillary tube, 3-way valve….”
73C, 73E: Abnormal high temperature of Flex Zone error.
Causes:
- The Flex Zone temperature rises abnormally or when the Fridge door remains open for a while.
- Dirty condenser coils.
- Faulty 3-way valve.
Solutions:
Unplug the refrigerator and:
- When its door remains open for an extended time or high temperature food is stored, close the door or take out the hot food. Then, after a while, the error will disappear.
- Clean the condenser coils.
- sealed system repair ” freon leak, restricted capillary tube, 3-way valve….”
76C, 76E: AutoFill infuser overflow error.
Causes:
- Faulty harness connector.
- Faulty autofill infuser sensor.
Solutions:
Unplug the refrigerator and:
- The error code is displayed when Over flow sensor is detected water: separation of Auto fill infuser system’s Overflow Sensor housing part, contact error disconnection, short circuit.
- Check voltage at the Main PCB:
- If 0Vdc ~ 4.5Vdc: Water overflow.
- If ~ 5Vdc: No problem.
77C, 77E: Camera error.
Causes:
- Faulty French assy.
- Camera hardware failure.
Solutions:
Unplug the refrigerator and:
- Check the wire harness connector.
- Check for 5 Vdc at French Assy connector.
- Check French Assy.
- Unstable USB terminal due to power noise.
79C, 79E: Showcase heater error.
Causes:
- Faulty harness connector.
- Faulty showcase heater.
Solutions:
Unplug the refrigerator and:
- Check the harness connector.
- Check the resistance of the showcase heater.
| Electric part name | Ohmic value |
|---|---|
| Showcase heater | ~ 14Ω |
81C, 81E: Compressor starting failure error (Inverter Board LED will be Blinking 1 time).
Causes:
- Faulty harness connector.
- Faulty inverter PCB.
- Faulty compressor.
Solutions:
Unplug the refrigerator and:
- Try resetting the unit by removing power then power on after 10 minutes.
- Check if there is a short between compressor terminals.
- Check if there is a short between IPM legs.
- Check the soldering status of the inverter PCB. (Check if any parts have short-circuited).
- Check the Compressor and the Cycle.
- If the Failure Condition is detected while the compressor is operating, stop the Compressor operating immediately and wait for 5 minutes. During these 5 minutes, the RPM command signal is not available. Even if the RPM command that orders the compressor to run is sent, the compressor does not work and keeps standing by.
- Check the inverter board, replace it if necessary.
- Check the compressor, replace it if necessary.
82C, 82E: Compressor IPM fault error (Inverter Board LED will be Blinking 2 times).
Causes:
- When the Compressor IPM Failure is detected.
- Faulty inverter board.
- Faulty compressor.
Solutions:
Unplug the refrigerator and:
- Short between Comp. U/V/W Inverter PCB.
- Short between IPM pins.
- Check Compressor and Cycle.
- After replacing or resetting the Inverter PCB give it 5 minutes for the Compressor to restart.
- Check the inverter board, replace it if necessary.
- Check the compressor, replace it if necessary.
83C, 83E: Abnormal Current pick up at Compressor error (Inverter Board LED will be Blinking 3 times).
Causes:
- When the abnormal Current is picked up at the Compressor.
- Faulty inverter board.
- Faulty compressor.
Solutions:
Unplug the refrigerator and:
- Disconnect Inverter PCB connector and check resistance between the wire’s U/V/W should be approx. 12Ω
- Check AC voltage should be between 96VAC~140VAC
- Check Compressor and Cycle.
- After replacing or resetting the Inverter PCB give it 5 minutes for the Compressor to restart.
- Check the inverter board, replace it if necessary.
- Check the compressor, replace it if necessary.
84C, 84E: Compressor Motor Restriction error (Inverter Board LED will be Blinking 4 times).
Causes:
- When the Compressor is restricted for more than 5 seconds.
- When the Comp runs at lower than 1000rpm for over 5 sec.
- Faulty inverter board.
- Faulty compressor.
Solutions:
Unplug the refrigerator and:
- Check Inverter PCB Connector.
- Check Compressor and Cycle.
- After replacing or resetting the Inverter PCB give it 5 minutes for the Compressor to restart.
- Check the inverter board, replace it if necessary.
- Check the compressor, replace it if necessary.
85C, 85E: Low Voltage Compressor error (Inverter Board LED will be Blinking 5 times).
Causes:
- When Low Voltage is detected at the Compressor.
- Faulty inverter board.
- Faulty compressor.
Solutions:
Unplug the refrigerator and:
- Check Inverter PCB Connector.
- Check Compressor and Cycle.
- After replacing or resetting the Inverter PCB give it 5 minutes for the Compressor to restart.
- Check the inverter board, replace it if necessary.
- Check the compressor, replace it if necessary.
86C, 86E: High Voltage compressor error (Inverter Board LED will be Blinking 6 times).
Causes:
- When High Voltage is detected at the Compressor.
- Faulty inverter board.
- Faulty compressor.
Solutions:
Unplug the refrigerator and:
- Check power to the compressor Higher than 150VAC at connector U, V, W.
- Check Compressor and Cycle.
- After replacing or resetting the Inverter PCB give it 5 minutes for the Compressor to restart.
- Check the inverter board, replace it if necessary.
- Check the compressor, replace it if necessary.
96C, 96E: Compressor IPM Shut down error (Inverter Board LED will be Blinking 1 or 2 times).
Causes:
- When the Compressor IPM Failure is detected.
Solutions:
Unplug the refrigerator and:
- Check the IPM temperature status of the inverter PCB.
- Check the heat-sink assembly status of the IPM
- Check the soldering status of the inverter PCB. (Check if any parts have short-circuited).
- Disconnect Inverter PCB connector and check resistance between the wire’s U, V and W should be approx. 12Ω
- Check AC voltage should be between 96VAC~140VAC.
- Check the inverter board, replace it if necessary.
- Check the compressor, replace it if necessary.
116C,116E, 117C, 117E: Ice Bites Maker Function error.
Causes:
- Faulty Ice Bites Maker assembly.
Solutions:
Unplug the refrigerator and:
- Check the Ice Maker conditions.
- Press the Ice maker test switch.
- Check the MAIN.
118C, 118E: Ice Pipe heater error.
Causes:
- The System Display error when open connection is detected from heater. Separation of Ice water pipe heater housing part, short circuit.
- Faulty ice pipe Heater.
Solutions:
Unplug the refrigerator and:
- Check if the ice pipe is clogged or Ice buildup.
- Check dc voltage to the water pipe heater at Main PCB CN90 should be 7v~12vdc.
- Check the ice pipe heater at the Main PCB should be about 62Ω.
- Press the Ice Maker test switch to check the ice maker function.
OF OF or O OF: Demo mode notification.
Cooling mode (also called shop mode), is designed for use by retailers when they are displaying refrigerators on the shop floor. In the cooling off mode, the refrigerator’s fan motor and lights work normally but the compressors do not run and the refrigerator and freezer cabinet do not get cold. Click here to find out more information about How to deactivate Cooling off mode or demo mode notification on your SAMSUNG Refrigerator.
Conclusion:
In conclusion; it is important to familiarize yourself with common error codes on your Samsung refrigerator, as they can help you diagnose and fix issues with your appliance. By following the troubleshooting steps outlined in this article, you may be able to resolve the problem yourself and keep your refrigerator running smoothly.
Find out more about SAMSUNG products error codes, learn more today.
Лазерный принтер Samsung M2070 выдает ошибку? Чтобы расшифровать код неисправности, воспользуйтесь рекомендациями специалистов сервисного центра MiraxPrint!
Будьте внимательны, если ошибки возникают на постоянной основе, обратитесь за квалифицированной помощью. Так вы обезопасите себя от дорогостоящего ремонта печатающего устройства.
Больше информации можно получить, позвонив по актуальным номерам телефонов или отправив запрос на электронную почту.
➦ Коды ошибок принтера Samsung M2070
Далее мы рассмотрим наиболее популярные ошибки Samsung M2070, которые даже неопытный пользователь может устранить своими руками.
| Номера ошибок | Инструкции по устранению ошибок |
| № 11-2T11 | Замените отработанные картриджи Samsung MLT-D111L | MLT-D111S на новые или заправьте их тонером. |
| № C2-1510 | C2-1711 | C2-1712 | Установленный вами картридж несовместим с принтером. Проблема может быть вызвана блокировкой счетчика из-за чипа. В таком случае замените микросхему или прошейте аппарат модифицированным ПО. |
| № М2-1110 | М2-1116 | Проконтролируйте наличие бумаги в лотке. Удалите замятые страницы. В сложнодоступных местах используйте пинцет. Перезагрузите принтер.
✓ Если замятие происходит регулярно, тогда следуйте алгоритму: |
| № S2-4110 | Закройте крышку принтера. Если ошибка не исчезла, перезакройте крышку. Возможно, произошла поломка датчика фиксации. |
| № S3-3121 | S3-3122 | Проверьте движение блока сканера. Если он не реагирует на задание, тогда обратитесь в сервисный центр. |
| № S6-3123 | Конфликт IP-адресов. Войдите в Samsung Easy Printer Manager: Настройка — Сеть — изменить IP-адрес. Если IP-адреса присваиваются динамическим способом, просто перезагрузите принтер. |
| № S6-3210 | Ошибка соединения контактов между материнской платой и сетевой картой. Вызовите специалиста! |
| № U1-2320 | U1-2330 | U1-2340 | Ошибка нагрева термоэлемента. Позаботьтесь о том, чтобы напряжение в электрической сети было на должном уровне. Также необходимо переставить аппарат в сухое проветриваемое помещение.
✓ Если перезагрузка не помогла, тогда предстоит частичный ремонт печи или ее замена. |
| № U2-1113 | U2-1112 | Привод работает с ошибками. Перезагрузите Samsung M2070. Проблема актуальна? Без помощи сервисного центра ее не решить. |
| № U3-3313 | U3-3314 | Устраните замятие бумаги в сканере. Проверьте работоспособность роликов захвата. |
| № U3-4110 | Закройте крышку сканера. Ошибка также может быть вызвана неисправностью датчика фиксации крышки. |
С 2007 года осуществляю заправку картриджей, экспертную диагностику и ремонт лазерной оргтехники для сервисного центра MiraxPrint. В свободное время делюсь своим опытом в блоге.
Похожие записи
Ошибки на принтерах Canon? Решение проблемы!
Принтеры – самый распространенный тип офисной техники на сегодняшний день. Они существенно облегчают нашу жизнь при печати документов, а также фотографий и различных изображений (графиков, диаграмм и так далее).

Ошибки принтеров Samsung и способы их устранения!
Южнокорейская компания Самсунг была основана в 1938 году. Ее основным профилем до Второй Мировой войны, да и долгое время после нее, были совсем не высокие технологии. Компания занималась поставками продуктов…