Предложите, как улучшить StudyLib
(Для жалоб на нарушения авторских прав, используйте
другую форму
)
Ваш е-мэйл
Заполните, если хотите получить ответ
Оцените наш проект
1
2
3
4
5
![]()
Choose the most popular programs from Audio & Video software
Review
Comments
Questions & Answers
Ask a question about Safari Oculus
![]()
Software Informer
Download popular programs, drivers and latest updates easily
Alternative downloads
![]()
Safari
Free
![]()
Fast web browser made by Apple for Windows.
![]()
Adventure Inlay
![]()
Adventure Inlay Safari Edition is a wonderful brain-teasing game.
![]()
Oculus Runtime
Free
![]()
Set of SDK tools and configuration utilities.
Popular stories
See all

Windows 11 22H2: First Major Update of the New OS

Best software to enjoy the matches of the FIFA World Cup

5 Best AI image generators in 2022

Instagram expands support for NFTs in 100 countries
Настройка Safari Oculus Rating: 3,2/5 4330 reviews
- Настройка Safari Oculus Free
- Настройка Safari Oculus 2017
- Safari Oculus Настройка
- С недавних пор Valve убеждает владельцев Oculus Rift установить клиент SteamVR, и это отличный способ.
- Safari работает быстрее и расходует меньше энергии. Отдельные настройки для разных сайтов.
Опишем настройку браузера Apple Safari для работы с приложениями сервиса 1cfresh.com. Откройте браузер Apple Safari. Вызовите окно настроек Apple Safari. Это можно сделать:. нажав комбинацию клавиш ⌘ +,. или выбрав команду меню: Safari Настройки (Safari Settings).

Инструкция по настройке Pimax4K(Oculus Home — WINDOWS 8 и 10 тоже) ниже Настройка SteamVR (WINDOWS 8 или 10) 1.
В появившемся окне выберите вкладку Безопасность (Security). На этой вкладке:. флажок Блокировать всплывающие окна (Block pop-up windows) должен быть выключен;. флажок Включить JavaScript (Enable JavaScript) должен быть включен. Перейдите на вкладку Конфиденциальность (Privacy). На этой вкладке значение переключателя Файлы сookie и данные веб-сайтов (Cookies and website data) должно быть:. Обучающие программы по математике для школьников.
Разрешать всегда (Always allow), или. Разрешать для посещаемых мной сайтов (Allow from websites I visit) — если вы уже посещали сайт 1cfresh.com.
Браузер Apple Safari настроен для работы с приложениями сервиса 1cfresh.com. Настройка других браузеров Ниже приведены ссылки на инструкции по настройке других браузеров. Открыть инструкцию: См.

Вы стали счастливым владельцем виртуальных очков oculus rift cv1, поздравляем вас. Предлагаем ознакомится с инструкцией по подключению и настройкой программного обеспечения.
Подключение к персональному компьютеру. Установка приложения.
Настройка оборудования Приступаем к выполнению поставленной задачи и вперёд покорять виртуальные миры. Подключение к персональному компьютеру. На этом этапе нам понадобится подключить разъёмы к материнской плате и видеокарте компьютера: -Первым делом подключаем сами очки, провода HDMI и USB. Для подключения USB нужно использовать порт с поддержкой протокола 3.0 ) При правильном подключение на внутренней стороне загорится индикатор желтым цветом.Теперь пора заняться подключением сенсора. Здесь всё просто достаточно подключить штекер в разъём USB 3.0. Если у вас комплект с двумя сенсорами или даже вы докупили третий сенсор.
То подключайте их в свободные гнезда USB.Геймпад от xbox one, подключается путем подключения USB ресивера в свободный порт компьютера, это может быть порт 2.0 На этом этап подключения закончен. Установка приложения. Переходим на сайт oculus.com скачиваем установочный файл oculus setupe.exe (844 Мегабайта ) и дожидаемся его загрузки. Производим установку приложения, она происходит автоматически. Данное действие занимает приблизительно от 3 до 10 минут. Настройка оборудования.
Запускаем приложение Oculus, после чего нам будет предложено создать свой профиль. Вводим все свои данные для регистрации. Пин код придумываем сами, не забывайте его! Выбираем лого для своего профиля.
Добрались до проверки подключения наших устройств виртуальной реальности За линзами стоит ухаживать тряпочкой идущей в комплект, не стоит оставлять гарнитуру на солнце она может испортиться! Если все соединения подключены верно, то мы увидим данную картинку.
Берем в руки пульт, вытягиваем пластиковую заглушку. Нажимаем на центральную кнопку. Ознакомившись с перечнем органов управления, переходим к следующему шагу. Соглашаемся на обновление прошивки для пульта.
Этап подключения джойстика xbox one очень прост. Не забудьте вставить батарейки. Нажимаем на центральную кнопку, для включения джойстика. Нажимаем кнопку синхронизации на принимающем ресивере. Нажимаем и держим кнопку синхронизации. Устройство найдено и готово к работе.
Изучаем кнопки навигации. Начинаем настройку сенсора. Вводим свой рост, не забываем переключить в метрическую систему.

Расположите свой датчик на столе, расположите его перед собой и направьте его на уровень вашей головы. Затем возьмите в руки руки очки oculus rift cv1 и сделайте движение перед датчиком влево и вправо, вверх, и вниз.
Настройка Safari Oculus 2017
Установка сенсора завершена. Делаем примерку гарнитуры, если что-то покажется неудобным то согласно инструкции подгоняем под свой размер головы. Важным моментом является чтобы во внутреннее пространство не попадал свет и не было просветов. Санминимум для продавцов продовольственных товаров. Следите за тем чтобы провода и соединения не мешали и не сковывали ваши движения. Проверьте чтобы ваше игровое место было свободно от посторонних предметов.
Safari Oculus Настройка
Данным ползунком мы регулируем расстояние от ваших глаз до линз. Одеваем очки виртуальной реальности, берем в руки пульт и погружаемся в оболочку виртуальной реальности Oculus Store. На этом этап настройки полностью завершён. В оригинальном приложении Oculus вы найдете как демонстрационные ролики так и полноценные игры.
Have you ever encountered the «com.oculus.guardian keeps stopping» error? Do you know what causes this error? In this post, MiniTool Partition Wizard provides some helpful solutions for you to solve this error and explains what causes this error.
The Oculus Guardian System is one of the features in the Oculus Quest 2 that is implemented to keep you safe in your physical playing area. It allows you to define boundaries within your playing space to stop you from walking into objects while using Oculus.
When you move close to the boundary you have defined, it displays wall and floor markers, which look like a translucent mesh grid displayed as a layer that is superimposed over the game or experience.
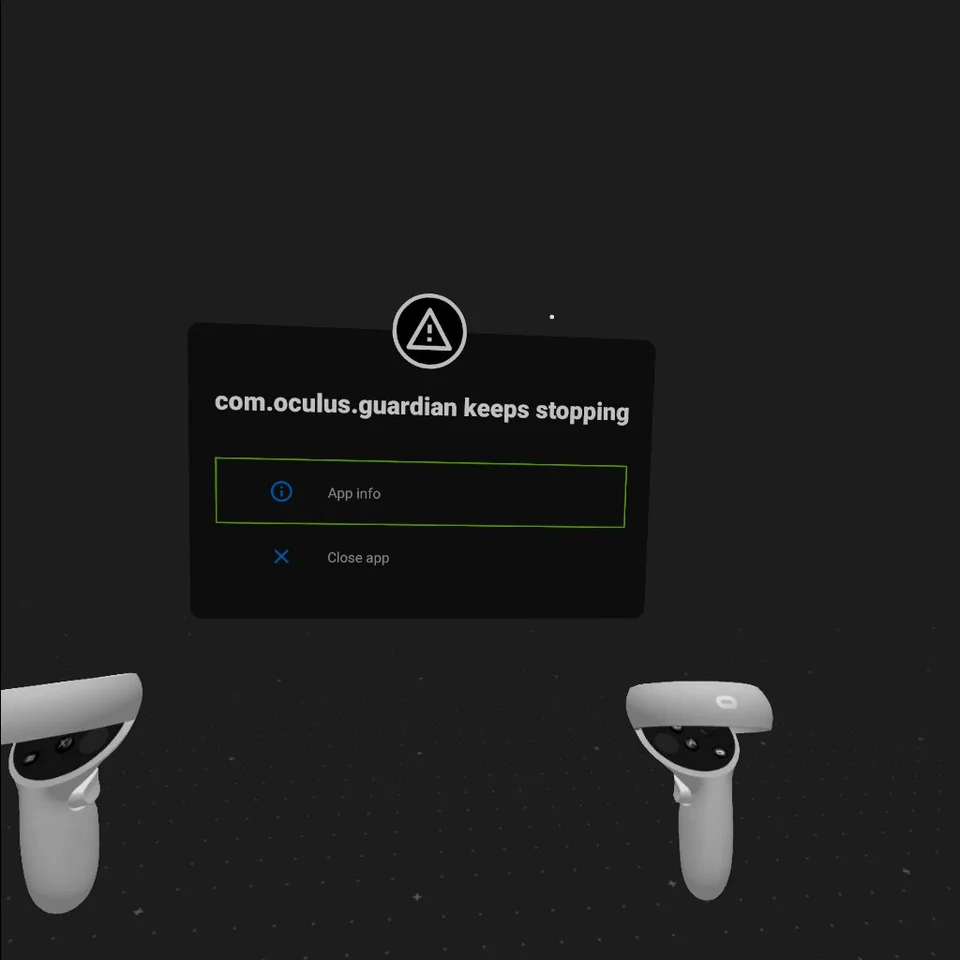
If there is something wrong with this function, you will see the “com.oculus.guardian keeps stopping” error.
These are the common reasons that cause this error to occur:
- Outdated Oculus.
- Newly-updated Oculus.
- The Guardian Cache or Oculus Storage has reached its limit.
How to fix com.oculus.guardian keeps stopping error? In the next section, I provide some useful solutions for you to solve this error.
Solution 1. Update Oculus
Oculus is normally set to update automatically. However, internet connections, lack of use, or some glitches may cause it not to update.
So, in these situations, you may receive the “com.oculus.guardian keeps stopping” error. You can follow these steps below to update your Quest or Quest 2:
- Put on your Oculus headset.
- On the right controller, press the Oculus button.
- On the Menu that appears, click the Clock icon.
- Go to Settings > System and then Software Update.
- At the top right corner, select Update if there is any available.
- Once done, check if the “com.oculus.guardian keeps stopping” error is fixed.
Solution 2. Perform A Clean Reboot
A clean boot is a useful way for you to solve many basic issues. If you encounter the “com.oculus.guardian keeps stopping” error, you can also try to perform a clean boot to fix it.
- Press the Power and Volume down at the same time for about 30 seconds to load the boot menu.
- Then use the Volume control keys to highlight Exit and Boot.
- Press the Power button to select and reboot the headset.
- After that, check if the “com.oculus.guardian keeps stopping” has cleared.
Solution 3. Clear Cache/History and Clear Storage
If your cache/history or storage is too full, you may encounter the “com.oculus.guardian keeps stopping” error too. In this case, you need to clear the Guardian cache and release the storage in Oculus.
To clear the Guardian history/cache:
- Press the Oculus button on the right controller.
- From the Universal Menu, choose Settings.
- Under the Guardian section, select Clear to clear your guardian history.
Tips:
This action will remove the history for all accounts on your Quest or Quest 2.
To release the storage:
- Press the Oculus button on the right controller.
- In the Universal menu, go to Settings > Storage.
- Then click the drop-down to select Applications, Images, Videos, and so on beside Manage Storage.
- Select the files that you want to delete, and select Delete.
- Confirm the deletion.
Solution 4. Reset Guardian
If clearing the Guardian history and releasing the storage does not fix the “com.oculus.guardian keeps stopping” error, you can try resetting the Guardian completely to fix this error.
To reset the Quest/Quest 2 headset:
- Press the Oculus button on the right controller.
- On the Universal menu, select Settings.
- Under the Guardian section, select Reset to clear your Guardian.
To reset on the Oculus app:
- Connect your headset to your PC or phone.
- Open the Oculus app.
- Choose Devices.
- Select your Quest or Quest 2 headset.
- Go to Settings.
- At the Guardian, select Reset.
Solution 5.Charge the Headset and Replace the Controller Batteries
If your headset battery or controller battery does not have enough charge, you may also encounter the “com.oculus.guardian keeps stopping” error. Here’s the way:
- Replace the batteries in your controller with high-quality Alkaline AA batteries.
- Turn off your headset and plug it in to charge.
- After a while, turn it back on while leaving it plugged in.
- After that, check if the “com.oculus.guardian keeps stopping” error has cleared.
Bottom Line
After reading this post, you can know how to fix com.oculus.guardian keeps stopping error. This post explains the causes and solutions for the “com.oculus.guardian keeps stopping” error in this post. You can select your preferred solution to this error.
MiniTool Partition Wizard is an all-in-one partition manager and can be used for data recovery and disk diagnosis. If you are interested in MiniTool Partition Wizard and want to know more about it, you can visit MiniTool Partition Wizard’s official website by clicking the hyperlink.
Have you noticed that the VR icon seems to disappear from Apples’ Safari browser?
It is a common and frustrating scenario in the Apple iPhone’s Safari browser Nowadays.
But don’t worry, I have also run into this issue with my iPhone, and I have researched to find a method to run VR on Safari, and I solve the problem and successfully run the VR.
I will help you run VR websites on your Safari by my own experience.
So, In this post, I will try to figure out the reason behind this issue and find a solution to fix this.
So, don’t waste any more time; let’s jump into the main article.![]()
Virtual Reality on Apple phones
Using virtual reality in apple is pretty straightforward. You just have to install or turn on some settings for using Virtual reality in Apple phones.
First, you have to download and install a VR app. Then launch it on your phone, and now put the iPhone in the viewer.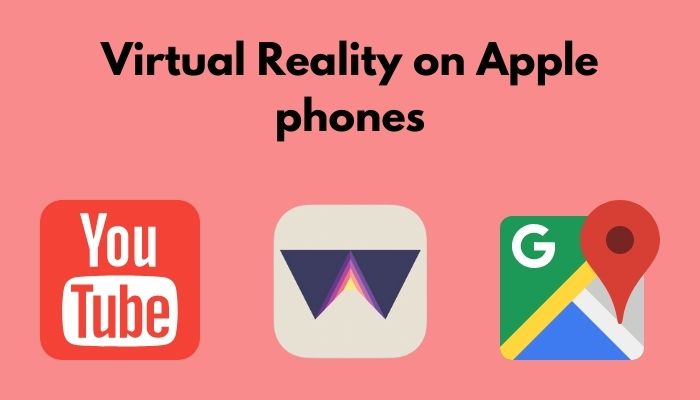
You can experience VR in several apps with your iPhone.Some of them are:
1. Youtube
Youtube is one of the best apps for experiencing VR on the iPhone.You can able to run VR in your installed Youtube app and experience the VR video.
2. WithinVR
Via Within VR app, you can experience your iPhone’s best 360-degree films and documatroies. It has a modern-visual design.
3. Italia VR
A VR-supported app created by the Italian National Tourist Board is one of the best VR apps for iPhone.You can explore various beautiful locations in Italy.
4. VR 3D Brush
If you have an artistic mind, use the 3D brush to explore the 3D space art experience on iPhone. You can art through VR with this app.
Check out our separate post on How Much does CPU Affect VR.
5. Google Street View
Navigate the google street view in VR with your iPhone.You can explore a whole new world of google street view.
6. Solitaire Zen
Solitaire Zen is a VR game for iPhone users which you can experience the Classic game in 360-degree views..
These are the apps that you can enjoy in VR on your iPhone.But you need a VR headset to experience VR on iPhone.
Some latest VR headsets for iPhone are:
- Dodocase P2.
- View-Master.
- Zeiss VR 1+.
- Homido VR.
You can experience VR through these headsets. From iPhone 5 to 13, every iPhone is capable of running VR.
But after the latest updates, Safari doesn’t show the VR icon.
Let’s find out the reason behind this problem.
Why is the VR icon not showing in Safari?
Apple recently stopped the websites from using AR/VR directly from their browsers, and they decided to stop this for improving their privacy settings. They stopped the service from OS version 12.1. Like previously, these websites cannot use the motion settings directly.
Iphone users can explore VR websites on Safari, the default browser of apple. Previously these websites could use iPhones motion and tracking data directly without any permission.
So, you can’t experience VR directly on safari, and apple stopped this direct interconnection for security purposes.
To run a Virtual reality app or Web, it needed to use the motion and tracking system. Otherwise, you can’t run a VR app on your device.
To date, Apple has permitted the VR websites to enter into the motion and tracking system directly.
But as their security concern, Apple has stopped this service.
From the browser update 12.2, Apple is not permitted any browser to use Motion settings default.
After this update, Safari cannot access motion and orientation data without any explicit permission. Your phone’s gyroscope mode will also be disabled without this permission.
This issue can be a problem for a VR user on Apple. Because web-based VR are different
from the other typical VR apps.
If a first-time VR user faces this problem, that will make a difference.
But, You can experience VR on Safari, and it’s pretty easy.
You just have to enable some settings and enjoy VR on the iPhone.
In the next portion, I will; discuss about the settings.
Also, check our exclusive tutorial on how to fix Oculus Rift S DisplayPort not working.
How to Enable VR in the Safari Browser
As Virtual Reality is a rising technology, every tech giant wants to adopt it.
Apple, the most popular technology company globally, is not an exception.
They also adopt VR for their users.
But for security concerns, they have changed some privacy settings for VR websites.
If you enable these settings on your iPhone, you can run VR perfectly on your iPhone.
In the latest updates, Apple introduced a new privacy setting Called “Motion and Orientation Access.” It is disabled by default on the phone.
You have to enable it manually if you want to access VR on your Safari Browser.
Here are the steps to enable Motion and Orientation Access on your iPhone:
- Unlock your iPhone.
- Go to the Settings app and tap to open it.
- Scroll down and find the Safari Settings menu.
- Tap to open it.
- Scroll down once again for “Motion and Orientation Access.”
- Toggle the button to enable it.
- Return to the home menu.
- Open Safari browser, and you will see the VR icon on it.
This setting will also enable the Gyroscope mode. By allowing this setting, you will be able to experience VR websites on Safari.
The question is this, why did Apple add this new setting for increasing security.
First, you have to know about the motion and orientation access for understanding the reason.
Motion and Orientation Access in iPhone is a newly introduced setting on Safari. It is made up for security purposes. When the websites have permission to access your phone’s motion settings directly, they can possibly track you and identify you. They also can steal your passwords from your browser, and it’s a direct security threat to your privacy.
Apple launched Motion and Orientation Access to prevent this security threat. Every website, including VR, needs permission to access the motion settings.
This setting is needed for Safari Browser. Some users ask that does google chrome needs these settings to open VR.
Okay, let’s find out the answer.
Here’s a complete guide on how to Fix VR Black Screen.
Does Google Chrome need permission to run VR?
No, Google Chrome doesn’t need any permission to run VR websites on iPhone.Because Apple permitted Google to access their settings when installing the Chrome browser, Google is also a very secure platform.
So, Google Chrome doesn’t need any permission to Run the VR. All you need to do is turn on the Google Daydream view option to explore VR settings.
If you have Google Daydream view or the Lenevo Solo Mirage headset, you can directly run the VR website in Chrome. You will browse any website in Chrome Browser.
You can also run the Netflix VR on your iPhone.Though there is no dedicated VR Netflix app for iPhone, you can run Netflix VR. For this, first, you have to turn on a Netflix show on your computer, then you have to click on the share on the apple screen option. You can enjoy Netflix on VR on an Apple device by following the instruction.
All these features are available on your phone if the phone is compatible with Virtual reality apps or web pages.
To check the Compatibility, download a Compatibility checker app and scan the ability of your phone to run the VR apps or web.
Generally, from iPhone 5 to 13, users can run VR on their phones.
All you have to do is go through our latest how-to clean VR headset foam, Check out our epic guide if you don’t know how to Change Your Name on VRChat, But, before that, do check our latest post on the Watch 3D Movies on Gear VR.
Conclusion
VR is one of the most rising technology in the world. People can experience VR not only on their computers but also on their phones.
Iphone users are not an exception; they can also explore VR webpages and apps through their phones.
As Apple is always concerned about security issues, users should follow instructions to use VR.
In this post, I briefly described the issue.
Hope the article is helpful to you, and it will help you run VR on the Safari browser.