Автоматизированное оборудование, используемое для уборки в жилых помещениях, оборудуется блоком самодиагностики. Коды ошибок воспроизводятся голосом, отображаются цифровыми данными на дисплее или миганием светодиода, расположенного на крышке корпуса. Например, возникающая на роботах iRobot Roomba ошибка зарядки 5 указывает на проблемы с программным обеспечением контроллера батареи. Подробное описание кодов неисправностей и способы устранения приведены в инструкции по эксплуатации.

Ошибка зарядки 1, отображаемая одиночной вспышкой светового индикатора, указывает на отсутствие контакта в цепи питания. Одновременно на дисплее отображается текстовое сообщение Err 1. Оборудование поставляется в продажу со специальным предохранителем, расположенным в нише аккумуляторной батареи. Пользователю требуется перевернуть робот и открыть пластиковую крышку, зафиксированную 2 винтами с крестообразной головкой.

Внутри отсека размещена батарея, которую необходимо снять. После удаления защитной вставки, выполненной из пластика желтого цвета, аккумулятор устанавливается на штатное место (логотип iRobot располагается в направлении крышки). При корректном включении оборудования зуммер проиграет мелодию.
Голосовое сообщение об ошибке 1 указывает на вывешивание корпуса робота, при котором фронтальный ролик теряет контакт с поверхностью пола. Пользователь переносит оборудование вручную, рекомендуется проверить ниши колес и удалить забившуюся в полости грязь. На части роботов сообщение о проблеме 1 указывает на потерю связи с полом левого колеса с индивидуальным моторным приводом.
Ошибка 2
Голосовая ошибка 2 указывает на неисправность в приводе центральных резиновых валков. Ремонт заключается в снятии и чистке элементов, закрепленных пластиковой прямоугольной рамкой. На торцах щеток расположены подшипниковые узлы, рекомендуется удалить намотавшиеся внутри волосы и шерсть.

Двойное мигание лампы сигнализирует об ошибке зарядки, возникшей из-за перегрева элементов батареи. Оборудование снимается с зарядной базы на 1-2 часа, после снижения температуры аккумулятора процедура восстановления емкости батареи возобновляется. Проблема возникает при поломке зарядного адаптера или при использовании нештатного устройства.
Сброс кода, записанного в память устройства, выполняется принудительной перезагрузкой (кнопки Spot и Dock).
Роботы, оборудованные звуковым сигнализатором, подают двойной короткий сигнал, указывающий на проблему с приводом чистящих узлов. Пользователю необходимо очистить щетки робота, параллельно удаляется загрязнение с поверхности приводных валов.
Ошибка 5
Звуковая ошибка 5 (пятикратный короткий сигнал зуммером или голосовым сообщением) указывает на заклинивание привода боковых колес. Руководство по эксплуатации рекомендует выключить питание робота и очистить полость под колесом от набившегося мусора. Дополнительно проверяется вращение колеса и связанных с ним механизмов. На части роботов голосовое предупреждение указывает на потерю контакта с полом правого колеса.

Пятикратная световая индикация (с отображением на дисплее кода Err 5) указывает на проблему при подключении к зарядному устройству Румба. Пользователю требуется проверить работу диодного индикатора, расположенного на корпусе напольной станции, а также протереть мягкой салфеткой металлические контактные пятаки, расположенные на зарядном блоке и днище робота. При повторной проблеме Error 5 рекомендуется сделать сброс настройки оборудования выключением питания боковым тумблером (или одновременным нажатием на 10 сек. клавиш Spot и Dock).
Техникой какого производителя пользуетесь дома?
Ошибка 6
Ошибка 6, отображаемая 6-кратной вспышкой диода, возникает при перегреве батареи. Инструкция рекомендует прекратить зарядку аккумулятора до снижения температуры. При повторном возникновении проблемы требуется обратиться в сервисный центр.

Голосовое сообщение о проблеме 6 указывает на некорректную работу сенсоров перепада высоты пола. Проблема возникает при зависании оборудования на ступеньках лестницы, высотный датчик фиксирует перепад высоты, но корректировка траектории невозможна. Для устранения проблемы необходимо перенести оборудование на ровную поверхность или протереть стекла сенсоров мягкой салфеткой без применения моющего средства.
Другие ошибки
Проблема 3, отображающаяся только световым индикатором, указывает на ошибку при зарядке батареи или поломку аккумулятора. Для восстановления работоспособности изделия рекомендуется сбросить настройки робота. Самостоятельное исправление внутреннего дефекта батареи невозможно, требуется обратиться в сервисную службу.

4-кратное мигание диода, возникающее при зарядке, происходит при использовании неоригинального зарядного устройства. Для устранения последствий требуется произвести перезагрузку робота (одновременным нажатием и удержанием на протяжении 12 секунд клавиш Spot и Dock) и установить оригинальный адаптер питания, поставляемый совместно с оборудованием.
Повторяющиеся 7-кратные вспышки индикатора в процессе уборки сигнализируют о перегреве аккумуляторной батареи во время разрядки. Техническая документация рекомендует остановить уборку и охладить элемент питания естественным способом на протяжении 1-2 часов. При повторном возникновении проблемы требуется обратиться в сервисный центр для диагностики причины неисправности.
В случае заедания или потери контакта боковых колес с поверхностью пола подается 7-кратный звуковой сигнал. Робот вручную убирается с неровной поверхности в другую рабочую зону. Дополнительно проверяется состояние редукторов и двигателей, при обнаружении загрязнения полости или оси требуется очистка узла. Заклинивание фронтального ролика отображается подачей 8 звуковых сигналов. Пользователь демонтирует узел из нижней части корпуса, а затем удаляет набившийся в нише мусор.
Голосовое сообщение об ошибке 8 указывает на засорение фильтра или отсутствие подачи воздуха к турбине. Для восстановления работоспособности требуется очистить колбу от пыли и промыть фильтрующие элементы. Дополнительно рекомендуется осмотреть каналы подачи воздуха и удалить из них застрявший мусор.
Заклинивание подвижного бампера или загрязнение защитного экрана сенсоров поиска препятствий включает голосовой информирующий блок, который сообщает о возникновении неисправности 9. Для устранения неисправности требуется осмотреть оборудование, удалить попавшие под демпфер частицы мусора и протереть фронтальное дымчатое стекло влажной салфеткой.
При использовании робота в протяженном помещении возникает проблема с обнаружением препятствий, робот подает голосовое сообщение об ошибке 10. При отсутствии голосового блока проблема передается 11-кратным сигналом зуммера. Рекомендуется убирать площадь по секторам, ограничивая зоны переносным инфракрасным датчиком виртуальной стены. Рекомендуется проверить подвижность бампера вручную, поскольку вторичной причиной появления ошибки является заклинивание фронтального демпфера.

На части роботов встроенный зуммер регистрирует проблемы с сенсорами падения с помощью подачи 12 коротких звуковых сигналов. Для устранения неполадки требуется удалить налет пыли, сформировавшийся на защитных стеклянных вставках, расположенных по периметру днища оборудования. Голосовой подсказчик сообщает пользователю о необходимости восполнения заряда батареи. Оборудование размещается на напольной станции вручную или выводится с помощью пульта дистанционного управления или приложения, установленного на смартфоне.
Вы можете столкнуться с ошибкой Roomba 5 или Err5, если на клеммах аккумулятора или док-станции скопился нагар или пыль. Более того, глубоко разряженный аккумулятор (который следует заряжать от лабораторного источника питания) также может вызвать проблему.
Проблема возникает, когда робот Roomba пользователя не заряжается с ошибкой 5, что означает, что любой из модулей зарядки (кабель для зарядки, док-станция, аккумулятор, материнская плата, зарядные терминалы и т. Д.) Робота Roomba не работает.
Ошибка Roomba 5
Вы можете исправить ошибку Roomba 5, очистив клеммы аккумулятора / док-станции или зарядив аккумулятор лабораторным источником питания (как обсуждается ниже), но перед этим убедитесь, что зарядный кабель (подключающий док-станцию к источнику питания) не отключен. неисправен.
Очистите контакты аккумулятора и клемм
Вы можете столкнуться с ошибкой зарядки робота Roomba 5, если на клеммах аккумулятора или док-станции скопился углерод (или пыль). В этом контексте очистка контактов аккумулятора и клемм док-станции может решить проблему.
- Выкрутите 4 винта в нижней части устройства и снимите нижнюю крышку.
Отверните нижние винты робота Roomba.
- Затем убедитесь, что желтая бирка батареи полностью удалена (если это новый блок).
- Теперь проверьте, не погнут ли какие-либо контакты или клеммы, затем выпрямите клеммы.
- Затем очистите клеммы аккумулятора и контакты док-станции розовым / волшебным ластиком (тем, что используется с графитными карандашами).
Очистите клеммы аккумуляторной батареи робота Roomba
- Теперь вставьте аккумулятор и снова установите нижнюю крышку.
Очистите батарейные блоки робота-пылесоса Roomba
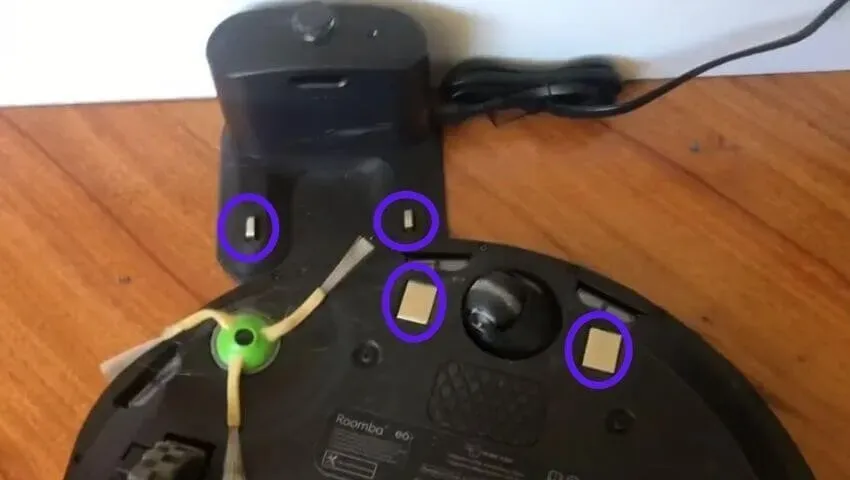
- Затем очистите точки зарядки робота Roomba.
Очистите точки зарядки док-станции и робота Roomba
- Теперь поставьте Roomba на зарядку как минимум на 16 часов, а затем проверьте, не исчезла ли ошибка Roomba 5.
- Если это не помогло, проверьте, помогает ли очистка аккумулятора и стыковочных клемм медицинским спиртом (или вы можете попробовать нанести немного уксуса с помощью зубной щетки) ошибку Roomba.
Если проблема не устраняется, проверьте, решает ли проблему включение Roomba на зарядку (пока кнопка «Очистить» не замигает зеленым) путем прямого подключения кабеля питания (без док-станции).
Кнопка очистки мигает зеленым при полной зарядке
Вы также можете попробовать лабораторный источник питания для прямой зарядки аккумулятора и проверить, устраняет ли это ошибку 5 (если аккумулятор был сильно разряжен). Если ошибка 5 все еще существует, возможно, вам придется использовать запасную батарею. Даже если это не сработало, возможно, домашний блок или материнская плата робота Roomba были повреждены, и вам, возможно, придется заменить их (по одному).
Are you tired of seeing your iRobot Roomba encountering the “charging error 5” 🥱? Don’t worry; we will provide you with a variety of fixes to get rid of this error. 🥳
The Roomba by iRobot is an impressive selection of cleaning robots, but since they are the first of their kind, they are prone to glitches and problems. One of the most commonly reported issues is the Roomba charging error 5, which signals a breakdown in the charging system of the device.
Charging Error 5 is an error that occurs when a Roomba robot vacuum cleaner fails to charge when placed in its charging dock. This error can be due to a number of different issues ranging from a damaged charging dock, a bad battery, or a defective power cord.
To troubleshoot this error, it is important to check the power connection and ensure the cord is securely plugged in and the outlet is receiving power. If the outlet receives power, the next step is to check the charging dock. Ensure the connectors are properly aligned, and the dock is securely connected to the Roomba. If the charging dock is still not charging the Roomba, it is likely that the battery is defective and needs to be replaced.
We will explain how to troubleshoot and fix the “Charging Error 5” message on iRobot Roomba robotic vacuum cleaners. If you are experiencing this issue with your Roomba, this article will help you identify the cause of the problem and provide steps to resolve it. So without further ado, let’s dive deep into the topic. 👇🎉
Why is My Roomba Showing a “Charging Error 5” Message?
A “Charging Error 5” message on a Roomba indicates that the robot vacuum has detected an abnormal voltage or current while attempting to charge. Following are some of the different factors:
- The power supply needs to provide the correct voltage or current. Check the power supply and ensure it provides the correct voltage and current as specified in the Roomba manual.
- The charging contacts on the Roomba are dirty or damaged. Clean or replace the charging contacts.
- The charging dock is damaged or malfunctioning. Check the charging dock and replace it if necessary.
- The battery is dead or damaged. Replace the battery.
- The Roomba software needs to be updated. Update the Roomba software to the latest version.
9 Fixes For the Charging Error 5 on Your iRobot Roomba
Error 5 on Roomba 900, 800, 700, 600, and 500 series devices is displayed differently.
- The 900 series displays: “Charging error five (5). Please open the iRobot app for help.”
- The other series Roomba 500, 600, 700 and 800, display: “Charging error five (5).”
- Additionally, the battery indicator and Troubleshoot or Clean indicator blink while the Roomba is charging.
To fix this error, 9 quick solutions have been discussed.
1. Remove The Yellow Label
Roomba Charging Error 5 is an error indicating that the robot vacuum cleaner is not charging properly. To fix this error, the first step is to remove the yellow label from the robot’s charging port.
The yellow label is usually located on the bottom of the robot, and it contains important information about the product and its warranty. Removing the yellow label will allow Roomba to recognize the charging port and start charging.
2. Restart Your Roomba
Restarting your Roomba can help solve Roomba Charging Error 5 in several ways. Error 5 is a charging error that can occur when your Roomba’s charging system is malfunctioning. It usually occurs when the Roomba’s battery is disconnected from the charging system. Restarting your Roomba can help correct the charging system and restore normal operation.
For S and I Series Models
- First, press and hold the “Clean” and “Spot” buttons at the same time for 20 seconds until the “white LED ring” on the top of the bin’s lid begins to rotate clockwise.
- Then release the buttons.
- After that, reconnect the Roomba to the charging station and power cord.
- At least, Press the “Clean” button to restart the Roomba.
For the 700, 800 and 900 Series
- First, “Disconnect” the Roomba from the charging station and power cord.
- Then press and hold the “Clean” button and wait until you hear a beep. Allow the Roomba a few minutes to begin the cleaning cycle again.
- Now release the buttons and connect the Roomba to the charging station and power cord.
- At least, Press the “Clean” button to restart the Roomba.
3. Clean The Battery And Charging Contacts
Cleaning the Battery and Charge Contacts is a process that helps to solve the Roomba Charging Error 5. Roomba Charging Error 5 occurs when the battery contacts are dirty or corroded. This can prevent the Roomba from charging properly or even from charging at all. Cleaning the battery contacts is a simple process that can restore the Roomba’s charging capabilities.
Clean the Battery and Charge Contacts to solve Roomba Charging Error 5:
- First, unplug the Roomba from the wall outlet and open the Roomba’s battery compartment.
- To open the battery door ;
For 900 and 800 series devices, loosen the two screws at the bottom of the device.
For 700, 600 and 500 series devices, undo the four screws at the bottom.
- Then inspect the battery terminals and contact points for corrosion or dirt buildup.
- Use a cotton swab to clean any corrosion or dirt buildup on the battery terminals and contact points.
- Clean up any remaining residue with a dry cloth or paper towel.
- After that, check that the contacts are firmly connected to the battery and the Roomba.
- Close the battery compartment and plug the Roomba back into the wall outlet.
- Finally, turn on the Roomba and check to see if the charging error has been resolved.
4. Check The Charging Cable
If your Roomba is experiencing Charging Error 5, it may be caused by a faulty charging cable. This error is usually caused by the cable being damaged, defective, or not properly connected. To solve this issue, you should first check the charging cable to make sure it is properly connected and undamaged.
- First, check the Roomba charging cable. Ensure that the cable is securely connected to both the Roomba and the wall outlet. Inspect the cable for any damage, such as cuts, frays, or other signs of wear.
- If the cable appears to be in good condition, unplug it from the wall outlet and plug it back in. Make sure the outlet is working by testing another appliance in it.
- If the cable is damaged, replace it with a new Roomba charging cable.
5. Reset The Battery
Resetting the Roomba battery can help resolve charging error 5, which is caused by a faulty connection between the Roomba’s battery and charging contacts. This error can prevent the Roomba from charging or running at all.
For 500 or 600 Series
- To reset your Roomba, press the “Clean” button.
- Then press and hold the “Spot” and “Dock” buttons for 15 seconds until a beep is heard.
- Afterwards, plug your Roomba into a charger until the “Clean” button turns green.
For 700 Series
- To reset the battery on your Roomba, attach it to the charging dock or use a cable to connect it to a power source.
- Then, press and hold the “Clean” button for 10 seconds until the words “r5t” appear on display. Once the beep is heard, stop pressing the button.
- Finally, to complete the reset process, allow the Roomba to charge for a minimum of 15 hours before using it again.
6. Roomba’s Electric Board Issue
The most common cause of the issue is a faulty electric board. The electric board is responsible for controlling the power supply to the Roomba. If it is not operating correctly, it can prevent the Roomba from charging or cause the charging to be slow.
- First, “Unplug” and remove the Roomba from the charging station.
- Then take off the bottom plate of the Roomba.
- Locate the electric board, which is a small, rectangular circuit board located in the centre of the Roomba’s interior.
- After that, check the electric board for any signs of damage, such as a broken or burned component.
- Then look for any loose or disconnected wires.
- Now check the connection between the electric board and the battery. Make sure the connection is secure and that there is no corrosion or corrosion damage to the battery terminals.
- Replace the electric board if necessary.
- Finally, put the bottom plate back on the Roomba and plug it back into the charging station.
7. Change The Battery
The Roomba Charging Error 5 is a common problem with the Roomba robotic vacuum cleaner. This error is caused when the battery is too low to charge the Roomba. To solve this problem, the battery must be replaced with a new one.
Following are the steps to change the battery to solve the Roomba Charging Error 5:
- First, “Unplug” the Roomba from the wall outlet and turn it off.
- Then lift up the Roomba and remove the screws located on the bottom of the unit.
- To open the battery door ;
For 900 and 800 series devices, loosen the two screws at the bottom of the device.
For 700, 600 and 500 series devices, undo the four screws at the bottom.
- Now carefully lift the top cover to access the battery compartment.
- After that, remove the old battery and install the new one. Make sure the new battery is compatible with your Roomba model.
- Then reassemble the Roomba and plug it back into the wall outlet.
- Finally, turn the Roomba on and check if the charging error has been resolved.
8. Perform a Factory Reset
A Factory Reset is a process that wipes all data stored on a device, returning it to its original factory settings. This process is often used to solve technical issues and problems, such as errors related to charging. In the case of Roomba charging error 5, a factory reset can help to restore the device to its original settings, which can potentially resolve the issue.
For factory resetting on a Roomba:
- First, the device should be powered off.
- Then, press and hold the “CLEAN” and “SPOT” buttons simultaneously for approximately 10 seconds.
- The device will then begin its Factory Reset process, which can take up to a few minutes to complete.
- Once it is finished, the Roomba should be ready to use again.
9. Contact Support
If you are experiencing error 5 when trying to charge your Roomba, you should contact the Roomba support team. The support team can provide you with instructions on how to troubleshoot the issue. Usually, this involves checking the power cord, battery, and charger for any damage. They may also suggest resetting the Roomba or replacing the battery or charger. All of the steps for these fixes are given above.
If that does not fix the issue, the support team may ask for the Roomba model number and serial number so they can investigate further. Additionally, they may be able to provide you with a replacement charger or battery if needed.
Conclusion
The Roomba charging error 5 can be fixed by resetting the robot and making sure it is connected to a working power source. You should also check the battery compartment and ensure that the cables are properly connected. Following these steps should help resolve the charging error and get your Roomba back up and running again.
Lastly, let us know in the comments section below:
- How do you deal with the Roomba charging error 5? Are they helpful?
- Have any of the above solutions been useful to you?
- What other good fixes do you know of for resolving this issue?
Hope you find this guide helpful 😀 do share it with your friends 🧑🤝🧑 to help them in resolving this issue, and let us know in the comment section below 👇 which fix best suits you.
iRobotRoomba

Zeeshan is a detail-oriented software engineer and technical content writer with a Bachelor’s in Computer Software Engineering and certifications in SEO and content writing. Thus, he has a passion for creating high-quality, SEO-optimized technical content to help companies and individuals document ideas to make their lives easier with software solutions. With over 300 published articles in various niches, including computer sciences and programming languages such as C++, Java, Python, HTML, CSS, and Ruby, he has a proven track record of delivering well-researched and engaging technical content.
Next post
Содержание
- Устранение ошибок в Roomba — Как исправить коды ошибок
- Что означают ошибки Irobot Roomba
- 1 звуковой сигнал/ошибка 1 (серии Roomba 500 и 600)
- 1 звуковой сигнал или ошибка «Нет голоса» (Roomba серии 700 и 800)
- 2 звуковых сигнала / ошибка 2
- 5 звуковых сигналов / ошибка 5
- 6 звуковых сигналов / ошибка 6
- 7 звуковых сигналов / ошибка 7
- 9 звуковых сигналов / ошибка 9
- 10 звуковых сигналов / ошибка 10
- 4-тактный звук разряженной батареи Irobot Roomba
- «Пожалуйста, осмотрите и очистите датчики Cliff Roomba»
- «Пожалуйста, осмотрите и почистите колеса Roomba»
- «Пожалуйста, удалите и очистите щетки Roomba»
- Roomba возвращается в док слишком рано с полной батареей
- Ошибки зарядки: Мигания Irobot Roomba
- 1 Миганий или Ошибка зарядки два
- 2 Миганий или Ошибка зарядки два
- 3 Миганий или Ошибка зарядки три
- 5 Миганий или Ошибка зарядки пять
- 6 Миганий или ошибка зарядки шесть
- 7 Миганий или Ошибка зарядки Семь
- 8 миганий или ошибка зарядки восемь
- 9 Миганий или Ошибка зарядки Девять
Ваш робот пылесос Roomba только что подал звуковой сигнал и выдал страшный код ошибки? Не волнуйтесь! Некоторые ошибки легко исправить. Ознакомьтесь с этим подробным руководством для получения информации по устранению ошибок на вашем Irobot Roomba.
Разные модели ведут себя по-разному, когда дело доходит до отображения кодов ошибок: некоторые просто издают звуковые сигналы, другие сообщают об ошибке словами. Но, к счастью, сами коды ошибок в большинстве случаев идентичны для разных моделей.
Следующие коды ошибок относятся к Roomba Series 500, 600, 700 и 800 :
Что означают ошибки Irobot Roomba
1 звуковой сигнал/ошибка 1 (серии Roomba 500 и 600)
Roomba говорит: «Ошибка 1: переместите Roomba в новое место, затем нажмите CLEAN для запуска». Обычно это происходит из-за зависания Roomba или зависания бокового колеса.
Как исправить: Переверните Roomba и осмотрите боковые колеса, очистите все застрявшие волосы или мусор и надавите на колеса, чтобы убедиться, что они могут свободно втягиваться и выдвигаться. Наконец, переместите вашу Roomba и нажмите clean, чтобы проверить, была ли ошибка исправлена.

1 звуковой сигнал или ошибка «Нет голоса» (Roomba серии 700 и 800)
Убедитесь, что мусорное ведро правильно установлено в Roomba.
2 звуковых сигнала / ошибка 2
Roomba говорит: «Ошибка 2: Откройте и чистите щетки Roomba». Если вы получаете эту ошибку, наиболее вероятным виновником является прилипание волос на щетках. Возможно, вы недостаточно часто чистите щетки вашего Roomba, а волосы мешают щеткам правильно вращаться.
Как исправить: Извлеките волосы
Совет: чистить кисти на старых моделях довольно утомительно. Более новые модели Roomba, такие как 860 и 960 , заменили щетки старого образца на ролики без щетины, что значительно упростило обслуживание Roomba.
5 звуковых сигналов / ошибка 5
Roomba «Ошибка 5: вращайте боковые колеса Roomba для очистки». Эта ошибка указывает на то, что одно из колес застряло, что может быть связано с препятствием для одного из колес.
Как исправить: очистите колеса от волос и мусора и убедитесь, что колеса могут свободно вращаться.
6 звуковых сигналов / ошибка 6
Roomba: «Ошибка 6: переместите Roomba в новое место, затем нажмите CLEAN для перезапуска». Это происходит в одной из следующих ситуаций: (1) датчики могут быть грязными или (2) Roomba застряла, на краю или на темной поверхности (которая похожа на обрыва для Roomba).
Как исправить: очистите датчики тканью, затем просто переместите Roomba в новое место и нажмите CLEAN, чтобы перезапустить его.
7 звуковых сигналов / ошибка 7
Одно из боковых колес застряло.
Как исправить: Проверьте их на наличие препятствий, очистите их и подтолкните колеса вверх и вниз, чтобы убрать любой мусор. Вручную поверните колеса, чтобы убедиться в их свободном движении.
9 звуковых сигналов / ошибка 9
Roomba: «Ошибка 9: коснитесь бамперов Roomba для очистки». Это происходит, когда загрязнены датчики на бамперах или загрязнена зона между устройством Roomba и бамперами.
Как исправить: сначала коснитесь бампера несколько раз, чтобы убрать любой мусор и убедиться, что он может вернуться на место. Если это не устраняет ошибку, вам может потребоваться очистить область между бамперами и устройством Roomba. Очистите мусор, а также очистите датчики бампера.
10 звуковых сигналов / ошибка 10
«Ошибка 10: вращайте боковые колеса Roomba для очистки». Это означает, что боковые колеса Roomba (два больших колеса) не могут вращаться или что Roomba застрял на чем-то.
Как исправить: Если Roomba где-то застрял, просто переместите его в новое место и нажмите CLEAN. В противном случае убедитесь, что на боковых колесах нет препятствий, мешающих их вращению. Толкайте колеса внутрь и наружу, чтобы ослабить мусор, и поверните колеса рукой, чтобы убедиться, что им ничего не мешает.
Эта ошибка также может возникнуть, если у вас в доме большая открытая площадка с очень небольшим количеством предметов. Чтобы исправить это, используйте виртуальные стены, чтобы разделить большую область на несколько меньших областей.
11 звуковых сигналов / ошибка 11
«Ошибка 11» по сути та же ошибка, что и ошибка 10.
4-тактный звук разряженной батареи Irobot Roomba
«Пожалуйста, зарядите Roomba».
Как исправить: полностью зарядить Roomba. Кроме того, выполняйте следующие действия, чтобы продлить срок службы батареи вашего Roomba:
- Заряжайте Roomba как можно быстрее после каждого использования. Старайтесь не оставлять Roomba разряженным после уборки.
- Используйте Roomba регулярно. Аккумуляторы предназначены для частой разрядки и перезарядки, поэтому бе бойтесь использовать робота часто.
- Держите док-станцию подключенной, а Roomba пристыкованного, когда он не используется.
- Наконец, если вы не будете использовать Roomba более нескольких недель, выньте аккумулятор и храните его в сухом и прохладном месте.
«Пожалуйста, осмотрите и очистите датчики Cliff Roomba»
Как и в случае ошибки 6, датчики, возможно, необходимо протереть. Протрите датчики обрыва влажной тканью, чтобы очистить их. См. Ошибку 6 выше для деталей.
«Пожалуйста, осмотрите и почистите колеса Roomba»
Вероятно, застряло одно из боковых колес. Убедитесь, что нет препятствий, мешающих вращению боковых колес. Толкайте колеса внутрь и наружу, чтобы извлечь мусор, и поверните колеса рукой, чтобы убедиться, что они свободно вращаются. Смотрите Ошибка 10 для деталей.
«Пожалуйста, удалите и очистите щетки Roomba»
Вращающиеся щетки не могут поворачиваться. Обычно это происходит из-за того, что волосы застревают в щетках. Извлеките вращающиеся щетки или валики под Roomba, очистите его, затем установите щетки на место. В будущем делайте это регулярно до появления ошибки, чтобы обеспечить долгий срок службы вашего Roomba. Если вы находите это утомительным, новые модели щеток Roomba изготовлены чтобы в них не оставались волосы.

Roomba возвращается в док слишком рано с полной батареей
Убедитесь, что батарея не разряжена. Индикатор батареи на устройстве Roomba будет светиться зеленым, если он полностью заряжен. Если это так, перезагрузите Roomba:
Roomba 500 и 600: нажмите и удерживайте кнопки SPOT и DOCK примерно 10 секунд.
Roomba 700 и 800: нажмите и удерживайте кнопку CLEAN в течение примерно 10 секунд, на устройстве отобразится «RST».
После этого вам необходимо перепрограммировать время, дату.
Ошибки зарядки: Мигания Irobot Roomba
1 Миганий или Ошибка зарядки два
Аккумулятор не подключен. Убедитесь, что батарея установлена правильно . Если ваш Roomba совершенно новый, это означает, что вы не вытащили пластиковые вкладки, блокирующие батареи.
2 Миганий или Ошибка зарядки два
Ток к батарее слишком высок. Эта ошибка требует обслуживания со стороны производителя, но в последний момент вы можете попытаться переместить Roomba в более прохладное место, чтобы дать ему остыть.
3 Миганий или Ошибка зарядки три
Эта ошибка зарядки обычно требует обслуживания производителя. Однако это также может означать, что контакты батареи не имеют хорошего контакта. Извлеките батареи и попробуйте согнуть большие контакты и попробуйте зарядить снова.
5 Миганий или Ошибка зарядки пять
Сначала проверьте аккумулятор и зарядные контакты. Удалите винты в нижней части Roomba, чтобы открыть крышку батарейного отсека. И протрите их чистой сухой тканью. Также сделайте то же самое для зарядных контактов на домашней базе.
Переместите домашнюю базу в более прохладное место, чтобы зарядка Roomba не вызывала его перегрева. Кроме того, домашняя база должна быть размещена на твердой ровной поверхности, чтобы контакты были правильно выровнены.
6 Миганий или ошибка зарядки шесть
Аккумулятор перегрелся. Эта ошибка возникает, когда температура батареи достигает 75 ° C. Переместите домашнюю базу в более прохладное место.
7 Миганий или Ошибка зарядки Семь
Аккумулятор не может охладиться. Эта ошибка возникает, когда батарея не остывает в течение 4 часов после зарядки или после использования. Дайте Roomba остыть в течение как минимум одного часа, затем зарядите его в более прохладном месте. Если проблема не устранена, возможно, потребуется заменить батарею.
8 миганий или ошибка зарядки восемь
Roomba не видит литий-ионную батареею. Возможно, аккумулятор неисправен или нуждается в замене.
9 Миганий или Ошибка зарядки Девять
Как и в случае ошибки зарядки 8, литий-ионная батарея может нуждаться в замене.
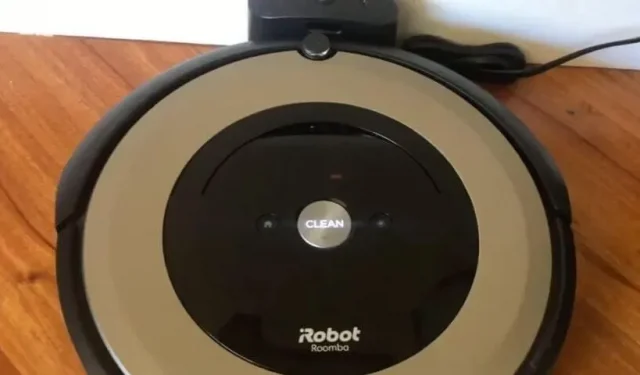
The iRobot Roomba usually charges without problems and keeps the floors clean. But in some cases, charging errors may occur. One of the common Roomba charging errors is error 5, which appears as Err5 on the Roomba display. Let’s find out why this is caused and how to fix it.
What does Err5 mean in Roomba?
Charging Error 5 or Err 5 means there is something wrong with Roomba’s charging system. In other words, Roomba is telling you that it has no idea what the problem is and you need to find out.
This could be an issue with the Home Base, the Roomba charging plates, the battery, or any other issue. But usually the problem can be solved by cleaning Roomba’s charging pads and docking station.
Causes of Charging Error 5 on Roomba
- Accumulation of carbon or dust on Roomba’s docking station, battery, and charging terminals.
- Roomba’s battery is dead or defective
- Yellow tab on battery not removed or removed incorrectly
- The power cord is damaged
- Charging dock is defective
- Roomba motherboard failed
- Software failure
How to fix Roomba 5 charging error?
- Clean Roomba’s Dock and Charging Terminals
- Remove the battery and clean the terminals
- Unplug your dock for a few minutes
- Connect the power cable directly to Roomba
- Raise the front of Roomba after docking
- Make sure the yellow battery tab is removed.
- Roomba should dock without anyone manually docking it
- Roomba Soft Reset
- Reset Roomba to factory settings.
- Contact iRobot support or contact a repair technician
1. Clean Roomba’s dock and charging ports.
Many users reported that after cleaning Roomba’s dock and charging plates, it started charging without any errors. You can use anything to clean Roomba and dock terminals, such as a microfiber cloth, melamine foam, or a toothbrush. You can also apply a cleaning solution, such as a few drops of alcohol or vinegar.
- Apply a small amount of vinegar or alcohol to a clean surface.
- Scrub your toothbrush or any other cleaning tool so that it soaks into it.
- Now gently clean the charging contacts on Roomba and the docking station. Don’t apply too much pressure. Hold it gently.
- After cleaning, wipe the terminals with a dry cloth.
2. Remove the battery and clean the terminals.
As with the Roomba docking station and charging plates, carbon and dust can build up on the battery contacts and terminal. This can result in Charging Error 5 on Roomba.
Also, it is possible that the battery is installed incorrectly, which is why the charging error is displayed. Follow these steps to clean the battery terminals and properly place the battery in the bay:
- Turn off Roomba completely.
- Lay it face down on the table.
- Remove the four screws on the four parts of the vacuum cleaner.
- Now remove the battery cover. You will be able to see the battery.
- Remove the battery.
- There will be charging plates on the front side of the battery. Scrub them gently with a toothbrush and vinegar and let them dry.
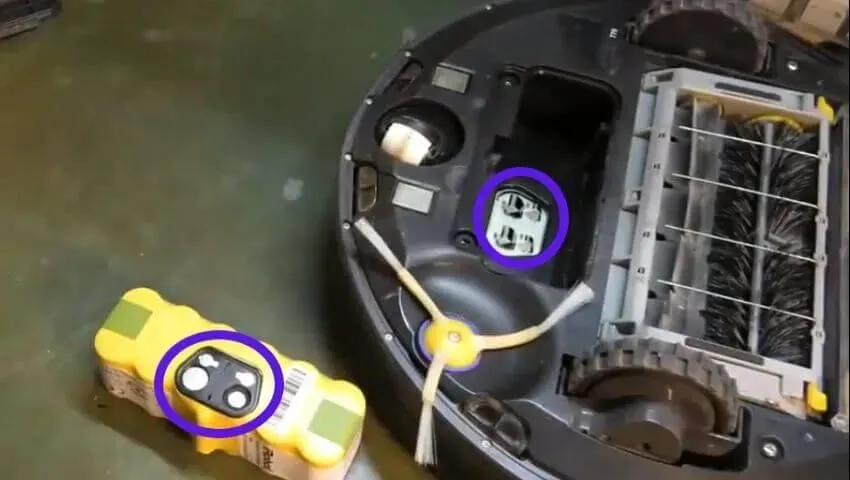
- Inside the battery compartment, you will see the battery terminal. Also clean it and let it dry for 5 minutes.
- After cleaning the battery and battery terminals, place the battery in the compartment.
- Replace the cover and put the screw back in as well.
- Make the Roomba dock again to charge.
3. Unplug your docking station for a few minutes.
There may be a power issue because the docking station can’t charge the device, so Roomba won’t charge. So, reset the dock’s power cycle.
- Disconnect the power cord from the docking station and the wall outlet.
- Leave it like that for a few minutes.
- Plug the power cable back into the wall outlet and dock.
- Connect Roomba to charge and see if it charges.
4. Connect the power cable directly to Roomba.
When Roomba is not charged, it will not work and your room or house will be a mess. Let’s say you see Roomba charging error 5 and you don’t have enough time to fix the problem.
In this case, you can insert the charging cable directly into the vacuum cleaner to charge and resume the cleaning process.
To do this, you only need to find a charging outlet on Roomba and then plug in the power cable to start charging.
5. Raise the front of Roomba after docking
Youtuber came up with this trick. If your Roomba connects to the charging dock but the charging process does not start or you see any error code including error 5, it may be because the Home Base and Roomba charging terminals are not touching each other.
This happens when some spring wears out and weakens the ability of the Roomba or docking station to fully connect its terminals. When these terminals are poorly connected, the charging process does not start.
The solution to this problem is quite simple:
- When Roomba is docked, lift it up at the front.
- You can also put a thin material like a pencil under it.
- As soon as Roomba is raised, the charging terminals will touch and the charging process will begin.
6. Make sure the yellow battery tab is removed.
If you just purchased a new Roomba or replaced the battery, there will be a yellow battery tab at the bottom. This is for battery safety. If this yellow cover is not removed, the battery will not charge.
- Locate the yellow cover on the bottom of the Roomba. It will come out of the battery compartment.

- Pull it all the way.
- Now connect Roomba to the docking station and start charging.
In some cases, the cover does not come off correctly. Instead of being completely removed, it tears, and the visible part comes out, but the removed part remains. The user will think that he removed the cover, but this will cause a charging error because part of it is still sticking to the battery.
So, if you removed the cover and Roomba won’t charge, open the battery compartment and check if the yellow cover is removed correctly.
- You will find four screws on the bottom of the Roomba. Unscrew them to remove the bottom cover.
- Once the cover is off, remove the battery and see if there are any parts of the yellow cover in there. If you find it, delete it.
- Return the battery correctly.
- Reinstall the cover with the screws and tighten the screws.
- Run a test by connecting Roomba to the docking station.
7. Roomba should dock without anyone manually docking it
Roomba robot vacuums are designed to charge only when docked. If someone manually docks them, they won’t charge. Therefore, if you try to charge it by placing it on the docking station, a charging error may appear.
- Lift Roomba off the dock and place it on the floor.
- Let it fit itself.
- The charging process may start.
If this doesn’t work, use the other methods mentioned in this guide.
8. Soft reset Roomba
A soft reset is useful when you want to reset Roomba but don’t want to delete your saved data and settings. In many cases, a soft reset fixes a crash or charging issue. Use these methods to reset Roomba.
8.1 Soft Reset Roomba S, I, and 900 Series Models
- Press and hold the Spot Clean, Home, and Clean buttons on Roomba at the same time.
- Keep the buttons pressed and wait a few seconds for the light around the Clear button to turn on.
- When you see a glowing ring around the clear button, release the buttons.
- The vacuum cleaner will restart after a soft reset.
8.2 Soft Reset Roomba 800 and 600 Series Models
- Press and hold the Home, Spot Clean, and Clean buttons at the same time.
- Keep them pressed until you hear a beep.
- Release the button when you hear a beep.
- Roomba will restart
9. Factory reset Roomba.
A factory reset removes everything from your Roomba and all settings return to their defaults. Perform a hard reset if you’ve tried all the fixes and the charging issue persists.
- Install the iRobot Home app on your Android or iPhone.

- Make sure your phone and Roomba are connected to the same Wi-Fi.
- Launch the iRobot Home app.
- Go to settings.
- Select Factory Reset.
- Roomba will be reset to factory settings.
10. Contact iRobot support or contact a repair technician
Charging error 5 does not specifically tell us what is causing the problem. So, if you’ve followed the methods above and your Roomba won’t charge, it could be an internal hardware issue.
If you are lucky it could be a battery issue and replacing the battery will fix the charging error. But in other cases, the problem may be due to a malfunctioning motherboard.
You can purchase a new battery and replace it yourself, but since we are not sure if this is the cause of the problem, you should inspect the cleaner before making any replacements.
If your Roomba is under warranty, please contact iRobot Support. For older vacuum cleaners, have a repair shop check it out.
Conclusion
Roomba 5 charging error is usually easy to fix, as you can clean Roomba’s charging terminals and dock to fix it. You can also reset Roomba to fix crashes. But in some cases, you may need the help of iRobot support or a repairman.
FAQ
How do I manually reset Roomba?
To manually reset Roomba, follow these steps:– Press and hold the Home, Spot Clean, and Clean buttons at the same time– Hold them down until you hear a beep or ring of light on the Clean button– Release the buttons
How to restart Roomba?
If your Roomba has Spot Clean and Dock buttons, restart Roomba by pressing and holding these two buttons for 10-15 seconds. On other models with a clear button, press and hold the clear button for 10-15 seconds to reboot Roomba.
How do I know if my Roomba battery needs to be replaced?
There is no clear way to tell if a Roomba battery needs to be replaced, but you can look for a few signs: – Roomba doesn’t hold a charge for long – Roomba needs to be charged more often than before – Your Roomba is too old – You see battery problems very often charging
What to do if Roomba won’t charge?
If your Roomba won’t charge, follow these steps:– Clean the charging terminals on Roomba and the docking station– Remove the battery and clean its contacts and terminals– Thoroughly clean Roomba– Connect the power cord directly to Roomba– Unplug the power cord from the docking station on a few minutes – hard reset Roomba