I am using C++ Builder XE7 VCL.
Around August 11 2016 2:00pm UTC, I started receiving multiple complaints from my user base about printing problems. Most of these printing modules have proven stable for many years, and there were no updates to my project within the past 24 hours. I was able to reproduce similar problems on my development/test environment.
Without going into many details of my project, let me present a very simple printing program that is failing:
void __fastcall TForm1::PrintButtonClick(TObject *Sender)
{
    // Test Print:
    TPrinter *Prntr = Printer();
    Prntr->Title = "Test_";
    Prntr->BeginDoc();
    Prntr->Canvas->Font->Size = 10;
    Prntr->Canvas->TextOut(300,1050,"* * * Printing Test * * *");
    if (Prntr->Printing) {
        Prntr->EndDoc();
    }
}
On the first attempt to print, everything works perfectly as expected. If I click the button a second time, TPrinter produces a small PDF, but the PDF file is actually corrupted and appears to have a file handle stuck to it.
If I click the button a third time, I get no printing and the following error message appears:
Printer is not currently printing.
My own test was done using a PDF printer driver, but the complaints I am receiving from users include a variety of local printers, network printers, PDF printers, etc.
In my actual project, I have try/catch exception handling, so the actual results are slightly different, but substantially similar to this result. The results show the hallmarks of instability and/or memory leaks without much in terms of error messages.
I suspect there may have been some Microsoft Windows updates that are tangling with Embarcadero DLLs, but I have not been able to verify this so far.
Is anyone else having similar problems?
|
Nancy Administrator Posts: 765 8/22/2016 |
Nancy Administrator Posts: 765 We have posted a PrintBoss update that helps alleviate this issue caused by a recent Microsoft update. |
|
0
link |
|
|
orion Posts: 2 8/19/2016 |
orion Posts: 2 Choosing the option to close the application after printing seems to help. Configuration > Misc Application Properties > When launched by Acct. Host, Terminate PrintBoss afterBatch Print |
|
0
link |
|
|
orion Posts: 2 8/19/2016 |
orion Posts: 2 Same here. User: Steps to reproduce: Call Stack Information: edited by orion on 8/19/2016 |
|
0
link |
|
|
pwhorten Posts: 1 8/18/2016 |
pwhorten Posts: 1 We are having this issue every third time printing (which is very strange). We have been using this without problem for years now with our Sage 300 ERP system and this began suddenly for a user after a windows update on her workstation. The printer is a network printer and nothing has been changed driverwise with it. Any ideas where I can look to troubleshoot this? ERROR Log more info: EurekaLog 7.2.1.0 |
|
+1
link |
Powered by Jitbit Forum 8.3.8.0
© 2006-2013 Jitbit Software
Содержание
- Исправляем ошибку «Не удалось напечатать этот документ»
- Способ 1: Назначение принтера по умолчанию
- Способ 2: Отключение функции двустороннего обмена данными
- Способ 3: Перезапуск службы «Диспетчер печати»
- Способ 4: Настройка очереди печати (для сетевых принтеров)
- Способ 5: Отключение автономного режима
- Способ 6: Переустановка драйвера
- Способ 7: Использование средства устранения неполадок
- Способ 8: Извлечение застрявшей бумаги
- Способ 9: Проверка картриджей
- Вопросы и ответы
Некоторые пользователи периодически сталкиваются с различными проблемами при попытке отправить какой-либо файл в печать. Одной из распространенных ошибок является появление уведомления «Не удалось напечатать этот документ». В большинстве случаев такая трудность решается программными методами, однако не стоит исключать и аппаратные поломки. Далее мы хотим поговорить об известных причинах появления этой проблемы и вариантах их исправления, начав с самой банальной и часто встречающейся.
Исправляем ошибку «Не удалось напечатать этот документ»
В первую очередь нужно проверить подключенный к компьютеру кабель от принтера. Он должен плотно сидеть в обоих разъемах и не иметь внешних повреждений. Если есть такая возможность, попробуйте подключить его к другому компьютеру и убедиться в обнаружении устройства. В случае неисправности замените провод. Перед выполнением всех последующих инструкций рекомендуем сразу очистить очередь печати. Детальное руководство по осуществлению этой задачи вы найдете в другой нашей статье по следующей ссылке.
Подробнее: Очистка очереди печати в Windows
Способ 1: Назначение принтера по умолчанию
В большинстве случаев юзеры не смотрят на выбранный принтер в программе, через которую запускается печать, и сразу отправляют документ в обработку. Иногда это приводит к тому, что аппаратом по умолчанию выступает отключенное оборудование, поэтому и появляется рассматриваемая проблема. Во избежание подобных ошибок рекомендуется вручную указывать необходимый аппарат или назначить его основным в системе.
Подробнее: Назначение принтера по умолчанию в Windows
Способ 2: Отключение функции двустороннего обмена данными
Стандартная конфигурация принтера включает в себя активный параметр автоматической передачи настроек из системы в принтер, а называется этот пункт «Двусторонний обмен данными». Даже сами разработчики устройств указывают на то, что активный режим работы этого инструмента часто приводит к появлению неполадок с печатью. Поэтому мы предлагаем отключить его.
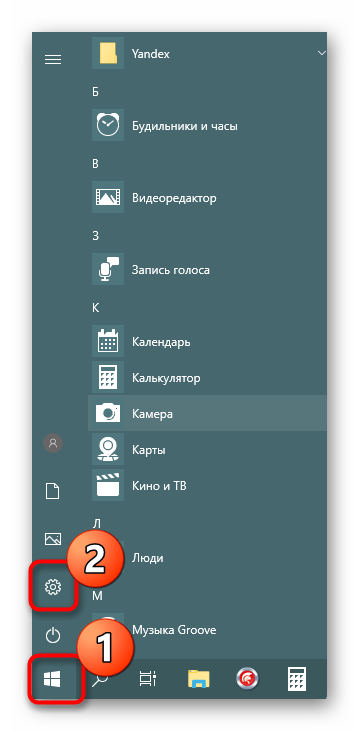
- Откройте «Пуск» и перейдите в «Параметры». В случае со старыми версиями Windows потребуется выбрать пункт «Устройства и принтеры».
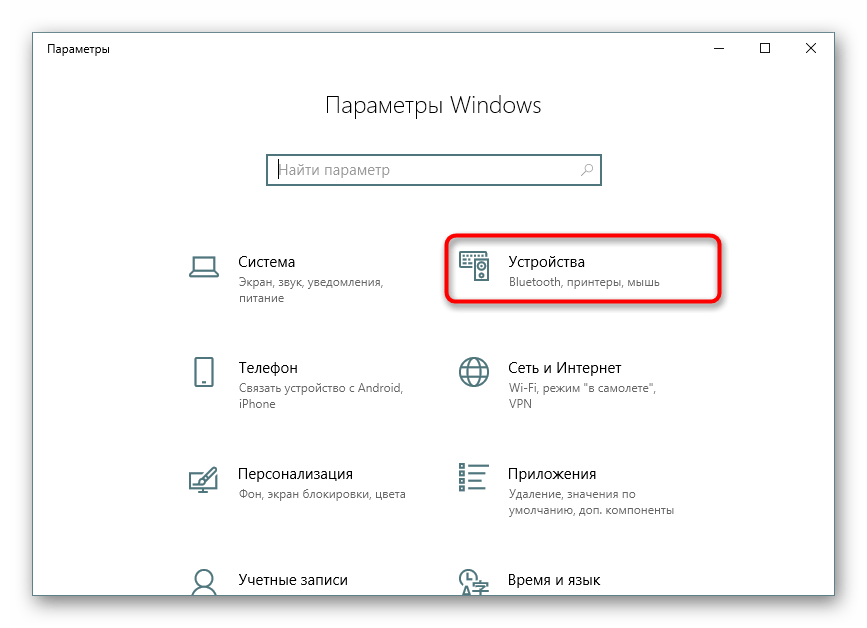
- Переместитесь в раздел «Устройства».
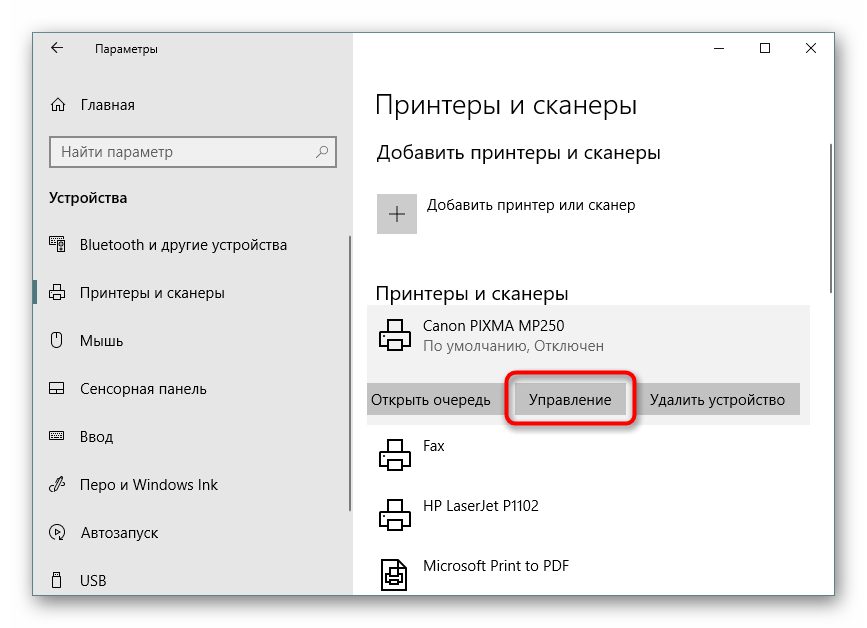
- На панели слева выберите категорию с печатающим оборудованием.
- В списке отыщите требуемый принтер и щелкните на нем ЛКМ.
- Кликните по кнопке «Управление».
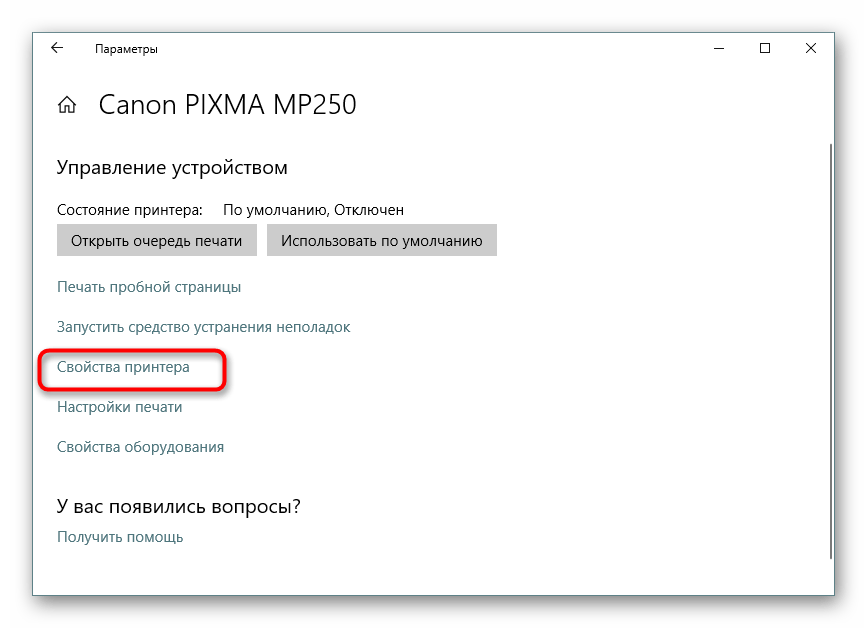
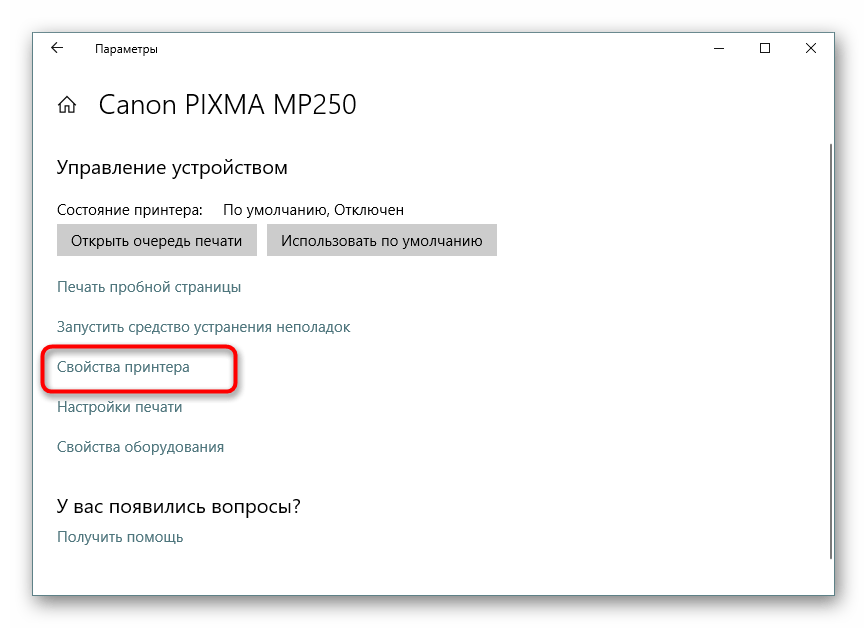
- Синим будет выделена надпись «Свойства принтера», нажмите на нее ЛКМ.
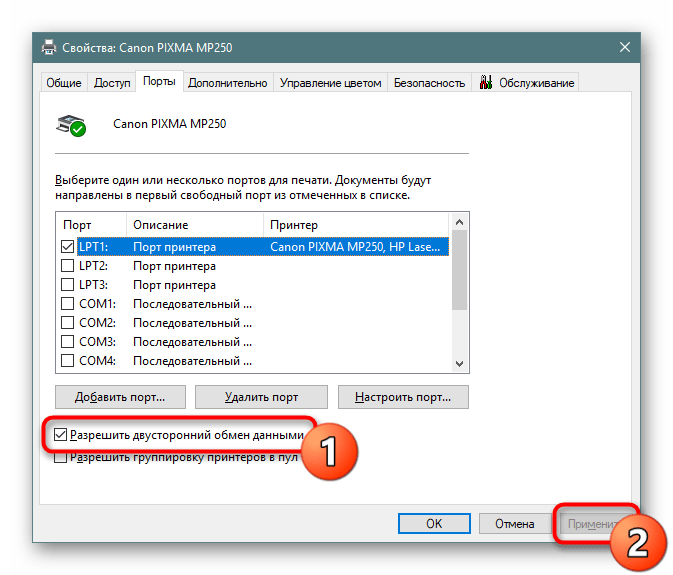
- Перейдите во вкладку «Порты».
- Снимите галочку с пункта «Разрешить двусторонний обмен данными» и примените изменения.


После выполнения указанных выше инструкций останется только перезапустить устройство, чтобы в силу вступили новые настройки, и попробовать отправить документ в печать заново.
Способ 3: Перезапуск службы «Диспетчер печати»
За корректное осуществление всех действий с принтером отвечает одна системная служба «Диспетчер печати». Из-за различных ошибок или сбоев в ОС она могла быть отключенной или перестать нормально функционировать. Поэтому мы советуем вручную перезапустить ее, что делается так:
- Откройте утилиту «Выполнить», зажав комбинацию клавиш Win + R. В поле введите
services.mscи щелкните на «ОК». - В списке отыщите строку «Диспетчер печати» и дважды нажмите на ней левой кнопкой мыши.
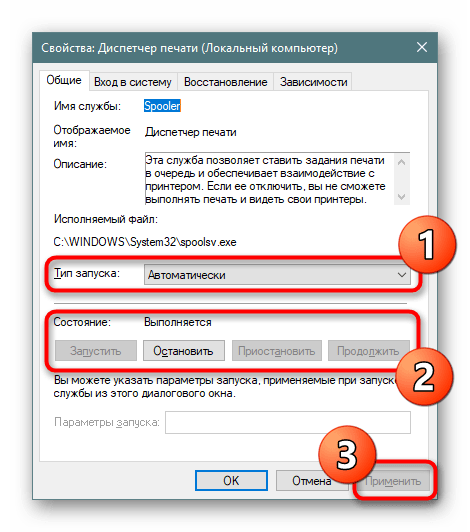
- Убедитесь в том, что тип запуска установлен в состояние «Автоматически», затем остановите службу и повторно запустите ее.


Иногда возникает ситуация, что «Диспетчер печати» отключается сам по себе спустя некоторое время работы. Связано это может быть с разными проблемами, для каждой из которых имеется отдельное решение. Развернутые руководства по исправлению этой трудности вы найдете в статье далее.
Читайте также: Исправление остановки службы печати в Windows
Способ 4: Настройка очереди печати (для сетевых принтеров)
Не все обладатели печатающих аппаратов имеют прямой доступ к ним, иногда они подключаются через локальную сеть с помощью домашней или корпоративной группы. Тогда в силу применяются стандартные параметры, отправляющие документ в очередь печати, а не сразу в принтер. Из-за этого возникает проблема с переходом файла в активный режим и отображается соответствующее уведомление. Настроить эти параметры можно на главном компьютере, воспользовавшись следующей инструкцией:
- Перейдите к списку устройств так, как это было показано в Способе 2, отыщите сетевое оборудование и откройте окно управления им.
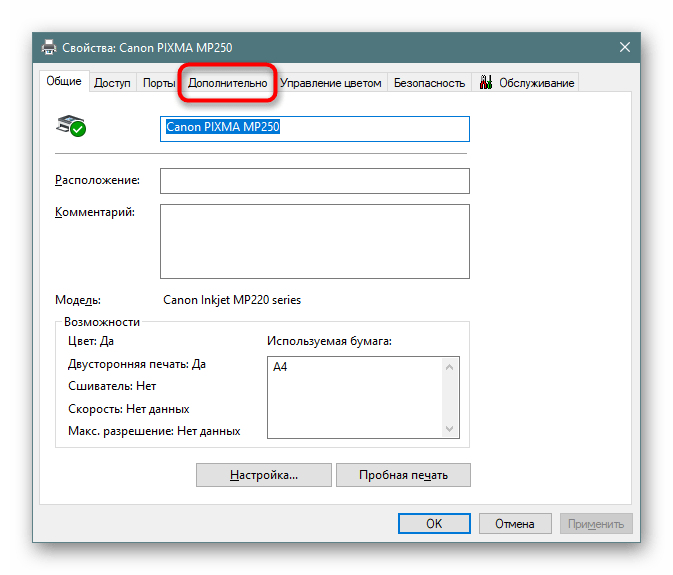
- Здесь вам необходимо меню «Свойства принтера».
- Переместитесь во вкладку «Дополнительно».
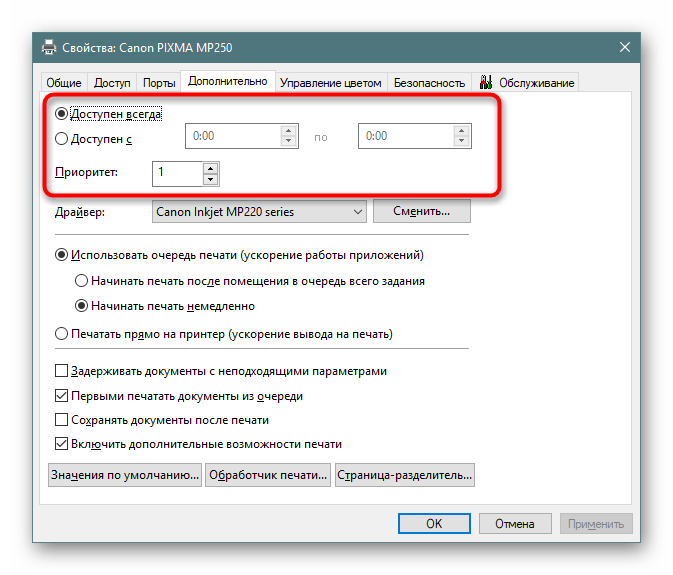
- Убедитесь в том, что нет ограничений на доступ к принтеру и не выставлен приоритет.
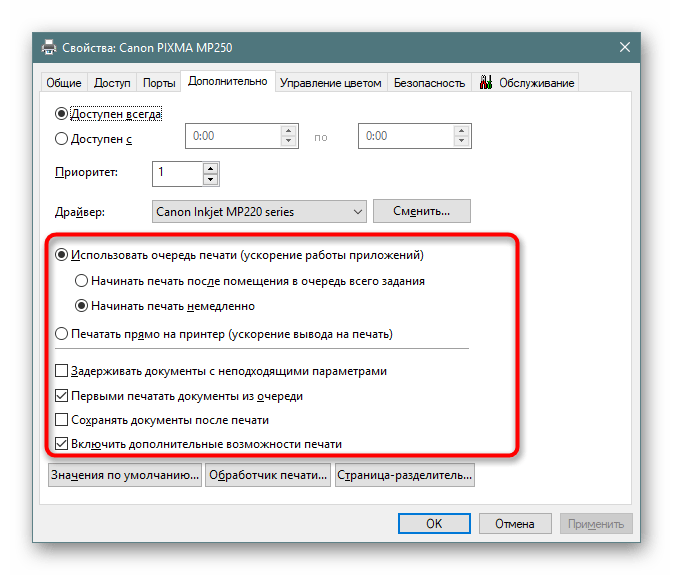
- Чуть ниже отметьте маркером пункт «Печатать прямо на принтер» и уберите галочки со всех пунктов, отвечающих за задержку печати (в разных моделях устройств их количество и функциональность отличаются).
- Не забудьте применить изменения.

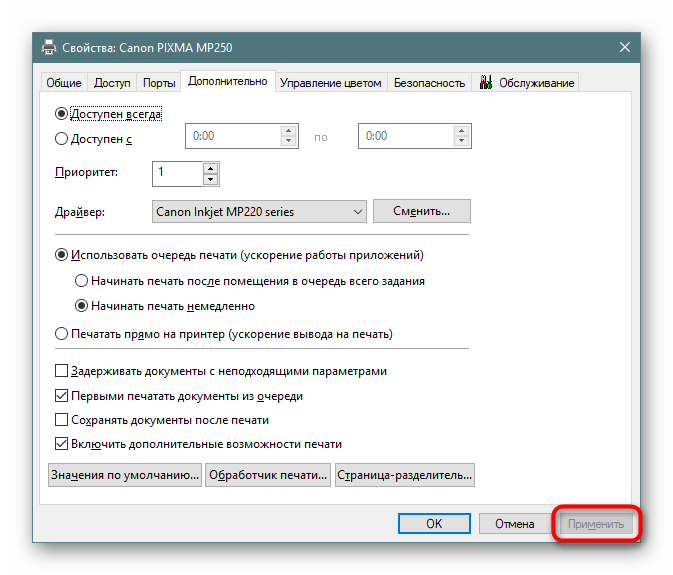
После этих действий обязательно перезагрузите принтер, а также не забудьте очистить очередь. Если нет никаких
параметров, задерживающих печать, неполадка должна немедленно исчезнуть.
Способ 5: Отключение автономного режима
Иногда принтер переходит в автономный режим, что связано с системными ошибками или отключением кабеля. Почти всегда из него он выходит автоматически, но бывают и исключения, тогда при попытке печати на экране появляется уведомление «Работа принтера приостановлена», но на некоторых моделях срабатывает другой код и надпись меняется на «Не удалось напечатать этот документ». Мы советуем ознакомиться с представленным ниже материалом, чтобы понять, как самостоятельно перевести принтер в активный режим и исправить возникшую трудность.
Подробнее: Решение проблемы «Работа принтера приостановлена»
Способ 6: Переустановка драйвера
Драйвер принтера отвечает за нормальное функционирование его программной части. Неполадки с работой этого компонента или неправильная установка приводит к прекращению работоспособности. Поэтому мы рекомендуем полностью удалить старый драйвер так, как это показано в статье по следующей ссылке.
Подробнее: Удаление старого драйвера принтера
После этого останется только отыскать драйвер последней версии любым удобным методом, скачать его и инсталлировать. Приоритетным местом поиска является официальный сайт, идущий в комплекте лицензионный диск или утилита от разработчика.
Подробнее: Установка драйверов для принтера
Способ 7: Использование средства устранения неполадок
Выше мы рассмотрели все программные методы решения возникшей неполадки, которые не задевает стандартное системное средство устранения проблем. Если ничего из перечисленного ранее не принесло результата, запустите этот инструмент, чтобы он провел автоматическую диагностику.
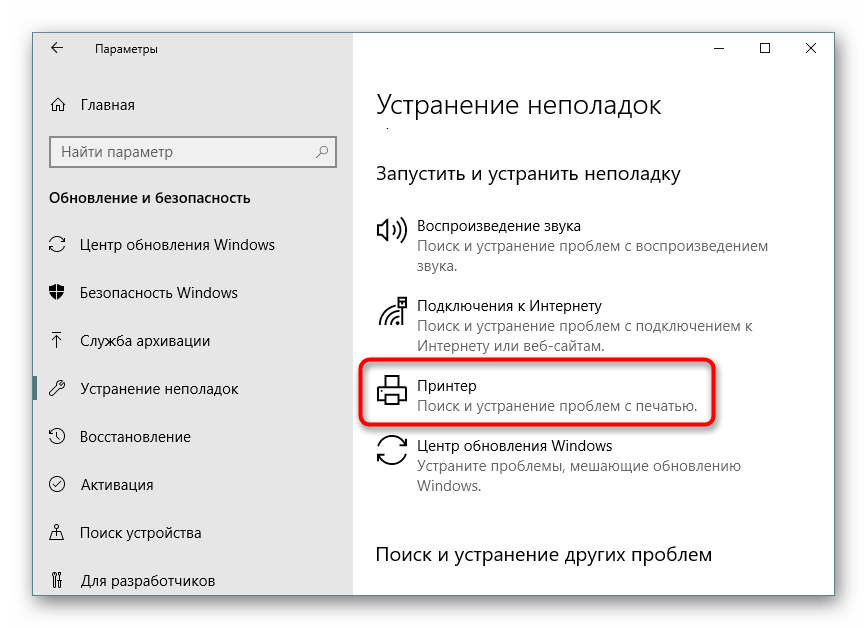
- Откройте меню «Параметры» через «Пуск» и перейдите в раздел «Обновление и безопасность».
- Через левую панель опуститесь в категорию «Устранение неполадок».
- Выберите пункт «Принтер».
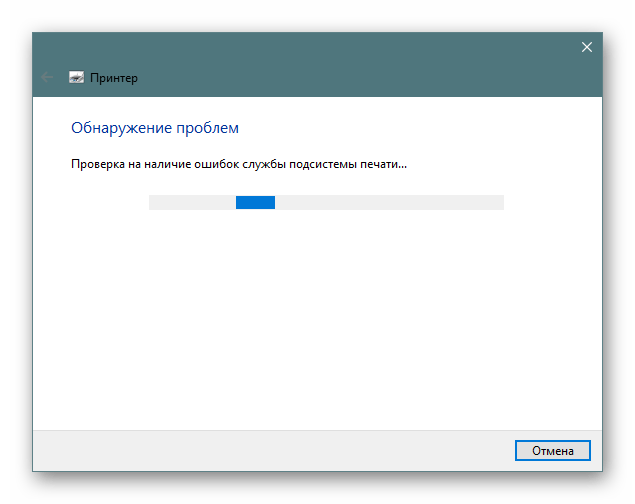
- Дождитесь, пока Мастер обнаружения проблем завершит сканирование. При отображении списка с принтерами выберите нерабочий и следуйте отобразившимся рекомендациям.


Способ 8: Извлечение застрявшей бумаги
Как уже было сказано ранее, не все модели печатающего оборудования отображают ошибки корректно, что бывает и при возникновении ситуации с застрявшей внутри бумагой. Ее клочки не позволяют ролику захвата взять новый лист или же уведомляют о наличии внутри посторонних предметов. В таком случае надо самостоятельно разобрать принтер и проверить его внутренности на наличие кусков бумаги или, например, скрепок. При обнаружении посторонних предметов их нужно аккуратно извлечь.
Подробнее:
Полная разборка принтеров
Решение проблемы с застрявшей в принтере бумагой
Решение проблем с захватом бумаги на принтере
Способ 9: Проверка картриджей
Если ни один из указанных выше методов не принес никого результата, проверять требуется картриджи. Не всегда программное обеспечение показывает уведомление о том, что краска кончается. Необходимо вручную достать чернильницы и проверить их содержимое. Кроме этого, иногда принтер вовсе не видит картридж, поэтому нужно предпринимать другие меры. Все необходимые сведения по работе с картриджами вы найдете в других наших статьях.
Читайте также:
Замена картриджей в принтерах
Исправление ошибки с обнаружением принтерного картриджа
Правильная чистка принтерного картриджа
Как заправить картридж принтера
Выше мы продемонстрировали все известные методы решения проблемы «Не удалось напечатать этот документ». Вам следует обязательно по очереди проверять каждый из них, чтобы выявить возникшую неполадку. Дополнительно попробуйте использовать другое приложение для печати или проверить другие файлы, возможно, неполадка заключается именно в этом, а не в работе принтера.
Читайте также:
Проверка принтера на качество печати
Решение проблем с распечаткой PDF-файлов
Recently when printing the 3rd time and up, you get this error in many Delphi programs and the Delphi IDE:

Printer is not currently printing.
In the past this only occurred when you used a TPrinter and forgot to call BeginDoc.
But now it always occurs after reusing the same TPrinter instance for the 3rd time and up. Since the Delphi Galileo based IDEs (8 and higher; likely older ones as well: the source code printing hasn’t changed in a long time). The error actually occurs twice: after starting a source code print job, but also after cancelling the same failed source code print job.
The second error stroke me as odd, so I went searching for “printer is not currently printing” “IDE” leading to this stack overflow question: c++builder – Why is TPrinter (XE7) suddenly having problems today? – Stack Overflow [WayBack].
The pattern there is using the
Printer()function which has been the way the (un)official code examples have shown for ages (Delphi 2007 Printers.Printer Function [WayBack]; earlier examples like Delphi 7 [WayBack] usually in PDF files).Like in the Delphi 7 “5-32 Developer’s Guide” page example:
procedure TForm1.Button1Click(Sender: TObject);
var
  r: TRect;
  i: Integer;
begin
  with Printer do
  begin
    r := Rect(200,200,(Pagewidth - 200),(PageHeight - 200));
    BeginDoc;
    Canvas.Brush.Style := bsClear;
    for i := 0 to Memo1.Lines.Count do
      Canvas.TextOut(200,200 + (i * Canvas.TextHeight(Memo1.Lines.Strings[i])),
    Memo1.Lines.Strings[i]);
    Canvas.Brush.Color := clBlack;
    Canvas.FrameRect(r);
    EndDoc;
  end;
end;
(Yes, that’s back in the D7 days when examples were still using with and not using try/finally statements for resource cleanup).
Actual cause and permanent fix
The printing problems are caused by various recent Windows updates part of MS16-098:
- KB3177725 MS16-098 may cause printer problems – Microsoft Community
- KB3176493 for Windows 10 and KB3177725 for Windows 7 broke printing in – Microsoft Community
Though MS16-098: Security update for Windows kernel-mode drivers: August 9, 2016 mentions the issue without a fix, KB3177725 in MS16-098: Description of the security update for Windows kernel-mode drivers: August 9, 2016 mentions both the issue and a permanent fix:
After you apply this security update and you print multiple documents in succession, the first two documents may print successfully. However, the third and subsequent documents may not print.
To resolve this issue, install update 3187022. For more information, click the following article number to view the article in the Microsoft Knowledge Base:
3187022 Print functionality is broken after any of the MS16-098 security updates are installed
This article describes printing issues that occur after any of the security updates that are described in Microsoft Security Bulletin MS16-098 are installed in Windows. You can fix these issues by installing the update that is described in this article. Before you install this update, check out the Prerequisites section.
This update applies to the following operating systems:
- Windows Server 2012 R2
- Windows 8.1
- Windows RT 8.1
- Windows Server 2012
- Windows Server 2008 R2 Service Pack 1 (SP1)
- Windows 7 SP1
- Windows Server 2008 Service Pack 2 (SP2)
- Windows Vista SP2
No solution for Windows 10 yet…
Until you install the fix: workarounds
For your own code (Thanks Remy Lebau for your answer), add this code for your BeginDoc call:
MyPrinter.Copies := MyPrinter.Copies;
You might want to keep including this in your code as you’re never sure when the end-users apply which Windows update.
For the Delphi IDE either:
- Press the “Setup…” button in the “Print Selection” dialog when printing source code, then “OK” in the “Print Setup” dialog:

Print Selection dialog

“Print Setup” dialog.
- Uninstall the security updated marked in blue (Security Update for Microsoft Windows (KB3177725):

Security Update for Microsoft Windows (KB3177725)


–jeroen
IDE stack trace when the print job fails:
[506B57F5]{vcl220.bpl  } Vcl.Printers.RaiseError (Line 249, "Vcl.Printers.pas" + 1) + $E
[506B62B2]{vcl220.bpl  } Vcl.Printers.TPrinter.CheckPrinting (Line 882, "Vcl.Printers.pas" + 2) + $14
[506B6040]{vcl220.bpl  } Vcl.Printers.TPrinterCanvas.Changing (Line 691, "Vcl.Printers.pas" + 1) + $5
[50660837]{vcl220.bpl  } Vcl.Graphics.TCanvas.GetHandle (Line 4144, "Vcl.Graphics.pas" + 1) + $4
[20761344]{coreide220.bpl} PrintSes.TPrintSession.PrintHeader (Line 312, "PrintSes.pas" + 12) + $16
[20760D49]{coreide220.bpl} PrintSes.DoUpdatePage (Line 108, "PrintSes.pas" + 3) + $7
[207611D5]{coreide220.bpl} PrintSes.TPrintSession.PrintBody (Line 279, "PrintSes.pas" + 4) + $7
[2076066A]{coreide220.bpl} PrintSts.TPrintStatusDlg.StartPrinting (Line 51, "PrintSts.pas" + 1) + $4
[50682FE9]{vcl220.bpl  } Vcl.Controls.TControl.WndProc (Line 7245, "Vcl.Controls.pas" + 91) + $6
[50687B91]{vcl220.bpl  } Vcl.Controls.TWinControl.WndProc (Line 10079, "Vcl.Controls.pas" + 158) + $6
[2185459B]{vclactnband220.bpl} Vcl.ActnMenus.CallWindowHook (Line 748, "Vcl.ActnMenus.pas" + 20) + $F
[500605B4]{rtl220.bpl  } System.TMonitor.TryEnter (Line 17939, "System.pas" + 10) + $0
[50060134]{rtl220.bpl  } System.TMonitor.Enter (Line 17632, "System.pas" + 4) + $2
[5005FFB8]{rtl220.bpl  } System.TMonitor.CheckOwningThread (Line 17550, "System.pas" + 2) + $0
[500602C2]{rtl220.bpl  } System.TMonitor.Exit (Line 17736, "System.pas" + 1) + $2
[50060313]{rtl220.bpl  } System.TMonitor.Exit (Line 17758, "System.pas" + 2) + $7
[50664E27]{vcl220.bpl  } Vcl.Graphics.FreeMemoryContexts (Line 7051, "Vcl.Graphics.pas" + 12) + $8
[50687B91]{vcl220.bpl  } Vcl.Controls.TWinControl.WndProc (Line 10079, "Vcl.Controls.pas" + 158) + $6
[507C1F58]{vcl220.bpl  } Vcl.Forms.TCustomForm.WndProc (Line 4427, "Vcl.Forms.pas" + 206) + $5
(002818D1){mmx_bds16.dll} [100F28D1]
[506871B0]{vcl220.bpl  } Vcl.Controls.TWinControl.MainWndProc (Line 9786, "Vcl.Controls.pas" + 3) + $6
[50172DF4]{rtl220.bpl  } System.Classes.StdWndProc (Line 16882, "System.Classes.pas" + 8) + $0
[5067DD2E]{vcl220.bpl  } Vcl.Controls.FindControl (Line 3574, "Vcl.Controls.pas" + 6) + $9
[507CB41F]{vcl220.bpl  } Vcl.Forms.TApplication.ProcessMessage (Line 10352, "Vcl.Forms.pas" + 23) + $1
[507CB462]{vcl220.bpl  } Vcl.Forms.TApplication.HandleMessage (Line 10382, "Vcl.Forms.pas" + 1) + $4
[507C69DA]{vcl220.bpl  } Vcl.Forms.TCustomForm.ShowModal (Line 7148, "Vcl.Forms.pas" + 33) + $5
[20760BFD]{coreide220.bpl} PrintSes.TPrintSession.Print (Line 81, "PrintSes.pas" + 18) + $0
[20775605]{coreide220.bpl} EditorControl.PrintEditView (Line 6450, "EditorControl.pas" + 13) + $12
[207756D1]{coreide220.bpl} EditorControl.TCustomEditControl.Print (Line 6476, "EditorControl.pas" + 0) + $1
[207219FF]{coreide220.bpl} EditorBuffer.TEditView.EditAction (Line 5478, "EditorBuffer.pas" + 12) + $2
[20754799]{coreide220.bpl} EditorForm.TEditWindow.EditAction (Line 1200, "EditorForm.pas" + 18) + $2
[00422C30]{bds.exe     } AppMain.TAppBuilder.FormEdit (Line 3901, "AppMain.pas" + 4) + $9
[00422CD9]{bds.exe     } AppMain.TAppBuilder.DoEditAction (Line 3916, "AppMain.pas" + 2) + $4
[0041EEBD]{bds.exe     } AppMain.TAppBuilder.FilePrint (Line 2680, "AppMain.pas" + 0) + $5
[50172097]{rtl220.bpl  } System.Classes.TBasicAction.Execute (Line 16378, "System.Classes.pas" + 3) + $7
[5066C5DA]{vcl220.bpl  } Vcl.ActnList.TCustomAction.Execute (Line 259, "Vcl.ActnList.pas" + 19) + $35
[50171EEF]{rtl220.bpl  } System.Classes.TBasicActionLink.Execute (Line 16289, "System.Classes.pas" + 2) + $7
[2185508D]{vclactnband220.bpl} Vcl.ActnMenus.TCustomActionMenuBar.ExecAction (Line 1077, "Vcl.ActnMenus.pas" + 6) + $D
[21856930]{vclactnband220.bpl} Vcl.ActnMenus.TCustomActionMenuBar.TrackMenu (Line 1843, "Vcl.ActnMenus.pas" + 19) + $15
[2185A34A]{vclactnband220.bpl} Vcl.ActnMenus.TCustomActionMainMenuBar.TrackMenu (Line 3637, "Vcl.ActnMenus.pas" + 5) + $3
[21854C53]{vclactnband220.bpl} Vcl.ActnMenus.TCustomActionMenuBar.CMEnterMenuLoop (Line 962, "Vcl.ActnMenus.pas" + 1) + $4
[50682FE9]{vcl220.bpl  } Vcl.Controls.TControl.WndProc (Line 7245, "Vcl.Controls.pas" + 91) + $6
[50687B91]{vcl220.bpl  } Vcl.Controls.TWinControl.WndProc (Line 10079, "Vcl.Controls.pas" + 158) + $6
[500605B4]{rtl220.bpl  } System.TMonitor.TryEnter (Line 17939, "System.pas" + 10) + $0
[50060134]{rtl220.bpl  } System.TMonitor.Enter (Line 17632, "System.pas" + 4) + $2
[5005FFB8]{rtl220.bpl  } System.TMonitor.CheckOwningThread (Line 17550, "System.pas" + 2) + $0
[500602C2]{rtl220.bpl  } System.TMonitor.Exit (Line 17736, "System.pas" + 1) + $2
[50060313]{rtl220.bpl  } System.TMonitor.Exit (Line 17758, "System.pas" + 2) + $7
[50664E27]{vcl220.bpl  } Vcl.Graphics.FreeMemoryContexts (Line 7051, "Vcl.Graphics.pas" + 12) + $8
[506871B0]{vcl220.bpl  } Vcl.Controls.TWinControl.MainWndProc (Line 9786, "Vcl.Controls.pas" + 3) + $6
[506871C5]{vcl220.bpl  } Vcl.Controls.TWinControl.MainWndProc (Line 9789, "Vcl.Controls.pas" + 6) + $0
[50172DF4]{rtl220.bpl  } System.Classes.StdWndProc (Line 16882, "System.Classes.pas" + 8) + $0
[50687B91]{vcl220.bpl  } Vcl.Controls.TWinControl.WndProc (Line 10079, "Vcl.Controls.pas" + 158) + $6
[500605B4]{rtl220.bpl  } System.TMonitor.TryEnter (Line 17939, "System.pas" + 10) + $0
[50060134]{rtl220.bpl  } System.TMonitor.Enter (Line 17632, "System.pas" + 4) + $2
[21856A46]{vclactnband220.bpl} Vcl.ActnMenus.TCustomActionMenuBar.WndProc (Line 1882, "Vcl.ActnMenus.pas" + 25) + $4
[506871B0]{vcl220.bpl  } Vcl.Controls.TWinControl.MainWndProc (Line 9786, "Vcl.Controls.pas" + 3) + $6
[50172DF4]{rtl220.bpl  } System.Classes.StdWndProc (Line 16882, "System.Classes.pas" + 8) + $0
[5067DD2E]{vcl220.bpl  } Vcl.Controls.FindControl (Line 3574, "Vcl.Controls.pas" + 6) + $9
[507CB41F]{vcl220.bpl  } Vcl.Forms.TApplication.ProcessMessage (Line 10352, "Vcl.Forms.pas" + 23) + $1
[507CB462]{vcl220.bpl  } Vcl.Forms.TApplication.HandleMessage (Line 10382, "Vcl.Forms.pas" + 1) + $4
[507CB795]{vcl220.bpl  } Vcl.Forms.TApplication.Run (Line 10520, "Vcl.Forms.pas" + 26) + $3

Stack trace leading to the “Printer is not currently printing.” error.
Stack trace after cancelling the print job:
[506B57F5]{vcl220.bpl  } Vcl.Printers.RaiseError (Line 249, "Vcl.Printers.pas" + 1) + $E
[506B62B2]{vcl220.bpl  } Vcl.Printers.TPrinter.CheckPrinting (Line 882, "Vcl.Printers.pas" + 2) + $14
[506B62FB]{vcl220.bpl  } Vcl.Printers.TPrinter.Abort (Line 889, "Vcl.Printers.pas" + 1) + $4
[20760C16]{coreide220.bpl} PrintSes.TPrintSession.Print (Line 82, "PrintSes.pas" + 19) + $C
[20775605]{coreide220.bpl} EditorControl.PrintEditView (Line 6450, "EditorControl.pas" + 13) + $12
[207756D1]{coreide220.bpl} EditorControl.TCustomEditControl.Print (Line 6476, "EditorControl.pas" + 0) + $1
[207219FF]{coreide220.bpl} EditorBuffer.TEditView.EditAction (Line 5478, "EditorBuffer.pas" + 12) + $2
[20754799]{coreide220.bpl} EditorForm.TEditWindow.EditAction (Line 1200, "EditorForm.pas" + 18) + $2
[00422C30]{bds.exe     } AppMain.TAppBuilder.FormEdit (Line 3901, "AppMain.pas" + 4) + $9
[00422CD9]{bds.exe     } AppMain.TAppBuilder.DoEditAction (Line 3916, "AppMain.pas" + 2) + $4
[0041EEBD]{bds.exe     } AppMain.TAppBuilder.FilePrint (Line 2680, "AppMain.pas" + 0) + $5
[50172097]{rtl220.bpl  } System.Classes.TBasicAction.Execute (Line 16378, "System.Classes.pas" + 3) + $7
[5066C5DA]{vcl220.bpl  } Vcl.ActnList.TCustomAction.Execute (Line 259, "Vcl.ActnList.pas" + 19) + $35
[50171EEF]{rtl220.bpl  } System.Classes.TBasicActionLink.Execute (Line 16289, "System.Classes.pas" + 2) + $7
[2185508D]{vclactnband220.bpl} Vcl.ActnMenus.TCustomActionMenuBar.ExecAction (Line 1077, "Vcl.ActnMenus.pas" + 6) + $D
[21856930]{vclactnband220.bpl} Vcl.ActnMenus.TCustomActionMenuBar.TrackMenu (Line 1843, "Vcl.ActnMenus.pas" + 19) + $15
[2185A34A]{vclactnband220.bpl} Vcl.ActnMenus.TCustomActionMainMenuBar.TrackMenu (Line 3637, "Vcl.ActnMenus.pas" + 5) + $3
[21854C53]{vclactnband220.bpl} Vcl.ActnMenus.TCustomActionMenuBar.CMEnterMenuLoop (Line 962, "Vcl.ActnMenus.pas" + 1) + $4
[50682FE9]{vcl220.bpl  } Vcl.Controls.TControl.WndProc (Line 7245, "Vcl.Controls.pas" + 91) + $6
[50687B91]{vcl220.bpl  } Vcl.Controls.TWinControl.WndProc (Line 10079, "Vcl.Controls.pas" + 158) + $6
[500605B4]{rtl220.bpl  } System.TMonitor.TryEnter (Line 17939, "System.pas" + 10) + $0
[50060134]{rtl220.bpl  } System.TMonitor.Enter (Line 17632, "System.pas" + 4) + $2
[5005FFB8]{rtl220.bpl  } System.TMonitor.CheckOwningThread (Line 17550, "System.pas" + 2) + $0
[500602C2]{rtl220.bpl  } System.TMonitor.Exit (Line 17736, "System.pas" + 1) + $2
[50060313]{rtl220.bpl  } System.TMonitor.Exit (Line 17758, "System.pas" + 2) + $7
[50664E27]{vcl220.bpl  } Vcl.Graphics.FreeMemoryContexts (Line 7051, "Vcl.Graphics.pas" + 12) + $8
[506871B0]{vcl220.bpl  } Vcl.Controls.TWinControl.MainWndProc (Line 9786, "Vcl.Controls.pas" + 3) + $6
[506871C5]{vcl220.bpl  } Vcl.Controls.TWinControl.MainWndProc (Line 9789, "Vcl.Controls.pas" + 6) + $0
[50172DF4]{rtl220.bpl  } System.Classes.StdWndProc (Line 16882, "System.Classes.pas" + 8) + $0
[50687B91]{vcl220.bpl  } Vcl.Controls.TWinControl.WndProc (Line 10079, "Vcl.Controls.pas" + 158) + $6
[500605B4]{rtl220.bpl  } System.TMonitor.TryEnter (Line 17939, "System.pas" + 10) + $0
[50060134]{rtl220.bpl  } System.TMonitor.Enter (Line 17632, "System.pas" + 4) + $2
[21856A46]{vclactnband220.bpl} Vcl.ActnMenus.TCustomActionMenuBar.WndProc (Line 1882, "Vcl.ActnMenus.pas" + 25) + $4
[506871B0]{vcl220.bpl  } Vcl.Controls.TWinControl.MainWndProc (Line 9786, "Vcl.Controls.pas" + 3) + $6
[50172DF4]{rtl220.bpl  } System.Classes.StdWndProc (Line 16882, "System.Classes.pas" + 8) + $0
[5067DD2E]{vcl220.bpl  } Vcl.Controls.FindControl (Line 3574, "Vcl.Controls.pas" + 6) + $9
[507CB41F]{vcl220.bpl  } Vcl.Forms.TApplication.ProcessMessage (Line 10352, "Vcl.Forms.pas" + 23) + $1
[507CB462]{vcl220.bpl  } Vcl.Forms.TApplication.HandleMessage (Line 10382, "Vcl.Forms.pas" + 1) + $4
[507CB795]{vcl220.bpl  } Vcl.Forms.TApplication.Run (Line 10520, "Vcl.Forms.pas" + 26) + $3

Stack trace after cancelling the print job: again “Printer is not currently printing.”
Printers are essential hardware for institutions and offices. It can cause mayhem in these places if the printers do not make hard copies of the necessary files.
When your printer refuses to make printouts, you might see the “Error printing” message errors on your screen. If you are wondering how to proceed and print your files or image, use this article to fix this error and get your printer pushing out warm sheets of paper in no time.
Solutions to fix the Error Printing message on your Windows 10 PC
The “Error Printing” message is generally caused by a loose connection or outdated printer drivers. When this dialog box appears on your screen, it could be accompanied by an error code for reference or no code. Do not confuse this issue with the Missing or Damaged ink cartridge errors.

These are the different steps that you can use on your Windows 10 computer to solve the Error Printing message errors.
- Take a look at the Printer’s paper tray
- Check the Printer cable and the port
- Disconnect and Reconnect the Printer device
- Run the Printer Troubleshooter
- Update the USB driver software
- Disable and Re-enable the Printer Spooler service
- Clear the Printing queue
Take a look at the Printer’s paper tray
Paper and ink are the most important factors that one needs to print. The paper is placed on an expandable tray, from which the device pulls in the paper and pushes out the hard copy of the file. If this tray is empty or damaged, the printer will not be able to find any paper to print the content onto. This will result in the computer showing you the Error Printing message.

If the tray is dislodged, you should be able to put it back in place, easily. If it is broken, take it to a repair center and the professionals will give you a solution.
Check the Printer cable
A cable is used to connect the printer and your computer. If this cable is disconnected or damaged, there would be no link between the device and the PC. Take a look at the wire and if there are any damages, take the printer to the service center and they should be able to replace the wire.
The problem can also lie with the slot, through which the printer is connected to the PC with the help of the cable. If the slot is loose or broken, your printer can be switched on but not be used to make print-outs.
Disconnect and Reconnect the Printer device
Another workaround for this issue is to unplug all the connections to the printer from your computer. Remove the wires carefully and attach them again. Wait for the printer to be detected again and try printing your files after this method.
Run the Printer Troubleshooter
- Launch the Windows Settings (Windows logo key + I).
- Go into the Updates & Security settings tile and click on the Troubleshoot tab.

- Locate the Printer option. If you haven’t used any troubleshooter before, you will have to look for the Printer troubleshooter in the Additional Troubleshooters link. It will be available in the Get up and running section.
- Click on the Printer option and select the Run as troubleshooter option.

This will initiate the troubleshooting for the printer hardware. You might have to select a few options, but that is unlikely.
- Once the process is complete you’ll be shown details of the error. Click on the Apply this fix button to make the apt changes, automatically.
Update the USB driver software
- Bring up the Quick-Link/Power User menu (Windows logo key + X key) by right-clicking on the Start button. You can also open the Run utility (Windows + R) and execute the devmgmt.msc command to open the Device Manager.

- Choose the Device Manager option in this menu and this will launch the Device Manager window. You’ll be able to see all the devices on your computer, categorized neatly.
- As an alternate method, You can also open the Run utility (Windows + R) and execute the devmgmt.msc command to open the Device Manager.
- Unfold the Universal Serial Bus Controllers section and right-click on the USB port driver, to which the printer is connected. These are not the driver names, which have Mass Storage or USB in them.

- Click on the Update driver option and this will prompt the Update USB driver window to appear on your screen.
- From this window, choose Search automatically for updated drivers.

- With a good internet connection, your system will download the latest USB port drivers.
- Restart your computer to install the downloaded updates.
This is the manual method to upgrade and install your driver software.
You can download drivers for the most recent USB drivers from the respective manufacturer’s site in the form of a setup. You can install it to update it to the latest version.
Disable and Re-enable the Print Spooler service
The Print Spooler is a Microsoft Windows 10 system service that retains all the files until the printer is ready to print them and produce hard copies of the image or document. The print job is held in the Spooler folder when the printer is busy and is printing something.
Here’s how you could restart this service.
- Search for the Services window in the taskbar search box and open the first search result. It will be the Services application.
- You’ll see a list of all the system services, that are dormant or functioning on your computer. From this long list, find the Print Spooler service.

- Check the status of the service, which should be running. Right-click on this service and choose the Restart option.
- You can also choose to Stop the process and Start it again to refresh it, from the context menu.
Now, try and print the file that you need to. If you are able to receive a printed output, you’re set.
Verify your printer port settings
- Open the Windows Control Panel. For this, you can use the search box or, alternatively, launch the Run tool (Windows key + R), enter the control command, and click Ok on the small dialog box.
- Go into the Devices and Printers settings and you’ll be shown a screen with all the devices that are currently attached to your computer.

- Right-click on your printer and choose the Printer properties option.
- Open the Ports tab and find the port through which your printers are connected.
- Check the checkbox next to the port that usually hosts the printer’s USB pin.
- Click on Apply and then, OK to save the changes and close this dialog box.
Clear the Printing queue
- Open a Windows Explorer window by pressing the Windows key and E together.
- Copy and paste the following directory in the Windows Explorer address bar:
%WINDIR%\system32\spool\printers
- If there are contents inside this folder, select all of them (Ctrl + A) and delete them.
This will clear the queue of documents and other files that are waiting to be printed.
If you cannot fix this issue with these solutions and get your printer, printing correctly on your Windows 10 PC, again, report this issue to the printer support and they should replace it or fix the printer for you. We hope this article was helpful for you to solve the error printing problem.