-
agerhard
- Posts: 3
- Joined: Thu Oct 25, 2018 8:30 am
RPI 3B : system stops / no access — where to find error logs / messages?
Hello together,
I have an issue here with an RPI 3B (no +) on Raspbian Buster which is used for data collection (24/7). Using USB-interfaces for ModBus and OneWire (1-wire) I have installed https://github.com/volkszaehler/mbmd and https://owfs.org/uploads/owserver.html to collect the data and display it on the provided overview page (ports :8080 and :2121). SSH is also enabled, as the unit is located in the local power distribution unit in the cellar next to the KNX-units for the smarthome functions. Temperature level in the distribution unit itself is at 29-30°C at all times.
Data is to be sent to an InfluxDB on a NAS in the future, however «data collector» system needs to run stable before I start this.
The system runs so far very well, however after roughly a week the overview pages on the two ports are not accessible anymore — via SSH unit also is not accessible. Unit itself has only the red LED lit, green LED does not show any reaction. Changed RPI3B-unit already from 1st in Italtronic-slimline REG-case to 2nd unit in standard REG-case (to eliminate overheating — even though unlikely).
Power is provided by a Siemens LOGO 5V REG power unit.
Pulling power cable and rebooting makes the system run again — until after ~ a week it stops.
Are there any error logs available on the system or can logging be activated to find out what stops the system here?
Thank you.
cu,
agerhard
-

thagrol
- Posts: 9842
- Joined: Fri Jan 13, 2012 4:41 pm
- Location: Darkest Somerset, UK

Re: RPI 3B : system stops / no access — where to find error logs / messages?
Wed Jun 17, 2020 11:32 am
Logs are in /var/log
Start with /var/log/syslog
Knowledge, skills, & experience have value. If you expect to profit from someone’s you should expect to pay for them.
All advice given is based on my experience. it worked for me, it may not work for you.
Need help? https://github.com/thagrol/Guides
-
agerhard
- Posts: 3
- Joined: Thu Oct 25, 2018 8:30 am
Re: RPI 3B : system stops / no access — where to find error logs / messages?
Wed Jun 17, 2020 9:09 pm
Hello thagrol, thanks for the pointer. While checking syslog and previous saved versions of it, it actually happened — suddenly the SSH connection broke at 22:30 h and the info pages were not accessible anymore.
Enclosed the content of the syslog for 17th June. Full content would be too lenghty (due to mbmd not respond line items), therefore only as as of 22:00 h. Full log beforehand looks for the whole day like 22:00-22:14 h — afterwards things change as seen below.
Note the inconsistency in the timestamp around 22:26 h.
As even the excerpt from syslog was 75000 chars with 60000 chars being allowed here, I moved it to pastebin:
https://pastebin.com/NTEkVLRU
Thanks for any hints on what is going on here.
cu,
agerhard
-
thagrol
- Posts: 9842
- Joined: Fri Jan 13, 2012 4:41 pm
- Location: Darkest Somerset, UK
Re: RPI 3B : system stops / no access — where to find error logs / messages?
Wed Jun 17, 2020 10:30 pm
Looks like you had a reboot just after 22:31:20. That would explain the time going backwards (no RTC on any Pi so it fakes it. time is out of sync at boot until the network comes up and an NTP server can be reached).
I don’t see anything obvious but I’d be looking into the mbmd messages especially if they’re flooding the log. Unfortunately that’s not something I know anything about.
Knowledge, skills, & experience have value. If you expect to profit from someone’s you should expect to pay for them.
All advice given is based on my experience. it worked for me, it may not work for you.
Need help? https://github.com/thagrol/Guides
Return to “Troubleshooting”
by Tashreef Shareef
Tashreef Shareef is a software developer turned tech writer. He discovered his interest in technology after reading a tech magazine accidentally. Now he writes about everything tech from… read more
Updated on
- If your Raspberry Pi is not booting, following the steps presented in this guide will surely help.
- To start the troubleshooting process, check for power issues, and figure out if the SD card has any errors.
- Check out our detailed Developer Tools section for more useful guides and fixes.
- For more Raspberry Pi guides, don’t hesitate to visit our comprehensive Raspberry Pi Errors Hub.
If you are reading this article, you are most likely experiencing Raspberry Pi boot issues. Your Raspberry Pi can stop booting or refuse to turn on due to several reasons. The device may be experiencing power issues, SD card issues. the operating system is not properly installed and other hardware issues.
In this article, we explore a few troubleshooting steps to help you fix the Raspberry Pi not booting issues. Follow the steps one by one to get your device up and running.
What to do if Raspberry Pi 3 or 4 is not booting?
1. Check for power issues

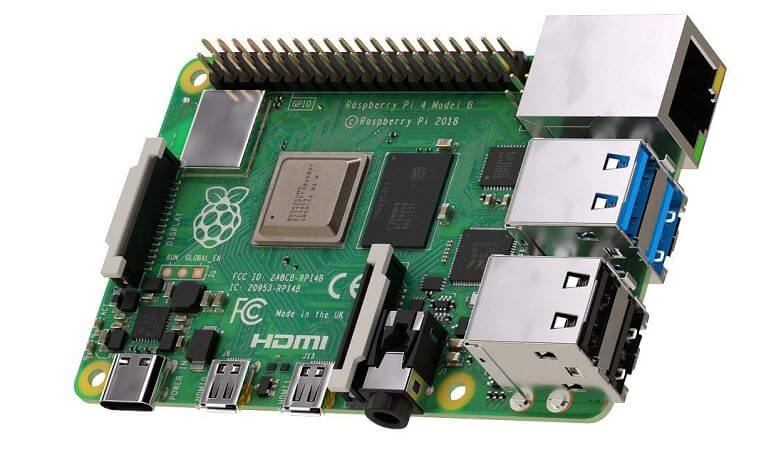
- The newer version of Raspberry Pi, like the Pi 4, comes with a USB Type C connection, unlike the older version RPis that use smaller capacity power adapters.
- Make sure the device is getting adequate power supply through the official 5.1V 3A PSU.
- You can check the requirements section of your device’s instruction manual to find a PSU that can supply adequate power.
- Avoid using your smartphone or tablet charger with the newer version of Raspberry Pi.
- You may also want to check your power cable. Sometimes, the power cable may not work with a Pi.
Check if the OS is installed.
- Needless to say, the Raspberry Pi won’t boot unless an operating system is installed on the SD card that is connected to the device.
- You can install Ubuntu on the SD card to boot up your device.
- You can also install Raspbian to get the Pi up and running and then choose Ubuntu or other distros of your choice to install.
2. Check for SD card issues

Most of the time (If not all), the Raspberry Pi booting issues are associated with a faulty or corrupt SD card. When the expensive cards are not necessarily better than the cheap SD cards as they tend to fail as well but are usually considered more reliable.
Eject the SD card and insert it into your Windows computer to see if the computer detects the card. Windows will prompt to scan and fix the card if it detects any issues with it. Click on Scan and fix the error option to repair the card.
If Windows fails to repair the card, use the dosfsck tool using a Ubuntu running computer to repair the card. If the issue persists, you may have to format the card and reinstall the OS to make it work. In case the formatting fails, you may need to replace the SD card.
Check the Raspberry Pi’s LED indicators.
If you are still not sure of the card being corrupt, your Raspberry Pi can help. The device comes with a built-in Red and Green LEDs. While the Red LED indicates the PWR status, which is the power status, the Green LED indicates ACT that is the activity status of your SD card.
If the SD card is not faulty, the green LED will flash without any issues. However, if the Green LED is not on, it means there is an issue with your SD card. The SD card again may require repair, reformatting, or replacement, depending on the situation.
You can try the SD card formatting utility to reformat the storage. Also, consider reading our how to fix a corrupted SD card on Raspberry Pi for detailed troubleshooting steps.
Raspberry Pi kits for RetroPie and gaming [2020 Guide]
3. Check for issues with the HDMI cable
The Raspberry Pi comes with an HDMI port that is used to connect the computer to a display like a TV or a monitor. If Red and Green indicators are working on the Pi, make sure the HDMI cable is working as well.
If the HDMI cable is working, try forcing the HDMI detection by editing the config file. Here’s how to do it.
- Insert the SD card into your computer and navigate to the following location:
/boot/ partition - Open the config.txt file.
- Add the following line to the end of the file:
hdmi_force_hotplug=1 - Save the file and eject the SD card.
- Reinsert the SD card and try booting your Raspberry Pi again to see if the issue is resolved.
4. Check if your Raspberry Pi is DoA
- Disconnect all the cables and other accessories connected to the faulty Pi.
- Connect the cable and insert the SD card into a different Raspberry Pi device that you own.
- Try to power on the device.
- Should the device work without any issues, your Raspberry Pi device can be faulty and may require replacement.
- If the issue occurs on the secondary Pi as well, try replacing the HDMI or Power cable or the SD card to see if that resolves the issue.
If you are using a Raspberry Pi A, A+, and Zero device, you can connect it to your Windows computer and open the device to manage to see if Windows detects the connected device. You can connect the Pi to your Windows computer using a USB cable.
Unfortunately, there isn’t much you can do other than ask for a replacement if the Pi has hardware issues. So, follow the steps in the article to diagnose the Raspberry Pi not booting issue and hope it is the usual suspect (SD card) that is causing the issue.
![]()
Back to the Hub.
This page lists the most common problems and suggests some solutions.
See RPi_Bugs for problems that are bugs.
Contents
- 1 Power / Start-up
- 1.1 Normal LED status
- 1.2 Red power LED does not light, nothing on display
- 1.3 Red power LED is blinking
- 1.4 Red power LED is on, green LED does not flash, nothing on display
- 1.5 Green LED blinks in a specific pattern
- 1.6 Coloured splash screen
- 1.7 Kernel Panic on boot
- 1.8 Raspberry Pi shuts down (or restarts) soon after booting up
- 1.9 Pi boots sometimes but not always
- 2 Keyboard / Mouse / Input Devices / Webcams
- 2.1 R-Pi does not respond to key presses / Keyboard randomly repeats key presses
- 2.1.1 Sticky keys
- 2.2 Keyboard / Mouse interferes with USB WiFi device
- 2.3 Wireless Keyboard trouble
- 2.4 Re-mapping the keyboard with Debian Squeeze
- 2.5 Slow keyboard mapping
- 2.6 No USB device works, with known good PS, SD card, KB
- 2.7 Webcam
- 2.7.1 guvcview
- 2.7.2 hub or internal usb
- 2.7.3 freeze
- 2.1 R-Pi does not respond to key presses / Keyboard randomly repeats key presses
- 3 Updating firmware
- 3.1 Check your firmware version
- 3.2 Get the latest firmware version
- 3.3 Choosing the right ARM/GPU memory split
- 4 SD cards
- 4.1 SD(DC|DX] Card Class 6 & 10 Hints
- 5 Networking
- 5.1 Ethernet connection is lost when a USB device is plugged in
- 5.2 Ethernet connects at 10M instead of 100M
- 5.3 Cannot ssh in to Pi
- 5.4 Network/USB chip gets too hot to touch
- 5.5 Networking no longer works when changing SD card between two Raspberry Pis
- 5.6 Crashes occur with high network load
- 5.7 Network connection fails when a Graphical User Interface is being used
- 6 Passwords
- 6.1 I do not know the password to login
- 6.2 Some programs refuse to accept my password
- 6.3 I don’t know the root password
- 7 Sound
- 7.1 Sound does not work with an HDMI monitor
- 7.2 No sound card present
- 7.3 Sound does not work at all, or in some applications
- 7.4 Removal of installed pulseaudio
- 7.5 Playing MP3 files
- 8 Display
- 8.1 Startx fails to start
- 8.2 Screen is the wrong color
- 8.3 Video does not play or plays very slowly
- 8.4 Can only get 800×480 resolution in LXDE (Arch linux)
- 8.5 Big black borders around small image on HD monitors
- 8.6 Writing spills off the screen on HD monitors
- 8.7 Interference visible on a HDMI or DVI monitor
- 8.8 No HDMI output at all
- 8.9 Composite displays no image
- 8.10 Composite displays only black and white image
- 8.11 HDMI -> VGA adapters
- 9 GPIO
- 9.1 Precautions
- 9.2 Testing
- 9.3 Digital Waveform Viewer
- 10 General
- 10.1 The time is incorrect
- 10.2 A part broke off
- 10.3 Unable to install new software
- 11 Troubleshooting power problems
- 12 Hardware versions/revisions
- 13 References
Power / Start-up
Note: if you have any kind of booting problems, start off by reading the «Is your Pi not booting? (The Boot Problems Sticky)» in the troubleshooting section of the Official Raspberry PI forum [1].
A good power supply that will supply 5 volts and at least 1 amp (5V 1A) is vital. A 5 volt 2 amp power supply can help some wifi USB adapters run more stable. For more information see #Troubleshooting_power_problems.
Note that the Pi has no BIOS, so nothing will be displayed on screen unless the Pi successfully boots!
Normal LED status
There are five LEDS near the USB connector.
| LED | colour | function | normal status |
|---|---|---|---|
| ACT | green | card status | flashing during SD card activity |
| PWR | red | power | steady ON when Pi receives some power on original B and A, but since the B+ (except for the zero) the PWR LED is also a power good indicator that goes off when power drops below 4.65V |
| FDX | orange | full duplex | on when Ethernet connection is full duplex |
| LNK | orange | link | on when Ethernet is connected |
| 100 | orange | 100 Mbps | on when connection is 100 Mbps off when 10 Mbps |
See the next sections for how to interpret other statuses.
Red power LED does not light, nothing on display
The power is not properly connected.
Red power LED is blinking
A blinking red power LED indicates problems with the power supply. On model A and B, it is hard-wired to the 3.3V power supply rail. If it is blinking, as one user has reported[1] it means the 5V power supply is dropping out. Use a different power supply.
On model B+ (and presumably also the A+), the circuit has been improved to give a much more reliable warning of poor power quality. The red power LED is wired to an APX803 supervisor[2] which kicks in when the 5V power supply drops below 4.63V[3]. If it does, the LED will blink. Check your connections, cable, and power supply.
Red power LED is on, green LED does not flash, nothing on display
Start off by reading the «Is your Pi not booting? (The Boot Problems Sticky)» in the troubleshooting section of the Official Raspberry PI forum [2] it contains the latest info about «Red power LED is on, green LED does not flash» kind of problems.
Note: A faintly glowing steady green LED means no boot code has ever been executed, as almost the first thing the boot code does is to turn the faint glow off! When flashing/blinking the green LED should be as bright as the red LED.
Note also there is a difference between the quad core Pi 2 (BCM2836) and the other models if there is no SD card inserted, or the SD card is improperly formatted. The former will have both red and green lights on bright and steady. The latter will have only the red light on. This indicates:
- The Raspberry Pi cannot find a valid image on the SD card. Turn the board over to check that the card is inserted correctly; the insertion force is much larger than for some laptops.
- Check that you have correctly written a Raspberry Pi image to the card by using a MAC or PC and browse for the following files:
- bootcode.bin
- fixup.dat
- start.elf amongst others
- Did you have admin rights when you used the SD-card writer software? Without it the software might go through the motions without actually doing anything!
- Older images do not load boot code for revB boards with the Hynix chip. Use release 2013-02-09 (?) or later. (I observe a single blip on the green activity LED)
- It is also possible that the image you are writing to the card is corrupt, as downloads do occasionally end up corrupted or truncated. You can check with a checksum utility to verify the integrity of the download.
- Check that you have correctly written a Raspberry Pi image to the card by using a MAC or PC and browse for the following files:
- The SD card may itself have an issue. See Known SD Cards.
- Try with no cables connected except the USB power lead, and SD card inserted. You should see flashing of the OK light for ~20 seconds. If that helps, plug in cables one at a time to identify which is interfering with boot.
- Confirm the USB cable is properly seated in the power slot. The red power LED does not necessarily mean it is fully connected.
- Look at the SD card holder on the Raspberry Pi carefully. At first glance it may look fine but the contacts must be springy and they must protrude at least 2mm as measured from the lower edge of the holder to the top of the contact bulge. This happens due to the solder process and the type of holder used. Some of the solder residue falls into the contact cavity restricting the springiness and the height that the contact protrudes. You can fix this yourself but remember you can void your warranty. The contacts are delicate so be carefull. Insert a needle pin under the contact bulge and pull lightly up until the one end of the contact unclips. Clean the cavity where the contact unclipped from of any solder or other residue by blowing into the cavity. Clip the contact back into the cavity by lightly pushing it into the cavity. Do this for all the contacts. Look at these photos. Media:SDcardHolder.JPG, Media:UnclipContact.JPG, Media:UnclippedContact.JPG
- Ensure that when your SD Card is fully inserted that the longer metal spring contacts (one clearly visible on the end of the slot, and one hidden in the side nearest the power connector) are closed. These are used to detect the presence of an SD Card therefore if no contact is made then the Raspberry Pi won’t attempt to access the the card.
- Check carefully for any cracks or damage to the SD Card slot, if the sides are damaged then the card may not be making proper contact with the pins (can usually confirm this if your Raspberry Pi boots if you manually hold the SD Card in position). For ways to resolve this, see PiHardware — SD Card slot fixes for more info.
- The voltage is too low (below 5 V), try a different power supply and/or cable. The R-Pi needs a supply rated for 700 mA or more. Some supplies labeled as such cannot actually provide their rated current while maintaining 5V. See also, #Troubleshooting_power_problems.
- (unlikely) hardware abuse, for example by connecting a 7 V supply to a 3v3 GPIO output pin[4] or powering up the board after a solder splash shorts some traces[5].
- If for whatever reason the main polyfuse F3 has been overheated previously it may happen that it hasn’t completely recovered, in which case, if you turn the PI on, a considerable amount of energy from the power supply is lost in the fuse and doesn’t reach the PI. Try if the polyfuse seems hot. For this problem too read #Troubleshooting_power_problems.
- Some problems have been reported if the ambient temperature is low that might be related to micro-fractures, fissures in solder or other issues. Try warming the Raspberry Pi with a hair dryer for just a few seconds (do not use excessive heat or you may cause irreversible damage!) and reconnect the power. Check this video http://www.youtube.com/watch?v=AwF6v-4NFdg
Green LED blinks in a specific pattern
- 1 flash: possibly you have a Rpi from Micron. Take a good look at the processor if it says M with an orbit around it. Using the lastest software ( >= sept 2013 ) will solve your problem. And make sure you have a 4Gb SD card: a 2Gb doesn’t work.
- 2 flashes: The SD Card cannot be read.
Solution : Format card and flash Raspbian with Pi Installer from Terminal.
— SD Formatter (Mac + Win)
https://www.sdcard.org/downloads/formatter_4/eula_mac/index.html
— Pi SD Installer by RayViljoen:
https://github.com/RayViljoen/Raspberry-PI-SD-Installer-OS-X
According to this forum post the green light will blink in a specific pattern to indicate some types of errors:
- 3 flashes: loader.bin not found
- 4 flashes: loader.bin not launched
- 5 flashes: start.elf not found
- 6 flashes: start.elf not launched
- 7 flashes: kernel.img not found
Firmware since 20th October 2012 no longer requires loader.bin, and the flashes mean:
- 3 flashes: start.elf not found
- 4 flashes: start.elf not launched
- 7 flashes: kernel.img not found
- 8 flashes: SDRAM not recognised. You need newer bootcode.bin/start.elf firmware.
If start.elf won’t launch, it may be corrupt.
Note that 4-flashes may point to a defective SD-card holder, if one or more of the data contacts is intermittent it can lead to this problem.
Coloured splash screen

With current firmware, a coloured splash screen (actually its just four pixels «blown up» by the GPU to full screen) is displayed after GPU firmware (start.elf) is loaded. This should be replaced by linux console a second later.
However if the coloured screen remains, it suggests the kernel.img file is failing to boot. Try replacing it with a known good one.
Immediately after displaying the splash screen, the PI starts consuming a little more current. If the PI resets at that moment, it is an indication that the power supply isn’t able to deliver the full current your PI requires, but dips its output voltage below a minimum when loaded with the full current the PI needs.
In some cases (Stuck on the Rainbow Screen), freezing at this point has been fixed by adding «boot_delay=1» to the config.txt file. This can be done from a Windows PC, which should show several files in the FAT partition on your SD card including bootcode.bin, kernel.img, and config.txt. You can open config.txt in wordpad or any text editor. Add «boot_delay=1» and save the file. Don’t forget to ‘eject’ the card before removing it from the reader. If you are reading the SD card from a working Pi, you can edit the file with sudo nano /boot/config.txt
Kernel Panic on boot
Text appears on screen, but then hangs with debug messages. This can be caused by USB devices such as keyboards.
Try again with nothing in the USB.
Raspberry Pi shuts down (or restarts) soon after booting up
This is caused by a power supply producing too low a voltage. See #Troubleshooting_power_problems.
Pi boots sometimes but not always
With a known good power supply and known good SD card, the R-Pi boots occasionally, but other times shows only a tiny green flicker from the «OK» LED and it fails to start, even with no USB devices and no Ethernet. This has been reported several times[6]
[7]
[8] and remains an open issue. Low voltage or an improper SD card can cause it. Some SD cards will work until they warm up slightly, and then fail[9]. When exposed to 21 C room temperature the warmest part of an uncased working R-Pi should be 41 C[10]. The wiki has a list of working SD cards. Buy from a reliable vendor as it has been claimed that 1/3 of all «Sandisk» labelled memory cards are counterfeit.
- It could be that the SD memory card is not making proper contact with the Raspberry Pi. Look at the SD card holder on the Raspberry Pi carefully. At first glance it may look fine, but the contacts must be springy and they must protrude at least 2mm as measured from the lower edge of the holder to the top of the contact bulge. Variations happen due to the solder process and the type of holder used. Some of the solder residue falls into the contact cavity, restricting the springiness and the height that the contact protrudes. You can fix this yourself, but remember you can void your warranty. The contacts are delicate, so be careful. Insert a needle pin under the contact bulge and pull lightly up until the one end of the contact unclips. Clean the cavity where the contact unclipped from any solder or other residue by blowing into the cavity. Clip the contact back into the cavity by lightly pushing it into the cavity. Do this for all the contacts. Refer to these photos: Media:SDcardHolder.JPG, Media:UnclipContact.JPG, Media:UnclippedContact.JPG
Keyboard / Mouse / Input Devices / Webcams
R-Pi does not respond to key presses / Keyboard randomly repeats key presses
note:during entering the password most linux distro’s wont show that you typed in anything (not even «*» characters) this is normal behaviour, try the keyboard while entering the user name!
This is most often caused by inadequate power. Use a good power supply and a good power cable. Some cheap cables that work with a cell phone, cannot fully power the R-Pi. Some USB devices require a lot of power: most will have a label showing the voltage and mA requirements. They should be 5v 100mA each max, any more than this they must be used with a powered USB hub. Try unplugging every USB device except the keyboard (you should also note that some keyboards have built in hubs and can try to draw 150mA (Pi can only handle 100mA per USB slot without a hub)).
Also, use the latest software. Forum user MrEngman reported some keyboard repeats and wireless hangs until upgrading to the debian6-19-04-2012 kernel, which he reports stable with no problems even with a low TP1-TP2 voltage of 4.65 — 4.68 volts.
Some users have reported that their keyboards work fine on Arch linux, but on Debian distro’s, their keyboards become erratic (repeats and/or skips key presses). One suggested remedy to this, which has some positive feedback, is to adjust the USB bus speed. To do this, you need to edit the cmdline.txt file, and add «dwc_otg.speed=1» (without quotes) to the end of the file (found in the /boot directory).
Worst case scenario, some (advanced) keyboards, such as the Roccat Arvo, have kernel modules that need activating. If you have access to another keyboard temporarily, you will need to modprobe the relevent driver. Or if this is not possible, you can rebuild the kernel (instructions available on the wiki page) with the modules installed. (to find the drivers for keyboards etc, you need to find «Device Drivers -> hid Devices».)
As a workaround you can use programs kbdrate and xset to tune the keyboard repeat rate:
kbdrate -r 2.0 -d 1000
on the console and
xset -r
on the desktop (xset is available with: sudo apt-get install x11-xserver-utils)
Sticky keys
Many wireless keyboards are known to have «sticky keys» on the R-Pi. Work has recently (summer 2013) been done on the USB code. Updating to a recent firmware might help. Updating the firmware can be done with rpi-update. Recent Raspbian releases comes with rpi-update installed.
sudo rpi-update
Note that the firware sits on the SD card, so each card, not R-Pi has to be updated.
Keyboard / Mouse interferes with USB WiFi device
Connecting a keyboard and/or mouse while a USB WiFi device is connected, may cause one or both devices to malfunction. On April 30 2012, there was a bugfix[11] relating to USB sharing between high-speed (eg. WiFi) and full/low-speed devices (eg. keyboard/mouse). User spennig[12][13] reports this patch did not fix the Mouse/WiFi conflict. On 2012-05-12, user spennig was pleased to confirm that wifi was working with a USB keyboard and mouse, as long as the Raspberry Pi had a good PSU and a powered hub. Even so, some experimentation was needed, e.g. USB WiFi connected to the device, and the keyboard and mouse connected to the powered hub. Some experimentation may be necessary to find a working combination; however a good power supply is essential.
My experience regarding this issue point to interferences in the 2.4 GHz frequency band in which both WiFi sticks, as well as USB keyboards transmit data. Changing the channel on the wireless access point fixed the problem completely. In my case (Belkin N150 + Logitech K260/M210) I switched from channel 1 to channel 13, which results in a frequency shift of 50 MHz. Possibly enough to not affect the keyboard/mouse receiver.
Wireless Keyboard trouble
Some wireless keyboards, for example the Microsoft Wireless Keyboard 800 are reported to fail[14] even though the current drawn by the wireless adaptor is within the R-Pi USB spec limit of 100 mA. This may be a software driver problem.
Re-mapping the keyboard with Debian Squeeze
If different letters appear on-screen from that which you typed, you need to reconfigure you keyboard settings. In Debian, from a command line type:
sudo dpkg-reconfigure keyboard-configuration
Follow the prompts. Then restart your RasPi.
Or:
From the command line type:
sudo nano /etc/default/keyboard
Then find where it says
XKBLAYOUT=”gb”
and change the gb to the two letter code for your country. [3]
Slow keyboard mapping
If you have remapped your keyboard and get a very long delay during the keyboard mapping at startup, type the following once on the command line after you have logged in:
sudo setupcon
No USB device works, with known good PS, SD card, KB
There has been more than one report[15][16][17] of a R-Pi booting but not getting USB input, using a known-good power supply, SD card, and keyboard. The more common cause for no USB devices working is low power supply voltage from bad PSU, cable, or USB hub, but in this case the problem was no clock signal present at the LAN9512 USB/Ethernet chip «IC3», and the solution was to reflow the solder on the 25 MHz crystal «X1» on the bottom side of the board.
Or return the board for a replacement, but before making this conclusion, confirm known good peripherals. A significant number of
USB keyboards are not compatible with R-Pi. As of June 1 2012, Eben reported[18] that only about 1 in 1000 shipped R-Pi boards have been found to have a hardware fault of any kind.
Webcam
guvcview
sudo apt-get install guvcview
Use the excellent guvcview program to test your webcam and to change the capture settings. You can improve the frame rate to a great extent by changing the settings.
hub or internal usb
It is possible that your camera will only work on an internal usb port and not on the hub.
freeze
If you are experiencing freezes or timeout errors while using a webcam this script may help:
#!/bin/bash
sudo rmmod uvcvideo
sudo modprobe uvcvideo nodrop=1 timeout=5000 quirks=0x80
(quirks=0x80 is a bandwidth quirk, the necessary bandwidth will be estimated by the uvcvideo driver instead of using the one proposed by the camera)
Updating firmware
Check your firmware version
Using the latest firmware version may help various problems with SD card and display compatibility. Check the kernel version with:
 uname -a
   Linux RPi 3.1.19 #1 PREEMPT Fri Jun 1 14:16:38 CEST 2012 armv6l GNU/Linux
And the GPU firmware with:
 /opt/vc/bin/vcgencmd version
   May 31 2012 13:35:03
   Copyright (c) 2012 Broadcom
   version 317494 (release)
Get the latest firmware version
The GPU firmware and kernel can be updated with Hexxeh’s rpi-update tool.
However this requires the Pi to be successfully booted. With sdcard problems, you may not get that far, so can try a manual udpate.
If you have a Linux machine, rpi-update can be run on that in an offline mode.
Use this to download rpi-update:
curl -L --output rpi-update https://raw.githubusercontent.com/Hexxeh/rpi-update/master/rpi-update && sudo chmod +x rpi-update
and this to run it:
sudo ROOT_PATH=/PATH/TO/RASPI/ROOT BOOT_PATH=/PATH/TO/RASPI/BOOT/PARTITION rpi-update
Make sure to substitute in the paths to the root and BOOT partitions on your SD card (likely something like /media/USER/root and /media/USER/BOOT), or it will install it on your linux machine! If you do this by accident, wait until the tool finishes, then delete /boot and move /boot.bak to /boot
Otherwise, on a Windows computer, you will see the «/boot» partition appear as the contents of SD card.
You can download the latest GPU firmware version here.
Click on view raw, then save it, and put the new start.elf file on the sdcard replacing the existing one. Similarly, the latest kernel is here.
After updating these files you should be able to boot. You still need to run rpi-update to update the kernel modules (in /lib/modules) and the GPU libraries (in /opt/vc).
If you are still having issues after update, you could also try the bleeding edge firmware by using the BRANCH=next option in rpi-update. If you are seeing SD card corruption after updating follow the SD Card/Power supply investigation steps. Firmware updates can be I/O intensive and reveal other issues.
Choosing the right ARM/GPU memory split
There is a choice of how the 256M/512M of RAM is divided between the ARM and GPU:
   gpu_mem=16 :  16M GPU,  240M/496M ARM split : Maximum ARM memory. Good for ARM desktop use. No accelerated video or 3D possible.
   gpu_mem=64 :  64M GPU,  192M/448M ARM split : Reasonable ARM memory. Simple video (omxplayer) or 3D (quake) is possible. This is the default.
   gpu_mem=128 : 128M GPU, 128M/384M ARM split : Use this for heavy 3D work, or 3D plus video. Needed for XBMC.
To switch, edit the gpu_mem= setting in your config.txt and reboot.
Note: other amounts are also possible, but setting gpu_mem=32 is usually the wrong choice. gpu_mem=16 is almost always a better choice.
Also note that before the release of the 51MB PI a different method was used based on splitting the 256MB RAM in a part for the CPU and GPU. As this noting system was causing trouble if the amount of RAM was not always the same. the above new method was adapted.
Make sure your editor doesn’t change the first letter of the line into an uppercase letter, as some editors do. The entry is case sensitive.
SD cards
- If you have problems, check you have latest firmware version (described above)
- Some SD cards do not work on the R-Pi, so check the list of known SD cards.
- If you are having problems setting up your SD card you might want to start by erasing it completely — especially if it has been used elsewhere and still contains data / partitions.
- Windows and Mac users can download a formatting tool from the SD Association: https://www.sdcard.org/downloads/formatter_3/
- Reformatting cards is also easy to do in a digital camera.
- After writing the image to the SD card, verify that you can see the boot partition when you insert the SD card into your computer. The partition should contain a number of files, including start.elf and kernel.img. If you do not see these files on the SD card, you have made an error writing the image file.
- If you are manually preparing your SD card on Linux or Mac OS using the dd command, this operation will completely erase any existing data and partitions. Make sure you write to the whole card (e.g. /dev/sdd) and not to an existing partition (e.g. /dev/sdd1).
- If you have an sdcard that doesn’t work with latest firmware, head over here.
- If you put the SD card into your PC in an attempt to write the R-Pi operating system onto it, and the PC tells you the card is write-protected, even with the write-protect tab in the correct, forward position, then you may have a faulty SD-card rewriter. There’s a common fault with many SD-card rewriters — The write-protect tab is detected by a very thin, narrow metal strip, that is part of a switch. When the card is inserted, the write-protect tab is supposed to push the strip and make/break the contact, as needed. Unfortunately, these strips have a habit of getting stuck, because they are mounted in a thin plastic channel, and only need to be deformed slightly sideways to get jammed.
Luckily, if you have this problem, most built-in card readers are easy to pull apart and repair; some users have even reported succesfully unjamming the switch with a blast of compressed air from a can into the SD-card slot without having to dislodge anything.
You may also be able to temporarily get round the problem by putting the write-protect tab in a half-way position — this pushes on a different part of the strip and may break the contact — it’s worth trying a few, slightly different positions. You could also use a USB-SD card adaptor, which are cheap to buy.
SD(DC|DX] Card Class 6 & 10 Hints
[card usage Hints with OverClocking ]
Networking
Ethernet connection is lost when a USB device is plugged in
This is often caused by inadequate power. Use a good power supply and a good power cable. Some cheap cables that work with a cell phone, cannot fully power the R-Pi. Some USB devices require a lot of power (>100 mA), so they must be used with a powered USB hub. Some cheap USB hubs suck power from the Raspberry Pi even if a USB power supply is connected. (More often than not, however, the reverse is true with cheap hubs—the Pi draws just enough power backwards from the powered hub to unsuccessfully attempt booting.)
There is an ongoing issue with the Ethernet connection being lost when low-speed devices, such as mice or keyboards are connected via a powered USB hub. The simplest way to solve this is to connect your mouse and keyboard directly into the 2 USB ports on the R-Pi (assuming they draw less than 100 mA apiece).
Ethernet connects at 10M instead of 100M
The LED in the corner of the board labelled «10M» is mislabeled on the rev 1.0 PC board. It is correctly labeled «100» on the rev 2.0 PC board. When that LED is on, RasPi is connected at 100 Mbps. You can confirm the true transfer rate using a network benchmark such as iperf. You can also read the current network speed with:
cat /sys/class/net/eth0/speed
Cannot ssh in to Pi
In the Debian image, ssh is disabled by default. Boot commands are taken from /boot/boot.rc if that file present. There is an example file named boot_enable_ssh.rc that enables ssh. So:
sudo mv /boot/boot_enable_ssh.rc /boot/boot.rc
and reboot should enable ssh. (password as below)
Network/USB chip gets too hot to touch
This is normal. In open air at 24 C, the LAN9512 Ethernet/USB chip reaches about 52 C after some time. This is too hot to touch for more than a few seconds, but it is not unusually hot for the chip.
The
LAN9512 data sheet in Table 4.1 on p.40 says it comes in two versions, rated for operation at an ambient temperature in still air (Ta) of 70 C (commercial) or 85 C (industrial). It uses 763 mW at 3.3V with maximum traffic on 100baseT and both USB ports (Table 4.3.4, p. 42).
There is a study of RasPi heat profiles by «Remy» at ¿Se calienta el ordenador Raspberry Pi? Estudio de sus temperaturas en funcionamiento (Is the Raspberry Pi computer getting hot? A study of its operational temperature.) The Spanish article has numerous color temperature images of RasPi in various operational modes, with the highest LAN9512 case temperature measured as 64.5 C.
Networking no longer works when changing SD card between two Raspberry Pis
In some distributions, /etc/udev/rules.d/70-persistent-net.rules remembers which MAC address is associated with eth0, so each new device will be assigned as a different interface (eth1, eth2, etc.) due to the different MAC addresses. Editing /etc/udev/rules.d/70-persistent-net.rules to remove the invalid rules and rebooting may help fix the problem.
Crashes occur with high network load
The USB driver allocates memory from the kernel, and when traffic is very high (e.g. when using torrents/newsgroup downloads) this memory can be exhausted causing crashes/hangs. (Crashes with high network load can also be related to your power supply, try a powered usb hub.) You should have a line like:
vm.min_free_kbytes = 8192
in /etc/sysctl.conf. Try increasing that number to 16384. If that doesn’t work, try adding to /boot/cmdline.txt
smsc95xx.turbo_mode=N
which will reduce network throughput, but has improved stability issues for some.
Under special circumstates additional /boot/cmdline.txt options are helpful (for example using RPi as Wifi Access-Point with high Network Traffic):
dwc_otg.dma_enable=1 dwc_otg.dma_burst_size=256
If the above fixes do not work, you can prevent the crashes by limiting the bandwidth (This is also working sometimes if the crashes are related to power supply.):
wondershaper wlan0 1500 1500
This bandwidth (~150k/s) is enough to stream video with flvstreamer and omxplayer.
(wondershaper is available in raspian: sudo apt-get install wondershaper. You could also test limiting the bandwidth in advance with wget —limit-rate=150)
Network connection fails when a Graphical User Interface is being used
The network connection may fail when the command startx is used to enter a Graphical User Interface. This is caused by a bug in the USB driver related to certain types of USB mouse.
As of 1 September 2012, this fault is fixed in the latest firmware. To load the latest firmware, see
http://elinux.org/R-Pi_Troubleshooting#Updating_firmware
Passwords
I do not know the password to login
Please check the page http://www.raspberrypi.org/downloads for the correct username and password for each image.
Here are the most common username/password combinations:
- Raspian «wheezy» pi/raspberry
- Debian after Feb 2012: pi/raspberry
- Debian 17 Feb 2012: pi/suse
- Arch: root/root
- Bodhi: pi/bodhilinux
- Raspbx:root/raspberry
- Kali Linux: root/toor
Some programs refuse to accept my password
While using Debian, some programs may ask for your password but refuse to accept a valid password.
This is a fault in old Debian images previous to September 2012. If you are using an image with this fault, upgrade to a more modern image or enter the following command on the command line.
gconftool-2 --type bool --set /apps/gksu/sudo-mode true
Please enter this command carefully, the spaces are important. The command should be accepted without any response or errors.
I don’t know the root password
There is no root password set by default on Debian. You are expected to do everything through sudo. You can set one with «sudo passwd root» — just make sure you know what you are doing with a root account.
Sound
Sound does not work with an HDMI monitor
This is caused by some computer monitors which select DVI mode even if an HDMI cable is connected. This fix may be necessary even if other HDMI devices work perfectly on the same monitor (or TV)!
Edit the configuration file — see the instructions at R-Pi_ConfigurationFile.
Add the following line to the configuration file /boot/config.txt:
hdmi_drive=2
This will force it to select HDMI mode.
You might need as well:
hdmi_force_hotplug=1
hdmi_force_edid_audio=1
More reasons why sound does not work with an HDMI monitor
With an HDMI connection it might be possible to hear:
/opt/vc/src/hello_pi/hello_audio/hello_audio.bin 1
but not:
aplay /usr/share/sounds/alsa/Front_Center.wav
Firstly, it seems that some HD TVs mute audible sound output when there is no digital input, and slowly fade the sound up and down at the start and end of digital input. This means that short duration sounds will not be heard. A work around is to play longer duration wav files.
Secondly, it seems that some HD TVs mute audible sound output when there is only one channel of digital input. So, as the file Front_Center.wav is mono, it might not be heard. ALSA aplay uses the file information header to configure its digital output. And the aplay -c 2 option does not over-ride the settings aplay picks up from the file information header. So, if your HD TV doesn’t accept just one channel of digital input, you cannot use aplay to hear a mono wav file. However, with the command speaker-test, the -c2 option does work, and sets 2 channels in the digital stream. So speaker-test can be used to hear the file Front_Center.wav in either the left or right speaker using the -s option 1 or 2.
For example
speaker-test -c 2 -s 1 -t wav -W /usr/share/sounds/alsa -w Front_Center.wav
should be heard on the left speaker. But note that the command speaker-test seems only to like mono wav files, and seems not to play stereo wav files.
The command aplay plays 2 channel stereo wav files in stereo sound without problem (provided they last longer than the time it takes the TV to unmute and remute). A helpful example I found is the stereo file LRMonoPhase4.wav at the Kozco web site [4]
No sound card present
If no sound is being produced, and alsamixer is unable to show you any controls, the GPU may have disabled audio. Run this command to check:
amixer controls
Which responds:
amixer: Control default open error: No such file or directory
You can also confirm by checking for the existence of the directory ‘/proc/asound’.
This issue can be experienced when upgrading the kernel, due to changes in how the device tree defaulting has changed.
To correct this, assuming the device tree is enabled, add the following to ‘/boot/config.txt’:
dtparam=audio=on
This can be unused along with other ‘dtparam’ settings, on the same line or different lines. Reboot, then check the amixer command again.
Sound does not work at all, or in some applications
Enter the command ‘alsamixer’ and use the control to check that the volume is up (arrow keys) and that the output is not muted (M key).
In Debian Squeeze, sound is disabled by default because the ALSA sound driver is still «alpha» (not fully tested) on the R-Pi. To install support for sound, type the following from a command line (from the command prompt before «startx» or in a terminal window)
 sudo apt-get update
 sudo apt-get upgrade
 sudo apt-get install alsa-utils
 sudo modprobe snd_bcm2835
On Debian Wheezy, snd_bm2835 is enabled by default, so the ‘modprobe’ step is not necessary. Next try:
aplay /usr/share/sounds/alsa/Front_Center.wav
By default output will be automatic (hdmi if hdmi supports audio, otherwise analogue). You can force it with:
amixer cset numid=3 <n>
where n is 0=auto, 1=headphones, 2=hdmi.
If you have pulseaudio installed you need to also specify the card number:
amixer -c 0 cset numid=3 <n>
You can immediately verify if you hear a 440 Hz tune:
speaker-test -t sine -f 440 -c 2 -s 1
With recent firmware, you can build hello_audio with:
 cd /opt/vc/src/hello_pi/
 ./rebuild.sh
 cd hello_audio
With older firmware
 cd /opt/vc/src/hello_pi/hello_audio
 make
to test analogue output:
./hello_audio.bin
and:
./hello_audio.bin 1
to test HDMI.
Also note that you may have to add your user to the ‘audio’ group to get permission to access the sound card.
Following this setup, you should be able to play wav files with the command
aplay /usr/share/scratch/Media/Sounds/Animal/Kitten.wav
Other command features can be found with
aplay --help
You will find numerous test files under /usr/share/scratch/Media/Sounds/ .
Removal of installed pulseaudio
Between December 2012 and February 2013 the standard raspbian wheezy distribution, and apt-get upgrade, included pulseaudio. Forum posts suggest that pulseaudio can break alsa. Whilst some members identify various workarounds, others find only removal of pulseaudio restores sound output.
sudo apt-get --purge remove pulseaudio
Playing MP3 files
The alsa app included in the standard distribution plays wav files. If you want to play mp3 files, do the following to install an mp3 player (after installing alsa-utils):
sudo apt-get update
sudo apt-get upgrade
sudo apt-get install mpg321
You can play mp3 files with the command
mpg321 "my file.mp3"
Other command options can be determined with
mpg321 --help
The mp3 support with this app is complete but not robust.
Display
Startx fails to start
If you just get errors instead of a desktop when typing
startx
you may be out of storage space on the SD card. By default there are only a few hundred MB free in the 2 GB main partition, which can quickly fill up if you download files. Make sure there is some space free (gparted can expand a partition, if the SD card is > 2GB). Also, installing some software may incorrectly create or modify a .Xauthority file in your home directory, causing startx to fail, according to this thread. Temporarily renaming, moving, or deleting that file may fix the problem.
Screen is the wrong color
Check and see if the DVI cable is screwed in properly. If that doesn’t work then try this section.
Video does not play or plays very slowly
The only hardware-accelerated video player is in the XBMC distribution and its command line variant omxplayer. H264 is the only hardware-accelerated codec, for playback. No hardware encoding is supported. Additional codecs were not purchased as licensing fees would have increased the R-Pi’s price.
Notwithstanding the previous paragraph, omxplayer may be included in some versions of raspbian. It is a command line tool, and happily plays .flv files.
Command: sudo omxplayer -o hdmi <path-to-filename>
Can only get 800×480 resolution in LXDE (Arch linux)
Known issue with distro package as of 17th April 2012 — there’s some missing boot config information. Creating a suitable cmdline.txt fixes it — type the following at the Raspberry Pi command line:
sudo echo "dwc_otg.lpm_enable=0 console=ttyAMA0,115200 kgdboc=ttyAMA0,115200 root=/dev/mmcblk0p2 rootfstype=ext3 rootwait" >/boot/cmdline.txt
Big black borders around small image on HD monitors
Out of the box, R-Pi graphics don’t necessarily fill the whole screen. This is due to something called «Underscan», and it can be fixed easily.
Note: the best solution is to disable overscan on the TV/monitor. Check the display menu options (it may be called «just scan», «screen fit», «HD size», «full pixel», «unscaled», «dot by dot», «native» or «1:1»), then use the disable_overscan=1 option.
Edit the configuration file, see the instructions at R-Pi_ConfigurationFile.
Add the following lines to the configuration file…
If your display has no overscan:
disable_overscan=1
or if your display has some overscan:
overscan_left=-20

overscan_right=-20

overscan_top=-20

overscan_bottom=-20
Making the R-Pi graphics fill the screen is a matter of experimenting with the numbers you put in the config.txt file. Change the numbers – try jumps of 5 or 10 at a time. Bigger negative numbers reduce the black borders (so -40 means less black border than -20). The numbers do not all have to be the same; you can use this feature to centre the display on the screen.
This only affects the framebuffer (e.g. console or X). It doesn’t affect hardware layers (like video/3D). You can make it apply to hardware layers with:
overscan_scale=1
Writing spills off the screen on HD monitors
Out of the box, R-Pi graphics may be larger than the 1080p (ie Full HD) screen. This is due to something called «Overscan», and it can be fixed easily by creating a simple text file on the R-Pi SD card by using Notepad on your PC.
Follow the instructions in the section «Big black borders around small image on HD monitors», but use positive numbers for the overscan settings, for example
overscan_left=20

overscan_right=20

overscan_top=20

overscan_bottom=20
Interference visible on a HDMI or DVI monitor
This may be caused by loss of signal on long video cables. The signal level may be increased by changing a configuration parameter.

Edit the configuration file; see the instructions at Raspberry Pi configuration file.
Add the following line to the configuration file
config_hdmi_boost=7
You may experiment with different values of config_hdmi_boost. The default is 2 for Pi1 model A/B, and 5 for newer Pi’s (B+, Pi2, Pi3). At your own risk, you can go up to 11.
Note that various adapters, such as HDMI-to-DVI, can also cause power loss and therefore require high values of config_hdmi_boost even with short cables.
This option can also help when there is no display output at all, the display periodically blanks, or colours are wrong/inverted.
This symptom can also be caused by RasPi +5V (measured from TP1 to TP2) falling too low. See Troubleshooting Power Problems.
No HDMI output at all

The PI’s GPIO header P1 Source
First make sure the display is powered on and switched to the right input before booting Pi.
If you have a case remove it as it can prevent your HDMI cable to properly connect to the HDMI port.
If you have the Rasbian Wheezy image (recommended) then try
hdmi_safe=1
Which will force the PI to boot in «safe mode».
For a quicker way to force wheezy into booting in safe mode, which doesn’t need editing config.sys, you can also try to boot while holding the GPIO header P1-pin-5 (GPIO 1, SCL) low. This pin is normally held high with a pullup, but if you place a jumper between pin 5, (GPIO 1) and pin 6, (GND) of the GPIO header it will force the PI to boot in safe mode, which will force a 640×480 VGA screen mode, which any HDMI device should be able to display. Be very careful not to connect any other pins, especially not pins 1 and 2 (3V3 and 5V) as doing so, with power on, will damage your PI!
Otherwise, try adding the following line to the configuration file (similar to interference case above)
config_hdmi_boost=4
Your monitor/cable may not be asserting the hotplug signal. You can override this with:
hdmi_force_hotplug=1
A similar problem has occured following the installation of Rasbian Wheezy image «2013-02-09-wheezy-raspbian» — the hotplug signal appeared to be no longer detected when a HDMI 3 Port Switcher was in use for the Pi running from that image. An older, but updated and upgraded image still worked, as did a similar image on the other Pi connected to the switch, but, unless the above override was implemented, the Pi with the new image would only provide a HDMI display when directly connected to the monitor. The same problem has re-occurred when using that wheezy image with a new (in March 2013) «Model A» Pi.
Also try the following video options:
hdmi_group=2
hdmi_mode=4
which resolved an issue with DVI monitor reporting «input signal out of range»
As a last resort, try deleting (rename to keep backup) config.txt from the SD card.
Also check that the RasPi +5V voltage (measured from TP1 to TP2) is in the correct range. One user found that his DVI-D monitor blanked out when +5V was too low. See Troubleshooting Power Problems.
Here’s a rare cause: A standard HDMI cable has five individual ground wires plus a shield. Some cheap HDMI cables do not implement the individual grounds and just have a common foil shield that’s connected to the HDMI plug shells at both ends. This works OK in most HDMI applications since most HDMI sources (like RasPi) and most monitors connect the shells to circuit ground. However, some HDMI or DVI monitors may requires individual ground lines. You can tell if an HDMI cable implements the individual grounds by checking for continuity using an Ohmmeter or multimeter. You can find the HDMI pinout for full-size connectors at Wikipedia.
Composite displays no image
The output display should default to HDMI if an HDMI display is connected, and composite if not (the composite output is the yellow RCA phono connector). At boot time, the Pi tries to detect an HDMI cable. If it cannot detect an HDMI cable it defaults to using composite output. Therefore, make sure there isn’t a HDMI cable connected when you want to use composite output. Also, the Pi will only auto-detect once, at boot-time. If you want to switch from HDMI to Composite or back you need to reboot (or know the appropriate command-line magic).
If you expected to get composite output and you do not, the problem is either with the Pi output, with the cable or with the TV/monitor. Here are some things to try
- Are you using the NOOBS GUI for OS installation and selection? On the first boot, i.e. when installing, you can hold 3 (PAL) or 4 (NTSC) while booting to force composite. If you install with HDMI and later want to change, alternately press SHIFT then 3 or 4 while booting: SHIFT takes you to the install screen, where 3 and 4 are recognized. You can then choose whether to make the change permanent, and press Esc to go back to the OS selection screen.
- Is the Pi configuration forcing HDMI output? Inspect the file «config.txt» in the boot partition of your memory card and look for the line «hdmi_force_hotplug=1». If you see this line, comment it out (in particular, look at the end of «config.txt», in the section entitled «NOOBS Auto-generated Settings:»)
- Is the cable connection ok? If you’re using a cable with red/white/yellow phonos on each end, make sure you’re plugging in the yellow at both ends, and make sure it is pushed home fully into the socket. Try using (e.g.) the white connectors at each end, instead.
- Are you using the correct connection on the TV/monitor? You need to be using a composite input, which will usually be a yellow RCA phono connector. This is NOT the same as the (RF modulated) antenna connection. If your TV has a SCART input you can buy a SCART Composite adaptor that has a set of RCA phono connectors. If you’re already using one of those connectors, make sure that the switch on it is set to IN.
- Have you selected the correct input on the TV/Monitor? It’s normally marked «AV». If your TV has multiple AV inputs, try all of the inputs, normally by pressing a button marked «AV» or «Input» or «Source» or «->O» on the remote control. If you have other things connected to the TV AV inputs they may have a higher «priority» in. Try disconnecting them.
- Are you being impatient? It takes about 7s from power-up for the Pi to start driving the composite output. With everything wired up, and the correct source selected on the monitor, power up the Pi and start counting. After about 7s you may see a brief white flicker or flash on the screen. That is the Pi considering using the composite output and choosing not to. If you see this, the problem is probably in your config.txt
- Is everything good apart from the TV? One user suggested connecting the composite output to the audio input (red or white RCA phono) e.g. on a mini HiFi system. Keep the volume right down low. After power-up you should hear a couple of clicks. After about 7s you should hear a near-constant throbbing buzz, changing tone a couple of times after a few seconds (that’s the desktop starting up, I think). If you power-cycle and then do the same thing with an HDMI cable connected (even with nothing connected at the far end of the HDMI cable) you should hear the clicks just after power-up and then no more sound.
- Is the Pi faulty? This is unlikely and you should consider it only as a last resort.
Composite displays only black and white image
The composite display defaults to NTSC (American) output. Most TVs will show an image with that, but older PAL (European) televisions may display only back and white or no image. To fix this:
Edit the configuration file, see the instructions at R-Pi_ConfigurationFile.
Add the following line to the configuration file
sdtv_mode=2
(You can try other values: 0 is NTSC, 1 is Japanese NTSC, 2 is PAL, 3 is Brazilian PAL)
HDMI -> VGA adapters
Some good information can be found here:
- RPi_VerifiedPeripherals#HDMI-.3EVGA_converter_boxes
- (RPi forum) Serious HDMI Problems. What’s that smell? Burning Raspberry!
A commonly used adapter from Ebay: gallery with detailed images & steps of a modification to use external power source: HERE —by Pinoccio
GPIO
Precautions
Remember that the GPIO pins are 3.3V logic level only, and are NOT 5V tolerant.
If you momentarily shorted the two end GPIO pins together (+3.3V and +5V), or a supply pin to ground, and the Pi appears to be dead, don’t panic. The input polyfuse may have tripped. It is self-resetting after it cools down and the polymer re-crystallizes, which can take several hours. Set the Pi aside and try again later.
The GPIO pins connect directly into the core of the ARM processer, and are static-sensitive, so you should avoid touching the pins wherever possible. If you are carrying a static charge, for example by taking off an acrylic pullover, or walking across a nylon carpet, touching the GPIO pins could destroy your R-Pi, so always earth yourself before touching the pins or anything connected to them.
Testing
If you think you have damaged one or more gpios you can carry out a diagnostic test.
The test is a bash (command line) script called gpiotest
The test requires the services of the pigpio library.
For the duration of the test nothing must be connected to the gpios (no LEDs, wires, ribbon cables etc.).
The test checks that each gpio may be read and written and that the internal resistor pull-ups and pull-downs are functional.
A video showing what happens to the gpios during a test.
A test with all gpios okay.
This program checks the Pi's (user) gpios.

The program reads and writes all the gpios.  Make sure NOTHING
is connected to the gpios during this test.

The program uses the pigpio daemon which must be running.

To start the daemon use the command sudo pigpiod.

Press the ENTER key to continue or ctrl-C to abort...

Testing...
Skipped non-user gpios: 0 1 28 29 30 31
Tested user gpios: 2 3 4 5 6 7 8 9 10 11 12 13 14 15 16 17 18 19 20 21 22 23 24 25 26 27
Failed user gpios: None
A test showing failed gpios.
This program checks the Pi's (user) gpios.

The program reads and writes all the gpios. Make sure NOTHING
is connected to the gpios during this test.

The program uses the pigpio daemon which must be running.

To start the daemon use the command sudo pigpiod.

Press the ENTER key to continue or ctrl-C to abort...

Testing...
Write 1 to gpio 17 failed.
Pull up on gpio 17 failed.
Write 1 to gpio 18 failed.
Pull up on gpio 18 failed.
Write 0 to gpio 23 failed.
Pull down on gpio 23 failed.
Write 0 to gpio 24 failed.
Pull down on gpio 24 failed.
Write 1 to gpio 27 failed.
Pull up on gpio 27 failed.
Skipped non-user gpios: 0 1 28 29 30 31
Tested user gpios: 2 3 4 5 6 7 8 9 10 11 12 13 14 15 16 17 18 19 20 21 22 23 24 25 26 27
Failed user gpios: 17 18 23 24 27
Digital Waveform Viewer
A logic analyser or a digital waveform viewer is a very useful tool to diagnose problems with the gpios.
piscope is a digital waveform viewer which lets you see what is happening on the gpios in a live view.
A video of a capture session.
Some screen captures.
-

DHT22
-
I2C
-

SPI
-

Virtual Wire


General
The time is incorrect
If the clock is off by a series of hours, in the command line type:
sudo dpkg-reconfigure tzdata
The R-Pi has no real-time clock, so unless it can access a timeserver over the network at boot, or time is manually entered by the user, the time/date will restart counting from the last logged time in the previous session.
A part broke off
The silver cylinder near the microUSB power input is a 220 uF capacitor («C6» on schematic). It sticks up and due to the small surface-mount pads, it is easy to break off; several people have done so. This is a power supply filter capacitor which reduces any noise and spikes on the input +5V power. If you like, you can solder it back on, or just leave it off. If you do solder it back on, take care to observe the correct polarity with the black stripe towards the board edge. This part, C6 is a «just in case» component which is good design practice to include, but as it turns out most power supplies still work OK without this part installed. This part is also discussed here.
Unable to install new software
When trying to install a software package (using the command sudo apt-get install xxxx) you may see the error
Package yyyy is not available
This means that your software list is out of date. Before attempting to install software, you should always make sure that you are using the latest software list by using the commands
sudo apt-get update
sudo apt-get upgrade
Troubleshooting power problems
If you think you have a problem with your power supply, it is a good idea to check the actual voltage
on the Raspberry Pi circuit board. Two test points labelled TP1 and TP2 are provided on the circuit board
to facilitate voltage measurements.
Use a multimeter which is set to the range 20 volts DC (or 20v =). You should see a voltage between 4.75 and 5.25 volts. Anything outside this range indicates that you have a problem with your power supply or your power cable.
If you have not used a multimeter before, see these [basic instructions]
Note: Even if the multimeter shows the correct voltage, you may have some power supply problems. A multimeter only displays the average voltage. If there are very short-lived dips or spikes in the voltage, these will not be shown by the multimeter. It is best to measure voltage when Pi is busy.
If your voltage is low, it could be:
- The power supply produces too low a voltage
- The power supply cannot supply enough current, which results in a voltage drop. Make sure Power supply is labelled as at least 700mA. (Some cheap power supplies don’t deliver what is labelled).
- The Micro USB power cable is low quality. Some Micro USB cables have very thin conductors, resulting in enough voltage drop for RasPi to fail even if the power supply itself is fine. For details, see On_the_RPi_usb_power_cable.
- Attached USB devices want too much power. The Pi is only designed for up to 100mA USB devices. A USB device wanting more that that will cause a voltage drop.
- The F3 Polyfuse could be blown or bad, see below for how to test.
Note: keyboards with LCD displays, built in USB hubs, backlights, etc are likely to be problematic. Try to use a basic one. Wifi dongles are also unlikely to work when directly connected. Connect high powered USB devices to a powered USB hub.
Try booting without HDMI, ethernet or USB deviced plugged in, and see if the voltage improves.
See also: Power Supply Problems


How to test the F3 polyfuse[19]
- Remove all the things plugged into your Raspberry Pi, including SD card.
- Locate the TP2 test point on the top of the board.
- Turn your board over and find the TP2 test point on the bottom of the board. One lead of your multi-meter will always be on the TP2 point on the bottom of the board for all tests.
- Plug your power supply into the micro usb port and power your board.
- Place one lead of your multi-meter on the TP2 point on the bottom of the board and one lead on the side of the F3 fuse closest to the edge of the board. Note the voltage. This is the voltage coming into your RPi from your power supply.
- Keeping one lead on TP2, move the other lead to the side of F3 closest to the SD card slot. This is the voltage coming out of the F3 fuse.

Multi-meter lead placement for testing the Raspberry Pi F3 Polyfuse
If the voltage is different by more than about 0.3v you probably have an issue with the F3 fuse[20].
When polyfuses «blow» their resistance increases dramatically, there by limiting the voltage that can pass through them. If your power problem suddenly appeared after your board was known to be working fine, it is probable the fuse is just «blown» and will return to normal. Polyfuses recover from the tripped state to near their normal value in a few minutes, but do take some hours to fully recover so leave it unpowered and check it again in a little while.[21] If your power problem has been since the first time you plugged in your board, the fuse was probably bad when it arrived and should be returned to place you purchased it.
Also, on a related issue, do note that if you do not power the PI in the «official manner», that is through it’s micro-USB port, but use any alternative way (such as through the GPIO header, the test points TP1 and TP2), but also by back-powering it, you are actually bypassing the PI’s input polyfuse protection device! This can have extreme consequences if ever you manage to put more than 6V on the PI, even for a very short period. As this causes the overvoltage device D17 on the the PI to trigger and short the 5V supply! Without the polyfuse limiting the current through D17, it will burn out, probably melting the PI’s enclosure with it, (if you have any) and possibly causing a fire-hazard. It will probably also create a permanent short of the 5V supply! So be warned, and if you use back power make sure your hub or its PSU has a fuse to prevent this from happening. If not, add your own fuse.
If you prefer to make your own PSU — see: Power Supply construction — HowTo
Hardware versions/revisions
Several different boards have been found probably from different assembly lines, and the following tables try to help you identify your board for better troubleshooting.
Look for the date of manufacturing printed with the year and week. In this example year (2012) and week (18th):

For what we can see for model B boards there are mainly two versions that differ on the type RAM used, Samsung (S) and Hynix (H).
For Board ver. we used: <model><RAM Maker><production date> (ex.: BS1218 is «Model B, Samsung RAM, 18th week of 2012»)
Model A:
| Board
ver. |
RAM
Chip |
USB
Chip |
Front | Back |
|---|---|---|---|---|
Model B:
| Board
ver. |
RAM
Chip |
USB
Chip |
Front | Back |
|---|---|---|---|---|
| BS12xx | Samsung | SMSC |
|
|
| BH12xx | Hynix | SMSC |
|
|


See a complete list and user feedback here: RaspberryPi Boards
References
- ↑ http://www.raspberrypi.org/phpBB3/viewtopic.php?f=28&t=7528
- ↑ http://www.raspberrypi.org/documentation/hardware/raspberrypi/schematics/Raspberry-Pi-B-Plus-V1.2-Schematics.pdf
- ↑ http://www.mouser.com/ds/2/115/APX803_D-86185.pdf
- ↑ http://www.raspberrypi.org/phpBB3/viewtopic.php?f=6&t=5096&p=76503#p76503
- ↑ http://www.raspberrypi.org/phpBB3/viewtopic.php?f=6&t=5096&p=76654#p76654
- ↑ http://www.raspberrypi.org/forum/troubleshooting/will-not-boot-consistently-any-suggestions-before-i-send-my-pi-back
- ↑ http://www.raspberrypi.org/forum/troubleshooting/booted-once-wont-work-again
- ↑ http://www.raspberrypi.org/forum/troubleshooting/possible-fault-pi-boots-sometimes-but-not-always
- ↑ http://www.raspberrypi.org/phpBB3/viewtopic.php?f=6&t=5900&p=79008#p79008
- ↑ http://www.raspberrypi.org/phpBB3/viewtopic.php?f=6&t=5900&p=78973#p78973
- ↑ https://github.com/raspberrypi/linux/commit/e09244e60881148431ecd016ccc42f1fa0678556
- ↑ http://www.raspberrypi.org/forum/troubleshooting/usb-power-hub-wifi/page-4#p74609
- ↑ http://www.raspberrypi.org/forum/troubleshooting/success-with-kb-mouse-wifi?value=3761&type=8&include=1&search=1
- ↑ http://www.raspberrypi.org/forum/troubleshooting/display-and-keyboard-issues-on-a-real-pi#p74816
- ↑ http://www.raspberrypi.org/phpBB3/viewtopic.php?f=28&t=7533
- ↑ http://www.raspberrypi.org/phpBB3/viewtopic.php?t=5766#p77576
- ↑ http://www.raspberrypi.org/phpBB3/viewtopic.php?t=5766#p80995
- ↑ http://www.raspberrypi.org/phpBB3/viewtopic.php?f=28&t=6822&p=89589&hilit=eben#p89513
- ↑ http://www.raspberrypi.org/phpBB3/viewtopic.php?f=26&t=22318
- ↑ http://www.raspberrypi.org/phpBB3/viewtopic.php?f=28&t=24005&p=222526#p222526
- ↑ http://www.raspberrypi.org/phpBB3/viewtopic.php?f=28&t=24005&p=222549#p222543
Raspberry Pi |
||
|---|---|---|
| Startup |
Buying Guide — SD Card Setup — Basic Setup — Advanced Setup — Beginners Guide — Troubleshooting |
|
| Hardware |
Hardware — Hardware History — Low-level peripherals — Expansion Boards |
|
| Peripherals |
Screens — Cases — Other Peripherals (Keyboard, mouse, hub, wifi…) |
|
| Software |
Software — Distributions — Kernel — Performance — Programming — VideoCore APIs — Utilities |
|
| Projects |
Tutorials — Guides — Projects — Tasks — DataSheets — Education — Communities |

Проверка/Оформление/Редактирование: Мякишев Е.А.
// в процессе создания
// текст может перемещаться и удаляться
Неисправности
Питание
- Нет изображения на экране монитора, не горит красный светодиод
- Красный светодиод мигает
- Красный светодиод не загорается
- Нет изображения на экране монитора, горит красный светодиод, но не мигает зеленый светодиод
Зеленый светодиод мигает от 3 до 6 раз
На новых прошивках это указывает на одну из неисправностей:
- 3 мигания — файл loader.bin не найден;
- 4 мигания — файл loader bin не может быть загружен;
- 5 миганий — файл start.elf не найден;
- 6 миганий — файл start.elf не может быть загружен;
Возможно один из файлов поврежден и его необходимо заменить.
На экране монитора отображается только разноцветный квадрат
На новых прошивках после загрузки start.elf на экране монитора отображается разноцветный квадрат. Если загрузка на этом остановилась, значит загрузчик, находящийся на карте памяти выполняется, но возможно поврежден файл kernel.img и его необходимо заменить.
На экране монитора отображается разноцветный квадрат и после этого устройство перезагружается
Raspberry Pi не хватает напряжения питания. Замените блок питания.
Raspberry Pi загружается, но затем появляется сообщение Kernel Panic
Возможно подключено несовместимое периферийное устройство. Попробуйте отключить все периферийные устройства и повторите загрузку. Если все прошло удачно подключайте их поочередно, пока снова не появится Kernel Panic.
Raspberry Pi выключается или перезагружается
Недостаточное напряжение питания. Замените блок питания.
Raspberry Pi включается через раз
Неисправен блок питания. Замените блок питания.
Периферийные устройства
Raspberry Pi не реагирует на нажатия клавиш клавиатуры
Недостаточное напряжение питания. Замените блок питания на более мощный.
Нажатые клавиши повторяются многократно
Недостаточное напряжение питания. Замените блок питания на более мощный.
Клавиатура и мышь не работает вместе с Wi-Fi адаптером
Недостаточное напряжение питания. Замените блок питания на более мощный.
Raspberry Pi не реагирует на нажатия клавиш беспроводной клавиатуры
- Ваша беспроводная клавиатура несовместима(отсутствует драйвер) с операционной системой Raspberry Pi. Проверьте входит ли ваша клавиатура в список совместимых устройств.
- Недостаточное напряжение питания. Замените блок питания на более мощный.
Вводимые символы не соответствуют раскладке клавиатуры
Измените раскладку клавиатуры.
Вариант первый
Запустите терминал и введите следующую команду:
sudo dpkg-reconfigure keyboard-configuration
Следуйте указаниям окна терминала. Перезагрузите Raspberry Pi.
Вариант второй
Изменить раскладку клавиатуры с помощью raspi-config.
Долгая загрузка после смены настроек раскладки клавиатуры
Запустите терминал и введите следующую команду:
SD-карты
- Удостоверьтесь. что у вас установлена последняя версия прошивки;
- Проверьте совместима ли ваша SD-карта с Raspberry Pi;
- Проверьте наличие загрузочного сектора boot на SD-карте;
- Проверьте наличие всех необходимых файлов на карте памяти;
- Проверьте переключатель защиты от записи на SD-карте;
- Попробуйте другой карт-ридер;
- Попробуйте установить переключатель в среднее положение(возможно он неисправен либо карт-ридер неверно определяет его положение);
Звук
Монитор со встроенными динамиками не воспроизводит звук по HDMI
Возможно монитор не переключился в режим HDMI, необходимо добавить в конфигурационный файл config.txt:
Нет звука
В старых версиях Raspian звук отключен по умолчанию, т.к. звуковой драйвер ALSA еще в стадии alpha-версии. Чтобы включить звук выполните в терминале, до запуска графической оболочки следующие команды:
sudo apt-get install alsa-utils
sudo modprobe snd_bcm2835
Выход звука для воспроизведения выбирается автоматически, но его можно задать вручную, выполнив команду в терминале:
sudo amixer cset numid=3 <n>
где <n> необходимо заменить на число:
- 0 автоматический режим;
- 1 наушники;
- 2 HDMI;
Изображение и видео
Не запускается графический интерфейс, startx не выполняется
- Возможно у вас закончилось свободное место на SD-карте;
- Возможно одна из программ при установке повредила файл .Xauthority. Удалите/переименуйте/переместите файл.
Инвертированы цвета на мониторе
Проверьте подключение видео кабеля.
Помехи на мониторе
Возможно некачественный или слишком длинный кабель.
Не могу воспроизвести ни один файл
Возможно не установлены необходимые кодеки.
Видео воспроизводится медленно
Аппаратное ускорение видео реализовано лишь в XBMC и omxplayer, и поддерживается только если видео закодировано с помощью h.264.
Черные поля по краям экрана
Это вы́лет развёртки (англ. Overscan), прочитайте как это исправить в разделе raspi-config про опцию Overscan.
Для более точной настройки обратитесь к руководству по конфигурационному файлу config.txt.
Изображение слишком большое и выходит за границы монитора
Смотри предыдущий пункт :).
Сеть
Пропадает сетевое соединение при подключении периферийных устройств по USB
- Недостаточная мощность источника питания, необходимо заменить на более мощный;
- Некачественный провод, необходимо заменить;
- USB устройство потребляет больше 100мА, поэтому необходимо использовать USB-концентратор(USB-хаб) с внешним питанием;
Контроллер USB и сетевой карты греется
Не стоит беспокоится. Температура микросхемы LAN9512 контроллера Ethernet/USB может достигать 52 градусов в нормальном рабочем режиме.
Переставил SD-карту в другую Raspberry Pi и сеть перестала работать
В некоторых дистрибутивах есть привязка MAC-адреса к интерфейсу и при смене MAC-адреса создается новый.
Отредактируйте файл:
etc/udev/rules.d/70-persistent-net.rules
и измените привязку MAC-адреса и интерфейса.
Система нестабильна при высокой нагрузке на сеть
Это происходит из-за нехватки памяти драйверу USB.
Решение 1
Откройте файл:
Найдите строку:
vm.min_free_kbytes = 8192
Измените значение параметра на 16384 или большего значения.
Решение 2
Необходимо уменьшить скорость сетевого обмена.
Откройте файл:
Добавьте строку:
При старте графической среды пропадает сеть
Это вызвано ошибкой в драйвере USB и может происходить с некоторыми USB-манипуляторами.
IP-адрес
Проверка/Оформление/Редактирование: Мякишев Е.А.
Любому девайсу, подключенному к локальной сети, присваивается собственный IP-адрес.
Чтобы при помощи SSH или VNC подключиться к Raspberry Pi с другой машины, вам надо знать IP-адрес Raspberry Pi. Это просто, если у вас есть подключенный дисплей, но в то же время существует несколько методов, благодаря которым IP-адрес можно узнать удаленно – с другой машины, подключенной к сети.
Поиск IP с дисплеем
Если вы загрузились не через рабочий стол, а через командную строку, ваш IP-адрес должен быть в последних нескольких сообщениях перед приглашением для входа в систему.
Используя терминал (загрузитесь через командную строку или откройте LXTerminal с рабочего стола), просто впишите hostname -1 – эта команда и покажет вам желанный IP-адрес.
Поиск IP без дисплея
Узнать IP-адрес Raspberry Pi можно и без подключенного к плате дисплея. Для этого можно воспользоваться следующими способами:
Список подключенных девайсов
В адресной строке веб-браузера введите IP-адрес вашего роутера (например, «192.168.1.1»), который, как правило, напечатан на фабричной этикетке вашего роутера. После этого должна открыться контрольная панель. Затем, используя параметры доступа (которые, как правило, тоже напечатаны на фабричной этикетке роутера или в сопроводительной документации), пройдите до списка подключенных девайсов (или что-то наподобие этого; у разных роутеров это меню называется по-разному), и в этом списке определенно должны быть какие-нибудь знакомые девайсы. Некоторые устройства будут определены как PC, планшеты, телефоны, принтеры и т.д., что позволит при помощи метода исключения понять, какое из этих устройств – Raspberry Pi. Также обратите внимание на тип подключения. Если ваша Pi подключена через провод, в списке будет несколько девайсов, из которых вы сможете выбрать.
Команда NMAP
Команда nmap (Network Mapper) – это бесплатный инструмент с открытым кодом для сетевого обнаружения, доступный для Linux, Mac OS и Windows.
- Для установки на Linux проинсталлируйте пакет nmap (например,
).
- Для установки на Mac OS и Windows, смотрите эту страницу – http://nmap.org/download.html
Чтобы использовать nmap для сканирования девайсов в вашей сети, вам надо знать подсеть, к которой вы подключены. Для начала находим свой собственный IP-адрес или, другими словами, адрес компьютера, который вы используете для поиска IP-адреса вашей Raspberry Pi.
- В Linux (или в терминале Mac OS) впишите в окне терминала
- В Mac OS пройдите в меню System Preferences, затем в Network, а после этого выберите активное сетевое соединение, после чего увидите IP-адрес
- В Windows откройте «Панель управления», затем под пунктом Network and Sharing Center кликните на View network connections, выберите активное сетевое подключение и кликните View status of the connection, после чего увидите IP-адрес
Теперь, когда у вас есть IP-адрес вашего компьютера, вы можете сканировать всю подсеть на предмет других устройств. Например, если ваш IP-адрес – это «192.168.1.5», другие девайсы будут иметь адреса вроде «192.168.1.2», «192.168.1.3», «192.168.1.4» и т.д. Числовой диапазон этой подсети – это «192.168.1.0/24» (сюда входят адреса от «192.168.1.0» до «192.168.1.255»).
Теперь воспользуемся командой nmap с флагом -sn (сканирование при помощи пинга) для сканирования по всему диапазону подсети. Это может занять несколько секунд.
Таким образом, мы просто будем сканировать пингом все IP-адреса и слушать, ответят ли они. Для каждого устройства, отвечающего на пинг, будут показаны данные с названием хоста и IP-адресом. Вроде этого:
Starting Nmap 6.40 ( http://nmap.org ) at 2014-03-10 12:46 GMT
Nmap scan report for hpprinter (192.168.1.2)
Host is up (0.00044s latency).
Nmap scan report for Gordons-MBP (192.168.1.4)
Host is up (0.0010s latency).
Nmap scan report for ubuntu (192.168.1.5)
Host is up (0.0010s latency).
Nmap scan report for raspberrypi (192.168.1.8)
Host is up (0.0030s latency).
Nmap done: 256 IP addresses (4 hosts up) scanned in 2.41 seconds
Таким образом, мы можем найти в этом списке и Raspberry Pi – с названием хоста raspberrypi и IP-адресом «192.168.1.8».
GPIO
Замкнул контакты GPIO, Raspberry Pi не подает признаков жизни
Не стоит беспокоится. Сработал само восстанавливающийся предохранитель. Необходимо некоторое время для его восстановления(несколько часов). Отложите Raspberry Pi и попробуйте включить его через пару часов.
Камера
Решение проблем с камерой
Проверка/Оформление/Редактирование: Мякишев Е.А.
Если камера не работает, можно попробовать сделать следующее:
- Ленточный кабель подключен туда, куда нужно? Дело в том, что его можно по ошибке воткнуть в DSI (последовательный порт для дисплея), а не в CSI (последовательный порт для камеры), т.к. ленточный коннектор подходит и туда, и туда. Но порт для камеры находится вблизи HDMI-коннектора.
- Ленточные коннекторы подключены максимально плотно? Не перекручены ли они?
- Плотно ли подключен коннектор камера-модуля (т.е. между самим камера-модулем черного цвета и платой камеры)? Бывает, что при установке камера-модуля в корпус или при перевозке это соединение разбалтывается. Ногтем подцепите коннектор на плате, а затем осторожным нажатием зафиксируйте его еще раз. Если все подключилось как надо, вы должны услышать слабый щелчок. Не прилагайте слишком много усилий – если коннектор не подключается, он, вероятно, просто сместился куда-то в сторону.
- Запущены ли , ?
- Включена ли камера и запущен ли raspi-config?
- Хватает ли вам питания? Камера-модуль требует дополнительно 200-250 mА сверх того, что необходимо для функционирования Raspberry Pi.
Если вы проделали все вышеописанное, но камера по-прежнему не работает, попробуйте следующее:
- Ошибка: raspistill/raspivid не найдены (Error: raspistill/raspivid not found). Это значит, вероятно, что функции апдейта/апгрейда каким-то образом сбоят. Попробуйте запустить их снова.
- Ошибка: отображается ENOMEM (Error: ENOMEM displayed). Камера не запускается. Стоит снова проверить все подключения и соединения.
- Ошибка отображается ENOSPC (Error: ENOSPC displayed). Камера-модуль, по всей видимости, истощил ресурсы GPU-памяти. Проверьте config.txt в папке . В пункте gpu_mem должно стоять как минимум 128. Впрочем, это можно настроить и через raspi-config – воспользуйтесь опцией Memory Split в секции Advanced.
- Если после всего этого камера по-прежнему не работает, вам, вероятно, стоит обновить прошивку Raspberry Pi. Для того, чтобы установить самую последнюю (но экспериментальную) версию прошивки, воспользуйтесь следующей командой:
- И если даже после всех этих попыток камера все еще не работает, она, вероятно, просто неисправна. Ее случайно не ударило статическим электричеством? Попробуйте попросить помощи на форуме Raspberry Pi (в секции Camera). Если и там не подскажут ничего дельного, камера-модуль, вероятно, придется просто заменить.
См.также
| Партнерские ресурсы | |
|---|---|
| Криптовалюты |
|
| Магазины |
|
| Хостинг |
|
| Разное |
|
Внешние ссылки
When things don’t seem to be working as expected, it’s time to troubleshoot. These are some of the common tools and commands that come in very handy for this process. You can also post in the Adafruit Forums and we’ll try and help as well.
If your Pi is not booting at all, this sticky in the Raspberry Pi forums is a good place to start.
Boot Error Code via LED blink
(Pi 4 and Pi 400, but possibly others!)
From https://www.raspberrypi.com/documentation/computers/configuration.html#led-warning-flash-codes
If a Pi fails to boot for some reason, or has to shut down, in many cases an LED will be flashed a specific number of times to indicate what happened. The LED will blink for a number of long flashes (0 or more), then short flashes, to indicate the exact status. In most cases, the pattern will repeat after a 2 second gap.

Getting System Information
Knowing specifics of your operating system and hardware are very useful for troubleshooting. Here are some commands to use to get this information.
To figure out what version of Linux you are running, use:

To get hardware details, use the following, cat is used to dump the contents of a file::

The model info can also be found here:
cat /sys/firmware/devicetree/base/model ; echo

An echo was added to the above since the file apparently does not end on a new line. This just makes the output look cleaner.
Viewing System Log
There are actually numerous system log files (look in /var/log), but the basic kernel one, accessed with the command dmesg, is the first place to look. There can be a lot of output from running this command. Too much to fit on one screen. One option is to send the output to a file:

And then you can view that file in a text editor, or upload it to the forums so support there can take a look.
Another option is to «pipe» the output to something like more, which will allow you to paginate through the listing:
Another useful way is to filter for specific text using grep (the -i ignores case):
dmesg | grep -i some_text

Hmmm. My network cable is not plugged in. Guess that’s why eth0 is not ready.
And yet another way — this may be the most useful — is to only show the most recent output by using tail. This is good for when you are trying to do SomeThing and it’s not working as expected. Try running the command before doing SomeThing:
and then do SomeThing and run the command again. This way you can see the operating system kernel messages associated with what happened when you did SomeThing. The -10 limits it to the last 10 lines.
For example, how do I know my Raspberry Pi is even seeing my USB Thermal Printer when I plug it in? Well, run the command before plugging in the printer:

Nothing exciting, just boot messages about Bluetooth. What we are really interested in is what happens after plugging the printer in:

Cool. It saw a new USB device being attached, recognized it as pl2303 and attached it to ttyUSB0. That is all as expected. But if you got the same thing as the first output again — then nothing happened and something is wrong. Or maybe there would be messages that are flagged more as *error*, etc.
Note:
- The numbers relate to time when message was logged. You can generally ignore them for basic checks like this.
- You can change
-10to some other value to increase/decrease the number of lines shown.
Is my I2C device there?
A lot of breakout boards use I2C to communicate with the Raspberry Pi. Each I2C devices has a unique address. A quick way to check that the Raspberry Pi can see the connected device is to scan for the addresses of everything attached. To do that, use:

The numbers that show up are the addresses, in hex. For the example above, something with the address 0x48 is seen. To find out what address your device should have, check the product page, or The List:
Make Sure Power Is Good
Raspberry Pi’s have gotten more power hungry over the years, with the current high end models recommending a whopping 2.5 amps! The actual current consumption will vary depending on what the Raspberry Pi is doing, but you need to accommodate the worst case scenario. Maintaining a good voltage of 5V is also important. Some power supplies will drop in voltage as current draw goes up — even if they claim they are rated for that current.
How do I know if I have a good power supply?
It actually can be difficult to know. At a minimum, look for the label on the supply and check its voltage and current rating.

The power supply above has an output of 5.25 volts and is rated for 2 amps.
If you’re using a (earlier) Pi 4, use the Official Pi Power Supply
Original manufactured Pi 4’s had a mistake on the USB connector which causes proper «USB Power Delivery (PD)» supplies to get confused and not power the Pi 4. You can tell which version you have by checking this guide.
If you have an older Pi, try using the official Pi Power supply or USB Micro B to USB C adapter attached to a standard micro USB power supply
Make sure USB cable is good.
Another important factor for power is the USB cable being used to deliver it to the Raspberry Pi. Cheap charge only cables may have conductors that can only carry a couple 100 milliamps. Even if you have a good power supply, these cables will fail to adequately deliver it to the Raspberry Pi.
How do I know if I have a good USB cable?
This is even more difficult to check. Ideally, the cable itself will have a printed label that will indicate the gauge of the wires used.

The units will probably be AWG (American Wire Gauge). For the cable above, the wires are 28 AWG. For Raspberry Pi usage, that’s probably about as thin as you want to go.
The thinner the cable, the higher the AWG number.
If you can’t find a label on your USB cable, the only other option is to try other cables.
Use an updated operating system image.
The Raspberry Pi Foundation typically roles out a new release of their operating system with each new Raspberry Pi model. These updated releases are needed to be able to boot the latest models. So make sure you are running latest software with latest hardware.
You should get your operating system images from here:
If you are just starting out, it’s best to steer clear of the Third Party images and use the main Raspbian distribution. Installation onto and SD card has become very easy:
Use a text editor, not a word processor, for configuration files
If you are doing setup and configuration by directly editing text files, as shown in this guide, then use a simple text editor, like Notepad, and not a full featured word processor, like Pages, Word, etc. A «text editor» edits text and nothing else, whereas a «word processor» allows for all kinds of formatting, like making text bold, inserting images, etc. A word processor can add additional content to the file which can make it appear unreadable when the operating system tries to access it.
This guide was first published on Mar 13, 2019. It was last
updated on Nov 15, 2018.
This page (Troubleshooting) was last updated on Nov 15, 2018.
Text editor powered by tinymce.