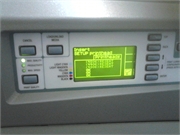
 Одной из первых моделей в линейке designjet у которых табло стало выдавать системные ошибки является 500 модель (hp designjet500). Ниже приводится таблица ошибок от данной модели.
До сегодняшнего дня после 500 модели вышло огромное количество других моделей, изменился и дизайн и оформление и скорость печати самих плоттеров. Неизменными остались только ошибки плоттеров, не считая мелких поправок и изменений. Но в общих чертах все без изменений.
Каждая ошибка содержит комбинацию из четырех цифр АА:ББ
Внимание! Уважаемые посетители нашего сайта, рады Вам предложить акцию от компании Дока-Сервис!
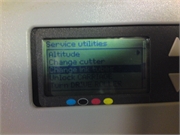
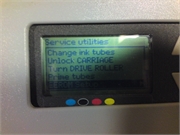
Кликайте на фото

Ниже приводятся 3 таблицы, по которым можно определить характер ошибки и причину ее возникновения.
таблица АА
| АА | Деталь плоттера Component/System | |
| ENGLISH | РУССКИЙ | |
| 01 | Main PCA/Electronics Module | Главный модуль PCA / плата электроники |
| 02 | Carriage/Carriage PCA | Каретка PCA |
| 03 | Power Supply Unit | Блок питания |
| 04 | Network Card | Сетевая карта |
| 05 | Formatter | Форматер |
| 06 | Hard Disk Drive | Жесткий диск |
| 07 | Interconnect PCA | Плата управления PCA |
| 08 | Front Panel | Панель управления |
| 11 | Trailing Cable | Шлейф каретки |
| 12 | Carriage Flex Circuit | Контакты печатающих головок |
| 17 | Interconnect Cable | Кабель платы управления |
| 21 | Service Station | Станция обслуживания, бункер отработки |
| 22 | Ink Supply Station | Станция подкачки чернил |
| 23 | Pressure System (APS) | Система давления APS |
| 24 | Ink Delivery System | Система поставки чернил |
| 25 | Spittoon | Губка-впитыватель чернил |
| 31 | Cutter | Нож, резак |
| 32 | Take-up Reel | Натяжитель |
| 33 | Sheet Feeder | Устройство подачи бумаги |
| 34 | Dryer/Blower | Вентилятор сушки |
| 41 | Paper-Axis Motor | Двигатель оси протяжки бумаги |
| 42 | Scan-Axis Motor | Двигатель привода ремня каретки |
| 43 | Vacuum Fan | Вакуумный вентилятор |
| 44 | Aerosol fan | Вентилятор аэрозоля |
| 51 | Window Sensor | Датчик открытия главной крышки |
| 52 | Drop Detector | Датчик вспрыска |
| 53 | Media Sensor | Датчик наличия бумаги |
| 54 | Pinch-Arm Sensor | Датчик ручки прижима рулона |
| 55 | Line Sensor | Датчик линейки позиционирования |
| 56 | Drive Roller Encoder Sensor | Датчик квадратуры оси протяжки рулона |
| 57 | Ink Leak Detector | Датчик расхода чернил |
| 58 | Color Sensor | Датчик цвета |
| 59 | Media Type Sensor | Датчик вида носителя |
| 61 | Language Interpreting | Языковая интерпретация |
| 62 | Input/Output through Parallel Port | Ввод-вывод параллельного порта |
| 63 | Input/Output through Network Card | Ввод-вывод сетевой карты |
| 64 | Input/Output through USB Port | Ввод-вывод USB порта |
| 65 | Input/Output | Ввод-вывод |
| 71 | Memory Management | Управление памяти |
| 72 | Generic Firmware | Общие микропрограммы |
| 73 | Servo | Контроль |
| 79 | Assertion | Внутрений контроль |
| 81 | Media Advance | Механизм носителя |
| 82 | Media Cut | Отрез носителя |
| 83 | Single-Sheet Feeding | Подача одиночного листа |
| 84 | Roll Feeding | Подача рулона |
| 85 | Media-Axis Encoder Reading | Датчик оборотов двигателя оси |
| 86 | Carriage Movement | Передвижение каретки |
| 87 | Scan-Axis Encoder Reading | Датчик оборотов двигателя привода ремня |
| 91 | Printhead Firing | Вспрыск печатающей головы |
| 92 | Servicing | Обслуживание |
| 93 | Ink Pumping | Помпа давления чернил |
таблица ББ
Possible for customer to perform action
Действие может быть выполнено пользователем
| ББ | Действие Recovery Action | |
| ENGLISH | РУССКИЙ | |
| 00 | Replace | Заменить |
| 01 | Reseat/(manually)Reconnect/Clean/Adjust | Переустановить / Переподключить / Очистить / Отрегулировать |
| 02 | Calibrate/Adjust (using Automatic Process) | Откалибровать / Отрегулировать |
| 03 | Power OFF | Отключить питание |
| 04 | Upgrade System Firmware | Обновить прошивку |
| 05 | Upgrade Driver | Обновить драйвер |
| 06 | Add Accessory | Добавить дополнительные модули |
| 07 | Escalate | Расширить память |
| 08 | Send Plot Again | Отправить печать заново |
| 09 | Wrong Part Installed | Установлен неправильный модуль |
талица ББ
On-Site visit required
Требуется вмешательство специалиста
| ББ | Действие Recovery Action | |
| ENGLISH | РУССКИЙ | |
| 10 | Replace | Заменить |
| 11 | Reseat/(manually)Reconnect/Clean/Adjust | Переустановить / Переподключить / Очистить / Отрегулировать |
| 12 | Calibrate/Adjust (using Automatic Process) | Откалибровать / Отрегулировать |
| 13 | Power OFF | Отключить питание |
| 14 | Upgrade System Firmware | Обновить прошивку |
| 15 | Upgrade Driver | Обновить драйвер |
| 16 | Add Accessory | Добавить дополнительные модули |
| 17 | Escalate | Расширить память |
| 18 | Send Plot Again | Отправить печать заново |
| 19 | Wrong Part Installed | Установлен неправильный модуль |
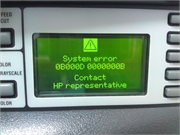
Руководствуясь данной таблицей можно самостоятельно решить большинство проблем с ошибками плоттеров. Не компетентное вмешательство может привести к серьезной проблеме. Компания не несет ответственность если пользователь руководствуясь таблицей ошибок сам разобрал плоттер пытаясь его реанимировать, а в результате сделал еще хуже. Ремонт дорогой и профессиональной техники лучше предоставить опытному сервисному инженеру.
Примеры самых распространенных ошибок плоттеров HP designjet
| Код ошибки | Действия |
|
01:10 01.1:10 |
Самая серьезная ошибка, которая говорит, что вышел из строя главный модуль плоттера или проще материнская плата. Ремонту не подлежит, блок электроники меняется целиком.
|
| 02:10 02.1:10 |
Причина, вышла из строя плата каретки. Ремонту не подлежит, замена каретки в сборе. |
| 03:10 | Проблема с блоком питания. иногда возможен ремонт, либо установка нового блока питания. |
| 05:10 |
Часто возникает среди моделей HP Designjet 500, 510 и 800, в которых установлена плата расширения, либо плата форматтера, в зависимости от модели. Выходит из строя либо сама плата или жесткий диск, который используется в некоторых моделях. Лечится заменой вышедшего из строя элемента. |
| 08:11 |
Обычно возникают в моделях Т и Z сериях. Передняя панель при старте не может найти связь с платой форматтера. Решение-смотреть ошибку 05:10 |
| 11:11 | В процессе непрерывной работы изнашивается подвижный кабель передачи информации между электронным модулем и блоком каретки. Лечится заменой шлейфа, меняются обе жилы. |
| 21:10 или 21:13 | Связана с выходом из строя сервисной станции (бункер отработки). Возникновение ошибки можно избежать своевременной профилактикой вашего плоттера раз в 1,5-2г. Применимо в моделях 100-х серий, 500, 510 и 800 моделях. В Т и Z сериях только под замену. |
| 22:10 или 22:13 |
Часто возникает при использовании СНПЧ, происходит утечка чернил, заливается плата управления узла подачи чернил (Ink Sistem) и узел выходит из строя, также риск возникновения увеличивается при использовании не оригинальных или заправляемых картриджей, чипы которых также сжигают электронику данного узла. И очень редко от времени и физического износа. Устраняется ошибка заменой узла целиком. |
| 41:10 или 41:13 |
Возникает при сбоях работы двигателя протяжки рулона. Требуется заменить двигатель. |
| 47:01 |
Возникает только в моделях Т и Z сериях. Выходит из строя двигатель, отвечающий за движение планки прижима рулона. На двигателе имеются три передаточные шестерни сидящие на хрупких осях, которые со временем просто обламываются от нагрузки. Устраняется заменой двигателя прижима рулона. |
| 61:05 |
Обычно возникает у старых моделях из за нехватки памяти при обработке задания. Часто пропадает после установки дополнительной карты памяти. |
| 79:04 |
Так же ошибка обработки задания, только причина ошибки связана или с прошивкой, или с просроченными расходниками (печатающие головы либо картриджи). Устраняется соответственно либо обновлением микропрограммы, либо заменой просроченного расходника. |
| 81:01 | Неверное позиционирование по оси Y. Выходит из строя плата квадратуры считывающая информацию о перемещении рулона вперед-назад. Замена платы квадратуры (датчик энкодера). |
| 86:01 |
Самая интересная ошибка, которая в документации характеризуется как ошибка замятия бумаги, которой в большинстве случаях и в помине нет. Работал плоттер и встал. А возникает всегда при отклонении движения каретки по оси следования. То есть проще говоря, все что мешает движению каретки приводит к сбою и возникновению данной ошибки. К примеру каретка подмяла лист и каретка встала-ошибка. Сервисная станция не ушла до конца в посадочное место, каретка при движении опять ударятся в парковку, действие не закончено-ошибка. Износ ремня привода каретки ,шаги перемещения ремня не соответствуют реальному передвижению-ошибка, износ ленты позиционирования, опять каретка не считывает свое местоположение-ошибка, либо перелом шлейфа каретки, который подминается под каретку при движении-опять ошибка. В данном случае квалифицированный подход, выявление причины, устранение дефекта и установка новой детали. |
| Ошибка принтера или системы печати Данная ошибка выскакивает только в плоттерах серии DesignJet T120 и T520. У данной ошибки нет нумерации, так как ошибка может быть связана с несколькими узлами. Это сама печатающая головка, потом картриджи, плата каретки и шлейф каретки. Более подробно и детально данная ошибка описана в нашей статье. |
|
| Ошибка загрузки носителя HP DesignJet T520 | T525 | T530| T120 | T125 | T130 |
По каждой модели есть отдельные статьи с видео-материалами, детально описаны ошибки и полезный контент. Если Вам нужна помощь пишите в чат, поможем с навигацией намного быстрее.
Если Вы не нашли нужную информацию выше, то из таблицы выберите Вашу модель плоттера и попадёте на список системных ошибок связанные с плоттером и методы их решения.
| — hp designjet 100 | — hp designjet T125 | — hp designjet T1120 | — hp designjet Z2100 |
| — hp designjet 110 | — hp designjet T130 | — hp designjet T1200 | — hp designjet Z2600 |
| — hp designjet 111 | — hp designjet T520 | — hp designjet T1300 | — hp designjet Z3100 |
| — hp designjet 130 | — hp designjet T525 | — hp designjet T1500 | — hp designjet Z3200 |
| — hp designjet 430 | — hp designjet T530 | — hp designjet T1530 | — hp designjet Z5200 |
| — hp designjet 500 | — hp designjet T610 | — hp designjet T1600 | — hp designjet Z5400 |
| — hp designjet 510 | — hp designjet T620 | — hp designjet T1700 | — hp designjet Z5600 |
| — hp designjet 800 | — hp designJet T730 | — hp designjet T1708 | — hp designjet Z6100 |
| — hp designjet 1050 | — hp designjet T770 | — hp designjet T2300 | — hp designjet Z6200 |
| — hp designjet 1055 | — hp designjet T790 | — hp designjet T2500 | — hp designjet Z6600 |
| — hp designjet 4000 | — hp designjet T795 | — hp designjet T2530 | — hp designjet Z6800 |
| — hp designjet 4500 | —hp designJet T830 | — hp designjet T2600MFP | — hp designjet Z6 |
| — hp designjet 5000 | — hp designjet T920 | — hp designjet T3500 | — hp designjet Z9+ |
| — hp designjet 5500 | — hp designjet T930 | — hp designjet T7100 | — hp designjet D5800 |
| — hp designjet T120 | — hp designjet T1100 | — hp designjet T7200 | — hp designjet L26500 |
 Для увеличения кликайте на фото
 |
 |
 |
 |
 |
 |
 |
 |
 |
 |
 |
 |
 |
 |
 |
 |
 |
 |
 |
Если вы столкнулись с такими проблемами, свяжитесь с нами по телефонам : 8 ( 499 ) 720 — 60 — 20
Консультация специалиста : 8 ( 925 ) 090 — 60 — 50
Либо заполните форму заявки о неисправности вашего аппарата
Будем рады Вам помочь!
Для навигации по сайту Вы можете писать в онлайн чат, наши консультанты с удовольствием Вам помогут.
Вернуться в главное меню 
Таблица ошибок HP Designjet 500 / 800
Каждая ошибка это комбинацию из четырех цифр АА:BB
АА- деталь плоттера BB – действие
| АА | Деталь плоттера Component/System | |
| ENGLISH | РУССКИЙ | |
| 01 | Main PCA/Electronics Module | Главный модуль PCA / плата электроники |
| 02 | Carriage/Carriage PCA | Каретка PCA |
| 03 | Power Supply Unit | Блок питания |
| 04 | Network Card | Сетевая карта |
| 05 | Formatter | Форматер |
| 06 | Hard Disk Drive | Жесткий диск |
| 07 | Interconnect PCA | Плата управления PCA |
| 08 | Front Panel | Панель управления |
| 11 | Trailing Cable | Шлейф каретки |
| 12 | Carriage Flex Circuit | Контакты печатающих головок |
| 17 | Interconnect Cable | Кабель платы управления |
| 21 | Service Station | Станция обслуживания, бункер отработки |
| 22 | Ink Supply Station | Станция подкачки чернил |
| 23 | Pressure System (APS) | Система давления APS |
| 24 | Ink Delivery System | Система поставки чернил |
| 25 | Spittoon | Губка-впитыватель чернил |
| 31 | Cutter | Нож, резак |
| 32 | Take-up Reel | Натяжитель |
| 33 | Sheet Feeder | Устройство подачи бумаги |
| 34 | Dryer/Blower | Вентилятор сушки |
| 41 | Paper-Axis Motor | Двигатель оси протяжки бумаги |
| 42 | Scan-Axis Motor | Двигатель привода ремня каретки |
| 43 | Vacuum Fan | Вакуумный вентилятор |
| 44 | Aerosol fan | Вентилятор аэрозоля |
| 51 | Window Sensor | Датчик открытия главной крышки |
| 52 | Drop Detector | Датчик вспрыска |
| 53 | Media Sensor | Датчик наличия бумаги |
| 54 | Pinch-Arm Sensor | Датчик ручки прижыма рулона |
| 55 | Line Sensor | Датчик линейки позиционирования |
| 56 | Drive Roller Encoder Sensor | Датчик квадратуры оси протяжки рулона |
| 57 | Ink Leak Detector | Датчик расхода чернил |
| 58 | Color Sensor | Датчик цвета |
| 59 | Media Type Sensor | Датчик вида носителя |
| 61 | Language Interpreting | Языковая интерпретация |
| 62 | Input/Output through Parallel Port | Ввод-вывод параллельного порта |
| 63 | Input/Output through Network Card | Ввод-вывод сетевой карты |
| 64 | Input/Output through USB Port | Ввод-вывод USB порта |
| 65 | Input/Output | Ввод-вывод |
| 71 | Memory Management | Управление памяти |
| 72 | Generic Firmware | Общие микропрограммы |
| 73 | Servo | Контроль |
| 79 | Assertion | Внутрений контроль |
| 81 | Media Advance | Механизм носителя |
| 82 | Media Cut | Отрез носителя |
| 83 | Single-Sheet Feeding | Подача одиночного листа |
| 84 | Roll Feeding | Подача рулона |
| 85 | Media-Axis Encoder Reading | Датчик оборотов двигателя оси |
| 86 | Carriage Movement | Передвижение каретки |
| 87 | Scan-Axis Encoder Reading | Датчик оборотов двигателя привода ремня |
| 91 | Printhead Firing | Вспрыск печатающей головы |
| 92 | Servicing | Обслуживание |
| 93 | Ink Pumping | Помпа давления чернил |
Таблица BB
Possible for customer to perform action. Действие может быть выполнено пользователем
| BB | Действие Recovery Action | |
| ENGLISH | РУССКИЙ | |
| 00 | Replace | Заменить |
| 01 | Reseat/(manually)Reconnect/Clean/Adjust | Переустановить / Переподключить / Очистить / Отрегулировать |
| 02 | Calibrate/Adjust (using Automatic Process) | Откалибровать / Отрегулировать |
| 03 | Power OFF | Отключить питание |
| 04 | Upgrade System Firmware | Обновить прошивку |
| 05 | Upgrade Driver | Обновить драйвер |
| 06 | Add Accessory | Добавить дополнительные модули |
| 07 | Escalate | Расширить память |
| 08 | Send Plot Again | Отправить печать заново |
| 09 | Wrong Part Installed | Установлен неправильный модуль |
On-Site visit required Требуется вмешательство специалиста
| BB | Действие Recovery Action | |
| ENGLISH | РУССКИЙ | |
| 10 | Replace | Заменить |
| 11 | Reseat/(manually)Reconnect/Clean/Adjust | Переустановить / Переподключить / Очистить / Отрегулировать |
| 12 | Calibrate/Adjust (using Automatic Process) | Откалибровать / Отрегулировать |
| 13 | Power OFF | Отключить питание |
| 14 | Upgrade System Firmware | Обновить прошивку |
| 15 | Upgrade Driver | Обновить драйвер |
| 16 | Add Accessory | Добавить дополнительные модули |
| 17 | Escalate | Расширить память |
| 18 | Send Plot Again | Отправить печать заново |
| 19 | Wrong Part Installed | Установлен неправильный модуль |
Руководствуясь данной таблицей можно самостоятельно решить большинство проблем с ошибками плоттеров. Не компетентное вмешательство может привести к серьезной проблеме. Компания не несет ответственность если пользователь руководствуясь таблицей ошибок сам разобрал плоттер пытаясь его реанимировать, а в результате сделал еще хуже. Ремонт дорогой и профессиональной техники лучше предоставить опытному сервисному инженеру.
Примеры самых распространенных ошибок плоттеров HP designjet
| Код ошибки | Действия |
| 01:1001.1:10 | Самая серьезная ошибка, которая говорит, что вышел из строя главный модуль плоттера или проще материнская плата. Ремонту не подлежит, блок электроники меняется целиком. |
| 02:10 02.1:10 |
Причина, вышла из строя плата каретки. Ремонту не подлежит, замена каретки в сборе. |
| 03:10 | Проблема с блоком питания. иногда возможен ремонт, либо установка нового блока питания. |
| 05:10 | Часто возникает среди моделей HP Designjet 500, 510 и 800, в которых установлена плата расширения, либо плата форматтера, в зависимости от модели. Выходит из строя либо сама плата или жесткий диск, который используется в некоторых моделях. Лечится заменой вышедшего из строя элемента. |
| 08:11 | Обычно возникают в моделях Т и Z сериях. Передняя панель при старте не может найти связь с платой форматтера. Решение-смотреть ошибку 05:10 |
| 11:11 | В процессе непрерывной работы изнашивается подвижный кабель передачи информации между электронным модулем и блоком каретки. Лечится заменой шлейфа, меняются обе жилы. |
| 21:10 или 21:13 | Связана с выходом из строя сервисной станции (бункер отработки). Возникновение ошибки можно избежать своевременной профилактикой вашего плоттера раз в 1,5-2г. Применимо в моделях 100-х серий, 500, 510 и 800 моделях. В Т и Z сериях только под замену. |
| 22:10 или 22:13 | Часто возникает при использовании СНПЧ, происходит утечка чернил, заливается плата управления узла подачи чернил (Ink Sistem) и узел выходит из строя, также риск возникновения увеличивается при использовании не оригинальных или заправляемых картриджей, чипы которых также сжигают электронику данного узла. И очень редко от времени и физического износа. Устраняется ошибка заменой узла целиком. |
| 41:10 или 41:13 | Возникает при сбоях работы двигателя протяжки рулона. Требуется заменить двигатель. |
| 47:01 | Возникает только в моделях Т и Z сериях. Выходит из строя двигатель, отвечающий за движение планки прижима рулона. На двигателе имеются три передаточные шестерни сидящие на хрупких осях, которые со временем просто обламываются от нагрузки. Устраняется заменой двигателя прижима рулона. |
| 61:05 | Обычно возникает у старых моделях из за нехватки памяти при обработке задания. Часто пропадает после установки дополнительной карты памяти. |
| 79:04 | Так же ошибка обработки задания, только причина ошибки связана или с прошивкой, или с просроченными расходниками (печатающие головы либо картриджи). Устраняется соответственно либо обновлением микропрограммы, либо заменой просроченного расходника. |
| 81:01 | Неверное позиционирование по оси Y. Выходит из строя плата квадратуры считывающая информацию о перемещении рулона вперед-назад. Замена платы квадратуры (датчик энкодера). |
| 86:01 | Самая интересная ошибка, которая в документации характеризуется как ошибка замятия бумаги, которой в большинстве случаях и в помине нет. Работал плоттер и встал. А возникает всегда при отклонении движения каретки по оси следования. То есть проще говоря, все что мешает движению каретки приводит к сбою и возникновению данной ошибки. К примеру каретка подмяла лист и каретка встала-ошибка. Сервисная станция не ушла до конца в посадочное место, каретка при движении опять ударятся в парковку, действие не закончено-ошибка. Износ ремня привода каретки ,шаги перемещения ремня не соответствуют реальному передвижению-ошибка, износ ленты позиционирования, опять каретка не считывает свое местоположение-ошибка, либо перелом шлейфа каретки, который подминается под каретку при движении-опять ошибка. В данном случае квалифицированный подход, выявление причины, устранение дефекта и установка новой детали. |
Alignment error due to
printheads.
Press ENTER to see faulty
printheads
The printer was aligning its printheads, but encountered an error
due to some printheads not printing properly. Alignment has
stopped.
Press the Enter key.
Alignment error
Press ENTER to continue
The printer was aligning its printheads, but encountered an error.
Alignment has stopped.
Press the Enter key.
Cartridges will expire in days:
nn
One or more of the cartridges are about to expire. nn is the number
of days until expiry date of the cartridge that will expire first. The
cartridges that are about to expire are indicated below this message.
Color calibration error
Press ENTER to continue
The printer was performing a calibration of its color system, but
encountered an error.
Press the Enter key.
Error
Select Replace Printheads

The printer has detected that one or more of the printheads is
missing or has an error, as indicated by flashing crosses. The four
icons refer from left to right to the Cyan  , Black
  , Magenta
  and Yellow
  printheads.
HP is not responsible for
damage from use of non-HP
ink.
Replace
Continue
The printer has determined that one or more of the ink cartridges is
not an HP product. Your product warranty applies only when you
use HP ink. Any damage caused to your printer resulting from the
use of non-HP ink cartridges is not the responsibility of Hewlett-
Packard.
If you want to replace the non-HP ink cartridges, select Replace and
press the Enter key. Otherwise, select Continue and press Enter to
continue.
Ink cartridge replacement
required

The printer has detected that one or more of the ink cartridges is
missing or has an error, as indicated by flashing crosses. The four
icons refer from left to right to the Cyan , Black , Magenta and Yellow cartridges.
INK CARTRIDGES need to be
functional.
Replace before replacing
printheads
You have attempted to replace printheads, but the printer has
detected that there are ink cartridges that are wrong. The ink
cartridges must be replaced before the printheads can be replaced.
First replace the faulty, empty or missing ink cartridges and then
replace the printheads.
Install missing cartridges and
replace empty cartridges
before replacing printheads
You are replacing printheads, but the printer has detected that some
cartridges are empty and some are missing. The empty cartridges
must be replaced and the missing ones inserted before the
printheads are replaced.
Follow the procedure for Ink cartridge replacement.
Press the Enter or
Cancel key to continue.
Install missing cartridges
before replacing printheads
You are replacing printheads, but the printer has detected that one
or more cartridges are missing. The missing cartridges must be
installed before the printheads are replaced.
Follow the procedure for Printhead replacement.
Press the Enter or
Cancel key to continue.
Open window and check
printhead cover is properly
closed
You have replaced one or more printheads and the printer’s check
has found that the printhead cover is not securely closed.
Open the window and check the printhead cover. The procedure is
described in the Printhead replacement procedure.
note:
This message may also appear following a paper jam, as the
printer cannot detect the exact reason for the problem. In this case
you may have to resort to powering off the printer or even removing
the power cable from the machine, in order to recover from the
problem.
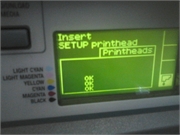
Open window and check
proper installation of setup
printheads
During system start-up, which occurs when you first install the
printer, you need to install the setup printheads. These special
printheads cannot be used for printing, but must be used when the
printer has been powered off. The printer has detected that the
setup printheads have not been installed correctly.
Open the window and follow subsequent instructions to reinstall or
relocate the setup printheads. Contact HP for advice if the setup
printheads are missing or cannot be installed correctly.
Option not available now
You have selected an option in the menu that is not available at the
moment. (The printer may be busy, out of ink, out of paper, etc.)
Out of paper
The printer ran out of paper while printing the calibration pattern.
Load a sheet or roll that is at least 65 cm (25 in) long and 50 cm
(20 in) wide.
Paper advance calibration is
recommended.
Press ENTER to calibrate
You are recommended to perform the Advance calibration routine,
to ensure the optimum print quality.
Press the Enter key to create the calibration pattern.
Paper advance calibration is
recommended. Load paper
and select Paper advance
calibration.
Press ENTER to finish
You are recommended to perform the Advance calibration routine,
to ensure optimum print quality.
Load a sheet or roll of paper and then select Advance calibration
from the Paper menu.
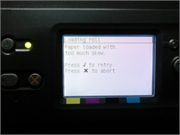
Paper loaded with too much
skew
Press ENTER to retry
Press CANCEL to abort
During the loading of paper, the printer has detected that the paper
is skewed too much; that is, it has not been loaded straight enough.
(‘Skew’ is the angle between the actual paper edge and the correct
line.)
Either: Press the Enter key to restart the loading procedure;
Or: Press the Cancel key to cancel paper loading.
Paper mispositioned
The paper is not properly positioned in the printer. Either it is out of
the load line margins or it has moved too much from its previous
position.
Reload the paper following the normal procedure, to solve this
problem.
Paper not found
Press ENTER to retry
Press CANCEL to abort
During the loading of paper, the printer has detected that no paper
has been loaded.
Either: Press the Enter key to restart the loading procedure;
Or: Press the Cancel key to cancel paper loading.
Paper not present.
Load paper to print calibration
pattern
The paper axis calibration routine has been triggered without having
paper loaded.
Load paper.
Paper too big to scan the
pattern after printing it
During paper loading for the Calibration routine, the printer has
detected that it will not be able to load the paper when it will be
needed for scanning. The minimum size required for the print is
65 cm (25 in) long and 50 cm (20 in) wide.
Load a smaller sheet that satisfies this minimum requirement.
Paper too big
Press ENTER to retry
Press CANCEL to abort
While loading paper into the printer (roll or sheet), the printer has
found that it is either too wide or too long (sheet only) to be loaded
properly.
Press the Enter key to load smaller paper, or the Cancel key to stop
the load.
Paper too small for a
diagnostic print
The Troubleshooting utility has found that the single sheet loaded in
the printer is too small for a Diagnostic Print.
Load a roll of paper, or a sheet that is A3 size or larger.
Paper too small
to align printheads
Load bigger size to
align
Press ENTER to continue
The paper loaded is not big enough to contain the alignment pattern.
Unload the paper (select Unload roll or Unload sheet from the
Paper menu) and then load paper that is large enough — at least A4/
Letter-size in landscape mode for Standard alignment, or A3/B size
in landscape mode for Special alignment.
Paper too small to print the
pattern
The paper loaded is not big enough to contain the paper axis
calibration pattern.
Load a roll or sheet that is at least 65 cm (25 in) long and 50 cm
(20 in) wide.
Paper too small
Press ENTER to retry
Press CANCEL to abort
While loading paper into the printer (roll or sheet), the printer has
found that it is either too narrow or too short (sheet only) to be
loaded properly.
Press the Enter key to load larger paper, or the Cancel key to stop
the load process.
Paper type not valid
to align printheads
Change paper type to
align
Press ENTER to continue
You have requested the printer to align paper but it has detected
that the paper loaded is not the right type to use to align the
printheads. The paper loaded is not big enough to contain the
alignment pattern.
Unload the paper (select Unload roll or Unload sheet from the
Paper menu) and then load paper that is the right type for the
alignment.
Pattern not found
Reload it again, please
The printer is trying to perform a scan of the calibration pattern, but
the pattern was not found.
Reload the sheet that was printed by the Create pattern part of the
calibration routine.
Possibly a paper jam
- Open window
- Switch power off
- Clear paper path
- Switch power on
- Align printheads
There may be paper jammed in the printer. (The printer has
detected that a motor is blocked and the likely cause is a paper jam;
however, it may be due to some other cause.)
Follow these steps to check the paper path, as described in Clearing
a paper jam. When the jammed paper has been cleared, you are
strongly recommended to align the printheads, as they are quite
likely to have become misaligned as a result of the paper jam.
Printhead replacement not
available now. Cancel print
jobs before replacement
You have requested the printer to replace one or more printheads,
but the printer is busy printing a job and cannot honor the request
now.
Either: press the Cancel key to cancel the job that is currently
printing, and then again select Replace Printheads (from the Ink
system menu).
Or: wait until the job has finished printing (and there are no more
jobs in the print queue), and then again select Replace Printheads
(from the Ink system menu).
Printhead warning
Poor print quality

A problem has occurred with one or more printheads. The
printheads are still functional. The problem was detected either
during printhead alignment or during troubleshooting. If you have
completed the routine, the system was unable to clean the
printheads fully.
You should use the Troubleshooting procedure to correct any print
quality problems that may be apparent; alternatively, you should
replace the printheads
Printheads not aligned
Paper type not valid
to align printheads
Press ENTER to continue
You have replaced one or more printheads but the printer has
detected that you do not have the right type of paper loaded for the
alignment process.
Press the Enter key to load the correct type of paper, or the Cancel
key to stop the load process.
Printheads not aligned
Paper too small
to align printheads
Press ENTER to continue
You have replaced one or more printheads but the printer has
detected that you do not have wide enough paper loaded for the
alignment process.
Press the Enter key to load larger paper, or the Cancel key to stop
the load process.
PRINTHEADS not functional
Replace printheads
Cancel print
The printer is attempting to print a job, but finds that there is a
problem with the printheads. You may either replace the printheads
at this stage or cancel the print.
Select the required option and press the Enter key. If you decide to
replace them, you will be told which ones are failing or missing.
Printheads require alignment.
Load paper and select Align
printheads.
Press ENTER to finish
The printer has detected that the printheads need to be aligned.
Press the Enter key to continue. Load a sheet or roll of paper, and
select Align printheads from the Ink menu.
Printheads require alignment.
Press ENTER to align
The printer has detected that the printheads need to be aligned.
Press the Enter key to align them.
Problem found during
calibration
A general problem was found during the Advance calibration
routine.
Respond to any other messages that appear on the front panel,
indicating ink or paper problems, and then retry the Advance
calibration routine.
Problems detected in INK
CARTRIDGES.
Continue process and replace
them.
Press ENTER to continue
There is an error with the ink cartridges during the preparation of the
ink system.
Press the Enter key and then follow the instructions to replace the
faulty ink cartridges.
Reload paper
There is an error in the paper, as shown in another message.
Use the normal procedure to reload the paper.
Replace empty cartridges
before replacing printheads
You have requested the printer to permit printhead replacement, but
the printer has detected that one or more cartridges are empty. The
empty cartridges must be replaced before the printheads are
replaced.
Press the Enter key and follow the procedure for replacing empty
cartridges, described in Ink cartridge replacement.
Right edge of roll too far from
load line
Press ENTER to retry
Press CANCEL to abort
The paper is out of the load line margins — too far from the line
where it should be loaded.
Either: Press the Enter key to restart the loading procedure;
Or: Press the Cancel key to cancel paper loading.
Right edge of sheet too far
from load line
Press ENTER to retry
Press CANCEL to abort
During the loading of a sheet of paper, the printer has detected that
the paper is too far to the left; it should be aligned close to the blue
line painted on the right side of the platen.
Either: Press the Enter key to restart the loading procedure;
Or: Press the Cancel key to cancel paper loading.
Roll edge not found
Please check roll edges are
non-clear
Press ENTER to retry
Press CANCEL to abort
During the loading of a roll, the printer cannot detect the side edge
of the paper. A possible cause is that the paper is transparent
(clear); only opaque paper types are supported.
Either: Press the Enter key to restart the loading procedure;
Or: Press the Cancel key to cancel paper loading.
Roll right edge too far from
load line
Press ENTER to retry
Press CANCEL to abort
During the loading of a roll of paper, the printer has detected that the
paper is too far to the left; it should be aligned with the blue line
painted on the right side of the platen.
Either: Press the Enter key to restart the loading procedure;
Or: Press the Cancel key to cancel paper loading.
Sheet edge not found
Please check sheet edges are
non-clear
Press ENTER to retry
Press CANCEL to abort
During the loading of a sheet, the printer cannot detect the side
edge of the paper. A possible cause is that the paper is transparent
(clear); only opaque paper types are supported.
Either: Press the Enter key to restart the loading procedure;
Or: Press the Cancel key to cancel paper loading.
Sheet not loaded
Load sheet with printed
pattern
The printer is trying to perform a scan of the calibration pattern, but
no sheet was found.
Load the sheet that was printed by the Create pattern part of the
calibration routine.
Sheet too long
Please check it is not a roll
Press ENTER to retry
Press CANCEL to abort
You have requested the printer to load a sheet of paper, but the
sheet appears to be too long.
Check that the paper is not a roll.
Either: Press the Enter key to try to load the sheet again;
Or: Press the Cancel key to stop the process. If the paper is on a
roll, follow the instructions in Loading roll paper.
Troubleshooting finished
Resume normal printing
If problem persists select
Troubleshooting again
Press ENTER to continue
The printer has finished the Troubleshooting routine and will not at
this stage perform further cleaning on the printheads because this
could damage the other ones. However, according to the evaluation
you have given, the printheads require cleaning because there are
defects in the Diagnostic Print.
Press the Enter key. Then resume your normal printing activities. If
the problem recurs, try using the Troubleshooting routine again, or
select Replace Printheads from the front panel (in the Ink System
menu) to replace the printheads that are faulty.
Troubleshooting requires
paper for a diagnostic print.
The Troubleshooting utility has found that there is no paper loaded
in the printer.
Load a roll of paper.
Unable to initialize ink system.
Call HP representative.
The system cannot successfully complete ink system start-up.
Call HP for service.
Unable to prepare ink system.
Open window to check
SETUP printheads
During ink system start-up, the purge of the ink system has failed
and the system is asking you if the preparation has completed.
Check the setup printheads and then follow the instructions in the
front panel and respond to further questions.
Unknown ink cartridges.
Press ENTER to continue.
The ink cartridges are not recognized by the printer as HP-approved,
and there is at least one that is new.
Press the Enter key.
Unknown paper format
Reload paper
The format (roll or sheet) of the paper loaded in the printer is
unknown.
Reload the paper following the normal procedure, to solve this
problem. See Loading roll paper or Loading sheet paper.
Unknown paper type
Select paper type
The type of the paper loaded in the printer is unknown to the printer.
Select a known paper type from the printer menu.
Unknown printheads.
Press ENTER to continue.
The printheads are not recognized by the printer as HP-approved,
although the printer can still use them.
Press the Enter key.
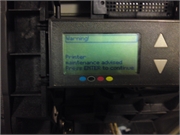
Warning!
Machine calibrations need to
be performed. Refer to guide
for instructions.
The color calibrations for the paper that is loaded have been lost.
Follow the procedure described in Advance calibration.
Warning: color calibration not
done on this paper type
The printer has detected that this paper type has not been colorcalibrated,
and the system is configured to do it.
To calibrate color for the current paper type, select Ink menu ->
Color calibration -> Calibrate paper.
Warning: printheads not
aligned
The printer has detected that the printheads have not been aligned
since the last replacement.
You should align the printheads by selecting Align printheads from
the Ink menu.
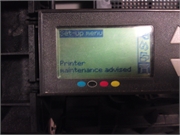
В данной статье мы поговорим об общем положении ошибок. Все системные ошибки можно посмотреть в сервисном мануале вашего плоттера. Опытные мастера без проблем определяют причину возникновения той или иной ошибки и устраняют их в большинстве случаев на территории заказчика. Большинство ошибок плоттера не имеют прямую связь с кодом ошибки и не могут быть исправлены описанными действиями, но тем не менее существуют и не критические ошибки, которые устраняются действиями рядового пользователя. В таких случаях компания HP рекомендует вызывать квалифицированных инженеров.
При некоторых ошибках можно продолжать работу, нажав кнопку Enter на передней панели; при других ошибках продолжать работу нельзя — попробуйте выключить и включить принтер, если ошибка не исчезла, то требуется квалифицированное вмешательство.
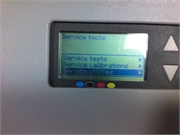
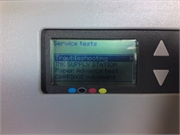
Код ошибки состоит из четырех цифр; в таблице 1 приведены расшифровки первых двух цифр, в таблице 2 — последних двух. Чтоб открыть таблицу нажмите на кнопку Показать/Скрыть
Таблица 1: первые две цифры кода ошибки
Таблица 2: последние две цифры кода ошибки
Утилита просмотра лог-файла ошибок
Подробное описание кодов ошибок плоттеров HP
Если Вы умный, смелый, ловкий и умелый, желаете работать в дружном коллективе и зарабатывать достойную заработную плату, то просто позвоните нам,…
Для юридических лиц мы рекомендуем заключить договор на сервисное техническое обслуживание. В случае, если Вы заключите договор во время покупки…
Коды ошибок широкоформатных плоттеров базируются на двоичной записи ХХ:АА, где
ХХ — вышедший из строя элемент,
АА — данные для ремонта элемента.
Значение ХХ:
01 — Главный модуль PCA / плата электроники
02 — Каретка PCA
03 — Блок питания
04 — Сетевая карта
05 — Форматер
06 — Жесткий диск
07 — Плата управления PCA
08 — Панель управления
11 — Шлейф каретки
12 — Контакты печатающих головок
17 — Кабель платы управления
21 — Станция обслуживания (верхняя часть)
22 — Станция поставки чернил (нижняя часть)
23 — Система давления APS
24 — Система поставки чернил
25 — Поролон очиститель (левый и правый)
31 — Резак
32 — Натяжитель
33 — Устройство подачи бумаги
34 — Вентилятор
41 — Двигатель оси бумаги
42 — Двигатель ремня каретки
43 — Вакуумный вентилятор
44 — Вентилятор аэрозоля
51 — Датчик окна
52 — Датчик капли
53 — Датчик носителя
54 — Датчик синего рычага
55 — Датчик строки
56 — Датчик шифратора диска
57 — Датчик расхода чернил
58 — Цветной датчик
59 — Датчик вида носителя
61 — Языковая интерпретация
62 — Ввод-вывод через параллельный порт
63 — Ввод-вывод через сетевую карту
64 — Ввод-вывод через USB порт
71 — Управление памяти
72 — Общие микропрограммы
73 — Серво
81 — Аванс носителя
82 — Media Cut
83 — Media Cut
84 — Roll Feeding
85 — Media-Axis Encoder Reading (датчик энкодера)
86 — Перемещение каретки
87 — Scan-Axis Encoder Reading
91 — Запуск печатающей головки
92 — Обслуживание
93 — Чернильная подкачка
Значение АА:
01 — Замените
02 — Ручная настройка, чистка
03 — Калибровка, автоматическая настройка
04 — Выключите аппарат
05 — Обновите Firmware
06 — Обновите драйвер
07 — Добавьте дополнительное оборудование
09 — Неправильные установки
10 — Замените (действия через сайт)
11 — Ручная настройка, чистка (действия через сайт)
12 — Калибровка, автоматическая настройка (действия через сайт)
13 — Выключите аппарат (действия через сайт)
14 — Обновите Firmware (действия через сайт)
15 — Обновите драйвер (действия через сайт)
16 — Добавьте дополнительно оборудование (действия через сайт)
19 — Неправильные установки (действия через сайт)