Найдена следующая информация по ошибке P1604 для автомобиля SUBARU LEGACY (2003-2009), B13:
На русском языке:
Потеря последовательных данных IPC
На английском языке:
Loss Of IPC Serial Data Conditions
Вы можете задать вопрос или поделиться опытом устранения ошибки P1604 на автомобиле SUBARU с другими пользователями.
Возможную причину возникновения и советы по устранению можно найти в каталоге причин и советов:
Найти причину >>>
Ошибки (коды ошибок) полученные от прибора, сканера требуют правильной интерпретации информации, дабы не тратить время и деньги на замену работающих элементов автомобиля.
Проблема зачастую кроется намного глубже чем кажется на первый взгляд. Это& вызвано теми обстоятельствами, что информационные сообщения содержат, как было выше сказано, косвенную информацию о нарушении работы системы.
Может быть полезным для решения вопроса по устранению неисправности у Subaru Legacy (B13):
Возможные причины: Неисправный приборный щиток (IPC); Панель приборов Жгут проводов кластера открыт или замкнут; Приборная панель Кластерная схема плохое электрическое соединение.
При частоте вращения двигателя более 500 об / мин в течение 10 секунд непрерывно модуль управления силовым агрегатом ( PCM ) обнаруживает недопустимый сигнал последовательных данных или отсутствие последовательных данных от комбинации приборов (IPC) к PCM в течение 11 секунд.
NHTSA ID Number: 10231308
Manufacturer Communication Number: 09-95-22R
Summary
This bulletin announces the availability of new reprograming files for the Engine Control Module (ECM) developed to remedy stored DTCs.
NUMBER: 09-95-22R
DATE: 01/23/23
REVISED: 01/30/23
| APPLICABILITY: | 2022MY WRX |
| SUBJECT: | Extended Engine Cranking During Starting DTCs: P1604, P0016, P0017, P0018, P0019, & P0128, P050B, P0088 |
INTRODUCTION:
This bulletin announces the availability of new reprograming files for the Engine Control Module (ECM) developed to remedy the following DTCs::
- P1604: Startability Malfunction
- P0016: Crankshaft Position – Camshaft Position Correlation Bank 1 Sensor A
- P0017: Crankshaft Position – Camshaft Position Correlation Bank 1 Sensor B
- P0018: Crankshaft Position – Camshaft Position Correlation Bank 2 Sensor A
- P0019: Crankshaft Position – Camshaft Position Correlation Bank 2 Sensor B
- P0128: Coolant Thermostat (Engine Coolant Temperature Below Thermostat Regulating Temperature)
- P0088: Fuel Rail/System Pressure – Too High Bank 1
- P050B: Cold Start Ignition Timing Performance
These files contain enhanced logic for the self-diagnosis program of the ECM. If any of the DTCs listed above are found to be stored in the ECM, follow the procedures outlined below.
PRODUCTION CHANGE INFORMATION:
The production change information is currently TBD.
PACK FILE APPLICABILITY:
| MY | Model | Trans | File Description | Decryption Keyword | New CID # |
| 22 | WRX | CVT | 22765AR885.pk2 | 1D2C307A | LHBHB10C00G |
| MT | 22765AR895.pk2 | 944297E3 | LHBHB10B00G |
These new files are included in the July 2022 SSM software update.
SERVICE PROCEDURE / INFORMATION:
(*1) Instructions on how to perform and read the OBD MODE test results. This procedure will be required when performing the diagnostic Steps outlined below.
Read the following data monitor values:
1. MID – $35 TID – $8B
2. MID – $35 TID – $8C
3. MID – $35 TID – $8D
4. MID – $35 TID – $8E
5. MID – $36 TID – $8B
6. MID – $36 TID – $8C
7. MID – $36 TID – $8D
8. MID – $36 TID – $8E
STEP 1: Are DTCs P0016, P0017, P0018, or P0019 displayed within the ECM fault memory?
NO – Perform the reprograming procedure outlined in STEP 2 ONLY. The service procedure is finished, no further action is required.
YES – Proceed to STEP 2 and continue to the proceeding steps.
STEP 2: Reprogram the ECM following the normal FlashWrite procedure.
Subaru of America, Inc. (SOA) highly recommends connecting either the Subaru Midtronics DCA8000 Dynamic Diagnostic Charging System or the Subaru Midtronics GR8-1100 Diagnostic Battery Charger to the vehicle and utilizing the Power Supply Mode feature anytime a vehicle control module is being reprogrammed. Once the Midtronics charger is connected to the vehicle, if the battery is fully charged, it takes less than three (3) minutes to boot-up the charger, select the Power Supply Mode, and have the battery voltage stabilized and ready for reprogramming.
NOTES:
- For instructions on using the Power Supply Mode, reference the applicable User Manual for the Midtronics DCA-8000 Dynamic Diagnostic Charging System and the Midtronics GR81100 Diagnostic Battery Charger on STIS.
- Confirm all electrical loads such as lights, audio, HVAC, seat heaters, and rear defroster are all switched OFF before setting up the charger for Power Supply Mode.
- Select the correct battery type (Enhanced Flooded, Flooded, Gel, AGM or AGM Spiral).
- Input the CCA which matches the vehicle’s battery. NOTE: OE and replacement batteries have different CCA ratings. Always confirm the battery’s CCA rating before proceeding.
- If using a DCA-8000 Dynamic Diagnostic Charging System, set the power supply voltage to 13.5 Volts.
- DO NOT connect the DST-i or DST-010 until the Power Supply mode function has completed its battery test mode and the Charging Voltage has dropped to and shows a steady 13.5 Volts on the display.
- Once Power Supply Mode reaches a steady 13.5 Volts, connect the DST-i or DST-010 to the OBD connector and proceed with initiating the normal FlashWrite reprogramming process.
- Amperage will fluctuate based upon the vehicle’s demand for power. NOTE: If the voltage rises beyond 14 Volts while programming is in process, the procedure will abort. This can indicate a need to test or charge the vehicle battery before any further attempt at programming is made.
- ALWAYS set the power supply voltage to 13.5 Volts when using Power Supply Mode. NEVER turn the ignition switch on when charging at voltages 15 Volts or higher.
REMINDER: If the DCA-8000 or GR8-1100 indicates the vehicle’s battery must be charged, charge the battery fully before proceeding to reprogram the vehicle while using the Power Supply Mode.
NOTE: Control module failures resulting from battery discharge during reprogramming are not a matter for warranty. Should any DTCs reset after the reprogramming update is performed, diagnose per the procedure outlined in the applicable Service Manual.
VERY IMPORTANT:
This information is applicable to the Subaru Midtronics DCA-8000 Dynamic Diagnostic ChargingSystem and the Subaru Midtronics GR8-1100 Diagnostic Battery Charger ONLY. It does not apply to any other brand / type of “generic” battery charger whatsoever. ONLY the DCA-8000 and the GR8-1100 and their Power Supply Mode feature have been tested and approved by SOA.
End of procedure for vehicles WITHOUT DTCs P0016, P0017, P0018, or P0019 store in the ECM.
STEP 3: Using SSM, read the value the following four data monitor items (ALWAYS Save SSM Data):
1. VVT Initial Position Learning Value #1
2. VVT Initial Position Learning Value #2
3. VVT EX Initial Position Learning Value #1
4. VVT EX Initial Position Learning Value #2
Are all of the data monitor item values within the acceptable range listed in the table above?
YES – proceed to STEP 5.
NO – proceed to STEP 4.
STEP 4: Perform the procedures outlined in “#7 INSPECTION MODE N” and “#12
INSPECTION MODE T”. Then re-check the threshold values in STEP 3 along with the OBD MODE test results (*1)
“#7 INSPECTION MODE N” procedure.
Using the applicable Service Manual, refer to: DIAGNOSTICS > ENGINE> Inspection Mode > #7 INSPECTION MODE N
A. Confirm the battery voltage is 12 Volts or more and the fuel tank is at least half full.
B. Using SSM, clear the fault memory. Prepare the SSM to be kept in the vehicle during the following road test.
C. With gear selector in the park position (neutral for MT models), idle the engine at approximately 2500 rpm for 40 seconds or more.
D. Move the gear selector into the drive position (appropriate gear range for MT models. Accelerate the vehicle to 31 mph or more.
E. When the vehicle speed is 31 mph or more, release the accelerator pedal and brake pedal (and clutch for MT models) and allow the vehicle to decelerate with any gear shift changes. Maintain the engine speed between 2500 rpm to 1900 rpm for 5 seconds during this deceleration.
NOTE: Depending on road conditions, an appropriate gear might have to be selected to maintain the desired engine speed. The vehicle speed is not important as long as the engine speed is within range during the declaration.
F. In a suitable area, safely bring the vehicle full stop and allow it to idle for 5 minutes.
“#7 INSPECTION MODE N” procedure is complete. Proceed to “#12 INSPECTION MODE T” procedure.
“#12 INSPECTION MODE T” procedure.
Using the applicable Service Manual, refer to: DIAGNOSTICS > ENGINE> Inspection Mode > #12 INSPECTION MODE T
A. Confirm the battery voltage is 12 Volts or more the fuel is at least half full.
B. Start the engine.
C. Allow the engine to idle for at least 3 minutes.
D. Accelerate the vehicle speed to approximately 37 mph.
E. While maintaining approximately 37 mph, cycle the accelerator from a 0% to 20% opening angle. Try to keep these cycles within 5 second intervals. Maintain this driving pattern for 20 minutes or more.
NOTE: It is acceptable to stop the vehicle if needed depending on road/traffic conditions during this driving pattern.
F. Release the accelerator pedal and brake pedal (and clutch for MT models) and allow the vehicle to decelerate with any gear shift changes.
G. In a suitable area, safely bring the vehicle full stop and turn off the engine.
“#12 INSPECTION MODE T” procedure is complete.
Read the threshold values from STEP 3 (pictured below) and the OBD MODE test results (*1)
Are all of the data monitor item values within the acceptable range listed in the table below?
Are the threshold values between -1500 to + 1500?
YES – The procedure is FINISHED.
NO – Repeat STEP 4 ONE TIME ONLY and if the result answer is still “NO”, proceed to STEP 6.
STEP 5: Perform the “#7 INSPECTION MODE N” and “#12 INSPECTION MODE T” procedure.
“#7 INSPECTION MODE N” procedure.
Using the applicable Service Manual, refer to: DIAGNOSTICS > ENGINE> Inspection Mode > #7
INSPECTION MODE N
A. Confirm the battery voltage is 12 Volts or more the fuel is at least half full.
B. Using SSM, clear the fault memory. Prepare the SSM to be kept in the vehicle during the following road test.
C. With gear selector in the park position (neutral for MT models), idle the engine at approximately 2500 rpm for 40 seconds or more.
D. Move the gear selector into the drive position (appropriate gear range for MT models. Accelerate the vehicle to 31 mph or more.
E. When the vehicle speed is 31 mph or more, release the accelerator pedal and brake pedal (and clutch for MT models) and allow the vehicle to decelerate without any gear shift changes. Maintain the engine speed between 2500 rpm to 1900 rpm for 5 seconds during this deceleration.
NOTE: Depending on road conditions, an appropriate gear might have to be selected to maintain the desired engine speed. The vehicle speed is not important as long as the engine speed is within range during the declaration.
F. In a suitable area, safely bring the vehicle full stop and allow it to idle for 5 minutes.
“#7 INSPECTION MODE N” procedure is complete. Proceed to “#12 INSPECTION MODE T” procedure.
“#12 INSPECTION MODE T” procedure.
Using the applicable Service Manual, refer to: DIAGNOSTICS > ENGINE> Inspection Mode > #12 INSPECTION MODE T
H. Confirm the battery voltage is 12 Volts or more the fuel is at least half full.
I. Start the engine.
J. Allow the engine to idle for at least 3 minutes.
K. Accelerate the vehicle speed to approximately 37 mph.
L. While maintaining approximately 37 mph, cycle the accelerator from a 0% to 20% opening angle. Try to keep these cycles within 5 second intervals. Maintain this driving pattern for 20 minutes or more.
NOTE: It is acceptable to stop the vehicle if needed depending on road/traffic conditions during this driving pattern.
M. Release the accelerator pedal and brake pedal (and clutch for MT models) and allow the vehicle to decelerate with any gear shift changes.
N. In a suitable area, safely bring the vehicle full stop and turn off the engine.
“#12 INSPECTION MODE T” procedure is complete.
O. Using SSM, select Diagnosis > Each System > Engine > DTC > Readiness Code
P. Read the readiness codes for P0016, P0017, P0018, P0019, P000A, P000B, P000C, and P000D. Confirm the self-diagnosis is complete and that the codes are not pending.
Q. Check the DTC and data monitor threshold values. Using SSM, select Diagnosis > Select Vehicle > OBD System – Each System > ECM-EngineControl > OBD MODE test results (*1)
Are there NO DTCs present and the threshold values between -1500 to + 1500?
YES – The procedure is FINISHED.
NO – Proceed to STEP 6
STEP 6: Inspect the engine oil level and condition.
IMPORTANT: If the engine oil and filter were replaced prior to diagnosis, there is no need for inspection. Proceed to STEP: 7.
Is there any abnormal condition or Inappropriate oil level??
YES – Perform the engine oil and filter change. Repeat STEP 4 and STEP 5, then continue diagnosis.
NO – Proceed to STEP 7
STEP 7: Performed the outlined timing chain inspection outlined below:
IMPORTANT: If the timing chain was replaced prior to diagnosis, there is no need to perform the inspection. Proceed to STEP 8.
A. Using SSM, clear the fault memory.
B. Switch the ignition to the “OFF” position.
C. Disconnect the oil control solenoid valve connector on the bank with associated DTC.
D. Switch the ignition switch to the “ON” position.
E. Using SSM and the engine not running, read the “VVT Advance Angle Value” data monitor value.
F. Start the engine and read the “VVT Advance Angle Value” data monitor value for a duration of 10 seconds.
G. Switch the ignition to the “OFF” position.
Is the “VVT Advance Angle Value” data monitor value out of -10 degrees to +10 degrees?
YES – Adjust and / repair the timing chain as needed. Repeat STEP 4 and STEP 5, then continue diagnosis.
NO – Proceed to STEP 8.
STEP 8: Perform a visual inspection of the engine harness and the connectors specified below for any physical damage.
IMPORTANT: If the engine harness was replaced prior to diagnosis, there is no need to perform the inspection. Proceed to STEP 9.
Connectors:
- ECM
- Oil Control Solenoid
- CAM Position Sensor
- Crank Position Sensor
Was there any damage found?
YES – Repair the damaged harness and / or connector. Repeat STEP 4 and STEP 5, then continue diagnosis.
NO – Proceed to STEP 9.
STEP 9: Perform the following Ohm tests:
A. Switch the ignition to the “OFF” position.
B. Disconnect the ECM and the Crank Position Sensor. Disconnect the Oil Control Valve and Cam Position Sensor associated with the DTC.
C. Measure the resistance between the following and record the results:
Connector E158 Pin 99 & Connector E38 Pin 2
Connector E158 Pin 99 & Connector E36 Pin 2
Connector E158 Pin 99 & Connector E10 Pin 1
Are there resistance values 1 Ohm or higher?
YES – Replace the damaged harness. Repeat STEP 4 and STEP 5, then continue diagnosis.
NO – Proceed to STEP 10.
STEP 10: Perform and engine oil pressure test as per the applicable Service Manual: Engine > Mechanical > Engine Oil Pressure > INSPECTION
Was the engine oil pressure found to be within specification?
YES – Repeat STEP 4 or STEP 5, then continue diagnosis.
NO – Proceed to inspect the items listed below in the following order. Clean or replace the needed parts depending on the inspection results. Repeat STEP 4 and STEP 5, then continue diagnosis.
- Engine Oil Strainer
- Oil Passages in the Chain Cover
- Oil Passages in the Cam Sprocket
- Cam Carriers (possible scoring)
1 Affected Product
Vehicle
1 Associated Document
Manufacturer Communications
NUMBER: 09-95-22R
DATE: 01/23/23
REVISED: 01/30/23
https://www.nhtsa.gov/recalls?nhtsaId=10231308
MC-10231308-0001.pdf 2013.067KB
MC-10231308-0001
SaleBestseller No. 1
Car Code Reader CGSULIT SC301 OBD2 Scanner with Smog Check & Check Engine Light Reset, Read/Clear Error Code, Live Data, DTC Lookup, On-Board Monitor Test, Diagnostic Scan Tool for All Cars After 1996
- 【Enhanced OBDII Service Modes】SC301 OBD2 scanner diagnostic tool enables you to reset check e-ngine light(CEL), locate bad O2 sensors, EVAP leak test, access engine status, reset monitors, retrieve vehicle’s VIN, read/reset fault codes, etc. Plug and play, no batteries, located your car’s problems in minutes. Note: Please fix the issue first, and then clear codes, otherwise, the OBD scanner won’t clear codes successfully. Gifts for Dad
- 【One Click I/M Readiness】+【Help Pass S-mog Check】SC301 car scanner monitors the engine-related systems’ status, to check if your car is ready for the s-mog test, such as Misfire, Fuel, CCM, EVAP System, etc. Help you pass the s-mog check easily, and save your money for paying fine tickets. A Green-Yellow-Red light and the speaker will indicate the readiness status
- 【Built-in 10,000+ DTC Lookup Library】+【»?» Button Offer Accurate Advice 】SC301 check engine light code reader with reset has a unique «?» button. SC301 scan tool not only shows DTC definition but also offers helpful tips to deal with DTCs by pressing the «?» button. No need to Google why your vehicle’s CEL comes on and what the DTC codes mean
- 【Accurate Live Data Streams】+【Record/Playback/Print Data】Not only can you view the live data but you can record it during the road test to find a problem and then playback/print the data. Live data can be displayed via graphs like you can see if the vehicle is running rich or lean with a fuel trim running lean
- 【99% of Vehicle Compatibility】+【Supports 10 Languages】SC301 check engine code reader work on most 1996 and newer American/European/Asian car with standard OBD2/EOBD protocols: KWP2000, ISO9141, J1850 VPW, J1850 PWM, CAN. Supports English, Spanish, French, German, Italian, Portuguese, Sweden, Hungarian, Russian, and Dutch
Bestseller No. 2
HUMZOR NC610 OBD2 Scanner,Car/Heavy Duty Truck Scanner Car Code Reader Diesel Diagnostic Tool, Full OBDII Function — 2 in 1 Auto & Truck Engine Light Clear Check Fault Diagnostic Scan Tool.
- 【2023 Newest OBD2 Scanner Diagnostic Tool】NC610 car scan diagnostic tool adopts new smart chip and latest user interface design, which perfectly combines OBDII 16-pin and 9-pin (gasoline and diesel). This OBD2 car code reader can easily determine why the check engine light is on, quickly read and erase diagnostic trouble codes, freeze frames, I/M monitor ready status, battery test, smoke test, fuel test, trouble code query library (50000+), read data stream and data playback function.
- 【Heavy Duty Truck Diagnosis + Powerful Data Streaming】: HD OBD heavy duty truck scanner can quickly read engine fault codes (stored fault codes, intermittent, permanent, recorded fault codes) and clear codes, retrieve vehicles Information as well as complete data streams, classify data streams Display real-time vehicle sensor data in text and graphs so you can view them more intuitively. Suitable for Cummins, Caterpillar, Detroit, Packard and other diesel engines with 9-pin connector.
- 【Vehicle coverage】: OBD2 scanner is suitable for most OBDII-compliant vehicles updated after 1996 (OBDII protocol//16-pin diagnostic interface: J1850 (PWM, VPW), ISO_9141-2, ISO_14230-4 (KWP , KWP-5BPS), ISO_15765-4 (CAN, CAN-B, CAN-C, CAN-D)) Compatible vehicles — cars, light trucks, pickups, SUVs, etc. Compliant with J1939 protocol // 9-pin diagnostic interface for light and heavy trucks, engineering vehicles, agricultural vehicles, buses, etc.
- 【The latest design】: Humzor NC610 car OBD2 scanner adopts the latest interface and 2.8″ large screen, long-term use will not cause eye fatigue. It is also equipped with three fault indicator lights to display the status, so that you can understand the vehicle status more intuitively and at the same time can execute the car Battery Voltage Test — 12V/24V.
- 【Instructions for use】: NC610 OBD2 car code reader is delivered with a portable tool box and a 9-pin connector. If you encounter any problems when using the NC610 professional scanning tool, you can directly contact us through Amazon Support or send us an email, and we will provide you with professional technical support. We provide hassle-free return service If you are not satisfied with the product, you can contact us directly, we will provide you with efficient after-sales service.
SaleBestseller No. 3

Bestseller No. 4

HUMZOR OBD2 Scanner Diagnostic Tool, Car/Heavy Duty Truck Engine Fault Code Reader, NC601 Supporting 16/9 Pin Interface Read Code Erasure Code, Compatible with Light and Heavy Truck, 2 in 1 Scan Tool.
- 【Functions covered】NC601 OBD2 Fault scanner diagnostic tool with new smart chip. It can easily determine the cause of check engine light on, read and erase fault diagnosis code quickly, view freeze frame, I/M monitor ready status, battery test, smoke test, fuel test, fault code information library (50000+), read data stream and playback function. Also supports 9-pin interface diesel light and heavy truck scan diagnostics, read/erase fault codes, data stream, etc.
- 【Heavy Duty Truck Diagnosis】:HD OBD Truck diagnostic scanner can quickly read engine fault codes (stored fault codes, intermittent fault codes, permanent fault codes, recorded fault codes) and erase the codes. It can also retrieve vehicle information and data stream. Suitable for 9-pin interface Cummins, Caterpillar, Detroit, Paccard etc diesel engines.
- 【Vehicle Coverage】:This OBD2 Scanner is suitable for most of the vehicles updated after 1996 that comply with OBDII standard (OBDII protocol: J1850(PWM,VPW),ISO_9141-2,ISO_14230-4(KWP,KWP-5BPS),ISO_15765-4(CAN,CAN-B, CAN-C,CAN-D)) compatible vehicles, passenger cars or light trucks are compatible. As well as J1939 compliant light and heavy duty trucks, tool trucks, etc.
- 【Exquisite Design】: Humzor car obd scanner adopts ergonomic design and large size screen, making it more convenient to operate. It also supports one-click I/M status, and the one-click help page allows you to understand detailed descriptions of functions, even if you have no professional automotive knowledge. The OBD2 code reader obtains power directly from the vehicle, and 3 fault indicators display the status, making it more intuitive to understand the vehicle status.
- 【Instructions】: If you encounter any problems when using the NC601 professional scanning tool, you can directly send it to us for technical support. We provide worry free return service. If you are not satisfied with the product, you can contact us directly, and we will provide you with efficient after-sales service.
SaleBestseller No. 5
ZMOON ZM201 Professional OBD2 Scanner Diagnostic Tool, Enhanced Check Engine Code Reader with Reset OBDII/EOBD Car Diagnostic Scan Tools for All Vehicles After 1996, 2023 Upgraded
- ✔Full OBDII Modes Scanner for Car: As professional car scanner, ZM201 has all the OBD2 functions you need.🔎Read & clear codes, 💡turn off engine light or MIL, ❄view freeze frame, 📋read I/M readiness, 🚕retrieve vehicle VIN, 🔋battery voltage test, 📈live data stream (with graphing display), ✅built-in 35901 DTCs, O2 sensor test, onboard monitoring mode, and perform component testing etc.
- ✔Enhanced OBD2 Scanner Diagnostic Tool: Live data and DTC replay combined with printing function, you can connect it to a computer for fault data printing, prevent auto repair shops from charging randomly, save money and time. ZM201 obd scanner also comes with free-lifetime software updates, ensuring you always have the latest features and improvements.
- ✔35,901 DTC Lookup: ZM201 car code reader built-in 35,901 DTCs, the old model obd2 usually only have 3,000-10,000. So the ZM201 car scanner has a huge advantage, which means that this obd2 scanner can better help diagnose and solve your vehicle faults. This is a great option if you want to replace or upgrade an existing car scanner.
- ✔Compatible with 98% Vehicles: ZM201 OBD2 scanner for car is compatible with most cars after 1996(USA)/2002(EU)/2008(Asia). If your car has an OBD2 port (16Pin), and the production time meets the above timeline, then your vehicle is compatible. But it is not compatible with new energy vehicles, hybrid vehicles, and models that do not comply with the OBD2 protocol.
- ✔Convenient Shortcut Functions: The addition of shortcut keys enhances the user experience. Pressing F1 enables you to quickly retrieve trouble codes, while F2 provides instant access to I/M readiness information. We’ve also introduced left and right navigation buttons (the previous model had only up and down buttons), making operation even more convenient.
SaleBestseller No. 7
Exctool OBD2 Scanner Diagnostic Tool Car Check Engine Code Reader with Full OBD II Modes for All 1996+ Cars & Light Trucks
- Read & Reset CEL: the ET331 obd2 scanner diagnostic tool enables you to quickly check your car when the check engine light (CEL, MIL or SES) turns on: read generic and manufacturer-specific error codes (DTCs) with the definitions along with freeze frame and other diagnostic data. You can then fix simple problems or take the car to a mechanic in confidence.
- Full OBD2 Functions: with support for full 10 OBDII modes, you can read: pending, stored and permanent DTCs; real-time sensor data (SAE standard PIDs) in chart or graphic; Evaporation check; O2 sensor & on-board monitor test results; and VIN reading.
- Universal Vehicle Coverage: Works with all vehicles that are OBD2 / EOBD compliant (cars and light trucks made since year 1996 in the US, 1998 in Canada, 2001 gas & 2004 diesel in UK & EU, etc.). It provides accurate and fast diagnosis for worldwide car owners. Supports all OBD II protocols: KWP2000, ISO9141, J1850 VPW, J1850 PWM, and CAN.
- More Versatile & Practical: It features a built-in DTC database with more than 35,000 DTCs (compared to normal 3000+ DTCs in basic OBD2 readers), 10 language options, and three LED indicator lights for DTC and connection status. It can even check current battery voltage so you can quickly know your battery status.
- Easy To Use: plug & play, powered by OBD II port directly, portable design with anti-slip protective sleeve; 2.8’’ clear color display with contrast adjustment & color scheme selection. Supports DTCs & live data review & print, and free update via Windows PC. Comes with 2-year Replacement Warranty against defect.
SaleBestseller No. 8

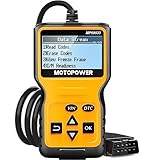
MOTOPOWER MP69039 Car OBD2 Scanner Code Reader Engine Fault Code Reader Scanner CAN Diagnostic Scan Tool Advanced Edition
- 🅰️【Advanced Edition】- Practical Multi-Functions OBD2 code reader features built-in OBD2 DTC lookup library, which help you to determine the cause of the engine light, read code, erase code, view freeze frame, I/M ready, vehicle information, data flow, real-time curve, get vehicle speed information, calculate load value, engine coolant temperature, get engine speed.
- ➡️【Wide Capability】- Supports 9 protocols compatible with most 1996 US-Based, 2000 EU-Based and Asian cars, and newer OBD II & CAN domestic or import vehicles. Supports 10 languages — English,German, Dutch, Spanish, French, Italian, Russia, Chinese, Japanese and Portuguese. Designed with a clear display 2.8Inch TFT screen (240 x 320 pixels). No need any battery or charger, OBD reader gets the power directly from your vehicle through the OBDII Data Link Connector.
- 👍【Professional Level Diagnostic Tool with Enhanced Coverage and Functionality】- The Scanner empowers home mechanics, automotive enthusiasts, and service & repair technicians with professional-level functionality. It is a vehicle code reader that reads and clears OBD engine codes and displays all vehicle information from when a trouble code was triggered.
- 🚗【Easy self-diagnosis of emission status and other important information】- Know your smog check results before your state does. The scanner determines whether you’ll pass a state vehicle smog test. It can also provide trip cycle procedures for completing your smog check.
- 💡【Deeper Level Data Analysis】- More than one hundred engine system datas to be checked in graphic view. Accurately analyze the data to better understand your vehicle condition.
Bestseller No. 9

ANCEL AD310 Classic Enhanced Universal OBD II Scanner Car Engine Fault Code Reader CAN Diagnostic Scan Tool-Black
- CEL Doctor: The ANCEL AD310 is one of the best-selling OBD II scanners on the market and is recommended by Scotty Kilmer, a YouTuber and auto mechanic. It can easily determine the cause of the check engine light coming on, quickly read and clear diagnostic trouble codes, read live data & hard memory data, view freeze frame, I/M monitor readiness and collect vehicle information. Instead of taking car to mechanic shop, you can use it to check the trouble code and show code definition by yourself.
- Sturdy and Compact: Equipped with a 2.5 foot cable made of very thick, flexible insulation. It is important to have a sturdy scanner as it can easily fall to the ground when working in a car. The AD310 OBD2 scanner is a well-constructed device with a sleek design. It weighs 12 ounces and measures 8.9 x 6.9 x 1.4 inches. Thanks to its compact design and light weight, transporting the device is not a problem. The buttons are clearly labelled and the screen is large and displays results clearly.
- Accurate Fast and Easy to Use: The AD310 scanner can help you or your mechanic understand if your car is in good condition, provides exceptionally accurate and fast results, reads and clears engine trouble codes in seconds. If you want to find out the cause of the check engine light, this device will let you know immediately and fix the problem right away without any car knowledge. No need for batteries or a charger, get power directly from the OBDII Data Link Connector in your vehicle.
- OBDII Protocols and Car Compatibility: Many cheap scan tools do not really support all OBD2 protocols. This is not the case with the AD310 scanner as it can support all OBDII protocols such as KWP2000, J1850 VPW, ISO9141, J1850 PWM and CAN. This device also has extensive vehicle compatibility with 1996 US-based, 2000 EU-based and Asian cars, light trucks, SUVs, as well as newer OBD2 and CAN vehicles both domestic and foreign. Check compatibility with your vehicle model before purchasing.
- Home Necessity and Worthy to Own: This is an excellent code reader to travel or home with as it weighs less and it is compact in design. You can easily slide it in your backpack as you head to the garage, or put it on the dashboard, this will be a great fit for you. The AD310 is not only portable, but also accurate and fast in performance. Moreover, it covers various car brands and is suitable for people who just need a code reader to check their car.
SaleBestseller No. 10
MOTOPOWER MP69033 Car OBD2 Scanner Code Reader Engine Fault Code Reader Scanner CAN Diagnostic Scan Tool for All OBD II Protocol Cars Since 1996, Yellow
- Multi-Functions — Practical Multi-Functions OBD2 code reader features built-in OBD2 DTC lookup library, which help you to determine the cause of the engine light, read code, erase code, view freeze frame, I/M ready, vehicle information, data flow, real-time curve, get vehicle speed information, calculate load value, engine coolant temperature, get engine speed.
- Wide Capability — Supports 9 protocols compatible with most 1996 US-Based, 2000 EU-Based and Asian cars, and newer OBD II & CAN domestic or import vehicles. Supports 6 languages — English,German, Dutch, Spanish, French, Italian.
- LCD Display — Designed with a clear display LCD screen (128 x 64 pixels) — white backlight and contrast adjustment. No need any battery or charger, OBD reader gets the power directly from your vehicle through the OBDII Data Link Connector.
- Compact Design — Car diagnostic scanner is equipped with a 2.5 feet long cable and made of a very thick flexible insulator.There are 6 buttons on OBD2 Scanner:scroll up/down,enter/exit and buttons that quick query VIN vehicle number& the DTC fault code.
- ABS / Airbag codes NOT Supported — It is able to read and clear check engine information which is part of OBDII system, but it cannot work with non-OBDII systems, including ABS / Airbag / Oil Service Light, etc.
Last update on 2023-09-03 / Affiliate links / Images from Amazon Product Advertising API
This product was presentation was made with AAWP plugin.
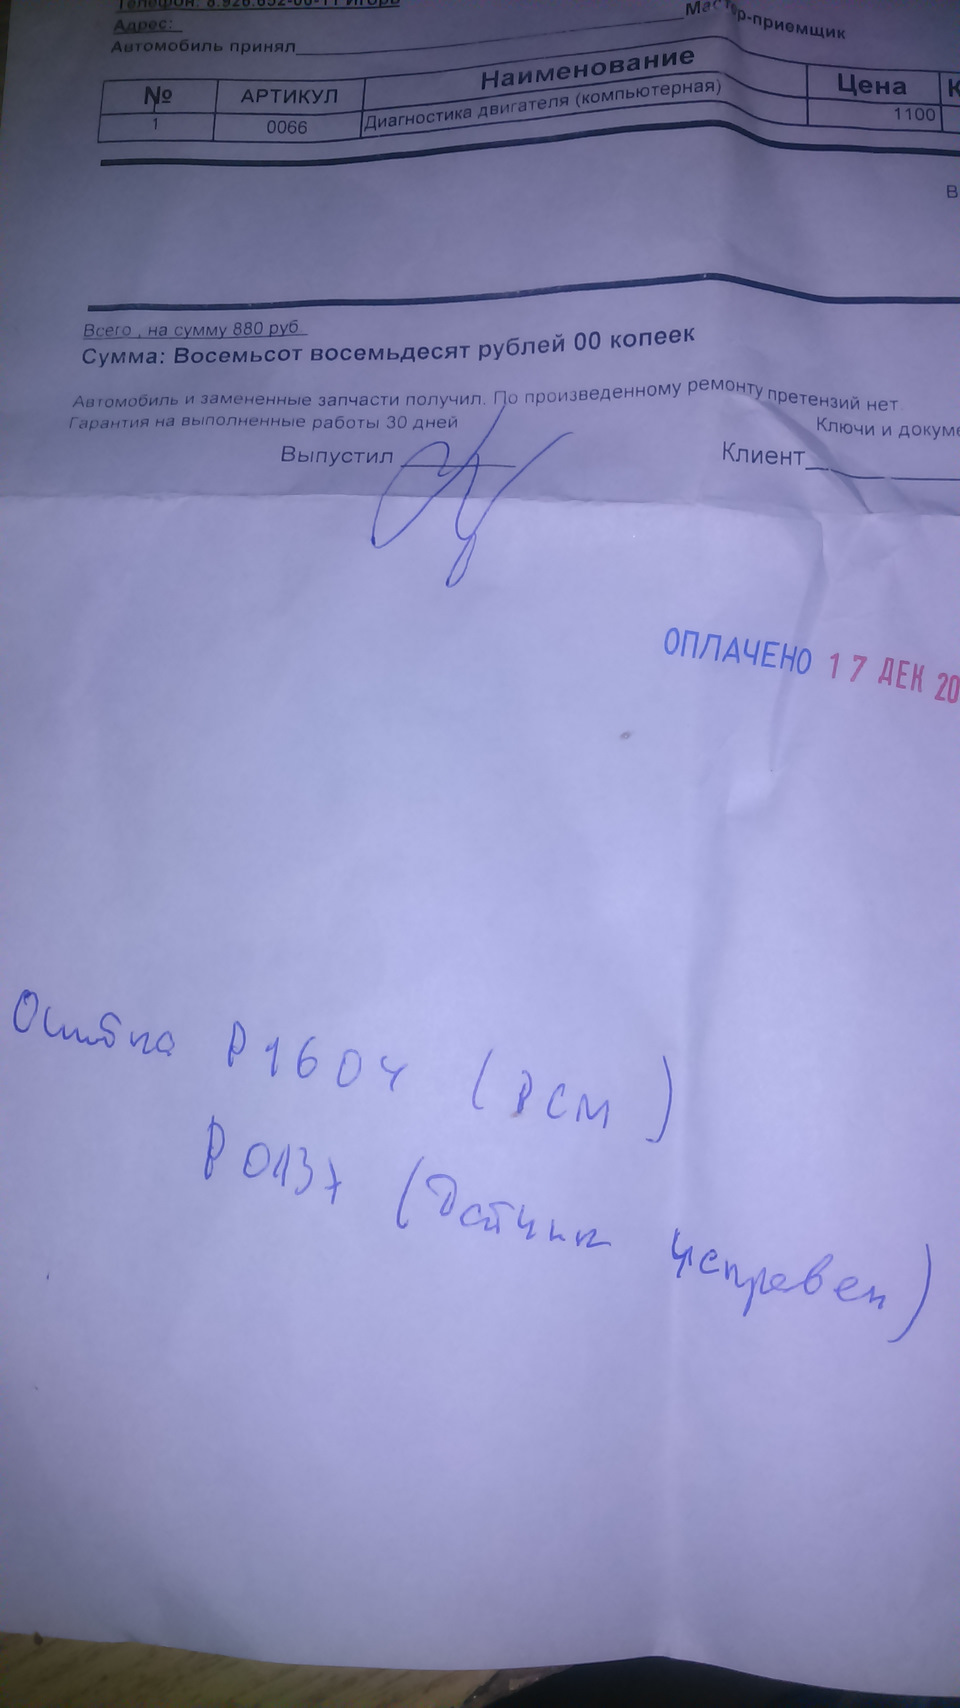
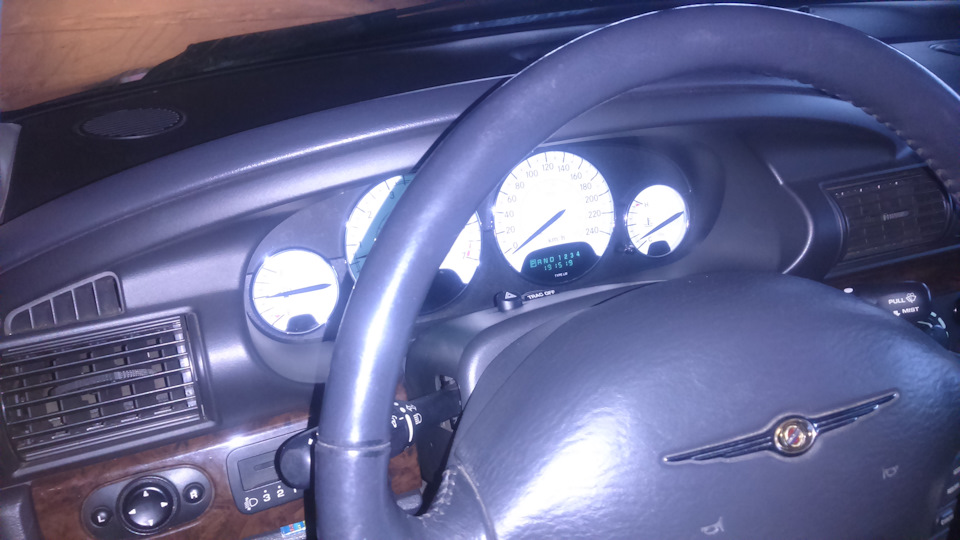
Не давала мне покоя, ситуация которая началась, три недели назад, а именно Р1604 PCM Internal Dual Port Ram начало здесь www.drive2.ru/l/488893448317829185/ Перекурив кучу форумов и кучу комментариев по этой ошибке, все сводилось к замене PCM, оставалось только съездить на компьютерную диагностику, что бы так сказать услышать приговор специалиста из сервиса, хотя понимал что нового мне ни чего не скажут, потому что всю информацию сервисмены берут со страниц интернета, так же как и я.Но все же мы с себрингом терпеливо ждали дня, когда выпадет возможность съездить в сервис, в глубине души надеясь на чудо.Все это время себринг простоял в гараже, а я ездил на другой машине.И вот этот день настал…И так спустя три недели, я снова за рулем крайслер, ключ в замке, запуск… Чувствуется просадка напряжения подсевшего аккумулятора, в какой-то момент на миг загораются все сигнальные лампы на панели приборов, но тут же мотор запускается, привычно горит ЧЕК. Прогревается, едем, машина едет хорошо, и даже отлично, то ли отвык за три недели, то ли после 1.4 литрового Шевролет так кажется. По приезду как обычно это водится, мастер приемщик молча забрал ключи и загнал машину а бокс, но на этот раз я не стал сидеть в комнате ожидания, а остался в зоне ремонта и занял наблюдательную позу.
-У тебя кислородный датчик ошибку выдает — вылупился на меня мастер
-ЧТО? какой датчик? -потеряв дар речи спросил я
-Нижний правый — ответил мастер и со знанием дела покрутил ключом в замке
На панели приборов отчетливо высветилось Р0137, DONE.
-Где 1604? -ни чего лучше не придумав спросил я
-Не знаю, сейчас я подключу и посмотрим как датчик работает -деловито сказал мастер, воткнул сканер и застыл в позе греческого мыслителя.
Повисла пауза
-Ну да вот она- ожил мастер — но сейчас она не активна, датчик работает хорошо и даже отлично.
После этого мастер еще минут двадцать ходил от машины к компьютеру, что то смотрел, отсоединял фишки от мозгов, тыкал тестером в разные места, без конца заводя и и глуша машину, при этом приговаривая-
-Плюс есть, с питанием все нормально… —
После всех процедур, мастер толкнул такую речь
-Сейчас я тебе их удалил и они не появляются, может появиться, а может и нет, может кислородный датчик так повлиял на мозги, а может и сам РСМ.
И рассказал историю из жизни, про то, как оторваные об препятствие провода нижнего кислородного датчика полностью уничтожили РСМ
-Короче ездий пока -закончил мастер -880 рублей с тебя-
Еще полдня я ездил по делам, глушил и заводил машину, но Чек так и не загорался.Что это было и вернется ли снова так и осталось загадкой.Естественно казалось что машина просто нереально летит.Возвращаясь домой в приподнятом настроении, я думал про то, какая же все таки хорошая эта Американская машина Крайслер Себринг, сама ломается, сама чинится, это не какая-то вам японка, которая хоть и ездит десятилетиями без проблем, но если сломается то уже сама не починится ни когда.
P.S.Однако чудо продолжалось не долго, на следующий день P1604 сияла на панели приборов еще ярче, всем видом говоря что пора бы заняться поиском, другого PCM ФАГ!
Get the Reddit app
Scan this QR code to download the app now
Or check it out in the app stores
Go to subaru
r/subaru
r/subaru
Where OC is the standard and boxer engines rule the world.
Members
Online
•
by
thomabrams
Anyone know what the problem is? 2015 Legacy 2.5. It’s throwing 2 powertrain codes P1603 and P1604.
Mechanical Help
Archived post. New comments cannot be posted and votes cannot be cast.
|
|
#1 |
|
Scooby Newbie Member#: 534942 Join Date: Jul 2023 Location: Richmond VA Vehicle: 2015 WRX |
Hello, I am new to this and I appreciate everyone taking their time to reply back and give me your input in order to help. So I bought this car with a blown engine and it had a bad ticking sound (https://www.vzmessages.com/vl/b9bdf2…2654c7eaf65713) as you can see in the link. Notice how the engine does not shake and it only has that loud sound. Well I bought it to a shop to get the short block replaced. I bought everything from Subaru. When we first fired it up it started shaking and backfiring and it still is. The code that is throwing are the following P0171, P0304, P0300, P1604. The car is not stock and it has the following mods done to it:
|
 |
|


Sponsored Links
|
|
#2 |
|
Big Ron Member#: 18062 Join Date: Apr 2002 Chapter/Region: Location: I can save you a ton of cash Vehicle: on car parts so PM |
Ask on https://www.facebook.com/rvasubies/ as we can’t diagnose complicated stuff online and you need an in person consult. |
|
|
|
|
|
#3 |
|
Scooby Guru Member#: 487 Join Date: Nov 1999 Chapter/Region: Location: Houston TX Vehicle: 1998 /2005 STunIcorn |
the brake cleaner sprayed on ‘the hose’ tells the entire story intake air leak this sucking in extra un-monitored air causing P0171 (Fuel Trim System Lean Bank 1) P0604 is likely unrelated |
|
|
|
|
|
#4 |
|
Scooby Specialist Member#: 510366 Join Date: Jan 2020 |
Used turbo subaru. If you can afford it used, you can afford it new. |
|
|
|
|
|
#5 |
|
Scooby Newbie Member#: 534942 Join Date: Jul 2023 Location: Richmond VA Vehicle: 2015 WRX |
Problem is that before changing the block to a new one it didn’t have any of those problems. That is why I am very confused. |
|
|
|
|
|
#6 |
|
Scooby Specialist Member#: 510366 Join Date: Jan 2020 |
Yes, we understand. Now you have new problems. Changing the engine means you effectively have a new car, anything the old car did or didnt do is not relavent anymore. You start troubleshooting at the top, then work your way down: 1. Is everything installed correctly? Uni already skipped to it, based on what you are describing and your level of experience with cars, it would be best to take it to a reputable shop. You are not at a reputable shop based on the information you are writing here. |
|
|
|
|
|
#7 |
|
Scooby Newbie Member#: 534942 Join Date: Jul 2023 Location: Richmond VA Vehicle: 2015 WRX |
So pretty much it just needs to be tuned again. And yes everything is on correctly, it was verified 4 times. Thanks so much for your help.
|
|
|
|