hp-concentra-wrapper-portlet
![]()
Actions
Introduction
Whenever the printer is switched on, it automatically performs a series of internal self-test and mechanical initialization sequences. If any of the printer parts fail, a system error or a system warning will occur.
note:
Unlike system errors, system warnings are not displayed on the front panel display of the printer. System warnings only appear in the Printer Status Section of the Printer Information pages, and unlike system errors, they do not interfere with the operation of the printer.
This document contains instructions for printing the Printer Information pages, and lists the system warning codes along with their descriptions and the corrective actions that are recommended for resolving them.
Retrieving system warning codes
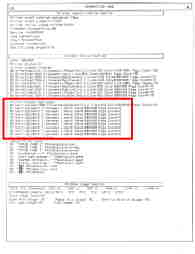
System warning messages can be found by printing the Printer Information pages. The warnings are listed on page one.
-
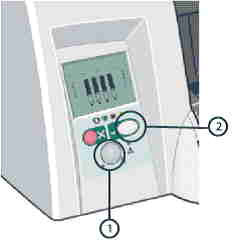
On the printer’s front panel, press and hold the Power switch.
-
While still pressing the Power switch, press the OK button four times.
-
Power switch
-
OK button
Figure : Front panel of printer

-
-
Release the Power switch and the Printer Information pages will print.
Figure : Printer Information page one
Understanding the front panel error code display
System error codes are displayed on the printer’s front panel, using the lit or flashing Ink Cartridge icon bars (see the figure below). When performing a system error test, count the lit or flashing bars, which indicate a four-digit code.
Since the front panel can display only graphics, determine the error code by counting the lit bars on the front panel.
-
Failing subsystem indicators
-
Recovery action indicators
-
First two digits of error code
-
Second two digits of error code
-
Solid light indicates one digit
-
Blinking light indicates two digits
Figure : Determining the error code

System error codes consist of four digits. The first two digits explain which component/system is failing. The second two digits indicate what action should be taken to resolve the problem.
A blinking light indicates two digits in the error code.
In the figure above, the error code displayed is 7904, using the following interpretation:
-
The first indicator area displays two columns totaling seven lights.
-
The two columns in the second indicator area show eight lights and one blinking light, indicating a total of nine in this area.
-
The next area is blank, indicating zero.
-
The last area displays four lights.
System Error codes
01:10 error code
Explanation
An error has occurred with the electronics module.
Recommended action
Please call HP for technical support to troubleshoot the problem.
01:12 error code
Explanation
Electronics Module Error.
note:
This error code may also be reported as a warning code, which will not prevent continued use of the printer.
Recommended action
Please call HP for technical support to troubleshoot the problem.
02:10 error code
Explanation
A problem has occurred with the printer’s carriage assembly.
Recommended action
-
Unplug the power cable from the printer and wait a few seconds. Plug in the power cable again and check to see if the error code has disappeared.
-
If the error code reappears, please call HP for technical support to troubleshoot the problem.
04:13 error code
Explanation
A generic firmware error (network card) has occurred.
Recommended action
Unplug the power cable from the printer and wait a few seconds. Plug in the power cable again and check to see if the error code has disappeared. If the error code continues, please call HP for technical support to troubleshoot the problem.
08:11 error code
Explanation
The printer’s front panel cannot be detected.
Recommended action
Please call HP for technical support to troubleshoot the problem.
11:10 error code
Explanation
A trailing cable failure has occurred.
Recommended action
Please call HP for technical support to troubleshoot the problem.
11:11 error code
Explanation
Problems with trailing cable connection.
Recommended action
Please call HP for technical support to troubleshoot the problem.
21:10 error code
Explanation
A service station failure has occurred.
Recommended action
Please call HP for technical support to troubleshoot the problem.
22:10 error code
Explanation
An ink supply station failure has occurred.
Recommended action
Please call HP for technical support to troubleshoot the problem.
35:01 error code
Explanation
Cleanout Assembly not detected while loading
media.
Recommended action
Remove and reinstall the cleanout assembly.
-
Remove and re-install the Cleanout assembly as follows:
-
To release the Cleanout assembly, push in
the 2 buttons on either side.Figure : Release buttons
-
Remove the Cleanout assembly from the
Printer.Figure : Removing cleanout assembly
-
-
Reinstall the cleanout assembly, and attempt to verify functionality.
-
If problems persist, contact HP support.


42:10 error code
Explanation
A carriage motor failure (short-circuit) has occurred.
Recommended action
Please call HP for technical support to troubleshoot the problem.
56:10 error code
Explanation
An error has occurred during the calibration of the motor encoder system, or there was a problem finding the zero position on the encoder disc.
Recommended action
Please call HP for technical support to troubleshoot the problem.
56:13 error code
Explanation
Error during the calibration of the Line-feed motor/Encoder system or a problem finding the zero position on the Encoder disk.
Recommended action
Unplug the power cable from the printer and wait a few seconds. Plug in the power cable again and check to see if the error code has disappeared. If the error code continues, please call HP for technical support to troubleshoot the problem.
58:10 error code
Explanation
Problem detected in the Color Sensor system.
note:
This error code may also be reported as a warning code, which will not prevent continued use of the printer.
Recommended action
Please call HP for technical support to troubleshoot the problem.
61:05 error code
Explanation
Language interpreting error. This is usually an error produced while
parsing a file. There is most likely an incompatibility between the driver and
the firmware.
note:
This error code may also be reported as a warning code, which will not prevent continued use of the printer.
Recommended action
It might be necessary to upgrade either the RIP software or the Designjet System Maintenance Tool. Please call HP for technical support to troubleshoot the problem.
62:04, 63:04, 64:04 and 65:04 error code
Description
I/O module error (62 = parallel; 63 = Network; 64 = USB).
Recommended action
-
Unplug the power cable from the printer and wait a few seconds. Plug in the power cable again and check to see if the error code has disappeared.
65:01 error code
Explanation
A communication failure has occurred.
note:
This error code may also be reported as a warning code, which will not prevent continued use of the printer.
Recommended action
-
Unplug the power cable from the printer and check the cable connections (parallel, USB, network). Plug in the power cable again and check to see if the error code has disappeared.
-
If the error code reappears, please call HP for technical support to troubleshoot the problem.
71:03 error code
Description
Memory Management Error (Out of memory).
Recommended action
-
Unplug the power cable from the printer and wait a few seconds. Plug in the power cable again and check to see if the error code has disappeared.
71:14 error code
Explanation
Memory Management Error (Out of memory during firmware upgrade).
Recommended action
Unplug the power cable from the printer and wait a few seconds. Plug in the
power cable again and check if the Error Code has disappeared.
If the problem persists, call HP for technical support to troubleshoot the problem.
72:04 error code
Explanation
A generic firmware error has occurred (expected).
Recommended action
-
Unplug the power cable from the printer and wait a few seconds. Plug in the power cable again and check to see if the error code has disappeared.
74:12 error code
Explanation
Firmware Upgrade Error (Memory size check failed during firmware upgrade).
Recommended action
Please call HP for technical support to troubleshoot the problem.
79:04 error code
Explanation
An unexpected generic firmware error has occurred (unexpected).
Recommended action
-
Unplug the power cable from the printer and wait a few seconds. Plug in the power cable again and check to see if the error code has disappeared.
-
Remove switchboxes and connect the printer directly to the computer via USB or Parallel cables.
81:01 error code
Explanation
There has been a paper-axis shutdown, which is usually a paper jam caused by a blockage of the paper-axis system.
note:
This error code may also be reported as a warning code, which will not prevent continued use of the printer.
Recommended action
-
If this error code was caused by a paper jam, unplug the power cable from the printer and clear the blockage. Plug in the power cable again and check to see if the error code has disappeared. Click here for information on how to clear a paper jam.
-
If the error code appeared but was not caused by a paper jam, please call HP for technical support to troubleshoot the problem.
81:12 error code
Explanation
Recommended action
This error usually appears during the paper-advance calibration. Retry the
paper-advance calibration.
83:10 error code
Explanation
A sheet-feeding failure has occurred.
Recommended action
Please call HP for technical support to troubleshoot the problem.
85:10 error code
Explanation
A paper-axis encoder error has occurred.
Recommended action
Please call HP for technical support to troubleshoot the problem.
86:01 error code
There has been a scan-axis shutdown — usually a paper jam caused by a blockage of the scan-axis system.
Recommended action
-
Turn the printer off.
-
Open the main top cover, and check for any possible obstruction that may be preventing the carriage to move freely.
-
Remove obstruction (if found), and attempt to verify printer functionality.
-
If the problem persists, call HP for technical support to troubleshoot the problem.
86:11 error code
Explanation
Scan-axis shutdown during initialization. This error typically occurs when the printer detects an incorrect length.
Recommended action
If the Carriage stopped on the right-hand side of the Printer:
-
Check that the foam packing that secures the
Carriage during shipping has been removed. -
Make sure that the carriage is properly latched.
If the Carriage stopped in the middle of the print zone, please call HP for technical support to troubleshoot the problem.
95:00 error code
Explanation
There has been a printhead alignment failure — the printhead alignment was cancelled.
note:
This error code may also be reported as a warning code, which will not prevent continued use of the printer.
Recommended action
95:02 error code
Explanation
There has been a printhead alignment failure — the printhead alignment was cancelled.
note:
This error code may also be reported as a warning code, which will not prevent continued use of the printer.
Recommended action
-
Unplug the power cable from the printer and wait a few seconds. Plug in the power cable again and try the printhead alignment again.
-
If the error code appears again, check the printhead alignment print.
-
If the printhead alignment was printed correctly without any print defects, then check that the media is moving freely (backwards and forwards) while the printer is scanning it.
-
If the printhead alignment was printed incorrectly with some print defects, replace the faulty printhead in which the color defects were noticeable. Click here to see how to install a printhead.
95:04 error code
Explanation
There has been a firmware error during printhead alignment.
note:
This error code may also be reported as a warning code, which will not prevent continued use of the printer.
Recommended action
System Warning codes
Warnings will not be displayed on the front panel. They will appear on the Information page, allowing continued operation of the printer without the need of immediate intervention. To print an Information Page, hold the POWER button down while pressing and releasing the CONTINUE button four times.
270:00 warning code
Explanation
Recommended action
271:00 warning code
Explanation
Recommended action
272:00 warning code
Explanation
Recommended action
273:00 warning code
Explanation
Recommended action
83:01:1 warning code (applicable to HP Designjet 100plus only)
Explanation
The paper is rejected from the Bypass due to skew.
Recommended action
When manually loading paper from the front of the printer, make sure that it
is loaded straight.
83:01:3 warning code (applicable to HP Designjet 100plus only)
Explanation
The paper is rejected from the roll due to skew.
Recommended action
When loading paper from the roll, make sure that it is loaded straight.
Upgrading the firmware
-
If the System Maintenance tool is not already loaded, load from the CD shipped with the printer, or download the HP Designjet System Maintenance Tool from the Web.
-
Install the tool.
-
Open the System Maintenance tool and select Upgrade firmware.
Clearing a paper jam
-
Try pressing the CONTINUE button on the printer’s front panel. If this does not solve the problem, continue with the remaining steps.
-
Turn off the printer.
-
Remove all media from the trays. Pull out any media that is visibly stuck.
-
If the rear path through is installed, remove it by pressing the buttons on each side and pulling it out.
-
Rear path through buttons
Figure : Rear path through
-
-
Removing the rear path through provides access to the inside of the printer from the rear. Pull out any media that may be stuck inside that is accessible from the rear.
-
Replace the rear path through and make sure it fits securely.
-
Remove the back panel by pressing the two catches inwards.
-
Pull out any media that may be stuck inside.
-
Replace the back panel and make sure it fits securely.
-
Close the rear access door.
-
If the printer still reports jammed media, lift the top cover and pull out any media that may be stuck.
caution:When lifting the cover, be careful not to damage or disturb any of the tubes or other internal parts of the printer.
-
Turn the printer back on.

Cleaning the printheads
-
Select the Help button from the driver software.
-
Start the Maintenance application.
-
Select the Recover Printheads option. (This is the cleaning process.)
Installing printheads
-
Press the POWER button to turn on the printer.
-
Open the ink cartridge door at the front, right side of the printer. Continue lifting the ink cartridge door until the printheads are accessible.
-
When the printhead door is opened, the carriage assembly will briefly move left, then back right.
warning:Do not attempt to access the printheads until the carriage assembly has come to a complete stop, flush against the right side of the printer.
-
Access the printheads by lifting the latch from the rear. Pull the latch forward and down to release the latch hook. Then, lift up and push the latch toward the back of the printer.
-
Remove the printhead from the packaging. Remove the protective tape from the printhead.
-
Insert the printhead into its own color-coded socket. Firmly press the printhead into its slot.
-
Repeat Steps 5 and 6 for each of the six printheads that may need to be installed or replaced.
-
Close the printhead latch. Ensure that the hook on the printhead latch catches the carriage lock.
-
Close the printhead door, and then close the ink cartridge door.
Contact HP
Go to the Contact HP page for further assistance.

Коды системных ошибок отображаются на передней панели в формате XX.YZ.
Коды системных ошибок отображаются на странице информации в формате XXn.YZ.m.
XX: сервисная часть
n: индекс сервисной части (например цвет или номер)
Y: кто должен выполнить действие (пользователь или инженер)
Z: действие для выполнения
m: дополнительное действие
Таблица кодов XX
01 — Main PCA/Electronics Module (основной модуль электроники)
02 — Carriage/Carriage PCA (печатающая каретка)
03 — Power Supply Unit (блок питания)
04 — Network Card (сетевая карта)
05 — Formatter (форматер)
06 — Hard Disk Drive (жесткий диск)
07 — Interconnect PCA (подключение PCA)
08 — Front Panel (передняя панель)
11 — Trailing Cable (кабель)
12 — Carriage Flex Circuit (фрикционный контур каретки)
17 — Interconnect Cable (соединительный кабель)
21 — Service Station (станция технического обслуживания)
22 — Ink Supply Station (станция подачи чернил)
23 — Pressure System (система давления APS)
24 — Ink Delivery Tubes (трубы подачи чернил)
25 — Spittoon
26n — Ink Cartridge (картридж, где n означает цвет)
26n — Printhead (печатающая головка, где n означает цвет)
31 — Cutter (резак)
32 — Take-up Reel (приемная катушка)
33 — Sheet Feeder (податчик бумаги)
34 — Dryer/Blower (воздуходувка)
35 — Cleanout Assembly (очиститель узел)
36 — Duplexer (дуплексер)
37 — ARSS/Rollfeed
38 — Output Tray (выходной лоток)
41 — Paper-Axis Motor (бумажно-осевой электродвигатель)
42 — Scan-Axis Motor
43 — — Vacuum Fan (вакуумный вентилятор)
44 — Aerosol fan (аэрозольный вентилятор)
51 — Window Sensor (оконный датчик)
52 — Drop Detector (детектор падения)
53 — Media Sensor (датчик бумаги)
54 — Pinch-Arm Sensor (датчик зажима)
55 — Line Sensor (датчик линии)
56 — Drive Roller Encoder Sensor (датчик двигателя энкодера)
57 — Ink Leak Detector (датчик утечки чернил)
58 — Color Sensor (датчик цвета)
59 — Media Type Sensor (датчик типа бумаги)
61 — Language Interpreting (перевод языка)
62 — Input/Output through Parallel Port (вход/выход через параллейный порт)
63 — Input/Output through Network Card (вход/выход через сетевую карту)
64 — Input/Output through USB Port (вход/выход через USB порт)
65 — Input/Output (вход/выход)
66 — Print Job Configuration (настройка задания печати)
71 — Memory Management (управление памятью)
72 — Generic Firmware (общая прошивка)
73 — Motor Control Functions (функции управления двигателя)
74 — Firmware Upgrade (обновление прошивки)
79 — Firmware Crash (ошибка прошивки)
81 — Media Advance (продвижение бумаги)
82 — Media Cut (резак бумаги)
83 — Single-Sheet Feeding (подача одного листа)
84 — Roll Feeding (подача рулона)
85 — Media-Axis Encoder Reading (чтение энкодера бумаги)
86 — Carriage Movement (перемещение каретки)
87 — Scan-Axis Encoder Reading (чтение энкодера сканера)
91 — Printhead Firing (работа печатающей головки)
92 — Servicing (обслуживание)
93 — Ink Pumping (прокачка чернил)
94 — Color Calibration (калибровка цвета)
95 — Printhead Alignment (выравнивание печатающей головки)
96 — Image Quality Troubleshooting (устранение неполадок с качеством изображения)
Таблица кодов YZ
Действия для пользователя:
00 — Replace (заменить)
01 — Reseat/Reconnect/Clean/Adjust ((сброс/очистка/настройка вручную))
02 — Calibrate/Adjust (калибровка/настройка автоматически)
03 — Power OFF (выключить питание)
04 — Upgrade System Firmware (обновить прошивку системы)
05 — Upgrade Driver (обновить драйвер)
06 — Add Accessory (добавить аксессуар)
07 — Escalate (расширить)
08 — Send Plot Again (отправить снова)
09 — Wrong Part Installed (неверно установлена деталь)
Действия для инженера:
10 — Replace (заменить)
11 — Reseat/Reconnect/Clean/Adjust (сброс/очистка/настройка вручную)
12 — Calibrate/Adjust (калибровка/настройка автоматически)
13 — Power OFF (выключить питание)
14 — Upgrade System Firmware (обновить прошивку системы)
15 — Upgrade Driver (обновить драйвер)
16 — Add Accessory (добавить аксессуар)
17 — Escalate (расширить)
18 — Send Plot Again (отправить снова)
19 — Wrong Part Installed (неверно установлена деталь)
Сервисный мануал и коды на Designjet 110+, 120, 130
HP Designjet 110, 130 Service Manual
| Сообщение #1
Отправлено 23 января 2010 — 17:32
Для начала, сервисные коды на этих плоттерах вводятся при нажатой клопке повер, нажатием кнопок Ok (галочка) и Отмена (крестик):
Первый столбик обозначает кол-во нажатий кнопки отмена, второй столбик — кол-во нажатий кнопки Ok:
0 1 Usage report (распечатает информацию по распечатанным листам, колличество, качество печати, тип бумаги — 1 лист А4)
0 4 Information pages (распечатает информацию по картриджам и головкам, последние выполнение задания и ошибки — 2 листа А4, если у вас есть сетевая карта то будет 3 страницы)
1 2 NVM contents page (распечатает 16-деричные дампы (как я поняла чего то с картриджей) — 3 (или 4) листа А4)
0 3 Printhead alignment (калибровка ПГ, та же процедура, что и при установке новой ПГ — печать листа с квадратиками и галочками — от 1 до 5 листов А4, у меня почему то всегда 1)
0 5 Enable/Disable buzzer (включает, отключает звук у этого плоттера, супер штука, а оф. сервисный центр в моем городе заявил, что это нельзя сделать )
2 0 Printhead recovery 1 (Soft) (Очистка ПГ, слабая)
2 1 Printhead recovery 2 (Medium) (очистка ПГ средняя)
2 2 Printhead recovery 1 (Hard) (очистка ПГ тяжелая)
2 3 Transport position (перевод каретки в позицию для транспортировки, сама не рассматривала)
3 1 Network card reset (сброс сетевой карты, у меня на USB так что то же не проверяла)
Встречались другие коды, но при их наборе ни чего кроме установки бумаги не происходило, так что их назначение мне не понятно
странно что нет кода для печати теста ПГ 
- Наверх of the page up there ^
-
1
| Сообщение #2
Отправлено 23 января 2010 — 18:31
Slava2
возможно код проверки дюз спрятан намного дальше
Код 83 или 84 не пробовали?
Я встречал коды даже посе 11 — 4
Принтера НР400 серии, HP800 серии, 900-й, 1100-й, 1200-й,ср1700, k5400, k850, k8600 и др.
А теперь ещё и epson L800 , epson L1800.
- Наверх of the page up there ^
-
1
| Сообщение #3
Отправлено 23 января 2010 — 19:04
Renoa
11 — 4 набрать нельзя
там если по простому, то нажимая на отмены вы набираете десятки, на Ок — еденицы (то есть любой код можно 1 кнопкой набрать, просто долго), коды больше 99 нет, следующий за ним — 1 а не сотый (и печатает соответственно статистику листов распечатанных с принтера). Возможно есть еще какой то способ вызыва системных команд.
9Х какой то точно есть (седня нашла, но там просто бумажка поставилась и ни чего он не печатал), какой точно сейчас не скажу (плоттеры на работе и список команд то же, а я дома сейчас)
- Наверх of the page up there ^
-
0
| Сообщение #4
Отправлено 23 января 2010 — 21:43
Renoa
а вот и ссылка на сервис мануал для принтеров указанных в заголовке темы
лично мне понравилось, как написан.
http://letitbit.net/download/2334.cd260e05…ow_end.pdf.html (вес 13 с небольшим Мб)
- Наверх of the page up there ^
-
0
| Сообщение #5
Отправлено 24 января 2010 — 10:31
Slava2
Вещь очень полезная. Просьба к модераторам: перенесите этот файл на свой сервер, дабы со временем не затерялся.
А может даже отдельную ветку создать по НР мануалам? Крайне редко встречаются они в сети.
Принтера НР400 серии, HP800 серии, 900-й, 1100-й, 1200-й,ср1700, k5400, k850, k8600 и др.
А теперь ещё и epson L800 , epson L1800.
- Наверх of the page up there ^
-
1
| Сообщение #6
Отправлено 24 января 2010 — 21:28
Episode
Нас помнят, пока мы мешаем другим.
- Наверх of the page up there ^
-
0
| Сообщение #7
Отправлено 24 января 2010 — 22:54
Slava2
Renoa, где Вы нашли мануал на плоттеры? Там не было мануалов на другие НР ?
Принтера НР400 серии, HP800 серии, 900-й, 1100-й, 1200-й,ср1700, k5400, k850, k8600 и др.
А теперь ещё и epson L800 , epson L1800.
- Наверх of the page up there ^
-
1
| Сообщение #8
Отправлено 14 апреля 2010 — 09:34
Zer-Gut
А кто нибудь пользуется HP system maintenance?
Из нее можно напечатать тестовую картинку, выровнять головы, прочистки запустить..
Что то не получается ее включить
upd: вот ссылочка на HPшном сайте с кодами
коды
HP 110+, R2400, 3хR270, c110 + DCTec sublim, Canon EOS 450D+18-55 и фикс 50-1,8II, speedlight 430 EX
- Наверх of the page up there ^
-
0
| Сообщение #9
Отправлено 14 апреля 2010 — 10:19
Slava2
а это что за зверь?
Цитата
А кто нибудь пользуется HP system maintenance?
где взяли? колитесь… 
Принтера НР400 серии, HP800 серии, 900-й, 1100-й, 1200-й,ср1700, k5400, k850, k8600 и др.
А теперь ещё и epson L800 , epson L1800.
- Наверх of the page up there ^
-
1
| Сообщение #10
Отправлено 14 апреля 2010 — 10:30
Zer-Gut
взять тут
HP Designjet 110 and 110 Plus System Maintenance Utility (Software)
без нее кнопка «status of my printer» на вкладке «Services» неактивна
как я понял запускает вебитерфейс для обслуживания плоттера, т.е. процесс идет через ж.. через иха сайт
Раньше точно запускал- сейчас нивкакую..
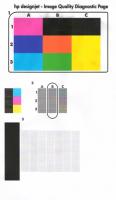
например можно распечатать такую картинку как:
HP 110+, R2400, 3хR270, c110 + DCTec sublim, Canon EOS 450D+18-55 и фикс 50-1,8II, speedlight 430 EX
- Наверх of the page up there ^
-
0
| Сообщение #11
Отправлено 22 июня 2010 — 14:15
Renoa
Через какой сайт???7 Вы о чем? Нормально работает, могут быть проблемы под семеркой, и если у вас IE с параноей
- Наверх of the page up there ^
-
0
| Сообщение #12
Отправлено 23 июня 2010 — 09:48
Zer-Gut
 Renoa (22nd June 2010 — 04:15 PM) писал:
Через какой сайт???7 Вы о чем? Нормально работает
если запускать кнопками на панели то работает. я даже листочек с кодами распечатал и на плоттер приклеил.
Если же запускать из драйвера, то требуется подключение к интернету.
тестовую картинку вроде как кнопками с панели не запустить.
HP 110+, R2400, 3хR270, c110 + DCTec sublim, Canon EOS 450D+18-55 и фикс 50-1,8II, speedlight 430 EX
- Наверх of the page up there ^
-
0
| Сообщение #13
Отправлено 23 июня 2010 — 16:27
Renoa
Не шутит так, прогрмама HP Designjet System Maintenance имеет веб интерфейс, она какой то сервер поднимает локальный, но ни какого подключения к инету не нужно!
у меня адрес выглядит так http://192.168.1.2:8190/MainMenu.html явно локальный адрес и порт, и инет специально отключала (фиг знает зачем и так понятно, что инетом и не пахнет)
- Наверх of the page up there ^
-
0
| Сообщение #14
Отправлено 29 июня 2010 — 08:54
Zer-Gut
Renoa (23rd June 2010 — 06:27 PM) писал:
Не шутит так, прогрмама HP Designjet System Maintenance имеет веб интерфейс, она какой то сервер поднимает локальный, но ни какого подключения к инету не нужно!
+1
извиняйте, что ввёл в заблуждение Проверил-всё работает.
видимо у меня какие то проблемы были, что ни с интернетом ни без него не работало. сейчас вроде ок.
HP 110+, R2400, 3хR270, c110 + DCTec sublim, Canon EOS 450D+18-55 и фикс 50-1,8II, speedlight 430 EX
- Наверх of the page up there ^
-
0
| Сообщение #15
Отправлено 28 января 2013 — 16:51
pavel.ignatenko
А не подскажите какого формата бумагу нужно ему дать, чтобы он напечатал Image Quality Test из Maintenence Utility?
А то он у меня все бумажки выплевывает. И А4 и А1, чего только не пробовали.
Спасибо.
- Наверх of the page up there ^
-
0
| Сообщение #16
Отправлено 28 января 2013 — 20:22
pavel.ignatenko
Всё… разобрался. Нужны листы формата А4, но ОБЯЗАТЕЛЬНО в лотке.
- Наверх of the page up there ^
-
0
| Сообщение #17
Отправлено 17 января 2017 — 18:09
s_p_a_w_n_666
Доброго времени суток! подскажите: в самом первом сообщении (где девушка описывает коды), есть сокращени «ПГ» — что такое «ПГ»?
- Наверх of the page up there ^
-
0
| Сообщение #18
Отправлено 17 января 2017 — 19:59
nik_2
- Наверх of the page up there ^
-
0
| Сообщение #19
Отправлено 24 января 2017 — 16:29
cannibale
а электрической принципиальной схему нигде не пролетало на 130?
Непонятно как и по чьей вине на майне оказалсь снесены напрочь 2 конденсатора и один резистор, резистор не успел потеряться, т.к. остался висеть на честном слове, а вот конденсаторов след простыл, порядковые номера элементов С5 и С6.
Пока поставил наугад, подходящие по размеру.
Canon PIXMA Pro 9000 + Epson r1800
- Наверх of the page up there ^
-
0
| Сообщение #20
Отправлено 25 января 2017 — 16:02
cannibale
все заколосилось! конденсаторы оказались некритичными по емкости, видимо просто подтяжки.
Canon PIXMA Pro 9000 + Epson r1800
- Наверх of the page up there ^
-
0
- ← Предыдущая тема
- Сервисные мануалы и утилиты для принтеров HP
- Следующая тема →
- Вы не можете создать новую тему
- Вы не можете ответить в тему
1 человек читают эту тему
0 пользователей, 1 гостей, 0 скрытых пользователей
Скачать обновленную версию бесплатной программы PrintHelp 2023, купить Код Сброса —
hp-concentra-wrapper-portlet
![]()
Actions
Introduction
Whenever the printer is switched on, it automatically performs a series of internal self-test and mechanical initialization sequences. If any of the printer parts fail, a system error or a system warning will occur.
note:
Unlike system errors, system warnings are not displayed on the front panel display of the printer. System warnings only appear in the Printer Status Section of the Printer Information pages, and unlike system errors, they do not interfere with the operation of the printer.
This document contains instructions for printing the Printer Information pages, and lists the system warning codes along with their descriptions and the corrective actions that are recommended for resolving them.
Retrieving system warning codes
System warning messages can be found by printing the Printer Information pages. The warnings are listed on page one.
-
On the printer’s front panel, press and hold the Power switch.
-
While still pressing the Power switch, press the OK button four times.
-
Power switch
-
OK button
Figure : Front panel of printer
-
-
Release the Power switch and the Printer Information pages will print.
Figure : Printer Information page one
Understanding the front panel error code display
System error codes are displayed on the printer’s front panel, using the lit or flashing Ink Cartridge icon bars (see the figure below). When performing a system error test, count the lit or flashing bars, which indicate a four-digit code.
Since the front panel can display only graphics, determine the error code by counting the lit bars on the front panel.
-
Failing subsystem indicators
-
Recovery action indicators
-
First two digits of error code
-
Second two digits of error code
-
Solid light indicates one digit
-
Blinking light indicates two digits
Figure : Determining the error code
System error codes consist of four digits. The first two digits explain which component/system is failing. The second two digits indicate what action should be taken to resolve the problem.
A blinking light indicates two digits in the error code.
In the figure above, the error code displayed is 7904, using the following interpretation:
-
The first indicator area displays two columns totaling seven lights.
-
The two columns in the second indicator area show eight lights and one blinking light, indicating a total of nine in this area.
-
The next area is blank, indicating zero.
-
The last area displays four lights.
System Error codes
01:10 error code
Explanation
An error has occurred with the electronics module.
Recommended action
Please call HP for technical support to troubleshoot the problem.
01:12 error code
Explanation
Electronics Module Error.
note:
This error code may also be reported as a warning code, which will not prevent continued use of the printer.
Recommended action
Please call HP for technical support to troubleshoot the problem.
02:10 error code
Explanation
A problem has occurred with the printer’s carriage assembly.
Recommended action
-
Unplug the power cable from the printer and wait a few seconds. Plug in the power cable again and check to see if the error code has disappeared.
-
If the error code reappears, please call HP for technical support to troubleshoot the problem.
04:13 error code
Explanation
A generic firmware error (network card) has occurred.
Recommended action
Unplug the power cable from the printer and wait a few seconds. Plug in the power cable again and check to see if the error code has disappeared. If the error code continues, please call HP for technical support to troubleshoot the problem.
08:11 error code
Explanation
The printer’s front panel cannot be detected.
Recommended action
Please call HP for technical support to troubleshoot the problem.
11:10 error code
Explanation
A trailing cable failure has occurred.
Recommended action
Please call HP for technical support to troubleshoot the problem.
11:11 error code
Explanation
Problems with trailing cable connection.
Recommended action
Please call HP for technical support to troubleshoot the problem.
21:10 error code
Explanation
A service station failure has occurred.
Recommended action
Please call HP for technical support to troubleshoot the problem.
22:10 error code
Explanation
An ink supply station failure has occurred.
Recommended action
Please call HP for technical support to troubleshoot the problem.
35:01 error code
Explanation
Cleanout Assembly not detected while loading
media.
Recommended action
Remove and reinstall the cleanout assembly.
-
Remove and re-install the Cleanout assembly as follows:
-
To release the Cleanout assembly, push in
the 2 buttons on either side.Figure : Release buttons
-
Remove the Cleanout assembly from the
Printer.Figure : Removing cleanout assembly
-
-
Reinstall the cleanout assembly, and attempt to verify functionality.
-
If problems persist, contact HP support.
42:10 error code
Explanation
A carriage motor failure (short-circuit) has occurred.
Recommended action
Please call HP for technical support to troubleshoot the problem.
56:10 error code
Explanation
An error has occurred during the calibration of the motor encoder system, or there was a problem finding the zero position on the encoder disc.
Recommended action
Please call HP for technical support to troubleshoot the problem.
56:13 error code
Explanation
Error during the calibration of the Line-feed motor/Encoder system or a problem finding the zero position on the Encoder disk.
Recommended action
Unplug the power cable from the printer and wait a few seconds. Plug in the power cable again and check to see if the error code has disappeared. If the error code continues, please call HP for technical support to troubleshoot the problem.
58:10 error code
Explanation
Problem detected in the Color Sensor system.
note:
This error code may also be reported as a warning code, which will not prevent continued use of the printer.
Recommended action
Please call HP for technical support to troubleshoot the problem.
61:05 error code
Explanation
Language interpreting error. This is usually an error produced while
parsing a file. There is most likely an incompatibility between the driver and
the firmware.
note:
This error code may also be reported as a warning code, which will not prevent continued use of the printer.
Recommended action
It might be necessary to upgrade either the RIP software or the Designjet System Maintenance Tool. Please call HP for technical support to troubleshoot the problem.
62:04, 63:04, 64:04 and 65:04 error code
Description
I/O module error (62 = parallel; 63 = Network; 64 = USB).
Recommended action
-
Unplug the power cable from the printer and wait a few seconds. Plug in the power cable again and check to see if the error code has disappeared.
65:01 error code
Explanation
A communication failure has occurred.
note:
This error code may also be reported as a warning code, which will not prevent continued use of the printer.
Recommended action
-
Unplug the power cable from the printer and check the cable connections (parallel, USB, network). Plug in the power cable again and check to see if the error code has disappeared.
-
If the error code reappears, please call HP for technical support to troubleshoot the problem.
71:03 error code
Description
Memory Management Error (Out of memory).
Recommended action
-
Unplug the power cable from the printer and wait a few seconds. Plug in the power cable again and check to see if the error code has disappeared.
71:14 error code
Explanation
Memory Management Error (Out of memory during firmware upgrade).
Recommended action
Unplug the power cable from the printer and wait a few seconds. Plug in the
power cable again and check if the Error Code has disappeared.
If the problem persists, call HP for technical support to troubleshoot the problem.
72:04 error code
Explanation
A generic firmware error has occurred (expected).
Recommended action
-
Unplug the power cable from the printer and wait a few seconds. Plug in the power cable again and check to see if the error code has disappeared.
74:12 error code
Explanation
Firmware Upgrade Error (Memory size check failed during firmware upgrade).
Recommended action
Please call HP for technical support to troubleshoot the problem.
79:04 error code
Explanation
An unexpected generic firmware error has occurred (unexpected).
Recommended action
-
Unplug the power cable from the printer and wait a few seconds. Plug in the power cable again and check to see if the error code has disappeared.
-
Remove switchboxes and connect the printer directly to the computer via USB or Parallel cables.
81:01 error code
Explanation
There has been a paper-axis shutdown, which is usually a paper jam caused by a blockage of the paper-axis system.
note:
This error code may also be reported as a warning code, which will not prevent continued use of the printer.
Recommended action
-
If this error code was caused by a paper jam, unplug the power cable from the printer and clear the blockage. Plug in the power cable again and check to see if the error code has disappeared. Click here for information on how to clear a paper jam.
-
If the error code appeared but was not caused by a paper jam, please call HP for technical support to troubleshoot the problem.
81:12 error code
Explanation
Recommended action
This error usually appears during the paper-advance calibration. Retry the
paper-advance calibration.
83:10 error code
Explanation
A sheet-feeding failure has occurred.
Recommended action
Please call HP for technical support to troubleshoot the problem.
85:10 error code
Explanation
A paper-axis encoder error has occurred.
Recommended action
Please call HP for technical support to troubleshoot the problem.
86:01 error code
There has been a scan-axis shutdown — usually a paper jam caused by a blockage of the scan-axis system.
Recommended action
-
Turn the printer off.
-
Open the main top cover, and check for any possible obstruction that may be preventing the carriage to move freely.
-
Remove obstruction (if found), and attempt to verify printer functionality.
-
If the problem persists, call HP for technical support to troubleshoot the problem.
86:11 error code
Explanation
Scan-axis shutdown during initialization. This error typically occurs when the printer detects an incorrect length.
Recommended action
If the Carriage stopped on the right-hand side of the Printer:
-
Check that the foam packing that secures the
Carriage during shipping has been removed. -
Make sure that the carriage is properly latched.
If the Carriage stopped in the middle of the print zone, please call HP for technical support to troubleshoot the problem.
95:00 error code
Explanation
There has been a printhead alignment failure — the printhead alignment was cancelled.
note:
This error code may also be reported as a warning code, which will not prevent continued use of the printer.
Recommended action
95:02 error code
Explanation
There has been a printhead alignment failure — the printhead alignment was cancelled.
note:
This error code may also be reported as a warning code, which will not prevent continued use of the printer.
Recommended action
-
Unplug the power cable from the printer and wait a few seconds. Plug in the power cable again and try the printhead alignment again.
-
If the error code appears again, check the printhead alignment print.
-
If the printhead alignment was printed correctly without any print defects, then check that the media is moving freely (backwards and forwards) while the printer is scanning it.
-
If the printhead alignment was printed incorrectly with some print defects, replace the faulty printhead in which the color defects were noticeable. Click here to see how to install a printhead.
95:04 error code
Explanation
There has been a firmware error during printhead alignment.
note:
This error code may also be reported as a warning code, which will not prevent continued use of the printer.
Recommended action
System Warning codes
Warnings will not be displayed on the front panel. They will appear on the Information page, allowing continued operation of the printer without the need of immediate intervention. To print an Information Page, hold the POWER button down while pressing and releasing the CONTINUE button four times.
270:00 warning code
Explanation
Recommended action
271:00 warning code
Explanation
Recommended action
272:00 warning code
Explanation
Recommended action
273:00 warning code
Explanation
Recommended action
83:01:1 warning code (applicable to HP Designjet 100plus only)
Explanation
The paper is rejected from the Bypass due to skew.
Recommended action
When manually loading paper from the front of the printer, make sure that it
is loaded straight.
83:01:3 warning code (applicable to HP Designjet 100plus only)
Explanation
The paper is rejected from the roll due to skew.
Recommended action
When loading paper from the roll, make sure that it is loaded straight.
Upgrading the firmware
-
If the System Maintenance tool is not already loaded, load from the CD shipped with the printer, or download the HP Designjet System Maintenance Tool from the Web.
-
Install the tool.
-
Open the System Maintenance tool and select Upgrade firmware.
Clearing a paper jam
-
Try pressing the CONTINUE button on the printer’s front panel. If this does not solve the problem, continue with the remaining steps.
-
Turn off the printer.
-
Remove all media from the trays. Pull out any media that is visibly stuck.
-
If the rear path through is installed, remove it by pressing the buttons on each side and pulling it out.
-
Rear path through buttons
Figure : Rear path through
-
-
Removing the rear path through provides access to the inside of the printer from the rear. Pull out any media that may be stuck inside that is accessible from the rear.
-
Replace the rear path through and make sure it fits securely.
-
Remove the back panel by pressing the two catches inwards.
-
Pull out any media that may be stuck inside.
-
Replace the back panel and make sure it fits securely.
-
Close the rear access door.
-
If the printer still reports jammed media, lift the top cover and pull out any media that may be stuck.
caution:When lifting the cover, be careful not to damage or disturb any of the tubes or other internal parts of the printer.
-
Turn the printer back on.
Cleaning the printheads
-
Select the Help button from the driver software.
-
Start the Maintenance application.
-
Select the Recover Printheads option. (This is the cleaning process.)
Installing printheads
-
Press the POWER button to turn on the printer.
-
Open the ink cartridge door at the front, right side of the printer. Continue lifting the ink cartridge door until the printheads are accessible.
-
When the printhead door is opened, the carriage assembly will briefly move left, then back right.
warning:Do not attempt to access the printheads until the carriage assembly has come to a complete stop, flush against the right side of the printer.
-
Access the printheads by lifting the latch from the rear. Pull the latch forward and down to release the latch hook. Then, lift up and push the latch toward the back of the printer.
-
Remove the printhead from the packaging. Remove the protective tape from the printhead.
-
Insert the printhead into its own color-coded socket. Firmly press the printhead into its slot.
-
Repeat Steps 5 and 6 for each of the six printheads that may need to be installed or replaced.
-
Close the printhead latch. Ensure that the hook on the printhead latch catches the carriage lock.
-
Close the printhead door, and then close the ink cartridge door.
Contact HP
Go to the Contact HP page for further assistance.
Сервисный мануал и коды на Designjet 110+, 120, 130
HP Designjet 110, 130 Service Manual
| Сообщение #1
Отправлено 23 января 2010 — 17:32
Для начала, сервисные коды на этих плоттерах вводятся при нажатой клопке повер, нажатием кнопок Ok (галочка) и Отмена (крестик):
Первый столбик обозначает кол-во нажатий кнопки отмена, второй столбик — кол-во нажатий кнопки Ok:
0 1 Usage report (распечатает информацию по распечатанным листам, колличество, качество печати, тип бумаги — 1 лист А4)
0 4 Information pages (распечатает информацию по картриджам и головкам, последние выполнение задания и ошибки — 2 листа А4, если у вас есть сетевая карта то будет 3 страницы)
1 2 NVM contents page (распечатает 16-деричные дампы (как я поняла чего то с картриджей) — 3 (или 4) листа А4)
0 3 Printhead alignment (калибровка ПГ, та же процедура, что и при установке новой ПГ — печать листа с квадратиками и галочками — от 1 до 5 листов А4, у меня почему то всегда 1)
0 5 Enable/Disable buzzer (включает, отключает звук у этого плоттера, супер штука, а оф. сервисный центр в моем городе заявил, что это нельзя сделать )
2 0 Printhead recovery 1 (Soft) (Очистка ПГ, слабая)
2 1 Printhead recovery 2 (Medium) (очистка ПГ средняя)
2 2 Printhead recovery 1 (Hard) (очистка ПГ тяжелая)
2 3 Transport position (перевод каретки в позицию для транспортировки, сама не рассматривала)
3 1 Network card reset (сброс сетевой карты, у меня на USB так что то же не проверяла)
Встречались другие коды, но при их наборе ни чего кроме установки бумаги не происходило, так что их назначение мне не понятно
странно что нет кода для печати теста ПГ 
- Наверх of the page up there ^
-
1
| Сообщение #2
Отправлено 23 января 2010 — 18:31
Slava2
возможно код проверки дюз спрятан намного дальше
Код 83 или 84 не пробовали?
Я встречал коды даже посе 11 — 4
Принтера НР400 серии, HP800 серии, 900-й, 1100-й, 1200-й,ср1700, k5400, k850, k8600 и др.
А теперь ещё и epson L800 , epson L1800.
- Наверх of the page up there ^
-
1
| Сообщение #3
Отправлено 23 января 2010 — 19:04
Renoa
11 — 4 набрать нельзя
там если по простому, то нажимая на отмены вы набираете десятки, на Ок — еденицы (то есть любой код можно 1 кнопкой набрать, просто долго), коды больше 99 нет, следующий за ним — 1 а не сотый (и печатает соответственно статистику листов распечатанных с принтера). Возможно есть еще какой то способ вызыва системных команд.
9Х какой то точно есть (седня нашла, но там просто бумажка поставилась и ни чего он не печатал), какой точно сейчас не скажу (плоттеры на работе и список команд то же, а я дома сейчас)
- Наверх of the page up there ^
-
0
| Сообщение #4
Отправлено 23 января 2010 — 21:43
Renoa
а вот и ссылка на сервис мануал для принтеров указанных в заголовке темы
лично мне понравилось, как написан.
http://letitbit.net/download/2334.cd260e05…ow_end.pdf.html (вес 13 с небольшим Мб)
- Наверх of the page up there ^
-
0
| Сообщение #5
Отправлено 24 января 2010 — 10:31
Slava2
Вещь очень полезная. Просьба к модераторам: перенесите этот файл на свой сервер, дабы со временем не затерялся.
А может даже отдельную ветку создать по НР мануалам? Крайне редко встречаются они в сети.
Принтера НР400 серии, HP800 серии, 900-й, 1100-й, 1200-й,ср1700, k5400, k850, k8600 и др.
А теперь ещё и epson L800 , epson L1800.
- Наверх of the page up there ^
-
1
| Сообщение #6
Отправлено 24 января 2010 — 21:28
Episode
Нас помнят, пока мы мешаем другим.
- Наверх of the page up there ^
-
0
| Сообщение #7
Отправлено 24 января 2010 — 22:54
Slava2
Renoa, где Вы нашли мануал на плоттеры? Там не было мануалов на другие НР ?
Принтера НР400 серии, HP800 серии, 900-й, 1100-й, 1200-й,ср1700, k5400, k850, k8600 и др.
А теперь ещё и epson L800 , epson L1800.
- Наверх of the page up there ^
-
1
| Сообщение #8
Отправлено 14 апреля 2010 — 09:34
Zer-Gut
А кто нибудь пользуется HP system maintenance?
Из нее можно напечатать тестовую картинку, выровнять головы, прочистки запустить..
Что то не получается ее включить
upd: вот ссылочка на HPшном сайте с кодами
коды
HP 110+, R2400, 3хR270, c110 + DCTec sublim, Canon EOS 450D+18-55 и фикс 50-1,8II, speedlight 430 EX
- Наверх of the page up there ^
-
0
| Сообщение #9
Отправлено 14 апреля 2010 — 10:19
Slava2
а это что за зверь?
Цитата
А кто нибудь пользуется HP system maintenance?
где взяли? колитесь…
Принтера НР400 серии, HP800 серии, 900-й, 1100-й, 1200-й,ср1700, k5400, k850, k8600 и др.
А теперь ещё и epson L800 , epson L1800.
- Наверх of the page up there ^
-
1
| Сообщение #10
Отправлено 14 апреля 2010 — 10:30
Zer-Gut
взять тут
HP Designjet 110 and 110 Plus System Maintenance Utility (Software)
без нее кнопка «status of my printer» на вкладке «Services» неактивна
как я понял запускает вебитерфейс для обслуживания плоттера, т.е. процесс идет через ж.. через иха сайт
Раньше точно запускал- сейчас нивкакую..
например можно распечатать такую картинку как:
HP 110+, R2400, 3хR270, c110 + DCTec sublim, Canon EOS 450D+18-55 и фикс 50-1,8II, speedlight 430 EX
- Наверх of the page up there ^
-
0
| Сообщение #11
Отправлено 22 июня 2010 — 14:15
Renoa
Через какой сайт???7 Вы о чем? Нормально работает, могут быть проблемы под семеркой, и если у вас IE с параноей
- Наверх of the page up there ^
-
0
| Сообщение #12
Отправлено 23 июня 2010 — 09:48
Zer-Gut
Renoa (22nd June 2010 — 04:15 PM) писал:
Через какой сайт???7 Вы о чем? Нормально работает
если запускать кнопками на панели то работает. я даже листочек с кодами распечатал и на плоттер приклеил.
Если же запускать из драйвера, то требуется подключение к интернету.
тестовую картинку вроде как кнопками с панели не запустить.
HP 110+, R2400, 3хR270, c110 + DCTec sublim, Canon EOS 450D+18-55 и фикс 50-1,8II, speedlight 430 EX
- Наверх of the page up there ^
-
0
| Сообщение #13
Отправлено 23 июня 2010 — 16:27
Renoa
Не шутит так, прогрмама HP Designjet System Maintenance имеет веб интерфейс, она какой то сервер поднимает локальный, но ни какого подключения к инету не нужно!
у меня адрес выглядит так http://192.168.1.2:8190/MainMenu.html явно локальный адрес и порт, и инет специально отключала (фиг знает зачем и так понятно, что инетом и не пахнет)
- Наверх of the page up there ^
-
0
| Сообщение #14
Отправлено 29 июня 2010 — 08:54
Zer-Gut
Renoa (23rd June 2010 — 06:27 PM) писал:
Не шутит так, прогрмама HP Designjet System Maintenance имеет веб интерфейс, она какой то сервер поднимает локальный, но ни какого подключения к инету не нужно!
+1
извиняйте, что ввёл в заблуждение Проверил-всё работает.
видимо у меня какие то проблемы были, что ни с интернетом ни без него не работало. сейчас вроде ок.
HP 110+, R2400, 3хR270, c110 + DCTec sublim, Canon EOS 450D+18-55 и фикс 50-1,8II, speedlight 430 EX
- Наверх of the page up there ^
-
0
| Сообщение #15
Отправлено 28 января 2013 — 16:51
pavel.ignatenko
А не подскажите какого формата бумагу нужно ему дать, чтобы он напечатал Image Quality Test из Maintenence Utility?
А то он у меня все бумажки выплевывает. И А4 и А1, чего только не пробовали.
Спасибо.
- Наверх of the page up there ^
-
0
| Сообщение #16
Отправлено 28 января 2013 — 20:22
pavel.ignatenko
Всё… разобрался. Нужны листы формата А4, но ОБЯЗАТЕЛЬНО в лотке.
- Наверх of the page up there ^
-
0
| Сообщение #17
Отправлено 17 января 2017 — 18:09
s_p_a_w_n_666
Доброго времени суток! подскажите: в самом первом сообщении (где девушка описывает коды), есть сокращени «ПГ» — что такое «ПГ»?
- Наверх of the page up there ^
-
0
| Сообщение #18
Отправлено 17 января 2017 — 19:59
nik_2
- Наверх of the page up there ^
-
0
| Сообщение #19
Отправлено 24 января 2017 — 16:29
cannibale
а электрической принципиальной схему нигде не пролетало на 130?
Непонятно как и по чьей вине на майне оказалсь снесены напрочь 2 конденсатора и один резистор, резистор не успел потеряться, т.к. остался висеть на честном слове, а вот конденсаторов след простыл, порядковые номера элементов С5 и С6.
Пока поставил наугад, подходящие по размеру.
Canon PIXMA Pro 9000 + Epson r1800
- Наверх of the page up there ^
-
0
| Сообщение #20
Отправлено 25 января 2017 — 16:02
cannibale
все заколосилось! конденсаторы оказались некритичными по емкости, видимо просто подтяжки.
Canon PIXMA Pro 9000 + Epson r1800
- Наверх of the page up there ^
-
0
- ← Предыдущая тема
- Сервисные мануалы и утилиты для принтеров HP
- Следующая тема →
- Вы не можете создать новую тему
- Вы не можете ответить в тему
1 человек читают эту тему
0 пользователей, 1 гостей, 0 скрытых пользователей
Коды системных ошибок отображаются на передней панели в формате XX.YZ.
Коды системных ошибок отображаются на странице информации в формате XXn.YZ.m.
XX: сервисная часть
n: индекс сервисной части (например цвет или номер)
Y: кто должен выполнить действие (пользователь или инженер)
Z: действие для выполнения
m: дополнительное действие
Таблица кодов XX
01 — Main PCA/Electronics Module (основной модуль электроники)
02 — Carriage/Carriage PCA (печатающая каретка)
03 — Power Supply Unit (блок питания)
04 — Network Card (сетевая карта)
05 — Formatter (форматер)
06 — Hard Disk Drive (жесткий диск)
07 — Interconnect PCA (подключение PCA)
08 — Front Panel (передняя панель)
11 — Trailing Cable (кабель)
12 — Carriage Flex Circuit (фрикционный контур каретки)
17 — Interconnect Cable (соединительный кабель)
21 — Service Station (станция технического обслуживания)
22 — Ink Supply Station (станция подачи чернил)
23 — Pressure System (система давления APS)
24 — Ink Delivery Tubes (трубы подачи чернил)
25 — Spittoon
26n — Ink Cartridge (картридж, где n означает цвет)
26n — Printhead (печатающая головка, где n означает цвет)
31 — Cutter (резак)
32 — Take-up Reel (приемная катушка)
33 — Sheet Feeder (податчик бумаги)
34 — Dryer/Blower (воздуходувка)
35 — Cleanout Assembly (очиститель узел)
36 — Duplexer (дуплексер)
37 — ARSS/Rollfeed
38 — Output Tray (выходной лоток)
41 — Paper-Axis Motor (бумажно-осевой электродвигатель)
42 — Scan-Axis Motor
43 — — Vacuum Fan (вакуумный вентилятор)
44 — Aerosol fan (аэрозольный вентилятор)
51 — Window Sensor (оконный датчик)
52 — Drop Detector (детектор падения)
53 — Media Sensor (датчик бумаги)
54 — Pinch-Arm Sensor (датчик зажима)
55 — Line Sensor (датчик линии)
56 — Drive Roller Encoder Sensor (датчик двигателя энкодера)
57 — Ink Leak Detector (датчик утечки чернил)
58 — Color Sensor (датчик цвета)
59 — Media Type Sensor (датчик типа бумаги)
61 — Language Interpreting (перевод языка)
62 — Input/Output through Parallel Port (вход/выход через параллейный порт)
63 — Input/Output through Network Card (вход/выход через сетевую карту)
64 — Input/Output through USB Port (вход/выход через USB порт)
65 — Input/Output (вход/выход)
66 — Print Job Configuration (настройка задания печати)
71 — Memory Management (управление памятью)
72 — Generic Firmware (общая прошивка)
73 — Motor Control Functions (функции управления двигателя)
74 — Firmware Upgrade (обновление прошивки)
79 — Firmware Crash (ошибка прошивки)
81 — Media Advance (продвижение бумаги)
82 — Media Cut (резак бумаги)
83 — Single-Sheet Feeding (подача одного листа)
84 — Roll Feeding (подача рулона)
85 — Media-Axis Encoder Reading (чтение энкодера бумаги)
86 — Carriage Movement (перемещение каретки)
87 — Scan-Axis Encoder Reading (чтение энкодера сканера)
91 — Printhead Firing (работа печатающей головки)
92 — Servicing (обслуживание)
93 — Ink Pumping (прокачка чернил)
94 — Color Calibration (калибровка цвета)
95 — Printhead Alignment (выравнивание печатающей головки)
96 — Image Quality Troubleshooting (устранение неполадок с качеством изображения)
Таблица кодов YZ
Действия для пользователя:
00 — Replace (заменить)
01 — Reseat/Reconnect/Clean/Adjust ((сброс/очистка/настройка вручную))
02 — Calibrate/Adjust (калибровка/настройка автоматически)
03 — Power OFF (выключить питание)
04 — Upgrade System Firmware (обновить прошивку системы)
05 — Upgrade Driver (обновить драйвер)
06 — Add Accessory (добавить аксессуар)
07 — Escalate (расширить)
08 — Send Plot Again (отправить снова)
09 — Wrong Part Installed (неверно установлена деталь)
Действия для инженера:
10 — Replace (заменить)
11 — Reseat/Reconnect/Clean/Adjust (сброс/очистка/настройка вручную)
12 — Calibrate/Adjust (калибровка/настройка автоматически)
13 — Power OFF (выключить питание)
14 — Upgrade System Firmware (обновить прошивку системы)
15 — Upgrade Driver (обновить драйвер)
16 — Add Accessory (добавить аксессуар)
17 — Escalate (расширить)
18 — Send Plot Again (отправить снова)
19 — Wrong Part Installed (неверно установлена деталь)
hp-concentra-wrapper-portlet
![]()
Actions
Introduction
Whenever the printer is switched on, it automatically performs a series of internal self-test and mechanical initialization sequences. If any of the printer parts fail, a system error or a system warning will occur.
note:
Unlike system errors, system warnings are not displayed on the front panel display of the printer. System warnings only appear in the Printer Status Section of the Printer Information pages, and unlike system errors, they do not interfere with the operation of the printer.
This document contains instructions for printing the Printer Information pages, and lists the system warning codes along with their descriptions and the corrective actions that are recommended for resolving them.
Retrieving system warning codes
System warning messages can be found by printing the Printer Information pages. The warnings are listed on page one.
-
On the printer’s front panel, press and hold the Power switch.
-
While still pressing the Power switch, press the OK button four times.
-
Power switch
-
OK button
Figure : Front panel of printer
-
-
Release the Power switch and the Printer Information pages will print.
Figure : Printer Information page one
Understanding the front panel error code display
System error codes are displayed on the printer’s front panel, using the lit or flashing Ink Cartridge icon bars (see the figure below). When performing a system error test, count the lit or flashing bars, which indicate a four-digit code.
Since the front panel can display only graphics, determine the error code by counting the lit bars on the front panel.
-
Failing subsystem indicators
-
Recovery action indicators
-
First two digits of error code
-
Second two digits of error code
-
Solid light indicates one digit
-
Blinking light indicates two digits
Figure : Determining the error code
System error codes consist of four digits. The first two digits explain which component/system is failing. The second two digits indicate what action should be taken to resolve the problem.
A blinking light indicates two digits in the error code.
In the figure above, the error code displayed is 7904, using the following interpretation:
-
The first indicator area displays two columns totaling seven lights.
-
The two columns in the second indicator area show eight lights and one blinking light, indicating a total of nine in this area.
-
The next area is blank, indicating zero.
-
The last area displays four lights.
System Error codes
01:10 error code
Explanation
An error has occurred with the electronics module.
Recommended action
Please call HP for technical support to troubleshoot the problem.
01:12 error code
Explanation
Electronics Module Error.
note:
This error code may also be reported as a warning code, which will not prevent continued use of the printer.
Recommended action
Please call HP for technical support to troubleshoot the problem.
02:10 error code
Explanation
A problem has occurred with the printer’s carriage assembly.
Recommended action
-
Unplug the power cable from the printer and wait a few seconds. Plug in the power cable again and check to see if the error code has disappeared.
-
If the error code reappears, please call HP for technical support to troubleshoot the problem.
04:13 error code
Explanation
A generic firmware error (network card) has occurred.
Recommended action
Unplug the power cable from the printer and wait a few seconds. Plug in the power cable again and check to see if the error code has disappeared. If the error code continues, please call HP for technical support to troubleshoot the problem.
08:11 error code
Explanation
The printer’s front panel cannot be detected.
Recommended action
Please call HP for technical support to troubleshoot the problem.
11:10 error code
Explanation
A trailing cable failure has occurred.
Recommended action
Please call HP for technical support to troubleshoot the problem.
11:11 error code
Explanation
Problems with trailing cable connection.
Recommended action
Please call HP for technical support to troubleshoot the problem.
21:10 error code
Explanation
A service station failure has occurred.
Recommended action
Please call HP for technical support to troubleshoot the problem.
22:10 error code
Explanation
An ink supply station failure has occurred.
Recommended action
Please call HP for technical support to troubleshoot the problem.
35:01 error code
Explanation
Cleanout Assembly not detected while loading
media.
Recommended action
Remove and reinstall the cleanout assembly.
-
Remove and re-install the Cleanout assembly as follows:
-
To release the Cleanout assembly, push in
the 2 buttons on either side.Figure : Release buttons
-
Remove the Cleanout assembly from the
Printer.Figure : Removing cleanout assembly
-
-
Reinstall the cleanout assembly, and attempt to verify functionality.
-
If problems persist, contact HP support.
42:10 error code
Explanation
A carriage motor failure (short-circuit) has occurred.
Recommended action
Please call HP for technical support to troubleshoot the problem.
56:10 error code
Explanation
An error has occurred during the calibration of the motor encoder system, or there was a problem finding the zero position on the encoder disc.
Recommended action
Please call HP for technical support to troubleshoot the problem.
56:13 error code
Explanation
Error during the calibration of the Line-feed motor/Encoder system or a problem finding the zero position on the Encoder disk.
Recommended action
Unplug the power cable from the printer and wait a few seconds. Plug in the power cable again and check to see if the error code has disappeared. If the error code continues, please call HP for technical support to troubleshoot the problem.
58:10 error code
Explanation
Problem detected in the Color Sensor system.
note:
This error code may also be reported as a warning code, which will not prevent continued use of the printer.
Recommended action
Please call HP for technical support to troubleshoot the problem.
61:05 error code
Explanation
Language interpreting error. This is usually an error produced while
parsing a file. There is most likely an incompatibility between the driver and
the firmware.
note:
This error code may also be reported as a warning code, which will not prevent continued use of the printer.
Recommended action
It might be necessary to upgrade either the RIP software or the Designjet System Maintenance Tool. Please call HP for technical support to troubleshoot the problem.
62:04, 63:04, 64:04 and 65:04 error code
Description
I/O module error (62 = parallel; 63 = Network; 64 = USB).
Recommended action
-
Unplug the power cable from the printer and wait a few seconds. Plug in the power cable again and check to see if the error code has disappeared.
65:01 error code
Explanation
A communication failure has occurred.
note:
This error code may also be reported as a warning code, which will not prevent continued use of the printer.
Recommended action
-
Unplug the power cable from the printer and check the cable connections (parallel, USB, network). Plug in the power cable again and check to see if the error code has disappeared.
-
If the error code reappears, please call HP for technical support to troubleshoot the problem.
71:03 error code
Description
Memory Management Error (Out of memory).
Recommended action
-
Unplug the power cable from the printer and wait a few seconds. Plug in the power cable again and check to see if the error code has disappeared.
71:14 error code
Explanation
Memory Management Error (Out of memory during firmware upgrade).
Recommended action
Unplug the power cable from the printer and wait a few seconds. Plug in the
power cable again and check if the Error Code has disappeared.
If the problem persists, call HP for technical support to troubleshoot the problem.
72:04 error code
Explanation
A generic firmware error has occurred (expected).
Recommended action
-
Unplug the power cable from the printer and wait a few seconds. Plug in the power cable again and check to see if the error code has disappeared.
74:12 error code
Explanation
Firmware Upgrade Error (Memory size check failed during firmware upgrade).
Recommended action
Please call HP for technical support to troubleshoot the problem.
79:04 error code
Explanation
An unexpected generic firmware error has occurred (unexpected).
Recommended action
-
Unplug the power cable from the printer and wait a few seconds. Plug in the power cable again and check to see if the error code has disappeared.
-
Remove switchboxes and connect the printer directly to the computer via USB or Parallel cables.
81:01 error code
Explanation
There has been a paper-axis shutdown, which is usually a paper jam caused by a blockage of the paper-axis system.
note:
This error code may also be reported as a warning code, which will not prevent continued use of the printer.
Recommended action
-
If this error code was caused by a paper jam, unplug the power cable from the printer and clear the blockage. Plug in the power cable again and check to see if the error code has disappeared. Click here for information on how to clear a paper jam.
-
If the error code appeared but was not caused by a paper jam, please call HP for technical support to troubleshoot the problem.
81:12 error code
Explanation
Recommended action
This error usually appears during the paper-advance calibration. Retry the
paper-advance calibration.
83:10 error code
Explanation
A sheet-feeding failure has occurred.
Recommended action
Please call HP for technical support to troubleshoot the problem.
85:10 error code
Explanation
A paper-axis encoder error has occurred.
Recommended action
Please call HP for technical support to troubleshoot the problem.
86:01 error code
There has been a scan-axis shutdown — usually a paper jam caused by a blockage of the scan-axis system.
Recommended action
-
Turn the printer off.
-
Open the main top cover, and check for any possible obstruction that may be preventing the carriage to move freely.
-
Remove obstruction (if found), and attempt to verify printer functionality.
-
If the problem persists, call HP for technical support to troubleshoot the problem.
86:11 error code
Explanation
Scan-axis shutdown during initialization. This error typically occurs when the printer detects an incorrect length.
Recommended action
If the Carriage stopped on the right-hand side of the Printer:
-
Check that the foam packing that secures the
Carriage during shipping has been removed. -
Make sure that the carriage is properly latched.
If the Carriage stopped in the middle of the print zone, please call HP for technical support to troubleshoot the problem.
95:00 error code
Explanation
There has been a printhead alignment failure — the printhead alignment was cancelled.
note:
This error code may also be reported as a warning code, which will not prevent continued use of the printer.
Recommended action
95:02 error code
Explanation
There has been a printhead alignment failure — the printhead alignment was cancelled.
note:
This error code may also be reported as a warning code, which will not prevent continued use of the printer.
Recommended action
-
Unplug the power cable from the printer and wait a few seconds. Plug in the power cable again and try the printhead alignment again.
-
If the error code appears again, check the printhead alignment print.
-
If the printhead alignment was printed correctly without any print defects, then check that the media is moving freely (backwards and forwards) while the printer is scanning it.
-
If the printhead alignment was printed incorrectly with some print defects, replace the faulty printhead in which the color defects were noticeable. Click here to see how to install a printhead.
95:04 error code
Explanation
There has been a firmware error during printhead alignment.
note:
This error code may also be reported as a warning code, which will not prevent continued use of the printer.
Recommended action
System Warning codes
Warnings will not be displayed on the front panel. They will appear on the Information page, allowing continued operation of the printer without the need of immediate intervention. To print an Information Page, hold the POWER button down while pressing and releasing the CONTINUE button four times.
270:00 warning code
Explanation
Recommended action
271:00 warning code
Explanation
Recommended action
272:00 warning code
Explanation
Recommended action
273:00 warning code
Explanation
Recommended action
83:01:1 warning code (applicable to HP Designjet 100plus only)
Explanation
The paper is rejected from the Bypass due to skew.
Recommended action
When manually loading paper from the front of the printer, make sure that it
is loaded straight.
83:01:3 warning code (applicable to HP Designjet 100plus only)
Explanation
The paper is rejected from the roll due to skew.
Recommended action
When loading paper from the roll, make sure that it is loaded straight.
Upgrading the firmware
-
If the System Maintenance tool is not already loaded, load from the CD shipped with the printer, or download the HP Designjet System Maintenance Tool from the Web.
-
Install the tool.
-
Open the System Maintenance tool and select Upgrade firmware.
Clearing a paper jam
-
Try pressing the CONTINUE button on the printer’s front panel. If this does not solve the problem, continue with the remaining steps.
-
Turn off the printer.
-
Remove all media from the trays. Pull out any media that is visibly stuck.
-
If the rear path through is installed, remove it by pressing the buttons on each side and pulling it out.
-
Rear path through buttons
Figure : Rear path through
-
-
Removing the rear path through provides access to the inside of the printer from the rear. Pull out any media that may be stuck inside that is accessible from the rear.
-
Replace the rear path through and make sure it fits securely.
-
Remove the back panel by pressing the two catches inwards.
-
Pull out any media that may be stuck inside.
-
Replace the back panel and make sure it fits securely.
-
Close the rear access door.
-
If the printer still reports jammed media, lift the top cover and pull out any media that may be stuck.
caution:When lifting the cover, be careful not to damage or disturb any of the tubes or other internal parts of the printer.
-
Turn the printer back on.
Cleaning the printheads
-
Select the Help button from the driver software.
-
Start the Maintenance application.
-
Select the Recover Printheads option. (This is the cleaning process.)
Installing printheads
-
Press the POWER button to turn on the printer.
-
Open the ink cartridge door at the front, right side of the printer. Continue lifting the ink cartridge door until the printheads are accessible.
-
When the printhead door is opened, the carriage assembly will briefly move left, then back right.
warning:Do not attempt to access the printheads until the carriage assembly has come to a complete stop, flush against the right side of the printer.
-
Access the printheads by lifting the latch from the rear. Pull the latch forward and down to release the latch hook. Then, lift up and push the latch toward the back of the printer.
-
Remove the printhead from the packaging. Remove the protective tape from the printhead.
-
Insert the printhead into its own color-coded socket. Firmly press the printhead into its slot.
-
Repeat Steps 5 and 6 for each of the six printheads that may need to be installed or replaced.
-
Close the printhead latch. Ensure that the hook on the printhead latch catches the carriage lock.
-
Close the printhead door, and then close the ink cartridge door.
Contact HP
Go to the Contact HP page for further assistance.
Коды системных ошибок отображаются на передней панели в формате XX.YZ.
Коды системных ошибок отображаются на странице информации в формате XXn.YZ.m.
XX: сервисная часть
n: индекс сервисной части (например цвет или номер)
Y: кто должен выполнить действие (пользователь или инженер)
Z: действие для выполнения
m: дополнительное действие
Таблица кодов XX
01 — Main PCA/Electronics Module (основной модуль электроники)
02 — Carriage/Carriage PCA (печатающая каретка)
03 — Power Supply Unit (блок питания)
04 — Network Card (сетевая карта)
05 — Formatter (форматер)
06 — Hard Disk Drive (жесткий диск)
07 — Interconnect PCA (подключение PCA)
08 — Front Panel (передняя панель)
11 — Trailing Cable (кабель)
12 — Carriage Flex Circuit (фрикционный контур каретки)
17 — Interconnect Cable (соединительный кабель)
21 — Service Station (станция технического обслуживания)
22 — Ink Supply Station (станция подачи чернил)
23 — Pressure System (система давления APS)
24 — Ink Delivery Tubes (трубы подачи чернил)
25 — Spittoon
26n — Ink Cartridge (картридж, где n означает цвет)
26n — Printhead (печатающая головка, где n означает цвет)
31 — Cutter (резак)
32 — Take-up Reel (приемная катушка)
33 — Sheet Feeder (податчик бумаги)
34 — Dryer/Blower (воздуходувка)
35 — Cleanout Assembly (очиститель узел)
36 — Duplexer (дуплексер)
37 — ARSS/Rollfeed
38 — Output Tray (выходной лоток)
41 — Paper-Axis Motor (бумажно-осевой электродвигатель)
42 — Scan-Axis Motor
43 — — Vacuum Fan (вакуумный вентилятор)
44 — Aerosol fan (аэрозольный вентилятор)
51 — Window Sensor (оконный датчик)
52 — Drop Detector (детектор падения)
53 — Media Sensor (датчик бумаги)
54 — Pinch-Arm Sensor (датчик зажима)
55 — Line Sensor (датчик линии)
56 — Drive Roller Encoder Sensor (датчик двигателя энкодера)
57 — Ink Leak Detector (датчик утечки чернил)
58 — Color Sensor (датчик цвета)
59 — Media Type Sensor (датчик типа бумаги)
61 — Language Interpreting (перевод языка)
62 — Input/Output through Parallel Port (вход/выход через параллейный порт)
63 — Input/Output through Network Card (вход/выход через сетевую карту)
64 — Input/Output through USB Port (вход/выход через USB порт)
65 — Input/Output (вход/выход)
66 — Print Job Configuration (настройка задания печати)
71 — Memory Management (управление памятью)
72 — Generic Firmware (общая прошивка)
73 — Motor Control Functions (функции управления двигателя)
74 — Firmware Upgrade (обновление прошивки)
79 — Firmware Crash (ошибка прошивки)
81 — Media Advance (продвижение бумаги)
82 — Media Cut (резак бумаги)
83 — Single-Sheet Feeding (подача одного листа)
84 — Roll Feeding (подача рулона)
85 — Media-Axis Encoder Reading (чтение энкодера бумаги)
86 — Carriage Movement (перемещение каретки)
87 — Scan-Axis Encoder Reading (чтение энкодера сканера)
91 — Printhead Firing (работа печатающей головки)
92 — Servicing (обслуживание)
93 — Ink Pumping (прокачка чернил)
94 — Color Calibration (калибровка цвета)
95 — Printhead Alignment (выравнивание печатающей головки)
96 — Image Quality Troubleshooting (устранение неполадок с качеством изображения)
Таблица кодов YZ
Действия для пользователя:
00 — Replace (заменить)
01 — Reseat/Reconnect/Clean/Adjust ((сброс/очистка/настройка вручную))
02 — Calibrate/Adjust (калибровка/настройка автоматически)
03 — Power OFF (выключить питание)
04 — Upgrade System Firmware (обновить прошивку системы)
05 — Upgrade Driver (обновить драйвер)
06 — Add Accessory (добавить аксессуар)
07 — Escalate (расширить)
08 — Send Plot Again (отправить снова)
09 — Wrong Part Installed (неверно установлена деталь)
Действия для инженера:
10 — Replace (заменить)
11 — Reseat/Reconnect/Clean/Adjust (сброс/очистка/настройка вручную)
12 — Calibrate/Adjust (калибровка/настройка автоматически)
13 — Power OFF (выключить питание)
14 — Upgrade System Firmware (обновить прошивку системы)
15 — Upgrade Driver (обновить драйвер)
16 — Add Accessory (добавить аксессуар)
17 — Escalate (расширить)
18 — Send Plot Again (отправить снова)
19 — Wrong Part Installed (неверно установлена деталь)
Сервисный мануал и коды на Designjet 110+, 120, 130
HP Designjet 110, 130 Service Manual
| Сообщение #1
Отправлено 23 января 2010 — 17:32
Для начала, сервисные коды на этих плоттерах вводятся при нажатой клопке повер, нажатием кнопок Ok (галочка) и Отмена (крестик):
Первый столбик обозначает кол-во нажатий кнопки отмена, второй столбик — кол-во нажатий кнопки Ok:
0 1 Usage report (распечатает информацию по распечатанным листам, колличество, качество печати, тип бумаги — 1 лист А4)
0 4 Information pages (распечатает информацию по картриджам и головкам, последние выполнение задания и ошибки — 2 листа А4, если у вас есть сетевая карта то будет 3 страницы)
1 2 NVM contents page (распечатает 16-деричные дампы (как я поняла чего то с картриджей) — 3 (или 4) листа А4)
0 3 Printhead alignment (калибровка ПГ, та же процедура, что и при установке новой ПГ — печать листа с квадратиками и галочками — от 1 до 5 листов А4, у меня почему то всегда 1)
0 5 Enable/Disable buzzer (включает, отключает звук у этого плоттера, супер штука, а оф. сервисный центр в моем городе заявил, что это нельзя сделать )
2 0 Printhead recovery 1 (Soft) (Очистка ПГ, слабая)
2 1 Printhead recovery 2 (Medium) (очистка ПГ средняя)
2 2 Printhead recovery 1 (Hard) (очистка ПГ тяжелая)
2 3 Transport position (перевод каретки в позицию для транспортировки, сама не рассматривала)
3 1 Network card reset (сброс сетевой карты, у меня на USB так что то же не проверяла)
Встречались другие коды, но при их наборе ни чего кроме установки бумаги не происходило, так что их назначение мне не понятно
странно что нет кода для печати теста ПГ
- Наверх of the page up there ^
-
1
| Сообщение #2
Отправлено 23 января 2010 — 18:31
Slava2
возможно код проверки дюз спрятан намного дальше
Код 83 или 84 не пробовали?
Я встречал коды даже посе 11 — 4
Принтера НР400 серии, HP800 серии, 900-й, 1100-й, 1200-й,ср1700, k5400, k850, k8600 и др.
А теперь ещё и epson L800 , epson L1800.
- Наверх of the page up there ^
-
1
| Сообщение #3
Отправлено 23 января 2010 — 19:04
Renoa
11 — 4 набрать нельзя
там если по простому, то нажимая на отмены вы набираете десятки, на Ок — еденицы (то есть любой код можно 1 кнопкой набрать, просто долго), коды больше 99 нет, следующий за ним — 1 а не сотый (и печатает соответственно статистику листов распечатанных с принтера). Возможно есть еще какой то способ вызыва системных команд.
9Х какой то точно есть (седня нашла, но там просто бумажка поставилась и ни чего он не печатал), какой точно сейчас не скажу (плоттеры на работе и список команд то же, а я дома сейчас)
- Наверх of the page up there ^
-
0
| Сообщение #4
Отправлено 23 января 2010 — 21:43
Renoa
а вот и ссылка на сервис мануал для принтеров указанных в заголовке темы
лично мне понравилось, как написан.
http://letitbit.net/download/2334.cd260e05…ow_end.pdf.html (вес 13 с небольшим Мб)
- Наверх of the page up there ^
-
0
| Сообщение #5
Отправлено 24 января 2010 — 10:31
Slava2
Вещь очень полезная. Просьба к модераторам: перенесите этот файл на свой сервер, дабы со временем не затерялся.
А может даже отдельную ветку создать по НР мануалам? Крайне редко встречаются они в сети.
Принтера НР400 серии, HP800 серии, 900-й, 1100-й, 1200-й,ср1700, k5400, k850, k8600 и др.
А теперь ещё и epson L800 , epson L1800.
- Наверх of the page up there ^
-
1
| Сообщение #6
Отправлено 24 января 2010 — 21:28
Episode
Нас помнят, пока мы мешаем другим.
- Наверх of the page up there ^
-
0
| Сообщение #7
Отправлено 24 января 2010 — 22:54
Slava2
Renoa, где Вы нашли мануал на плоттеры? Там не было мануалов на другие НР ?
Принтера НР400 серии, HP800 серии, 900-й, 1100-й, 1200-й,ср1700, k5400, k850, k8600 и др.
А теперь ещё и epson L800 , epson L1800.
- Наверх of the page up there ^
-
1
| Сообщение #8
Отправлено 14 апреля 2010 — 09:34
Zer-Gut
А кто нибудь пользуется HP system maintenance?
Из нее можно напечатать тестовую картинку, выровнять головы, прочистки запустить..
Что то не получается ее включить
upd: вот ссылочка на HPшном сайте с кодами
коды
HP 110+, R2400, 3хR270, c110 + DCTec sublim, Canon EOS 450D+18-55 и фикс 50-1,8II, speedlight 430 EX
- Наверх of the page up there ^
-
0
| Сообщение #9
Отправлено 14 апреля 2010 — 10:19
Slava2
а это что за зверь?
Цитата
А кто нибудь пользуется HP system maintenance?
где взяли? колитесь…
Принтера НР400 серии, HP800 серии, 900-й, 1100-й, 1200-й,ср1700, k5400, k850, k8600 и др.
А теперь ещё и epson L800 , epson L1800.
- Наверх of the page up there ^
-
1
| Сообщение #10
Отправлено 14 апреля 2010 — 10:30
Zer-Gut
взять тут
HP Designjet 110 and 110 Plus System Maintenance Utility (Software)
без нее кнопка «status of my printer» на вкладке «Services» неактивна
как я понял запускает вебитерфейс для обслуживания плоттера, т.е. процесс идет через ж.. через иха сайт
Раньше точно запускал- сейчас нивкакую..
например можно распечатать такую картинку как:
HP 110+, R2400, 3хR270, c110 + DCTec sublim, Canon EOS 450D+18-55 и фикс 50-1,8II, speedlight 430 EX
- Наверх of the page up there ^
-
0
| Сообщение #11
Отправлено 22 июня 2010 — 14:15
Renoa
Через какой сайт???7 Вы о чем? Нормально работает, могут быть проблемы под семеркой, и если у вас IE с параноей
- Наверх of the page up there ^
-
0
| Сообщение #12
Отправлено 23 июня 2010 — 09:48
Zer-Gut
Renoa (22nd June 2010 — 04:15 PM) писал:
Через какой сайт???7 Вы о чем? Нормально работает
если запускать кнопками на панели то работает. я даже листочек с кодами распечатал и на плоттер приклеил.
Если же запускать из драйвера, то требуется подключение к интернету.
тестовую картинку вроде как кнопками с панели не запустить.
HP 110+, R2400, 3хR270, c110 + DCTec sublim, Canon EOS 450D+18-55 и фикс 50-1,8II, speedlight 430 EX
- Наверх of the page up there ^
-
0
| Сообщение #13
Отправлено 23 июня 2010 — 16:27
Renoa
Не шутит так, прогрмама HP Designjet System Maintenance имеет веб интерфейс, она какой то сервер поднимает локальный, но ни какого подключения к инету не нужно!
у меня адрес выглядит так http://192.168.1.2:8190/MainMenu.html явно локальный адрес и порт, и инет специально отключала (фиг знает зачем и так понятно, что инетом и не пахнет)
- Наверх of the page up there ^
-
0
| Сообщение #14
Отправлено 29 июня 2010 — 08:54
Zer-Gut
Renoa (23rd June 2010 — 06:27 PM) писал:
Не шутит так, прогрмама HP Designjet System Maintenance имеет веб интерфейс, она какой то сервер поднимает локальный, но ни какого подключения к инету не нужно!
+1
извиняйте, что ввёл в заблуждение Проверил-всё работает.
видимо у меня какие то проблемы были, что ни с интернетом ни без него не работало. сейчас вроде ок.
HP 110+, R2400, 3хR270, c110 + DCTec sublim, Canon EOS 450D+18-55 и фикс 50-1,8II, speedlight 430 EX
- Наверх of the page up there ^
-
0
| Сообщение #15
Отправлено 28 января 2013 — 16:51
pavel.ignatenko
А не подскажите какого формата бумагу нужно ему дать, чтобы он напечатал Image Quality Test из Maintenence Utility?
А то он у меня все бумажки выплевывает. И А4 и А1, чего только не пробовали.
Спасибо.
- Наверх of the page up there ^
-
0
| Сообщение #16
Отправлено 28 января 2013 — 20:22
pavel.ignatenko
Всё… разобрался. Нужны листы формата А4, но ОБЯЗАТЕЛЬНО в лотке.
- Наверх of the page up there ^
-
0
| Сообщение #17
Отправлено 17 января 2017 — 18:09
s_p_a_w_n_666
Доброго времени суток! подскажите: в самом первом сообщении (где девушка описывает коды), есть сокращени «ПГ» — что такое «ПГ»?
- Наверх of the page up there ^
-
0
| Сообщение #18
Отправлено 17 января 2017 — 19:59
nik_2
- Наверх of the page up there ^
-
0
| Сообщение #19
Отправлено 24 января 2017 — 16:29
cannibale
а электрической принципиальной схему нигде не пролетало на 130?
Непонятно как и по чьей вине на майне оказалсь снесены напрочь 2 конденсатора и один резистор, резистор не успел потеряться, т.к. остался висеть на честном слове, а вот конденсаторов след простыл, порядковые номера элементов С5 и С6.
Пока поставил наугад, подходящие по размеру.
Canon PIXMA Pro 9000 + Epson r1800
- Наверх of the page up there ^
-
0
| Сообщение #20
Отправлено 25 января 2017 — 16:02
cannibale
все заколосилось! конденсаторы оказались некритичными по емкости, видимо просто подтяжки.
Canon PIXMA Pro 9000 + Epson r1800
- Наверх of the page up there ^
-
0
- ← Предыдущая тема
- Сервисные мануалы и утилиты для принтеров HP
- Следующая тема →
- Вы не можете создать новую тему
- Вы не можете ответить в тему
1 человек читают эту тему
0 пользователей, 1 гостей, 0 скрытых пользователей
Правила форума
Просьба ознакомиться с Правилами форума.
Также большая просьба, картинки выкладывать или в Галерею, или прикрепляйте их к своим сообщениям.
Ссылки в темах на сторонние фотохостинги (кроме вконтакте) заблокированы.


 Решила написать о плоттере Нр DesignJet 110 Plus с ошибкой 22:10 потому как может кто то столкнется с этой проблемой ….Сразу извинияюсь, если что то напишу не совсем правильно
Итак, начну с самого начала…принесли мне его как то зимой и попросили провести диагностику (полосил черный и синий цвет)… Я расстерялась, так как никогда не связывалась с плоттерами, но все же решила попробовать…Поменяла головы, промыла картриджи, почистила ролики и шестерни….И все стало отлично печатать…я успокоилась и забыла про него)
НО НЕ ТУТ ТО БЫЛО ….приносят мне его через полгода и говорят…что не работает, разберитесь пожалуйста…. Включаю на дисплее вижу гаечный ключ с отверткой, ну думаю…Гугл с Яндексом мне в помощь…. Все что мне удалось выяснить, это то что произошел сбой в станции чернил …обратитесь в поддержку НР….думаю фиг с Вами будем разбираться в следствие чего произошло…звоню клиентам и мне говорят,Вы знаете нам вот картриджи не подходили(быстро заканчиваются), и мы САМИ решили установить СНПЧ…я конечно знала, что русскому народу ничего не страшно, но чтоб САМИМ в плоттер лезть –это уж слишком….
Прочитала много разных статей (половину текста просто не понимала) самых разных авторов и проштудировав все ссылки, решилась все таки разобрать его.Добравшись до платы с фоторецепторами (может не совсем правильно выразилась -фото прилагаю)
Я АХИНЕЛА, по другому не скажешь просто…. Надеюсь все видно на приложенном фото. Мало того,что там было все залито краской,так еще и контакты разъело!!! (я так думаю чернилами, потому как больше нечему)…Предложение о замене Ink Supply Station меня не удовлетворило,и я решила попытаться ее восстановить….отмочив его в ультразвуке, а потом паяльник и хороший мастер сделали свое дело!!!
Итак по существу (по проблеме 22:10)
Скачать программу НР DesignJet system maintenance (с оф сайта Нр)
Посмотреть какая именно ошибка
В ошибке 22:10 есть два случая : 1) ошибка записи EEROM (если я не ошибаюсь,то в этом случае может помочь обновление прошивки) 2) один из датчиков окончания чернил не подает должный сигнал ( лично у меня он ругался на черный цвет в отчетах) и приниматься за ремонт ) 
Также прилагаю сканы распространенных ошибок на русском языке
Вот в принципе и все Всем удачных ремонтов! 
Все вопросы и претензии по IСQ 603596722
- За это сообщение автора Женька 116 поблагодарили: 5
- bucag, Leshka5, Plusha, standart, Vigi
-

Женька 116
- Луч света в тонерном царстве
-

![]()
Вернуться в Изба-флудильня
Кто сейчас на форуме
Сейчас этот форум просматривают: нет зарегистрированных пользователей и гости: 6
I could not find this error for your printer but found information for the 110 plus. Maybe?
Issue
The HP Designjet 110plus Printer displays the following message: error 01:13. This error is not included in the Service Manual.
Solution
Apply the Hard EEPROM Reset using the following instructions:
Apply the Hard EEPROM Reset, and upgrade the firmware to the latest version.
The Hard EEPROM Reset must be done through the Restricted Access Utilities.
WARNING: Some of the Service Utilities are restricted to HP-qualified personnel only.
To access these restricted service utilities, while the printer is switched OFF, press both the Resume and Power buttons together, until the Tool icon appears on the front panel.
If the error persists, replaces the carriage and electronic module at the same time in the following sequence:
-
Panel+Module+Power: Error 01:13
-
Panel+Module+Power+Carriage: Error 22:10
-
Panel+Module+Power+Carriage+Motor Carriage: Error 22:10
-
Panel+Module+Power+Carriage+Motor Paper Axis: Error 22:10
-
Panel+Module+Power+Ink Supply: Error 01:13
-
Panel+Module+Power+Carriage+Ink Supply: Error 21:10
-
Panel+Module+Power+Carriage+Ink Supply+Motor Carriage: Error all the icons displayed on panel.
-
Panel+Module+Power+Carriage+InkSupply+Motor Carriage+Motor Paper Axis: Initialized without problems, requests supplies.
-
Panel+Module+Power+Carriage+InkSupply+Motor Carriage+Motor Paper Axis+Ramp drive motor: Initialized without problems, requests supplies.
-
Set complete with inks and heads: initialized without problems.
See the attached on how to perform the reset on your plotter.
Коды системных ошибок отображаются на передней панели в формате XX.YZ.
Коды системных ошибок отображаются на странице информации в формате XXn.YZ.m.
XX: сервисная часть
n: индекс сервисной части (например цвет или номер)
Y: кто должен выполнить действие (пользователь или инженер)
Z: действие для выполнения
m: дополнительное действие
Таблица кодов XX
01 — Main PCA/Electronics Module (основной модуль электроники)
02 — Carriage/Carriage PCA (печатающая каретка)
03 — Power Supply Unit (блок питания)
04 — Network Card (сетевая карта)
05 — Formatter (форматер)
06 — Hard Disk Drive (жесткий диск)
07 — Interconnect PCA (подключение PCA)
08 — Front Panel (передняя панель)
11 — Trailing Cable (кабель)
12 — Carriage Flex Circuit (фрикционный контур каретки)
17 — Interconnect Cable (соединительный кабель)
21 — Service Station (станция технического обслуживания)
22 — Ink Supply Station (станция подачи чернил)
23 — Pressure System (система давления APS)
24 — Ink Delivery Tubes (трубы подачи чернил)
25 — Spittoon
26n — Ink Cartridge (картридж, где n означает цвет)
26n — Printhead (печатающая головка, где n означает цвет)
31 — Cutter (резак)
32 — Take-up Reel (приемная катушка)
33 — Sheet Feeder (податчик бумаги)
34 — Dryer/Blower (воздуходувка)
35 — Cleanout Assembly (очиститель узел)
36 — Duplexer (дуплексер)
37 — ARSS/Rollfeed
38 — Output Tray (выходной лоток)
41 — Paper-Axis Motor (бумажно-осевой электродвигатель)
42 — Scan-Axis Motor
43 — — Vacuum Fan (вакуумный вентилятор)
44 — Aerosol fan (аэрозольный вентилятор)
51 — Window Sensor (оконный датчик)
52 — Drop Detector (детектор падения)
53 — Media Sensor (датчик бумаги)
54 — Pinch-Arm Sensor (датчик зажима)
55 — Line Sensor (датчик линии)
56 — Drive Roller Encoder Sensor (датчик двигателя энкодера)
57 — Ink Leak Detector (датчик утечки чернил)
58 — Color Sensor (датчик цвета)
59 — Media Type Sensor (датчик типа бумаги)
61 — Language Interpreting (перевод языка)
62 — Input/Output through Parallel Port (вход/выход через параллейный порт)
63 — Input/Output through Network Card (вход/выход через сетевую карту)
64 — Input/Output through USB Port (вход/выход через USB порт)
65 — Input/Output (вход/выход)
66 — Print Job Configuration (настройка задания печати)
71 — Memory Management (управление памятью)
72 — Generic Firmware (общая прошивка)
73 — Motor Control Functions (функции управления двигателя)
74 — Firmware Upgrade (обновление прошивки)
79 — Firmware Crash (ошибка прошивки)
81 — Media Advance (продвижение бумаги)
82 — Media Cut (резак бумаги)
83 — Single-Sheet Feeding (подача одного листа)
84 — Roll Feeding (подача рулона)
85 — Media-Axis Encoder Reading (чтение энкодера бумаги)
86 — Carriage Movement (перемещение каретки)
87 — Scan-Axis Encoder Reading (чтение энкодера сканера)
91 — Printhead Firing (работа печатающей головки)
92 — Servicing (обслуживание)
93 — Ink Pumping (прокачка чернил)
94 — Color Calibration (калибровка цвета)
95 — Printhead Alignment (выравнивание печатающей головки)
96 — Image Quality Troubleshooting (устранение неполадок с качеством изображения)
Таблица кодов YZ
Действия для пользователя:
00 — Replace (заменить)
01 — Reseat/Reconnect/Clean/Adjust ((сброс/очистка/настройка вручную))
02 — Calibrate/Adjust (калибровка/настройка автоматически)
03 — Power OFF (выключить питание)
04 — Upgrade System Firmware (обновить прошивку системы)
05 — Upgrade Driver (обновить драйвер)
06 — Add Accessory (добавить аксессуар)
07 — Escalate (расширить)
08 — Send Plot Again (отправить снова)
09 — Wrong Part Installed (неверно установлена деталь)
Действия для инженера:
10 — Replace (заменить)
11 — Reseat/Reconnect/Clean/Adjust (сброс/очистка/настройка вручную)
12 — Calibrate/Adjust (калибровка/настройка автоматически)
13 — Power OFF (выключить питание)
14 — Upgrade System Firmware (обновить прошивку системы)
15 — Upgrade Driver (обновить драйвер)
16 — Add Accessory (добавить аксессуар)
17 — Escalate (расширить)
18 — Send Plot Again (отправить снова)
19 — Wrong Part Installed (неверно установлена деталь)
hp-concentra-wrapper-portlet
![]()
Actions
Introduction
Whenever the printer is switched on, it automatically performs a series of internal self-test and mechanical initialization sequences. If any of the printer parts fail, a system error or a system warning will occur.
note:
Unlike system errors, system warnings are not displayed on the front panel display of the printer. System warnings only appear in the Printer Status Section of the Printer Information pages, and unlike system errors, they do not interfere with the operation of the printer.
This document contains instructions for printing the Printer Information pages, and lists the system warning codes along with their descriptions and the corrective actions that are recommended for resolving them.
Retrieving system warning codes
System warning messages can be found by printing the Printer Information pages. The warnings are listed on page one.
-
On the printer’s front panel, press and hold the Power switch.
-
While still pressing the Power switch, press the OK button four times.
-
Power switch
-
OK button
Figure : Front panel of printer
-
-
Release the Power switch and the Printer Information pages will print.
Figure : Printer Information page one
Understanding the front panel error code display
System error codes are displayed on the printer’s front panel, using the lit or flashing Ink Cartridge icon bars (see the figure below). When performing a system error test, count the lit or flashing bars, which indicate a four-digit code.
Since the front panel can display only graphics, determine the error code by counting the lit bars on the front panel.
-
Failing subsystem indicators
-
Recovery action indicators
-
First two digits of error code
-
Second two digits of error code
-
Solid light indicates one digit
-
Blinking light indicates two digits
Figure : Determining the error code
System error codes consist of four digits. The first two digits explain which component/system is failing. The second two digits indicate what action should be taken to resolve the problem.
A blinking light indicates two digits in the error code.
In the figure above, the error code displayed is 7904, using the following interpretation:
-
The first indicator area displays two columns totaling seven lights.
-
The two columns in the second indicator area show eight lights and one blinking light, indicating a total of nine in this area.
-
The next area is blank, indicating zero.
-
The last area displays four lights.
System Error codes
01:10 error code
Explanation
An error has occurred with the electronics module.
Recommended action
Please call HP for technical support to troubleshoot the problem.
01:12 error code
Explanation
Electronics Module Error.
note:
This error code may also be reported as a warning code, which will not prevent continued use of the printer.
Recommended action
Please call HP for technical support to troubleshoot the problem.
02:10 error code
Explanation
A problem has occurred with the printer’s carriage assembly.
Recommended action
-
Unplug the power cable from the printer and wait a few seconds. Plug in the power cable again and check to see if the error code has disappeared.
-
If the error code reappears, please call HP for technical support to troubleshoot the problem.
04:13 error code
Explanation
A generic firmware error (network card) has occurred.
Recommended action
Unplug the power cable from the printer and wait a few seconds. Plug in the power cable again and check to see if the error code has disappeared. If the error code continues, please call HP for technical support to troubleshoot the problem.
08:11 error code
Explanation
The printer’s front panel cannot be detected.
Recommended action
Please call HP for technical support to troubleshoot the problem.
11:10 error code
Explanation
A trailing cable failure has occurred.
Recommended action
Please call HP for technical support to troubleshoot the problem.
11:11 error code
Explanation
Problems with trailing cable connection.
Recommended action
Please call HP for technical support to troubleshoot the problem.
21:10 error code
Explanation
A service station failure has occurred.
Recommended action
Please call HP for technical support to troubleshoot the problem.
22:10 error code
Explanation
An ink supply station failure has occurred.
Recommended action
Please call HP for technical support to troubleshoot the problem.
35:01 error code
Explanation
Cleanout Assembly not detected while loading
media.
Recommended action
Remove and reinstall the cleanout assembly.
-
Remove and re-install the Cleanout assembly as follows:
-
To release the Cleanout assembly, push in
the 2 buttons on either side.Figure : Release buttons
-
Remove the Cleanout assembly from the
Printer.Figure : Removing cleanout assembly
-
-
Reinstall the cleanout assembly, and attempt to verify functionality.
-
If problems persist, contact HP support.
42:10 error code
Explanation
A carriage motor failure (short-circuit) has occurred.
Recommended action
Please call HP for technical support to troubleshoot the problem.
56:10 error code
Explanation
An error has occurred during the calibration of the motor encoder system, or there was a problem finding the zero position on the encoder disc.
Recommended action
Please call HP for technical support to troubleshoot the problem.
56:13 error code
Explanation
Error during the calibration of the Line-feed motor/Encoder system or a problem finding the zero position on the Encoder disk.
Recommended action
Unplug the power cable from the printer and wait a few seconds. Plug in the power cable again and check to see if the error code has disappeared. If the error code continues, please call HP for technical support to troubleshoot the problem.
58:10 error code
Explanation
Problem detected in the Color Sensor system.
note:
This error code may also be reported as a warning code, which will not prevent continued use of the printer.
Recommended action
Please call HP for technical support to troubleshoot the problem.
61:05 error code
Explanation
Language interpreting error. This is usually an error produced while
parsing a file. There is most likely an incompatibility between the driver and
the firmware.
note:
This error code may also be reported as a warning code, which will not prevent continued use of the printer.
Recommended action
It might be necessary to upgrade either the RIP software or the Designjet System Maintenance Tool. Please call HP for technical support to troubleshoot the problem.
62:04, 63:04, 64:04 and 65:04 error code
Description
I/O module error (62 = parallel; 63 = Network; 64 = USB).
Recommended action
-
Unplug the power cable from the printer and wait a few seconds. Plug in the power cable again and check to see if the error code has disappeared.
65:01 error code
Explanation
A communication failure has occurred.
note:
This error code may also be reported as a warning code, which will not prevent continued use of the printer.
Recommended action
-
Unplug the power cable from the printer and check the cable connections (parallel, USB, network). Plug in the power cable again and check to see if the error code has disappeared.
-
If the error code reappears, please call HP for technical support to troubleshoot the problem.
71:03 error code
Description
Memory Management Error (Out of memory).
Recommended action
-
Unplug the power cable from the printer and wait a few seconds. Plug in the power cable again and check to see if the error code has disappeared.
71:14 error code
Explanation
Memory Management Error (Out of memory during firmware upgrade).
Recommended action
Unplug the power cable from the printer and wait a few seconds. Plug in the
power cable again and check if the Error Code has disappeared.
If the problem persists, call HP for technical support to troubleshoot the problem.
72:04 error code
Explanation
A generic firmware error has occurred (expected).
Recommended action
-
Unplug the power cable from the printer and wait a few seconds. Plug in the power cable again and check to see if the error code has disappeared.
74:12 error code
Explanation
Firmware Upgrade Error (Memory size check failed during firmware upgrade).
Recommended action
Please call HP for technical support to troubleshoot the problem.
79:04 error code
Explanation
An unexpected generic firmware error has occurred (unexpected).
Recommended action
-
Unplug the power cable from the printer and wait a few seconds. Plug in the power cable again and check to see if the error code has disappeared.
-
Remove switchboxes and connect the printer directly to the computer via USB or Parallel cables.
81:01 error code
Explanation
There has been a paper-axis shutdown, which is usually a paper jam caused by a blockage of the paper-axis system.
note:
This error code may also be reported as a warning code, which will not prevent continued use of the printer.
Recommended action
-
If this error code was caused by a paper jam, unplug the power cable from the printer and clear the blockage. Plug in the power cable again and check to see if the error code has disappeared. Click here for information on how to clear a paper jam.
-
If the error code appeared but was not caused by a paper jam, please call HP for technical support to troubleshoot the problem.
81:12 error code
Explanation
Recommended action
This error usually appears during the paper-advance calibration. Retry the
paper-advance calibration.
83:10 error code
Explanation
A sheet-feeding failure has occurred.
Recommended action
Please call HP for technical support to troubleshoot the problem.
85:10 error code
Explanation
A paper-axis encoder error has occurred.
Recommended action
Please call HP for technical support to troubleshoot the problem.
86:01 error code
There has been a scan-axis shutdown — usually a paper jam caused by a blockage of the scan-axis system.
Recommended action
-
Turn the printer off.
-
Open the main top cover, and check for any possible obstruction that may be preventing the carriage to move freely.
-
Remove obstruction (if found), and attempt to verify printer functionality.
-
If the problem persists, call HP for technical support to troubleshoot the problem.
86:11 error code
Explanation
Scan-axis shutdown during initialization. This error typically occurs when the printer detects an incorrect length.
Recommended action
If the Carriage stopped on the right-hand side of the Printer:
-
Check that the foam packing that secures the
Carriage during shipping has been removed. -
Make sure that the carriage is properly latched.
If the Carriage stopped in the middle of the print zone, please call HP for technical support to troubleshoot the problem.
95:00 error code
Explanation
There has been a printhead alignment failure — the printhead alignment was cancelled.
note:
This error code may also be reported as a warning code, which will not prevent continued use of the printer.
Recommended action
95:02 error code
Explanation
There has been a printhead alignment failure — the printhead alignment was cancelled.
note:
This error code may also be reported as a warning code, which will not prevent continued use of the printer.
Recommended action
-
Unplug the power cable from the printer and wait a few seconds. Plug in the power cable again and try the printhead alignment again.
-
If the error code appears again, check the printhead alignment print.
-
If the printhead alignment was printed correctly without any print defects, then check that the media is moving freely (backwards and forwards) while the printer is scanning it.
-
If the printhead alignment was printed incorrectly with some print defects, replace the faulty printhead in which the color defects were noticeable. Click here to see how to install a printhead.
95:04 error code
Explanation
There has been a firmware error during printhead alignment.
note:
This error code may also be reported as a warning code, which will not prevent continued use of the printer.
Recommended action
System Warning codes
Warnings will not be displayed on the front panel. They will appear on the Information page, allowing continued operation of the printer without the need of immediate intervention. To print an Information Page, hold the POWER button down while pressing and releasing the CONTINUE button four times.
270:00 warning code
Explanation
Recommended action
271:00 warning code
Explanation
Recommended action
272:00 warning code
Explanation
Recommended action
273:00 warning code
Explanation
Recommended action
83:01:1 warning code (applicable to HP Designjet 100plus only)
Explanation
The paper is rejected from the Bypass due to skew.
Recommended action
When manually loading paper from the front of the printer, make sure that it
is loaded straight.
83:01:3 warning code (applicable to HP Designjet 100plus only)
Explanation
The paper is rejected from the roll due to skew.
Recommended action
When loading paper from the roll, make sure that it is loaded straight.
Upgrading the firmware
-
If the System Maintenance tool is not already loaded, load from the CD shipped with the printer, or download the HP Designjet System Maintenance Tool from the Web.
-
Install the tool.
-
Open the System Maintenance tool and select Upgrade firmware.
Clearing a paper jam
-
Try pressing the CONTINUE button on the printer’s front panel. If this does not solve the problem, continue with the remaining steps.
-
Turn off the printer.
-
Remove all media from the trays. Pull out any media that is visibly stuck.
-
If the rear path through is installed, remove it by pressing the buttons on each side and pulling it out.
-
Rear path through buttons
Figure : Rear path through
-
-
Removing the rear path through provides access to the inside of the printer from the rear. Pull out any media that may be stuck inside that is accessible from the rear.
-
Replace the rear path through and make sure it fits securely.
-
Remove the back panel by pressing the two catches inwards.
-
Pull out any media that may be stuck inside.
-
Replace the back panel and make sure it fits securely.
-
Close the rear access door.
-
If the printer still reports jammed media, lift the top cover and pull out any media that may be stuck.
caution:When lifting the cover, be careful not to damage or disturb any of the tubes or other internal parts of the printer.
-
Turn the printer back on.
Cleaning the printheads
-
Select the Help button from the driver software.
-
Start the Maintenance application.
-
Select the Recover Printheads option. (This is the cleaning process.)
Installing printheads
-
Press the POWER button to turn on the printer.
-
Open the ink cartridge door at the front, right side of the printer. Continue lifting the ink cartridge door until the printheads are accessible.
-
When the printhead door is opened, the carriage assembly will briefly move left, then back right.
warning:Do not attempt to access the printheads until the carriage assembly has come to a complete stop, flush against the right side of the printer.
-
Access the printheads by lifting the latch from the rear. Pull the latch forward and down to release the latch hook. Then, lift up and push the latch toward the back of the printer.
-
Remove the printhead from the packaging. Remove the protective tape from the printhead.
-
Insert the printhead into its own color-coded socket. Firmly press the printhead into its slot.
-
Repeat Steps 5 and 6 for each of the six printheads that may need to be installed or replaced.
-
Close the printhead latch. Ensure that the hook on the printhead latch catches the carriage lock.
-
Close the printhead door, and then close the ink cartridge door.
Contact HP
Go to the Contact HP page for further assistance.
На панели управления HP DesignJet 10, 20, 30, 50, 70, 90, 100, 110, 120, 130 всего 3 кнопки, так что способ выполнения ряда сервисных команд не очевиден и не интуитивен.

1. Отмена. 2. Включение. 3. Ввод.
Для выполнения сервисных команд необходимо зажать кнопку «Включение». Затем, с зажатой клавишей, последовательно нажать несколько раз «Отмену» и «Ввод». Количество нажатий на две данных клавиши определяет функцию, которую станет исполнять принтер. После ввода комбинации клавишу «Включения» нужно отпустить.
|
Кол-во нажатий «Отмены» |
Кол-во нажатий «Ввода» | Запускаемая команда | |
| 0 | 1 | Usage Report | Печать основной информации |
| 0 | 4 | Information Pages | Печать подробной информации |
| 1 | 2 | NVM Contents Page | Печать сервисной информации |
| 0 | 3 | Printhead Alignment | Калибровка ПГ |
| 0 | 5 | Enable/Disable Buzzer | Включение/выключение динамика |
| 2 | 0 | Printhead Recovery 1 (Soft) | Быстрая очистка ПГ |
| 2 | 1 | Printhead Recovery 2 (Medium) | Стандартная очистка ПГ |
| 2 | 2 | Printhead Recovery 3 (Hard) | Глубокая прочистка ПГ |
| 2 | 3 | Transport Position | Каретка в позицию для переноса |
| 3 | 1 | Network Card Reset | Сброс сетевой карты |
Расшифровка команд
- Usage Report. Распечатка 1 страницы A4 со следующими данными: модель принтера, артикул, серийный номер, дата первого запуска, дата последнего запуска, общее количество израсходованных чернил, общее число распечатанных страниц.
- Information Pages. Распечатка 3 страниц с информацией о состоянии принтера и печатающей головки (ПГ), картриджей, сетевой карты (если есть).
- NVM Contents Page. Выгрузка данных памяти NVM, печатающей головки и картриджей (функция для сервисных инженеров, бесполезная для обычных пользователей).
- Printhead Alignment. Калибровка ПГ, распечатывает тестовую страницу с квадратами и чёрточками разных цветов.
- Enable/Disable Buzzer. Включение и выключение звуковых сигналов динамика на принтере.
- Printhead Recovery 1/2/3 (Soft/Medium/Hard). Запуск процедуры прочистки печатающей головки 1/2/3 (быстрая/средняя/глубокая).
- Transport Position. Перевод каретки в позицию для транспортировки (переноса) принтера.
- Network Card Reset. Сброс сетевой карты до заводских настроек.
Связаны со статьей
Сервисный мануал и коды на Designjet 110+, 120, 130
HP Designjet 110, 130 Service Manual
| Сообщение #1
Отправлено 23 января 2010 — 17:32
Для начала, сервисные коды на этих плоттерах вводятся при нажатой клопке повер, нажатием кнопок Ok (галочка) и Отмена (крестик):
Первый столбик обозначает кол-во нажатий кнопки отмена, второй столбик — кол-во нажатий кнопки Ok:
0 1 Usage report (распечатает информацию по распечатанным листам, колличество, качество печати, тип бумаги — 1 лист А4)
0 4 Information pages (распечатает информацию по картриджам и головкам, последние выполнение задания и ошибки — 2 листа А4, если у вас есть сетевая карта то будет 3 страницы)
1 2 NVM contents page (распечатает 16-деричные дампы (как я поняла чего то с картриджей) — 3 (или 4) листа А4)
0 3 Printhead alignment (калибровка ПГ, та же процедура, что и при установке новой ПГ — печать листа с квадратиками и галочками — от 1 до 5 листов А4, у меня почему то всегда 1)
0 5 Enable/Disable buzzer (включает, отключает звук у этого плоттера, супер штука, а оф. сервисный центр в моем городе заявил, что это нельзя сделать )
2 0 Printhead recovery 1 (Soft) (Очистка ПГ, слабая)
2 1 Printhead recovery 2 (Medium) (очистка ПГ средняя)
2 2 Printhead recovery 1 (Hard) (очистка ПГ тяжелая)
2 3 Transport position (перевод каретки в позицию для транспортировки, сама не рассматривала)
3 1 Network card reset (сброс сетевой карты, у меня на USB так что то же не проверяла)
Встречались другие коды, но при их наборе ни чего кроме установки бумаги не происходило, так что их назначение мне не понятно
странно что нет кода для печати теста ПГ
- Наверх of the page up there ^
-
1
| Сообщение #2
Отправлено 23 января 2010 — 18:31
Slava2
возможно код проверки дюз спрятан намного дальше
Код 83 или 84 не пробовали?
Я встречал коды даже посе 11 — 4
Принтера НР400 серии, HP800 серии, 900-й, 1100-й, 1200-й,ср1700, k5400, k850, k8600 и др.
А теперь ещё и epson L800 , epson L1800.
- Наверх of the page up there ^
-
1
| Сообщение #3
Отправлено 23 января 2010 — 19:04
Renoa
11 — 4 набрать нельзя
там если по простому, то нажимая на отмены вы набираете десятки, на Ок — еденицы (то есть любой код можно 1 кнопкой набрать, просто долго), коды больше 99 нет, следующий за ним — 1 а не сотый (и печатает соответственно статистику листов распечатанных с принтера). Возможно есть еще какой то способ вызыва системных команд.
9Х какой то точно есть (седня нашла, но там просто бумажка поставилась и ни чего он не печатал), какой точно сейчас не скажу (плоттеры на работе и список команд то же, а я дома сейчас)
- Наверх of the page up there ^
-
0
| Сообщение #4
Отправлено 23 января 2010 — 21:43
Renoa
а вот и ссылка на сервис мануал для принтеров указанных в заголовке темы
лично мне понравилось, как написан.
http://letitbit.net/download/2334.cd260e05…ow_end.pdf.html (вес 13 с небольшим Мб)
- Наверх of the page up there ^
-
0
| Сообщение #5
Отправлено 24 января 2010 — 10:31
Slava2
Вещь очень полезная. Просьба к модераторам: перенесите этот файл на свой сервер, дабы со временем не затерялся.
А может даже отдельную ветку создать по НР мануалам? Крайне редко встречаются они в сети.
Принтера НР400 серии, HP800 серии, 900-й, 1100-й, 1200-й,ср1700, k5400, k850, k8600 и др.
А теперь ещё и epson L800 , epson L1800.
- Наверх of the page up there ^
-
1
| Сообщение #6
Отправлено 24 января 2010 — 21:28
Episode
Нас помнят, пока мы мешаем другим.
- Наверх of the page up there ^
-
0
| Сообщение #7
Отправлено 24 января 2010 — 22:54
Slava2
Renoa, где Вы нашли мануал на плоттеры? Там не было мануалов на другие НР ?
Принтера НР400 серии, HP800 серии, 900-й, 1100-й, 1200-й,ср1700, k5400, k850, k8600 и др.
А теперь ещё и epson L800 , epson L1800.
- Наверх of the page up there ^
-
1
| Сообщение #8
Отправлено 14 апреля 2010 — 09:34
Zer-Gut
А кто нибудь пользуется HP system maintenance?
Из нее можно напечатать тестовую картинку, выровнять головы, прочистки запустить..
Что то не получается ее включить
upd: вот ссылочка на HPшном сайте с кодами
коды
HP 110+, R2400, 3хR270, c110 + DCTec sublim, Canon EOS 450D+18-55 и фикс 50-1,8II, speedlight 430 EX
- Наверх of the page up there ^
-
0
| Сообщение #9
Отправлено 14 апреля 2010 — 10:19
Slava2
а это что за зверь?
Цитата
А кто нибудь пользуется HP system maintenance?
где взяли? колитесь…
Принтера НР400 серии, HP800 серии, 900-й, 1100-й, 1200-й,ср1700, k5400, k850, k8600 и др.
А теперь ещё и epson L800 , epson L1800.
- Наверх of the page up there ^
-
1
| Сообщение #10
Отправлено 14 апреля 2010 — 10:30
Zer-Gut
взять тут
HP Designjet 110 and 110 Plus System Maintenance Utility (Software)
без нее кнопка «status of my printer» на вкладке «Services» неактивна
как я понял запускает вебитерфейс для обслуживания плоттера, т.е. процесс идет через ж.. через иха сайт
Раньше точно запускал- сейчас нивкакую..
например можно распечатать такую картинку как:
HP 110+, R2400, 3хR270, c110 + DCTec sublim, Canon EOS 450D+18-55 и фикс 50-1,8II, speedlight 430 EX
- Наверх of the page up there ^
-
0
| Сообщение #11
Отправлено 22 июня 2010 — 14:15
Renoa
Через какой сайт???7 Вы о чем? Нормально работает, могут быть проблемы под семеркой, и если у вас IE с параноей
- Наверх of the page up there ^
-
0
| Сообщение #12
Отправлено 23 июня 2010 — 09:48
Zer-Gut
Renoa (22nd June 2010 — 04:15 PM) писал:
Через какой сайт???7 Вы о чем? Нормально работает
если запускать кнопками на панели то работает. я даже листочек с кодами распечатал и на плоттер приклеил.
Если же запускать из драйвера, то требуется подключение к интернету.
тестовую картинку вроде как кнопками с панели не запустить.
HP 110+, R2400, 3хR270, c110 + DCTec sublim, Canon EOS 450D+18-55 и фикс 50-1,8II, speedlight 430 EX
- Наверх of the page up there ^
-
0
| Сообщение #13
Отправлено 23 июня 2010 — 16:27
Renoa
Не шутит так, прогрмама HP Designjet System Maintenance имеет веб интерфейс, она какой то сервер поднимает локальный, но ни какого подключения к инету не нужно!
у меня адрес выглядит так http://192.168.1.2:8190/MainMenu.html явно локальный адрес и порт, и инет специально отключала (фиг знает зачем и так понятно, что инетом и не пахнет)
- Наверх of the page up there ^
-
0
| Сообщение #14
Отправлено 29 июня 2010 — 08:54
Zer-Gut
Renoa (23rd June 2010 — 06:27 PM) писал:
Не шутит так, прогрмама HP Designjet System Maintenance имеет веб интерфейс, она какой то сервер поднимает локальный, но ни какого подключения к инету не нужно!
+1
извиняйте, что ввёл в заблуждение Проверил-всё работает.
видимо у меня какие то проблемы были, что ни с интернетом ни без него не работало. сейчас вроде ок.
HP 110+, R2400, 3хR270, c110 + DCTec sublim, Canon EOS 450D+18-55 и фикс 50-1,8II, speedlight 430 EX
- Наверх of the page up there ^
-
0
| Сообщение #15
Отправлено 28 января 2013 — 16:51
pavel.ignatenko
А не подскажите какого формата бумагу нужно ему дать, чтобы он напечатал Image Quality Test из Maintenence Utility?
А то он у меня все бумажки выплевывает. И А4 и А1, чего только не пробовали.
Спасибо.
- Наверх of the page up there ^
-
0
| Сообщение #16
Отправлено 28 января 2013 — 20:22
pavel.ignatenko
Всё… разобрался. Нужны листы формата А4, но ОБЯЗАТЕЛЬНО в лотке.
- Наверх of the page up there ^
-
0
| Сообщение #17
Отправлено 17 января 2017 — 18:09
s_p_a_w_n_666
Доброго времени суток! подскажите: в самом первом сообщении (где девушка описывает коды), есть сокращени «ПГ» — что такое «ПГ»?
- Наверх of the page up there ^
-
0
| Сообщение #18
Отправлено 17 января 2017 — 19:59
nik_2
- Наверх of the page up there ^
-
0
| Сообщение #19
Отправлено 24 января 2017 — 16:29
cannibale
а электрической принципиальной схему нигде не пролетало на 130?
Непонятно как и по чьей вине на майне оказалсь снесены напрочь 2 конденсатора и один резистор, резистор не успел потеряться, т.к. остался висеть на честном слове, а вот конденсаторов след простыл, порядковые номера элементов С5 и С6.
Пока поставил наугад, подходящие по размеру.
Canon PIXMA Pro 9000 + Epson r1800
- Наверх of the page up there ^
-
0
| Сообщение #20
Отправлено 25 января 2017 — 16:02
cannibale
все заколосилось! конденсаторы оказались некритичными по емкости, видимо просто подтяжки.
Canon PIXMA Pro 9000 + Epson r1800
- Наверх of the page up there ^
-
0
- ← Предыдущая тема
- Сервисные мануалы и утилиты для принтеров HP
- Следующая тема →
- Вы не можете создать новую тему
- Вы не можете ответить в тему
1 человек читают эту тему
0 пользователей, 1 гостей, 0 скрытых пользователей
 Одной из первых моделей в линейке designjet у которых табло стало выдавать системные ошибки является 500 модель (hp designjet500). Ниже приводится таблица ошибок от данной модели.
До сегодняшнего дня после 500 модели вышло огромное количество других моделей, изменился и дизайн и оформление и скорость печати самих плоттеров. Неизменными остались только ошибки плоттеров, не считая мелких поправок и изменений. Но в общих чертах все без изменений.
Каждая ошибка содержит комбинацию из четырех цифр АА:ББ
Внимание! Уважаемые посетители нашего сайта, рады Вам предложить акцию от компании Дока-Сервис!
Кликайте на фото

Ниже приводятся 3 таблицы, по которым можно определить характер ошибки и причину ее возникновения.
таблица АА
| АА | Деталь плоттера Component/System | |
| ENGLISH | РУССКИЙ | |
| 01 | Main PCA/Electronics Module | Главный модуль PCA / плата электроники |
| 02 | Carriage/Carriage PCA | Каретка PCA |
| 03 | Power Supply Unit | Блок питания |
| 04 | Network Card | Сетевая карта |
| 05 | Formatter | Форматер |
| 06 | Hard Disk Drive | Жесткий диск |
| 07 | Interconnect PCA | Плата управления PCA |
| 08 | Front Panel | Панель управления |
| 11 | Trailing Cable | Шлейф каретки |
| 12 | Carriage Flex Circuit | Контакты печатающих головок |
| 17 | Interconnect Cable | Кабель платы управления |
| 21 | Service Station | Станция обслуживания, бункер отработки |
| 22 | Ink Supply Station | Станция подкачки чернил |
| 23 | Pressure System (APS) | Система давления APS |
| 24 | Ink Delivery System | Система поставки чернил |
| 25 | Spittoon | Губка-впитыватель чернил |
| 31 | Cutter | Нож, резак |
| 32 | Take-up Reel | Натяжитель |
| 33 | Sheet Feeder | Устройство подачи бумаги |
| 34 | Dryer/Blower | Вентилятор сушки |
| 41 | Paper-Axis Motor | Двигатель оси протяжки бумаги |
| 42 | Scan-Axis Motor | Двигатель привода ремня каретки |
| 43 | Vacuum Fan | Вакуумный вентилятор |
| 44 | Aerosol fan | Вентилятор аэрозоля |
| 51 | Window Sensor | Датчик открытия главной крышки |
| 52 | Drop Detector | Датчик вспрыска |
| 53 | Media Sensor | Датчик наличия бумаги |
| 54 | Pinch-Arm Sensor | Датчик ручки прижима рулона |
| 55 | Line Sensor | Датчик линейки позиционирования |
| 56 | Drive Roller Encoder Sensor | Датчик квадратуры оси протяжки рулона |
| 57 | Ink Leak Detector | Датчик расхода чернил |
| 58 | Color Sensor | Датчик цвета |
| 59 | Media Type Sensor | Датчик вида носителя |
| 61 | Language Interpreting | Языковая интерпретация |
| 62 | Input/Output through Parallel Port | Ввод-вывод параллельного порта |
| 63 | Input/Output through Network Card | Ввод-вывод сетевой карты |
| 64 | Input/Output through USB Port | Ввод-вывод USB порта |
| 65 | Input/Output | Ввод-вывод |
| 71 | Memory Management | Управление памяти |
| 72 | Generic Firmware | Общие микропрограммы |
| 73 | Servo | Контроль |
| 79 | Assertion | Внутрений контроль |
| 81 | Media Advance | Механизм носителя |
| 82 | Media Cut | Отрез носителя |
| 83 | Single-Sheet Feeding | Подача одиночного листа |
| 84 | Roll Feeding | Подача рулона |
| 85 | Media-Axis Encoder Reading | Датчик оборотов двигателя оси |
| 86 | Carriage Movement | Передвижение каретки |
| 87 | Scan-Axis Encoder Reading | Датчик оборотов двигателя привода ремня |
| 91 | Printhead Firing | Вспрыск печатающей головы |
| 92 | Servicing | Обслуживание |
| 93 | Ink Pumping | Помпа давления чернил |
таблица ББ
Possible for customer to perform action
Действие может быть выполнено пользователем
| ББ | Действие Recovery Action | |
| ENGLISH | РУССКИЙ | |
| 00 | Replace | Заменить |
| 01 | Reseat/(manually)Reconnect/Clean/Adjust | Переустановить / Переподключить / Очистить / Отрегулировать |
| 02 | Calibrate/Adjust (using Automatic Process) | Откалибровать / Отрегулировать |
| 03 | Power OFF | Отключить питание |
| 04 | Upgrade System Firmware | Обновить прошивку |
| 05 | Upgrade Driver | Обновить драйвер |
| 06 | Add Accessory | Добавить дополнительные модули |
| 07 | Escalate | Расширить память |
| 08 | Send Plot Again | Отправить печать заново |
| 09 | Wrong Part Installed | Установлен неправильный модуль |
талица ББ
On-Site visit required
Требуется вмешательство специалиста
| ББ | Действие Recovery Action | |
| ENGLISH | РУССКИЙ | |
| 10 | Replace | Заменить |
| 11 | Reseat/(manually)Reconnect/Clean/Adjust | Переустановить / Переподключить / Очистить / Отрегулировать |
| 12 | Calibrate/Adjust (using Automatic Process) | Откалибровать / Отрегулировать |
| 13 | Power OFF | Отключить питание |
| 14 | Upgrade System Firmware | Обновить прошивку |
| 15 | Upgrade Driver | Обновить драйвер |
| 16 | Add Accessory | Добавить дополнительные модули |
| 17 | Escalate | Расширить память |
| 18 | Send Plot Again | Отправить печать заново |
| 19 | Wrong Part Installed | Установлен неправильный модуль |
Руководствуясь данной таблицей можно самостоятельно решить большинство проблем с ошибками плоттеров. Не компетентное вмешательство может привести к серьезной проблеме. Компания не несет ответственность если пользователь руководствуясь таблицей ошибок сам разобрал плоттер пытаясь его реанимировать, а в результате сделал еще хуже. Ремонт дорогой и профессиональной техники лучше предоставить опытному сервисному инженеру.
Примеры самых распространенных ошибок плоттеров HP designjet
| Код ошибки | Действия |
|
01:10 01.1:10 |
Самая серьезная ошибка, которая говорит, что вышел из строя главный модуль плоттера или проще материнская плата. Ремонту не подлежит, блок электроники меняется целиком. |
| 02:10 02.1:10 |
Причина, вышла из строя плата каретки. Ремонту не подлежит, замена каретки в сборе. |
| 03:10 | Проблема с блоком питания. иногда возможен ремонт, либо установка нового блока питания. |
| 05:10 |
Часто возникает среди моделей HP Designjet 500, 510 и 800, в которых установлена плата расширения, либо плата форматтера, в зависимости от модели. Выходит из строя либо сама плата или жесткий диск, который используется в некоторых моделях. Лечится заменой вышедшего из строя элемента. |
| 08:11 |
Обычно возникают в моделях Т и Z сериях. Передняя панель при старте не может найти связь с платой форматтера. Решение-смотреть ошибку 05:10 |
| 11:11 | В процессе непрерывной работы изнашивается подвижный кабель передачи информации между электронным модулем и блоком каретки. Лечится заменой шлейфа, меняются обе жилы. |
| 21:10 или 21:13 | Связана с выходом из строя сервисной станции (бункер отработки). Возникновение ошибки можно избежать своевременной профилактикой вашего плоттера раз в 1,5-2г. Применимо в моделях 100-х серий, 500, 510 и 800 моделях. В Т и Z сериях только под замену. |
| 22:10 или 22:13 |
Часто возникает при использовании СНПЧ, происходит утечка чернил, заливается плата управления узла подачи чернил (Ink Sistem) и узел выходит из строя, также риск возникновения увеличивается при использовании не оригинальных или заправляемых картриджей, чипы которых также сжигают электронику данного узла. И очень редко от времени и физического износа. Устраняется ошибка заменой узла целиком. |
| 41:10 или 41:13 |
Возникает при сбоях работы двигателя протяжки рулона. Требуется заменить двигатель. |
| 47:01 |
Возникает только в моделях Т и Z сериях. Выходит из строя двигатель, отвечающий за движение планки прижима рулона. На двигателе имеются три передаточные шестерни сидящие на хрупких осях, которые со временем просто обламываются от нагрузки. Устраняется заменой двигателя прижима рулона. |
| 61:05 |
Обычно возникает у старых моделях из за нехватки памяти при обработке задания. Часто пропадает после установки дополнительной карты памяти. |
| 79:04 |
Так же ошибка обработки задания, только причина ошибки связана или с прошивкой, или с просроченными расходниками (печатающие головы либо картриджи). Устраняется соответственно либо обновлением микропрограммы, либо заменой просроченного расходника. |
| 81:01 | Неверное позиционирование по оси Y. Выходит из строя плата квадратуры считывающая информацию о перемещении рулона вперед-назад. Замена платы квадратуры (датчик энкодера). |
| 86:01 |
Самая интересная ошибка, которая в документации характеризуется как ошибка замятия бумаги, которой в большинстве случаях и в помине нет. Работал плоттер и встал. А возникает всегда при отклонении движения каретки по оси следования. То есть проще говоря, все что мешает движению каретки приводит к сбою и возникновению данной ошибки. К примеру каретка подмяла лист и каретка встала-ошибка. Сервисная станция не ушла до конца в посадочное место, каретка при движении опять ударятся в парковку, действие не закончено-ошибка. Износ ремня привода каретки ,шаги перемещения ремня не соответствуют реальному передвижению-ошибка, износ ленты позиционирования, опять каретка не считывает свое местоположение-ошибка, либо перелом шлейфа каретки, который подминается под каретку при движении-опять ошибка. В данном случае квалифицированный подход, выявление причины, устранение дефекта и установка новой детали. |
| Ошибка принтера или системы печати Данная ошибка выскакивает только в плоттерах серии DesignJet T120 и T520. У данной ошибки нет нумерации, так как ошибка может быть связана с несколькими узлами. Это сама печатающая головка, потом картриджи, плата каретки и шлейф каретки. Более подробно и детально данная ошибка описана в нашей статье. |
|
| Ошибка загрузки носителя HP DesignJet T520 | T525 | T530| T120 | T125 | T130 |
По каждой модели есть отдельные статьи с видео-материалами, детально описаны ошибки и полезный контент. Если Вам нужна помощь пишите в чат, поможем с навигацией намного быстрее.
Если Вы не нашли нужную информацию выше, то из таблицы выберите Вашу модель плоттера и попадёте на список системных ошибок связанные с плоттером и методы их решения.
| — hp designjet 100 | — hp designjet T125 | — hp designjet T1120 | — hp designjet Z2100 |
| — hp designjet 110 | — hp designjet T130 | — hp designjet T1200 | — hp designjet Z2600 |
| — hp designjet 111 | — hp designjet T520 | — hp designjet T1300 | — hp designjet Z3100 |
| — hp designjet 130 | — hp designjet T525 | — hp designjet T1500 | — hp designjet Z3200 |
| — hp designjet 430 | — hp designjet T530 | — hp designjet T1530 | — hp designjet Z5200 |
| — hp designjet 500 | — hp designjet T610 | — hp designjet T1600 | — hp designjet Z5400 |
| — hp designjet 510 | — hp designjet T620 | — hp designjet T1700 | — hp designjet Z5600 |
| — hp designjet 800 | — hp designJet T730 | — hp designjet T1708 | — hp designjet Z6100 |
| — hp designjet 1050 | — hp designjet T770 | — hp designjet T2300 | — hp designjet Z6200 |
| — hp designjet 1055 | — hp designjet T790 | — hp designjet T2500 | — hp designjet Z6600 |
| — hp designjet 4000 | — hp designjet T795 | — hp designjet T2530 | — hp designjet Z6800 |
| — hp designjet 4500 | —hp designJet T830 | — hp designjet T2600MFP | — hp designjet Z6 |
| — hp designjet 5000 | — hp designjet T920 | — hp designjet T3500 | — hp designjet Z9+ |
| — hp designjet 5500 | — hp designjet T930 | — hp designjet T7100 | — hp designjet D5800 |
| — hp designjet T120 | — hp designjet T1100 | — hp designjet T7200 | — hp designjet L26500 |
 Для увеличения кликайте на фото
 |
 |
 |
 |
 |
 |
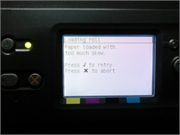 |
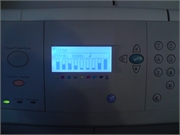 |
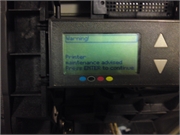 |
 |
 |
 |
 |
 |
 |
 |
 |
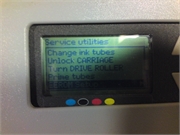 |
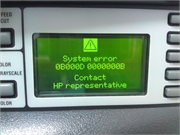 |
Если вы столкнулись с такими проблемами, свяжитесь с нами по телефонам : 8 ( 499 ) 720 — 60 — 20
Консультация специалиста : 8 ( 925 ) 090 — 60 — 50
Либо заполните форму заявки о неисправности вашего аппарата
Будем рады Вам помочь!
Для навигации по сайту Вы можете писать в онлайн чат, наши консультанты с удовольствием Вам помогут.
Вернуться в главное меню 
Правила форума
Просьба ознакомиться с Правилами форума.
Также большая просьба, картинки выкладывать или в Галерею, или прикрепляйте их к своим сообщениям.
Ссылки в темах на сторонние фотохостинги (кроме вконтакте) заблокированы.
Решила написать о плоттере Нр DesignJet 110 Plus с ошибкой 22:10 потому как может кто то столкнется с этой проблемой ….Сразу извинияюсь, если что то напишу не совсем правильно
Итак, начну с самого начала…принесли мне его как то зимой и попросили провести диагностику (полосил черный и синий цвет)… Я расстерялась, так как никогда не связывалась с плоттерами, но все же решила попробовать…Поменяла головы, промыла картриджи, почистила ролики и шестерни….И все стало отлично печатать…я успокоилась и забыла про него)
НО НЕ ТУТ ТО БЫЛО ….приносят мне его через полгода и говорят…что не работает, разберитесь пожалуйста…. Включаю на дисплее вижу гаечный ключ с отверткой, ну думаю…Гугл с Яндексом мне в помощь…. Все что мне удалось выяснить, это то что произошел сбой в станции чернил …обратитесь в поддержку НР….думаю фиг с Вами будем разбираться в следствие чего произошло…звоню клиентам и мне говорят,Вы знаете нам вот картриджи не подходили(быстро заканчиваются), и мы САМИ решили установить СНПЧ…я конечно знала, что русскому народу ничего не страшно, но чтоб САМИМ в плоттер лезть –это уж слишком….
Прочитала много разных статей (половину текста просто не понимала) самых разных авторов и проштудировав все ссылки, решилась все таки разобрать его.Добравшись до платы с фоторецепторами (может не совсем правильно выразилась -фото прилагаю)
Я АХИНЕЛА, по другому не скажешь просто…. Надеюсь все видно на приложенном фото. Мало того,что там было все залито краской,так еще и контакты разъело!!! (я так думаю чернилами, потому как больше нечему)…Предложение о замене Ink Supply Station меня не удовлетворило,и я решила попытаться ее восстановить….отмочив его в ультразвуке, а потом паяльник и хороший мастер сделали свое дело!!!
Итак по существу (по проблеме 22:10)
Скачать программу НР DesignJet system maintenance (с оф сайта Нр)
Посмотреть какая именно ошибка
В ошибке 22:10 есть два случая : 1) ошибка записи EEROM (если я не ошибаюсь,то в этом случае может помочь обновление прошивки) 2) один из датчиков окончания чернил не подает должный сигнал ( лично у меня он ругался на черный цвет в отчетах) и приниматься за ремонт )
Также прилагаю сканы распространенных ошибок на русском языке
Вот в принципе и все Всем удачных ремонтов!
Все вопросы и претензии по IСQ 603596722
- За это сообщение автора Женька 116 поблагодарили: 5
- bucag, Leshka5, Plusha, standart, Vigi
-
Женька 116
- Луч света в тонерном царстве
-
![]()
Вернуться в Изба-флудильня
Кто сейчас на форуме
Сейчас этот форум просматривают: нет зарегистрированных пользователей и гости: 6