Download Windows Speedup Tool to fix errors and make PC run faster
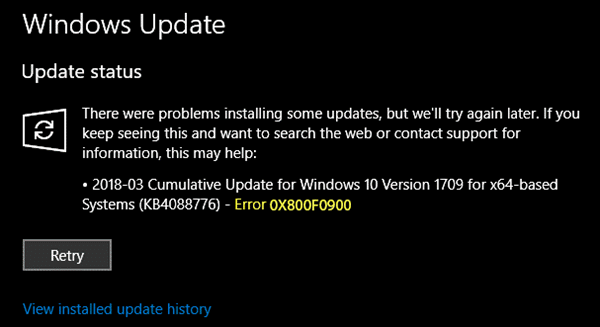
When trying to update or upgrade Windows 11/10 using Windows Update, if you encounter an Error 0x800f0900, the problem is probably due to some corrupted files that are on your system. The chances are that the Windows Database may have been corrupted. If you face this issue, this post is sure to help you.
1] Run DISM Tool
When you run DISM (Deployment Imaging and Servicing Managemen) tool it will repair Windows System Image and Windows Component Store in Windows 10. All of the system inconsistencies and corruptions should be fixed.
2] Run System File Checker
Run System File Checker. This will repair corrupted or damaged Windows files. You will need to run this command from elevated CMD, i.e., command prompt launched with admin privileges.
3] Run Windows Update Troubleshooter

Run this Windows Update troubleshooter to fix most common Update problems on Windows 10.
4] Reset SoftwareDistribution & Catroot2 folders
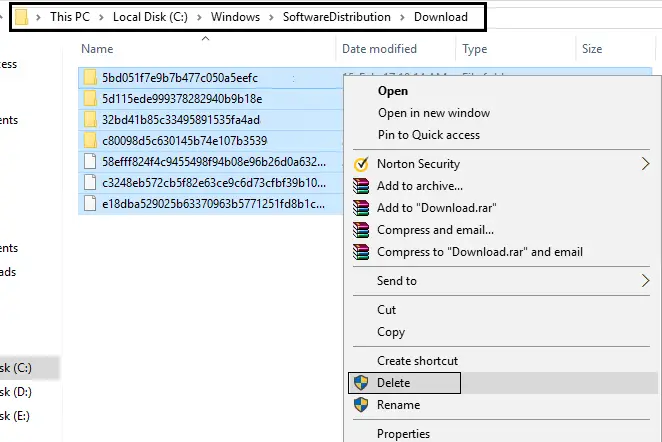
You need to delete the contents of SoftwareDistribution folder. All the update files are downloaded inside the Software Distribution folder which is located at C:\Windows\SoftwareDistribution. First, delete all the files in it after pausing Windows Update Services. Second, try restarting the computer multiple times to see if the update process automatically starts.
You should also reset the Catroot2 folder which stores the signatures of the Windows Update package and helps in its installation.
5] System Restore
Lastly, you can try System Restore to get back to a working state of Windows, and then initiate the download again. If you have been creating restore point frequently, it’s going to help.
Let us know if this helped you to fix Windows Update Error 0x800f0900.
Anand Khanse is the Admin of TheWindowsClub.com, a 10-year Microsoft MVP (2006-16) & a Windows Insider MVP (2016-2022). Please read the entire post & the comments first, create a System Restore Point before making any changes to your system & be careful about any 3rd-party offers while installing freeware.
Ошибка 0x800f0900 может возникнуть во время установки кумулятивного обновления для Windows 10. Зачастую пользователи жалуются на эту ошибку, когда пытаются установить апдейт KB4464218, но это может происходить и с другими пакетами, например, KB4056887.
0x800f0900 — вполне типичная ошибка для Центра обновления (WU), которая решается набором давно проверенных способов. Средство устранения неполадок, SFC и DISM, полный сброс компонентов WU — вот что мы сейчас с вами рассмотрим ниже.
Решение ошибки 0x800f0900
Способ №1 Средство устранения неполадок
Запуск средства устранения неполадок — это самое первое, что вы должны попробовать в случае появление 0x800f0900 и других подобных ошибок. Делается это следующим образом:
- нажмите Win+I для вызова окошка с параметрами системы;
- откройте раздел «Обновление и безопасность»;
- перейдите во вкладку (подраздел) «Устранение неполадок»;
- выберите пункт «Центр обновления Windows» и кликните на «Запустить средство устранения неполадок»;
- следуйте инструкциям на экране.
Перезагрузите компьютер после использования средства устранения неполадок, после чего еще раз запустите обновление Windows 10.
Способ №2 Запуск SFC и DISM
Поврежденные системные файлы легко могут самые разные проблемы для системы, включая и различные ошибки при обновлении. Мы рекомендуем воспользоваться SFC и DISM, чтобы восстановить потенциальные повреждения. Сделайте следующее:
- нажмите Win+R;
- пропишите cmd и нажмите Ctrl+Shift+Enter;
- открыв командную строку (от администратора), впишите команду sfc /scannow и нажмите Enter;
- подождите окончания работы команды и перезагрузите ПК;
- снова откройте командную строку;
- выполните команду DISM /Online /Cleanup-Image /RestoreHealth;
- перезагрузите компьютер.
Проверьте, была ли исправлена ошибка 0x800f0900 при обновлении Windows 10.
Способ №3 Сброс компонентов Центра обновления (WU)
Сброс компонентов Центра обновления — способ, который зачастую решает все неполадки во время апдейта Windows 10. Обычно, пользователя выполняют его с помощью особого набора команд, которые вводятся, как несложно догадаться, в Командную строку. Тем не менее в сети можно найти кучу смышленых ребят, которые составили скрипты для автоматизированного выполнения подобного процесса.
Откройте самый обычный Блокнот (Win+R→notepad) и вставьте в него следующий скрипт:
:: Run the reset Windows Update components.
:: void components();
:: /*************************************************************************************/
:components
:: —— Stopping the Windows Update services ——
call :print Stopping the Windows Update services.
net stop bitscall :print Stopping the Windows Update services.
net stop wuauservcall :print Stopping the Windows Update services.
net stop appidsvccall :print Stopping the Windows Update services.
net stop cryptsvccall :print Canceling the Windows Update process.
taskkill /im wuauclt.exe /f
:: —— Checking the services status ——
call :print Checking the services status.sc query bits | findstr /I /C:»STOPPED»
if %errorlevel% NEQ 0 (
echo. Failed to stop the BITS service.
echo.
echo.Press any key to continue . . .
pause>nul
goto :eof
)call :print Checking the services status.sc query wuauserv | findstr /I /C:»STOPPED»
if %errorlevel% NEQ 0 (
echo. Failed to stop the Windows Update service.
echo.
echo.Press any key to continue . . .
pause>nul
goto :eof
)call :print Checking the services status.
sc query appidsvc | findstr /I /C:»STOPPED»
if %errorlevel% NEQ 0 (
sc query appidsvc | findstr /I /C:»OpenService FAILED 1060″
if %errorlevel% NEQ 0 (
echo. Failed to stop the Application Identity service.
echo.
echo.Press any key to continue . . .
pause>nul
if %family% NEQ 6 goto :eof
)
)call :print Checking the services status.
sc query cryptsvc | findstr /I /C:»STOPPED»
if %errorlevel% NEQ 0 (
echo. Failed to stop the Cryptographic Services service.
echo.
echo.Press any key to continue . . .
pause>nul
goto :eof
):: —— Delete the qmgr*.dat files ——
call :print Deleting the qmgr*.dat files.del /s /q /f «%ALLUSERSPROFILE%\Application Data\Microsoft\Network\Downloader\qmgr*.dat»
del /s /q /f «%ALLUSERSPROFILE%\Microsoft\Network\Downloader\qmgr*.dat»:: —— Renaming the softare distribution folders backup copies ——
call :print Deleting the old software distribution backup copies.cd /d %SYSTEMROOT%
if exist «%SYSTEMROOT%\winsxs\pending.xml.bak» (
del /s /q /f «%SYSTEMROOT%\winsxs\pending.xml.bak»
)
if exist «%SYSTEMROOT%\SoftwareDistribution.bak» (
rmdir /s /q «%SYSTEMROOT%\SoftwareDistribution.bak»
)
if exist «%SYSTEMROOT%\system32\Catroot2.bak» (
rmdir /s /q «%SYSTEMROOT%\system32\Catroot2.bak»
)
if exist «%SYSTEMROOT%\WindowsUpdate.log.bak» (
del /s /q /f «%SYSTEMROOT%\WindowsUpdate.log.bak»
)call :print Renaming the software distribution folders.
if exist «%SYSTEMROOT%\winsxs\pending.xml» (
takeown /f «%SYSTEMROOT%\winsxs\pending.xml»
attrib -r -s -h /s /d «%SYSTEMROOT%\winsxs\pending.xml»
ren «%SYSTEMROOT%\winsxs\pending.xml» pending.xml.bak
)
if exist «%SYSTEMROOT%\SoftwareDistribution» (
attrib -r -s -h /s /d «%SYSTEMROOT%\SoftwareDistribution»
ren «%SYSTEMROOT%\SoftwareDistribution» SoftwareDistribution.bak
if exist «%SYSTEMROOT%\SoftwareDistribution» (
echo.
echo. Failed to rename the SoftwareDistribution folder.
echo.
echo.Press any key to continue . . .
pause>nul
goto :eof
)
)
if exist «%SYSTEMROOT%\system32\Catroot2» (
attrib -r -s -h /s /d «%SYSTEMROOT%\system32\Catroot2»
ren «%SYSTEMROOT%\system32\Catroot2» Catroot2.bak
)
if exist «%SYSTEMROOT%\WindowsUpdate.log» (
attrib -r -s -h /s /d «%SYSTEMROOT%\WindowsUpdate.log»
ren «%SYSTEMROOT%\WindowsUpdate.log» WindowsUpdate.log.bak
):: —— Reset the BITS service and the Windows Update service to the default security descriptor ——
call :print Reset the BITS service and the Windows Update service to the default security descriptor.sc.exe sdset wuauserv D:(A;;CCLCSWLOCRRC;;;AU)(A;;CCDCLCSWRPWPDTLOCRSDRCWDWO;;;BA)(A;;CCDCLCSWRPWPDTLCRSDRCWDWO;;;SO)(A;;CCLCSWRPWPDTLOCRRC;;;SY)S:(AU;FA;CCDCLCSWRPWPDTLOCRSDRCWDWO;;WD)
sc.exe sdset bits D:(A;;CCLCSWLOCRRC;;;AU)(A;;CCDCLCSWRPWPDTLOCRSDRCWDWO;;;BA)(A;;CCDCLCSWRPWPDTLCRSDRCWDWO;;;SO)(A;;CCLCSWRPWPDTLOCRRC;;;SY)S:(AU;FA;CCDCLCSWRPWPDTLOCRSDRCWDWO;;WD)
sc.exe sdset cryptsvc D:(A;;CCLCSWLOCRRC;;;AU)(A;;CCDCLCSWRPWPDTLOCRSDRCWDWO;;;BA)(A;;CCDCLCSWRPWPDTLCRSDRCWDWO;;;SO)(A;;CCLCSWRPWPDTLOCRRC;;;SY)S:(AU;FA;CCDCLCSWRPWPDTLOCRSDRCWDWO;;WD)
sc.exe sdset trustedinstaller D:(A;;CCLCSWLOCRRC;;;AU)(A;;CCDCLCSWRPWPDTLOCRSDRCWDWO;;;BA)(A;;CCDCLCSWRPWPDTLCRSDRCWDWO;;;SO)(A;;CCLCSWRPWPDTLOCRRC;;;SY)S:(AU;FA;CCDCLCSWRPWPDTLOCRSDRCWDWO;;WD):: —— Reregister the BITS files and the Windows Update files ——
call :print Reregister the BITS files and the Windows Update files.cd /d %SYSTEMROOT%\system32
regsvr32.exe /s atl.dll
regsvr32.exe /s urlmon.dll
regsvr32.exe /s mshtml.dll
regsvr32.exe /s shdocvw.dll
regsvr32.exe /s browseui.dll
regsvr32.exe /s jscript.dll
regsvr32.exe /s vbscript.dll
regsvr32.exe /s scrrun.dll
regsvr32.exe /s msxml.dll
regsvr32.exe /s msxml3.dll
regsvr32.exe /s msxml6.dll
regsvr32.exe /s actxprxy.dll
regsvr32.exe /s softpub.dll
regsvr32.exe /s wintrust.dll
regsvr32.exe /s dssenh.dll
regsvr32.exe /s rsaenh.dll
regsvr32.exe /s gpkcsp.dll
regsvr32.exe /s sccbase.dll
regsvr32.exe /s slbcsp.dll
regsvr32.exe /s cryptdlg.dll
regsvr32.exe /s oleaut32.dll
regsvr32.exe /s ole32.dll
regsvr32.exe /s shell32.dll
regsvr32.exe /s initpki.dll
regsvr32.exe /s wuapi.dll
regsvr32.exe /s wuaueng.dll
regsvr32.exe /s wuaueng1.dll
regsvr32.exe /s wucltui.dll
regsvr32.exe /s wups.dll
regsvr32.exe /s wups2.dll
regsvr32.exe /s wuweb.dll
regsvr32.exe /s qmgr.dll
regsvr32.exe /s qmgrprxy.dll
regsvr32.exe /s wucltux.dll
regsvr32.exe /s muweb.dll
regsvr32.exe /s wuwebv.dll:: —— Resetting Winsock ——
call :print Resetting Winsock.
netsh winsock reset:: —— Resetting WinHTTP Proxy ——
call :print Resetting WinHTTP Proxy.if %family% EQU 5 (
proxycfg.exe -d
) else (
netsh winhttp reset proxy
):: —— Set the startup type as automatic ——
call :print Resetting the services as automatics.
sc.exe config wuauserv start= auto
sc.exe config bits start= delayed-auto
sc.exe config cryptsvc start= auto
sc.exe config TrustedInstaller start= demand
sc.exe config DcomLaunch start= auto:: —— Starting the Windows Update services ——
call :print Starting the Windows Update services.
net start bitscall :print Starting the Windows Update services.
net start wuauservcall :print Starting the Windows Update services.
net start appidsvccall :print Starting the Windows Update services.
net start cryptsvccall :print Starting the Windows Update services.
net start DcomLaunch:: —— End process ——
call :print The operation completed successfully.echo.Press any key to continue . . .
pause>nul
goto :eof
:: /*************************************************************************************/
Далее назовите созданный файл, например, FastWinUpReset, измените ему расширение на .bat и сохраните в любое удобное место — подойдет даже рабочий стол. У вас должен получиться файл FastWinUpReset.bat. Кликните на этот файл дважды левой кнопкой мыши и наблюдайте за автоматическим сбросом компонентов Центра обновления.
Способ №4 Установка обновления вручную
Все еще не получается нормально установить нужное обновление? Тогда вам прямая дорога в каталог Центра обновления Майкрософт. Перейдите на сайт, воспользуйтесь поисковой строкой, чтобы найти и скачать проблемный апдейт. Далее достаточно дважды нажать на загруженный файл ЛКМ и следовать инструкциям на экране. При таком способе ошибка 0x800f0900 не должна вас потревожить.
@Kapil Arya
Yep I run it and it has me try:
net stop bits
net stop wuauserv
net stop appidsvc
net stop cryptsvc
Some of these weren’t running anyway so I proceeded with:
Del “%ALLUSERSPROFILE%\Application Data\Microsoft\Network\Downloader\qmgr*.dat”
Which then throws an error saying:
Could Not Find C:\ProgramData\Application Data\Microsoft\Network\Downloader\qmgr*.dat
I also tried the commands in here:
Windows update fails with Error 0x800f0900 — Microsoft Community
Open administrative Command Prompt and type following commands one-by-one followed by Enter key.
net stop wuauserv

net stop cryptSvc

net stop bits

net stop msiserver
Ren C:\Windows\SoftwareDistribution SoftwareDistribution.old
Ren C:\Windows\System32\catroot2 Catroot2.old
net start wuauserv
net start cryptSvc
net start bits
net start msiserver
These did not resolve the issue either.
После установки накопительного обновления (как KB4493437, так и KB4499167) для систем на базе Windows 10 версии 1803 x64, некоторые пользователи вынуждены наблюдать код ошибки с именем 0x800f0900 после неудачной установки нового обновления. Обычно такие обновления предназначены для исправления ранее существовавших проблем или ошибок, однако во многих случаях свежие исправления приносят еще больше проблем, вместо устранения их. В большинстве случаев пользователям трудно избавиться от проблемы по следующим причинам: отсутствующие или поврежденные файлы, неисправные службы, проблемы с конфигурацией и другие проблемы, вызывающие ошибку. Чтобы решить эту проблему, мы подготовили список эффективных инструкций, которые устранят проблему 0x800f0900.

Скачать средство восстановления Windows
Скачать средство восстановления Windows

Существуют специальные утилиты для восстановления Windows, которые могут решить проблемы, связанные с повреждением реестра, неисправностью файловой системы, нестабильностью драйверов Windows. Мы рекомендуем вам использовать Advanced System Repair Pro, чтобы исправить ошибку «Обновление Windows 10 0x800f0900» в Windows 10.
1. Воспользуйтесь средством устранения неполадок Центра обновления Windows
Всякий раз, когда вы сталкиваетесь с проблемами, связанными с обновлением, отличный инструмент, готовый прийти на помощь, — это средство устранения неполадок Windows — специальная утилита, уже встроенная в вашу систему. Это первый метод, который следует попробовать, прежде чем переходить к более продвинутым решениям. Вот простые шаги для запуска утилиты.
- Откройте настройки, как мы делали выше, и перейдите в Обновление и безопасность > Устранение неполадок.
- На правой панели найдите Центр обновления Windows и нажмите Запустить средство устранения неполадок.
- Завершите процесс, следуя инструкциям на экране, и перезагрузите компьютер.
2. Запустите сканирование с помощью средства проверки системных файлов (SFC).
Как мы уже упоминали в описании ошибки, некоторые проблемы с обновлением могут возникать из-за отсутствия или повреждения файлов. Обычно эти файлы являются важными компонентами системы, обеспечивающими правильную связь между различными процессами. Если некоторые из этих файлов отсутствуют, то скорее всего, это вызовет ошибку. Ниже мы собираемся использовать средство проверки системных файлов (SFC), которое обнаружит и восстановит отсутствующие компоненты. Вот как:
- Открытые Командная строка , введя
cmdв поле поиска рядом с Меню Пуск кнопку. - Щелкните правой кнопкой мыши по Командная строка , а затем выбрать Запуск от имени администратора.
- После открытия консоли введите
sfc /scannowкоманду и нажмите Enter. - Когда процесс восстановления будет завершен, перезагрузите компьютер.
- После того, как вы закончите этот шаг, попробуйте снова установить обновление. Если ошибка по-прежнему напоминает о себе, продолжайте читать это руководство, чтобы попробовать другие варианты ниже.
3. Запустите DISM
Обслуживание образов развертывания и управление ими (DISM) аналогично запуску сканирования SFC. Однако оно использует разные алгоритмы для поиска проблемы и исправления поврежденных данных, которые SFC может пропустить. Поэтому давайте попробуем запустить этуо сканирование с помощью командной строки, как мы это уже делали.
- Открытые Командная строка как мы это делали на предыдущем шаге.
- Скопируйте и вставьте эту команду
DISM.exe /Online /Cleanup-image /Restorehealth. - Нажмите Enter и подождите, пока Windows закончит сканирование и исправление.
- После этого перезагрузите компьютер и снова установите обновление.
4. Очистите компоненты Windows.
Проблема 0x800f0900 может появиться из-за перегруженных библиотек. Вполне возможно, что они могут засориться ненужными компонентами за время использования. В результате это может привести к нестабильности различных служб. Ниже мы покажем, как удалить их с помощью Диспетчера задач и DISM.
Через Диспетчер задач
- Нажмите Windows + R сочетание клавиш, чтобы открыть строку «Выполнить», затем вставьте
taskschd.mscи нажмите OK. - На левой панели перейдите в Библиотека > Microsoft > Windows > Servicing.
- После этого щелкните правой кнопкой мыши на StartComponentCleanup , а затем выбрать Run.
- Дождитесь завершения процесса, перезагрузите компьютер и попробуйте еще раз установить конфликтующее обновление.
Через DISM
Этот метод делает то же самое, что и выше, поэтому вы можете выбрать любой из них.
- Открытые Командная строка как мы уже делали раньше.
- Теперь вставьте эту команду:
dism /online /cleanup-image /startcomponentcleanupи нажмите Enter. - После завершения перезагрузите компьютер и проверьте, появляется ли ошибка.
5. Перезапустите компоненты и Службу обновления Windows.
Если ни один из предыдущих способов не помог, вы можете попробовать этот. Он поможет нам сбросить и перезапустить настройки Центра обновления Windows. Весь процесс состоит из перезапуска служб BITS, Cryptographic, MSI Installer и Windows Update, а также переименования некоторых папок обновлений (SoftwareDistribution и Catroot2). Эти папки содержат специальные подписи для обновлений Windows. Исходя из этого, мы заставим Windows удалить поврежденные элементы и создать компоненты обновления с нуля. Для этого мы воспользуемся консолью для запуска необходимых команд. Этот метод довольно сложен, но с ним легко справиться, выполнив следующие действия:
- Открытые Командная строка , введя
cmdв поле поиска рядом с Меню Пуск кнопку. - Щелкните правой кнопкой мыши по Командная строка , а затем выбрать Запуск от имени администратора.
- Скопируйте и вставьте этот список команд одну за другой, нажимая Enter после каждой из них. (Это действие отключит службы, отвечающие за обновления Windows)
- Затем введите эту команду и нажмите Enter.
- После этого мы должны переименовать вышеупомянутые папки. Просто вставьте эти команды, нажимая Enter после каждой.
- Теперь скопируйте и вставьте эти две команды, чтобы сбросить BITS и службу Центра обновления Windows до дескриптора безопасности по умолчанию. Нажмите Enter после каждой.
- Затем введите эту команду и нажмите Enter.
- Предпоследний и очень важный шаг — перерегистрировать файлы BITS и Windows Update. Просто введите этот длинный список команд, нажимая Enter после каждой.
- Сбросьте Winsock с помощью этой команды.
net stop wuauserv
net stop cryptSvc
net stop bits
net stop msiserver
del "%ALLUSERSPROFILE%\Application Data\Microsoft\Network\Downloader\qmgr*.dat"
ren C:\Windows\SoftwareDistribution SoftwareDistribution.old

ren C:\Windows\System32\catroot2 Catroot2.old
sc.exe sdset bits D:(A;;CCLCSWRPWPDTLOCRRC;;;SY)(A;;CCDCLCSWRPWPDTLOCRSDRCWDWO;;;BA)(A;;CCLCSWLOCRRC;;;AU)(A;;CCLCSWRPWPDTLOCRRC;;;PU)

sc.exe sdset wuauserv D:(A;;CCLCSWRPWPDTLOCRRC;;;SY)(A;;CCDCLCSWRPWPDTLOCRSDRCWDWO;;;BA)(A;;CCLCSWLOCRRC;;;AU)(A;;CCLCSWRPWPDTLOCRRC;;;PU)
cd /d %windir%\system32
regsvr32.exe atl.dll

regsvr32.exe urlmon.dll

regsvr32.exe mshtml.dll

regsvr32.exe shdocvw.dll

regsvr32.exe browseui.dll

regsvr32.exe jscript.dll

regsvr32.exe vbscript.dll

regsvr32.exe scrrun.dll

regsvr32.exe msxml.dll

regsvr32.exe msxml3.dll

regsvr32.exe msxml6.dll

regsvr32.exe actxprxy.dll

regsvr32.exe softpub.dll

regsvr32.exe wintrust.dll

regsvr32.exe dssenh.dll

regsvr32.exe rsaenh.dll

regsvr32.exe gpkcsp.dll

regsvr32.exe sccbase.dll

regsvr32.exe slbcsp.dll

regsvr32.exe cryptdlg.dll

regsvr32.exe oleaut32.dll

regsvr32.exe ole32.dll

regsvr32.exe shell32.dll

regsvr32.exe initpki.dll

regsvr32.exe wuapi.dll

regsvr32.exe wuaueng.dll

regsvr32.exe wuaueng1.dll

regsvr32.exe wucltui.dll

regsvr32.exe wups.dll

regsvr32.exe wups2.dll

regsvr32.exe wuweb.dll

regsvr32.exe qmgr.dll

regsvr32.exe qmgrprxy.dll

regsvr32.exe wucltux.dll

regsvr32.exe muweb.dll

regsvr32.exe wuwebv.dll
netsh winsock reset
Наконец, все, что осталось сделать, это включить отключенные службы. Введите эти команды аналогичным образом.
net start wuauserv

net start cryptSvc

net start bits

net start msiserver
6. Отключите / удалите стороннее ПО.
Стороннее программное обеспечение, такое как антивирус, порой склонно вызывать сбои в работе некоторых служб. Оно может заподозрить и воспринять некоторые процессы как нечто подозрительное. По какой-то причине даже службы Windows могут быть занесены в черный список и ограничены антивирусным программным обеспечением. Поскольку мы не знаем, так ли это, попробуйте отключить сторонний антивирус, если он у вас установлен. Помимо антивируса, виновниками таких ошибок часто являются нежелательные или вредоносные программы. Если вы помните, как недавно устанавливали новое ПО, попробуйте удалить его и посмотреть, изменилось ли что-то. Возможно, это решит проблему.
7. Очистите ненужные системные файлы.
Некоторые пользователи сообщили, что очистка системных файлов может решить проблему. Это означает, что вам придется удалить копии для восстановления и кэшированные файлы, хранящиеся на вашем компьютере. Это может быть довольно рискованно, так как в дальнейшем у вас не будет возможности вернуться к предыдущей версии, которая записана на резервной копии в вашей системе. Несмотря на это, некоторые пользователи говорят, что это помогло решить проблему с обновлением.
- Открытые Этот компьютер.
- Щелкните правой кнопкой мыши на основной диск и выберите Объекты.
- Найдите и нажмите на Очистка диска.
- Затем выберите Очистить системные файлы, установите все флажки и нажмите OK.
- После этого перезагрузите компьютер и попробуйте установить обновление снова.
Надеемся, этот метод помог вам разобраться с ошибкой 0x800704c7. Если нет, и она по-прежнему надоедает своим появлением при регулярном использовании, перейдите к последним 2 методам этой статьи.
8. Попробуйте загрузить конфликтующее обновление из каталога Microsoft.
Если у вас возникла проблема с получением КБ обновлений, то вы можете попробовать установить их вручную. Перед тем как это сделать, нам нужно будет запомнить, какое обновление вам необходимо установить. Для этого:
- Нажмите Windows + I одновременно.
- Затем перейдите в Обновление и безопасность.
- В правой части окна выберите Просмотр журнала обновлений.
- После этого найдите и запишите самое последнее обновление КБ (вверху списка).
- Затем загрузите записанное обновление из Microsoft Update Catalog.
9. Используйте Media Creation Tool.
Другой вариант установки конфликтующих обновлений — через Media Creation Tool. Этот способ позволяет пользователям обновлять систему до последней существующей версии. Не волнуйтесь, эта процедура не коснется ваших личных данных, а просто обновит компьютер. Для этого, выполните шаги, описанные ниже:
- Для начала, вам нужно скачать утилиту с веб-сайта Microsoft.
- Затем запустите загруженный файл.
- После соглашения с Общие Условия, вы увидите два варианта на выбор. Выберите Обновить этот компьютер сейчас.
- Выберите Сохранить личные файлы чтобы они не пострадали.
- Наконец, запустите процесс и дождитесь его завершения.
Итоги
Не смотря на то, что в большинстве случаев проблемы, связанные с обновлениями, не являются ошибкой пользователей, в конечном итоге именно они ответственны за ее решение. Хорошо, что существует множетсво веб-ресурсов, где тестируются и предоставляется ряд эффективных решений. Мы надеемся, что наше руководство наконец помогло вам решить проблему 0x800f0900. Вы также можете воспользоваться другими статьями на нашем веб-сайте, если возникнет какая-то новая ошибка.
Microsoft releases cumulative updates every second Tuesday of the month to keep your device free of bugs and bugs. However, bugs are things that find their own ways to sneak into your system and disrupt normal operation. In today’s topic, we are going to discuss one such problem – ” Update Error 0x800f0900 “, the possible causes of it and how to solve this problem.
What fails when updating with error code 0x800f0900?
Typically, this issue occurs when your device meets one or more of the following conditions:
- Corrupted Windows 11/10 Image
- Missing/corrupted system files
- Essential Services for the Disabled
- Over-saved cache on your PC
Apart from the aforementioned reasons, error 0x800f0900 can also occur when you are using a corrupted peripheral or your system has been compromised by malware or viruses.
To get rid of this problem, you need to find and repair corrupted system files using the SFC or DISM command line utility. If the issue persists even after doing this, try workarounds such as “Run the update troubleshooter”, “Delete temporary files with Disk Cleanup”, “Perform a full scan”, or “Update device drivers”.
If checking for updates doesn’t work even after following these solutions, you should install the latest build of Windows 10 using the Upgrade Assistant or Media Creation Tool.
Fix update error 0x800f0900 in Windows 11/10
To resolve update error 0x800f0900 on Windows 10 PC, use the following workarounds:
1] Repair corrupted files using the Update Troubleshooter.
To resolve an update-related issue such as code 0x800f0900, you must first run the update troubleshooter. This built-in tool not only identifies corrupted files but also fixes the root cause. Let’s see how to use this tool −
- Launch the Settings app (using the Win and I keys ).
- Select ” Update and Security ” and then ” Troubleshoot ” in the next window.
- Go to the right pane and click on Windows Update .
- Now click “Run the troubleshooter” to start this process.

- Restart your computer again to save the latest changes.
2] Scan and Repair with File Checker Utility
A sudden fluctuation in power can corrupt several system files, preventing a new patch from being installed. To update an existing version of an assembly, it is necessary to identify and restore all obsolete files that lie inside the OS. Follow the below steps to complete this task −
- Open the search bar, type cmd and right click on the top result.
- From the context menu, select Run as administrator .
- If a UAC window appears, click ” Yes ” to allow access.
- Copy/paste the below command line and press Enter at the end −
sfc/scannow

- When the scan starts, wait for a while as it will take a few minutes.
- Finally, reboot your system.
After next login, check if you can install any new updates without getting error 0x800f0900 or not. If not, move on to the next solution −
3] Use the Deployment Image Servicing and Management tool.
If you are still getting update error 0x800f0900, you can try another DISM utility to identify and repair corrupted Windows image files. Here are the basic steps −
- Press Win + R together to open the Run dialog box.
- Type cmd in the text box and press Ctrl+Shift+Enter at the same time .
- When the User Account Control window appears, click Yes .
- From an elevated command prompt, run the following codes one by one:
DISM /online /Cleanup-Image / ScanHealth
DISM /Online /Cleanup-Image /RestoreHealth

- This will take some time, so please wait accordingly.
- Finally, restart your computer to confirm the changes you’ve made.
4] Remove junk files with Disk Cleanup.
If the above methods did not resolve error 0x800f0900 on your PC, try deleting the temporary file using the Disk Cleanup tool. All you need is to follow the following steps −
- Hold the Win and E keys together to launch File Explorer .
- Then click This available PC in the left pane.
- Right-click the primary partition ( C:\ ) and select Properties .
- Click Disk Cleanup , see snapshot below −

- In the next window, click the button ” with extracting system files “.
- After that check all the boxes except ” Download ” and click ” OK “.
- Let this tool find junk files and when it prompts, click OK again.
Restart your computer after deleting unnecessary files. This will ensure that any leftovers that are left even after completing the above task are removed.
5] Restart Update Services.
Another possible reason that can prevent Windows from updating is “update services stopped”. If this is the case, you need to recheck the services by following the steps below and restart them if necessary.
- Right-click the Windows icon and select the Run option .
- Enter
services.mscnext to the blinking cursor and press the OK button . - This will launch the Services window . Here, scroll down and look for Windows Update .
- Once found, right-click and select Properties .

- Under Startup Type, select Automatic and make sure its Service status says Running .

- If not, click the ” Start ” button, then ” OK ” to save the changes.
- Restart your computer , check if it fixes error 0x800f0900 or not when updating Windows 10 OS.
6] Perform a Full System Scan
Malware infection inside Windows 10 can also result in update error 0x800f0900. Therefore, you should scan the entire computer for an infected file. Here is how to do the same with Windows Defender Full Scan −
- Click the up arrow available on the taskbar on the right.
- When it expands, click on the Shield icon .
- In the next wizard, select Virus & Threat Protection and then Scan Options .
- Select the Full Scan radio button and click the Scan Now button .

- Immediately after that, the scanning process will begin. If this reports any malware, remove it.
- After successfully completing the above task, restart your computer .
7] Remove additional peripherals
Using multiple additional devices on your computer can also result in error 0x800f0900. This can happen due to bad ports or corrupted system drivers. If this is the case, we suggest removing all peripherals and see if that actually fixes the issue you were struggling with.
Note . If you receive an error message even after removing all optional devices, there is no point in performing the above task.
8] Use Update Assistant
If manual updates still don’t work, you should download and install ” Update Assistant “. This is Microsoft’s official tool to install the latest build of Windows on your device.
- Go to the official Microsoft website and click on the Update Now button .

- Immediately after that, the download of the file begins.
- Navigate to your Downloads folder and double click on the setup file.
- The Windows 10 Upgrade Assistant window appears immediately after installation is complete.
- That’s it, now follow the steps to update your PC to the latest build.
9] Use a media creation tool
The Windows 10 Upgrade Assistant requires a stable Internet connection to download and install the necessary files. Again, if you’re using a metered connection, this is definitely not the best choice. Instead, you should use the Media Creation tool to update Windows OS.
Here’s how to proceed –
- First of all, visit the Microsoft website and download the Media Creation Tool.
- When the site comes into view, click ” Download Tool Now “.
- Open your Downloads folder , right-click on the setup file, and select Run as administrator .
- Check the ” Upgrade this PC now ” box and click ” Next ” to install this program.

- Select “Keep personal files and apps” and click ” Accept “.

- Your computer is now ready to be updated.
I hope you were able to fix error code 0x800f0900 by following the tips and tricks provided in this guide. Let us know if you are still facing this issue on your PC in the comments section below.