12.11.2016
Прошивка принтеров
0
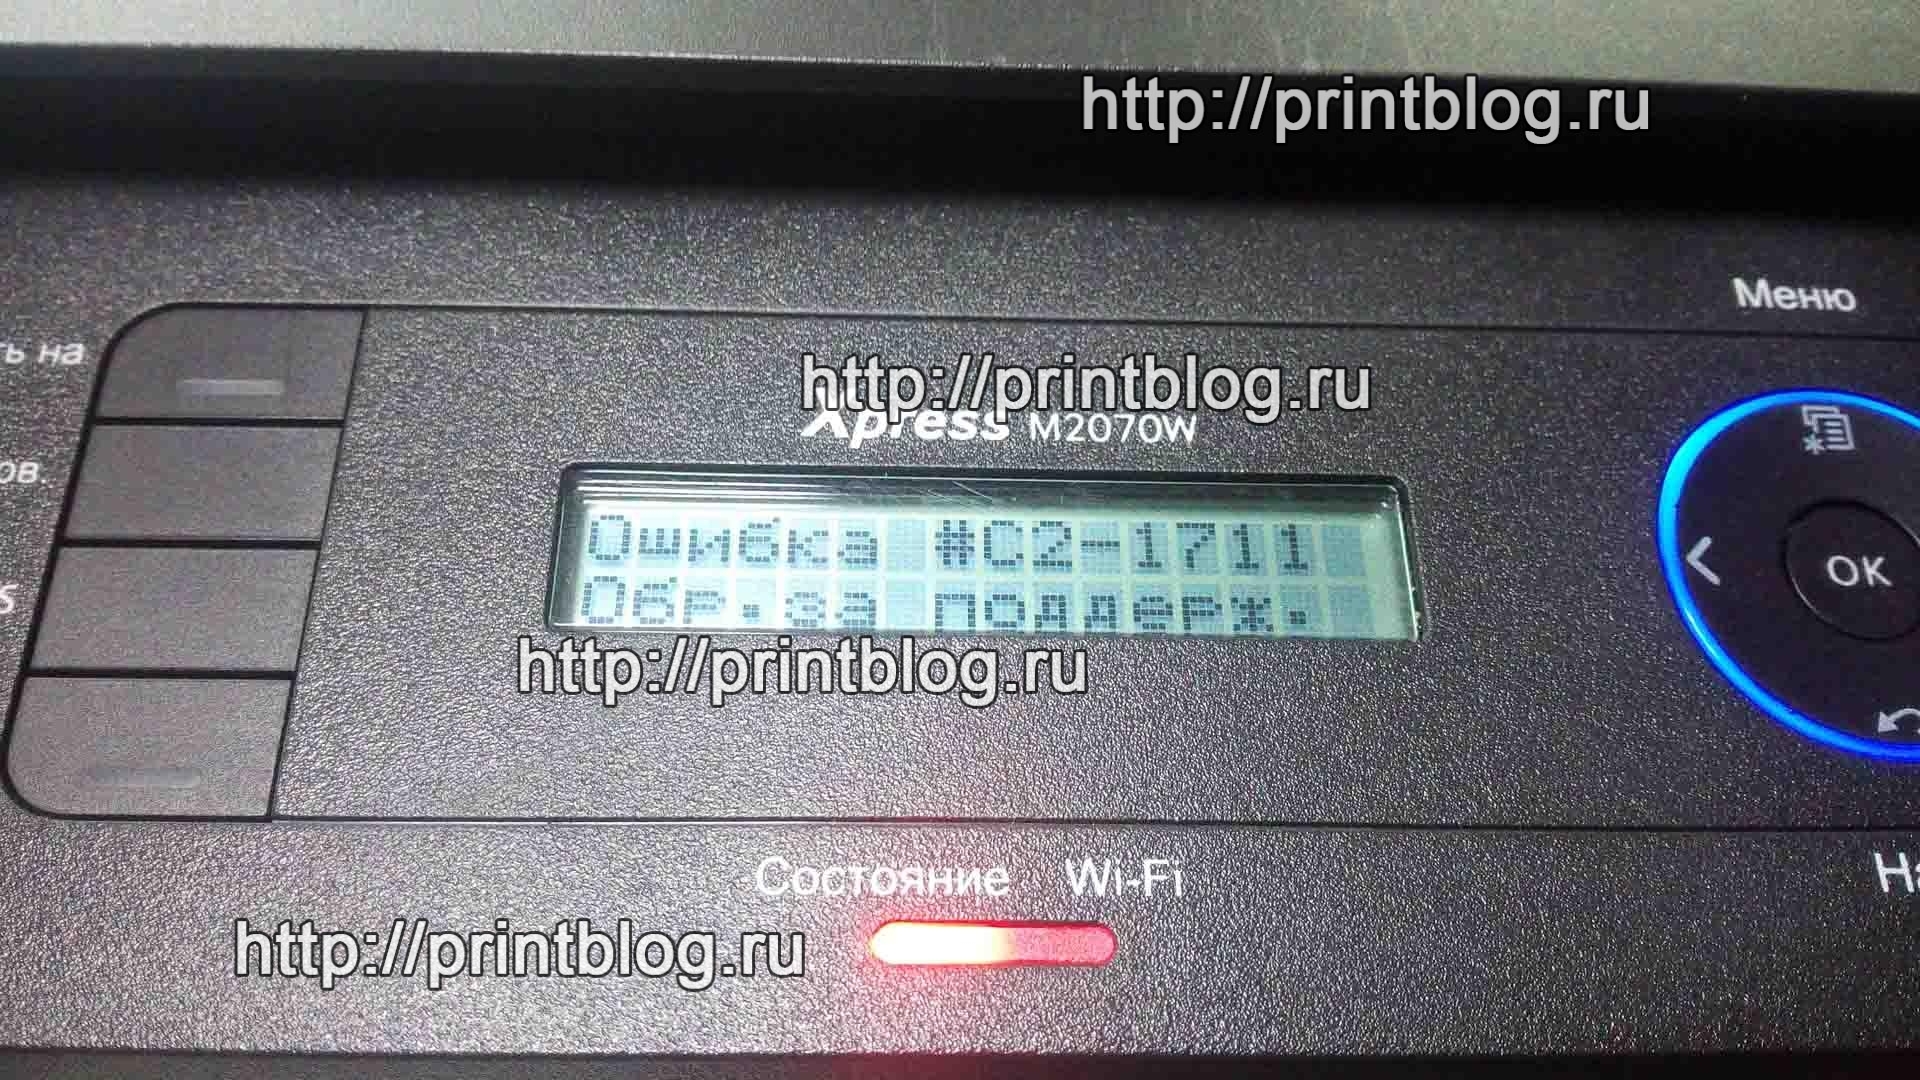
Samsung M2070 ошибка #C2-1711, #C2-1712 Обр. за поддерж.
Сервисная документация вещает на английском следующее по этому поводу:
1) Check if the toner cartridge is installed. If it is OK, turn machine off and on.
2) If the error message is not desappeared, remove the toner cartriadge. Thoroughly roll the cartridge over 6 tomes to distribute the toner evenly inside the cartridge.
3) If the problem persists check that the CRUM contact area is contaminated (sea pic.1 below). Clean it.
4) If the problem persists replace the cartridge with the new one.
Осуществить ремонт или прошивку вашего принтера в г. Симферополь вы можете в сервисном центре по ул. Старозенитная, д.9 (вход со стороны забора). Обращайтесь пожалуйста в рабочее время с 9.00-18.00 по номеру +7 (978) 797-66-90
Если перевести на русский, то будет следующее:
1) Проверьте, установлен ли картридж с тонером. Если картридж установлен, выключите принтер и включите.
2) Если сообщение об ошибке не исчезло, извлеките картридж из принтера и тщательно встряхните его, чтобы равномерно распределить тонер внутри картриджа.
3) Если проблема не устранена, проверьте, что бы зона контактов чипа картриджа (CRUM) не была загрязнена.
4) Если проблема не устраняется замените картридж на новый.
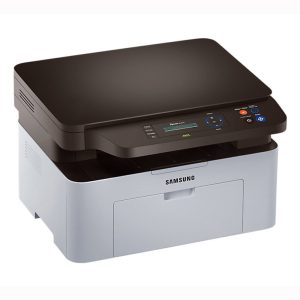
В свою очередь, мне хотелось бы добавить, если вам не хочется возится с покупкой нового картриджа, с покупкой нового чипа картриджа или чистить контакты чипа картриджа, вы можете раз и навсегда избавится от этой проблемы, изменив прошивку принтера Samsung на fix прошивку. В fix прошивке принтера (для тех, кто не знает) отключена функция идентификации картриджа по его чипу. После прошивки принтера, чип из картриджа извлекается и больше не будет в нем необходимости, принтер всегда будет показывать уровень тонера 100%. Просто засыпаете в картридж тонер (порошок) и продолжаете печатать.
Прошивка принтера Samsung, например, Xpress SL-M2070, занимает минут 10 и не требует особых знаний, справится даже домохозяйка.
Заказать прошивку для принтера Samsung, Xerox, Dell можете на нашем сайте пройдя по ссылке:
-
В наличии
Код: 99227
Прошивка для Samsung M2070F, M2070FW
799.00 руб.
Купить -
В наличии
Код: 99228
Прошивка для SAMSUNG M3320ND, M3820D (DW, ND), M4020ND
999.00 руб.
Купить -
В наличии
Код: 99247
Прошивка для Samsung Xpress M2670, M2675, M2875, M2870 (F, FN, FD)
456.00 руб. – 698.00 руб.
Купить -
В наличии
Код: 99245
Прошивка для SAMSUNG Xpress M2070, M2070W
799.00 руб.
Купить
Также, рекомендуем ознакомится с предыдущей записью по прошивке принтера: “Прошивка Xerox Phaser 3020. Зачем? Как?”
Осуществить ремонт или прошивку вашего принтера в г. Симферополь вы можете в сервисном центре по ул. Старозенитная, д.9 (вход со стороны забора). Обращайтесь пожалуйста в рабочее время с 9.00-18.00 по номеру +7 (978) 797-66-90
Не забывайте оценить запись и поделится ей с друзьями в социальных сетях, нажав специальные кнопки ниже.
Не забудь оставить комментарий и подписаться на наш канал Youtube
Рекомендуемые товары:
-
В наличии
Код: 00015
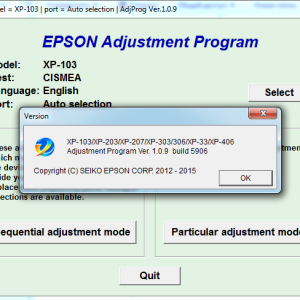
Adjustment program для Epson XP-103 (XP-100), XP-203, XP-207, XP-303, XP-306, XP-33, XP-406 (сброс памперса)
811.20 руб.
Купить -
28 в наличии
Код: 50022
Микросхема EEPROM 95080 (508RP, WP, L080) для Canon MG2440 с сброшенным счетчиком памперса
349.00 руб.
Купить -
12 в наличии
Код: 50027
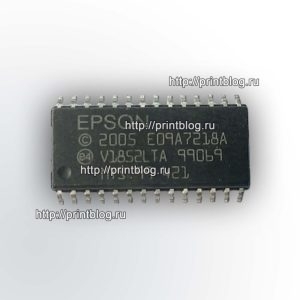
Микросхема шифратор E09A7218A для Epson R290, T50, P50, L800 и др.
558.00 руб.
Купить -
В наличии
Код: 00017
Adjustment program Epson L200
136.80 руб.
Купить
- Печать
Страницы: [1] Вниз
Тема: Samsung ProXpress M4020nd Ошибка с#2-1712 (Прочитано 8419 раз)
Доброго времени суток! ))) Пришел аппарат с таким вот казусом… Как быть? Если я правильно понял, то была попытка сунуть из другого аппарата картридж в этот, и после этого вот такая ошибка. Если кто знает, подскажите пожалуйста!
« Последнее редактирование: Февраль 09, 2019, 09:12:01 am от dvv73 »
Записан
Доброго времени суток.
Сдох трансформатор инвертора 6024B706003GP -03 на телевизоре Samsung le37m87bd 37 дюймов, 10 ламп.
Так вот, нужна помощь по маркировке трансформатора, что значат цифры после 6024B, в особенности -03.
Подсказали, что в принципе подойдет и 6016В, но вот что остальная маркировка значит в душе не знаю. Может это рабочий ток, сопротивление?
Знатоками из сервис-центра был впаян 6026В, но с ним синий экран. не подходит, срабатывает защита я так понял
В общем прошу помощи, товарищи знатоки.
P.S.
В общем 6024В взаимозаменяем с 6026В, 6016В, 6010В инфа 100. У них одинаковый выход сопротивления: 2200 Ом, по этому критерию сходятся и являются взаимозаменяемыми.
Прабла была в загнутых зубцах в штекере подключения инвертора к блоку питания ремонтники проипались и погнули.
Спасибо, тему можно закрыть, но лучше оставить на всякий случай, потому что поиск этой инфы занял 3 суток
Записан
- Печать
Страницы: [1] Вверх
The most common error codes.
| Error | |
|---|---|
| S2-4120 | Display: Door open. Close it. |
| C2-1710, C2-1711, C2-1712 | Display: Error: #C2-1710 Call for Service Error: #C1-1711 Call for Service Error: #C1-1712 Call for Service |
| H1-1240 | Display: Tray2 Not Install |
| U2-1112, U2-1113 | Display: Error #U2-1111 Turn off then on. Error #U2-1113 Turn off then on. |
| S6–3123 | Display: Network Problem: IP Conflict. |
– Compatible Printer model: Samsung ProXpress M4020ND
– Samsung ProXpress M4020ND Error Codes with quick guides:
- Code: A1-1110
- Display: Error #A1-1110: Turn off then on.
- Description: Harness or main BLDC motor or main board is defective. / OPC coupler in the toner cartridge(or imaging unit) has overloaded.
- Troubleshooting Guides: 1) Turn the machine off then on. If the error persists, refer to the following. 2) Remove the right cover. 3) Check if the motor connector on main board is connected properly. Reconnect it. 4) OPC coupler has overloaded. After removing the toner cartridge/imaging unit, rotate the OPC coupler. If there is any damage, the OPC coupler can’t rotate well. Replace the toner cartridge/imaging unit. 5) Remove the left cover. 6) Remove the main drive unit. 7) The main BLDC motor is defective. a) Unplug the connector from the motor carefully. b) Replace the main BLDC motor (JC31-00075A)with new one.
If the problem persists, replace the main board.
- Code: C1-1110, C1-1120, C1-1144
- Display: Prepare new cartridge. Replace new cartridge.
- Description: The remaining toner cartridge is less than 10% / The toner cartridge is at the end of its life.
- Troubleshooting Guides: NOTE These errors are for M3325/3825/4025. Check the life remaining of the toner cartridge. If its life is at the end, turn the machine off and replace the toner cartridge with new one.
- Code: C1-1150, C1-1160, C1-1170
- Display: Prepare new cartridge. Replace new cartridge.
- Description: The remaining toner cartridge is less than 10% / The toner cartridge is at the end of its life.
- Troubleshooting Guides: NOTE These errors are for M3325/3825/4025. Check the life remaining of the toner cartridge. If its life is at the end, turn the machine off and replace the toner cartridge with new one.
- Code: C1-1310, C1-1411
- Display: Error: #C1-1310 Install toner Install toner.
- Description: The toner cartridge is not installed.
- Troubleshooting Guides: NOTE These errors are for M3325/3825/4025. 1) Turn the machine off then on. 2) Open the front cover. 3) Check if the toner cartridge is installed. If yes, remove and reinstall it. 4) If the problem persists, replace the toner cartridge with new one.
- Code: C1-1512
- Display: Error message Not Compatible Toner cartridge.
- Description: Toner cartridge is not compatible.
- Troubleshooting Guides: NOTE This error is for M3325/3825/4025. 1) Open the front cover. 2) Remove the toner cartridge. 3) If the toner cartridge is not a Samsung genuine toner cartridge, replace with new one.
- Code: C1-1710, C1-1711, C1-1712
- Display: Error: #C1-1710 Call for Service Error: #C1-1711 Call for Service Error: #C1-1712 Call for Service
- Description: The machine can’t detect the CRUM chip of the toner cartridge.
- Troubleshooting Guides: NOTE These errors are for M3325/3825/4025. 1) Open the front cover. 2) Remove the toner cartridge. 3) Check if the CRUM terminal is contaminated. Clean it. 4) If the toner cartridge is not a Samsung genuine toner cartridge, replace with new one.
- Code: C2–1110, C2–1120, C2–1150
- Display: Prepare new cartridge. Replace new cartridge.
- Description: The remaining toner cartridge is less than 10% / The toner cartridge is at the end of its life.
- Troubleshooting Guides: NOTE These errors are for M3320/3820/4020. Check the life remaining of the toner cartridge. If its life is at the end, turn the machine off and replace the toner cartridge with new one.
- Code: C2–1160, C2–1170
- Display: Prepare new cartridge. Replace new cartridge.
- Description: The remaining toner cartridge is less than 10% / The toner cartridge is at the end of its life.
- Troubleshooting Guides: NOTE These errors are for M3320/3820/4020. Check the life remaining of the toner cartridge. If its life is at the end, turn the machine off and replace the toner cartridge with new one.
- Code: C2-1411
- Display: Install toner.
- Description: The toner cartridge is not installed.
- Troubleshooting Guides: NOTE This error is for M3320/3820/4020. 1) Turn the machine off then on. 2) Open the front cover. 3) Check if the toner cartridge is installed. If yes, remove and reinstall it. 4) If the problem persists, replace the toner cartridge with new one.
- Code: C2-1512
- Display: Not Compatible Toner cartridge.
- Description: Toner cartridge is not compatible.
- Troubleshooting Guides: NOTE This error is for M3320/3820/4020. 1) Open the front cover. 2) Remove the toner cartridge. 3) If the toner cartridge is not a Samsung genuine toner cartridge, replace with new one.
- Code: C2-1710, C2-1711, C2-1712
- Display: Error: #C2-1710 Call for Service Error: #C1-1711 Call for Service Error: #C1-1712 Call for Service
- Description: The machine can’t detect the CRUM chip of the toner cartridge.
- Troubleshooting Guides: NOTE These errors are for M3320/3820/4020. 1) Open the front cover. 2) Remove the toner cartridge. 3) Check if the CRUM terminal is contaminated. Clean it. 4) If the toner cartridge is not a Samsung genuine toner cartridge, replace with new one.
- Code: C3–1110, C3–1120, C3–1144
- Display: Prepare new cartridge. Replace new cartridge.
- Description: The remaining imaging unit is less than 10% / The imaging unit is at the end of its life.
- Troubleshooting Guides: NOTE These errors are for M3325/3825/4025. Check the life remaining of the imaging unit. If its life is at the end, turn the machine off and replace the imaging unit with new one.
Solve Samsung ProXpress M4020ND Error codes
- Code: C3-1410
- Display: Not Installed Imaging unit
- Description: The imaging unit is not installed.
- Troubleshooting Guides: NOTE This error is for M3325/3825/4025. 1) Turn the machine off then on. 2) Open the front cover. 3) Check if the imaging unit is installed. If yes, remove and reinstall it. 4) If the problem persists, replace the imaging unit with new one.
- Code: C3-1510
- Display: Not compatible Imaging unit
- Description: Imaging unit is not compatible.
- Troubleshooting Guides: NOTE This error is for M3320/3820/4020. 1) Open the front cover. 2) Remove the toner cartridge and imaging unit. 3) If the imaging unit is not a Samsung genuine imaging unit, replace with new one.
- Code: C9-1112
- Display: Replace new tray 1 roller
- Description: Tray1 pick up roller is worn out.
- Troubleshooting Guides: 1) Remove the tray 1 cassette. 2) Remove the duplex unit. 3) Pull the small tap down, then release the pick up roller(JC73-00340A).
- Code: C9-1115
- Display: Replace new tray 1 roller
- Description: Tray1 reverse roller is worn out.
- Troubleshooting Guides: 1) Remove the tray1 cassette. 2) Remove the reverse roller(JC90-01032A).
- Code: C9-1122
- Display: Replace new tray 2 roller
- Description: Tray2 pick up roller is worn out.
- Troubleshooting Guides: 1) Remove the Tray 2 cassette. 2) See the bottom of the SCF Unit. 3) Pull the small tap down, then release the pick up roller(JC97-02259A).
- Code: C9-1125
- Display: Replace new tray 2 roller
- Description: Tray2 reverse roller is worn out.
- Troubleshooting Guides: 1) Remove the Tray 2 cassette. 2) Open the cassette cover. 3) Pull the small tap down, then release the reverse roller(JC97-02259A).
- Code: H1-1210
- Display: Paper jam in Tray2.
- Description: A paper jam was detected in the feed area of the tray2.
- Troubleshooting Guides: 1) Remove the Tray2 cassette. 2) Find and remove the jammed paper. 3) If the problem persists, check the following. • Check if the pick up/forward/reverse roller(JC97-02259A) is contaminated or worn out. • Check if the feed sensor connector is connected properly. • If the feed sensor(0604–001325) is defective replace it.
- Code: H1-1220
- Display: Tray 2 Door Open. Close it
- Description: Optional cassette is not installed properly.
- Troubleshooting Guides: 1) Remove and reinstall the Tray2 cassette. 2) Check the cassette detection sensor. • Check if the connection between sensor and main board is OK. Reconnect the harness. • If the sensor(JC34-00001A) is defective, replace it. 3) If the problem persists, replace the SCF main board(JC92-02636A).
- Code: H1-1230
- Display: Error: #H1-1230 Check Tray 2
- Description: Communication error has occurred.
- Troubleshooting Guides: 1) Turn the machine off then on. 2) If the problem persists, turn the machine off. 3) Remove the SCF right cover. 4) Check if the interface connector is connected to the SCF main board. If the interface connector is defective, replace it. 5) If the problem persists, replace the SCF main board.(JC92-02636A)
- Code: H1-1240
- Display: Tray2 Not Install
- Description: Optional cassette is not installed properly.
- Troubleshooting Guides: 1) Remove and reinstall the Tray2 cassette. 2) Check the cassette detection sensor. • Check if the connection between sensor and main board is OK. Reconnect the harness. • If the sensor(JC34-00001A) is defective, replace it. 3) If the problem persists, replace the SCF main board(JC92-02636A).
- Code: H1-1252, H1-1254
- Display: Paper is empty in Tray2
- Description: There is no paper in the tray2. / Actuator-Paper Empty or photo sensor is defective.
- Troubleshooting Guides: 1) Load the paper in the tray2. 2) If the problem persists, turn the machine off and check the following. 3) If the Actuator-Paper Empty is defective, replace it. 4) If the Photo Sensor(0604-001325) is defective, replace it. Check if the connector is connected properly. 5) If the problem persists, replace the SCF main board.(JC92-02636A)
- Code: M1–5612
- Display: Paper Empty in MP Tray.
- Description: There is no paper in the MP tray. / Actuator-Paper Empty or photo sensor is defective.
- Troubleshooting Guides: 1) Load the paper in the tray1. If the problem persists, check the followings after turning the machine off. 2) If the Actuator-Paper Empty(JC66-02762A) is defective, replace it. 3) If the photo sensor(0604-001393) is defective, replace it. Check if the connector is connected properly. 4) If the problem persists, replace the main board.
- Code: M1-1110
- Display: Paper Jam in Tray1.
- Description: The jammed paper has occurred in the tray1.
- Troubleshooting Guides: 1) Clear the jammed paper. If the problem persists, check the following. 2) While pushing the Paper Empty Sensor, send the printing data. Check if the pick up roller is rotating normally. 3) Check if there is any obstacles in the paper path (from Pick-Up to Feed Sensor). The feed roller should be especially checked. 4) Print out the Supplies Information. Check the Tray 1 Roller Life and Tray1 Reverse(Retard) roller Life. If the life came to the end, replace the relative roller.
- Code: M1-1610
- Display: Paper Jam in MP tray.
- Description: The jammed paper has occurred in the MP tray.
- Troubleshooting Guides: 1) Clear the jammed paper. If the problem persists, check the following. 2) Turn the machine off. 3) Remove the right cover. 4) Check if the MP Unit connector is connected properly. 5) Remove the MP Unit. 6) Check if the MP rollers are worn out. If necessary, replace the defective roller or MP unit.
- Code: M1-5112, M1-5113, M1-5120
- Display: Paper is empty in tray 1. Paper empty in all tray
- Description: There is no paper in the tray1. / Actuator-Paper Empty or photo sensor is defective.
- Troubleshooting Guides: 1) Load the paper in the tray1. If the problem persists, check the followings after turning the machine off. 2) If the Actuator-Paper Empty(JC66-02762A) is defective, replace it. 3) If the photo sensor(0604-001393) is defective, replace it. Check if the connector is connected properly. 4) If the problem persists, replace the main board.
- Code: M2-1110
- Display: Paper Jam inside machine.
- Description: A paper jam was detected at the feed sensor.
- Troubleshooting Guides: 1) Remove the jammed paper. If the error persists, check the followings. 2) Check if the feed sensor connector is connected properly. 3) Check if the Regi roller is contaminated or worn out. If yes, replace it. 4) Check if there is any obstacles or contamination in the paper path. If yes, clean or remove it.
- Code: M2-2210
- Display: Paper Jam bottom of duplex.
- Description: A paper jam was detected in the bottom of duplex.
- Troubleshooting Guides: 1) Remove the jammed paper. 2) Remove the contamination or obstacles in the paper path. 3) If this jam error occur continually, replace the duplex unit.
- Code: M3–1110
- Display: Paper Jam in exit area.
- Description: A paper jam was detected in the exit area.
- Troubleshooting Guides: 1) Remove the jammed paper. 2) Check if there is any obstacles or contamination in the paper path. If yes, clean or remove it. 3) Check if the exit roller rubber is worn out. Replace the exit roller(JC93-00323A). 4) Check if the exit sensor connector is connected properly. If the connection is OK, replace the exit sensor.
- Code: M3-2130
- Display: Output bin full. Remove paper.
- Description: The machine detected that the output tray has got full or the bin-full sensor is defective.
- Troubleshooting Guides: 1) Remove the paper on the output tray. 2) If the problem persists, check the followings. 3) Remove top cover. 4) Check if the Bin-full Sensor connector is connected properly. Reconnect it or replace the Bin-full sensor
- Code: S2-4120
- Display: Door open. Close it.
- Description: Door is open or the cover open switch is defective.
- Troubleshooting Guides: 1) Check if the front door is closed correctly. 2) Check if the rear door is closed correctly. 3) Check if the connection between the main board and HVPS board is correct. 4) Check if the cover open switch on HVPS board is operated properly. If it is defective, replace the HVPS board(JC44-00197A).
- Code: S6–3123
- Display: Network Problem: IP Conflict.
- Description: IP address conflicts with that of other system. / There is no response when checking the ping test.
- Troubleshooting Guides: Change the machine’s IP address. • Set-up the IP address in this order, Network -> TCP/IP (IPv4) -> STATIC. • In case of DHCP or Bootp, reboot the machine to receive a new IP address.
- Code: S6–3128
- Display: 802.1x Network Error.
- Description: The confirmation was requested for wired port, the server has rejected. / The confirmation protocol is not the same or user information (ID/Password) is wrong.
- Troubleshooting Guides: Check the setting-up for 802.1x confirmation server. • Re-enter the server information and confirmation protocol. • Re-enter the user information.
- Code: U1–2315, U1–2320, U1–2330
- Display: Error #U Turn off then on.
- Description: The temperature control of fuser unit is abnormal.
- Troubleshooting Guides: 1) Turn the machine off. Re-install the fuser unit. Then turn the machine on. Is the error message is disappeared? 2) If the problem persists, turn the machine off and remove the fuser unit. a) Check if the fuser connector is connected properly. b) Check if the input voltage is normal. c) Check if the thermistor is twisted or contaminated. 3) After confirming continuity in the fuser connector and the problem still exists; order an SMPS/HVPS and Fuser Unit and install as is necessary. • HVPS : JC44-00197A • SMPS : JC44-00095D (110V) / JC44-00096D (220V) • Fuser Unit : JC91-01023A (110V) / JC91-01024A (220V)
- Code: U1–2334, U1–2340
- Display: Error #U Turn off then on.
- Description: The temperature control of fuser unit is abnormal.
- Troubleshooting Guides: 1) Turn the machine off. Re-install the fuser unit. Then turn the machine on. Is the error message is disappeared? 2) If the problem persists, turn the machine off and remove the fuser unit. a) Check if the fuser connector is connected properly. b) Check if the input voltage is normal. c) Check if the thermistor is twisted or contaminated. 3) After confirming continuity in the fuser connector and the problem still exists; order an SMPS/HVPS and Fuser Unit and install as is necessary. • HVPS : JC44-00197A • SMPS : JC44-00095D (110V) / JC44-00096D (220V) • Fuser Unit : JC91-01023A (110V) / JC91-01024A (220V)
- Code: U2-1112, U2-1113
- Display: Error #U2-1111 Turn off then on. Error #U2-1113 Turn off then on.
- Description: LSU Motor does not work normally.
- Troubleshooting Guides: 1) Execute the LSU motor test in EDC mode. Check LSU motor operation sound. 2) If there is no sound, remove the right cover. Check if the LSU harness is connected on the main board properly. (picture-1) 3) If it is OK, remove the top cover. Check if the LSU harness is connected on LSU board properly. (picture- 2,3) 4) Check if the LSU harness is defective. (picture-4) 5) Reconnect the LSU harness and then execute the LSU motor test again. 6) If the problem persists, replace the LSU(JC97-04065A). 7) If the problem persists after replacing LSU, replace the main board.
– Get more information about Epson XP 15000 troubleshooting, click here
– Get more error code list with quick guide to fix printer product, click here
– About get help with reseting Epson inkpad or others, click here
Samsung printer reset software introduction:
Notes before resetting Samsung printer:
– Identify accurate version, serial and crum of Samsung printer.
– How to get Samsung printer model info: Click Here
– Before you continue with the reprogramming of the firmware, please make sure that the device is installed on your computer.
– It is very important that under no circumstances should you remove the chip from the cartridge while reprogramming the firmware. After you have succesfully reprogrammed the printer, remove the chip from the cartridge and store it somewhere safely (the chip – a key). In all cartridges which you are going to use in the printer, the chip has to be either removed or sealed. If you have accidently inserted a new cartridge without removing the chip, the device will be blocked. In order to unblock it, you can use the stored chip as a key which help you to unblock the printer.
– And make sure that any other devices (except mouse and keyboard), which are connected to your computer via USB or LPT ports are disconnected. It’s preferable that the computer is connected to the “UPS” (uninterruptible power source) device, because if during the reprogramming process the electricity source has any interruptions, then the reprogramming will be carried out with an error, which makes the device unable to work.
– This firmware will be installed directly to your printer. Before opening firmare link make sure that printer is turned on and connected to your computer and printer drivers are installed correctly.
Be aware that with the reprogramming of the firmware the manufacturer’s warranty goes lost!!
How To Run Firmware Fix Samsung printer
1. Connect the printer to the computer and turn it on.
2. Wait until the printer is ready for work.
3. Drag and drop *.hd to usbprns2.exe file.
4. The reprogramming process starts automatically.
5. Wait until the printer reprograms (10-20 minute) and restarts.
6. After that the reprogramming process is finished, restart the printer.
Contact us to get support with Samsung ProXpress M4020ND Error case
Telegram: https://t.me/hyperaktiv
Facebook: https://www.facebook.com/dngnm/
Or click here to get more ways.
Правила форума
Картинки и фотографии (если они нужны в сообщении) надо загружать только как вложения к своему сообщению (через кнопку Добавить файлы). Тогда картинки будут автоматически отображаться в сообщении.
-
kot
- Сообщения: 27
- Стаж: 1 год 2 месяца
- Откуда: Санкт-Петербург
- Благодарил (а): 1 раз
Samsung M4020DN стал выдавать ошибку LSU.
Сообщение
kot »
Добрый день!
Принтер Samsung M4020DN стал выдавать ошибку: «System Error: U2-1112 The laser scanning unit cannot be controlled. User intervention is required to power off then on the machine, replace new laser scanning unit if problem persists. Printing has stopped, all other machine services (if installed) are unaffected..».
Сдали в ремонт, там разобрали/собрали, ничего не меняя. Он проработал ещё месяц.
Пообщались с авторизованным СЦ — они принтерами не занимаются.
Позвонили на горячую линию Самсунг — были «посланы». =/
Подскажите, что за деталь? Это она «JC97-04065A»?
Можно ли купить?
Благодарю за ответы, советы.
-
стронций
- Сообщения: 417
- Стаж: 1 год 9 месяцев
- Благодарил (а): 13 раз
- Поблагодарили: 43 раза
-
Репутация:
Samsung M4020DN стал выдавать ошибку LSU.
Сообщение
стронций »
Что за авторизированные сервисы такие что НЕзанимаются ремонтом принтеров ? И что за «служба поддержки» такая что посылает клиента ? Я бы их всех сам послал бы кое куда, на СВО к примеру.
JC97-04065A — это блок лазера, купить можно но вот он ли это или нет это уже от обстоятельств зависит. Если есть желание и деньги то можете купить блок лазера и попробовать заменить его.
-
kot
- Сообщения: 27
- Стаж: 1 год 2 месяца
- Откуда: Санкт-Петербург
- Благодарил (а): 1 раз
Samsung M4020DN стал выдавать ошибку LSU.
Сообщение
kot »
стронций писал(а): ↑26 окт 2022, 15:00
Что за авторизированные сервисы такие что НЕзанимаются ремонтом принтеров ?
http://umaservice.ru/
Сказали, что информация на сайте старая и «досвидос». =(
стронций писал(а): ↑26 окт 2022, 15:00И что за «служба поддержки» такая что посылает клиента ?
+78005555555.
стронций писал(а): ↑26 окт 2022, 15:00JC97-04065A — это блок лазера, купить можно но вот он ли это или нет это уже от обстоятельств зависит. Если есть желание и деньги то можете купить блок лазера и попробовать заменить его.
Так и планирую.
-
kot
- Сообщения: 27
- Стаж: 1 год 2 месяца
- Откуда: Санкт-Петербург
- Благодарил (а): 1 раз
Samsung M4020DN стал выдавать ошибку LSU.
Сообщение
kot »
pc-porta писал(а): ↑26 окт 2022, 15:26
на Озоне или Авито
Там только бу.
На озоне есть новый, с датой доставки как на Али. Думаю оттуда и везут, но в три раза дороже. =/
pc-porta писал(а): ↑26 окт 2022, 15:26
«плотно покопал» на предмет восстановления
Это и сделали в первый «ремонт». Хватило на месяц.
Сам «копать» не готов.
-
kot
- Сообщения: 27
- Стаж: 1 год 2 месяца
- Откуда: Санкт-Петербург
- Благодарил (а): 1 раз
Samsung M4020DN стал выдавать ошибку LSU.
Сообщение
kot »
В продолжение истории:
На выходных разобрал принтер, «протёр» LSU.
Принтер заработал.
Проработал три дня. =)))
Судя по звуку, до «ремонта», принтер не может раскрутить призму. Вращается она без усилий, и после разборки/сборки нормально раскручивалась.
Вопрос: Не может быть, что сгорает одна из обмоток двигателя и при определённом начальном положении ротора у него не получается стартануть? Такое часто встречается у кулеров, но там всего 3 обмотки. Здесь, по идее, должно быть больше.
-
dviz
- Сообщения: 238
- Стаж: 1 год 9 месяцев
- Откуда: Ярославль
- Благодарил (а): 21 раз
- Поблагодарили: 29 раз
-
Репутация:
Samsung M4020DN стал выдавать ошибку LSU.
Сообщение
dviz »
kot писал(а): ↑02 ноя 2022, 19:07Вопрос: Не может быть, что сгорает одна из обмоток двигателя и при определённом начальном положении ротора у него не получается стартануть? Такое часто встречается у кулеров, но там всего 3 обмотки. Здесь, по идее, должно быть больше.
Маловероятно )
Если чистка/смазка полигон-мотора не помогает, то менять конечно.
-
serg-serg
- Сообщения: 448
- Стаж: 1 год 6 месяцев
- Откуда: Выкса
- Благодарил (а): 102 раза
- Поблагодарили: 43 раза
-
Репутация:
Samsung M4020DN стал выдавать ошибку LSU.
Сообщение
serg-serg »
kot писал(а): ↑04 ноя 2022, 04:55Она внутри LSU?
На плате полигона, там, обычно, всегда одна микруха, это она и есть.
Бывает, ещё один из датчиков Холла может откинуться. А обмотки если и сгорают, то лишь как следствие, при этом их невооружённым глзом видно, что почернело всё. Ну или после кого-то шибко рукастого, который полазил и оторвал витки у обмотки, такое у меня попадалось разок.
-
kot
- Сообщения: 27
- Стаж: 1 год 2 месяца
- Откуда: Санкт-Петербург
- Благодарил (а): 1 раз
Samsung M4020DN стал выдавать ошибку LSU.
Сообщение
kot »
Меня смутило, что после разборки/сборки принтер три дня проработал. Я естественно ничего не делал, просто крутанул полигон. Крутился он без напряга. Вот и родилась мысль об определённом положении, из которого у него не получается стартовать.
-
serg-serg
- Сообщения: 448
- Стаж: 1 год 6 месяцев
- Откуда: Выкса
- Благодарил (а): 102 раза
- Поблагодарили: 43 раза
-
Репутация:
Samsung M4020DN стал выдавать ошибку LSU.
Сообщение
serg-serg »
Бывает, что не может раскрутиться полигон до нужной скорости и/или войтии в фазу, долго молотить может, прежде, чем выдаст ошибку. У меня была пара случаев. Виновата оказалась именно микросхема драйвера. Причём иногда вдруг начинала ненадолго работать нормально.
-
- 15 Ответы
- 280 Просмотры
-
Последнее сообщение
-
- 1 Ответы
- 156 Просмотры
-
Последнее сообщение
-
- 1 Ответы
- 128 Просмотры
-
Последнее сообщение
-
- 3 Ответы
- 191 Просмотры
-
Последнее сообщение
-
- 9 Ответы
- 482 Просмотры
-
Последнее сообщение



 If the problem persists, replace the main board.
