Ошибки вроде 0x8007000d связаны с обновлениями и могут встречаться пользователями довольно часто. К сожалению, эта и многие другие проблемы сохраняются с момента появления Windows 7 до последних существующих версий. На данный момент диапазон зарегистрированных случаев включает количество накопительных обновлений, которые пользователи не могут установить — KB3124200, KB4586853, KB4592438 для Windows 10 версии 1511 и 20H2. Сообщение об ошибке, отображаемое после сбоя, не дает ценных рекомендаций по восстановлению обновлений. Он предоставляет только соответствующий код ошибки (0x8007000d), помогающий пользователям повышать осведомленность и вместе предлагать решения на форумах и в ресурсах по устранению неполадок. Если вам интересно, каковы причины возникновения таких проблем, то вот пара из них. Обычно проблемы с обновлением могут быть вызваны повреждением или отсутствием файловой системы. В других случаях успешному обновлению может помешать неправильная конфигурация или стороннее программное обеспечение, вызывающее конфликт. Как бы то ни было, трудно решить, какой из них на самом деле ваш. Таким образом, стоит попробовать все методы, пока не найдете тот, который решает проблему. Поэтому обязательно следуйте приведенному ниже списку пошаговых инструкций, которые помогут вам избавиться от ошибки 0x8007000d.

Ошибка Центра обновления Windows 0x8007000d

Ошибка автономного установщика Центра обновления Windows 0x8007000d
Скачать средство восстановления Windows
Скачать средство восстановления Windows

Существуют специальные утилиты для восстановления Windows, которые могут решить проблемы, связанные с повреждением реестра, неисправностью файловой системы, нестабильностью драйверов Windows. Мы рекомендуем вам использовать Advanced System Repair Pro, чтобы исправить «Ошибка Центра обновления Windows 0x8007000d» в Windows 10.
1. Воспользуйтесь средством устранения неполадок Центра обновления Windows
Хотя этот метод редко помогает, все же стоит попробовать уже установленное средство устранения неполадок Центра обновления Windows. Он предназначен для решения наиболее распространенных проблем, связанных с обновлениями на базовом уровне. Он просканирует вашу систему на предмет потенциальных проблем и попытается в конечном итоге их исправить. Узнайте, как это сделать, следуя приведенным ниже инструкциям:
- Открытые Настройки , а затем перейдите в Обновление и безопасность > Устранение неполадок.
- На правой панели найдите Центр обновления Windows и нажмите Запустить средство устранения неполадок.
- Завершите процесс, следуя инструкциям на экране, и перезагрузите компьютер.
2. Проверьте целостность системных файлов.
Чаще всего отсутствующие или поврежденные файлы становятся основными виновниками ошибок обновления. Даже второстепенные файлы иногда могут быть жизненно важными для правильного взаимодействия служб Windows. Если какие-то из этих файлов выпадают из головоломки, скорее всего, это будет причиной проблем с обновлением. Ниже мы собираемся использовать как SFC (средство проверки системных файлов), так и DISM (обслуживание и управление образами развертывания), которые будут обнаруживать и восстанавливать отсутствующие компоненты, если таковые имеются. Обязательно используйте оба сканирования, поскольку они могут по-разному повлиять на решение ошибки. Вот как:
С помощью SFC
- Открытые Командная строка , введя
cmdв поле поиска рядом с Меню Пуск кнопку. - Щелкните правой кнопкой мыши по Командная строка , а затем выбрать Запуск от имени администратора.
- После открытия консоли введите
sfc /scannowкоманду и нажмите Enter. - Когда процесс восстановления будет завершен, перезагрузите компьютер.
С помощью DISM
- Открытые Командная строка как мы это делали на предыдущем шаге.
- Скопируйте и вставьте эту команду
DISM.exe /Online /Cleanup-image /Restorehealth. - Нажмите Enter и подождите, пока Windows закончит сканирование и исправление.
- После этого перезагрузите компьютер и снова установите обновление.
После завершения обоих этих сканирований попробуйте снова запустить установку обновлений. Если это не помогает решить проблему, перейдите к альтернативным методам ниже.
3. Укажите параметры для установки необязательных компонентов и восстановления компонентов.
В этом методе мы собираемся повлиять на некоторые изменения в настройках групповой политики. В частности, чтобы Windows загружала материалы для восстановления и дополнительные функции непосредственно из Центра обновления Windows. Вот как можно выполнить это простое, но очень эффективное решение:
- Нажмите Windows key + R комбинацию клавиш и напишите
gpedit.msc. - Редактор локальной групповой политики откроется. На левой панели перейдите в Административные шаблоны > Система.
- На правой панели прокрутите список вниз, пока не найдете Укажите параметры для установки необязательных компонентов и восстановления компонентов.
- Дважды щелкните по этому тексту, и выберете Включено , потом поставьте галочку напротив Скачайте содержимое для восстановления и дополнительные компоненты непосредственно из Центра обновления Windows вместо использования служб Windows Server Update Services (WSUS). опцию.
- После выполнения этих шагов нажмите Применить и OK для сохранения изменений.
Наконец, попробуйте установить обновления еще раз. Еще нет эффекта? — перейдите к остальным решениям ниже.
4. Очистите ненужные системные файлы.
Может помочь удаление избыточных системных файлов. Другими словами, некоторые пользователи извлекли выгоду из очистки своего диска от копий для восстановления и кешированных файлов, хранящихся на ПК. Обратите внимание, что удаление копий для восстановления означает, что вы не сможете использовать точки восстановления предыдущих версий для отката, если они вам вдруг понадобятся. Несмотря на это, использование такого метода помогло некоторым пользователям избавиться от проблемы.
- Открытые Этот компьютер.
- Щелкните правой кнопкой мыши на основной диск и выберите Объекты.
- Найдите и нажмите на Очистка диска.
- Затем выберите Очистить системные файлы, установите все флажки и нажмите OK.
- После этого перезагрузите компьютер и попробуйте установить обновление снова.
5. Включите Чистый запуск Windows.
Ошибка 0x8007000d также может возникнуть из-за проблем несовместимости. Антивредоносное ПО или любое другое стороннее программное обеспечение может конфликтовать со службами Windows, вызывая ошибку. Вот почему в Windows есть функция чистой загрузки, помогающая пользователям загружать свой компьютер только со встроенными приложениями и службами, чтобы узнать, является ли какое-то дополнительное приложение частью проблемы. Чтобы запустить систему в режиме чистой загрузки, выполните следующие действия:
- Нажмите Windows Key + R кнопки одновременно и вставьте
msconfig. - Затем в открывшемся окне перейдите в Услуги сверху.
- Установите флажок рядом с Не отображать службы Майкрософт и нажмите на Отключить все кнопку.
- Теперь перейдите в Общие и выберите Выборочный запуск опцию. Убедитесь, что флажок установлен только рядом с Загружать системные службы.
- Нажмите Применить и OK. Затем перезагрузите компьютер.
Теперь вы можете попробовать обновить свою систему, находясь в режиме чистой загрузки. Независимо от того, удалось ли вам установить проблемные обновления или нет, вам следует вернуть Windows к параметрам обычного запуска. Для этого просто повторите все шаги, описанные выше, включив отключенные службы и изменив параметр запуска с Выборочный запуск в нормальная.
6. Сбросьте компоненты Центра обновления Windows.
Предпоследняя мера в нашем списке — сброс настроек Центра обновления Windows. Статистически этот метод зарекомендовал себя как очень эффективный при решении многих проблем с обновлением. Вся процедура включает перезапуск служб BITS, Cryptographic, MSI Installer и Windows Update, а также переименование некоторых папок обновлений (SoftwareDistribution и Catroot2). Эти папки содержат временные файлы, необходимые для установки обновлений Windows. Исходя из этого, мы заставим Windows удалять поврежденные элементы и создавать компоненты, связанные с обновлением, с нуля. Ниже мы покажем вам два способа выполнения этого метода. Первый требует ввода и выполнения каждой консольной команды в ручной последовательности. Другой выполняется с помощью так называемого пакетного сценария, написанного в Блокноте и сохраненного как WUReset.bat. Нет никакой реальной разницы в том, какой из них вы выберете. Хотя вся процедура может показаться сложной и сложной, она не займет много времени и знаний. Просто следуйте последовательности, указанной ниже:
Вручную
- Открытые Командная строка , введя
cmdв поле поиска рядом с Меню Пуск кнопку. - Щелкните правой кнопкой мыши по Командная строка , а затем выбрать Запуск от имени администратора.
- Скопируйте и вставьте этот список команд одну за другой, нажимая Enter после каждой. (Это действие отключит службы, ответственные за Обновления Windows)
- Затем мы должны переименовать вышеупомянутые папки. Просто вставьте эти команды, нажимая Enter после каждой.
- Наконец, все, что осталось сделать, это вернуть отключенные службы. Введите эти команды так же, как мы делали ранее.
- На этом все. Перейдите в центр обновления Windows и попробуйте выполнить установку снова.
net stop wuauserv

net stop cryptSvc

net stop bits

net stop msiserver
ren C:\Windows\SoftwareDistribution SoftwareDistribution.old

ren C:\Windows\System32\catroot2 Catroot2.old
net start wuauserv

net start cryptSvc

net start bits

net start msiserver
С помощью Пакетного файла
Это альтернативный метод описанному выше. Пакетный сценарий используется для выполнения тех же команд для сброса всех компонентов Центра обновления Windows, криптографических служб и папок, таких как SoftwareDistribution. В какой-то степени, этот способ даже проще, чем предыдущий. Все, что вам нужно, — это обычный блокнот Windows и немного копирования и вставки. Пакетные сценарии лучше ручного набора текста, поскольку они позволяют выполнять все необходимые команды сразу в один клик. Если вы когда-нибудь столкнетесь с подобными проблемами в будущем, просто запустите уже созданный .bat файл и для сброса компонентов обновления:
- Откройте новый Блокнот . Для этого щелкните правой кнопкой мыши на любую свободную область на рабочем столе, выберите Новая и Текстовый документ.
- Затем вставьте этот список команд в блокнот:
- После вставки всех команд, нажмите Файл > Сохранить как и назовите файл WUReset.bat, Обязательно установите Кодирование в ANSI и сохраните файл в любом месте.
- Наконец, нажмите на файл правой кнопкой мыши и выберите Запуск от имени администратора и наслаждайтесь автоматическим сбросом компонентов обновлений Windows.
@ECHO OFF

echo Simple Script to Reset / Clear Windows Update

echo.

PAUSE

echo.

attrib -h -r -s %windir%system32catroot2

attrib -h -r -s %windir%system32catroot2*.*

net stop wuauserv

net stop CryptSvc

net stop BITS

ren %windir%system32catroot2 catroot2.old

ren %windir%SoftwareDistribution sold.old

ren "%ALLUSERSPROFILE%\Application Data\Microsoft\Network\Downloader" downloader.old

net Start BITS

net start CryptSvc

net start wuauserv

echo.

echo Task completed successfully...

echo.

PAUSE
7. Используйте Помощник по обновлению для загрузки проблемных обновлений.
Помощник по обновлению Windows 10, как он официально называется, — это специальная утилита, предназначенная для помощи людям в получении последних обновлений, доступных для их системы. Он отлично работает как обходной путь для многих проблем, с которыми пользователи сталкиваются при обновлении. Это совершенно бесплатно и не требует много времени для загрузки. Просто выполните следующие действия:
- Сначала посетите официальный сайт Помощник по обновлению и нажмите на Обновить сейчас кнопку.
- Затем откройте загруженный файл и нажмите Обновить сейчас снова.
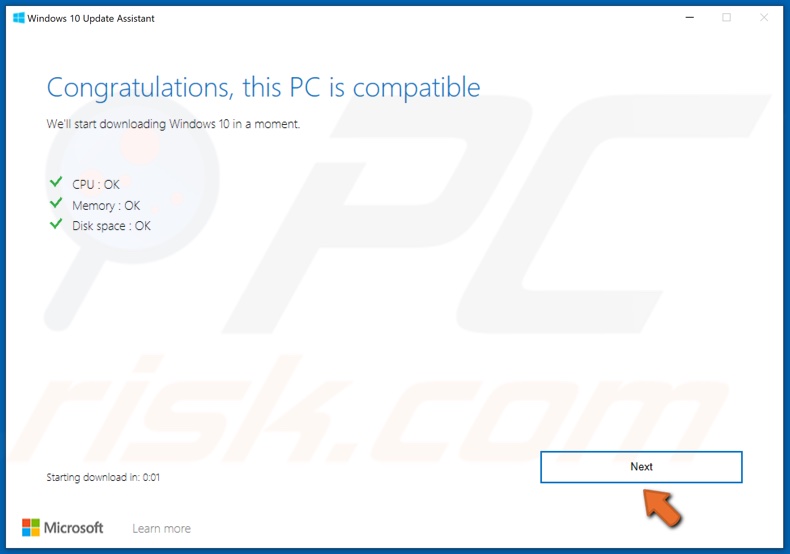
- Windows выполнить проверку вашего ПК на совместимость в течение нескольких секунд. После этого нажмите Следующая и подождите, пока Windows обновит ваш компьютер.
- В конце нажмите Перезапустить сейчас чтобы Windows завершила установку обновлений.
Вот и все. После выполнения этих шагов ваш компьютер должен быть обновлен и не сталкиваться с проблемами, как это было раньше.
Итоги
Несмотря на то, что вышеупомянутые решения очень эффективны, они не исключают возможности повторения подобных проблем в будущем. Если что-то подобное, связанное с обновлениями, повторится снова, сохраните этот список решений, чтобы выполнить их снова. Они должны уметь обрабатывать и другие ошибки.
How to Fix Windows Update Error 0x8007000d in Windows 10
Error 0x8007000d occurs specifically when system files become corrupt, or Windows Update components become outdated. Despite that, there are ways you can fix error 0x8007000d, which we will explain in this article.
What is Error 0x8007000d
Many users experienced error 0x8007000d when installing the Cumulative Update for Windows 10 Version 1511 for x64-based Systems (KB3124200). Most recently, people witnessed the resurgence of the error again when attempting to update Windows 10 version 20H2. Specifically, many got error 0x8007000d when trying to install updates KB4586853 and KB4592438.
On a side note, many users get this same error code (0x8007000d) when trying to activate Windows 10.
What Causes Error 0x8007000d
0x8007000d may occur due to any number of reasons. The problem is that this error message doesn’t provide much information about what triggered it. However, error 0x8007000d is usually accompanied by the following message:
Some update files are missing or have problems. We’ll try to download the update again later. Error code: (0x8007000d)
According to our research, this error may occur for two reasons:
- Some system files have become corrupt.
- Some Windows Update components have become outdated.
Video Instructions on How to Fix Windows Update Error 0x8007000d
Table of Contents:
- Introduction
- Solution 1. Run the Windows Update Troubleshooter
- Solution 2. Update Windows 10 Using the Windows Update Assistant
- Solution 3. Clear the Windows Update Cache Folder
- Solution 4. Run the Deployment Image & Servicing Management (DISM) Scan
- Solution 5. Run the System File Checker (SFC) Scan
- Solution 6. Reset Windows Update Components Manually
- Solution 7. Configure the Group Policy Setting
- Video Instructions on How to Fix Windows Update Error 0x8007000d
Solution 1. Run the Windows Update Troubleshooter
If Windows Update components fail due to corruption, you can run the Windows Update Troubleshooter to repair the files and many other issues. We recommend running the troubleshooter twice in a row for the result.

1. Right-click the Start Menu button and click Settings.
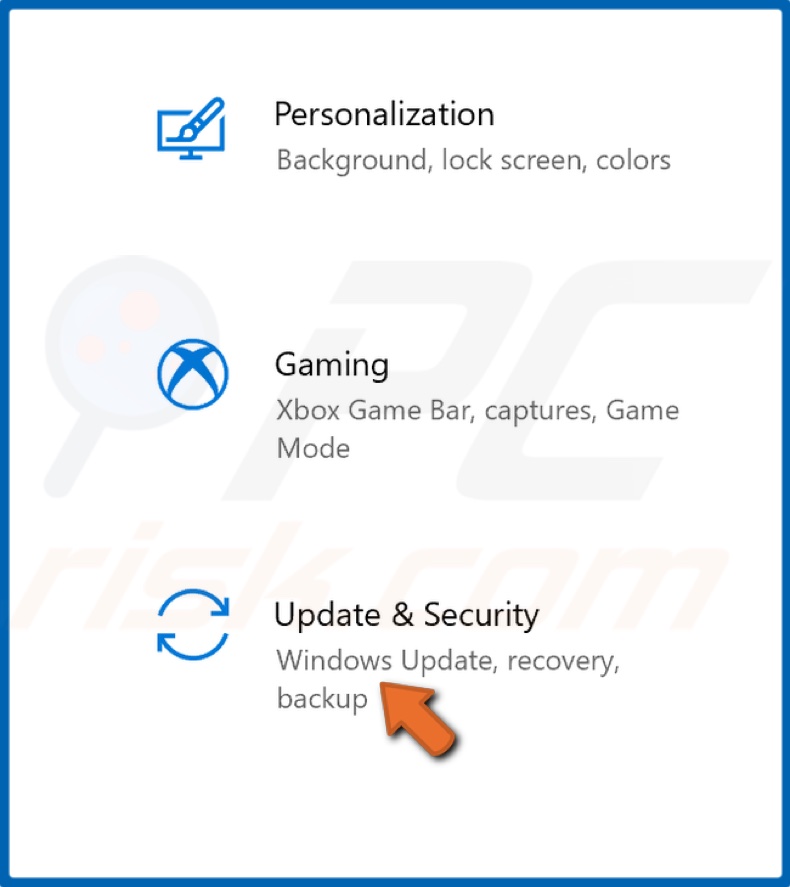
2. Select Update & Security.
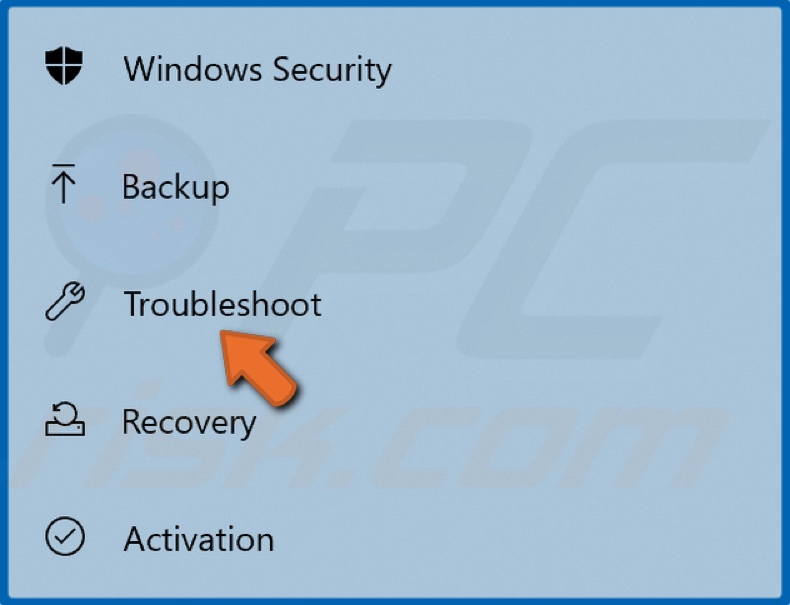
3. Click Troubleshoot.
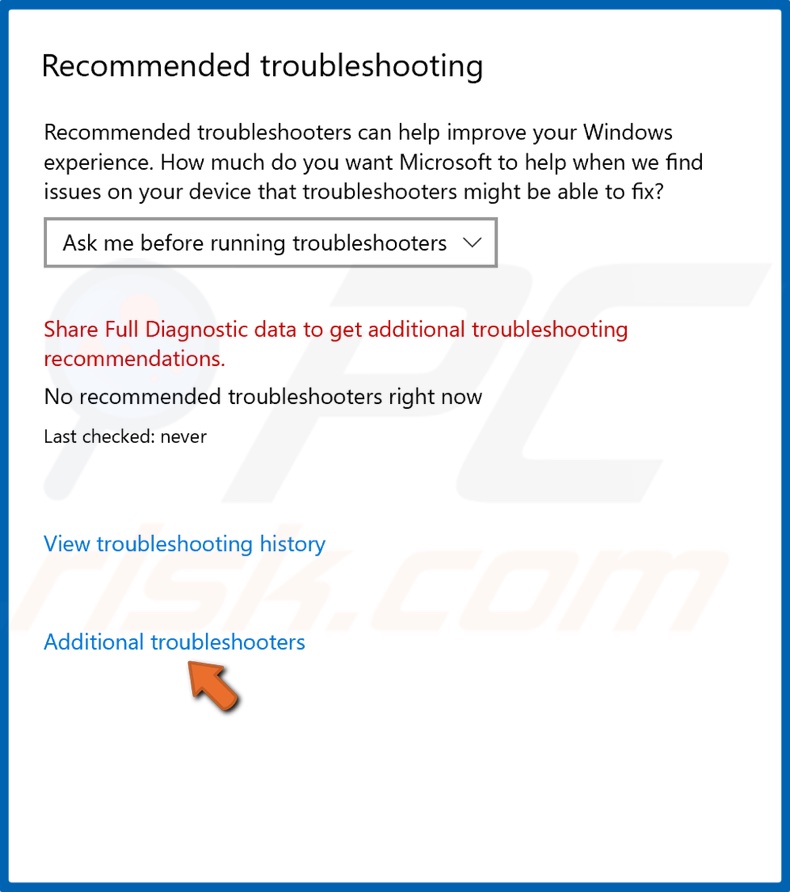
4. Click Additional troubleshooters.
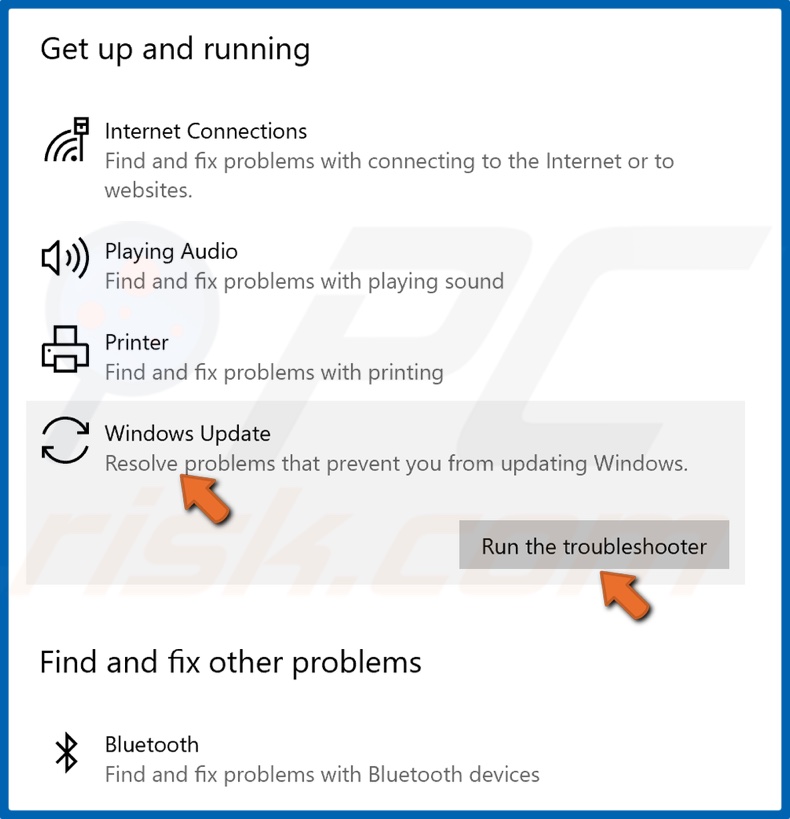
5. Select Windows Update and click Run the troubleshooter.
6. If the troubleshooter detects an issue, it will select and apply a fix automatically.
7. Try updating Windows.
[Back to Table of Contents]
Solution 2. Update Windows 10 Using the Windows Update Assistant
Windows 10 Update Assistant is designed to install the latest Windows 10 updates that users might miss or choose not to install. The Update Assistant ensures that you have the latest Windows 10 version running on your computer.
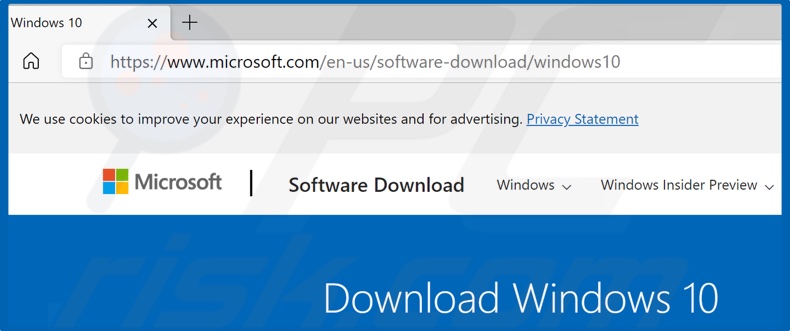
1. Open your web browser and go to the Windows 10 Update Assistant download page.
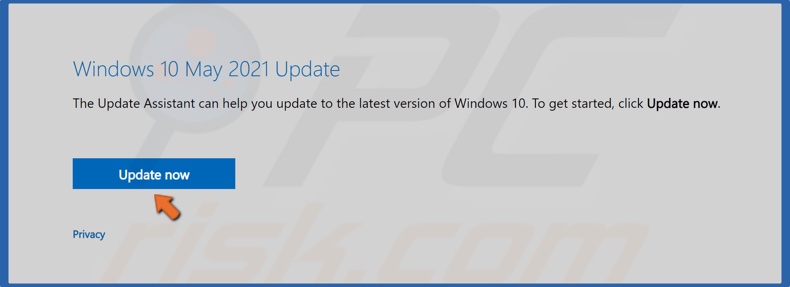
2. Click Update now to get the Windows 10 Update Assistant.
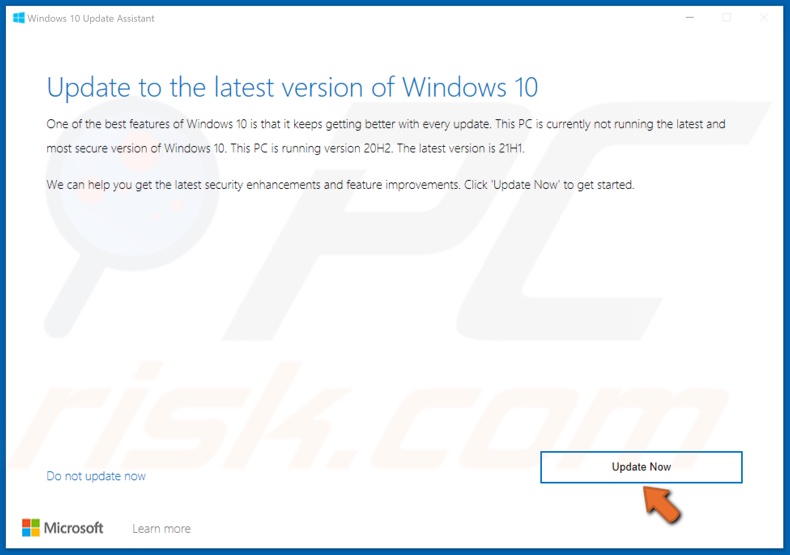
3. Once downloaded, Run the Update Assistant executable file.
4. Then, click Update Now.
5. Click Next.
6. Allow Windows to update. The update process may take a while.
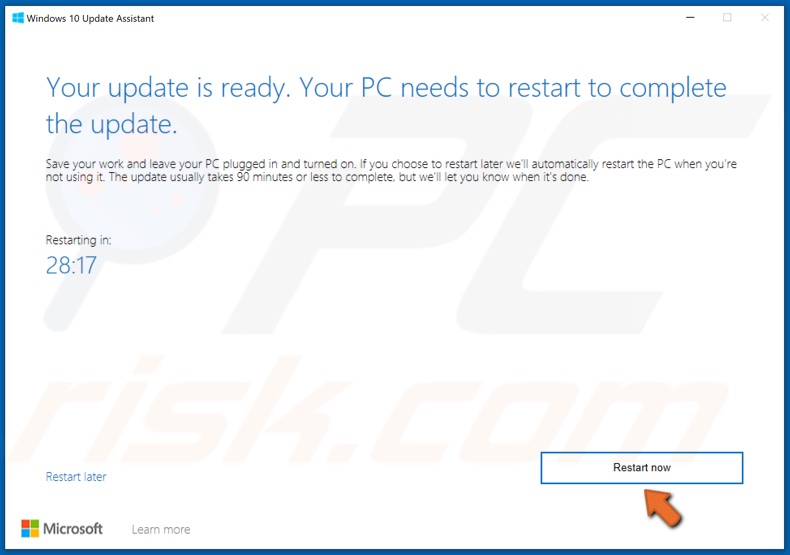
7. Click Restart now when prompted.
[Back to Table of Contents]
Solution 3. Clear the Windows Update Cache Folder
1. Hold down Windows+R keys to open Run.
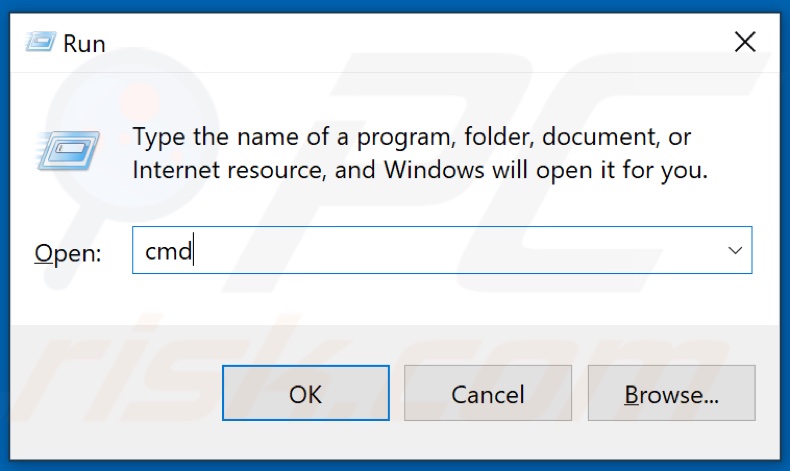
2. In the Run dialog box, type in CMD and hold down Ctrl+Shift+Enter keys to open the elevated Command Prompt.
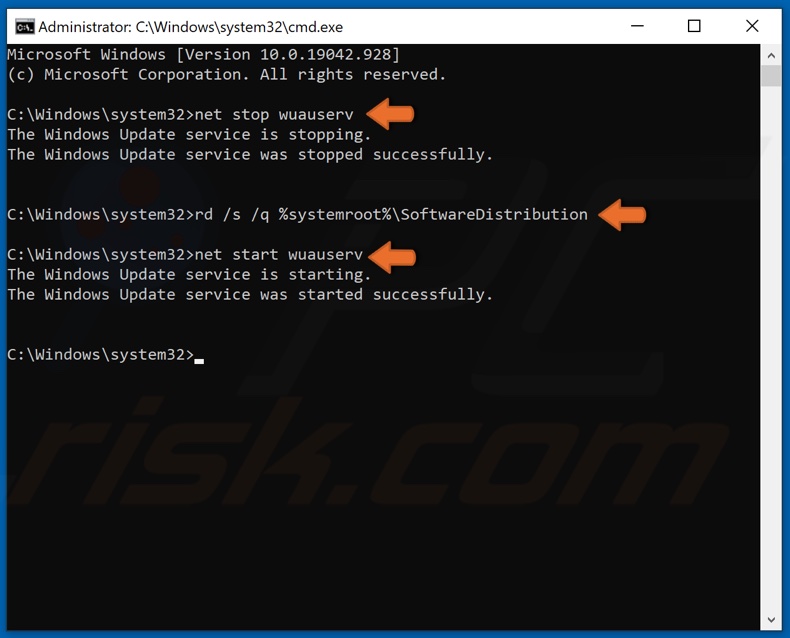
3. In the Command Prompt window, type in net stop wuauserv and press Enter to stop Windows Update Service.
4. Then, type in rd /s /q %systemroot%\SoftwareDistribution and press Enter to clear the Update cache folder.
5. Then, type in net start wuauserv to restart the previously stopped Windows Update Service.
6. Close the Command Prompt and try updating Windows.
[Back to Table of Contents]
Solution 4. Run the Deployment Image & Servicing Management (DISM) Scan
1. Hold down Windows+R keys to open Run.
2. In the Run dialog box, type in CMD and hold down Ctrl+Shift+Enter keys to open the elevated Command Prompt.
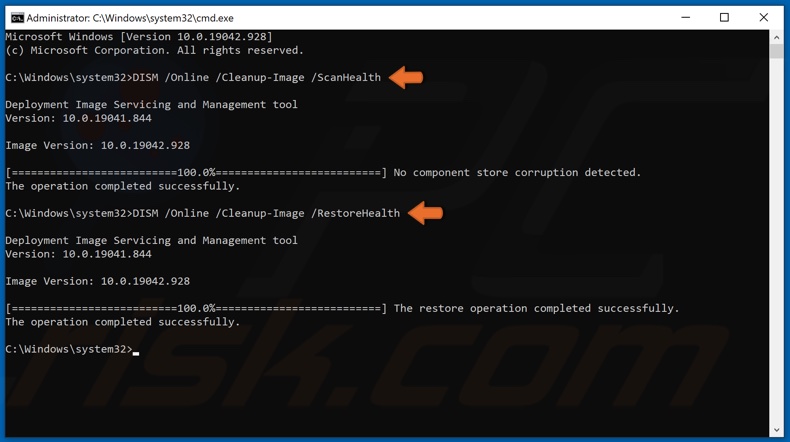
3. In the Command Prompt window, type in DISM /Online /Cleanup-Image /ScanHealth and press the Enter key. This parameter will scan the component store for corruption.
4. Type in the DISM /Online /Cleanup-Image /RestoreHealth and press Enter.
5. Once the process has been completed, close the Command Prompt and try updating Windows 10.
[Back to Table of Contents]
Solution 5. Run the System File Checker (SFC) Scan
1. Hold down Windows+R keys to open Run.
2. In the Run dialog box, type in CMD and hold down Ctrl+Shift+Enter keys to open the elevated Command Prompt.
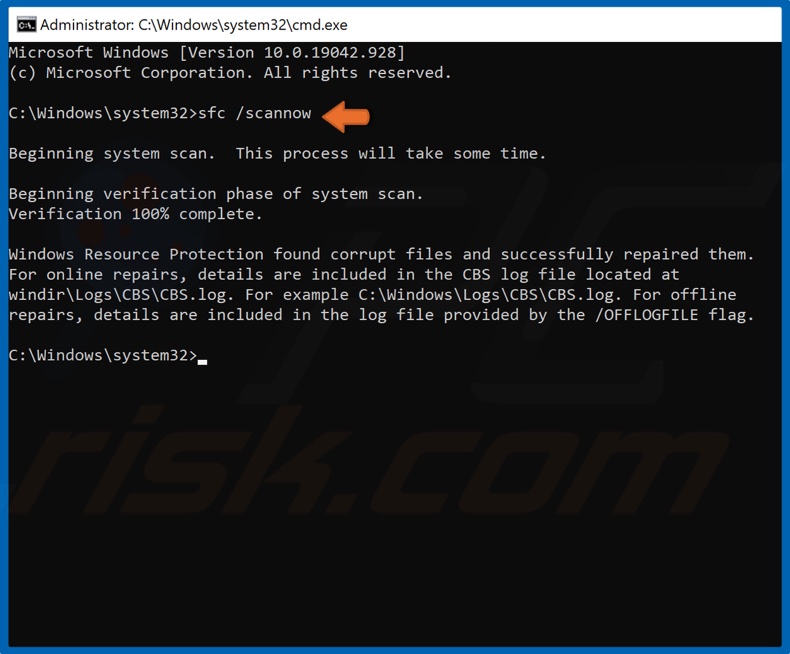
3. In the Command Prompt window, type in SFC /ScanNow and press the Enter key to start the scan and repair missing or corrupt files.
4. Once the scan has been completed, restart your PC and try updating Windows.
[Back to Table of Contents]
Solution 6. Reset Windows Update Components Manually
1. Hold down Windows+R keys to open the Run.
2. In the Run dialog box, type in CMD and then hold down Shift+Ctrl+Enter keys to open Command Prompt with administrative privileges.
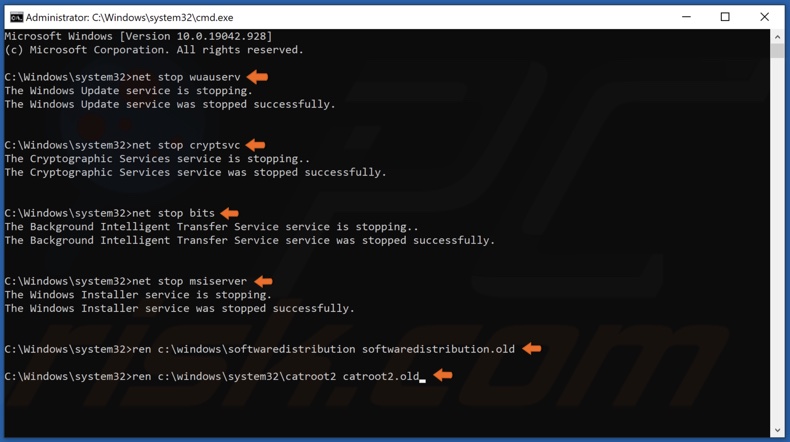
3. Type in the following commands and press Enter after typing in each one:
- net stop wuauserv
- net stop cryptSvc
- net stop bits
- net stop msiserver
After the services have been disabled, rename the SoftwareDistribution and Catroot2.
4. Type in ren C:\Windows\SoftwareDistribution SoftwareDistribution.old and press Enter.
5. Then, type in ren C:\Windows\System32\catroot2 Catroot2.old and press Enter.
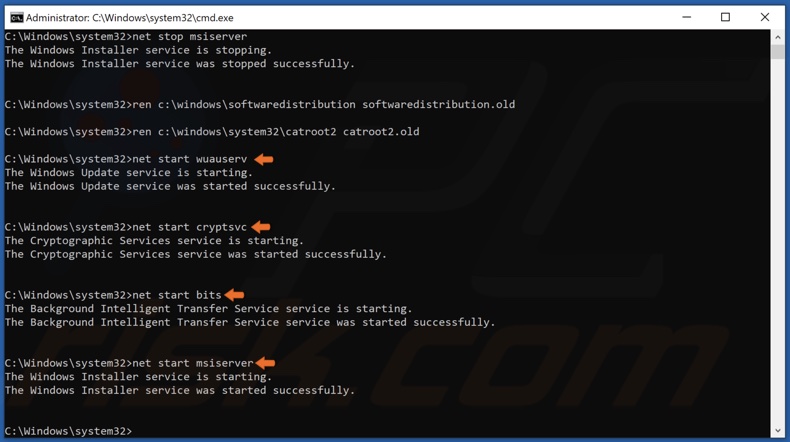
6. Type in the following commands and press Enter after typing in each one:
- net start wuauserv
- net start cryptSvc
- net start bits
- net start msiserver
7. Close the Command Prompt and try updating Windows
[Back to Table of Contents]
Solution 7. Configure the Group Policy Setting
This solution is not possible on Windows 10 Home Edition since the Home Edition does not have the Group Policy Editor.
1. Hold down Windows+R keys to open the Run.
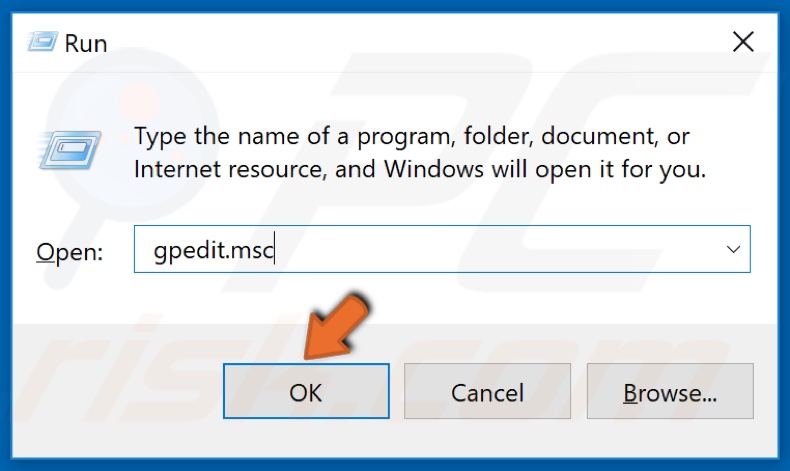
2. In the Run dialog box, type in gpedit.msc and click OK.
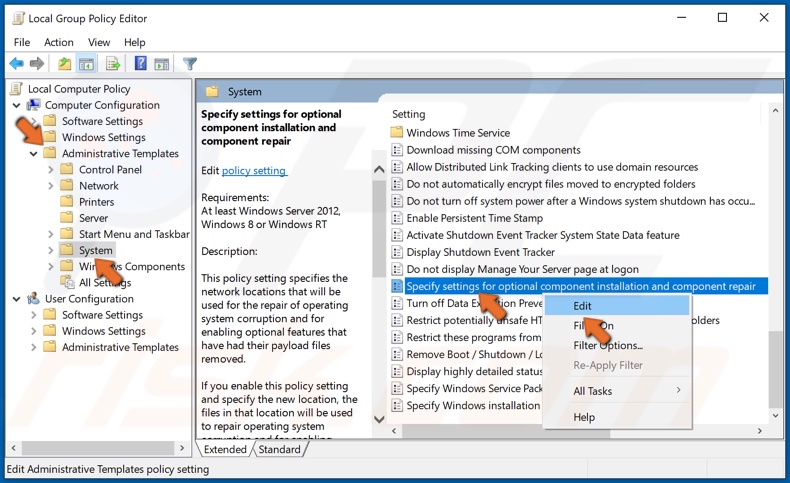
3. In the left pane, expand Administrative Templates and select System.
5. In the right pane, right-click Specify Settings for Optional Content Installation and click Edit.
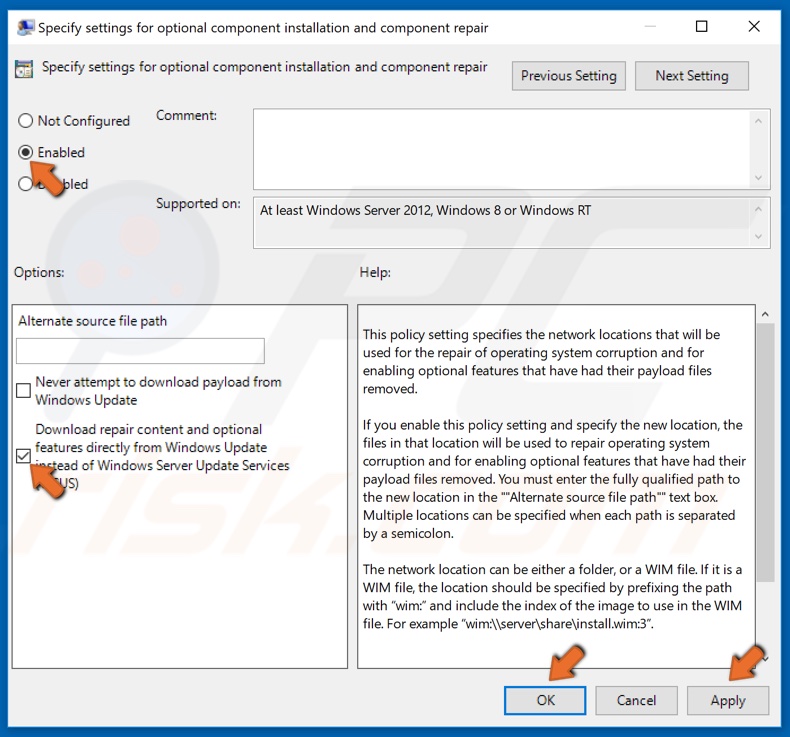
6. At the top-right of the window, select the Enabled option.
7. Then, mark the Download Repair Content and options features directly from Windows Update instead of Windows Server Update Services (WSUS) checkbox.
8. Click Apply and click OK to save the changes.
[Back to Top]
Рассказываем, как исправить ошибку 0x8007000d в ОС Windows.
Обычно этот сбой происходит при попытке обновить операционную систему. Код ошибки указывает на неисправность в центре обновлений. Поэтому именно там надо искать проблему.
Используем средство автоматического поиска и устранения неполадок
В Windows 10 есть специальная программа, которая в автоматическом режиме разыскивает неисправности и пытается их устранить. Говорят, что она неплохо справляется со своей задачей. Сейчас в ее работе задействован искусственный интеллект, который помогает находить наиболее оптимальные пути решения проблем.
Чтобы воспользоваться этой функцией:
- Открываем меню «Пуск», кликнув по логотипу системы.

Это же меню можно открыть, нажав Win
- Потом переходим к настройкам.

Сюда можно попасть, одновременно нажав Win + I
- Ищем в списке настроек подменю «Обновление и безопасность». Заходим туда.

Вот нужный пункт настроек
- Ищем в боковой панели вкладку «Устранение неполадок». Переходим на нее.

Раздел с инструментами для поиска и исправления ошибок
- Откроется окно с большим списком разных служб и устройств Windows. Мы ищем строчку «Центр обновления Windows» и жмем на нее.

Кликаем вот сюда
- Затем нажимаем на кнопку «Запустить средство устранения неполадок».
В течение нескольких минут система будет пытаться исправить все найденные ошибки. Если повезет, то это сработает.
Проверяем целостность системных компонентов
Если не удалось автоматически исправить ошибки с помощью графического интерфейса, можно прибегнуть к использованию текстовых утилит. Иногда простейшие консольные команды приносят больше пользы, чем современные технологии с ИИ и прочими прелестями. Попробуем утилиты System File Checker и DISM.
- Сначала одновременно нажимаем клавиши Win + R.
- В появившемся окошке вводим cmd.exe и нажимаем на клавишу Enter.

Можно найти эту же утилиту в локальном поисковике
-
Затем проверяем систему на наличие поврежденных файлов с помощью команды sfc /scannow. Вводим ее в терминал, а затем нажимаем Enter, чтобы активировать.
-
После этого в командную строку по очереди вводим команды: Dism /Online /Cleanup-Image /CheckHealth для проверки состояния системы. А затем Dism /Online /Cleanup-Image /RestoreHealth для ее восстановления. После каждой команды так же надо нажимать клавишу Enter, чтобы они сработали.

Вводим команды по очереди и каждую запускаем, нажав на «Ввод»
Как только все команды завершат свою работу, надо будет перезагрузить систему. Ну а после этого снова попытаться обновить Windows. Проблем возникнуть не должно.
Перезапускаем службы обновления и заново регистрируем необходимые DLL
Иногда, чтобы заставить нормально работать центр обновления, приходится сбрасывать его параметры, а иногда и вовсе сбрасывать настройки всей операционной системы. Вплоть до полной переустановки.
Но мы все-таки сперва попробуем сбросить настройки центра обновлений. Для этого:
- Запускаем командную строку (выше я уже писал, как это можно сделать).
- Поочередно вводим туда все описанные ниже команды. После каждой нажимаем на Enter, чтобы они заработали.
Останавливаем действующие службы
net stop bits
net stop wuauserv
net stop appidsvc
net stop cryptsvc
Удаляем настройки системы обновлений
    Del «%ALLUSERSPROFILE%\Application Data\Microsoft\Network\Downloader\qmgr*.dat» *

    sc.exe sdset bits D:(A;;CCLCSWRPWPDTLOCRRC;;;SY)(A;;CCDCLCSWRPWPDTLOCRSDRCWDWO;;;BA)(A;;CCLCSWLOCRRC;;;AU)(A;;CCLCSWRPWPDTLOCRRC;;;PU)

    sc.exe sdset wuauserv D:(A;;CCLCSWRPWPDTLOCRRC;;;SY)(A;;CCDCLCSWRPWPDTLOCRSDRCWDWO;;;BA)(A;;CCLCSWLOCRRC;;;AU)(A;;CCLCSWRPWPDTLOCRRC;;;PU)
Переходим в системную папку Windows
cd /d %windir%\system32
Поочередно регистрируем все необходимые библиотеки DLL
regsvr32.exe atl.dll regsvr32.exe urlmon.dll regsvr32.exe mshtml.dll regsvr32.exe shdocvw.dll regsvr32.exe browseui.dll regsvr32.exe jscript.dll regsvr32.exe vbscript.dll regsvr32.exe scrrun.dll regsvr32.exe msxml.dll regsvr32.exe msxml3.dll regsvr32.exe msxml6.dll regsvr32.exe actxprxy.dll regsvr32.exe softpub.dll regsvr32.exe wintrust.dll regsvr32.exe dssenh.dll regsvr32.exe rsaenh.dll regsvr32.exe gpkcsp.dll regsvr32.exe sccbase.dll regsvr32.exe slbcsp.dll regsvr32.exe cryptdlg.dll regsvr32.exe oleaut32.dll regsvr32.exe ole32.dll regsvr32.exe shell32.dll regsvr32.exe initpki.dll regsvr32.exe wuapi.dll regsvr32.exe wuaueng.dll regsvr32.exe wuaueng1.dll regsvr32.exe wucltui.dll regsvr32.exe wups.dll regsvr32.exe wups2.dll regsvr32.exe wuweb.dll regsvr32.exe qmgr.dll regsvr32.exe qmgrprxy.dll regsvr32.exe wucltux.dll regsvr32.exe muweb.dll regsvr32.exe wuwebv.dll
Заново запускаем выключенные службы обновления
netsh winsock reset
netsh winhttp reset proxy
net start bits
netstart wuauserv
net start appidsvc
net start cryptsvc
После этого перезагружаем компьютер и снова пытается обновить ОС.
Ну и на случай, если ничего не помогает, придется сделать полный сброс параметров Windows 10. Правда, это чревато потерей важных данных. Придется заранее сохранить их в облаке или на отдельном носителе.
![]() Загрузка …
Загрузка …
Post Views: 12 176
Появление на вашем компьютере ошибки с кодом 0x8007000d обычно означает, что на диске есть файл, запрашиваемый Центром обновления Windows, но получить доступ к нему не удалось, так как тот поврежден или отсутствует. Это происшествие не даст вам провести обновление для операционной системы Windows 10 и любых ее компонентов. Также возможной причиной этой ошибки могли стать какие-либо поврежденные драйвера.
Ошибка 0x8007000d является, пожалуй, одной из самых обычных и распространенных проблем с Центром обновления Windows. Решается она практически тем же набором методов, какие применяются и в случае других ошибок. Сразу же к ним и перейдем.
Методы решения для ошибки 0x8007000d
Метод №1 Использование Устранения неполадок с совместимостью
Если у вас возникла данная проблема, когда вы попытались установить определенный драйвер, то вам может помочь средство Устранения несовместимости для этого драйвера. Для этого сделайте следующее:
- Откройте Проводник Windows нажатием комбинации клавиш Win+E.
- Пройдите в ту папку, в которой у вас содержится установщик драйвера.
- Нажмите на установщик правой кнопкой мыши и выберите «Исправление проблем с совместимостью».
- Нажмите на пункт «Диагностика программы».
- Сразу же на следующей экране, выберите проблемы, которые вы испытываете с драйверов, кликните «Далее».
- Выберите старшую версию операционной системы Windows, на которой будет работать драйвер(Windows 7 будет хорошим выбором, так как она является самой стабильной версией из всех ОС).
- Кликните «Далее» и выберите «Проверить программу…»
- Запустите установщик, как вы обычно делали до этого, и если все пойдет нормально, то выберите «Да, сохранить параметры для этой программы».
Если все дело заключалось в совместимости, то такой метод решит для вас проблему с «неустанавливающимся» драйвером и ошибкой 0x8007000d. В другом же случае переходим к следующему методу.
Метод №2 Ручной сброс компонентов Центра обновления Windows
Сброс компонентов Центра обновления Windows может решить вашу проблему. Для сброса сделайте следующее:
- Нажмите одновременно кнопки Win+X и выберите «Командная строка(администратор)».
- Последовательно вписывайте эти команды в Командную строку и не забывайте подтверждать их нажатием на Enter:
- net stop bits
- net stop wuauserv
- net stop appidsvc
- net stop cryptsvc
- Теперь вам необходимо удалить qmgr*.dat. Это тоже можно сделать через всю ту же Командную строку. Откройте ее таким образом, как было указанно выше, копируйте нижеуказанную строку и нажмите Enter:
- Del “%ALLUSERSPROFILE%\Application Data\Microsoft\Network\Downloader\qmgr*.dat
- Затем впишите во все еще открытую Командную строку команду cd /d %windir%\system32 и нажмите Enter.
- Далее вам нужно ввести ряд последовательных команд, нажимая Enter через каждую из них для проведения повторной регистрации файлов BITS и Центра обновления Windows:
- regsvr32.exe atl.dll
- regsvr32.exe urlmon.dll
- regsvr32.exe mshtml.dll
- regsvr32.exe shdocvw.dll
- regsvr32.exe browseui.dll
- regsvr32.exe jscript.dll
- regsvr32.exe vbscript.dll
- regsvr32.exe scrrun.dll
- regsvr32.exe msxml.dll
- regsvr32.exe msxml3.dll
- regsvr32.exe msxml6.dll
- regsvr32.exe actxprxy.dll
- regsvr32.exe softpub.dll
- regsvr32.exe wintrust.dll
- regsvr32.exe dssenh.dll
- regsvr32.exe rsaenh.dll
- regsvr32.exe gpkcsp.dll
- regsvr32.exe sccbase.dll
- regsvr32.exe slbcsp.dll
- regsvr32.exe cryptdlg.dll
- regsvr32.exe oleaut32.dll
- regsvr32.exe ole32.dll
- regsvr32.exe shell32.dll
- regsvr32.exe initpki.dll
- regsvr32.exe wuapi.dll
- regsvr32.exe wuaueng.dll
- regsvr32.exe wuaueng1.dll
- regsvr32.exe wucltui.dll
- regsvr32.exe wups.dll
- regsvr32.exe wups2.dll
- regsvr32.exe wuweb.dll
- regsvr32.exe qmgr.dll
- regsvr32.exe qmgrprxy.dll
- regsvr32.exe wucltux.dll
- regsvr32.exe muweb.dll
- regsvr32.exe wuwebv.dll
- Впишите команду netsh winsock reset для сброса каталога Winsock.
- Впишите команду netsh winhttp reset proxy для сброса Прокси.
- Впишите следующие команды для перезапуска служб, которые вы остановили несколько шагов назад:
- net start bits
- net start wuauserv
- net start appidsvc
- net start cryptsvc
- И напоследок, перезагрузите свой компьютер. После выполнения вышеописанных действий, ошибка 0x8007000d должна будет оставить вас в покое.
Метод №3 Запуск DISM
Если вам не помог предыдущий метод, то вы можете попробовать запустить средство «Система обслуживания образов развертывания и управления ими» или просто коротко DISM, которое уже встроено в вашу систему и может решить проблему с поврежденными файлами.
- Нажмите комбинацию клавиш Win+X и выберите из контекстного меню пункт «Командная строка(администратор)».
- Впишите команду dism.exe /online /cleanup-image /scanhealth и нажмите Enter.
- Как только закончится выполнение предыдущей команды, введите dism.exe /online /cleanup-image /restorehealth и нажмите Enter.
- После выполнения, закройте Командную строку.
Определенно какой-то из методов сможет помочь вам с ошибкой 0x8007000d, которая, кстати, является очередной проблемой в Windows 10, оставшейся в ней даже после двух лет ее жизни. Как только вы избавитесь от проблемы, то сможете спокойно выполнить задуманное обновление в Центре обновления Windows.
Reading time: 9 Minutes
Maintaining updated Windows is crucial for system protection. Microsoft’s built-in Windows Update simplifies downloading and installing updates for the OS, security services, app drivers, and programs.
However, installing system updates, which should have been a lot easier and smoother with Windows Update, doesn’t always end up successful. Various issues can hinder the update process and result in installation failure. One of the most common Windows Update problems around is error code 0x8007000d.
Error Code 0x8007000d is usually accompanied by any of these notifications:
- Windows couldn’t be activated.
Go to the Control Panel to learn about other ways to activate.
Error code: 8007000d
Error description: The data is invalid.
- Windows could not search for new updates.
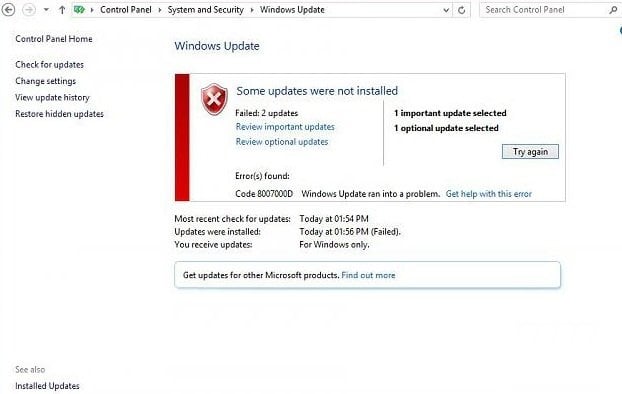
An error occurred while checking for new updates for your computer.
Error(s) found: Code 0x8007000d Windows Update encountered an unknown error.
This problem happens whenever you try to run Windows Update to install new drivers or system updates. When you see this error, anything you try to download or install via Windows Update will all fail in the end. Frustrating, isn’t it? Getting this error means that Windows users are missing out on important security updates, new features, or other improvements that are crucial to the smooth running of the operating system.
What causes error code 0x8007000d? This error is often associated with damaged or missing Windows Update files. Without these files, Windows Update cannot proceed with the installation. If you’re installing an update for an app, the error might occur due to compatibility issues.
Network problems are another major cause of error code 0×80070000d. If your network is unstable, the update files are unable to download completely, and as aforementioned, the Windows update cannot continue with some files missing. Also, viruses and malware may corrupt your files, rendering them unrecognizable during the update.
When your PC has corrupted files, unusual issues might arise, hindering smooth system performance. The corrupted system files can also interrupt system update processes while updating your operating system.
When you experience error code 0x8007000d, it is vital to establish the cause to develop the quickest course of action. Otherwise, your computer won’t function smoothly, and this can be a cause of frustration.
Error Code 0x8007000d is usually accompanied by any of these notifications:
- Windows couldn’t be activated.
Go to the Control Panel to learn about other ways to activate.
Error code: 8007000d
Error description: The data is invalid.
- Windows could not search for new updates.
An error occurred while checking for new updates for your computer.
Error(s) found: Code 0x8007000d Windows Update encountered an unknown error.
This problem happens whenever you try to run Windows Update to install new drivers or system updates. When you see this error, anything you try to download or install via Windows Update will all fail in the end. Frustrating, isn’t it? Getting this error means that Windows users are missing out on important security updates, new features, or other improvements that are crucial to the smooth running of the operating system.
What causes error code 0x8007000d? This error is often associated with damaged or missing Windows Update files. Without these files, Windows Update cannot proceed with the installation. If you’re installing an update for an app, the error might occur due to compatibility issues.
We’ve listed down several fixes below for you to resolve this error. You can try each one of them to see which one solves the problem.
How to Fix Error Code 0x8007000d
Before you start fixing error code 0x8007000d, make sure you do these basic troubleshooting steps first.
Close all your programs and restart your computer. Make sure to back up your files in case the repair goes wrong. You can also use a PC repair tool to remove old updates and other unnecessary files that may be preventing new updates from downloading.We also recommend you clear all junk files. To remove junk files, access the disk cleanup tool via the Windows search box, select the disk you want to clean up then selectively delete the file types you want to get rid of.
If these fixes don’t work, you can try the methods below to solve error code 0x8007000d on Windows 10/11. If the first one doesn’t work, then go to the next method until you find one that does.
Method #1: Run the Compatibility Troubleshooter
If you’re getting 0x8007000d error code when you’re trying to download or install a specific driver, using the compatibility troubleshooter might solve your problem.
To do this, follow the steps outlined below:
- Press Windows + E to launch File Explorer.
- Go to the folder where the driver installer is located.
- Right-click on the installer file, then choose Troubleshoot Compatibility.
- Once the Program Compatibility Troubleshooter is launched, click on Troubleshoot Program.
- Select the issues you’re experiencing with the driver, then click Next.
- Select an older version of Windows under Run this program in compatibility mode for. We recommend you use Windows 7 since it is the most stable version of the OS so far.
- Click Next, then hit the Test the program button.
- Install the driver by following the on-screen instructions.
If everything goes as it should, click Yes, save these settings for this program at the end to remember your settings.
Method #2: Run the Windows Update Troubleshooter.
You should also consider running the Windows Update troubleshooter to see if it will help you fix the 0×8007000d error.
Accessing troubleshooters on Windows 10 and 11 differs slightly. Use the following steps to access the Windows Update troubleshooter on Windows 10 PCs:
- Press Windows + I combination to open Settings
- Select “Update & Security”, then choose “Troubleshoot.”
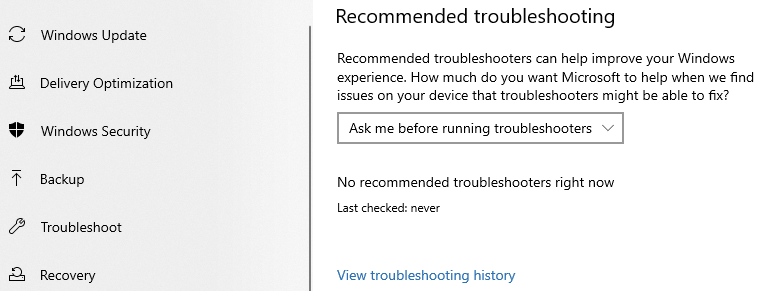
- Next, pick the “Additional troubleshooters” option.
- Select “Windows Update” from the “Additional troubleshooters” list.
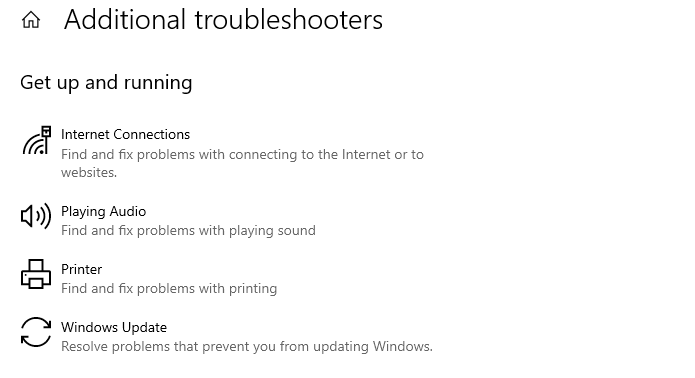
- Click “Run the troubleshooter”.
For Windows 11, follow this procedure:
- Open Settings from the Start options or by using the Win + I combo.
- Select “System,” then navigate to “Troubleshoot.”
- Next, click on “Other troubleshooters.”
- After accessing other troubleshooters, pick “Windows Update” from the available options. This troubleshooter will run diagnostics and automatically fix the issues hindering you from installing Windows updates.
If the error occurred when running Windows Update, you can use the troubleshooter to scan for issues and try to fix it. If you have the Windows Update Troubleshooter installed on your computer, just press Windows + Q to launch it. If nothing pops up, download the app here and install it according to instructions.
Alternatively, you can use the troubleshooter integrated into Windows to deal with error code 0x8007000d. To do this:
- Click Start > Control Panel > System and Security.
- Click on the Update Troubleshooter link.
- Choose Fix problems with Windows Update.
- Click on the Advanced tab, then select Run as administrator. Make sure that Apply repairs automatically is also ticked off.
Once launched, the troubleshooter will automatically scan for any errors with Windows Update. Wait for the process to complete, then try downloading your updates again to see if the error still exists.
Method #3: Run System File Checker.
One of the possible causes of error code 0x8007000d is corrupted Windows Update files. If this is the case, running System File Checker can help resolve this issue. SFC is a built-in tool designed to fix potential problems caused by corrupt Windows files.
To run System File Checker, follow the steps below:
- Press Windows + X keys, then choose Command Prompt (Admin).
- Type in the following commands, then hit Enter:
- Sfc /scannow
- sfc /scannow /offbootdir=c:\ /offwindir=c:\windows
Wait for the process to finish, then reboot your computer to see if the error has been fixed.
Method #4: Run DISM.
If the System File Checker came up empty, the next step would be to run a deeper scan using the Deployment Image Servicing and Management (DISM) tool. Follow the instructions below to use the DISM tool to fix the 0x8007000d error:
- Press Windows + X, then select Command Prompt (Admin) to launch the terminal.
- Type in the following commands one by one, followed by Enter:
- dism.exe /online /cleanup-image /scanhealth
- dism.exe /online /cleanup-image /restorehealth
Wait for the scan to be completed, then check Windows Update if the error has been resolved.
Method #5: Reset Windows Update Components via Command Prompt.
Refreshing the system can fix various errors, and the same is true for Windows Update. However, resetting Windows Update requires executing several command lines, so make sure to follow the instructions closely. You can copy-paste the commands to avoid mistakes in the execution.
Here are the steps you need to follow in order to reset Windows Update components:
- Follow the steps in Method #3 to launch Command Prompt with admin privileges.
- Copy-paste the following commands into the Command Prompt window. These commands will kill all Windows Update processes that are currently running. Paste the commands line by line, then hit Enter after each line to execute each command:
- net stop bits
- net stop wuauserv
- net stop appidsvc
- net stop cryptsvc
- Next, copy-paste the following command to delete the qmgr*.dat file. Press Enter to execute it: Del “%ALLUSERSPROFILE%\ApplicationData\Microsoft\Network\Downloader\qmgr*.dat
- Navigate to the System32 folder by typing in: cd /d %windir%\system32.
- Hit Enter to access the folder. This is where you’ll re-register the BITS and Windows Update files.
- Next, type in the following commands to reset your BITS and Windows Update components. Copy each line one by one, then hit Enter to execute each command.
- regsvr32.exe atl.dll
- regsvr32.exe urlmon.dll
- regsvr32.exe mshtml.dll
- regsvr32.exe shdocvw.dll
- regsvr32.exe browseui.dll
- regsvr32.exe jscript.dll
- regsvr32.exe vbscript.dll
- regsvr32.exe scrrun.dll
- regsvr32.exe msxml.dll
- regsvr32.exe msxml3.dll
- regsvr32.exe msxml6.dll
- regsvr32.exe actxprxy.dll
- regsvr32.exe softpub.dll
- regsvr32.exe wintrust.dll
- regsvr32.exe dssenh.dll
- regsvr32.exe rsaenh.dll
- regsvr32.exe gpkcsp.dll
- regsvr32.exe sccbase.dll
- regsvr32.exe slbcsp.dll
- regsvr32.exe cryptdlg.dll
- regsvr32.exe oleaut32.dll
- regsvr32.exe ole32.dll
- regsvr32.exe shell32.dll
- regsvr32.exe initpki.dll
- regsvr32.exe wuapi.dll
- regsvr32.exe wuaueng.dll
- regsvr32.exe wuaueng1.dll
- regsvr32.exe wucltui.dll
- regsvr32.exe wups.dll
- regsvr32.exe wups2.dll
- regsvr32.exe wuweb.dll
- regsvr32.exe qmgr.dll
- regsvr32.exe qmgrprxy.dll
- regsvr32.exe wucltux.dll
- regsvr32.exe muweb.dll
- regsvr32.exe wuwebv.dll
- After resetting these components, you should also reset Winsock by typing in the following command followed by Enter: netshwinsock reset.
- Reset Proxy by typing in: netshwinhttp reset proxy.
- Once done, it is now time to restart the services you stopped at the beginning. Type in the following commands one by one, then press Enter after each line:
- net start bits
- net start wuauserv
- net start appidsvc
- net start cryptsvc
Don’t forget to restart your computer for the changes to apply.
Method #6: Update Windows Via the Windows Update Assistant
When installing Windows 10 updates through the Settings app, you may experience error 0x8007000d. The Windows Update Assistant can help avoid this issue. With this method, your system’s updates are checked for compatibility immediately after asking your assistant to check for new updates.
The Update Assistant updates Windows with these steps:
- Download the Windows 10 Update Assistant on your browser, and launch it.
- Then select “Update now.”
- After downloading the update files, run them.
- Then follow the instructions on the screen to install the updates.
- Restart your PC.
- The error should no longer appear once your PC restarts.
Method #7: Try Downloading and Installing Update Packages Manually
You can get all the latest Windows Update packages from the Windows Update catalog. You can download and install these packages manually if the automatic update misbehaves. However, this method might need you to know the name of some updates. You can access some update files by typing “KB”(without quotes) into the search box. Several packages will be displayed. Download the relevant files, then run them from your downloads.
Wrapping Up
Windows is a versatile operating system, but issues such as error code 0x8007000d put your system at risk since you are unable to download critical updates for your computer. Fortunately, there are several ways you can go about to resolve these issues. Any of the methods above should do the work to fix the error and improve how your Windows Update works.
Give us some love and rate our post!