I tried testing my app on Android Studio but I was getting stuck at
"waiting for AVD to come online..."
I’ve read resetting adb from Android Device Monitor will do it, and it did…
for 1 test, when I’ve restarted my PC the next day I’m getting not only:
"waiting for AVD to come online..."
but also
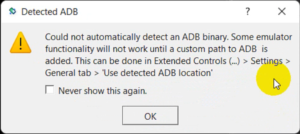
"Could not automatically detect an ADB binary." error every time I try testing my app.

Maybe worth mentioning when I did that 1 test, I was also getting the
"Could not automatically detect an ADB binary."
error, but at least it worked.
![]()
Vikrant
4,94017 gold badges48 silver badges72 bronze badges
asked Sep 21, 2016 at 13:29
![]()
1
Just open the emulator and click on the three dots on the last of the toolbar line, the other page will open then go to setting, then there is the the option «USE DETECTED ABD LOCATION» just off that than the option will come click on that and select adb.exe the location of adb.exe is go to your main disk location example my main disk location is C:\ just select your own disk where your windows, mac, linus is installed,then go to users, then AppData, then Local, then Android then select sdk then platform-tool and select adb.exe then click ok
![]()
answered Aug 13, 2021 at 8:28
![]()
1
From my experience this is because the AVD can’t detect your ADB binary. When you launch the AVD if you go into settings, it’s the ‘…’ symbol on the toolbar of the virtual machine, then go to the ‘Settings’ section there should be an option called ‘Use detected ADB location’ switch this off then select the location of your adb binary. In Linux you can do this by typing the command:
which adb
Select the location shown in the settings. Once you’ve done that the error should stop appearing.
answered Mar 28, 2017 at 8:29
![]()
James LendremJames Lendrem
1,7802 gold badges15 silver badges23 bronze badges
2
This error because android studio did not find adb.exe in SDK\platform-tools folder. Maybe this is caused by sdkmanager while trying to update current packages.
Any way, the easiest way to fix this error is by downloading SDK Platform Tools as zip file from https://developer.android.com/studio/releases/platform-tools.html , unzip it and replace the current platform-tools folder in SDK folder.
answered Jan 12, 2018 at 3:55
![]()
Eng. Samer TEng. Samer T
6,4756 gold badges36 silver badges43 bronze badges
go to ..\AppData\Local\Android\Sdk\platform-tools and reinstall your ADB, i guess this happens on ADB 32 in an system 64bits
answered Jun 6, 2019 at 14:19
![]()
Go and check your sdk/platform-tools, is adb there? If not Open SDK manager and download Android platform tools, contains adb.
After that try once again, for me this works
answered May 14, 2020 at 12:49
![]()
Vijay RamVijay Ram
3855 silver badges12 bronze badges
On my device (Windows 10 x64) it is located at:
C:\Program Files (x86)\Android\android-sdk\platform-tools\adb.exe
answered Aug 11, 2022 at 16:27
![]()
PerseusPerseus
3302 silver badges8 bronze badges

Click on the ... in the emulator and click on settings -> «User detected ABD location» will be switched on. Change it to off and browse the location of adb.exe under platform tools.
![]()
answered Jan 11 at 5:49
![]()
I’m remaking the selected answer. I tried to edit it myself but the editing queue is full. Here it is, for the sake of clarity.
Follow these steps:
- Open the emulator and click on the
three dotsat the bottom of the toolbar line. A new window will open (theExtended Controlsof the emulator). - Then select the
Settingstab. There, toggle the option `Use detected ABD location» off. - The folder selection for that field will turn on. Open it, and select the
adb.exefrom its current location. - That executable should be somewhere in your main disk (this will vary depending on your actual OS, either Windowx, Linux or macOS). Go to
users>AppData>local>Android>sdk>platform-tools> selectadb.exefile. - Click
Openin the selection window. The full path to the file shoulb be visible. Lastly, close the emulator’sExtended Controlswindow. Done!
Path example in Windows:
C:/Users/<username>/AppData/Local/Android/Sdk/platform-tools/adb.exe
Screen recording:

When you install a new android studio or initiate an emulator, then this type of error message comes while running the app.
Could not automatically detect an ADB binary. Some emulator functionality will not work
until a custom path to ADB is added.
This can be done in Extended Controls (…) > Settings > General tab > Use detected ADB location’. At the time when you run your app in Android Studio, Could not automatically detect ADB binary. Some emulator functionality will not work
unless a custom path is added for ADB. The error comes because the android studio could not locate the path. So you need to add the ADB custom path.
Let’s try to figure out practically “Could not automatically detect ADB binary.” Error in Android Studio.
Step: 1
start emulator
We want to set a custom path for ADB, hence the essential to start the emulator.
Step: 2
Click on the three dots as seen in the following picture.

Step: 3
now click settings.
Step: 4
Here you can see “Use detected ADB location”
Disable the toggle button and set the ADB custom path.

Step: 5
select adb.exe path.
C:/Users/username/AppData/Local/Android/Sdk/platform-tools/adb.exe

Step: 6
Right-click on the “Could not automatically detect ADB binary” dialogue and run your app again.
Maybe this error message goes.
Search code, repositories, users, issues, pull requests…
Provide feedback
Saved searches
Use saved searches to filter your results more quickly
Sign up
AVG Manager Unable to locate ADB Android Studio on Windows 11/10
The unable to locate ADB error is quite common to encounter while trying to run an app through the Android Studio on Windows 10 or above. The ADB or Android Debug Bridge, as its name suggests, acts as a bridge between you and the various applications installed on your system.
However, due to some reasons that I’ll discuss next, users reported the unable to locate ADB error. If you’re looking for its solutions, you’ve landed in the right place.
Read on as I discuss what causes the above error and offer the top six working solutions for the same.
Reasons of Error “unable to locate ADB”
As aforementioned, the unable to locate ADB error message can be triggered by various reasons, besides your AV removing the ADB.exe file which is stored in the platforms tools folder. Here are the other common reasons that contribute to the above.
- If no SDK (Software Development Kit) is assigned to the project, it can’t access the ADB file. As a result, you get the error.
- Your third-party AV removed the ADB.exe file due to false security issues.
- The relevant Android SDK version is absent on your PC.
- Damaged or corrupt platform-tools files.
So, these are the common reasons behind the AVG manager unable to locate ADB error message on your Windows 10/11.
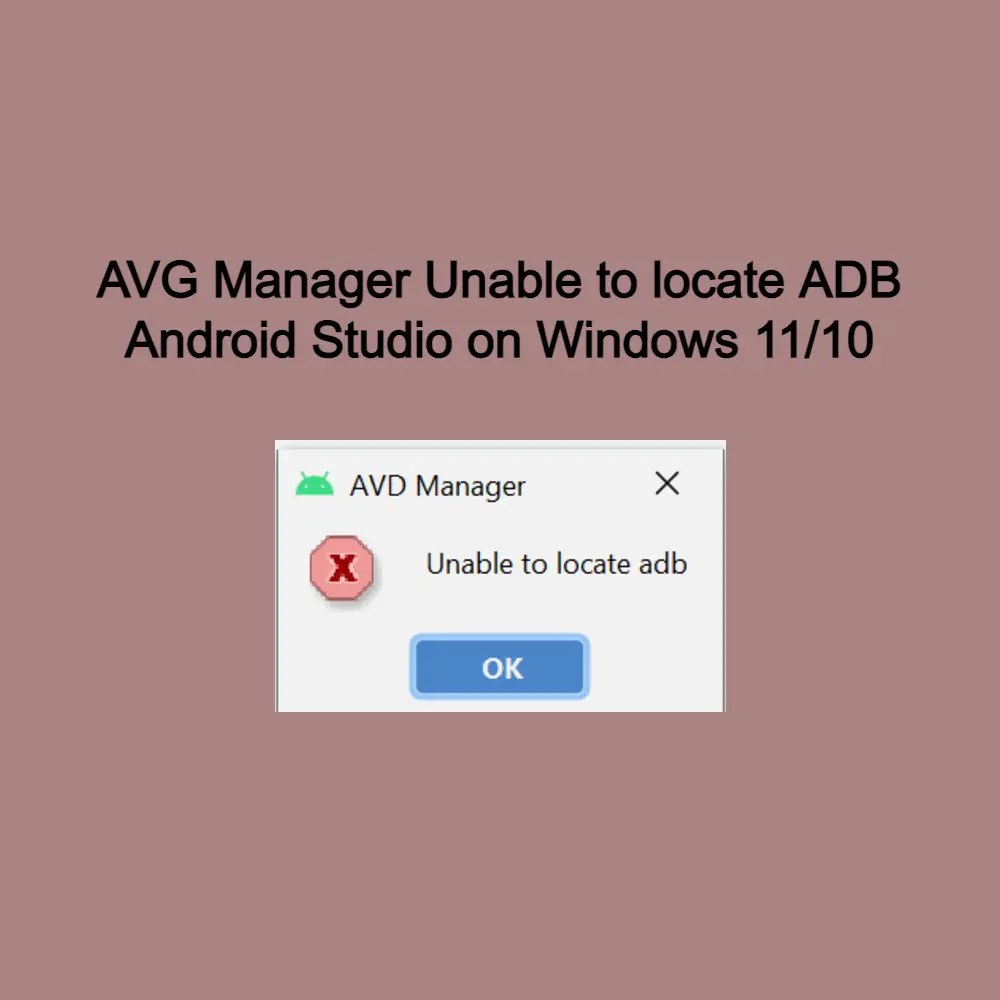
AVG Manager Unable to locate ADB Android Studio on Windows 11 10
Now that you’ve understood why you’re unable to locate ADB in the Android Studio, let’s work around the following eight solutions to solve it.
-
Look for the ADB.exe file
As aforementioned, if you can’t find the adb.exe file on your system, the unable to locate ADB error is inevitable. Hence, I recommend checking the file before trying out any other solution.
To check the adb.exe file, follow these steps.
- Launch the File Explorer on your device.
- Under Device and drives, click on Local Disk (C:).
- Next, follow this path: Username > AppData > Local > Android > SDK > Platform-Tools.
- Inside the Platform Tools folder, look for the adb.exe file.
-
Use the PC Repair Tool
Since you may have damaged or corrupt ADB files on your system that are contributing to the error, you can also use any PC Repair tool to scan and repair those files.
A PC repair tool is a software application that monitors your system performance and optimizes it to avoid issues going forward. Since there are tons of PC repair tools online, I recommend Restoro.
It’s an easy-to-use tool designed for Windows. And guess what? It has a free trial as well. So, you can check its performance to solve the flutter unable to locate the ADB error message on Windows 10/11.
If the PC repair tool doesn’t work, try the next method.
-
Check your AV
An antivirus may protect your system from malicious files, programs, applications, and other malware attacks. However, it can also trigger a false positive report for certain files that are not at all dangerous for your system in any way.
As a result, the AV quarantines the files, including the adb.exe file to cause the above error. As a resolution, restore the file from the virus chest. Follow these steps to do so.
- Go to the taskbar and right-click on the AV icon. You can find it in the taskbar’s right-hand corner.
- A small menu will open. Click on the Virus Chest (I’ve Avast AV installed on my PC.)
- On the next screen, click on the Protection option on the left panel.
- Here, you’ll find the files, programs, and applications that the antivirus suspects as harmful to your device. Look for the adb.exe file.
- If the file is present there, click on the three horizontal dots next to the file.
- A small context menu will open. Click on the Restore
- The adb.exe file will now be restored and ready to use.
Note: Although you’ve restored the adb.exe file for now. The antivirus will again add it to the threat list after scanning it. To avoid this, in the last step, select Restore and add exception from the drop-down menu. Now, the adb.exe file will never appear in the Virus Chest.
-
Modify the Project Settings
Another common reason for the unable to locate ADB on Android Studio error message is the project settings. By default, the setting is set to No SDK. Due to this, no SDK is assigned to the project, and thus, it can’t locate the ADB.
Follow the given steps to modify the project settings.
- Launch the Android Studio on your PC.
- Click on the Project Structure This will open the Project Structure window.
- On the current window, click on the Project option under the Project Settings section on the left panel.
- Under Project SDK:, you will find that SDK is set to NO SDK.
- Click on the downward arrow and select Android API 30 Platform (java version “1.8.0_242”) from the drop-down menu.
- Once completed, click on OK.
Now, check again whether you’re getting the error message or not. If yes, try installing Android SDK from the SDK manager. It’s discussed below.
-
Install Android SDK from SDK Manager
If your system lacks the latest version of Android SDK, the unable to locate the ADB error message is inevitable. Thus, I recommend installing the latest version of the Software Development Kit.
Follow these steps to do so.
- First of all, let’s install the latest version of Android Studio on the system. For this, visit the official website of Android Studio.
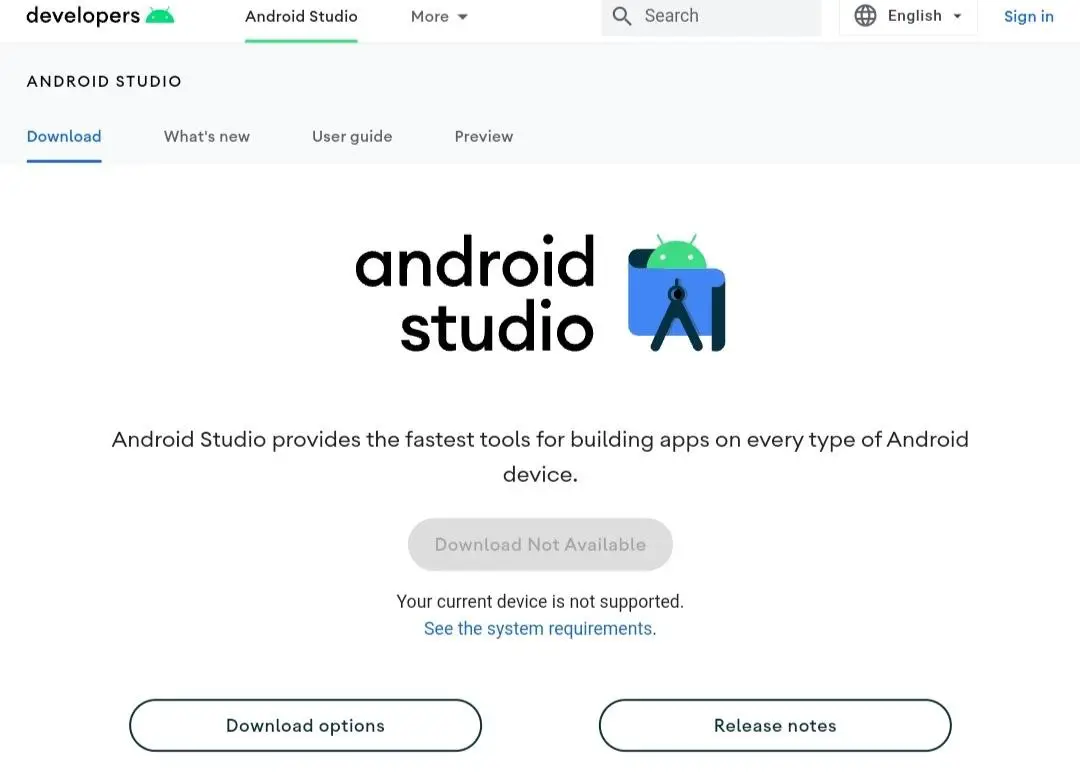
install the latest version of Android Studio
- On the home screen, click on Download options.
- You’ll be taken to the downloads page. Find the latest .exe file for your system and download it.
- Once downloaded, install it by following the on-screen instructions.
Now that you’ve installed the latest version of Android Studio, let’s install the latest version of the SDK as well.
- Launch the Android Studio app on your system.
- On the landing page, click on More Actions, and select SDK Manager from the drop-down menu.
- Once you’re on the SDK Manager window, you’ll find three tabs – SDK Platforms, SDK Tools, and SDK Update Sites. Click on SDK Platforms.
- Find the latest SDK platform for your Android Studio, and install it.
- Hit the OK
Now, check if the error is gone or not. If it persists, work around the next solution of reinstalling Android SDK Platform Tools.
-
Reinstall Android SDK Platform Tools files
As the last remedy, I suggest reinstalling Android SDK Platform Tools files as damaged or corrupt files can also be another reason behind the unable to locate ADB error message on Windows 10/11.
Follow the given steps to do so.
- Close the Android Studio for now.
- Go to the taskbar and right-click on it.
- A menu will open. Select Task Manager from it.
- When the Task Manager window opens, click on the Processes tab, navigate to the exe process, and end it.
- Launch the Android Studio again.
- Open the SDK Manager again from the Android Studio. For this, click on the cube-like icon with a downward arrow.
- On the SDK Manager window, click on the SDK Tools
- Navigate to the Android SDK Platform-Tools option, uncheck it, and click on OK. This will uninstall the Platform Tools.
- Once uninstalled, reopen the SDK Manager window, and click on the SDK Tools
- Navigate to the Android SDK Platform-Tools option, check it, and click on OK.
This way, you’ve reinstalled the Android SDK Platform Tools files.
So, here you go. These were the best tried and tested methods to solve the flutter unable to locate ADB issue.
Conclusion
ADB or Android Debug Bridge is a command-line tool that helps you interact with a device. It is automatically installed on your system along with the Android Studio when you install Android SDK. Sometimes, due to some reasons, the adb.exe file may get damaged, corrupted, or lost.
In such a case, you get the unable to locate ADB error on your Windows system. Several culprits contribute to this and they are discussed above. Further in this article, you get the top 8 solutions to solve.
So, were you able to solve the issue? Let’s know in the comments.
Could not automatically detect an ADB binary. Some emulator functionality will not work until a custom path to ADB is added. This can be done in Extended Controls (…) > Settings > General tab > ‘Use detected ADB location’
I happened to download Android Studio that runs natively on M1 Silicon Mac, I was looking for an Android Emulator that could also run natively, after getting it installed when I ran the emulator I got the above messages.
Now the question that I had was — How to connect the emulator to Android Studio and run by applications that I want to test, here is how I was able to do this,
- Open Android Studio
- Go to: Menu -> Tools -> SDK Manager
- Click on SDK Tools Tab,
- Now Check on — «Android SDK Platform-Tools»
- Click on OK to install.
- Now you should see «Virtual Device» under Device Connector (just next to build icon)
- Run your App and it should start in Native M1 Android Emulator.

Run Android App from Android Studio on Native M1 Emulator
Have Questions? Post them here!