Привет друзья! Если вы заглянете в Журнал событий Windows и развернёте раздел «Система», то наверняка обнаружите там целый ряд записей об ошибках и предупреждениях. Большинство из них внешне никак себя не проявляют, поэтому вы бы никогда о их не узнали, если бы не удосужились изучить содержимое Журнала. Но есть такие ошибки, которые не заметить невозможно — это ошибки, приводящие к появлению так называемого синего экрана смерти, или BSOD. С одной из таких ошибок, а именно Critical Service Failed, мы сегодня попробуем разобраться.
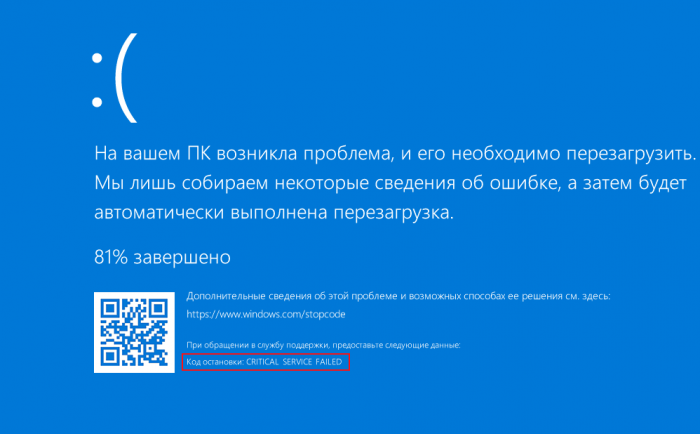
В отличие от Windows 7, Windows 8.1 и 10 обычно не сообщают кода ошибки, что затрудняет выявление причины её появления. Данные об ошибке сохраняются в файл дампа, но очень немногие из пользователей умеют интерпретировать его содержимое. Вместо этого они прибегают к общим решениям, которые часто оказываются вполне действенными. Ошибка Critical Service Failed буквально означает падение критического, то есть критически важного процесса, без которого Windows не может запуститься. Чаще всего причиной этой ошибки становится конфликт низкоуровневого программного обеспечения — драйверов, с аппаратными компонентами, ядром или внезапный сбой в их работе. Реже ошибка возникает из-за неисправности оборудования и повреждения системных файлов.
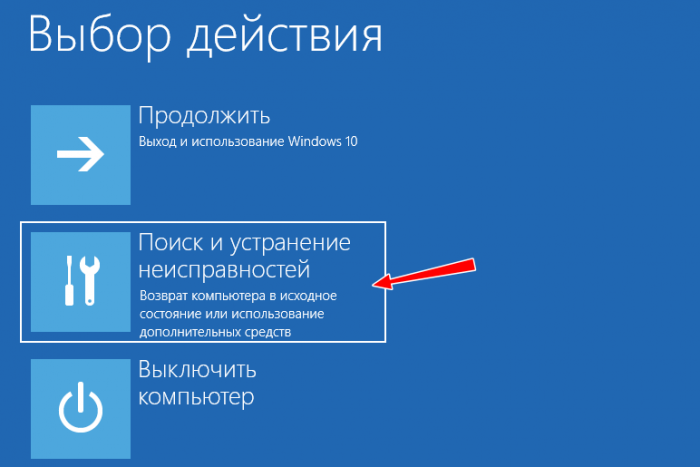
Отключаем проверку подписи драйверов, потенциально способных привести к ошибке. В работающей системе для входа в соответствующее меню нужно выполнить перезагрузку с зажатой Shift, в неработающей — дважды прервать процедуру загрузки на её раннем этапе.

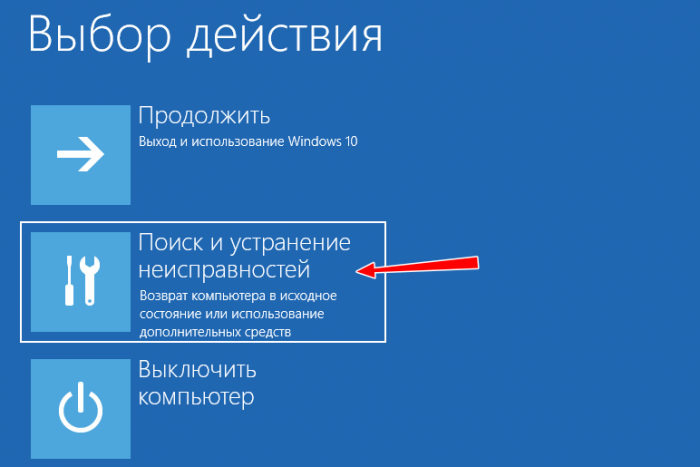
 В меню выбора действия выбираем «Поиск и исправление неисправностей»
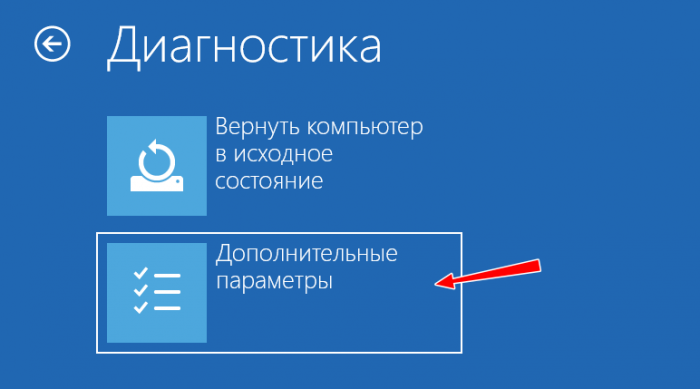
 «Дополнительные параметры».
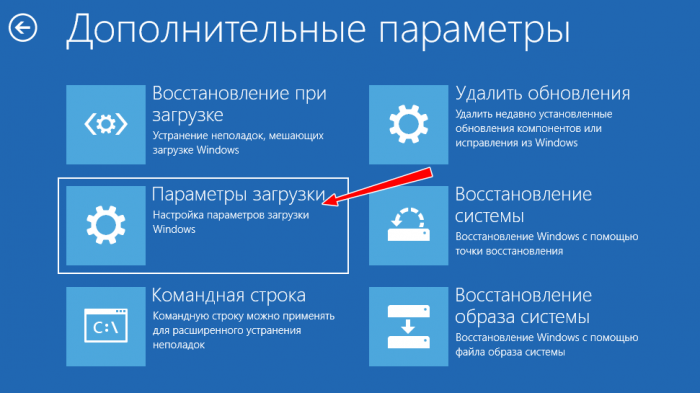
 «Параметры загрузки» и перезагружаем ПК.
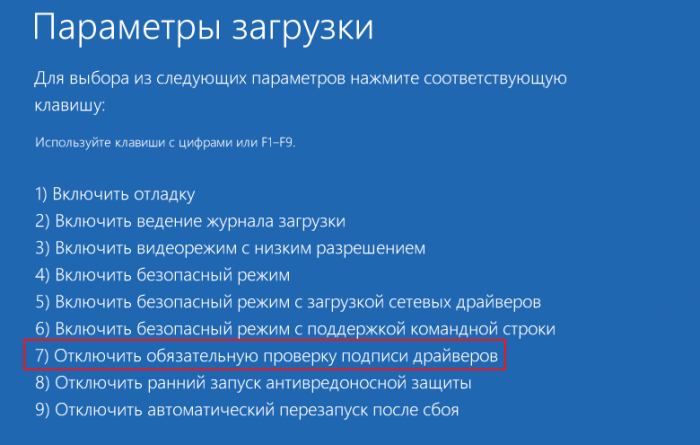
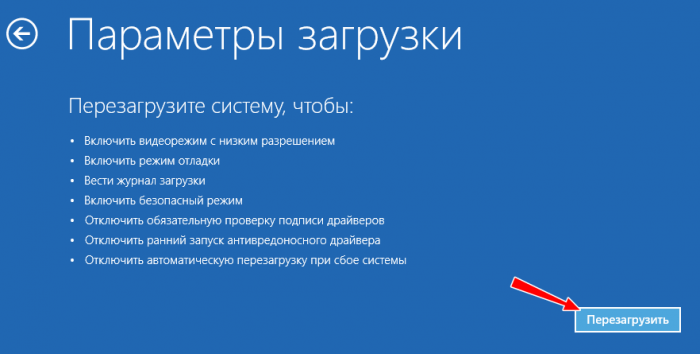 Когда компьютер загрузит меню доступных параметров, нажимаем на клавиатуре F7, чтобы отключить проверку подписи драйверов. С проблемным драйвером или устройством, однако, всё равно придётся что-то делать: вы либо удаляете, либо обновляете его, либо откатываете к ранней версии.
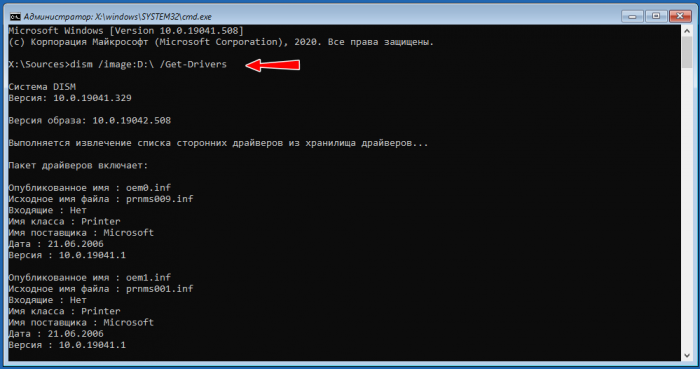
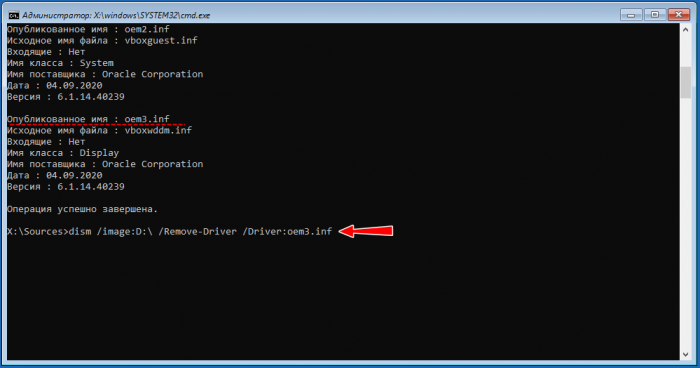
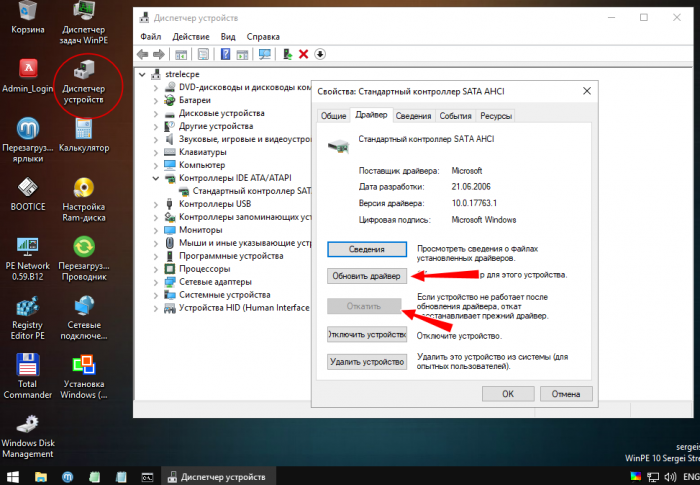
Если ошибка возникает периодически после установки или обновления драйвера, последний необходимо удалить или откатить из оснастки «Диспетчер устройств». Если компьютер не загружается, удаление драйвера производится в загрузочной среде WinPE с использованием командной строки, предварительно определив букву системного раздела (она обычно отличается). Для получения списка установленных в системе драйверов используется команда Dism /image:D:\ /Get-Drivers. Найдя в списке проблемный драйвер, удаляем его такой командой, где oem.inf — опубликованное имя драйвера:
DISM /Image:D:\ /Remove-Driver /Driver:oem.inf
 Поскольку данный способ может вызвать затруднения у начинающих пользователей, более простым и универсальным решением является удаление обновлений, исправлений или откат системы из той же загрузочной среды WinPE.
Примечание: для удаления, обновления и отката драйверов можно использовать диск WinPE 10-8 Sergei Strelec, вернее, встроенную в него утилиту «Диспетчер устройств».
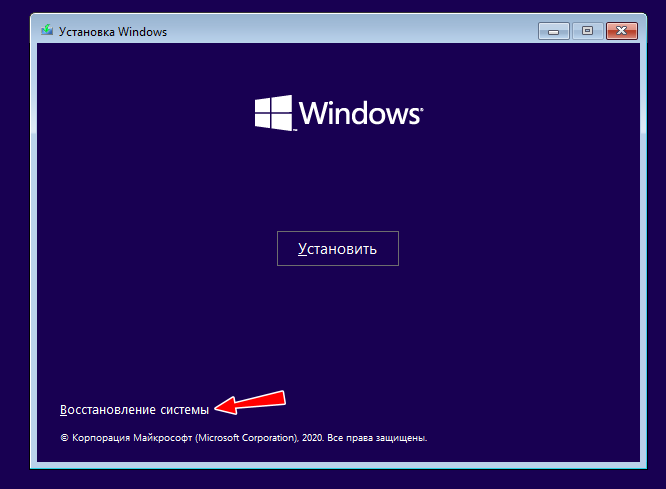
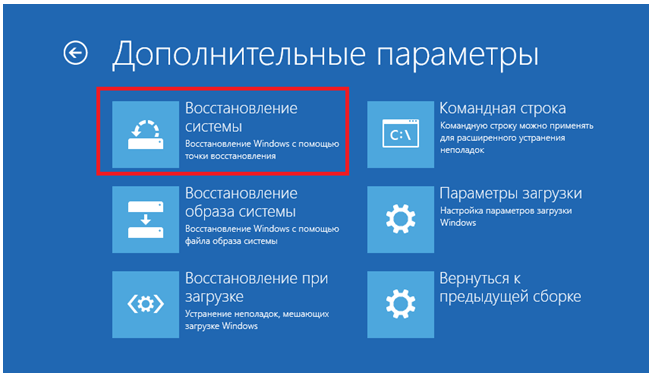
Загрузившись с установочного диска, жмём «Восстановление системы» → «Поиск и исправление неисправностей» и выбираем один из методов восстановления. Загрузочная среда WinPE предлагает несколько вариантов:
 • Восстановление при загрузке. Поможет, если ошибка была вызвана повреждением загрузочных файлов.
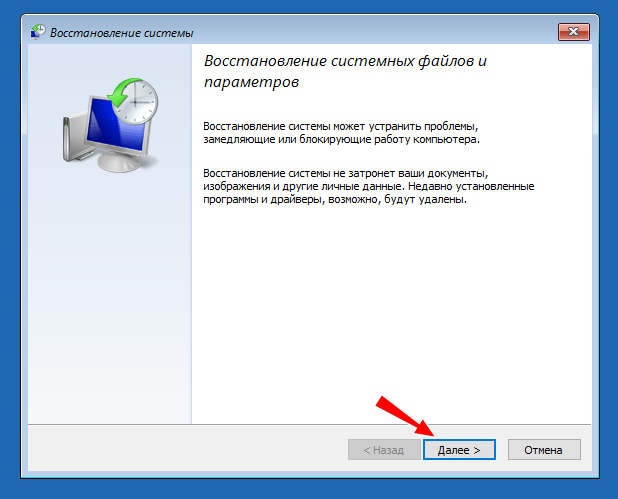
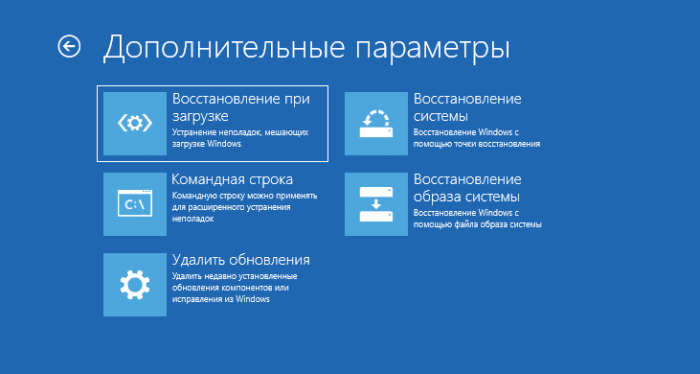 • Восстановление системы. То же, что и откат к предыдущей точке восстановления. Один из действенных методов устранения ошибки Critical Service Failed, поскольку включает в себя автоматическое восстановление прежних версий драйверов. Чтобы иметь возможность им воспользоваться, в свойствах системы должна быть включена опция защиты.
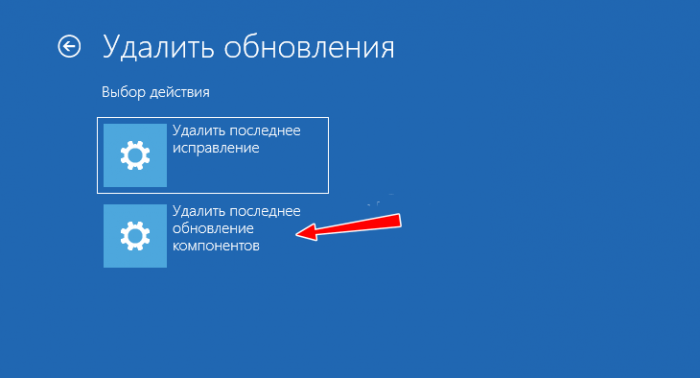
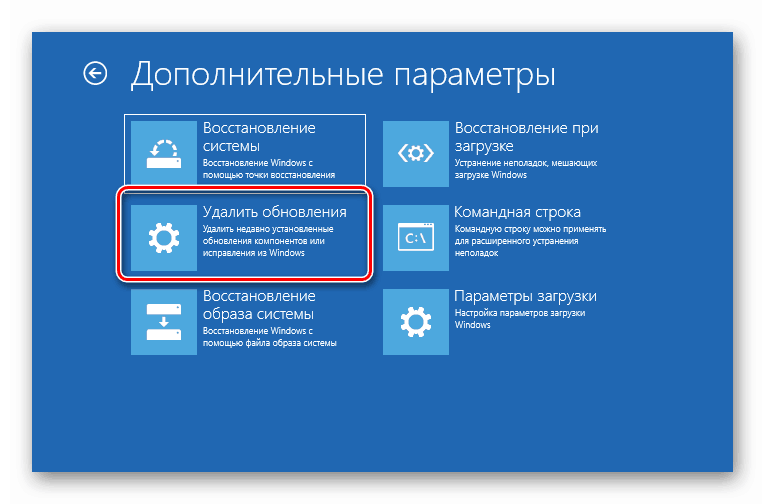
 • Удаление обновлений. Включает в себя две опции — Удаление последних исправлений и Удаление последних обновлений компонентов. Используйте вторую для исправления ошибки Critical Service Failed.
 • Восстановление образа системы. Позволяет восстановить данные и логическую структуру системного раздела из резервной копии, но нужно, чтобы такая копия была создана заранее.
• Вернуться к предыдущей сборке. Эта опция будет доступна только у тех пользователей, которые выполняли «мажорное» обновление Windows, то есть переход на новую версию.
Это эффективный, но радикальный и близкий к полной переустановке метод исправления критических ошибок. Чтобы попасть в меню сброса, нужно дважды принудительно прервать загрузку Windows. При этом вы получите сообщение «Компьютер запущен некорректно», нажмите «Дополнительные параметры».
 «Поиск и исправление неисправностей».
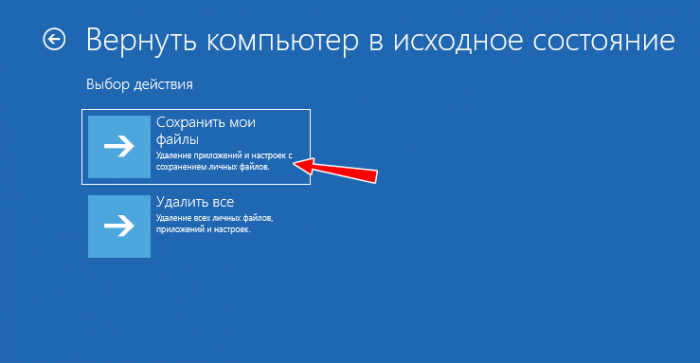
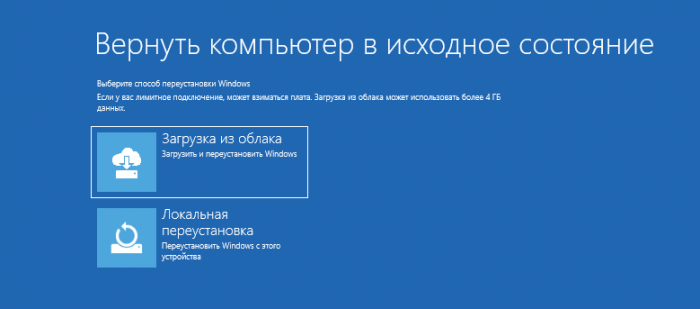
 «Вернуть компьютер в исходное состояние».
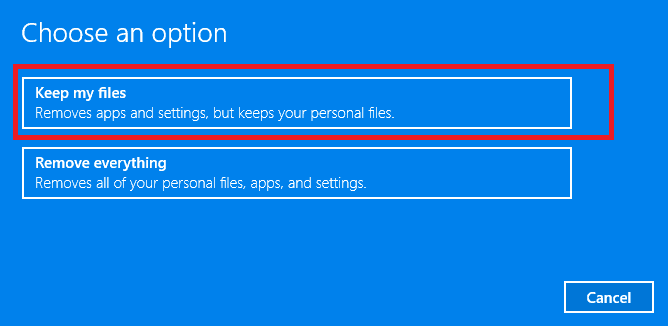
 Далее необходимо будет выбрать режим восстановления — с сохранением пользовательских настроек и личных файлов или их удалением. Первый вариант, естественно, предпочтительнее.
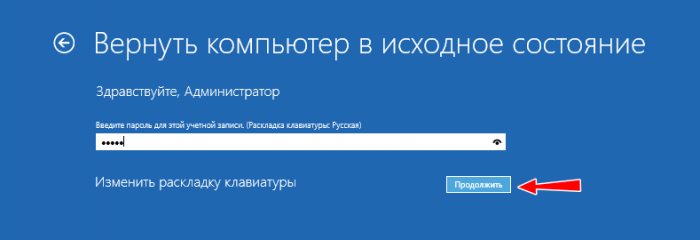
 Для продолжения операции система попросит вас указать вашу учётную запись и ввести пароль. Последний этап — выбор хранилища данных для восстановления. В последних версиях Windows 10 файлы могут быть загружены с серверов Microsoft (Загрузка из облака) и локального хранилища (Локальная переустановка). Оба способа эффективны, но в том и ином случае вы потеряете все установленные программы и некоторую часть настроек.

• Проверка жёсткого диска утилитой CHKDSK в работающей системе или в загрузочной среде.
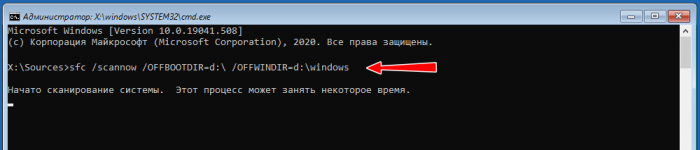
 • Проверка целостности системных файлов командой sfc /scannow (в загрузочной среде процедура проверки несколько отличается, смотрите скриншот ниже).
 • Обновление системы с дистрибутива, смотрите также скриншоты ниже.
Поскольку ошибка Critical Service Failed чаще всего связана именно с работой драйверов, наиболее эффективным способом её устранения является удаление конфликтующего драйвера или откат к его предыдущей версии. Как показывает опыт, обновление драйверов ради самого обновления далеко не всегда себя оправдывает. Если система работает стабильно, разумнее будет не вмешиваться в её работу без крайней на то необходимости. Это касается также и апгрейда железа компьютера.
Хорошая статья нашего сайта на эту тему: Как определить причину синего экрана Windows 10, если ваша OS не загружается.
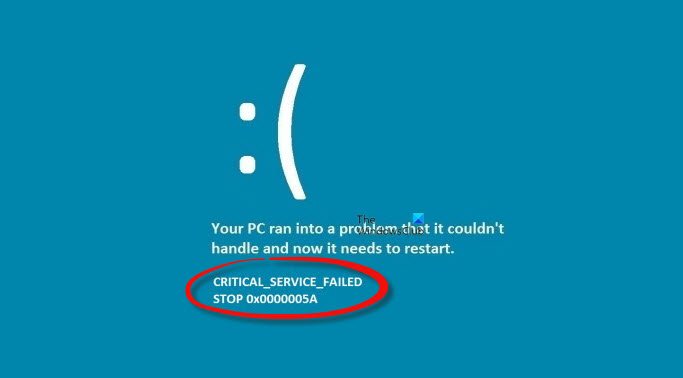
Here is a full guide to fix the CRITICAL SERVICE FAILED Blue Screen error on Windows 11/10. A lot of users have complained about experiencing this error. The users get a Blue Screen of Death (BSoD) with an error message that says “CRITICAL_SERVICE_FAILED”. This error keeps them stuck and prevents them from entering their login screen and accessing Windows. This BSOD error is identified with the “0x0000005A” code.
In case you are one of those encountering the same error and it is frustrating you, we got you covered. This guide is for you if you are clueless about how to fix it up. Here, we are going to discuss all the working fixes that will help you get rid of the CRITICAL SERVICE FAILED error permanently. All these fixes require you to boot Windows into Advanced Recovery mode. Let us check out the fixes and steps to easily resolve this issue.
Before discussing the solutions, let us try to understand the exact reasons behind this error.
What causes CRITICAL SERVICE FAILED in Windows?
Here are the main causes that may trigger CRITICAL SERVICE FAILED BSOD error in Windows 11/10:
- It can be caused due to a missing or corrupted device driver on your system.
- It can also be triggered if there are some incompatibility issues with a newly installed hardware or driver.
- Corrupted system files can also result in this blue screen error in Windows.
Now, we have curated a list of solutions that will enable you to get rid of this error permanently.
Since you cannot access the desktop you will have to either boot Windows in Safe Mode and do the needful or boot Windows to the Advanced Startup Options screen, and then access the system tools like Command Prompt, etc, to carry out these fixes.
Here are the methods to fix BSOD error with the CRITICAL_SERVICE_FAILED message on Windows 11/10:
- Disable Driver Signature Enforcement.
- Run Offline SFC scan.
- Rebuild BCD and MBR.
- Update your device drivers.
- Run System Restore.
- Run Startup Repair.
- Repair Windows Installation using ISO.
Let us discuss the above methods in detail now!
1] Disable Driver Signature Enforcement
You can fix this error by using the Disable Driver Signature Enforcement option at the Advanced Startup Options screen. Doing so will enable you to install and use drivers not officially signed and might help you bypass this error.
Here are the steps to enable the “Disable Driver Signature Enforcement” option:
- Firstly, start your PC and when Windows is loading, turn it off instantly. Repeat this until you see a Preparing Automatic Repair message on the screen.
- Now, from the appeared Options menu, tap on the Troubleshoot option.
- On the next screen, you need to tap on Advanced options and then press the Startup Settings option.
- After that, simply click on the Restart button on the next screen.
- Then, you will see a screen with several options with numbers. To activate the Disable Driver Signature Enforcement option, you need to press the 7 or F7 key on your keyboard. Just press 7 and your PC will restart with driver signature enforcement disabled.
This should resolve this blue screen error for you. However, it may occur again after you reboot your PC. In that case, try the below solutions to fix it permanently.
Read: Fix dxgmms2.sys BSOD error.
2] Run Offline SFC scan
This error can be a result of corrupted system files. In that case, running a System File Checker (SFC) scan will help you get rid of this error. It will verify all your system files and attempt to repair them. When the system is restored to a healthy state, you might not encounter this error again.
You can perform an offline SFC scan by using the following steps:
- First, turn on, then turn off the PC when Windows is loading. Do this until you see the Preparing Automatic Repair screen.
- Now, click on the Troubleshoot option and then select Advanced options.
- Next, you have to choose the Command Prompt option on the next screen.
- Then, select your user account and enter and confirm your password.
- After that, just click on the Continue button to launch Command Prompt.
- Now, to run offline SFC scan, you need to enter the below simple command:
sfc /scannow /offbootdir=C:\ /offwindir=C:\Windows
- Finally, let the command execute completely and then restart your PC normally.
Check if the CRITICAL SERVICE FAILED BSOD error is fixed now and you are able to use your system.
See: Fix REFS_FILE_SYSTEM Blue Screen error.
3] Rebuild BCD and MBR
BCD stands for Boot Configuration Data that stores the boot configuration parameters to start Windows. In case the configuration file is corrupted and causing this error, you can try rebuilding BCD to fix the error. For that, you can follow the below procedure:
Firstly, simply boot into Advanced Recovery Mode and then launch the Command Prompt using the same steps as method (2). Now, type and enter the bootrec /rebuildbcd command in the CMD and then select the OS to add to BCD. Alternately, you can also use the BCDboot tool for the same. See if rebuilding BCD helps you fix the error.
You can also try rebuilding Master Boot Record (MBR) if the MBR is corrupted and leading to the CRITICAL SERVICE FAILED BSoD error. You need to launch the Command Prompt from Advanced Startup options (refer to the method (2)) and then enter the following command one by one:
bootrec /RebuildBcd
bootrec /fixMbr
bootrec /fixboot
When the commands are executed fully, exit the Command Prompt and reboot your PC. Hopefully, you won’t see the CRITICAL SERVICE FAILED error anymore on your screen.
See: Fix EXFAT FILE SYSTEM (volmgr.sys) BSOD error.
4] Update your device drivers
As this error is mainly associated with bad or incompatible drivers, you can try updating your device drivers and then see if the error is fixed for you. To update your device drivers when you are unable to access your PC, you can use the Advanced Recovery mode. Here are the steps to do that:
- First, enter the Advanced Recovery mode using the steps in method (1).
- Now, click on Advanced Options on the Automatic Repair screen.
- Next, press the Troubleshoot option and then choose Advanced options.
- After that, click on the Startup Settings option, and then on the next screen, tap on the Restart button.
- Then, press 5 on your keyboard to activate the Enable Safe Mode with Networking option.
- You can now update your device drivers.
You can update the device driver manually by going to Settings > Updates & security > Windows update and then clicking on the Optional updates option. There you will see updates for all your drivers. Simply select the drivers you want to update and then click on the Download and install button to install driver updates. Alternately, there are some driver update software as well that can automatically update drivers on your PC.
Reboot your PC normally and check whether or not the error is fixed after update device drivers.
Read: Fix CLOCK_WATCHDOG_TIMEOUT Blue Screen Error on Windows
5] Run System Restore
System restore is another fix that you can try to resolve the error. This will revert your PC to a healthier state when you were not receiving this error message. It is effective in a lot of cases and might just fix the error for you as well. Here are the steps to perform a system restore:
- First, boot into Advanced Recovery mode using method (1).
- Now, on the Automatic Repair screen, tap on Advanced options.
- Then, click on Troubleshoot > Advanced Options.
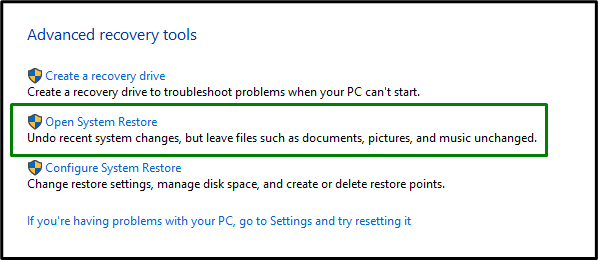
- Next, select the System Restore option.
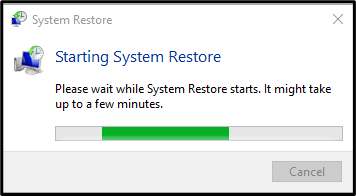
- After that, you can follow the onscreen guide to run the system restore and check if the error is fixed.
Read: Fix HYPERVISOR_ERROR Blue Screen.
6] Run Startup Repair
If the above fixes don’t work for you, you can try running Start repair to fix this error. To run startup repair, you can boot into Advanced Startup Options, and then on the Choose an option screen, click on the Troubleshoot option. Then, go to the Advanced Options > Automatic/Startup Repair option. You will be asked to choose your account name and enter your password. Do that and click on Continue. This will run Startup Repair and try to fix the problems.
7] Repair Windows Installation using ISO
If you are still unable to fix the CRITICAL SERVICE FAILED blue screen error even after trying all the above methods, repairing Windows installation is the last resort. It will repair the corrupted Windows and will help you get rid of CRITICAL SERVICE FAILED Blue Screen error permanently. You can download Windows ISO and then repair your Windows computer using bootable Installation USB.
How do I permanently fix the Blue Screen of Death in Windows?
There are some fixes to fix the Blue Screen of Death in Windows permanently. You can try updating your Drivers and cleaning up malware. Also, make sure your system files are not corrupted; if so, running an SFC scan is recommended. Or, you can also try running Startup repair. Other than that, you can diagnose your computer’s memory problems and fix them up.
That’s it!
Now read: Fix EVENT TRACING FATAL ERROR Blue screen error.
Are you among those Windows users facing the Critical Service Failed BSOD error message on your Windows 10 OS? If YES, then you are in the right place. Here in this blog, I’ll discuss the complete information to fix the Critical_Service_Failed Blue Screen of death error.
Well, the critical service failed Windows 10 error is very irritating and appears with the error code 0x000000EF. And can affect the system hardware such as hard disk drive, system memory, system processor, etc.
Critical Service Failed error generally appears when a critical system process died with error code – 0x000000EF or Blue screen error.
And once a critical system process fails to run it crashes the operating system with a Critical Service Failed Stop Error 0x000000EF or Blue Screen appeared on Windows PC/Laptop.
That’s why; it is suggested to fix the “Critical_Service_Failed” Blue Screen of death error as soon as possible.
Some Related CRITICAL_SERVICE_FAILED Error Messages:
Below are some of the related Windows 10 critical service failed error message. Have a look at them and see which one you encounter.
- “CRITICAL_SERVICE_FAILED” appears and the active program window crashes.
- “STOP error 0x5A: CRITICAL_SERVICE_FAILED” is displayed.
- “A problem has been encountered Windows has been shut down to prevent the computer from being corrupted” The problem may have been caused by the following file “
- Your PC often crashes with Error 0x5A if you run the same program.
- “The CRITICAL_SERVICE_FAILED bug check has a value of 0x0000005A.” Is displayed.
- Windows is slow and slow to respond to the mouse or keyboard.
- Your computer hangs up regularly for a few seconds.
In order to fix the critical service failed Windows 10 BSOD error perform the solutions listed below one after the other and see which one suits you in resolving this BSOD error from your operating system.
Table of Contents
Fix 1: Make sure that System Files are in Working Condition
In order to verify system files, there are mainly two options first one is using the SFC command and the second one is via DISM. We will try both options to verify and repair Windows system files.
Run SFC command
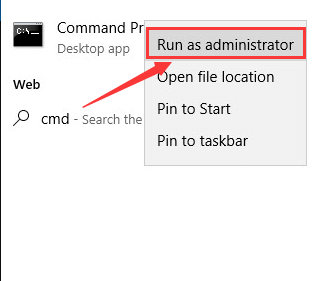
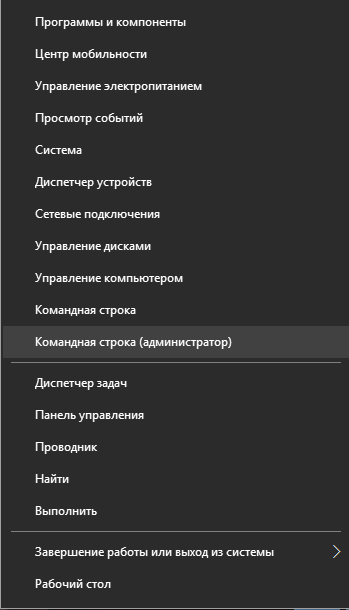
First, you need to open the command prompt with administrator privilege. To do this, press the Windows logo key -> type in cmd -> Right-click Command Prompt and click Run as administrator.
After opening the command prompt, now you need to run the SFC command. To do this, type sfc /scannow and hit Enter key. 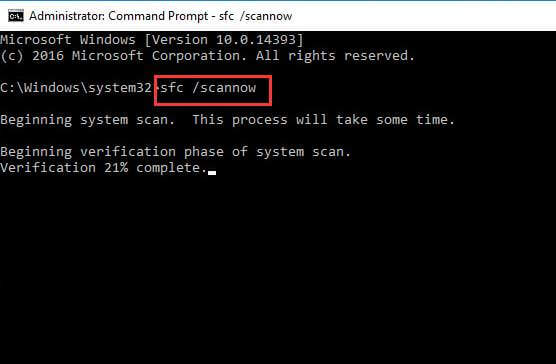
This command will take a few minutes to complete this process. After the completion of this command, reboot your computer.
RUN DISM
DISM or Deployment Image Servicing and Management is the tool that specially designed to check the system files and fixes the blue screen of death error.
Again open the command prompt with admin privilege – Press the Windows logo key -> type in cmd -> Right-click Command Prompt and click Run as administrator.
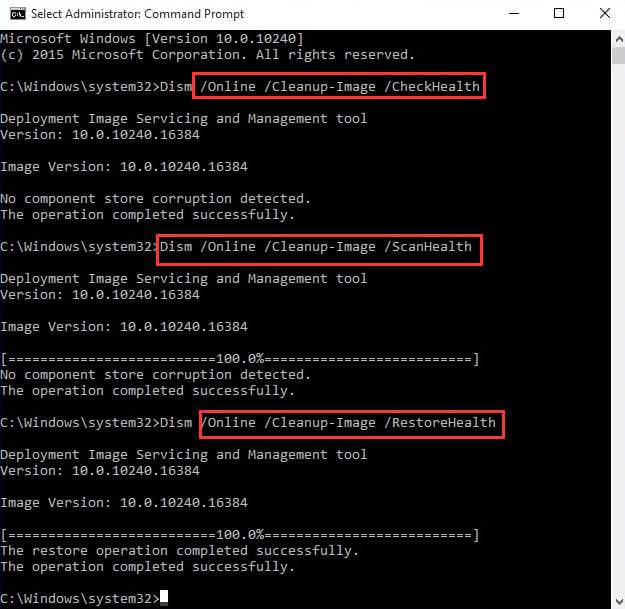
In the Command Prompt, type the below-given command one by one.
NOTE: Press Enter key after each command.
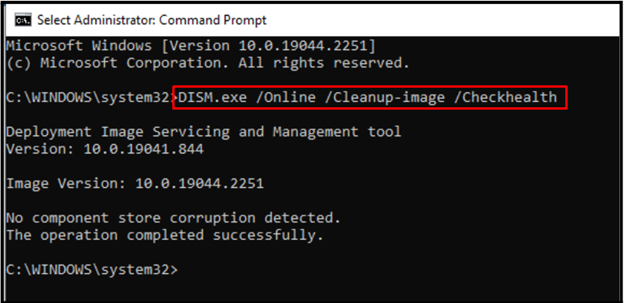
Dism /Online /Cleanup-Image /CheckHealth
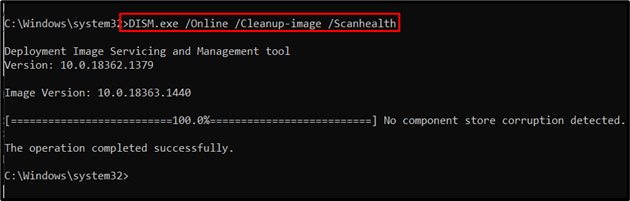
Dism /Online /Cleanup-Image /ScanHealth
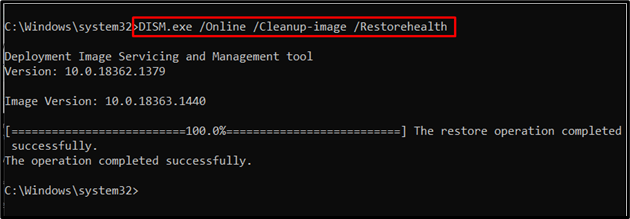
Dism /Online /Cleanup-Image /RestoreHealth
After the completion of this command, reboot your computer and see if this fix helped you to solve the critical service failed Windows 10 error or not.
Fix 2: Update all System Drivers
An outdated system’s drivers can affect the performance of any computer or laptop and may trigger Critical service failed Windows 10 error. That’s why it is recommended to update and fix all the Windows drivers problems as soon as possible.
Manually update the system driver
- Click on the Start button -> type Device Manager and choose it from the results.
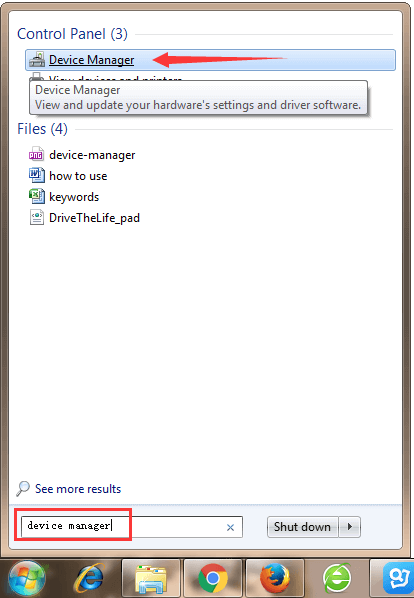
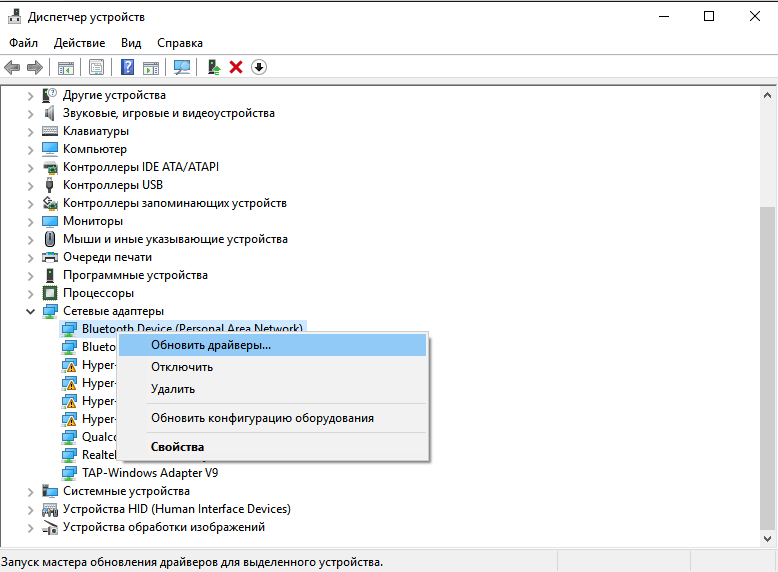
- Click on the category to expand it and find the name of your device, after it right-clicks on it, and choose Update Driver.
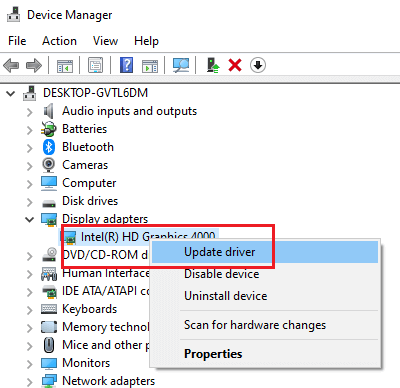
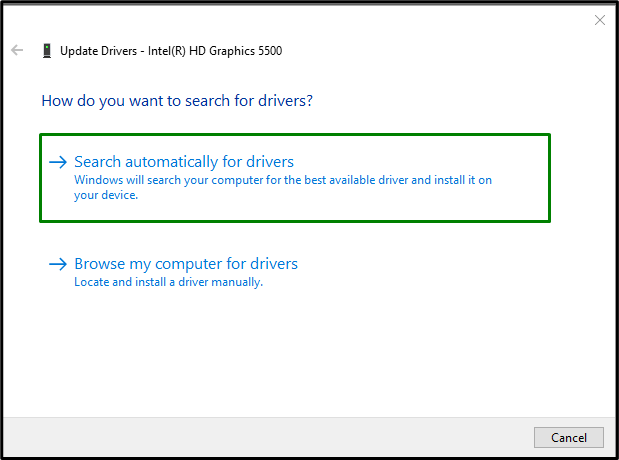
For example, if you want to update graphics cards, then click on the Display adapters category to expand it. And to update the driver, right-click on your graphics card and choose Update Driver.
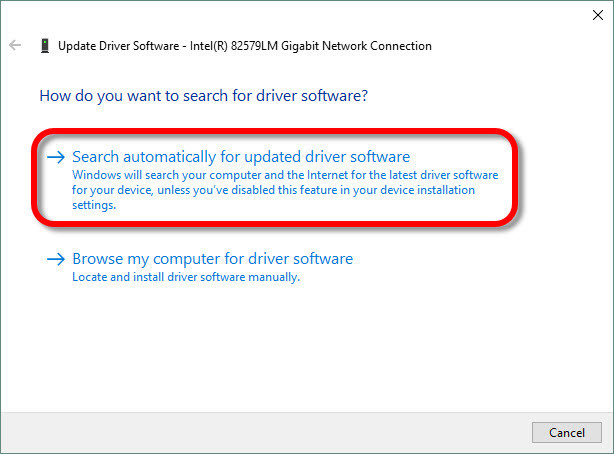
- Choose Search automatically for updated driver software.
- Sometimes Windows gets unable to find the new driver, in this case, you should visit the device manufacturer’s official website and download the update.
NOTE: If you are unable to update the system drivers after applying the above steps then try to reinstall the driver. To do this, open the Device Manager -> right-click on the name of the device and choose Uninstall.
At last, reboot your PC and the Windows system will attempt to reinstall the driver.
Well, the manual step to update the driver is a bit tricky so you can run the Driver Updater to update drivers automatically without any hassle.
Get Driver Updater to Update Drivers Automatically
Fix 3: Do a Clean Boot
Performing a clean boot can also be helpful in solving the critical service failed error on Windows 10. In order to do a clean boot in Windows 10 follow the below-given steps one by one:
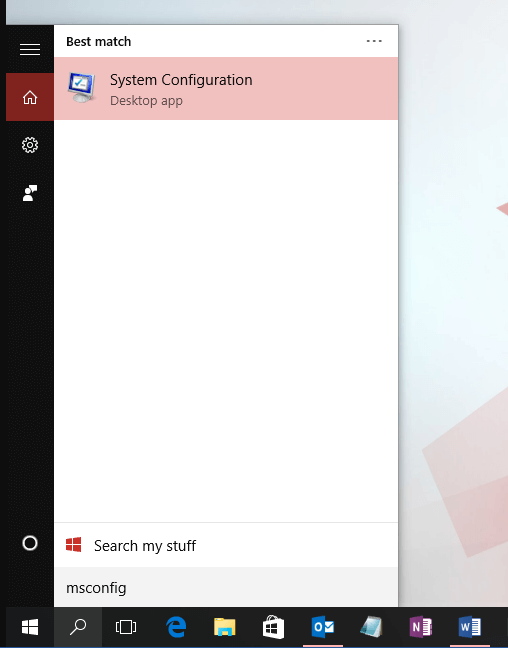
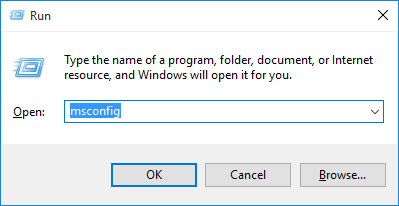
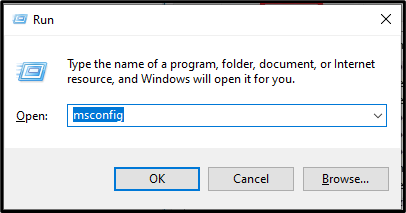
- First, you need to open the run dialogue box (Press “Windows + R“) after opening the run box type msconfig in it and click OK.

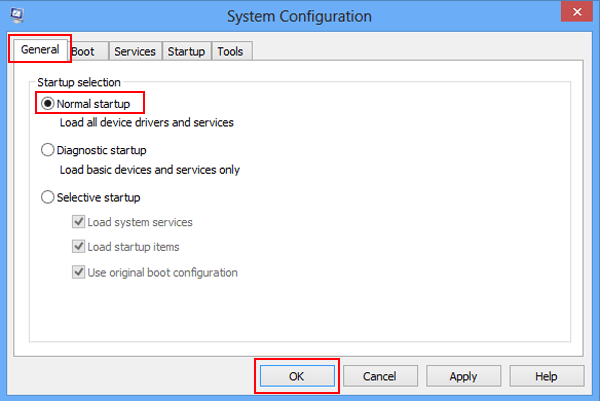
- After it, on the General tab, click on the Selective startup.
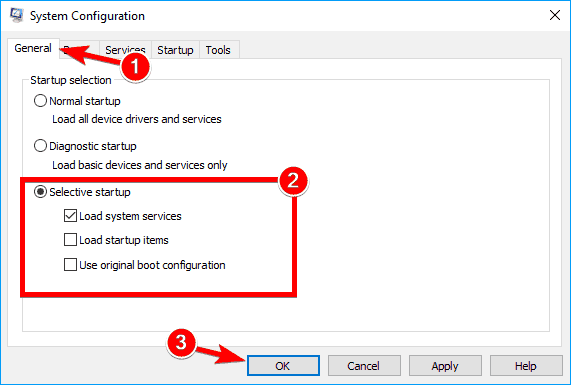
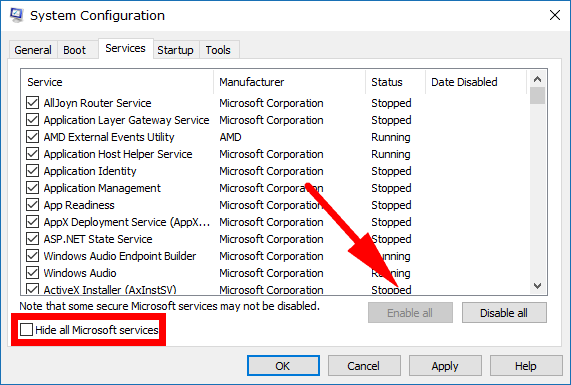
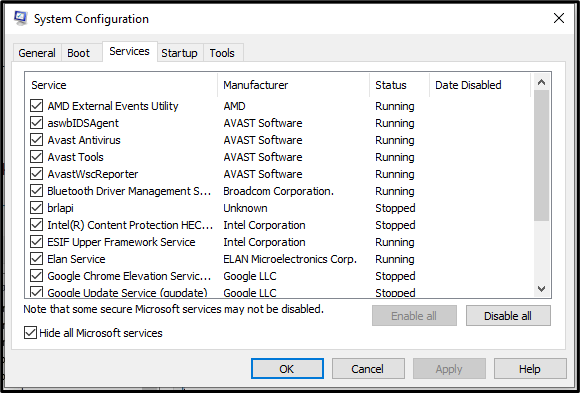
- Now, clear the Load startup items checkbox and click on the Services
- Choose the Hide all Microsoft services check box present at the bottom.
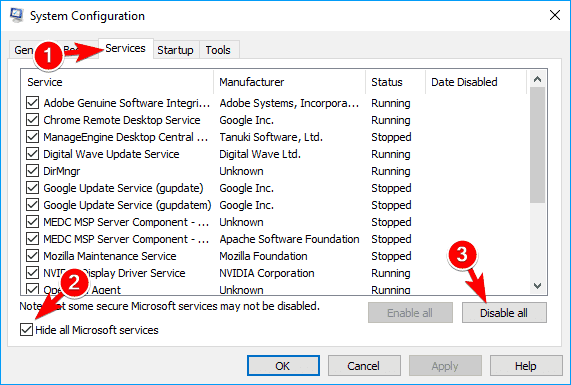
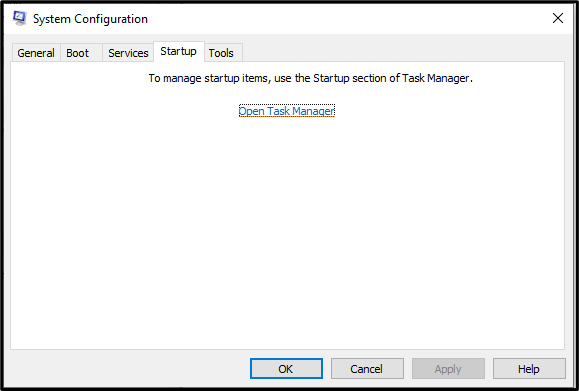
- Click on the Disable all and then click on the Startup
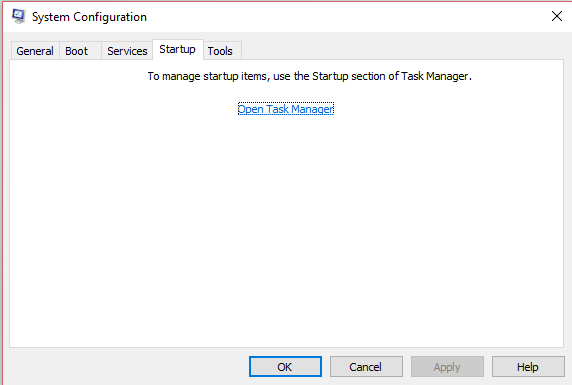
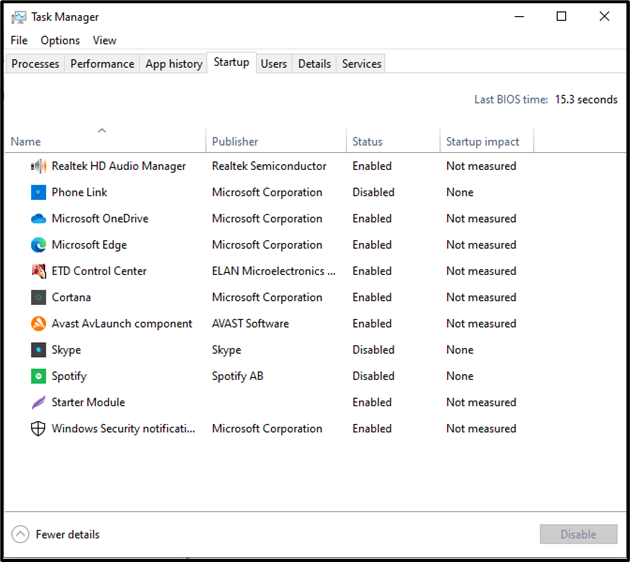
- Click on the Open Task Manager.
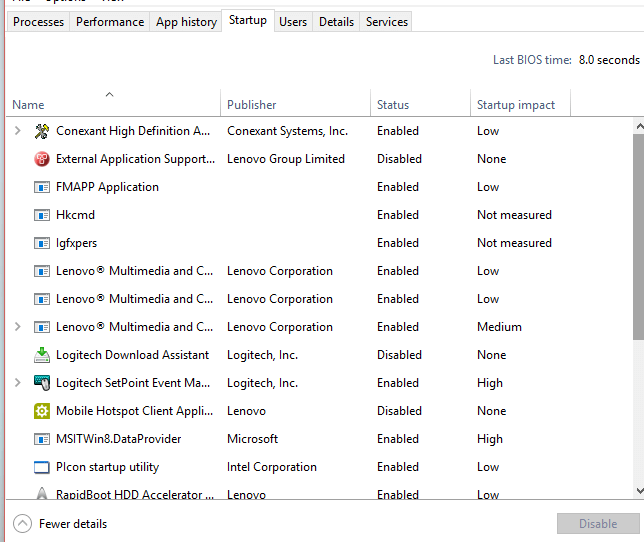
- Now, on the Startup tab, right-click on each enabled startup item and choose Disable.
- At last, click on the OK and Restart.
After it, you need to restore the system. To do this follow the below-given steps:
- Again open the run dialogue box (press “Windows + R”), in the run dialogue box type msconfig and click OK.
- Now, on the General tab, choose Normal startup.
- Click on the Services tab and unmark the Hide all Microsoft services checkbox.
- Click Enable all and then click on the Startup
- After it, click on the Open Task Manager and turn on all of your startup programs.
- At last, click OK and Restart.
NOTE: Make sure to “Enable all” Microsoft services after completion of troubleshooting steps, and re-enable all the programs in the Startup tab. This is to avoid the loss of some OS functions and applications.
Fix 4: System Restore to a Previous Restore Point
Restoring system will help you to fix your PC and allow it to run normally.
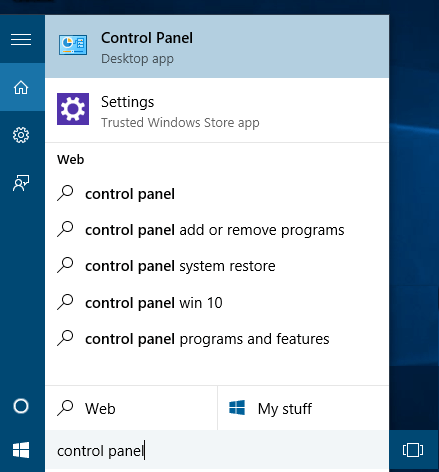
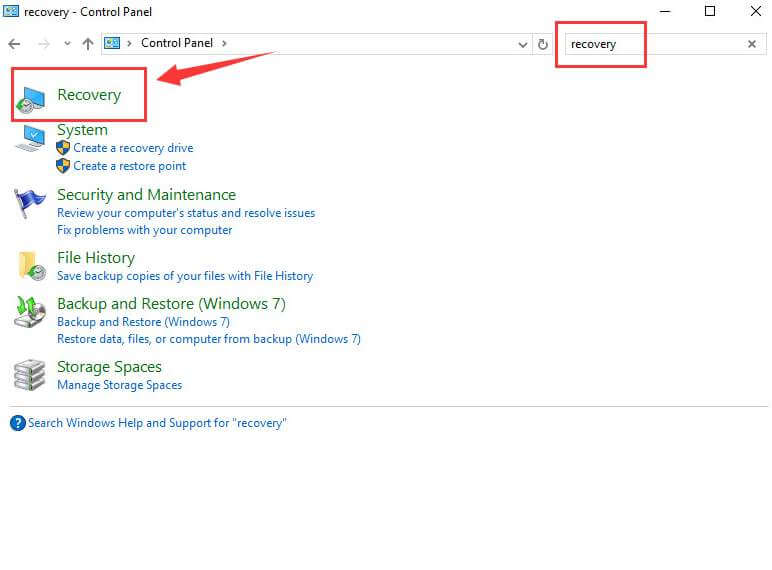
- Open the control panel, to do this click on the Start button and then choose Control Panel.
- Now, press Ctrl + F keys to open the search option and search for the “recovery”. Select the Recovery from the search result.
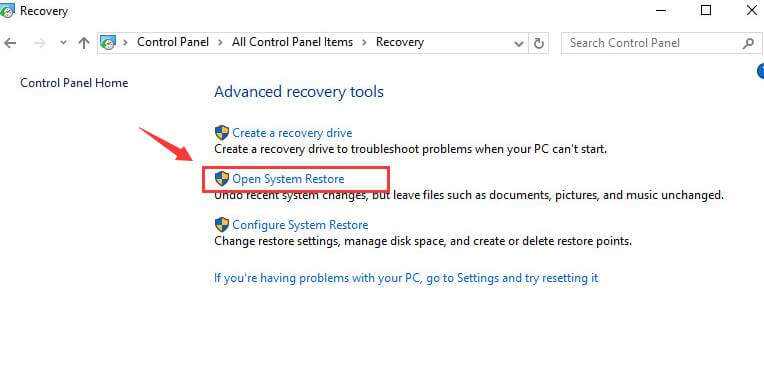
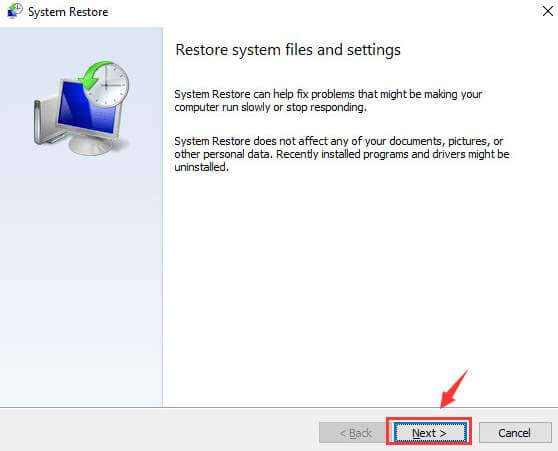
- After it, select Open System Restore and then click on the Next to continue.

- Now, you need to choose one from the restore point from the list of the available restore point. Select the Restore point and press Next.
- At last click on the Finish to continue.
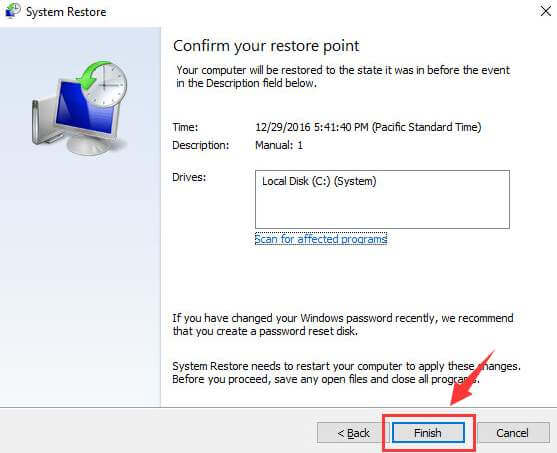
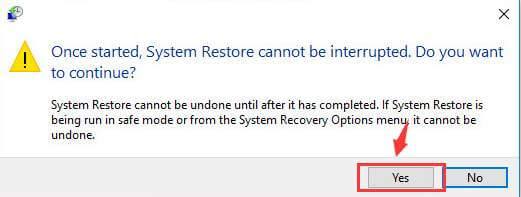
- When you see the following notification then click on the Yes to confirm.
It is estimated after following the above-given solutions you are able to fix the critical_service_failed BSOD error.
Fix 5: Refresh the Windows 10
Refreshing Windows 10 will remove the third-party software that is installed, you can also create a backup of your personal data to keep them safe before refreshing Windows 10.
Follow the steps to proceed further:
- First of all, restart your PC several times to get into boot options
- Choose Troubleshooot> Reset this PC
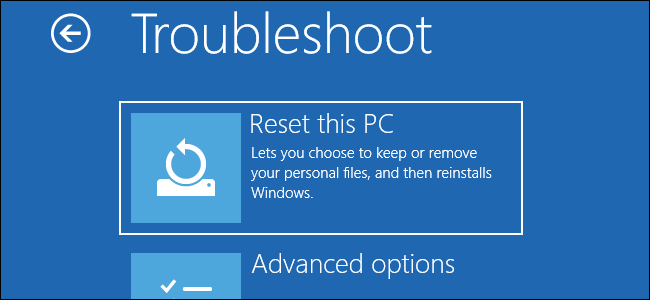
- Select Keep my files option
- Make sure you have a Windows 10 DVD or USB to insert into the system during the process
- Select the version of Windows that you need to refresh
- Click on Reset button
This process will take some time, so have patience. Once the refresh process is completed, check if the critical service failed Windows 10 vanished or not.
Best & Easy Solution to Critical Service Failed Error
All the above-discussed manual solutions are effective and allow you to deal with the “Critical_Service_Failed” Blue Screen of death error.
But if you are not an advanced user and unable to follow the manual solutions then here is the best solution that works for you to fix the Windows 10 critical service failed error easily.
Scan your system with the professional recommended PC Repair Tool, this is an advanced tool, that just by scanning once, detect and fix the errors automatically.
This tool is able to make your PC error-free and boost the performance of your PC or laptop with ease. Download this tool and it will fix all types of errors like BSOD error, DLL errors, registry issues, slow PC performance, and more.
Get PC Repair Tool to Fix Critical_Service_Failed Error
Conclusion
So, this is all about the Critical_Service_Failed Windows 10 error, I tried my best to list down the entire possible working solutions to fix the error.
Make sure to follow the given manual solutions carefully and fix the critical service failed Windows 10 BSOD error in Windows operating system.
I hope the solutions mentioned in the article have helped you to fix the issue with the Critical Service Failed BSOD error.
Well, you can also check out our BSOD errors hub to fix any other BSOD error.
If having any queries, comments, suggestions then you can write to us by visiting our Facebook page.

Always up to help others with their PC-related issues, Jack loves to write on subjects such as Windows 10, Xbox, and numerous technical things. In his free time, he loves to play with his dog “Bruno” and hang out with his friends.
The “Critical Service Failed” BSOD in Windows is the type of error that results in displaying a blue screen, thereby becoming a bottleneck for the user to get to the login screen. This particular error is encountered generally when a critical system process dies with error code “0x000000EF”. However, you can resolve it by scanning for corrupted files or performing a system restore.
This write-up will illustrate the approaches to resolve the Critical Service Failed BSOD error in Windows 10.
To resolve the “Critical Service Failed” BSOD error faced in Windows 10, apply the following fixes:
- Update the Graphics Card Driver.
- Run the System in Clean Boot Mode.
- Execute SFC Scan.
- Execute DISM.
- Run Startup Repair.
- System Restore.
Fix 1: Update the Graphics Card Driver
An outdated driver affects the PC’s performance and can trigger the stated error. To update/upgrade the driver, apply the below-given steps.
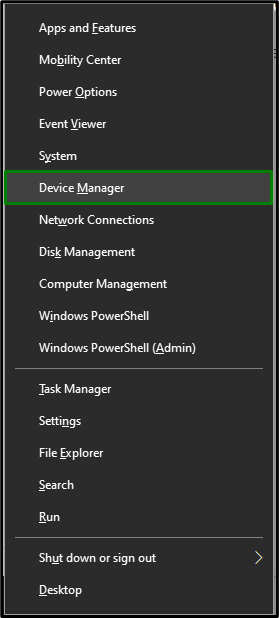
Step 1: Open Device Manager
Firstly, press the “Windows + X” shortcut keys and select “Device Manager” to navigate to the Device Manager:
Step 2: Update Driver
Now, expand the “Display Adapter” options, right-click the highlighted driver and select “Update driver”:

Step 3: Update Graphics Driver
Now, opt for the search for the driver’s mode:
If the update becomes unsuccessful after performing the above steps, then try to “reinstall” the driver.
Fix 2: Run/Execute the System in Clean Boot Mode
Clean boot mode in Windows also assists in getting rid of the stated error. To do so, apply the following steps.
Step 1: Open System Configuration
Enter “msconfig” in the Run box to switch to the “System Configuration” window:
Step 2: Redirect to Services Tab
Switch to the “Services” tab. Here, select the “Hide all Microsoft services” checkbox and hit the “Disable all” button:
Step 3: Switch to Startup Tab
Now, navigate to the “Startup” tab and hit the “Open Task Manager” link:
Step 4: Disable the Applications
In the below window, disable the stated applications one by one:
Now, in the “System Configuration” Window, switch to the “Boot” tab and mark the “Safe boot” checkbox:
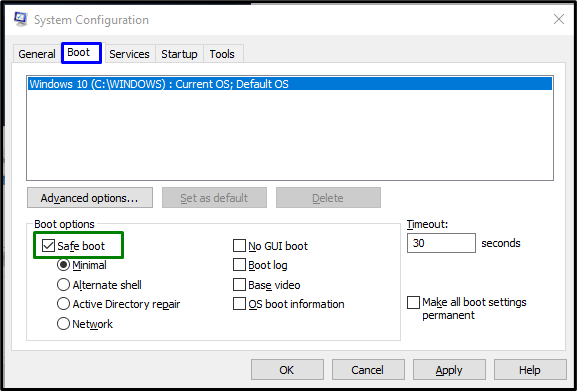
Restart the PC and see if the stated issue is resolved.
Fix 3: Execute SFC Scan
The SFC(System File Checker) scan locates and fixes the corrupted files after scanning. To run this scan, apply the following steps.
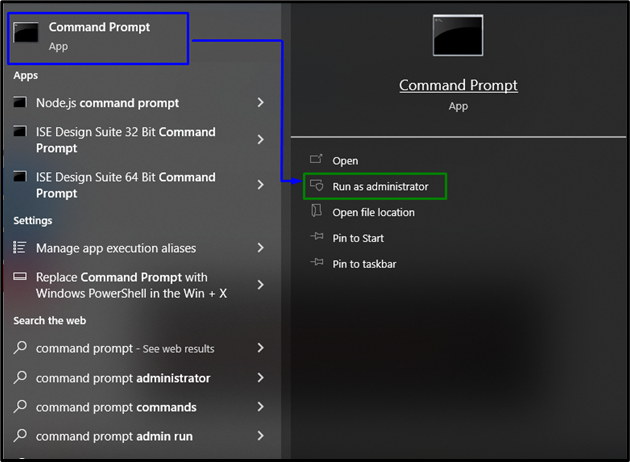
Step 1: Run Command Prompt
Run the Command Prompt as an “administrator”:
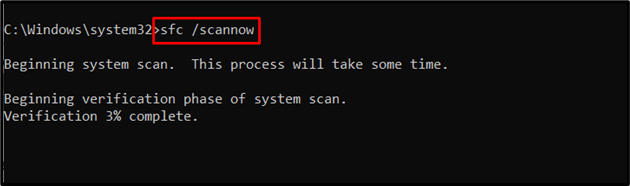
Step 2: Initiate SFC Scan
Type the “sfc /scan now” command to start the system scan and locate the corrupted files:
Fix 4: Execute DISM
Executing “DISM” is also an alternative for users having issues with the SFC scan. To do so, firstly, check the health of the system image:
>DISM.exe /Online /Cleanup-image /Checkhealth
Now, enter the command to scan the “health” of the system image:
>DISM.exe /Online /Cleanup-image /Scanhealth
Finally, restore the system image health:
>DISM.exe /Online /Cleanup-image /Restorehealth
After completing the scanning process, restart your computer and check whether the stated error in Windows 10 is resolved.
Fix 5: Run Startup Repair
The stated error can be resolved by fixing the issues with Windows via “Startup” repair. For the corresponding purpose, go through the below-given steps.
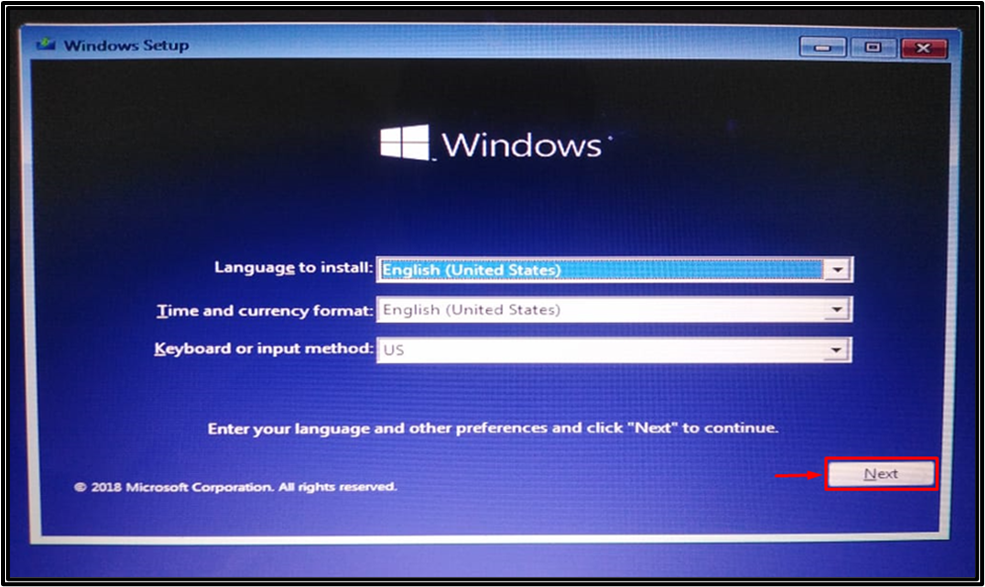
Step 1: Launch Windows Setup
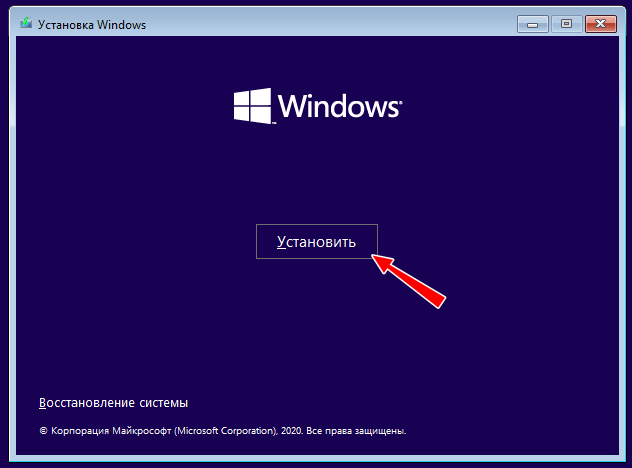
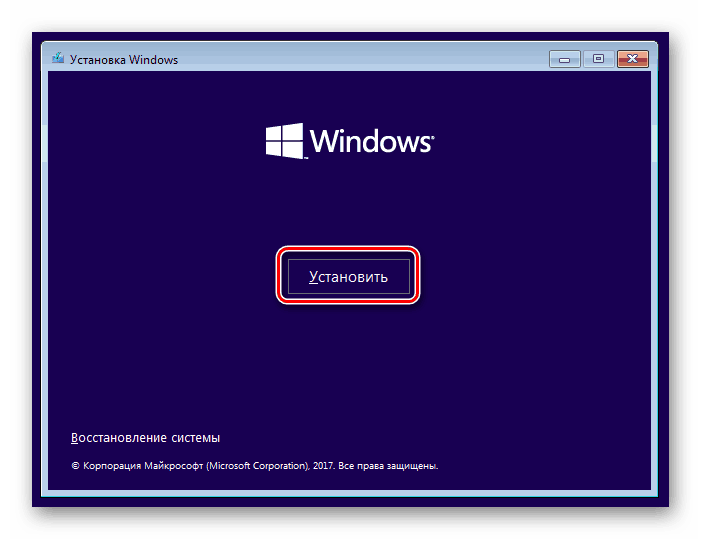
Firstly, plug a bootable USB flash drive or DVD, and boot into Windows 10. Whenever the “Windows Setup” appears, hit the “Next” button:
Step 2: Launch Start-up Repair
In the following Window, hit “Repair your computer”:

Step 3: Trigger Troubleshoot Option
Select “Troubleshoot” from the stated options for resetting your PC:

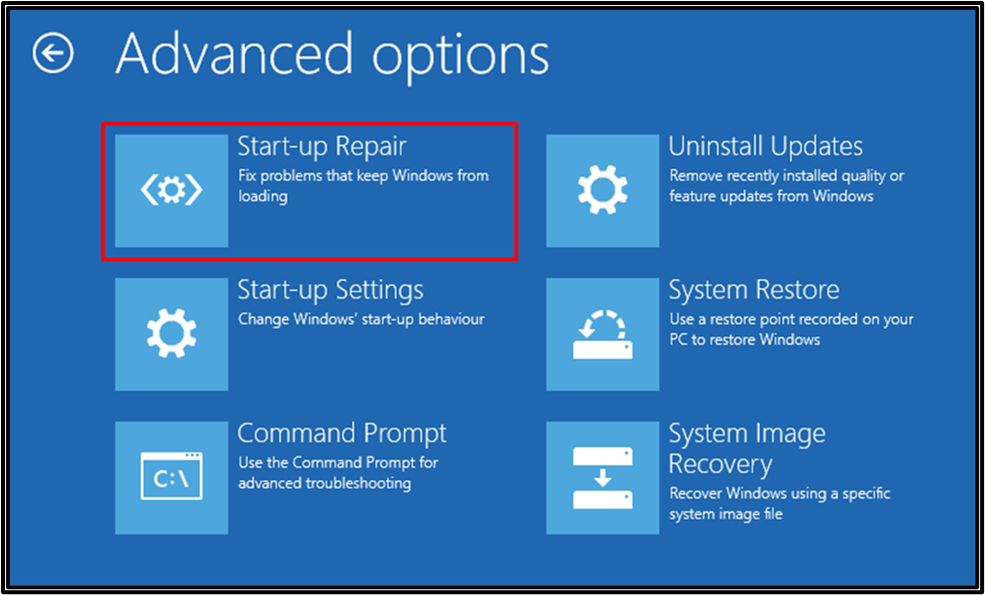
Step 4: Open Advanced Options
Now, select “Advanced options” from the troubleshoot window:

Step 5: Launch Start-up Repair
Finally, launch “Start-up Repair” to repair Windows 10 as follows:
As you can see that the Startup repair has started to diagnose the Windows 10:
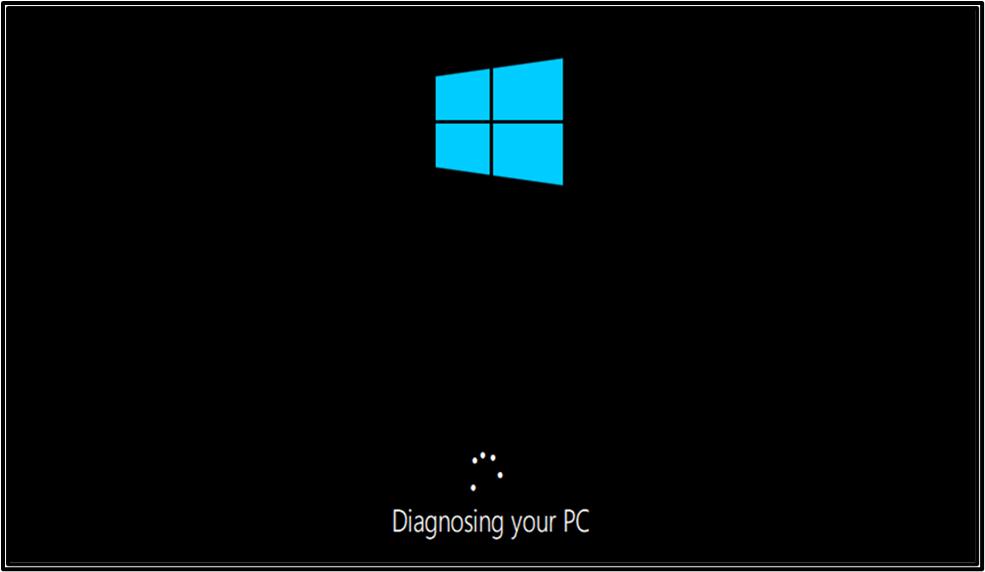
After that, reboot the system and verify if the error got resolved.
Fix 6: System Restore
Restoring the system assists in fixing the PC and allows it to run normally and resolve the stated issue.
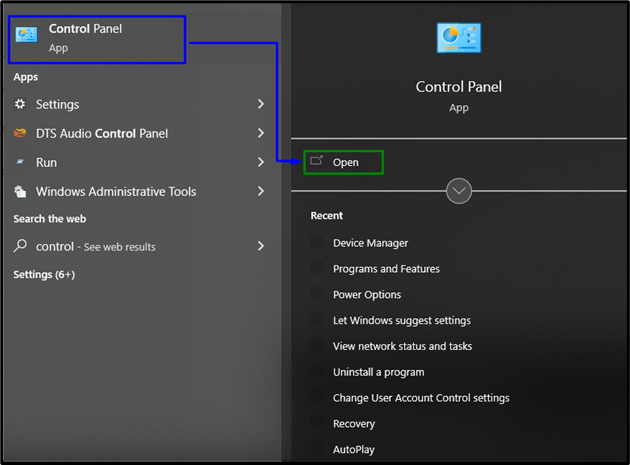
Step 1: Open Control Panel
Firstly, open the “Control Panel” from the Startup menu:
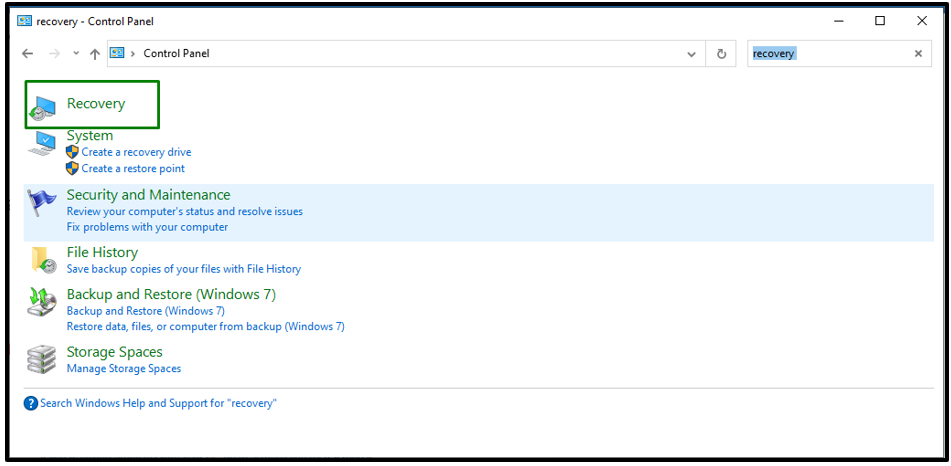
Step 2: Navigate to Recovery
In the below-stated window, type “recovery” in the search bar and navigate to “Recovery” as follows:
Step 3: Switch to System Restore
Then, click on the highlighted option to switch to “System Restore”:
The below-stated Window signifies that the system restore is initiated:
As a result, the Critical Service Failed error will get fixed.
Conclusion
To fix the “Critical Service Failed” BSOD error in Windows 10, update the Graphics Card Driver, run the system in Clean Boot Mode, execute SFC Scan, execute DISM, run Startup Repair, or apply System Restore. This write-up stated the fixes to resolve the Critical Service Failed BSOD error encountered in Windows 10.
About the author

I am a Front-End Web Developer. Being a technical author, I try to learn new things and adapt with them every day. I am passionate to write about evolving software tools and technologies and make it understandable for the end-user.
CRITICAL_SERVICE_FAILED — одна из ошибок, которая приводит к появлению синего экрана смерти. Из названия понятно, что речь идёт о критическом сбое в работе системы. Без устранения этой ошибки использовать Windows 10 дальше не получится — синий экран смерти будет периодически возникать. Поэтому давайте постараемся определить её причину. Главная сложность — понять, какая служба, сервис или драйвер выдают сбой.
Физическое отключение оборудования
Если ошибка появилась после подключения к компьютеру или ноутбуку периферического оборудования, то стоит на время его отключить. Это актуально для принтеров и других офисных устройств, внешних дисков, модулей Wi-Fi и Bluetooth, подключаемых через USB.
На новых ПК можно отключить вообще все внешние устройства, кроме мыши и клавиатуры. Затем нужно последовательно подключать периферию и проверять, загружается ли система. Это поможет определить устройство, которое вызывает сбой в работе системы.
Если сбой вызывает внешнее устройство, то нужно проверить и обновить его драйверы
После определения проблемного оборудования необходимо зайти на сайт его производителя, скачать и установить последнюю версию драйвера. В редких случаях для работы устройства требуется, наоборот, старая версия ПО.
![]() Загрузка …
Загрузка …
Проверка диска
Причиной сбоя могут быть и ошибки на загрузочном диске. Если система запускается хотя бы на время, то можно попробовать устранить неполадки через командную строку.
- Запускаем командную строку с правами администратора.

Запустить командную строку с расширенными правами можно через меню «Пуск»
- Выполнить команду chkdsk с: /f /r, где «C» — это буква системного диска.
Если система перестала загружаться, то придётся выполнять проверку через инструменты устранения неисправностей WIndows 10. После появления синего экрана смерти отображается такое меню:
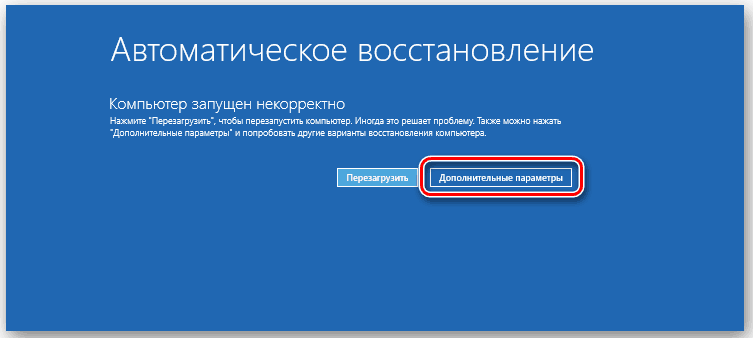
Сообщив об ошибке, Windows 10 предлагает выполнить автоматическое восстановление
Что мы делаем, чтобы выполнить проверку диска:
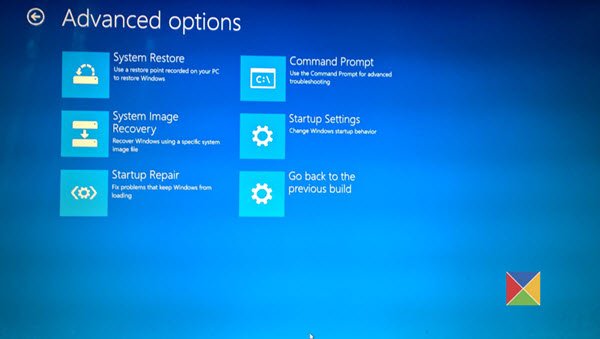
- Нажимаем на кнопку «Дополнительные параметры».
- Переходим в раздел «Поиск и устранение неисправностей».
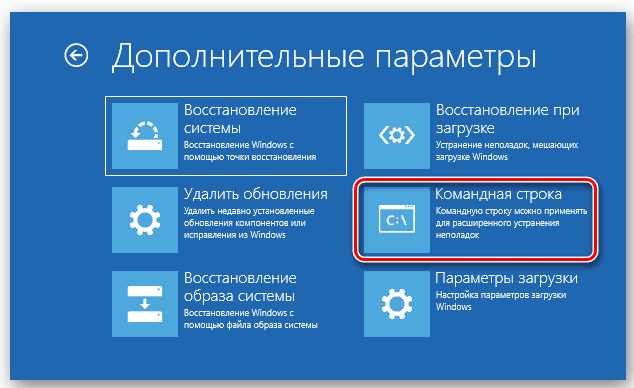
- Нажимаем на блок «Дополнительные параметры».
- Запускаем командную строку.

Получить доступ к командной строке можно и без загрузки системы
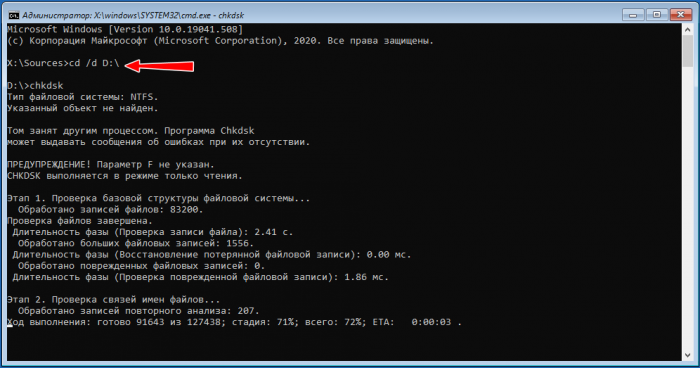
Здесь не получится сразу выполнить проверку диска. Сначала нам нужно узнать, какая у него буква. Наименование в системе и в инструментах восстановления отличается. Не будем гадать и просто воспользуемся утилитой DISKPART.
- Вводим в командной строке запрос diskpart и нажимаем на Enter (нажимать нужно после каждой команды).
- Выполняем команду lis vol для отображения полного списка дисков.
- Определяем букву системного раздела по размеру — этот параметр нужно помнить.
- Завершаем работу утилиты с помощью команды exit.

На этом компьютере системные файлы хранятся на диске D
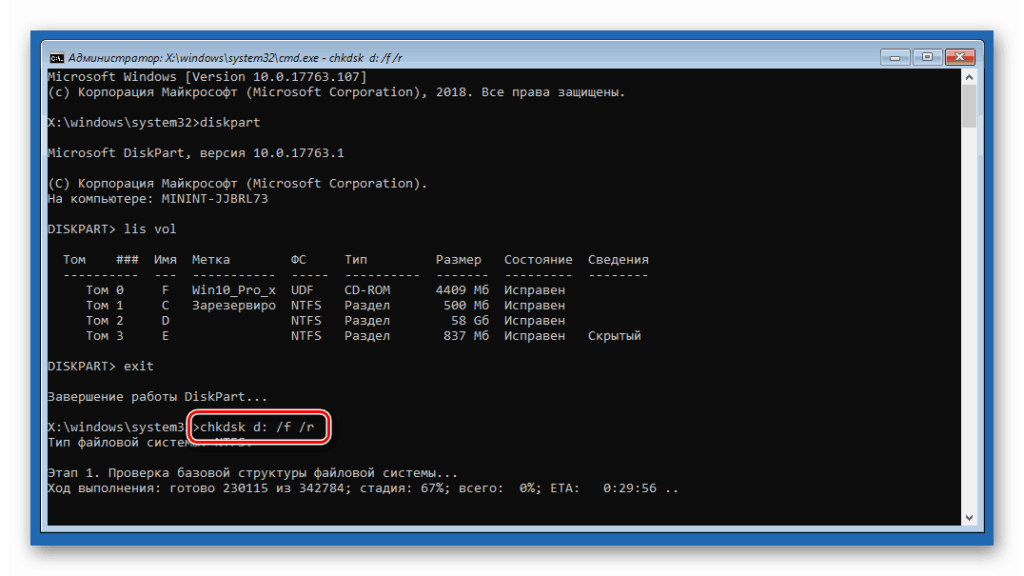
Узнав букву системного диска, мы можем запустить утилиту проверки и устранения неполадок — chkdsk d: /f /r. После завершения процедуры сканирования выходим из консоли командой exit и пробуем снова запустить систему. Лучше сделать это через выключение и включение компьютера.
![]() Загрузка …
Загрузка …
Восстановление при загрузке
Возможно, причина сбоя кроется в загрузчике. Windows 10 предлагает удобный инструмент для автоматического исправления ошибок:
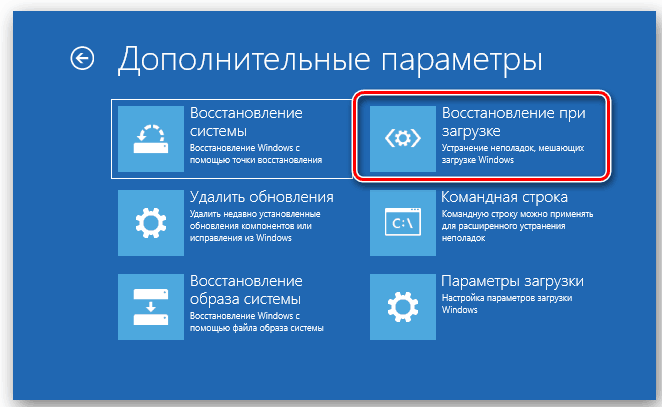
- В окне после синего экрана смерти переходим в раздел «Дополнительные параметры» (шаги 1-3 предыдущего раздела).
- Выбираем опцию «Восстановление при загрузке».
- Ждём завершения работы средства исправления ошибок.

Проверка диска на наличие ошибок в загрузчике может занять длительное время
После того как сканирование закончится, инструмент восстановления выполнит автоматическую перезагрузку.
![]() Загрузка …
Загрузка …
Восстановление системы
Ещё один инструмент, доступный в дополнительных параметрах восстановления — откат к предыдущему рабочему состоянию через контрольные точки. См. также: восстановление системы Windows 10.
- В разделе «Дополнительные параметры» запускаем инструмент «Восстановление системы».
- Выбираем дату, когда система работала без сбоев.
- Ждём завершения процедуры восстановления.

Если в системе было включено создание точек восстановления, то вы быстро вернёте Windows 10 в работоспособное состояние
Функция восстановления доступна и в самой Windows 10. Если система загружается, то вы можете найти её с помощью встроенного поиска и так же выбрать контрольную точку для отката.
![]() Загрузка …
Загрузка …
Удаление обновлений
Следующий инструмент, который может нам помочь, — удаление обновлений и исправлений.
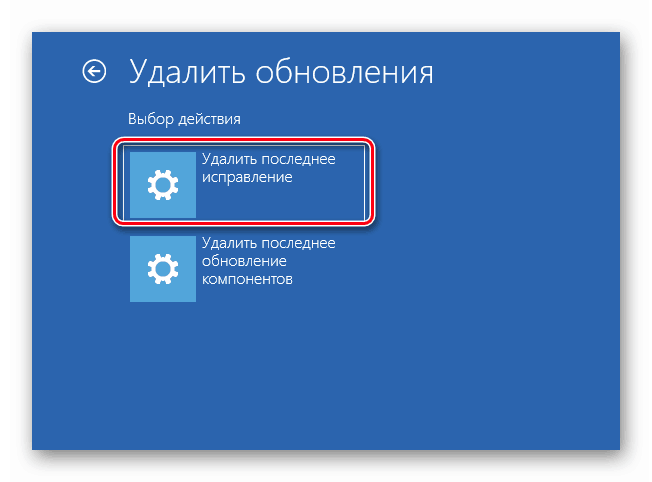
- В разделе «Дополнительные параметры» выбираем пункт «Удалить обновления».
- Переходим в раздел «Удалить последнее обновление компонентов».

Сначала попробуем избавиться от последних обновлений
- Дожидаемся завершения удаления и перезагрузки компьютера.
- Если удаление обновления компонентов не помогло, то повторяем операцию, но на этот раз выбираем раздел «Удалить последнее исправление».

Ошибки могли возникнуть и в результат добавления исправлений
После удаления исправления компьютер тоже перезагрузится автоматически. Если нам удалось правильно определить причину сбоя, то синий экран смерти больше не появится.
![]() Загрузка …
Загрузка …
Возвращение к предыдущей сборке
Если система периодически загружается, то для исправления ошибок, вызывающих BSOD, можно попробовать функцию возврата к предыдущей версии Windows 10. Это особенно актуально, если критический сбой появился после обновления системы.
- Открываем «Параметры» Windows 10.
- Переходим в раздел «Обновление и безопасность».
- На вкладке «Восстановление» находим поле «Вернуться к предыдущей версии Windows 10» и нажимаем «Начать».

Возврат к предыдущей версии возможен только в том случае, если на жёстком диске сохранились её файлы
- Причину возврата можно указать любую.
- В ответ на предложение проверить обновления нажимаем «Нет, спасибо».
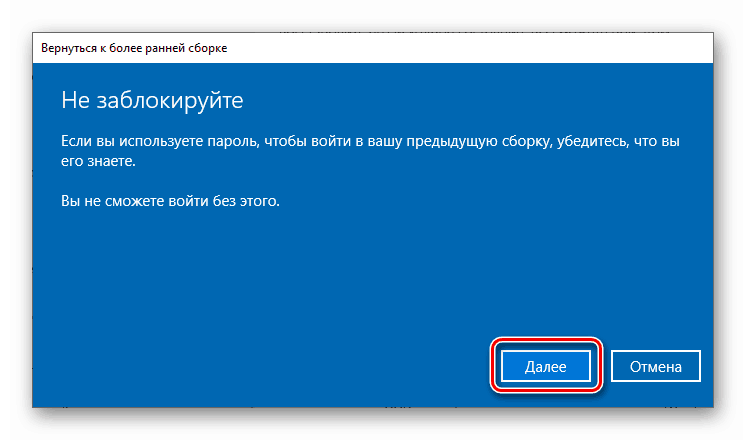
- Читаем предупреждение, оцениваем, где у нас хранятся важные файлы, и если всё в порядке, нажимаем «Далее».
- Подтверждаем возврат к предыдущей сборке.

Если на предыдущей версии проблем не было, то синий экран больше не будет появляться

Иногда возврат выполнить не удаётся. В таком случае нужно переходить к следующему способу решения проблемы.
![]() Загрузка …
Загрузка …
Восстановление исходного состояния
В разделе «Диагностика», который открывается при переходе в «Дополнительные параметры» после синего экрана смерти, есть пункт «Вернуть компьютер в исходное состояние». Запустив эту функцию, вы откатите систему к виду, в котором она была сразу после установки. При этом можно выбрать сохранение или удаление пользовательских файлов.
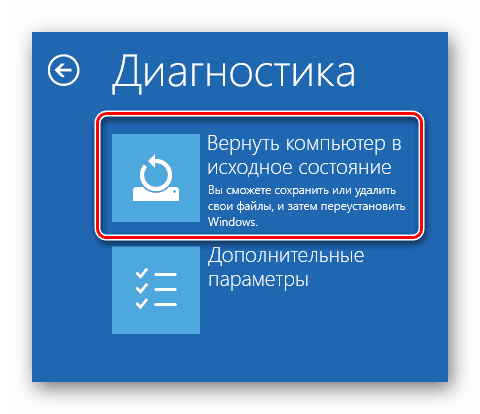
Возвращение компьютера в исходное состояние — неплохой способ, если ошибок накопилось слишком много
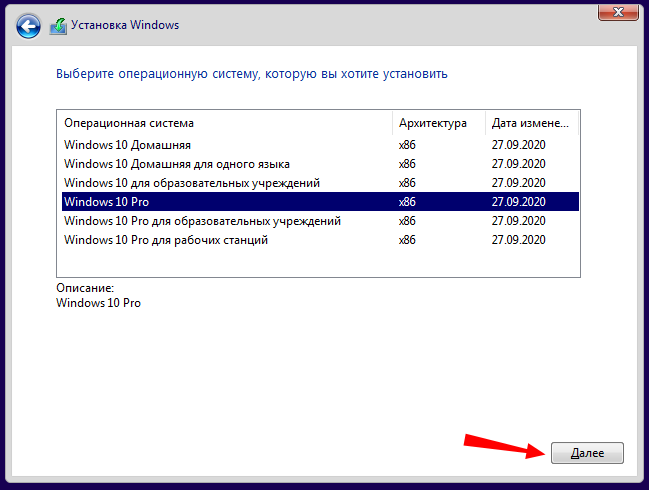
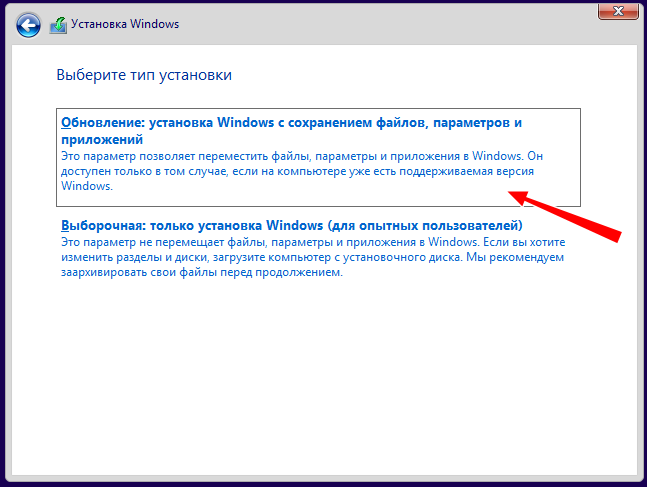
Если этот способ тоже не помог, то остаётся ещё один вариант решения проблемы — чистая установка WIndows 10 с сохранением предустановленных приложений и лицензионных ключей. Недостаток этого метода в том, что все данные с системного раздела будут удалены. Но если вы храните пользовательские файлы на другом томе диска, то ничего не потеряете — при установке будет отформатирована только часть с папкой Windows.
Если ничего не помогает, то переустановка Windows 10 точно устранит неисправности
![]() Загрузка …
Загрузка …
Обычно доходить до переустановки системы не приходится — разобраться с синим экраном смерти поможет один из менее радикальных методов. Но будьте к этому готовы, потому что критические ошибки в работе системы могут быть очень сложными для выявления и устранения.
![]() Загрузка …
Загрузка …
Post Views: 2 405