Posted byu/[deleted]4 years ago
![]()
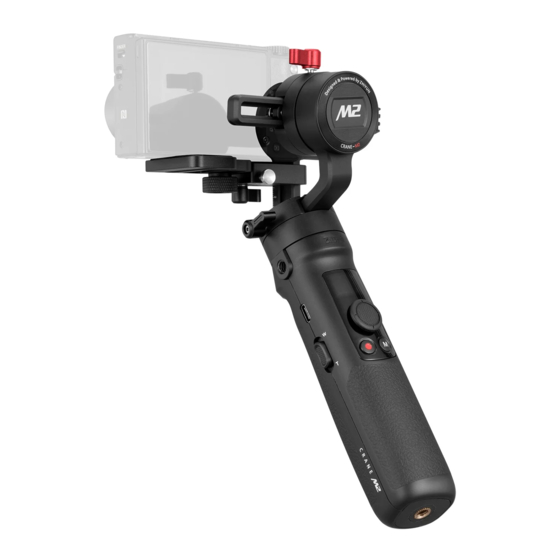
I have a new zhiyun crane m2. When i have it in tripod mode, it beeps and says axis lock and shuts off after about 15 seconds. I have a sony a6000 with the kit lens on it. Please help. Thanks
Log in or sign up to leave a comment
![]()
level 2
I dont think ive found a 100 percent answer but i think it does this when there is too much resistance. like of the camera is too heavy or if it isnt balanced. or if you hold the camera really hard when its on the gimbal
About Community

Here you can discuss ideas for Zhiyun, reviews, experiences and anything else relating to Zhiyun.
Mod IG: @felipe.m.Vera
- Manuals
- Brands
- Zhiyun Manuals
- Camera Accessories
- CRANE — M2 S
- User manual
-
Contents
-
Table of Contents
-
Bookmarks
Quick Links
The following features are available in
this PDF document.
Quick Keyword Search
Enter the keyword in the search box
and hit the search button
Quick Jump between
Chapters
Click the title of a specific chapter on
the Contents to jump to it
*Reading software such as Adobe Reader is needed to support
the functions above.
Related Manuals for Zhiyun CRANE — M2 S
Summary of Contents for Zhiyun CRANE — M2 S
-
Page 1
The following features are available in this PDF document. Quick Keyword Search Enter the keyword in the search box and hit the search button Quick Jump between Chapters Click the title of a specific chapter on the Contents to jump to it *Reading software such as Adobe Reader is needed to support the functions above. -
Page 2
CRANE — M2 S U s er G ui de… -
Page 3: Table Of Contents
Contents Product List ■ Product List ······················ 1 Get to Know CRANE-M2 S ■ Get to Know CRANE-M2 S ················ 3 Battery and Charging ■ Battery and Charging ·················· 4 Mounting and Balancing ■ Mounting the Tripod ·················· 5 Mounting the Camera ················· 5 Mounting the Phone ··················…
-
Page 4
ZY Play Feature Description ··············· 25 Firmware Upgrade and Calibration ■ Firmware Upgrade ··················· 26 Six-side Calibration ·················· 27 Product Specifications ■ Disclaimer and Warning ■ Reading Tips ····················· 31 Warnings ······················· 31 Safe Operation Guidelines ··············· 32 Warranty Terms ■… -
Page 5: Product List
Before using this product, please check carefully that all the following items are included in the product package. In case that any item is found missing, please contact ZHIYUN or your local selling agent. Main Device x1 Quick Release Plate x1…
-
Page 6
Product List Phone Clamp** x1 TransMount EasyGo Backpack** x1 Quick Start Guide x1 Item marked “*” is included in CRANE-M2 S. Items marked “**” are included in CRANE-M2 S COMBO. -
Page 7: Get To Know Crane-M2 S
Get to Know CRANE-M2 S Get to Know CRANE-M2 S 1. Fill Light 16. Tripod 2. Level Mount Lock Screw 17. Camera Control Port 3. Quick Release Plate 18. Quick Release Plate Release 4. 1/4″ Camera Lock Screw Button 5. Pan Axis Latch 19.
-
Page 8: Battery And Charging
Battery and Charging Battery and Charging CRANE-M2 S is equipped with built-in battery. When using CRANE-M2 S for the first time, please fully charge the battery to activate and to ensure the proper function of the gimbal. Charging method: Use provided USB Type-C cable to connect the USB charger (not provided, recommend chargers that meet the USB Power Deliver y Specification, supports 12W at most) to the charging port of CRANE-M2 S.
-
Page 9: Mounting And Balancing
Mounting and Balancing Mounting the Tripod Mount the tripod to the bottom of the CRANE-M2 S handle, then unfold the tripod and place the CRANE-M2 S on a flat surface. Mounting the Camera 1. Each axis of the gimbal is equipped with a lock switch. You can use these lock switches to lock the axis for convenient installation and storage.
-
Page 10
Mounting and Balancing Lock state for installation 2. Mount the camera on the quick release plate. Tighten the screw. -
Page 11
Mounting and Balancing 3. Toggle the quick release plate safety lock to unlock ① , install the whole quick release plate on CRANE-M2 S ② and make sure a firm installation. ① ② When detaching, toggle the quick release plate safety lock to unlock ① ,press the quick release plate release button ②… -
Page 12
4. Connect the camera control port of the gimbal to the USB port of the camera. Please connect with the proper cable corresponding to the USB port type of the camera. For details of the compatible camera models, please visit the official website of ZHIYUN (www.zhiyun-tech.com) and check the “CRANE-M2 S Camera Compatibility List”… -
Page 13: Mounting The Phone
Mounting and Balancing Mounting the Phone Mount the phone to the phone clamp and mount the whole phone clamp to the quick release plate. Make sure to tighten the screw.
-
Page 14: Mounting The Action Camera
Mounting and Balancing Mounting the Action Camera Mount the action camera to the camera base (not provided) and mount the whole base to the quick release plate. Make sure to tighten the screw. CRANE-M2 S only provides stabilization for mobile phones and action cameras.
-
Page 15
Mounting and Balancing 2. Vertical Balance of the Tilt Axis Unlock the tilt axis arm, make the lens face up, loosen the level mount lock screw ① . Push the whole level mount to move forward or backward ② . Push until the camera can stay still with the lens facing up (i.e.the camera stays still and vertical to the ground) ③… -
Page 16
Mounting and Balancing 4. Pan Axis Balance Unlock the pan axis ① , loosen the pan axis latch ② , hold and slightly tilt the handle, push the pan axis to move left or right ③ until the pan axis can stay still in any position. -
Page 17: How To Use Crane-M2 S
How to Use CRANE-M2 S Buttons Description Trigger Button Double press: Reposition Triple press: 180° rotation for the pan axis motor Press and hold: Enter Go Mode. Release to return to the previous mode. Type-C Charging/Firmware Upgrade Port Charge the gimbal/connect to computer for firmware upgrade via this port.
-
Page 18: Display Screen Description
How to Use CRANE-M2 S Filming Button Single press: Start/stop the filming. Power Button Toggle up and hold for 2s to power on/off the gimbal. Menu Button Single press: Enter/exit display screen main menu. Double press: Enable/disable gimbal joystick lock. M Button Single press: Switch gimbal modes (PF-L-F).
-
Page 19: Icon Description
How to Use CRANE-M2 S Icon Description Camera connected to gimbal “ZY Play” app connected to gimbal Joystick locked Current battery level/charging status This icon prompts when the axis is locked and the gimbal will make a beep sound. (Please unlock the axis, press and hold the M Button to resume operation) Standby Pan Follow Mode…
-
Page 20: Menu Option Description
How to Use CRANE-M2 S Menu Option Description auto (Automatic motor torque adjustment) level medium motor (motor torque level) ( Motor Torque high Settings ) Tilt (tilt axis) custom Roll (roll axis) (customization) Pan (pan axis) follow medium (motor follow speed) high control (joystick control…
-
Page 21: Motor Torque Adjustment
How to Use CRANE-M2 S Motor Torque Adjustment After balancing CRANE-M2 S, the motor torque needs to be adjusted for proper function. You can adjust the motor torque according to the weight of your camera and lens, so that the CRANE-M2 S can be used in its ideal state. Following are two methods for adjustment.
-
Page 22
How to Use CRANE-M2 S 3. custom: You can customize the motor torque for three axis motors. Push the joystick up/down to select the axis motor you wish to customize and push to the right to enter the customization. In the customization, push the joystick up/ down to customize the motor torque and push to the left to save the setting. -
Page 23: Gimbal Modes Description
How to Use CRANE-M2 S Gimbal Modes Description Motors circled in red are free to move in line with the movement of the gimbal handle while motors circled in grey are locked. Pan Follow mode (PF): The tilt axis and roll axis motors are locked, and the camera rotates with the handle while panning horizontally.
-
Page 24
How to Use CRANE-M2 S Follow mode (F): The roll axis motor is locked, and the tilt axis and pan axis motors follow the rotation of the handle. Push the joystick up/down to change the tilt Tilt Axis 俯仰轴 angle of the camera and left/right to change the horizontal orientation of the camera. -
Page 25
How to Use CRANE-M2 S Vortex mode (V): The tilt axis motor rotates upward by 90° , and the tilt axis, roll axis, and pan axis motors follow the rotation of the handle. Push the joystick to the left/ right to control the rotation of the pan Tilt Axis 俯仰轴… -
Page 26: Manual Reposition
How to Use CRANE-M2 S Manual Reposition In Pan Follow mode (PF) and Lock mode (L), the camera can be rotated by a certain angle by hand. Hold it for 2s and the camera angle will be fixed at that angle after you release the camera.
-
Page 27: Changing Fill Light Filters
How to Use CRANE-M2 S Changing Fill Light Filters The fill light filters for CRANE-M2 S are magnetic and easy to detach. There are four colors for the filters: red, yellow, blue, and orange. You can change your fill light filters according to your actual filming scenarios.
-
Page 28: Download The App
How to Use the App Download the App Scan the QR code on the left (Android 5.0 and above, iOS 9.0 and above required) or search «ZY Play» in App Store or Google Play to download. ① “ZY Play” is an app dedicated to CRANE-M2 S.
-
Page 29: Zy Play Feature Description
ZY Play Feature Description Virtual Joystick Six-side Calibration Control Video Filming Community ZY Play Firmware Upgrade Editor For more details of the “ZY Play” app features, please visit the official website of ZHIYUN (www.zhiyun-tech.com) and watch CRANE-M2 S video tutorials.
-
Page 30: Firmware Upgrade And Calibration
Firmware Upgrade and Calibration Firmware Upgrade You can use «Zhiyun Gimbal Tools» or «ZY Play» App to upgrade the firmware of CRANE-M2 S. Method 1: 1. Connect the Type-C charging /firmware upgrade port vertical arm to the computer with the USB Type-C cable, power on CRANE-M2 S, and enter standby mode.
-
Page 31: Six-Side Calibration
Firmware Upgrade and Calibration Searching Files Firmware Upgrade Path: Browse File Name: Open Cancel Upgrade Uploading, please wait Cancel Method: Connect CRANE-M2 S to the “ZY Play” app. If “ZY Play” app prompts to upgrade the firmware, follow the instructions to upgrade. Internet connection is required.
-
Page 32
Type-C USB cable, Open «Zhiyun Gimbal Tools», click «open» on the top and click «calibration» on the bottom. Please conduct the process according to the following steps. A » √ » mark will appear after the calibration is complete. -
Page 33: Product Specifications
Product Specifications Product Model: CR123 Min. Standard Max. Remark Operation Voltage 9.6V 11.1V 12.6V Operation Current 135mA 4000mA Output Voltage (Camera Control Port) Output Current (Camera Control 1.2A Port) Tilt Mechanical 320° Range Roll Mechanical 320° Range Pan Mechanical 360° Range Controllable Tilt -60°…
-
Page 34
In addition, the lower the temperature, the longer the charging time. All the data in this guide is collected from internal experiments of ZHIYUN laboratories. Under different scenarios, the above data is subject to a margin of… -
Page 35: Reading Tips
Guilin Zhishen Information Technology Co., Ltd (hereinafter referred to as «ZHIYUN») reserves all rights for final explanation on this instruction and other documents related to CRANE-M2 S. The information is subject to update without notice.
-
Page 36: Safe Operation Guidelines
4. Never use or charge swollen, leaky, or damaged batteries. Never use or charge if the battery smells, or overheats (exceeding the maximum temperature of 160 ° F/71 ° C). If your batteries are abnormal, contact ZHIYUN or a ZHIYUN authorized dealer for further assistance.
-
Page 37
Disclaimer and Warning of any electrolytes with your skin or eyes, rinse immediately with water for at least 15 minutes and seek medical advice as soon as possible. 10. Do not use the battery if it has been involved in a crash or heavy impact. 11. -
Page 38: Warranty Period
1. Customers are entitled to replacement or free repair service in case of quality deficits found in the product within 15 days upon receipt of the product. 2. Customers are entitled to free repair service from ZHIYUN for any product proven defective in material or workmanship that results in product failure during normal consumer usage and conditions within the valid warranty period, which is 12 months counting from the date of selling.
-
Page 39
Warranty Terms Customer information Customer Name : Contact No : Address : Sales Information Sales Date : Prod. Serial No : Dealer : Contact No :: #1 Maintenance Record Service Date : Signature of Repairman : Cause of Problem : □… -
Page 40: Contact Card
Contact Card Website Weibo Vimeo Google+ Facebook Facebook (Zhiyun Support) (Zhiyun Tech) Youku Youtube Wechat Instagram…
-
Page 41
CertificateofQuality This product is confirmed to meet quality standards and permitted for sale after strict inspection. QC Inspector: Please download the latest version from www.zhiyun-tech.com This document is subject to change without notice. ZHIYUN is a trademark of ZHISHEN. All other trademarks cited herein are the property of their respective owners.
Quick Start Guide

https://www.zhiyun-tech.com/zycami
https://www.zhiyun-tech.com/gateway/5STDBjQUWV0ZDYyp
https://www.zhiyun-tech.com/gateway/0TAtanaAQDhmFUTP
Get to Know CRANE-M3

| 1. Quick Release Plate Safety Lock 2. Quick Release Plate Release Button 3. Quick Release Plate 4. 1/4″ Camera Lock Screw 5. Roll Axis Lock Switch 6. 1/4″ Threaded Hole 7. Fill Light Control Wheel 8. Joystick 9. Handle 10. Tripod 11. Audio Transmission Port 12. Audio Status Indicator Light 13. Camera Control/Charging Port 14. Roll Axis Latch 15. Roll Axis Motor 16. Touch Screen |
17. M Button 18. Photo/Video Button 19. Tilt Axis Lock Switch 20. Tilt Axis Latch 21. Tilt Axis Motor 22. Pan Axis Lock Switch 23. Power Button 24. Type-C Charging/ Firmware Upgrade Port 25. Fill Light 26. Pan Axis Motor 27. Pan Axis Latch 28. Pan Axis Motor 29. Adjustment Wheel 30. Trigger Button 31. Contact Points |
Charging
Use provided USB Type-C cable to connect with the USB charger (not provided) to charge the CRANE-M3. It is recommended to use USB chargers that meet the USB Power Delivery Specification (supports 14W at most).
Installation
Mounting the Tripod

Mounting the Camera
 Each axis of the gimbal is equipped with a lock switch. You can use these lock switches to lock the axes for convenient installation and storage. The storage state is the default state. Please toggle the lock switch to unlock the three axes, expand the gimbal as shown in the image, and lock the axes again for convenient camera installation.
- Mount the camera on the quick release plate. Tighten the bottom screw.

- Toggle the quick release plate safety lock to unlock ®, install the whole quick release plate on CRANE-M3 0O and make sure a firm installation.

When detaching, toggle the quick release plate safety lock to unlock, press the quick release plate release button to push the whole quick release plate out.
- Connect the camera control/charging port of the gimbal to the USB port of the camera.
 Each axis of the gimbal is equipped with a lock switch. You can use these lock switches to lock the axes for convenient installation and storage. The storage state is the default state. Please toggle the lock switch to unlock the three axes, expand the gimbal as shown in the image, and lock the axes again for convenient camera installation.


- Type-C to Multi cable is the control cable for Sony cameras. Can be used to control the Sony cameras to start/stop the filming. Type-C to Type-C and Type-C to Micro cables camera charging cables. Choose the correct cable according to your actual filming scenarios.
- The camera control/charging port is only available for controlling Sony cameras. For other cameras, you can purchase the “TransMount CRANE-M3 Bluetooth Control Unit” and install it on the gimbal to control. For the detailed tutorial of the unit, please visit the official website of ZHIVUN (www.zhiyun-tech.com) and check the “TransMount CRANE-M3 Bluetooth Control Unit User Guide”.
Balancing
Horizontal Balance of the Tilt Axis
Unlock the tilt axis arm 1, and loosen the tilt axis latch 2. Push the camera to move forward or backward ® until the camera is steady and is at almost level with the ground 4. Tighten the latch 5.
Vertical Balance of the Tilt Axis
Unlock the tilt axis arm, make the lens face up, loosen the level mount lock screw (1). Push the whole level to mount to move forward or backward 2. Push until the camera can stay still with the lens facing up (i.e.the camera stays still and vertical to the ground) 3. Complete this step by tightening up the screw 4.
Roll Axis Balance
Unlock the roll axis, loosen the roll axis latch, push the roll axis arm to move left or right until the camera can stay still and horizontal to the ground (as shown below). Complete this step by tightening up the latch.
Pan Axis Balance
Unlock the pan axis, loosen the pan axis latch, hold and slightly tilt the handle, push the pan axis to move left or right until the pan axis can stay still in any position. Complete this step by tightening up the pan axis latch
After balancing CRANE-M3, the motor torque needs to be adjusted for proper function. It is recommended to use “Auto Calibration” in the touch screen menu.
How to Use CRANE-M3
Buttons Description
 Power Button
Single press: Lock/unlock the touch screen
Press and hold: Power on/off
 Photo/Video Button
Single press: Start/stop filming video
Double press: Take a photo
 M Button
Single press: Switch gimbal modes (PF-L-F)
Double press: Switch gimbal modes (P0V-V)
Press and hold: Sleep mode/wake mode for the gimbal motor
 Fill Light Control Wheel
Single press: Switch between brightness/ color tern perature
Press and hold: Turn on/off the fill light
Toggle up/down: Adjust brightness/color temperature
 Trigger Button
Double press: Reposition
Triple press: 180*rotation for the pan axis motor
Press and hold: Enter Go Mode. Release to return to the previous mode.
 Joystick
Push the joystick up/down/left/right to control the gimbal to rotate. Adjustment Wheel
Adjust customized setting (aperture, shutter, ISO, zoom), can customize on the touch screen

Connect to “ZY Cami” App
- Power on CRANE-M3 and turn on Bluetooth on the smartphone.
- Launch the “ZY Play(‘ app. Select the CRANE-M3 page and tap to connect. Select the Bluetooth name of your CRANE-M3 to connect (the CRANE-M3 Bluetooth name can be found on the side of the tilt axis USER ID: XXXX).
- Activation on the Play app is required if the crane-M3 is being used for the first time. Internet connection is required. After the activation succeeds, you can enter the camera interface of the ZY Play App.

- “ZY Play” is an app dedicated to CRANE-M3. When activated CRANE-M3 via “ZY Play”, you can also use it for firmware upgrade, virtual joystick control, motion sensor control, timelapse, etc.
- ZY Play is subject to updates without notice. Please always refer to the latest version.
Disclaimer and Warning
Thank you for purchasing CRANE-M3. The information contains herein affects your safety, legitimate rights, and obligation. Please read this instruction carefully to ensure proper configuration before use. Failure to read and follow this instruction and warnings herein may result in serious injury to you or bystanders, or damage to your device or property. Guilin Zhishen Information Technology Co., Ltd (hereinafter referred to as “ZHIYUN”) reserves all rights for a final explanation on this instruction and other documents related to CRANE-M3. The information is subject to update without notice. Please visit www.zhiyun-tech.com to obtain the latest product information.
By using this product, you hereby signify that you have read this document carefully and that you understand and agree to abide by the terms and conditions herein. You agree that you are solely responsible for your own conduct while using this product, and for any consequences thereof. You agree to use this product only for purposes that are proper and in accordance with all terms, precautions, practices, policies and guidelines ZHIYUN has made and may make available.
ZHIYUN accepts no liability for damage, injury or any legal responsibility incurred directly or indirectly from the use of this product. Users shall observe safe and lawful practices including, but not limited to, those set forth herein.
ZHIYUN’”, TransMountm are the trademark of Guilin Zhishen Information Technology Co., Ltd and its affiliates. All product names or trademarks referred to herein are trademarks or registered trademarks of their respective holders.
Reading Tips
Legends: ![]() Hints and
Hints and ![]() Tips Important
Tips Important
Warnings
Read the ENTIRE User Guide to become familiar with the features of this product before operating. Failure to operate the product correctly can result in damage to the product or personal property and cause serious injury. This is a sophisticated product. It must be operated with caution and common sense and requires some basic mechanical ability. Failure to operate this product in a safe and responsible manner could result in injury or damage to the product or other property. This product is not intended for use by children without direct adult supervision. DO NOT use with incompatible components or in any way otherwise as mentioned or instructed in the product documents provided by ZHIYUN. The safety guidelines herein contain instructions for safety, operation, and maintenance. It is essential to read and follow all of the instructions and warnings in the User Guide, prior to assembly, setup or use, in order to operate the product correctly and avoid damage or serious injury.
Safe Operation Guidelines
CAUTION:
- CRANE-M3 is a high-precision control device. Damage may be caused to CRANE-M3 if dropped or subject to external force, and this may result in malfunction.
- Make sure the rotation of the gimbal axes is not blocked by external force when CRANE-M3 is turned on.
- CRANE-M3 is not waterproof. Prevent contacts of any kind of liquid or cleaner with the CRANE-M3. It is recommended to use a dry cloth for cleaning.
- Protect CRANE-M3 from dust and sand during use.
WARNING: To avoid fire, serious injury, and property damage, observe the following safety guidelines when using, charging, or storing your batteries.
- Prevent the batteries from coming into contact with any kind of Do not leave batteries out in the rain or near a source of moisture. Do not drop the battery into the water. If the inside of the battery comes into contact with water, chemical decomposition may occur, potentially resulting in the battery catching on fire, and may even lead to an explosion.
- If the battery catches fire, use a sand or dry powder fire extinguisher immediately to put out the fire.
- Never use non-ZHIYUN batteries. If replacement or backup is needed, please purchase new batteries from ZHIYUN’s official website or authorized channels. ZHIYUN takes no responsibility for any damage caused by non-ZHIYUN batteries.
- Never use or charge swollen, leaky, or damaged batteries. Never use or charge if the battery smells, or overheats (exceeding the maximum temperature of 160 ° F/71 ° C). If your batteries are abnormal, contact ZHIYUN or a ZHIYUN authorized dealer for further assistance.
- The battery should be used within the temperature range from -10°C to 60° C. Use of the battery in environments above 60° C may lead to a fire or explosion. The use of batteries below -10° C may lead to serious battery damage.
- Do not use the battery in a strong electrostatic or electromagnetic Otherwise, the battery protection board may malfunction.
- Do not disassemble or use any sharp object to puncture the battery in any way. Otherwise, the battery may leak, catch fire or explode.
- Do not mechanically strike, crush, or throw the battery. Do not place heavy objects on the battery or charger.
- Electrolytes inside the battery are highly corrosive In case of accidental contact of any electrolytes with your skin or eyes, rinse immediately with water for at least 15 minutes and seek medical advice as soon as possible.
- Do not use the battery if it has been involved in a crash or heavy impact.
- Do not heat the battery and never put the battery in a microwave oven or in a pressurized container.
- Do not place the battery on a conductive surface (such as a metal desk surface, eyeglasses, watch, jewelry, etc.)
- Prevent the use of wires or other metal objects that could cause positive and negative short-circuit to the battery.
Battery Charging
- Do not put the battery and charger near flammable materials or on flammable surfaces (such as carpet or wood). Never leave the battery unattended during charging to prevent any accident.
- Please disconnect the battery and the charger when fully charged.
- Do not charge the battery immediately after use, because the battery temperature may be too high. Do not charge the battery until it cools down to normal room temperature. Charging the battery with its temperature over 45°C or lower than 0°C may lead to leakage, overheating, or damage.
Battery Storage
- Keep batteries out of the reach of children and pets.
- Do not leave the battery near heat sources such as a furnace or heater, or inside of a vehicle on hot days. Never expose the battery in any environment with a temperature of over 60°C. The ideal storage temperature is 22° C-28°C.
- Store batteries in a dry environment.
- Do not leave the battery unused for too long after it has been completely discharged to prevent over-discharge of the battery which may result in battery damage and permanent failure.
Battery Maintenance
- Do not over-charge or over-discharge the battery, which will damage the battery:
- The battery performance will be affected by not being used for a long time;
- Never use the battery when the temperature is too high or too low;
- Do not store the battery in any environment with a temperature of over 60°C.
- Recharge and discharge every 3 months to keep the battery active. Battery Disposal
Please fully discharge the battery before putting it in the designated recycling bin. Batteries contain hazardous constituents and it is forbidden to put the battery in the general waste bin. For related details please abide by the local laws and regulations on battery recycling and disposal.
Warranty Period
- Customers are entitled to a replacement or free repair service in case of quality deficits found in the product within 15 days upon receipt of the product.
- Customers are entitled to free repair service from ZHIYUN for any product proven defective in material or workmanship that results in product failure during normal consumer usage and conditions within the valid warranty period, which is 12 months counting from the date of selling. However, the warranty period varies by product component and country of purchase. Please contact our after-sales service team on the ZHIYUN official website or your place of purchase for detailed warranty information.
Warranty Exclusions
- Products subjected to unauthorized repair, misuse, collision, neglect, mishandling, soaking, accident, and unauthorized alteration.
- Products subject to improper use or whose labels or security tags have been torn off or altered.
- Products whose warranty has expired.
- Products damaged due to force majeure, such as fire, flood, lightning, etc.
Warranty Claim Procedure
- If failure or any problem occurs to your product after purchase, please contact a local agent for assistance, or you can always contact ZHIYUN’s customer service through email at info@zhiyun-tech.com or website at www.zhiyun-tech.com.
- Your local agent or ZHIYUN’s customer service will guide you through the whole service procedure regarding any product issue or problem you have encountered. ZHIYUN reserves the right to reexamine damaged or returned products.

https://www.facebook.com/officialzhiyunsupport/
http://zhiyun-tech.com/
https://www.facebook.com/ZhiyunGlobal/
https://www.youtube.com/channel/UCeeYm4DCcKiN6hmKBspX8Ig
https://www.instagram.com/zhiyun_tech/
Quality Certificate
Please download the latest version from www.zhiyun-tech.com This document is subject to change without notice.
ZHIYUN”‘is the trademark of ZHISH EN.
Copyright 0 2021 ZHISHEN. All rights reserved.
Tel: +86400 900 6868
USA Hotline: +1808-319-6137,9:00-18:00 GMT-7,Mon-Fri
Europe Hotline: +49 (0)6101 8132 180,10:00-17:00 GMT+1,Mon-Fri Email: info@zhiyun-tech.com
Website: www.zhiyun-tech.com
Address: 09 Huangtong Road, Tieshan Industrial Zone, Qixing District, Guilin, 541004, Guangxi, China
 If at any time in the future you should need to dispose of this product please note that: Waste electrical products should not be disposed of with household waste. Please recycle where facilities exist. Check with your Local Authority or retailer for recycling advice. (Waste Electrical and Electronic Equipment Directive)
NOTE: This equipment has been tested and found to comply with the limits fora Class B digital devices, pursuant to part 15 of the FCC Rules. These limits are designed to provide reasonable protection against harmful interference in a residential installation. This equipment generates uses and can radiate radio frequency energy and, if not installed and used in accordance with the instructions, may cause harmful interference to radio communications. However, there is no guarantee that interference will not occur in a particular installation. If this equipment does cause harmful interference to radio or television reception, which can be determined by turning the equipment off and on, the user is encouraged to try to correct the interference by one or more of the following measures:
– Reorient or relocate the receiving antenna.
– Increase the separation between the equipment and receiver.
-Connect the equipment into an outlet on a circuit different from that to which the receiver is connected.
-Consult the dealer or an experienced radio/TV technician for help.
NOTE: The manufacturer is not responsible for any radio or TV interference caused by unauthorized modifications to this equipment. Such modifications could void the user’s authority to operate the equipment. RF Exposure: The device has been evaluated to meet general RF exposure requirements, The device can be used in portable exposure conditions without restriction Federal Communication Commission (FCC) Radiation Exposure Statement Power is so low that no RF exposure calculation is needed.
This device complies with part 15 of the FCC Rules. Operation is subject to the following two conditions: (1) This device may not cause harmful interference, and (2) this device must accept any interference received, including interference that may cause undesired operation. Any changes or modifications not expressly approved by the party responsible for compliance could void the user’s authority to operate the equipment.
zhiyun-tech.com
Documents / Resources
3.0
Rated 3 out of 5
3 out of 5 stars (based on 1 review)
Your overall rating
ZHIYUN CRANE-M2 CR106 (01) PDF MANUAL
Click here to download ZHIYUN CRANE-M2 CR106 (01) PDF MANUAL
ZHIYUN CRANE-M2 CR106 (01) PDF MANUAL
FREE ENGLISH PDF
OPERATING INSTRUCTIONS
USER GUIDE – USER MANUAL
OWNER GUIDE – OWNER MANUAL
REFERENCE GUIDE – REFERENCE MANUAL
INSTRUCTION GUIDE – INSTRUCTION MANUAL
Your overall rating
- YouTube
ZHIYUN CRANE-M2 CR106 (01) PDF MANUAL
ZHIYUN CRANE-M2 CR106 (01) PDF MANUAL

Dreamss Eater:
не поддает никаких признаков жизни , не заряжается . Перестал работать внезапно , октлючился и все. Что можно сделать? 😩
Сообщение:
Увеличить поле для сообщения
Егор Александрович
06.08.2021
Привет. Подскажи как его к телефону подключить? Ничего не получается. Только новый вчера купил.
Егор, в приложении выбираете конкретно эту модель, подключиться, и он через блютуз должен найти его после этого
Егор Александрович
07.08.2021
Антон, приложение ZY Play? Там нету модели этой.
Егор, есть, в разделе For Pro cameras
Егор Александрович
08.08.2021
Антон, спасибо, нашёл.