by Milan Stanojevic
Milan has been enthusiastic about technology ever since his childhood days, and this led him to take interest in all PC-related technologies. He’s a PC enthusiast and he… read more
Updated on
- If you own a gaming PC, you have probably used ASUS Aura software, at least once.
- Many users reported that ASUS Aura has stopped working for them, so today we’ll show you how to fix that.
- You can try to reinstall the app or unblock ASIO folders, see our recommendations on how to proceed safely.
ASUS Aura is a great software for controlling your computer’s LED lights, but many users reported that ASUS Aura has stopped working for them.
This can be a problem, and in today’s article, we’re going to take a closer look and show you how to fix this problem once and for all.
Why is Aura sync not working?
There are several reasons why ASUS Aura is not working, but the most common one is the damaged installation.
It’s worth mentioning that other lighting control software can also interfere with Asus Aura, so you might want to remove it if you suspect that it’s causing issues.
What do I do if Asus Aura has stopped working?
1. Reinstall Asus Aura
- Download the latest version of Asus Aura.
- Run the setup file.
- The previous version of Asus Aura will be removed.
- Run the setup file again to reinstall ASUS Aura.
You can also reinstall it manually by doing the following:
- Open the Settings app and go to the Apps section.

- Now uninstall the following software:
- AURA
- AURA Service
- GALAX GAMER RGB
- Patriot Viper RGB

- After removing these applications go to the following directory:
C:Program Files (x86) - Now locate and remove LightingService directory.
- After removing all the applications and directories mentioned above, install ASUS Aura again.


Alternatively, we recommend using a professional third-party app that along with uninstalling, will also clean leftovers.
When you remove an app manually, unnoticeable junk files will remain in your system, affecting its speed and functionality over time.
⇒ Get CCleaner
2. Unblock AsIO folders
- Uninstall Asus Aura software.
- Go to
C:Program Files (x86)Io - You should see several AsIO folders.
- Right-click the first directory and choose Properties.

- Now check the Unblock option and Apply and OK to save changes.

- Repeat these steps for all ASiO directories.
- After doing that, install Asus Aura again.


Several users reported that you need to unblock the Asus Aura setup file before you install it, so be sure to try that as well.
ASUS Aura is a decent tool, but if ASUS Aura has stopped working for you, be sure to perform a complete reinstall and fix the problem for good.
We covered software issues in the past, and you can find all of our previous articles in our PC Software section.
If you’re a gamer, be sure to visit our Gaming Hub for the latest gaming guides and fixes.
![]()
Most of the users encounter the error code ‘ASUS AURA Service is Currently Unavailable’ issue. In this article, we will discuss how to fix this issue in simple steps. Asus Aura basically runs on Windows 10. There are a lot of users present worldwide who have Asus aura hardware devices. The main use of these hardware devices is to use the official Asus Aura Sync utility so that RGB components can be managed. This feature is a savior only for those users who have LED strips on their devices.
Although Asus Aura has plenty of unique features, still users face few errors. Errors are mainly visible when an application is not launched properly. This drawback forces us to think about why Asus Aura Sync is not working? There are many possible reasons by which Asus Aura service is currently unavailable.
In this article, we will be discussing how to solve the issue of the Asus Aura service. It’s very easy to fix this problem but no worries you will surely overcome this issue permanently. But proceeding further we need to know in-depth about Asus Aura. Let’s get started.
What is Asus Aura?
Talking about the Asus Aura, it is the most significant application to control the RGB add-ons that are available at your site. For instance LED strips, RGB RAM, Motherboard, RGB fans, and many other components of your computer system. Its the must apply for the users who are hardcore RGB gamer. It’s useless for them to have a computer system without an Asus Aura application.  There is a drawback to using this app in your computer system. Asus Aura sync is compatible only with the Asus Aura Motherboard. It’s the necessity of the Asus Aura. although we have another option of making it compatible if we want to use a Gigabyte motherboard. The only thing you have to do is install a gigabyte RGB fusion app.
Most Common Errors In Asus Aura Service

Many errors occur in the Asus Aura service and before trying to fix them, we need to know about what errors occur in Asus Aura.
1. Error In Opening Of App
This is the main error that we face during the opening of the app. Most of the time when we install software on a computer system, users may suffer majorly from this issue. Here starting the app using the app icon is of no use to users.
2. Asus Aura Sync-in App Buttons Improper Functioning
There comes a situation many times where the app’s button doesn’t function properly. When the user makes an effort to click on the button, it greys out. The main reason for this issue is the unresponsive action of software towards hardware components on the computer system.
3. Working of Asus Aura Stopped
There is a very common error on Microsoft Windows systems that there is a no. of apps which cause the stopped working error. Asus Aura is also that app that stopped working on Microsoft Windows.
4. Asus Aura Unable To Detect Motherboard
It is a very complicated issue. We will not be able to access the benefits of the Aura Sync if our application will not be able to discover the motherboard. Most of the users suffer from this worst issue
5. Unable To Sync With RGB Components
This is one of the most crucial issues with the Aura Sync Application. Users spend most of their time syncing the hardware with each other and their coms no result. This issue only appears when the hardware will not go right with the system.
How To Fix Asus Aura Service is Currently Unavailable Issue?
There are a no. of methods by which this issue can be resolved. Have a look into its methods
1. Disable Fast Startup
Fast startup is one of the best features of Windows features that intended to reduce the boot time of your PC. But a sometimes fast startup can cause problems while using ASUS AURA services, so it would be best if you disable the fast startup.
- In the windows Cortana search box, you have to type the control Panel.

- Click on the control panel to open it.
- After that, you have to set the view by large icons and select the power section.

- Now click on the power button action on the left side menu.
- Click on the “Change the settings that are unavailable”.
- Disable the “fast startup” option and hit the save changes button.`
- Now Restart your PC and check if your issue of Asus Aura Currently unavailable is resolved or not.


2. Try Reinstalling Asus Aura
You need to uninstall the current version of the ASUS AURA service from your computer and then install it back by visiting the official website. Sometimes, instead of reinstallation, you can consider updating the service to the latest version.
- Click on the window log key and R together so that the Run box will appear. Then type appwiz.cpl in the Run box.
- Then click on the enter button.
- From the program, then list select Asus Aura.
- Right-click on it and select the option to uninstall.
- Then proceed further with screen follow up to uninstall Asus Aura and then you are ready to restart the computer system.
- Open the official website of Asus Aura and download the Asus Aura.

- Install the app on your PC and don’t alter the built-in installation directory on PC.
- After you have installed the Asus Aura, restart the Asus Aura to check if it’s working properly or not.


3. Try Uninstalling Other Lightning Software On Your PC
If you have any other software present on your systems like cooler master and corsair then they may compete with the Asus Aura and can cause problems in the working of Asus Aura. So to overcome the issue, you have to uninstall this software. After you have done this, you can open the Asus Aura to check if it’s working or not.
Conclusion
Asus Aura is a wonderful software for controlling the RGB lighting in peripherals. I hope you have fixed your issue with the Asus aura service is currently unavailable after reading the above-mentioned methods. In case you’re continuously facing this site I would suggest you restart your PC and reinstall Asus Aura. Don’t forget to share his useful article with your friends. Thanks…
After you install your case lighting, you may experience an issue with the aura service not being available, and the lights would not light up. The problem most likely is a hardware issue. In other words, this indicates the lights are not fastened onto the motherboard properly. However, in case it’s not a hardware issue, here is a guide to troubleshoot it.
Why Does Asus Aura Sync Software Not Work?
The usual issue causing this problem might just be a faulty RGB/ARGB header. This connects the lighting peripheral to the motherboard or a corrupt driver or an older Aura Sync app version.
You have to check whether your lighting components are compatible with the Asus Aura software or not. This is the first step in fixing Asus Aura not working. Next is to carry out a check if your motherboard is also compatible with Asus Aura software.
If you face any one of the compatibility issues it will render these solutions useless. Therefore, make sure of that beforehand to avoid disappointment later on. You can, however, check for compatibility of your components on the Asus Aura website.
How to Fix the Aura Service Not Working
There are a number of ways you can fix these software related issues. Each of which is listed in this article. We will guide you through each of our proposed solutions so that you do not encounter any difficulty.
1.Reconnecting the RGB Headers
Fastening the RGB/ARGB headers properly and in the exact position is of utmost importance. If you connect the header in an improper position on the motherboard or mix-up with other lighting components, no matter how hard you try the software will not detect the peripheral component(s).
Therefore, try to make sure of that beforehand, the connectors, two of them usually, lie on the very edge of the motherboard so it can be a little tough to squeeze your hand into the right place. Just be more careful.
2.Uninstalling all other RGB software
If you simultaneously run third-party RGB lighting software with the Asus Aura Sync, you are likely to face some issues. In order to fix this just uninstall all other RGB lighting software running on your system.
For complete uninstall of the software head over to the programs and features in the Control-panel:
Press Windows logo key + R, this will prompt the run program, type appwiz.cpl in the dialogue box and this will take you directly to the programs and features in the Control-panel.
Next thing is to look for RGB lighting software (other than Asus Aura) in the programs and features list of applications and click uninstall.
Doing so will ensure the complete removal of the software. If up till now the Asus Aura is still not working, try the next solution.
3.Disabling the Fast Startup feature on Windows
This Fast Startup feature on Windows operating system helps to boot up fast by restoring the previous configurations. This allows the users a fast boot-up of the system once they restart the system. This startup feature does not affect the installation procedure of the Asus Aura.
However, it can cause problems after installing the app. Sometimes the Asus Aura app upon starting the system fails to load, this means you do not get the RGB lighting effects upon startup and it has to be manually run from the windows application.
Follow the steps below to fix the problem:
Press Windows logo key + R, this will prompt the run program.
Type control panel in the dialogue box.
Next, search for the Power Options and click on it.
Once you are there, click on the option Choose what power buttons do.
Here you will see an option Change settings that are currently unavailable. Click on it. But you should keep in mind you can only access this option only if you are an administrator.
Now head to the bottom of the opened window, un-tick the box that says, Turn on fast startups.
Once that is done, apply changes and exit the control panel. Finally, just restart your computer to see if the RGB lighting works. If the problem persists, move over to the next solution.
4.Reinstalling the Asus Aura Sync software
Properly installing software that is already full of bugs can be a tedious task. There are a number of ways to do the re-installation of the Asus Aura Sync software correctly but we have picked the best method out for you.
If you are facing this issue, once you run Asus Aura it stops working, the problem might be with the software having trouble synchronizing with other components. Check this guide on the installation and download of Asus Aura Sync software.
Asus Aurora Sync will not work sometimes when your CPU is over-performing due to msmpeng.exe. ‘msmpeng.exe’ is a built-in feature of Microsoft Windows Defender. To halt its operation, disable the Windows Defender application.
Also try disabling anti-virus operations temporarily, now run the Asus Aura app which should fix the issue of “ Aura service is currently unavailable.”
Another annoying problem faced by users is that the motherboard is not detected by the Asus Aura service. To fix this issue what you can do is firstly, check whether your motherboard and other RGB components are Aura Sync compatible or not.
The Two-Step Solution
Step#1:
Now if you have found out your motherboard is indeed Aura Sync compatible then activate RGB lighting from the BIOS menu of your motherboard.
To do this restart your computer and rapidly press the F2 key to enter the BIOS menu. It may differ for some manufacturers.
Once you are there, press the Advanced mode(F7)>column named Advanced>Onboard Devices config.> navigate to RGB lighting and turn on both the options> save and exit BIOS.
Step#2:
Download the working Aura service Sync app and follow the installation instructions given here.
Following the instructions properly will ensure the problem with the motherboard detection is fixed.
If you come across the issue where the Asus Aura Sync software does not launch or open upon clicking the icon of the app, the problem might just be with the installation.
Uninstall the software and remove all the files.
Next, reinstall and download the files from here. And follow the installation guide, in doing so this should fix your issue.
On the user interface to see some button or icons that are unresponsive, these buttons do not highlight if you hover the cursor over them but you do see them working on someone else’s software.
The reason for this is that Asus Aurora is not picking up any lighting component indicating that the components are not fastened onto the motherboard properly.
Reasons why Asus Aura is not detecting motherboard
1.Improper RGB/ARGB header connections:
Most of the time sees the problem with the lighting is just a faulty connection. What happens is that usually, the users who want to light-up their gaming rigs have the motherboard already integrated within the system.
Therefore, it is hard to reach the exact place where the headers for the lighting are, and connecting all the components in the correct order is a bit of a challenge and it is this where we see most of the human errors committed.
We recommend you use a flashlight to properly see where the connection goes, also make sure the components are fastened properly and not dangling, and please do not use too much force.
Be careful not to damage the delicate connectors of the RGB header because if you do then you would have to get new ones soldered on the motherboard. And just imagine the hassle that would be in taking the motherboard out of the system.
2.Fast Startup
Windows has this built-in feature with the intention to boot up the system as quickly as possible once the user turns on or restarts the system. Aura Sync fails to load properly with this feature, you sometimes do not get a synchronized light-up of the entire system.
What happens is that Windows tries to disable as many services as possible in the startup. As a result, when the system is turned on, the Aura service is currently unavailable. One component might be showing one color while the other might still be turned off. Our recommendation would be to turn this feature off.
3. Corrupted installation file
During the download, if the user encounters an internet disconnection issue either due to a power outage or an unplugged router, the installation file consequently might corrupt. Just reinstall the file with a fresh download. We have a comprehensive guide to the multiple features of Asus Aura software in one of our other articles on the subject.
Conclusion
We have gone through each one of the multiple options available for fixing the aura service error. You are recommended to install the setup file in the default file location. Looking at how buggy the latest versions of the software are, just imagine how difficult the earlier versions of the software would be to use.
Now having said that we recommend you update to the latest version and erase all data, files, and folders of previous versions (they tend to cause inexplicable issues).
Многие материнские платы ASUS оснащены управляемой системой LED подсветки AURA. Она обеспечивает настраиваемое поведение RGB-индикаторов и даже позволяет синхронизировать другие светодиодные ленты, прикрепленные к ней.
Программа позволяет пользователям персонализировать цветность LED индикаторов и устанавливать ее в соответствии с их предпочтениями. Уже настроен ряд различных предустановленных режимов, поэтому добавить новый будет намного легче. С момента появления системы было много нареканий у пользователей о том, что ASUS AURA работает не так, как ожидалось. Она либо вообще не открывается, либо переходит в состояние «не отвечает».

Поскольку это приложение привязано к элементам управления на материнской плате ASUS, есть несколько причин, при которых AURA может не работать.
- Файлы установки приложения повреждены и стали непригодными для использования.
- Указанный путь установки программного обеспечения AURA должен быть сохранен по умолчанию, иначе приложение не будет работать.
- Конфликт с другими программами управления подсветкой. Уже известный факт, что другие утилиты для настройки подсветки, такие как Corsair и прочие вызывают конфликты с ASUS AURA.
- Неправильно подключена RGB лента к материнской плате.
- Версия программного обеспечения AURA несовместима с установленным оборудованием.
- Активирован быстрый запуск Windows. Эта функция помогает очень быстро загрузить операционную систему, но также может конфликтовать с приложением AURA.
Перед выполнением следующих действий проверьте, что материнская плата физически не повреждена, включая контакты LED подсветки. Кроме того, нужно зайти в систему как администратор.
Отключение быстрого запуска Windows
Эта функция предназначена для сокращения времени запуска системы. Она сохраняет начальную конфигурацию Windows при завершении работы компьютера. Поэтому, когда включаем ПК снова, он быстро извлекает состояние системы и загружается, не занимая много времени. Функция пытается дать ощущение «SSD», когда на самом деле установлен жесткий диск HDD. Мы попытаемся отключить эту функцию и посмотреть, будет ли работать система RGB индикации.
- Откройте окно «Выполнить» (клавиши Win + R), впишите control panel и нажмите на Enter для входа в Панель управления.

- Установите просмотр на крупные значки, затем перейдите в раздел «Электропитание».
- Выберите в левом боковом меню «Действие кнопок питания».
- Теперь кликните на опцию, предоставляющей администраторские права с именем «Изменение параметров, которые сейчас недоступны».
- После этого снимите флажок «Включить быстрый запуск», сохраните изменения и выйдите из окна.


Перезагрузите компьютер и проверьте, работает ли подсветка на материнской плате ASUS.
Переустановка ASUS AURA
Если после отключения быстрой загрузки AURA по-прежнему не работает, попробуйте полностью удалить приложение, а затем заменить его на последнюю версию. Дело в том, кроме установочных файлов повреждаются данные сохраненных настроек пользователя. Для удаления нужно использовать деинсталлятор AURA, чтобы не осталось никаких следов.
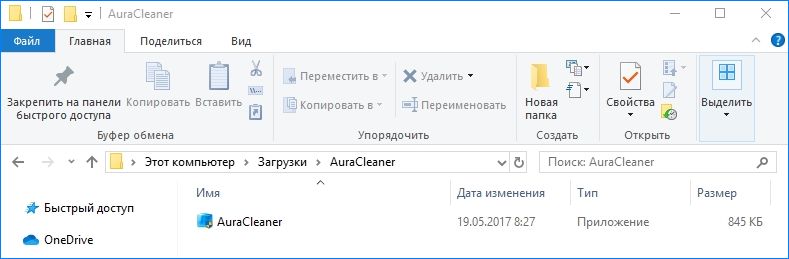
- Загрузите утилиту AuraCleaner. Кликните правой кнопкой мыши на исполняемом файле и выберите запуск от имени администратора. AURA будет удален со всеми сохраненными пользователем файлами.

- Выключите компьютер. Отключите кабель питания, также проверьте, что все периферийные устройства отключены. Теперь подождите 5-10 минут, прежде чем подключить все обратно.
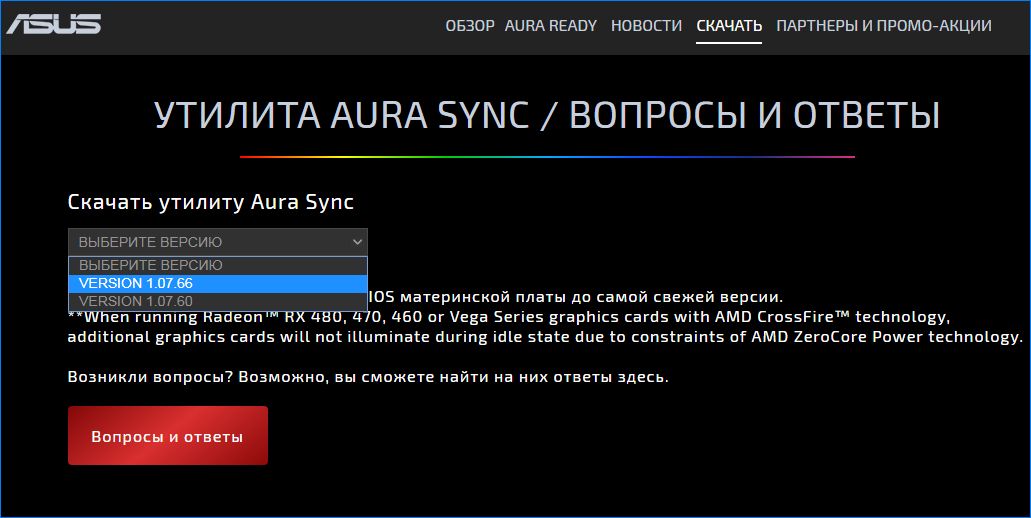
- Откройте официальный сайт ASUS AURA, загрузите последнюю версию приложения.

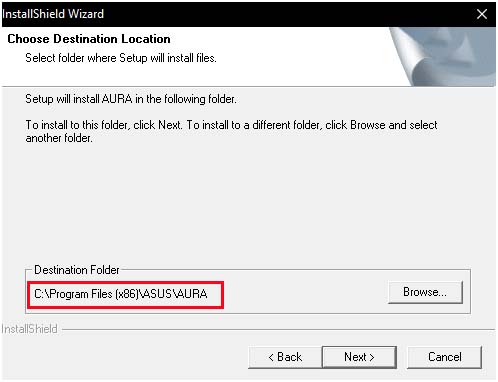
- Запустите исполняемый файл и не изменяйте каталог установки, указанный путь оставьте по умолчанию, иначе приложение работать не будет.

После завершения установки перезапустите компьютер, посмотрите, работает ли индикация.
Если последняя версия не работает на конфигурации вашего компьютера, попробуйте установить предыдущую.
Проверка разъемов RGB
Часто пользователи подключают дополнительные светодиодные ленты. На материнских платах в основном есть два разъема: для светодиодной ленты и подсветки вентилятора (Fan RGB header). В некоторых лентах нет направляющих, поэтому можно ошибиться с правильностью их подключения.
Поэтому еще раз проверьте, правильно ли подключена RGB лента. Кроме этого, не применяйте физическую силу, так как можете повредить разъемы.
Удаление других программ управления подсветкой
Известно, что AURA конфликтует с другими приложениями RGB, среди которых Corsair, Cooler master и прочие. Поскольку все эти приложения используют одни и те же основные компоненты, может возникнуть ситуация, когда каждый модуль конкурирует за использование внешнего ресурса.
Откройте диалоговое окно «Выполнить» (Win + R), наберите команду appwiz.cpl для входа в раздел удаления / изменения программ. Кликните правой кнопкой мыши на другую установленную программу управления подсветкой и удалите ее.
Перезагрузите компьютер и проверьте, правильно ли работает функция подсветки.
Материнские платы ASUS имеют функции RBG, которые в значительной степени характерны для всех материнских плат высокого класса. Они обеспечивают настраиваемое поведение подсветки RGB на материнской плате и даже позволяют синхронизировать другие прикрепленные к ней светодиодные ленты. 
У ASUS также есть программное обеспечение под названием AURA, которое позволяет пользователям персонализировать свои RGB-подсветки и настраивать их в соответствии с их собственными предпочтениями. Уже есть несколько различных предустановленных режимов, и их легче добавить. С момента первого выпуска пользователи много раз сообщали о том, что их программное обеспечение AURA не работает должным образом. Он либо не открывается, либо переходит в состояние отсутствия ответа.
Содержание
- Почему ASUS AURA не работает? на работу?
- Решение 1. Отключение быстрого запуска
- Решение 2: Переустановка ASUS AURA
- Решение 3. Проверка заголовков RGB
- Решение 4. Удаление другого программного обеспечения RGB
Почему ASUS AURA не работает? на работу?
Поскольку это приложение привязано к элементам управления на материнской плате, есть несколько причин, по которым ваше приложение AURA может не работать. Некоторые из причин, помимо прочего, следующие:
- Файлы установки: Мы видели многочисленные сообщения от пользователей о том, что установка файлы программного обеспечения AURA были повреждены или стали непригодными для использования.
- Путь установки: Похоже, что путь установки программного обеспечения AURA необходимо оставить по умолчанию в противном случае программное обеспечение не загружается.
- Конфликт с другим программным обеспечением освещения: Это хорошо известный факт, что другое программное обеспечение освещения, такое как программное обеспечение Corsair и т. д., вызывает проблемы и конфликт с ASUS AURA.
- Полоса вставлена неправильно: Полоса, которую вы используете, может быть неправильно подключена к материнской плате. Фактически это не приведет к подключению ваших светодиодов и, следовательно, вызовет проблемы.
- Версия AURA: Также может быть вероятность, что версия программного обеспечения AURA может быть несовместимой. с вашим оборудованием.
- Быстрый запуск: Быстрый запуск помогает очень быстро загрузить операционную систему, но также известно, что он конфликтует с AURA.
Прежде чем мы перейдем к решениям, убедитесь, что ваша материнская плата не физически повреждена , включая контакты RGB на ней. Также убедитесь, что вы вошли в систему как администратор.
Решение 1. Отключение быстрого запуска
Функция быстрого запуска в Windows предназначена для сокращения времени загрузки при повторном запуске компьютера. Он сохраняет первоначальную конфигурацию вашего компьютера, когда он выключается, поэтому при повторной загрузке он быстро извлекает состояние системы и загружается, не занимая много времени. Он пытается создать впечатление «SSD», когда на самом деле у вас есть жесткий диск. Мы попробуем отключить эту функцию и посмотрим, поможет ли это.
- Нажмите Windows + R и введите « control. панель »в поле и нажмите Enter, чтобы открыть панель управления..
- На панели управления выберите Большие значки и нажмите Параметры электропитания .

- В параметрах питания нажмите «. Выберите, какие кнопки питания do »в левой части экрана.

- Теперь вы увидите параметр, требующий прав администратора, с именем «Изменить настройки, которые в настоящее время недоступны ». Нажмите на нее.
- Теперь перейдите в нижнюю часть экрана и снимите флажок с надписью « Включить быстрый запуск ». . Сохраните изменения и выйдите.

- Правильно перезагрузите компьютер и проверьте если вы можете запустить AURA без каких-либо проблем.
Решение 2: Переустановка ASUS AURA
Если быстрый запуск не является виновником того, что ваше программное обеспечение AURA не работает, мы можем попробовать полностью удалить AURA, а затем заменить его более новой версией. Файлы установки постоянно портятся вместе с некоторыми временными данными пользователя в виде конфигураций. Мы также будем использовать AURA Uninstaller, чтобы убедиться в отсутствии остатков.
- Загрузите Uninstallation Utility (здесь) и сохраните ее в доступном месте на вашем компьютере.
- Теперь щелкните правой кнопкой мыши исполняемый файл и выберите Запуск от имени администратора . ASUS AURA будет удален с вашего компьютера вместе со всеми его временными файлами.
Примечание. Для этого у вашей учетной записи должны быть права администратора.

- Правильно выключите компьютер. Теперь выньте кабели питания из ЦП и убедитесь, что все периферийные устройства отключены. Теперь удерживайте кнопку питания около 30 секунд. Теперь подождите 5–10 минут, прежде чем снова подключить все и приступить к решению.
- Теперь перейдите на официальный сайт ASUS AURA и загрузите приложение в доступное место.

- Теперь запустите исполняемый файл и установите приложение AURA на свой компьютер. Убедитесь, что вы не изменили установленный по умолчанию каталог на вашем компьютере. Было несколько случаев, когда изменение каталога установки делало установку бесполезной.

- После установки перезагрузите компьютер должным образом и запустите AURA. Проверьте, решена ли проблема.
Примечание. Если последняя версия не работает на вашем компьютере, вы всегда можете продолжить и установить более старая версия.
Решение 3. Проверка заголовков RGB
Большинство пользователей, читающих эту статью, скорее всего, использовали бы дополнительный светодиод на их буровые установки. Эти светодиоды подключаются к разъемам светодиодов на материнской плате ASUS. К полоскам подключаются в основном два разъема (эти ленты включают в себя светодиодные ленты, а также ленты вентиляторов RGB). Если вы неправильно подключаете полосы RGB к заголовкам, вы не увидите ни одного светодиода, и это может создать иллюзию того, что AURA не работает.

Убедитесь, что полоски правильно подключены к заголовкам. Есть определенный способ подключения разъемов к заголовкам. Кроме того, не применяйте физическую силу, это может повредить заголовки.
Решение 4. Удаление другого программного обеспечения RGB
AURA известно, что конфликтует с другим программным обеспечением RGB, установленным на вашем компьютере, которое может включать программное обеспечение от Corsair, Cooler master и т. д. Поскольку все это программное обеспечение использует одни и те же основные компоненты, может возникнуть состояние гонки, когда каждый модуль будет конкурировать за использование внешнего ресурс.

Нажмите Windows + R, введите « appwiz.cpl »В диалоговом окне и нажмите Enter. В диспетчере приложений щелкните правой кнопкой мыши любое дополнительное программное обеспечение для освещения , установленное на вашем компьютере, и удалите его . После выполнения этих действий перезагрузите компьютер и проверьте, решена ли проблема.