С консоли PlayStation 3 можно зайти в сервис PlayStation Network, позволяющий расширить возможности приставки. Здесь можно не только играть и соревноваться с другими пользователями, но и общаться, делиться достижениями. Многие игры не работают без подключения PSN.

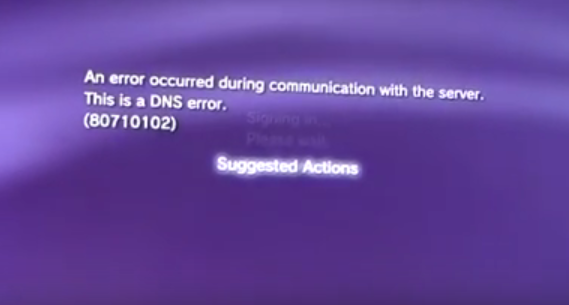
Во время игры на PS3 может возникнуть ошибка 80710102, свидетельствующая об отказе DNS.
Поэтому весьма неприятна ситуация, когда консоль отказывается заходить в PSN либо вылетает из него в неподходящий момент. Обычно при этом появляется сообщение об ошибке DNS 80710102.
Согласно расшифровке кодов PS3, она означает конфликт IP адресов. То есть в локальной сети, где находится наша консоль, находится ещё устройство с точно таким же IP. Либо у приставки проблемы при соединении с роутером. Рассмотрим, как исправить ошибку 80710102 на PS3 в зависимости от причин, её вызвавших.
Способы решения
Для начала попробуйте исправить ошибку стандартными при зависании любой компьютерной техники действиями:
- отключите и снова подключите интернет на консоли;
- перезагрузите приставку;
- перезагрузите роутер, желательно выключить его из розетки на несколько минут и снова включить.
Маловероятно, что это поможет, однако, необходимо убедиться, что ошибка действительно системная, а не банальный глюк.
Исправление ошибки 80710102 в большинстве случаев сводится к ручной настройке ip на Playstation 3:
- Зайдите в настройки сетевого подключения на компьютере.
- Выберите свойства текущего подключения.
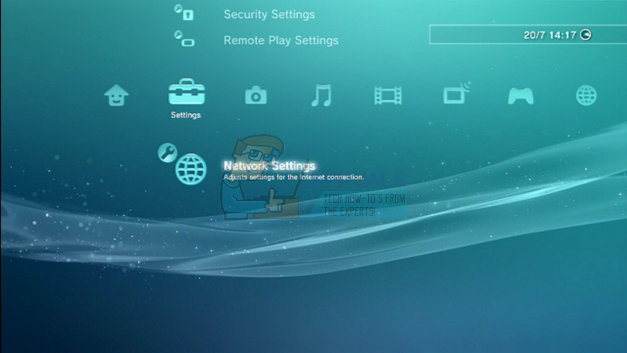
- На приставке зайдите в меню «Настройки», «Настройки сети».

- Выберите «Настройки интернет-соединения».
- Подтвердите отключение от сети.
- Выберите «Специальные» настройки.
- Метод соединения «Беспроводное».

- Нажмите «Сканировать».

- Выберите ваш метод шифрования (из настроек роутера).

- Введите пароль беспроводной сети. Ввод пароля
- Рабочий режим Ethernet «Выбирать автоматически».
- В настройках ip адреса выберите «Вручную».
- Введите ip, как на компьютере, кроме последней цифры. Её измените на любую другую.
- Остальные настройки оставьте, как на компьютере.


Если решить проблему не удалось, то нужно ввести вручную адреса DNS:
- Проведите все пункты предыдущей инструкции до окна ввода IP.
- IP выберите «Автоматически».
- В окне DHCP выберите «Не устанавливать».
- Настройки DNS назначьте вручную. Пропишите Primary 8.8.8 и Secondary 8.8.4.4.

- MTU выберите «Автоматически».
- Прокси-сервер отмечаете «Не использовать».
- UPnP включите.

Можно также прописать такие адреса DNS:
- 2.2.2 и 4.2.2.1.
- 88.8.8 и 77.88.8.1.
- 67.222.222 и 208.67.220.220.
DNS серверы служат для преобразования буквенного обозначения доменных имён в ip и обратно. DNS провайдеры часто работают очень медленно, подвисают или вовсе оказываются на время неработоспособными. Публичные же DNS, например, от Гугл или Яндекс, позволяют достичь большей скорости интернет-соединения, производить фильтрацию сайтов, а также обходить блокировки. Именно из-за проблем DNS серверов провайдера может возникать ошибка 80710102.
Однако не спешите вносить изменения в настройки консоли. Возможно, проблема заключается в серверах самой Sony, которые в данный момент могли подвергнуться атаке, либо производятся технические работы. В таком случае все вышеописанные рекомендации не решают проблемы. Нужно лишь дождаться, пока работоспособность PSN восстановится.
Есть ли проблема на сервере PSN, вы можете узнать следующим образом:
- Позвонить в техподдержку Сони.
- Зайти на сайт https://status.playstation.com/ru-ru.
- Если на странице присутствует хоть один красный квадратик, значит, есть технические неполадки. Дождитесь, пока это не будет решено.


Часто ошибка dns 80710102 возникает из-за того, что провайдер использует так называемые серые ip адреса. Это означает то, что все компьютеры или группы компьютеров выходят в сеть с одного внешнего ip, но имеют разные внутренние «серые» адреса. И если с какого-то такого адреса Сони фиксирует подозрительную активность, она может поставить в бан ip самого провайдера, и ни один из клиентов которого не сможет подключиться к PSN. Вероятно, через некоторое время бан будет снят. Но это не гарантирует, что провайдер не заблокируется снова.
В этом случае вы можете обратиться к своему поставщику интернета. Как правило, почти все за отдельную плату предоставляют возможность получить белый ip. Если у вашего поставщика нет такой услуги, то вы всегда можете воспользоваться мобильным интернетом, предварительно уточнив этот момент у оператора.
Подключение без роутера
Кроме того, решить проблему, когда ошибка с кодом 80710102 возникает на консоли PS3 по причине серого ip, можно при помощи компьютера или ноутбука с двумя сетевыми картами. Способ непростой, но зато избавит вас от головной боли и нервов, связанных с блокировкой со стороны PSN:
- Подключите компьютер к интернету. В данном случае неважно, будет это Ethernet кабель, либо Wi-Fi.
- Скачайте и установите бесплатную программу SoftEther VPN Client Manager http://www.softether.org/5-download.

- Скачайте утилиту Connectify http://connectify-me.ru.

- Запустите VPN Client Manager.
- Нажмите «Add VPN Connection».

- На вопрос о создании виртуального сетевого адаптера нажмите «Да».
- Придумайте и введите его название.
- Откройте список VPN сервисов (вторая строка в окне).
- Выберите любой с наименьшим пингом и нажмите «Connect to the VPN Server».

- В открывшемся окне отметься первую строку (TCP протокол) и нажмите ОК.
- Дождитесь подключения.
- Запустите Connectify. В открывшемся окне введите:
- Название и пароль сети.
- Выберите сетевой адаптер, по которому компьютер получает интернет (в строке «Internet to share»).
- Укажите адаптер, который будет раздавать интернет в строке «Share over».
- После заполнения указанных данных нажмите «Start».


После этого подключите PS3 к вновь созданной сети. Таким образом приложение VPN Client Manager изменила ip на незаблокированный, а утилита Connectify раздала интернет на консоль.
Таковы распространённые способы решения проблемы доступа в PSN. В каких-то случаях может помочь простая перезагрузка роутера. При его перезапуске изменится назначенный консоли ip, и, возможно, PSN заработает. Во многих случаях помогает ручная настройка DNS и ip.
Каждый раз при возникновении каких-либо проблем не ленитесь обращаться в техподдержку Sony и своего провайдера. Ведь ошибки могут быть банально вызваны техническими неполадками на серверах. Обновляйте программное обеспечение консоли до последних версий и скачивайте новейшие прошивки для своего маршрутизатора. Смените провайдера, если не получается избавиться от ошибки никаким способом. Посоветуйтесь с другими игроками, у какого оператора не возникает подобных проблем. Оставляйте комментарии, если вам знакома ошибка 80710102, расскажите, после чего она возникла, и каким способом удалось её исправить.
Ошибка 80710102 на PS3 — это такая проблема, с которой никто никогда не хочет сталкиваться. Появляется данная ошибка во время попытки получения доступа к функционалу сервиса Playstation Network. По-сути, перед нами достаточно непростая сетевая ошибка, с которой можно долго провозиться. Наиболее часто она встречается у пользователей, чьи консоли подключены к сети посредством маршрутизатора. Однако, в данной статье мы с вами рассмотрим, почему возникла ошибка 80710102 на PS3 и как от нее можно избавиться.
Причины появления ошибки 80710102 на PS3
Итак, почему же вообще появилась ошибка 80710102? Что же, причин может быть несколько:
- проблемы с подключением консоли PS3 к Wi-Fi маршрутизатору;
- в локальной сети маршрутизатора присутствует два устройства с одинаковым IP-адресом;
- «серый» IP-адрес от провайдера;
- проблемы с DNS-сервером провайдера;
- сервера Sony испытывают в данный момент какие-то проблемы;
Вот, по-сути, все причины, по которым может возникать ошибка 80710102 на PS3. Разумеется, устранить ее можно тем или иным способом в зависимости от причины возникновения. Давайте же посмотрим, как вы можете избавиться от 80710102.
Исправляем ошибку 80710102 на PS3

Подождать
Ошибка 80710102 на PS3 могла возникнуть по одной простой причине — сервера Sony испытывают на данный момент какие-то трудности в своей работе, они на техническом обслуживании или же «упали», например, после атаки на них. Так или иначе вы можете проверить состояния серверов и служб Sony, перейдя по нижеуказанной ссылке.
https://status.playstation.com/ru-ru/
Перейдите по ссылке и убедитесь, находятся ли сервера Playstation Network в рабочем состоянии. Если же нет — вам придется дождаться восстановления их работы. Если же они полностью в порядке — ошибка 80710102 возникла по какой-то иной причине. Собственно, при втором исходе — двигаемся дальше.
Перезапуск консоли/маршрутизатора
Давайте теперь с вами убедимся, что ошибка 80710102 на PS3 — это не какой-то случайный баг в программном обеспеспечении консоли. Попробуйте перезапустить для начала вашу PS3, а затем проверьте, исчезнет ли проблема. Если же нет, то попробуйте тогда перезапустить ваш маршрутизатор, так как, возможно, тот начать сбоить. Не получив никакого результата от выполненных действий — двигайтесь дальше.
Ручное выставление IP-адреса в PS3
Ранее мы уже говорили, что ошибка 80710102 на PS3 также может возникнуть в результате того, что у вашей консоли и какого-то другого устройства в сети маршрутизатора одинаковый IP-адрес. Такое происходит время от времени, но это крайне просто исправить, введя нужный вам IP для консоли.
Чтобы это сделать, вам нужно выполнить следующие шаги:
- откройте «Настройки» на PS3;
- выберите следующие пункты: Настройки сети→подтверждение отключения консоли от сети→Специальные→Беспроводное→Сканировать→Выбрать метод шифрования сети вашего маршрутизатора→Введите пароль от сети;
- для рабочего режима Ethernet выберите «Выбрать автоматически»;
- далее выберите «Автоматически» в пункте о настройках IP-адреса;
- введите IP-адрес вашего компьютера(или любого другого устройства в сети), но замените последнюю цифру в нем;
- выберите все остальные настройки согласно вашему сетевому подключению;
Попробуйте снова воспользоваться функционалом Playstation Network, чтобы убедиться, что ошибка 80710102 на PS3 была устранена. Если проблема действительно заключалась в некорректном IP-адресе на консоли, то вы без проблем сможете использовать PSN.
Изменение DNS
Проблемы с DNS-сервером провайдера — это еще одна причина, по которой вы можете встретиться с ошибкой 80710102 на PS3. Вы можете попробовать сменить адрес DNS-сервера на своей PS3, чтобы избавиться от возникшей ошибки. Собственно, именно такое решение чаще всего и срабатывает в такой ситуации.
Итак, сделайте следующее:
- выполните все вышеуказанное и доберитесь до настройки IP-адреса для консоли;
- выберите пункт «Автоматически» для IP-адреса;
- далее выберите «Не устанавливать» на моменте с настройкой DHCP;
- выберите «Вручную» на экране DNS;
- выставьте адреса 8.8.8.8. и 8.8.4.4. для основного и дополнительного DNS;
- теперь выставьте следующее:
- MTU — «Автоматически»;
- Прокси-сервер — «Не использовать»;
- UPnP — «Включить»;
Как только закончите выставлять настройки для вашей сети, попробуйте воспользоваться сервисами Playstation Network и проверьте, была ли устранена ошибка 80710102 на PS3. Как правило, она должна исчезнуть, если проблема действительно заключалась в DNS. Если вы все еще ее наблюдаете, то можете попробовать воспользоваться иными публичными DNS-сервисами, например, попробуйте применить адреса DNS-серверов от интернет-службы OpenDNS:
- 208.67.222.222
- 208.67.220.220
- 208.67.222.220
- 208.67.220.222
Возьмите два любых адреса — и используйте их при выставлении DNS-сервера на своей консоли, выполняя вышеуказанные шаги. Мы надеемся, что данный материал помог вам избавиться от ошибки 80710102 на PS3.
If you’re looking forward to fix the issue with PS3 DNS Error (80710101 and 80710102), then you’re the right place. As I will brief you on everything you need to know about PS3 DNS Error, why it happens and also how to fix it.
Recently, I was trying to connect my PS3 to the internet so that I can get on with my Netflix and watch some cool seasonal movies. Tried so many troubleshooting procedure, and none but this which about to reveal worked for me. Before I detail you on how to fix PS3 DNS Error, I would first tell you what this error means.
What Does PS3 DNS Error Means?
PS3 DNS Error is a an error code or error message that displays on the Playstation 3 whenever there is a connection timeout when trying to connect the PS3 to the Internet service provider’s (ISP) domain name server (DNS). It’s made known that this connection issues can be fixed once you’ve contacted them, but don’t worry, there’s a way to bypass such.
Method 1 – PS3 DNS Error [Easy fix]
I call this an easy fix because it requires little task and you’re done. As known, the DNS error might be as a result of hardware issue, maybe little connection problem on hardware. So if you’re set to fix the PS3 DNS error, simply follow the below procedure.
1. Firstly, power off your PS3 console and then Press and hold the power button until the PS3 console beeps twice. Remember, the first beep powers it on and second beep powers it off. Make sure that same procedure is repeated again till you get a message that displays on the screen, “Plug your controller in using the USB to continue”.
2. Next, you’re to unplug both the power cable and Ethernet cable from the device. Also make sure that the power cable on router and Ethernet is unplugged.
3. Wait for about 20seconds before you connect every cable and power on your PS3 console. Also try to test other Ethernet ports if your router ha multiple ports.
Once your PS3 console is powered on, then the problem is solved. You won’t be experiencing the PS3 DNS error with code number 80710101 or 80710102. But if the error still insist to be eradicated, just know that the problem is not a connection issue, but a problem that you’re to fix from inside the PS3 console, and that’s where the second method comes into use.
Method 2 – PS3 DNS Error [Soft Fix]
As I explained earlier, the PS3 DNS error can either be a connection issue or something you’ve to fix from the software part of the device (troubleshooting). So, follow the below procedure to solve the PS3 DNS error issue.
1. So, for the fix, simply go to Network settings >> Internet connection settings. It will then show you a prompt if you want to adjust network settings or make wired connection which requires a connected Ethernet… simply click OK.
2. Next, you’re to select a method, simply select custom.
3. Another interface would be shown to you asking if the connection method is wireless or wired connection. Once it’s wired, then make use of auto detect as the Ethernet operation mode, but if it’s wireless, then scan and select your Wi-Fi and input password.
4. Once you’ve input your password, then follow the below configurations.
IP Address settings: Automatic
DHCP Host name: Do not set
DNS Settings: Manual
Primary DNS: 129.250.35.250 or 8.8.8.8
Secondary DNS: 129.250.35.251 or 8.8.4.4
MTU: Automatic
Proxy Server: Do Not Use
UPnP: Enable
Once you’ve completed the above configuration, go back and sign in and you would notice that the PS3 DNS error is solved. Feel free to let me know via comment section if you’re facing any other related problem with your PS3 Console.

If you are facing a recurrent PS3 DNS Error (80710102), then you have come to the right place. In this Techspirited article, we shall explain the methods that you can use to resolve this error, and connect to the Internet once again.
Official Meaning
According to the official PS3 error code list, 80710102 indicates an IP conflict, meaning, the PS3 is unable to connect to the router with your current IP information.
Sony’s PlayStation 3 (PS3) is one of the most sort after gadgets in the gaming world today. With Internet connectivity, a built-in Blu-ray disc player, and plenty of hard disk space, PS3 is much more than just a gaming device; it is a complete multimedia solution with extended capabilities of home entertainment.
However, being one of the best and most advanced gaming console doesn’t mean that it is free from problems. As it happens, many PS3 users have been reporting a common error in this device – the DNS Error (80710102).
In case you are having trouble logging into your PlayStation network due to this error, then go through the following checks and fixes to see if you can get your device connected to the Internet again. But before that, let’s find out a little more about this DNS error.
What is a DNS Error?
DNS stands for ‘Domain Name Service’. It is a system developed to resolve the numerical IP addresses with the domain names on the Internet. It is something similar to the conversion between area names and pin codes in the process of delivering letters.
A one-to-one identification needs to be made between the IP addresses and domain names for routing data. If there is a DNS error, then it means that resolution of IP addresses is not possible.
In most cases, DNS errors have nothing to do with the DNS system. The source of the issue usually lies in connectivity problems, caused by wrong configuration, ISP downtime, or a faulty router/modem.
What is a PS3 DNS Error?
A DNS error, more often than not, occurs when you are using a wireless router. Typically, you see a DNS error message on the screen, and get disconnected from the network. These errors are mostly numbered according to the underlying problem. Noting these number down might help you in ascertaining the reason for that error. Even though you might reconnect for a short period of time, the problem can relapse periodically.
One of the major reasons for the occurrence of these errors is the failure on the part of the router to accept an IP address request made by the PS3. These errors can be really frustrating, especially when you are in the middle of an engaging game, and you suddenly get disconnected.
The DNS error is not a hardware compatibility problem, but rather a software issue, with the most probable cause being incorrect network settings. A DNS error usually does not occur on a wired connection, as it directly gets the configuration settings from the wired router. This is a persistent problem with wireless connections.
How to Fix DNS Error (80710102) in a PS3
The DNS error code 80710102 is one of the most frequent errors reported by PS3 users. Presented below are two common methods that you can try out in order to fix this problem.
Method 1: Disable Universal Plug and Play
Step 1
Launch the browser and type your router’s IP address in its address bar. For most routers, the default IP address is 192.168.11.
Step 2
Now, type in your ‘Username’ and ‘Password’, and click on OK to gain access to your router’s console application.
Step 3
Click on the ‘Password’ tab and look for UPnP settings under the router’s password settings.
Step 4
There, select the ‘Disable’ option in the UPnP box, and click on ‘Save’. Lastly, close your router’s console, and restart your PlayStation. You should now be able to access the Internet.
Method 2: Change DNS Address on PS3
You can try changing the DNS address on your PlayStation (not your modem) to some other value, reconfiguring your wired or wireless Internet connection. To do this, follow the steps mentioned below.
Step 1
On your PS3, go to Settings -> Network Settings -> Internet Connection Settings. In the Internet Connection Settings, select ‘Yes’ and then ‘Custom’.
Step 2
Depending upon the type of connection that you have, do one of the following:
Wired – If you have a wired Internet connection, select ‘Auto-Detect’ for the Ethernet Operation Mode.
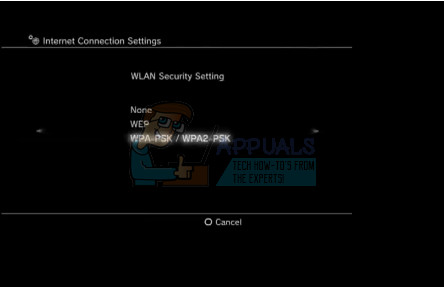
Wireless – For a wireless connection, select the type of type of security that your wireless router is using (WEP, WPA, or WPA2). After that, enter the password for your network.
Step 3
In the IP Address Settings, select ‘Automatic’ and ‘Do Not Set’ for the DHCP host name. Set your DNS settings to ‘Manual’, and enter the following pairs of primary and secondary DNS numbers.
Primary – 208.67.222.222
Secondary – 208.67.220.220
Primary – 129.250.35.250
Secondary – 129.250.35.251
Primary – 4.2.2.1
Secondary – 4.2.2.2
Step 4
Set the MTU to ‘Automatic’, proxy server to ‘Do Not Use’, and enable the Universal Plug and Play. Lastly, press the ‘X’ button to save the settings, and press it again to test the connection. The DNS error should now be sorted, and the Internet should be accessible.
If after trying out the methods presented above, you are still faced with the DNS error, then it is advised that you seek professional help by contacting your dealer or the service center.
Get Updates Right to Your Inbox
Sign up to receive the latest and greatest articles from our site automatically each week (give or take)…right to your inbox.
PlayStation 3 is full of different error codes and the ones who claim that they haven’t encountered a single one during they playing career are almost definitely lying. However, some errors are more dangerous than others and the 80710102 error code is definitely no joke as there has been an outrage regarding it. The error is usually shown next to this message:
Cannot connect to the Internet.
It appears that there are several solutions to this problem so users should definitely pay close attention to all of the methods listed below in order to get rid of this error message completely.
Solution 1: Disable Media Server Connection
If the solution above did not work for you, a similar one may help you if you want to fix your problem for good and it involves changing the way your PlayStation 3 console connects to the Internet. Make sure you follow the instructions below carefully.
Disabling this option from the PlayStation 3 settings seems to have helped plenty of users while dealing with this issue and process is simple:
- From the menu on your PS3 navigate to Settings >> Network Settings.
- Locate the Media Server Connection option and set it to Disabled.
- Check to see if the error code still appears
Solution 2: Tweak the DNS Settings to a Specific DNS Address
This DNS was proven to be quite effective when it comes to dealing with this error code and changing your PS3 Internet settings to this particular DNS address could prove to be quite successful if you follow the instructions carefully.
- Turn on your PS3 and navigate to Settings >> Network Settings.
- After that, go to the Internet Connection Settings submenu and select Custom.

- Select the type of connection your using (If your PS3 is plugged in to the router, select ‘Wired’ and if you’re using a wireless connection, select that intead.)
- If you selected wireless, set up your connection as normal until you get to the IP Address menu. If you selected wired, select the ‘Auto-Detect’ option at the next screen and continue to the IP Address menu.
- Make sure you set your settings as following:
IP Address Setting: Automatic
DHCP Host name: Do Not Set
DNS Settings: Manual
Primary DNS: 129.250.35.250
Secondary DNS: 129.250.35.251
MTU: Automatic
Proxy Server: Do Not Use
UPnP: Enable
- Test your connection and check to see if the error code still appears.
Note: Alternate primary and secondary DNS addresses may as well work with:
Primary DNS: 208.67.222.222
Secondary DNS: 208.67.220.220
Solution 3: Restore Default Settings on Your PlayStation 3
Restoring default settings is a recommended operation when something goes wrong with your PS3 and it basically simply resets the following settings:
BD/DVD Settings
Music Settings
Chat Settings
System Settings
Date and Time Settings
Accessory Settings
Display Settings
Sound Settings
Security Settings
Network Settings
Internet Browser Settings
This operation should not be confused with the Restore PS3 System option which would also delete all of your hard disk content. Follow the instructions below in order to perform this and hopefully get rid of the error code.
- From the top submenu of the PlayStation 3 Home Menu, go to Settings >> System Settings >> Restore Default Settings.
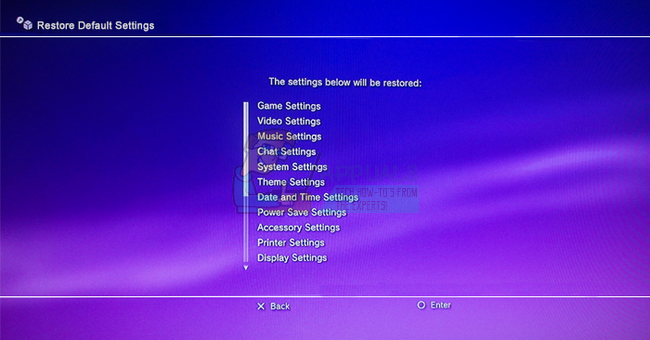
- Once you select the Restore Default Settings option, you will see a list of settings that will be restored. Scroll through them and press the X button to restore the settings.
- After the operation is complete, you will see the initial setup screen that appeared the first time you turned on your PlayStation 3 system. You will need to go through the initial setup process before you can use the PlayStation 3 system.
- First of all, you should have a controller connected and then press the PlayStation button.
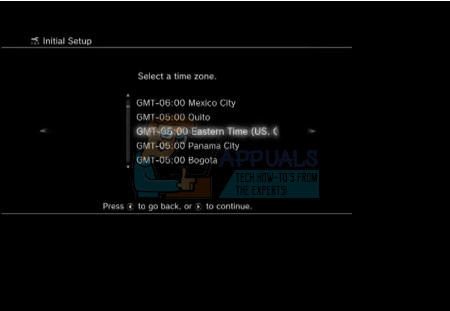
- After that, you will need to choose your correct time zone. Make sure you choose the correct one as wrong time and date settings may lead to further error codes.
- Select the type of connection you are using (If your PS3 is plugged in to the router, select ‘Wired’ and if you’re using a wireless connection, select that instead.)
- If you selected wireless, set up your connection as normal until you get to the IP Address menu. If you selected wired, select the ‘Auto-Detect’ option at the next screen and continue to the IP Address menu.
- If you chose wireless, you should display a list of access points within the range of the PS3 console. Select the hotspot that you want to use.
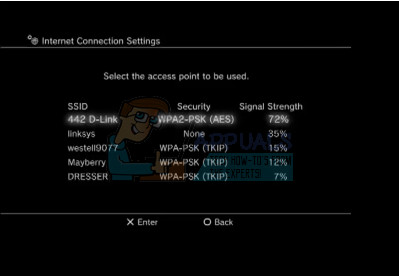
- An “SSID” is an identification name assigned to an access point. Make sure you try to connect to your own access point or to a point to which you have access to at the list.
- Select the type of security which is used for the network and enter the security credentials.
- No matter if you chose Wired or Wireless, the settings should be over now to make sure you save them and continue to turn on your PS3.
Solution 4: Switch to a Different Type of Connection
Most users already know that playing using a wireless connection is unsafe and it can lead to high latency and frequent disconnects. However, some users have reported that sometimes it’s the other way around as they switched from connecting directly into the modem to using Wi-Fi.
This means that the error code can appear either due a faulty connection with your modem or with your router. If you were using the Ethernet connection, try switching to Wi-Fi and turning on your PS3 to check if the error code still appears; and vice-versa. Both of these options can help you get rid of the error code for good.

Kevin Arrows
Kevin Arrows is a highly experienced and knowledgeable technology specialist with over a decade of industry experience. He holds a Microsoft Certified Technology Specialist (MCTS) certification and has a deep passion for staying up-to-date on the latest tech developments. Kevin has written extensively on a wide range of tech-related topics, showcasing his expertise and knowledge in areas such as software development, cybersecurity, and cloud computing. His contributions to the tech field have been widely recognized and respected by his peers, and he is highly regarded for his ability to explain complex technical concepts in a clear and concise manner.