Содержание
- Почему не печатает принтер с компьютера если он подключен и есть краска?
- Проверяем исправность USB-кабеля и портов
- Неверный выбор принтера при отправке на печать
- Отсутствует или установлен неверный драйвер устройства
- Зависание процесса печати
- Не печатает сетевой принтер — поиск проблемы
- Не печатает сетевой принтер
- 1. Проверка доступности принтера в сети
- 2. Проверка статуса через «Устройства и принтеры» и Web интерфейс
- 3. очищаем зависшую очередь печати
- 4. Перезапуск службы диспетчера печати и очищаем очередь печати
- 5. Ремонт
- Xerox WC3025 ошибка: заменить картридж. Прошивка МФУ
- Как убрать ошибку на принтере?
- Основные причины
- Программные ошибки печати принтера
- Аппаратные ошибки принтера — что делать?
- Не печатает принтер: ошибка очереди печати
- Ошибка принтера: почему еще может появиться
Почему не печатает принтер с компьютера если он подключен и есть краска?
Рассмотрим наиболее типичные проблемы.
Проверяем исправность USB-кабеля и портов
Все современные принтеры подключаются к компьютеру при помощи USB-кабеля. Если Вы подключили принтер к порту на передней панели системного блока, то попробуйте подсоединить его к разъему на задней панели. Они, как правило, впаиваются сразу в материнскую плату, что исключает возможность неисправности шлейфа, использующегося для подключения USB-портов к передней панели. Также может случиться ситуация, когда переломился основной кабель, при помощи которого подключается принтер. В таком случае система не увидит его вообще, или же, при шевелении шнура, будет находить и терять устройство. В этом случае понадобиться замена USB-кабеля.
Неверный выбор принтера при отправке на печать
Данная проблема чаще всего возникает в случаях, когда в системе присутствуют несколько принтеров. (Подключенных как напрямую, так и через сеть).
Как правило, программа, которая используется для печати использует принтер, отмеченный в системе по умолчанию. Можно поступить двумя способами:
Если вы не видите в списке устройств необходимый принтер, тогда переходите к следующему пункту.
Отсутствует или установлен неверный драйвер устройства
Чтобы проверить наличие установленного драйвера перейдите в диспетчер устройств. Сделать это можно зажав одновременно кнопки Win + Pause/Break или же открыв свойства ярлыка «Мой компьютер». В левой части окна жмем на ссылку «Диспетчер устройств» и ищем ветку «Устройства обработки изображений» или «Принтеры и факсы».

Если вашего принтера здесь нет или же вы заметили рядом с ним восклицательный знак, то драйвер не установлен, неисправно работает, несовместим с вашей версией ОС или же просто произошел сбой.
Скачайте последнюю версию драйвера с сайта производителя.
Зависание процесса печати
В очередь на печать может ставиться множество документов, которые не могут быть отправлены на принтер. Чтобы проверить, нет ли зависших документов, переходим к подкатегории «Устройства и принтеры» в панели управления, открываем меню подключенного оборудования, и выбираем пункт «Просмотр очереди печати». Отмените печать всех документов, и запустите процесс заново.

Прежде чем лезть глубоко в системные настройки необходимо удостовериться, что сам принтер находится в исправном состоянии и не показывает на дисплее никакой ошибки. Причинами неисправности может быть замятие бумаги, пустые картриджи и другие проблемы, решение которых производители описывают в руководстве по использованию. В некоторых случаях достаточно вовсе вытянуть USB-кабель и вставить его обратно.
Источник
Не печатает сетевой принтер — поиск проблемы
Не печатает сетевой принтер
Ну вот мы и подошли к углубленному изучению причин почему может не печатать принтер, в данном разделе будут представлены варианты проблем и их решения конкретно для принтеров которые подключены через LAN сеть (Ethernet см. рис. 1) Эти варианты стоит пробовать, только после того как вы прошлись по вариантам выше и ничего не получилось (инструкция почему не печатает принтер USB).
В нашей организации мы используем следующие сетевые принтеры:
Как видите у нас огромный парк печатающих устройств который может выйти из строя в любой момент и наша задача сделать диагностику и устранить неполадку в максимально короткий срок, чтобы не создавать пользователям неудобства в работе.
1. Проверка доступности принтера в сети
Сетевой принтер или сетевое МФУ который подключен к сети представляет из себя независимый узел который имеет собственный сетевой адрес (IP адрес ) по средствам которого он обозначен в сети и общается с другими узлами.
Если отступить от непонятных слов и терминов и объяснить все на пальцах, то это примерно выглядит так:
Вы дома настроили Wi-Fi и каждое устройство которые вы подключаете к вашему роутеру будет находится в одной сети с вашими другими устройствами работающими от этого же wifi, значит у каждого вашего устройства будет тот адрес который был настроен по умолчанию на роутере (по умолчанию это 192.168.0.* )
Далее: возвращаемся обратно к нашему принтеру, когда его подключают к сети ему тоже выдают адрес (вы, администратор или сам принтер берет адрес по dhcp) и уже зная этот адрес можно понять доступен принтер или нет.
Примечание: сетевой ip адрес принтера можно посмотреть несколькими способами:
теперь мы знаем ip принтера, как можно его проверить на работоспособность? И тут я Вам подскажу как минимум три способа как это просто сделать:
2. Проверка статуса через «Устройства и принтеры» и Web интерфейс
Иногда сам windows нам может дать ответ, почему может не печатать принтер. Для этого откроем Устройства и принтеры и выберем принтер из списка, после чего внизу экрана можно будет посмотреть статус устройства (в нашем случае это проблемы с открытым корпусом) для решение данной проблемы нужно подойти и открыть закрыть крышку люка с картриджем.
 Если же у принтера или МФУ есть веб интерфейс, то можно зайти в него и там на главной странице сразу будет показана причина неисправности или неработоспособности принтера как на примере ниже (см. рис. 2)
Если у Вас была обнаружена ошибка в статусе принтера, то уже отталкиваясь от текста сообщения решаем проблему, если и в статусе все нормально, тогда читаем дальше 🙂
3. очищаем зависшую очередь печати
Иногда бывают ситуации когда в следствии сбоя или «глюка» драйвера печати документ посланный на печать зависает и не пускает другие посланные на печать задания. В таком случае необходимо очистить очередь печати. Для этого зайдем в Устройства и принтера и два раза кликнем на нашем принтере в зависимости от модели принтера у Вас либо сразу откроется Просмотр очереди печати, либо как на принтерах HP откроется доп окно в котором надо выбрать Просмотр очереди печати и у нас откроется такое окно:

в нем можно увидеть всю очередь печати, для исправления ситуации выделяем все документы и удаляем их (правой кнопкой мыши — Отменить как на рис. 3) Кстати как видим в очереди печати тоже отображается статус неисправности.
После удаления зависшей очереди, выключить и включите принтер и попробуйте снова напечатать, если и после этого принтер не заработал, тогда переходим к след способу.
4. Перезапуск службы диспетчера печати и очищаем очередь печати
Если у Вас зависла очередь печать (как мы описывали в инструкции выше) и при отмене задания у вас вылетает ошибка или очередь не очищается, тогда придется переходить к крайним мерам очищая все вручную.
Данная операция делается независимо от модели принтера (если у вас не печатает принтер samsung, HP, Kyocera, canon, Xerox и другие модели ) данная операция стандартная для всех устройств.
Вот видео снял кому лень читать:
у кого и после этого принтер не запечатал, тогда идем дальше
5. Ремонт
Данный вариант последний в этом списке и Вам нужно вызывать мастера по ремонту принтера. Если у Вас таких нет, звоните или пишите нам и мы вам направим специалиста для решения данного вопроса.
Источник
Xerox WC3025 ошибка: заменить картридж. Прошивка МФУ
Производители оргтехники помимо прибыли от продажи принтеров и МФУ стремятся заработать и на расходных материалах – картриджах. Картридж может заправляться без потери качества печати 5-6 раз, а то и более. Как они зарабатывают на расходниках? Все очень просто. Зачем ждать когда картридж физически износится? Можно прибыль получить гораздо быстрее. С этой целью производители ввели защиту от заправки – чипирование картриджа. В картрирдж устанавливается чип, в который записывается количество пройденных через принтер (МФУ) листов бумаги. При достижении определенного заданного значения чип блокируется, а принтер (МФУ) воспринимает это как выход из строя картриджа и печать становится невозможной. Приходится покупать новый картридж. Но существует выход из данной ситуации. Это прошивка чипа картриджа или более выгодное решение в перспективе прошивка программного обеспечения принтера (МФУ). При прошивке принтера (МФУ) программно отключается проверка чипа и аппарат «думает» что в нем установлен новый картридж, который будет печатать пока не закончится тонер. Прошивка делается один раз, потом только происходят заправки картриджа. Выгода для потребителя очевидна.
Рассмотрим подробный процесс замены (прошивки) программного обеспечения (ПО) МФУ Xerox WC3025.
Внешний вид МФУ Xerox WC3025.

При включении МФУ выходит сообщение «Заменить принт-картридж».

Данное сообщение говорит о том что чип картриджа заблокирован, требуется прошивка МФУ. Для прошивки нужны следующие данные:
Эти данные можно получить из служебных отчетов МФУ. Для этого загружаем бумагу в лоток и включаем МФУ. Далее быстро нажимаем следующие кнопки: Влево->Вправо->Вверх->Вниз->OK->Красная кнопка->Влево. На дисплее появиться Diagnostics Mode и внизу Diagnostics. Нажмаем OK. Джойстиком вниз находим пункт Report. Нажимаем OK. Выбераем нужный отчёт Supplies Information или Configuration Report и подтверждаем печать.
Вот эти данные нам будут нужны.
Покупаем прошивку в интернете, передав вышеуказанные данные. Прошивка будет идти с инструкцией. Инструкцию читаем внимательно.
Прошивка происходит в 2 этапа.
Этап 1. Переводим принтер в принудительный режим для прошивки. Удерживая кнопку «Очистить все (Clear All)» (желтая кнопка) включаем принтер и сразу нажимаем «Очистить все (Clear All)» (желтая кнопка) еще раз.

На дисплее появляется надпись «Wait Image».

Понижаем версию прошивки МФУ. Файл First_WC3025BI_V3.50.01.15.hd с помощью левой кнопки мыши перетаскиваем на usbprns2.exe. Произойдет прошивка.

По завершении прошивки МФУ перезагрузится. Произойдет инициализация системы.


Появится опять сообщение «Заменить принт-картридж». Это нормально.

Горит красный индикатор ошибки.


Обновление завершено. Перезагрузка МФУ.


Появится еще раз сообщение «Заменить принт-картридж». Это тоже нормально.

Извлекаем картридж и заклеиваем чип.

Ошибка пропала. Горит зеленый индикатор. МФУ прошился. Теперь только последуют заправки картриджа.
Источник
Как убрать ошибку на принтере?
Внимание: воспользуйтесь интерактивным прайс-листом для определения стоимости заправки Вашего картриджа (принтера):
Довольно распространенная ситуация — нужно срочно напечатать важный документ, а на экране возникает ошибка принтера. Сходу разобраться в причинах иногда не получается, даже если уведомление содержит указание на проблему. Рассмотрим основные ситуации, когда принтер выдает ошибку, и дадим несколько советов по их устранению. А если наладить устройство не получается, то предлагаем обратиться к профессионалам в наш сервисный центр.

Основные причины
Возможных ситуаций, в которых принтер отказывается работать, не так уж много:
Некоторые неполадки вполне можно устранить дома самостоятельно, с другими лучше обратиться к специалистам, особенно если есть подозрение, что технику нужно разбирать.
Программные ошибки печати принтера
Работу печатающего устройства обеспечивают два вида программ: драйвера и специальное ПО, которое предоставляется производителем и помогает удобно управлять рабочими задачами. В том случае, если программное обеспечение установлено ненадлежащим образом или отсутствует, то даже при наличии драйвера могут возникнуть проблемы. О них сигнализирует система, сообщением, которое появляется при отправке файла на печать.
Возможна также вирусная атака на компьютер, которая повредила софт, из-за чего принтер пишет ошибку при попытке работать с ним. Необходимо установить качественный антивирус и свежие базы, пролечить компьютер, а затем переустановить программное обеспечение.
Распространенная проблема — конфликт драйверов, если к одному ПК подключено сразу несколько печатающих устройств, либо есть локальная сеть с несколькими аппаратами и общим доступом. Рекомендуется единовременно подключать к компьютеру только один принтер, а при устройстве локальной сети выбирать одинаковые приборы для всех участников сети. Также можно зайти в «Панель управления» и настроить принтер, используемый по умолчанию.
Аппаратные ошибки принтера — что делать?
Несколько вариантов неполадок, которые связаны именно с физической частью прибора и его подключением:
Распространенный вариант поломки — потребность в обновлении или замене чипа, отслеживающего статус заправки чернил. Актуально и для лазерных, и для струйных моделей. Также следует проверить, не засохла ли печатающая головка, и при необходимости прочистить ее.
Не печатает принтер: ошибка очереди печати
Случается так, что из-за неполадок устройства пользователь раз за разом отправляет документ на печать, чем провоцирует еще одну проблему — скопление файлов в очереди, из-за чего система зависает и может не исправиться даже после перезагрузки. Тогда требуется ручная очистка очереди.
Сделать это несложно. В панели управления Windows найдите раздел с принтерами. Затем отыщите интересующую модель, с которой возникла проблема. Щелкните на ней правой кнопкой мыши, выберите пункт «Просмотр очереди». В открывшемся окне есть кнопка «Очистить очередь печати», на которую и следует нажать.

Ошибка принтера: почему еще может появиться
Рассмотрим еще несколько возможных вариантов, которые хоть и редко, но встречаются:
Если ничего не помогает, то можно также попробовать устранение неполадки через откат операционной системы до последней удачной точки. Однако это возможно только в том случае, если такая точка имеется. Желательно почаще создавать их вручную, так они автоматически создаются при установке некоторых важных программ и обновлений.
Наконец, самый лучший способ решения проблемы — это обратиться в наш сервисный центр. Мы знаем, как исправить ошибку принтера любой сложности, работаем с разными моделями печатающих устройств (Canon, HP, Epson и пр.). Так что, если не удается распечатать документ и нет вариантов, как это исправить, то мы всегда готовы оказать компетентную помощь по разумной цене.
Мы предлагаем свои услуги как фисическим, так и юридическим лицам, и готовы взять на комплексное абонентское обслуживание ваше предприятие. Все подробности вы сможете узнать позвонив на номер в шапке сайта.
Не забудьте сказать автору «Спасибо», «лайкнуть» или сделать перепост:
Источник

Чтобы было комфортнее жить и работать дома было принято решение купить МФУ.
Выбирали по принципу «хорошие отзывы и шоб недорого». В общей сложности потратили на это чудо со всеми бонусами и скидками 7590 руб, что дешево. Все увиденные нами МФУ начинались от 8500 руб. (цены актуальны на сентябрь 2018 г)
— дорогие (даже не оригинальные) картриджи/заправки картриджей,
— большой, а значит быстрый, расход краски (тонера),
— засыхание краски в картридже после 1-3 месяцев простоя в зависимости от модели.
ФУНКЦИИ И ХАРАКТЕРИСТИКИ:
Не буду много внимания уделять цифрам, так как это все-таки не проф. оборудование, а МФУ для домашнего использования. Опишу все просто, ясно и по существу.
Он умеет:
— ксерокопировать с высоким разрешением со скоростью 10 секунд на копию, возможности засунуть пачку листов для автоматической копии НЕТ, придется поднимать крышку и менять листы самостоятельно каждый раз
— печатать в ч/б хорошо, качественно и четко с максимальным форматом А4 (можно другие форматы: А5, В5, конверты) со скоростью 20 стр/мин, что для дома или малого офиса оптимально
2 варианта подключения к компьютеру:
— по Wi Fi (ниже расскажу как настроить его просто и быстро)
Приятные мелочи:
— Есть режим Сна. То есть МФУ каждый раз после окончания работы засыпает и не беспокоит неожиданными шумами (у кого был лазерный принтер поймут), которые могут напугать или разбудить ночью. Я ужасно бесилась раньше и не понимала зачем это делает наш старый принтер, а это он всего лишь решал прогреться и «встряхнуть» тонер в картридже временами.
— Доступна печать со всех устройств на всех известных нам операционных системах: хоть с телефона на андроид, хоть с айфона, хоть с планшета, хоть с компьютера, с чего угодно.
Это в принципе все, что нужно знать о его умениях в целом. Это абсолютно БАЗОВЫЙ набор функций и характеристик, которого хватит для дома. Уверяю, бОльшего вам не надо!
ВНЕШНИЙ ВИД, РАЗМЕРЫ, КНОПКИ, ЭКРАН:
Внешний вид незатейливый, все просто и ясно как день.
Цветовая гамма: сочетание бело-серого, черного и темно-синего.
НАСТРОЙКА.
Мы подключали по Wi Fi. Затратили пол часа на все манипуляции. Вот вам обещанная инструкция как сделать это самому не приглашая компьютерщика Васю:
1. Принтер включаем в розетку и нажимаем кнопку ВКЛ на самом аппарате (на передней панели)
2. В настройках на самом МФУ (кнопка с иконкой в виде книжки, на которой нарисована буква i) выбираем переключая стрелками вниз/вверх «Сеть», жмем ОК
3. В открывшемся меню находим «wps», нажимаем ОК
4. В открывшемся меню выбираем «PBC», если с ним не сработает, то пролистайте ниже и выберете «PIN»
5. Включаем «wps» на роутере (обычно кнопка так и подписана wps, но на роутерах Заксель обычно это большая круглая кнопка на верхней крышке аппарата с иконкой, нужно нажать и подержать) и ждём пока роутер настроит принтер.
6. Устанавливаем драйвера, их можно найти на официальном сайте Xerox.
5. Печатаем с удовольствием.
Настройка через провод USB еще легче:
1. Принтер включаем в розетку и нажимаем кнопку ВКЛ на самом аппарате (на передней панели)
2. Подключаем провод USB в принтер и компьютер
3. Качаем драйвера, устанавливаем и работаем на здоровье
*программа для сканирования не входит в тот пакет с драйверами, который вы скачаете с официального сайта [ссылка], но на всех современных операционных системах (и на windows, и на mac) есть встроенные программы для сканирования, их этот МФУ любит и с ними дружит, но если вдруг у вас такой программы нет, то можно установить любую или официальную с того же сайта [ссылка] (поищите на сайте, там точно будет)
ЗАПРАВКА КАРТРИДЖЕЙ
Тут есть загвоздка с многими МФУ. Производитель настроен на заработок, поэтому придумал «чиповать» картриджи тем самым вынуждая людей неосведомленных покупать новые (3000-3500 руб на нашу модель). Но из этой ситуации есть как минимум 2 недорогих выхода:
1. Находим контору, которая занимается заправкой картриджей, просим их во время заправки родного картриджа из коробки менять чип на картридже. В нашем городе эта услуга стоит 800 руб каждый раз как закончится тонер (смена чипа+заправка).
2. В той же конторе просим найти/сделать прошивку и «залить» ее в мозги нашего аппарата (500-1000 руб за прошивку + стоимость работы ну допустим еще 1000, платим один раз). После этого МФУ перестает выпендриваться и принимает этот свой картридж после заправки со старым чипом (около 200 руб каждая заправка). Но если перепрошить картридж, то вы лишитесь ряда функций, например, МФУ перестанет вести подсчет напечатанных страниц и не будет понимать сколько тонера осталось в процентном соотношении. Но как бы это не самая большая потеря в вашей жизни. То, что тонер закончился вы итак поймете:)
Учитывая, что картридж в комплекте способен напечатать 1500 страниц, а этого примерно на пол года-год лично нам хватает при умеренном использовании дома, то даже отдавать по 800 руб не считаю накладным. Что я подразумеваю под умеренным использованием: ксерить документики несколько раз в месяц, печатать доклады и рефераты в универ пару раз в месяц, печатать какие-то личные небольшие документы 1-2 раза в неделю. Картриджа из коробки, который был заправлен не полностью нам хватило на пол года.
Так же нужно понимать, что любой другой аналогичный МФУ так же будет требовать затрат на перепрошивку, заправку и прочее, возможно даже бОльших, чем конкретно этот.
Достать картридж не трудно, просто беремся за панель управления и тихонько тянем вверх.
Потом поднимаем вторую «крышку». Нужно найти место, где написано OPEN и аккуратно потянуть за него.
Источник
Типичные проблемы
Xerox
®
WorkCentre
®
3025
Руководство пользователя
195
Неполадки при печати
Ситуация
Вероятная причина
Рекомендуемые действия
Аппарат не выполняет
печать.
На аппарат не подается
питание.
• Проверьте подключение шнура
питания.
• Проверьте выключатель и
источник питания.
Аппарат не является
устройством по умолчанию.
• Выберите данный аппарат в
качестве устройства, используемого
по умолчанию в ОС Windows.
Проверьте наличие следующих неполадок:
• Не закрыта верхняя крышка. Закройте верхнюю крышку.
• Застряла бумага. Устранить застревание. (См. раздел
Извлечение
застрявшей бумаги.
•
Не загружена бумага. Загрузите бумагу.
• Не установлен принт-картридж. Установить принт-картридж.
При возникновении системных ошибок во время печати обратитесь в
сервисную службу.
Неправильно подключен
соединительный кабель между
компьютером и аппаратом.
• Отключите кабель аппарата и
подключите его еще раз.
Соединительный кабель
между компьютером и
аппаратом неисправен.
• Если возможно, подключите
кабель к заведомо исправному
компьютеру и напечатайте
документ. Кроме того, можно
попробовать подключить кабель
от другого устройства.
Указан неправильный порт.
• Проверьте настройки принтера в
операционной системе Windows и
убедитесь, что работа печати
отправляется на правильный порт.
Если у компьютера несколько
портов, убедитесь, что аппарат
подключен к нужному порту.
Неправильно настроены
параметры аппарата.
• Проверьте настройки драйвера
принтера и убедитесь, что все
параметры печати установлены
правильно.
Драйвер принтера
установлен неправильно.
• Переустановите программное
обеспечение принтера. См. раздел
Установка и настройка
.
Произошел сбой в работе
аппарата.
• Просмотрите сообщение на экране
панели управления, чтобы выяснить,
не произошла ли системная ошибка.
Обратитесь в сервисную службу.
Почему не печатает принтер с компьютера если он подключен и есть краска?
Рассмотрим наиболее типичные проблемы.
Проверяем исправность USB-кабеля и портов
Все современные принтеры подключаются к компьютеру при помощи USB-кабеля. Если Вы подключили принтер к порту на передней панели системного блока, то попробуйте подсоединить его к разъему на задней панели. Они, как правило, впаиваются сразу в материнскую плату, что исключает возможность неисправности шлейфа, использующегося для подключения USB-портов к передней панели. Также может случиться ситуация, когда переломился основной кабель, при помощи которого подключается принтер. В таком случае система не увидит его вообще, или же, при шевелении шнура, будет находить и терять устройство. В этом случае понадобиться замена USB-кабеля.
Неверный выбор принтера при отправке на печать
Данная проблема чаще всего возникает в случаях, когда в системе присутствуют несколько принтеров. (Подключенных как напрямую, так и через сеть).
Как правило, программа, которая используется для печати использует принтер, отмеченный в системе по умолчанию. Можно поступить двумя способами:
- Перед каждой отправкой на печать выбирать необходимое устройство.
- Установить необходимый принтер в системе по умолчанию. Перейдите в панель управления, раздел «Оборудование и звук», подраздел «Устройства и принтеры» или же в поиске меню «Пуск» наберите название необходимого подраздела. Смотрим, какой принтер в настоящий момент установлен и подключен, жмем на него правой кнопкой мыши и в меню ставим отметку на пункте «Использовать по умолчанию». Стоит обратить внимание, что вы выбираете принтер, в названии которого отсутствуют буквы XPS. Иначе документы будут сохраняться в проект предварительной печати на жестком диске.


Если вы не видите в списке устройств необходимый принтер, тогда переходите к следующему пункту.
Отсутствует или установлен неверный драйвер устройства
Чтобы проверить наличие установленного драйвера перейдите в диспетчер устройств. Сделать это можно зажав одновременно кнопки Win + Pause/Break или же открыв свойства ярлыка «Мой компьютер». В левой части окна жмем на ссылку «Диспетчер устройств» и ищем ветку «Устройства обработки изображений» или «Принтеры и факсы».
Если вашего принтера здесь нет или же вы заметили рядом с ним восклицательный знак, то драйвер не установлен, неисправно работает, несовместим с вашей версией ОС или же просто произошел сбой.
Скачайте последнюю версию драйвера с сайта производителя.
Зависание процесса печати
В очередь на печать может ставиться множество документов, которые не могут быть отправлены на принтер. Чтобы проверить, нет ли зависших документов, переходим к подкатегории «Устройства и принтеры» в панели управления, открываем меню подключенного оборудования, и выбираем пункт «Просмотр очереди печати». Отмените печать всех документов, и запустите процесс заново.
Прежде чем лезть глубоко в системные настройки необходимо удостовериться, что сам принтер находится в исправном состоянии и не показывает на дисплее никакой ошибки. Причинами неисправности может быть замятие бумаги, пустые картриджи и другие проблемы, решение которых производители описывают в руководстве по использованию. В некоторых случаях достаточно вовсе вытянуть USB-кабель и вставить его обратно.
Современные копировальные аппараты Xerox отличаются качество, надежностью и «быстрым» стартом. Также у них существует множество особенностей, которые отличают их от принтеров других производителей. Например, используется тефлоновый вал, а не термопленка.
Однако избегать различных поломок и ошибок пока не удается ни одному устройству. К самым частым неисправностям у принтеров Xerox относятся: залипание или повреждение датчика бумаги, повреждение роликов подачи, часто требуется перепрошивка программного обеспечения.
Если у вас возникнут вопросы насчет того, как исправить код ошибки копировального аппарата Xerox, то вы можете обратиться к специалистам нашего сервисного центра.

Основные коды ошибок копировальных аппаратов Xerox и способы их устранения:
- Коды ошибок Xerox 1012, 1012(RE)
- Коды ошибок Xerox 1020
- Коды ошибок Xerox 1025
- Коды ошибок Xerox 1035
- Коды ошибок Xerox 1038
- Коды ошибок Xerox 2830
- Коды ошибок Xerox 5011, 5012, 5014
- Коды ошибок Xerox 5016, 5017, 5316, 5317
- Коды ошибок Xerox 5018, 5028
- Коды ошибок Xerox 5312, 5313, 5314
- Коды ошибок Xerox 5318, 5320, 5322
- Коды ошибок Xerox 5328
- Коды ошибок Xerox 5330
- Коды ошибок Xerox 5340, 5343
- Коды ошибок Xerox 5345
- Коды ошибок Xerox 5350, 5352
- Коды ошибок Xerox 5355
- Коды ошибок Xerox 5622
- Коды ошибок Xerox XC520, 540, 560, 580
Xerox 1012, 1012(RE)
| Код ошибки | Описание |
|---|---|
| E1 | Jam between paper feed and fuser |
| E3 | Jam in fuser |
| E5 | Clam shell open |
| E6 | Paper feed section cover is open |
| J1 | Toner cartridge near empty |
| J3 | Drum cartridge not seated properly |
| J7 | Waste toner full (replace drum cartridge) |
| L6 | Key counter out |
| L8 | Exposure area overheat |
| U1 | No clock pulse (drive problem) |
| U2 | Scan problem |
| U3 | Lens/mirror problem (RE model only) |
| U4 | Heat problem |
| U8 | Exposure lamp control circuit problem |
Xerox 1020
| Код ошибки | Описание |
|---|---|
| LL | Probable bad heater lamp |
Xerox 1025
| Код ошибки | Описание |
|---|---|
| A1 | DF jam |
| C1 | PF jam cass. 1 |
| C2 | PF jam cass. 2 |
| C3 | PF jam cass. 3 |
| C9 | Bypass jam |
| E1-1 | Paper jam before exit switch |
| E1-2 | Paper jam |
| E1-5 | Paper jam |
| E1-6 | Paper jam |
| E3-3 | Paper jam at exit switch |
| E3-4 | Paper jam at exit switch |
| E5 | Front door open |
| F1 | Collator jam |
| F5 | Collator interlock |
| F8 | No power to collator |
| F9 | Collator bin home switch |
| J7 | 250 copies since toner waste was full |
| L5 | Original cass. not present after clearing interrupt |
| L6 | Key counter |
| L8 | Platen glass too hot |
| U1 | Main motor clock pulse |
| U2 | Scan problem |
| U3-1 | Lens problem |
| U4-1 | Open thermistor |
| U4-2 | Low temperature |
| U4-4 | Temperature |
| U4-5 | Main PWB |
| U6-1 | Main PWB |
| U6-2 | Main PWB |
| U6-3 | Main board battery |
| U6-4 | Initialization |
| U8 | Exposure lamp |
Xerox 1035
| Код ошибки | Описание |
|---|---|
| A9 | Scanner location |
| C1 | Paper feed — upper cassette |
| C2 | Paper feed — lower cassette |
| C9 | Bypass jam |
| E5 | Clam shell is open |
| L6 | Key counter |
| U1 | Off/On |
| U2 | Optics |
| U4 | Low fuser temperature |
Xerox 1038
| Код ошибки | Описание |
|---|---|
| A1 | DF jam |
| C1 | PF jam cass. 1 |
| C2 | PF jam cass. 2 |
| C3 | PF jam cass. 3 |
| C9 | Bypass jam |
| E1-1 | Paper jam before exit switch |
| E1-2 | Paper jam |
| E1-5 | Paper jam |
| E1-6 | Paper jam |
| E3-3 | Paper jam at exit switch |
| E3-4 | Paper jam at exit switch |
| E5 | Front door open |
| F1 | Collator jam |
| F5 | Collator interlock |
| F8 | No power to collator |
| F9 | Collator bin home switch |
| J7 | 250 copies since toner waste was full |
| L5 | Original cass. not present after clearing interrupt |
| L6 | Key counter |
| L8 | Platen glass too hot |
| U1 | Main motor clock pulse |
| U2 | Scan problem |
| U3-1 | Lens problem |
| U4-1 | Open thermistor |
| U4-2 | Low temperature |
| U4-4 | Temperature |
| U4-5 | Main PWB |
| U6-1 | Main PWB |
| U6-2 | Main PWB |
| U6-3 | Main board battery |
| U6-4 | Initialization |
| U8 | Exposure lamp |
Xerox 2830
| Код ошибки | Описание |
|---|---|
| A9 | Scanner location |
| C1 | Paper feed — upper cassette |
| C2 | Paper feed — lower cassette |
| C9 | Bypass jam |
| E5 | Clam shell is open |
| E5 | Clam shell open |
| L6 | Key counter |
| U1 | Off/On |
| U2 | Optics |
| U4 | Low fuser temperature |
Xerox 5011, 5012, 5014
| Код ошибки | Описание |
|---|---|
| C8 | Bypass jam/no paper |
| C9 | Bypass jam |
| E1 | Jam |
| E3 | Fuser jam |
| E5 | Clamshell open |
| E6 | PF section cover open |
| J1 | Toner cartridge amost empty |
| J3 | Copy cart (drum unit) missing/not seated right |
| J7 | Copy cartridge has run 18,000 copies |
| J8 | Copy cartridge. Improperly seated or possible only one of two fuses in the cartridge blew |
| L6 | Key counter |
| L8 | Exposure glass too hot |
| U1 | Drive problem |
| U2 | Scan problem |
| U3 | Lens or mirror drive problem |
| U4 | Fuser problem. Heat lamp, thermoswitch, SSR, thermistor |
| U6 | Battery on main board |
| U8 | Exposure lamp or exposure lamp circuit |
Xerox 5016, 5017, 5316, 5317
| Code | Description |
|---|---|
| A1-1 | Document feeder feed jam |
| A1-2 | Document feeder belt jam |
| A2-1 | Document feeder exit jam |
| A2-2 | Duplex jam |
| A3 | DAD interlock |
| A5 | Duplex and DAD right side interlock |
| A6 | Copier jams after |
| A9 | Document feed belt drive motor |
| C1-3 | Top cassette misfeed |
| C2-3 | Middle cassette misfeed |
| C3-3 | Bottom cassette misfeed |
| C9-3 | Bypass misfeed |
| E1-11 to E1-14 | Paper jam in machine. Did not reach exit switch soon enough |
| E1-6 | Paper path jam |
| E3-31 to E3-34 | Exit switch jam |
| E3-6 | Fuser jam |
| E5 | Front door interlock |
| E6 | Right side interlock or TTM interlock |
| F1 | Sorter jam |
| F5 | Sorter interlock |
| F8 | Sorter board to copier main board communication problem |
| F9 | Sorter bins |
Xerox 5018, 5028
| Code | Description |
|---|---|
| A1 | Document is ADF |
| A1-8 | Main board received reset signal |
| A2 | ADF jams |
| A6, A7 | ADF jams |
| A9 | ADF jams |
| C1 — C4 | Feed jam |
| C5-1 to C5-4 | Jams in various areas |
| C5-2 | Jams in various areas |
| C5-3 | Jams in various areas |
| C5-4 | Duplex jam |
| E0 | Machine has reset |
| E1 | Jam |
| E1-E0 | Registration jam |
| E1-E5 | Clamshell interlock |
| E1-E6 | Right side interlock |
| E1-E7 | Two tray interlock |
| E1-E8 | Sorter interlock |
| E1-E9 | Copy cartridge interlock |
| E2 | Reset signal happened |
| E3 | Jam |
| E4 | Exit jam |
| E4-10 | Exit jam |
| E4-5 | Clamshell interlock |
| E4-6 | Right side interlock |
| E4-7 | Two tray interlock. Duplex interlock |
| E4-8 | Sorter interlock |
| E4-9 | Copy cartridge interlock |
| E5 | Clamshell interlock |
| E6 | Right side interlock |
| E7 | Duplex interlock |
| E9 | Copy cartridge interlock |
| F3-1 | Sorter bin home switch |
| F3-2 | Sorter cam switch |
| F3-3 | Sorter cam switch |
| J1-1 | Add toner |
| J1-2 | Temporary low toner signal |
| J2-0 | Replace copy cartridge |
| L2 | 2000 copies left on copy cartridge |
| L3 | ADF to machine communication problem |
| L4 (flashing) | 1000 copies left on fuser web |
| rr | Bad EPROM on main board |
| U0 | Main board |
| U2 | Scan problem |
| U2-1 | Scan home |
| U3-00 | Cam drive problem |
| U3-01 | Cam movement slow |
| U3-04 | Main board to duplex communication |
| U3-09 | Cam problem |
| U3-12 | Jogger problem |
| U3-19 | Cam problem |
| U3-21 | Cam problem |
| U3-23 | Cam problem |
| U3-29 | Cam problem |
| U3-32 | Cam problem |
| U3-34 | Cam problem |
| U3-39 | Cam problem |
| U3-43 | Cam problem |
| U3-45 | Cam problem |
| U3-49 | Cam problem |
| U3-54 | Cam problem |
| U3-56 | Cam problem |
| U3-59 | Cam problem |
| U4-1 | Fuser problem. Long warm up |
| U4-2 | Low fuser temperature after warm up |
| U4-3 | High fuser temperature |
| U4-4 | Open fuser thermistor |
| U4-6 | Replace fuser web |
| U4-7 | Thermistor signal problem |
| U7-1 | Copy cartridge belt drive problem |
| U9-3 | Exposure lamp problem |
| U9-4 | Toner motor |
| U9-5 | Problem in warm up |
Xerox 5312, 5313, 5314
| Код ошибки | Описание |
|---|---|
| C1 | Upper paper feed problem. Did not reach feed sensor |
| C2 | Lower paper feed problem. Did not reach feed sensor |
| E1 | Exit jam. Paper did not reach exit sensor |
| E3 | Exit jam. Paper still on exit sensor |
| J1 | Add toner |
| J3 | Copy cartridge (drum unit) not installed |
| J7 | Copy cartridge (drum unit) must be replaced |
| J8 | Copy cartridge (drum unit) problem |
| L6 | Problem with an accessory. Installed but not initialized |
| U1 | Drive problem. Main motor, gear etc. |
| U2 | Scan problem |
| U3 | Main board dip switches wrong. Lens drive problem |
| U4 | Fuser problem. Heat lamp, thermal switch, overheat, thermistor. |
| U6 | EPROM error |
| U8 | Auto exposure sensor. No exposure lamp or weak lamp |
Xerox 5318, 5320, 5322
| Code | Description |
|---|---|
| A1-11 | Original ready switch |
| A1-12 | Feed sensor |
| A1-1 to A1-32 | All indicate a paper path problem, etc. in the ADF |
| A1-21 | Original ready switch and document registration sensor or both the document feed sensor and document registration sensor |
| A1-22 | ADF registration sensor |
| A1-23 | Original did not reach ADF registration sensor quickly enough |
| A1-24 | ADF sensor stuck down too long |
| A1-25 | ADF sensor actuated at the wrong time during single sheet feed |
| A1-26 | ADF sensor not actuated quickly enough in sheet feed mode |
| A1-31 | In reverse, ADF sensor is not actuated soon enough |
| A1-32 | In reverse, ADF sensor is actuated too long |
| A2 | ADF exit problems |
| A2-1 | Original ready sensor and ADF exit switch are actuated or ADF feed in sensor and ADF exit switch are both actuated |
| A2-2 | ADF exit switch |
| A2-3 | ADF exit switch is not actuated on time |
| A3 | Irregular size documents |
| A3-1 | Wrong size original sensed in 1:1 mode |
| A3-2 | Wrong size original sensed in the 2:1 mode |
| A5 | ADF interlock |
| A5 | ADF interlock |
| A6 | ADF single sheet document reset. |
| A6-1 | Reset original |
| A6-2 | Reset sheet feeder |
| A7 | Document cover interlock |
| A8 | ADF exit interlock |
| C1 | Tray 1 jam |
| C1-2 | Paper feed problem in tray 1 |
| C1-3 | Paper does not reach registration |
| C2 | Tray 2 jam |
| C3 | Tray 3 jam |
| C3-1 | Paper feed problem from tray 3 |
| C3-2 | Paper feed problem from tray 3 |
| C3-3 | Paper feed problem from tray 1 |
| C6-1 | Duplex paper feed problem |
| C6-2 | Duplex and/or tray 1 paper feed problem |
| C6-3 | Paper feed problem from tray 1 |
| C7-1 | Paper feed problem from HCF |
| C7-2 | Paper feed problem from HCF on tray 1 |
| C7-3 | Paper feed problem from tray 1 |
| C8 | Paper stays in tray or duplex or HCF |
| C8-1 | Paper on tray 1 feed sensor |
| C8-2 | Paper on tray 2 feed sensor |
| C8-3 | Paper on tray 3 feed sensor |
| C8-4 | Paper on HCF feed sensor |
| C8-5 | Paper in duplex section |
| C9 | Bypass feed problem |
| C9-3 | Paper from bypass did not reach registration sensor quickly enough |
| E1-10 to E1-25 | Internal jam |
| E1-6 | Paper on registration sensor |
| E2 | Reset signal happened. Might read E-2 something else. |
| E3-30 to E4-14 | Exit jam |
| E3-30 to E3-35 | Exit switch actuated too long |
| E3-6 | Exit jam |
| E3-6 | Paper on exit switch |
| E4-10 to E4-14 | Inverter sensor not actuated. |
| E4-10 to E4-45 | Paper did not reach inverter switch soon enough |
| E4-15 | Inverter sensor |
| E4-40 to E4-45 | Duplex entry sensor |
| E4-6 | Paper on inverter switch |
| E4-6 | Inverter sensor |
| E5 | Front door interlock |
| E6-1 | Tray 1 interlock |
| E6-2 | 2 tray or duplex interlock |
| E6-3 | HCF interlock |
| E7-2 | Duplex inverter interlock |
| E7-3 | Duplex interlock |
| E8-10 to E8-15 | Paper on duplex feed sensor is not actuated soon enough |
| E8-6 | Paper in duplex |
| E8-6 to E8-15 | Duplex entry sensor |
| F1-1 | Paper did not reach sorter |
| F1-2 | Paper stayed on sorter feed sensor |
| F1-6 | Sorter exit sensor |
| F3 | Paper size not available for sort/stack |
| F5 | Sorter interlock |
| H2-1 | Communication problem between main board and duplex board |
| H2-2 | Side guard sensor problem |
| H3-1 | Communication problem between main board and HCF |
| H3-2 | Upper limit sensor problem on HCF |
| H6-1 | ADF size sensor |
| H6-2 | ADF nudgeer sensor |
| H6-3 | Belt drive motor does not have 24 volts. Black toner is empty, but 100 copies have been run without changing toner |
| J1 | Black toner is empty, but 100 copies have been run without changing toner |
| J3 | Replace copy cartridge |
| J3 | No copy cartridge (drum unit) |
| J7 | Copy cartrige must be replaced |
| J8-1 | Wrong copy cartridge installed |
| J8-2 | Copy cartridge EEPROM must be changed |
| L6 | Auditron or other counter problem |
| L6 | Key counter not installed |
| L8 | Platen glass temperature is too high |
| L9 | Communication problem between interimage erase/edge lamps and main board |
| U1-1 | Main motor drive problem |
| U2-1 | Scan home problem |
| U2-1 to U2-4 | Scan home sensor |
| U2-2 | Scan home problem or optics problem |
| U2-3, U2-4 | Scan home problem |
| U3-1 | Lens sensor problem |
| U4-1 | Fuser thermistor open |
| U4-2 | Fuser did not warm up properly |
| U4-3 | Fuser temperature too high |
| U4-4 | Fuser problem. Staying on too long |
| U4-6 | High fuser temperature |
| U5-1 | Sorter bin home switch not activated |
| U5-2 | Sorter bin home switch stayed actuated |
| U5-3 | Sorter bin home switch |
| U5-4 | Sorter bin home switch |
| U6-1 | ROM problem |
| U6-2 | RAM problem |
| U6-3 | Low battery |
| U6-4 | Incorrect value in NVM. Reinitialize main board with code 20-96 |
| U8-1 | Exposure lamp problem |
| U8-2 | Communication problem main board and exposure board |
| U8-3 | Exposure lamp or exposure lamp board problem |
| U8-4 to U8-6 | Problem with exposure lamp, lamp sensor, lamp board |
Xerox 5328
| Code | Description |
|---|---|
| A1 | Document in ADF |
| A1-8 | Main board received reset signal |
| A2 | ADF jams |
| A6 | ADF registration jam |
| A7 | ADF interlock |
| A9 | Tray 1 jam |
| C1 | Tray 2 jam |
| C2 | Tray 3 jam |
| C3 | Bypass feed jams |
| C4 | Machine has reset |
| E1 | Jam |
| E1-5 | Clamshell interlock |
| E1-6 | Right side interlock |
| E1-7 | Two tray interlock, or duplex interlock |
| E1-8 | Sorter interlock |
| E1-9 | Copy cartridge interlock |
| E1 or E1-0 | Registration jam |
| E2 | Reset signal happened |
| E3 | Jam in transfer area |
| E4 | Exit jam |
| E4-0 | Exit jam |
| E4-5 | Clamshell interlock |
| E4-6 | Right side interlock |
| E4-7 | Two tray interlock |
| E4-8 | Sorter interlock |
| E4-9 | Copy cartridge interlock |
| E5 | Clamshell interlock |
| E6 | Right side interlock |
| E9 | Copy cartridge interlock |
| F3-1 | Sorter bin home switch |
| F3-2 | Sorter cam switch |
| F3-3 | Sorter cam switch |
| F5 | Sorter interlock |
| J1-1 | Add toner |
| J1-2 | Temporary low toner signal |
| J2-1, J2-2 | Replace copy cartridge |
| J5, J6 | ADF to machine communications problem |
| L2 | 2000 copies left on cartridge |
| L3 | ADF to machine communications problem |
| L4 | (flashing) 1000 copier left on fuser web |
| L6 | Auditron or other counter problem |
| LL | Main board. Try simulation 1.1 to initialize |
| rc | Wrong operation panel installed |
| rr | Bad EPROM on main board. Try 1.1 |
| U0 | Main board |
| U2 | Scan problem |
| U2-1 | Scan home |
| U2-2 | Scan home or scan encoder |
| U2-4 | Scan home or scan dual page sensor |
| U2-7 | Scan home |
| U4-1 | Fuser problem. Long warm up |
| U4-2 | Low fuser temperature after warm up |
| U4-3 | High fuser temperature |
| U4-4 | Open fuser thermistor |
| U4-6 | Replace fuser web. |
| U4-7 | Thermistor signal problem |
| U7-1 | Copy cartridge belt drive problem |
| U9-3 | Exposure lamp problem |
| U9-4 | Toner motor |
| U9-5 | Problem in warm-up |
Xerox 5330
| Code | Description |
|---|---|
| A1-1 to A1-32 | All indicate a paper path problem, etc. in the ADF. |
| A2 | ADF exit problems |
| A3 | Irregular size documents |
| A5 | ADF interlock |
| A6 | ADF single sheet document reset. |
| A7 | Platen interlock |
| A8 | ADF exit interlock |
| C1 | Tray 1 jam |
| C2 | Tray 2 jam |
| C3 | Tray 3 jam |
| C6-1, C6-2 | Jams related to duplex |
| C6-3 | Registration sensor, re tray 1 |
| C7-1, C7-2 | HCF feed problems |
| C7-3 | Tray 1 feed problem |
| C8 | Paper stays in tray or duplex or HCF |
| C9 | Bypass feed problem |
| E1-10 to E1-25 | Internal jam |
| E1-6 | Paper on registration sensor |
| E2 | Reset signal happened. Might read E-2 something else. |
| E3-30 to E4-14 | Exit jam |
| E3-6 | Exit jam |
| E4-10 to E4-14 | Inverter sensor not actuated. |
| E4-15 | Inverter sensor |
| E4-40 to E4-45 | Duplex entry sensor |
| E4-6 | Inverter sensor |
| E5 | Front door interlock |
| E6-1 | Tray 1 interlock |
| E6-2 | 2 tray or duplex interlock |
| E6-3 | HCF interlock |
| E7-2, E7-3 | Duplex interlock |
| E8-6 to E8-15 | Duplex entry sensor |
| F1-1 | Sorter entry sensor |
| F1-6 | Sorter exit sensor |
| F3 | Paper size not available for sort/stack |
| F5 | Sorter interlock |
| J1 | Add toner |
| J3 | Replace copy cartridge |
| J7 | Replace copy cartridge |
| J8-1 | Wrong copy cartridge installed |
| J8-2 | Copy cartridge EEPROM |
| L6 | Auditron or other counter problem |
| L8 | Platen glass temperature is too high |
| L9 | Communication problem between interimage erase/edge lamps and main board |
| U1-1 | Main motor drive problem |
| U2-1 to U2-4 | Scan home sensor |
| U3-1 | Lens sensor |
| U4-1 | Open fuser thermistor |
| U4-2 | Fuser did not warm up properly |
| U4-3 | Fuser temperature too high |
| U4-4 | Fuser problem. Staying on too long |
| U4-6 | High fuser temperature |
| U5-1 | Sorter bin home switch not activated |
| U5-2 | Sorter bin home switch stayed actuated |
| U5-3 | Sorter bin home switch |
| U5-4 | Sorter bin home switch |
| U6-1 | ROM problem |
| U6-2 | RAM problem |
| U6-3 | Low battery |
| U6-4 | Incorrect value in NVM. Reinitialize main board with code 20-96 |
| U8-1 to U8-6 | Problem with exposure lamp, lamp sensor, lamp board |
Xerox 5340, 5343
| Code | Description |
|---|---|
| 00-009; 030 to 033 | A door was opened while paper was being fed |
| 00-047 | Paper in duplex |
| 00-1 | Auditron |
| 00-2 | Diagnostic error |
| 00-3 | Faults error |
| 00-4 | Ric error |
| 00-5 | Job manager system error |
| 00-6 | LLM interface |
| 00-7 | Standby error |
| 00-8 | Communications error |
| 00-9 | Xerographic error |
| 01-300 | Front interlock |
| 01-310 | Right upper interlock |
| 01-315 | Left upper interlock |
| 01-320 | Left lower interlock |
| 01-325 | Fuser interlock |
| 02-910 | Key counter missing |
| 02-920 | Wrong combination of accessories |
| 03-321, 322, 326, 327 | LLM to ISIL communications problems |
| 03-328 | IOT communications problem with duplex or tray 4 |
| 03-330 | IOT communications problems with HCF |
| 03-335, 03-336 | LLM communications problems with edit |
| 03-340 | NVM memory |
| 03-341, 03-347 | Communications problems between IOT and sorter |
| 03-350, 03-354 | Communications problem with LLM and user interface |
| 03-363, 03-364 | Communications problem between LLM & optics |
| 03-370, 03-373 | Communications problem between LLM & DADF |
| 03-380, 384 | |
| 03-416, 03-422 | RAM memory problem |
| 03-424, 426 | NVM memory problem |
| 03-430, 432 | Billing problem |
| 03-439 | GRAIB communications problem |
| 03-440 | RIC communications problem |
| 03-441 | RIC NVM problem |
| 03-442 | Modem |
| 03-443, 03-458 | RIC problems |
| 03-460 | Serial communications processor problem |
| 04-300 | Main motor or drive problem |
| 05-100, 05-108 | DADF registration sensor |
| 05-110 | DADF exit sensor |
| 05-115, 120 | DADF jams |
| 05-305 | DADF document drive |
| 05-310, 312 | DADF document sensor |
| 05-316 | DADF registration sensor jam |
| 05-325 | DADF exit sensor |
| 05-335, 341, 345 | DADF interlock switches |
| 06-300, 06-310 | Scan problems |
| 06-315 | Scan drive |
| 06-320A, 320B, 320C, 325 | Scan problem |
| 06-330 | Lens drive |
| 06-340 | Exposure control problem |
| 06-342 | LLM CPU problem |
| 06-344, 06-350 | Exposure cvontrol problem |
| 06-352 | IOT CPU problem |
| 07-300, 315, 330, 345 | Tray faults |
| 07-360, 07-370 | HCF problems |
| 07-375, 380A, 380B | Duplex problems |
| 08-100, 08-110 | Feed problems. Lead edge of copy paper is late getting to feed sensor of tray 1 |
| 08-115, 08-162 | Feed problem. Lead edge of copy paper is late getting to registration sensor |
| 08-165 | Paper jam at registration sensor |
| 08-310, 08-370 | Paper at a sensor when power is turned on |
| 08-330 | DADF nudger sensor |
| 08-380 | Registration side to side problem with home position |
| 08-390 | Nip |
| 09-300 | Copy cartridge finished (drum unit) |
| 09-310 | Add black toner Add color toner |
| 09-320 | Add color toner |
| 09-330 | Wrong copy cartridge (wrong drum unit) |
| 09-340 | Drum cartridge not installed properly |
| 09-350 | Waste toner full |
| 100 | A fault has occurred |
| 10-100 | Exit jam |
| 10-105 | Exit jam |
| 10-110 | Vertical sensor jam |
| 10-120, 122, 125 | Duplex jam |
| 10-150, 155 | Too much or not enough paper in duplex tray |
| 10-300 | Fuser thermistor |
| 10-302 | Low fuser temperature |
| 10-304 | Bad fuser temp |
| 10-308 | High fuser temperature or open thermistor |
| 10-310 | High fuser temperature |
| 10-312 | Fuser not up to temperature after energy save |
| 10-314 | Fuser problem |
| 10-320 | Fuser web finished |
| 10-330, 335, 340 | Exit switch, vertical sensor switch actuated when power is turned on |
| 11-100, 11-116 | Sorter jam |
| 11-150, 11-176 | Sorter auto stapler jam |
| 11-310, 314, 316 | Sorter interlock |
| 11-325A, B, C, D, E, F, G | Sorter index |
| 11-352, 354, 356 | Sorter auto stapler interlocks |
| 11-365A, B, C, D, E | Sorter auto stapler bin |
| 11-370, 371, 372A, 373A, 373B, 374 | Sorter auto stapler staple failure, staple home problem or tamper home problem |
| 11-385A, 385B, 390A,B,C,D,E, 396A | Sorter auto stapler staple failure, staple home problem or tamper home problem |
| 301 | Fuser web must be replaced |
| 302 | Copy cartridge (drum unit) must be replaced |
| 501 | Tray 1 must be rebuilt |
| 502 | Tray 2 must be rebuilt |
| 503 | Tray 3 must be rebuilt |
| 504 | Tray 4 must be rebuilt |
| 505 | HCF must be rebuilt |
| 506 | Bypass must be rebuilt |
| 507 | Duplex unit must be rebuilt |
| 508 | Replace black developer |
| 509 | Replace red developer |
| 510 | Replace green developer |
| 512 | Replace brown developer |
| 513 | Copy cartridge (drum unit) will need replacing soon |
| 514 | Fuser web will need replacing soon |
| 515 | DADF belt should be replaced |
| 516 | DADF feed rollers should be replaced |
| 517 | Replace exposure lamp |
| 518 | Replace suction filter |
| 519 | Replace ozone filter |
| 520 | Replace optics filter |
| 521 | Replace particle filter |
| 522 | Replace upper fuser roller |
| 523 | Replace fuser pawls |
| 524 | Replace pressure roller |
| 525 | Replace pressure roller pawls |
| 900-905 | Key operator calls |
Xerox 5345
| Код ошибки | Описание |
|---|---|
| 01-01 | Frequency monitoring and zero cross problem |
| 01-02 | Interlock |
| 01-03 | AC power problem |
| 01-04 | Finisher interlock |
| 01-05 | 24v problem |
| 03-01 | Optics to main board communication problem |
| 03-02 | Software reset problem |
| 03-03 | Could be punched holes in the lead edge of the original |
| 03-04 | Software problem |
| 03-06 | Low battery |
| 03-07 | NVM not initialized or is missing or defective |
| 03-17 | Communication problem between main board and finisher board |
| 03-18 | Initializes one NVM counter to agree to others |
| 03-19 | All three NVM counter to agree with others |
| 03-20 | Main board/interface board problems |
| 03-21 | Problem with RIC NVM |
| 03-22 | RIC modem problem |
| 03-23 | RIC real time clock failure. |
| 03-25 | RIC NVM problem or not initialized |
| 03-27 | NVM problem |
| 03-28 | Watchdog software problem |
| 03-29 | Microprocessor crystal not at correct frequency |
| 03-30 | No software response from finisher after 20 seconds have elapsed |
| 06-01 | Lens did not reach 1.1 position |
| 06-02 | 1/2 rate scanner problem |
| 06-03 | Scan home problem |
| 06-04 | Scan home problem |
| 06-05 | Scan home problem |
| 06-06 | Scan encoder |
| 06-07 | Scan encoder |
| 06-08 | Scan drive boost |
| 06-09 | Scan encoder |
| 06-11 | Scan encoder pulse phases |
| 06-12 | Insufficient scan damping |
| 07-01 | Duplex tray not home during duplexing |
| 07-02 | Tray 2 not home when selected |
| 07-13 | Tray 2 height sensor problem |
| 07-15 | Tray 2 empty |
| 07-16 | Tray 1 door open |
| 07-18 | Tray 1 stack sensor |
| 07-22 | Tray 1 empty |
| 07-26 | Tray 1 bypass switch actuated too long |
| 07-27 | Tray 1 bypass switch deactuated too early |
| 07-30 | Paper in duplex |
| 07-31 | Paper in duplex |
| 07-32 | Duplex tray empty, when paper should be there |
| 08-10 | Paper did not reach tray 2 input tray sensor |
| 08-11 | Paper did not reach duplex input sensor |
| 08-12 | Paper did not reach tray 1 |
| 08-14 | Paper did not leave tray 2 input sensor quickly enough |
| 08-18 | Trail edge did not reach tray 2 input sensor quickly enough |
| 08-19 | Trail edge did not reach tray 1 input sensor quickly enough |
| 08-20 | Paper in duplex |
| 08-21 | Paper in tray 2 input |
| 08-22 | Paper in tray 2 or duplex at wrong time |
| 08-23 | Paper at tray 1 input at wrong time |
| 08-24 | Paper in tray 1 at wrong time |
| 08-28 | Upper and lower nips problem |
| 09-08 | Low toner condition |
| 09-12 | Drum signals are out of range |
| 09-13 | Unstable drum patch readings |
| 09-15 | Patch is too dark |
| 09-16 | Patch is too light |
| 09-17 | Open toner container access cover |
| 09-18 | Low toner level |
| 09-21 | Low toner sensor disconnected |
| 09-22 | Low toner condition, even after machine has been theoretically, adding toner |
| 10-02 | Low fuser temperature |
| 10-03 | High fuser temperature |
| 10-06 | Paper did not reach out put switch |
| 10-07 | Paper stayed on output switch |
| 10-10 | Paper did not reach decurler sensor |
| 10-11 | Paper did not reach decurler sensor |
| 10-12 | Paper on decurler sensor |
| 10-13 | Paper did not reach duplex entry sensor in time |
| 10-14 | Paper did not reach duplex entry sensor in time |
| 10-15 | Paper on entry sensor at wrong time |
| 10-17 | Fuser temperature is too high and fuser relay has deactuated |
| 12-01 | Paper at finisher input sensor |
| 12-02 | Paper did not reach finisher |
| 12-03 | Paper reached finisher too soon |
| 12-05 | Paper at stapler |
| 12-06 | Paper at stapler |
| 12-07 | Paper did not reach stapler |
| 12-08 | Paper did not reach stapler |
| 12-10 | Complied motor not working properly |
| 12-15 | Eject motor problem and/or eject encoder |
| 12-20 | Stacker motor problem |
| 12-21 | Stacker interlock |
| 12-22 | Stacker bottom sensor |
| 12-23 | Stacker bottom sensor |
| 12-24 | Stacker bottom sensor senses full |
| 12-25 | Stack height sensor |
| 12-26 | Stack height sensor |
| 12-27 | Stack height sensor |
| 12-30 | Offset home sensor |
| 12-31 | Offset home sensor |
| 12-32 | OCT switch |
| 12-35 | Eject nip carriage |
| 12-36 | Eject cam interlock |
| 12-37 | Eject nip carriage open timing |
| 12-38 | Eject cam interlock |
| 12-40 | Tamper motor |
| 12-41 | Tamper home problem |
| 12-42 | Tamper home sensor |
| 12-43 | Staple load sensor |
| 12-44 | Tamper home sensor |
| 12-45 | Tamper home sensor |
| 12-50 | Low on staples |
| 12-51 | Stapler home sensor |
| 12-52 | Stapler home sensor |
| 12-53 | Eject cam interlock |
| 33-37 | Too few documents |
| 55-01 | RDH interlock switch open during use |
| 55-04 | Paper on bypass sensor |
| 55-05 | Paper at vacuum timing sensor |
| 55-06 | Paper on output sensor |
| 55-10 | No paper reached S31 |
| 55-20 | Paper did not leave S31 at correct time |
| 55-24 | Set counter arm problem |
| 55-25 | Documents in input tray not detected |
| 55-27 | Lead edge did not reach S35 at correct time |
| 55-2955-30 | Trail edge did not reach S35 at correct time |
| 55-31 | S32, ADF registration sensor did not see paper at correct time |
| 55-32 | S32 did not see trail edge at correct time |
| 55-33 | S36 One too many documents |
| 55-36 | One too many documents |
| 55-39 | Hole count problem on document feeder belt |
| 55-40 | Document belt travel problem |
| 55-41 | Document belt mistracking or skewing |
| 55-45 | Paper at inverter sensor |
| 55-47 | Inverter sensor did not see paper lead edge at correct time |
| 55-49 | More than 50 sheets in input tray |
| 55-50 | Right side interlock |
| 55-51 | Left side interlock |
| 55-55 | Document on glass |
| 93-93 | NVM has to be initialized after new software installed |
Xerox 5350, 5352
| Code | Description |
|---|---|
| 00-009, 030, 031, 032, 033 | A door was opened while paper was being fed |
| 00-047 | Paper in duplex |
| 00-1 | Auditron |
| 00-2 | Diagnostic error |
| 00-3 | Faults error |
| 00-4 | Ric error |
| 00-5 | Job manager system error |
| 00-6 | LLM interface |
| 00-7 | Standby error |
| 00-8 | Communications error |
| 00-9 | Xerographic error |
| 01-300 | Front interlock |
| 01-310 | Right upper interlock |
| 01-315 | Left upper interlock |
| 01-320 | Left lower interlock |
| 01-325 | Fuser interlock |
| 02-910 | Key counter missing |
| 02-920 | Wrong combination of accessories |
| 03-321, 322, 326, 327 | LLM to ISIL communications problems |
| 03-328 | IOT communications problem with duplex or tray 4 |
| 03-330 | IOT communications problems with HCF |
| 03-335, 336 | LLM communications problems with edit |
| 03-340 | NVM memory |
| 03-341-347 | Communications problems between IOT and sorter |
| 03-350-354 | Communications problem with LLM and user interface |
| 03-363, 364 | Communications problem between LLM & optics |
| 03-370-03-373 | Communications problem between LLM & DADF |
| 03-380, 384 | |
| 03-416-422 | RAM memory problem |
| 03-424, 426 | NVM memory problem |
| 03-430, 432 | Billing problem |
| 03-439 | GRAIB communications problem |
| 03-440 | RIC communications problem |
| 03-441 | RIC NVM problem |
| 03-442 | Modem |
| 03-443-458 | RIC problems |
| 03-460 | Serial communications processor problem |
| 04-300 | Main motor or drive problem |
| 05-100-108 | DADF registration sensor |
| 05-110 | DADF exit sensor |
| 05-115, 120 | DADF jams |
| 05-305 | DADF document drive |
| 05-310, 312 | DADF document sensor |
| 05-316 | DADF registration sensor jam |
| 05-325 | DADF exit sensor |
| 05-335, 341, 345 | DADF interlock switches |
| 06-300-310 | Scan problems |
| 06-315 | Scan drive |
| 06-320A, 320B, 320C, 325 | Scan problem |
| 06-330 | Lens drive |
| 06-340 | Exposure control problem |
| 06-342 | LLM CPU problem |
| 06-344-350 | Exposure cvontrol problem |
| 06-352 | IOT CPU problem |
| 07-300, 315, 330, 345 | Tray faults |
| 07-360-370 | HCF problems |
| 07-375, 380A, 380B | Duplex problems |
| 08-100-110 | Feed problems. Lead edge of copy paper is late getting to feed sensor of tray 1 |
| 08-115-162 | Feed problem. Lead edge of copy paper is late getting to registration sensor |
| 08-165 | Paper jam at registration sensor |
| 08-310-370 | Paper at a sensor when power is turned on |
| 08-330 | DADF nudger sensor |
| 08-380 | Registration side to side problem with home position |
| 08-390 | Nip |
| 09-300 | Copy cartridge finished (drum unit) |
| 09-310 | Add black toner Add color toner |
| 09-320 | Add color toner |
| 09-330 | Wrong copy cartridge (wrong drum unit) |
| 09-340 | Drum cartridge not installed properly |
| 09-350 | Waste toner full |
| 100 | A fault has occurred |
| 10-100 | Exit jam |
| 10-105 | Exit jam |
| 10-110 | Vertical sensor jam |
| 10-120, 122, 125 | Duplex jam |
| 10-150, 155 | Too much or not enough paper in duplex tray |
| 10-300 | Fuser thermistor |
| 10-302 | Low fuser temperature |
| 10-304 | Bad fuser temp |
| 10-308 | High fuser temperature or open thermistor |
| 10-310 | High fuser temperature |
| 10-312 | Fuser not up to temperature after energy save |
| 10-314 | Fuser problem |
| 10-320 | Fuser web finished |
| 10-330, 335, 340 | Exit switch, vertical sensor switch actuated when power is turned on |
| 11-100-116 | Sorter jam |
| 11-150-176 | Sorter auto stapler jam |
| 11-310, 314, 316 | Sorter interlock |
| 11-325A,B,C,D,E,F,G | Sorter index |
| 11-352, 354, 356 | Sorter auto stapler interlocks |
| 11-365A,B,C,D,E | Sorter auto stapler bin |
| 11-370,371,372A,373A,373B,374 | Sorter auto stapler staple failure, staple home problem or tamper home problem |
| 11-385A,385B,390A,B,C,D,E,396A | Sorter auto stapler staple failure, staple home problem or tamper home problem |
| 301 | Fuser web must be replaced |
| 302 | Copy cartridge (drum unit) must be replaced |
| 501 | Tray 1 must be rebuilt |
| 502 | Tray 2 must be rebuilt |
| 503 | Tray 3 must be rebuilt |
| 504 | Tray 4 must be rebuilt |
| 505 | HCF must be rebuilt |
| 506 | Bypass must be rebuilt |
| 507 | Duplex unit must be rebuilt |
| 508 | Replace black developer |
| 509 | Replace red developer |
| 510 | Replace green developer |
| 512 | Replace brown developer |
| 513 | Copy cartridge (drum unit) will need replacing soon |
| 514 | Fuser web will need replacing soon |
| 515 | DADF belt should be replaced |
| 516 | DADF feed rollers should be replaced |
| 517 | Replace exposure lamp |
| 518 | Replace suction filter |
| 519 | Replace ozone filter |
| 520 | Replace optics filter |
| 521 | Replace particle filter |
| 522 | Replace upper fuser roller |
| 523 | Replace fuser pawls |
| 524 | Replace pressure roller |
| 525 | Replace pressure roller pawls |
| 900-905 | Key operator calls |
Xerox 5355
| Код ошибки | Описание |
|---|---|
| 01-01 | Frequency monitoring and zero cross problem |
| 01-02 | Interlock |
| 01-03 | AC power problem |
| 01-04 | Finisher interlock |
| 01-05 | 24v problem |
| 03-01 | Optics to main board communication problem |
| 03-02 | Software reset problem |
| 03-03 | Could be punched holes in the lead edge of the original |
| 03-04 | Software problem |
| 03-06 | Low battery |
| 03-07 | NVM not initialized or is missing or defective |
| 03-17 | Communication problem between main board and finisher board |
| 03-18 | Initializes one NVM counter to agree to others |
| 03-19 | All three NVM counter to agree with others |
| 03-20 | Main board/interface board problems |
| 03-21 | Problem with RIC NVM |
| 03-22 | RIC modem problem |
| 03-23 | RIC real time clock failure. |
| 03-25 | RIC NVM problem or not initialized |
| 03-27 | NVM problem |
| 03-28 | Watchdog software problem |
| 03-29 | Microprocessor crystal not at correct frequency |
| 03-30 | No software response from finisher after 20 seconds have elapsed |
| 06-01 | Lens did not reach 1.1 position |
| 06-02 | 1/2 rate scanner problem |
| 06-03 | Scan home problem |
| 06-04 | Scan home problem |
| 06-05 | Scan home problem |
| 06-06 | Scan encoder |
| 06-07 | Scan encoder |
| 06-08 | Scan drive boost |
| 06-09 | Scan encoder |
| 06-11 | Scan encoder pulse phases |
| 06-12 | Insufficient scan damping |
| 07-01 | Duplex tray not home during duplexing |
| 07-02 | Tray 2 not home when selected |
| 07-13 | Tray 2 height sensor problem |
| 07-15 | Tray 2 empty |
| 07-16 | Tray 1 door open |
| 07-18 | Tray 1 stack sensor |
| 07-22 | Tray 1 empty |
| 07-26 | Tray 1 bypass switch actuated too long |
| 07-27 | Tray 1 bypass switch deactuated too early |
| 07-30 | Paper in duplex |
| 07-31 | Paper in duplex |
| 07-32 | Duplex tray empty, when paper should be there |
| 08-10 | Paper did not reach tray 2 input tray sensor |
| 08-11 | Paper did not reach duplex input sensor |
| 08-12 | Paper did not reach tray 1 |
| 08-14 | Paper did not leave tray 2 input sensor quickly enough |
| 08-18 | Trail edge did not reach tray 2 input sensor quickly enough |
| 08-19 | Trail edge did not reach tray 1 input sensor quickly enough |
| 08-20 | Paper in duplex |
| 08-21 | Paper in tray 2 input |
| 08-22 | Paper in tray 2 or duplex at wrong time |
| 08-23 | Paper at tray 1 input at wrong time |
| 08-24 | Paper in tray 1 at wrong time |
| 08-28 | Upper and lower nips problem |
| 09-08 | Low toner condition |
| 09-12 | Drum signals are out of range |
| 09-13 | Unstable drum patch readings |
| 09-15 | Patch is too dark |
| 09-16 | Patch is too light |
| 09-17 | Open toner container access cover |
| 09-18 | Low toner level |
| 09-21 | Low toner sensor disconnected |
| 09-22 | Low toner condition, even after machine has been theoretically, adding toner |
| 10-02 | Low fuser temperature |
| 10-03 | High fuser temperature |
| 10-06 | Paper did not reach out put switch |
| 10-07 | Paper stayed on output switch |
| 10-10 | Paper did not reach decurler sensor |
| 10-11 | Paper did not reach decurler sensor |
| 10-12 | Paper on decurler sensor |
| 10-13 | Paper did not reach duplex entry sensor in time |
| 10-14 | Paper did not reach duplex entry sensor in time |
| 10-15 | Paper on entry sensor at wrong time |
| 10-17 | Fuser temperature is too high and fuser relay has deactuated |
| 12-01 | Paper at finisher input sensor |
| 12-02 | Paper did not reach finisher |
| 12-03 | Paper reached finisher too soon |
| 12-05 | Paper at stapler |
| 12-06 | Paper at stapler |
| 12-07 | Paper did not reach stapler |
| 12-08 | Paper did not reach stapler |
| 12-10 | Complied motor not working properly |
| 12-15 | Eject motor problem and/or eject encoder |
| 12-20 | Stacker motor problem |
| 12-21 | Stacker interlock |
| 12-22 | Stacker bottom sensor |
| 12-23 | Stacker bottom sensor |
| 12-24 | Stacker bottom sensor senses full |
| 12-25 | Stack height sensor |
| 12-26 | Stack height sensor |
| 12-27 | Stack height sensor |
| 12-30 | Offset home sensor |
| 12-31 | Offset home sensor |
| 12-32 | OCT switch |
| 12-35 | Eject nip carriage |
| 12-36 | Eject cam interlock |
| 12-37 | Eject nip carriage open timing |
| 12-38 | Eject cam interlock |
| 12-40 | Tamper motor |
| 12-41 | Tamper home problem |
| 12-42 | Tamper home sensor |
| 12-43 | Staple load sensor |
| 12-44 | Tamper home sensor |
| 12-45 | Tamper home sensor |
| 12-50 | Low on staples |
| 12-51 | Stapler home sensor |
| 12-52 | Stapler home sensor |
| 12-53 | Eject cam interlock |
| 33-37 | Too few documents |
| 55-01 | rdh interlock switch open during use |
| 55-04 | Paper on bypass sensor |
| 55-05 | Paper at vacuum timing sensor |
| 55-06 | Paper on output sensor |
| 55-10 | No paper reached S31 |
| 55-20 | Paper did not leave S31 at correct time |
| 55-24 | Set counter arm problem |
| 55-25 | Documents in input tray not detected |
| 55-27 | Lead edge did not reach S35 at correct time |
| 55-2955-30 | Trail edge did not reach S35 at correct time |
| 55-31 | S32, ADF registration sensor did not see paper at correct time |
| 55-32 | S32 did not see trail edge at correct time |
| 55-33 | S36 One too many documents |
| 55-36 | One too many documents |
| 55-39 | Hole count problem on document feeder belt |
| 55-40 | Document belt travel problem |
| 55-41 | Document belt mistracking or skewing |
| 55-45 | Paper at inverter sensor |
| 55-47 | Inverter sensor did not see paper lead edge at correct time |
| 55-49 | More than 50 sheets in input tray |
| 55-50 | Right side interlock |
| 55-51 | Left side interlock |
| 55-55 | Document on glass |
| 93-93 | NVM has to be initialized after new software installed |
Xerox XC520, 540, 560, 580
| Код ошибки | Описание |
|---|---|
| H2 | Fuser thermistor |
| H3 | Fuser temperature too high. Must be reset in diagnostics |
| H4 | Fuser temperature too low. Must be reset in diagnostics |
| L3 | Scan problem |
| L4 | Min motor drive problem |
| L8 | Exposure lamp not lightning or not enough light reaching auto exposure sensor |
| P | Paper did not feed |
Xerox 5622
| Code | Description |
|---|---|
| A1-1 to A1-32 | All indicate a paper path problem, etc. in the ADF |
| A2 | ADF exit problems |
| A3 | Irregular size documents |
| A5 | ADF interlock |
| A6 | ADF single sheet document reset |
| A7 | Platen interlock |
| A8 | ADF exit interlock |
| C1 | Tray 1 jam |
| C2 | Tray 2 jam |
| C3 | Tray 3 jam |
| C6-1, C6-2 | Jams related to duplex |
| C6-3 | Registration sensor, re tray 1 |
| C7-1, C7-2 | HCF feed problems |
| C7-3 | Tray 1 feed problem |
| C8 | Paper stays in tray or duplex or HCF |
| C9 | Bypass feed problem |
| E1-10 to E1-25 | Internal jam |
| E1-6 | Paper on registration sensor |
| E2 | Reset signal happened. Might read E-2 something else |
| E3-30 to E4-14 | Exit jam |
| E3-6 | Exit jam |
| E4-10 to E4-14 | Inverter sensor not actuated |
| E4-15 | Inverter sensor |
| E4-40 to E4-45 | Duplex entry sensor |
| E4-6 | Inverter sensor |
| E5 | Front door interlock |
| E6-1 | Tray 1 interlock |
| E6-2 | 2 tray or duplex interlock |
| E6-3 | HCF interlock |
| E7-2, E7-3 | Duplex interlock |
| E8-6 to E8-15 | Duplex entry sensor |
| F1-1 | Sorter entry sensor |
| F1-6 | Sorter exit sensor |
| F3 | Paper size not available for sort/stack |
| F5 | Sorter interlock |
| J1 | Add toner |
| J3 | Replace copy cartridge |
| J7 | Replace copy cartridge |
| J8-1 | Wrong copy cartridge installed |
| J8-2 | Copy cartridge EEPROM |
| L6 | Auditron or other counter problem |
| L8 | Platen glass temperature is too high |
| L9 | Communication problem between interimage erase/edge lamps and main board |
| U1-1 | Main motor drive problem |
| U2-1 to U2-4 | Scan home sensor |
| U3-1 | Lens sensor |
| U4-1 | Open fuser thermistor |
| U4-2 | Fuser did not warm up properly |
| U4-3 | Fuser temperature too high |
| U4-4 | Fuser problem. Staying on too long |
| U4-6 | High fuser temperature |
| U5-1 | Sorter bin home switch not activated |
| U5-2 | Sorter bin home switch stayed actuated |
| U5-3, U5-4 | Sorter bin home switch |
| U6-1 | ROM problem |
| U6-2 | RAM problem |
| U6-3 | Low battery |
| U6-4 | Incorrect value in NVM. Reinitialize main board with code 20-96 |
| U8-1 to U8-6 | Problem with exposure lamp, lamp sensor, lamp board |
Содержание
- Почему не печатает принтер с компьютера если он подключен и есть краска?
- Проверяем исправность USB-кабеля и портов
- Неверный выбор принтера при отправке на печать
- Отсутствует или установлен неверный драйвер устройства
- Зависание процесса печати
- Не печатает сетевой принтер — поиск проблемы
- Не печатает сетевой принтер
- 1. Проверка доступности принтера в сети
- 2. Проверка статуса через «Устройства и принтеры» и Web интерфейс
- 3. очищаем зависшую очередь печати
- 4. Перезапуск службы диспетчера печати и очищаем очередь печати
- 5. Ремонт
- Xerox WC3025 ошибка: заменить картридж. Прошивка МФУ
- Как убрать ошибку на принтере?
- Основные причины
- Программные ошибки печати принтера
- Аппаратные ошибки принтера — что делать?
- Не печатает принтер: ошибка очереди печати
- Ошибка принтера: почему еще может появиться
Почему не печатает принтер с компьютера если он подключен и есть краска?
Рассмотрим наиболее типичные проблемы.
Проверяем исправность USB-кабеля и портов
Все современные принтеры подключаются к компьютеру при помощи USB-кабеля. Если Вы подключили принтер к порту на передней панели системного блока, то попробуйте подсоединить его к разъему на задней панели. Они, как правило, впаиваются сразу в материнскую плату, что исключает возможность неисправности шлейфа, использующегося для подключения USB-портов к передней панели. Также может случиться ситуация, когда переломился основной кабель, при помощи которого подключается принтер. В таком случае система не увидит его вообще, или же, при шевелении шнура, будет находить и терять устройство. В этом случае понадобиться замена USB-кабеля.
Неверный выбор принтера при отправке на печать
Данная проблема чаще всего возникает в случаях, когда в системе присутствуют несколько принтеров. (Подключенных как напрямую, так и через сеть).
Как правило, программа, которая используется для печати использует принтер, отмеченный в системе по умолчанию. Можно поступить двумя способами:
Если вы не видите в списке устройств необходимый принтер, тогда переходите к следующему пункту.
Отсутствует или установлен неверный драйвер устройства
Чтобы проверить наличие установленного драйвера перейдите в диспетчер устройств. Сделать это можно зажав одновременно кнопки Win + Pause/Break или же открыв свойства ярлыка «Мой компьютер». В левой части окна жмем на ссылку «Диспетчер устройств» и ищем ветку «Устройства обработки изображений» или «Принтеры и факсы».
Если вашего принтера здесь нет или же вы заметили рядом с ним восклицательный знак, то драйвер не установлен, неисправно работает, несовместим с вашей версией ОС или же просто произошел сбой.
Скачайте последнюю версию драйвера с сайта производителя.
Зависание процесса печати
В очередь на печать может ставиться множество документов, которые не могут быть отправлены на принтер. Чтобы проверить, нет ли зависших документов, переходим к подкатегории «Устройства и принтеры» в панели управления, открываем меню подключенного оборудования, и выбираем пункт «Просмотр очереди печати». Отмените печать всех документов, и запустите процесс заново.
Прежде чем лезть глубоко в системные настройки необходимо удостовериться, что сам принтер находится в исправном состоянии и не показывает на дисплее никакой ошибки. Причинами неисправности может быть замятие бумаги, пустые картриджи и другие проблемы, решение которых производители описывают в руководстве по использованию. В некоторых случаях достаточно вовсе вытянуть USB-кабель и вставить его обратно.
Источник
Не печатает сетевой принтер — поиск проблемы
Не печатает сетевой принтер
Ну вот мы и подошли к углубленному изучению причин почему может не печатать принтер, в данном разделе будут представлены варианты проблем и их решения конкретно для принтеров которые подключены через LAN сеть (Ethernet см. рис. 1) Эти варианты стоит пробовать, только после того как вы прошлись по вариантам выше и ничего не получилось (инструкция почему не печатает принтер USB).
В нашей организации мы используем следующие сетевые принтеры:
Как видите у нас огромный парк печатающих устройств который может выйти из строя в любой момент и наша задача сделать диагностику и устранить неполадку в максимально короткий срок, чтобы не создавать пользователям неудобства в работе.
1. Проверка доступности принтера в сети
Сетевой принтер или сетевое МФУ который подключен к сети представляет из себя независимый узел который имеет собственный сетевой адрес (IP адрес ) по средствам которого он обозначен в сети и общается с другими узлами.
Если отступить от непонятных слов и терминов и объяснить все на пальцах, то это примерно выглядит так:
Вы дома настроили Wi-Fi и каждое устройство которые вы подключаете к вашему роутеру будет находится в одной сети с вашими другими устройствами работающими от этого же wifi, значит у каждого вашего устройства будет тот адрес который был настроен по умолчанию на роутере (по умолчанию это 192.168.0.* )
Далее: возвращаемся обратно к нашему принтеру, когда его подключают к сети ему тоже выдают адрес (вы, администратор или сам принтер берет адрес по dhcp) и уже зная этот адрес можно понять доступен принтер или нет.
Примечание: сетевой ip адрес принтера можно посмотреть несколькими способами:
теперь мы знаем ip принтера, как можно его проверить на работоспособность? И тут я Вам подскажу как минимум три способа как это просто сделать:
2. Проверка статуса через «Устройства и принтеры» и Web интерфейс
Иногда сам windows нам может дать ответ, почему может не печатать принтер. Для этого откроем Устройства и принтеры и выберем принтер из списка, после чего внизу экрана можно будет посмотреть статус устройства (в нашем случае это проблемы с открытым корпусом) для решение данной проблемы нужно подойти и открыть закрыть крышку люка с картриджем.
Если же у принтера или МФУ есть веб интерфейс, то можно зайти в него и там на главной странице сразу будет показана причина неисправности или неработоспособности принтера как на примере ниже (см. рис. 2)
Если у Вас была обнаружена ошибка в статусе принтера, то уже отталкиваясь от текста сообщения решаем проблему, если и в статусе все нормально, тогда читаем дальше 🙂
3. очищаем зависшую очередь печати
Иногда бывают ситуации когда в следствии сбоя или «глюка» драйвера печати документ посланный на печать зависает и не пускает другие посланные на печать задания. В таком случае необходимо очистить очередь печати. Для этого зайдем в Устройства и принтера и два раза кликнем на нашем принтере в зависимости от модели принтера у Вас либо сразу откроется Просмотр очереди печати, либо как на принтерах HP откроется доп окно в котором надо выбрать Просмотр очереди печати и у нас откроется такое окно:
в нем можно увидеть всю очередь печати, для исправления ситуации выделяем все документы и удаляем их (правой кнопкой мыши — Отменить как на рис. 3) Кстати как видим в очереди печати тоже отображается статус неисправности.
После удаления зависшей очереди, выключить и включите принтер и попробуйте снова напечатать, если и после этого принтер не заработал, тогда переходим к след способу.
4. Перезапуск службы диспетчера печати и очищаем очередь печати
Если у Вас зависла очередь печать (как мы описывали в инструкции выше) и при отмене задания у вас вылетает ошибка или очередь не очищается, тогда придется переходить к крайним мерам очищая все вручную.
Данная операция делается независимо от модели принтера (если у вас не печатает принтер samsung, HP, Kyocera, canon, Xerox и другие модели ) данная операция стандартная для всех устройств.
Вот видео снял кому лень читать:
у кого и после этого принтер не запечатал, тогда идем дальше
5. Ремонт
Данный вариант последний в этом списке и Вам нужно вызывать мастера по ремонту принтера. Если у Вас таких нет, звоните или пишите нам и мы вам направим специалиста для решения данного вопроса.
Источник
Xerox WC3025 ошибка: заменить картридж. Прошивка МФУ
Производители оргтехники помимо прибыли от продажи принтеров и МФУ стремятся заработать и на расходных материалах – картриджах. Картридж может заправляться без потери качества печати 5-6 раз, а то и более. Как они зарабатывают на расходниках? Все очень просто. Зачем ждать когда картридж физически износится? Можно прибыль получить гораздо быстрее. С этой целью производители ввели защиту от заправки – чипирование картриджа. В картрирдж устанавливается чип, в который записывается количество пройденных через принтер (МФУ) листов бумаги. При достижении определенного заданного значения чип блокируется, а принтер (МФУ) воспринимает это как выход из строя картриджа и печать становится невозможной. Приходится покупать новый картридж. Но существует выход из данной ситуации. Это прошивка чипа картриджа или более выгодное решение в перспективе прошивка программного обеспечения принтера (МФУ). При прошивке принтера (МФУ) программно отключается проверка чипа и аппарат «думает» что в нем установлен новый картридж, который будет печатать пока не закончится тонер. Прошивка делается один раз, потом только происходят заправки картриджа. Выгода для потребителя очевидна.
Рассмотрим подробный процесс замены (прошивки) программного обеспечения (ПО) МФУ Xerox WC3025.
Внешний вид МФУ Xerox WC3025.
При включении МФУ выходит сообщение «Заменить принт-картридж».
Данное сообщение говорит о том что чип картриджа заблокирован, требуется прошивка МФУ. Для прошивки нужны следующие данные:
Эти данные можно получить из служебных отчетов МФУ. Для этого загружаем бумагу в лоток и включаем МФУ. Далее быстро нажимаем следующие кнопки: Влево->Вправо->Вверх->Вниз->OK->Красная кнопка->Влево. На дисплее появиться Diagnostics Mode и внизу Diagnostics. Нажмаем OK. Джойстиком вниз находим пункт Report. Нажимаем OK. Выбераем нужный отчёт Supplies Information или Configuration Report и подтверждаем печать.
Вот эти данные нам будут нужны.
Покупаем прошивку в интернете, передав вышеуказанные данные. Прошивка будет идти с инструкцией. Инструкцию читаем внимательно.
Прошивка происходит в 2 этапа.
Этап 1. Переводим принтер в принудительный режим для прошивки. Удерживая кнопку «Очистить все (Clear All)» (желтая кнопка) включаем принтер и сразу нажимаем «Очистить все (Clear All)» (желтая кнопка) еще раз.
На дисплее появляется надпись «Wait Image».
Понижаем версию прошивки МФУ. Файл First_WC3025BI_V3.50.01.15.hd с помощью левой кнопки мыши перетаскиваем на usbprns2.exe. Произойдет прошивка.
По завершении прошивки МФУ перезагрузится. Произойдет инициализация системы.
Появится опять сообщение «Заменить принт-картридж». Это нормально.
Горит красный индикатор ошибки.
Обновление завершено. Перезагрузка МФУ.
Появится еще раз сообщение «Заменить принт-картридж». Это тоже нормально.
Извлекаем картридж и заклеиваем чип.
Ошибка пропала. Горит зеленый индикатор. МФУ прошился. Теперь только последуют заправки картриджа.
Источник
Как убрать ошибку на принтере?
Внимание: воспользуйтесь интерактивным прайс-листом для определения стоимости заправки Вашего картриджа (принтера):
Довольно распространенная ситуация — нужно срочно напечатать важный документ, а на экране возникает ошибка принтера. Сходу разобраться в причинах иногда не получается, даже если уведомление содержит указание на проблему. Рассмотрим основные ситуации, когда принтер выдает ошибку, и дадим несколько советов по их устранению. А если наладить устройство не получается, то предлагаем обратиться к профессионалам в наш сервисный центр.
Основные причины
Возможных ситуаций, в которых принтер отказывается работать, не так уж много:
Некоторые неполадки вполне можно устранить дома самостоятельно, с другими лучше обратиться к специалистам, особенно если есть подозрение, что технику нужно разбирать.
Программные ошибки печати принтера
Работу печатающего устройства обеспечивают два вида программ: драйвера и специальное ПО, которое предоставляется производителем и помогает удобно управлять рабочими задачами. В том случае, если программное обеспечение установлено ненадлежащим образом или отсутствует, то даже при наличии драйвера могут возникнуть проблемы. О них сигнализирует система, сообщением, которое появляется при отправке файла на печать.
Возможна также вирусная атака на компьютер, которая повредила софт, из-за чего принтер пишет ошибку при попытке работать с ним. Необходимо установить качественный антивирус и свежие базы, пролечить компьютер, а затем переустановить программное обеспечение.
Распространенная проблема — конфликт драйверов, если к одному ПК подключено сразу несколько печатающих устройств, либо есть локальная сеть с несколькими аппаратами и общим доступом. Рекомендуется единовременно подключать к компьютеру только один принтер, а при устройстве локальной сети выбирать одинаковые приборы для всех участников сети. Также можно зайти в «Панель управления» и настроить принтер, используемый по умолчанию.
Аппаратные ошибки принтера — что делать?
Несколько вариантов неполадок, которые связаны именно с физической частью прибора и его подключением:
Распространенный вариант поломки — потребность в обновлении или замене чипа, отслеживающего статус заправки чернил. Актуально и для лазерных, и для струйных моделей. Также следует проверить, не засохла ли печатающая головка, и при необходимости прочистить ее.
Не печатает принтер: ошибка очереди печати
Случается так, что из-за неполадок устройства пользователь раз за разом отправляет документ на печать, чем провоцирует еще одну проблему — скопление файлов в очереди, из-за чего система зависает и может не исправиться даже после перезагрузки. Тогда требуется ручная очистка очереди.
Сделать это несложно. В панели управления Windows найдите раздел с принтерами. Затем отыщите интересующую модель, с которой возникла проблема. Щелкните на ней правой кнопкой мыши, выберите пункт «Просмотр очереди». В открывшемся окне есть кнопка «Очистить очередь печати», на которую и следует нажать.
Ошибка принтера: почему еще может появиться
Рассмотрим еще несколько возможных вариантов, которые хоть и редко, но встречаются:
Если ничего не помогает, то можно также попробовать устранение неполадки через откат операционной системы до последней удачной точки. Однако это возможно только в том случае, если такая точка имеется. Желательно почаще создавать их вручную, так они автоматически создаются при установке некоторых важных программ и обновлений.
Наконец, самый лучший способ решения проблемы — это обратиться в наш сервисный центр. Мы знаем, как исправить ошибку принтера любой сложности, работаем с разными моделями печатающих устройств (Canon, HP, Epson и пр.). Так что, если не удается распечатать документ и нет вариантов, как это исправить, то мы всегда готовы оказать компетентную помощь по разумной цене.
Мы предлагаем свои услуги как фисическим, так и юридическим лицам, и готовы взять на комплексное абонентское обслуживание ваше предприятие. Все подробности вы сможете узнать позвонив на номер в шапке сайта.
Не забудьте сказать автору «Спасибо», «лайкнуть» или сделать перепост:
Источник
Чтобы было комфортнее жить и работать дома было принято решение купить МФУ.
Выбирали по принципу «хорошие отзывы и шоб недорого». В общей сложности потратили на это чудо со всеми бонусами и скидками 7590 руб, что дешево. Все увиденные нами МФУ начинались от 8500 руб. (цены актуальны на сентябрь 2018 г)
— дорогие (даже не оригинальные) картриджи/заправки картриджей,
— большой, а значит быстрый, расход краски (тонера),
— засыхание краски в картридже после 1-3 месяцев простоя в зависимости от модели.
ФУНКЦИИ И ХАРАКТЕРИСТИКИ:
Не буду много внимания уделять цифрам, так как это все-таки не проф. оборудование, а МФУ для домашнего использования. Опишу все просто, ясно и по существу.
Он умеет:
— ксерокопировать с высоким разрешением со скоростью 10 секунд на копию, возможности засунуть пачку листов для автоматической копии НЕТ, придется поднимать крышку и менять листы самостоятельно каждый раз
— печатать в ч/б хорошо, качественно и четко с максимальным форматом А4 (можно другие форматы: А5, В5, конверты) со скоростью 20 стр/мин, что для дома или малого офиса оптимально
2 варианта подключения к компьютеру:
— по Wi Fi (ниже расскажу как настроить его просто и быстро)
Приятные мелочи:
— Есть режим Сна. То есть МФУ каждый раз после окончания работы засыпает и не беспокоит неожиданными шумами (у кого был лазерный принтер поймут), которые могут напугать или разбудить ночью. Я ужасно бесилась раньше и не понимала зачем это делает наш старый принтер, а это он всего лишь решал прогреться и «встряхнуть» тонер в картридже временами.
— Доступна печать со всех устройств на всех известных нам операционных системах: хоть с телефона на андроид, хоть с айфона, хоть с планшета, хоть с компьютера, с чего угодно.
Это в принципе все, что нужно знать о его умениях в целом. Это абсолютно БАЗОВЫЙ набор функций и характеристик, которого хватит для дома. Уверяю, бОльшего вам не надо!
ВНЕШНИЙ ВИД, РАЗМЕРЫ, КНОПКИ, ЭКРАН:
Внешний вид незатейливый, все просто и ясно как день.
Цветовая гамма: сочетание бело-серого, черного и темно-синего.
НАСТРОЙКА.
Мы подключали по Wi Fi. Затратили пол часа на все манипуляции. Вот вам обещанная инструкция как сделать это самому не приглашая компьютерщика Васю:
1. Принтер включаем в розетку и нажимаем кнопку ВКЛ на самом аппарате (на передней панели)
2. В настройках на самом МФУ (кнопка с иконкой в виде книжки, на которой нарисована буква i) выбираем переключая стрелками вниз/вверх «Сеть», жмем ОК
3. В открывшемся меню находим «wps», нажимаем ОК
4. В открывшемся меню выбираем «PBC», если с ним не сработает, то пролистайте ниже и выберете «PIN»
5. Включаем «wps» на роутере (обычно кнопка так и подписана wps, но на роутерах Заксель обычно это большая круглая кнопка на верхней крышке аппарата с иконкой, нужно нажать и подержать) и ждём пока роутер настроит принтер.
6. Устанавливаем драйвера, их можно найти на официальном сайте Xerox.
5. Печатаем с удовольствием.
Настройка через провод USB еще легче:
1. Принтер включаем в розетку и нажимаем кнопку ВКЛ на самом аппарате (на передней панели)
2. Подключаем провод USB в принтер и компьютер
3. Качаем драйвера, устанавливаем и работаем на здоровье
*программа для сканирования не входит в тот пакет с драйверами, который вы скачаете с официального сайта [ссылка], но на всех современных операционных системах (и на windows, и на mac) есть встроенные программы для сканирования, их этот МФУ любит и с ними дружит, но если вдруг у вас такой программы нет, то можно установить любую или официальную с того же сайта [ссылка] (поищите на сайте, там точно будет)
ЗАПРАВКА КАРТРИДЖЕЙ
Тут есть загвоздка с многими МФУ. Производитель настроен на заработок, поэтому придумал «чиповать» картриджи тем самым вынуждая людей неосведомленных покупать новые (3000-3500 руб на нашу модель). Но из этой ситуации есть как минимум 2 недорогих выхода:
1. Находим контору, которая занимается заправкой картриджей, просим их во время заправки родного картриджа из коробки менять чип на картридже. В нашем городе эта услуга стоит 800 руб каждый раз как закончится тонер (смена чипа+заправка).
2. В той же конторе просим найти/сделать прошивку и «залить» ее в мозги нашего аппарата (500-1000 руб за прошивку + стоимость работы ну допустим еще 1000, платим один раз). После этого МФУ перестает выпендриваться и принимает этот свой картридж после заправки со старым чипом (около 200 руб каждая заправка). Но если перепрошить картридж, то вы лишитесь ряда функций, например, МФУ перестанет вести подсчет напечатанных страниц и не будет понимать сколько тонера осталось в процентном соотношении. Но как бы это не самая большая потеря в вашей жизни. То, что тонер закончился вы итак поймете:)
Учитывая, что картридж в комплекте способен напечатать 1500 страниц, а этого примерно на пол года-год лично нам хватает при умеренном использовании дома, то даже отдавать по 800 руб не считаю накладным. Что я подразумеваю под умеренным использованием: ксерить документики несколько раз в месяц, печатать доклады и рефераты в универ пару раз в месяц, печатать какие-то личные небольшие документы 1-2 раза в неделю. Картриджа из коробки, который был заправлен не полностью нам хватило на пол года.
Так же нужно понимать, что любой другой аналогичный МФУ так же будет требовать затрат на перепрошивку, заправку и прочее, возможно даже бОльших, чем конкретно этот.
Достать картридж не трудно, просто беремся за панель управления и тихонько тянем вверх.
Потом поднимаем вторую «крышку». Нужно найти место, где написано OPEN и аккуратно потянуть за него.
Источник
Типичные проблемы
Xerox
®
WorkCentre
®
3025
Руководство пользователя
195
Неполадки при печати
Ситуация
Вероятная причина
Рекомендуемые действия
Аппарат не выполняет
печать.
На аппарат не подается
питание.
• Проверьте подключение шнура
питания.
• Проверьте выключатель и
источник питания.
Аппарат не является
устройством по умолчанию.
• Выберите данный аппарат в
качестве устройства, используемого
по умолчанию в ОС Windows.
Проверьте наличие следующих неполадок:
• Не закрыта верхняя крышка. Закройте верхнюю крышку.
• Застряла бумага. Устранить застревание. (См. раздел
Извлечение
застрявшей бумаги.
•
Не загружена бумага. Загрузите бумагу.
• Не установлен принт-картридж. Установить принт-картридж.
При возникновении системных ошибок во время печати обратитесь в
сервисную службу.
Неправильно подключен
соединительный кабель между
компьютером и аппаратом.
• Отключите кабель аппарата и
подключите его еще раз.
Соединительный кабель
между компьютером и
аппаратом неисправен.
• Если возможно, подключите
кабель к заведомо исправному
компьютеру и напечатайте
документ. Кроме того, можно
попробовать подключить кабель
от другого устройства.
Указан неправильный порт.
• Проверьте настройки принтера в
операционной системе Windows и
убедитесь, что работа печати
отправляется на правильный порт.
Если у компьютера несколько
портов, убедитесь, что аппарат
подключен к нужному порту.
Неправильно настроены
параметры аппарата.
• Проверьте настройки драйвера
принтера и убедитесь, что все
параметры печати установлены
правильно.
Драйвер принтера
установлен неправильно.
• Переустановите программное
обеспечение принтера. См. раздел
Установка и настройка
.
Произошел сбой в работе
аппарата.
• Просмотрите сообщение на экране
панели управления, чтобы выяснить,
не произошла ли системная ошибка.
Обратитесь в сервисную службу.
Современные копировальные аппараты Xerox отличаются качество, надежностью и «быстрым» стартом. Также у них существует множество особенностей, которые отличают их от принтеров других производителей. Например, используется тефлоновый вал, а не термопленка.
Однако избегать различных поломок и ошибок пока не удается ни одному устройству. К самым частым неисправностям у принтеров Xerox относятся: залипание или повреждение датчика бумаги, повреждение роликов подачи, часто требуется перепрошивка программного обеспечения.
Если у вас возникнут вопросы насчет того, как исправить код ошибки копировального аппарата Xerox, то вы можете обратиться к специалистам нашего сервисного центра.
Основные коды ошибок копировальных аппаратов Xerox и способы их устранения:
- Коды ошибок Xerox 1012, 1012(RE)
- Коды ошибок Xerox 1020
- Коды ошибок Xerox 1025
- Коды ошибок Xerox 1035
- Коды ошибок Xerox 1038
- Коды ошибок Xerox 2830
- Коды ошибок Xerox 5011, 5012, 5014
- Коды ошибок Xerox 5016, 5017, 5316, 5317
- Коды ошибок Xerox 5018, 5028
- Коды ошибок Xerox 5312, 5313, 5314
- Коды ошибок Xerox 5318, 5320, 5322
- Коды ошибок Xerox 5328
- Коды ошибок Xerox 5330
- Коды ошибок Xerox 5340, 5343
- Коды ошибок Xerox 5345
- Коды ошибок Xerox 5350, 5352
- Коды ошибок Xerox 5355
- Коды ошибок Xerox 5622
- Коды ошибок Xerox XC520, 540, 560, 580
Xerox 1012, 1012(RE)
| Код ошибки | Описание |
|---|---|
| E1 | Jam between paper feed and fuser |
| E3 | Jam in fuser |
| E5 | Clam shell open |
| E6 | Paper feed section cover is open |
| J1 | Toner cartridge near empty |
| J3 | Drum cartridge not seated properly |
| J7 | Waste toner full (replace drum cartridge) |
| L6 | Key counter out |
| L8 | Exposure area overheat |
| U1 | No clock pulse (drive problem) |
| U2 | Scan problem |
| U3 | Lens/mirror problem (RE model only) |
| U4 | Heat problem |
| U8 | Exposure lamp control circuit problem |
| E1 | Jam between paper feed and fuser |
| E3 | Jam in fuser |
| E5 | Clam shell open |
| E6 | Paper feed section cover is open |
| J1 | Toner cartridge near empty |
| J3 | Drum cartridge not seated properly |
| J7 | Waste toner full (replace drum cartridge) |
| L6 | Key counter out |
| L8 | Exposure area overheat |
| U1 | No clock pulse (drive problem) |
| U2 | Scan problem |
| U3 | Lens/mirror problem (RE model only) |
| U4 | Heat problem |
| U8 | Exposure lamp control circuit problem |
Xerox 1020
| Код ошибки | Описание |
|---|---|
| LL | Probable bad heater lamp |
Xerox 1025
| Код ошибки | Описание |
|---|---|
| A1 | DF jam |
| C1 | PF jam cass. 1 |
| C2 | PF jam cass. 2 |
| C3 | PF jam cass. 3 |
| C9 | Bypass jam |
| E1-1 | Paper jam before exit switch |
| E1-2 | Paper jam |
| E1-5 | Paper jam |
| E1-6 | Paper jam |
| E3-3 | Paper jam at exit switch |
| E3-4 | Paper jam at exit switch |
| E5 | Front door open |
| F1 | Collator jam |
| F5 | Collator interlock |
| F8 | No power to collator |
| F9 | Collator bin home switch |
| J7 | 250 copies since toner waste was full |
| L5 | Original cass. not present after clearing interrupt |
| L6 | Key counter |
| L8 | Platen glass too hot |
| U1 | Main motor clock pulse |
| U2 | Scan problem |
| U3-1 | Lens problem |
| U4-1 | Open thermistor |
| U4-2 | Low temperature |
| U4-4 | Temperature |
| U4-5 | Main PWB |
| U6-1 | Main PWB |
| U6-2 | Main PWB |
| U6-3 | Main board battery |
| U6-4 | Initialization |
| U8 | Exposure lamp |
Xerox 1035
| Код ошибки | Описание |
|---|---|
| A9 | Scanner location |
| C1 | Paper feed — upper cassette |
| C2 | Paper feed — lower cassette |
| C9 | Bypass jam |
| E5 | Clam shell is open |
| L6 | Key counter |
| U1 | Off/On |
| U2 | Optics |
| U4 | Low fuser temperature |
Xerox 1038
| Код ошибки | Описание |
|---|---|
| A1 | DF jam |
| C1 | PF jam cass. 1 |
| C2 | PF jam cass. 2 |
| C3 | PF jam cass. 3 |
| C9 | Bypass jam |
| E1-1 | Paper jam before exit switch |
| E1-2 | Paper jam |
| E1-5 | Paper jam |
| E1-6 | Paper jam |
| E3-3 | Paper jam at exit switch |
| E3-4 | Paper jam at exit switch |
| E5 | Front door open |
| F1 | Collator jam |
| F5 | Collator interlock |
| F8 | No power to collator |
| F9 | Collator bin home switch |
| J7 | 250 copies since toner waste was full |
| L5 | Original cass. not present after clearing interrupt |
| L6 | Key counter |
| L8 | Platen glass too hot |
| U1 | Main motor clock pulse |
| U2 | Scan problem |
| U3-1 | Lens problem |
| U4-1 | Open thermistor |
| U4-2 | Low temperature |
| U4-4 | Temperature |
| U4-5 | Main PWB |
| U6-1 | Main PWB |
| U6-2 | Main PWB |
| U6-3 | Main board battery |
| U6-4 | Initialization |
| U8 | Exposure lamp |
Xerox 2830
| Код ошибки | Описание |
|---|---|
| A9 | Scanner location |
| C1 | Paper feed — upper cassette |
| C2 | Paper feed — lower cassette |
| C9 | Bypass jam |
| E5 | Clam shell is open |
| E5 | Clam shell open |
| L6 | Key counter |
| U1 | Off/On |
| U2 | Optics |
| U4 | Low fuser temperature |
Xerox 5011, 5012, 5014
| Код ошибки | Описание |
|---|---|
| C8 | Bypass jam/no paper |
| C9 | Bypass jam |
| E1 | Jam |
| E3 | Fuser jam |
| E5 | Clamshell open |
| E6 | PF section cover open |
| J1 | Toner cartridge amost empty |
| J3 | Copy cart (drum unit) missing/not seated right |
| J7 | Copy cartridge has run 18,000 copies |
| J8 | Copy cartridge. Improperly seated or possible only one of two fuses in the cartridge blew |
| L6 | Key counter |
| L8 | Exposure glass too hot |
| U1 | Drive problem |
| U2 | Scan problem |
| U3 | Lens or mirror drive problem |
| U4 | Fuser problem. Heat lamp, thermoswitch, SSR, thermistor |
| U6 | Battery on main board |
| U8 | Exposure lamp or exposure lamp circuit |
Xerox 5016, 5017, 5316, 5317
| Code | Description |
|---|---|
| A1-1 | Document feeder feed jam |
| A1-2 | Document feeder belt jam |
| A2-1 | Document feeder exit jam |
| A2-2 | Duplex jam |
| A3 | DAD interlock |
| A5 | Duplex and DAD right side interlock |
| A6 | Copier jams after |
| A9 | Document feed belt drive motor |
| C1-3 | Top cassette misfeed |
| C2-3 | Middle cassette misfeed |
| C3-3 | Bottom cassette misfeed |
| C9-3 | Bypass misfeed |
| E1-11 to E1-14 | Paper jam in machine. Did not reach exit switch soon enough |
| E1-6 | Paper path jam |
| E3-31 to E3-34 | Exit switch jam |
| E3-6 | Fuser jam |
| E5 | Front door interlock |
| E6 | Right side interlock or TTM interlock |
| F1 | Sorter jam |
| F5 | Sorter interlock |
| F8 | Sorter board to copier main board communication problem |
| F9 | Sorter bins |
Xerox 5018, 5028
| Code | Description |
|---|---|
| A1 | Document is ADF |
| A1-8 | Main board received reset signal |
| A2 | ADF jams |
| A6, A7 | ADF jams |
| A9 | ADF jams |
| C1 — C4 | Feed jam |
| C5-1 to C5-4 | Jams in various areas |
| C5-2 | Jams in various areas |
| C5-3 | Jams in various areas |
| C5-4 | Duplex jam |
| E0 | Machine has reset |
| E1 | Jam |
| E1-E0 | Registration jam |
| E1-E5 | Clamshell interlock |
| E1-E6 | Right side interlock |
| E1-E7 | Two tray interlock |
| E1-E8 | Sorter interlock |
| E1-E9 | Copy cartridge interlock |
| E2 | Reset signal happened |
| E3 | Jam |
| E4 | Exit jam |
| E4-10 | Exit jam |
| E4-5 | Clamshell interlock |
| E4-6 | Right side interlock |
| E4-7 | Two tray interlock. Duplex interlock |
| E4-8 | Sorter interlock |
| E4-9 | Copy cartridge interlock |
| E5 | Clamshell interlock |
| E6 | Right side interlock |
| E7 | Duplex interlock |
| E9 | Copy cartridge interlock |
| F3-1 | Sorter bin home switch |
| F3-2 | Sorter cam switch |
| F3-3 | Sorter cam switch |
| J1-1 | Add toner |
| J1-2 | Temporary low toner signal |
| J2-0 | Replace copy cartridge |
| L2 | 2000 copies left on copy cartridge |
| L3 | ADF to machine communication problem |
| L4 (flashing) | 1000 copies left on fuser web |
| rr | Bad EPROM on main board |
| U0 | Main board |
| U2 | Scan problem |
| U2-1 | Scan home |
| U3-00 | Cam drive problem |
| U3-01 | Cam movement slow |
| U3-04 | Main board to duplex communication |
| U3-09 | Cam problem |
| U3-12 | Jogger problem |
| U3-19 | Cam problem |
| U3-21 | Cam problem |
| U3-23 | Cam problem |
| U3-29 | Cam problem |
| U3-32 | Cam problem |
| U3-34 | Cam problem |
| U3-39 | Cam problem |
| U3-43 | Cam problem |
| U3-45 | Cam problem |
| U3-49 | Cam problem |
| U3-54 | Cam problem |
| U3-56 | Cam problem |
| U3-59 | Cam problem |
| U4-1 | Fuser problem. Long warm up |
| U4-2 | Low fuser temperature after warm up |
| U4-3 | High fuser temperature |
| U4-4 | Open fuser thermistor |
| U4-6 | Replace fuser web |
| U4-7 | Thermistor signal problem |
| U7-1 | Copy cartridge belt drive problem |
| U9-3 | Exposure lamp problem |
| U9-4 | Toner motor |
| U9-5 | Problem in warm up |
Xerox 5312, 5313, 5314
| Код ошибки | Описание |
|---|---|
| C1 | Upper paper feed problem. Did not reach feed sensor |
| C2 | Lower paper feed problem. Did not reach feed sensor |
| E1 | Exit jam. Paper did not reach exit sensor |
| E3 | Exit jam. Paper still on exit sensor |
| J1 | Add toner |
| J3 | Copy cartridge (drum unit) not installed |
| J7 | Copy cartridge (drum unit) must be replaced |
| J8 | Copy cartridge (drum unit) problem |
| L6 | Problem with an accessory. Installed but not initialized |
| U1 | Drive problem. Main motor, gear etc. |
| U2 | Scan problem |
| U3 | Main board dip switches wrong. Lens drive problem |
| U4 | Fuser problem. Heat lamp, thermal switch, overheat, thermistor. |
| U6 | EPROM error |
| U8 | Auto exposure sensor. No exposure lamp or weak lamp |
Xerox 5318, 5320, 5322
| Code | Description |
|---|---|
| A1-11 | Original ready switch |
| A1-12 | Feed sensor |
| A1-1 to A1-32 | All indicate a paper path problem, etc. in the ADF |
| A1-21 | Original ready switch and document registration sensor or both the document feed sensor and document registration sensor |
| A1-22 | ADF registration sensor |
| A1-23 | Original did not reach ADF registration sensor quickly enough |
| A1-24 | ADF sensor stuck down too long |
| A1-25 | ADF sensor actuated at the wrong time during single sheet feed |
| A1-26 | ADF sensor not actuated quickly enough in sheet feed mode |
| A1-31 | In reverse, ADF sensor is not actuated soon enough |
| A1-32 | In reverse, ADF sensor is actuated too long |
| A2 | ADF exit problems |
| A2-1 | Original ready sensor and ADF exit switch are actuated or ADF feed in sensor and ADF exit switch are both actuated |
| A2-2 | ADF exit switch |
| A2-3 | ADF exit switch is not actuated on time |
| A3 | Irregular size documents |
| A3-1 | Wrong size original sensed in 1:1 mode |
| A3-2 | Wrong size original sensed in the 2:1 mode |
| A5 | ADF interlock |
| A5 | ADF interlock |
| A6 | ADF single sheet document reset. |
| A6-1 | Reset original |
| A6-2 | Reset sheet feeder |
| A7 | Document cover interlock |
| A8 | ADF exit interlock |
| C1 | Tray 1 jam |
| C1-2 | Paper feed problem in tray 1 |
| C1-3 | Paper does not reach registration |
| C2 | Tray 2 jam |
| C3 | Tray 3 jam |
| C3-1 | Paper feed problem from tray 3 |
| C3-2 | Paper feed problem from tray 3 |
| C3-3 | Paper feed problem from tray 1 |
| C6-1 | Duplex paper feed problem |
| C6-2 | Duplex and/or tray 1 paper feed problem |
| C6-3 | Paper feed problem from tray 1 |
| C7-1 | Paper feed problem from HCF |
| C7-2 | Paper feed problem from HCF on tray 1 |
| C7-3 | Paper feed problem from tray 1 |
| C8 | Paper stays in tray or duplex or HCF |
| C8-1 | Paper on tray 1 feed sensor |
| C8-2 | Paper on tray 2 feed sensor |
| C8-3 | Paper on tray 3 feed sensor |
| C8-4 | Paper on HCF feed sensor |
| C8-5 | Paper in duplex section |
| C9 | Bypass feed problem |
| C9-3 | Paper from bypass did not reach registration sensor quickly enough |
| E1-10 to E1-25 | Internal jam |
| E1-6 | Paper on registration sensor |
| E2 | Reset signal happened. Might read E-2 something else. |
| E3-30 to E4-14 | Exit jam |
| E3-30 to E3-35 | Exit switch actuated too long |
| E3-6 | Exit jam |
| E3-6 | Paper on exit switch |
| E4-10 to E4-14 | Inverter sensor not actuated. |
| E4-10 to E4-45 | Paper did not reach inverter switch soon enough |
| E4-15 | Inverter sensor |
| E4-40 to E4-45 | Duplex entry sensor |
| E4-6 | Paper on inverter switch |
| E4-6 | Inverter sensor |
| E5 | Front door interlock |
| E6-1 | Tray 1 interlock |
| E6-2 | 2 tray or duplex interlock |
| E6-3 | HCF interlock |
| E7-2 | Duplex inverter interlock |
| E7-3 | Duplex interlock |
| E8-10 to E8-15 | Paper on duplex feed sensor is not actuated soon enough |
| E8-6 | Paper in duplex |
| E8-6 to E8-15 | Duplex entry sensor |
| F1-1 | Paper did not reach sorter |
| F1-2 | Paper stayed on sorter feed sensor |
| F1-6 | Sorter exit sensor |
| F3 | Paper size not available for sort/stack |
| F5 | Sorter interlock |
| H2-1 | Communication problem between main board and duplex board |
| H2-2 | Side guard sensor problem |
| H3-1 | Communication problem between main board and HCF |
| H3-2 | Upper limit sensor problem on HCF |
| H6-1 | ADF size sensor |
| H6-2 | ADF nudgeer sensor |
| H6-3 | Belt drive motor does not have 24 volts. Black toner is empty, but 100 copies have been run without changing toner |
| J1 | Black toner is empty, but 100 copies have been run without changing toner |
| J3 | Replace copy cartridge |
| J3 | No copy cartridge (drum unit) |
| J7 | Copy cartrige must be replaced |
| J8-1 | Wrong copy cartridge installed |
| J8-2 | Copy cartridge EEPROM must be changed |
| L6 | Auditron or other counter problem |
| L6 | Key counter not installed |
| L8 | Platen glass temperature is too high |
| L9 | Communication problem between interimage erase/edge lamps and main board |
| U1-1 | Main motor drive problem |
| U2-1 | Scan home problem |
| U2-1 to U2-4 | Scan home sensor |
| U2-2 | Scan home problem or optics problem |
| U2-3, U2-4 | Scan home problem |
| U3-1 | Lens sensor problem |
| U4-1 | Fuser thermistor open |
| U4-2 | Fuser did not warm up properly |
| U4-3 | Fuser temperature too high |
| U4-4 | Fuser problem. Staying on too long |
| U4-6 | High fuser temperature |
| U5-1 | Sorter bin home switch not activated |
| U5-2 | Sorter bin home switch stayed actuated |
| U5-3 | Sorter bin home switch |
| U5-4 | Sorter bin home switch |
| U6-1 | ROM problem |
| U6-2 | RAM problem |
| U6-3 | Low battery |
| U6-4 | Incorrect value in NVM. Reinitialize main board with code 20-96 |
| U8-1 | Exposure lamp problem |
| U8-2 | Communication problem main board and exposure board |
| U8-3 | Exposure lamp or exposure lamp board problem |
| U8-4 to U8-6 | Problem with exposure lamp, lamp sensor, lamp board |
Xerox 5328
| Code | Description |
|---|---|
| A1 | Document in ADF |
| A1-8 | Main board received reset signal |
| A2 | ADF jams |
| A6 | ADF registration jam |
| A7 | ADF interlock |
| A9 | Tray 1 jam |
| C1 | Tray 2 jam |
| C2 | Tray 3 jam |
| C3 | Bypass feed jams |
| C4 | Machine has reset |
| E1 | Jam |
| E1-5 | Clamshell interlock |
| E1-6 | Right side interlock |
| E1-7 | Two tray interlock, or duplex interlock |
| E1-8 | Sorter interlock |
| E1-9 | Copy cartridge interlock |
| E1 or E1-0 | Registration jam |
| E2 | Reset signal happened |
| E3 | Jam in transfer area |
| E4 | Exit jam |
| E4-0 | Exit jam |
| E4-5 | Clamshell interlock |
| E4-6 | Right side interlock |
| E4-7 | Two tray interlock |
| E4-8 | Sorter interlock |
| E4-9 | Copy cartridge interlock |
| E5 | Clamshell interlock |
| E6 | Right side interlock |
| E9 | Copy cartridge interlock |
| F3-1 | Sorter bin home switch |
| F3-2 | Sorter cam switch |
| F3-3 | Sorter cam switch |
| F5 | Sorter interlock |
| J1-1 | Add toner |
| J1-2 | Temporary low toner signal |
| J2-1, J2-2 | Replace copy cartridge |
| J5, J6 | ADF to machine communications problem |
| L2 | 2000 copies left on cartridge |
| L3 | ADF to machine communications problem |
| L4 | (flashing) 1000 copier left on fuser web |
| L6 | Auditron or other counter problem |
| LL | Main board. Try simulation 1.1 to initialize |
| rc | Wrong operation panel installed |
| rr | Bad EPROM on main board. Try 1.1 |
| U0 | Main board |
| U2 | Scan problem |
| U2-1 | Scan home |
| U2-2 | Scan home or scan encoder |
| U2-4 | Scan home or scan dual page sensor |
| U2-7 | Scan home |
| U4-1 | Fuser problem. Long warm up |
| U4-2 | Low fuser temperature after warm up |
| U4-3 | High fuser temperature |
| U4-4 | Open fuser thermistor |
| U4-6 | Replace fuser web. |
| U4-7 | Thermistor signal problem |
| U7-1 | Copy cartridge belt drive problem |
| U9-3 | Exposure lamp problem |
| U9-4 | Toner motor |
| U9-5 | Problem in warm-up |
Xerox 5330
| Code | Description |
|---|---|
| A1-1 to A1-32 | All indicate a paper path problem, etc. in the ADF. |
| A2 | ADF exit problems |
| A3 | Irregular size documents |
| A5 | ADF interlock |
| A6 | ADF single sheet document reset. |
| A7 | Platen interlock |
| A8 | ADF exit interlock |
| C1 | Tray 1 jam |
| C2 | Tray 2 jam |
| C3 | Tray 3 jam |
| C6-1, C6-2 | Jams related to duplex |
| C6-3 | Registration sensor, re tray 1 |
| C7-1, C7-2 | HCF feed problems |
| C7-3 | Tray 1 feed problem |
| C8 | Paper stays in tray or duplex or HCF |
| C9 | Bypass feed problem |
| E1-10 to E1-25 | Internal jam |
| E1-6 | Paper on registration sensor |
| E2 | Reset signal happened. Might read E-2 something else. |
| E3-30 to E4-14 | Exit jam |
| E3-6 | Exit jam |
| E4-10 to E4-14 | Inverter sensor not actuated. |
| E4-15 | Inverter sensor |
| E4-40 to E4-45 | Duplex entry sensor |
| E4-6 | Inverter sensor |
| E5 | Front door interlock |
| E6-1 | Tray 1 interlock |
| E6-2 | 2 tray or duplex interlock |
| E6-3 | HCF interlock |
| E7-2, E7-3 | Duplex interlock |
| E8-6 to E8-15 | Duplex entry sensor |
| F1-1 | Sorter entry sensor |
| F1-6 | Sorter exit sensor |
| F3 | Paper size not available for sort/stack |
| F5 | Sorter interlock |
| J1 | Add toner |
| J3 | Replace copy cartridge |
| J7 | Replace copy cartridge |
| J8-1 | Wrong copy cartridge installed |
| J8-2 | Copy cartridge EEPROM |
| L6 | Auditron or other counter problem |
| L8 | Platen glass temperature is too high |
| L9 | Communication problem between interimage erase/edge lamps and main board |
| U1-1 | Main motor drive problem |
| U2-1 to U2-4 | Scan home sensor |
| U3-1 | Lens sensor |
| U4-1 | Open fuser thermistor |
| U4-2 | Fuser did not warm up properly |
| U4-3 | Fuser temperature too high |
| U4-4 | Fuser problem. Staying on too long |
| U4-6 | High fuser temperature |
| U5-1 | Sorter bin home switch not activated |
| U5-2 | Sorter bin home switch stayed actuated |
| U5-3 | Sorter bin home switch |
| U5-4 | Sorter bin home switch |
| U6-1 | ROM problem |
| U6-2 | RAM problem |
| U6-3 | Low battery |
| U6-4 | Incorrect value in NVM. Reinitialize main board with code 20-96 |
| U8-1 to U8-6 | Problem with exposure lamp, lamp sensor, lamp board |
Xerox 5340, 5343
| Code | Description |
|---|---|
| 00-009; 030 to 033 | A door was opened while paper was being fed |
| 00-047 | Paper in duplex |
| 00-1 | Auditron |
| 00-2 | Diagnostic error |
| 00-3 | Faults error |
| 00-4 | Ric error |
| 00-5 | Job manager system error |
| 00-6 | LLM interface |
| 00-7 | Standby error |
| 00-8 | Communications error |
| 00-9 | Xerographic error |
| 01-300 | Front interlock |
| 01-310 | Right upper interlock |
| 01-315 | Left upper interlock |
| 01-320 | Left lower interlock |
| 01-325 | Fuser interlock |
| 02-910 | Key counter missing |
| 02-920 | Wrong combination of accessories |
| 03-321, 322, 326, 327 | LLM to ISIL communications problems |
| 03-328 | IOT communications problem with duplex or tray 4 |
| 03-330 | IOT communications problems with HCF |
| 03-335, 03-336 | LLM communications problems with edit |
| 03-340 | NVM memory |
| 03-341, 03-347 | Communications problems between IOT and sorter |
| 03-350, 03-354 | Communications problem with LLM and user interface |
| 03-363, 03-364 | Communications problem between LLM & optics |
| 03-370, 03-373 | Communications problem between LLM & DADF |
| 03-380, 384 | |
| 03-416, 03-422 | RAM memory problem |
| 03-424, 426 | NVM memory problem |
| 03-430, 432 | Billing problem |
| 03-439 | GRAIB communications problem |
| 03-440 | RIC communications problem |
| 03-441 | RIC NVM problem |
| 03-442 | Modem |
| 03-443, 03-458 | RIC problems |
| 03-460 | Serial communications processor problem |
| 04-300 | Main motor or drive problem |
| 05-100, 05-108 | DADF registration sensor |
| 05-110 | DADF exit sensor |
| 05-115, 120 | DADF jams |
| 05-305 | DADF document drive |
| 05-310, 312 | DADF document sensor |
| 05-316 | DADF registration sensor jam |
| 05-325 | DADF exit sensor |
| 05-335, 341, 345 | DADF interlock switches |
| 06-300, 06-310 | Scan problems |
| 06-315 | Scan drive |
| 06-320A, 320B, 320C, 325 | Scan problem |
| 06-330 | Lens drive |
| 06-340 | Exposure control problem |
| 06-342 | LLM CPU problem |
| 06-344, 06-350 | Exposure cvontrol problem |
| 06-352 | IOT CPU problem |
| 07-300, 315, 330, 345 | Tray faults |
| 07-360, 07-370 | HCF problems |
| 07-375, 380A, 380B | Duplex problems |
| 08-100, 08-110 | Feed problems. Lead edge of copy paper is late getting to feed sensor of tray 1 |
| 08-115, 08-162 | Feed problem. Lead edge of copy paper is late getting to registration sensor |
| 08-165 | Paper jam at registration sensor |
| 08-310, 08-370 | Paper at a sensor when power is turned on |
| 08-330 | DADF nudger sensor |
| 08-380 | Registration side to side problem with home position |
| 08-390 | Nip |
| 09-300 | Copy cartridge finished (drum unit) |
| 09-310 | Add black toner Add color toner |
| 09-320 | Add color toner |
| 09-330 | Wrong copy cartridge (wrong drum unit) |
| 09-340 | Drum cartridge not installed properly |
| 09-350 | Waste toner full |
| 100 | A fault has occurred |
| 10-100 | Exit jam |
| 10-105 | Exit jam |
| 10-110 | Vertical sensor jam |
| 10-120, 122, 125 | Duplex jam |
| 10-150, 155 | Too much or not enough paper in duplex tray |
| 10-300 | Fuser thermistor |
| 10-302 | Low fuser temperature |
| 10-304 | Bad fuser temp |
| 10-308 | High fuser temperature or open thermistor |
| 10-310 | High fuser temperature |
| 10-312 | Fuser not up to temperature after energy save |
| 10-314 | Fuser problem |
| 10-320 | Fuser web finished |
| 10-330, 335, 340 | Exit switch, vertical sensor switch actuated when power is turned on |
| 11-100, 11-116 | Sorter jam |
| 11-150, 11-176 | Sorter auto stapler jam |
| 11-310, 314, 316 | Sorter interlock |
| 11-325A, B, C, D, E, F, G | Sorter index |
| 11-352, 354, 356 | Sorter auto stapler interlocks |
| 11-365A, B, C, D, E | Sorter auto stapler bin |
| 11-370, 371, 372A, 373A, 373B, 374 | Sorter auto stapler staple failure, staple home problem or tamper home problem |
| 11-385A, 385B, 390A,B,C,D,E, 396A | Sorter auto stapler staple failure, staple home problem or tamper home problem |
| 301 | Fuser web must be replaced |
| 302 | Copy cartridge (drum unit) must be replaced |
| 501 | Tray 1 must be rebuilt |
| 502 | Tray 2 must be rebuilt |
| 503 | Tray 3 must be rebuilt |
| 504 | Tray 4 must be rebuilt |
| 505 | HCF must be rebuilt |
| 506 | Bypass must be rebuilt |
| 507 | Duplex unit must be rebuilt |
| 508 | Replace black developer |
| 509 | Replace red developer |
| 510 | Replace green developer |
| 512 | Replace brown developer |
| 513 | Copy cartridge (drum unit) will need replacing soon |
| 514 | Fuser web will need replacing soon |
| 515 | DADF belt should be replaced |
| 516 | DADF feed rollers should be replaced |
| 517 | Replace exposure lamp |
| 518 | Replace suction filter |
| 519 | Replace ozone filter |
| 520 | Replace optics filter |
| 521 | Replace particle filter |
| 522 | Replace upper fuser roller |
| 523 | Replace fuser pawls |
| 524 | Replace pressure roller |
| 525 | Replace pressure roller pawls |
| 900-905 | Key operator calls |
Xerox 5345
| Код ошибки | Описание |
|---|---|
| 01-01 | Frequency monitoring and zero cross problem |
| 01-02 | Interlock |
| 01-03 | AC power problem |
| 01-04 | Finisher interlock |
| 01-05 | 24v problem |
| 03-01 | Optics to main board communication problem |
| 03-02 | Software reset problem |
| 03-03 | Could be punched holes in the lead edge of the original |
| 03-04 | Software problem |
| 03-06 | Low battery |
| 03-07 | NVM not initialized or is missing or defective |
| 03-17 | Communication problem between main board and finisher board |
| 03-18 | Initializes one NVM counter to agree to others |
| 03-19 | All three NVM counter to agree with others |
| 03-20 | Main board/interface board problems |
| 03-21 | Problem with RIC NVM |
| 03-22 | RIC modem problem |
| 03-23 | RIC real time clock failure. |
| 03-25 | RIC NVM problem or not initialized |
| 03-27 | NVM problem |
| 03-28 | Watchdog software problem |
| 03-29 | Microprocessor crystal not at correct frequency |
| 03-30 | No software response from finisher after 20 seconds have elapsed |
| 06-01 | Lens did not reach 1.1 position |
| 06-02 | 1/2 rate scanner problem |
| 06-03 | Scan home problem |
| 06-04 | Scan home problem |
| 06-05 | Scan home problem |
| 06-06 | Scan encoder |
| 06-07 | Scan encoder |
| 06-08 | Scan drive boost |
| 06-09 | Scan encoder |
| 06-11 | Scan encoder pulse phases |
| 06-12 | Insufficient scan damping |
| 07-01 | Duplex tray not home during duplexing |
| 07-02 | Tray 2 not home when selected |
| 07-13 | Tray 2 height sensor problem |
| 07-15 | Tray 2 empty |
| 07-16 | Tray 1 door open |
| 07-18 | Tray 1 stack sensor |
| 07-22 | Tray 1 empty |
| 07-26 | Tray 1 bypass switch actuated too long |
| 07-27 | Tray 1 bypass switch deactuated too early |
| 07-30 | Paper in duplex |
| 07-31 | Paper in duplex |
| 07-32 | Duplex tray empty, when paper should be there |
| 08-10 | Paper did not reach tray 2 input tray sensor |
| 08-11 | Paper did not reach duplex input sensor |
| 08-12 | Paper did not reach tray 1 |
| 08-14 | Paper did not leave tray 2 input sensor quickly enough |
| 08-18 | Trail edge did not reach tray 2 input sensor quickly enough |
| 08-19 | Trail edge did not reach tray 1 input sensor quickly enough |
| 08-20 | Paper in duplex |
| 08-21 | Paper in tray 2 input |
| 08-22 | Paper in tray 2 or duplex at wrong time |
| 08-23 | Paper at tray 1 input at wrong time |
| 08-24 | Paper in tray 1 at wrong time |
| 08-28 | Upper and lower nips problem |
| 09-08 | Low toner condition |
| 09-12 | Drum signals are out of range |
| 09-13 | Unstable drum patch readings |
| 09-15 | Patch is too dark |
| 09-16 | Patch is too light |
| 09-17 | Open toner container access cover |
| 09-18 | Low toner level |
| 09-21 | Low toner sensor disconnected |
| 09-22 | Low toner condition, even after machine has been theoretically, adding toner |
| 10-02 | Low fuser temperature |
| 10-03 | High fuser temperature |
| 10-06 | Paper did not reach out put switch |
| 10-07 | Paper stayed on output switch |
| 10-10 | Paper did not reach decurler sensor |
| 10-11 | Paper did not reach decurler sensor |
| 10-12 | Paper on decurler sensor |
| 10-13 | Paper did not reach duplex entry sensor in time |
| 10-14 | Paper did not reach duplex entry sensor in time |
| 10-15 | Paper on entry sensor at wrong time |
| 10-17 | Fuser temperature is too high and fuser relay has deactuated |
| 12-01 | Paper at finisher input sensor |
| 12-02 | Paper did not reach finisher |
| 12-03 | Paper reached finisher too soon |
| 12-05 | Paper at stapler |
| 12-06 | Paper at stapler |
| 12-07 | Paper did not reach stapler |
| 12-08 | Paper did not reach stapler |
| 12-10 | Complied motor not working properly |
| 12-15 | Eject motor problem and/or eject encoder |
| 12-20 | Stacker motor problem |
| 12-21 | Stacker interlock |
| 12-22 | Stacker bottom sensor |
| 12-23 | Stacker bottom sensor |
| 12-24 | Stacker bottom sensor senses full |
| 12-25 | Stack height sensor |
| 12-26 | Stack height sensor |
| 12-27 | Stack height sensor |
| 12-30 | Offset home sensor |
| 12-31 | Offset home sensor |
| 12-32 | OCT switch |
| 12-35 | Eject nip carriage |
| 12-36 | Eject cam interlock |
| 12-37 | Eject nip carriage open timing |
| 12-38 | Eject cam interlock |
| 12-40 | Tamper motor |
| 12-41 | Tamper home problem |
| 12-42 | Tamper home sensor |
| 12-43 | Staple load sensor |
| 12-44 | Tamper home sensor |
| 12-45 | Tamper home sensor |
| 12-50 | Low on staples |
| 12-51 | Stapler home sensor |
| 12-52 | Stapler home sensor |
| 12-53 | Eject cam interlock |
| 33-37 | Too few documents |
| 55-01 | RDH interlock switch open during use |
| 55-04 | Paper on bypass sensor |
| 55-05 | Paper at vacuum timing sensor |
| 55-06 | Paper on output sensor |
| 55-10 | No paper reached S31 |
| 55-20 | Paper did not leave S31 at correct time |
| 55-24 | Set counter arm problem |
| 55-25 | Documents in input tray not detected |
| 55-27 | Lead edge did not reach S35 at correct time |
| 55-2955-30 | Trail edge did not reach S35 at correct time |
| 55-31 | S32, ADF registration sensor did not see paper at correct time |
| 55-32 | S32 did not see trail edge at correct time |
| 55-33 | S36 One too many documents |
| 55-36 | One too many documents |
| 55-39 | Hole count problem on document feeder belt |
| 55-40 | Document belt travel problem |
| 55-41 | Document belt mistracking or skewing |
| 55-45 | Paper at inverter sensor |
| 55-47 | Inverter sensor did not see paper lead edge at correct time |
| 55-49 | More than 50 sheets in input tray |
| 55-50 | Right side interlock |
| 55-51 | Left side interlock |
| 55-55 | Document on glass |
| 93-93 | NVM has to be initialized after new software installed |
Xerox 5350, 5352
| Code | Description |
|---|---|
| 00-009, 030, 031, 032, 033 | A door was opened while paper was being fed |
| 00-047 | Paper in duplex |
| 00-1 | Auditron |
| 00-2 | Diagnostic error |
| 00-3 | Faults error |
| 00-4 | Ric error |
| 00-5 | Job manager system error |
| 00-6 | LLM interface |
| 00-7 | Standby error |
| 00-8 | Communications error |
| 00-9 | Xerographic error |
| 01-300 | Front interlock |
| 01-310 | Right upper interlock |
| 01-315 | Left upper interlock |
| 01-320 | Left lower interlock |
| 01-325 | Fuser interlock |
| 02-910 | Key counter missing |
| 02-920 | Wrong combination of accessories |
| 03-321, 322, 326, 327 | LLM to ISIL communications problems |
| 03-328 | IOT communications problem with duplex or tray 4 |
| 03-330 | IOT communications problems with HCF |
| 03-335, 336 | LLM communications problems with edit |
| 03-340 | NVM memory |
| 03-341-347 | Communications problems between IOT and sorter |
| 03-350-354 | Communications problem with LLM and user interface |
| 03-363, 364 | Communications problem between LLM & optics |
| 03-370-03-373 | Communications problem between LLM & DADF |
| 03-380, 384 | |
| 03-416-422 | RAM memory problem |
| 03-424, 426 | NVM memory problem |
| 03-430, 432 | Billing problem |
| 03-439 | GRAIB communications problem |
| 03-440 | RIC communications problem |
| 03-441 | RIC NVM problem |
| 03-442 | Modem |
| 03-443-458 | RIC problems |
| 03-460 | Serial communications processor problem |
| 04-300 | Main motor or drive problem |
| 05-100-108 | DADF registration sensor |
| 05-110 | DADF exit sensor |
| 05-115, 120 | DADF jams |
| 05-305 | DADF document drive |
| 05-310, 312 | DADF document sensor |
| 05-316 | DADF registration sensor jam |
| 05-325 | DADF exit sensor |
| 05-335, 341, 345 | DADF interlock switches |
| 06-300-310 | Scan problems |
| 06-315 | Scan drive |
| 06-320A, 320B, 320C, 325 | Scan problem |
| 06-330 | Lens drive |
| 06-340 | Exposure control problem |
| 06-342 | LLM CPU problem |
| 06-344-350 | Exposure cvontrol problem |
| 06-352 | IOT CPU problem |
| 07-300, 315, 330, 345 | Tray faults |
| 07-360-370 | HCF problems |
| 07-375, 380A, 380B | Duplex problems |
| 08-100-110 | Feed problems. Lead edge of copy paper is late getting to feed sensor of tray 1 |
| 08-115-162 | Feed problem. Lead edge of copy paper is late getting to registration sensor |
| 08-165 | Paper jam at registration sensor |
| 08-310-370 | Paper at a sensor when power is turned on |
| 08-330 | DADF nudger sensor |
| 08-380 | Registration side to side problem with home position |
| 08-390 | Nip |
| 09-300 | Copy cartridge finished (drum unit) |
| 09-310 | Add black toner Add color toner |
| 09-320 | Add color toner |
| 09-330 | Wrong copy cartridge (wrong drum unit) |
| 09-340 | Drum cartridge not installed properly |
| 09-350 | Waste toner full |
| 100 | A fault has occurred |
| 10-100 | Exit jam |
| 10-105 | Exit jam |
| 10-110 | Vertical sensor jam |
| 10-120, 122, 125 | Duplex jam |
| 10-150, 155 | Too much or not enough paper in duplex tray |
| 10-300 | Fuser thermistor |
| 10-302 | Low fuser temperature |
| 10-304 | Bad fuser temp |
| 10-308 | High fuser temperature or open thermistor |
| 10-310 | High fuser temperature |
| 10-312 | Fuser not up to temperature after energy save |
| 10-314 | Fuser problem |
| 10-320 | Fuser web finished |
| 10-330, 335, 340 | Exit switch, vertical sensor switch actuated when power is turned on |
| 11-100-116 | Sorter jam |
| 11-150-176 | Sorter auto stapler jam |
| 11-310, 314, 316 | Sorter interlock |
| 11-325A,B,C,D,E,F,G | Sorter index |
| 11-352, 354, 356 | Sorter auto stapler interlocks |
| 11-365A,B,C,D,E | Sorter auto stapler bin |
| 11-370,371,372A,373A,373B,374 | Sorter auto stapler staple failure, staple home problem or tamper home problem |
| 11-385A,385B,390A,B,C,D,E,396A | Sorter auto stapler staple failure, staple home problem or tamper home problem |
| 301 | Fuser web must be replaced |
| 302 | Copy cartridge (drum unit) must be replaced |
| 501 | Tray 1 must be rebuilt |
| 502 | Tray 2 must be rebuilt |
| 503 | Tray 3 must be rebuilt |
| 504 | Tray 4 must be rebuilt |
| 505 | HCF must be rebuilt |
| 506 | Bypass must be rebuilt |
| 507 | Duplex unit must be rebuilt |
| 508 | Replace black developer |
| 509 | Replace red developer |
| 510 | Replace green developer |
| 512 | Replace brown developer |
| 513 | Copy cartridge (drum unit) will need replacing soon |
| 514 | Fuser web will need replacing soon |
| 515 | DADF belt should be replaced |
| 516 | DADF feed rollers should be replaced |
| 517 | Replace exposure lamp |
| 518 | Replace suction filter |
| 519 | Replace ozone filter |
| 520 | Replace optics filter |
| 521 | Replace particle filter |
| 522 | Replace upper fuser roller |
| 523 | Replace fuser pawls |
| 524 | Replace pressure roller |
| 525 | Replace pressure roller pawls |
| 900-905 | Key operator calls |
Xerox 5355
| Код ошибки | Описание |
|---|---|
| 01-01 | Frequency monitoring and zero cross problem |
| 01-02 | Interlock |
| 01-03 | AC power problem |
| 01-04 | Finisher interlock |
| 01-05 | 24v problem |
| 03-01 | Optics to main board communication problem |
| 03-02 | Software reset problem |
| 03-03 | Could be punched holes in the lead edge of the original |
| 03-04 | Software problem |
| 03-06 | Low battery |
| 03-07 | NVM not initialized or is missing or defective |
| 03-17 | Communication problem between main board and finisher board |
| 03-18 | Initializes one NVM counter to agree to others |
| 03-19 | All three NVM counter to agree with others |
| 03-20 | Main board/interface board problems |
| 03-21 | Problem with RIC NVM |
| 03-22 | RIC modem problem |
| 03-23 | RIC real time clock failure. |
| 03-25 | RIC NVM problem or not initialized |
| 03-27 | NVM problem |
| 03-28 | Watchdog software problem |
| 03-29 | Microprocessor crystal not at correct frequency |
| 03-30 | No software response from finisher after 20 seconds have elapsed |
| 06-01 | Lens did not reach 1.1 position |
| 06-02 | 1/2 rate scanner problem |
| 06-03 | Scan home problem |
| 06-04 | Scan home problem |
| 06-05 | Scan home problem |
| 06-06 | Scan encoder |
| 06-07 | Scan encoder |
| 06-08 | Scan drive boost |
| 06-09 | Scan encoder |
| 06-11 | Scan encoder pulse phases |
| 06-12 | Insufficient scan damping |
| 07-01 | Duplex tray not home during duplexing |
| 07-02 | Tray 2 not home when selected |
| 07-13 | Tray 2 height sensor problem |
| 07-15 | Tray 2 empty |
| 07-16 | Tray 1 door open |
| 07-18 | Tray 1 stack sensor |
| 07-22 | Tray 1 empty |
| 07-26 | Tray 1 bypass switch actuated too long |
| 07-27 | Tray 1 bypass switch deactuated too early |
| 07-30 | Paper in duplex |
| 07-31 | Paper in duplex |
| 07-32 | Duplex tray empty, when paper should be there |
| 08-10 | Paper did not reach tray 2 input tray sensor |
| 08-11 | Paper did not reach duplex input sensor |
| 08-12 | Paper did not reach tray 1 |
| 08-14 | Paper did not leave tray 2 input sensor quickly enough |
| 08-18 | Trail edge did not reach tray 2 input sensor quickly enough |
| 08-19 | Trail edge did not reach tray 1 input sensor quickly enough |
| 08-20 | Paper in duplex |
| 08-21 | Paper in tray 2 input |
| 08-22 | Paper in tray 2 or duplex at wrong time |
| 08-23 | Paper at tray 1 input at wrong time |
| 08-24 | Paper in tray 1 at wrong time |
| 08-28 | Upper and lower nips problem |
| 09-08 | Low toner condition |
| 09-12 | Drum signals are out of range |
| 09-13 | Unstable drum patch readings |
| 09-15 | Patch is too dark |
| 09-16 | Patch is too light |
| 09-17 | Open toner container access cover |
| 09-18 | Low toner level |
| 09-21 | Low toner sensor disconnected |
| 09-22 | Low toner condition, even after machine has been theoretically, adding toner |
| 10-02 | Low fuser temperature |
| 10-03 | High fuser temperature |
| 10-06 | Paper did not reach out put switch |
| 10-07 | Paper stayed on output switch |
| 10-10 | Paper did not reach decurler sensor |
| 10-11 | Paper did not reach decurler sensor |
| 10-12 | Paper on decurler sensor |
| 10-13 | Paper did not reach duplex entry sensor in time |
| 10-14 | Paper did not reach duplex entry sensor in time |
| 10-15 | Paper on entry sensor at wrong time |
| 10-17 | Fuser temperature is too high and fuser relay has deactuated |
| 12-01 | Paper at finisher input sensor |
| 12-02 | Paper did not reach finisher |
| 12-03 | Paper reached finisher too soon |
| 12-05 | Paper at stapler |
| 12-06 | Paper at stapler |
| 12-07 | Paper did not reach stapler |
| 12-08 | Paper did not reach stapler |
| 12-10 | Complied motor not working properly |
| 12-15 | Eject motor problem and/or eject encoder |
| 12-20 | Stacker motor problem |
| 12-21 | Stacker interlock |
| 12-22 | Stacker bottom sensor |
| 12-23 | Stacker bottom sensor |
| 12-24 | Stacker bottom sensor senses full |
| 12-25 | Stack height sensor |
| 12-26 | Stack height sensor |
| 12-27 | Stack height sensor |
| 12-30 | Offset home sensor |
| 12-31 | Offset home sensor |
| 12-32 | OCT switch |
| 12-35 | Eject nip carriage |
| 12-36 | Eject cam interlock |
| 12-37 | Eject nip carriage open timing |
| 12-38 | Eject cam interlock |
| 12-40 | Tamper motor |
| 12-41 | Tamper home problem |
| 12-42 | Tamper home sensor |
| 12-43 | Staple load sensor |
| 12-44 | Tamper home sensor |
| 12-45 | Tamper home sensor |
| 12-50 | Low on staples |
| 12-51 | Stapler home sensor |
| 12-52 | Stapler home sensor |
| 12-53 | Eject cam interlock |
| 33-37 | Too few documents |
| 55-01 | rdh interlock switch open during use |
| 55-04 | Paper on bypass sensor |
| 55-05 | Paper at vacuum timing sensor |
| 55-06 | Paper on output sensor |
| 55-10 | No paper reached S31 |
| 55-20 | Paper did not leave S31 at correct time |
| 55-24 | Set counter arm problem |
| 55-25 | Documents in input tray not detected |
| 55-27 | Lead edge did not reach S35 at correct time |
| 55-2955-30 | Trail edge did not reach S35 at correct time |
| 55-31 | S32, ADF registration sensor did not see paper at correct time |
| 55-32 | S32 did not see trail edge at correct time |
| 55-33 | S36 One too many documents |
| 55-36 | One too many documents |
| 55-39 | Hole count problem on document feeder belt |
| 55-40 | Document belt travel problem |
| 55-41 | Document belt mistracking or skewing |
| 55-45 | Paper at inverter sensor |
| 55-47 | Inverter sensor did not see paper lead edge at correct time |
| 55-49 | More than 50 sheets in input tray |
| 55-50 | Right side interlock |
| 55-51 | Left side interlock |
| 55-55 | Document on glass |
| 93-93 | NVM has to be initialized after new software installed |
Xerox XC520, 540, 560, 580
| Код ошибки | Описание |
|---|---|
| H2 | Fuser thermistor |
| H3 | Fuser temperature too high. Must be reset in diagnostics |
| H4 | Fuser temperature too low. Must be reset in diagnostics |
| L3 | Scan problem |
| L4 | Min motor drive problem |
| L8 | Exposure lamp not lightning or not enough light reaching auto exposure sensor |
| P | Paper did not feed |
Xerox 5622
| Code | Description |
|---|---|
| A1-1 to A1-32 | All indicate a paper path problem, etc. in the ADF |
| A2 | ADF exit problems |
| A3 | Irregular size documents |
| A5 | ADF interlock |
| A6 | ADF single sheet document reset |
| A7 | Platen interlock |
| A8 | ADF exit interlock |
| C1 | Tray 1 jam |
| C2 | Tray 2 jam |
| C3 | Tray 3 jam |
| C6-1, C6-2 | Jams related to duplex |
| C6-3 | Registration sensor, re tray 1 |
| C7-1, C7-2 | HCF feed problems |
| C7-3 | Tray 1 feed problem |
| C8 | Paper stays in tray or duplex or HCF |
| C9 | Bypass feed problem |
| E1-10 to E1-25 | Internal jam |
| E1-6 | Paper on registration sensor |
| E2 | Reset signal happened. Might read E-2 something else |
| E3-30 to E4-14 | Exit jam |
| E3-6 | Exit jam |
| E4-10 to E4-14 | Inverter sensor not actuated |
| E4-15 | Inverter sensor |
| E4-40 to E4-45 | Duplex entry sensor |
| E4-6 | Inverter sensor |
| E5 | Front door interlock |
| E6-1 | Tray 1 interlock |
| E6-2 | 2 tray or duplex interlock |
| E6-3 | HCF interlock |
| E7-2, E7-3 | Duplex interlock |
| E8-6 to E8-15 | Duplex entry sensor |
| F1-1 | Sorter entry sensor |
| F1-6 | Sorter exit sensor |
| F3 | Paper size not available for sort/stack |
| F5 | Sorter interlock |
| J1 | Add toner |
| J3 | Replace copy cartridge |
| J7 | Replace copy cartridge |
| J8-1 | Wrong copy cartridge installed |
| J8-2 | Copy cartridge EEPROM |
| L6 | Auditron or other counter problem |
| L8 | Platen glass temperature is too high |
| L9 | Communication problem between interimage erase/edge lamps and main board |
| U1-1 | Main motor drive problem |
| U2-1 to U2-4 | Scan home sensor |
| U3-1 | Lens sensor |
| U4-1 | Open fuser thermistor |
| U4-2 | Fuser did not warm up properly |
| U4-3 | Fuser temperature too high |
| U4-4 | Fuser problem. Staying on too long |
| U4-6 | High fuser temperature |
| U5-1 | Sorter bin home switch not activated |
| U5-2 | Sorter bin home switch stayed actuated |
| U5-3, U5-4 | Sorter bin home switch |
| U6-1 | ROM problem |
| U6-2 | RAM problem |
| U6-3 | Low battery |
| U6-4 | Incorrect value in NVM. Reinitialize main board with code 20-96 |
| U8-1 to U8-6 | Problem with exposure lamp, lamp sensor, lamp board |
Почему не печатает принтер с компьютера если он подключен и есть краска?
Рассмотрим наиболее типичные проблемы.
Проверяем исправность USB-кабеля и портов
Все современные принтеры подключаются к компьютеру при помощи USB-кабеля. Если Вы подключили принтер к порту на передней панели системного блока, то попробуйте подсоединить его к разъему на задней панели. Они, как правило, впаиваются сразу в материнскую плату, что исключает возможность неисправности шлейфа, использующегося для подключения USB-портов к передней панели. Также может случиться ситуация, когда переломился основной кабель, при помощи которого подключается принтер. В таком случае система не увидит его вообще, или же, при шевелении шнура, будет находить и терять устройство. В этом случае понадобиться замена USB-кабеля.
Неверный выбор принтера при отправке на печать
Данная проблема чаще всего возникает в случаях, когда в системе присутствуют несколько принтеров. (Подключенных как напрямую, так и через сеть).
Как правило, программа, которая используется для печати использует принтер, отмеченный в системе по умолчанию. Можно поступить двумя способами:
- Перед каждой отправкой на печать выбирать необходимое устройство.
- Установить необходимый принтер в системе по умолчанию. Перейдите в панель управления, раздел «Оборудование и звук», подраздел «Устройства и принтеры» или же в поиске меню «Пуск» наберите название необходимого подраздела. Смотрим, какой принтер в настоящий момент установлен и подключен, жмем на него правой кнопкой мыши и в меню ставим отметку на пункте «Использовать по умолчанию». Стоит обратить внимание, что вы выбираете принтер, в названии которого отсутствуют буквы XPS. Иначе документы будут сохраняться в проект предварительной печати на жестком диске.
Если вы не видите в списке устройств необходимый принтер, тогда переходите к следующему пункту.
Отсутствует или установлен неверный драйвер устройства
Чтобы проверить наличие установленного драйвера перейдите в диспетчер устройств. Сделать это можно зажав одновременно кнопки Win + Pause/Break или же открыв свойства ярлыка «Мой компьютер». В левой части окна жмем на ссылку «Диспетчер устройств» и ищем ветку «Устройства обработки изображений» или «Принтеры и факсы».
Если вашего принтера здесь нет или же вы заметили рядом с ним восклицательный знак, то драйвер не установлен, неисправно работает, несовместим с вашей версией ОС или же просто произошел сбой.
Скачайте последнюю версию драйвера с сайта производителя.
Зависание процесса печати
В очередь на печать может ставиться множество документов, которые не могут быть отправлены на принтер. Чтобы проверить, нет ли зависших документов, переходим к подкатегории «Устройства и принтеры» в панели управления, открываем меню подключенного оборудования, и выбираем пункт «Просмотр очереди печати». Отмените печать всех документов, и запустите процесс заново.
Прежде чем лезть глубоко в системные настройки необходимо удостовериться, что сам принтер находится в исправном состоянии и не показывает на дисплее никакой ошибки. Причинами неисправности может быть замятие бумаги, пустые картриджи и другие проблемы, решение которых производители описывают в руководстве по использованию. В некоторых случаях достаточно вовсе вытянуть USB-кабель и вставить его обратно.
Типичные проблемы
Xerox
®
WorkCentre
®
3025
Руководство пользователя
195
Неполадки при печати
Ситуация
Вероятная причина
Рекомендуемые действия
Аппарат не выполняет
печать.
На аппарат не подается
питание.
• Проверьте подключение шнура
питания.
• Проверьте выключатель и
источник питания.
Аппарат не является
устройством по умолчанию.
• Выберите данный аппарат в
качестве устройства, используемого
по умолчанию в ОС Windows.
Проверьте наличие следующих неполадок:
• Не закрыта верхняя крышка. Закройте верхнюю крышку.
• Застряла бумага. Устранить застревание. (См. раздел
Извлечение
застрявшей бумаги.
•
Не загружена бумага. Загрузите бумагу.
• Не установлен принт-картридж. Установить принт-картридж.
При возникновении системных ошибок во время печати обратитесь в
сервисную службу.
Неправильно подключен
соединительный кабель между
компьютером и аппаратом.
• Отключите кабель аппарата и
подключите его еще раз.
Соединительный кабель
между компьютером и
аппаратом неисправен.
• Если возможно, подключите
кабель к заведомо исправному
компьютеру и напечатайте
документ. Кроме того, можно
попробовать подключить кабель
от другого устройства.
Указан неправильный порт.
• Проверьте настройки принтера в
операционной системе Windows и
убедитесь, что работа печати
отправляется на правильный порт.
Если у компьютера несколько
портов, убедитесь, что аппарат
подключен к нужному порту.
Неправильно настроены
параметры аппарата.
• Проверьте настройки драйвера
принтера и убедитесь, что все
параметры печати установлены
правильно.
Драйвер принтера
установлен неправильно.
• Переустановите программное
обеспечение принтера. См. раздел
Установка и настройка
.
Произошел сбой в работе
аппарата.
• Просмотрите сообщение на экране
панели управления, чтобы выяснить,
не произошла ли системная ошибка.
Обратитесь в сервисную службу.
В лазерных устройствах печать обеспечивается с помощью специального элемента – фьюзера, который еще называют печкой, а также блоком или узлом термозакрепления. При необходимости его легко заменить, и в продаже всегда можно найти разные варианты, например, популярную модель 126k30553 от XEROX, использующуюся в распространенных устройствах этого производителя – compsch.com.
Фьюзер состоит из корпуса, в котором располагаются два валика – верхний и нижний. Верхний выполнен из алюминия и покрыт тефлоном, а внутри находится галогеновая лампа, благодаря которой тонер разогревается и закрепляется на листе бумаге. Нижний валик – прижимной, он вдавливает пигмент в поверхность.

Поломки и ошибки
Блок термозакрепления лазерных устройств XEROX, к сожалению, иногда подвергается поломкам и разнообразным ошибкам. Некоторые из них критичны – тогда элемент следует заменить новым. Но многие неполадки можно устранить, обратившись в сервисный центр или самостоятельно.
Наиболее часто пользователи XEROX встречаются с такими ошибками фьюзера:
- низкая температура или перегрев;
- открыта крышка фьюзера;
- бумага мнется или вообще не выходит;
- появление дефектов при печати.
Причиной низкой температуры (ошибка 10-327) может быть использование некачественных и несовместимых с устройством печек – тогда аппарат не может нагреть их. Но если вы используете оригинальный или качественный совместимый элемент, нужно выполнить сброс ошибки из сервисного режима.
Перегрев при первом включении возникает при отхождении силового предохранителя (его нужно поправить). При частом использовании такая ошибка может выдаваться из-за налипания тонера на термисторе (что решается очисткой), а также из-за неисправности термопредохранителя (тут нужна замена детали).
Если устройство сообщает, что открытка крышка, нужно убедиться, что она закрыта, и если все в порядке – выполнить сброс. Если лист сминается на выходе или застревает – возможны проблемы с термопленкой или верхним валом печки, в таком случае нужно произвести замену дефектного элемента.
При появлении дефектов на отпечатанном изображении (от вертикальных белых полос, белых точек на черном фоне до фонового ореола), нужно убедиться в отсутствии загрязнений валиков и неисправностей блока питания. Если ничего такого нет, возможно, потребуется ремонт или замена фьюзера.
Часто справиться с ошибками помогает сброс. Он заключается в нажатии определенной комбинации кнопок, а их последовательность зависит от вида и модели устройства.
Современные копировальные аппараты Xerox отличаются качество, надежностью и «быстрым» стартом. Также у них существует множество особенностей, которые отличают их от принтеров других производителей. Например, используется тефлоновый вал, а не термопленка.
Однако избегать различных поломок и ошибок пока не удается ни одному устройству. К самым частым неисправностям у принтеров Xerox относятся: залипание или повреждение датчика бумаги, повреждение роликов подачи, часто требуется перепрошивка программного обеспечения.
Если у вас возникнут вопросы насчет того, как исправить код ошибки копировального аппарата Xerox, то вы можете обратиться к специалистам нашего сервисного центра.
Основные коды ошибок копировальных аппаратов Xerox и способы их устранения:
- Коды ошибок Xerox 1012, 1012(RE)
- Коды ошибок Xerox 1020
- Коды ошибок Xerox 1025
- Коды ошибок Xerox 1035
- Коды ошибок Xerox 1038
- Коды ошибок Xerox 2830
- Коды ошибок Xerox 5011, 5012, 5014
- Коды ошибок Xerox 5016, 5017, 5316, 5317
- Коды ошибок Xerox 5018, 5028
- Коды ошибок Xerox 5312, 5313, 5314
- Коды ошибок Xerox 5318, 5320, 5322
- Коды ошибок Xerox 5328
- Коды ошибок Xerox 5330
- Коды ошибок Xerox 5340, 5343
- Коды ошибок Xerox 5345
- Коды ошибок Xerox 5350, 5352
- Коды ошибок Xerox 5355
- Коды ошибок Xerox 5622
- Коды ошибок Xerox XC520, 540, 560, 580
Xerox 1012, 1012(RE)
| Код ошибки | Описание |
|---|---|
| E1 | Jam between paper feed and fuser |
| E3 | Jam in fuser |
| E5 | Clam shell open |
| E6 | Paper feed section cover is open |
| J1 | Toner cartridge near empty |
| J3 | Drum cartridge not seated properly |
| J7 | Waste toner full (replace drum cartridge) |
| L6 | Key counter out |
| L8 | Exposure area overheat |
| U1 | No clock pulse (drive problem) |
| U2 | Scan problem |
| U3 | Lens/mirror problem (RE model only) |
| U4 | Heat problem |
| U8 | Exposure lamp control circuit problem |
| E1 | Jam between paper feed and fuser |
| E3 | Jam in fuser |
| E5 | Clam shell open |
| E6 | Paper feed section cover is open |
| J1 | Toner cartridge near empty |
| J3 | Drum cartridge not seated properly |
| J7 | Waste toner full (replace drum cartridge) |
| L6 | Key counter out |
| L8 | Exposure area overheat |
| U1 | No clock pulse (drive problem) |
| U2 | Scan problem |
| U3 | Lens/mirror problem (RE model only) |
| U4 | Heat problem |
| U8 | Exposure lamp control circuit problem |
Xerox 1020
| Код ошибки | Описание |
|---|---|
| LL | Probable bad heater lamp |
Xerox 1025
| Код ошибки | Описание |
|---|---|
| A1 | DF jam |
| C1 | PF jam cass. 1 |
| C2 | PF jam cass. 2 |
| C3 | PF jam cass. 3 |
| C9 | Bypass jam |
| E1-1 | Paper jam before exit switch |
| E1-2 | Paper jam |
| E1-5 | Paper jam |
| E1-6 | Paper jam |
| E3-3 | Paper jam at exit switch |
| E3-4 | Paper jam at exit switch |
| E5 | Front door open |
| F1 | Collator jam |
| F5 | Collator interlock |
| F8 | No power to collator |
| F9 | Collator bin home switch |
| J7 | 250 copies since toner waste was full |
| L5 | Original cass. not present after clearing interrupt |
| L6 | Key counter |
| L8 | Platen glass too hot |
| U1 | Main motor clock pulse |
| U2 | Scan problem |
| U3-1 | Lens problem |
| U4-1 | Open thermistor |
| U4-2 | Low temperature |
| U4-4 | Temperature |
| U4-5 | Main PWB |
| U6-1 | Main PWB |
| U6-2 | Main PWB |
| U6-3 | Main board battery |
| U6-4 | Initialization |
| U8 | Exposure lamp |
Xerox 1035
| Код ошибки | Описание |
|---|---|
| A9 | Scanner location |
| C1 | Paper feed — upper cassette |
| C2 | Paper feed — lower cassette |
| C9 | Bypass jam |
| E5 | Clam shell is open |
| L6 | Key counter |
| U1 | Off/On |
| U2 | Optics |
| U4 | Low fuser temperature |
Xerox 1038
| Код ошибки | Описание |
|---|---|
| A1 | DF jam |
| C1 | PF jam cass. 1 |
| C2 | PF jam cass. 2 |
| C3 | PF jam cass. 3 |
| C9 | Bypass jam |
| E1-1 | Paper jam before exit switch |
| E1-2 | Paper jam |
| E1-5 | Paper jam |
| E1-6 | Paper jam |
| E3-3 | Paper jam at exit switch |
| E3-4 | Paper jam at exit switch |
| E5 | Front door open |
| F1 | Collator jam |
| F5 | Collator interlock |
| F8 | No power to collator |
| F9 | Collator bin home switch |
| J7 | 250 copies since toner waste was full |
| L5 | Original cass. not present after clearing interrupt |
| L6 | Key counter |
| L8 | Platen glass too hot |
| U1 | Main motor clock pulse |
| U2 | Scan problem |
| U3-1 | Lens problem |
| U4-1 | Open thermistor |
| U4-2 | Low temperature |
| U4-4 | Temperature |
| U4-5 | Main PWB |
| U6-1 | Main PWB |
| U6-2 | Main PWB |
| U6-3 | Main board battery |
| U6-4 | Initialization |
| U8 | Exposure lamp |
Xerox 2830
| Код ошибки | Описание |
|---|---|
| A9 | Scanner location |
| C1 | Paper feed — upper cassette |
| C2 | Paper feed — lower cassette |
| C9 | Bypass jam |
| E5 | Clam shell is open |
| E5 | Clam shell open |
| L6 | Key counter |
| U1 | Off/On |
| U2 | Optics |
| U4 | Low fuser temperature |
Xerox 5011, 5012, 5014
| Код ошибки | Описание |
|---|---|
| C8 | Bypass jam/no paper |
| C9 | Bypass jam |
| E1 | Jam |
| E3 | Fuser jam |
| E5 | Clamshell open |
| E6 | PF section cover open |
| J1 | Toner cartridge amost empty |
| J3 | Copy cart (drum unit) missing/not seated right |
| J7 | Copy cartridge has run 18,000 copies |
| J8 | Copy cartridge. Improperly seated or possible only one of two fuses in the cartridge blew |
| L6 | Key counter |
| L8 | Exposure glass too hot |
| U1 | Drive problem |
| U2 | Scan problem |
| U3 | Lens or mirror drive problem |
| U4 | Fuser problem. Heat lamp, thermoswitch, SSR, thermistor |
| U6 | Battery on main board |
| U8 | Exposure lamp or exposure lamp circuit |
Xerox 5016, 5017, 5316, 5317
| Code | Description |
|---|---|
| A1-1 | Document feeder feed jam |
| A1-2 | Document feeder belt jam |
| A2-1 | Document feeder exit jam |
| A2-2 | Duplex jam |
| A3 | DAD interlock |
| A5 | Duplex and DAD right side interlock |
| A6 | Copier jams after |
| A9 | Document feed belt drive motor |
| C1-3 | Top cassette misfeed |
| C2-3 | Middle cassette misfeed |
| C3-3 | Bottom cassette misfeed |
| C9-3 | Bypass misfeed |
| E1-11 to E1-14 | Paper jam in machine. Did not reach exit switch soon enough |
| E1-6 | Paper path jam |
| E3-31 to E3-34 | Exit switch jam |
| E3-6 | Fuser jam |
| E5 | Front door interlock |
| E6 | Right side interlock or TTM interlock |
| F1 | Sorter jam |
| F5 | Sorter interlock |
| F8 | Sorter board to copier main board communication problem |
| F9 | Sorter bins |
Xerox 5018, 5028
| Code | Description |
|---|---|
| A1 | Document is ADF |
| A1-8 | Main board received reset signal |
| A2 | ADF jams |
| A6, A7 | ADF jams |
| A9 | ADF jams |
| C1 — C4 | Feed jam |
| C5-1 to C5-4 | Jams in various areas |
| C5-2 | Jams in various areas |
| C5-3 | Jams in various areas |
| C5-4 | Duplex jam |
| E0 | Machine has reset |
| E1 | Jam |
| E1-E0 | Registration jam |
| E1-E5 | Clamshell interlock |
| E1-E6 | Right side interlock |
| E1-E7 | Two tray interlock |
| E1-E8 | Sorter interlock |
| E1-E9 | Copy cartridge interlock |
| E2 | Reset signal happened |
| E3 | Jam |
| E4 | Exit jam |
| E4-10 | Exit jam |
| E4-5 | Clamshell interlock |
| E4-6 | Right side interlock |
| E4-7 | Two tray interlock. Duplex interlock |
| E4-8 | Sorter interlock |
| E4-9 | Copy cartridge interlock |
| E5 | Clamshell interlock |
| E6 | Right side interlock |
| E7 | Duplex interlock |
| E9 | Copy cartridge interlock |
| F3-1 | Sorter bin home switch |
| F3-2 | Sorter cam switch |
| F3-3 | Sorter cam switch |
| J1-1 | Add toner |
| J1-2 | Temporary low toner signal |
| J2-0 | Replace copy cartridge |
| L2 | 2000 copies left on copy cartridge |
| L3 | ADF to machine communication problem |
| L4 (flashing) | 1000 copies left on fuser web |
| rr | Bad EPROM on main board |
| U0 | Main board |
| U2 | Scan problem |
| U2-1 | Scan home |
| U3-00 | Cam drive problem |
| U3-01 | Cam movement slow |
| U3-04 | Main board to duplex communication |
| U3-09 | Cam problem |
| U3-12 | Jogger problem |
| U3-19 | Cam problem |
| U3-21 | Cam problem |
| U3-23 | Cam problem |
| U3-29 | Cam problem |
| U3-32 | Cam problem |
| U3-34 | Cam problem |
| U3-39 | Cam problem |
| U3-43 | Cam problem |
| U3-45 | Cam problem |
| U3-49 | Cam problem |
| U3-54 | Cam problem |
| U3-56 | Cam problem |
| U3-59 | Cam problem |
| U4-1 | Fuser problem. Long warm up |
| U4-2 | Low fuser temperature after warm up |
| U4-3 | High fuser temperature |
| U4-4 | Open fuser thermistor |
| U4-6 | Replace fuser web |
| U4-7 | Thermistor signal problem |
| U7-1 | Copy cartridge belt drive problem |
| U9-3 | Exposure lamp problem |
| U9-4 | Toner motor |
| U9-5 | Problem in warm up |
Xerox 5312, 5313, 5314
| Код ошибки | Описание |
|---|---|
| C1 | Upper paper feed problem. Did not reach feed sensor |
| C2 | Lower paper feed problem. Did not reach feed sensor |
| E1 | Exit jam. Paper did not reach exit sensor |
| E3 | Exit jam. Paper still on exit sensor |
| J1 | Add toner |
| J3 | Copy cartridge (drum unit) not installed |
| J7 | Copy cartridge (drum unit) must be replaced |
| J8 | Copy cartridge (drum unit) problem |
| L6 | Problem with an accessory. Installed but not initialized |
| U1 | Drive problem. Main motor, gear etc. |
| U2 | Scan problem |
| U3 | Main board dip switches wrong. Lens drive problem |
| U4 | Fuser problem. Heat lamp, thermal switch, overheat, thermistor. |
| U6 | EPROM error |
| U8 | Auto exposure sensor. No exposure lamp or weak lamp |
Xerox 5318, 5320, 5322
| Code | Description |
|---|---|
| A1-11 | Original ready switch |
| A1-12 | Feed sensor |
| A1-1 to A1-32 | All indicate a paper path problem, etc. in the ADF |
| A1-21 | Original ready switch and document registration sensor or both the document feed sensor and document registration sensor |
| A1-22 | ADF registration sensor |
| A1-23 | Original did not reach ADF registration sensor quickly enough |
| A1-24 | ADF sensor stuck down too long |
| A1-25 | ADF sensor actuated at the wrong time during single sheet feed |
| A1-26 | ADF sensor not actuated quickly enough in sheet feed mode |
| A1-31 | In reverse, ADF sensor is not actuated soon enough |
| A1-32 | In reverse, ADF sensor is actuated too long |
| A2 | ADF exit problems |
| A2-1 | Original ready sensor and ADF exit switch are actuated or ADF feed in sensor and ADF exit switch are both actuated |
| A2-2 | ADF exit switch |
| A2-3 | ADF exit switch is not actuated on time |
| A3 | Irregular size documents |
| A3-1 | Wrong size original sensed in 1:1 mode |
| A3-2 | Wrong size original sensed in the 2:1 mode |
| A5 | ADF interlock |
| A5 | ADF interlock |
| A6 | ADF single sheet document reset. |
| A6-1 | Reset original |
| A6-2 | Reset sheet feeder |
| A7 | Document cover interlock |
| A8 | ADF exit interlock |
| C1 | Tray 1 jam |
| C1-2 | Paper feed problem in tray 1 |
| C1-3 | Paper does not reach registration |
| C2 | Tray 2 jam |
| C3 | Tray 3 jam |
| C3-1 | Paper feed problem from tray 3 |
| C3-2 | Paper feed problem from tray 3 |
| C3-3 | Paper feed problem from tray 1 |
| C6-1 | Duplex paper feed problem |
| C6-2 | Duplex and/or tray 1 paper feed problem |
| C6-3 | Paper feed problem from tray 1 |
| C7-1 | Paper feed problem from HCF |
| C7-2 | Paper feed problem from HCF on tray 1 |
| C7-3 | Paper feed problem from tray 1 |
| C8 | Paper stays in tray or duplex or HCF |
| C8-1 | Paper on tray 1 feed sensor |
| C8-2 | Paper on tray 2 feed sensor |
| C8-3 | Paper on tray 3 feed sensor |
| C8-4 | Paper on HCF feed sensor |
| C8-5 | Paper in duplex section |
| C9 | Bypass feed problem |
| C9-3 | Paper from bypass did not reach registration sensor quickly enough |
| E1-10 to E1-25 | Internal jam |
| E1-6 | Paper on registration sensor |
| E2 | Reset signal happened. Might read E-2 something else. |
| E3-30 to E4-14 | Exit jam |
| E3-30 to E3-35 | Exit switch actuated too long |
| E3-6 | Exit jam |
| E3-6 | Paper on exit switch |
| E4-10 to E4-14 | Inverter sensor not actuated. |
| E4-10 to E4-45 | Paper did not reach inverter switch soon enough |
| E4-15 | Inverter sensor |
| E4-40 to E4-45 | Duplex entry sensor |
| E4-6 | Paper on inverter switch |
| E4-6 | Inverter sensor |
| E5 | Front door interlock |
| E6-1 | Tray 1 interlock |
| E6-2 | 2 tray or duplex interlock |
| E6-3 | HCF interlock |
| E7-2 | Duplex inverter interlock |
| E7-3 | Duplex interlock |
| E8-10 to E8-15 | Paper on duplex feed sensor is not actuated soon enough |
| E8-6 | Paper in duplex |
| E8-6 to E8-15 | Duplex entry sensor |
| F1-1 | Paper did not reach sorter |
| F1-2 | Paper stayed on sorter feed sensor |
| F1-6 | Sorter exit sensor |
| F3 | Paper size not available for sort/stack |
| F5 | Sorter interlock |
| H2-1 | Communication problem between main board and duplex board |
| H2-2 | Side guard sensor problem |
| H3-1 | Communication problem between main board and HCF |
| H3-2 | Upper limit sensor problem on HCF |
| H6-1 | ADF size sensor |
| H6-2 | ADF nudgeer sensor |
| H6-3 | Belt drive motor does not have 24 volts. Black toner is empty, but 100 copies have been run without changing toner |
| J1 | Black toner is empty, but 100 copies have been run without changing toner |
| J3 | Replace copy cartridge |
| J3 | No copy cartridge (drum unit) |
| J7 | Copy cartrige must be replaced |
| J8-1 | Wrong copy cartridge installed |
| J8-2 | Copy cartridge EEPROM must be changed |
| L6 | Auditron or other counter problem |
| L6 | Key counter not installed |
| L8 | Platen glass temperature is too high |
| L9 | Communication problem between interimage erase/edge lamps and main board |
| U1-1 | Main motor drive problem |
| U2-1 | Scan home problem |
| U2-1 to U2-4 | Scan home sensor |
| U2-2 | Scan home problem or optics problem |
| U2-3, U2-4 | Scan home problem |
| U3-1 | Lens sensor problem |
| U4-1 | Fuser thermistor open |
| U4-2 | Fuser did not warm up properly |
| U4-3 | Fuser temperature too high |
| U4-4 | Fuser problem. Staying on too long |
| U4-6 | High fuser temperature |
| U5-1 | Sorter bin home switch not activated |
| U5-2 | Sorter bin home switch stayed actuated |
| U5-3 | Sorter bin home switch |
| U5-4 | Sorter bin home switch |
| U6-1 | ROM problem |
| U6-2 | RAM problem |
| U6-3 | Low battery |
| U6-4 | Incorrect value in NVM. Reinitialize main board with code 20-96 |
| U8-1 | Exposure lamp problem |
| U8-2 | Communication problem main board and exposure board |
| U8-3 | Exposure lamp or exposure lamp board problem |
| U8-4 to U8-6 | Problem with exposure lamp, lamp sensor, lamp board |
Xerox 5328
| Code | Description |
|---|---|
| A1 | Document in ADF |
| A1-8 | Main board received reset signal |
| A2 | ADF jams |
| A6 | ADF registration jam |
| A7 | ADF interlock |
| A9 | Tray 1 jam |
| C1 | Tray 2 jam |
| C2 | Tray 3 jam |
| C3 | Bypass feed jams |
| C4 | Machine has reset |
| E1 | Jam |
| E1-5 | Clamshell interlock |
| E1-6 | Right side interlock |
| E1-7 | Two tray interlock, or duplex interlock |
| E1-8 | Sorter interlock |
| E1-9 | Copy cartridge interlock |
| E1 or E1-0 | Registration jam |
| E2 | Reset signal happened |
| E3 | Jam in transfer area |
| E4 | Exit jam |
| E4-0 | Exit jam |
| E4-5 | Clamshell interlock |
| E4-6 | Right side interlock |
| E4-7 | Two tray interlock |
| E4-8 | Sorter interlock |
| E4-9 | Copy cartridge interlock |
| E5 | Clamshell interlock |
| E6 | Right side interlock |
| E9 | Copy cartridge interlock |
| F3-1 | Sorter bin home switch |
| F3-2 | Sorter cam switch |
| F3-3 | Sorter cam switch |
| F5 | Sorter interlock |
| J1-1 | Add toner |
| J1-2 | Temporary low toner signal |
| J2-1, J2-2 | Replace copy cartridge |
| J5, J6 | ADF to machine communications problem |
| L2 | 2000 copies left on cartridge |
| L3 | ADF to machine communications problem |
| L4 | (flashing) 1000 copier left on fuser web |
| L6 | Auditron or other counter problem |
| LL | Main board. Try simulation 1.1 to initialize |
| rc | Wrong operation panel installed |
| rr | Bad EPROM on main board. Try 1.1 |
| U0 | Main board |
| U2 | Scan problem |
| U2-1 | Scan home |
| U2-2 | Scan home or scan encoder |
| U2-4 | Scan home or scan dual page sensor |
| U2-7 | Scan home |
| U4-1 | Fuser problem. Long warm up |
| U4-2 | Low fuser temperature after warm up |
| U4-3 | High fuser temperature |
| U4-4 | Open fuser thermistor |
| U4-6 | Replace fuser web. |
| U4-7 | Thermistor signal problem |
| U7-1 | Copy cartridge belt drive problem |
| U9-3 | Exposure lamp problem |
| U9-4 | Toner motor |
| U9-5 | Problem in warm-up |
Xerox 5330
| Code | Description |
|---|---|
| A1-1 to A1-32 | All indicate a paper path problem, etc. in the ADF. |
| A2 | ADF exit problems |
| A3 | Irregular size documents |
| A5 | ADF interlock |
| A6 | ADF single sheet document reset. |
| A7 | Platen interlock |
| A8 | ADF exit interlock |
| C1 | Tray 1 jam |
| C2 | Tray 2 jam |
| C3 | Tray 3 jam |
| C6-1, C6-2 | Jams related to duplex |
| C6-3 | Registration sensor, re tray 1 |
| C7-1, C7-2 | HCF feed problems |
| C7-3 | Tray 1 feed problem |
| C8 | Paper stays in tray or duplex or HCF |
| C9 | Bypass feed problem |
| E1-10 to E1-25 | Internal jam |
| E1-6 | Paper on registration sensor |
| E2 | Reset signal happened. Might read E-2 something else. |
| E3-30 to E4-14 | Exit jam |
| E3-6 | Exit jam |
| E4-10 to E4-14 | Inverter sensor not actuated. |
| E4-15 | Inverter sensor |
| E4-40 to E4-45 | Duplex entry sensor |
| E4-6 | Inverter sensor |
| E5 | Front door interlock |
| E6-1 | Tray 1 interlock |
| E6-2 | 2 tray or duplex interlock |
| E6-3 | HCF interlock |
| E7-2, E7-3 | Duplex interlock |
| E8-6 to E8-15 | Duplex entry sensor |
| F1-1 | Sorter entry sensor |
| F1-6 | Sorter exit sensor |
| F3 | Paper size not available for sort/stack |
| F5 | Sorter interlock |
| J1 | Add toner |
| J3 | Replace copy cartridge |
| J7 | Replace copy cartridge |
| J8-1 | Wrong copy cartridge installed |
| J8-2 | Copy cartridge EEPROM |
| L6 | Auditron or other counter problem |
| L8 | Platen glass temperature is too high |
| L9 | Communication problem between interimage erase/edge lamps and main board |
| U1-1 | Main motor drive problem |
| U2-1 to U2-4 | Scan home sensor |
| U3-1 | Lens sensor |
| U4-1 | Open fuser thermistor |
| U4-2 | Fuser did not warm up properly |
| U4-3 | Fuser temperature too high |
| U4-4 | Fuser problem. Staying on too long |
| U4-6 | High fuser temperature |
| U5-1 | Sorter bin home switch not activated |
| U5-2 | Sorter bin home switch stayed actuated |
| U5-3 | Sorter bin home switch |
| U5-4 | Sorter bin home switch |
| U6-1 | ROM problem |
| U6-2 | RAM problem |
| U6-3 | Low battery |
| U6-4 | Incorrect value in NVM. Reinitialize main board with code 20-96 |
| U8-1 to U8-6 | Problem with exposure lamp, lamp sensor, lamp board |
Xerox 5340, 5343
| Code | Description |
|---|---|
| 00-009; 030 to 033 | A door was opened while paper was being fed |
| 00-047 | Paper in duplex |
| 00-1 | Auditron |
| 00-2 | Diagnostic error |
| 00-3 | Faults error |
| 00-4 | Ric error |
| 00-5 | Job manager system error |
| 00-6 | LLM interface |
| 00-7 | Standby error |
| 00-8 | Communications error |
| 00-9 | Xerographic error |
| 01-300 | Front interlock |
| 01-310 | Right upper interlock |
| 01-315 | Left upper interlock |
| 01-320 | Left lower interlock |
| 01-325 | Fuser interlock |
| 02-910 | Key counter missing |
| 02-920 | Wrong combination of accessories |
| 03-321, 322, 326, 327 | LLM to ISIL communications problems |
| 03-328 | IOT communications problem with duplex or tray 4 |
| 03-330 | IOT communications problems with HCF |
| 03-335, 03-336 | LLM communications problems with edit |
| 03-340 | NVM memory |
| 03-341, 03-347 | Communications problems between IOT and sorter |
| 03-350, 03-354 | Communications problem with LLM and user interface |
| 03-363, 03-364 | Communications problem between LLM & optics |
| 03-370, 03-373 | Communications problem between LLM & DADF |
| 03-380, 384 | |
| 03-416, 03-422 | RAM memory problem |
| 03-424, 426 | NVM memory problem |
| 03-430, 432 | Billing problem |
| 03-439 | GRAIB communications problem |
| 03-440 | RIC communications problem |
| 03-441 | RIC NVM problem |
| 03-442 | Modem |
| 03-443, 03-458 | RIC problems |
| 03-460 | Serial communications processor problem |
| 04-300 | Main motor or drive problem |
| 05-100, 05-108 | DADF registration sensor |
| 05-110 | DADF exit sensor |
| 05-115, 120 | DADF jams |
| 05-305 | DADF document drive |
| 05-310, 312 | DADF document sensor |
| 05-316 | DADF registration sensor jam |
| 05-325 | DADF exit sensor |
| 05-335, 341, 345 | DADF interlock switches |
| 06-300, 06-310 | Scan problems |
| 06-315 | Scan drive |
| 06-320A, 320B, 320C, 325 | Scan problem |
| 06-330 | Lens drive |
| 06-340 | Exposure control problem |
| 06-342 | LLM CPU problem |
| 06-344, 06-350 | Exposure cvontrol problem |
| 06-352 | IOT CPU problem |
| 07-300, 315, 330, 345 | Tray faults |
| 07-360, 07-370 | HCF problems |
| 07-375, 380A, 380B | Duplex problems |
| 08-100, 08-110 | Feed problems. Lead edge of copy paper is late getting to feed sensor of tray 1 |
| 08-115, 08-162 | Feed problem. Lead edge of copy paper is late getting to registration sensor |
| 08-165 | Paper jam at registration sensor |
| 08-310, 08-370 | Paper at a sensor when power is turned on |
| 08-330 | DADF nudger sensor |
| 08-380 | Registration side to side problem with home position |
| 08-390 | Nip |
| 09-300 | Copy cartridge finished (drum unit) |
| 09-310 | Add black toner Add color toner |
| 09-320 | Add color toner |
| 09-330 | Wrong copy cartridge (wrong drum unit) |
| 09-340 | Drum cartridge not installed properly |
| 09-350 | Waste toner full |
| 100 | A fault has occurred |
| 10-100 | Exit jam |
| 10-105 | Exit jam |
| 10-110 | Vertical sensor jam |
| 10-120, 122, 125 | Duplex jam |
| 10-150, 155 | Too much or not enough paper in duplex tray |
| 10-300 | Fuser thermistor |
| 10-302 | Low fuser temperature |
| 10-304 | Bad fuser temp |
| 10-308 | High fuser temperature or open thermistor |
| 10-310 | High fuser temperature |
| 10-312 | Fuser not up to temperature after energy save |
| 10-314 | Fuser problem |
| 10-320 | Fuser web finished |
| 10-330, 335, 340 | Exit switch, vertical sensor switch actuated when power is turned on |
| 11-100, 11-116 | Sorter jam |
| 11-150, 11-176 | Sorter auto stapler jam |
| 11-310, 314, 316 | Sorter interlock |
| 11-325A, B, C, D, E, F, G | Sorter index |
| 11-352, 354, 356 | Sorter auto stapler interlocks |
| 11-365A, B, C, D, E | Sorter auto stapler bin |
| 11-370, 371, 372A, 373A, 373B, 374 | Sorter auto stapler staple failure, staple home problem or tamper home problem |
| 11-385A, 385B, 390A,B,C,D,E, 396A | Sorter auto stapler staple failure, staple home problem or tamper home problem |
| 301 | Fuser web must be replaced |
| 302 | Copy cartridge (drum unit) must be replaced |
| 501 | Tray 1 must be rebuilt |
| 502 | Tray 2 must be rebuilt |
| 503 | Tray 3 must be rebuilt |
| 504 | Tray 4 must be rebuilt |
| 505 | HCF must be rebuilt |
| 506 | Bypass must be rebuilt |
| 507 | Duplex unit must be rebuilt |
| 508 | Replace black developer |
| 509 | Replace red developer |
| 510 | Replace green developer |
| 512 | Replace brown developer |
| 513 | Copy cartridge (drum unit) will need replacing soon |
| 514 | Fuser web will need replacing soon |
| 515 | DADF belt should be replaced |
| 516 | DADF feed rollers should be replaced |
| 517 | Replace exposure lamp |
| 518 | Replace suction filter |
| 519 | Replace ozone filter |
| 520 | Replace optics filter |
| 521 | Replace particle filter |
| 522 | Replace upper fuser roller |
| 523 | Replace fuser pawls |
| 524 | Replace pressure roller |
| 525 | Replace pressure roller pawls |
| 900-905 | Key operator calls |
Xerox 5345
| Код ошибки | Описание |
|---|---|
| 01-01 | Frequency monitoring and zero cross problem |
| 01-02 | Interlock |
| 01-03 | AC power problem |
| 01-04 | Finisher interlock |
| 01-05 | 24v problem |
| 03-01 | Optics to main board communication problem |
| 03-02 | Software reset problem |
| 03-03 | Could be punched holes in the lead edge of the original |
| 03-04 | Software problem |
| 03-06 | Low battery |
| 03-07 | NVM not initialized or is missing or defective |
| 03-17 | Communication problem between main board and finisher board |
| 03-18 | Initializes one NVM counter to agree to others |
| 03-19 | All three NVM counter to agree with others |
| 03-20 | Main board/interface board problems |
| 03-21 | Problem with RIC NVM |
| 03-22 | RIC modem problem |
| 03-23 | RIC real time clock failure. |
| 03-25 | RIC NVM problem or not initialized |
| 03-27 | NVM problem |
| 03-28 | Watchdog software problem |
| 03-29 | Microprocessor crystal not at correct frequency |
| 03-30 | No software response from finisher after 20 seconds have elapsed |
| 06-01 | Lens did not reach 1.1 position |
| 06-02 | 1/2 rate scanner problem |
| 06-03 | Scan home problem |
| 06-04 | Scan home problem |
| 06-05 | Scan home problem |
| 06-06 | Scan encoder |
| 06-07 | Scan encoder |
| 06-08 | Scan drive boost |
| 06-09 | Scan encoder |
| 06-11 | Scan encoder pulse phases |
| 06-12 | Insufficient scan damping |
| 07-01 | Duplex tray not home during duplexing |
| 07-02 | Tray 2 not home when selected |
| 07-13 | Tray 2 height sensor problem |
| 07-15 | Tray 2 empty |
| 07-16 | Tray 1 door open |
| 07-18 | Tray 1 stack sensor |
| 07-22 | Tray 1 empty |
| 07-26 | Tray 1 bypass switch actuated too long |
| 07-27 | Tray 1 bypass switch deactuated too early |
| 07-30 | Paper in duplex |
| 07-31 | Paper in duplex |
| 07-32 | Duplex tray empty, when paper should be there |
| 08-10 | Paper did not reach tray 2 input tray sensor |
| 08-11 | Paper did not reach duplex input sensor |
| 08-12 | Paper did not reach tray 1 |
| 08-14 | Paper did not leave tray 2 input sensor quickly enough |
| 08-18 | Trail edge did not reach tray 2 input sensor quickly enough |
| 08-19 | Trail edge did not reach tray 1 input sensor quickly enough |
| 08-20 | Paper in duplex |
| 08-21 | Paper in tray 2 input |
| 08-22 | Paper in tray 2 or duplex at wrong time |
| 08-23 | Paper at tray 1 input at wrong time |
| 08-24 | Paper in tray 1 at wrong time |
| 08-28 | Upper and lower nips problem |
| 09-08 | Low toner condition |
| 09-12 | Drum signals are out of range |
| 09-13 | Unstable drum patch readings |
| 09-15 | Patch is too dark |
| 09-16 | Patch is too light |
| 09-17 | Open toner container access cover |
| 09-18 | Low toner level |
| 09-21 | Low toner sensor disconnected |
| 09-22 | Low toner condition, even after machine has been theoretically, adding toner |
| 10-02 | Low fuser temperature |
| 10-03 | High fuser temperature |
| 10-06 | Paper did not reach out put switch |
| 10-07 | Paper stayed on output switch |
| 10-10 | Paper did not reach decurler sensor |
| 10-11 | Paper did not reach decurler sensor |
| 10-12 | Paper on decurler sensor |
| 10-13 | Paper did not reach duplex entry sensor in time |
| 10-14 | Paper did not reach duplex entry sensor in time |
| 10-15 | Paper on entry sensor at wrong time |
| 10-17 | Fuser temperature is too high and fuser relay has deactuated |
| 12-01 | Paper at finisher input sensor |
| 12-02 | Paper did not reach finisher |
| 12-03 | Paper reached finisher too soon |
| 12-05 | Paper at stapler |
| 12-06 | Paper at stapler |
| 12-07 | Paper did not reach stapler |
| 12-08 | Paper did not reach stapler |
| 12-10 | Complied motor not working properly |
| 12-15 | Eject motor problem and/or eject encoder |
| 12-20 | Stacker motor problem |
| 12-21 | Stacker interlock |
| 12-22 | Stacker bottom sensor |
| 12-23 | Stacker bottom sensor |
| 12-24 | Stacker bottom sensor senses full |
| 12-25 | Stack height sensor |
| 12-26 | Stack height sensor |
| 12-27 | Stack height sensor |
| 12-30 | Offset home sensor |
| 12-31 | Offset home sensor |
| 12-32 | OCT switch |
| 12-35 | Eject nip carriage |
| 12-36 | Eject cam interlock |
| 12-37 | Eject nip carriage open timing |
| 12-38 | Eject cam interlock |
| 12-40 | Tamper motor |
| 12-41 | Tamper home problem |
| 12-42 | Tamper home sensor |
| 12-43 | Staple load sensor |
| 12-44 | Tamper home sensor |
| 12-45 | Tamper home sensor |
| 12-50 | Low on staples |
| 12-51 | Stapler home sensor |
| 12-52 | Stapler home sensor |
| 12-53 | Eject cam interlock |
| 33-37 | Too few documents |
| 55-01 | RDH interlock switch open during use |
| 55-04 | Paper on bypass sensor |
| 55-05 | Paper at vacuum timing sensor |
| 55-06 | Paper on output sensor |
| 55-10 | No paper reached S31 |
| 55-20 | Paper did not leave S31 at correct time |
| 55-24 | Set counter arm problem |
| 55-25 | Documents in input tray not detected |
| 55-27 | Lead edge did not reach S35 at correct time |
| 55-2955-30 | Trail edge did not reach S35 at correct time |
| 55-31 | S32, ADF registration sensor did not see paper at correct time |
| 55-32 | S32 did not see trail edge at correct time |
| 55-33 | S36 One too many documents |
| 55-36 | One too many documents |
| 55-39 | Hole count problem on document feeder belt |
| 55-40 | Document belt travel problem |
| 55-41 | Document belt mistracking or skewing |
| 55-45 | Paper at inverter sensor |
| 55-47 | Inverter sensor did not see paper lead edge at correct time |
| 55-49 | More than 50 sheets in input tray |
| 55-50 | Right side interlock |
| 55-51 | Left side interlock |
| 55-55 | Document on glass |
| 93-93 | NVM has to be initialized after new software installed |
Xerox 5350, 5352
| Code | Description |
|---|---|
| 00-009, 030, 031, 032, 033 | A door was opened while paper was being fed |
| 00-047 | Paper in duplex |
| 00-1 | Auditron |
| 00-2 | Diagnostic error |
| 00-3 | Faults error |
| 00-4 | Ric error |
| 00-5 | Job manager system error |
| 00-6 | LLM interface |
| 00-7 | Standby error |
| 00-8 | Communications error |
| 00-9 | Xerographic error |
| 01-300 | Front interlock |
| 01-310 | Right upper interlock |
| 01-315 | Left upper interlock |
| 01-320 | Left lower interlock |
| 01-325 | Fuser interlock |
| 02-910 | Key counter missing |
| 02-920 | Wrong combination of accessories |
| 03-321, 322, 326, 327 | LLM to ISIL communications problems |
| 03-328 | IOT communications problem with duplex or tray 4 |
| 03-330 | IOT communications problems with HCF |
| 03-335, 336 | LLM communications problems with edit |
| 03-340 | NVM memory |
| 03-341-347 | Communications problems between IOT and sorter |
| 03-350-354 | Communications problem with LLM and user interface |
| 03-363, 364 | Communications problem between LLM & optics |
| 03-370-03-373 | Communications problem between LLM & DADF |
| 03-380, 384 | |
| 03-416-422 | RAM memory problem |
| 03-424, 426 | NVM memory problem |
| 03-430, 432 | Billing problem |
| 03-439 | GRAIB communications problem |
| 03-440 | RIC communications problem |
| 03-441 | RIC NVM problem |
| 03-442 | Modem |
| 03-443-458 | RIC problems |
| 03-460 | Serial communications processor problem |
| 04-300 | Main motor or drive problem |
| 05-100-108 | DADF registration sensor |
| 05-110 | DADF exit sensor |
| 05-115, 120 | DADF jams |
| 05-305 | DADF document drive |
| 05-310, 312 | DADF document sensor |
| 05-316 | DADF registration sensor jam |
| 05-325 | DADF exit sensor |
| 05-335, 341, 345 | DADF interlock switches |
| 06-300-310 | Scan problems |
| 06-315 | Scan drive |
| 06-320A, 320B, 320C, 325 | Scan problem |
| 06-330 | Lens drive |
| 06-340 | Exposure control problem |
| 06-342 | LLM CPU problem |
| 06-344-350 | Exposure cvontrol problem |
| 06-352 | IOT CPU problem |
| 07-300, 315, 330, 345 | Tray faults |
| 07-360-370 | HCF problems |
| 07-375, 380A, 380B | Duplex problems |
| 08-100-110 | Feed problems. Lead edge of copy paper is late getting to feed sensor of tray 1 |
| 08-115-162 | Feed problem. Lead edge of copy paper is late getting to registration sensor |
| 08-165 | Paper jam at registration sensor |
| 08-310-370 | Paper at a sensor when power is turned on |
| 08-330 | DADF nudger sensor |
| 08-380 | Registration side to side problem with home position |
| 08-390 | Nip |
| 09-300 | Copy cartridge finished (drum unit) |
| 09-310 | Add black toner Add color toner |
| 09-320 | Add color toner |
| 09-330 | Wrong copy cartridge (wrong drum unit) |
| 09-340 | Drum cartridge not installed properly |
| 09-350 | Waste toner full |
| 100 | A fault has occurred |
| 10-100 | Exit jam |
| 10-105 | Exit jam |
| 10-110 | Vertical sensor jam |
| 10-120, 122, 125 | Duplex jam |
| 10-150, 155 | Too much or not enough paper in duplex tray |
| 10-300 | Fuser thermistor |
| 10-302 | Low fuser temperature |
| 10-304 | Bad fuser temp |
| 10-308 | High fuser temperature or open thermistor |
| 10-310 | High fuser temperature |
| 10-312 | Fuser not up to temperature after energy save |
| 10-314 | Fuser problem |
| 10-320 | Fuser web finished |
| 10-330, 335, 340 | Exit switch, vertical sensor switch actuated when power is turned on |
| 11-100-116 | Sorter jam |
| 11-150-176 | Sorter auto stapler jam |
| 11-310, 314, 316 | Sorter interlock |
| 11-325A,B,C,D,E,F,G | Sorter index |
| 11-352, 354, 356 | Sorter auto stapler interlocks |
| 11-365A,B,C,D,E | Sorter auto stapler bin |
| 11-370,371,372A,373A,373B,374 | Sorter auto stapler staple failure, staple home problem or tamper home problem |
| 11-385A,385B,390A,B,C,D,E,396A | Sorter auto stapler staple failure, staple home problem or tamper home problem |
| 301 | Fuser web must be replaced |
| 302 | Copy cartridge (drum unit) must be replaced |
| 501 | Tray 1 must be rebuilt |
| 502 | Tray 2 must be rebuilt |
| 503 | Tray 3 must be rebuilt |
| 504 | Tray 4 must be rebuilt |
| 505 | HCF must be rebuilt |
| 506 | Bypass must be rebuilt |
| 507 | Duplex unit must be rebuilt |
| 508 | Replace black developer |
| 509 | Replace red developer |
| 510 | Replace green developer |
| 512 | Replace brown developer |
| 513 | Copy cartridge (drum unit) will need replacing soon |
| 514 | Fuser web will need replacing soon |
| 515 | DADF belt should be replaced |
| 516 | DADF feed rollers should be replaced |
| 517 | Replace exposure lamp |
| 518 | Replace suction filter |
| 519 | Replace ozone filter |
| 520 | Replace optics filter |
| 521 | Replace particle filter |
| 522 | Replace upper fuser roller |
| 523 | Replace fuser pawls |
| 524 | Replace pressure roller |
| 525 | Replace pressure roller pawls |
| 900-905 | Key operator calls |
Xerox 5355
| Код ошибки | Описание |
|---|---|
| 01-01 | Frequency monitoring and zero cross problem |
| 01-02 | Interlock |
| 01-03 | AC power problem |
| 01-04 | Finisher interlock |
| 01-05 | 24v problem |
| 03-01 | Optics to main board communication problem |
| 03-02 | Software reset problem |
| 03-03 | Could be punched holes in the lead edge of the original |
| 03-04 | Software problem |
| 03-06 | Low battery |
| 03-07 | NVM not initialized or is missing or defective |
| 03-17 | Communication problem between main board and finisher board |
| 03-18 | Initializes one NVM counter to agree to others |
| 03-19 | All three NVM counter to agree with others |
| 03-20 | Main board/interface board problems |
| 03-21 | Problem with RIC NVM |
| 03-22 | RIC modem problem |
| 03-23 | RIC real time clock failure. |
| 03-25 | RIC NVM problem or not initialized |
| 03-27 | NVM problem |
| 03-28 | Watchdog software problem |
| 03-29 | Microprocessor crystal not at correct frequency |
| 03-30 | No software response from finisher after 20 seconds have elapsed |
| 06-01 | Lens did not reach 1.1 position |
| 06-02 | 1/2 rate scanner problem |
| 06-03 | Scan home problem |
| 06-04 | Scan home problem |
| 06-05 | Scan home problem |
| 06-06 | Scan encoder |
| 06-07 | Scan encoder |
| 06-08 | Scan drive boost |
| 06-09 | Scan encoder |
| 06-11 | Scan encoder pulse phases |
| 06-12 | Insufficient scan damping |
| 07-01 | Duplex tray not home during duplexing |
| 07-02 | Tray 2 not home when selected |
| 07-13 | Tray 2 height sensor problem |
| 07-15 | Tray 2 empty |
| 07-16 | Tray 1 door open |
| 07-18 | Tray 1 stack sensor |
| 07-22 | Tray 1 empty |
| 07-26 | Tray 1 bypass switch actuated too long |
| 07-27 | Tray 1 bypass switch deactuated too early |
| 07-30 | Paper in duplex |
| 07-31 | Paper in duplex |
| 07-32 | Duplex tray empty, when paper should be there |
| 08-10 | Paper did not reach tray 2 input tray sensor |
| 08-11 | Paper did not reach duplex input sensor |
| 08-12 | Paper did not reach tray 1 |
| 08-14 | Paper did not leave tray 2 input sensor quickly enough |
| 08-18 | Trail edge did not reach tray 2 input sensor quickly enough |
| 08-19 | Trail edge did not reach tray 1 input sensor quickly enough |
| 08-20 | Paper in duplex |
| 08-21 | Paper in tray 2 input |
| 08-22 | Paper in tray 2 or duplex at wrong time |
| 08-23 | Paper at tray 1 input at wrong time |
| 08-24 | Paper in tray 1 at wrong time |
| 08-28 | Upper and lower nips problem |
| 09-08 | Low toner condition |
| 09-12 | Drum signals are out of range |
| 09-13 | Unstable drum patch readings |
| 09-15 | Patch is too dark |
| 09-16 | Patch is too light |
| 09-17 | Open toner container access cover |
| 09-18 | Low toner level |
| 09-21 | Low toner sensor disconnected |
| 09-22 | Low toner condition, even after machine has been theoretically, adding toner |
| 10-02 | Low fuser temperature |
| 10-03 | High fuser temperature |
| 10-06 | Paper did not reach out put switch |
| 10-07 | Paper stayed on output switch |
| 10-10 | Paper did not reach decurler sensor |
| 10-11 | Paper did not reach decurler sensor |
| 10-12 | Paper on decurler sensor |
| 10-13 | Paper did not reach duplex entry sensor in time |
| 10-14 | Paper did not reach duplex entry sensor in time |
| 10-15 | Paper on entry sensor at wrong time |
| 10-17 | Fuser temperature is too high and fuser relay has deactuated |
| 12-01 | Paper at finisher input sensor |
| 12-02 | Paper did not reach finisher |
| 12-03 | Paper reached finisher too soon |
| 12-05 | Paper at stapler |
| 12-06 | Paper at stapler |
| 12-07 | Paper did not reach stapler |
| 12-08 | Paper did not reach stapler |
| 12-10 | Complied motor not working properly |
| 12-15 | Eject motor problem and/or eject encoder |
| 12-20 | Stacker motor problem |
| 12-21 | Stacker interlock |
| 12-22 | Stacker bottom sensor |
| 12-23 | Stacker bottom sensor |
| 12-24 | Stacker bottom sensor senses full |
| 12-25 | Stack height sensor |
| 12-26 | Stack height sensor |
| 12-27 | Stack height sensor |
| 12-30 | Offset home sensor |
| 12-31 | Offset home sensor |
| 12-32 | OCT switch |
| 12-35 | Eject nip carriage |
| 12-36 | Eject cam interlock |
| 12-37 | Eject nip carriage open timing |
| 12-38 | Eject cam interlock |
| 12-40 | Tamper motor |
| 12-41 | Tamper home problem |
| 12-42 | Tamper home sensor |
| 12-43 | Staple load sensor |
| 12-44 | Tamper home sensor |
| 12-45 | Tamper home sensor |
| 12-50 | Low on staples |
| 12-51 | Stapler home sensor |
| 12-52 | Stapler home sensor |
| 12-53 | Eject cam interlock |
| 33-37 | Too few documents |
| 55-01 | rdh interlock switch open during use |
| 55-04 | Paper on bypass sensor |
| 55-05 | Paper at vacuum timing sensor |
| 55-06 | Paper on output sensor |
| 55-10 | No paper reached S31 |
| 55-20 | Paper did not leave S31 at correct time |
| 55-24 | Set counter arm problem |
| 55-25 | Documents in input tray not detected |
| 55-27 | Lead edge did not reach S35 at correct time |
| 55-2955-30 | Trail edge did not reach S35 at correct time |
| 55-31 | S32, ADF registration sensor did not see paper at correct time |
| 55-32 | S32 did not see trail edge at correct time |
| 55-33 | S36 One too many documents |
| 55-36 | One too many documents |
| 55-39 | Hole count problem on document feeder belt |
| 55-40 | Document belt travel problem |
| 55-41 | Document belt mistracking or skewing |
| 55-45 | Paper at inverter sensor |
| 55-47 | Inverter sensor did not see paper lead edge at correct time |
| 55-49 | More than 50 sheets in input tray |
| 55-50 | Right side interlock |
| 55-51 | Left side interlock |
| 55-55 | Document on glass |
| 93-93 | NVM has to be initialized after new software installed |
Xerox XC520, 540, 560, 580
| Код ошибки | Описание |
|---|---|
| H2 | Fuser thermistor |
| H3 | Fuser temperature too high. Must be reset in diagnostics |
| H4 | Fuser temperature too low. Must be reset in diagnostics |
| L3 | Scan problem |
| L4 | Min motor drive problem |
| L8 | Exposure lamp not lightning or not enough light reaching auto exposure sensor |
| P | Paper did not feed |
Xerox 5622
| Code | Description |
|---|---|
| A1-1 to A1-32 | All indicate a paper path problem, etc. in the ADF |
| A2 | ADF exit problems |
| A3 | Irregular size documents |
| A5 | ADF interlock |
| A6 | ADF single sheet document reset |
| A7 | Platen interlock |
| A8 | ADF exit interlock |
| C1 | Tray 1 jam |
| C2 | Tray 2 jam |
| C3 | Tray 3 jam |
| C6-1, C6-2 | Jams related to duplex |
| C6-3 | Registration sensor, re tray 1 |
| C7-1, C7-2 | HCF feed problems |
| C7-3 | Tray 1 feed problem |
| C8 | Paper stays in tray or duplex or HCF |
| C9 | Bypass feed problem |
| E1-10 to E1-25 | Internal jam |
| E1-6 | Paper on registration sensor |
| E2 | Reset signal happened. Might read E-2 something else |
| E3-30 to E4-14 | Exit jam |
| E3-6 | Exit jam |
| E4-10 to E4-14 | Inverter sensor not actuated |
| E4-15 | Inverter sensor |
| E4-40 to E4-45 | Duplex entry sensor |
| E4-6 | Inverter sensor |
| E5 | Front door interlock |
| E6-1 | Tray 1 interlock |
| E6-2 | 2 tray or duplex interlock |
| E6-3 | HCF interlock |
| E7-2, E7-3 | Duplex interlock |
| E8-6 to E8-15 | Duplex entry sensor |
| F1-1 | Sorter entry sensor |
| F1-6 | Sorter exit sensor |
| F3 | Paper size not available for sort/stack |
| F5 | Sorter interlock |
| J1 | Add toner |
| J3 | Replace copy cartridge |
| J7 | Replace copy cartridge |
| J8-1 | Wrong copy cartridge installed |
| J8-2 | Copy cartridge EEPROM |
| L6 | Auditron or other counter problem |
| L8 | Platen glass temperature is too high |
| L9 | Communication problem between interimage erase/edge lamps and main board |
| U1-1 | Main motor drive problem |
| U2-1 to U2-4 | Scan home sensor |
| U3-1 | Lens sensor |
| U4-1 | Open fuser thermistor |
| U4-2 | Fuser did not warm up properly |
| U4-3 | Fuser temperature too high |
| U4-4 | Fuser problem. Staying on too long |
| U4-6 | High fuser temperature |
| U5-1 | Sorter bin home switch not activated |
| U5-2 | Sorter bin home switch stayed actuated |
| U5-3, U5-4 | Sorter bin home switch |
| U6-1 | ROM problem |
| U6-2 | RAM problem |
| U6-3 | Low battery |
| U6-4 | Incorrect value in NVM. Reinitialize main board with code 20-96 |
| U8-1 to U8-6 | Problem with exposure lamp, lamp sensor, lamp board |
Просмотр сообщений об ошибках и уведомлений на панели
управления
При возникновении ошибки на панели управления отображается сообщение с
информацией о проблеме. Сообщения об ошибке уведомляют пользователя о
состояниях принтера, которые не допускают печать или приводят к ухудшению
показателей печати. Если происходит более одной ошибки, на панели управления
отображается только одно сообщение об ошибке.
Просмотр списка текущих ошибок на панели управления:
1. Нажмите кнопку Статус аппарата, затем нажмите вкладку Активные сообщения.
2. Выберите меню Неисправности и предупреждения, затем выберите нужный
пункт.
• Неисправности: в этом меню показаны сообщения об ошибках, которые
негативно сказываются на работе принтера, а также соответствующие коды
ошибок.
• Предупреждения: в этом меню показаны уведомления, касающиеся текущего
состояния работ, а также соответствующие коды уведомлений.
Просмотр статуса работы на панели управления
Просмотр текущих или сохраненных работ на панели управления:
1. На панели управления принтера нажмите кнопку Статус работы.
2. Чтобы просмотреть список выполняемых работ нажмите Выполняемые работы.
3. Чтобы просмотреть список личных и защищенных работ нажмите Личные и
защищ. работы.
4. Чтобы просмотреть список завершенных работ нажмите Выполнен. работы.
Использование интегрированных программных средств для
устранения неисправностей
В данный принтер встроен комплект отчетов, которые можно распечатать. Два
таких отчета — демонстрационная страница и отчет о сообщениях об ошибках —
могут помочь в устранении некоторых проблем. Изображение на распечатанной
демонстрационной странице показывает текущие возможности печати принтера.
Отчет о сообщениях об ошибках содержит информацию о последних ошибках
принтера.
Многофункциональный принтер Xerox
®
WorkCentre
®
3335/3345
10-40
Руководство пользователя
Устранение проблем
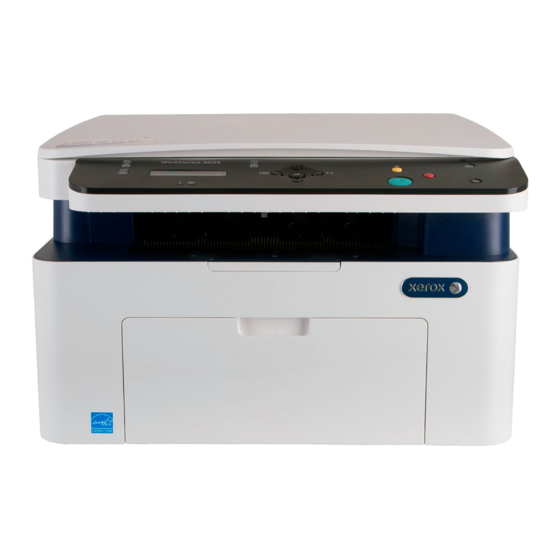
- Manuals
- Brands
- Xerox Manuals
- All in One Printer
- WorkCentre 3025BI
- Service manual
-
Contents
-
Table of Contents
-
Bookmarks
Related Manuals for Xerox WorkCentre 3025BI
Summary of Contents for Xerox WorkCentre 3025BI
-
Page 1
Xerox WorkCentre 3025BI/NI ® ® Service Manual 702P02831 June 2014 Initial Issue… -
Page 3
Xerox service documentation is intended for use by certified, product-trained service per- sonnel only. Xerox does not warrant or represent that it will notify or provide to such customer any future change to this documentation. Customer performed service of equipment, or mod- ules, components, or parts of such equipment may affect whether Xerox is responsible to fix machine defects under the warranty offered by Xerox with respect to such equipment. -
Page 4
Draft June 2014 Xerox® WorkCentre® 3025 Multifunction Printer Service Manual… -
Page 5: Table Of Contents
How to Use this Manual ………………..Service Safety Summary………………..Reference Symbology………………… Voltage Specifications………………… Health and Safety Incident Reporting …………….viii Regulatory Specifications………………..Translation of Warnings ………………..Tag Usage……………………WorkCentre 3025 Overview ……………….. Introduction June 2014 Xerox® WorkCentre® 3025 Multifunction Printer Service Manual…
-
Page 6
Introduction June 2014 Xerox® WorkCentre® 3025 Multifunction Printer Service Manual… -
Page 7: About This Manual
The Xerox® WorkCentre® 3025 Printer Service Manual is part of the multinational documenta- Section 7 Wiring Data tion for the Xerox® WorkCentre® 3025 Multifunction Printer. It is structured in standard Xerox This section contains Block Schematic Diagrams (BSDs), Plug/Jack locations, Voltage service documentation format.
-
Page 8: How To Use This Manual
NOTE: A note is used where it is essential to highlight a procedure, practice, condition or state- ment. Introduction June 2014 How to Use this Manual Xerox® WorkCentre® 3025 Multifunction Printer Service Manual…
-
Page 9: Service Safety Summary
Do not use aerosol cleaners. The use of supplies that are not approved may cause poor performance and could create a hazardous condition. • Do not burn any consumables or routine maintenance items. For information on Xerox supplies recycling programs, go to www.xerox.com. June 2014 Service Safety Summary Xerox®…
-
Page 10: Reference Symbology
Arrow • This symbol points to the location to install, gain access to, or to release a compo- nent. The following reference symbols are used throughout the Xerox® WorkCentre® 3025 Printer Service Documentation. Flag • This symbol indicates a reference point into a circuit diagram from a RAP.
-
Page 11: Voltage Specifications
TP33. If a second test point is not given, it is assumed that the black meter lead may be attached to the copier frame. June 2014 Reference Symbology, Voltage Specifications Xerox® WorkCentre® 3025 Multifunction Printer Service Manual…
-
Page 12
Fund all field retrofits. II. Scope Field Service Operations shall: Preserve the Xerox product involved and the scene of the incident inclusive of any Xerox Corporation and subsidiaries worldwide. associated equipment located in the vicinity of the incident. III. Objective Return any affected equipment/part(s) to the location designated by Xerox EH&S… -
Page 13: Regulatory Specifications
Xerox has tested this product to electromagnetic emission and immunity standards. These A signed copy of the Declaration of Conformity for this product can be obtained from Xerox. standards are designed to mitigate interference caused or received by this product in a typical office environment.
-
Page 14: Translation Of Warnings
GP 16. Das Modul ist sehr schwer. de las normas sobre incendios. AVISO: Utilice los procedimientos de seguridad cuando elimine el módulo. Consulte el GP 16. El módulo es pesado. Introduction June 2014 Translation of Warnings Xerox® WorkCentre® 3025 Multifunction Printer Service Manual…
-
Page 15: Tag Usage
Tag Usage WARNING Use only Xerox materials and components. This product is safety certified using Xerox Tags materials and components. The use of non Xerox materials and components may invali- If different parts or actions exist because of a modification, the Tag number will identify the date the safety certificate.
-
Page 16: Workcentre 3025 Overview
E-mail Not Applicable Not Applicable USB Device Standard Standard USB Host Not Applicable Not Applicable Network Printing Not Applicable Standard Wi-Fi Standard Standard Wi-Fi Direct™ Standard Standard Introduction June 2014 WorkCentre 3025 Overview Xerox® WorkCentre® 3025 Multifunction Printer Service Manual…
-
Page 17
Safety Precautions ………………….SCP 01 Introduction to Service Call Procedures …………SCP 02 Initial Actions…………………. SCP 03 Corrective Actions………………..SCP 04 Final Actions …………………. System/Subsystem Maintenance HFSI’s ……………………..Service Call Procedures June 2014 Xerox® WorkCentre® 3025 Multifunction Printer Service Manual… -
Page 18
Service Call Procedures June 2014 Xerox® WorkCentre® 3025 Multifunction Printer Service Manual… -
Page 19: Service Call Overview
Diagnostic Mode The Xerox® WorkCentre® 3025 has built-in diagnostics to test components, display status and some NVM access. The diagnostic tests are accessed through the Control Panel. Refer to the User Guide for detailed instructions on using the Control Panel buttons and menus. Refer to Section 6 for information regarding diagnostic testing.
-
Page 20: Scp 01 Introduction To Service Call Procedures
SCP 02 Initial Actions Purpose Purpose Service Call Procedures (SCP) are the guide to performing a service call on the Xerox® Work- The purpose of the Initial Actions is to help organize the service call. Customer input, machine Centre® 3025 Multifunction Printer.
-
Page 21: Scp 03 Corrective Actions
Troubleshoot fault codes with the lowest chain number first. If the problem is IQ related, refer to Section 3, Image Quality. When the primary problem is resolved, proceed to Final Actions. Service Call Procedures June 2014 SCP 03, SCP 04 Xerox® WorkCentre® 3025 Multifunction Printer Service Manual…
-
Page 22
Customer and Service HFSI’s As with other CSE actions, these actions should be performed according to customer run requirements. Some actions may be deferred to a Xerox Initiated activity, taking into consider- ation any risks with deferring those actions. Table 1 Customer/Service HFSI’s… -
Page 23
20-400 / 410 Line Fault ………………..2-15 20-500 Memory Full Fault ………………..2-15 20-600 No Answer Fault ………………..2-16 20-700 Number Not Assigned Fault…………….2-16 20-900 Retry Redial Fault ………………..2-17 Status Indicator RAPs June 2014 Xerox® WorkCentre® 3025 Multifunction Printer Service Manual… -
Page 24
Status Indicator RAPs June 2014 Xerox® WorkCentre® 3025 Multifunction Printer Service Manual… -
Page 25
Check that there is no contamination present. • Check for broken or defective wires or cables. • Replace the Main PWB (REP 1.7), 1.1. Replace the LVPS/HVPS PWB (REP 1.5), 5.1. Status Indicator RAPs June 2014 01-100 , 03-410 Xerox® WorkCentre® 3025 Multifunction Printer Service Manual… -
Page 26
Check the paper path drives and clear any jammed sheets from the paper path. If problem per- sists, replace the Main PWB (REP 1.7), 1.1. Status Indicator RAPs June 2014 05-100 / 900 , 05-500 Xerox® WorkCentre® 3025 Multifunction Printer Service Manual… -
Page 27
Nichteinhaltung dieser Regel kann zu ernsthaften körperlichen Verletzungen führen. AVISO: Use gafas de protección para realizar el procedimiento siguiente. No proteger los ojos puede ocasionar daños personales graves. Status Indicator RAPs June 2014 06-100 / 200 Xerox® WorkCentre® 3025 Multifunction Printer Service Manual… -
Page 28
Ensure that paper is loaded in the tray. Clear any jammed sheets. Refer to Section 7: Trouble- • Disconnect and securely reconnect the harness. shooting, in the Xerox® WorkCentre® 3025 User Guide for detailed instructions on clearing Check the harness for a short circuit or open circuit (BSD 6.1). The harness is OK. paper jams. -
Page 29
If problem continues, Remove the Fuser Assembly REP 1.18 and replace if necessary 5.2. Exit Diagnostic Mode and perform SCP Final Actions Exit Diagnostics Mode and perform SCP Final Actions. Status Indicator RAPs June 2014 08-100 , 08-500 Xerox® WorkCentre® 3025 Multifunction Printer Service Manual… -
Page 30
If the Print Cartridge has reached end of life, switch Off the power and replace the Print If the Print Cartridge is at end of life, switch Off the power and replace the Print Cartridge. Cartridge Status Indicator RAPs June 2014 09-100 , 09-350 Xerox® WorkCentre® 3025 Multifunction Printer Service Manual… -
Page 31
Check the CRUM contact area for contamination and clean if necessary. Reinstall the Print Cartridge. If the problem continues, install a new Print Cartridge. Status Indicator RAPs June 2014 09-450 , 09-550 Xerox® WorkCentre® 3025 Multifunction Printer Service Manual… -
Page 32
Do not handle the fuser components until they have cooled. Some fuser components operate at hot temperatures and can produce serious personal injury if touched. Replace the Print Cartridge if it is not a genuine Xerox® cartridge. DANGER: Ne pas manipuler les éléments du four avant de les laisser refroidir. Certains If problem continues, go to RAP 09-500, Toner Cartridge Undetected Fault to check for éléments du four fonctionnent à… -
Page 33
If problem is intermittent, check the circuit of the Fuser Assembly for one of the following • All connectors are securely connected and no contamination is present. • Short circuit or damaged wire. Repair as necessary. Status Indicator RAPs June 2014 10-100 , 10-200/ 300 Xerox® WorkCentre® 3025 Multifunction Printer Service Manual 2-11… -
Page 34
Procedure Switch Off the power then switch On the power. (The Contact Image Sensor should move dur- Use Xerox Easy Print Manger to obtain a new IP address. ing start up.) From the menu, select: [Machine Settings, Network Settings, Assign IP address]. -
Page 35
Replace the Fax PWB (REP 1.9), PL 1.2 • Check that no contamination is present. • Replace the Main PWB (REP1.17), PL 1.1 PL 1.2 Status Indicator RAPs June 2014 17-310 , 20-100 Xerox® WorkCentre® 3025 Multifunction Printer Service Manual 2-13… -
Page 36
Clear any jammed sheets. Refer to the WorkCentre® 3025 User Guide for detailed jam clear- ance instructions. Check the scanner. Refer to RAP 14-100 for troubleshooting the scanner. Resubmit fax using a group location. Resubmit the job. Status Indicator RAPs June 2014 20-120 , 20-200 2-14 Xerox® WorkCentre® 3025 Multifunction Printer Service Manual… -
Page 37
Delete necessary documents, resend job when memory becomes available, or split the trans- Resubmit fax job. If problem persists, resubmit after an hour. mission into multiple operations. Status Indicator RAPs June 2014 20-400 / 410 , 20-500 Xerox® WorkCentre® 3025 Multifunction Printer Service Manual 2-15… -
Page 38
Ensure that remote machine is powered on and reattempt submission. Dial the number manually or assign the number to the speed dial location. Refer to Section 8: Address Book, Using Address Book from the Control Panel in the Xerox® Phaser® 3025 User Guide on assigning speed dial numbers. -
Page 39
20-900 Retry Redial Fault The machine is waiting for the programmed interval to automatically redial. BSD-Reference: Procedure Press <START> to immediately redial or <STOP> to cancel the redial operation. Status Indicator RAPs June 2014 20-900 Xerox® WorkCentre® 3025 Multifunction Printer Service Manual 2-17… -
Page 40
Status Indicator RAPs June 2014 20-900 2-18 Xerox® WorkCentre® 3025 Multifunction Printer Service Manual… -
Page 41
IQ7 Uneven Density RAP………………..IQ8 Background RAP …………………. IQ9 Residual Image (Ghosting) RAP …………….IQ10 Side 2 Staining ………………….. IQ11 Blank Page RAP………………… 3-10 IQ12 Partial Image Deletions RAP……………… 3-11 Image Quality June 2014 Xerox® WorkCentre® 3025 Multifunction Printer Service Manual… -
Page 42
Image Quality June 2014 Xerox® WorkCentre® 3025 Multifunction Printer Service Manual… -
Page 43: Image Quality Overview
Areas of the printed image are light or missing entirely IQ12 • Vertical white lines tions on limited areas of the paper. • Vertical black line or band Image Quality June 2014 Image Quality Overview Xerox® WorkCentre® 3025 Multifunction Printer Service Manual…
-
Page 44: Iq1 Vertical Black Line And Band Rap
Switch On the power and make a test print. The defect is gone. Replace the Fuser Module; (REP 1.19), 5.2. Switch on the power. Perform Final Actions. Figure 1 Black lines and bands Figure 1 White lines and bands Image Quality June 2014 IQ1, IQ2 Xerox® WorkCentre® 3025 Multifunction Printer Service Manual…
-
Page 45: Iq3 Horizontal Black Bands Rap
Print Cartridge. If problem persists, replace the Fuser Module; (REP 1.19), 5.2. Figure 1 Horizontal black bands Figure 1 Black spots Image Quality June 2014 IQ3, IQ4 Xerox® WorkCentre® 3025 Multifunction Printer Service Manual…
-
Page 46: Iq5 Low Image Density Rap
The Charge Roller is likely defective, replace the Toner Cartridge. Refer to the WorkCentre® 3025 User Guide, Section 6 Maintenance, General Care, for detailed instructions on how to replace the Toner Cartridges. Figure 1 Light Image Image Quality June 2014 IQ5, IQ6 Xerox® WorkCentre® 3025 Multifunction Printer Service Manual…
-
Page 47: Iq7 Uneven Density Rap
Check the Transfer Roller for wear or damage. The Transfer Roller is OK. Replace the Transfer Roller; (REP 1.17), 5.1. If problem persists, replace the LVPS / HVPS PWB; (REP 1.6), 5.1. Image Quality June 2014 IQ6, IQ7 Xerox® WorkCentre® 3025 Multifunction Printer Service Manual…
-
Page 48: Iq8 Background Rap
Switch on the power and make a test print. The test print looks OK. Replace the LVPS / HVPS PWB; (REP 1.6), 5.1. Go to Call Closeout. Figure 1 Uneven Density Figure 1 Background Image Quality June 2014 IQ7, IQ8 Xerox® WorkCentre® 3025 Multifunction Printer Service Manual…
-
Page 49: Iq9 Residual Image (Ghosting) Rap
Print Cartridge. • Fuser Module; (REP 1.19), 5.2. • LVPS / HVPS PWB; (REP 1.6), 5.1. Figure 1 Side 2 Staining Figure 1 Ghost Image Image Quality June 2014 IQ9, IQ10 Xerox® WorkCentre® 3025 Multifunction Printer Service Manual…
-
Page 50: Iq11 Blank Page Rap
Main PWB to High Voltage Power Supply Wire Harness. • Main PWB; (REP 1.7), PL 1.1 1.2. • LVPS / HVPS PWB; (REP 1.6), 5.1. Replace the LSU; (REP 1.12), 5.6. Image Quality June 2014 IQ11 3-10 Xerox® WorkCentre® 3025 Multifunction Printer Service Manual…
-
Page 51: Iq12 Partial Image Deletions Rap
• Wear or damage. • The left and right tension springs for damage. • Be sure all parts are installed correctly. Figure 1 Image Deletions Image Quality June 2014 IQ12 Xerox® WorkCentre® 3025 Multifunction Printer Service Manual 3-11…
-
Page 52
Image Quality June 2014 IQ12 3-12 Xerox® WorkCentre® 3025 Multifunction Printer Service Manual… -
Page 53
REP 1.21 LSU Cable …………………. 4-36 REP 1.22 Automatic Document Feeder (ADF) …………… 4-37 REP 1.23 Platen Cover ………………..4-38 REP 1.24 ADF Feed Separation Pad…………….4-39 REP 1.25 ADF Feed Rolls Assembly…………….4-40 Repairs June 2014 Xerox® WorkCentre® 3025 Multifunction Printer Service Manual… -
Page 54
Repairs June 2014 Xerox® WorkCentre® 3025 Multifunction Printer Service Manual… -
Page 55: Rep 1.1 Left And Right Side Covers
Remove the Side Covers being careful not to damage the Fastening Hooks (Figure Pull the bottom of the cover away from the printer to remove it. Figure 2 Fastening Hooks Repairs June 2014 REP 1.1 Xerox® WorkCentre® 3025 Multifunction Printer Service Manual…
-
Page 56: Rep 1.2 Front Cover
Release the Side fasteners, then the Top fasteners. Left Hinge Figure 1 Paper Tray Cover Removal (Front View) Figure 3 Fastening Hooks Replacement Install the components in the reverse of removal. Repairs June 2014 REP 1.2 Xerox® WorkCentre® 3025 Multifunction Printer Service Manual…
-
Page 57: Rep 1.3 Rear Cover
Screws Figure 2 Rear Cover Screws and Connector Locations (Rear View 3025 BI) Wire Guides Figure 1 Rear Cover Wires to Release Remove the Scanner Module (REP 1.10). Repairs June 2014 REP 1.3 Xerox® WorkCentre® 3025 Multifunction Printer Service Manual…
-
Page 58: Rep 1.4 Middle Cover
Make sure that the Plastic Screws go into plastic components and Machine Screws go into the metal frame. Install the components in the reverse of removal. Figure 1 Exit Cover Pivots (Top View) Repairs June 2014 REP 1.3, REP 1.4 Xerox® WorkCentre® 3025 Multifunction Printer Service Manual…
-
Page 59
Release the wires from the Main PWB, from the wire guides on the underside of the Mid- dle Cover (Figure Remove the Middle Cover front screws (2) (Figure Repairs June 2014 REP 1.4 Xerox® WorkCentre® 3025 Multifunction Printer Service Manual… -
Page 60: Rep 1.5 Control Panel Pwb
Make sure that the Plastic Screws go into plastic components and Machine Screws go into the metal frame. Figure 1 Releasing the Control Panel (Bottom View) Install the components in the reverse of removal. Repairs June 2014 REP 1.4, REP 1.5 Xerox® WorkCentre® 3025 Multifunction Printer Service Manual…
-
Page 61
Figure 2 Control Panel Removal 3025 BI (Front View) Screws Figure 5 Control Panel PWB Removal 3025 NI Figure 3 Control Panel Removal 3025 NI (Front View) Replacement Install the components in the reverse of removal. Repairs June 2014 REP 1.5 Xerox® WorkCentre® 3025 Multifunction Printer Service Manual… -
Page 62: Rep 1.6 Lvps / Hvps
For a 3025 NI, remove the FAX PWB (REP 1.9) and the Speaker (2 screws). Remove the Main PWB (REP 1.7). Figure 1 Fax PWB and Metal Shield Screws Repairs June 2014 REP 1.6 4-10 Xerox® WorkCentre® 3025 Multifunction Printer Service Manual…
-
Page 63
Make sure that the Plastic Screws go into plastic components and Machine Screws go into the metal frame. Install the components in the reverse of removal. Repairs June 2014 REP 1.6 Xerox® WorkCentre® 3025 Multifunction Printer Service Manual 4-11… -
Page 64: Rep 1.7 Main Pwb
Switch Off the Printer and unplug the Power Cord. Figure 1 Main PWB Connectors Remove the following covers: The Front Cover (REP 1.2). The Right Side Cover (REP 1.1). The Rear Cover (REP 1.3). Repairs June 2014 REP 1.7 4-12 Xerox® WorkCentre® 3025 Multifunction Printer Service Manual…
-
Page 65
Double-click the executable file and follow the steps listed in the USB Serial applica- tion window to write the machine serial number to the new Main PWB. Figure Repairs June 2014 REP 1.7 Xerox® WorkCentre® 3025 Multifunction Printer Service Manual 4-13… -
Page 66: Rep 1.8 Left Frame And Drive Motor
Disconnect the Drive Motor connector (Figure Figure 2 Main Drive Unit Removal (Left View) Connector Figure 1 Drive Motor Connector (Front View) Remove the Fuser Module (REP 1.17). Repairs June 2014 REP 1.8 4-14 Xerox® WorkCentre® 3025 Multifunction Printer Service Manual…
-
Page 67
Install, but do not tighten, the screws (7) (Figure Tighten the Frame screws from the center of the Frame: To the Front of the printer, then to the Rear of the Printer. Repairs June 2014 REP 1.8 Xerox® WorkCentre® 3025 Multifunction Printer Service Manual 4-15… -
Page 68: Rep 1.9 Fax Pwb
Make sure that the Plastic Screws go into plastic components and Machine Screws go into the metal frame. Install the components in the reverse of removal. Repairs June 2014 REP 1.9, REP 1.10 4-16 Xerox® WorkCentre® 3025 Multifunction Printer Service Manual…
-
Page 69
The Figure shows the 3025 BI, the connectors are in the same location for the 3025 NI. Hinge Pivot Slot Figure 2 Scanner Support Hinge Removal (Top View) Connectors Figure 3 Main PWB Scanner/ Control Panel Connectors Repairs June 2014 REP 1.10 Xerox® WorkCentre® 3025 Multifunction Printer Service Manual 4-17… -
Page 70
Lift the Scanner Module and release it from the hinges (2). Hinge Latch Hinges Figure 4 Scanner Support Hinge (Right Side View) Figure 5 Scanner Removal Replacement Install the components in the reverse of removal. Repairs June 2014 REP 1.10 4-18 Xerox® WorkCentre® 3025 Multifunction Printer Service Manual… -
Page 71: Rep 1.11 Scanner Drive Motor
Open the Scanner and release the Control Panel from the Scanner (Figure Remove the screws (4). Release the latches (2). Latches Figure 2 Control Panel Removal (Front View) Screws Figure 1 Control Panel Bottom Screws (Bottom View) Repairs June 2014 REP 1.11 Xerox® WorkCentre® 3025 Multifunction Printer Service Manual 4-19…
-
Page 72
Remove the Platen bottom screws (2). Release the latches (8) around the Platen and remove it. Screws Figure 3 Platen Top Screws Screws Figure 4 Platen Removal Repairs June 2014 REP 1.11 4-20 Xerox® WorkCentre® 3025 Multifunction Printer Service Manual… -
Page 73: Rep 1.12 Lsu
Make sure that the Plastic Screws go into plastic components and Machine Screws go into the metal frame. Install the components in the reverse of removal. Repairs June 2014 REP 1.11, REP 1.12 Xerox® WorkCentre® 3025 Multifunction Printer Service Manual 4-21…
-
Page 74
LSU in the same location. Remove the inside LSU cover screws (2). Screw Screw Figure 2 LSU Cover Top Screws (Top View) Connector Figure 1 LSU Connectors and Screws (Front View) Repairs June 2014 REP 1.12 4-22 Xerox® WorkCentre® 3025 Multifunction Printer Service Manual… -
Page 75: Rep 1.13 Feed Rolls And Retard Pad
Make sure that the Plastic Screws go into plastic components and Machine Screws go into the metal frame. Connector Install the components in the reverse of removal. Figure 1 Motor Connector and LSU Cover Screws (Front View) Repairs June 2014 REP 1.12, REP 1.13 Xerox® WorkCentre® 3025 Multifunction Printer Service Manual 4-23…
-
Page 76
Remove the Feed Rolls Assembly screws (2) through the bottom of the Printer (Figure Screwdriver Access Holes Front View Screw Figure 2 LSU Cover Top Screws (Top View) Figure 3 Feed Rolls Assembly Screws Removal Repairs June 2014 REP 1.13 4-24 Xerox® WorkCentre® 3025 Multifunction Printer Service Manual… -
Page 77
Move the Retard Pad into the printer to remove it. Latches Figure 4 Feed Rolls Assembly Removal (Top View) Spring Figure 5 Retard Pad Removal (Rear View) Repairs June 2014 REP 1.13 Xerox® WorkCentre® 3025 Multifunction Printer Service Manual 4-25… -
Page 78: Rep 1.14 Paper Drive Roll And Drive Gear
Remove the Main Drive Unit (4 screws) (Figure Locating Pins Figure 6 Feed Rolls Assembly Locating Pins (Top View) Screws Figure 1 Main Drive Unit (Left View) Repairs June 2014 REP 1.13, REP 1.14 4-26 Xerox® WorkCentre® 3025 Multifunction Printer Service Manual…
-
Page 79
Note the location of the Spring in the frame cutout for reinstallation. Unlatch and remove the actuator. Spring Gear Figure 2 Paper Drive Roll Gear (Left View) Latch Feed Sensor Actuator Figure 3 Feed Sensor Actuator (Rear View) Repairs June 2014 REP 1.14 Xerox® WorkCentre® 3025 Multifunction Printer Service Manual 4-27… -
Page 80: Rep 1.15 Paper Feed Sensors Pwb And Actuators
NOTE: When replacing the Main Drive Unit, the drive gears may need to be rotated to align them with the other drives. Install the components in the reverse of removal. Repairs June 2014 REP 1.14, REP 1.15 4-28 Xerox® WorkCentre® 3025 Multifunction Printer Service Manual…
-
Page 81: Rep 1.16 Paper Tray
Release the Paper Tray from the Right Frame. into the metal frame. NOTE: Make sure that the Actuator Spring is location in frame cutout (Figure Repairs June 2014 REP 1.15, REP 1.16 Xerox® WorkCentre® 3025 Multifunction Printer Service Manual 4-29…
-
Page 82: Rep 1.17 Transfer Roll
NOTE: Make sure the Locating Pins and Tabs on the Paper Tray align with the cutouts in the frame. Figure 1 Transfer Roll Bushing Latches (Rear View) Repairs June 2014 REP 1.16, REP 1.17 4-30 Xerox® WorkCentre® 3025 Multifunction Printer Service Manual…
-
Page 83
Transfer Roll Figure 2 Transfer Roll Removal (Top View) Guide Slot Figure 3 Transfer Roll Bushing Alignment (Top View) Install the components in the reverse of removal. Repairs June 2014 REP 1.17 Xerox® WorkCentre® 3025 Multifunction Printer Service Manual 4-31… -
Page 84: Rep 1.18 Feed Clutch
Make sure that the Plastic Screws go into plastic components and Machine Screws go into the metal frame. Install the components in the reverse of removal. Connector Figure 1 Feed Clutch Connector Remove the Left Frame (REP 1.8). Repairs June 2014 REP 1.18 4-32 Xerox® WorkCentre® 3025 Multifunction Printer Service Manual…
-
Page 85: Rep 1.19 Fuser Module
Switch Off the Printer and unplug the Power Cord. Remove the Middle Cover (REP 1.4). Remove the Main PWB (REP 1.7). Repairs June 2014 REP 1.19 Xerox® WorkCentre® 3025 Multifunction Printer Service Manual 4-33…
-
Page 86
Remove the Plastic Shield (2 screws) (Figure Disconnect the Fuser Connector (Figure Route the Fuser wires through the frame. Screws Connector Figure 2 Plastic Shield Removal Figure 3 Fuser Connector Repairs June 2014 REP 1.19 4-34 Xerox® WorkCentre® 3025 Multifunction Printer Service Manual… -
Page 87
(Figure Install the components in the reverse of removal. Repairs June 2014 REP 1.19 Xerox® WorkCentre® 3025 Multifunction Printer Service Manual 4-35… -
Page 88: Rep 1.20 Wnpc (Wifi) Pwb
Figure 1 LSU Connectors Remove the SMPS / HVPS PWB (REP 1.6). WNPC PWB Figure 1 WNPC (WiFi) PWB Replacement Install the components in the reverse of removal. Repairs June 2014 REP 1.20, REP 1.21 4-36 Xerox® WorkCentre® 3025 Multifunction Printer Service Manual…
-
Page 89: Rep 1.22 Automatic Document Feeder (Adf)
Make sure that the Plastic Screws go into plastic components and Machine Screws go into the metal frame. Install the components in the reverse of removal. Repairs June 2014 REP 1.21, REP 1.22 Xerox® WorkCentre® 3025 Multifunction Printer Service Manual 4-37…
-
Page 90: Rep 1.23 Platen Cover
Figure 2 ADF Connector Replacement Install the components in the reverse of removal. Figure 1 Platen Cover Removal Replacement Install the components in the reverse of removal. Repairs June 2014 REP 1.22, REP 1.23 4-38 Xerox® WorkCentre® 3025 Multifunction Printer Service Manual…
-
Page 91: Rep 1.24 Adf Feed Separation Pad
Remove the ADF Cover, release the Rear Pivots and remove the cover (Figure Rear Pivot Latches Figure 1 ADF Cover Pivots (Top View) Figure 2 Separation Pad Latches (Top View) Repairs June 2014 REP 1.24 Xerox® WorkCentre® 3025 Multifunction Printer Service Manual 4-39…
-
Page 92: Rep 1.25 Adf Feed Rolls Assembly
Remove the ADF Cover, release the Rear Pivots and remove the cover (Figure Rear Pivot Spring Figure 1 ADF Cover Pivots (Top View) Figure 3 Separation Pad Spring (Top View) Repairs June 2014 REP 1.24, REP 1.25 4-40 Xerox® WorkCentre® 3025 Multifunction Printer Service Manual…
-
Page 93
NOTE: Install the E-rings in the following order: The E-ring by the gear. The E-ring (center) by the Spring. The E-ring at the end of the shaft. Repairs June 2014 REP 1.25 Xerox® WorkCentre® 3025 Multifunction Printer Service Manual 4-41… -
Page 94
Repairs June 2014 REP 1.25 4-42 Xerox® WorkCentre® 3025 Multifunction Printer Service Manual… -
Page 95
PL 5.5 Right Main Frame ………………..5-15 Middle And Bottom Frame PL 5.6 Paper Tray and LSU Frame…………….. 5-16 Idle Feed PL 5.7 Paper Feed Assembly ………………5-17 Part Number Index ………………….5-18 Parts List June 2014 Xerox® WorkCentre® 3025 Multifunction Printer Service Manual… -
Page 96
Parts List June 2014 Xerox® WorkCentre® 3025 Multifunction Printer Service Manual… -
Page 97: 1.1 Main
Paper Support (Black) 002N03180 Right Cover – 002N03181 Right Cover (Black) 140N63718 PWB-MAIN-3025 BI (USB / Wifi) 140N63727 WNPC (WiFi) PWB – Controller Shield – Document Pad Parts Lists June 2014 PL 1.1 Xerox® WorkCentre® 3025 Multifunction Printer Service Manual…
-
Page 98: 1.2 Main
FAX Board Cover 140N63726 Fax PWB 140N63717 PWB-MAIN-3025 NI (NW / Wifi) 140N63727 WNPC (WiFi) PWB – Speaker – Controller Shield 005N01172 Surge Protector (South Africa Only) Parts Lists June 2014 PL 1.2 Xerox® WorkCentre® 3025 Multifunction Printer Service Manual…
-
Page 99: 1.3 Adf (Automatic Document Feeder)
PL 1.3 ADF (Automatic Document Feeder) Item Part Description 022N02801 ADF Feed Roll Assembly 127N07864 ADF Drive Motor 022N02800 ADF Separation Pad Parts Lists June 2014 PL 1.3 Xerox® WorkCentre® 3025 Multifunction Printer Service Manual…
-
Page 100: Middle Cover
Top Cover Closed Switch Actuator – Spring – Latch – Spring – Middle Cover 002N03185 Middle Cover Assembly – 002N03186 Middle Cover Assembly (Black) – Output Tray – Output Support Parts Lists June 2014 PL 2.1 Xerox® WorkCentre® 3025 Multifunction Printer Service Manual…
-
Page 101: 3.1 Control Panel Assembly
Key Holder Cover – LCD Cover – LED Status Indicator – Power Key – Stop Key – Power Saver Key – Start Key 140N63732 Control Panel Assembly Parts Lists June 2014 PL 3.1 Xerox® WorkCentre® 3025 Multifunction Printer Service Manual…
-
Page 102: 3.2 Control Panel Assembly
Control Panel Cover – Function Key – FAX Key – Tel Key – LCD Cover 140N63722 Control Panel PWB – Key Holder Cover 140N63731 Control Panel Assembly Parts Lists June 2014 PL 3.2 Xerox® WorkCentre® 3025 Multifunction Printer Service Manual…
-
Page 103: 4.1 Scanner
Upper Scanner Frame – Lower Scanner Frame – Sensor – Flat Cable – Platen Scanner – Scanner Drive Motor – Drive Belt – Contact Image Sensor (CIS) Parts Lists June 2014 PL 4.1 Xerox® WorkCentre® 3025 Multifunction Printer Service Manual…
-
Page 104: 4.2 Scanner
Upper Scanner Frame – Lower Scanner Frame – Scanner PWB – Flat Cable – Sensor – Platen Scanner – Platen Drive – Drive Belt – Contact Image Sensor Parts Lists June 2014 PL 4.2 5-10 Xerox® WorkCentre® 3025 Multifunction Printer Service Manual…
-
Page 105: 5.1 Frame
Fuser (PL 5.2) – LSU Cover – Right Frame – HVPS Insulator – HVPS Contacts 105N02303 LVPS/HVPS 220V – 105N02302 LVPS/HVPS 110V – Input Guide – HVPS/SMPS Cover Parts Lists June 2014 PL 5.1 Xerox® WorkCentre® 3025 Multifunction Printer Service Manual 5-11…
-
Page 106: 5.2 Fuser
– Exit Shaft – Rubber Rolls – Exit Roll – Exit Holder – Exit Roll – Spring 126N00432 FUSER Module 110V – 126N00433 FUSER Module 220V Parts Lists June 2014 PL 5.2 5-12 Xerox® WorkCentre® 3025 Multifunction Printer Service Manual…
-
Page 107: 5.3 Frame Path
Paper Path Guide – Feed Roll Shaft 121N01246 Feed Clutch 007N01801 Feed Gear – Left Bushing – Spring – Right Bushing 001N00547 Retard Pad – Path Frame Parts Lists June 2014 PL 5.3 Xerox® WorkCentre® 3025 Multifunction Printer Service Manual 5-13…
-
Page 108: Left Main Frame
Fuser Drive Gear – RDCN Fuser Gear – RDCN A Gear – Drive Motor – Left Main Frame – Drive Mounting Plate 001N00548 Drive Gear Assembly Parts Lists June 2014 PL 5.4 5-14 Xerox® WorkCentre® 3025 Multifunction Printer Service Manual…
-
Page 109: Right Main Frame
Right Frame – CRUM Contacts – Spring – Ground Clip – Washer – Screw – CRUM Cover – Print Cartridge Guide – Main Right Frame Assembly Parts Lists June 2014 PL 5.5 Xerox® WorkCentre® 3025 Multifunction Printer Service Manual 5-15…
-
Page 110: 5.6 Paper Tray And Lsu Frame
Left Guide – Rubber Friction Pad – Bottom Plate – Pinion Gear – Sponge Damper 062N00293 – Motor Cover – LSU Frame 117N01971 LSU Flat Cable Parts Lists June 2014 PL 5.6 5-16 Xerox® WorkCentre® 3025 Multifunction Printer Service Manual…
-
Page 111: 5.7 Paper Feed Assembly
Pickup Roller – Washer – Bushing – Sleeve – Spring – Pickup Gear – Feed Gear – Shaft Drive Roller – Right Latch – Sponge Damper Parts Lists June 2014 PL 5.7 Xerox® WorkCentre® 3025 Multifunction Printer Service Manual 5-17…
-
Page 112: Part Number Index
PL 1.2 062N00293 PL 5.6 090N00183 PL 1.2 090N00184 PL 1.1 090N00185 PL 1.1 105N02302 PL 5.1 105N02303 PL 5.1 117N01971 PL 5.6 120N00546 PL 5.3 Parts Lists June 2014 Part Number Index 5-18 Xerox® WorkCentre® 3025 Multifunction Printer Service Manual…
-
Page 113
Entering Diagnostic Mode (Tech Mode)…………….6-21 Data Setup ……………………6-24 Machine Test……………………6-25 Report ……………………..6-26 EDC (Diagnostic) Mode ………………..6-26 6d Glossary Glossary of Terms………………….6-29 General Procedures and Information June 2014 Xerox® WorkCentre® 3025 Multifunction Printer Service Manual… -
Page 114
General Procedures and Information June 2014 Xerox® WorkCentre® 3025 Multifunction Printer Service Manual… -
Page 115
• Sensor Locations — Figure 5 • Laser Scanner Unit (LSU) — Figure 6 Refer to Xerox® WorkCentre® 3025BI/3025NI User Guide for detailed feature and configura- tion information. • Drives — Figure 7 •… -
Page 116
The following diagrams display the path that the paper follows during the printing process. Figure 3 System Layout Figure 1 Paper Path Figure 2 Automatic Document Feeder (ADF) 3025NI Model General Procedures and Information June 2014 Product Overview Xerox® WorkCentre® 3025 Multifunction Printer Service Manual… -
Page 117
Figure 5 shows the areas of the printer where the sensors are located on the 3025NI model. cess. Figure 4 Print Process Figure 5 Sensor Locations General Procedures and Information June 2014 Product Overview Xerox® WorkCentre® 3025 Multifunction Printer Service Manual… -
Page 118
(OPC) with a laser to create a latent image. with various gears for the Drum Cartridge (OPC), Fuser, Pick-up, Registration, Feed and Exit Rollers. Figure 6 Laser Scanner Unit Figure 7 Drives General Procedures and Information June 2014 Product Overview Xerox® WorkCentre® 3025 Multifunction Printer Service Manual… -
Page 119
From Platen in Power Save Mode 42 seconds From ADF in Standby Mode 15 seconds From ADF in Power Save Mode 42 seconds Resolution 1200 x 1200 dpi General Procedures and Information June 2014 Product Overview, Product Specifications Xerox® WorkCentre® 3025 Multifunction Printer Service Manual… -
Page 120
256 Color 300dpi: 65 ipm on Document Glass, 70 ipm from ADF • True Color 300dpi: 70 ipm on Document Glass, 70 ipm from ADF General Procedures and Information June 2014 Product Specifications Xerox® WorkCentre® 3025 Multifunction Printer Service Manual… -
Page 121
Windows® 2000/ XP (32/64bit) Windows® Vista(32/64bit) Windows® 2003 Server (32/64bit) Windows® 2008 Server (32/64bit) Windows® 7 (32/64bit) Windows® 2008 Server R2 (64bit) Windows® 8 (32/64bit) General Procedures and Information June 2014 Product Specifications Xerox® WorkCentre® 3025 Multifunction Printer Service Manual… -
Page 122
12.04, 12.10, 13.04 (32/64 bit) SuSE Linux Enterprise Desktop 10, 11 (32/64 bit) Debian 5.0, 6.0, 7.0, 7.1 (32/64 bit) Mac OS X 10.5 through 10.8 General Procedures and Information June 2014 Product Specifications 6-10 Xerox® WorkCentre® 3025 Multifunction Printer Service Manual… -
Page 123
Face down: 100 sheets @ 80 gsm Output Full Sensing Duplex Supporting Printable Area Non-Printable Area 3 mm (0.12 in.) from edge (top, bottom, left, right) General Procedures and Information June 2014 Product Specifications Xerox® WorkCentre® 3025 Multifunction Printer Service Manual 6-11… -
Page 124
3025BI: 14.66.lbs. (6.65 Kg) Print cartridge) • 3025NI: 17.64 lbs. (8.0 Kg) Operating Environment Temperature 50°- 90°F (10°C to 32°C) Humidity 20% — 80% RH General Procedures and Information June 2014 Product Specifications 6-12 Xerox® WorkCentre® 3025 Multifunction Printer Service Manual… -
Page 125
Login to CWIS: username (admin) password (1111) NOTE: It may be necessary to obtain the username and password from the customer if they have been changed. General Procedures and Information June 2014 GP 1, GP 2 Xerox® WorkCentre® 3025 Multifunction Printer Service Manual 6-13… -
Page 126
Printing machine reports Use the up/down arrows to select <Usage Counter>, then press <OK>, then <OK> again to print a Usage Counter report. General Procedures and Information June 2014 GP 2, GP 3 6-14 Xerox® WorkCentre® 3025 Multifunction Printer Service Manual… -
Page 127
Open Easy Printer Manager. Select: [Machine Settings, System Altitude Adjustment]. Select the correct altitude value for the placement of the machine. Table 1. Press <OK>. General Procedures and Information June 2014 GP 4, GP 5 Xerox® WorkCentre® 3025 Multifunction Printer Service Manual 6-15… -
Page 128
Login in to CWIS. Username: (Admin) Password: (1111) NOTE: It may be necessary to obtain the username and password from the customer if they have been changed. General Procedures and Information June 2014 GP 6 6-16 Xerox® WorkCentre® 3025 Multifunction Printer Service Manual… -
Page 129
Click [Apply] to save the changes. 10. Select the [Support] tab. 11. In the [Firmware Upgrade] link, select the [Upgrade Wizard] button. In the Firmware File area, select [Browse]. General Procedures and Information June 2014 GP 7 Xerox® WorkCentre® 3025 Multifunction Printer Service Manual 6-17… -
Page 130
Panel. Press the Copy Mode button to continue. Test the display buttons by pressing them sequentially, as indicated on the Control Panel display. General Procedures and Information June 2014 GP 8, GP 9 6-18 Xerox® WorkCentre® 3025 Multifunction Printer Service Manual… -
Page 131
Continue pressing the <Stop> button until all control panel indicator lights are turned off and the machine is returned to Copy mode. General Procedures and Information June 2014 GP 9, GP 10 Xerox® WorkCentre® 3025 Multifunction Printer Service Manual 6-19… -
Page 132
General Procedures and Information June 2014 GP 9, GP 10 6-20 Xerox® WorkCentre® 3025 Multifunction Printer Service Manual… -
Page 133
In Diagnostic Mode, use the navigation buttons to scroll to the following sub-menus. Press<OK> after selecting menu items. • Data Setup • Machine Test • Report • Exit Diagnostics General Procedures and Information June 2014 Diagnostic Information, Entering Diagnostic Mode Xerox® WorkCentre® 3025 Multifunction Printer Service Manual 6-21… -
Page 134
*Caller ID Off/On *Busy Tone Off/On Wrap Jam Clear No/Yes F/W Upgrade Off/On **Set Serial No. Enter machine serial number (Numeric characters only) General Procedures and Information June 2014 Entering Diagnostic Mode 6-22 Xerox® WorkCentre® 3025 Multifunction Printer Service Manual… -
Page 135
K THV — Bias Status: Off/On 109 Fuser Temp A Status: 110 LSU LSU Mot1 Run Status: Off/On LD Power4 Status: Off/On LSU HSync4 Status: General Procedures and Information June 2014 Entering Diagnostic Mode Xerox® WorkCentre® 3025 Multifunction Printer Service Manual 6-23… -
Page 136
Pickup Roll – Retard Roller – Forward Roller – Feed Roller – ADF Rubber Pad NOTE: A passcode is required to reset these counters. General Procedures and Information June 2014 Entering Diagnostic Mode 6-24 Xerox® WorkCentre® 3025 Multifunction Printer Service Manual… -
Page 137
Image Sensor. • Scan Aging An internal Engineering tool that tests the reliability of the Scanner Motor. (Not a field diagnostic function.) General Procedures and Information June 2014 Data Setup, Machine Test Xerox® WorkCentre® 3025 Multifunction Printer Service Manual 6-25… -
Page 138
109 Fuser Fuser Temp A Detects what the tem- Input Numeric 3 perature A is on fuser. digits General Procedures and Information June 2014 Report, EDC (Diagnostic) Mode 6-26 Xerox® WorkCentre® 3025 Multifunction Printer Service Manual… -
Page 139
LSU Motor1 On/Off Output On [Off] LSU LD Power4 LSU LD4 Power On/Off Output On [Off] (black) LSU HSync4 LSU Horizontal Sync Input [Low] General Procedures and Information June 2014 EDC (Diagnostic) Mode Xerox® WorkCentre® 3025 Multifunction Printer Service Manual 6-27… -
Page 140
General Procedures and Information June 2014 EDC (Diagnostic) Mode 6-28 Xerox® WorkCentre® 3025 Multifunction Printer Service Manual… -
Page 141
Glossary of Terms Table 1 Glossary Term/Acronym Definition NOTE: For a comprehensive list of Xerox acronyms, refer to the Xerox Acronym database at: Gateway A node (a router) on a TCP/IP network that serves as an access point https://open.xerox.com/Services/acronym to another network. -
Page 142
Internet. The first part of the address indicates what protocol to use, the second part specifies the IP address or the domain name where the resource is located. General Procedures and Information June 2014 Glossary of Terms 6-30 Xerox® WorkCentre® 3025 Multifunction Printer Service Manual… -
Page 143
Content Development and Language Services — North America Xerox Corporation 800 Phillips Road; Building 0218-01A Webster, New York 14580 USA ©2014 Xerox Corporation. All rights reserved. Xerox® and the sphere of connectivity design are trademarks of Xerox Corporation in the US and/or other countries.. -
Page 144
THIS PAGE INTENTIONALLY BLANK June 2014 ® ® Xerox WorkCentre 3025 Multifunction Printer Service Manual BSDs… -
Page 145
DC COM DC COM DC COM +5VDC +5 VDC +5 VDC +5 VDC DC COM +3.3 VDC +24 VDC POWER GENERATION DC COM +3.3 VDC +3.3 VDC +3.3 VDC +3.3 VDC June 2014 BSD’s Xerox® WorkCentre® 3025 Multifunction Printer Service Manual… -
Page 146
LED Y ANODE DC COM DC COM DC COM +5 VDC +5 VDC +5 VDC DC COM SIGNAL +3.3 VDC SIGNAL SIGNAL WIDTH SENSOR FEED SENSOR June 2014 ® ® Xerox WorkCentre 3025 Multifunction Printer Service Manual BSDs 7- 2… -
Page 147
ECO KEY WPS LED WPS KEY POWER LED POWER KEY DC COM DC COM DC COM +5 VDC +5 VDC +5 VDC CANCEL KEY READY LED ERROR LED TONER LED June 2014 BSD’s Xerox® WorkCentre® 3025 Multifunction Printer Service Manual… -
Page 148
4.1 MAIN DRIVE MAIN PWB PL 1.1 — 1.2 +24 VDC DRIVE MOTOR PL 5.4 MOTOR DRIVER PHASE A PHASE B PHASE C PHASE D June 2014 ® ® Xerox WorkCentre 3025 Multifunction Printer Service Manual BSDs… -
Page 149
+3.3 VDC DC COM +3.3 VDC DC COM DC COM +3.3 VDC +3.3 VDC DC COM DC COM DC COM DC COM DC COM +3.3 VDC +3.3 VDC +3.3 VDC June 2014 BSD’s Xerox® WorkCentre® 3025 Multifunction Printer Service Manual… -
Page 150
PL 1.1 — 1.2 ADF PWB +24 VDC ADF MOTOR PL 3.1 MOTOR DRIVER PHASE A PHASE A PHASE B PHASE B PHASE C PHASE C PHASE D PHASE D June 2014 ® ® Xerox WorkCentre 3025 Multifunction Printer Service Manual BSDs… -
Page 151
MOTOR READY MOTOR CLOCK POWER MOTOR SIGNAL SIGNAL DC COM DC COM DC COM SIGNAL SIGNAL DC COM DC COM DC COM SYNC SIGNAL +3.3 VDC +3.3 VDC +3.3 VDC June 2014 BSD’s Xerox® WorkCentre® 3025 Multifunction Printer Service Manual… -
Page 152
+3.3 VDC WIDTH SENSOR PAPER AT REG SENSOR (L) +3.3 VDC +3.3 VDC +3.3 VDC FEED CLUTCH PL 5.3 +24 VDC FEED CLUTCH ON (L) +24 VDC DC COM June 2014 ® ® Xerox WorkCentre 3025 Multifunction Printer Service Manual BSDs… -
Page 153
DEVELOPER ENABLED DEVELOPER AC DEVELOPER DC TRANSFER ENABLED SUPPLY PR DRUM ROLL CHARGE ENABLED TRANSFER CHARGE ON ROLL CRUM +3 VDC +3.3 VDC CRUM SIGNAL CRUM SIGNAL DC COM DC COM June 2014 BSD’s Xerox® WorkCentre® 3025 Multifunction Printer Service Manual… -
Page 154
PL 5.1 FUSER THERMISTOR RT10-001 Fuser Temperature Enable Fuser Signal Relay Fuser Relay +3.3 VDC FUSER MODULE PL5.2 +3.3 VDC OVERTEMPERATURE THERMOSTAT Heat Lamp On ACH HEAT LAMP June 2014 ® ® Xerox WorkCentre 3025 Multifunction Printer Service Manual BSDs 7-10… -
Page 155
PHASE B SCAN HOME SENSOR SIGNAL PHASE C SCANNER HOME +5 VDC SENSOR SCANNER HOME PHASE D (H) +5 VDC DC COM DC COM +5 VDC +5VDC June 2014 ® ® Xerox WorkCentre 3025 Multifunction Printer Service Manual BSDs 7-11… -
Page 156
©2014 Xerox Corporation. All rights reserved. Xerox® and the sphere of connectivity design are trademarks of Xerox Corporation in the US and/or other countries..