Consider the following scenario:
-
The System Center Configuration Manager Administrator manages all updates in the environment.
-
Users have no access to the Windows Update website.
-
The Configuration Manager Software Update Point is configured and synchronizing.
-
The Automatic Deployment Rule for Definition Updates is configured and appears to deliver updates nightly with no problem.
In this scenario, when a new client is deployed and the local Administrator clicks the Update button in the System Center 2012 Endpoint Protection client user interface (SCEP UI), the search for updates eventually times out and the following error is displayed:
0x8024402c – System Center Endpoint Protection couldn’t install the definition updates because the proxy server or target server names can’t be resolved
Analysis of the C:\Windows\WindowsUpdate.log file also indicates that the SCEP client is attempting to access the Microsoft Update Website.
Symptoms
The Updates Distributed from Configuration Manager source setting is not like any of the other definition update source settings in SCEP policies. You cannot pull definitions from this source by clicking Update in the SCEP UI.
Cause
To work around this issue, set up another Definition Update source such as WSUS to fall back to when a client attempts to manually update definitions via the SCEP UI. Alternatively, you can hide the SCEP UI from the end user so they cannot click Update in the client UI using the Disable the client user interface policy setting introduced in System Center 2012 Configuration Manager SP1. The Disable the client user interface option is located in the Advanced area of the Antimalware policy setting in the Configuration Manager administration console.
Resolution
When you click Update in the SCEP UI, the client looks for a FallbackOrder registry key in HKLM\Software\Policies\Microsoft\Microsoft Antimalware\Signature Updates. The client will check each update source in the FallbackOrder registry key in the order that they are listed until it locates a source that has available definitions. If it goes through all sources without detecting available definitions, it returns an error and the update attempt is unsuccessful. Configuration Manager is never listed in the FallbackOrder registry key, as the SCEP client does not recognize a Configuration Manger Software Update Point agent (and associated infrastructure) as a valid definition source and cannot pull definitions from Configuration Manager. FallbackOrder sources can include InternalDefinitionUpdateServer (WSUS), MicrosoftUpdateServer (Microsoft Update Website), FileShares (One or more UNC file shares whose location is determined by policy), and MMPC (Microsoft Malware Protection Center alternate download location).
Configuration Manager definition updates are handled entirely by the CCM client Software Updates Agent and are downloaded and installed by the CCM software update agent. The schedule for these updates is determined when configuring the deployment rule during server side setup. See http://technet.microsoft.com/en-us/library/jj822983.aspx for more information.
When you select Updates Distributed from Configuration Manager in your SCEP policy, it does not modify the FallbackOrder registry key. Instead, this update source option sets the AuGracePeriod registry key in HKLM\Software\Policies\Microsoft\Microsoft Antimalware\Signature Updates. This registry setting suppresses the SCEP client from attempting to automatically pull definitions from sources defined in the FallbackOrder key for a set length of time determined by SCEP policy which is 72 hours by default, or 4320 minutes. This is designed to give the CCM client Software Update process sufficient time to complete the definition update process independently of the SCEP client.
If Updates Distributed from Configuration Manager is the only update source defined in your policy, then the FallbackOrder registry key will be blank. In this case, clicking Update in the SCEP UI will cause the client to revert to behavior similar to Microsoft Security Essentials and the client will attempt to update from the Microsoft Update website.
More Information
Need more help?
Want more options?
Explore subscription benefits, browse training courses, learn how to secure your device, and more.
Communities help you ask and answer questions, give feedback, and hear from experts with rich knowledge.
Windows Update error 8024402C (Windows could not search for new updates – Errors found 8024402C) while checking for updates is commonly caused by invalid network settings or invalid update settings. The problem also occurs if your computer was connected to a local network (LAN) and managed by a Windows Server Update Services (WSUS).

This tutorial contains detailed instructions on how to resolve In order to fix the Windows Update error 0x8024402C in Windows 8, 7 or Vista.
How to fix Error code 0x8024402C in Windows Update.
Solution 1. Run the Windows Update Troubleshooter.
1. Navigate to Windows Control Panel, set the ‘View By’ to Small icons and open Troubleshooting.

2. In Troubleshooting options, click View all.

3. Open the Windows Update.

4. Click Next to troubleshoot Windows update problems.

5. When the troubleshooting process is complete, close the troubleshooter.
6. Restart your computer and see if the Error code 8024402C is resolved.
Solution 2. Change the DNS servers.
Some IPS causes errors with Windows Update. So try to manually add a public DNS server (e.g. Google DNS) on your network connection.
1. Press Windows ![]() + R keys to open the run command box.
+ R keys to open the run command box.
2. Type ncpa.cpl and press Enter.

3. Double click at your active Network Adapter.
4. Click Properties.

5. Open ‘Internet Protocol Version 4 (TCP/IPv4)’ Properties.

6. Select «Use the following DNS server addresses:» and type the following Google’s public DNS server addresses:
- 8.8.8.8
- 8.8.4.4

7. Press OK twice to exit Network settings.
8. Restart your computer and check for updates again.
Solution 3. Configure Automatic Updates client to connect directly to the Windows Update site on the Internet.
1. Press Windows ![]() + R keys to open the run command box.
+ R keys to open the run command box.
2. Type regedit and press Enter.

3. In Windows registry editor locate the following key:
HKEY_LOCAL_MACHINE\SOFTWARE\Policies\Microsoft\Windows\WindowsUpdate\AU

Note: If you don’t find the WindowsUpdate key you have to create it: Right click on Windows key (on the left pane) and select New > Key. Give the name: WindowsUpdate. Then right click at «WindowsUpdate’ & perform the same operation to create the AU key.

4. At the right double click to open the UseWUServer value and change the Value data from 1 to 0.

Note: If you don’t find the UseWUServer value you have to create it: Right click on the right pane and select New > DWORD (32-bit) Value. Give the name: UseWUServer.

5. Press OK to apply changes and exit from Registry Editor.

That’s all folks! Did it work for you?
Please leave a comment in the comment section below or even better: like and share this blog post in the social networks to help spread the word about this solution.
If this article was useful for you, please consider supporting us by making a donation. Even $1 can a make a huge difference for us.

- Remove From My Forums
-
Question
-
Hi,
I am getting this error on my Server 2008 SP2 Domain Controller. I have searched all the sites & have carried out the following:Stopped all Sophos Anti Virus services (I even tried uninstalling it at one point)
Checked Windows firewall — disabled
Set proxy — netsh winhttp>set proxy proxy-server=»servername:port”
followed bynet stop WuAuServ
net start WuAuServ
Then I tried renaming the Software Distribution folder, but got an access denied message.
I was logged in as domain administrator, but couldn’t try local administrator account as there isn’t one on a domain controller.Has anyone got any ideas? I have tried contacting Microsoft as they offer free support on Windows Updates errors, but the reply I got was «due to the nature of the technical query, it has not been possible for me to answer your query» and I was told to try this forum.
Somebody please help!For your information here is the latest log file. What is odd, is the reference to an old server which no longer exists in the domain: http://cserec/ Is this stuck in the cache somewhere? If so how do I get rid of it & why are all my other servers updating ok? Please note I have changed the name of my proxy server in the log as it is an external local authority server.
2009-11-24 09:10:46:474 1012 be4 AU Triggering AU detection through DetectNow API
2009-11-24 09:10:46:474 1012 be4 AU Triggering Online detection (interactive)
2009-11-24 09:10:46:490 1012 858 AU #############
2009-11-24 09:10:46:490 1012 858 AU ## START ## AU: Search for updates
2009-11-24 09:10:46:490 1012 858 AU #########
2009-11-24 09:10:46:490 1012 858 AU <<## SUBMITTED ## AU: Search for updates [CallId = {1B4FC90F-028C-44A9-9418-975614BBE5E0}]
2009-11-24 09:10:46:490 1012 4ac Agent *************
2009-11-24 09:10:46:490 1012 4ac Agent ** START ** Agent: Finding updates [CallerId = AutomaticUpdates]
2009-11-24 09:10:46:490 1012 4ac Agent *********
2009-11-24 09:10:46:490 1012 4ac Agent * Online = Yes; Ignore download priority = No
2009-11-24 09:10:46:490 1012 4ac Agent * Criteria = «IsInstalled=0 and DeploymentAction=’Installation’ or IsPresent=1 and DeploymentAction=’Uninstallation’ or IsInstalled=1 and DeploymentAction=’Installation’ and RebootRequired=1 or IsInstalled=0 and DeploymentAction=’Uninstallation’ and RebootRequired=1»
2009-11-24 09:10:46:490 1012 4ac Agent * ServiceID = {3DA21691-E39D-4DA6-8A4B-B43877BCB1B7}
2009-11-24 09:10:46:490 1012 4ac Agent * Search Scope = {Machine}
2009-11-24 09:10:46:490 1012 4ac Setup Checking for agent SelfUpdate
2009-11-24 09:10:46:490 1012 4ac Setup Client version: Core: 7.2.6001.788 Aux: 7.2.6001.788
2009-11-24 09:10:46:490 1012 4ac Misc Validating signature for C:\Windows\SoftwareDistribution\SelfUpdate\wuident.cab:
2009-11-24 09:10:46:490 1012 4ac Misc Microsoft signed: Yes
2009-11-24 09:10:49:110 1012 4ac Misc WARNING: SendRequest failed with hr = 80072ee7. Proxy List used: <proxyservername:8080> Bypass List used : <<local>> Auth Schemes used : <>
2009-11-24 09:10:49:110 1012 4ac Misc WARNING: WinHttp: SendRequestUsingProxy failed for <http://cserec/selfupdate/wuident.cab>. error 0x8024402c
2009-11-24 09:10:49:110 1012 4ac Misc WARNING: WinHttp: SendRequestToServerForFileInformation MakeRequest failed. error 0x8024402c
2009-11-24 09:10:49:110 1012 4ac Misc WARNING: WinHttp: SendRequestToServerForFileInformation failed with 0x8024402c
2009-11-24 09:10:49:110 1012 4ac Misc WARNING: WinHttp: ShouldFileBeDownloaded failed with 0x8024402c
2009-11-24 09:10:51:404 1012 4ac Misc WARNING: SendRequest failed with hr = 80072ee7. Proxy List used: <proxyservername:8080> Bypass List used : <<local>> Auth Schemes used : <>
2009-11-24 09:10:51:404 1012 4ac Misc WARNING: WinHttp: SendRequestUsingProxy failed for <http://cserec/selfupdate/wuident.cab>. error 0x8024402c
2009-11-24 09:10:51:404 1012 4ac Misc WARNING: WinHttp: SendRequestToServerForFileInformation MakeRequest failed. error 0x8024402c
2009-11-24 09:10:51:404 1012 4ac Misc WARNING: WinHttp: SendRequestToServerForFileInformation failed with 0x8024402c
2009-11-24 09:10:51:404 1012 4ac Misc WARNING: WinHttp: ShouldFileBeDownloaded failed with 0x8024402c
2009-11-24 09:10:53:697 1012 4ac Misc WARNING: SendRequest failed with hr = 80072ee7. Proxy List used: <proxyservername:8080> Bypass List used : <<local>> Auth Schemes used : <>
2009-11-24 09:10:53:697 1012 4ac Misc WARNING: WinHttp: SendRequestUsingProxy failed for <http://cserec/selfupdate/wuident.cab>. error 0x8024402c
2009-11-24 09:10:53:697 1012 4ac Misc WARNING: WinHttp: SendRequestToServerForFileInformation MakeRequest failed. error 0x8024402c
2009-11-24 09:10:53:697 1012 4ac Misc WARNING: WinHttp: SendRequestToServerForFileInformation failed with 0x8024402c
2009-11-24 09:10:53:697 1012 4ac Misc WARNING: WinHttp: ShouldFileBeDownloaded failed with 0x8024402c
2009-11-24 09:10:55:990 1012 4ac Misc WARNING: SendRequest failed with hr = 80072ee7. Proxy List used: <proxyservername:8080> Bypass List used : <<local>> Auth Schemes used : <>
2009-11-24 09:10:55:990 1012 4ac Misc WARNING: WinHttp: SendRequestUsingProxy failed for <http://cserec/selfupdate/wuident.cab>. error 0x8024402c
2009-11-24 09:10:55:990 1012 4ac Misc WARNING: WinHttp: SendRequestToServerForFileInformation MakeRequest failed. error 0x8024402c
2009-11-24 09:10:55:990 1012 4ac Misc WARNING: WinHttp: SendRequestToServerForFileInformation failed with 0x8024402c
2009-11-24 09:10:55:990 1012 4ac Misc WARNING: WinHttp: ShouldFileBeDownloaded failed with 0x8024402c
2009-11-24 09:10:55:990 1012 4ac Misc WARNING: DownloadFileInternal failed for http://cserec/selfupdate/wuident.cab: error 0x8024402c
2009-11-24 09:10:55:990 1012 4ac Setup WARNING: SelfUpdate check failed to download package information, error = 0x8024402C
2009-11-24 09:10:55:990 1012 4ac Setup FATAL: SelfUpdate check failed, err = 0x8024402C
2009-11-24 09:10:55:990 1012 4ac Agent * WARNING: Skipping scan, self-update check returned 0x8024402C
2009-11-24 09:10:55:990 1012 4ac Agent * WARNING: Exit code = 0x8024402C
2009-11-24 09:10:55:990 1012 4ac Agent *********
2009-11-24 09:10:55:990 1012 4ac Agent ** END ** Agent: Finding updates [CallerId = AutomaticUpdates]
2009-11-24 09:10:55:990 1012 4ac Agent *************
2009-11-24 09:10:55:990 1012 4ac Agent WARNING: WU client failed Searching for update with error 0x8024402c
2009-11-24 09:10:55:990 1012 de8 AU >>## RESUMED ## AU: Search for updates [CallId = {1B4FC90F-028C-44A9-9418-975614BBE5E0}]
2009-11-24 09:10:55:990 1012 de8 AU # WARNING: Search callback failed, result = 0x8024402C
2009-11-24 09:10:55:990 1012 de8 AU # WARNING: Failed to find updates with error code 8024402C
2009-11-24 09:10:55:990 1012 de8 AU #########
2009-11-24 09:10:55:990 1012 de8 AU ## END ## AU: Search for updates [CallId = {1B4FC90F-028C-44A9-9418-975614BBE5E0}]
2009-11-24 09:10:55:990 1012 de8 AU #############
2009-11-24 09:10:55:990 1012 de8 AU AU setting next detection timeout to 2009-11-24 14:10:55
Answers
-
Hello
You’ll not be able to delete the Directory if the service is started.
If you’re sure the proxy is correct, the WSUS URL is correct (http or https? Certificat’s ok? etc..). you can try this…
sc stop bits
sc stop wuauservrmdir /s «%windir%\SoftwareDistribution»
mkdir /s «%windir%\SoftwareDistribution»
cacls «%windir%\SoftwareDistribution» /G Everyone:Fgpupdate /target:computer
sc start bits
sc start wuauservwuauclt /detectnow
Conrad
-
Marked as answer by
Wednesday, November 25, 2009 10:03 AM
-
Unmarked as answer by
StBernards
Wednesday, November 25, 2009 10:04 AM -
Marked as answer by
StBernards
Wednesday, November 25, 2009 10:14 AM
-
Marked as answer by
-
Hi,
Thanks for the info. I followed your instructions & was able to delete the Software Distribution folder. Then I stopped my antivirus services & checked updates again.
This time after I received the error I noticed that under the option «check for updates» it said «you receive updates: managed by your system administrator» This is not true because our WSUS server is set up only to install updates to the client machines, not servers — is it the case that server 2008 detects the WSUS server in the domain which makes WSUS the default method of checking for updates?
Anyway when I clicked «check online for updates from windows update» — not seen this option before either — it successfully downloaded & installed all remaining updates.
Thanks for your help as I think removing the Software Distribution folder was the key to sorting out this problemMany thanks
-
Marked as answer by
StBernards
Wednesday, November 25, 2009 10:14 AM
-
Marked as answer by
Return Error Code 0x8024402c prompt when installing .NET Framework 3.5 feature on Windows 10 or Windows Server 2019 although installation media disc inserted.
The request to add or remove features on the specified server failed. Installation of one or more roles, role services, or features failed. Error: 0x8024402c
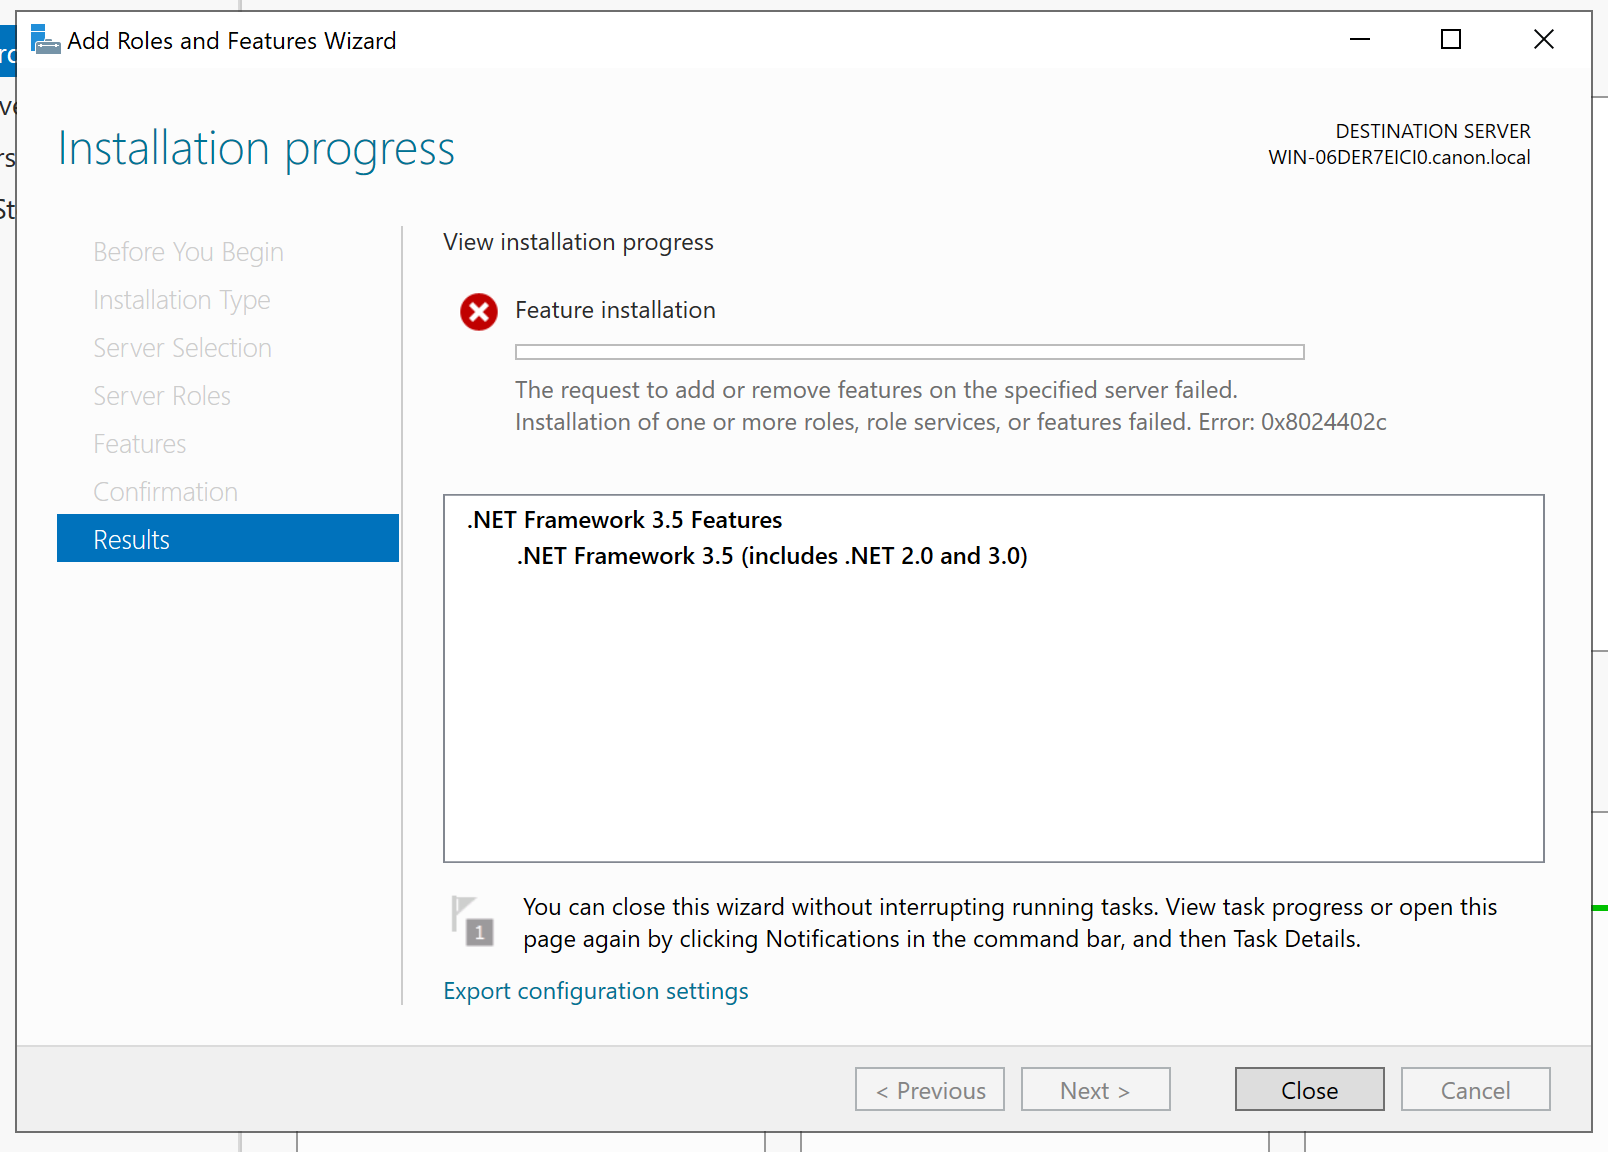
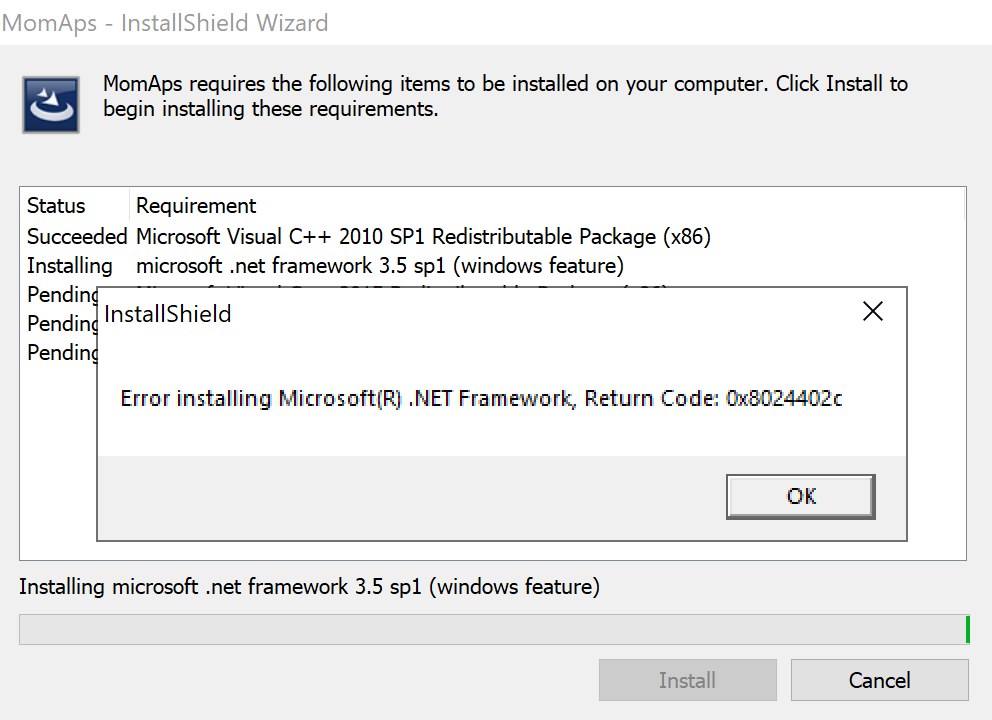
Error installation Microsoft(R) .NET Framework, Return Code: 0x8024402c
Resolution step as below:
Step 1: Open Notepad.
Step 2: Copy and paste the following into it:
@echo off

Title .NET Framework 3.5 Offline Installer

for %%I in (D E F G H I J K L M N O P Q R S T U V W X Y Z) do if exist "%%I:\\sources\install.wim" set setupdrv=%%I

if defined setupdrv (

echo Found drive %setupdrv%

echo Installing .NET Framework 3.5...

Dism /online /enable-feature /featurename:NetFX3 /All /Source:%setupdrv%:\sources\sxs /LimitAccess

echo.

echo .NET Framework 3.5 should be installed

echo.

) else (

echo No installation media found!

echo Insert DVD or USB flash drive and run this file once again.

echo.

)

pause
Step 3: Save it as framefx.cmd
Step 4: Insert Windows 10 / Windows Server 2019 installation media ISO.
Step 5: Right-click framefx.cmd
Step 6: Click Run as administrator.
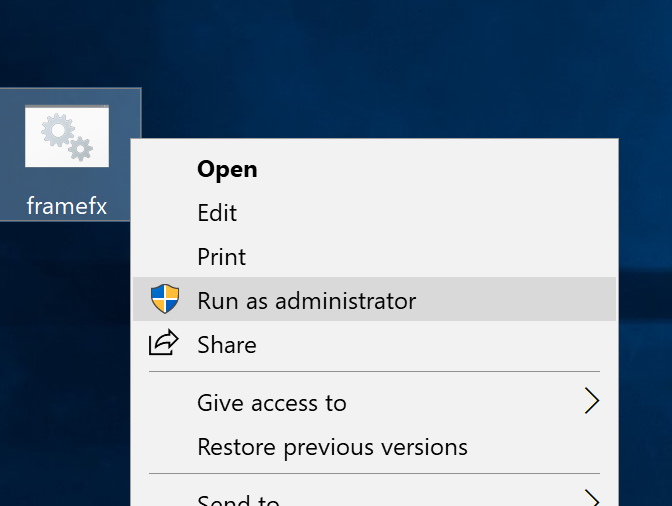
Run as administrator
Step 7: The file will install .NET Framework 3.5 automatically after finding the drive letter of your Windows 10 installation media.

.NET Framework 3.5 Offline Installer
If the installation media are not found then insert Windows 10 / Windows Server 2019 USB or DVD drive and run as administrator again. If there is an issue in regards to your installation media, download the Windows 10 / Windows Server 2019 ISO file from Microsoft Evaluation Center then double-click to mount it.
Reference: Microsoft Community > Error Code 0x8024402c windows 10 when installing .net framework 3.5
Содержание
- Твой Сетевичок
- Все о локальных сетях и сетевом оборудовании
- Ошибка центра обновления windows 0x8024402c на windows 7
- Причины возникновения ошибки 0x8024402c в Windows 7
- Как исправить ошибку 0x8024402c с помощью средства устранения неполадок Windows в автоматическом режиме
- Устранение ошибки вручную
- Ошибка 8024402c Центра обновления Windows: что это такое и как ее исправить
- Причины ошибки Центра обновления Windows 8024402c
- Убедитесь, что ваш брандмауэр / антивирус не блокирует обновление
- Проверьте VPN / прокси-серверы — они могут быть заблокированы или мешать загрузке обновлений
- Попробуйте запустить функцию «Устранение неполадок Центра обновления Windows»
- Измените DNS-сервера
- (Решено) Windows Update Ошибка 8024402C Исправить
- Сброс настроек прокси
- Обновление за апрель 2021 года:
- Измените свой адрес DNS
- Отключить антивирусное программное обеспечение
- Использование Regedit
Твой Сетевичок
Все о локальных сетях и сетевом оборудовании
С ошибкой центра обновления windows могут столкнуться как опытные пользователи ПК, так и начинающие юзеры, только познающие таинственный и загадочный мир ОС Windows. И возникает она всегда внезапно и неожиданно.
Итак, попробуем разобраться, почему возникает данная неполадка и как самостоятельно исправить ее без вреда для операционной системы.

Причины возникновения ошибки 0x8024402c в Windows 7
Основной причиной возникновения данной ошибки является неправильная настройка проски-сервера вInternet Explorer, либо в настройках сетевого подключения. Так же нельзя исключать блокирование сетевого трафика антивирусами и межсетевыми экранами.
Как исправить ошибку 0x8024402c с помощью средства устранения неполадок Windows в автоматическом режиме
На официальном сайте Microsoft для решения всех проблем связанных с ошибками Windows Update в качестве простейшего элемента их исправлений существует утилита – средство устранения неполадок центра обновления Windows.

Данная программа самостоятельно исправит все имеющиеся ошибки Центра обновления и предоставит отчет о возникающих проблемах при ее работе.
Главным недостатком данного метода является обязательное подключение к сети интернет. К сожалению, это не везде возможно. Например корпоративные сети, где в качестве Центра обновления Windows используются сервера с предустановленными на них службами WSUS (Windows Server Update Servise). К сожалению данная ошибка может распространяться и среди клиентских компьютеров корпоративной сети, что может повлечь серьезные проблемы безопасности.
Устранение ошибки вручную
Если у пользователя по каким-то причинам нет возможности скачать данное исправление (либо оно не смогло решить данную проблему в автоматическом режиме) можно самостоятельно устранить первопричину данной проблемы.

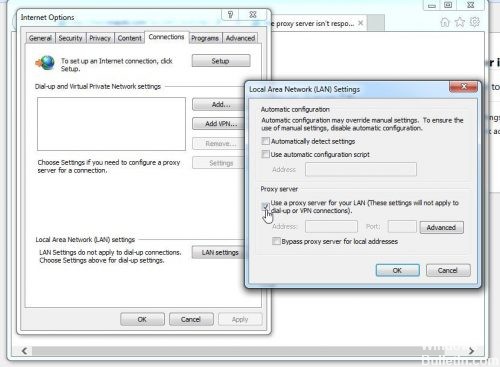
Открываем браузер Internet Explorer, после заходим в свойства браузера:

Заходим во вкладку «Подключения», подпункт «Настройка параметров локальной сети», жмем на кнопку «Настройка сети»:

Ставим галочку в пункте «Использовать прокси-сервер…», нажимаем кнопку «Дополнительно»:

Удаляем все существующие записи в данном подразделе и нажимаем кнопку «Ок»:

Но это еще не все. Чтобы ошибка окончательно исчезла нужно запустить командную строку. Для этого нужно запустить командную строку от имени администратора:

В командной строке ввести следующие команды (каждую команду нужно писать отдельно друг от друга):
- netsh winhttp reset proxy – данная команда перезагружает параметры прокси-сервера;
- net stop wuauserv – данная команда останавливает службу Центра обновления Windows;
- net start wuauserv – данная команда запускает заново службу Центра обновления Windows;

После проделанных действий стоит попробовать заново включить «Поиск обновлений» — все должно заработать.
Примечание: Если проделанные действия не возымели должного успеха, то удалите содержимое папки SoftwareDistribution, которая находиться в папке Windows системного диска (Например: C:WindowsSoftwareDistribution). Перезагрузите ПК и попробуйте заново.
Вывод: Ошибку 0x8024402c может исправить любой посредством автоматического исправления Windowsи даже при отсутствии возможности запустить данное средство ручное исправление не требует от пользователя больших знаний. Желательно при проведении данных действий отключить все межсетевые экраны и антивирусную защиту.
Ошибка 8024402c Центра обновления Windows: что это такое и как ее исправить

Центр обновления Windows необходим для нормальной работы вашего ПК. Вот почему ошибка при обновлении может быть настолько большой проблемой, насколько это возможно. Ошибка Центра обновления Windows 8024402c — это один из наиболее распространенных способов возникновения проблемы с обновлением Windows. Это вызвано тем, что ваш компьютер не может подключиться к серверам обновлений Microsoft.
Причины ошибки Центра обновления Windows 8024402c
Эта ошибка будет появляться всякий раз, когда Центр обновления Windows не может подключиться к серверам обновлений Microsoft. Если вы запускаете Центр обновления Windows, запускается ваше запланированное обновление, и нет соединения с Интернетом, или это соединение где-то заблокировано, есть большая вероятность, что вы увидите ошибку 8024402c.
Эту ошибку особенно сложно решить, поскольку существует множество причин, которые могут помешать компьютеру подключиться. Ваше WiFi соединение слабое? Вы не связаны вообще? Ошибка может случиться. Затем, есть более технические и трудные, чтобы определить причины.
Хитрость в том, чтобы выяснить, какой это на самом деле, потому что эта ошибка довольно расплывчата и не сообщает точную причину. Вот четыре наиболее распространенных технических причины ошибки 8024402c:
Убедитесь, что ваш брандмауэр / антивирус не блокирует обновление
Сначала проверьте свою собственную антивирусную программу. Попробуйте отключить любой брандмауэр и остановите его, если сможете. Если это не облегчает проблему, продолжайте.
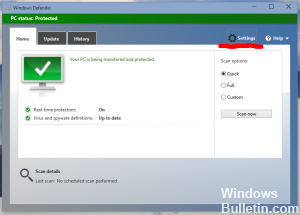
Откройте меню Пуск и в строке поиска наберите «Безопасность и обслуживание»

Выберите раздел Безопасность. Если вы видите, что брандмауэр и антивирус включены, вам нужно их отключить.

Выберите Изменить параметры безопасности и обслуживания в левом верхнем углу экрана.
Выберите Сетевой брандмауэр и Защита от вирусов, чтобы отключить их.

Проверьте VPN / прокси-серверы — они могут быть заблокированы или мешать загрузке обновлений
Если вы в настоящее время используете VPN или прокси для подключения к Интернету, лучше временно отключить его, чтобы исключить его в качестве причины. Если у вас есть приложение VPN от вашего провайдера, сначала используйте его для отключения VPN. В противном случае выполните следующие действия, чтобы отключить VPN.
Выберите меню «Пуск» > «Настройки».

Выберите Сеть и Интернет.

Выберите VPN.
Найдите ваше VPN-соединение и отключите его.
Попробуйте запустить функцию «Устранение неполадок Центра обновления Windows»
Microsoft предлагает собственное автоматизированное решение для устранения неполадок Центра обновления Windows. Перейдите на страницу загрузки Microsoft и загрузите правильную версию средства устранения неполадок для вашей версии Windows.
Запустите средство устранения неполадок, и, если повезет, он обнаружит и решит проблему
Измените DNS-сервера
Серверы системы доменных имен (DNS) направляют ваш компьютер к нужным серверам для поиска веб-сайтов, которые вы ищете. Они являются важной частью вашего компьютера для установления соединения с серверами Центра обновления Windows. Если вы не можете подключиться к Центру обновления Windows, причиной может быть плохой DNS-сервер. К счастью, вы можете изменить их в любое время.
Введите новый предпочтительный и альтернативный DNS-сервер. Вот два хороших варианта:
- Cloudflare: 1.1.1.1 и 1.0.0.1
- Google: 8.8.8.8 и 8.8.4.4
Нажмите OK в нижней части окна, чтобы сохранить изменения. Попробуйте запустить Центр обновления Windows еще раз, чтобы увидеть, можно ли подключиться. Если у вас остались вопросы — пишите их в комментариях.
(Решено) Windows Update Ошибка 8024402C Исправить
Вы получаете код ошибки 8024402C при обновлении windows? Эта ошибка может возникать в Windows 10 и других версиях Windows. Это обычный Ошибка обновления Windows.
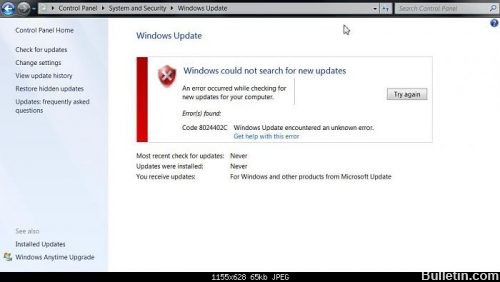
Это появляется на экране вашего компьютера как это сообщение:
Windows не может проверить наличие новых обновлений.
Произошла ошибка при поиске вашего компьютера.
Обнаружена ошибка:
Код 8024402C Windows Update обнаружил неизвестную ошибку.
Эта ошибка обновления Windows 8024402c вызвана неправильными настройками прокси-сервера или брандмауэра, которые не позволяют службам обновления Windows подключаться к Интернету.
Вот несколько методов, которые помогут вам решить эту проблему:
Сброс настроек прокси
Это решение может быть очень полезным, поскольку оно может быть легко выполнено и может решить проблему путем сброса настроек прокси-сервера на вашем компьютере, которые были повреждены с момента последнего обновления. Следуйте инструкциям ниже, чтобы решить проблему.
Используйте Windows + X, чтобы открыть меню, из которого вы должны выбрать параметр командной строки (Admin). Вы также можете щелкнуть правой кнопкой мыши меню «Пуск» для того же эффекта или просто найти командную строку, щелкнуть правой кнопкой мыши и выбрать «Запуск от имени администратора».
Введите команды, перечисленные ниже, и обязательно нажимайте Enter после каждой команды, чтобы выполнить ее правильно.
сеть
ветер
сбросить прокси
Обновление за апрель 2021 года:
Теперь мы рекомендуем использовать этот инструмент для вашей ошибки. Кроме того, этот инструмент исправляет распространенные компьютерные ошибки, защищает вас от потери файлов, вредоносных программ, сбоев оборудования и оптимизирует ваш компьютер для максимальной производительности. Вы можете быстро исправить проблемы с вашим ПК и предотвратить появление других программ с этим программным обеспечением:
- Шаг 1: Скачать PC Repair & Optimizer Tool (Windows 10, 8, 7, XP, Vista — Microsoft Gold Certified).
- Шаг 2: Нажмите «Начать сканирование”, Чтобы найти проблемы реестра Windows, которые могут вызывать проблемы с ПК.
- Шаг 3: Нажмите «Починить все», Чтобы исправить все проблемы.

Вернитесь в Центр обновления Windows и проверьте, сохраняется ли проблема на вашем компьютере.
Измените свой адрес DNS
Если ваш провайдер действительно вызывает эти проблемы, другие решения могут оказаться бесполезными, поскольку они не могут устранить тот факт, что ваш текущий DNS-адрес просто не совместим с серверами Microsoft. К счастью, изменить DNS-адрес очень просто, если вы будете тщательно следовать этим инструкциям. Вы можете легко отменить операцию, если что-то пойдет не так.
Откройте диалоговое окно «Выполнить», одновременно нажав кнопку с логотипом Windows + кнопку R. Затем введите «ncpa.cpl» и нажмите «ОК».
Теперь, когда окно подключения к Интернету открыто, дважды щелкните активный сетевой адаптер.
Затем нажмите «Свойства» и дважды щелкните «Версия протокола Интернета 4» (TCP / IPv4).
Поиск Используйте следующую опцию для адресов DNS-серверов.
Установите для предпочитаемого DNS-сервера значение 8.8.8.8.8.8.8.8.8.8.8.8.
Установите альтернативный DNS-сервер на 8.8.8.4.4.4.4.4.
Отключить антивирусное программное обеспечение
Временно отключите защитное программное обеспечение и проверьте, сохраняется ли проблема.
a: Нажмите логотип Windows + Q, чтобы открыть поле поиска.
b: Теперь нажмите «Настройки», затем войдите в «Центр поддержки» и нажмите «Ввод».
c: Нажмите на шеврон рядом с безопасностью.
d: отключить антивирусную защиту, установленную на вашем компьютере.
Предупреждение. Антивирусное программное обеспечение может защитить ваш компьютер от вирусов и других угроз безопасности. В большинстве случаев не следует отключать антивирусное программное обеспечение. Если вам необходимо временно отключить его для установки другого программного обеспечения, вы должны активировать его, когда закончите. Если вы подключены к Интернету или сети, когда антивирусное программное обеспечение отключено, ваш компьютер уязвим для атак.
Использование Regedit
Очень легко следовать этой процедуре:
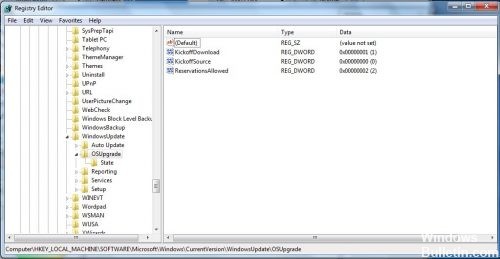
Откройте редактор реестра (меню Пуск -> Выполнить -> Regedit).
Найдите следующий путь HKEY_LOCAL_MACHINE SOFTWARE Policies Microsoft Windows WindowsUpdate AU
Установите значение UseWUServer от 1 до 0 (дважды щелкните его, измените значение и нажмите OK).
Перезапустите службу Центра обновления Windows (меню «Пуск» -> Выполнить -> services.msc, найдите службу Центра обновления Windows и нажмите «Перезагрузить»).
Если вы по-прежнему не можете обновить Windows, могут быть другие причины.

CCNA, веб-разработчик, ПК для устранения неполадок
Я компьютерный энтузиаст и практикующий ИТ-специалист. У меня за плечами многолетний опыт работы в области компьютерного программирования, устранения неисправностей и ремонта оборудования. Я специализируюсь на веб-разработке и дизайне баз данных. У меня также есть сертификат CCNA для проектирования сетей и устранения неполадок.
Return Error Code 0x8024402c prompt when installing .NET Framework 3.5 feature on Windows 10 or Windows Server 2019 although installation media disc inserted.
The request to add or remove features on the specified server failed. Installation of one or more roles, role services, or features failed. Error: 0x8024402c
Error installation Microsoft(R) .NET Framework, Return Code: 0x8024402c
Resolution step as below:
Step 1: Open Notepad.
Step 2: Copy and paste the following into it:
@echo off

Title .NET Framework 3.5 Offline Installer

for %%I in (D E F G H I J K L M N O P Q R S T U V W X Y Z) do if exist "%%I:\sourcesinstall.wim" set setupdrv=%%I

if defined setupdrv (

echo Found drive %setupdrv%

echo Installing .NET Framework 3.5...

Dism /online /enable-feature /featurename:NetFX3 /All /Source:%setupdrv%:sourcessxs /LimitAccess

echo.

echo .NET Framework 3.5 should be installed

echo.

) else (

echo No installation media found!

echo Insert DVD or USB flash drive and run this file once again.

echo.

)

pause
Step 3: Save it as framefx.cmd
Step 4: Insert Windows 10 / Windows Server 2019 installation media ISO.
Step 5: Right-click framefx.cmd
Step 6: Click Run as administrator.
Run as administrator
Step 7: The file will install .NET Framework 3.5 automatically after finding the drive letter of your Windows 10 installation media.
.NET Framework 3.5 Offline Installer
If the installation media are not found then insert Windows 10 / Windows Server 2019 USB or DVD drive and run as administrator again. If there is an issue in regards to your installation media, download the Windows 10 / Windows Server 2019 ISO file from Microsoft Evaluation Center then double-click to mount it.
Reference: Microsoft Community > Error Code 0x8024402c windows 10 when installing .net framework 3.5
Download PC Repair Tool to quickly find & fix Windows errors automatically
While trying to connect to the Microsoft’s Windows Updates servers, you might run into a plethora of errors. One such error code is 0x8024402C. This error code can be seen mentioned on the screen when the user checks for updates.

This error is caused when the proxy or the firewall settings are configured incorrectly. This results in the client’s connection to the Windows Update servers failing.
If you receive this error code 0x8024402c, here are two things you could try:
- Fix the Proxy Settings.
- Set up Automatically Detect the connection settings.
If you tend to create a System Restore point usually, you can try to undo any sorts of intentional or unintentional modifications on your computer; you can try to perform a System Restore from that System Restore point. And in case, you do not have any habit to create and maintain a System Restore point; you can also start doing so because it is a very strong feature that will let you fix your computer in a number of scenarios.
1] Fix the Proxy Settings
Search for Internet Explorer in the Cortana Search box and select the appropriate entry.
Now, hit the WINKEY + T button combination on your keyboard and click on Internet Options. Navigate to the tab named Connections.
Click on LAN Settings.
Then click on Advanced.
Delete all the entries in the list generated in the section called Exceptions.
In case the Advanced button is disabled because of the checkbox labeled as Use a proxy server for your LAN (These settings will not apply to the dial-up or VPN connections) is disabled, you are good to go and jump to the next step.
Then start by pressing WIN+X keys or right-click on the Start button and click on Command Prompt (Admin) or just search for cmd in the Cortana search box, right click on the Command Prompt icon and click on Run as Administrator. Click on Yes for the UAC or User Account Control prompt that you get.
Now type in the following commands one by one and then hit Enter after each one of them.
netsh winhttp reset proxy
net stop wuauserv
net start wuauserv
Reboot your computer and then try to check for updates again.
2] Set up Automatically Detect the connection settings
Start by typing in Internet Options in the Cortana Search Box. Click on the appropriate result.
Now navigate to the tab called Connections.
Under the section labeled as Local Area Network (LAN) settings. Click on the button that says LAN Settings.
Under the section of Proxy Server, uncheck the option that is labeled as Use a proxy server for your LAN (These settings will not apply to dial-up or VPN connections).
Click on OK and then Reboot the computer for the changes to take effect.
Now check if your issue is fixed or not.
Hope this works for you!

Ayush has been a Windows enthusiast since the day he got his first PC with Windows 98SE. He is an active Windows Insider since Day 1 and has been a Windows Insider MVP.
При попытке подключиться к серверам Microsoft Windows Updates вы можете столкнуться с множеством ошибок. Одним из таких кодов ошибок является 0x8024402C. Этот код ошибки упоминается на экране, когда пользователь проверяет наличие обновлений.

Эта ошибка возникает, когда параметры прокси-сервера или брандмауэра настроены неправильно. Это приводит к сбою подключения клиента к серверам Центра обновления Windows.
Содержание
- Код ошибки Центра обновления Windows 0x8024402c
- Исправьте настройки прокси
- Настроить автоматически Определить параметры подключения
Код ошибки Центра обновления Windows 0x8024402c
Если вы получите этот код ошибки 0x8024402c, попробуйте две вещи:
- Исправьте настройки прокси.
- Настроить автоматически Определить параметры подключения.
Если вы обычно создаете точку восстановления системы, вы можете попытаться отменить любые преднамеренные или непреднамеренные изменения на вашем компьютере; вы можете попытаться выполнить восстановление системы из этой точки восстановления системы. И в случае, если у вас нет привычки создавать и поддерживать точку восстановления системы; Вы также можете начать делать это, потому что это очень сильная функция, которая позволит вам исправить ваш компьютер в ряде сценариев.
Исправьте настройки прокси
Найдите Internet Explorer в поле поиска Cortana и выберите соответствующую запись.
Теперь нажмите сочетание клавиш WINKEY + T на клавиатуре и нажмите Свойства обозревателя. Перейдите на вкладку с именем Подключения.

Нажмите Настройки локальной сети.

Затем нажмите Дополнительно.
Удалите все записи в списке, сгенерированном в разделе Исключения.
Если кнопка «Дополнительно» отключена из-за флажка, обозначенного Использовать прокси-сервер для вашей локальной сети (эти параметры не будут применяться для подключений удаленного доступа или VPN-подключений) , вы можете перейти и перейти к следующему шагу.
Затем начните с нажатия клавиш WIN + X или щелкните правой кнопкой мыши кнопку «Пуск» и нажмите Командная строка (Admin) или просто найдите cmd . в окне поиска Cortana щелкните правой кнопкой мыши значок командной строки и выберите Запуск от имени администратора. Нажмите Да , чтобы получить приглашение UAC или Контроль учетных записей пользователей.
Теперь введите следующие команды одну за другой, а затем нажмите Enter после каждой из них.
 netsh winhttp reset прокси
чистая остановка wuauserv
чистый старт wuauserv
Перезагрузите компьютер и попробуйте снова проверить наличие обновлений.
Настроить автоматически Определить параметры подключения
Начните с ввода Свойства обозревателя в поле поиска Cortana. Нажмите на соответствующий результат.

Теперь перейдите на вкладку Подключения.
Под разделом, помеченным как Настройки локальной сети (LAN). Нажмите на кнопку с надписью Настройки локальной сети.

В разделе Прокси-сервер снимите флажок с отметки Использовать прокси-сервер для вашей локальной сети (эти настройки не будут применяться для подключений удаленного доступа или VPN).
Нажмите ОК и перезагрузите компьютер, чтобы изменения вступили в силу.
Теперь проверьте, исправлена ли ваша проблема или нет.
Надеюсь, это работает для вас!
Обновлено March 2023: перестаньте получать сообщения об ошибках и замедлите работу вашей системы с помощью нашего инструмента оптимизации. Получить сейчас в эту ссылку
- Скачайте и установите инструмент для ремонта здесь.
- Пусть он просканирует ваш компьютер.
- Затем инструмент почини свой компьютер.
Вы получаете код ошибки 8024402C при обновлении windows? Эта ошибка может возникать в Windows 10 и других версиях Windows. Это обычный Ошибка обновления Windows.

Это появляется на экране вашего компьютера как это сообщение:
Windows не может проверить наличие новых обновлений.
Произошла ошибка при поиске вашего компьютера.
Обнаружена ошибка:
Код 8024402C Windows Update обнаружил неизвестную ошибку.
Эта ошибка обновления Windows 8024402c вызвана неправильными настройками прокси-сервера или брандмауэра, которые не позволяют службам обновления Windows подключаться к Интернету.
Вот несколько методов, которые помогут вам решить эту проблему:
Сброс настроек прокси

Это решение может быть очень полезным, поскольку оно может быть легко выполнено и может решить проблему путем сброса настроек прокси-сервера на вашем компьютере, которые были повреждены с момента последнего обновления. Следуйте инструкциям ниже, чтобы решить проблему.
Используйте Windows + X, чтобы открыть меню, из которого вы должны выбрать параметр командной строки (Admin). Вы также можете щелкнуть правой кнопкой мыши меню «Пуск» для того же эффекта или просто найти командную строку, щелкнуть правой кнопкой мыши и выбрать «Запуск от имени администратора».
Введите команды, перечисленные ниже, и обязательно нажимайте Enter после каждой команды, чтобы выполнить ее правильно.
сеть
ветер
сбросить прокси
Обновление за март 2023 года:
Теперь вы можете предотвратить проблемы с ПК с помощью этого инструмента, например, защитить вас от потери файлов и вредоносных программ. Кроме того, это отличный способ оптимизировать ваш компьютер для достижения максимальной производительности. Программа с легкостью исправляет типичные ошибки, которые могут возникнуть в системах Windows — нет необходимости часами искать и устранять неполадки, если у вас под рукой есть идеальное решение:
- Шаг 1: Скачать PC Repair & Optimizer Tool (Windows 10, 8, 7, XP, Vista — Microsoft Gold Certified).
- Шаг 2: Нажмите «Начать сканирование”, Чтобы найти проблемы реестра Windows, которые могут вызывать проблемы с ПК.
- Шаг 3: Нажмите «Починить все», Чтобы исправить все проблемы.

Вернитесь в Центр обновления Windows и проверьте, сохраняется ли проблема на вашем компьютере.
Измените свой адрес DNS
Если ваш провайдер действительно вызывает эти проблемы, другие решения могут оказаться бесполезными, поскольку они не могут устранить тот факт, что ваш текущий DNS-адрес просто не совместим с серверами Microsoft. К счастью, изменить DNS-адрес очень просто, если вы будете тщательно следовать этим инструкциям. Вы можете легко отменить операцию, если что-то пойдет не так.
Откройте диалоговое окно «Выполнить», одновременно нажав кнопку с логотипом Windows + кнопку R. Затем введите «ncpa.cpl» и нажмите «ОК».
Теперь, когда окно подключения к Интернету открыто, дважды щелкните активный сетевой адаптер.
Затем нажмите «Свойства» и дважды щелкните «Версия протокола Интернета 4» (TCP / IPv4).
Поиск Используйте следующую опцию для адресов DNS-серверов.
Установите для предпочитаемого DNS-сервера значение 8.8.8.8.8.8.8.8.8.8.8.8.
Установите альтернативный DNS-сервер на 8.8.8.4.4.4.4.4.
Отключить антивирусное программное обеспечение

Временно отключите защитное программное обеспечение и проверьте, сохраняется ли проблема.
a: Нажмите логотип Windows + Q, чтобы открыть поле поиска.
b: Теперь нажмите «Настройки», затем войдите в «Центр поддержки» и нажмите «Ввод».
c: Нажмите на шеврон рядом с безопасностью.
d: отключить антивирусную защиту, установленную на вашем компьютере.
Предупреждение. Антивирусное программное обеспечение может защитить ваш компьютер от вирусов и других угроз безопасности. В большинстве случаев не следует отключать антивирусное программное обеспечение. Если вам необходимо временно отключить его для установки другого программного обеспечения, вы должны активировать его, когда закончите. Если вы подключены к Интернету или сети, когда антивирусное программное обеспечение отключено, ваш компьютер уязвим для атак.
Использование Regedit

Очень легко следовать этой процедуре:
Откройте редактор реестра (меню Пуск -> Выполнить -> Regedit).
Найдите следующий путь HKEY_LOCAL_MACHINE SOFTWARE Policies Microsoft Windows WindowsUpdate AU
Установите значение UseWUServer от 1 до 0 (дважды щелкните его, измените значение и нажмите OK).
Перезапустите службу Центра обновления Windows (меню «Пуск» -> Выполнить -> services.msc, найдите службу Центра обновления Windows и нажмите «Перезагрузить»).
Если вы по-прежнему не можете обновить Windows, могут быть другие причины.

CCNA, веб-разработчик, ПК для устранения неполадок
Я компьютерный энтузиаст и практикующий ИТ-специалист. У меня за плечами многолетний опыт работы в области компьютерного программирования, устранения неисправностей и ремонта оборудования. Я специализируюсь на веб-разработке и дизайне баз данных. У меня также есть сертификат CCNA для проектирования сетей и устранения неполадок.
Сообщение Просмотров: 1,675
When you launch Windows Update, it makes an effort to connect to the internet to update your PC, and this problem can show up: 0x8024402c. How to fix the error? Here is the quick navigation.
| Workable Solutions | Step-by-step Troubleshooting |
|---|---|
| Fix 1. Enable Automatic Network | In the first method, we shall enable automatic network detection settings via Windows Settings…Full steps |
| Fix 2. Disable Windows Firewall | By temporarily disabling Windows Defender Firewall, check whether the error code 0x8024402c…Full steps |
| Fix 3. Delete Distribution | In this method, you should delete software distribution to eliminate the error…Full steps |
| Fix 4. Restart to Clean the Boot | We will perform a Clean Boot via System Configuration to eliminate the error…Full steps |
| More Fixes | The other 2 fixes are available here for you to fix Windows update error 0x8024402c…Full steps |
What Is Windows Error Code 0x8024402c
This occurs when the PC cannot correctly connect to the Windows Update Server, which then confuses the system and ultimately causes it to crash and display the blue screen of death. An incorrect network setting, LAN setting, or update setting that does not comply with the update requirements could cause this issue. By approving the Automatically detected connection settings, it can be stopped.
The connection between the PC and the Windows Updates servers may break down if the firewall or proxy settings are misconfigured, another possible reason for this issue. Given below are more causes on why the Windows update error 0x8024402c occurs:
- ⏳Pending updates
- ⚙️Incorrect time setting on your PC
- 📄Damaged files
- 🗑️Junk files that contain active threats
- 🧱Incorrect firewall configuration preventing critical computer updates
So, these are the possible causes of the error 0x8024402c Windows 10 or 11 error. Now, let us move on to the solutions to solve the error.
There are several methods to fix the Windows 11/10 error 0x8024402c. Check out the solutions below for the error code and a detailed video.
- 00: 22 — Disable Proxy Settings
- 00: 57 — Reset Proxy
- 01: 46 — Install Windows Updates
- 02: 18 — Automatically detect LAN Settings
So, I hope this video helped you understand more about Windows 11/10 error 0x8024402c. Now, let us move on to the detailed solutions for this error.
- Fix 1. Enabling Automatic Network Detection Settings
- Fix 2. Temporarily Disable Windows Defender Firewall
- Fix 3. Delete Software Distribution
- Fix 4. Restart to Access Clean Boot
- Fix 5. Removing the Invalid Characters in the Proxy Exception List
- Fix 6. Changing the DNS Servers
Fix 1. Enabling Automatic Network Detection Settings
In the first method, we shall allow automatic network detection settings via Windows Settings. Here is how to go about it:
Step 1. Press the Windows key + I to open Settings.
Step 2. Choose Network & Internet from the left pane.
Step 3. Click on Wi-Fi. Next, click on the Wi-Fi properties you are connected to.
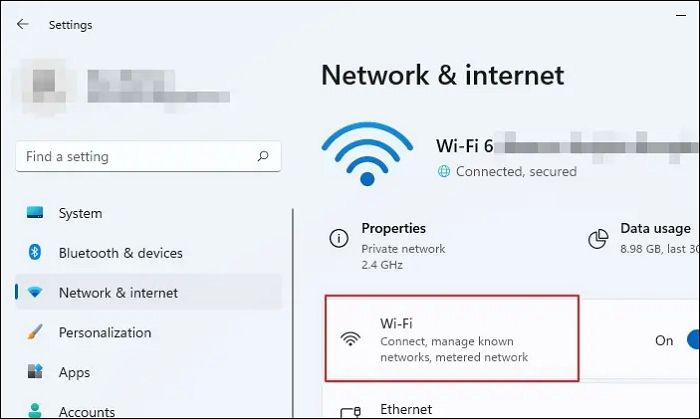
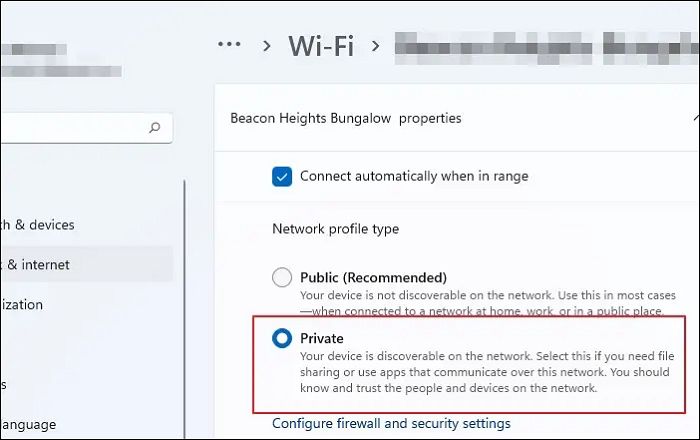
Step 4. Under the Network profile type, click the «radio» button next to the Private option to enable automatic network detection. This will make your PC discoverable and may help eliminate the Windows error code 0x8024402c.
Fix 2. Temporarily Disable Windows Defender Firewall
By temporarily disabling Windows Defender Firewall, check whether the error code 0x8024402c gets eliminated. This is how you go about it:
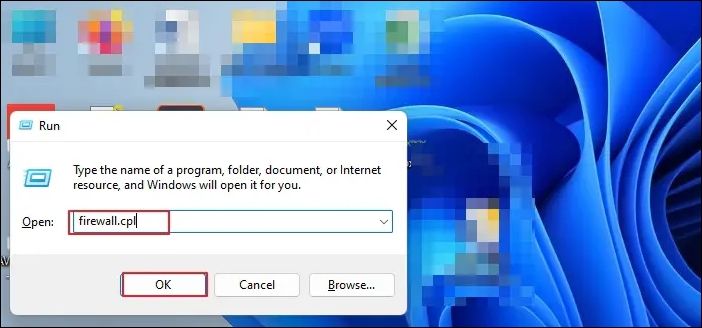
Step 1. Type firewall.cpl into the Windows search bar and press Enter.
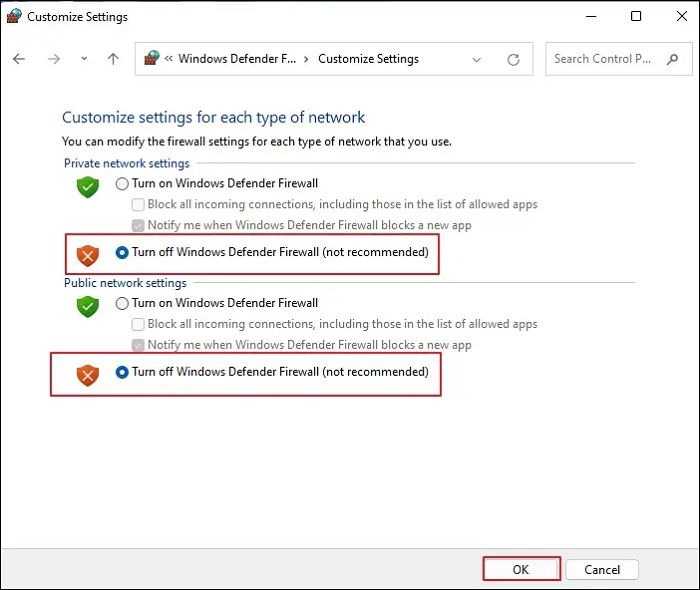
Step 2. On the left side of the windows, click the «Turn Windows Defender Firewall» on or off option.
Step 3. Under Private Network Settings, click the «radio» button next to Turn off «Windows Defender Firewall». Do the same for Public Network Settings and click «OK» to save the changes.
You should now check the Windows updates and see whether the issue is fixed.
Fix 3. Delete Software Distribution
In this method, you should delete software distribution to eliminate the error. This is how you go about it:
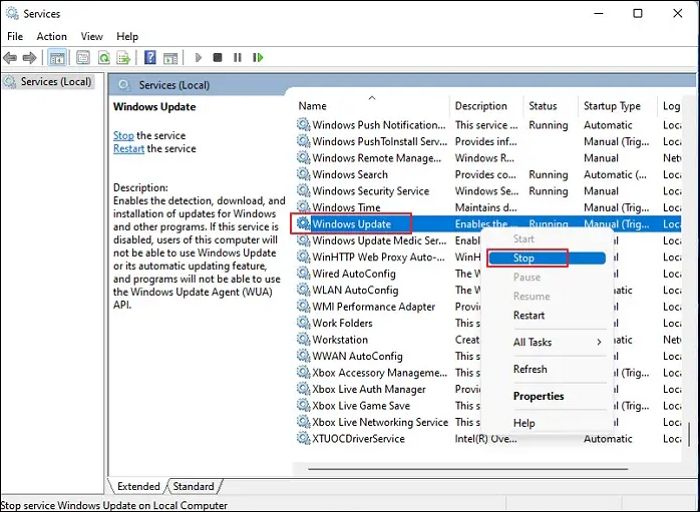
Step 1. Type Services into the Windows search bar, right-click on the result and choose the Run as administrator option.
Step 2. In the Services window, please scroll down and locate the Windows Update option, right-click on it, and choose the «Stop» option from the context menu.
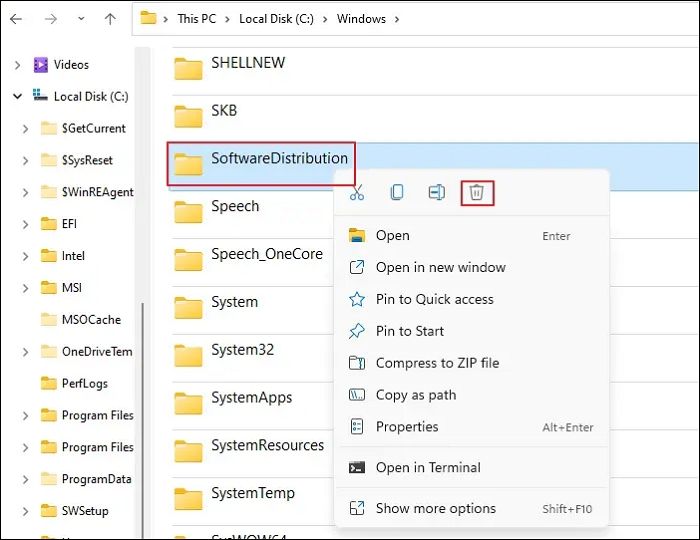
Step 3. After it stops, click on File Explorer and choose Local Disk (C:).
Step 4. Click on the «Windows folder». Next, please scroll down and locate the SoftwareDistribution folder, right-click on it, and choose the Delete option from the context menu.
After removing the contents from the SoftwareDistribution folder, check whether the Windows 11/10 error 0x8024402c disappears.
Fix 4. Restart to Access Clean Boot
We will perform a Clean Boot via System Configuration to eliminate the error. Let us see how to go about it:
Step 1. Press Windows key + R to open the Run dialogue box. Type msconfig into the text box and press OK. This will open the System Configuration window.
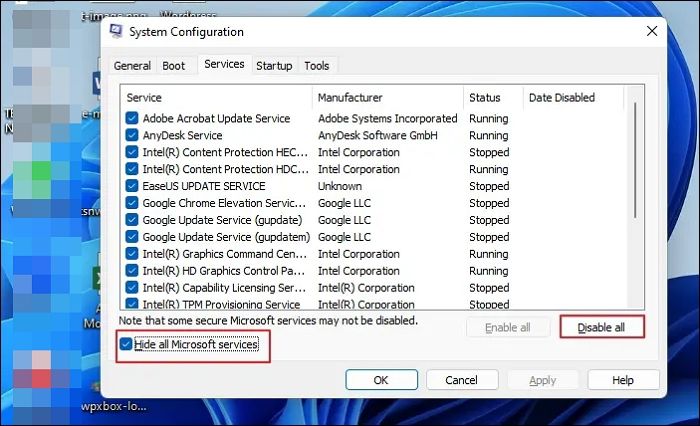
Step 2. Click the «Services» tab and the check box next to «Hide all Microsoft services» to enable it. Next, click the «Disable al»l button and «Apply».
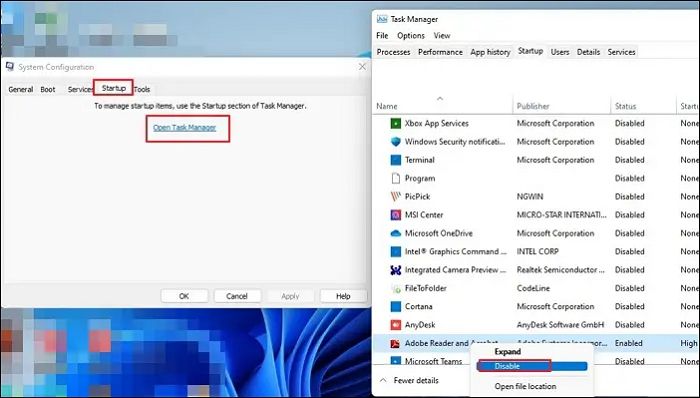
Step 3. Click on the Startup tab and click on «Open Task Manager». Next, please find all the application that has the Enabled status, right-click on them, and choose the Disabled option.
Step 4. Close the window and click OK. Click the Restart button to apply the changes in the System Configuration prompt.
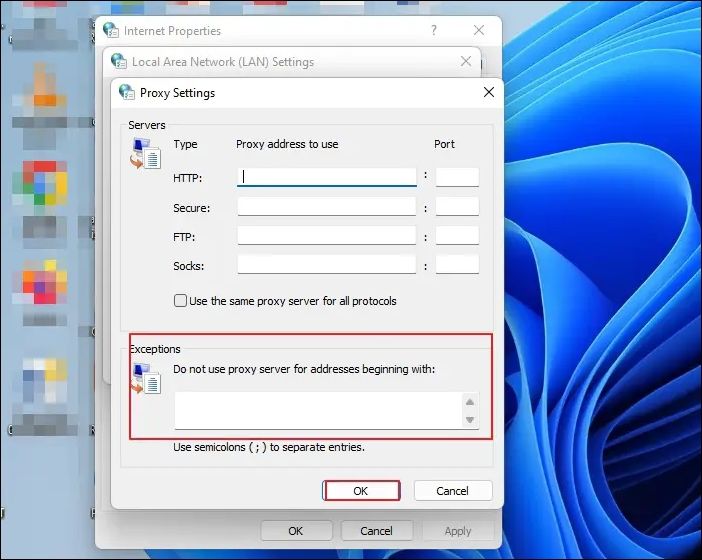
Fix 5. Removing the Invalid Characters in the Proxy Exception List
In the proxy exception list, remove all the invalid characters. This is how you go about it:
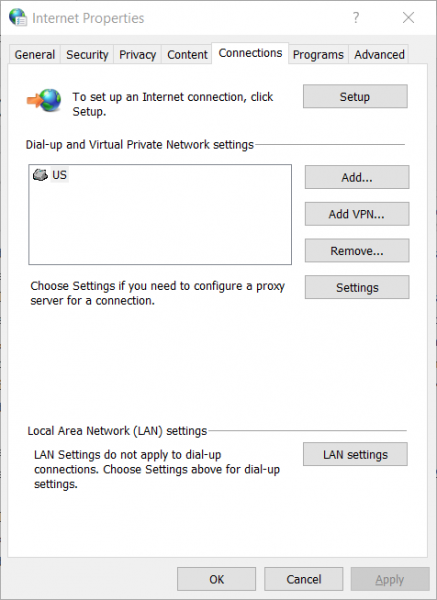
Step 1. Type internet options into the Windows search bar and click on the result to open the Internet Properties window.
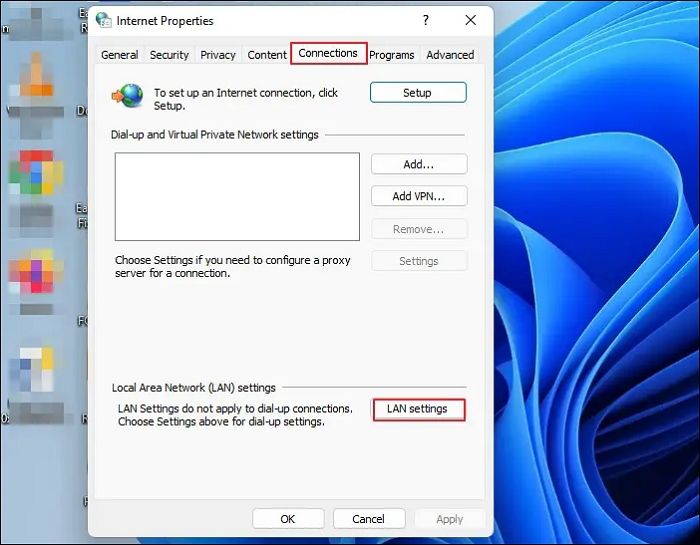
Step 2. Click on the «Connections» tab and the LAN settings button.
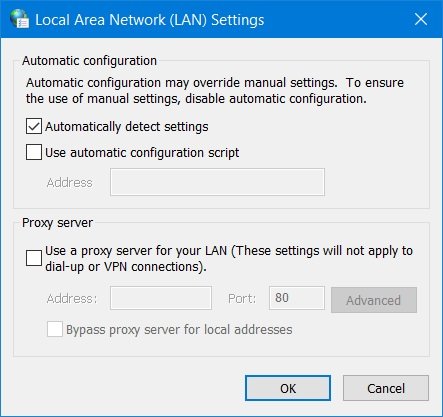
Step 3. In the next window, click on the radio button next to Use a proxy server for your LAN and click on the Advanced button to open Proxy Settings.
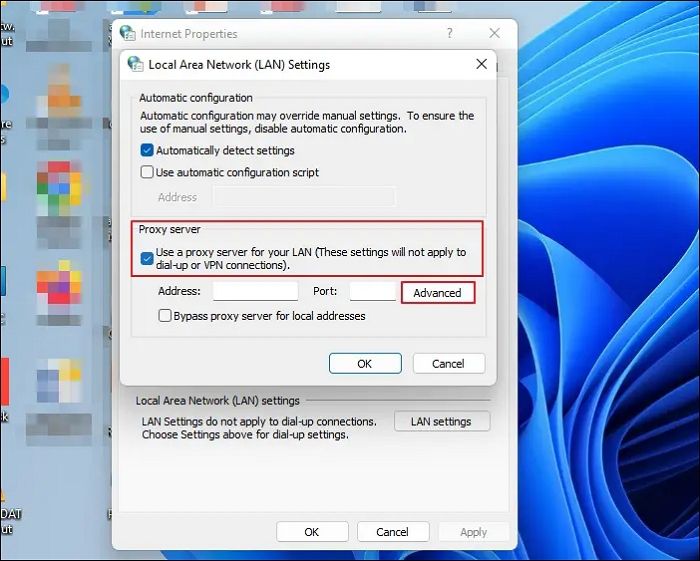
Step 4. Delete everything in the Do not use a proxy server for addresses beginning with the field, press OK in the prompt window, and OK again to close the LAN settings window.
The next step is to clear the proxy cache. Here is how to go about it:
Step 1. Right-click on the Windows logo and click on Windows Terminal (Admin).
Step 2. Press Enter after typing each command line one by one:
netsh winhttp reset proxy net stop wuauserv net start wuauserv
The error code 0x8024402c should be resolved after it is finished.
Fix 6. Changing the DNS Servers
In this method, change DNS servers to fix the 0x8024402c error. Let us see how to go about it:
Step 1. Press the Windows key + R to open the Run command box and type ncpa.cpl into the text box and press Enter to open the Wi-Fi-Status window.
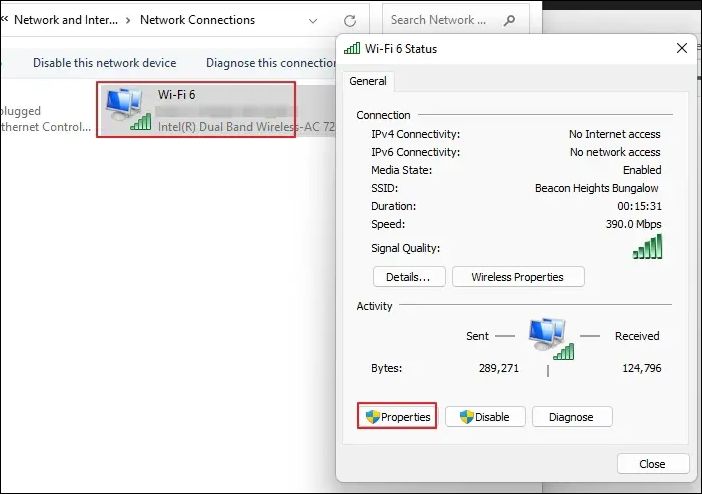
Step 2. Click on the Properties button. Next, locate the Internet Protocol Version 4 option and double-click on t to open its properties.
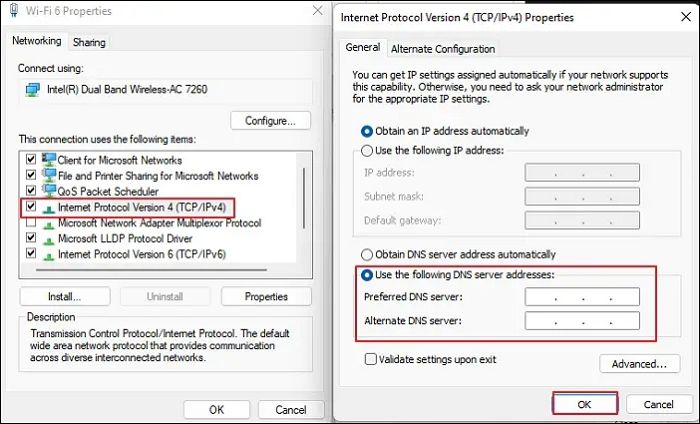
Step 3. Click on the radio button next to Use the following DNS server addresses and type in the following addresses:
- Preferred DNS server: 8.8.8.8
- Alternate DNS server: 8.8.4.4
Step 4. Click OK to update the changes and check whether the Windows error code 0x8024402c has disappeared.
Windows users have proved the efficacy of these fixes. If one of the methods helps fix the Windows update error 0x8024402c, share it on Facebook, Twitter, Instagram, and other social media platforms!
How to Recover Data When Fixing Error 0x8024402c
Windows users may lose data after fixing error code 0x8024402c. So, to recover deleted files from Windows 11/10/8/7, I recommend using EaseUS Data Recovery Wizard. It was created to aid in the recovery of data lost as a result of a file system malfunction, system crashes, and unintended file deletion. Even novice users can recover files quickly because of the software’s user-friendly interface.
EaseUS Data Recovery Wizard
- It can recover lost photos, videos, music files, documents, and other files with simple clicks.
- This software recovers data from external hard drives, SSD, USB flash drive, and pen drive.
- It makes restoring a partition’s data simple, even if it has been completely lost or the system cannot recognize it.
Download it now and follow the guide below to restore data from your PC quickly.
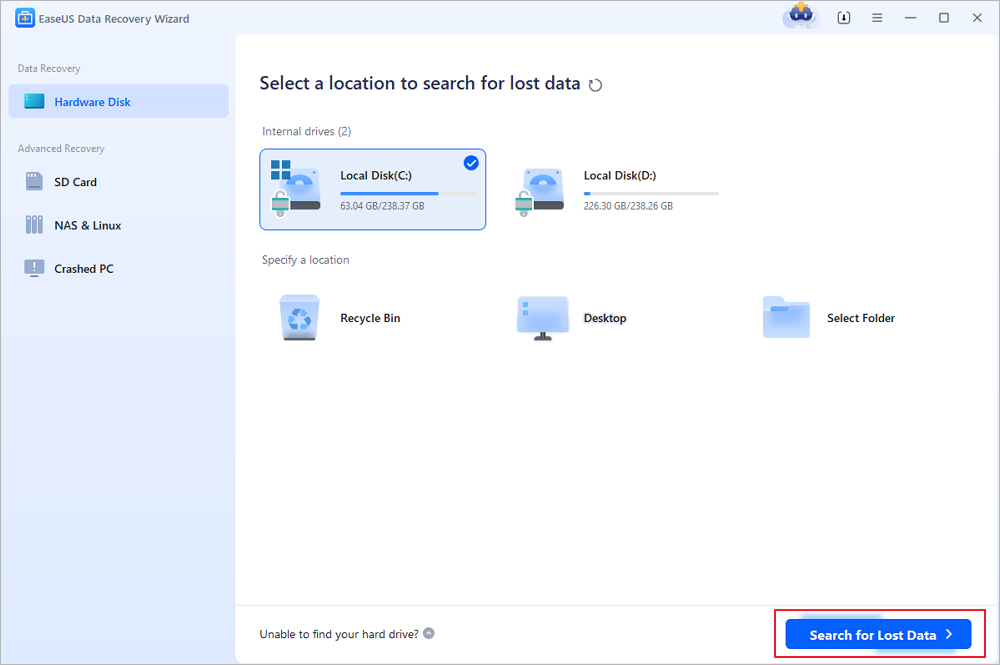
Step 1. Select the location to scan
Choose the specific device and drive where you have permanently deleted files using Shift delete or emptying recycle bin. Then, click the «Scan» button to find lost files.
Step 2. Check the results
The software will automatically start scanning all over the selected drive. When the scan completes, select the «Deleted Files» and «Other Lost Files» folders in the left panel. Then, apply the «Filter» feature or click the «Search files or folders» button to quickly find the deleted files.

Step 3. Recover deleted files
Select the deleted files and click «Preview». Next, click «Recover» to save them to another secure location or device.

Conclusion
The abovementioned techniques can resolve the Windows Update error code 0x8024402c.
You can also consider setting up a time sync between your PC and the internet, then restarting Windows Updates. When updates stop working due to malware, you can run security software. You should also be aware that Windows Updates is a compassionate application; if it has problems, the system will be adversely affected and may start to run slowly or improperly. So, follow the solutions given in this article carefully for a smooth and successful completion of the Windows update without any errors.
Also, note that after fixing the error code 0x8024402c, you may lose some data on your PC. So, download and use the data recovery tool EaseUS Data Recovery Wizard to save all your lost files. So that is it! I hope this article helped you resolve the error code issue!
Windows Update Error Code 0x8024402c FAQs
Do you have more questions on the Windows update error code 0x8024402c? Check out the frequently asked questions and their answers given below:
1. What does 0x8024401c mean?
You might encounter various issues when connecting to Microsoft’s Windows Update servers. It usually happens when you attempt to install updates, but the proxy, firewall, or other network settings are incorrect. 0x8024402C is one of these error codes. The error code is displayed on the screen when a user checks for updates.
2. How do I get rid of the error-checking drive?
On your Windows PC. Right-click on the Windows logo and choose Windows Terminal (Admin). Click Yes on User Account Control prompt and type chkdsk into the Windows Terminal window. Press Enter. CHKDSK will scan for drive errors and let you know if it finds any issues that need repair. Remember that it will not fix the errors without a command.
3. What does the Windows Update client fail to detect with error 0x8024402c?
An incorrect network setting, LAN setting, or update setting that does not comply with the update requirements could cause this issue. By approving the Automatically detected connection settings, it can be stopped.
4. What is error 0x8024402c for feature installation?
Not sure what this is feature installation. Kindly send me a message about it.