- Remove From My Forums
-
Вопрос
-
1 Есть wsus server на windows server 2016 и я обновляю через wsus другой сервер тоже на windows server 2016 вообщем посмотрите ниже текст неужели программисты Майкрософт могли допустить такие ошибки при сосдание службы
wsus почему такая ошибка • Обновление служебного стека для Windows Server 2016 для систем на базе процессоров x64, 202003 (KB4540723) — ошибка 0x80244019 ?2 Активируйте учетную запись чтобы я мог скриншеты отправлять ?
-
Изменено
17 апреля 2020 г. 2:34
-
Изменено
Petko KrushevMicrosoft contingent staff, Moderator
17 апреля 2020 г. 7:06
Редакция заголовка -
Изменено
Vector BCOModerator
17 апреля 2020 г. 7:07
переименван заголовок
-
Изменено
Ответы
-
Проверка идет в англоязычной ветке
https://social.msdn.microsoft.com/Forums/en-US/94f05325-8566-4c4c-806c-179a5a0beafc/verify-accounts-43?forum=reportabug
Пролистайте тред «до дна» и напишите в ответ последнему участнику просьбу о проверке. Тексты предыдущих участников послужат образцами заявлений.
-
Помечено в качестве ответа
Андрей50
18 апреля 2020 г. 16:44 -
Снята пометка об ответе
Vector BCOModerator
18 апреля 2020 г. 22:41 -
Помечено в качестве ответа
Vector BCOModerator
20 апреля 2020 г. 5:20
-
Помечено в качестве ответа
-
почему такая ошибка • Обновление служебного стека для Windows Server 2016 для систем на базе процессоров x64, 202003 (KB4540723) — ошибка 0x80244019 ?
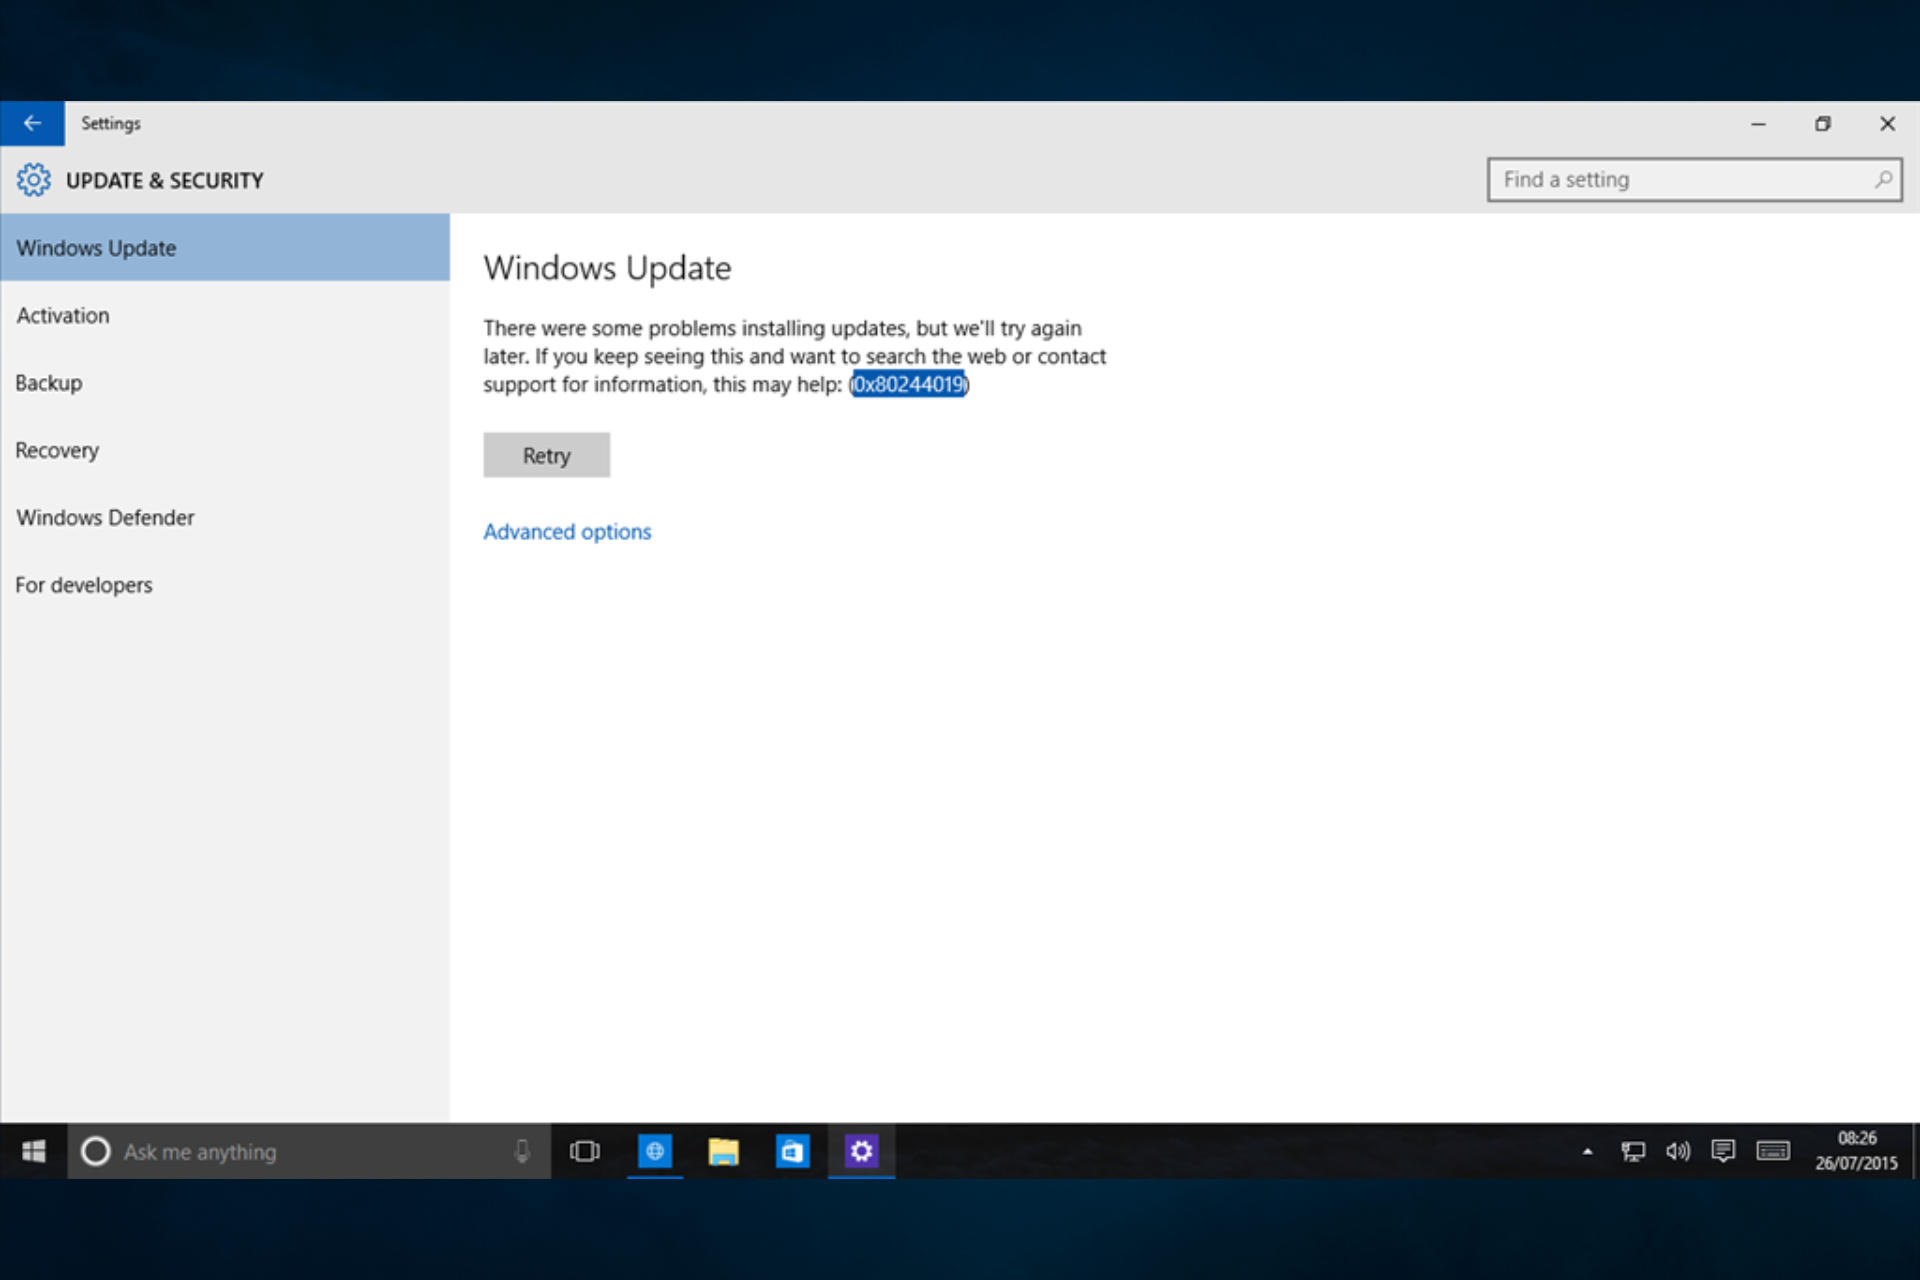
WU_E_PT_HTTP_STATUS_NOT_FOUND (0x80244019) — Same as HTTP status 404 – The server cannot find the requested URI (Uniform Resource Identifier).
Слава России!
-
Предложено в качестве ответа
Vector BCOModerator
18 апреля 2020 г. 21:22 -
Помечено в качестве ответа
Vector BCOModerator
20 апреля 2020 г. 5:20
-
Предложено в качестве ответа
-
SUS_E_PT_HTTP_STATUS_NOT_FOUND Http status 404 — object not found (0x80244019)
Возможно, что данного обновления нет на WSUS, либо добавьте его туда вручную, либо также вручную скачайте и установите на нужный хост.
-
Предложено в качестве ответа
Vector BCOModerator
18 апреля 2020 г. 21:22 -
Помечено в качестве ответа
Vector BCOModerator
20 апреля 2020 г. 5:20
-
Предложено в качестве ответа
Если вы хотите обеспечить безопасность и бесперебойную работу своей системы, важно установить обновления, которые Microsoft регулярно выпускает. В конце концов, вирусы и вредоносные программы проникли в Интернет, и обновления Windows — это один из способов защитить свой компьютер от таких угроз.
К сожалению, какими бы незаменимыми они ни были, обновления могут приносить с собой досадные ошибки. В этой статье мы сосредоточимся на устранении ошибки обновления Windows 0x80244019 в Windows 10, 8.1 и 7. Прежде чем мы дадим вам обходные пути, было бы лучше, если бы мы обсудили некоторые сценарии, о которых сообщили пользователи. Проверьте проблемы, указанные ниже, и посмотрите, не возникает ли у вас такая же проблема:
- Ошибка обновления Windows 7 0x80244019 . Ошибка 0x80244019 также может возникать в более старых версиях Windows. Хотя наши решения лучше всего подходят для Windows 10, они также могут применяться в Windows 8.1 и Windows 7.
- 0x80244019 Windows Server 2016 — ошибка обновления 0x80244019 может повлиять на Windows Server 2016. Вы можете избавиться от этой проблемы, попробовав любой из наших методов ниже.
Если вы используете стороннюю антивирусную программу, она может мешать работе вашей системы и вызывать появление ошибки 0x80244019. Вы можете устранить эту проблему, отключив определенные функции в вашем антивирусе.
Если вы попробовали это решение, но ошибка не исчезла, попробуйте полностью удалить антивирус. Это могло бы навсегда избавить от проблемы. Если это так, то мы рекомендуем перейти на другую антивирусную программу.
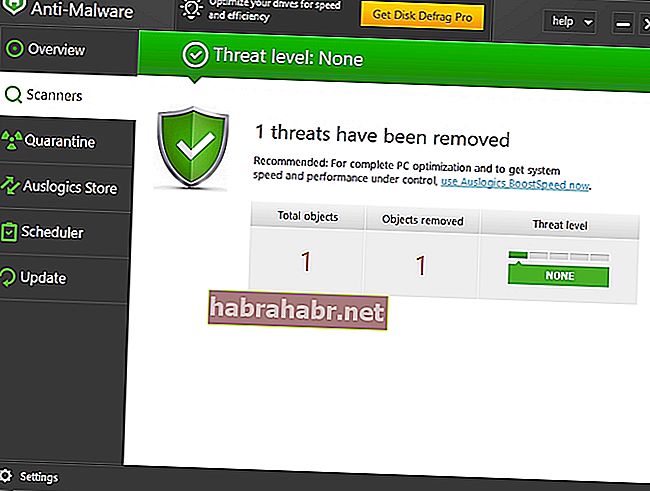
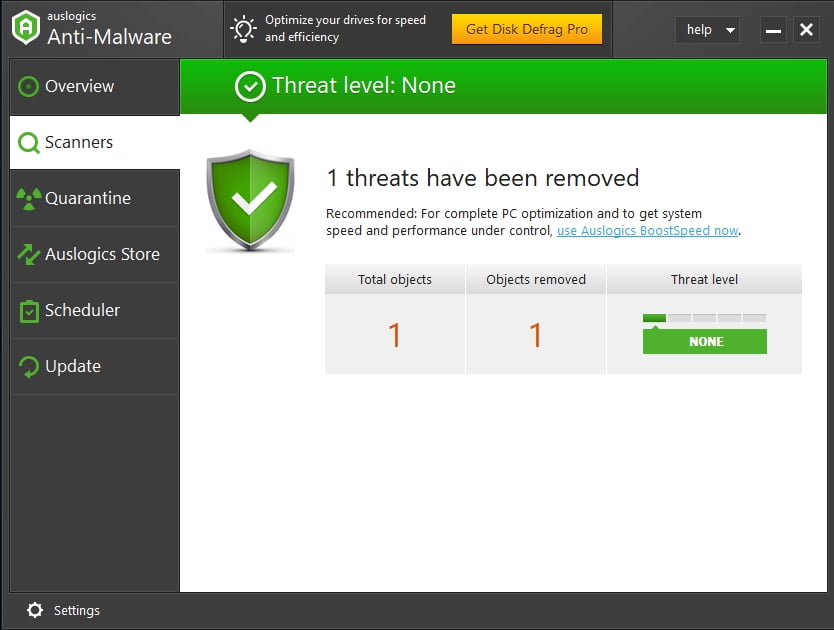
На рынке вы можете найти несколько инструментов безопасности. Однако мы настоятельно рекомендуем использовать надежную программу, такую как Auslogics Anti-Malware. Он разработан, чтобы не мешать работе вашего основного антивируса при обнаружении угроз и атак, о существовании которых вы даже не подозревали. Таким образом, вы можете удалить ошибку и по-прежнему получить необходимую защиту для своего компьютера.
Метод 2: Использование средства устранения неполадок для обновлений Windows
В Windows 10 есть разные средства устранения неполадок, предназначенные для восстановления определенных программ и процессов. Пользователи, которые пытались найти способы исправить код ошибки Windows 10 0x8024401, обнаружили, что использование средства устранения неполадок для обновлений помогло им решить проблему. Вы также можете использовать этот инструмент, чтобы избавиться от ошибки. Просто следуйте этим инструкциям:
- На клавиатуре нажмите Windows Key + I. Это должно открыть приложение «Настройки».
- Выберите «Обновления и безопасность», затем перейдите на левую панель и нажмите «Устранение неполадок».
- Перейдите на правую панель и щелкните Центр обновления Windows.
- Щелкните Запустить средство устранения неполадок.
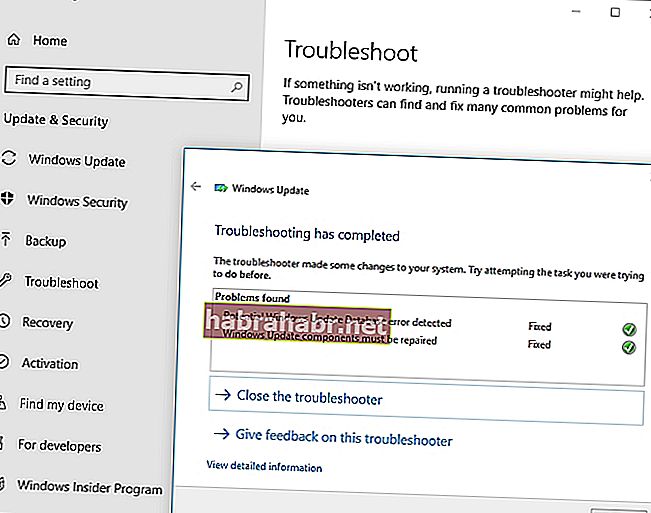
- После того, как средство устранения неполадок завершит процесс сканирования и восстановления, проверьте, сохраняется ли проблема.
Метод 3: изменение настроек обновлений Windows
Возможно, что определенные настройки обновлений Windows вызывают появление ошибки 0x8024401. Вы можете немного настроить параметры и посмотреть, решит ли это проблему. Просто следуйте инструкциям ниже:
- Щелкните значок поиска на панели задач.
- Введите «настройки» (без кавычек), затем нажмите Enter.
- Перейдите в раздел «Обновление и безопасность».
- Прокрутите вниз, пока не дойдете до раздела «Настройки обновления».
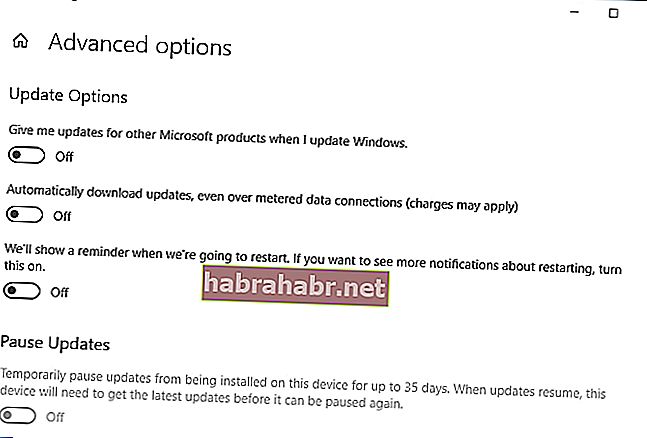
- Щелкните Дополнительные параметры.
- Отключите параметр «Предоставлять мне обновления для других продуктов Microsoft при обновлении Windows».
Метод 4: сброс компонентов для обновлений Windows
Вы должны убедиться, что все важные компоненты обновлений Windows работают правильно. В противном случае вы не сможете успешно загрузить и установить обновления. Вы даже можете увидеть ошибку 0x80244019. К счастью, это можно решить, сбросив некоторые компоненты. Для этого вам просто нужно следовать этим инструкциям:
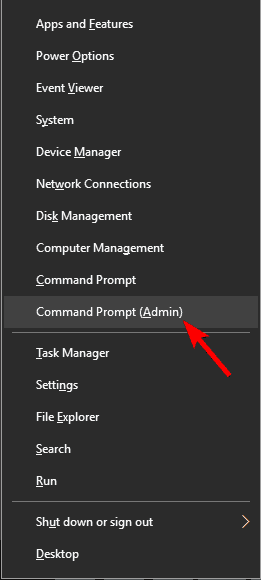
- Щелкните правой кнопкой мыши логотип Windows на панели задач.
- В меню выберите Командная строка (администратор) или Powershell (администратор).
- Выполните следующие команды:
чистая остановка wuauserv
чистая остановка cryptSvc
чистые стоповые биты
net stop msiserver
ren C: \ Windows \ SoftwareDistribution SoftwareDistribution.old
ren C: \ Windows \ System32 \ catroot2 Catroot2.old
чистый старт wuauserv
чистый старт cryptSvc
чистые стартовые биты
чистый запуск msiserver
Эти команды должны сбросить необходимые компоненты для обновлений Windows. Попробуйте загрузить и установить обновления еще раз и посмотрите, сохраняется ли ошибка.
Метод 5: Выполнение чистой загрузки
Ошибка 80244019 может появиться из-за того, что некоторые сторонние приложения вмешиваются в вашу систему. Вы можете исправить это, выполнив чистую загрузку. При этом ваш компьютер запустится без каких-либо сторонних служб или приложений. Тем не менее, вот шаги, которые вам необходимо выполнить:
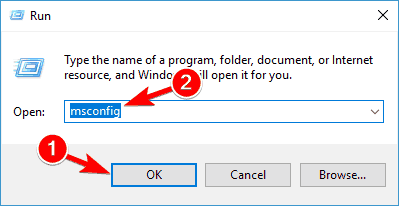
- На клавиатуре нажмите клавиши Windows + R. Это должно открыть диалоговое окно «Выполнить».
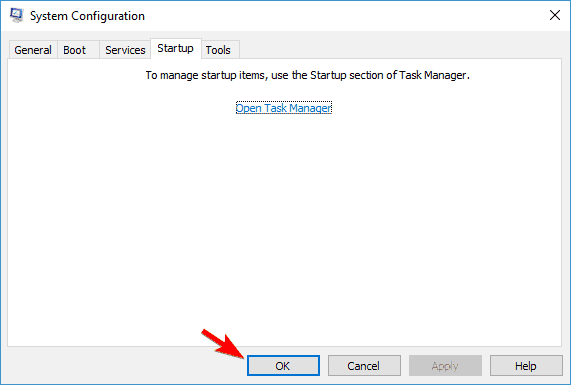
- Введите «msconfig» (без кавычек), затем нажмите Enter.
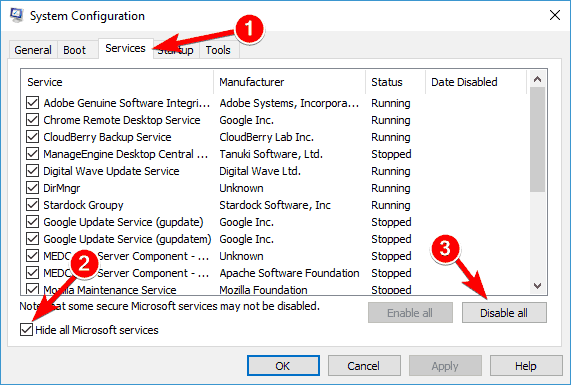
- Перейдите на вкладку «Службы» и установите флажок «Скрыть все службы Microsoft».
- Щелкните Отключить все.
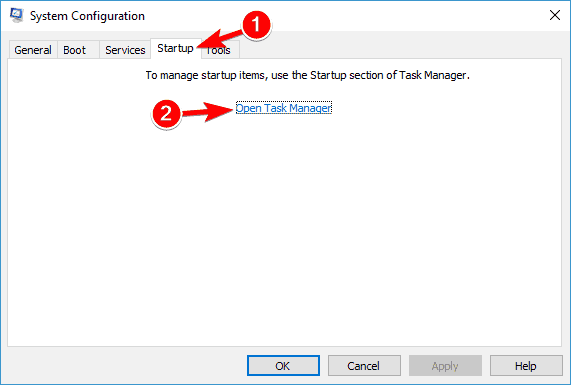
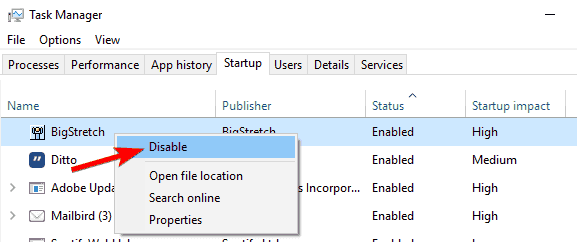
- Перейдите на вкладку «Автозагрузка» и нажмите «Открыть диспетчер задач».
- Щелкните правой кнопкой мыши каждый элемент автозагрузки и выберите «Отключить».
- Выйдите из диспетчера задач, затем нажмите OK, чтобы перезагрузить компьютер.
После выполнения чистой загрузки попробуйте установить обновление и проверьте, исчезла ли ошибка.
Метод 6: установка обновлений вручную
В некоторых случаях для устранения ошибки обновления Windows 0x80244019 в Windows 10 требуется установка вручную. Процесс не слишком сложный. Первое, что вам нужно сделать, это получить номер обновления в КБ. Просто посетите раздел Центра обновления Windows и найдите этот номер.
- После того, как вы запомнили номер базы знаний, выполните следующие действия:
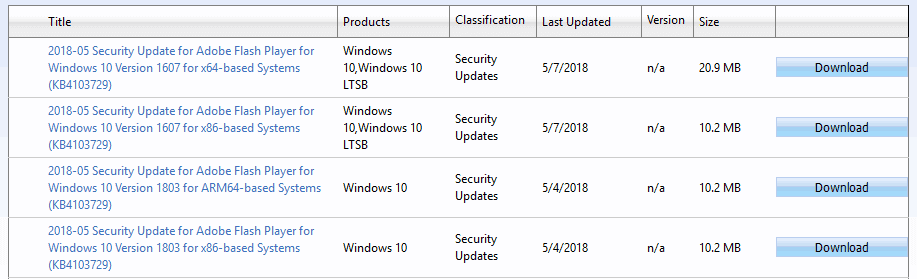
- Посетите веб-сайт каталога Центра обновления Windows.
- Щелкните поле поиска и введите номер базы знаний.
- Вы увидите список подходящих обновлений. Выберите обновление, подходящее для архитектуры вашей системы.
- Загрузите и установите обновление, затем проверьте, сохраняется ли ошибка.
Стоит отметить, что этот метод — всего лишь обходной путь для устранения ошибки. Это только позволяет избежать ошибки, но не решает основную проблему. Итак, если у вас есть время для этого, попробуйте выполнить обновление на месте, как описано в методе 8.
Метод 7: установка дополнительных обновлений
Некоторые пользователи, которые устали от проблемных обновлений, предпочли использовать специальный инструмент, блокирующий процесс установки. Конечно, этот метод может помочь вам избежать определенных проблем с обновлением. Однако, когда вы скрываете необязательные обновления, это может вызвать появление ошибки 0x80244019. Так что лучше всего их разблокировать и установить. Это должно помочь вам установить остальные обновления без каких-либо проблем.
Метод 8: выполнение обновления на месте
Вы также можете избавиться от ошибки 0x80244019, выполнив обновление на месте. Это позволяет установить последнюю версию Windows вместе со всеми текущими обновлениями. Не волнуйтесь, потому что этот метод по-прежнему позволяет вам сохранить все ваши файлы и приложения. Вам просто нужно следовать приведенным ниже инструкциям:
- Перейдите на веб-сайт Microsoft и загрузите Media Creation Tool.
- Запустите программу, затем выберите Обновить этот компьютер сейчас. Программа установки загрузит все необходимые файлы.
- Выберите вариант «Загрузить и установить обновления (рекомендуется)».
- Подождите, пока программа установки загрузит обновления.
- Следуйте инструкциям на экране, пока не дойдете до экрана «Готово к установке».
- Нажмите на опцию «Изменить, что оставить».
- Не забудьте выбрать опцию «Сохранить личные файлы и приложения». Щелкните Далее, чтобы продолжить.
После завершения процесса на вашем компьютере должна быть установлена последняя версия Windows. Это также должно помочь вам устранить ошибку 0x80244019.
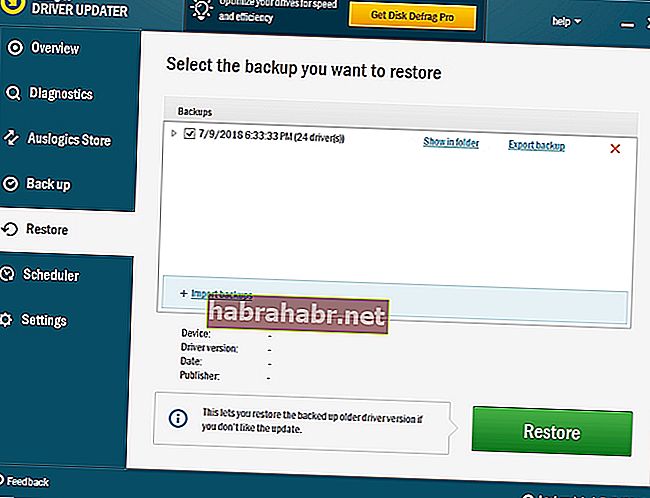
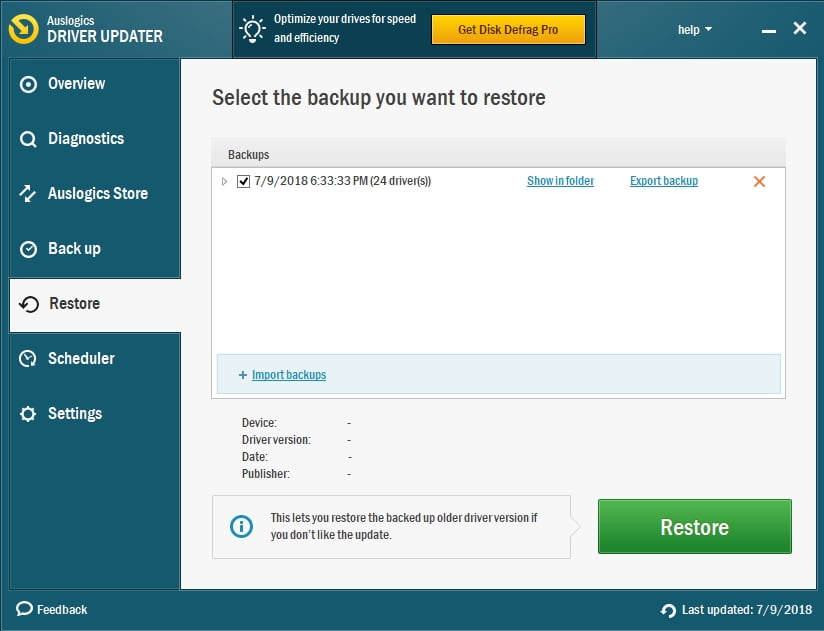
Если вы планируете запускать Media Creation Tool с USB-накопителя, мы рекомендуем сначала обновить драйверы. Это гарантирует, что вы сможете без проблем выполнить обновление на месте. Вы можете сделать это вручную, но более простым вариантом будет использование Auslogics Driver Updater. Этот инструмент исправляет и обновляет все ваши проблемные драйверы, гарантируя, что вы сможете без проблем использовать USB-накопитель и другие периферийные устройства.
Вы нашли другие способы устранения ошибки 0x80244019?
Делитесь своими идеями в комментариях ниже!
Contents
- Method 1: Reviewing the features of your anti-virus
- Method 2: Using the troubleshooter for Windows updates
- Method 3: Modifying the settings for your Windows updates
- Method 4: Resetting the components for Windows updates
- Method 5: Performing a clean boot
- Method 6: Manually installing the updates
- Method 7: Installing optional updates
- Method 8: Performing an in-place upgrade

If you want to keep your system secure and running smoothly, it is essential that you install the updates that Microsoft regularly rolls out. After all, viruses and malware have permeated the Internet, and Windows updates are one of the ways you can protect your computer from such threats.
Unfortunately, no matter how indispensable they are, updates can bring annoying errors with them. In this article, we are going to focus on resolving Windows update error 0x80244019 on Windows 10, 8.1, and 7. Before we give you the workarounds, it would be best if we discuss some scenarios that users reported. Check the issues below and see if you’re experiencing the same problem:
- Windows 7 update error 0x80244019 – The error 0x80244019 can also happen to older Windows versions. While our solutions work best for Windows 10, they can also apply to Windows 8.1 and Windows 7.
- 0x80244019 Windows Server 2016 – The update error 0x80244019 can affect Windows Server 2016. You can get rid of this issue by trying any of our methods below.
Method 1: Reviewing the features of your anti-virus
If you’re using a third-party anti-virus program, it can possibly interfere with your system and cause the error 0x80244019 to show up. You can eliminate this problem by disabling certain features in your anti-virus.
If you’ve tried that solution yet the error persists, you should try completely removing your anti-virus. This just might permanently get rid of the problem. If this is the case, then we recommend switching to a different anti-virus program.
You might find several security tools on the market. However, we highly suggest using a reliable program like Auslogics Anti-Malware. It is designed not to interfere with your main anti-virus while detecting threats and attacks you’d never suspect existed. So, you can remove the error and still get the protection you need for your computer.
Method 2: Using the troubleshooter for Windows updates
Windows 10 has different troubleshooters dedicated to repairing specific programs and processes. Users who tried to find methods on how to fix Windows 10 error code 0x8024401 discovered that using the troubleshooter for updates had helped them resolve the problem. You can also use that tool to get rid of the error. Simply follow these instructions:
- On your keyboard, press Windows Key+I. This should open the Settings app.
- Select Updates & Security, then go to the left pane and click Troubleshoot.
- Go to the right pane and click Windows Update.
- Click Run the Troubleshooter.
- Once the troubleshooter has completed the scanning and repair process, check if the problem persists.

Method 3: Modifying the settings for your Windows updates
It is possible that certain settings on your Windows updates are causing the error 0x8024401 to show up. You can tweak the options a bit and see if doing this fixes the issue. Simply follow the steps below:
- Click the Search icon on your taskbar.
- Type “settings” (no quotes), then hit Enter.
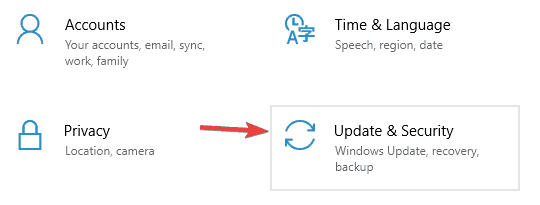
- Go to Update & Security.
- Scroll down until you reach the Update Settings section.
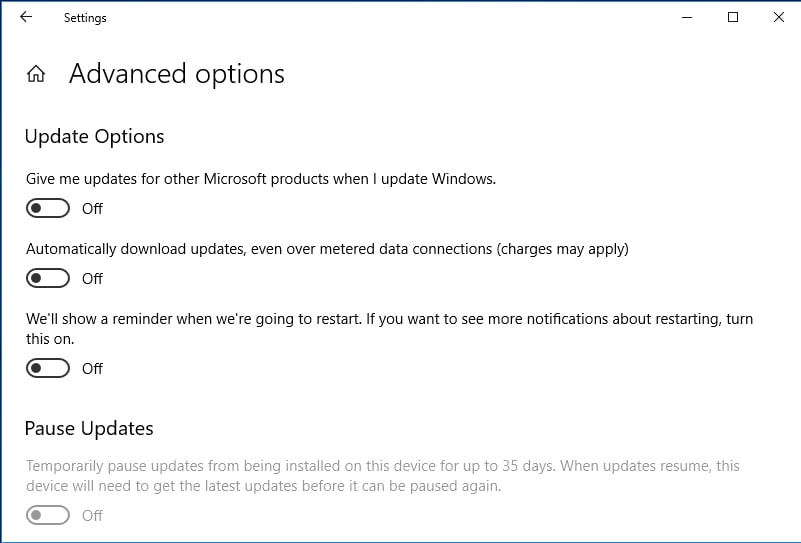
- Click Advanced Options.
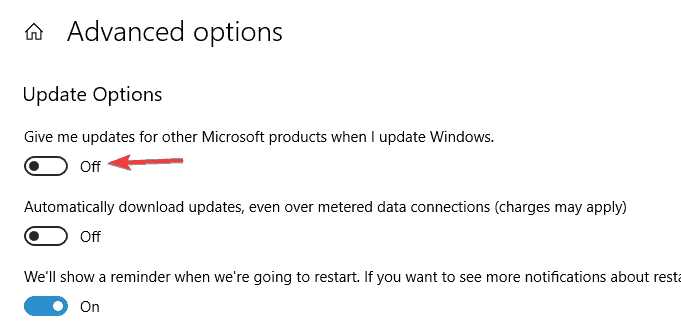
- Switch off the ‘Give me updates for other Microsoft products when I update Windows’ option.
Method 4: Resetting the components for Windows updates
You have to ensure that all the important components of Windows updates are running properly. If they aren’t, you can’t successfully download and install the updates. You might even see the error 0x80244019. Thankfully, this can be resolved by resetting certain components. To do that, you just need to follow these instructions:
- Right-click the Windows logo on your taskbar.
- From the menu, select Command Prompt (Admin) or Powershell (Admin).
- Run the following commands:
net stop wuauserv
net stop cryptSvc
net stop bits
net stop msiserver
ren C:\Windows\SoftwareDistribution SoftwareDistribution.old
ren C:\Windows\System32\catroot2 Catroot2.old
net start wuauserv
net start cryptSvc
net start bits
net start msiserver
These commands should reset the necessary components for Windows updates. Try downloading and installing the updates again and see if the error persists.
Method 5: Performing a clean boot
The error 80244019 can show up due to certain third-party applications interfering with your system. You can fix this by performing a clean boot. By doing this, your computer will start without any third-party services or applications. That said, here are the steps you need to follow:
- On your keyboard, press Windows Key+R. This should open the Run dialog box.
- Type “msconfig” (no quotes), then hit Enter.
- Go to the Services tab and select the ‘Hide all Microsoft services’ box.
- Click Disable All.
- Go to the Startup tab, then click Open Task Manager.
- Right-click every startup item, then select Disable.
- Exit Task Manager, then click OK to restart your PC.
After performing a clean boot, try installing the update and check if the error is gone.
Method 6: Manually installing the updates
In some cases, resolving Windows update error 0x80244019 on Windows 10 requires manual installation. The process is not too complicated. The first thing you have to do is get the KB number of the update. Simply visit the Windows Update section and search for that number.
- Once you’ve taken note of the KB number, follow the steps below:
- Visit the Windows Update Catalog website.
- Click the search field and submit the KB number.
- You will see a list of matching updates. Choose the update that is suitable for your system architecture.
- Download and install the update, then check if the error persists.
It is worth noting that this method is just a workaround for the error. It only lets you avoid the error, but it does not fix the core problem. So, if you find the time to do so, try performing an in-place upgrade as laid out in Method 8.
Method 7: Installing optional updates
Some users who had become tired of problematic updates opted to use a special tool that blocked the installation process. Of course, this method can help you avoid certain update issues. However, when you hide optional updates, it can cause the error 0x80244019 to appear. So, it would be best to unblock and install them. Doing this should help you install the rest of the updates without any hassle.
Method 8: Performing an in-place upgrade
You can also get rid of the error 0x80244019 by performing an in-place upgrade. This allows you to install the latest Windows version, along with all the current updates. Don’t worry because this method still allows you to keep all your files and applications. You just have to follow the instructions below:
- Go to Microsoft’s website and download the Media Creation Tool.
- Run the program, then select Upgrade this PC Now. The setup will now download all the necessary files.
- Select the ‘Download and install updates (recommended)’ option.
- Wait while setup is downloading the updates.
- Follow the on-screen instructions until you reach the ‘Ready to Install’ screen.
- Click the ‘Change what to keep’ option.
- Don’t forget to select the ‘Keep personal files and apps’ option. Click Next to proceed.
After the process is complete, your PC should have the latest Windows version. This should also help you resolve the error 0x80244019.
If you’re planning to run the Media Creation Tool from a USB flash drive, we recommend updating your drivers first. This ensures that you will be able to perform the in-place upgrade with no problems. You can manually do that, but an easier option would be to use Auslogics Driver Updater. This tool fixes and updates all your problematic drivers, ensuring that you will be able to use your USB flash drive and other peripherals without any hassle.
Did you find other workarounds for the error 0x80244019?
Share your ideas in the comments below!
Do you like this post? 🙂
Please rate and share it and subscribe to our newsletter!
4 votes,
average: 5.00 out of
5
Loading…
Easy fixes to get the latest updates
by Madalina Dinita
Madalina has been a Windows fan ever since she got her hands on her first Windows XP computer. She is interested in all things technology, especially emerging technologies… read more
Updated on
- Update errors are not uncommon on Windows devices, and error 0x80244019 is one a few users may face.
- In many cases, running the Windows Update troubleshooter should be enough to fix the problem.
Keeping Windows and your apps up-to-date is critical for your system’s security. An infinite number of threats circulate on the internet, many of which cause irreparable damage to your computer.
Unfortunately, many errors can occur during the update process. In this article, we’ll focus on the Windows Update error 0x80244019 and show you how to fix it.
Note that users have also experienced this error in Windows 7.
How can I fix the Windows Update error 0x80244019?
- How can I fix the Windows Update error 0x80244019?
- 1. Run the Windows Update troubleshooter
- 2. Change Windows update options
- 3. Check your antivirus
- 4. Reset Windows Update components
- 5. Perform a clean boot
- 6. Disconnect all USB devices
- 7. Install the update manually
- 8. Install optional updates
- 9. Perform an in-place upgrade
1. Run the Windows Update troubleshooter
- Press Windows Key + I to open the Settings app.
- When Settings app opens, go to Update & Security section.

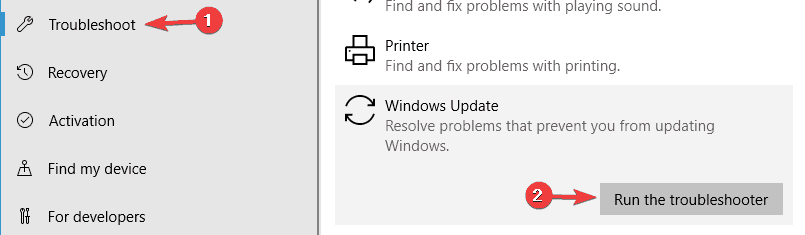
- Select Troubleshoot from the left pane. In the right pane select Windows Update and click Run the troubleshooter button.

- Follow the instructions on the screen to complete the troubleshooter.
According to users, sometimes you might be able to fix this problem simply by running Windows Update troubleshooter.
As you know, Windows 10 has a wide range of troubleshooters available, and they are specially designed to automatically fix common problems.
If you’re having error 0x80244019 on your PC, you just need to run the Windows Update troubleshooter by following the above steps.
Once the troubleshooter is finished, check if the problem is still there.
2. Change Windows update options
- Open the Settings app and navigate to Update & Security section.
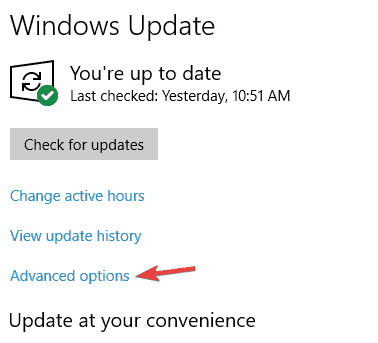
- When Windows Update window opens, click on Advanced options.

- Now turn off Give me updates for other Microsoft products when I update Windows.

According to users, sometimes your options can cause error 0x80244019 to appear.
If you can’t update your PC due to this error, you might have to change your settings a bit. You can do that by following these steps from above.
After turning off this option, the issue should be resolved and you’ll be able to update Windows without any issues.
3. Check your antivirus
According to users, sometimes your antivirus can interfere with your system and cause error 0x80244019 to appear.
To fix the problem, it’s recommended to disable certain antivirus features and check if that solves the issue.
If that doesn’t work, your next step would be to completely disable your antivirus. In the worst-case scenario, you might have to uninstall your antivirus and check if that solves the issue.
If removing the antivirus solves the problem, you should consider switching to different antivirus software.
4. Reset Windows Update components
- Press Windows Key + X to open Win + X menu. Now select Command Prompt (Admin) or Powershell (Admin) from the list.

- When Command Prompt opens, run the following commands:
- net stop wuauserv
- net stop cryptSvc
- net stop bits
- net stop msiserver
- ren C:WindowsSoftwareDistribution SoftwareDistribution.old
- ren C:WindowsSystem32catroot2 Catroot2.old
- net start wuauserv
- net start cryptSvc
- net start bits
- net start msiserver
In order to download the updates, certain Windows Update components need to be running. If these components aren’t running, you might encounter error 0x80244019.
However, you can fix this problem simply by resetting these components. To do that, you just need to follow these steps describe in the lines above.
After running these commands the necessary components will be reset and the issue should be resolved.
If you don’t want to run these commands manually, you can always create a Windows Update reset script that will automatically reset the necessary components for you.
5. Perform a clean boot
- Press Windows Key + R and enter msconfig. Now press Enter or click OK.

- On the Services tab select the Hide all Microsoft services check box > click Disable all.

- On the Startup tab > click Open Task Manager.
- Right-click each startup item and then click Disable.

- Close Task Manager > click OK > restart the computer.
Third-party applications can sometimes interfere with your system and cause error 0x80244019 and other update errors to appear. To fix the problem, it’s advised to perform a Clean boot.
If you’re not familiar, in Clean boot state your PC will start without any third-party applications or services.
This is a great feature, especially if you’re concerned that a third-party application is interfering with your system. To perform a clean boot, perform the steps that were described a bit earlier.
After disabling all startup applications and services, try to install the update again and check if the issue is still there.
6. Disconnect all USB devices
In some rare cases, your USB devices can cause error 0x80244019 to appear. If you’re having this problem, it’s advised to disconnect all your USB devices from your PC.
This includes external hard drives, USB flash drives, gamepads, printers, etc.
Basically, you need to disconnect all devices except your keyboard and mouse. After doing that, try to install the update again and check if the problem is still there.
7. Install the update manually
- Go to Windows Update Catalog website.
- Enter the KB number in the search field.
- List of matching updates will now appear. Select the update that matches your system architecture and download it.

If you can’t download the latest updates due to error 0x80244019, you might want to try installing the update manually.
This isn’t that hard, and in order to do it, first you need to find the KB number of the update. To do that, visit the Windows Update section and look for the KB number of the update.
Once you find the KB number, you need to do perform the steps from above.
Once you download the update, install it and check if that solves the issue.
Keep in mind that this method won’t fix the core problem, instead, you’ll just avoid the error message by downloading and installing the update on your own.
8. Install optional updates
Windows 10 installs updates automatically, but sometimes you might encounter a problematic update. In order to prevent the update from installing, you need to block it with a special tool.
If you want to know more about blocking Windows Updates, we wrote a special article about it, so you should check it out.
Although blocking updates can help you with certain problems, several users reported that hiding optional updates can cause this problem to appear.
Therefore, if you have any optional updates hidden, be sure to unblock and install them.
After doing that, this problem should be resolved and you’ll be able to install the updates without any problems.
9. Perform an in-place upgrade
- Download Media Creation Tool and run it.
- Select Upgrade this PC now and click Next.
- Wait while the setup downloads the necessary files.
- Select Download and install updates (recommended).
- Wait while setup downloads the updates.
- Follow the instructions on the screen until you reach Ready to install screen. Click on Change what to keep.
- Make sure that Keep personal files and apps is selected. Now click Next.
- Follow the instructions on the screen to complete the setup.
To fix this problem you might have to perform an in-place upgrade.
By doing so, you’ll install the latest version of Windows, with all current updates, while keeping your files and applications intact.
This process is relatively simple, and you can perform it by following the steps from above.
Once the setup is finished, you’ll have the latest version of Windows installed and the issue should be resolved.
- Adding layers in Windows 11’s Paint greatly increases RAM usage
- How to copy texts from images with Snipping Tool’s Text Action
Update error 0x80244019 can be problematic since it can leave your system vulnerable. Speaking of this error message, here are some related issues that users reported:
- 0x80244019 Windows Server 2016 – This issue can affect Windows Server 2016, and if you have this problem, you might be able to fix it using one of our solutions.
- Windows 7 update error 0x80244019 – Many users reported this issue on older versions of Windows. Even if you don’t use Windows 10, you should know that most of our solutions can b applied to older versions of Windows as well.
We hope the solutions listed above helped you fix Windows 10 update error 0x80244019.
If you’ve come across other workarounds to fix this problem, you can list the troubleshooting steps in the comment section below.
![]()
WSUS на базе Windows Server 2012 и выше поддерживает возможность установки на Windows 10 не только обычных обновлений безопасности и исправлений, но и крупных пакетов обновлений (в терминологии Microsoft – апгрейдов). Но прямо из коробки этот функционал не работает, такие апгрейды (в концепции Windows 10 называются Redstone ) на клиенты просто не закачиваются. Разберемся в проблеме.
Во WSUS на Windows Server 2012 появился новый тип классов обновлений – Upgrades. Включается он в консоли WSUS в разделе Options ->Product and Classification -> вкладка Classification. Нас интересует опция Upgrades (если она не включена, не спешите ее включать!).
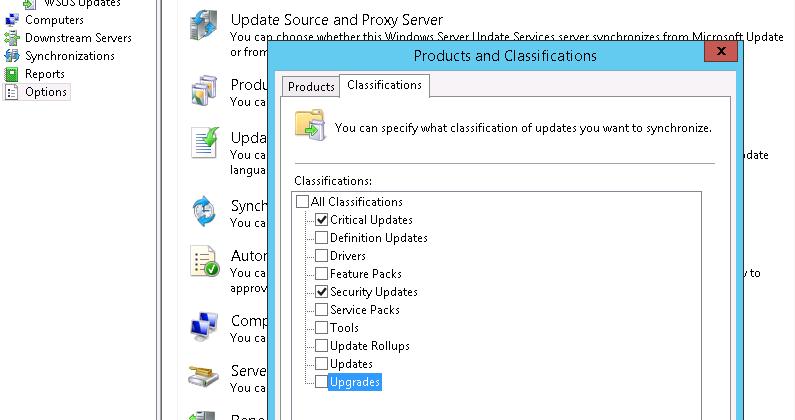
Если включить эту опцию, то сервер WSUS все равно не будет загружать апгрейды, выдавая при загрузке ошибку. Чтобы сервер WSUS начал скачивать пакеты апгрейдов, нужно на WSUS сервере установить отдельное обновление: KB 3095113 (https://support.microsoft.com/en-us/kb/3095113).
Примечание. Если у вас ранее уже была активирована классификация Upgrades и выполнялась синхронизация, после установки KB 3095113 придется провести очистку базы WSUS с помощью следующих PowerShell команд:
- Отключаем классификацию Upgrades
Get-WsusClassification | Where-Object -FilterScript {$_.Classification.Title -Eq “Upgrades”} | Set-WsusClassification –Disable - Удаляем из базы информацию об этик апгрейдах
$wsus = Get-WsusServer
$wsus.SearchUpdates(“version 1511, 10586, 1607”) | foreach { $wsus.DeleteUpdate($_.Id.UpdateId) } - Осталось включить классификацию Upgrades
Get-WsusClassification | Where -FilterScript {$_.Classification.Title -Eq “Upgrades”} | Set-WsusClassification - И повторно запустить синхронизацию.
$sub = $s.GetSubscription()
$sub.StartSynchronization()
Но это еще не все, даже после установки KB 3095113 на сервере, пакеты апгрейдов на клиентах все равно не появляются. В журналах WindowsUpdate.log на ПК с Windows 10 появляется можно найти ошибку 0x80244019:
2016/08/24 15:32:36.3654849 1064 2660 DownloadManager BITS job {84234ABB-06CE-4251-941C-281B4424EB32} failed, updateId = 8CB55544-8521-238E-AAFB-422D647DC0A6.200, hr = 0x80190194. File URL = _http://wsus.mydomain.com:8530/Content/7C/6F5CAF07827FAE0E37739F3222603EAF38808B7C.esd, local path = C:\Windows\SoftwareDistribution\Download\dc0dc85b32300fe505d5d9a2f479c1b0\10586.0.151029-1700.th2_release_CLIENTENTERPRISE_VOL_x64fre_en-us.esd
2016/08/24 15:33:36.3658125 1064 2660 DownloadManager Progress failure bytes total = 2659650046, bytes transferred = 18574952
2016/08/24 15:33:36.3845664 1064 2660 DownloadManager Error 0x80244019 occurred while downloading update; notifying dependent calls.
В логе видна попытка закачать файл ESD (новый формат распространения образа ОС), —7C/6F5CAF07827FAE0E37739F3222603EAF38808B7C.esd с сервера. Попробуйте открыть этот URL в браузере – появится ошибка 404. Дело в том, что этот тип файлов не разрешен в настройках IIS и его передача блокируется.
Чтобы разрешить серверу WSUS передавать ESD файлы, откройте консоль Internet Information Service (IIS) Manager, перейдите на сайт WSUS Administration и выберите каталог Content. В настройках IIS выберите раздел Mime Types.
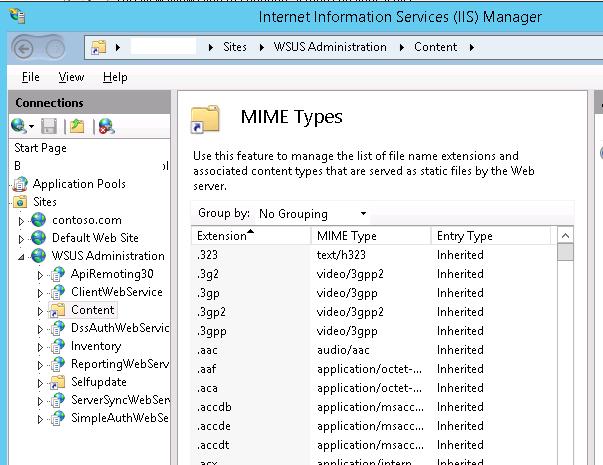 Добавьте новый тип MIME (Add MIME type):
Расширение файла: .esd
Тип MIME: application/octet-stream

Совет. То же самое можно сделать командами:
cd %windir%\system32\inetsrv
appcmd set config /section:staticContent /+"[fileExtension='.esd',mimeType='application/octet-stream']"
Перезапустите службу IIS (iisreset) и выполните повторную синхронизацию на клиентах. Клиенты Windows 10 должны начать закачивать esd файлы и могут приступать к установке пакетов обновлений.
Примечание. Для информации: WSUS версии 3.2 на Windows Server 2008 R2 раздавать апгрейды для Windows 10 не сможет. Судя по всему, в ближайшее время Microsoft этот недостаток исправлять не планирует.