Содержание
- Распространенные ошибки глюкометра – 100% решение
- Распространенные ошибки глюкометра – что означают и как исправить?
- Советы, как избежать ошибок глюкометра
- Вывод
- Часто задаваемые вопросы
- Заказ дневника самоконтроля
- Сообщения об ошибках глюкометра
- One touch ultra easy – новое слово в диагностике
- Общее представление об аппарате
- Что входит в поставочный комплект
- Как работает аппарат
- Как пользоваться глюкометром
- Кому надо купить глюкометр
Распространенные ошибки глюкометра – 100% решение
Во время работы глюкометра могут возникать разного рода сбои, самостоятельно исправить которые порой бывает крайне сложно. А ведь от правильности и точности показателей напрямую зависит здоровье человека, страдающего диабетом. Если уровень сахара в крови будет измерен некорректно, то это может привести к неприятным последствиям. Поэтому предлагаем рассмотреть наиболее распространенные ошибки глюкометра и способы их исправления. В основном речь пойдет о неполадках, имеющих кодовое обозначение на экране прибора (E1, E2, E3, E4, LO, HI). Но также затронем вопросы, касающиеся тест-полосок и погрешностей в измерениях.
Распространенные ошибки глюкометра – что означают и как исправить?
В большинстве случаев ошибки глюкометра возникают не из-за поломки прибора, а в результате воздействия внешних факторов. Например, довольно часто измерить уровень сахара в крови не удается по причине повреждения тест-полоски. Также нельзя исключать тот факт, что красного вещества попросту недостаточно для замера. Но если вы увидели кодовое обозначение на экране глюкометра, то вот основные методы устранения неполадок:
- Ошибка E1 на глюкометре – измерение не проводится. У этого сбоя разные причины, и в подавляющем большинстве случаев они связаны с самим прибором. Поэтому для решения проблемы необходимо заменить батарейки и выполнить повторную настройку глюкометра. Если это не помогло, то обратите внимание на используемую тест-полоску. Она должна быть корректно установлена и иметь не вышедший срок годности.

- Сбой E2 на глюкометре – замер даже не начинается. Такая кодировка свидетельствует о том, что проблемы наблюдаются с тест-полоской. Возможно, вы пытаетесь использовать просроченную, влажную или поврежденную полоску. Для устранения ошибки достаточно заменить тест-элемент.
- Ошибка E3 на глюкометре – измерения начаты, но не произведены до конца. Как правило, кодовый идентификатор указывает на недостаточное количество крови. Также не исключено, что вы не полностью заполнили окошко для красного вещества. В качестве решения проблемы предлагаем заменить тест-полоску, а затем повторно повторить измерения.
- Неполадка E4 – неточные показания или отсутствие измерений. Возможно, вы пытаетесь использовать поврежденную, поломанную или грязную тест-полоску. Это не приведет ни к чему хорошему, поэтому рекомендуем заменить элемент.
- Ошибка на глюкометре E5 – прибор не мерит уровень сахара. Сбой свидетельствует о том, что вы слишком рано нанесли кровь на тест-полоску. Напоминаем, это нужно делать только после появления на дисплее соответствующего значка. Чтобы решить возникшую проблему, достаточно заменить испорченный тест-элемент.
- Сбой E6 – прибор не реагирует на нанесение крови. Скорее всего, вы вставили в глюкометр повреждённую или испорченную тест-полоску. Попробуйте повторить измерения, но только с использованием нового элемента. Если же на экране отображается значок солнца, то уберите устройство от прямых солнечных лучей. В крайнем случае обратитесь в сервис гарантийного обслуживания клиентов.
- Ошибка HI – значение сахара в крови выше, чем 33,3. Если вы обнаружили на экране предельно большой уровень глюкозы, то первым делом воспользуйтесь проверочным раствором. Такой компонент идет в комплекте с каждым глюкометром. Нанесите жидкость на тест-полоску, а затем снимите результаты. Показатель в норме? Значит вам следует немедленно обратиться к врачу! Если же и при использовании контрольного вещества прибор показывает странные значения, то следует отправиться в сервисный центр.
- Сбой LO – уровень глюкозы ниже, чем 0,6. Как и в предыдущем случае, рекомендуем провести измерение с использованием проверочного раствора. Если показатель в норме, то желательно посетить врача. В противном случае, когда ошибка LO осталась, следует искать причину поломки. Самостоятельно это сделать крайне сложно, так что лучше посетить гарантийный центр.


Здесь были представлены наиболее распространенные ошибки глюкометра и способы их решения. Как показывает практика, код E сигнализирует о повреждении тест-полоски или недостаточном количестве крови. А сбои HI и LO указывают на предельно высокий и низкий уровень сахара в крови соответственно.
Советы, как избежать ошибок глюкометра
И напоследок мы подготовили несколько советов, которые помогут избежать ошибок во время использования глюкометра. Рекомендуем ознакомиться с ними в следующем списке:
- храните тест-полоски в правильном месте (с нужной влажностью и температурой);
- следите за сроком годности элементов тестирования;
- устанавливайте правильный код для тестовых полосок;
- проводите измерения в границах допустимой температуры (+10 °C и +45 °C);
- берите кровь только тогда, когда руки теплые.

Если следовать этим рекомендациям, то со многими сбоями попросту не придется столкнуться.
Вывод
Таким образом, мы рассмотрели наиболее распространенные ошибки глюкометра (E1, E2, E3, E4, E5, E6, LO, HI) и способы их решения. Остались дополнительные вопросы по теме материала? Тогда задавайте их в комментариях ниже!
Источник
Часто задаваемые вопросы
Найдите ответы на часто задаваемые вопросы о своем глюкометре, тест-полосках и многом другом.
Заказ дневника самоконтроля
Чтобы узнать, нажмите сюда.
Сообщения об ошибках глюкометра
Если вы столкнулись с проблемами при использовании глюкометра OneTouch ® , сначала обратитесь к разделу «Поиск и устранение неисправностей» в руководстве пользователя. Чтобы скачать руководство, выберите модель своего глюкометра на странице поддержки продуктов.
Если проблема не разрешится, свяжитесь с нашей Горячей линией OneTouch ® по телефону 8-800-200-83-53 Мы сделаем все возможное, чтобы помочь вам. Убедитесь, что глюкометр и тест-полоски находятся возле вас во время звонка.
Если вы столкнулись с проблемами при использовании глюкометра OneTouch ® , сначала обратитесь к разделу «Поиск и устранение неисправностей» в руководстве пользователя. Чтобы скачать руководство, выберите модель своего глюкометра на странице поддержки продуктов.
Если проблема не разрешится, свяжитесь с нашей Горячей линией OneTouch ® по телефону 8-800-200-83-53. Мы сделаем все возможное, чтобы помочь вам. Убедитесь, что глюкометр и тест-полоски находятся возле вас во время звонка.
Глюкометр OneTouch Select Plus Flex ® отображает сообщение об ошибке при наличии проблем с тест-полосками или глюкометром, а также если уровень глюкозы в крови выше 33,3 ммоль/л или ниже 1,1 ммоль/л. Для получения дополнительной информации об ошибках ознакомьтесь с разделом «Поиск и устранение неисправностей» в руководстве пользователя. Вместе с сообщением об ошибке в верхнем левом углу экрана глюкометра могут отображаться следующие экраны ошибок. ПРИМЕЧАНИЕ: Если глюкометр включен, но не работает, свяжитесь с нашей Горячей линией OneTouch ® по телефону 8-800-200-83-53.
Ошибка 1

Что это значит:
Проблема с глюкометром.
Порядок действий:
Не пользуйтесь глюкометром. Свяжитесь с нашей Горячей линией OneTouch ® по телефону 8-800-200-83-53.
Ошибка 2

Что это значит:
Сообщение об ошибке может быть вызвано либо повторным использованием одной и той же тест-полоски, либо проблемой с глюкометром или тест-полоской.
Порядок действий:
Повторите измерение, используя новую тест-полоску. Ознакомьтесь с Разделом 3 руководства пользователя «Измерение уровня глюкозы в крови». Если сообщение продолжает появляться, свяжитесь с нашей Горячей линией OneTouch ® по телефону 8-800-200-83-53.
Ошибка 3

Что это значит:
Образец крови был нанесен до готовности глюкометра к работе.
Порядок действий:
Повторите измерение, используя новую тест-полоску. Наносите образец крови или контрольного раствора только после появления мигающего символа на дисплее. Если сообщение продолжает появляться, свяжитесь с нашей Горячей линией OneTouch ® по телефону 8-800-200-83-53.
Ошибка 4

Что это значит:
Возможен один из следующих вариантов:
- Нанесено недостаточно крови или контрольного раствора или нанесен дополнительный образец после начала обратного отсчета.
- Тест-полоска была повреждена или смещена во время измерения.
- Испытуемый образец нанесен неправильно.
- Возможно, возникла проблема с глюкометром.
Порядок действий:
Повторите измерение, используя новую тест-полоску. Ознакомьтесь со страницей 50 или страницей 66 руководства пользователя. Если сообщение об ошибке появляется снова, свяжитесь с нашей Горячей линией OneTouch ® по телефону 8-800-200-83-53.
Ошибка 5

Что это значит:
Глюкометр обнаружил проблему с тест-полоской. Возможная причина – повреждение тест-полоски.
Порядок действий:
Повторите измерение, используя новую тест-полоску. Ознакомьтесь со страницей 48 или страницей 66 руководства пользователя. Если сообщение об ошибке появляется снова, свяжитесь с нашей Горячей линией OneTouch ® по телефону 8-800-200-83-53.
Ошибка 6

Что это значит:
Глюкометр обнаружил проблему с тест-полоской. Возможно, вы не нанесли на тест-полоску образец нужного типа – образец крови или контрольный раствор.
Порядок действий:
Проведите измерение с новой тест-полоской. Описание процедуры измерения уровня глюкозы в крови приведено на странице 34, а тест с контрольным раствором описан на странице 66 руководства пользователя. Если это сообщение об ошибке снова появится на экране, обратитесь на Горячую линию OneTouch ® по телефону: 8-800-200-83-53.
Глюкометр OneTouch Verio Reflect ® отображает сообщения при возникновении проблем с тест-полоской, самим глюкометром, а также когда уровень глюкозы в крови выше 33,3 ммоль/л или ниже 1,1 ммоль/л.
Неправильное обращение может привести к неточным результатам без появления сообщения об ошибке.
Описание возможных ошибок приведено на странице 148 руководства пользователя.
Порядок действий:
Проведите измерение с новой тест-полоской. Описание процедуры измерения уровня глюкозы в крови приведено на странице 40, а тест с контрольным раствором описан на странице 66 руководства пользователя. Если это сообщение об ошибке снова появится на экране, обратитесь на Горячую линию OneTouch ® по телефону: 8-800-200-83-53.
Если вы пользуетесь глюкометром OneTouch Select Plus Flex ® , для получения помощи с сообщениями об ошибках нажмите сюда.
Источник
Глюкометр – это незаменимая вещь для каждого человека, страдающего сахарным диабетом. Он позволяет точно и безопасно измерить уровень глюкозы крови, определить наличие у пациентов опаснейших острых осложнений – гипо- и гипергликемической комы. Рассмотрим особенности применения глюкометра one touch ultra easy.
Общее представление об аппарате

Оne touch ultra easy имеет миниатюрные размеры, благодаря чему им очень удобно пользоваться. Помимо уровня гликемии, с помощью глюкометра уан тач изи можно измерить уровень триглицеридов и холестерина в крови, что является важным в диагностике атеросклероза. Такую диагностику можно провести дома с помощью специальной тест полоски ван тач. Результаты анализов определяются в принятых в нашей стране миллимолях на литр. Не нужно переводить одни единицы в другие.
Стоимость аппарата onetouch относительно небольшая и колеблется в пределах, эквивалентных 55 – 60 долларов.
Это устройство не требует чистки, специального ухода. Его конструкция продумана таким образом, что в него не попадает жидкость или пыль. Можно эффективно чистить его при помощи влажной салфетки. Категорически запрещается использовать спиртовые растворители.
Что входит в поставочный комплект

Следует обратить внимание, что в комплект onetouch обязательно должны входить такие элементы:
- само устройство ультра изи;
- тест полоски;
- ланцеты (должны находиться в запечатанной упаковке);
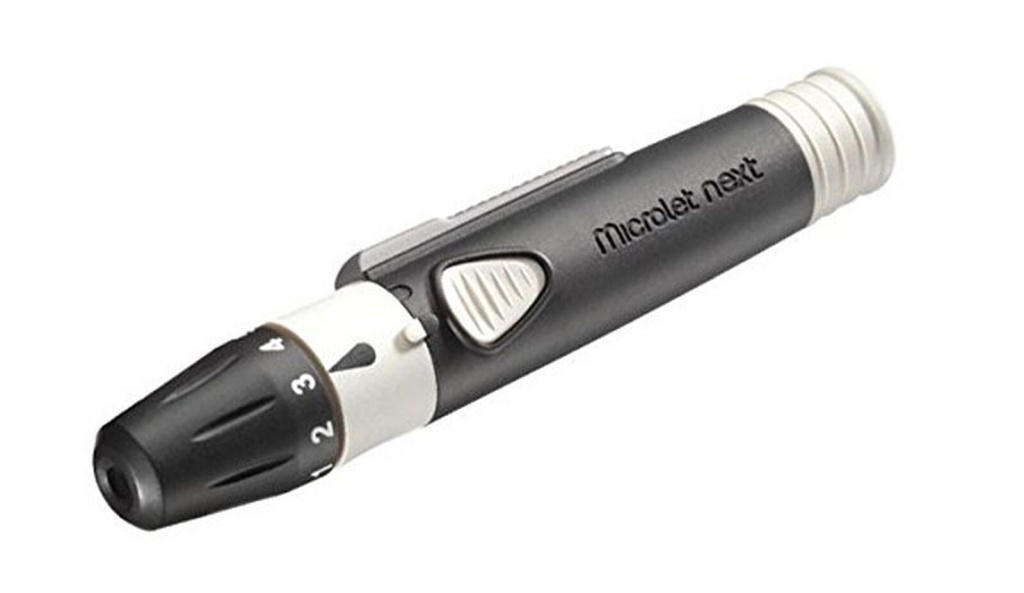
- специальная ручка для прокола пальца;
- чехол (защищает аппарат ультра изи);
- руководство пользователя onetouch.
Аккумуляторная батарея – встроенная, компактная.
Как работает аппарат
Устройство one touch ultra easy работает очень быстро и выдает точные результаты, что очень необходимо для своевременного обнаружения острых диабетических состояний. Основные технические характеристики глюкометра one touch ultra easy такие:
- время для получения результата – не более пяти мин;
- для проведения диагностики и определения уровня гликемии достаточно одного микролитра крови;
- можно прокалывать палец, а также плечо;
- ван тач изи хранит в своей памяти до 150 измерений, показывая точное время измерения;
- ван тач также может рассчитать средний показатель глюкозы – за две недели или месяц;
- onetouch оборудован специальным устройством для передачи информации на компьютер;
- одна батарейка onetouch ultra easy обеспечивает тысячу диагностик.

Как пользоваться глюкометром
Устройство этого аппарата очень простое. Даже те, кто ни разу не пользовался им, быстро обучаются основным приемам работы. Чтобы увидеть, что это действительно просто, мы составили понятную пошаговую инструкцию.
- Для начала надо вымыть руки.
- Устройство one touch настроить согласно инструкции. Не надо выполнять действия, не предусмотренные инструкцией: это может привести к порче глюкометра.
- Подготовить тест полоски ван тач ультра, спирт, ватку, специальный флакон для прокалывания кожи. Упаковку с ними не открывать.
- Ручка имеет специальные деления для определения глубины прокалывания. Если диагностика делается взрослому, то пружину надо зафиксировать на делении 7 – 8.
- Смочить в этаноле ватный тампон и протереть им кожу.
- Тест-полоски вскрыть и вставить их в прибор так, как показано в инструкции.
- Проколоть кожу. При этом должна появиться небольшая капелька крови.
- Полоску приложить к месту прокола. Рабочая зона тест полоски ван тач ультра должна быть полностью покрыта кровью.
- К месту прокола приложить тампон, смоченный в спирте.
- Получить значение сахара крови.
Устройство one touch ultra easy не надо специально программировать на тот или иной вид тестовых полосок. Все параметры автоматически указаны в нем.
Кому надо купить глюкометр
Это полезное портативное устройство для определения гликемии необходимо иметь каждому, кто не только болен диабетом, но и имеет нарушения глюкозотолерантности. Контролировать показатель сахара надо в таких случаях ежедневно, а также после тяжелых физических и эмоциональных перегрузок, переедания и прочего.
Кроме того, его надо купить и тем, кто постоянно следит за своим здоровьем и измеряет сахар крови в профилактических целях. Ведь тихого убийцу (а диабет без всякого преувеличения надо называть именно так) гораздо легче предупредить.
В целом отзывы об этом глюкометре свидетельствуют о том, что он очень прост в использовании и доступен в цене. Дает точные результаты измерений, что очень важно при диабете инсулинозависимого и инсулиннезависимого типа. Тестовые ленты и ланцеты к такому аппарату продаются в большинстве аптек. Не нужно экономить на тестовых полосках: сэкономленные на них деньги в тысячи раз меньше, чем затраты на лечение диабетических осложнений. А душевные страдания, получаемые при этом, вовсе не поддаются денежному выражению.
Источник
Содержание
- Руководство по эксплуатации Lifescan OneTouch Ultra
- Руководство по эксплуатации для устройства Lifescan OneTouch Ultra
- Как пользоваться?
- Контроль сахара с глюкометром One Touch Ultra
- Настройка
- Особенности глюкометра
- Комплектация и технические характеристики
- Информация о глюкометре Оне Тач Ультра
- Описание и технические характеристики
- Преимущества биоанализатора
- Особенности прибора OneTouch Ultra
- Инструкция по применению
- Инструкция по применению
- Как пользоваться глюкометром
- Содержание:
- Что такое глюкометр, принцип действия?
- Как правильно настроить глюкометр?
- Как правильно пользоваться глюкометром?
Руководство по эксплуатации Lifescan OneTouch Ultra
Руководство по эксплуатации для устройства Lifescan OneTouch Ultra
Устройство: Lifescan OneTouch Ultra
Размер: 2,92 MB
Добавлено: 2014-01-03 19:08:54
Количество страниц: 138
Печатать инструкцию
Как пользоваться?
Наша цель — обеспечить Вам самый быстрый доступ к руководству по эксплуатации устройства Lifescan OneTouch Ultra . Пользуясь просмотром онлайн Вы можете быстро просмотреть содержание и перейти на страницу, на которой найдете решение своей проблемы с Lifescan OneTouch Ultra .
Для Вашего удобства
Если просмотр руководства Lifescan OneTouch Ultra непосредственно на этой странице для Вас неудобен, Вы можете воспользоваться двумя возможными решениями:
- Полноэкранный просмотр -, Чтобы удобно просматривать инструкцию (без скачивания на компьютер) Вы можете использовать режим полноэкранного просмотра. Чтобы запустить просмотр инструкции Lifescan OneTouch Ultra на полном экране, используйте кнопку Полный экран .
- Скачивание на компьютер — Вы можете также скачать инструкцию Lifescan OneTouch Ultra на свой компьютер и сохранить ее в своем архиве. Если ты все же не хотите занимать место на своем устройстве, Вы всегда можете скачать ее из ManualsBase.
Печатная версия
Многие предпочитают читать документы не на экране, а в печатной версии. Опция распечатки инструкции также предусмотрена и Вы можете воспользоваться ею нажав на ссылку, находящуюся выше — Печатать инструкцию . Вам не обязательно печатать всю инструкцию Lifescan OneTouch Ultra а только некоторые страницы. Берегите бумагу.
Резюме
Ниже Вы найдете заявки которые находятся на очередных страницах инструкции для Lifescan OneTouch Ultra . Если Вы хотите быстро просмотреть содержимое страниц, которые находятся на очередных страницах инструкции, Вы воспользоваться ими.
Источник
Контроль сахара с глюкометром One Touch Ultra
Настройка
Перед началом работы нужно провести соответствующую настройку глюкометра.
Отрегулируйте ручку-прокалыватель, определив необходимую глубину прокола с помощью специальной пружины и фиксатора. Для забора крови у взрослых рекомендуется использовать 7–8-й уровень.
Установите дату и время. Это позволит вести точный учет показателей.
Проведите кодировку устройства с помощью кодовой пластины тест-полосок. Ее нужно вставить в предназначенный разъем и сверить код, появившийся на экране, с номером на упаковке
Важно повторять процедуру при использовании полосок с каждой новой упаковки.
Особенности глюкометра
 Чтобы выбрать подходящий прибор для домашнего использования, нужно ознакомиться с особенностями каждого из них. Глюкометр OneTouch Ultra создан для контроля уровня глюкозы в крови у людей, больных сахарным диабетом, а также для тех, у кого есть предрасположенность к данному заболеванию.
Кроме этого, это приспособление позволяет установить уровень холестерина в ходе биохимического анализа. Поэтому его используют не только диабетики, но и люди с избыточной массой тела. Уровень глюкозы устройство определяет по плазме. Результат исследования представлен в мг/дл или ммоль/л.
Устройство можно использовать не только дома, поскольку его компактные размеры позволяют брать его с собой. Оно предоставляет максимально точные результаты, что было установлено путем сравнения с показателями лабораторных исследований. Прибор легко настраивается, поэтому использовать его могут даже пожилые люди, которым сложно приспособиться к новым технологиям.
Еще одной важной особенностью устройства является простота в уходе. Кровь, используемая для исследования, не попадает внутрь прибора, поэтому глюкометр не засоряется
Уход за ним подразумевает внешнюю очистку при помощи влажных салфеток. Спирт и растворы, его содержащие, применять для обработки поверхности нежелательно.
Комплектация и технические характеристики
Чтобы определиться с выбором глюкометра, необходимо ознакомиться с его основными характеристиками.
У этого прибора они заключаются в следующем:
- небольшой вес устройства и компактные размеры;
- предоставление результатов исследования спустя 5 минут;
- отсутствие необходимости в заборе большого количества крови (достаточно 1 мкл);
- большой объем памяти, где хранятся данные последних 150 исследований;
- возможность отследить динамику, используя статистические данные;
- длительность службы элементов питания;
- возможность передачи данных на ПК.
К данному устройству прилагаются необходимые дополнительные приспособления:
- тест-полоски;
- ручка для прокалывания;
- ланцеты;
- приспособление для забора биоматериала;
- футляр для хранения;
- раствор для контроля;
- инструкция.
Тестовые полоски, предназначенные для этого устройства, являются одноразовыми. Поэтому есть смысл приобрести сразу 50 или 100 шт.
Информация о глюкометре Оне Тач Ультра
Приобрести прибор для измерения уровня сахара в крови можно в любом специализированном магазине или на страницах интернет-магазинов. Цена устройства от Johnson & Johnson составляет около 60 долларов, на территории России его можно приобрести примерно за 3 тысячи рублей.
В комплект входит сам глюкометр, тест полоски к глюкометру Уан Тач Ультра, ручка-прокалыватель, набор ланцет, инструкция по применению, чехол для удобной переноски прибора. Питание осуществляется за счет компактного встроенного аккумулятора.
По сравнению с другими устройствами для измерения глюкозы в крови, глюкометр Уан Тач Ультра обладает весьма привлекательными преимуществами, благодаря чему он имеет хорошие отзывы.
- Тестовый анализ на содержание сахара в плазме крови осуществляется в течение пяти минут.
- У прибора минимальная погрешность, поэтому показатели точности сопоставимы в результатами лабораторных исследований.
- Для получения точного результата требуется всего 1 мкл крови.
- Делать анализ крови при помощи данного устройства можно не только из пальца, но и из плеча.
- У глюкометра One Touch Ultra имеется возможность хранения последних 150 измерений.
- Устройство умеет рассчитывать средний результат за последние 2 недели или 30 дней.
- Чтобы перенести на компьютер результаты исследования и показать врачу динамику изменений, у прибора имеется порт для передачи цифровых данных.
- В среднем одной батарейки CR 2032 на 3.0 вольт хватает на проведение 1 тысячи измерений крови.
- Измеритель имеет не только миниатюрные размеры, но и маленький вес, который составляет всего 185 г.
Описание и технические характеристики
Глюкометр One Touch Ultra можно назвать самым простым и удобным в использовании среди всей линейки приборов. С ним сможет справиться как ребенок, так и пожилой человек. Управление устройством осуществляется при помощи всего двух кнопок.
Прибор сохраняет до 500 последних результатов тестов, сохраняя также дату и время проведения теста. Эти данные можно перенести на компьютер, чтобы иметь возможность контролировать годовые и месячные изменения уровня сахара. Обычно уровень глюкозы проверяется дважды в день: утром и вечером. При необходимости тесты можно проводить неограниченное количество раз в течение дня.
Для проведения теста необходимы специальные экспресс-полоски. Получение результата не занимает более 10 секунд. При этом измерять сахар можно при влажности до 90 процентов. Температурный режим функционирования прибора составляет от 5 до 40 градусов. Высота над уровнем моря не должна превышать 3040 м.
Прибор сам автоматически включается при установке тест-полоски в отсек и выключается через 2 минуты после завершения тестирования.

Устройство не требует особого ухода, но иголку ручки для проколов лучше обрабатывать спиртовыми растворами раз в неделю. Также не следует давать свою ручку для тестов другим людям, даже родственникам. Точность устройства будет выше, если им будет пользоваться только один человек.
Преимущества биоанализатора
В комплекте, как уже говорилось, имеются полоски, они сами поглощают нужную для исследования порцию крови. Если той капли, что вы поместили на полоску, недостаточно, анализатор подаст сигнал.
 Для взятия крови из пальца используется специальная ручка. Туда вставляется одноразовый ланцет, который быстро и безболезненно делает прокол. Если по каким-то причинам вы не можете взять кровь из пальца, то разрешено использовать капилляры на ладони или участок в области предплечья.
Относится биоанализатор к 3-му поколению устройств для домашнего исследования уровня глюкозы в крови.
Принцип действия прибора – образование слабого электрического тока после того, как главный реагент вступит в химическую реакцию с сахаром крови пользователя.
Гаджет по настройкам отмечает этот ток, и он быстро демонстрирует общее количество глюкозы в крови.
Очень важный момент: этот прибор не нуждается в отдельном программировании на разные типы полосок-индикаторов, так как автоматические параметры уже внесены в устройство изготовителем.
Особенности прибора OneTouch Ultra
- Прибор предоставляет результаты исследования крови через 5 минут после считывания информации из капли крови.
- Для проведения анализа требуется 1 микролитр крови.
- Пациент может самостоятельно выбрать, откуда брать кровь для анализа.
- Прибор сохраняет в памяти последние 150 исследований с указанием даты и времени анализа.
- Для отслеживания динамики изменений имеется возможность расчета среднего значения за последние две недели или месяц.
- Устройство можно подключать к компьютеру для передачи данных.
- Результаты исследования демонстрируются в ммоль/л и мг/дл.
- Одного элемента питания хватает на 1000 измерений.
- Вес прибора составляет 185 грамм.
Инструкция по применению
Для получения результатов об уровне глюкозы в крови с помощью этого прибора нужно выполнить следующую последовательность действий.
- Перед началом процедуры полагается вымыть руки и насухо их вытереть.
- Одну из тест-полосок нужно установить до упора в предназначенное для этого гнездо. Контакты на ней должны быть сверху.
- Когда полоска установлена, на дисплее появляется числовой код. Его нужно сверить с кодом, находящимся на упаковке.
- Если код верен, можно приступать к набору биоматериала. Прокол делается на пальце, ладони либо на предплечье. Это делается с помощью специальной ручки.
- Чтобы выделилось достаточное количество крови, тот участок, где сделан прокол, нужно помассировать.
- Далее надо прижать поверхность полоски к области прокола и подождать, пока впитается кровь.
- Иногда выделившейся крови недостаточно для проведения теста. В этом случае нужно воспользоваться новой тест-полоской.
Когда процедура будет закончена, на экране появятся результаты. Они автоматически сохраняются в памяти приспособления.
Видео-инструкция по использованию прибора:
Стоимость прибора зависит от вида модели. Встречаются разновидности One Touch Ultra Easy, One Touch Select и One Touch Select Simple. Первый тип является самым дорогим и обходится в 2000-2200 руб. Вторая разновидность несколько дешевле – 1500-2000 руб. Самым дешевым при тех же характеристиках является последний вариант – 1000-1500 руб.
Инструкция по применению
Перед первым использованием глюкометра нужно выполнить его настройку. Для этого кнопкой «стрелка вниз» включаем прибор и кнопками «вверх», «вниз» выбираем нужные дату и время.
В настройке нуждается и ручка, на ней нужно выбрать глубину прокола. Для этого устанавливаем ручку в положение 6-7 для взрослых больных диабетом, 3-4 для детей, делаем прокол и слегка сдавливаем палец, чтобы на нем появилась капля крови.
Если удалось получить каплю 3-4 мм, ручка настроена правильно. Если капля меньше, силу прокола увеличиваем.
Как сделать анализ:
- Вымыть место прокола с мылом, обсушить чистой салфеткой.
- Снять колпачок с ручки. С небольшим усилием вставить ланцет в ручку. Прокрутив, снять защитный диск с ланцета. Надеть снятый колпачок на ручку.
- Рычаг на боку ручки установить в верхнее положение.
- Прислонить ручку вплотную к коже, нажать на кнопку. Если настройка ручки произведена правильно, прокол будет почти безболезненным.
- Вставить тест-полоску в глюкометр. Прибор при этом включится самостоятельно. К полоске можно касаться в любом месте, на правильность измерений это не повлияет.
- Поднести поперечный край тест-полоски сбоку к капле крови. Дождаться, пока кровь втянется внутрь полоски.
- Результат анализа будет готов через 5 секунд. Он выводится на дисплей в привычных для России единицах – ммоль/л. В память глюкометра результат заносится автоматически.
На точность результатов могут повлиять внешние факторы:
Источник
Как пользоваться глюкометром
Статью подготовил Кривогуз И.М., семейный врач, инфекционист.
Специально для сайта medprostor.by
Содержание:
Любые нарушения обмена углеводов, включая сахарный диабет 1 или 2 типа, требуют контроля уровня глюкозы в крови. Для этого применяется прибор глюкометр. Как пользоваться полосками и самим аппаратом, калибровать его для получения достоверных результатов указано в инструкции. В целом большинство приборов имеют сходства в принципе определения глюкозы и использовании.

Что такое глюкометр, принцип действия?
Глюкометр – это прибор, при помощи которого проводится определение уровня глюкозы в крови. Все современные приборы осуществляют измерения, основываясь на 3 принципах действия:
Фотометрия – по силе изменения цвета реагента после контакта с кровью определяется концентрация глюкозы.
Биосенсорное измерение – кровь наносится на полоску, глюкоза реагирует с определенным соединением, что приводит к изменению электрического потенциала, который регистрируется прибором.
Электрохимическое определение (кулонометрия) – анализ концентрации глюкозы осуществляется за счет подсчета общего заряда электронов после реакции крови с определенными соединениями.
Для получения достоверного результата важно правильно использовать глюкометр. Инструкция по применению содержит всю информацию об этапах определения глюкозы в крови, а также калибровки прибора.
Как правильно настроить глюкометр?
Перед первым использованием каждый прибор должен быть правильно настроен. Практически во всех глюкометрах, независимо от принципа действия и производителя, базовые настройки включают следующие параметры:
Язык экранного меню .
Единицы измерения сахара (в большинстве случаев устанавливается измерение в единицах ммоль/л).
Диапазон измерения с установкой граничной нижней и верхней концентрации сахара, которые задаются индивидуально для каждого человека – если во время измерения прибор определяет, что концентрация глюкозы выше или ниже установленных граничных уровней, то он подает звуковой сигнал, а затем выводит показатель на дисплей.
Калибровка прибора – большинство моделей включают в комплект специальную калибровочную жидкость с определенным уровнем сахара. Ее наносят на тест-полоску, после чего сверяют результат на дисплее со значением, которое дает инструкция по эксплуатации глюкометра.
Правильная настройка, проведенная перед тем, как использовать глюкометр, дает возможность получать достоверные результаты измерений в будущем.
Как правильно пользоваться глюкометром?
Алгоритм действий, который определяет, как правильно использовать глюкометр, зависит от модели прибора. Для большинства представителей особенности применения имеют сходства:
Для увеличения притока крови к пальцам встряхивают рукой.
Тщательно вымывают кисти, палец обрабатывают раствором антисептика (70% раствор спирта).
В специальное отверстие на приборе вставляют тест-полоску до упора (обычно слышен характерный щелчок).
Осуществляют прокол пальца специальным скарификатором или автоматической ручкой-прокалывателем.
Каплю крови наносят на тест полоску.
Дожидаются появления результата на дисплее (в зависимости от модели глюкометра следует подождать от 5 до 40 секунд).
Извлекают использованную тест-полоску и утилизируют ее.
Нюансы и отличия в отношении того, как пользоваться глюкометром, указаны в инструкции к каждой конкретной модели.
О том, какой лучше задать диапазон допустимых значений сахара, лучше проконсультироваться с лечащим врачом. В некоторых инструкциях о том, как правильно пользоваться глюкометром, есть видео на диске. Это удобно, так как после просмотра риск ошибок становится минимальным.
Источник
- Manuals
- Brands
- OneTouch Manuals
- Blood Glucose Meter
- VERIOPRO +
- Operator’s manual
-
Contents
-
Table of Contents
-
Bookmarks
Quick Links
Yellow = 5mm margin, Red = 7mm margin
Blood glucose monitoring system
Meter Operator’s Guide
1
Yellow = 5mm margin, Red = 7mm margin
AW05948101B_OT_VerioPro+_OB_Insides_R1.indd 1
4/3/12 3:07 PM
Related Manuals for OneTouch VERIOPRO +
Summary of Contents for OneTouch VERIOPRO +
-
Page 1
Yellow = 5mm margin, Red = 7mm margin Blood glucose monitoring system Meter Operator’s Guide Yellow = 5mm margin, Red = 7mm margin AW05948101B_OT_VerioPro+_OB_Insides_R1.indd 1 4/3/12 3:07 PM… -
Page 2
Thank you for choosing OneTouch®. The OneTouch® Verio™Pro+ Blood Glucose Monitoring System is one of the latest product innovations from LifeScan®. Every OneTouch® meter is designed to make it easy to test your patient’s blood glucose and help you manage their diabetes. -
Page 3
Yellow = 5mm margin, Red = 7mm margin Symbols Cautions and Warnings. Refer to the Meter Operator’s Guide and inserts that came with the system for safety-related information. Direct current Consult instructions for use Battery low Number [Insert additional local symbols as required] Yellow = 5mm margin, Red = 7mm margin AW05948101B_OT_VerioPro+_OB_Insides_R1.indd 3 4/3/12 3:07 PM… -
Page 4: Table Of Contents
Yellow = 5mm margin, Red = 7mm margin Table of Contents Getting to know the system Setting up the meter Performing a control solution test Performing a blood glucose test Reviewing past results Performing a linearity test Care and maintenance Yellow = 5mm margin, Red = 7mm margin AW05948101B_OT_VerioPro+_OB_Insides_R1.indd 4 4/3/12 3:07 PM…
-
Page 5
Yellow = 5mm margin, Red = 7mm margin Batteries Troubleshooting Detailed information about the system Index Yellow = 5mm margin, Red = 7mm margin AW05948101B_OT_VerioPro+_OB_Insides_R1.indd 5 4/3/12 3:07 PM… -
Page 6: Before You Begin
Before you begin Before using this product to test a patient’s blood glucose, carefully read this Meter Operator’s Guide, and the inserts that come with the OneTouch® Verio™ Test Strips and OneTouch® Verio™ Control Solutions and OneTouch Verio™Pro+ Linearity Solutions.
-
Page 7: Test Principle
Yellow = 5mm margin, Red = 7mm margin Test principle Glucose in the whole blood sample mixes with chemicals in the test strip and a small electric current is produced. The strength of this current changes with the amount of glucose in the whole blood sample. The meter measures the current, calculates the patient’s blood glucose level, displays the blood glucose result, and stores it in its memory.
-
Page 8: Batteries
Yellow = 5mm margin, Red = 7mm margin The OneTouch® Verio™Pro+ Blood Glucose Monitoring System The OneTouch® Verio™Pro+ System Kit OneTouch® Verio™Pro+ Meter (batteries included) Meter Storage Case Yellow = 5mm margin, Red = 7mm margin AW05948101B_OT_VerioPro+_OB_Insides_R1.indd 8 4/3/12 3:07 PM…
-
Page 9
OneTouch® Verio™ High Control Solution (Red cap) OneTouch® Verio™ Test Strips The OneTouch® Verio™ Control Solutions and Test Strips are available separately. Follow your institution’s procedure for obtaining additional test strips and control solutions. Use only OneTouch® Verio™ Control Solutions and Test Strips with the OneTouch® Verio™Pro+ Meter. -
Page 10
OneTouch® Verio™Pro+ Linearity Solution Level 4 (Red cap) OneTouch® Verio™Pro+ Linearity Solution Level 5 (Purple cap) The OneTouch® Verio™Pro+ Linearity Solutions are available separately. Follow your institution’s procedure for obtaining additional linearity solutions. Use only OneTouch® Verio™Pro+ Linearity Solutions with the OneTouch® Verio™Pro+ Meter. -
Page 11: Yellow = 5Mm Margin, Red = 7Mm Margin
Yellow = 5mm margin, Red = 7mm margin Getting to know the system Getting to know the OneTouch® Verio™Pro+ Blood Glucose Monitoring System Meter Test strip port Insert test strip here to turn meter on Low battery icon Indicates time to change batteries…
-
Page 12: Test Strip
Yellow = 5mm margin, Red = 7mm margin Getting to know the system Test strip Front Back Channel to apply sample Silver prongs Silver prongs should face you when you insert test strip into test strip port Yellow = 5mm margin, Red = 7mm margin AW05948101B_OT_VerioPro+_OB_Insides_R1.indd 12 4/3/12 3:07 PM…
-
Page 13
Yellow = 5mm margin, Red = 7mm margin Getting to know the system Turning the meter on Press and hold until the start-up screen appears. Once the start-up screen is displayed, release VerioPro If the meter does not turn on, check the meter batteries. See pages 80-82. NOTE: When turning the meter on for the first time, it will automatically start at the Set Language screen to set the language, time and date (see pages 16-18). -
Page 14
Yellow = 5mm margin, Red = 7mm margin Getting to know the system A bar highlights the current selection on the Main Menu. 30 Apr 08:00 Example History (mmol/L) Main Menu with Settings History highlighted Last Result: 19:00 NOTE: • When History is highlighted, the result from the most 01 Apr 12:45 recent blood glucose test appears at the bottom of the… -
Page 15: Turning The Meter Off
Yellow = 5mm margin, Red = 7mm margin Getting to know the system Using the display backlight The backlight comes on automatically whenever the meter is turned on. After a few seconds of no activity, the backlight will dim. Pressing any button will turn the backlight back on without affecting the current screen.
-
Page 16
Yellow = 5mm margin, Red = 7mm margin Setting up the meter Setting the meter language, time and date When turning on the meter for the first time, it will automatically start at the Set Language screen. NOTE: You will not be able to perform a test when in the Settings mode. 1. -
Page 17: Setting Up The Meter
Yellow = 5mm margin, Red = 7mm margin Setting up the meter NOTE: The time and date formats are pre-set. These settings cannot be changed. Set Time 2. Set the time of day In the Set Time screen, press to set the hour and press .
-
Page 18
Yellow = 5mm margin, Red = 7mm margin Setting up the meter 4. Confirm the meter settings Settings If the settings are correct, press with Done highlighted. The settings will be Time: 12:45 saved. Date: 01 Apr 2011 Language: If a setting is not correct, press to highlight the incorrect setting and English press… -
Page 19
Yellow = 5mm margin, Red = 7mm margin Setting up the meter Adjusting settings after setting up the meter for the first time 01 Apr 12:45 Adjust the settings in the meter as needed. History (mmol/L) Highlight Settings on the Main Menu screen and press Settings Serial #: BCXFF2HK… -
Page 20
Yellow = 5mm margin, Red = 7mm margin Setting up the meter Viewing information about the meter Settings The meter serial number, software version, unit of measure and date of last data Time: 10:05 transfer are stored in the meter and can be viewed at any time. Date: Highlight Meter Care on the Settings screen and press 10 Dec 2011… -
Page 21
Yellow = 5mm margin, Red = 7mm margin Setting up the meter The information is displayed. Press and hold to return to the Main Menu. Meter Info Serial #: BCXFF2HK So ware: XX.YY.ZZ.AA Units: mmol/L Meter Care Last PC Transfer: 03 Mar 2011 Yellow = 5mm margin, Red = 7mm margin AW05948101B_OT_VerioPro+_OB_Insides_R1.indd 21… -
Page 22
Performing a control solution test Checking the meter with control solution OneTouch® Verio™ Control Solution is used to check that the meter and test strips are working together properly and the test is performed correctly. Control solution is available separately. Follow your institution’s procedure for obtaining control solution. -
Page 23: Performing A Control Solution Test
Yellow = 5mm margin, Red = 7mm margin Performing a control solution test • When opening a new vial of control solution, record the discard date (date opened plus 6 months) on the vial label. • When opening a new vial of test strips, record the discard date (date opened plus 6 months) on the label.
-
Page 24
Yellow = 5mm margin, Red = 7mm margin Performing a control solution test • Do Not return the used test strip to the vial after performing a test. • Do Not use a test strip with bent or broken silver prongs. •… -
Page 25: Do A Control Solution Test
Yellow = 5mm margin, Red = 7mm margin Performing a control solution test Do a control solution test • Whenever opening a new vial of test strips. • Whenever using a new batch or lot of test strips. • If you suspect that the meter or test strips are not working properly. •…
-
Page 26
Insert a test strip into the test strip port with the gold side of the test strip and the two silver prongs facing you. Unlike some blood glucose meters, no separate step to code the OneTouch® Verio™Pro+ Meter is required. Test strip port NOTE: Do Not press or the eject button during a test. -
Page 27
Yellow = 5mm margin, Red = 7mm margin Performing a control solution test 2. Prepare the control solution Remove the vial cap and place it on a flat surface with the top of the cap pointing up. Squeeze the vial to discard the first drop. Example Wipe both the tip of the control solution vial and the top of the cap with a clean, damp tissue or cloth. -
Page 28
Yellow = 5mm margin, Red = 7mm margin Performing a control solution test Squeeze a drop into the small well on the top of the cap or onto another clean, non-absorbent surface. 3. Apply the control solution Hold the meter so that the side edge of the test strip is at a slight angle to the drop of control solution. -
Page 29
Yellow = 5mm margin, Red = 7mm margin Performing a control solution test • Do Not apply more control solution to the test strip after you have moved the test strip away. • Do Not remove the test strip until the result is displayed or the meter will turn off. 4. -
Page 30
Yellow = 5mm margin, Red = 7mm margin Performing a control solution test If the Level selected does not match the result of the control solution test, you will be prompted to change the Level. If this screen appears, this means: Please verify. -
Page 31
Yellow = 5mm margin, Red = 7mm margin Performing a control solution test 5. Read the Result 30 Apr 19 : 00 Once a control solution level has been selected, the meter will display the control solution result along with the date, time, unit of measure and the level of control solution selected. -
Page 32
Yellow = 5mm margin, Red = 7mm margin Performing a control solution test Viewing control solution test results 01 Apr 12:45 1. From the Main Menu, press to select Settings and press History (mmol/L) Settings Serial #: BCXFF2HK 2. Next, press to choose Meter Care and press Settings Time:… -
Page 33
Yellow = 5mm margin, Red = 7mm margin Performing a control solution test 3. Select Control Results and press Meter Care Control Reminder Control Results Linearity Test Linearity Results Meter Info The meter can display up to 5 control solution test results at a time, starting with Control Results the most recent. -
Page 34
Yellow = 5mm margin, Red = 7mm margin Performing a control solution test NOTE: If the control solution result is shown without a level beside the , a level Control Results was not selected for this result. When completing a control solution test, if the mmol/L Mon, 29 Apr meter times out or the meter is turned off before a level is selected, the result will… -
Page 35
Yellow = 5mm margin, Red = 7mm margin Performing a control solution test Receiving reminders to perform a control solution test Settings The meter can be set to send a reminder when it is time to perform a control Time: solution test. -
Page 36
Yellow = 5mm margin, Red = 7mm margin Performing a control solution test 3. Press with Reminder highlighted Control Reminder Reminder: Off Reminder Settings No. of Days: Time: —:— 4. Press to select On or Off and press Reminder Of f Turn On to set and receive Control Solution… -
Page 37
Yellow = 5mm margin, Red = 7mm margin Performing a control solution test Set the number of days in between each control solution Control Reminder test, and the time of day the reminder will appear Reminder: NOTE: To set the number of days and time of day, the Control Reminder feature Reminder Settings must be turned on. -
Page 38
Yellow = 5mm margin, Red = 7mm margin Performing a control solution test 3. Next, highlight Time on the Control Reminder screen and Control Reminder press Reminder: Reminder Settings No. of Days: Time: 09:00 4. Press to set the hour and press Reminder Time When finished, press to return to the Control Reminder screen. -
Page 39
Yellow = 5mm margin, Red = 7mm margin Performing a control solution test Receiving reminders Reminder Whenever turning the meter on and it is time for a control solution test to be Perform a control solution performed, this Reminder screen will appear, within an 8-hour window of the test soon. -
Page 40: Performing A Blood Glucose Test
• Unlike some blood glucose meters, no separate step to code the OneTouch® Verio™Pro+ Meter is required. • Make sure the meter and test strips are at about the same temperature before testing. The OneTouch® Verio™Pro+ Blood Glucose Monitoring System cannot be used outside the operating temperature range (6°C-44°C).
-
Page 41
Yellow = 5mm margin, Red = 7mm margin Performing a blood glucose test • Do Not test if there is condensation (water build-up) on the meter. Move the meter and test strips to a cool, dry spot and wait for the meter surface to dry before testing. •… -
Page 42
Yellow = 5mm margin, Red = 7mm margin Performing a blood glucose test • Use clean, dry hands to remove a test strip from the vial. The test strip may be touched anywhere on its surface. Do Not bend, cut or modify the test strip in any way. •… -
Page 43
Yellow = 5mm margin, Red = 7mm margin Performing a blood glucose test Personal Protective Equipment Health care professionals should follow their institution’s policy and procedure guidelines for hand hygiene. In addition, follow the Centers for Disease Control recommendations regarding hand hygiene and the use of disposable gloves when performing glucose testing on patients. -
Page 44: Test Strips
Performing a blood glucose test Test Strips OneTouch® Verio™ Test Strips are intended for single use only. They should be disposed of in an appropriate biohazard container immediately after use. Test strips must be handled with dry hands. Handling test strips with wet hands may result in an Error 2 message.
-
Page 45
Yellow = 5mm margin, Red = 7mm margin Performing a blood glucose test When testing multiple patients, follow these guidelines for disease control: • Never reuse lancets. Restrict use of fingerstick capillary whole blood sampling devices to individual patients. Use only single-use lancets that permanently retract upon puncture. •… -
Page 46
CAUTION • The OneTouch® Verio™Pro+ Blood Glucose Monitoring System should not be used for patients within 24 hours of receiving a D-xylose absorption test, as it may cause inaccurately high results. • Do Not use test strips if the vial is damaged or left open to air. This could lead to error messages or inaccurate results. -
Page 47
Yellow = 5mm margin, Red = 7mm margin Performing a blood glucose test m CAUTION (continued) • If unable to test due to a problem with the testing supplies (see page 40), contact Customer Service and/or LifeScan® sales representative. Failure to test could delay patient treatment decisions and lead to a serious medical condition. -
Page 48
Insert a test strip into the test strip port with the gold side of the test strip and the two silver prongs facing you. Unlike some blood glucose meters, no separate step to code the OneTouch® Verio™Pro+ Meter is required. Test strip port NOTE: Do Not press or the eject button during a test. -
Page 49
Yellow = 5mm margin, Red = 7mm margin Performing a blood glucose test Getting a whole blood sample from the fingertip Follow your institution’s policy and procedure guidelines for whole blood collection and blood glucose monitoring. Prior to testing, the puncture site should be cleaned with warm, soapy water, rinsed and dried. -
Page 50
Yellow = 5mm margin, Red = 7mm margin Performing a blood glucose test Getting a venous or arterial blood sample Follow your institution’s policy and procedure guidelines for venous or arterial whole blood collection. Use only fresh whole blood when performing a blood glucose test using an arterial or venous blood sample. -
Page 51
Yellow = 5mm margin, Red = 7mm margin Performing a blood glucose test NOTE: When applying a whole blood sample from the finger, syringe or pipette, keep the meter pointed down to prevent blood from entering the test strip port. Fingerstick Holding the meter at a slight angle, guide the channel to the blood drop. -
Page 52
Yellow = 5mm margin, Red = 7mm margin Performing a blood glucose test Syringe Gently apply pressure to the plunger to expel a drop of blood. Touch the blood drop to the opening of the channel. Alternatively, dispense the blood from the syringe into a test tube, then apply blood to the test strip using a narrow bore pipette. -
Page 53
Yellow = 5mm margin, Red = 7mm margin Performing a blood glucose test 2. Wait for the channel to fill completely The blood drop will be drawn into the narrow channel. The channel should fill completely. The channel turns red and the meter will count down from 5 to 1. Blood should not be applied on the top of the test strip or to the top edge of the test strip. -
Page 54
Yellow = 5mm margin, Red = 7mm margin Performing a blood glucose test 3. Read the result on the meter The blood glucose result appears on the display, along with the unit of measure, and the date and time of the test. After a few seconds, View Previous will appear on the display. -
Page 55
Yellow = 5mm margin, Red = 7mm margin Performing a blood glucose test Interpreting unexpected test results Refer to the following cautions whenever blood glucose results are higher or lower than what you expect. m CAUTION Low blood glucose results This may require immediate treatment. -
Page 56
Yellow = 5mm margin, Red = 7mm margin Performing a blood glucose test m CAUTION (continued) High blood glucose results 30 Apr Re-test the blood glucose. If the result is EXTREME HIGH GLUCOSE again, this 19 : 00 indicates a severe problem with the patient’s blood glucose control. Follow your EXTREME institution’s policy regarding treatment of hyperglycemia. -
Page 57
Yellow = 5mm margin, Red = 7mm margin Performing a blood glucose test After getting a blood glucose result 30 Apr 19 : 00 Once you have a blood glucose result, you may: • Press to view the previous result, then press to hide the previous result. -
Page 58: Reviewing Past Results
Yellow = 5mm margin, Red = 7mm margin Reviewing past results The meter stores the most recent 980 patient blood glucose test results and displays them in several ways. If you have just completed a test, press to get to the Main Menu from the blood glucose result screen. If the meter is off, press and hold until the start-up screen appears.
-
Page 59
Yellow = 5mm margin, Red = 7mm margin Reviewing past results • When there are no results stored in History, (e.g., when no tests have been History performed or the results have been deleted after downloading, see pages 60-61) mmol/L No results No results is displayed. -
Page 60: Downloading Results To A Computer
Downloading results to a computer OneTouch® Diabetes Management Software (DMS) can be used to download and store all of the meter records. To learn more about OneTouch® DMS, visit www.OneTouchDiabetes.com. To order the software from LifeScan®, contact Customer Service and/or your LifeScan® sales representative.
-
Page 61
Yellow = 5mm margin, Red = 7mm margin Reviewing past results Once the command to start the download is sent from the computer to the meter, the meter display will show PC Connected indicating that the meter is in communication mode. Do Not perform a test while the meter is connected to a computer. -
Page 62
Perform evaluation of system linearity between the temperature ranges of 18°C-28°C at non-condensing relative humidity between 30% and 70%. • Use only OneTouch® Verio™Pro+ Linearity Solution (Levels 1 through 5) with the OneTouch® Verio™Pro+ Meter. Refer to the linearity solution vial label to determine the appropriate level for testing. -
Page 63: Performing A Linearity Test
Yellow = 5mm margin, Red = 7mm margin Performing a linearity test • When opening a new vial of linearity solution, record the discard date (date opened plus 6 months) on the vial label. • When opening a new vial of test strips, record the discard date (date opened plus 6 months) on the label.
-
Page 64
Yellow = 5mm margin, Red = 7mm margin Performing a linearity test • Do Not open the test strip vial until ready to remove a test strip and perform a test. Use the test strip immediately after removing it from the vial, especially in high humidity environments. A test strip left out of the vial in excess of two minutes before testing can lead to inaccurate results. -
Page 65
Yellow = 5mm margin, Red = 7mm margin Performing a linearity test m CAUTION • Do Not apply linearity solution to the skin or eyes as it may cause irritation. • Do Not use linearity solution after the expiration date (printed on the vial label) or the discard date (date opened plus 6 months), whichever comes first, or test results may be inaccurate. -
Page 66
Yellow = 5mm margin, Red = 7mm margin Performing a linearity test 2. Next, press to choose Meter Care and press Settings Time: 12:45 Date: 01 Apr 2011 Language: English Meter Care 3. Select Linearity Test and press Meter Care Control Reminder Control Results Linearity Test… -
Page 67
Silver prongs Unlike some blood glucose meters, no separate step to code the OneTouch® Verio™Pro+ Meter is required. Test strip port Yellow = 5mm margin, Red = 7mm margin AW05948101B_OT_VerioPro+_OB_Insides_R1.indd 67… -
Page 68
Yellow = 5mm margin, Red = 7mm margin Performing a linearity test Wait for the Apply Solution screen to appear on the meter display. NOTE: Do Not press or the eject button during a test. 6. Prepare the linearity solution Remove the vial cap and place it on a flat surface with the top of the cap pointing up. -
Page 69
Yellow = 5mm margin, Red = 7mm margin Performing a linearity test Wipe both the tip of the linearity solution vial and the top of the cap with a clean, damp tissue or cloth. NOTE: These steps are performed to reduce the risk of contamination which may lead to inaccurate linearity solution results. -
Page 70
Yellow = 5mm margin, Red = 7mm margin Performing a linearity test 7. Apply the linearity solution Hold the meter so that the side edge of the test strip is at a slight angle to the drop of linearity solution. Keep the meter pointed down to prevent linearity solution from entering the test strip port. -
Page 71
Yellow = 5mm margin, Red = 7mm margin Performing a linearity test 8. Read the result 30 Apr The meter will count down from 5 to 1. The result is displayed along with the date, 19 : 00 time, unit of measure and the linearity solution level. If mmol/L does not appear with the linearity test result, contact Customer Service and/or LifeScan®… -
Page 72
Yellow = 5mm margin, Red = 7mm margin Performing a linearity test 9. Press to continue the linearity test The Eject Strip screen appears on the meter display. Hold the meter pointed down. Press the eject button and the test strip will come out. Used test strips may be considered biohazardous waste in your area. -
Page 73
Yellow = 5mm margin, Red = 7mm margin Performing a linearity test 10. Select a level and insert a new test strip to continue the linearity solution test Return to Step 4 (see page 67). NOTE: If the linearity test is complete, press and hold to return to the Main Menu. -
Page 74
Yellow = 5mm margin, Red = 7mm margin Performing a linearity test Viewing linearity solution test results 01 Apr 12:45 1. From the Main Menu, press to select Settings and press History (mmol/L) Settings Serial #: BCXFF2HK 2. Next, press to choose Meter Care and press Settings Time:… -
Page 75
Yellow = 5mm margin, Red = 7mm margin Performing a linearity test 3. Select Linearity Results and press Meter Care NOTE: Follow your institutions policy and guidelines for interpreting linearity Control Reminder solution results. Control Results Linearity Test Linearity Results Meter Info For the current day, the number of tests performed using each level of linearity Linearity Results… -
Page 76
Yellow = 5mm margin, Red = 7mm margin Performing a linearity test To view the time of day and actual test result (mmol/L) for a specific level of Level 1 Results solution on any given day, highlight the level on the Linearity Results screen and mmol/L Tue, 30 Apr press… -
Page 77: Care And Maintenance
Yellow = 5mm margin, Red = 7mm margin Care and maintenance Storing the system Store the meter in the meter case. Keep in a dry place between 5°C and 30°C, with a relative humidity of less than 65%. Keep all items away from direct sunlight and heat. Store test strips under these same conditions.
-
Page 78
Yellow = 5mm margin, Red = 7mm margin Care and maintenance It is recommended that a 10% bleach solution or pre-saturated wipes, containing a minimum of 0.55% sodium hypochlorite, be used to disinfect the outer surfaces of the meter. Equivalent disinfecting agents may be used as specified by the local regulations or guidelines and must be effective against Hepatitis B, HIV and other blood borne pathogens as per the manufacturer’s labeling for the disinfectant. -
Page 79
Yellow = 5mm margin, Red = 7mm margin Care and maintenance Hold the meter with the test strip port pointed down. Use either a soft cloth dampened with the recommended disinfectant solution or a pre-saturated wipe to completely pre-clean the meter surface of all gross debris/contamination. Disinfect by using a new soft cloth dampened with the recommended disinfectant solution or pre-saturated wipe to dampen the outer surfaces of the meter. -
Page 80
Batteries Batteries The OneTouch® Verio™Pro+ Meter uses two AA alkaline batteries. See Troubleshooting, pages 92-93 for information on when to change the meter batteries. IMPORTANT: Use only new AA alkaline batteries with the meter. Do Not use rechargeable batteries. Use of an incorrect battery type may result in the meter providing fewer tests than normal from when the battery icon or the LOW BATTERY screen first appears. -
Page 81: Replacing The Batteries
Yellow = 5mm margin, Red = 7mm margin Batteries Replacing the batteries 1. Remove the old batteries Start with the meter turned off. Gently push down on the blue circle and slide the cover to remove. m WARNING To avoid a possible shock, Do Not change the batteries while the meter is connected to a computer.
-
Page 82
Yellow = 5mm margin, Red = 7mm margin Batteries 2. Insert the new batteries Insert two new AA alkaline batteries into the battery compartment. The icons in the battery compartment will guide you in placing the batteries. Lower cover onto the back of the meter, push down on the blue circle, and slide back into place. -
Page 83
Troubleshooting Troubleshooting The OneTouch® Verio™Pro+ Meter displays messages when there are problems with the test strip, or with the meter. Improper use may cause an inaccurate result without producing an error message. NOTE: If the meter is on but does not operate (locks-up), contact Customer Service and/or LifeScan®… -
Page 84
Yellow = 5mm margin, Red = 7mm margin Troubleshooting (continued) Warning What it means for Linearity Solution Testing Temperature Meter is too hot (above 28°C) to work correctly. too high. Out of operating range. What to do for Linearity Solution Testing See Meter Operator’s Guide. -
Page 85
Yellow = 5mm margin, Red = 7mm margin Troubleshooting What it means for Blood and Control Solution Testing Warning Meter is too cold (below 6°C) to work correctly. Temperature What to do for Blood and Control Solution Testing too low. Out of Move the meter and test strips to a warmer area. -
Page 86
Yellow = 5mm margin, Red = 7mm margin Troubleshooting (continued) Warning What it means for Linearity Solution Testing Meter is too cold (below 18°C) to work correctly. Temperature too low. Out of operating range. What to do for Linearity Solution Testing See Meter Move the meter and test strips to a warmer area. -
Page 87
Yellow = 5mm margin, Red = 7mm margin Troubleshooting What it means Warning The meter has detected an incorrect sample when doing a linearity test. Incorrect Sample What to do Detected. Repeat the linearity test with a new test strip, see linearity testing (pages 62-73). Retest with a new strip. -
Page 88
Yellow = 5mm margin, Red = 7mm margin Troubleshooting What it means 30 Apr The blood glucose level may be very low (severe hypoglycemia), below 1.1 mmol/L. 19 : 00 What to do EXTREME LOW GLUCOSE This may require immediate treatment. Although this message could be due to a (below 1.1 mmol/L) test error, it is safer to treat first and then do another test. -
Page 89
Yellow = 5mm margin, Red = 7mm margin Troubleshooting What it means ERROR 1 There is a problem with the meter. Meter problem. What to do Contact Customer Do Not use the meter. Contact Customer Service and/or LifeScan® sales Service. representative. -
Page 90
Yellow = 5mm margin, Red = 7mm margin Troubleshooting What it means ERROR 3 The sample was applied before the meter was ready. Meter was not What to do ready. Retest with a new strip. Repeat the test with a new test strip. Apply a whole blood sample, control, or linearity solution only after Apply Blood or Apply Solution appears on the display. -
Page 91
Yellow = 5mm margin, Red = 7mm margin Troubleshooting What it means ERROR 4 One of the following may apply: • Not enough whole blood, control, or linearity solution was applied or more was Strip f ill problem. Retest with a added after the meter began to count down. -
Page 92
Yellow = 5mm margin, Red = 7mm margin Troubleshooting What it means ERROR 5 The meter has detected a problem with the test strip. Possible cause is test strip damage. Strip problem. Retest with a What to do new strip. Repeat the test with a new test strip;… -
Page 93
Yellow = 5mm margin, Red = 7mm margin Troubleshooting What it means Battery power is low but there is still enough power to perform a test. What to do Press to continue but replace the batteries as soon as possible. Low Battery Replace soon. -
Page 94: Detailed Information About The System
Yellow = 5mm margin, Red = 7mm margin Detailed information about the system Technical Specifications Reported result range 1.1-33.3 mmol/L Calibration Plasma-equivalent Sample Fresh capillary, venous, and arterial whole blood Sample volume 0.4 µL Test time 5 seconds Assay method GDH-FAD glucose dehydrogenase Unit of measure mmol/L…
-
Page 95
Yellow = 5mm margin, Red = 7mm margin Detailed information about the system Technical Specifications (continued) Size 120 mm x 51 mm x 31 mm Weight Approximately 137 grams Operating ranges Temperature: 6°C to 44°C Relative humidity: non-condensing 10-90% Altitude: up to 3048 meters Hematocrit: 20-60% Battery type Two replaceable AA alkaline batteries… -
Page 96
4.2 mmol/L, and within 20% of a laboratory method when the glucose concentration is 4.2 mmol/L or higher. Samples from 100 patients were tested using both the OneTouch® Verio™Pro+ System and the YSI 2300 glucose analyzer laboratory instrument. System Accuracy Results for Glucose Concentrations <4.2 mmol/L Percent (and number) of meter results that match the laboratory test Within ±0.28 mmol/L… -
Page 97
Percent (and number) of meter results that match the laboratory test Within ±0.83 mmol/L or ±20% 99.7% (598/600) Therefore, 99.7% of the total results obtained with the OneTouch® Verio™Pro+ System achieved the goal suggested by the diabetes experts. Yellow = 5mm margin, Red = 7mm margin AW05948101B_OT_VerioPro+_OB_Insides_R1.indd 97… -
Page 98
Yellow = 5mm margin, Red = 7mm margin Detailed information about the system Regression Statistics Samples were tested in duplicate on three test strip lots. Results indicate that the OneTouch® Verio™Pro+ System compares well with a laboratory method. # of Subjects… -
Page 99
Yellow = 5mm margin, Red = 7mm margin Detailed information about the system Precision Within Run Precision (300 Venous Blood Tests) Target Glucose Mean Glucose Standard Deviation Coefficient of Variation (mmol/L) (mmol/L) (mmol/L) 0.06 2.55 0.10 1.88 0.14 1.90 11.1 10.8 0.22 2.01… -
Page 100
Yellow = 5mm margin, Red = 7mm margin Detailed information about the system Precision Total Precision (600 Control Solution Tests) Glucose Level Ranges Mean Glucose Standard Deviation Coefficient of Variation (mmol/L) (mmol/L) (mmol/L) Low (1.4-2.7) 2.11 0.04 2.11 Mid (5.7-7.7) 6.50 0.10 1.53… -
Page 101
Yellow = 5mm margin, Red = 7mm margin Detailed information about the system Fingertip Results for Glucose Concentrations <4.2 mmol/L Percent (and number) of meter results that match the laboratory test Within ±0.28 mmol/L Within ±0.56 mmol/L Within ±0.83 mmol/L 25% (2/8) 63% (5/8) 100% (8/8) -
Page 102
Yellow = 5mm margin, Red = 7mm margin Detailed information about the system Venous Results across the entire Glucose Range Percent (and number) of meter results that match the laboratory test Within ±0.83 mmol/L or ±20% 100% (177/177) Arterial Results across the entire Glucose Range Percent (and number) of meter results that match the laboratory test Within ±0.83 mmol/L or ±20% 99.5% (199/200) -
Page 103
Detailed information about the system Guarantee LifeScan® guarantees that the OneTouch® Verio™Pro+ Meter will be free of defects in material and workmanship for three years, valid from the date of purchase. The guarantee extends only to the original purchaser and is not transferable. -
Page 104: Index
Yellow = 5mm margin, Red = 7mm margin Index Backlight Batteries Battery Empty message Blood glucose test Buttons on meter Control solution, discard and expiration dates 23, 24 Control solution testing, reminder Control solution, testing Control solution test results, viewing Dehydration Date setting Disinfecting the meter…
-
Page 105
Yellow = 5mm margin, Red = 7mm margin Index Error messages History Hyperglycemia 56, 88 Hypoglycemia 55, 88 Guarantee Intended use Interfering substances Kit components 8, 9, 10 Lancing device 40, 43 Language, setting Linearity solution, discard and expiration dates 63, 65 Linearity solution, testing Linearity solution test results, viewing… -
Page 106
11, 31, 54, 71, 94 Mini USB cable Mini USB data port 11, 60 Plasma calibration Results, reviewing past Settings [DMS Available <Software, OneTouch® Diabetes Management>] Start-up screen 13, 58 Storing the system Symbols Technical specifications Temperature 22, 40, 62, 83, 84, 85, 86, 95… -
Page 107
Yellow = 5mm margin, Red = 7mm margin Index Turning meter off 15, 57 Turning meter on 13, 26, 48, 58 Unexpected blood glucose results 55, 56 Unit of measure 11, 31, 54, 71, 94 Unusual red blood cell count (hematocrit) Yellow = 5mm margin, Red = 7mm margin AW05948101B_OT_VerioPro+_OB_Insides_R1.indd 107 4/3/12 3:08 PM… -
Page 108
Yellow = 5mm margin, Red = 7mm margin Notes Yellow = 5mm margin, Red = 7mm margin AW05948101B_OT_VerioPro+_OB_Insides_R1.indd 108 4/3/12 3:08 PM… -
Page 109
GC AW Template Title: Rev. Date: Round Number: Template, OneTouch Lion, Owner’s Booklet 4/3/12 GC AW Template Number: AW 05948101B LifeScan Contact: Marcello Centofanti x4839 GC Document Number: Job No: LSGSUR4 GC 059481 ADS-03/LCB-03 ADS Reference Number: Number of Colors:…

Onetouch Verio Flex Glucose Meter Review | Diabetesmine
We’re sorry, an error occurred. We are unable to collect your feedback at this time. However, your feedback is important to us. Please try again later. Of course, we get excited about new technology and love being able to test drive the latest gadgets. And with my 32 years of type 1 experience, I do appreciate how far we’ve come. From time to time, I enjoy looking back on the past D-tech to give myself perspective on just how good we have it today. But as much as I love progress, I’m not a fan of removing basic features that have made our lives with diabetes easier and more flexible in this day and age. Sadly, that’s what I feel the newest OneTouch Verio Flex glucose meter by LifeScan does. This meter launched at the end of February 2016 seems like a step back in time by at least a decade. Of course, the whole point of this curvy new white-faced meter is to offer a very prominent «color range indicator» for low, in-range, and high readings (blue, green, red) to help patients who otherwise had trouble interpreting their blood sugar results. What comes to mind are older patients or probably many type 2’s who may be less savvy about what the numbers mean than those of us making insulin dosing decisions all day long. The company touts : «While it has broad appeal as a simple, intuitive meter on its own, patients can also use the meter’s built-in Bluetooth Smart Technology to wirelessly connect with the companion OneTouch Reveal mobile app available on compatible iOS and Android mobile devices.» In other words, it’s supposed to be a super-simple meter, but with all the latest wireless bells and whistles. Odd combination. It replaces the now-discontinued Verio Sync , which may still be lingering on store and pharmacy shelves. There are a number of good points about the new F
Continue reading >>
- A Craftsman Blames His Tools: Blood Glucose Meter Accuracy & Long-Term Diabetes Control
- Kicking Off Diabetes Awareness Month: What Glucose Meter Is Best For Me?
- NZ case study; A citizen scientist controls autoimmune diabetes without insulin, with a low carb diet, a glucose meter, and metformin.
Active Error Screens | Accu-chek
The battery is empty or there is no battery in the meter. Insert a new battery. You will need one CR2032 type battery You have inserted the battery the wrong way round. Remove the battery and place it in the battery compartment as shown in the manual. The temperature may be too low. Ensure that the ambient temperature is +8 to +42 C (+46.4 F to +107.6 F) The meter may be defective. Contact (insert affiliate contact information here). The code chip has not been correctly inserted into the meter. Remove the code chip and re-insert it. There is no code chip in the meter. Insert the code chip that belongs to the Accu-Chek Active test strips you are currently using. You did not slide the test strip in correctly or completely. Hold the test strip so that the arrows printed on it and the green square face upwards. Without bending it, gently slide the test strip into the test strip guide in the direction of the arrows. You must feel the test strip lock into place. You slid a used test strip into the meter. You applied blood or control solution to the test strip too soon, i.e. before the drop symbol flashed on the display. Start the blood glucose test from the beginning with a new test strip. The measurement window is dirty. Clean the measurement window. Your blood glucose value may be very low. If you have typical symptoms of a very low blood glucose, immediately follow your healthcare professionals instructions for such cases. Repeat the test afterwards. You removed the test strip from the meter in order to apply blood and did not slide it back in it within 20 seconds. The test strip was bent or moved while testing was in progress. You applied too little blood or control solution to the test strip. You waited too long before applying a second drop of blood or control solution
Continue reading >>
- Tips for Staying Active with Diabetes
- Camp PowerUp Takes Active, Mindful Approach to Diabetes Prevention

High? What Your Glucose Meter May Know, But Isn’t Sharing
Your glucose meter might be keeping secrets from you. If and when you see a message on the screen alerting you to a «High» blood sugar, the meter probably knows more than it’s telling you, as in the exact numerical value associated with that warning. But the device makers decided that we don’t need that information… This came to light (in our brains, at least) following the March 25 announcement that almost two million LifeScan OneTouch VerioIQ meters were being recalled across the globe. LifeScan issued warnings on three brands of its OneTouch meters, totaling over 1.8 million meters worldwide! About 90,000 of its popular VerioIQ meters here in the U.S., part of the 1.2 million of those meters sold globally, and two brands sold outside the States: the OneTouch® Verio®Pro consumer meter and VerioPro+ professional meter. The reason for the recall? The meter software isn’t properly registering extremely high blood sugars. At a certain point the meter shuts down with no warning and without alerting you to the hyperglycemic danger. The number you have to reach for this to happen: 1024 mg/dL (or 56.8 mmol to those outside the U.S.)! Geez, the number 1024 is oddly specific… Like many meters, LifeScan’s units only show a numerical value for anything between 20-600, while anything outside that range just displays an «Extreme Low Glucose (below 20 mg/dL)» or «Extreme High Glucose (above 600 mg/dL)» message. So, who would have thought the meter actually knows when you’ve tipped past 1023? Maybe our meters are smarter than we give them credit for, despite the fact that they’re sometimes a bit off thanks to that pesky +/-20% accuracy standard that we don’t think is good enough. Why No Numbers? LifeScan confirmed our suspicions: Yes, their meters can track your blood sugar’s n
Continue reading >>
- Soon your car will know when you are having a heart attack — and know how to react
- Why Eating More of This High-Fiber Food May Lower Your Diabetes Risk
- Diabetes: New compounds may lower blood sugar but prevent weight gain
Error E-9 On Accu-chek Aviva
Registration is fast, simple and absolutely free so please,join our community todayto contribute and support the site. This topic is now archived and is closed to further replies. I keep getting this error message on my meter when trying to test and cant find my booklet. Does anyone know what this means? If i am not mistaken, the e-9 error are the batteries getting low. You’ll probably find the manual on-line : The battery is almost out of power. Change the battery now. See Chapter 5, Changing the Battery. Oh thanx buddy, I just bought 100 strips off Amazon so I was worried and don’t want to go through the hassle. I haven’t replaced the battery since I got the meter so I guess its time. Phew… now I feel better. Is your ACCU-CHEK Aviva working now? Did you replace the battery? I’m using that monitor also. Oh thanx buddy, I just bought 100 strips off Amazon so I was worried and don’t want to go through the hassle. I haven’t replaced the battery since I got the meter so I guess its time. Phew… now I feel better. Let me start by saying that I’m not meter bashing here but……..I received an Aviva in the mail. I’ve tried to use it several times and keep getting a code error (don’t remember the number). According to the website, the code means that my bg is too low to check. Funny thing is, when I checked with my US, my readings were in the 90-120 range. I’ve thought of sending it back but I’m not sure I would feel safe using this particular meter. I’m gonna stick with my One Touch meters. That’s exactly what I did, and now mine works… I’m using a Performa Nano here in OZ. This error just popped up for me on Sunday evening….to tell me that my battery was dead…and then the unit shut down. No warning. Just the beep and off. Before I’m told, «you should buy back up b
Continue reading >>

How To Troubleshoot A Onetouch Ultramini
by Dustin Thornton; Updated September 30, 2017 The OneTouch UltraMini is a blood-glucose monitoring system for people with diabetes. If your UltraMini is not functioning properly or if you are receiving frequent error messages when trying to test your blood-glucose level, there are a few troubleshooting steps you can perform to be sure that you are using the system correctly and that the machine is working properly. Check that the temperature is between 43 degrees and 111 degrees. If the meter becomes too hot or cold, it will not function properly and will display an error message on screen. It may not function at all. Look at each of your test strips for any obvious damage. Damaged test strips often cause an «Er2», «Er4» or «Er5» error message. Repeat the test with a fresh undamaged test strip if you receive this error. Place the meter on a flat surface, while the OneTouch is reading your blood-glucose level, so you do not accidentally move the test strip. Moving the test strip can cause the machine to display an «Er4» error message. Repeat the test with a fresh test strip if you receive this error. Apply the blood solution sample to the machine only after it flashes the blood drop image on the screen. Applying the blood solution sample too early can cause an «Er3» message. Repeat the test with a fresh test strip if you receive this error. Replace the battery if the «battery» icon flashes on the screen of if the unit does not power on at all. Open the battery compartment and remove the old battery by pulling the ribbon behind it. Insert the new battery into the slot with the «positive» side facing you. Close the battery compartment and turn on the unit.
Continue reading >>
Diabetes Is Hard: A Humbling Experience With Er5
Diabetes is hard: A humbling experience with Er5 I dont have diabetes. But I do think about diabetes a lot, read about diabetes a lot, and certainly talk about diabetes a lot. So, this past week, I decided it was time to walk the walk. I opened up a shiny package for a new glucometer with the plan of monitoring my glucose 3 or 4 times a day for several days. I actually read the instruction manual on how to properly set the time and date, and did so within a few minutes. As long as I was going to do this, I at least wanted my data to be accurate, a true quantified-self experiment (of course, choosing a night where I went out for a hamburger and fries was a true test of my pancreas abilities!). Then, like a know-it-all physician, I tried to check my sugar. Er5 said the screen. Hmmm. Did it again. Punched hole #2 in my finger. Ouch. Er5. Maybe I didnt get a big enough drop of blood. So, I cranked up the dial on the lancet device from 3 to 9 so I could get the deepest finger puncture and guarantee a burgundy nugget for the test strip. This time, ouch out loud. Er5 on the screen again. I did this several times, howling in pain down the hall of my apartment, and said to my fiancee, this hurts! I cant believe I ask people to check their sugar multiple times a day! And worse, I cant even do it right! At this point, I figured the test strips must be defective so I googled Er5 onetouch ultramini to see what was going wrong. I didnt have another vial of test strips so I was hopeful that test strip damage was not my issue. If it was, my experiment would be over rather quickly. I had to read a little further to find out that an incompletely filled confirmation window actually means, you are not putting the blood on the test strip properly. It turns out, rather than placing the drop
Continue reading >>
- Diabetes mellitus cured — George’s experience
- My Experience with Gestational Diabetes
- Real Talk With Dave: Feeling Bad For Having Diabetes – My Worst Experience

What Causes A Test Strip Error On My Meter?
Glucose meters display error messages when there are problems with test strips, problems with the glucose meter, or when your glucose level is higher or lower than normal. One of the common errors is the test strip error. This error is often an easy fix. However, it’s important to understand the test strip error so you can prevent it from happening again in the future. Every time a test strip error occurs you will need to repeat the test with a new test strip. This often results in use of a few test strips which can become costly over time. Test Strip Error First and foremost, make sure you are using the right test strip with your meter. Using test strips that are incompatible with your meter often causes an error. If you’re not sure which test strips to use with your meter, contact the manufacturer. Here are a few common test strip errors: High or Low Operating Temperature: your glucose meter may display a test strip error when the it detects that the temperature is above or below the operating range. Do not perform a test until the meter and test strips reach a temperature within the operating range of your glucose monitoring system. Used, Damaged, or Expired Test Strip: glucose test strips are for single use. Do not use expired, short-dated, used, or damaged test strips. In this case, repeat the test with a new strip. Always read the safety instructions provided in the test strip box. Keep your strips in their original packages and away from heat, humidity and sunlight. Do not leave them open to air because that will make the strip unusable. When you remove a test strip for use, place a clean cloth underneath it in case you drop it; this way it will still be clean and usable. Always dispose used test strips and never use them again. You may also get a test strip
Continue reading >>
- Home blood glucose test: How to test for diabetes at home
- When Youre Afraid to Test: The Root of Diabetes Test Anxiety
- A Craftsman Blames His Tools: Blood Glucose Meter Accuracy & Long-Term Diabetes Control

Onetouch Verio Monitor Question
D.D. Family T2 for a few years-diet, exercise, Metformin I was wondering if anyone else uses the OneTouch Verio IQ, and if so, whether you’ve had problems with it? I used to use the Accu-Chek Compact, for a long time, and now that it’s died and I’m with Kaiser, they gave me the OneTouch Verio IQ. I got it in July and didn’t get around to using it at first, but when I did (a few weeks ago), I kept getting an error message, #4, something about a test trip error. So I phoned the company, and they had me try some things over the phone. BTW the doctor had given me 3 containers of strips, and I had tried strips from all 3 and gotten nothing but errors. However, the test solution did work fine. So anyway, the company sent me a new monitor, but no new strips. The woman on the phone had said they would send me some new strips as well. I tried using it and out of about 15 tries I got one good reading in the morning, but when I tried after lunch, it just wouldn’t work. I followed the instructions, and what the woman told me on the phone, and I also tried putting my blood on the strip all different ways to see if one would work better, but I keep getting that same darned error message, until I gave up (I tried strips from the 2 remaining bottles of strips that they said to keep and use). I was wondering if anyone else had this problem or if there’s some trick to it. I tried phoning the company again but they’re closed now. D.D. Family Glucose Disregulation since 2005 I have been using this meter for some time. The error #4 is a strip fill error. The Verio IQ is different than the OneTouch and uses the Gold strips which fill differently. They fill from two very small ports on the side of the strip rather than the end. You need to make sure you lance and position the blood drop to t
Continue reading >>
- A Diabetes Monitor That Spares the Fingers
- The Apple Watch could one day help monitor diabetes
- The dogs that smell breath to monitor diabetes
My Contour Meter Is Displaying An ‘e3’ Code, What Does This Mean?
My CONTOUR meter is displaying an ‘E3’ code, what does this mean? An E3 Error Code means the meter is sensing that blood has already been applied to the test strip (or the strip has already been used). What to do: Please make sure you see the flashing blood drop on the display before adding the blood sample. Ensure that you are using a clean, new strip each time you If issue persists contact Customer Support at 1-800-348-8100. Please tell us how we can make this answer more useful. The information brought to you by Ascensia Diabetes Care US, Inc provides general information. It is not intended to be used as medical advice, diagnosis or treatment and should not replace the advice of your Healthcare Provider. 2016 Ascensia Diabetes Care US, Inc. All rights reserved. Bayer , the Bayer Cross are trademarks of Bayer. CONTOUR, No Coding, the No Coding logo , Sip-In Sampling, Second-Chance, the Second-Chance logo are trademarks of Ascensia Diabetes Care US, Inc. Ascensia Diabetes Care, 5 Wood Hollow Road, Parsippany, NJ, 07054 United States
Continue reading >>
- Does Gestational Diabetes always mean a Big Baby and Induction?
- Just Because You Have Diabetes Doesn’t Mean You Can’t Have Pizza
- A Craftsman Blames His Tools: Blood Glucose Meter Accuracy & Long-Term Diabetes Control
Support & Faqs | Onetouch Diabetes
Most of the food we eat is turned into glucose (sugar) for our bodies to use for energy. The Pancreas, an organ near the stomach makes a hormone called insulin to help glucose get into our body cells. When you have diabetes, your body either doesnt make enough insulin or cant use its own insulin very well. This problem causes glucose to build up in your blood. It is important to remember that diabetes cannot be cured but is controllable to a large extent and at Diabetes — Sweet and Simple; we help you simplify all thats diabetes. Ref: Centres for Disease Control and Prevention. Take Charge of Your Diabetes. [Monograph online] 4th edition. Atlanta: U.S. Department of Health and Human Services, 2007. Do you know that there are different types of diabetes? Type1 Diabetes Mellitus: In people with Type1 diabetes or insulin dependent diabetes, the body does not make sufficient or any insulin to meet the needs of the body. It is most often diagnosed in children and adolescents. Therefore, people with Type 1 diabetes need to take insulin every day. Type2 Diabetes Mellitus: Type2 diabetes, also called non-insulin dependent diabetes is the most common type. In people with type 2 diabetes, either the person is not making enough insulin, or the body is resistant to insulin and cannot use it properly. This type of diabetes is more common in adults and older people. It can be managed through a combination of oral medication, and/or insulin, diet and exercise. Gestational Diabetes Mellitus: This type of diabetes is seen in pregnant women. If diabetes is not properly managed at the right time, it can lead to complications. Hence, in this type of diabetes there is a need to be extremely cautious about blood glucose levels. Please remember, controlling each of these types of diabetes re
Continue reading >>
- National Standards for Diabetes Self-Management Education and Support
- 2017 National Standards for Diabetes Self-Management Education and Support
- Experts Share Ways You Can Support Your Family Member With Diabetes

Error Code 0 True Metrix Meter
this is what the pharmacy give my mom for her testing, since she is on medicare. she has been having a terrible time with it. More than 50% of the time, she get’s an E-0 message on the meter. I’ve searched the internet, with no luck as to what Moderator T2 insulin resistant Using Basal/Bolus Therapy There should have been an instruction booklet in the box. If you no longer have it, call the manufacturer (e-mail) and ask for an instruction manual. «Invalid hematocrit»? That’s an odd error message. It doesn’t say what’s wrong (high or low/ not enough sample blood, meter problem? to me, it implies something wrong with the blood sample), if it’s your fault or the meter’s fault, or if you need to be concerned. Medicare pays for all different types of strips. I use a Bayer Contour USB meter and the only time I ever get an error message is when I put too little blood on the strip. does your mom use a Medicare Advantage Plan or does she use original Medicare. You can call them and they will tell you what strips they cover. She should not use a meter that is difficult to use. 115 pounds, Breast Cancer dx’d 6/16, 6 months of chemo and 6 weeks of radiation 2000 metformin ER, 100 mg Januvia,Glimperide, Prolia, Gabapentin, Meloxicam, Probiotic with a Prebiotic, , Lisinopril, B-12, B-6, Tumeric, Magnesium, Calcium, Vit D, and Occuvite mostly vegan diet, low fat and around 125 carbs a day, walk 5-6 miles every other day and 1 hour of yoga and light weights.
Continue reading >>
- #LCHF The genius of Dr. Joseph R. Kraft — Exposing the true Extent of #Diabetes
- American Girl’s New Diabetes Kit Is Making Real Girls’ Dreams Come True
- Bye Bye, Diabetes: 100 Years With This Vaccine, and We’re Finally Learning Its True Capabilities

Everything You Need To Know About Diabetes Test Strips
Update: A lot of our readers ask us where can they find the best deals for test strips. We personally recommend Amazon. You can check the list of selections they offer by clicking here. Blood glucose test strips play a crucial role in helping you to monitor your daily blood glucose level and giving your doctor the data to adjust your medication to control your diabetes symptoms. Without the help from these little disposable strips, life with diabetes can become even more chaotic than ever. But what exactly are these thin little plastic slip and why are they so expensive? Are there any alternative method I can use? Where can I get the best deal on these test strips? This article will answer many of your questions and concerns regarding these blood glucose test strips: Table of Contents History on Glucose Test Strips How Does the Test Strips Work Why Are the Strips So Expensive? And Why the Price Discrepancy? Why Must Diabetic Patients Use Glucometer and Test Strip? How Often Should You Administer A Blood Glucose Test? How to Find Out if Your Glucose Monitor is Accurate? How Accurate Are the Test Strips? How to Find Out if Your Glucose Monitor is Accurate? What is a Urine Glucose Test? Can’t I Use This Procedure Instead? Expiration of Test Strips Medicare Plan B Coverage for Glucose Test Strips Where to Get the Best Deal on Test Strips? Ways to Save of Test Strips How to Avoid Counterfeit Blood Glucose Test Strips Can You Reuse Test Strips? Can You Make Your Own Test Strip? 4 Most Affordable Meters How to Pick the Right Glucometer? How to Dispose Used Test Strips, Lancets, and Needles? What to Do with All These Test Strip Containers? Selling Your Glucose Test Strips A Good Idea? Odd Way to Earn Some Money Back Questions? History on Glucose Test Strips The first glucomet
Continue reading >>
- What a Cool Animation! Tells You Everything You Need to Know About The Basics of Diabetes
- Diabetes and Fatigue: Everything You Need To Know
- Diabetes And Renal Failure: Everything You Need To Know

An Analysis: To Code Or Not To Codethat Is The Question
An Analysis: To Code or Not to CodeThat Is the Question Diabetes Technology Consultants, Wyckoff, New Jersey Correspondence to: Barry H. Ginsberg, M.D., Ph.D., Diabetes Technology Consultants, 501 Lydia Lane, Wyckoff, NJ; email address moc.oohay@stnatlusnoc_setebaid Disclosure: Dr. Ginsberg is a consultant for Bayer Diabetes Healthcare, Roche Diagnostics, and AgaMatrix. Author information Copyright and License information Copyright 2008 Diabetes Technology Society See the article » Performance Evaluation of a New Blood Glucose Monitor That Requires No Coding: The OneTouch Vita System » onpage814. Most blood glucose monitoring systems need coding to correct for variation in lots of enzyme, which leads to differences in lots of strips. About 16% of patients miscode the meters, although the magnitude of the miscoding is unstudied. This miscoding has the potential to cause errors as high as 30% and to cause errors in adjusting insulin therapy that could lead to hypoglycemia at least 10% of the time. Studies of these systems suggest that they have accuracy similar to other current meters and have similar physical characteristics. Because they do not require coding, they are often easier to use. No-coding systems have the potential to avoid some errors in blood glucose. Keywords: accuracy, auto code, glucose, monitoring, no code The earliest blood glucose meter, the Eyetone, required a two-point calibration before each test, making it too difficult for most patients to use at home. 1 When newer meters did away with this cumbersome procedure by just inserting a code (number) into the meter, the era of modern blood glucose (BG) monitoring began. The enzymes used in blood glucose strips are purified from microorganisms and often have significant lot-to-lot variation. Used in th
Continue reading >>
- Caffeinated and Decaffeinated Coffee Consumption and Risk of Type 2 Diabetes: A Systematic Review and a Dose-Response Meta-analysis
- Diabetes educator role boundaries in Australia: a documentary analysis
- Type 1 Diabetes and Polycystic Ovary Syndrome: Systematic Review and Meta-analysis

Freestyle Flash Error Codes
It is important for a person with diabetes to monitor his blood glucose on a regular basis. The FreeStyle Flash is a blood glucose meter made by TheraSense. It uses 0.3 microliters of blood to measure the amount of blood glucose present. There are issues that will cause the meter to give incorrect readings. Specific error codes help the user determine and correct the problem. Error code 1, displayed as Er1, could mean that the blood sample is too small, the test strip is defective, the blood glucose is below 20 milligrams per deciliter (mg/dL) or the meter is malfunctioning. Use the control solution to test the meter before retesting with blood. If the test results are correct, conduct a new test with a fresh blood sample. Er2, or Error Code 2, could mean that there is a problem with the test strip or meter. It could also mean that the blood glucose is above 500 mg/dL. If you apply the control solution labeled High when the meter is below its normal operating temperature, you will receive this error. Use the control solution to test the meter. Perform a new test with a fresh blood sample. Error code 3 is displayed as Er3. Failing to follow the test procedure, a faulty test strip or meter malfunction can cause this error. Test the meter with the control solution, and then retest with a fresh blood sample. Do not apply blood to the strip before it is inserted in the meter or before the blood droplet appears on the screen. Error code 4, or Er4, means there is a problem with the strip or the meter. Test the meter with the control solution. If the test results are within the correct range for the solution, retest with a new strip and fresh blood sample. There is no error code 5. Error code 6 is displayed as Er6. This error means that the strip code number was changed while
Continue reading >>
- Continuous Versus Flash Glucose Monitoring To Reduce Hypoglycemia In Type 1 Diabetes
- BREAKING: Flash glucose sensing available on NHS for type 1 diabetes from November
- It’s a Gangnam Style Flash Mob for Diabetes — With a Special Guest at 1:18!
Reporting Problems With Your Blood Glucose Meter
Reporting Problems With Your Blood Glucose Meter Occasional problems can occur with blood glucose meters . This guide shows which problems need to be reported. When reporting a problem with your blood glucose meter, contact the manufacturer as soon as you are able. Blood glucose meter manufacturers have a legal responsibility to follow any reports of problems with their glucometers. The following problems are example which should be reported to the blood glucose meters manufacturer. Display issues such as failure to display part or all of a result. If failure to display is the result of damage, for example being trodden on, your meter manufacturer may be able to help replace your meter. Performance problems include falsely high or low results or incorrect calibration. These errors could be related to the meter or the test strips. The meter company will be able to help discover which. Some blood glucose meters require a calibration code to be entered which can lead to mistakes and errors. A number of meters these days feature no coding technology to reduce mistakes occurring. Blood glucose meters should come with intelligible user guides to help you to use your meter correctly. If the meter comes without the user guide, or the wrong user guide, this should be reported. Problems arising from faulty manufacture might include failure to switch on or switching to displaying the wrong units. Error codes may typically appear for reasons including: Blood test sample smeared or not large enough Temperature of the strip is too warm or cold Meter error codes should need to be reported as such. However, if they are persistent or seem to be wrong or invalid, this will need to be reported to manufacturer.
Continue reading >>
- A Craftsman Blames His Tools: Blood Glucose Meter Accuracy & Long-Term Diabetes Control
- Postprandial Blood Glucose Is a Stronger Predictor of Cardiovascular Events Than Fasting Blood Glucose in Type 2 Diabetes Mellitus, Particularly in Women: Lessons from the San Luigi Gonzaga Diabetes Study
- Kicking Off Diabetes Awareness Month: What Glucose Meter Is Best For Me?
Если вы столкнулись с проблемами при использовании глюкометра OneTouch®, сначала обратитесь к разделу «Поиск и устранение неисправностей» в руководстве пользователя. Чтобы скачать руководство, выберите модель своего глюкометра на странице поддержки продуктов.
Если проблема не разрешится, свяжитесь с нашей Горячей линией OneTouch® по телефону 8-800-200-83-53 Мы сделаем все возможное, чтобы помочь вам. Убедитесь, что глюкометр и тест-полоски находятся возле вас во время звонка.
Если вы столкнулись с проблемами при использовании глюкометра OneTouch®, сначала обратитесь к разделу «Поиск и устранение неисправностей» в руководстве пользователя. Чтобы скачать руководство, выберите модель своего глюкометра на странице поддержки продуктов.
Если проблема не разрешится, свяжитесь с нашей Горячей линией OneTouch® по телефону 8-800-200-83-53. Мы сделаем все возможное, чтобы помочь вам. Убедитесь, что глюкометр и тест-полоски находятся возле вас во время звонка.
Глюкометр OneTouch Select Plus Flex® отображает сообщение об ошибке при наличии проблем с тест-полосками или глюкометром, а также если уровень глюкозы в крови выше 33,3 ммоль/л или ниже 1,1 ммоль/л. Для получения дополнительной информации об ошибках ознакомьтесь с разделом «Поиск и устранение неисправностей» в руководстве пользователя. Вместе с сообщением об ошибке в верхнем левом углу экрана глюкометра могут отображаться следующие экраны ошибок. ПРИМЕЧАНИЕ: Если глюкометр включен, но не работает, свяжитесь с нашей Горячей линией OneTouch® по телефону 8-800-200-83-53.
Ошибка 1
Что это значит:
Проблема с глюкометром.
Порядок действий:
Не пользуйтесь глюкометром. Свяжитесь с нашей Горячей линией OneTouch® по телефону 8-800-200-83-53.
Ошибка 2
Что это значит:
Сообщение об ошибке может быть вызвано либо повторным использованием одной и той же тест-полоски, либо проблемой с глюкометром или тест-полоской.
Порядок действий:
Повторите измерение, используя новую тест-полоску. Ознакомьтесь с Разделом 3 руководства пользователя «Измерение уровня глюкозы в крови». Если сообщение продолжает появляться, свяжитесь с нашей Горячей линией OneTouch® по телефону 8-800-200-83-53.
Ошибка 3
Что это значит:
Образец крови был нанесен до готовности глюкометра к работе.
Порядок действий:
Повторите измерение, используя новую тест-полоску. Наносите образец крови или контрольного раствора только после появления мигающего символа на дисплее. Если сообщение продолжает появляться, свяжитесь с нашей Горячей линией OneTouch® по телефону 8-800-200-83-53.
Ошибка 4
Что это значит:
Возможен один из следующих вариантов:
- Нанесено недостаточно крови или контрольного раствора или нанесен дополнительный образец после начала обратного отсчета.
- Тест-полоска была повреждена или смещена во время измерения.
- Испытуемый образец нанесен неправильно.
- Возможно, возникла проблема с глюкометром.
Порядок действий:
Повторите измерение, используя новую тест-полоску. Ознакомьтесь со страницей 50 или страницей 66 руководства пользователя. Если сообщение об ошибке появляется снова, свяжитесь с нашей Горячей линией OneTouch® по телефону 8-800-200-83-53.
Ошибка 5
Что это значит:
Глюкометр обнаружил проблему с тест-полоской. Возможная причина – повреждение тест-полоски.
Порядок действий:
Повторите измерение, используя новую тест-полоску. Ознакомьтесь со страницей 48 или страницей 66 руководства пользователя. Если сообщение об ошибке появляется снова, свяжитесь с нашей Горячей линией OneTouch® по телефону 8-800-200-83-53.
Ошибка 6
Что это значит:
Глюкометр обнаружил проблему с тест-полоской. Возможно, вы не нанесли на тест-полоску образец нужного типа – образец крови или контрольный раствор.
Порядок действий:
Проведите измерение с новой тест-полоской. Описание процедуры измерения уровня глюкозы в крови приведено на странице 34, а тест с контрольным раствором описан на странице 66 руководства пользователя. Если это сообщение об ошибке снова появится на экране, обратитесь на Горячую линию OneTouch® по телефону: 8-800-200-83-53.
Глюкометр OneTouch Verio Reflect® отображает сообщения при возникновении проблем с тест-полоской, самим глюкометром, а также когда уровень глюкозы в крови выше 33,3 ммоль/л или ниже 1,1 ммоль/л.
Неправильное обращение может привести к неточным результатам без появления сообщения об ошибке.
Описание возможных ошибок приведено на странице 148 руководства пользователя.
Порядок действий:
Проведите измерение с новой тест-полоской. Описание процедуры измерения уровня глюкозы в крови приведено на странице 40, а тест с контрольным раствором описан на странице 66 руководства пользователя. Если это сообщение об ошибке снова появится на экране, обратитесь на Горячую линию OneTouch® по телефону: 8-800-200-83-53.
Если вы пользуетесь глюкометром OneTouch Select Plus Flex®, для получения помощи с сообщениями об ошибках нажмите сюда.
If you’re reading this, there’s a good chance that you have been staring at your One Touch Verio meter for the last hour. Maybe it’s flashing some cryptic message and throwing around error codes, or maybe it merely refused to show any signs of life when prompted.
Fear not, dear reader, as we are here to help! We’ll guide you through the process of resetting your device from start to finish. So buckle up and get ready for an exciting ride down tech lane!
Before You Begin
Before diving in headfirst into resetting, pause and take a deep breath. Now let us first understand what causes most problems.
Understanding the Main Cause Behind Most Issues with One Touch Verio Meters
A typical problem many experience is their meters telling them that they must “renew” their test strips despite having plenty in stock as they haven’t used them over time. This issue happens because your meter’s internal clock must match our test strip code within 30 minutes before inserting a strip.
We hope you didn’t ‘clear’ away all those still functional test strips like Joey did once on Friends (wink wink)
Tools Required
Here are some things required during this task;
- A well-rested mind
- The poorly performing OneTouch Veiro meter
- Charged batteries
- A Patience level greater than space travel
The Actual Resetting Process: Step by Step
First Things First – Powering Off and Back On:
To begin fixing your machine, firstly turn off (press ring button for two seconds) the device; secondly turn back on by pressing several buttons simultaneously hold down left/right arrows + OK too quickly wake up display screen)
Restoring Factory Settings
Restoring factory settings brings devices back onto manufacturer-configured operating circumstances without data loss resets all customization settings.
Here’s how to reset your One Touch Verio Meter
- Power off by pressing the ring button.
- Press and hold down the Left, Right and OK buttons simultaneously.
- Wait for five seconds with these three keys pressed simultaneously.
- Release all three buttons together (Phew! Your fingers are probably starting to cramp)
- It will show you a setup screen; configure it according to desired settings
- Language
- Screen brightness level
- Time format (12 hour/ 24 hours)
Reconnecting Wireless Devices To The Resettled Arduino – Bluetooth Connection Made Easy
This is one of those tricky areas where mistakes could lead to bigger headaches than baldness in early twenties. Don’t fret! By following our quick guide below, you can avoid losing data and connect wireless devices successfully with minimal hassle.
Using Bluetooth connectivity checklist:
- Turn on smartphone or other Bluetooth-enabled device(s), then turn off meter’s power mode using center circle button.
- With both devices now powered ON hopefully 😉 press center circle button again briefly so meter powers up ready for use as normal after brief pause during which an icon displays, confirming bluetooth connection established successfully.
BONUS TIP: In casebluetooth connections don’t work check if app updates or firmware updates need attention.
Final Thoughts
Phew! If this hasn’t worked we’re sorry that we couldn’t solve the issue with resetting vereometers but fear not there may be alternatives available out there. Also, never forget: do not give into temptation and start throwing your faulty meters across the room at walls just because you feel like it might ultimately help fix things sometimes!
Finally—the real reward—you’ve demonstrated perseverance through painful technical issues by learning how-to Resetting Onetouch Veiro Meter today!
So go ahead, pat yourself on back (you earned it). Congrats my friend; you’ve just earned yourself a spot in the league of techies!

Hey there, I’m Dane Raynor, and I’m all about sharing fascinating knowledge, news, and hot topics. I’m passionate about learning and have a knack for simplifying complex ideas. Let’s explore together!
Random Posts
- Can a hernia pop?
- How many units of basaglar should i take?
- How to know metabolic type?
- Why does my nose hurt when i blow it?
- Why Am I So Bad at Being Good? Unlocking the Mystery
- What’s the best pill?
- Fearless Living: Powerful Live without Fear Quotes
- How to stop hamstring cramps at night?
- Why do i crave alcohol at night?
- What ‘Love You All’ Really Means: Exploring the True Definition
- Can you use hair gel with rogaine?
- Stretches to do the middle splits?