The error ‘An Unspecified Error Occurred while Recording‘ typically occurs when users attempt to start recording using the open-source program OBS Studio. In most cases, these are the log files of the error “[ffmpeg muxer: ‘adv_file_output’] os_process_pipe_write for info structure failed”.
Most users experiencing this issue have confirmed that the streaming function of OBS usually works, but the whole suite crashes when they start the recording.
If you’re trying to fix this issue, the first thing you’d want to do is ensure that you are using the correct recording settings to prevent outside interference with other programs using the same dependencies.
However, this problem can also occur due to a missing DLL or when the variable path needs to be updated. Other potential causes include a GPU driver inconsistency, an AV interference, or a VPN or proxy interference.
Below you’ll find a selection of confirmed methods that other affected users have successfully used to fix the ‘An Unspecified Error Occurred while Recording’ error.
1. Change the recording type
You’ll often get the ‘An Unspecified Error Occurred while Recording’ error in situations where the recording function in OBS defaults to a Custom Output (FFmpeg) instead of using the standard recording mode.
Using a custom will also have the unintended consequence of adjusting the default encoder away from H265 / HEVC Encoder (AMD Advanced Media Framework).
Note: OBS is notoriously unstable when forced to record with a custom encoder from an integrated GPU. Depending if you’re using an integrated or a dedicated GPU, the recommended recording type is different as you’ll see below.
If you’re just starting to troubleshoot the issue, follow the instruction below to change the recording type settings before reinitiating the recording:
- Open OBS and make sure you’re not actively streaming or performing any other task. If your OBS application is busy, the certain settings menu will not be available.
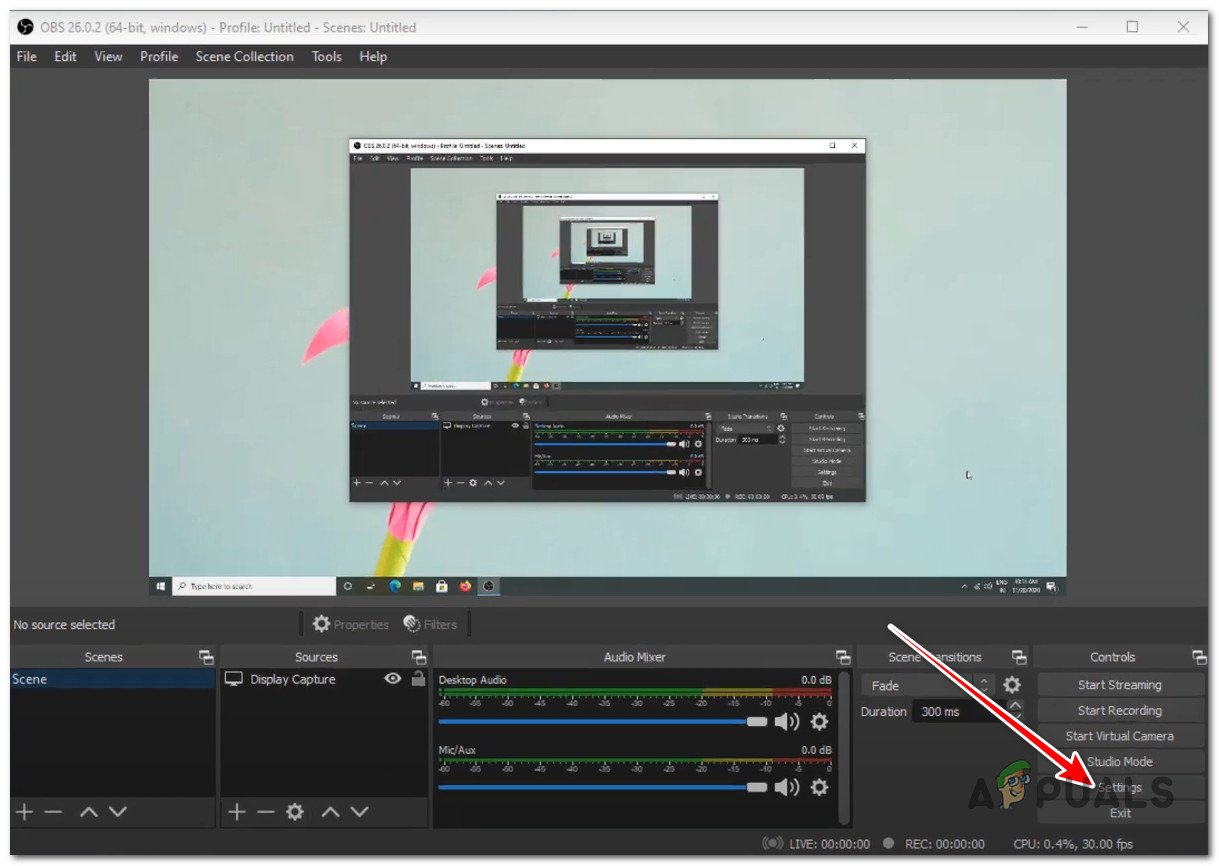
- Load your project, then click on the Settings menu from the bottom-left section of the screen.

Access the Settings menu - Inside the Settings menu, click on Output from the left-hand side menu, then go over to the right-hand pane and select the Recording tab.
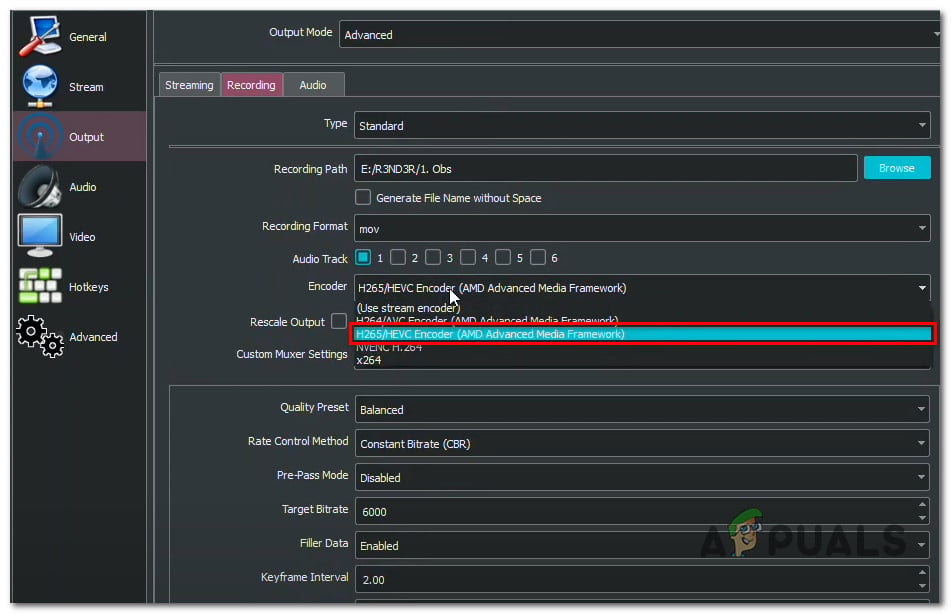
- Next, see the currently used option for the Recoding Type:
- If it’s set to Standard, change it to Custom Output (FFmpeg)
- If it’s set to Custom Output, change it to Standard.
- Once you successfully changed the type, move down below to the Encoder section and set it to H265 / HEVC Encoder (AMD Advanced Media Framework).

Setting the Advanced Media Framework - Click Apply to save the changes, then restart OBS and see if the issue is now fixed.
2. Download the missing DLL manually
If you already tried adjusting the encoding engine and the same ‘An Unspecified Error Occurred while Recording’ is still occurring, take a look at the underlying message of the error.
If any essential .DLL files are missing, they were probably removed by an overprotective AV suite and are either in quarantine or completely removed from your PC.
If this scenario is applicable, you can fix the issue easily by downloading the missing .dll files from a specialized directory locally and copying them inside the obs-ffmpeg folder.
IMPORTANT: There is no directory where you can download .DLL files that are 100% safe. The most reputable and arguably safest website is DLL-Files.com because most of their DLL library is uploaded and maintained by the staff. If you want a safe approach, follow the next method below.
It’s always good practice to check DLL files for bundled malware or adware when dealing with DLL files. To make sure you don’t expose your system to security threats, we will show you how to check these files for any virus infection before you actively use them on your system.
Follow the instructions below to download the missing DLL dependencies and ensure that they are not bundled with adware or malware:
- Press Windows key + E to open up File Explorer.
- Next, navigate to the installation location of OBS. By default, you’ll find it in the following path:
C:\Program Files\OBS\\data\obs-plugins\obs-ffmpeg\
- Once inside, double-click on both ffmpeg-mux64.exe and ffmpeg-mux32.exe and see which .dll dependencies are missing. Most commonly, the following you the error message will point toward one of the following dependencies:
avcodec-57.dll
avformat-57.dll
avutil-55.dll
swresample-2.dll
Note: Note the missing dependencies down as you will need to download them in the next steps.
- Open your default browser and navigate to the root directory of DLL-Fles.com.
- Use the search function to find and download every missing .dll file you discovered in step 3.

Download the missing DLL dependency IMPORTANT: Don’t try to open, rename or move the file after you’ve downloaded it.
- Navigate to the upload page of Virus Total and upload every file that you previously downloaded.Note: Make sure that you check every dependency individually.
- Once you make sure that every DLL file is safe, copy them into the obs-fmpeg folder. The default location is:
C:\Program Files\OBS\\data\obs-plugins\obs-ffmpeg\
Note: If you installed OBS in a custom location, navigate there instead.
- If the OBS program is currently open, close it before opening it again to force it to load the missing dependencies.
- Initiate recording once again and see if the ‘unspecified error’ is still being thrown.

Note: If the steps above didn’t fix the issue, you can also re-add the dependencies by uninstalling your current OBS version before reinstalling the latest version from the official website. But keep in mind that going this route will clear all projects that are currently saved in the OBS program.
3. Update the variable PATH
If you already tried reinstalling OBS and you are still seeing the same ‘unspecified error’, it’s likely because the ffmpeg executables that OBS users are not finding the expected DDLs even if you have them on your system.
You can correct this issue by tweaking the PATH environment to ‘help’ OBS find the expected DLLs.
Note: This procedure is technical and involves doing PATH alterations that might negatively affect other programs that are also using ffmpeg.
Here’s how to update the PATH variable using an elevated CMD to help OBS locate the missing .DLL dependencies that are indirectly causing the ‘unspecified error’:
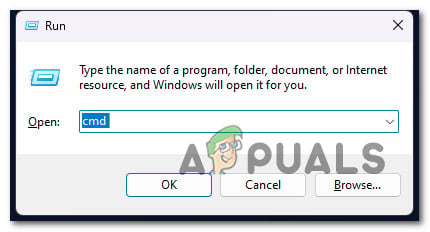
- Press Windows key + R to open up a Run dialog box.
- Next, type ‘cmd’ and press Ctrl + Shift + Enter to open up an elevated CMD prompt with admin access.

Opening up an elevated CMD window - At the User Account Control (UAC), click Yes to grant admin access.
- Once you’re inside the elevated CMD prompt, run the following command to navigate to the obs-ffmpeg installation folder:
CD C:\Program Files (x86)\obs-studio\data\obs-plugins\obs-ffmpeg
Note: The command above assumes that OBS Studio is installed in the default installation path and Windows is installed on the C drive. If your path is different or you’re using the 64-bit version of OBS, adjust the command above accordingly.
- Type the following command to run the ffmpeg-mux32 executable:
start ffmpeg-mux32
- At the UAC prompt, click Yes to grant admin access.
- If the pop-up error is still occurring, you’ve just confirmed that the problem is happening due to a variable PATH issue.
- Press Windows key + R to open up another Run dialog box
- Type ‘sysdm.cpl’ and press Ctrl + Shift + Enter to open System Properties with admin access.
Open the Advanced System Settings - Accept the UAC prompt by clicking Yes.
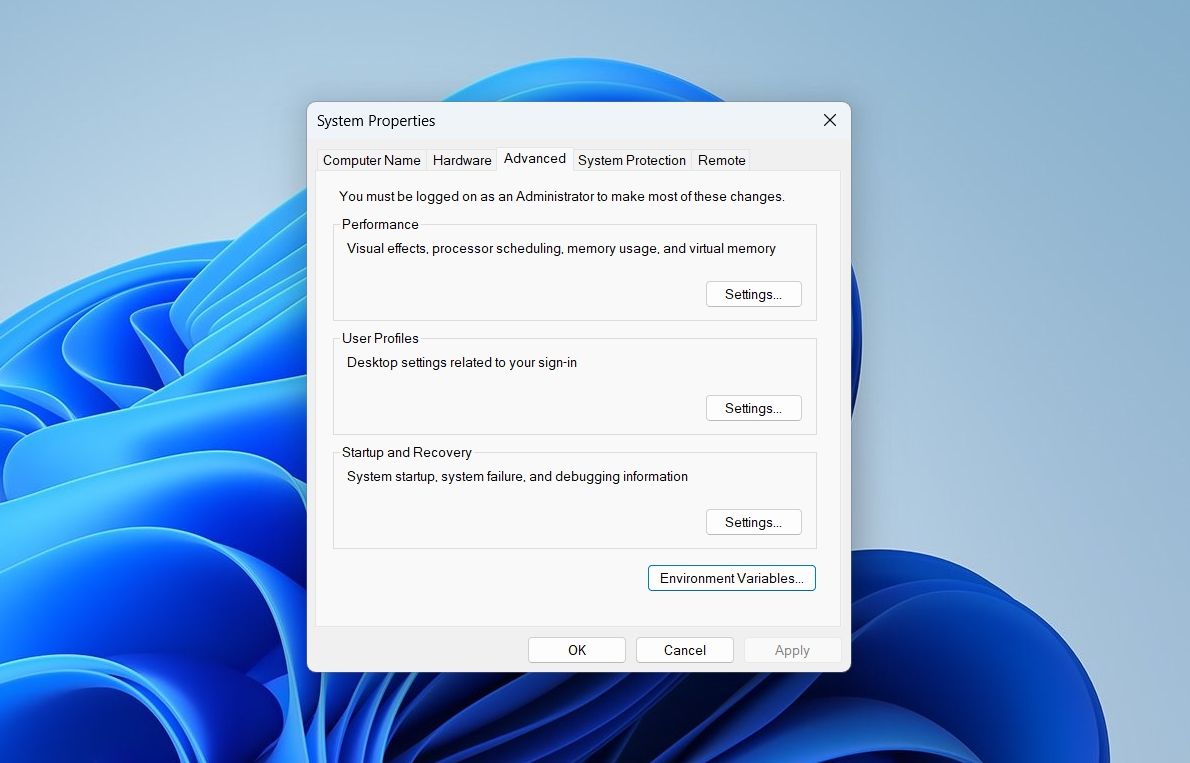
- Next, click on the Advanced tab and click on Environment Variables.
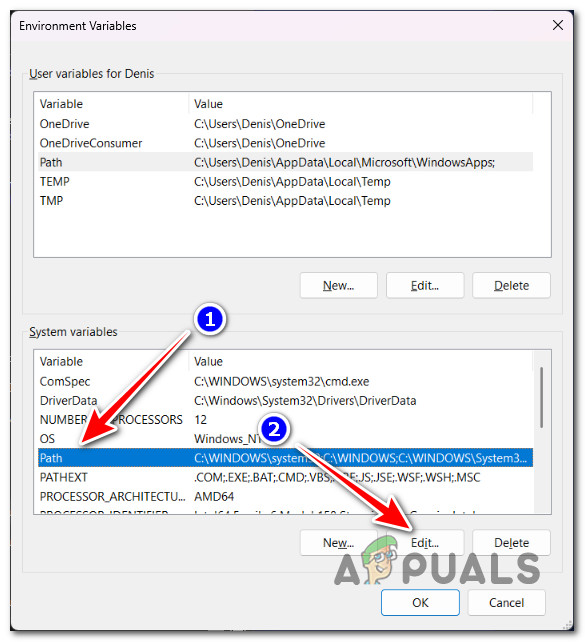
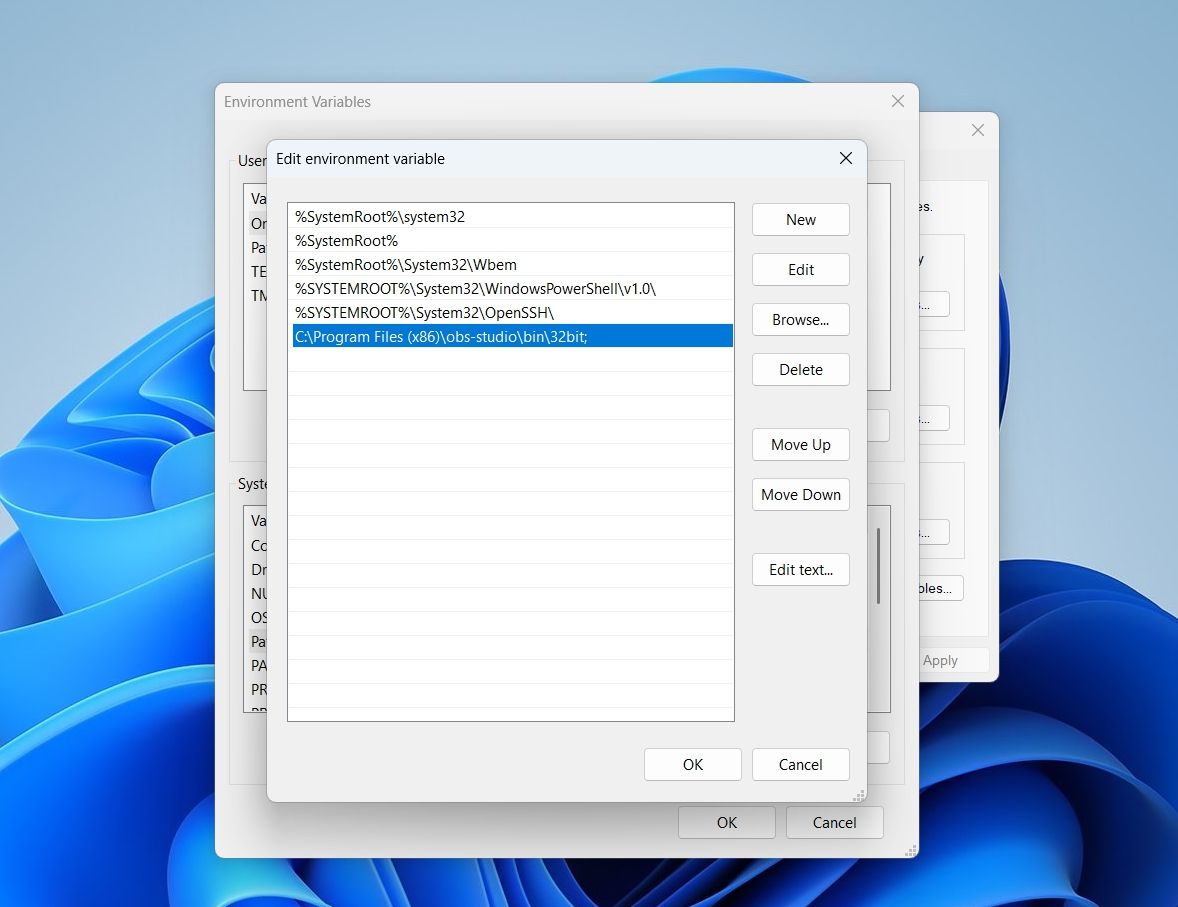
- Once you’re inside the Environment Variables screen, select thee Path variable from the ‘System Variables’ section and click the associated Edit button.

Editing the path Note: Before you modify anything in this window, copy and paste the current variable path in a notepad or somewhere safe. If this fix does not work, it’s advised to return this path to it’s original value.
- Inside the ‘Variable value’ text box, move the cursor to the beginning of the text and paste the following path:
C:\Program Files (x86)\obs-studio\bin\32bit;
- Click Ok, then confirm one last time to close the dialog box.
- Now to check if the issue is fixed, press Windows key + R to open up a Run dialog box.
- Next, type ‘cmd’ and press Ctrl + Shift + Enter to open up an elevated CMD prompt with admin access.
Opening up an elevated CMD window - At the User Account Control (UAC), click Yes to grant admin access.
- Run the following command to navigate to the location where obs-ffmpeg is installed for OBS Studio:
CD C:\Program Files (x86)\obs-studio\data\obs-plugins\obs-ffmpeg
- Type the following command to run the ffmpeg executable:
start ffmpeg-mux32
- All required DLLs will be found by ffmpeg-mux32. You might get a different error message (‘expected option missing’), but you can just close it and turn to your application. Note: If you get an additional error complaining about deflateBound not being located in zlib.dll, you can fix it by copying the specific version of zlib.dll into the obs-ffmpeg folder. To do this, you can just run the following command:
copy "C:\Program Files (x86)\obs-studio\bin\32bit\zlib.dll" "C:\Program Files (x86)\obs-studio\\data\obs-plugins\obs-ffmpeg"
Make sure to double-check the paths to make sure they fit your situation.
4. Disable GPU driver before launching OBS (temporary fix)
Another popular fix among the OBS Studio community is to disable the active GPU driver after opening the program.
This fix supposedly works because it refreshes the GPU log that OBS uses and forces the program to create a new one.
To do this, you’ll need to go in Device Manager and disable the active dedicated GPU before re-launching OBS and initiating a recording session.
Here’s a quick guide on disabling the GPU driver before launching OBS to fix the ‘An Unspecified Error Occurred while Recording’ error:
- Press Windows key + R to open up a Run dialog box.
- Next, type ‘devmgmt.msc’ and press Ctrl + Shift + Enter to open up Device Manager with admin access.
Open Device Manager - Click Yes at the UAC (User Account Control) prompt to grant admin access.
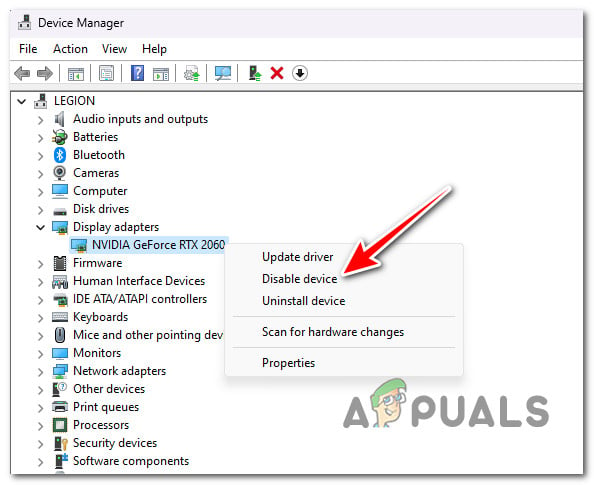
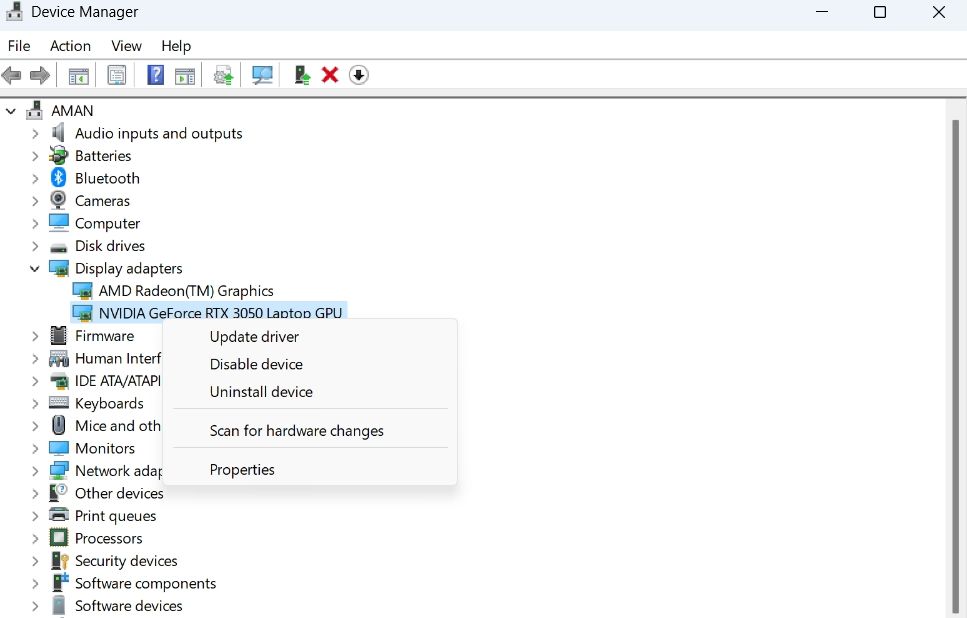
- Inside Device Manager, expand the drop-down menu associated with Display Adapters.
- Right-click on the active dedicated GPU and click Disable device from the context menu that just appeared.

Disable the dedicated GPU - At the confirmation prompt, click Yes once again.
Note: After you confirm, you might experience screen flickering as the generic driver is being started. - Once the video signal returns, open OBS Studio and load your project.
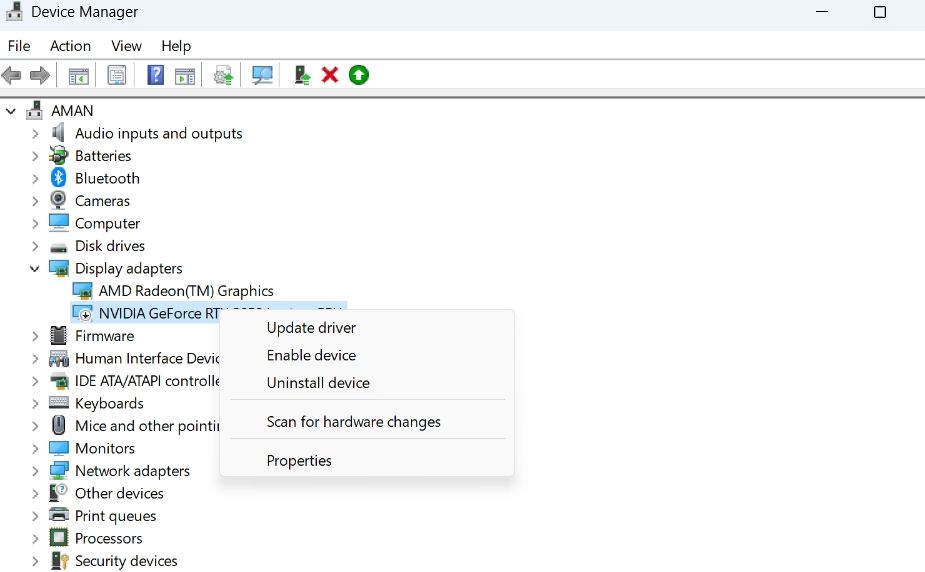
- Return to Device Manager, right-click on the disabled GPU (under Display Adapters), then click on Enable.
- Return to OBS Studio, initiate a recording session, and see if the issue is fixed.
5. Whitelist the obs-ffmpeg-mux file (if applicable)
Another reason why you might see the ‘An Unspecified Error Occurred while Recording‘ is interference caused by a false-positive triggered by your AV. OBS Studio is open source and a lot of the available mods and addons are prone to be flagged by both 3rd party AV suites and Windows Security.
If you’re using a 3rd party suite, go into your AV settings and whitelist the installation Folder + the mainobs-ffmpeg-mux executable separately.
Note: This procedure will be different depending on the 3rd party AV that you’re using.
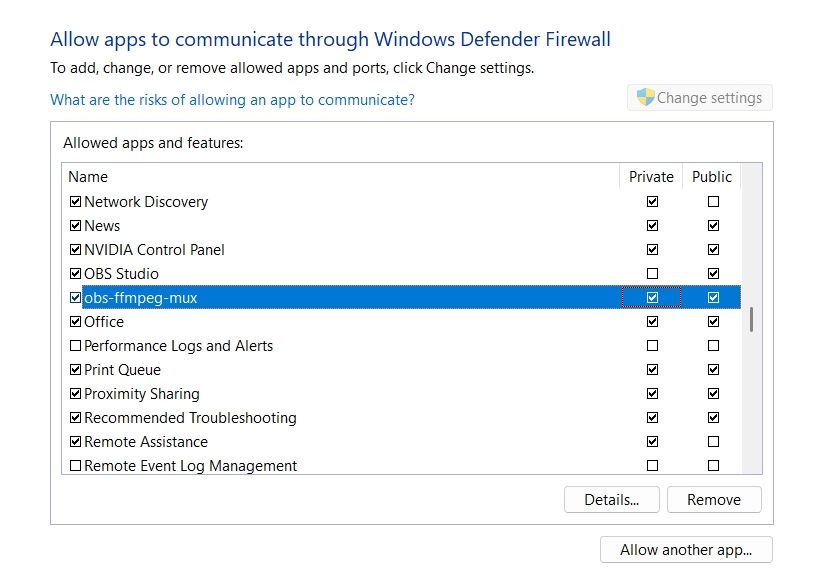
If you use the built-in Windows Defender (Windows Security), follow the steps below to whitelist the obs-ffmpeg-mux executable + the installation path:
- Begin by pressing the Windows key + R to bring up the Run dialog box.
- Type “control firewall.cpl” and press Enter to open the classic Windows Firewall interface.
Open the Firewall Menu - To grant admin access, click Yes in the UAC (User Account Control).
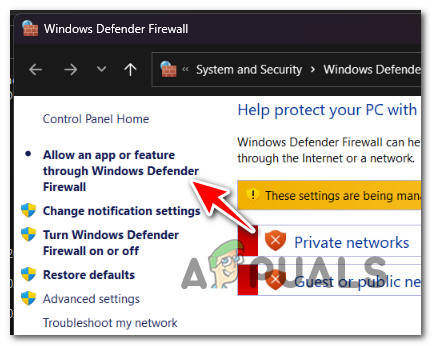
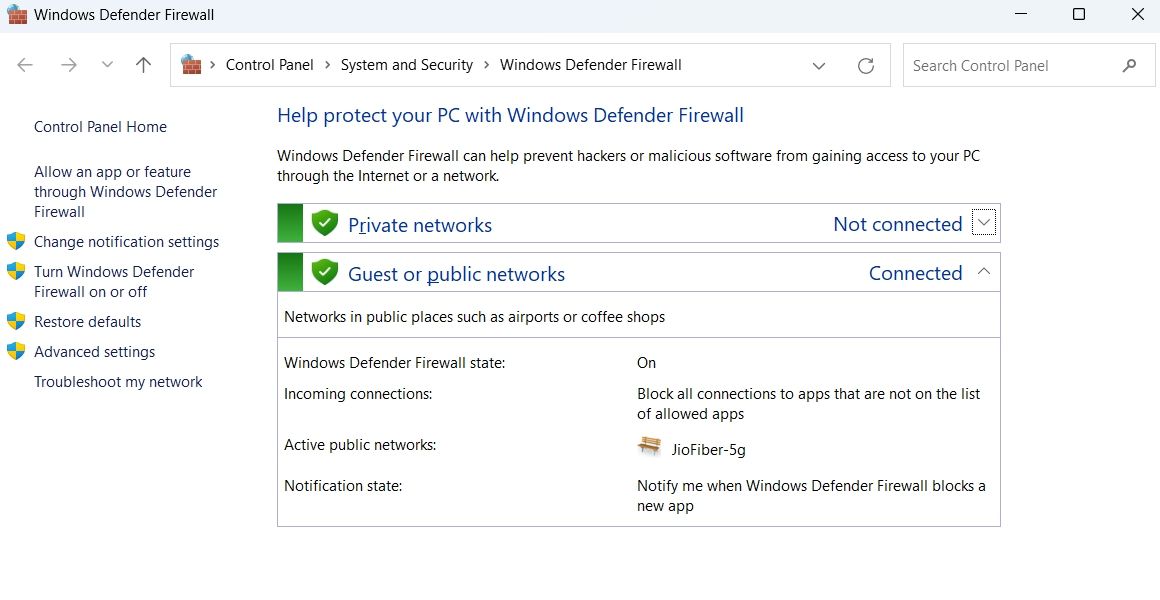
- Next, select Allow an app or feature through Windows Defender Firewall from the menu on the left.

Allowing an app - From the Allowed apps menu, select Change settings and grant admin access by selecting Yes at the UAC (User Account Control) question.
- Once you have the appropriate rights, go down the list of permitted applications and check if you can find any entries related to OBS Studio.
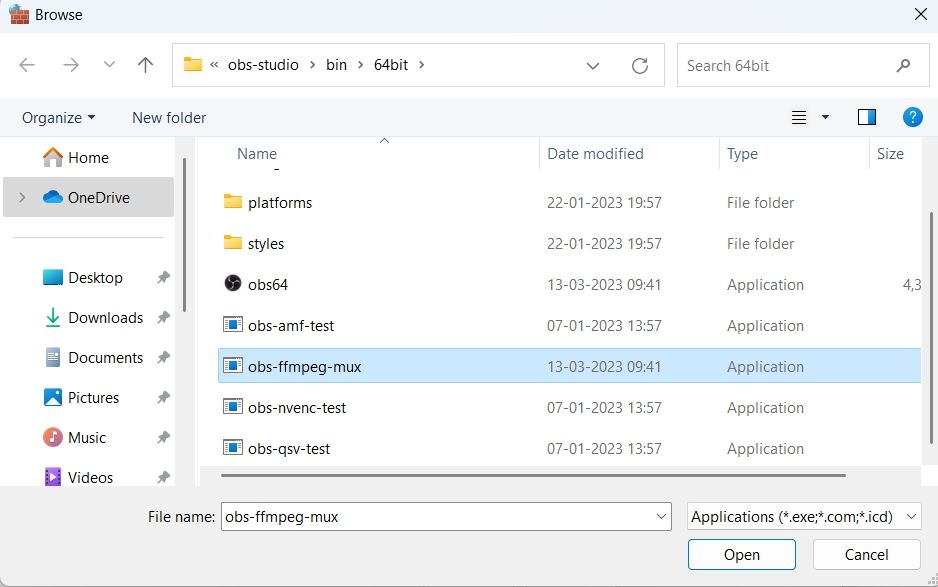
- If they aren’t there, click the Allow another program option, then Browse, navigate to their location, and add the ffmpeg-mux + the installation folder.
- Save your modifications, restart your PC, and restart OBS Studio.
- Start the recording session and see if the problem is fixed.
6. Disable VPN or Proxy Connection
Another third-party component that could cause this issue with OBS Studio is a proxy or VPN client. If you’re trying to initiate a recording session while using OBS Studio to live stream, the usage of an anonymity app might cause the program to throw the ‘An Unspecified Error Occurred while Recording’ error.
If your scenario is similar to the one described above, try removing your VPN client or disabling your proxy server before restarting OBS studio.
We created two guidelines to address both of these scenarios, so select the one that relates to you.
6.1. Disable the VPN connection
The method for disabling a VPN service on a Windows machine differs depending on whether it was configured by Windows or by a third-party program.
If you are using a standalone program, you must go to the VPN interface and disconnect the connection there.
However, if you set up your VPN using the built-in option, you can disable it by doing the following:
- Open the Run box by pressing the Windows key + R.
- Then, after typing “ms-settings:network-vpn” hit Enter to launch the VPN tab in the Windows Settings app.
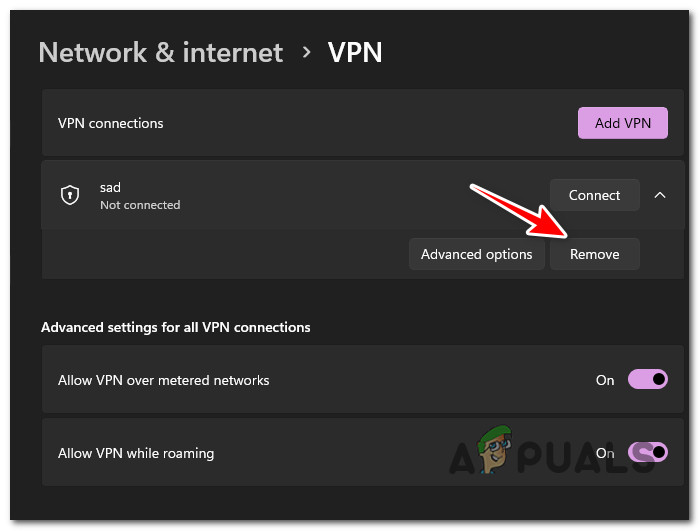
Open the VPN tab - On the right side, click on your VPN connection.
- Select Remove from the new context menu to prevent it from interfering with connections to the outside world.

Remove the VPN - Relaunch OBS Studio and see if the recording function works properly now.
6.2 Turn Off the proxy connection
If you’ve previously set up a proxy server locally, you can easily disable it by going to the Settings menu and selecting the Proxy tab.
Here’s how to do this:
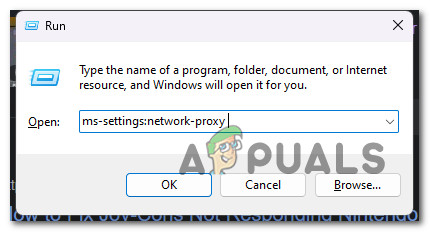
- Open the Run box by pressing the Windows key + R.
- Type “ms-settings:network-proxy” in the next menu and click Enter to access the Proxy tab in the Settings app.
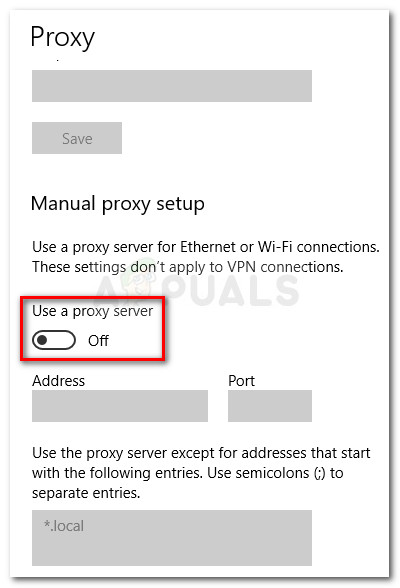
Access the Proxy tab - In the Settings menu, navigate to the Proxy tab and select Manual Proxy Setup.
- Uncheck the box that reads “Use a proxy server” on the right side of the screen.

Using a proxy server - Restart your PC after shutting off the proxy server and try to connect remotely with Cisco AnyConnect again to determine if the problem has been resolved.
Get recording on OBS Studio again with these Windows 11 fixes/
OBS Studio is a great program to record and stream online. However, some users can’t utilize OBS Studio because of a recording error that occurs when they try to record their screens. Instead of recording, OBS Studio throws up this message: «An unspecified error occurred while recording.»
The error usually appears when an important DLL file is missing, or there’s corruption in the OBS Studio installation directory. As such, if you also see the same error, then try the below solutions to eliminate the problem for good.
1. Restart OBS Studio
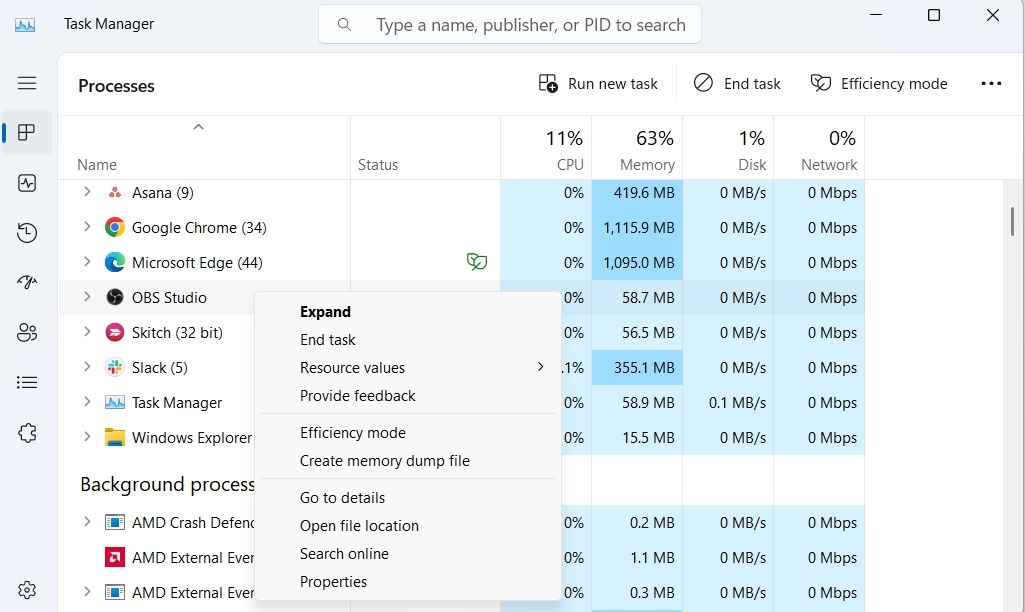
Whether you’re seeing a black screen or getting the «An unspecified error occurred while recording» error, the best way to fix any OBS Studio issue is to restart it. Restarting OBS Studio will clear the system resources and kill any temporary bugs or glitches that might be causing the error.
To restart OBS Studio, open the Task Manager (see how to open the Task Manager), right-click on OBS Studio, and choose End Task. Then, search for OBS Studio in the Start Menu and choose Open from the right pane.
2. Temporarily Disable Your Graphics Driver
The error is likely to occur if there’s corruption in the GPU log file that is used by the OBS Studio. To remove the corruption, you’ll have to disable the graphics driver before launching the OBS Studio. Doing this will force the program to create a new GPU log.
Here’s what you need to do:
- Open the Power User Menu by pressing the Win + X hotkey and choose Device Manager from the context menu.
- In the Device Manager, double-click on the Display adapters node to expand it.
- Right-click on the dedicated graphics driver and choose Disable device.

- Click Yes to the prompt that appears.
Your screen might flicker after disabling the dedicated graphics driver. But worry not; it’ll become normal after the generic driver is started.
Now, launch the OBS Studio and open your project. Then, open the Device Manager again > access the Display adapters node > right-click on the dedicated graphics driver and choose Enable device.
That’s it! Return to OBS Studio and check if you are able to record.
3. Allow OBS Studio Through Your Firewall
OBS Studio might fail to record and throw the error at hand if it’s blocked under Windows Firewall. To fix this, you’ll have to whitelist OBS Studio from the Windows Firewall blocked app list. Here’s how to do that:
- Press the Win key to open the Start Menu.
- Type Windows Firewall in the search bar and press Enter.
- Choose Allow an app or feature through Windows Defender Firewall option from the left sidebar.

- Click the Change settings button.
- Click on Allow another app and then choose Browse from the Add an app prompt.

- Navigate to the location where you have installed the OBS Studio.
- Select the obs-ffmpeg-mux executable file and click Open.

- Click Add.
- Check both the Private and Public boxes for obs-ffmpeg-mux and click OK to save the settings.


Restart your computer and check if the problem continues.
4. Fix the Missing DLL Files
Dynamic Link Libraries, aka DLL files, are special implementations of system libraries that contain various functions and variables that programs use when needed. If an important DLL file required by OBS Studio goes missing, you will see the «An unspecified error occurred while recording» error.
To fix that, you will have to re-acquire the required DLL file. Here’s how:
- Navigate to the place where you have installed the OBS Studio.
- Double-click on the obs-ffmpeg-mux file, and note down which of the following DLL file is missing.
 avcodec-57.dll
avformat-57.dll
avutil-55.dll
swresample-2.dll - Follow our guide on how to fix DLL files missing on Windows to repair the missing file.
Restart your computer and check for the issue.
5. Edit the OBS-Ffmpeg-Mux Installation Folder
If you’re still facing the issue even after downloading the missing DLL file, then it indicates that OBS Studio is unable to find the required DLL. The solution, in this case, is to edit the Path environment so that OBS Studio finds the required DLL files.
You can do that by following the below instructions:
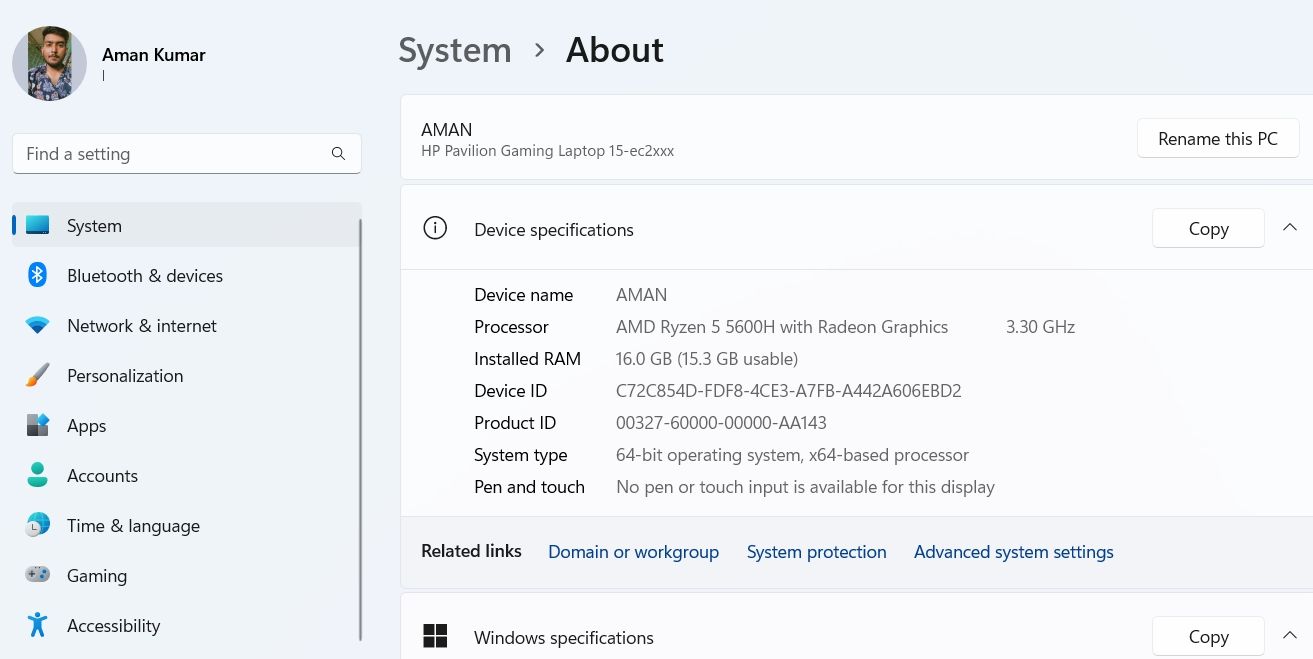
- Press the Win + I key to open the Settings app.
- In the System tab, choose the About option in the left pane.
- Click the Advanced system settings option.

- Click the Environment Variables button.

- Select Path under the System Variables section, and click the Edit button.
- Paste the following path in the Variable value text box and click OK.
C:\Program Files (x86)\obs-studio\bin\32bit;
That’s it! Now, start recording in OBS Studio and check if the problem persists.
6. Check for Corrupted or Missing Files
Sometimes, OBS Studio might fail to record due to corruption in its installation folder. The problem can also occur if an important file is missing.
In either case, you can use the «Check File Integrity» feature to scan the OBS installation for corruption and redownload broken/ missing files. Here’s how to use that feature:
- Launch OBS Studio, click the Help option at the top, and choose the Check File Integrity option from the context menu.

- Click Yes to confirm your selection.
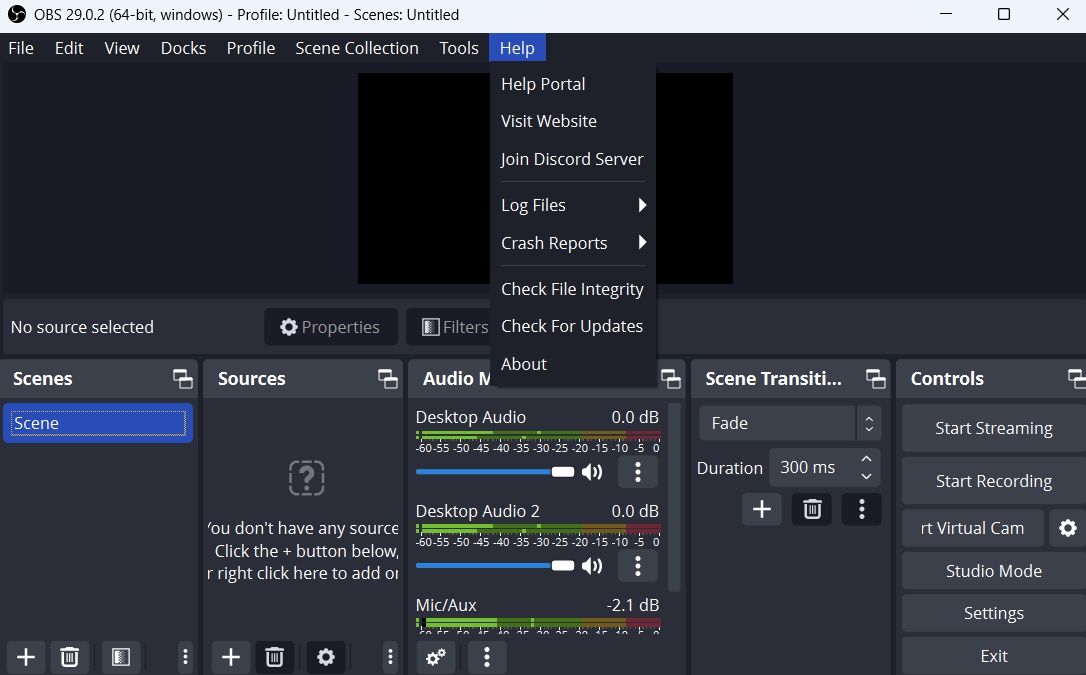
OBS Studio will compare the available files with those on its server and download any missing or broken files.
While you’re at the OBS Studio home screen, check for and download any available updates. To do that, click Help and choose Check for Updates.
7. Reinstall OBS Studio
If you’re still getting the error message, you’re left with no option other than reinstalling OBS Studio. To do that, first uninstall OBS Studio from Windows.
Then, visit the OBS Studio official website, and download and install the latest version on your computer.
Enjoy Seamless Recording With OBS Studio
OBS Studio makes it a cakewalk to record anything and upload it online. However, due to corruption in its installation folder or missing DLL files, it might throw the «An unspecified error occurred while recording» error. Fortunately, you can quickly get rid of this error by applying the above fixes.
В некоторых случаях при попытке запустить запись в OBS может возникнуть ошибка Не удалось начать запись — не удалось запустить вывод. Обычно эта ошибка появляется при неправильных настройках OBS, неправильном источнике графики или при наложении нескольких фоновых приложений на приложение.
Но, независимо от причины, устранение неполадки с записью в вашем приложении OBS — довольно простой процесс.
Итак, в этом всеобъемлющем руководстве давайте узнаем больше о потенциальных причинах и эффективных исправлениях, которые вы можете применить для решения проблемы, связанной с тем, что OBS не записывает.
Содержание
- Почему OBS показывает ошибку «Не удалось начать запись»?
- Как исправить ошибку OBS, при которой не удалось запустить запись?
- Измените настройки графики
- Для Windows 10 и более новых версий
- Запуск в режиме совместимости
- Выйдите из фоновых приложений
- Обновите драйверы устройств
- Проверка на наличие вредоносных программ
- Проверьте наличие обновлений
- Настройте параметры кодировщика
- Измените настройки графики
- Вопросы по теме
- Как исправить, что OBS не записывает на Mac?
- Могу ли я записывать свой экран и веб-камеру одновременно?
Почему OBS показывает ошибку «Не удалось начать запись»?
Вот некоторые из основных причин, по которым ваше приложение OBS может быть не в состоянии записывать видео на ваше устройство.
- Устаревшие драйверы устройств
- Несколько загруженных приложений, работающих в фоновом режиме
- Неправильная настройка параметров графики
- Устаревшее или поврежденное приложение OBS
- Настройки OBS
Как исправить ошибку OBS, при которой не удалось запустить запись?
Прежде чем мы углубимся в технические исправления этой статьи, возможно, вы захотите попытать счастья с перезагрузкой вашего устройства. В некоторых случаях доказано, что перезагрузка устраняет незначительные проблемы, возникающие в приложениях, поскольку она удаляет все временные файлы и обновляет систему.
Кроме того, пожалуйста, убедитесь, что значок глаза рядом с функцией захвата дисплея включен.
Но, если проблема не устранена, вы можете перейти к указанным ниже исправлениям.
Измените настройки графики
Если на вашем устройстве Windows установлена система с несколькими графическими процессорами, могут быть случаи, когда ваше устройство выбирает неправильную видеокарту для таких приложений, как OBS. Итак, быстрое решение этой проблемы заключается в выборе правильной видеокарты вручную.
Для Windows 10 и более новых версий
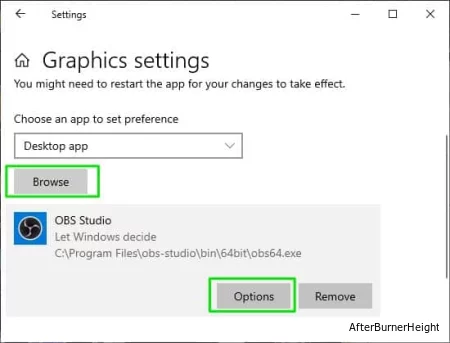
- Нажмите на значок Windows в левом нижнем углу.
- Введите настройки графики в строке поиска и нажмите enter.
- В выпадающем меню выберите опцию настольного приложения.
- Нажмите на кнопку Обзор и найдите приложение OBS.
- Найдите свой исполняемый файл, следуя по этому пути.Локальный диск C> Program Files> obs-studio> Bin> 64bit
- После добавления файла нажмите на кнопку Параметры.

- Если вы пытаетесь использовать захват игры, мы советуем вам выбрать опцию Высокой производительности. Но, если вы используете захват дисплея, выберите Энергосбережение и нажмите Сохранить.
Запуск в режиме совместимости
Иногда OBS может не записывать видео, если у него возникают проблемы с совместимостью в вашей текущей Windows. Итак, быстрое решение этой проблемы — вернуться к более ранней версии Windows, совместимой с приложением.
Кроме того, вы также можете предоставить права администратора. Это позволяет приложению устанавливать приоритеты и получать максимальные ресурсы, такие как выделение памяти графического процессора и физической памяти.
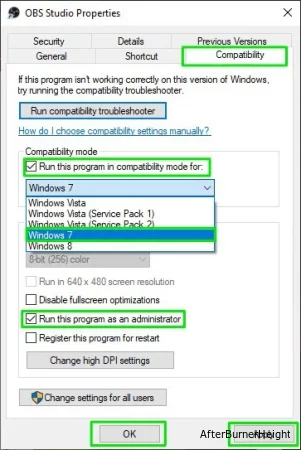
- Щелкните правой кнопкой мыши на значке быстрого доступа OBS.
- Выберите опцию Свойства .
- Теперь перейдите на вкладку « Совместимость«.
- Установите флажок для запуска этой программы в режиме совместимости.
- Вернитесь к предыдущей версии Windows из выпадающего меню.
- Кроме того, установите флажок для запуска от имени администратора.
- Нажмите Применить> ОК.
Выйдите из фоновых приложений
Если у вас запущено несколько фоновых приложений в фоновом режиме, они могут перегружать вашу оперативную память. Кроме того, некоторые приложения могут использовать функцию записи с экрана. Итак, мы рекомендуем вам выйти из этих приложений. Для этого,
- Используйте сочетание клавиш Ctrl + Shift + Esc, чтобы открыть диспетчер задач.
- На вкладке Процессы выберите приложения.
- Щелкните по ним правой кнопкой мыши и выберите опцию Завершить задачу.

Обновите драйверы устройств
Устаревший драйвер устройства может быть основной причиной того, что OBS не удается записать ваши видео на ваше устройство Windows. Вот как вы можете обновить драйверы вашего устройства.
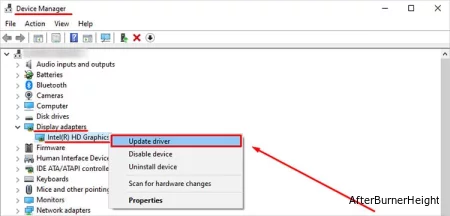
- Используйте сочетание клавиш Windows + R, чтобы открыть диалоговое окно Выполнить.
- В диалоговом окне запуска введите devmgmt. msc и нажмите на кнопку OK, чтобы открыть диспетчер устройств.
- Прокрутите раздел «Диспетчер устройств» вниз и нажмите на кнопку со стрелкой рядом с адаптерами дисплея.
- Щелкните на своей видеокарте и щелкните по ней правой кнопкой мыши.
- Выберите Обновить драйвер.
- Выберите опцию Автоматического поиска драйверов.
Кроме того, вы также можете вручную проверить наличие обновлений драйверов, перейдя на страницу веб-сайта вашего производителя.
Проверка на наличие вредоносных программ
В некоторых случаях ваше приложение может быть заражено вирусами и вредоносными программами. На всякий случай мы рекомендуем вам выполнить полную проверку вашего устройства.
Вот как вы можете это сделать с помощью защитника брандмауэра Windows.
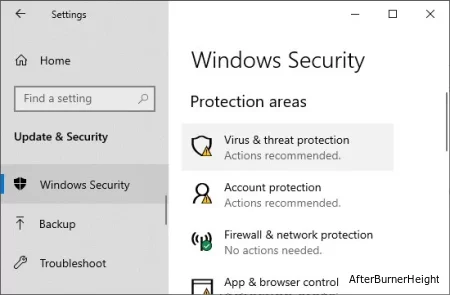
- Перейдите к значку «Пуск» и нажмите на настройки.
- На левой панели нажмите на Конфиденциальность и безопасность.
- Нажмите на Безопасность Windows.
- Теперь нажмите на Защиту от вирусов и угроз.
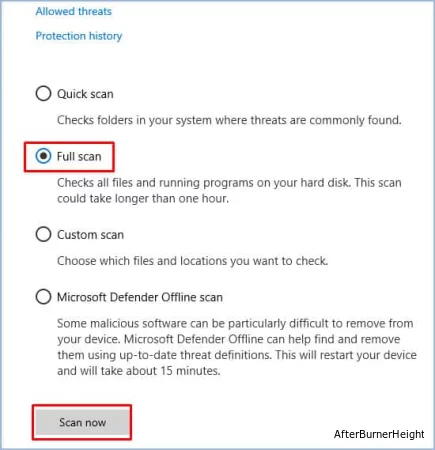
- Нажмите на ссылку «Параметры сканирования«.
- Установите флажок для полного сканирования.
- Наконец, нажмите на кнопку Сканировать сейчас.
Проверьте наличие обновлений
Обычно устаревшее приложение OBS может вызывать ошибки видео и другие системные сбои. Поэтому мы рекомендуем вам регулярно обновлять OBS, чтобы избежать подобных проблем.
Вот как вы можете проверить наличие обновлений.
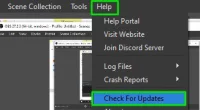
- Перейдите в строку меню и нажмите на Справка.
- Теперь выберите опцию Проверять наличие обновлений.
- Нажмите на кнопку Обновить сейчас, если какие-либо обновления доступны.
Если проблема все еще повторяется, мы рекомендуем вам удалить и переустановить приложение снова. В вашей существующей версии могут быть ошибки и системные ошибки, которые могут привести к появлению ошибки видео.
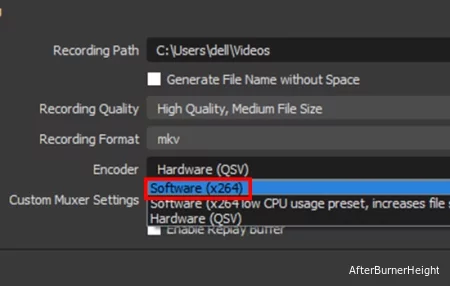
Настройте параметры кодировщика
Если у вас устаревший кодировщик устройств или в нем есть ошибки, то у нас может быть для вас обходной путь. Этот метод позволяет настроить OBS на использование программного кодировщика вашей системы. В результате это может помочь вам обойти проблему с записью видео.
Вот пошаговое руководство по обходному пути о том, как вы можете это сделать.
- Запустите свое приложение OBS.
- Перейдите к опции «Настройки «.
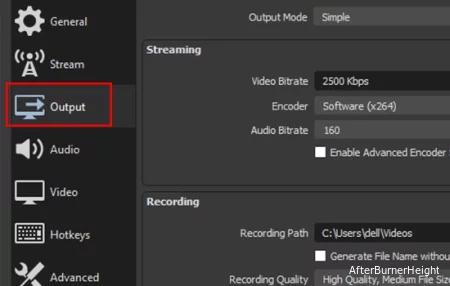
- На левой панели выберите Вывод.
- В разделе «Запись» перейдите в раздел «Кодировщик«.
- В выпадающем меню выберите опцию Программное обеспечение (x264).
- Нажмите на кнопку Применить.
- Теперь снова нажмите на кнопку Начать запись, чтобы проверить, работает ли это.
Вопросы по теме
Как исправить, что OBS не записывает на Mac?
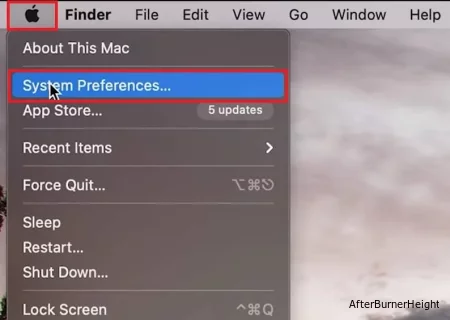
Если вы используете устройство Mac, рекомендуется сначала проверить, разрешили ли вы OBS предоставлять доступ к записи экрана.
Вот пошаговое руководство о том, как вы можете это сделать.
- Перейдите к логотипу Apple и нажмите на Системные настройки.
- Выберите опцию Безопасность и конфиденциальность.
- На левой панели прокрутите и выберите Запись экрана.
- Чтобы разрешить доступ, нажмите на значок блокировки в левом нижнем углу.
- Введите свой пароль, чтобы изменить настройки разрешений.
- Теперь отметьте галочкой опцию для OBS.

Если эта проблема у вас не решается, возможно, вы захотите удалить и переустановить приложение OBS.
Могу ли я записывать свой экран и веб-камеру одновременно?
ДА. Приложение OBS позволяет записывать ваш экран и веб-камеру одновременно. Для этого наведите курсор на значок плюса. В разделе « Источник» выберите «Захват дисплея » и начните запись.
I finally found out why my OBS doesn’t work correctly. It’s because the program «super display» which is installed for using Galaxy tab as a second monitor. I uninstalled the program and OBS worked well. but It’s a shame I can’t use the OBS lately version with the program. I need to use «super display» program

@backcgo
I would recommend filing a report with the authors/publishers of SuperDisplay. I’d guess that it is using up hardware resources that OBS would otherwise need or it is causing some other conflict. Their documentation suggests that you could enable software encoding, but I suspect that may be too much strain on your system resources.
I have just encountered the same issue with OBS Studio 27.1.3 on an Asus Zenbook Duo 14, Windows 11, Intel Gen 11 Iris Plus Graphics G7 (i7-1165G7, Tiger Lake). I paused Windows Updates for two weeks. Now, after resuming and installing a single Windows cumulative update, the OBS error message has gone. I wonder why that solved it, since the Intel Graphics driver is the same version, before and after this update.
@cRoCx
If you experience this issue again, please seek assistance via our Discord server or the forums, and if it’s determined that this is indeed a bug, then you can open a new GitHub Issue. For now, it sounds like you’re no longer experiencing an issue, and the issue that you were experiencing was not the same as the reporter here.
With all of that, I will be closing this Issue. Thank you for your assistance!
Сегодня расскажем что предпринять если у вас появился сбой вывода в программе OBS. NVEC или AMD. Ошибка может звучать в английском варианте «Failed to open NVENC codec: Function Not Implemented» или Generic error in an external library. Симптомы у них похожи. Либо просто выскакивает окошко с уведомлением как на скриншоте ниже: «Сбой вывода. Подробности отражены в журнале. Примечание: Если вы используете кодировщики NVEC или AMD, убедитесь что у вас установлена последняя версия видеодрайвера.»

Сбой вывода. Не удалось начать запись в OBS
Причины ошибки вывода потока в OBS
Поскольку запись или трансляция стримов потребляют большие ресурсы видеопамяти все ошибки нужно начинать с проверки видеокарты и ее работы. Естественно, первым делом стоит убедиться, что вы загрузили последнюю версию драйверов на официальном сайте и обновили. Для видеокарт от NVIDIA после запуска любой игры или приложения в трее есть иконка, которая позволяет увидеть какая видеокарта задействована в данный момент. При работе с графикой и записи видео или стримов разумеется должна отображаться внешняя видеокарта.
Второе – часто программа конфликтует с продуктами от Adobe запущенными на компьютере в данный момент(Photoshop, InDesign, Premiere Pro, Illustrator или Adobe XD). Сохраните всё, что делали, выключите программу и попробуйте снова запустить запись. Эта ошибка вызвана тем, что графические редакторы задействуют ресурсы видеокарт по максимуму, а если карточка не последних поколений, выделить дополнительную память на стрим или запись она просто не сможет.
Как исправить ошибку вывода?
Если обновление драйверов не помогло, посмотрим что пишут в логах. Закройте все лишние работающие программы. Далее в запущенной программе OBS:
- Переходим в пункт меню «Справка», «Log файлы», «Посмотреть текущий журнал».

Справка, Log файлы, посмотреть текущий журнал
- Листаем в самый них текстового файла. Смотрим есть ли строчка Failed to open NVENC codec или Stream output type «rtmp_output» failed to start!.

Stream output type «rtmp_output» failed to start!
- Обычно такая проблема говорит о том, что не удалось открыть нужный кодек во внешней библиотеке. Из-за этого не удается запустить сам вывод потока.
- Закрываем логи, открываем «Файл», «Настройки» и переходим в раздел «Вывод».

Файл, настройки, вывод в программе OBS
- Далее смотрим на строку GPU. Если на компьютере установлена одна видеокарта, а там стоит цифра 1,2 или 3 – устанавливаем значение на 0.

Устанавливаем значение 0 в настройках GPU
- Запускаем трансляцию и проверяем. Если ошибка, можно попробовать переключить кодек с NVENC H.264 на любой другой и перезапустить трансляцию еще раз.

Переключаем кодек с с NVENC H.264 на любой другой


Дополнительно можно обновить саму библиотеку кодеков, если вы до сих пор сидите на Windows XP или 7. Скачать можно с любого сайта. Яндекс предлагает [mask_link href=»https://softportal.pro/codecs/» target=»_blank»]https://softportal.pro/codecs/[/mask_link]. Обновляем кодеки Video Codec x264, которые как раз подходят для стрима и записи в OBS. Заодно можно установить Windows 10 Codec Pack.

Обновляем кодеки Video Codec x264 и Windows 10 Codec Pack
Выводы
Самые распространенные ошибки при работе с OBS связанные со сбоем вывода или ошибкой открытия кодеков «Failed to open NVENC codec» появляются из-за конфликтов при запущенных программах Adobe(поскольку они потребляют ресурсы видеопамяти). Либо проблемой с кодеками. Проверьте в настройках какая видеокарта выставлена. Затем обновите кодеки и если не помогло переключайте текущий кодировщик. Если что-то осталось непонятно задавайте вопросы в комментариях под этой странице и обязательно напишите какой из способов помог вам решить проблему.
Актуальное на этой неделе:

02.06.2023
Как отключить «Скрыть IP-адрес» для веб-сайта на iPhone
IP-адрес телефона является технически важной информацией, позволяющей идентифицировать пользователей в…
Далее

28.04.2023
Как охладить бойлеры в квесте Atomic Heart «В самое пекло»?
Atomic Heart предлагает захватывающий игровой процесс, который сочетает в себе различные элементы геймплея….
Далее

27.04.2023
Как получить атомные стикеры в Atomic Heart
Atomic Heart – это ожидаемая игра от российской студии Mundfish, которая предлагает игрокам уникальную смесь научной…
Далее

26.04.2023
Как отключить защиту Google Play Protect на Android
Google — крупная компания, у которой есть множество сервисов для мобильных устройств. Одним из таких сервисов…
Далее