Создание компонента для обработки 500-x ошибок
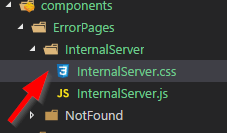
Давайте создадим новую папку InternalServer внутри папки ErrorPages, а в ней создадим два новых файла и назовем их InternalServer.js и InternalServer.css:
Мы собираемся изменить файл InternalServer.js:
import React from 'react';
import './InternalServer.css';

const internalServer = (props) => {
    return (
        <p className={'internalServer'}>{"500 SERVER ERROR, CONTACT ADMINISTRATOR!"}</p>
    )
}

export default internalServer;
Затем изменим файл InternalServer.css:
.internalServer{
    font-weight: bold;
    font-size: 50px;
    text-align: center;
    color: #c72d2d;
}
Далее, давайте изменим файл App.js:
import InternalServer from '../components/ErrorPages/InternalServer/InternalServer';
<Route path="/" exact component={Home} />
<Route path="/owner-list" component={AsyncOwnerList} />
<Route path="/500" component={InternalServer} />
<Route path="*" component={NotFound} />
Превосходно.
Компонент для информации о 500-x ошибок готов, и мы можем продолжить.
Реализация Redux для обработки ошибок
Как и в случае с репозиторием в этом приложении, мы собираемся создать еще один экземпляр redux для обработки ошибок в одном месте нашего приложения. Мы уже немного знакомы с redux, поэтому эту часть будет довольно легко реализовать. Еще одна вещь заключается в том, что после создания нового файла-редьюсера у нас будет два файла-редьюсера, и, следовательно, нам нужно выполнить другой процесс регистрации внутри файла Index.js.
Мы можем обрабатывать ошибки несколькими способами, и здесь мы собираемся сделать это, используя несколько редьюсеров в проекте. Более того, централизация действий по обработке ошибок в целом является хорошей практикой.
Давайте продолжим, изменив файл ActionTypes.js, добавив три дополнительных типа действий:
export const HTTP_404_ERROR = 'HTTP_404_ERROR';
export const HTTP_500_ERROR = 'HTTP_500_ERROR';
export const HTTP_OTHER_ERROR = 'HTTP_OTHER_ERROR';
Внутри папки actions находится файл repositoryActions.js. Теперь внутри той же папки нам нужно добавить еще один файл действия errorHandlerActions.js. Итак, давайте изменим этот файл:
import * as actionTypes from './actionTypes';

const execute404Handler = (props) => {
    return {
        type: actionTypes.HTTP_404_ERROR,
        props: props
    }
}

const execute500Handler = (props) => {
    return {
        type: actionTypes.HTTP_500_ERROR,
        props: props
    }
}

const executeOtherErrorHandler = (error) => {
    return {
        type: actionTypes.HTTP_OTHER_ERROR,
        error: error
    }
}

export const handleHTTPError = (error, props) => {
    if (error.response.status === 404) {
        return execute404Handler(props);
    }
    else if (error.response.status === 500) {
        return execute500Handler(props);
    }
    else {
        return executeOtherErrorHandler(error);
    }
}
В приведенном выше коде мы экспортируем действие handleHTTPError, в котором мы проверяем код состояния ошибки и выполняем соответствующую функцию. То же самое мы сделали с файлом repositoryActions.js.
Внутри файла repositoryActions.js нам нужно импортировать этот файл errorHandlerActions.js:
import * as errorHandlerActions from './errorHandlerActions';
И чтобы заменить все комментарии в блоке catch каждой функции:
dispatch(errorHandlerActions.handleHTTPError(error, props));
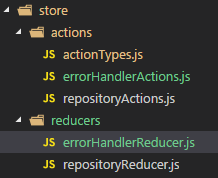
Давайте продолжим, создав новый файл reducer errorHandlerReducer.js внутри папки reducer.
Сейчас у нас есть такая структура папок:
Файл errorHandlerReducer.js должен выглядеть так:
import * as actionTypes from '../actions/actionTypes';

const initialState = {
    showErrorModal: false,
    errorMessage: ''
}

const execute404 = (state, action) => {
    action.props.history.push('/404');
    return { ...state };
}

const execute500 = (state, action) => {
    action.props.history.push('/500');
    return { ...state };
}

const executeOtherError = (state, action) => {
    return {
        ...state,
        showErrorModal: true,
        errorMessage: action.error.response.data
    };
}

const reducer = (state = initialState, action) => {
    switch (action.type) {
        case actionTypes.HTTP_404_ERROR:
            return execute404(state, action);
        case actionTypes.HTTP_500_ERROR:
            return execute500(state, action);
        case actionTypes.HTTP_OTHER_ERROR:
            return executeOtherError(state, action);
        default:
            return state;
    }
}

export default reducer;
Эта логика тоже знакома. Мы создаем объект состояния (initialState), а затем функцию reducer, которая принимает параметры state и action. Функция reducer обновит state на основе свойства type, отправленного из файла errorHandlerActions.
Регистрация нескольких редьюсеров
Чтобы завершить настройку Redux, давайте изменим файл Index.js, чтобы также зарегистрировать этот редьюсер:
import repositoryReducer from './store/reducers/repositoryReducer';
import errorHandlerReducer from './store/reducers/errorHandlerReducer';
import { Provider } from 'react-redux';
import { createStore, applyMiddleware, combineReducers } from 'redux';
import thunk from 'redux-thunk';

const rootReducers = combineReducers({
    repository: repositoryReducer,
    errorHandler: errorHandlerReducer
})

const store = createStore(rootReducers, applyMiddleware(thunk));

ReactDOM.render(<Provider store={store}><App /></Provider>, document.getElementById('root'));
registerServiceWorker();****
Мы импортируем файл errorHandlerReducer и функцию combineReducers. Затем с помощью функции combineReducers мы создаем объект rootReducers, который содержит все наши редьюсеры. Наконец, мы просто передаем этот объект в создание магазина.
Модификация компонента OwnerList
Нам нужно сделать еще одну вещь. В компоненте OwnerList нам нужно изменить способ настройки свойства data из файла repositoryReducer. Давайте изменим функцию mapStateToProps:
const mapStateToProps = (state) => {
    return {
        data: state.repository.data
    }
}
Мы должны это сделать, потому что у нас больше нет одного файла-редьюсера. Оба наших файла-редьюсера зарегистрированы внутри одного корневого объекта, и поэтому мы должны указать, какой редьюсер мы хотим использовать.
Мы можем попробовать нашу обработку ошибок, изменив код в методе сервера GetAllOwners. В качестве первой строки кода мы можем добавить return NotFound() или return StatusCode(500, “Some message”), и мы обязательно будем перенаправлены на правильную страницу ошибки.
Реализация компонента OwnerDetails
В этом компоненте мы собираемся показать отдельного владельца со всеми его учетными записями. Если вы думаете: «Ну, мы могли бы разделить это на две части», вы совершенно правы.
Мы и сделаем именно это.
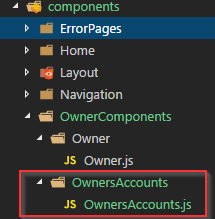
Родительский компонент будет компонентом OwnerDetails, а дочерний компонент будет компонентом OwnersAccounts. Итак, давайте начнем с создания дочернего компонента.
Для компонента OwnersAccounts мы собираемся создать такую структуру:
Давайте изменим файл OwnersAccounts.js:
import React from 'react';
import { Row, Col, Table } from 'react-bootstrap';
import Moment from 'react-moment';

const ownersAccounts = (props) => {
    let accounts = null;
    if (props.accounts) {
        accounts = props.accounts.map(account => {
            return (
                <tr key={account.id}>
                    <td>{account.accountType}</td>
                    <td><Moment format="DD/MM/YYYY">{account.dateCreated}</Moment></td>
                </tr>
            );
        })
    }
    return (
        <Row>
            <Col md={12}>
                <Table responsive striped>
                    <thead>
                        <tr>
                            <th>Account type</th>
                            <th>Date created</th>
                        </tr>
                    </thead>
                    <tbody>
                        {accounts}
                    </tbody>
                </Table>
            </Col>
        </Row>
    )
}

export default ownersAccounts;
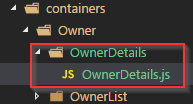
Давайте продолжим, создав структуру папок для компонента OwnerDetails:
Затем мы собираемся импортировать все необходимые файлы в компонент OwnerDetails:
import React, { Component } from 'react';
import { connect } from 'react-redux';
import { Well, Row, Col } from 'react-bootstrap';
import * as repositoryActions from '../../../store/actions/repositoryActions';
import Moment from 'react-moment';
import OwnersAccounts from '../../../components/OwnerComponents/OwnersAccounts/OwnersAccounts';
import Aux from '../../../hoc/Auxiliary/Auxiliary';
После этого добавим реализацию компонента:
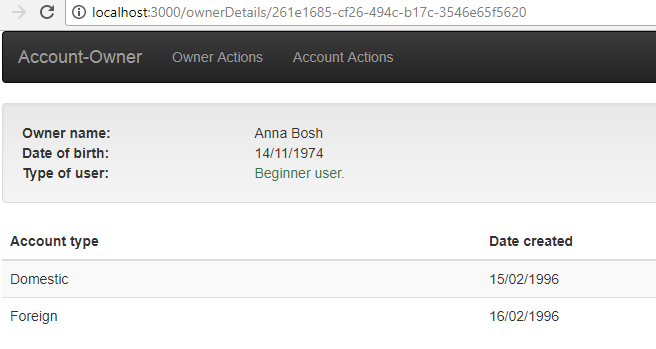
class OwnerDetails extends Component {
    render() {
       const owner = this.props.data;

        return (
            <Aux>
                <Well>
                    <Row>
                        <Col md={3}>
                            <strong>Owner name:</strong>
                        </Col>
                        <Col md={3}>
                            {owner.name}
                        </Col>
                    </Row>
                    <Row>
                        <Col md={3}>
                            <strong>Date of birth:</strong>
                        </Col>
                        <Col md={3}>
                            <Moment format="DD/MM/YYYY">{owner.dateOfBirth}</Moment>
                        </Col>
                    </Row>
                    {this.renderTypeOfUserConditionally(owner)}
                </Well>
                <OwnersAccounts accounts={owner.accounts} />
            </Aux>
        )
    }
}

export default OwnerDetails;
В приведенном выше коде мы используем оператор this.props.data, но еще не реализовали редьюсер. Мы сделаем это через минуту. Обратите внимание на вызов функции renderTypeOfUserConditionally. В этой функции мы условно обрабатываем данные владельца и возвращаем код JSX для отображения. Мы собираемся реализовать эту функцию через минуту. Ниже данных владельца мы отображаем все аккаунты, связанные с владельцем.
Условный рендеринг
Чтобы реализовать renderTypeOfUserConditionally, нам нужно добавить следующий код над функцией render, но все еще внутри класса:
renderTypeOfUserConditionally = (owner) => {
    let typeOfUser = null;

    if (owner.accounts && owner.accounts.length <= 2) {
        typeOfUser = (
            <Row>
                <Col md={3}>
                    <strong>Type of user:</strong>
                </Col>
                <Col md={3}>
                    <span className={'text-success'}>Beginner user.</span>
                </Col>
            </Row>
        );
    }
    else {
        typeOfUser = (
            <Row>
                <Col md={3}>
                    <strong>Type of user:</strong>
                </Col>
                <Col md={3}>
                    <span className={'text-info'}>Advanced user.</span>
                </Col>
            </Row>
        );
    }

    return typeOfUser;
}
Подключение к Redux
Наконец, давайте подключим этот компонент к файлу редьюсера, чтобы получить данные владельца под закрывающим тегом функции рендеринга:
const mapStateToProps = (state) => {
    return {
        data: state.repository.data
    }
}

const mapDispatchToProps = (dispatch) => {
    return {
        onGetData: (url, props) => dispatch(repositoryActions.getData(url, props))
    }
}

export default connect(mapStateToProps, mapDispatchToProps)(OwnerDetails);
И над функцией renderTypeOfUserConditionally добавьте этот хук жизненного цикла:
componentDidMount = () => {
    let id = this.props.match.params.id;
    let url = '/api/owner/' + id + '/account';
    this.props.onGetData(url, { ...this.props })
}
Мы извлекаем id из URL-адреса, вызывая оператор match.params.id из объекта props. Затем мы просто создаем наш URL-адрес и вызываем свойство onGetData для получения данных с сервера.
Прежде чем проверять наш результат, мы должны добавить маршрут для этого нового компонента в файл App.js, прямо под маршрутом owner-list:
<Route path="/ownerDetails/:id" component={OwnerDetails} />
Наконец, мы можем проверить результат для начинающего пользователя:
Кроме того, давайте проверим результат для опытного пользователя:

Мы можем проверить эти результаты и убедиться, что все работает должным образом.
Заключение
На данный момент мы почти уверены, что вы поняли как работает Redux. Как мы уже говорили в предыдущих статьях, после некоторой практики вы сможете легко применять Redux, используя его собственный шаблон реализации. Мы использовали его для отправки HTTP-запросов и обработки HTTP-ошибок, а теперь вы можете использовать его для других задач, которые вы хотели бы решить.
Прочитав этот пост, вы узнали:
- Как реализовать логику обработки ошибок с помощью рабочего процесса Redux.
- Как объединить редьюсеры в один объект
- Как получить данные для подробного представления.
Спасибо, что прочитали статью, и я надеюсь, что вы нашли в ней что-то полезное.
В следующей части серии, мы узнаем, как использовать динамический ввод для создания форм. Кроме того, мы собираемся представить модальные компоненты и создать компонент для действий POST.
In today’s rapidly evolving world of web applications, delivering a seamless and user-friendly experience has become more crucial than ever. One key aspect of achieving this is effective error handling, which helps ensure that users encounter minimal roadblocks while interacting with your application. This article will explore the best practices and techniques for error handling in React applications using GraphQL and Redux Toolkit. We will dive deep into understanding the basics of these technologies and demonstrate practical ways to implement error handling that is both efficient and maintainable. This comprehensive guide will serve as an invaluable resource for developers looking to enhance their skills and knowledge in error management for modern web applications.
By the end of this article, you will have a thorough understanding of:
- The importance of error handling in modern web applications
- The fundamentals of React, GraphQL, and Redux Toolkit
- How to set up your environment for effective error handling
- Implementing error boundaries in React components
- Various techniques for handling GraphQL errors
- Managing errors using Redux Toolkit
- Integrating error handling techniques across React, GraphQL, and Redux Toolkit
- Best practices for providing user-friendly error messages, centralizing error management, and monitoring and logging errors
Whether you are a seasoned developer or just starting your journey in web development, this guide on error handling in React applications with GraphQL and Redux Toolkit will help you master the art of creating robust and resilient applications. So, let’s dive in and explore these best practices and techniques together!
Understanding the Basics
Before we delve into the practical aspects of error handling, it is essential to have a solid understanding of the key concepts and tools involved. In this section, we will discuss the basics of React and Error Boundaries, GraphQL Error Types, and Redux Toolkit and Error Management. By grasping these fundamentals, you will be better equipped to implement efficient and maintainable error handling techniques in your applications.
React and Error Boundaries
React, a popular JavaScript library for building user interfaces, offers a built-in mechanism for handling errors called Error Boundaries. Error Boundaries are specialized React components designed to catch JavaScript errors anywhere in the component tree and display a fallback UI instead of crashing the entire application. To create an Error Boundary, you simply define a class component with the componentDidCatch() lifecycle method. Here’s a basic example of an Error Boundary:
class ErrorBoundary extends React.Component {
  constructor(props) {
    super(props);
    this.state = { hasError: false };
  }

  componentDidCatch(error, info) {
    this.setState({ hasError: true });
    // Log the error and info for further analysis
  }

  render() {
    if (this.state.hasError) {
      return <h1>An error has occurred. Please try again.</h1>;
    }
    return this.props.children;
  }
}
GraphQL Error Types
GraphQL, a query language for your API, enables clients to request only the data they need, making it a powerful tool for building efficient and flexible applications. When working with GraphQL, it is essential to understand the two primary error types: Network Errors and GraphQL Errors.
- Network Errors: These errors occur when there is a problem connecting to the server, such as a lost internet connection or a server-side issue. In such cases, the response from the server will not contain any data.
- GraphQL Errors: These errors arise when the server successfully processes the request but encounters issues while executing the query or mutation. In this case, the server will return a response with an
errorsarray containing detailed information about each error.
Redux Toolkit and Error Management
Redux Toolkit, the official, opinionated, batteries-included toolset for Redux, simplifies and streamlines state management in your applications. Error management in Redux Toolkit involves creating custom middleware, handling asynchronous errors with Redux Thunk, and defining error actions and reducers. By incorporating these tools and techniques, you can maintain a centralized error management system that keeps your application resilient and easy to maintain.
Understanding these fundamental concepts in React, GraphQL, and Redux Toolkit will serve as a strong foundation for implementing best practices and techniques for error handling in your web applications. In the following sections, we will explore these techniques in greater detail and provide practical examples to help you grasp the concepts more effectively.
Setting up the Environment
Before diving into the error handling techniques for React applications with GraphQL and Redux Toolkit, it is crucial to set up your development environment correctly. In this section, we will guide you through installing the required dependencies and creating an optimal project structure to kickstart your error handling journey.
Installing Required Dependencies
To begin, make sure you have Node.js and npm (Node Package Manager) installed on your system. Once you have them set up, create a new React project using the Create React App command-line tool:
npx create-react-app error-handling-demo
Next, navigate to the newly created project directory and install the following dependencies:
cd error-handling-demo
npm install @apollo/client graphql reduxjs/toolkit react-redux @reduxjs/toolkit
These dependencies include:
@apollo/client: A comprehensive state management library for JavaScript that enables you to manage both local and remote data with GraphQL.graphql: A runtime for executing GraphQL queries.reduxjs/toolkit: The official, opinionated, batteries-included toolset for Redux.react-redux: Official React bindings for Redux.@reduxjs/toolkit: A package containing useful utilities for working with Redux.
Project Structure and Boilerplate
Organizing your project structure efficiently is crucial for maintaining your codebase as it grows. Here’s a suggested project structure for a React application with GraphQL and Redux Toolkit:

components: Contains your React components.error-boundaries: Houses your custom Error Boundary components.graphql: Includes GraphQL queries, mutations, and any other related files.redux: Contains Redux-related files, such as actions, reducers, and the store configuration.
Once you have set up the project structure, you can create the necessary boilerplate code for the Redux store and Apollo Client in the src/index.js file. This will allow you to start implementing the error handling techniques discussed in the following sections.
With your development environment correctly set up, you are now ready to explore the best practices and techniques for error handling in React applications using GraphQL and Redux Toolkit. The following sections will guide you through practical examples and in-depth explanations, helping you build robust and maintainable web applications.
Implementing Error Handling with Error Boundaries in React
In this section, we will explore how to implement error handling in your React applications using Error Boundaries. Error Boundaries are an essential feature that helps catch JavaScript errors in your component tree and display a fallback UI, ensuring that your application remains resilient and user-friendly. We will walk you through creating a custom Error Boundary component and demonstrate how to use it in your React components.
Creating Custom Error Boundary Component
To create a custom Error Boundary component, you need to define a class component that extends React.Component and includes the componentDidCatch() lifecycle method. This method catches errors that occur in the component tree and allows you to take appropriate action, such as logging the error or updating the component’s state. Here’s an example of a custom Error Boundary component:
import React from 'react';

class CustomErrorBoundary extends React.Component {
  constructor(props) {
    super(props);
    this.state = { hasError: false, errorInfo: null };
  }

  componentDidCatch(error, info) {
    this.setState({ hasError: true, errorInfo: info });
    // Log the error and info for further analysis
    console.error('ErrorBoundary caught an error:', error, info);
  }

  render() {
    if (this.state.hasError) {
      return (
        <div>
          <h1>An error has occurred. Please try again.</h1>
          {/* Optionally, display additional error information */}
          <details>
            <summary>Click for more details</summary>
            {this.state.errorInfo && this.state.errorInfo.componentStack.toString()}
          </details>
        </div>
      );
    }
    return this.props.children;
  }
}

export default CustomErrorBoundary;
Usage in React Components
After creating your custom Error Boundary component, you can easily use it in your React components to catch errors and display a fallback UI. To do this, simply wrap your components with the Error Boundary component like this:
import React from 'react';
import CustomErrorBoundary from './error-boundaries/CustomErrorBoundary';
import MyComponent from './components/MyComponent';

function App() {
  return (
    <div className="App">
      <CustomErrorBoundary>
        <MyComponent />
      </CustomErrorBoundary>
    </div>
  );
}

export default App;
With this implementation, if an error occurs within the MyComponent tree, the CustomErrorBoundary will catch the error and display the fallback UI, preventing the entire application from crashing.
In conclusion, implementing Error Boundaries in React is a powerful technique for handling JavaScript errors in your application. By creating custom Error Boundary components and wrapping your components with them, you can provide a more resilient and user-friendly experience. The following sections will explore additional error handling techniques using GraphQL and Redux Toolkit to further enhance your application’s error management capabilities.
GraphQL Error Handling Techniques
Handling errors effectively in GraphQL is essential for creating resilient web applications. In this section, we will discuss the differences between Network Errors and GraphQL Errors, demonstrate how to handle GraphQL errors using the Apollo Client, and explore the use of custom Error Links for more fine-grained error management.
Network Errors vs. GraphQL Errors
When working with GraphQL, it’s crucial to understand the two primary error types:
- Network Errors: These errors occur when there’s a problem connecting to the server, such as a lost internet connection or a server-side issue. In these cases, the response from the server will not contain any data.
- GraphQL Errors: These errors arise when the server successfully processes the request but encounters issues while executing the query or mutation. In this case, the server will return a response with an
errorsarray containing detailed information about each error.
Differentiating between these error types is vital for implementing effective error handling strategies in your GraphQL-based applications.
Handling GraphQL Errors in Apollo Client
Apollo Client is a comprehensive state management library that makes it easy to manage both local and remote data with GraphQL. By default, the Apollo Client catches GraphQL errors and includes them in the error object of the query or mutation result. You can handle these errors by checking the error object and taking appropriate action, such as displaying an error message or logging the error details. Here’s an example of handling GraphQL errors in a query using the useQuery hook from Apollo Client:
import { useQuery } from '@apollo/client';
import { GET_DATA } from '../graphql/queries';

function MyComponent() {
  const { loading, error, data } = useQuery(GET_DATA);

  if (loading) return <p>Loading...</p>;
  if (error) {
    console.error('GraphQL error:', error);
    return <p>An error occurred while fetching data. Please try again.</p>;
  }

  return (
    <div>
      {/* Render data */}
    </div>
  );
}
Custom Error Link in Apollo Client
For more fine-grained control over error handling, you can create a custom Error Link in Apollo Client. Error Links allow you to intercept errors returned by your GraphQL server, giving you the opportunity to perform additional actions like logging errors or retrying requests. To create a custom Error Link, use the onError function from the @apollo/client/link/error package:
import { onError } from '@apollo/client/link/error';

const customErrorLink = onError(({ graphQLErrors, networkError }) => {
  if (graphQLErrors) {
    graphQLErrors.forEach(({ message, locations, path }) =>
      console.error(
        `[GraphQL error]: Message: ${message}, Location: ${locations}, Path: ${path}`
      )
    );
  }

  if (networkError) {
    console.error(`[Network error]: ${networkError}`);
    // Optionally, retry the request or handle the network error
  }
});
After creating your custom Error Link, include it in your Apollo Client configuration:
import { ApolloClient, InMemoryCache, HttpLink } from '@apollo/client';
import { customErrorLink } from './customErrorLink';

const httpLink = new HttpLink({ uri: 'https://your-graphql-server.com/graphql' });

const client = new ApolloClient({
  link: customErrorLink.concat(httpLink),
  cache: new InMemoryCache(),
});
By implementing custom Error Links, you gain greater control over error handling in your Apollo Client-powered applications.
In summary, understanding and effectively managing Network Errors and GraphQL Errors is crucial for creating robust React applications with GraphQL. By handling errors in Apollo Client and utilizing custom Error Links, you can create a seamless and resilient user experience. These error handling techniques, combined with the Error Boundaries in React and error management in Redux Toolkit, equip you with a comprehensive toolkit for managing errors in modern web applications. In the following sections, we will explore how to manage errors using Redux Toolkit and integrate these error handling techniques across React, GraphQL, and Redux Toolkit to create a unified error management system.
Redux Toolkit Error Management
Managing errors effectively in Redux Toolkit is essential for creating maintainable and scalable web applications. In this section, we will discuss how to create custom middleware for error handling, handle asynchronous errors with Redux Thunk, and define error actions and reducers to centralize error management in your applications.
Creating Custom Middleware for Error Handling
Custom middleware allows you to intercept and process actions before they reach the reducer. This is particularly useful for handling errors centrally in your application. To create custom middleware for error handling, define a middleware function that checks for specific error actions or error properties in actions:
const errorHandlingMiddleware = (store) => (next) => (action) => {
  if (action.type.includes('error')) {
    console.error('An error has occurred:', action.payload);
    // Perform additional error handling tasks if necessary
  }
  return next(action);
};
To include the custom middleware in your Redux store configuration, use the configureStore function from Redux Toolkit:
import { configureStore } from '@reduxjs/toolkit';
import rootReducer from './reducers';
import errorHandlingMiddleware from './errorHandlingMiddleware';

const store = configureStore({
  reducer: rootReducer,
  middleware: (getDefaultMiddleware) =>
    getDefaultMiddleware().concat(errorHandlingMiddleware),
});

export default store;
Handling Asynchronous Errors with Redux Thunk
Redux Thunk is a middleware that allows you to write action creators that return a function instead of an action object. This is particularly useful for handling asynchronous actions and associated errors. To handle asynchronous errors with Redux Thunk, you can catch errors in your asynchronous action creators and dispatch error actions accordingly:
import { createAsyncThunk } from '@reduxjs/toolkit';
import { fetchData } from '../api';

export const fetchUser = createAsyncThunk('user/fetch', async (userId, { rejectWithValue }) => {
  try {
    const response = await fetchData(userId);
    return response.data;
  } catch (error) {
    console.error('Error fetching user:', error);
    return rejectWithValue(error.message);
  }
});
Error Actions and Reducers
In Redux Toolkit, you can define error actions and reducers to centralize error handling in your application. Using the createSlice function, you can create a slice of the state that is responsible for handling errors and define the appropriate reducers:
import { createSlice } from '@reduxjs/toolkit';
import { fetchUser } from '../actions/userActions';

const errorSlice = createSlice({
  name: 'error',
  initialState: {
    message: null,
  },
  extraReducers: (builder) => {
    builder.addCase(fetchUser.rejected, (state, action) => {
      state.message = action.payload;
    });
  },
});

export default errorSlice.reducer;
With this implementation, any error that occurs during the fetchUser action will update the error state in your Redux store, making it easy to display error messages or perform other error handling tasks in your components.
In conclusion, Redux Toolkit provides powerful tools for managing errors in your applications. By creating custom middleware, handling asynchronous errors with Redux Thunk, and defining error actions and reducers, you can create a centralized error management system that is both efficient and maintainable. Integrating these techniques with the error handling strategies in React and GraphQL will help you build robust, resilient, and user-friendly web applications.
Integrating Error Handling Techniques
To create robust and resilient web applications, it’s crucial to integrate the error handling techniques discussed in previous sections. In this part, we will explore how to combine React Error Boundaries with GraphQL Errors and manage errors using Redux Toolkit and GraphQL together.
Combining React Error Boundaries with GraphQL Errors
When using React Error Boundaries in combination with GraphQL, it’s essential to propagate GraphQL errors up to the Error Boundary component. You can do this by throwing an error in your React components if a GraphQL error occurs. This way, the Error Boundary can catch and handle the error accordingly. Here’s an example of how to combine React Error Boundaries with GraphQL Errors:
import React from 'react';
import { useQuery } from '@apollo/client';
import { GET_DATA } from '../graphql/queries';
import CustomErrorBoundary from './error-boundaries/CustomErrorBoundary';

function MyComponent() {
  const { loading, error, data } = useQuery(GET_DATA);

  if (loading) return <p>Loading...</p>;
  if (error) {
    throw new Error('A GraphQL error has occurred');
  }

  return (
    <div>
      {/* Render data */}
    </div>
  );
}

function App() {
  return (
    <div className="App">
      <CustomErrorBoundary>
        <MyComponent />
      </CustomErrorBoundary>
    </div>
  );
}

export default App;
Error Handling with Redux Toolkit and GraphQL
Integrating Redux Toolkit with GraphQL error handling involves dispatching error actions in your Redux Thunk asynchronous action creators when a GraphQL error occurs. This allows you to centralize error management and maintain a single source of truth for error handling. Here’s an example of how to handle errors using Redux Toolkit and GraphQL:
import { createAsyncThunk } from '@reduxjs/toolkit';
import { useMutation } from '@apollo/client';
import { UPDATE_DATA } from '../graphql/mutations';

export const updateData = createAsyncThunk('data/update', async (input, { rejectWithValue }) => {
  try {
    const response = await useMutation(UPDATE_DATA, { variables: { input } });
    return response.data;
  } catch (error) {
    console.error('GraphQL error:', error);
    return rejectWithValue(error.message);
  }
});
In your reducer, handle the error case by updating the error state:
import { createSlice } from '@reduxjs/toolkit';
import { updateData } from '../actions/dataActions';

const errorSlice = createSlice({
  name: 'error',
  initialState: {
    message: null,
  },
  extraReducers: (builder) => {
    builder.addCase(updateData.rejected, (state, action) => {
      state.message = action.payload;
    });
  },
});

export default errorSlice.reducer;
By integrating these error handling techniques, you can create a unified and robust error management system in your React applications with GraphQL and Redux Toolkit. This comprehensive approach to error handling ensures that your applications remain resilient, maintainable, and user-friendly, providing an enhanced user experience in the face of inevitable errors.
Best Practices and Tips
When it comes to handling errors in your React applications with GraphQL and Redux Toolkit, following best practices and implementing useful tips can make a significant difference. In this section, we will discuss how to provide user-friendly error messages, centralize error management, and implement error monitoring and logging.
Providing User-friendly Error Messages
User-friendly error messages are essential for enhancing user experience and guiding users through issues that may arise while using your application. Ensure that your error messages are clear, concise, and informative, helping users understand what went wrong and, if possible, how to fix the issue. You can display error messages using UI components such as alerts, toasts, or modals:
import React from 'react';
import { useSelector } from 'react-redux';

function ErrorMessage() {
  const errorMessage = useSelector((state) => state.error.message);

  if (!errorMessage) {
    return null;
  }

  return (
    <div className="error-message">
      <p>{errorMessage}</p>
    </div>
  );
}

export default ErrorMessage;
Centralizing Error Management
Centralizing error management ensures that your application’s error handling is consistent and maintainable. By using React Error Boundaries, custom middleware in Redux Toolkit, and error actions and reducers, you can create a centralized error handling system. This approach allows you to handle errors consistently across your application, making it easier to maintain and update your error handling logic.
Error Monitoring and Logging
Monitoring and logging errors in your application are crucial for diagnosing and fixing issues that may arise in production. Implement error monitoring and logging tools like Sentry, LogRocket, or Rollbar to capture and analyze errors in real-time. These tools can help you track errors, identify patterns, and improve your application’s stability and performance.
For example, to set up Sentry for your React application, install the required dependencies:
npm install --save @sentry/react @sentry/tracing
Then, configure Sentry in your application:
import React from 'react';
import ReactDOM from 'react-dom';
import * as Sentry from '@sentry/react';
import { Integrations } from '@sentry/tracing';

import App from './App';

Sentry.init({
  dsn: 'your_sentry_dsn',
  integrations: [new Integrations.BrowserTracing()],
  tracesSampleRate: 1.0,
});

ReactDOM.render(
  <React.StrictMode>
    <App />
  </React.StrictMode>,
  document.getElementById('root')
);
By following these best practices and tips, you can create a robust error handling system for your React applications with GraphQL and Redux Toolkit. Providing user-friendly error messages, centralizing error management, and implementing error monitoring and logging will contribute to an enhanced user experience and improved application stability.
Conclusion
In this blog post, we explored various error handling techniques and best practices for React applications using GraphQL and Redux Toolkit. To recap the key takeaways:
- React Error Boundaries help to catch and handle errors in components, ensuring a seamless user experience.
- GraphQL provides a clear distinction between network errors and GraphQL errors, allowing for targeted error handling.
- Redux Toolkit enables centralized error management through custom middleware, asynchronous error handling using Redux Thunk, and error actions and reducers.
By integrating these techniques, you can create a comprehensive error management system that enhances the resilience and maintainability of your web applications.
Furthermore, we discussed best practices and tips, such as providing user-friendly error messages, centralizing error management, and implementing error monitoring and logging. These practices contribute to an improved user experience and application stability.
We encourage you to explore these error handling techniques further and continuously look for ways to improve your React applications with GraphQL and Redux Toolkit. As web development continues to evolve, staying up-to-date with best practices and refining your error handling strategies will be essential for building successful, user-friendly applications.
I have an asynchronous function in my redux actions and it returns an object like this in my reducer:
{
user: {},
fetching: false,
fetched, false,
error: null
}
So basically when I start calling the asynchronous function I update the redux state to fetching: true and if the result is successfully fulfilled then fetched:true and fetching:false
So I map the redux state to props using connect in react-redux and I added this in my component’s render function:
if(this.props.fetched) {
  // Go to next page
}
And it automatically goes to the next page once the data is fetched.
However, I have a problem with my error handling. When error changes from null to error then how do I handle the error handling on my react component. What I have right now is:
if(this.props.error != null) {
   // popup error
}
But now I end up in a situation that next time I call my action it already has this.props.error assigned to an error and its not null which results it displaying the popup even if there is no error.
Do I have to reset my error everytime it is displayed or is there any better practice of doing this whole thing?
I would say that neither of your initial ideas capture the whole picture. Idea 1 is just a callback. If you want to use a callback: useCallback. Idea 2 will work and is preferable if you don’t need to use redux. Sometimes you’re better off using redux. Maybe you’re setting form validity by checking none of the input fields have errors or something similar. Since we’re on the topic of redux, let’s assume that’s the case.
Usually the best approach to error handling with redux is to have an error field in state that is then passed to an error component.
const ExampleErrorComponent= () => {
  const error = useSelector(selectError);
  if (!error) return null;
  return <div className="error-message">{error}</div>;
}
The error component doesn’t have to just display an error, it could also do side effects with useEffect.
How the error is set/unset depends on your application. Let’s use your phone number example.
1. If the validity check is a pure function, it can be done in the reducer.
You would then set or unset the error field in response to phone number change actions. In a reducer built with a switch statement it could look like this.
case 'PHONE_NUMBER_CHANGE':
  return {
    ...state,
    phoneNumber: action.phoneNumber,
    error: isValidPhoneNumber(action.phoneNumber) ? undefined : 'Invalid phone number',
  };
2. If errors are reported by the backend, dispatch error actions.
Let’s say you’re sending the phone number to a backend that does validation before it does something with the number. You can’t know if the data is valid on the client side. You’ll just have to take the server’s word for it.
const handleSubmit = useCallback(
  () => sendPhoneNumber(phoneNumber)
    .then(response => dispatch({
      type: 'PHONE_NUMBER_SUBMISSION_SUCCESS',
      response,
    }))
    .catch(error => dispatch({
      type: 'PHONE_NUMBER_SUBMISSION_FAILURE',
      error,
    })),
  [dispatch, phoneNumber],
);
The reducer should then come up with an appropriate message for the error and set it.
Don’t forget to unset the error. You can unset the error on a change action or when making another request depending on the application.
The two approaches I outlined are not mutually exclusive. You can use the first to display locally detectable errors and also use the second to display server side or network errors.
Redux powers our global state at FireHydrant, one of the things we use most heavily is the ability to let redux store our API errors to handle failure states on the UI. Outside of showing error states, properly handling errors keeps your application up and running. Nothing is worse than getting a page because your application didn’t properly handle an API error response and crashed your entire React app.
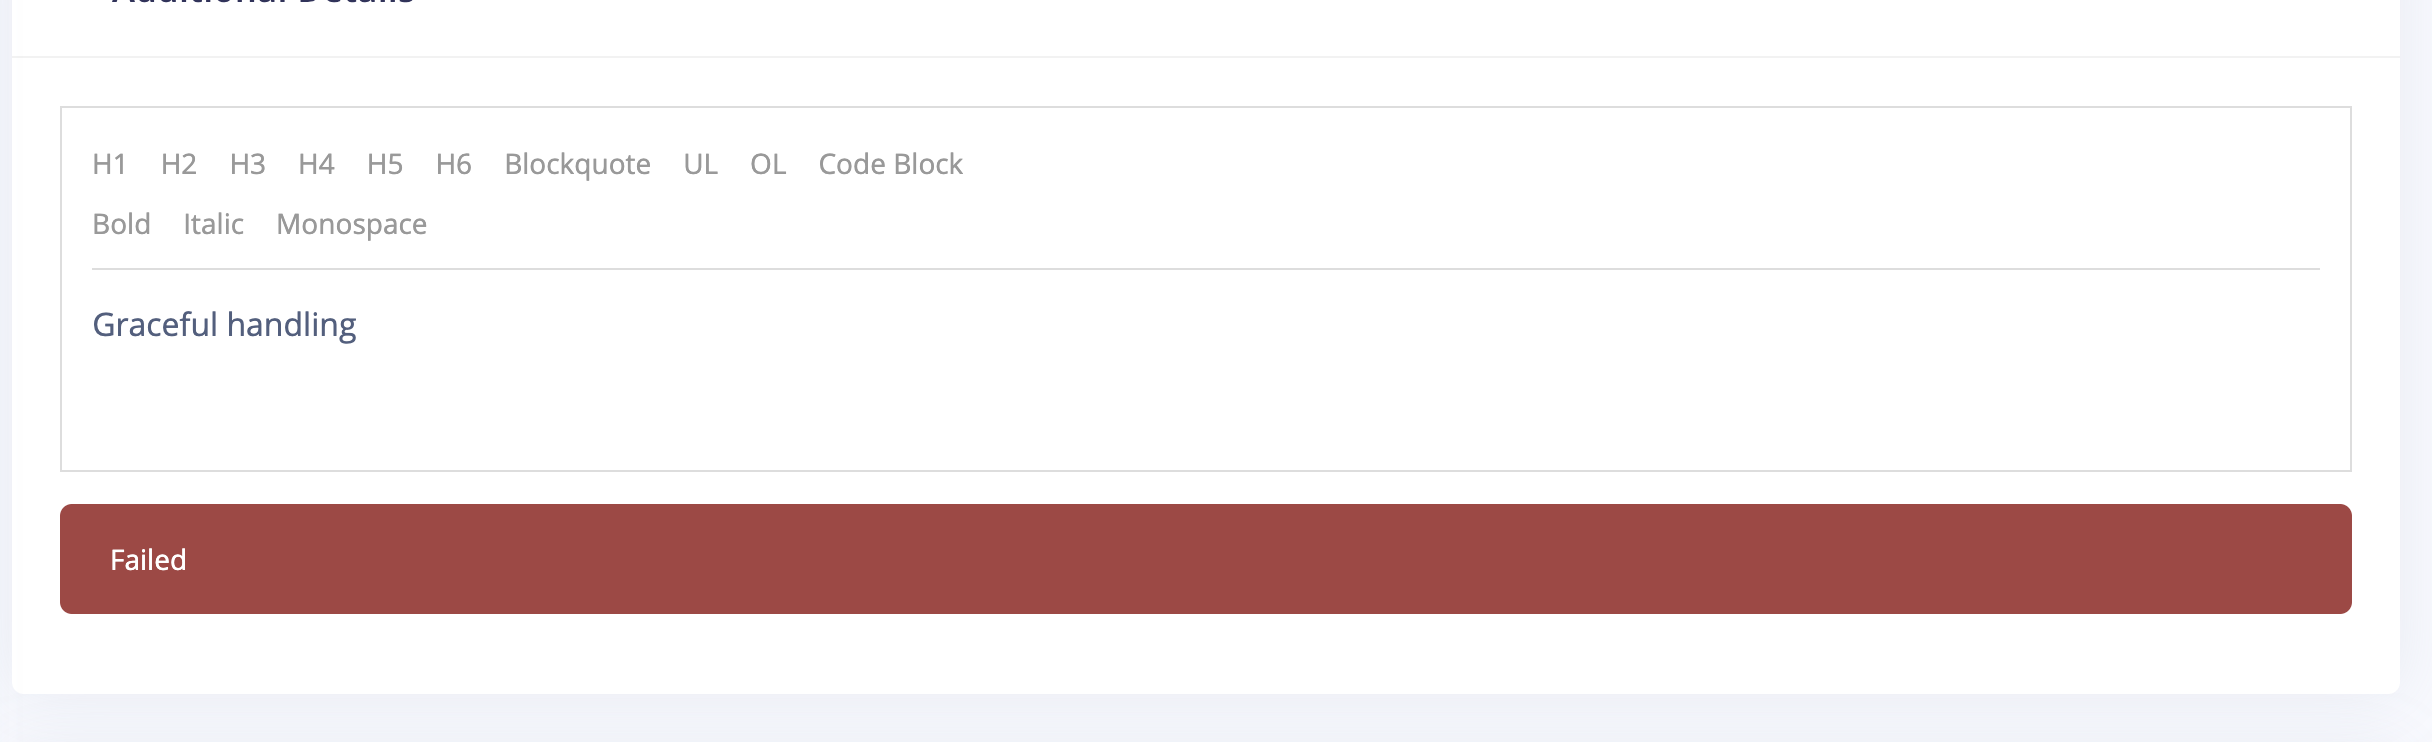
What we will end up with
In this post, we will build a component that wraps a version of draft-js, a rich text editor component, along with bootstrap alerts that appear when the content saves and fails to save.
We will go through the state and reducer, actions, and the component that uses the error state.
State and reducer needs
Our state needs here are simple, all we need are `error` and `data` to capture all of the states we need for this component.
const initialState = {
  error: null,
  data: null,
};
Again the reducers are very simple, we just need to modify two fields so we handle each of those states.
case UPDATE_ADDITIONAL_DETAILS_SUCCESS:
  newState = {
	data: action.data,
	error: null,
  };
  return Object.assign({}, state, newState);
case UPDATE_ADDITIONAL_DETAILS_ERROR:
  newState = {
	error: action.error,
  };
  return Object.assign({}, state, newState);
Actions
Actions are where the real meat of this logic comes into play. Since these are API calls, this action is being run with redux thunk for async dispatching.
// Additional Details
export const updateAdditionalDetails = data => dispatch => {
  return new Promise((resolve, reject) => {
	axios.patch('additional_details', { data })
	  .then(response => {
		dispatch(updateAdditionalDetailsSuccess(response.data));
		resolve();
	  })
	  .catch(err => {
		dispatch(updateAdditionalDetailsError(err.response));
		reject();
	  });
  });
};
By wrapping the axios request in a Promise, we now have the ability to call additional functions on the success or failure of the API request from the component that is calling them. This is something that has a lot of benefits for creating side effects in the parent component which we will look at in the next section. We’re also calling our traditional redux actions here. This is also the first error handling step, we’re catching the bad API response, keeping the app up and running. However, we’re rejecting that Promise so we also need to catch from the function that is calling this action to prevent an UnhandledPromiseRejectionWarning.
These are the actions interacting with the reducer.
export const UPDATE_ADDITIONAL_DETAILS_SUCCESS = 'UPDATE_ADDITIONAL_DETAILS_SUCCESS';
export const updateAdditionalDetailsSuccess = data => ({
  type: UPDATE_ADDITIONAL_DETAILS_SUCCESS,
  data,
});
export const UPDATE_ADDITIONAL_DETAILS_ERROR = 'UPDATE_ADDITIONAL_DETAILS_ERROR';
export const updateAdditionalDetailsError = error => ({
  type: UPDATE_ADDITIONAL_DETAILS_ERROR,
  error,
});
Using error state in the component
Now that your handling our error in our store, let’s look at how this error is managed in the actual component. This Freeform component has an editor and two Alert reactstrap components wrapped in Fade components for proper animation. As the editor calls its onChange handler it dispatches the action to submit to the API. Once the axios request completes it will call fadeIn to modify the state and fade in the proper Alert and then fade it out 3 seconds later.
export class Freeform extends React.Component {
  constructor(props) {
	super(props);
	this.state = { success: false, danger: false };
  }

  fadeIn = type => {
	this.setState({ [type]: true });
	setTimeout(() => {
	  this.setState({ [type]: false });
	}, 3000);
  }

  handleChange = value => {
	const { dispatchUpdateReportAdditionalDetails } = this.props;
	dispatchUpdateReportAdditionalDetails(postmortemReportId, data).then(() => this.fadeIn('success')).catch(() => this.fadeIn('danger'));
  }

  render() {
	const { error } = this.props;
	const { success, danger } = this.state;
	return (
		  <Editor onChange={this.handleChange} />
		  <div className="mt-3">
			<Fade in={success} mountOnEnter unmountOnExit>
			  <Alert color="success">Saved</Alert>
			</Fade>
			<Fade in={danger} mountOnEnter unmountOnExit>
			  <Alert color="danger">{`Failed: ${error}`}</Alert>
			</Fade>
		  </div>
	);
  }
}

const mapStateToProps = state => ({
  error: state.error,
})

const mapDispatchToProps = dispatch => ({
  dispatchUpdateReportAdditionalDetails: data => dispatch(updateAdditionalDetails(data)),
});
Error handling is something that you are most likely already doing. Wrapping errors in this way let you hook into more powerful side effect generation and graceful states. Don’t force your team to wake up from a page that is caused because your application failed when a single API returned an error.
You just got paged. Now what?
FireHydrant helps every team master incident response with straightforward processes that build trust and make communication easy.
Learn How