NV9 USB Manual Set – Section 2
2.2
The NV9 USB Validator has inbuilt fault detection facilities. If there is a configuration
or other error the NV9 USB front bezel will flash in a particular sequence; a summary
of the Bezel Flash Codes for the NV9 USB is shown below:
Flashes
Long
Short
0
1
3
4
Copyright © Innovative Technology Ltd 2012
Indicated Error
0
None
2
Note path jam
3
Unit not initialised
4
Internal sensor
unable to calibrate
1
Firmware checksum
error
2
Interface checksum
error or unable to
set programmed
interface
3
EEPROM checksum
error
4
Dataset checksum
error
1
Power supply too
low
2
Power supply too
high
Comments
Remove obstruction and
follow the cleaning
procedure in subsection 2.1
of this manual
Contact ITL technical
support
Ensure note path is firmly
closed, then cycle the
power to the unit. If the
problem persists contact ITL
technical support
Download new firmware
Check power supply
9
GA00550-2
- Page 1
Doc: NV9 Range User Manual Version: 1.0… -
Page 2: Table Of Contents
Re-programming ……………………… 18 ……………………….19 EZEL OUNTING 4.2.1 Bezel Fitting ……………………….19 4.2.2 Bezel Removal ……………………..19 ……………………….20 ASHBOX OUNTING 4.3.1 Cashbox Fitting ……………………..20 4.3.2 Cashbox Removal ………………………21 Copyright © Innovative Technology Ltd 2018 Doc: NV9 Range User Manual Version: 1.0 Page 1 of 63…
- Page 3
IF5 Interface ………………………40 …………………………41 ARALLEL 6.7.1 General Description ……………………41 6.7.2 Pinout ………………………..41 6.7.3 Inhibit Control ……………………..42 6.7.4 Escrow Control……………………..42 6.7.5 Busy Control ………………………42 Copyright © Innovative Technology Ltd 2018 Doc: NV9 Range User Manual Version: 1.0 Page 2 of 63… - Page 4
RUSTED 11.7 ………………………60 SCROW ONTROL 11.7.1 Escrow Timing Diagram………………….61 11.8 ………………….61 OWER IMING IAGRAM 11.9 ………………….62 ONFIGURATION UTTON UNCTIONS 11.10 ……………………62 AMING ONVENTION Copyright © Innovative Technology Ltd 2018 Doc: NV9 Range User Manual Version: 1.0 Page 3 of 63… - Page 5
<< Back to Contents 11.11 ………………..63 ROGRAMMING VIA ONFIGURATION Copyright © Innovative Technology Ltd 2018 Doc: NV9 Range User Manual Version: 1.0 Page 4 of 63… -
Page 6: Document Introduction
Authorized Reseller, and extending for the length of time stipulated by Innovative Technology Ltd. A list of Innovative Technology Ltd offices can be found in every section of this manual set. If the product proves defective within the applicable warranty period, Innovative Technology Ltd will repair or replace the product.
-
Page 7: Product Safety Information
In no event will Innovative Technology Ltd be liable for any damages, including loss of profits, cost of cover or other incidental, consequential or indirect damages arising out the installation, maintenance, use, performance, failure or interruption of an Innovative Technology Ltd product, however caused.
- Page 8
Napájecí svorky a/nebo konektory: Nejsou sledované pro externí kabeláž • Sledovaný stupeň znečištění je: 2 • Následující krytí konečného produktu jsou požadované: Mechanické, Protipožární Copyright © Innovative Technology Ltd 2018 Doc: NV9 Range User Manual Version: 1.0 Page 7 of 63… -
Page 9: Product Introduction
2 PRODUCT INTRODUCTION 2.1 General Description The NV9 range are versatile banknote validators with cashbox and bezel options to suit all applications, boasting enhanced sensing technology and a high acceptance rate for multi- currency. The units can be mounted horizontally or vertically and exceptional field reliability make them a truly global product range.
- Page 10
<< Back to Contents NV11+ NV12+ Copyright © Innovative Technology Ltd 2018 Doc: NV9 Range User Manual Version: 1.0 Page 9 of 63… -
Page 11: Bezel Options
PA00985 NV9USB Facia Long nv11-spares/nv9-usb-facia-long-detail 2.6 Cashbox Options ITL Part Number Description Details http://www.innovative- PA00185 NV9 USB 300 Clip On Cashbox technology.com/shop/bezels/nv9-300-clip-on- cashbox-detail http://www.innovative- PA00186 NV9 USB 300 Lockable Cashbox technology.com/shop/bezels/nv9-300-lockable- cashbox-detail http://www.innovative- PA00192 NV9 USB 300 Slide Cashbox technology.com/shop/bezels/nv9-300-slide-…
-
Page 12: Technical Data
<< Back to Contents 3 TECHNICAL DATA 3.1 Dimensions Note: If required, IGES 3D models are available on request from ITL technical support; support@innovative-technology.com Copyright © Innovative Technology Ltd 2018 Doc: NV9 Range User Manual Version: 1.0 Page 11 of 63…
-
Page 13: Weight(S)
NV9 300 slide with bezel – 1.86kg NV9 600 clip with bezel – 1.72kg NV9 600 slide with bezel – 2.14kg NV11 NV9 300 clip with bezel + note float – 2.22kg NV12 NV9 300 clip with bezel + NVR-280 printer – 2.2kg 3.3 Environmental Requirements…
-
Page 14: Power Supply Guidance
5.0 A 3.4.3 Power Supply Guidance The NV9 Range of products require a stable 12V DC power supply. Please check the power requirements of your host machine and other peripherals to dimension a suitable power environment for your machine setup.
-
Page 15: Media Requirements
The NV9 range supports multiple currencies and denominations as per the specifications detailed in the table above. Furthermore polymer and windowed notes are in use in a number of countries and so are already fully supported on the NV9 range of validators.
-
Page 16: Barcode Requirements
This space should be 10mm. Positioning The barcode itself should be centred along the width (D) on the ticket. Copyright © Innovative Technology Ltd 2018 Doc: NV9 Range User Manual Version: 1.0 Page 15 of 63…
- Page 17
Narrow Bar Width Maximum: 0.6mm W:N Ratio 90mm to 166mm Number of Characters Minimum: 6 Minimum 10mm Maximum: 24 Barcode must be centred Minimum 10mm Copyright © Innovative Technology Ltd 2018 Doc: NV9 Range User Manual Version: 1.0 Page 16 of 63… -
Page 18: Mechanical Installation
The NV11+ and NV12+ have the same space envelope so swapping the recycler for the printer will not require any mechanical adjustments. Innovative Technology Ltd. has a policy of continuous product improvement. Due to design changes, older model or product bezels (and cashboxes) may not be compatible with the current NV9USB+.
-
Page 19: Power Supply
4.1.2 Software Compatibility 4.1.2.1 Interface Protocols When using the NV9 range of products as a fitting replacement for an older model or product some events such like credits may be given earlier. This is due to improved firmware routines and faster motors being used. This may cause missing events such like credits in those host machines where timeouts are defined for the older model or product.
-
Page 20: Bezel Mounting
(2). 2. Lift Bezel Now bezel is free of locating lugs, lift bezel upwards (3). Copyright © Innovative Technology Ltd 2018 Doc: NV9 Range User Manual Version: 1.0 Page 19 of 63…
-
Page 21: Cashbox Mounting
2. Clip-on Cashbox The clip-on cashbox attaches directly to the validator and is identical to the process above. Copyright © Innovative Technology Ltd 2018 Doc: NV9 Range User Manual Version: 1.0 Page 20 of 63…
-
Page 22: Cashbox Removal
Simply slide the cashbox back so that the locating tabs are no longer locked in position. You can then pull cashbox away from unit. Copyright © Innovative Technology Ltd 2018 Doc: NV9 Range User Manual Version: 1.0 Page 21 of 63…
-
Page 23: Lock Mounting
<< Back to Contents 4.4 Lock Mounting The NV9 range has an option for a 300-lockable cashbox. This is designed for a 300- slide cashbox option. ITL Part Number: PA00186 Webshop link: https://innovative-technology.com/shop/nv9-a-nv11-spares/nv9-300- lockable-cashbox-detail Details on the locking position can be found below.
-
Page 24: Lock Specifications
<< Back to Contents 4.4.2 Lock Specifications Locks for the NV9 range cashbox are available from Innovative Technology Ltd. ITL Part Number: PA00650 Webshop Link: http://innovative-technology.com/shop/nv200-spares/lock-detail Please note: PA00650 is a universal lock across a number of our products therefore the website may stock it under a different product’s spare list.
-
Page 25: Machine Mounting
4.5.2 Earth Bonding It is very important that the NV9USB+ is properly bonded to earth. Lack of proper bonding can cause communication issues and other failures. Copyright © Innovative Technology Ltd 2018 Doc: NV9 Range User Manual Version: 1.0 Page 24 of 63…
-
Page 26: Software Installation And Configuration
For detailed instructions please refer to the relevant manual package supplied with the software or contact support@innovative-technology.com. 5.2 Software Downloads All software from Innovative Technology Ltd is free of charge and can be downloaded from the website www.innovative-technology.com/support/secure- download once registered and logged in.
-
Page 27: Hardware Setup
Connect the power supply to the DA2. Connect the USB cable to the DA2 and to your computer or laptop. Connect the Ribbon cable from the DA2 to the validator. Direct USB: Copyright © Innovative Technology Ltd 2018 Doc: NV9 Range User Manual Version: 1.0…
-
Page 28: Switching To Programming Mode (Ssp)
<< Back to Contents Please note: the connection methods are identical between NV9 and NV11 products. NV12: 5.4.1.4 Switching to Programming Mode (SSP) Before programming via Validator Manager, the device needs to be switched to its programming mode (SSP interface). Please refer to Appendix 11.5…
-
Page 29: Da3
DA3. Once programmed the user can update or override existing software as well as test the functionality of the validator, away from the host machine. Copyright © Innovative Technology Ltd 2018 Doc: NV9 Range User Manual Version: 1.0…
-
Page 30: System Requirements
Once the download has begun, you will see the blue LED’s start to swirl and will continue to do so until download is complete. Copyright © Innovative Technology Ltd 2018 Doc: NV9 Range User Manual Version: 1.0…
-
Page 31: Smart Update Da3
5.4.3 Remote Updates 5.4.3.1 General Description The NV9 range of products all support remote update, which is the ability to send an update file via protocol commands. This means that you do not physically have to be stood at the machine, as the host initiates the download via the protocol.
-
Page 32: Configuration Card
Full instructions on programming via the configuration card can be found in Appendix 11.11 Copyright © Innovative Technology Ltd 2018 Doc: NV9 Range User Manual Version: 1.0 Page 31 of 63…
-
Page 33: Protocols And Interfacing
<< Back to Contents 6 PROTOCOLS AND INTERFACING 6.1 Introduction The NV9 range supports standard industry protocols. Interfaces that are not listed may be available upon request. For any queries regarding interfaces that are not listed please contact support@innovative-technology.com. Caution!
-
Page 34: Setup Examples
USB connections. 6.2.3 Setup Examples The drawings below highlights how to connect the NV9 range to an SSP or eSSP host machine using available cables and interfaces from Innovative Technology Ltd. For cable drawings please refer to Appendix 11.1.
- Page 35
SMART Payout to NV200 Adapter technology.com/shop/cables/smart- payout-to-nv200-adaptor-detail http://www.innovative- Cable CN00214 USB Type A to B technology.com/shop/cables/usb-a-to-b- cable-assembly-detail http://www.innovative- Interface IF17 TTL to USB Converter technology.com/shop/accessories/if17- interface-converter-detail Copyright © Innovative Technology Ltd 2018 Doc: NV9 Range User Manual Version: 1.0 Page 34 of 63… - Page 36
NVr-280 Cable technology.com/shop/cables/nvr280- cable-detail http://www.innovative- Cable CN00214 USB Type A to B technology.com/shop/cables/usb-a-to-b- cable-assembly-detail http://www.innovative- Interface IF17 TTL to USB Converter technology.com/shop/accessories/if17- interface-converter-detail Copyright © Innovative Technology Ltd 2018 Doc: NV9 Range User Manual Version: 1.0 Page 35 of 63… -
Page 37: Cctalk
+ Vin Power +12/24VDC Supply Power 0V Supply (GND) Caution! +12VDC and 0V (GND) must always be connected, also when using USB connections. Copyright © Innovative Technology Ltd 2018 Doc: NV9 Range User Manual Version: 1.0 Page 36 of 63…
-
Page 38: Cctalk Des Encryption
Trusted Mode maintaining security. The Trusted Mode can only be entered by a physical access to the validator. Please refer to Appendix 11.6 details. Copyright © Innovative Technology Ltd 2018 Doc: NV9 Range User Manual Version: 1.0 Page 37 of 63…
-
Page 39: General Description
+ Vin Power +12/24VDC Supply Power 0V Supply (GND) Caution! +12VDC and 0V (GND) must always be connected, also when using USB connections. Copyright © Innovative Technology Ltd 2018 Doc: NV9 Range User Manual Version: 1.0 Page 38 of 63…
-
Page 40: Sio And Si2
USB Data — USB Vcc Power USB Vcc (+5VDC) Factory Use Only Do not connect + Vin Power +12/24VDC Supply Power 0V Supply (GND) Copyright © Innovative Technology Ltd 2018 Doc: NV9 Range User Manual Version: 1.0 Page 39 of 63…
-
Page 41: Mdb
NV9USB+ of 12v +/- 10%. The IF5 drops this higher voltage down to the required level. Copyright © Innovative Technology Ltd 2018 Doc: NV9 Range User Manual Version: 1.0…
-
Page 42: Parallel
Data Not Used USB Vcc Power Not Used Factory Use Only Do not connect + Vin Power +12VDC Supply Power 0V Supply (GND) Copyright © Innovative Technology Ltd 2018 Doc: NV9 Range User Manual Version: 1.0 Page 41 of 63…
-
Page 43: Inhibit Control
(GND) the Master Inhibit is set and the validator is disabled. 6.7.4 Escrow Control The NV9 validator has a single note escrow facility. This allows the unit to hold onto the note once validated, and then only stack the note into a cashbox when the host machine confirms that the Vend operation has been completed.
-
Page 44: Binary
Inhibit 3 Input Inhibit Input Channel 3 Inhibit 4 Input Inhibit Input Channel 4 Busy Output Output Busy Signal Escrow Input Input Escrow Control Copyright © Innovative Technology Ltd 2018 Doc: NV9 Range User Manual Version: 1.0 Page 43 of 63…
-
Page 45: Inhibit Control
(GND) the Master Inhibit is set and the validator is disabled. 6.8.4 Escrow Control The NV9 validator has a single note escrow facility. This allows the unit to hold onto the note once validated, and then only stack the note into a cashbox when the host machine confirms that the Vend operation has been completed.
-
Page 46: Pulse
Data Not Used USB Vcc Power Not Used Factory Use Only Do not connect + Vin Power +12VDC Supply Power 0V Supply (GND) Copyright © Innovative Technology Ltd 2018 Doc: NV9 Range User Manual Version: 1.0 Page 45 of 63…
-
Page 47: Inhibit Control
(GND) the Master Inhibit is set and the validator is disabled. 6.9.4 Escrow Control The NV9 validator has a single note escrow facility. This allows the unit to hold onto the note once validated, and then only stack the note into a cashbox when the host machine confirms that the Vend operation has been completed.
-
Page 48: Routine Maintenance
7 ROUTINE MAINTENANCE 7.1 Introduction The NV9 range of products have been designed to minimise any performance variation over time. Much of this is achieved by careful hardware and software design. However, depending upon the environment the validator and/or its modules may at some time require cleaning, belt changing or note path clearing.
-
Page 49: First Level Support
Cash Box Jam Not applicable Not applicable Firmware Interface Checksum EEPROM Dataset Note Float Checksum Checksum Checksum Incompatable PSU too Low PSU too High Copyright © Innovative Technology Ltd 2018 Doc: NV9 Range User Manual Version: 1.0 Page 48 of 63…
-
Page 50: Status Led Flash Codes
8.3 Configuration Button The NV9USB+ and NV11+ both have a configuration button that has several functions available to the user. These are detailed below: Copyright © Innovative Technology Ltd 2018 Doc: NV9 Range User Manual Version: 1.0 Page 49 of 63…
-
Page 51: Dil Switches
When ON, the button can be held to print a test ticket. Safe Mode: Enables SSP with default settings When ON, upon powering the unit the printer head will start in SSP. Copyright © Innovative Technology Ltd 2018 Doc: NV9 Range User Manual Version: 1.0 Page 50 of 63…
-
Page 52: Second Level Support
9.2 Fault Finding Chart You can use the below chart as an aid, in order to help resolve a number of common issues you might experience. Copyright © Innovative Technology Ltd 2018 Doc: NV9 Range User Manual Version: 1.0 Page 51 of 63…
-
Page 53: Clearing A Jam
2. Open the Note Path Slide the red catch to the left (1) Lift up the top half of the unit (2) Copyright © Innovative Technology Ltd 2018 Doc: NV9 Range User Manual Version: 1.0 Page 52 of 63…
-
Page 54: Cleaning The Product(S)
2. Open the Note Path Slide the red catch to the left (1) Lift up the top half of the unit (2) Copyright © Innovative Technology Ltd 2018 Doc: NV9 Range User Manual Version: 1.0 Page 53 of 63…
-
Page 55: Printer Head
Use ethyl or isopropyl alcohol to clean the thermal printer. TIP: use the compressed air before using the alcohol or after it has dried. Copyright © Innovative Technology Ltd 2018 Doc: NV9 Range User Manual Version: 1.0 Page 54 of 63…
-
Page 56: Changing The Drive Belts
TIP: Pushing the drive wheels down into your desk, helps. Copyright © Innovative Technology Ltd 2018 Doc: NV9 Range User Manual Version: 1.0 Page 55 of 63…
-
Page 57: Clearing A Checksum Error
Please refer to our GA02037 — Software calibrate the validator, using the Guide for full instructions on how to use appropriate calibration paper ITL Diagnostics. (LB00149) Copyright © Innovative Technology Ltd 2018 Doc: NV9 Range User Manual Version: 1.0 Page 56 of 63…
-
Page 58: Compliances And Approvals
10 COMPLIANCES AND APPROVALS 10.1 EC Declaration of Conformity • RoHS • EN Directives • UL • REACH • WEEE • Central Bank Approvals Copyright © Innovative Technology Ltd 2018 Doc: NV9 Range User Manual Version: 1.0 Page 57 of 63…
-
Page 59: Appendix
• If SSP is needed, Press and hold red button until bezel light illuminates • As soon as the bezel illuminates, release button. • Unit will flicker, reset and start up again in SSP Copyright © Innovative Technology Ltd 2018 Doc: NV9 Range User Manual Version: 1.0…
-
Page 60: Cctalk Des Encryption — Trusted Mode
• If successful, the LED described above will be blinking. • The unit will remain in trusted mode for 30 seconds or until DES key has been exchanged. Copyright © Innovative Technology Ltd 2018 Doc: NV9 Range User Manual Version: 1.0 Page 59 of 63…
-
Page 61: Escrow Control
Hold Pin 10 High Note Rejects Check Credit Line/s No Response Pulse Received? in 30s Note Forcibly Credit Removed By Customer Hold Pin 10 Low Copyright © Innovative Technology Ltd 2018 Doc: NV9 Range User Manual Version: 1.0 Page 60 of 63…
-
Page 62: Escrow Timing Diagram
<< Back to Contents Caution! Only book the credit on the second Vend pulse! 11.7.1 Escrow Timing Diagram 11.8 Low Power Mode Timing Diagram Copyright © Innovative Technology Ltd 2018 Doc: NV9 Range User Manual Version: 1.0 Page 61 of 63…
-
Page 63: Configuration Button Functions
<< Back to Contents 11.9 Configuration Button Functions 11.10 File Naming Convention Copyright © Innovative Technology Ltd 2018 Doc: NV9 Range User Manual Version: 1.0 Page 62 of 63…
- Page 64
LEDs will flash at a fast rate while programming takes place. After completion of programming the validator will reset. Copyright © Innovative Technology Ltd 2018 Doc: NV9 Range User Manual Version: 1.0 Page 63 of 63…
- Главная
- Форум
- Новости
- Колонка эксперта
- Законодательство
- Деловая переписка
- Разное
-
На главную
Список форумов
Российская Ассоциация Развития Игорного Бизнеса
Вопросы по игорному оборудованию
Купюроприемники
ITL
-
Поиск
-
kkk28
- Гуру

- Сообщения: 1304
- Зарегистрирован: 27 май 2008, 19:18

Ошибки NV9USB
Закупили кучу этих девайсов. Раньше в основном работали просто с NV разные модели, но без USB. Не могу найти описание ошибок. На передней панели мигает как я понимаю код ошибки, например один длинный и три коротких вспышки или одна длинная и две коротких. В мануалах не нашёл, может кто в курсе? Перешивка не помогает, калибровать не даёт
-
kkk28
- Гуру
- Сообщения: 1304
- Зарегистрирован: 27 май 2008, 19:18
Re: Ошибки NV9USB
Непрочитанное сообщение
kkk28 » 25 фев 2014, 06:51
Спасибо, с Note Path Jam разобрался. Везде приходилось заднюю шторку либо регулировать, либо даже подтачивать, зато теперь работают как часики. А вот Unit Not Initialized — не могу побороть. Вроде и откалибровать удалось, всё равно пару секунд постоит и моргать начинает.
-
Embedder
- Сообщения: 124
- Зарегистрирован: 11 янв 2009, 15:42
- Откуда: ЛНР Луганск

Re: Ошибки NV9USB
Непрочитанное сообщение
Embedder » 25 фев 2014, 18:20
kkk28 писал(а):Вроде и откалибровать удалось, всё равно пару секунд постоит и моргать начинает.
Как удалось откалибровать? У меня NV10USB откалибровать не получается. Хоть в режим SSP точно перевёл.
-
kkk28
- Гуру
- Сообщения: 1304
- Зарегистрирован: 27 май 2008, 19:18
Re: Ошибки NV9USB
Непрочитанное сообщение
kkk28 » 04 мар 2014, 11:37
Embedder писал(а):
kkk28 писал(а):Вроде и откалибровать удалось, всё равно пару секунд постоит и моргать начинает.
Как удалось откалибровать? У меня NV10USB откалибровать не получается. Хоть в режим SSP точно перевёл.
Есть у ITL такая програмка BNVInitialise, она калибрует, даже если валидатор вообще в тест заходить не хочет или ошибки горят.
-
Embedder
- Сообщения: 124
- Зарегистрирован: 11 янв 2009, 15:42
- Откуда: ЛНР Луганск
Re: Ошибки NV9USB
Непрочитанное сообщение
Embedder » 05 мар 2014, 01:35
kkk28 писал(а):
Есть у ITL такая програмка BNVInitialise, она калибрует, даже если валидатор вообще в тест заходить не хочет или ошибки горят.
Когда-то пробовал эту программу. Там неактивные кнопки были. Для неё нужна аппаратная поддержка?
-
kkk28
- Гуру
- Сообщения: 1304
- Зарегистрирован: 27 май 2008, 19:18
Re: Ошибки NV9USB
Непрочитанное сообщение
kkk28 » 05 мар 2014, 16:04
Embedder писал(а):
kkk28 писал(а):
Есть у ITL такая програмка BNVInitialise, она калибрует, даже если валидатор вообще в тест заходить не хочет или ошибки горят.Когда-то пробовал эту программу. Там неактивные кнопки были. Для неё нужна аппаратная поддержка?
Там в папке с установочным файлом есть програмка InitCodeNumber, запускаешь её, генерируешь код и декодируешь, там всё понятно, правда через месяц приходится повторять процедуру, ну это я думаю мелочи.
-
Embedder
- Сообщения: 124
- Зарегистрирован: 11 янв 2009, 15:42
- Откуда: ЛНР Луганск
Re: Ошибки NV9USB
Непрочитанное сообщение
Embedder » 06 мар 2014, 00:23
kkk28 писал(а):
Там в папке с установочным файлом есть програмка InitCodeNumber, запускаешь её, генерируешь код и декодируешь, там всё понятно, правда через месяц приходится повторять процедуру, ну это я думаю мелочи.
Установил, запустил программу. Вот такое окно. Всё неактивно.
- Главная
- Форум
- Новости
- Колонка эксперта
- Законодательство
- Деловая переписка
- Разное
-
На главную
Список форумов
Российская Ассоциация Развития Игорного Бизнеса
Вопросы по игорному оборудованию
Купюроприемники
ITL
-
Поиск
-

vt1980
- Гуру
- Сообщения: 693
- Зарегистрирован: 10 авг 2010, 16:25
- Откуда: Крым


Re: Помогите с калибровкой NV9
Непрочитанное сообщение
vt1980 » 29 мар 2015, 14:00
33193sd писал(а):
Прошу прошения,пишет «Ther are no firmware in the srt directiry»! не подскажите мне, где взять прошивку?
Какая модель купюрника ?
Какая прошивка зашита в купюрник ?
Какая у вас версия программы ?
-
33193sd
- Сообщения: 6
- Зарегистрирован: 29 мар 2015, 01:35
Re: Помогите с калибровкой NV9
Непрочитанное сообщение
33193sd » 29 мар 2015, 14:25
vt1980 писал(а):
33193sd писал(а):
Прошу прошения,пишет «Ther are no firmware in the srt directiry»! не подскажите мне, где взять прошивку?Какая модель купюрника ?
Какая прошивка зашита в купюрник ?
Какая у вас версия программы ?
Модель — NV9usb
Firmware Version — nv9 3.55 2157 000
Dataset Version — UAH10b03
Validator manager 3.3.11
проблема — не принимает купюры вообще.
-
vt1980
- Гуру
- Сообщения: 693
- Зарегистрирован: 10 авг 2010, 16:25
- Откуда: Крым
Re: Помогите с калибровкой NV9
Непрочитанное сообщение
vt1980 » 29 мар 2015, 14:52
33193sd писал(а):
Модель — NV9usb
Firmware Version — nv9 3.55 2157 000
Dataset Version — UAH10b03
Validator manager 3.3.11
проблема — не принимает купюры вообще.
ValidatorManager 3.3.13
прошивка UAH10B03. Firmware и Currency находится в одном файле.
Если 3.3.13 тоже будет ругаться, то нужно кинуть прошивку в папку с программой, или в менеджере открыть её.
Повторю ещё раз про калибровочную бумагу, если её нет, то лучше калибровку не запускать, а то получите мигающий кирпич.
Проблемы могут быть связаны с плохим контактом в проводе между верхней и нижней частью.
Если купюрник неисправен, то после калибровки он опять же превращается в мигающий кирпич.
-
33193sd
- Сообщения: 6
- Зарегистрирован: 29 мар 2015, 01:35
Re: Помогите с калибровкой NV9
Непрочитанное сообщение
33193sd » 29 мар 2015, 15:30
vt1980 писал(а):
33193sd писал(а):
Модель — NV9usb
Firmware Version — nv9 3.55 2157 000
Dataset Version — UAH10b03
Validator manager 3.3.11
проблема — не принимает купюры вообще.ValidatorManager 3.3.13
прошивка UAH10B03. Firmware и Currency находится в одном файле.
Если 3.3.13 тоже будет ругаться, то нужно кинуть прошивку в папку с программой, или в менеджере открыть её.Повторю ещё раз про калибровочную бумагу, если её нет, то лучше калибровку не запускать, а то получите мигающий кирпич.
Проблемы могут быть связаны с плохим контактом в проводе между верхней и нижней частью.
Если купюрник неисправен, то после калибровки он опять же превращается в мигающий кирпич.
Спасибо вам за помощь.Бумага есть) Но вот такую ошибку выдает «diagnostic not supported switch to SSP or use standalone itl diagnostic tool» . Так он и так В SSP, или я что то путаю. Сделал 2 скрина.
-
vt1980
- Гуру
- Сообщения: 693
- Зарегистрирован: 10 авг 2010, 16:25
- Откуда: Крым
Re: Помогите с калибровкой NV9
Непрочитанное сообщение
vt1980 » 29 мар 2015, 15:44
33193sd писал(а):
ошибку выдает «diagnostic not supported switch to SSP or use standalone itl diagnostic tool» . Так он и так В SSP, или я что то путаю.
Для перевода купюрника в режим программирования по SSP, нужно нажать на нём кнопку, и держать дольше 2 секунд (в это время должен светится)
Для выхода из этого режима, одно короткое нажатие кнопки.
-
33193sd
- Сообщения: 6
- Зарегистрирован: 29 мар 2015, 01:35
Re: Помогите с калибровкой NV9
Непрочитанное сообщение
33193sd » 29 мар 2015, 17:37
vt1980 писал(а):
33193sd писал(а):
ошибку выдает «diagnostic not supported switch to SSP or use standalone itl diagnostic tool» . Так он и так В SSP, или я что то путаю.Для перевода купюрника в режим программирования по SSP, нужно нажать на нём кнопку, и держать дольше 2 секунд (в это время должен светится)
Для выхода из этого режима, одно короткое нажатие кнопки.
Спасибо, в мануале читал это, но при удержании кнопки более 2 сек, начинает светится, отпускаю — перезапуск. поставил VM последней версии.
вот скрин ошибки VM 4.3.3 —
и log файл с VM 3.3.1.3 —
- Manuals
- Brands
- Innovative Technology Manuals
- Bank Note Validator
- NV9 USB
- User manual
-
Contents
-
Table of Contents
-
Bookmarks
Quick Links
NV9 USB
MANUAL SET
INTRODUCTION
Related Manuals for Innovative Technology NV9 USB
Summary of Contents for Innovative Technology NV9 USB
-
Page 1
NV9 USB MANUAL SET INTRODUCTION… -
Page 2
NV9 USB Manual Set — Introduction MANUAL AMENDMENTS Document Base Details Spec. Used Issue Receipt Comments Date Date GA550-1 29/02/11 17/05/11 GA138 01/11/10 22/01/11 GA959 29/03/11 29/07/11 Amendment Details Rev. Date Amendment Details Issued by 13/04/12 Revised First Issue Copyright © Innovative Technology Ltd 2013… -
Page 3
NV9 USB Manual Set — Introduction NV9 USB MANUAL SET — INTRODUCTION COPYRIGHT LIMITED WARRANTY PRODUCT SAFETY INFORMATION INTRODUCTION FEATURES TYPICAL APPLICATIONS STRUCTURE OF THIS MANUAL SET WHICH SECTION IS RELEVANT TO ME? MAIN HEADQUARTERS Innovative Technology Ltd Derker Street – Oldham – England — OL1 4EQ Tel: +44 161 626 9999 Fax: +44 161 620 2090 E-mail: support@innovative-technology.co.uk… -
Page 4
Authorized Reseller, and extending for the length of time stipulated by Innovative Technology Ltd. A list of Innovative Technology Ltd offices can be found in every section of this manual set. If the product proves defective within the applicable warranty period, Innovative Technology Ltd will repair or replace the product. -
Page 5
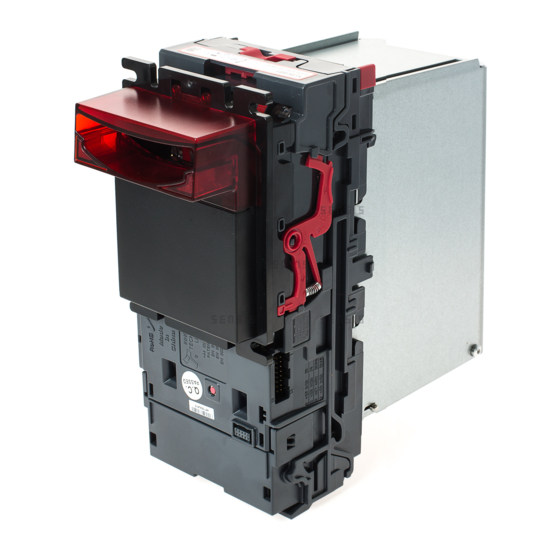
(as shown below): Removable bezel NV9 USB validator head Cashbox The NV9 USB validator is a device that can accept, validate and store 300 or 600 bank notes of mixed denominations. NV9 USB NV9 USB NV9 USB Rear View Side View… -
Page 6
Secure encrypted protocol available for communication TYPICAL APPLICATIONS The NV9 USB validator can be used in a variety of situations where high security and high volume bank note acceptance and validation are needed. Some typical applications are: AWP and SWP applications … -
Page 7
– Typically used by a field service engineer who is maintaining the product. – This section contains the essential information that the field service engineer needs to clean, maintain and fault find an NV9 USB validator that is installed in a host machine. ITL Software Support Guide: … -
Page 8
– Design engineers who are designing a host machine cabinet, or looking to integrate the NV9 USB validator into an existing cabinet. – This section contains the all the mechanical and electrical information a designer needs to effectively integrate the NV9 USB validator into a host machine. Software Implementation Guide: … -
Page 9
SECTION NV9 USB MANUAL SET QUICK START CONFIGURATION GUIDE… -
Page 10: Table Of Contents
NV9 USB Manual Set – Section 1 NV9 USB MANUAL SET – SECTION 1 QUICK START AND CONFIGURATION GUIDE Assembly Bezel Removal and Refitting: Interfacing Configuration Connector and Pinouts Programming Technical Specifications NV9 USB Bezel Flash Codes Fault Finding 1.10 Frequently Asked Questions Copyright ©…
-
Page 11: Nv9 Usb Manual Set — Section 1
Validator compatibility. product (NV2 – NV5). Assembly Installing the NV9 USB is a simple operation; the validator can be installed vertically or horizontally, depending on the type of cashbox fitted or orientation needed: If the validator is fitted with a clip-on cashbox, then the…
-
Page 12
NV9 USB Manual Set – Section 1 The cashbox is attached to the validator by locating and sliding until the cashbox is clipped securely If the validator is fitted with a slide-on cashbox, then the validator can be mounted HORIZONTALLY or… -
Page 13
NV9 USB Manual Set – Section 1 The cashbox housing is mounted in the host machine with the NV9 USB mounted on top. The cashbox is then slid into the housing until it is securely clipped. If the validator is fitted with… -
Page 14: Bezel Removal And Refitting
NV9 USB Manual Set – Section 1 There are many variants of bezel and cashbox type Information available for the NV9 USB validator. Please check the ITL website (www.innovative-technology.co.uk) for Check website for options. up to date information on the options available.
-
Page 15: Interfacing
Interfacing The connector needed to set up and interface the NV9 USB Validator is easily accessible on the side of the unit: Interface Socket Copyright © Innovative Technology Ltd 2012…
-
Page 16: Configuration
NV9 USB Manual Set – Section 1 Configuration The NV9 USB does not use DIP switches to configure the unit – configuration and setting is carried out by using a Configuration Button mounted on top of the unit: Configuration Button…
-
Page 17: Connector And Pinouts
16 way connector. regardless of connection type. The connector is a 16 pin socket used to interface the NV9 USB to the host machine. The pin numbering of the socket is shown below, as well as an overview of the socket connections:…
-
Page 18: Programming
NV9 USB Manual Set – Section 1 To use a USB connection with the NV9 USB, a USB cable fitted with a 16 way connector on one end (ITL Part Number CN00392) should be used. The CN00392 cable fits into the 16 way connector and allows high speed programming and serial communications when used in SSP, ccTalk and SIO modes.
-
Page 19: Technical Specifications
NV9 USB Manual Set – Section 1 Technical Specifications The full technical specifications for the NV9 USB Validator can be found in Section 6, Appendix B of this manual set. A brief summary is given here: DC Voltage Minimum Nominal…
-
Page 20: Nv9 Usb Bezel Flash Codes
The NV9 USB Validator has inbuilt fault detection facilities. If there is a configuration or other error the NV9 USB front bezel will flash in a particular sequence; a summary of the Bezel Flash Codes for the NV9 USB is shown below:…
-
Page 21: Fault Finding
NV9 USB Manual Set – Section 1 Fault Finding Please use this flow chart with the Flash Codes in the previous sub-section as an aid to help resolve any configuration or start up problems you might have after installing the NV9 USB validator…
-
Page 22
NV9 USB Manual Set – Section 1 Check and clean the note path (see Section 2 of this manual set). Foreign objects in note path Check drive belts are fitted correctly and that there is no debris underneath the belts. -
Page 23: 1.10 Frequently Asked Questions
1.10 Frequently Asked Questions a. Why are there no DIP switches on the unit? The NV9 USB has no dipswitches. Configuring the unit is carried out using a configuration button mounted on top of the unit – see subsection 1.3 of this manual for more information.
-
Page 24
Tel: +44 161 626 9999 Fax: +44 161 620 2090 E-mail: support@innovative-technology.co.uk Web site: www.innovative-technology.co.uk BRAZIL suporte@bellis-technology.com.br CHINA support@innovative-technology.co.uk GERMANY supportDE@innovative-technology.eu SPAIN supportES@innovative-technology.eu UNITED KINGDOM support@innovative-technology.co.uk UNITED STATES OF AMERICA supportusa@bellis-technology.com REST OF THE WORLD support@innovative-technology.co.uk Copyright © Innovative Technology Ltd 2012 GA550-2… -
Page 25
SECTION NV9 USB MANUAL SET FIELD SERVICE MANUAL… -
Page 26
NV9 USB Manual Set – Section 2 NV9 USB MANUAL SET – SECTION 2 FIELD SERVICE MANUAL Cleaning Fault Finding — Flash Codes Technical Specifications Fault Finding Flow Chart Frequently Asked Questions Spare Parts Copyright © Innovative Technology Ltd 2012… -
Page 27: Nv9 Usb Manual Set — Section 2
This section contains the essential information that the field engineer needs to clean, maintain and fault find an NV9 USB Validator that is installed in a host machine. The NV9 USB Validator has been designed to minimise any problems or performance variations over time.
-
Page 28
NV9 USB Manual Set – Section 2 Note path Lozenge release catch Lozenge Drive belts Note stacker Cash box spring plate Note path Cashbox Unless stated otherwise, you should disconnect WARNING! the power BEFORE carrying out any cleaning operations to avoid the risk of causing damage Disconnect power BEFORE to the validator. -
Page 29
NV9 USB Manual Set – Section 2 Front sensors Optical sensor Start sensor Rear sensor Optical sensor Examine the note paths, lozenge and note stacker for any dirt or debris, and carefully clear and wipe the surfaces of the note paths and lozenge with a soft lint free cloth that has been dampened with a water and mild detergent solution (i.e. -
Page 30
NV9 USB Manual Set – Section 2 When cleaning the recessed front sensor, use a Caution! small soft brush or cotton bud – do not use Be careful cleaning sensors. anything sharp or abrasive. Cleaning the belts is a simple operation. Ensure the validator is enabled (i.e. bezel lights are illuminated), then remove the bezel: b. -
Page 31
NV9 USB Manual Set – Section 2 Insert a piece of paper, which is narrower than the width between the two belts, in the centre of the note path to activate the drive motor Use a lint free… -
Page 32
NV9 USB Manual Set – Section 2 If the belts are worn or damaged, they should be replaced (ITL part number FD00106). This is a simple procedure, and is carried out as follows: Do not attempt to disassemble the validator WARNING! head –… -
Page 33: Fault Finding — Flash Codes
The NV9 USB Validator has inbuilt fault detection facilities. If there is a configuration or other error the NV9 USB front bezel will flash in a particular sequence; a summary of the Bezel Flash Codes for the NV9 USB is shown below:…
-
Page 34: Technical Specifications
NV9 USB Manual Set – Section 2 Technical Specifications The full technical specifications for the NV9 USB Validator can be found in Section 6, Appendix B of this manual set. A brief summary is given here: DC Voltage Minimum Nominal…
-
Page 35: Fault Finding Flow Chart
NV9 USB Manual Set – Section 2 Fault Finding Flow Chart Please use this flow chart with the Flash Codes in subsection 2.2 as an aid to help resolve any configuration or start up problems you might have after installing the NV9…
-
Page 36
NV9 USB Manual Set – Section 2 Check and clean the note path (see subsection 2.1 of this manual). Foreign objects in note path Check drive belts are fitted correctly and that there is no debris underneath the belts. Check voltage and current supplied to the validator are… -
Page 37: Frequently Asked Questions
Frequently Asked Questions a. Why are there no DIP switches on the unit? The NV9 USB has no dipswitches. Configuring the unit is carried out using a configuration button mounted on top of the unit – see Section 1, subsection 1.3 of this manual set for more information.
-
Page 38: Spare Parts
Full details of the interface cable connector pinouts, connector types / makes and other related information can be found in Section 4 of this manual set. The user can obtain the following parts for the NV9 USB validator: ITL Part Number…
-
Page 39
NV9 USB Manual Set – Section 2 Bezels ITL Part Description Number Vertical Upstack Bezel PA00188 Assembly PA00189 Horizontal Bezel Assembly Vertical Upstack Extended PA00190 Snout Bezel Assembly Vertical Downstack PA00191 Extended Snout Bezel Assembly 66mm Vertical Upstack No image available… -
Page 40
NV9 USB Manual Set – Section 2 Horizontal Bezel Assembly PA00896 (NV11) Cashboxes Clip-on Cashbox PA00185 Assembly (300C) Locking Cashbox PA00186 Assembly (300L) Copyright © Innovative Technology Ltd 2012 GA550-2… -
Page 41
NV9 USB Manual Set – Section 2 Slide-on Cashbox PA00192 Assembly (300S) Clip-on Cashbox PA00193 Assembly (600C) Slide-on Cashbox PA00194 Assembly (600S) Copyright © Innovative Technology Ltd 2012 GA550-2… -
Page 42
PA00898 Assembly (NV11) There are many variants of bezel and cashbox type Information available for the NV9 USB validator. Please check the ITL website (www.innovative-technology.co.uk) for Check website for options. up to date information on the options available. Drive Belts… -
Page 43
Tel: +44 161 626 9999 Fax: +44 161 620 2090 E-mail: support@innovative-technology.co.uk Web site: www.innovative-technology.co.uk BRAZIL suporte@bellis-technology.com.br CHINA support@innovative-technology.co.uk GERMANY supportDE@innovative-technology.eu SPAIN supportES@innovative-technology.eu UNITED KINGDOM support@innovative-technology.co.uk UNITED STATES OF AMERICA supportusa@bellis-technology.com REST OF THE WORLD support@innovative-technology.co.uk Copyright © Innovative Technology Ltd 2012 GA550-2…
- Главная
- Форум
- Новости
- Колонка эксперта
- Законодательство
- Деловая переписка
- Разное
-
На главную
Список форумов
Российская Ассоциация Развития Игорного Бизнеса
Вопросы по игорному оборудованию
Купюроприемники
ITL
-
Поиск
-
kkk28
- Гуру
- Сообщения: 1304
- Зарегистрирован: 27 май 2008, 19:18
Ошибки NV9USB
Закупили кучу этих девайсов. Раньше в основном работали просто с NV разные модели, но без USB. Не могу найти описание ошибок. На передней панели мигает как я понимаю код ошибки, например один длинный и три коротких вспышки или одна длинная и две коротких. В мануалах не нашёл, может кто в курсе? Перешивка не помогает, калибровать не даёт
-
kkk28
- Гуру
- Сообщения: 1304
- Зарегистрирован: 27 май 2008, 19:18
Re: Ошибки NV9USB
Непрочитанное сообщение
kkk28 »
Спасибо, с Note Path Jam разобрался. Везде приходилось заднюю шторку либо регулировать, либо даже подтачивать, зато теперь работают как часики. А вот Unit Not Initialized — не могу побороть. Вроде и откалибровать удалось, всё равно пару секунд постоит и моргать начинает.
-
Embedder
- Сообщения: 124
- Зарегистрирован: 11 янв 2009, 15:42
- Откуда: ЛНР Луганск
Re: Ошибки NV9USB
Непрочитанное сообщение
Embedder »
kkk28 писал(а):Вроде и откалибровать удалось, всё равно пару секунд постоит и моргать начинает.
Как удалось откалибровать? У меня NV10USB откалибровать не получается. Хоть в режим SSP точно перевёл.
-
kkk28
- Гуру
- Сообщения: 1304
- Зарегистрирован: 27 май 2008, 19:18
Re: Ошибки NV9USB
Непрочитанное сообщение
kkk28 »
Embedder писал(а):
kkk28 писал(а):Вроде и откалибровать удалось, всё равно пару секунд постоит и моргать начинает.
Как удалось откалибровать? У меня NV10USB откалибровать не получается. Хоть в режим SSP точно перевёл.
Есть у ITL такая програмка BNVInitialise, она калибрует, даже если валидатор вообще в тест заходить не хочет или ошибки горят.
-
Embedder
- Сообщения: 124
- Зарегистрирован: 11 янв 2009, 15:42
- Откуда: ЛНР Луганск
Re: Ошибки NV9USB
Непрочитанное сообщение
Embedder »
kkk28 писал(а):
Есть у ITL такая програмка BNVInitialise, она калибрует, даже если валидатор вообще в тест заходить не хочет или ошибки горят.
Когда-то пробовал эту программу. Там неактивные кнопки были. Для неё нужна аппаратная поддержка?
-
kkk28
- Гуру
- Сообщения: 1304
- Зарегистрирован: 27 май 2008, 19:18
Re: Ошибки NV9USB
Непрочитанное сообщение
kkk28 »
Embedder писал(а):
kkk28 писал(а):
Есть у ITL такая програмка BNVInitialise, она калибрует, даже если валидатор вообще в тест заходить не хочет или ошибки горят.Когда-то пробовал эту программу. Там неактивные кнопки были. Для неё нужна аппаратная поддержка?
Там в папке с установочным файлом есть програмка InitCodeNumber, запускаешь её, генерируешь код и декодируешь, там всё понятно, правда через месяц приходится повторять процедуру, ну это я думаю мелочи.
-
Embedder
- Сообщения: 124
- Зарегистрирован: 11 янв 2009, 15:42
- Откуда: ЛНР Луганск
Re: Ошибки NV9USB
Непрочитанное сообщение
Embedder »
kkk28 писал(а):
Там в папке с установочным файлом есть програмка InitCodeNumber, запускаешь её, генерируешь код и декодируешь, там всё понятно, правда через месяц приходится повторять процедуру, ну это я думаю мелочи.
Установил, запустил программу. Вот такое окно. Всё неактивно.
Как лечить у NV9 ошибку «стекер полный» ?
Модератор: Guzel
- Ответить с цитатой
Как лечить у NV9 ошибку «стекер полный» ?
Накопилось много NV9 — примут 5-10 купюр и падают в ошибку «стекер полный» -переменное мигание красного и зелёного. Тест проходят, ремни тянет, лапу толкает/подымает, разбирались, чистились все сенсоры, смазка, на некоторых замена новых движков, правда калиброваться нормально с 3-го раза и то не все хотят, проходит лишь полная рекалибровка.
Может кто знает — как лечить ?
- IGOR_ZSU
- Гуру
- Сообщений: 769
- Зарегистрирован: 12 янв 2005, 20:29
- Откуда: Украина
-
- Сайт
- ICQ

- Ответить с цитатой
Re: Как лечить у NV9 ошибку «стекер полный» ?
![]() kkk28 » 24 июн 2011, 16:15
kkk28 » 24 июн 2011, 16:15
Игорь, напиши своё мыло, я тебе вышлю програмку для считывания ошибок с купюроприёмника. И адресок немцев дам. Считаешь, отправишь файл и описание проблеммы (можно по русски). Они подскажут как бороться. Кстати у них же можешь и комплектующие заказывать если нужны.
- kkk28
- Гуру
- Сообщений: 1287
- Зарегистрирован: 27 май 2008, 19:18
- Ответить с цитатой
Re: Как лечить у NV9 ошибку «стекер полный» ?
![]() kkk28 » 15 сен 2011, 20:48
kkk28 » 15 сен 2011, 20:48
Случайно натолкнулся на решение примерно 50% ошибок связанных со стеккером и антифишингом на NV-9. Дело в том, что на NV-9 двигатели работают почти в два раза быстрее, чем на NV-7. Так вот, при загрязнении лент протяжки купюра в конце проскальзывает, до конца не затягивается,антифишинг выдаёт ошибку или стеккер не может уложить купюру. Помогает банальное обезжиривание и очистка от грязи лентопротягов. И никакой регулировки антифишинга не надо. 
- kkk28
- Гуру
- Сообщений: 1287
- Зарегистрирован: 27 май 2008, 19:18
- Ответить с цитатой
Re: Как лечить у NV9 ошибку «стекер полный» ?
![]() IGOR_ZSU » 17 мар 2014, 18:30
IGOR_ZSU » 17 мар 2014, 18:30
Опять с этой фигнёй, калибровку и рекалибровку проходят ок, в работу запускаться не хотят, сразу ошибка, ремни чистые, движки живые при калибровке всё ок.
- IGOR_ZSU
- Гуру
- Сообщений: 769
- Зарегистрирован: 12 янв 2005, 20:29
- Откуда: Украина
-
- Сайт
- ICQ
- Ответить с цитатой
Re: Как лечить у NV9 ошибку «стекер полный» ?
![]() kkk28 » 18 мар 2014, 18:24
kkk28 » 18 мар 2014, 18:24
IGOR_ZSU писал(а):Опять с этой фигнёй, калибровку и рекалибровку проходят ок, в работу запускаться не хотят, сразу ошибка, ремни чистые, движки живые при калибровке всё ок.
Если купюрники более старой модели, без букв UK перед номером снимаешь антифишинг и слегка напильничком подтачиваешь лапку, чтобы она не перекрывалв светодиоды, когда купюра не проходит через него. На многих пружинка ослабевает или грязь попадает и антифишинг срабатыват ложно. Даёт кстати ту же ошибку
- kkk28
- Гуру
- Сообщений: 1287
- Зарегистрирован: 27 май 2008, 19:18
- Ответить с цитатой
Re: Как лечить у NV9 ошибку «стекер полный» ?
![]() IGOR_ZSU » 22 май 2014, 18:51
IGOR_ZSU » 22 май 2014, 18:51
опять та же фигня, купюрник UK, движки живые, шторка пружинит нормально, калибровка ок, просто после очередного включения упал в ошибку стекер полный и никак не сбросить.
- IGOR_ZSU
- Гуру
- Сообщений: 769
- Зарегистрирован: 12 янв 2005, 20:29
- Откуда: Украина
-
- Сайт
- ICQ
- Ответить с цитатой
Re: Как лечить у NV9 ошибку «стекер полный» ?
![]() kkk28 » 15 авг 2014, 14:28
kkk28 » 15 авг 2014, 14:28
Вообще, все проблеммы NV9 в антифишинге. На новых моделях NV7 была точно такая же болячка и точно такие же проблеммы, но там лечилось просто, снимаешь шторку антифишинга, купюрник програмно на это никакак не реагирует, а все проблеммы заканчиваются. Не могу найти, где этот контроль в прошивке NV9, убрать бы его аккуратьненько и NV9 и NV9USB годами бы без сбоев работали. Может найдётся спец? Готов даже денег дать. 
- kkk28
- Гуру
- Сообщений: 1287
- Зарегистрирован: 27 май 2008, 19:18
Вернуться в ITL
Кто сейчас на форуме
Сейчас этот форум просматривают: нет зарегистрированных пользователей и гости: 2