The issue is that your server is not configured to respond to OPTIONS requests with the correct response status, 2xx success status.
The GET is working because it is not making a preflight request, as it meets the criteria to be a simple request as defined by the CORS documentation
On the other hand, the POST request meets the criteria to be a Preflighted request, meaning a preflight OPTIONS request should be made first.
In short, you have correctly setup the CORS response headers, but the server is not configured to respond with a 2xx response for OPTIONS method requests(commonly 200 status).
The server must respond to OPTIONS requests with a 2xx success status—typically 200 or 204.
If the server doesn’t do that, it makes no difference what Access-Control-* headers you have it configured to send. And the answer to configuring the server to handle OPTIONS requests in the right way—to send a 200 or 204 success message—depends on what server software it’s running
Borrowing the solution from this answer, do this on your backend, .NET WEB API:
In your BaseApiController.cs:
We do this to allow the OPTIONS http verb
public class BaseApiController : ApiController
  {
    public HttpResponseMessage Options()
    {
      return new HttpResponseMessage { StatusCode = HttpStatusCode.OK };
    }
}
References
Preflighted requests
response for preflight 403 forbidden
Note
Running a nodejs server on domainA.com is irrelevent. The «axios» library can be used either to a) make XMLHttpRequests from the browser or b) make http requests from node.js. In this case it is the first option, the «axios.post» to domainB is done through a XMLHttpRequest from the browser, that `s why you get a preflighted request at domainB.com.
The 4xx HTTP status codes may not be enough to describe the cause of the error to the client. For this reason, several companies introduced a custom error response format to provide the caller with everything they need to deal with the error. This is a great addition you can make to your backend application, especially considering that implementing it requires only a few lines of code. Let’s see what you need to get started with error response customization for 401 Unauthorized and 403 Forbidden errors in Express.
An Introduction to HTTP Error Status Codes
The HTTP status code is a code number returned by the server in response to a client’s request. The many HTTP status codes available can be grouped into the following five classes based on their number:
1xx: informational responses2xx: successful responses3xx: redirection messages4xx: client error responses5xx: server error responses
As you can see, there are only two categories of HTTP status codes that represent errors: 4xx and 5xx.
The 4xx class of HTTP status code refers to errors due to the client’s request, for example, because of a malformed request. When it comes to 4xx errors, the server should provide the client with additional info behind the error to prevent it from causing it again.
The 5xx class of HTTP status code refers to errors encountered by the server while processing the request. For security reasons, you should not provide the client with additional info about this type of error. This is because you do not want an attacker to understand how the server works based on what you returned to them.
Using the right HTTP error status codes is important to help the client understand what occurred. In fact, each 4xx or 5xx HTTP status code corresponds to a particular type of error. For example, the 400 status code should be used when the form of the client request is not as the API expects, while the 401 status code should be returned when the client provides no credentials or invalid credentials. However, with 4xx errors, the HTTP status code alone may not be enough, and you should provide the client with more info.
Let’s delve into why you might need to customize your HTTP error responses.
Why Customize Error Responses?
Considering that 4xx errors are caused by the client’s request, not receiving enough info to understand why that request failed may be frustrating. Therefore, you need to customize error responses to provide the client with more details about the problem that occurred. This means returning additional data along with the HTTP error status code.
For example, imagine a situation where an API requires a numeric customerId parameter. Now, a client calls that API without the customerId parameter or using a non-numeric string. As a result, it will receive a generic 400 Bad Request error from the server. As you can imagine, the default «Bad Request» message cannot help the caller understand how they should call the API. On the other hand, if the server returned a 400 HTTP status code response containing the «customerId required» or «customerId must be a number» message, the client could figure out how they need to call the API properly and avoid making the same mistake twice. Therefore, providing a detailed message on 4xx errors helps end-users, and it is also why several companies with public APIs use custom error responses.
Notice that customizing error responses represent a security concern. Although providing extra info in case of errors can be helpful, you should never return info that could jeopardize the security of your application. This is why you should consider customization on error responses only on
4xxerrors, which are all directly referable to the client. On the contrary, you should never provide additional info on your5xxerror responses.
Now, let’s see an interesting format for your custom error responses.
A Format for Your Error Responses
To get an idea of how to define a good custom error response format, you can have a look at what reputable companies with public APIs like Google, Apple, and Amazon do in case of errors. For example, this is what GitHub returns in case of a 401 error:
{
   "message": "Requires authentication",
   "documentation_url": "https://docs.github.com/rest/reference/repos#create-an-organization-repository"
}
Returning a string message containing the error description is a common practice, but what is particularly insightful is the documentation_url field. This is a brilliant idea to provide the caller with pathways to solutions and not just report error messages. Also, if something changes, you do not have to update your error responses. What will be changing is the content of the documentation page used in the error response. In addition, returning a public link to the documentation does not pose a security problem by definition because anyone can already access the documentation.
Now, let’s see how to customize your error responses to follow this format in an Express server.
Customize Error Responses in Express
Here, you will learn how to customize the 401 Unauthorized or 403 Forbidden HTTP errors by extending the Auth0 Hello World API. This is a good example of a demo Express application in JavaScript to start from. Also, HTTP 401 and 403 errors fall into the 4xx class and are good examples of errors that may require custom responses.
Let’s now dive into the Auth0 Express Hello World API.
Get started with the Auth0 Hello Word API
You can find the Auth0 Express Hello World API repo here. In detail, let’s focus on the basic-role-based-access-control branch. You can clone it to take a look at its code with the command below:
git clone https://github.com/auth0-developer-hub/api_express_javascript_hello-world.git --branch basic-role-based-access-controlThis codebase contains the Express.js Hello World API protected via role validation provided by Auth0. You need an Auth0 account to configure the application, If you don’t have one, sign up for free right now!
Notice that this RBAC (Role-Based Access Control) strategy depends on the Auth0 User Management features. You can learn more about the Express Hello World API with basic RBAC protection here.
Specifically, authentication and authorization error logic is handled in the error.middleware.js file as below:
// src/middleware/error.middleware.js

const errorHandler = (error, request, response, next) => {
  if (error.status === 401 && error.message === "Unauthorized") {
    const status = 401;
    const message = "Requires authentication";

    response.status(status).json({ message });

    return;
  }

  if (
    error.status === 401 &&
    error.code === "invalid_token" &&
    error.message === "Permission denied"
  ) {
    const status = 403;
    const message = error.message;

    response.status(status).json({ message });

    return;
  }

  const status = error.statusCode || error.code || 500;
  const message = error.message || "internal error";

  response.status(status).json({ message });
};

module.exports = {
  errorHandler,
};
Here, the «Unauthorized» 401 error raised by the Auth0 SDK is intercepted and transformed into the following 401 HTTP status code error response:
"Requires authentication"Similarly, the “Permission denied” 401 error generated by the Auth0 SDK is converted into the following 403 HTTP status code error response:
"Permission denied"Note that the Auth0 Express library used to provide authorization and authentication does not return a 403 error when the access token is not associated with a user with the expected role, as you might expect. This is because the Auth0 SDK team wanted to keep the library as generic as possible and always returns a generic 401 error. It is up to you to weigh in and determine whether that error returned by the SDK is the most appropriate for your use case. Here, it is not, and that is why the 401 error becomes a 403 error.
Let’s now learn more about the Auth0 library used.
How is access checked?
The Express Hello World API relies on the express-oauth2-jwt-bearer Auth0 library to implement authorization and authentication. If you are not familiar with it, express-oauth2-jwt-bearer is an authentication middleware for Express that validates bearer access tokens in JWT format.
In detail, express-oauth2-jwt-bearer is used in the src/middleware/auth0.middleware.js file as follows:
// src/middleware/auth0.middleware.js

const { auth, claimCheck } = require("express-oauth2-jwt-bearer");
const dotenv = require("dotenv");

dotenv.config();

const validateAccessToken = auth({
  issuerBaseURL: `https://${process.env.AUTH0_DOMAIN}`,
  audience: process.env.AUTH0_AUDIENCE,
});

const checkRequiredPermissions = (requiredPermissions) => {
  return (req, res, next) => {
    const permissionCheck = claimCheck((payload) => {
      const permissions = payload.permissions || [];

      return requiredPermissions.every((requiredPermission) =>
        permissions.includes(requiredPermission)
      );
    }, "Permission denied");

    permissionCheck(req, res, next);
  };
};

module.exports = {
  validateAccessToken,
  checkRequiredPermissions,
};
The validateAccessToken() function is generated by the express-oauth2-jwt-bearer auth() function, which takes a AuthOptions object and returns a middleware function that can be used to restrict an Express endpoint to authorized users. Similarly, the checkRequiredPermissions() function is generated by the express-oauth2-jwt-bearer claimCheck() function, which takes a JWTPayload object and returns a middleware function that can be used to restrict an Express endpoint to authenticated users.
The two functions can be used to provide authentication and authorization as follows:
// src/services/example.js

const express = require("express");
const {
  checkRequiredPermissions,
  validateAccessToken,
} = require("../middleware/auth0.middleware.js");

const messagesRouter = express.Router();

// a public endpoint
messagesRouter.get("/public", (req, res) => {
  res.status(200).json("Hello, World!");
});

// an Express endpoint accessible only by authenticated users
// thanks to the validateAccessToken middleware
messagesRouter.get("/protected", validateAccessToken, (req, res) => {
  res.status(200).json("Hello, World!");
});

// an Express endpoint accessible only by authenticated and authorized users
// thanks to the validateAccessToken and checkRequiredPermissions middleware
// functions respectively
messagesRouter.get(
  "/admin",
  validateAccessToken,
  checkRequiredPermissions(["read:admin-messages"]),
  (req, res) => {
    const message = getAdminMessage();

    res.status(200).json(message);
  }
);

module.exports = { messagesRouter };
Customizing 401 and 403 Error Responses
Let’s now see how to extend the basic-role-based-access-control branch application to implement custom error responses on 401 and 403 errors. You can find the full code in the GitHub repository that supports the article. To achieve the goal, simply change the file error.middleware.js as follows:
// src/middleware/error.middleware.js

const errorHandler = (error, request, response, next) => {
  if (error.status === 401 && error.message === "Unauthorized") {
    // defining the HTTP status code
    const status = 401;
    // standard HTTP 401 error message
    const message = "Unauthorized";
    // the link to the hosted version of the "how-to-handle-authentication" HTML page
    // you can find in the /docs folder
    const authority = `${request.protocol}://${request.hostname}:${process.env.PORT}`;
    const documentationLink = `${authority}/docs/how-to-handle-authentication.html`;

    // implementing a custom error response on 401 errors
    // matching the GitHub error response format
    response.status(status).json({
      message: message,
      documentationLink: documentationLink
    });

    return;
  }

  if (
      error.status === 401 &&
      error.code === "invalid_token" &&
      error.message === "Permission denied"
  ) {
    // defining the HTTP status code
    const status = 403;
    // standard HTTP 403 error message
    const message = "Forbidden";
    // the link to the hosted version of the "how-to-handle-authorization" HTML page
    // you can find in the /docs folder
    const authority = `${request.protocol}://${request.hostname}:${process.env.PORT}`;
    const documentationLink = `${authority}/docs/how-to-handle-authorization.html`;

    // implementing a custom error response on 403 errors
    // matching the GitHub error response format
    response.status(status).json({
      message: message,
      documentationLink: documentationLink
    });

    return;
  }

  const status = error.statusCode || error.code || 500;
  const message = error.message || "internal error";

  response.status(status).json({ message });
};

module.exports = {
  errorHandler,
};
This is what the 401 error response will look like:
{
   "message": "Unauthorized",
   "documentationLink": "https://your-domain.com/docs/how-to-handle-authentication.html"
}
And this is what the 403 error response will look like:
{
   "message": "Forbidden",
   "documentationLink": "https://your-domain.com/docs/how-to-handle-authorization.html"
}
Note that in both cases the error message matches the standard HTTP error message. Also, the links used in the error responses point to the hosted version of the two custom static HTML pages you can find in the /docs folder of the project.
Keep in mind that these HTML documents are only sample pages with lorem ipsum text. Therefore, you should populate the pages with complete information to handle authentication and authorization errors or replace the URLs with appropriate links to your documentation.
Testing the 401 and 403 Error Response
First, clone the extended version of the basic-role-based-access-control Auth0 Hello World API branch with the following command:
git clone https://github.com/auth0-blog/extended-basic-role-based-access-controlThen, enter the extended-basic-role-based-access-control project directory with this command:
cd extended-basic-role-based-access-controlNow, install the npm project dependencies with:
npm installThen, create a .env file under the root directory of the project and populate it as follows:
PORT=6060
CLIENT_ORIGIN_URL=http://localhost:4040
AUTH0_AUDIENCE=<YOUR-AUTH0-AUDIENCE>
AUTH0_DOMAIN=<YOUR-AUTH0-DOMAIN>
Replace <YOUR-AUTH0-AUDIENCE> and <YOUR-AUTH0-DOMAIN> with the values you can find in the Auth0 dashboard. Also, you will need to retrieve a valid <AUTH0-ACCESS-TOKEN> value. Follow this guide from the official Auth0 documentation to learn how to retrieve these values.
Launch the Express.js API server with the command below:
npm run devYou are now ready to start testing the 401 error response. For example, let’s try to call the api/messages/protected API that requires authentication without the required Auth0 access token:
curl --request GET \
  --url http:/localhost:6060/api/messages/protected
You will receive a 401 error response containing the following JSON:
{
   "message": "Unauthorized",
   "documentationLink": "https://your-domain.com/docs/how-to-handle-authentication.html"
}
On the contrary, let’s try to use the valid <AUTH0-ACCESS-TOKEN> retrieved earlier.
curl --request GET \
  --url http:/localhost:6060/api/messages/protected \
  --header 'authorization: <AUTH0-ACCESS-TOKEN>'
In this case, you would get:
{
    text: "This is a protected message."
}
Replicating a 403 error requires a little more effort. This is because you need to run a frontend client application that uses the Auth0 SDK. Follow this tutorial from the official documentation to learn how to set up RBAC in Auth0. Make sure to set up a «read:admin-messages» role and associate it with the admin user role.
Then, use any of the Auth0 frontend client demos from the list you can find here to login and access the GET /api/messages/admin endpoint exposed by the Express server launched earlier on port 6060.
When logging with an authorized admin user, you will get:
{
    "text": "This is an admin message."
}
On the other hand, when using an unauthorized user, you will receive the following JSON error response:
{
   "message": "Forbidden",
   "documentationLink": "https://your-domain.com/docs/how-to-handle-authorization.html"
}
Conclusion
In this article, we looked at how to customize error responses when dealing with REST applications developed in Express. This requires just a bunch of lines of code, but you should not take it lightheartedly. On the contrary, it should be implemented with security in mind to avoid providing attackers with useful information about how your backend works. First, we introduced HTTP error status codes and clarified why you might need error response customization on 4xx errors. Then, we studied how companies with public APIs deal with the 4xx errors to define a real-world backed error response format. Finally, we learned how to implement this format when it comes to 401 and 403 errors returned by the Auth0 Express Hello World API using the express-oauth2-jwt-bearer library for authentication and authorization.
Thanks for reading! I hope that you found this article helpful. Feel free to reach out to me with any questions, comments, or suggestions.
Время на прочтение
7 мин
Количество просмотров 24K
Когда я только начинал работать с Express и пытался разобраться с тем, как обрабатывать ошибки, мне пришлось нелегко. Возникало такое ощущение, будто никто не писал о том, что мне было нужно. В итоге мне пришлось самому искать ответы на мои вопросы. Сегодня я хочу рассказать всё, что знаю об обработке ошибок в Express-приложениях. Начнём с синхронных ошибок.

Обработка синхронных ошибок
Если вам нужно обработать синхронную ошибку, то вы можете, для начала, с помощью инструкции throw, выдать такую ошибку в обработчике запроса Express. Обратите внимание на то, что обработчики запросов ещё называют «контроллерами», но я предпочитаю использовать термин «обработчик запросов» так как он кажется мне понятнее.
Вот как это выглядит:
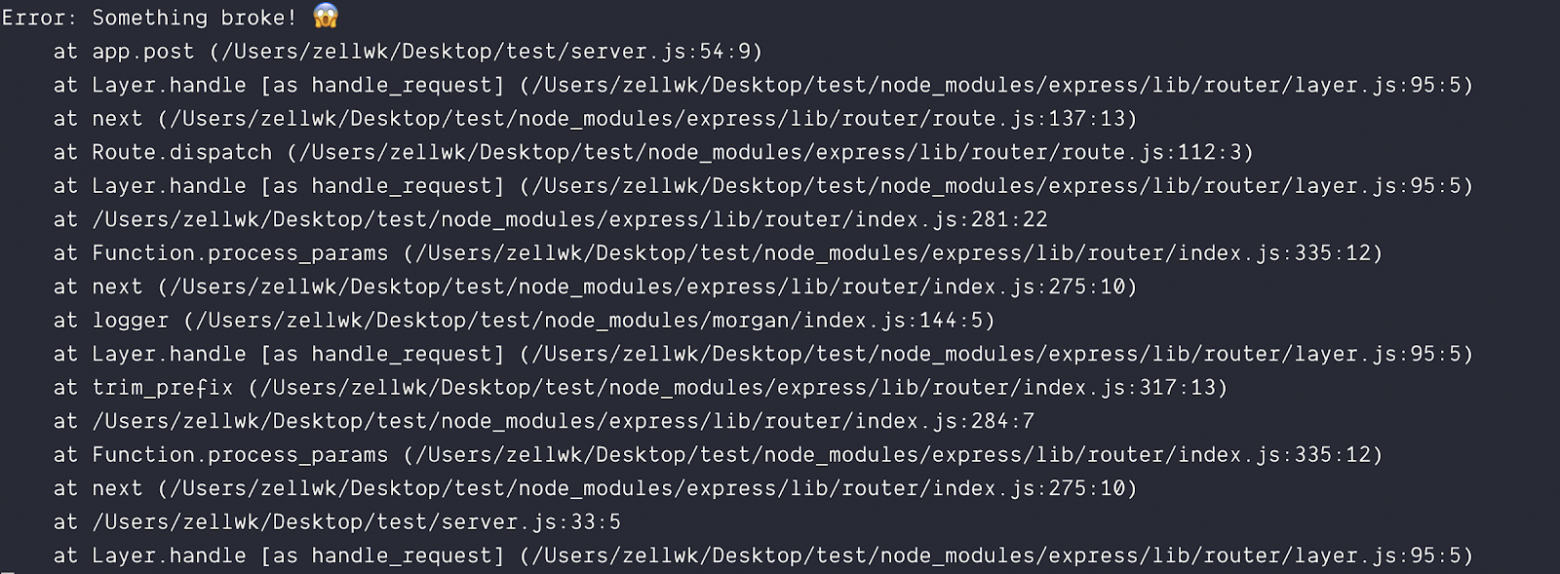
app.post('/testing', (req, res) => {
  throw new Error('Something broke! ')
})
Такие ошибки можно перехватить с помощью обработчика ошибок Express. Если вы не написали собственный обработчик ошибок (подробнее об этом мы поговорим ниже), то Express обработает ошибку с помощью обработчика, используемого по умолчанию.
Вот что делает стандартный обработчик ошибок Express:
- Устанавливает код состояния HTTP-ответа в значение 500.
- Отправляет сущности, выполнившей запрос, текстовый ответ.
- Логирует текстовый ответ в консоль.
Сообщение об ошибке, выведенное в консоль
Обработка асинхронных ошибок
Для обработки асинхронных ошибок нужно отправить ошибку обработчику ошибок Express через аргумент next:
app.post('/testing', async (req, res, next) => {
  return next(new Error('Something broke again! '))
})
Вот что попадёт в консоль при логировании этой ошибки.
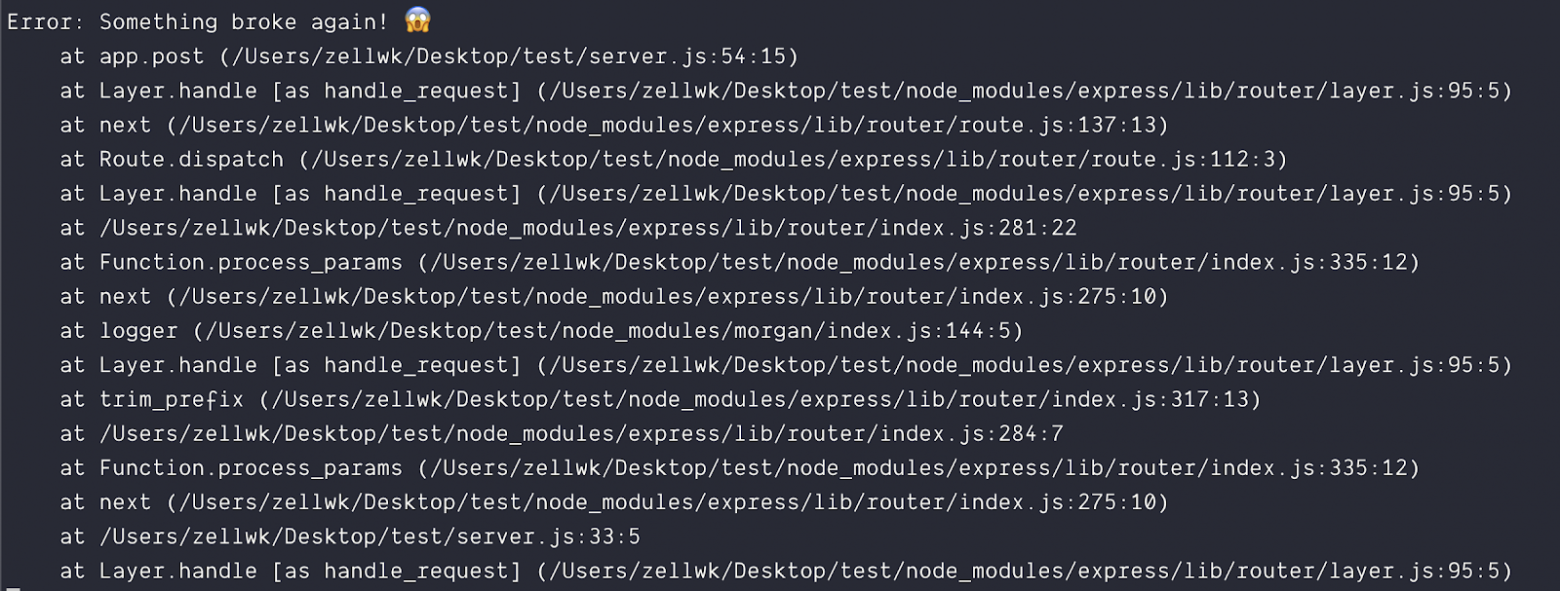
Сообщение об ошибке, выведенное в консоль
Если вы пользуетесь в Express-приложении конструкцией async/await, то вам понадобится использовать функцию-обёртку, наподобие express-async-handler. Это позволяет писать асинхронный код без блоков try/catch. Подробнее об async/await в Express можно почитать здесь.
const asyncHandler = require('express-async-handler')

app.post('/testing', asyncHandler(async (req, res, next) => {
  // Сделать что-нибудь
}))
После того, как обработчик запроса обёрнут в express-async-handler, то можно, так же, как было описано выше, выбросить ошибку с использованием инструкции throw. Эта ошибка попадёт к обработчику ошибок Express.
app.post('/testing', asyncHandler(async (req, res, next) => {
  throw new Error('Something broke yet again! ')
}))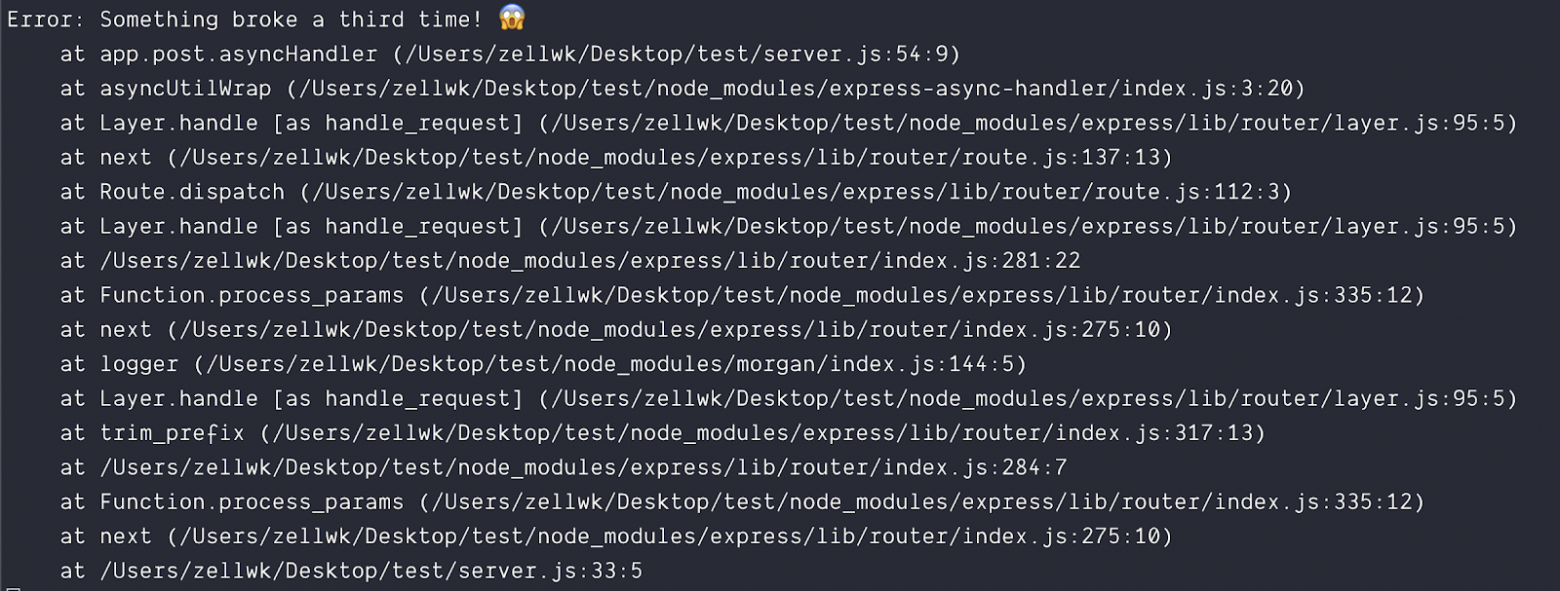
Сообщение об ошибке, выведенное в консоль
Написание собственного обработчика ошибок
Обработчики ошибок Express принимают 4 аргумента:
- error
- req
- res
- next
Размещать их нужно после промежуточных обработчиков и маршрутов.
app.use(/*...*/)
app.get(/*...*/)
app.post(/*...*/)
app.put(/*...*/)
app.delete(/*...*/)

// Собственный обработчик ошибок нужно поместить после всех остальных промежуточных обработчиков
app.use((error, req, res, next) => { /* ... */ })
Если создать собственный обработчик ошибок, то Express прекратит использование стандартного обработчика. Для того чтобы обработать ошибку, нужно сформировать ответ для фронтенд-приложения, которое обратилось к конечной точке, в которой возникла ошибка. Это означает, что нужно выполнить следующие действия:
- Сформировать и отправить подходящий код состояния ответа.
- Сформировать и отправить подходящий ответ.
То, какой именно код состояния подойдёт в каждом конкретном случае, зависит от того, что именно произошло. Вот список типичных ошибок, к обработке которых вы должны быть готовы:
- Ошибка
400 Bad Request. Используется в двух ситуациях. Во-первых — тогда, когда пользователь не включил в запрос необходимое поле (например — в отправленной платёжной форме не заполнено поле со сведениями о кредитной карте). Во-вторых — тогда, когда в запросе содержатся некорректные данные (например — ввод в поле пароля и в поле подтверждения пароля разных паролей). - Ошибка
401 Unauthorized. Этот код состояния ответа применяется в том случае, если пользователь ввёл неправильные учётные данные (вроде имени пользователя, адреса электронной почты или пароля). - Ошибка
403 Forbidden. Используется в тех случаях, когда пользователю не разрешён доступ к конечной точке. - Ошибка
404 Not Found. Применяется в тех случаях, когда конечную точку невозможно обнаружить. - Ошибка
500 Internal Server Error. Применяется тогда, когда запрос, отправленный фронтендом, сформирован правильно, но на бэкенде при этом возникла какая-то ошибка.
После того, как определён подходящий код состояния ответа, его нужно установить с помощью res.status:
app.use((error, req, res, next) => {
  // Ошибка, выдаваемая в ответ на неправильно сформированный запрос
  res.status(400)
  res.json(/* ... */)
})
Код состояния ответа должен соответствовать сообщению об ошибке. Для этого нужно отправлять код состояния вместе с ошибкой.
Легче всего это сделать с помощью пакета http-errors. Он позволяет отправлять в ошибке три фрагмента информации:
- Код состояния ответа.
- Сообщение, сопутствующее ошибке.
- Любые данные, которые нужно отправить (это необязательно).
Вот как установить пакет http-errors:
npm install http-errors --saveВот как этим пакетом пользоваться:
const createError = require('http-errors')

// Создание ошибки
throw createError(status, message, properties)
Рассмотрим пример, который позволит как следует в этом всём разобраться.
Представим, что мы пытаемся обнаружить пользователя по адресу его электронной почты. Но этого пользователя найти не удаётся. В результате мы решаем отправить в ответ на соответствующий запрос ошибку User not found, сообщающую вызывающей стороне о том, что пользователь не найден.
Вот что нам нужно будет сделать при создании ошибки:
- Установить код состояния ответа как
400 Bad Request(ведь пользователь ввёл неправильные данные). Это будет наш первый параметр. - Отправить вызывающей стороне сообщение наподобие
User not found. Это будет второй параметр.
app.put('/testing', asyncHandler(async (req, res) => {
  const { email } = req.body
  const user = await User.findOne({ email })

  // Если пользователь не найден - выбросим ошибку
  if (!user) throw createError(400, `User '${email}' not found`)
}))
Получить код состояния можно с помощью конструкции error.status, а сообщение ошибки — с помощью error.message:
// Логирование ошибки
app.use((error, req, res, next) => {
  console.log('Error status: ', error.status)
  console.log('Message: ', error.message)
})
Результат логирования ошибки в консоли
Затем состояние ответа устанавливают с помощью res.status, а сообщение записывают в res.json:
app.use((error, req, res, next) => {
  // Установка кода состояния ответа
  res.status(error.status)

  // Отправка ответа
  res.json({ message: error.message })
})
Лично я предпочитаю отправлять в подобных ответах код состояния, сообщение и результат трассировки стека. Это облегчает отладку.
app.use((error, req, res, next) => {
  // Установка кода состояния ответа
  res.status(error.status)

  // Отправка ответа
  res.json({
    status: error.status,
    message: error.message,
    stack: error.stack
  })
})
▍Код состояния ответа, используемый по умолчанию
Если источником ошибки не является createError, то у неё не будет свойства status. Вот пример, в котором сделана попытка прочесть несуществующий файл с помощью fs.readFile:
const fs = require('fs')
const util = require('util')

// Преобразуем readFile из функции, использующей коллбэки, в async/await-функцию.
// Подробности об этом смотрите здесь: https://zellwk.com/blog/callbacks-to-promises
const readFilePromise = util.promisify(fs.readFile)

app.get('/testing', asyncHandler(async (req, res, next) => {
  const data = await readFilePromise('some-file')
})
У такого объекта ошибки не будет свойства status:
app.use((error, req, res, next) => {
  console.log('Error status: ', error.status)
  console.log('Message: ', error.message)
})
Результат логирования ошибки в консоли
В подобных случаях можно задать код ошибки, используемый по умолчанию. А именно, речь идёт об ошибке 500 Internal Server Error:
app.use((error, req, res, next) => {
  res.status(error.status || 500)
  res.json({
    status: error.status,
    message: error.message,
    stack: error.stack
  })
})
▍Изменение кода состояния ошибки
Предположим, мы собираемся прочитать некий файл, воспользовавшись данными, предоставленными пользователем. Если такого файла не существует, это значит, что нам нужно выдать ошибку 400 Bad Request. Ведь в том, что файл найти не удаётся, нет вины сервера.
В подобном случае нужно воспользоваться конструкцией try/catch для перехвата исходной ошибки. Затем нужно воссоздать объект ошибки с помощью createError:
app.get('/testing', asyncHandler(async (req, res, next) => {
  try {
    const { file } = req.body
    const contents = await readFilePromise(path.join(__dirname, file))
  } catch (error) {
    throw createError(400, `File ${file} does not exist`)
  }
})
▍Обработка ошибок 404
Если запрос прошёл через все промежуточные обработчики и маршруты, но так и не был обработан, это означает, что конечная точка, соответствующая такому запросу, не была найдена.
Для обработки ошибок 404 Not Found нужно добавить, между маршрутами и обработчиком ошибок, дополнительный обработчик. Вот как выглядит создание объекта ошибки 404:
// Промежуточные обработчики...
// Маршруты...

app.use((req, res, next) => {
  next(createError(404))
})

// Обработчик ошибок...
Сведения об ошибке
▍Замечания об ошибке ERR_HTTP_HEADERS_SENT
Не впадайте в панику если видите сообщение об ошибке ERR_HTTP_HEADERS_SENT: Cannot set headers after they are sent to the client. Она возникает из-за того, что в одном и том же обработчике многократно вызывается метод, устанавливающий заголовки ответа. Вот методы, вызов которых приводит к автоматической установке заголовков ответа:
- res.send
- res.json
- res.render
- res.sendFile
- res.sendStatus
- res.end
- res.redirect
Так, например, если вы вызовете методы res.render и res.json в одном и том же обработчике ответа, то вы получите ошибку ERR_HTTP_HEADERS_SENT:
app.get('/testing', (req, res) => {
  res.render('new-page')
  res.json({ message: '¯\_(ツ)_/¯' })
})
В результате, в том случае, если вы сталкиваетесь с этой ошибкой, тщательно проверьте код обработчиков ответа и убедитесь в том, что в нём нет ситуаций, в которых вызывается несколько вышеописанных методов.
▍Обработка ошибок и потоковая передача данных
Если что-то идёт не так при потоковой передаче ответа фронтенду, то можно столкнуться с той же самой ошибкой ERR_HTTP_HEADERS_SENT.
В подобном случае обработку ошибок нужно передать стандартным обработчикам. Такой обработчик отправит ошибку и автоматически закроет соединение.
app.use((error, req, res, next) => {
  // Сделать это нужно только в том случае, если ответ передаётся в потоковом режиме
  if (res.headersSent) {
    return next(error)
  }

  // Остальной код обработки ошибок
})
Итоги
Сегодня я рассказал вам всё, что знаю об обработке ошибок в Express. Надеюсь, это поможет вам писать более надёжные Express-приложения.
Уважаемые читатели! Как вы обрабатываете ошибки в своих Node.js-проектах?


HTTP response status codes are used in web development to determine whether a particular HTTP request has been completed successfully.
This article will talk about httpServerResponse.statusCode and how to use it in modern Node.js.
What is httpServerResponse.statusCode?
This property controls the status code that will be delivered to the client when the headers are flushed.
The httpServerResponse.statusCode is an internal application programming interface of class ServerResponse within the HTTP module.
Types of status codes
Status codes are a set of universal web development codes utilized to create apps all over the world.
- Informational responses (
100–199) - Successful responses (
200–299) - Redirects (
300–399) - Client errors (
400–499) - Server errors (
500–599)
How to usehttpServerResponse.statusCode
In our discussion, we’ll see some instances of how to use some of these status codes.
1.200 OK
The HTTP 200 OK response code implies a successful request.
Here is an example of this kind of HTTP response.
GET: The response contains an entity that corresponds to the resource requested.POST: An entity that describes or contains the action’s result.HEAD: In the response, the entity-header fields related to the requested resource are sent without any message-body.
Example:
app.get('/', function (req, res) {
    res.status(200).send('Status: OK')
});
2.201 Created
This indicates that the request was completed, and a new resource was created as a result. The URI(s) sent in the response entity can refer to the newly generated help, with a Location header field providing the most particular URI for the resource.
app.get('/', function (req, res) {
    res.status(201).send('Status: Created')
});
3.204 No Content
This response is sent when the server has completed the request and does not need to return an entity-body, but wants updated metainformation. The answer may contain additional or updated metadata in entity-headers, which should be associated with the requested variant if present.
app.get('/', function (req, res) {
    res.status(204).send('Status: No Content')
});
4.400 Bad Request
When the server is unable to understand the request due to incorrect syntax, this response is returned.
app.get('/', function (req, res) {
    res.status(400).send('Status: Bad Request')
});
5.401 Unauthorized
Even though the HTTP standard specifies “unauthorized,” this response indicates “unauthenticated” logically. To get the requested response, the client must first authenticate itself.
This response code can also be used to ensure the user has the proper access to the resource.
app.get('/', function (req, res) {
    res.status(401).send('Status: Unauthorized')
});
6.403 Forbidden
This response is gotten when the server refuses to provide the requested resource because the client does not have access permissions to the material; it is unauthorized. Unlike 401, the server is aware of the client’s identity.
app.get('/', function (req, res) {
    res.status(403).send('Status: Forbidden')
});
7.404 Not Found
This means the requested resource is unavailable on the server, or maybe the URL has been mistyped in the browser. This can also indicate that the endpoint is correct, but the resource does not exist in an API. This response may be used instead of 403 to conceal the existence of a resource from an unauthorized client.
app.get('/', function (req, res) {
    res.status(404).send('Status: Not Found')
});
8.500 Internal Server Error
The server ran into an unanticipated problem that stopped it from completing the request.
app.get('/', function (req, res) {
    res.status(500).send('Status: Internal Server Error')
});
9.503 Service Not Available
This happens due to a sudden overload or server maintenance and it means the server cannot handle the request.
app.get('/', function (req, res) {
    res.status(503).send('Status: Service Not Available')
});
10.504 Gateway Timeout
When the server is operating as a gateway and cannot promptly respond, this error response is returned.
app.get('/', function (req, res) {
    res.status(504).send('Status: GateWay Timeout')
});
There are many different status codes for HTTP responses, and we’ve gone through a few of them here. For more, see the resources section of this page.
Conclusion
In this article, we learned what status codes are and how to apply them in our applications.
Resources
- Status codes
Hi
I am relatively new to node.js. I am currently trying to figure out a 403 error which I am getting. My objective is to fetch the raw html data, and after scrape for specific data. I am not able to fetch the raw html data at this moment. Code is as follows.
const express = require('express');
const axios = require('axios'); const cors = require('cors'); const app = express();
app.use(cors());
app.get('/', function (req, res, next) { axios .get('https://stockx.com/adidas-yeezy-700-v3-alvah', { method: 'GET', mode: 'no-cors', headers: { 'Access-Control-Allow-Origin': '*', 'Content-Type': 'application/json', }, credentials: 'same-origin', }) .then((data) => console.log(data)) .catch((err) => console.log('error data', err.response)); });
app.listen(8000, function () { console.log(Listening on port 8000); });
What bothers me right now is that the request works fine on postman, but not through Node. Upon searching for answers, I made some adjustments to account for potential CORS conflicts, however I am still getting a 403 forbidden response. The error object is as follows.
{
  status: 403,
  statusText: 'Forbidden',
  headers: {
    date: 'Thu, 11 Jun 2020 01:31:32 GMT',
    'content-type': 'application/json',
    'content-length': '257',
    connection: 'close',
    'set-cookie': [
      '__cfduid=dbc29358fa0401162bfa0317aae94304e1591839092; expires=Sat, 11-Jul-20 01:31:32 GMT; path=/; domain=.stockx.com; HttpOnly; SameSite=Lax; Secure',
      '_pxhd=32b483d8b71f3d939a7fe09fcd8f322b3db066cd944e3d281b465758d1a37fdd:4810d6b1-ab83-11ea-a45d-e3c5bbb15d65; path=/;'
    ],
    'cf-request-id': '03429a07770000f9951c0bb200000001',
    'expect-ct': 'max-age=604800, report-uri="https://report-uri.cloudflare.com/cdn-cgi/beacon/expect-ct"',
    'strict-transport-security': 'max-age=31536000; includeSubDomains; preload',
    'x-content-type-options': 'nosniff',
    server: 'cloudflare',
    'cf-ray': '5a1792b8bbccf995-YYZ'
  },
  config: {
    url: 'https://stockx.com/adidas-yeezy-700-v3-alvddddah',
    method: 'get',
    headers: {
      Accept: 'application/json, text/plain, */*',
      'Access-Control-Allow-Origin': '*',
      'Content-Type': 'application/json',
      'User-Agent': 'axios/0.19.2'
    },
    transformRequest: [ [Function: transformRequest] ],
    transformResponse: [ [Function: transformResponse] ],
    timeout: 0,
    adapter: [Function: httpAdapter],
    xsrfCookieName: 'XSRF-TOKEN',
    xsrfHeaderName: 'X-XSRF-TOKEN',
    maxContentLength: -1,
    validateStatus: [Function: validateStatus],
    mode: 'no-cors',
    credentials: 'same-origin',
    data: undefined
  },
  request: ClientRequest {
    _events: [Object: null prototype] {
      socket: [Function],
      abort: [Function],
      aborted: [Function],
      error: [Function],
      timeout: [Function],
      prefinish: [Function: requestOnPrefinish]
    },
    _eventsCount: 6,
    _maxListeners: undefined,
    outputData: [],
    outputSize: 0,
    writable: true,
    _last: true,
    chunkedEncoding: false,
    shouldKeepAlive: false,
    useChunkedEncodingByDefault: false,
    sendDate: false,
    _removedConnection: false,
    _removedContLen: false,
    _removedTE: false,
    _contentLength: 0,
    _hasBody: true,
    _trailer: '',
    finished: true,
    _headerSent: true,
    socket: TLSSocket {
      _tlsOptions: [Object],
      _secureEstablished: true,
      _securePending: false,
      _newSessionPending: false,
      _controlReleased: true,
      _SNICallback: null,
      servername: 'stockx.com',
      alpnProtocol: false,
      authorized: true,
      authorizationError: null,
      encrypted: true,
      _events: [Object: null prototype],
      _eventsCount: 9,
      connecting: false,
      _hadError: false,
      _parent: null,
      _host: 'stockx.com',
      _readableState: [ReadableState],
      readable: true,
      _maxListeners: undefined,
      _writableState: [WritableState],
      writable: false,
      allowHalfOpen: false,
      _sockname: null,
      _pendingData: null,
      _pendingEncoding: '',
      server: undefined,
      _server: null,
      ssl: [TLSWrap],
      _requestCert: true,
      _rejectUnauthorized: true,
      parser: null,
      _httpMessage: [Circular],
      [Symbol(res)]: [TLSWrap],
      [Symbol(asyncId)]: 16,
      [Symbol(kHandle)]: [TLSWrap],
      [Symbol(lastWriteQueueSize)]: 0,
      [Symbol(timeout)]: null,
      [Symbol(kBuffer)]: null,
      [Symbol(kBufferCb)]: null,
      [Symbol(kBufferGen)]: null,
      [Symbol(kCapture)]: false,
      [Symbol(kBytesRead)]: 0,
      [Symbol(kBytesWritten)]: 0,
      [Symbol(connect-options)]: [Object]
    },
    connection: TLSSocket {
      _tlsOptions: [Object],
      _secureEstablished: true,
      _securePending: false,
      _newSessionPending: false,
      _controlReleased: true,
      _SNICallback: null,
      servername: 'stockx.com',
      alpnProtocol: false,
      authorized: true,
      authorizationError: null,
      encrypted: true,
      _events: [Object: null prototype],
      _eventsCount: 9,
      connecting: false,
      _hadError: false,
      _parent: null,
      _host: 'stockx.com',
      _readableState: [ReadableState],
      readable: true,
      _maxListeners: undefined,
      _writableState: [WritableState],
      writable: false,
      allowHalfOpen: false,
      _sockname: null,
      _pendingData: null,
      _pendingEncoding: '',
      server: undefined,
      _server: null,
      ssl: [TLSWrap],
      _requestCert: true,
      _rejectUnauthorized: true,
      parser: null,
      _httpMessage: [Circular],
      [Symbol(res)]: [TLSWrap],
      [Symbol(asyncId)]: 16,
      [Symbol(kHandle)]: [TLSWrap],
      [Symbol(lastWriteQueueSize)]: 0,
      [Symbol(timeout)]: null,
      [Symbol(kBuffer)]: null,
      [Symbol(kBufferCb)]: null,
      [Symbol(kBufferGen)]: null,
      [Symbol(kCapture)]: false,
      [Symbol(kBytesRead)]: 0,
      [Symbol(kBytesWritten)]: 0,
      [Symbol(connect-options)]: [Object]
    },
    _header: 'GET /adidas-yeezy-700-v3-alvddddah HTTP/1.1\r\n' +
      'Accept: application/json, text/plain, */*\r\n' +
      'Access-Control-Allow-Origin: *\r\n' +
      'Content-Type: application/json\r\n' +
      'User-Agent: axios/0.19.2\r\n' +
      'Host: stockx.com\r\n' +
      'Connection: close\r\n' +
      '\r\n',
    _onPendingData: [Function: noopPendingOutput],
    agent: Agent {
      _events: [Object: null prototype],
      _eventsCount: 2,
      _maxListeners: undefined,
      defaultPort: 443,
      protocol: 'https:',
      options: [Object],
      requests: {},
      sockets: [Object],
      freeSockets: {},
      keepAliveMsecs: 1000,
      keepAlive: false,
      maxSockets: Infinity,
      maxFreeSockets: 256,
      maxCachedSessions: 100,
      _sessionCache: [Object],
      [Symbol(kCapture)]: false
    },
    socketPath: undefined,
    method: 'GET',
    insecureHTTPParser: undefined,
    path: '/adidas-yeezy-700-v3-alvddddah',
    _ended: true,
    res: IncomingMessage {
      _readableState: [ReadableState],
      readable: false,
      _events: [Object: null prototype],
      _eventsCount: 3,
      _maxListeners: undefined,
      socket: [TLSSocket],
      connection: [TLSSocket],
      httpVersionMajor: 1,
      httpVersionMinor: 1,
      httpVersion: '1.1',
      complete: true,
      headers: [Object],
      rawHeaders: [Array],
      trailers: {},
      rawTrailers: [],
      aborted: false,
      upgrade: false,
      url: '',
      method: null,
      statusCode: 403,
      statusMessage: 'Forbidden',
      client: [TLSSocket],
      _consuming: false,
      _dumped: false,
      req: [Circular],
      responseUrl: 'https://stockx.com/adidas-yeezy-700-v3-alvddddah',
      redirects: [],
      [Symbol(kCapture)]: false
    },
    aborted: false,
    timeoutCb: null,
    upgradeOrConnect: false,
    parser: null,
    maxHeadersCount: null,
    reusedSocket: false,
    _redirectable: Writable {
      _writableState: [WritableState],
      writable: true,
      _events: [Object: null prototype],
      _eventsCount: 2,
      _maxListeners: undefined,
      _options: [Object],
      _redirectCount: 0,
      _redirects: [],
      _requestBodyLength: 0,
      _requestBodyBuffers: [],
      _onNativeResponse: [Function],
      _currentRequest: [Circular],
      _currentUrl: 'https://stockx.com/adidas-yeezy-700-v3-alvddddah',
      [Symbol(kCapture)]: false
    },
    [Symbol(kCapture)]: false,
    [Symbol(kNeedDrain)]: false,
    [Symbol(corked)]: 0,
    [Symbol(kOutHeaders)]: [Object: null prototype] {
      accept: [Array],
      'access-control-allow-origin': [Array],
      'content-type': [Array],
      'user-agent': [Array],
      host: [Array]
    }
  },
  data: {
    appId: 'PX16uD0kOF',
    jsClientSrc: '/16uD0kOF/init.js',
    firstPartyEnabled: true,
    vid: '',
    uuid: '4810d6b0-ab83-11ea-a45d-e3c5bbb15d65',
    hostUrl: '/16uD0kOF/xhr',
    blockScript: '/16uD0kOF/captcha/captcha.js?a=c&u=4810d6b0-ab83-11ea-a45d-e3c5bbb15d65&v=&m=0'
  }
}
Any help would be greatly appreciated.
Thanks so much.