Hello @jiriks74,
thank you very much for your quick reply and sorry for my late feedback.
I can’t do your procedure unfortunately as I am not using an ARM64 based system. I am using a virtual machine running Nextcloud. As Docker I use the package docker-ce, docker-compose is not installed on my system.
However, the parameters are the same.
I use the following command to start docker:
docker run —name=onlyofficedocker -i -t -d -p 172.17.0.1:443:443 -p 172.17.0. 1:80:80 -v /app/onlyoffice/DocumentServer/data:/var/www/onlyoffice/Data -e JWT_ENABLED=’true’ -e JWT_SECRET=’test’ -e JWT_IN_BODY=’true’ -e JWT_HEADER=’AuthorizationJwt’ —restart=always onlyoffice/documentserver
My apache2 ports config:
Listen 192.168.60.10:80
Listen 192.168.60.10:443
Lists 192.168.60.10:443
To explain this a bit further, 172.17.0.1 is the Docker IP, while 192.168.60.10 is the IP of the VM. This is how I realized that both can listen on both ports (80 and 443).
Docker 80 vHost config:
<VirtualHost *:80>
    ServerName office.yourdomain.com
    Redirect / https://office.yourdomain.de

    ErrorLog ${APACHE_LOG_DIR}/office.yourdomain.de.error.log
    CustomLog ${APACHE_LOG_DIR}/office.yourdomain.de.access.log combined
Docker 443 vHost config:
<VirtualHost *:443>
ServerName office.yourdomain.com

    ErrorLog ${APACHE_LOG_DIR}/office.yourdomain.de-ssl.error.log
    CustomLog ${APACHE_LOG_DIR}/office.yourdomain.de-ssl.access.log combined

    # SSL configuration
    SSLEngine on
    SSLCertificateFile /etc/ssl/wildcard/2022/star_yourdomain_en.crt
    SSLCertificateKeyFile /etc/ssl/wildcard/2022/star_yourdomain_en.key
SSLCertificateChainFile /etc/ssl/wildcard/2022/star_yourdomain_en_chain.crt
    SSLProxyEngine on
    SSLProxyVerify none
    SSLProxyCheckPeerCN off
    SSLProxyCheckPeerName off
    SSLProxyCheckPeerExpire off

    SetEnvIf Host "^(.*)$" THE_HOST=$1
    RequestHeader setifempty X-Forwarded-Proto https
    RequestHeader setifempty X-Forwarded-Host %{THE_HOST}e
    ProxyAddHeaders Off


    ProxyPassMatch (.*)(\/websocket)$ "ws:///office.yourdomain.com:80/$1$2"
    ProxyPass / "https://office.yourdomain.de/"
    ProxyPassReverse / "https://office.yourdomain.de/"
Nextcloud config.php:
»,
‘secret’ => »,
‘allow_local_remote_servers’ => true,
‘onlyoffice’ =>
array (
‘verify_peer_off’ => true,
‘jwt_secret’ => ‘test’,
‘jwt_header’ => ‘AuthorizationJwt’,
),
‘trusted_domains’ =>
array (
0 => ‘localhost’,
1 => ‘192.168.60.10’,
2 => ‘cloud.yourdomain.com’,
3 => ‘cloud.yourdomain.de’,
4 => ‘office.yourdomain.com’,
5 => ‘172.17.0.1’,
),
‘trusted_proxies’ =>
array (
0 => ‘172.17.0.1’,
1 => ‘office.yourdomain.com’,
),
‘default_phone_region’ => ‘DE’,
‘ldapIgnoreNamingRules’ => false,
‘datadirectory’ => ‘/var/nc_data’,
‘dbtype’ => ‘mysql’,
‘version’ => ‘23.0.3.2’,
‘overwrite.cli.url’ => ‘https://cloud.yourdomain.de’,
‘mail_smtpport’ => ‘587’,
‘mail_smtpsecure’ => ‘tls’,
‘mail_from_address’ => ‘admin’,
‘mail_domain’ => ‘yourdomain.com’,
‘mail_smtpauth’ => 1,
‘mail_smtpname’ => ‘admin@yourdomain.de’,
‘mail_smtpauthtype’ => ‘LOGIN’,
‘app_install_overwrite’ =>
array (
0 => ‘gallery’,
1 => ‘fulltextsearch’,
2 => ‘groupfolders’,
),
‘dbname’ => ‘nextcloud’,
‘dbhost’ => ‘localhost’,
‘dbport’ => »
‘dbtableprefix’ => ‘oc_’,
‘mysql.utf8mb4’ => true,
‘dbuser’ => ‘nextcloud’,
‘installed’ => true,
‘ldapProviderFactory’ => ‘OCA\\User_LDAP\LDAPProviderFactory’,
‘activity_expire_days’ => 14,
‘auth.bruteforce.protection.enabled’ => true,
‘blacklisted_files’ =>
array (
0 => ‘.htaccess’,
1 => ‘Thumbs.db’,
2 => ‘thumbs.db’,
),
‘cron_log’ => true,
‘enable_previews’ => true,
‘memcache.local’ => ‘\\OC\\Memcache\\Redis’,
‘filelocking.enabled’ => ‘true’,
‘memcache.locking’ => ‘\\OC\\Memcache\\Redis’,
‘redis’ =>
array (
‘host’ => ‘/run/redis/redis.sock’,
‘port’ => 0,
‘timeout’ => 1.5,
),
‘enabledPreviewProviders’ =>
array (
0 => ‘OC\\Preview\\PNG’,
1 => ‘OC\\Preview\\JPEG’,
2 => ‘OC\\Preview\\GIF’,
3 => ‘OC\\Preview\\BMP’,
4 => ‘OC\\Preview\\XBitmap’,
5 => ‘OC\\Preview\\Movie’,
6 => ‘OC\\Preview\\PDF’,
7 => ‘OC\\Preview\\MP3’,
8 => ‘OC\\Preview\\TXT’,
9 => ‘OC\\Preview\\MarkDown’,
),
‘filesystem_check_changes’ => 0,
‘htaccess.RewriteBase’ => ‘/’,
‘integrity.check.disabled’ => false,
‘knowledgebaseenabled’ => false,
‘log_rotate_size’ => 104857600,
‘logfile’ => ‘/var/log/nextcloud/nextcloud.log’,
‘loglevel’ => 2,
‘logtimezone’ => ‘Europe/Berlin’,
‘preview_max_x’ => 1024,
‘preview_max_y’ => 768,
‘preview_max_scale_factor’ => 1,
‘quota_include_external_storage’ => false,
‘share_folder’ => ‘/Freigaben’,
‘skeletondirectory’ => »,
‘trashbin_retention_obligation’ => ‘auto, 7’,
‘maintenance’ => false,
);
The Office page opens, a test document can be created.
However, the connection does not work, I get the same error,
you described in the start post. Do you think I am doing something wrong?
Thanks in advance and best regards
ONLYOFFICE имеет хорошую поддержку документов в формате Microsoft Office, поэтому выбор пал на него.
Технологический стек:
- ONLYOFFICE Docs Community.
- CentOS 9 под ONLYOFFICE.
- NextCloud развёрнут в TrueNAS и работает в Jail, но у вас может работать на чём угодно.
Устанавливаем через snap – это просто и быстро.
Добавить репозиторий EPEL:
sudo yum install epel-releaseУстановить snap:
sudo yum install snapdВключить системный модуль, который управляет основным сокетом связи snap:
sudo systemctl enable --now snapd.socketВключить поддержку классической привязки, создав символическую ссылку между /var/lib/snapd/snap и /snap:
sudo ln -s /var/lib/snapd/snap /snapУстановить ONLYOFFICE:
sudo snap install onlyoffice-dsПерезагрузить сервер:
sudo reboot -nНастройка сети
Открыть порты, на которых работает ONLYOFFICE:
sudo firewall-cmd --permanent --zone=public --add-port=80/tcp
sudo firewall-cmd --permanent --zone=public --add-port=443/tcp
sudo firewall-cmd --reload
Вы уже можете заходить по адресу вашего сервера и наблюдать работу сервера ONLYOFFICE.
Настройка SSL и работа по HTTPS
Если у вас уже есть сертификат и ключ, чуть ниже читайте куда их поместить. Мы же сейчас разберём как создать самоподписанный сертификат для использования его на сервере ONLYOFFICE.
Перейти во временный каталог:
cd /tmpСоздать закрытый ключ:
openssl genrsa -out onlyoffice.key 2048Создать запрос на подпись сертификата:
openssl req -new -key onlyoffice.key -out onlyoffice.csrПодписать сертификат:
openssl x509 -req -days 365 -in onlyoffice.csr -signkey onlyoffice.key -out onlyoffice.crtДля усиления безопасности сервера сгенерировать усиленный dhparam:
openssl dhparam -out dhparam.pem 2048Скопировать созданные файлы в рабочий каталог ONLYOFFICE:
cp onlyoffice.key /var/snap/onlyoffice-ds/current/var/www/onlyoffice/Data/certs/
cp onlyoffice.crt /var/snap/onlyoffice-ds/current/var/www/onlyoffice/Data/certs/
cp dhparam.pem /var/snap/onlyoffice-ds/current/var/www/onlyoffice/Data/certs/
Разрешить серверу использовать самоподписанные сертификаты:
snap set onlyoffice-ds onlyoffice.use-unautorized-storage=trueПерезапустить ONLYOFFICE, чтобы он подхватил настройки и начал автоматически работать по HTTPS:
snap restart onlyoffice-dsСертификат и ключ будут действительны год, через год повторите описанное в данном разделе.
Дополнительные команды
Перейти на HTTP удалив сертификат и перезапустив ONLYOFFICE:
rm /var/snap/onlyoffice-ds/current/var/www/onlyoffice/Data/certs/onlyoffice.*
rm /var/snap/onlyoffice-ds/current/var/www/onlyoffice/Data/certs/dhparam.pem
snap restart onlyoffice-ds
Сменить HTTPS-порт:
snap set onlyoffice-ds onlyoffice.ds-ssl-port=8443Сменить HTTP-порт:
snap set onlyoffice-ds onlyoffice.ds-port=8080Включить примеры на сервере, чтобы проверить работу сервера без подключения к NextCloud:
snap set onlyoffice-ds onlyoffice.example-enabled=trueПосле выполнения команды на главной странице сервера жмите на кнопку и проверяйте работу сервера:

Если работает, то можно подключать к NextCloud. Не забудьте потом отключить:
snap set onlyoffice-ds onlyoffice.example-enabled=falseПолучить секретный ключ
Необходимо узнать секретный ключ, который требуется указать в NextCloud, чтобы он мог подключаться к ONLYOFFICE. Для этого на сервере, где установлен ONLYOFFICE открываем файл /var/snap/onlyoffice-ds/current/etc/onlyoffice/documentserver/local.json
Ищем секцию secret и записываем секретный ключ:

Он нам пригодится дальше.
Настройка интеграции ONLYOFFICE и NextCloud
Кстати, есть небольшие особенности при интеграции, поэтому не упускайте детали.
Идём в настройки NextCloud https://{IP-DOMEN}/settings/apps/files и включаем плагин ONLYOFFICE connector:

После включения идём в настройки плагина https://{IP-DOMEN}/settings/admin/onlyoffice

(1) — указать домен сервера или IP-адрес доступный снаружи, на котором развёрнут ONLYOFFICE. Если указать IP вашей внутренней сети, то редактировать документы сможете только с внутренней сети, так как NextCloud при открытии документов на редактирование обращается по этому адресу к ONLYOFFICE с вашего устройства (проверьте). И понятно, что если этот адрес недоступен из внешнего мира, то вы не сможете работать с документами.
(2) — тут указываем секретный ключ, который записали ранее узнав его в секции secret.
(3) — тут указываете IP сервера ONLYOFFICE принадлежащий к вашей внутренней сети.
(4) — здесь я указал домен NextCloud, который доступен из внешней сети. По умолчанию он и подставляется сюда.
Далее я выставил следующие настройки, так как считаю их оптимальными для себя:

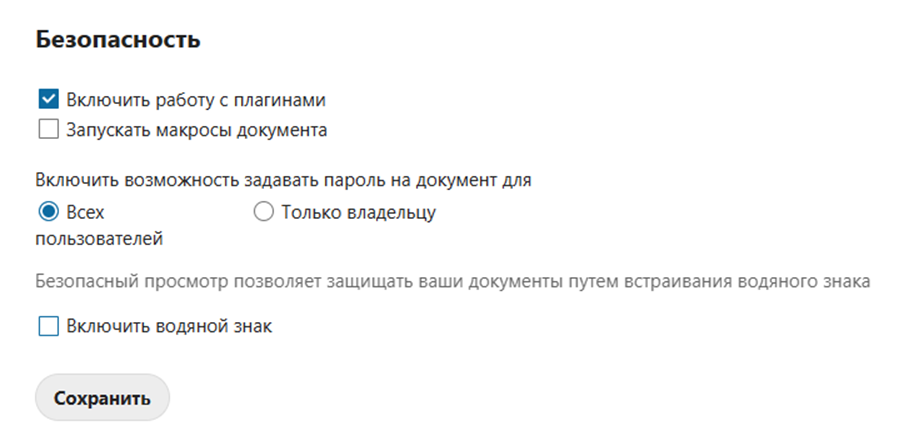
Вы можете указывать свои настройки.
Особенности интеграции
- Первую особенность я озвучил выше, когда указывал какой IP прописывать, чтобы можно было документы править не только из локальной сети.
- Если время на сервере NextCloud отличается от времени на сервере ONLYOFFICE, то вы получите ошибку при сохранении настроек интеграции «При попытке соединения возникла ошибка (Возникла ошибка в службе документов: Error while downloading the document file to be converted.)». Устанавливайте одинаковое время и настройте синхронизацию серверов с каким-нибудь NTP сервером. У Google их четыре https://developers.google.com/time/guides
- Если при сохранении настроек синхронизации получаете ошибку «…Invalid Token», то скорее всего пока вы правили настройки NextCloud сбросил секретный ключ. Проверьте и снова внесите корректное значение.

Loading
Добрый день! Нужна помощь. Не получается связать приложение Nextcloud с Onlyoffice.
Настраивал из docker контейнеров приложения Nextcloud и Onlyoffice. Отдельно приложения работают.
Работает на самоподписных ssl сертификатах. Перед Nextcloud-ом настроен реверс прокси. Проксирует имя example на 192.168.1.10:8088. Приложение открывает. При добавлении сервера из веб-браузера выходит ошибка «При попытке соединения возникла ошибка (Ошибка запроса или тайм-аута).
Поиск в интернете дает ответ, что ругается на самоподписные сертификаты. Но они поидее должны работать в локальной сети бех валидных сертов.
В какую сторону «копать» ?
Логи из сервера nextcloud:
{«reqId»:»8aTGtsuZtKwWXD9J75iU»,»level»:3,»time»:»2017-09-25 17:55:41″,»remoteAddr»:»172.17.0.1″,»user»:»nextcloud»,»app»:»onlyoffice»,»method»:»PUT»,»url»:»\/apps\/onlyoffice\/ajax\/settings»,»message»:»CommandRequest on check error: \u041e\u0448\u0438\u0431\u043a\u0430 \u0437\u0430\u043f\u0440\u043e\u0441\u0430 \u0438\u043b\u0438 \u0442\u0430\u0439\u043c\u0430\u0443\u0442″,»userAgent»:»Mozilla\/5.0 (Windows NT 10.0; Win64; x64) AppleWebKit\/537.36 (KHTML, like Gecko) Chrome\/60.0.3112.113 Safari\/537.36″,»version»:»12.0.3.3″}
Прикрепляю скрин добавления сервера из веб-интерфейса.
Заранее благодарен за любую помощь.
![]()
I have installed ONLYOFFICE 4.1.4 and Community Document Server 0.1.3 on Nextcloud 18.0.0 running in a Docker container (official image) on Ubuntu 19.10 x64.
When I go to the ONLYOFFICE settings the «Document Editing Service address» and «Server address for internal requests from the Document Editing Service» are prefilled with the address of my Nextcloud instance but the «Document Editing Service address for internal requests from the server» is empty.
If I hit save on the settings page I get an error toast with the message «Error when trying to connect (Bad healthcheck status)». There are no Onlyoffice options in either the create file menu or the file context menu.
![]()
Still not working with 0.1.5.
I noticed this in my Nextcloud logs (via settings > Logging) —
[PHP] Error: fclose(): supplied resource is not a valid stream resource at /var/www/html/custom_apps/documentserver_community/lib/Document/FontManager.php#66
GET /index.phpapps/update/documentserver_community
from 59.167.111.65 by allan at 2020-02-04T12:59:10+00:00
… and this in my docker logs for the nextcloud container —
[Tue Feb 04 20:59:38.166593 2020] [authz_core:error] [pid 125] [client 59.167.111.65:0] AH01630: client denied by server configuration: /var/www/html/config
![]()
![]()
Stuck at this point too, also behind a nginx reverse proxy.
![]()
Similar setup and healthcheck error on our side:
nginx reverse proxy & ssl termination (no docker)
To fix this error we added a different subdomain as «Document Editing Service address» and «Server address for internal requests from the Document Editing Service» and as trusted_domain in config.php.
![]()
I fixed my issue by letting removing the ONLYOFFICE application only, then installing it again. The correct server address was already filled in, but I just avoided pressing save on it and it then worked correctly and could connect.
![]()
The following fixed my issue on a NC 19.0.6 installation with OO 0.1.8 DSCE.
- In the OO-settings page I simply removed ALL server-entries and REFRAINED from clicking the safe-button.
- After that I switched to another settings page, the «Overview» in my case, and returned to the OO-settings without changing anything else.
- The OO-settings had been auto-filled with working entries, see below. Clicking on the safe-button at that time successfully enabled OO in my NC-installation.
The entry that had been auto-filled was:
https://<MY.DOMAIN.TLD>/index.php/apps/documentserver_community/
![]()
@LordMort : Thanks! Your the hero of the day with that URL — did the trick on v.21 and current OO as of today…
![]()
The following fixed my issue on a NC 19.0.6 installation with OO 0.1.8 DSCE.
- In the OO-settings page I simply removed ALL server-entries and REFRAINED from clicking the safe-button.
- After that I switched to another settings page, the «Overview» in my case, and returned to the OO-settings without changing anything else.
- The OO-settings had been auto-filled with working entries, see below. Clicking on the safe-button at that time successfully enabled OO in my NC-installation.
The entry that had been auto-filled was: https://<MY.DOMAIN.TLD>/index.php/apps/documentserver_community/
if this dosent work try adding /index.php/apps/documentserver_community/ to the end of the url
for example your server is at https://<MY.DOMAIN.TLD>/ fill in https://<MY.DOMAIN.TLD>/index.php/apps/documentserver_community/
![]()
The following fixed my issue on a NC 19.0.6 installation with OO 0.1.8 DSCE.
- In the OO-settings page I simply removed ALL server-entries and REFRAINED from clicking the safe-button.
- After that I switched to another settings page, the «Overview» in my case, and returned to the OO-settings without changing anything else.
- The OO-settings had been auto-filled with working entries, see below. Clicking on the safe-button at that time successfully enabled OO in my NC-installation.
The entry that had been auto-filled was: https://<MY.DOMAIN.TLD>/index.php/apps/documentserver_community/
In my case I had to click «Save», but simply changing the URL manually works the same. Just ensure that it includes the «index.php». Also, it’s important that both «Nextcloud Office» and «Collabora Online — Built-in CODE Server» are disabled. Otherwise, documents will be stalled at the loading screen as [at least one of] the two apps appear to interfere with ONLYOFFICE somehow. Once disabled, everything worked fine for me.
![]()
In my case, I had installed OnlyOffice from NextCloud’s app directory, but documentserver_community had not been downloaded automatically. I had to add it myself, then activate it, then re-enable the OnlyOffice connector, and now things run fine.
I followed the SpaceInvader video for setting up OnlyOffice. However at the very last step when I click save, an error pop out and say «Error when trying to connect (bad healthcheck status». I did tried to remove the cert and key file and recopy again but still not working. I am still a newbie. Could anyone tell me what is the problem?
I have copy and paste my conf file below for referrence as well: —
# only office doc server
server {
listen 443 ssl;
server_name onlyoffice.*;
include /config/nginx/ssl.conf;
client_max_body_size 0;
location / {
include /config/nginx/proxy.conf;
resolver 127.0.0.11 valid=30s;
set $upstream_docs OnlyOfficeDocumentServer;
proxy_pass https://$upstream_docs:443;
proxy_redirect off;
proxy_set_header Host $host;
proxy_set_header X-Real-IP $remote_addr;
proxy_set_header X-Forwarded-For $proxy_add_x_forwarded_for;
proxy_set_header X-Forwarded-Host $server_name;
proxy_set_header X-Forwarded-Proto $scheme;
}
}

Edited August 3, 2020 by Wong
Nextcloud + OnlyOfficeDocumentServer + NGINX = Error when trying to connect (Bad healthcheck status)
I gave up on Nextcloud’s OnlyOffice integration to work properly so went down the rabbit hole of installing the DocumentServer docker and setting everything up.
I get the above error when trying to save the URL for the Document Editing Service Address (https://documentserver.mydomain.com)
I’m able to ping the documentserver.mydomain.com. I can type the documentserver.mydomain.com into FireFox and the Welcome page displays so I’m thinking it’s not a Cloudflare/NGINX issue otherwise I wouldn’t be able to reach documentserver.mydomain.com at all via URL or Pinging it.
I’m at a loss as to what to try next however. Any suggestions?