3 способа исправить ошибку SteamVR 108 (01.28.23)
 steamvr error 108
Многие пользователи, вероятно, уже знакомы со SteamVR, режимом виртуальной реальности, предлагаемым Steam, который позволяет пользователям играть во все свои любимые игры в VR, если они поддерживают эту функцию. Это удобная функция, но она не лишена недостатков. Существует множество ошибок, с которыми можно столкнуться при его использовании по разным причинам, одна из основных — ошибка SteamVR 108. Это ошибка, которая возникает, когда система не может идентифицировать гарнитуру виртуальной реальности пользователя. Если вы тоже сталкиваетесь с этим, вот несколько возможных решений, которые стоит попробовать.
Лучшие способы решения ошибки SteamVR 108:
Как мы уже упоминали, ошибка SteamVR 108 возникает, когда система не может определить гарнитуру VR, которую подключили пользователи. Это обычное дело, и не о чем беспокоиться. Самое простое решение, которое подходит большинству пользователей, — просто выключить компьютер, пока к нему подключена гарнитура. Теперь просто включите его и подождите некоторое время, прежде чем запускать какие-либо приложения. Система сможет идентифицировать набор виртуальной реальности как устройство вывода, и после этого ошибка не возникнет.
Практически для всех VR-гарнитур, которые используются с компьютерами, есть соединительный блок, который позволяет использовать устройство с ПК. Переключение и включение питания этого блока должно быть более чем достаточно, чтобы сбросить соединение и исправить ошибку. Примером таких ящиков может служить Link Box, с которым наверняка знакомы пользователи гарнитуры Oculus. Независимо от того, какой у вас есть, метод включения и выключения питания у них очень похож.
Просто отсоедините разъем от компьютера и подождите минуту или две. По прошествии этого небольшого времени подключите его снова. Убедитесь, что SteamVR отключен и не работает в фоновом режиме на протяжении всего процесса. Это завершит цикл питания, и в систему могут быть установлены некоторые новые драйверы, которые гарантируют, что игроки больше не столкнутся с этой проблемой.
Говоря о драйверах, если последнего решения было недостаточно для исправления ошибки 108, мы рекомендуем вам попробовать последний метод, который немного более экстремален. Это требует от пользователей избавиться от всех драйверов, связанных со SteamVR, в настройках Windows и убедиться, что все они удалены. Как только это будет сделано, отключите гарнитуру и выключите компьютер.
Перед повторным включением подключите гарнитуру. После перезагрузки системы и идентификации гарнитуры она автоматически загрузит все необходимые драйверы. Если какие-то из них, связанные со SteamVR, все еще отсутствуют после этого, их можно легко загрузить через официальный сайт Steam. Ошибка должна быть устранена после выполнения всех этих действий.
YouTube видео: 3 способа исправить ошибку SteamVR 108
01, 2023
SteamVR Error 108 or Steam vr headset not detected is a generic HMD error message. HTC Vive is developed by HTC and Valve for virtual reality experience as a fully immersive virtual reality headset. It uses the room-scale tracking technology that makes it possible for users to move and interact with the 3D environment. However, as many other peripheral device it has it’s own issues. Sometimes users cannot connect the HTC Vive headset to the SteamVr. The most common errors they are getting are HTC Vive Error 108 and HTC Vive Error 208. Those errors can have a number of solutions, so please follow our today’s guide to make sure you’ve attempted all available solutions.
SteamVR Error 108
How to fix the Steam vr headset not detected – Hardware Issues
Before beginning with any of the methods how to fix it, you need to check if each cable is connected properly. Also, check that Link Box isn’t connected backward. The HTC fully immersive virtual reality headset will have the power port in the middle and all the cable will be close to. The computer will have the power port on the corner and there’ll be a space between HDMI and USB port. The solutions mentioned below are from the hardware part.
Fix 1 – Restart your computer
The “old trick” in some cases by simply restarting your computer can solve SteamVR error 108. By restarting your computer you also are restarting even your devices or applications. In this way it allows your headset device to reload his resources by solving the connectivity issues.
- Click on the Start menu in your taskbar
- Click on the Power button.
- Choose Restart from the context menu. Or you can choose the Shutdown option and manually power on your computer after it is powered off.
- After your computer has restarted, check if it resolves the problem.
Note: If after the restart the problem is still present, you can try to run your Steam in an administrator mode. Right-click on Steam shortcut and choose Run as administrator option to run steam as admin.
Fix 2 – Connect HTC Vive Headset Directly to Computer
Sometimes the Link Box can be the main cause for the connection problem between HTC Vive headset and your computer. You as a user in this case will get the pop-up message with vive error 108. You can try to skip the Link Box and connect the USB and HDMI direct to PC. However, do not disconnect the power cables from Link Box, as your HTC Vive headset needs the power to run. Before trying to perform the below steps make sure all the cables are connected.
- Unplug the USB and HDMI cables from your PC. Now unplug the HDMI and USB cables from Link Box.
- Do not unplug the Power cable from both sides of the Link Box.
- Now plug the USB and HDMI cable of the HTC Vive headset directly into your PC.
Note: Try connecting the USB cable in USB 2.0 port rather than USB 3.0. - Reboot your computer and then check if the SteamVR error 108 is solved.
Fix 3 – Checking the HTC Vive Headset Connections
Most of the time the USB cable inside the HTC Vive headset is connected to the wrong port. You can open the headset top part and change the cable by performing this simple steps:
- Take the top part of the HTC Vive headset off. Change the USB cable port from the side port to the middle port (USB 2.0).
- If that doesn’t work, then make sure to unplug all the other cables connected to the HTC Vive headset and plug it back again.
- Check if this will solve HTC Vive Error 108.
How to fix the Steam vr headset not detected – Software Issues
Fix 1 – Uninstall the Graphics drivers, and let Windows install its own
Since this is after all a driver issue, one more possible solution is to uninstall the drivers you have installed and let Windows install its own. Windows will find compatible drivers which shouldn’t be causing any issues with your computer, and you will be able to use it without worrying afterward. The steps to doing this are fairly easy.
- Go to “Search”, type device manager, and choose “Device Manager” from the result. Then it opens with your computer name at the top and a list of devices that are installed on your computer beneath your computer name.
- Find and right-click the problematic device and choose “Properties”.
- Click “Driver” and then choose “Update Driver”.
- Click “Search automatically for updated driver software”.
- After the update, restart your computer
- Check if this will solve Vive Error 108.
Fix 2 – Enable Direct Mode on SteamVR
- Go to the Start menu, and launch Steam.
- Start SteamVR by clicking the VR button.
- Click the dropdown arrow, go to Settings, and select Developer.
- Make sure that Direct Mode is enabled, and restart your PC.
- Check if this will solve SteamVR error 108.
Fix 3 – Select the beta version of SteamVR
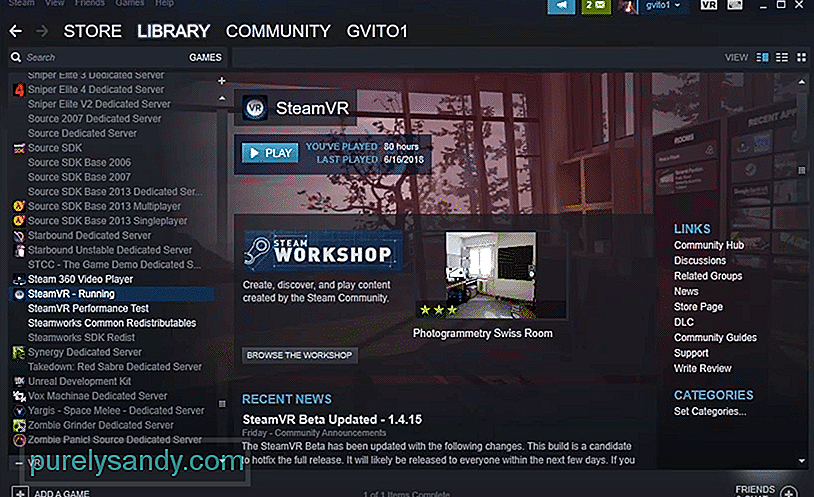
- Launch Steam, go to Library, and select Tools.
- Right-click on SteamVR, and go to Properties.
- Click on the Betas tab, and navigate to Select the beta you would like to opt into.
- Select None, close the menu, and restart your PC.
- Check if this will solve HTC Vive Error 108 and HTC Vive Error 108 issues.
Fix 4 – Reinstall your SteamVR USB devices
- Unplug all cables from your PC, and launch Steam.
- Open SteamVR, go to Settings, and select Developer.
- Click on Remove all SteamVR USB Device.
- Select Yes, and Continue.
- Restart your PC.
- Check if this will solve the error.
Fix 5 – Re install SteamVR to fix SteamVR error 108
- Launch Steam, go to Library, and select Tools.
- Right–click on SteamVR, select Uninstall, and click Delete.
- Restart your PC, and follow the above steps again, but this time select Install.
- Check if this will solve the error.
Fix 6 – Other fix for SteamVR error 108 from Steam Support
- Make sure that your Vive’s Link Box and the monitor or TV you use as a primary display are plugged into the same graphics card. If you are connected to your onboard display adapter, you will see an Intel HD Graphics device listed in your SteamVR system report. Onboard cards, such as those connected to a PC’s motherboard, will not be powerful enough to use the Vive. Reconnect your Vive to your PC’s dedicated graphics card.
- Check to make sure you are in Direct Display Mode by going to the menu in the upper left of the SteamVR window and then Developer > Developer Settings > Direct Display Mode. Click the button that says “Enable Direct Display Mode.” SteamVR will restart with this setting.
- If Direct Display Mode is not enabled, SteamVR will still work but will run in Extended Mode. For this to work correctly, make sure your displays are extended in Windows > Display Settings
Fix 7 – General fix for SteamVR Error 108
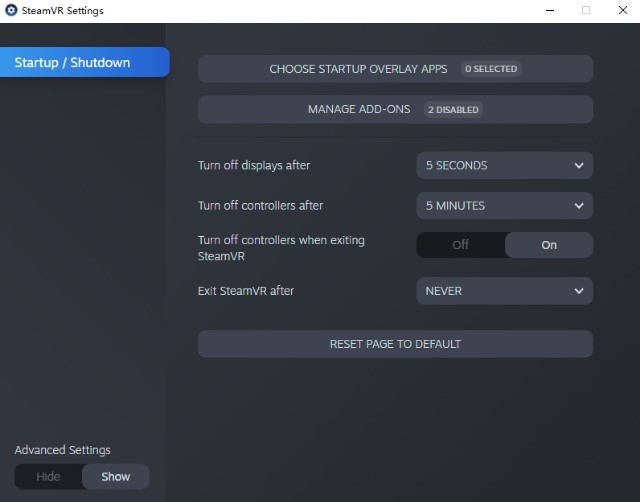
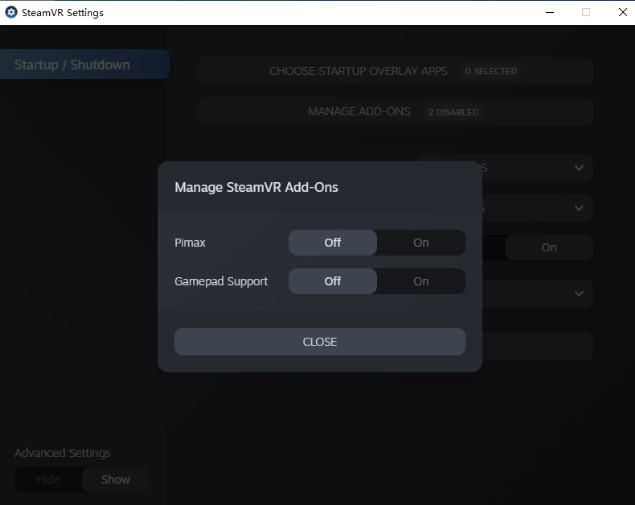
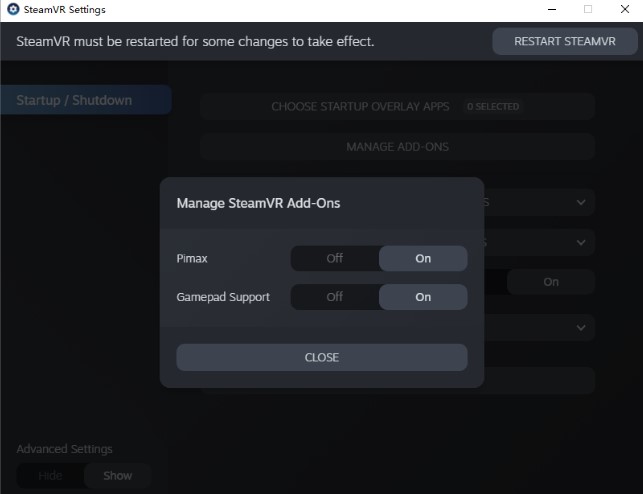
1. Open SteamVR Settings and choose MANAGE ADD-ONS
vive error 108
2. Turn on Pimax and Gamepad Support etc.
htc vive headset not detected
SteamVR Setting
3. Finally,Restart Steam VR
Restart Steam VR
If the settings cannot be saved after restarting Steam VR, please save the settings and restart your computer before opening Steam VR.
Conclusions about SteamVR error 108:
In our step-by-step tutorial, we have provided all the possible solutions for you to fix SteamVR error 108. We hope you will find this methods helpful. Have you managed to solve it? Please let us know in the comments below.
Возникают проблемы со SteamVR? После прочтения этой статьи, вы будете знать все самые распространенные ошибки и способы их устранения.
Если вы сталкивались с какими-либо проблемами при использовании SteamVR, то знаете, насколько сложно бывает найти решение проблемы. Из-за поддержки нескольких разных гарнитур и целого ряда сложных функций, устранение любых ошибок может быть чрезвычайно сложным.
К счастью, коды ошибок являются одним из самых простых способов диагностики проблемы. Если у вас возникли проблемы, будет полезно узнать несколько распространенных кодов ошибок SteamVR.
- Ошибка 108 — Гарнитура не обнаружена;
- Ошибка 113 — Путь реестра не доступен для записи;
- Ошибка 200 — Сбой драйвера;
- Ошибка 206 — Драйвер не откалиброван;
- Ошибка 207 — Неверная калибровка драйвера;
- Ошибка 208 — HMD-дисплей не найден;
- Ошибка 300 — SteamVR не удалось инициализировать по неизвестным причинам;
- Ошибка 301 — Ошибка подключения;
- Ошибка 302 — Ошибка инициализации;
- Ошибка 1101-1112 — Ошибка USB;
- SteamVR не запускается полностью;
Разберем по порядку эти ошибки и научимся их устранять.
Ошибка 108 — Гарнитура не обнаружена
Ошибка 108 становится все более распространенной в последние месяцы. Она вызвана проблемами при поиске гарнитуры VR. Однако двусмысленность этого сообщения означает, что найти решение может оказаться трудно, поскольку проблема может быть связана как с программным, так и с аппаратным обеспечением. Мы рекомендуем прочитать более подробное описание проблем с гарнитурой, чтобы найти правильное решение.
Ошибка 113 — Путь реестра не доступен для записи
Этот код ошибки вызван проблемами с правами записи пользователя в SteamVR. Чтобы SteamVR мог сохранять данные по нужным путям, проверьте, выставили ли вы разрешение на запись в каталог пользователя вашего компьютера.
Ошибка 200 — Сбой драйвера
Ошибка 200 появляется после возникновения проблем с драйвером OpenVR и часто связана с недостаточными разрешениями пользователя. Также это может быть вызвано конфликтами в каталоге драйверов SteamVR. Если вы вручную добавили в эту библиотеку неутвержденные файлы или драйверы, их следует удалить.
Ошибка 206 — Драйвер не откалиброван / Ошибка 207 — Неверная калибровка драйвера
Обе эти ошибки вызваны проблемами калибровки, возникающими когда файл калибровки не может быть загружен с гарнитуры. Если возникла эта проблема, Valve рекомендует выполнить следующие действия.
- Отключите гарнитуру VR от компьютера;
- Откройте десктопное приложение SteamVR;
- Откройте раскрывающееся меню SteamVR. Перейдите в Настройки> Сброс;
- Нажмите Удалить все устройства SteamVR USB;
- Подключите гарнитуру и подождите пока драйверы не будут автоматически переустановлены.
Если проблема не устранена, это может указывать на неисправную гарнитуру. В этом случае обратитесь к производителю гарнитуры за дополнительной информацией.
Ошибка 208 — HMD-дисплей не найден
Эта ошибка является результатом того, что дисплей гарнитуры VR не обнаружен. Чтобы ее устранить, проверьте все соединения между гарнитурой и ПК. Если вы используете HTC Vive, убедитесь, что ваши кабели правильно подключены через прилагаемый Link Box.
Ошибка 300 — SteamVR не удалось инициализировать по неизвестным причинам
Ошибка 300 является довольно редкой ошибкой SteamVR, и, если она появляется, ее часто можно исправить с помощью полной перезагрузки компьютера. С таким расплывчатым сообщением об ошибке часто трудно точно определить точную причину проблемы.
Большое количество пользователей, которые неоднократно сталкивались с ошибкой 300, выясняли, что источником этой проблемы являются привилегии. Выполнение запуска Steam с правами администратора, может решить эту проблему:
- Перейдите в папку с установленным Steam (часто C: Program Files (x86) Steam);
- Щелкните правой кнопкой мыши Steam.exe;
- Выберите Свойства;
- Перейдите на вкладку «Совместимость»;
- Установите флажок «Запускать эту программу от имени администратора».
Ошибка 301 — Ошибка подключения
Ошибка 301 является относительно распространенной ошибкой, вызванной невозможностью запустить или подключиться к vrserver.exe. Это часто происходит, если исполняемый файл уже запущен, что можно определить с помощью встроенного диспетчера задач Windows. Если vrserver.exe запущен, выйдите из процесса и попробуйте снова запустить SteamVR.
Ошибка 302 — Ошибка инициализации
Эта ошибка вызвана проблемами при запуске vrserver. Попробуйте перезагрузить компьютер и повторите попытку открыть SteamVR.
Ошибка 1101-1112 — Ошибка USB
Ошибки с 1101 по 1112 являются результатом сбоев USB, вероятно, вызванных проблемами с драйверами. Если они встречаются, мы рекомендуем выполнить следующие шаги:
- Отключите гарнитуру VR и все сопутствующие аксессуары от компьютера;
- Откройте десктопное приложение SteamVR;
- Откройте раскрывающееся меню SteamVR. Перейдите в Настройки> Сброс;
- Нажмите Удалить все устройства SteamVR USB;
- Повторно подключите гарнитуру, переключаясь между различными портами USB;
- После обнаружения дождитесь автоматической переустановки драйверов.
SteamVR не запускается полностью
Хотя коды ошибок SteamVR являются отличным способом выявления проблем, но в случае, когда приложение отказывается запускаться, они совершенно бесполезны. Распространенными причинами являются неправильные настройки SteamVR или конфликты программного обеспечения, которые можно исправить с помощью специального руководства.
Все еще испытываете проблемы?
Если ни одно из предложенных решений не устранило проблемы, Valve рекомендует отправить системный отчет в список рассылки SteamVR. Чтобы создать системный отчет, выполните следующие действия:
- Откройте vrmonitor;
- Перейдите на панель «Дополнительно» и выберите «Обзор»;
- Нажмите «Создать системный отчет», чтобы создать отчет;
- Выберите «Сохранить в файл», чтобы сохранить отчет в выбранном месте.
Помогли ли вам наши советы по устранению неполадок? Или вы все еще испытываете проблемы? Обязательно сообщите нам об этом в комментариях!
Are you trying to get Minecraft working in VR but are facing problems? If that’s the case, you have arrived at the right place!
In this article, I am going to share a variety of different steps you can take when you are having issues playing either Minecraft Java or Bedrock edition in VR.
I personally used a Meta (Oculus) Quest 2 headset for testing and installing both Minecraft editions (see my step-by-step setup guides), but most of the solutions should be applicable to other VR headsets as well.
The article is divided into the following sections:
- General checks and steps to solve Minecraft VR issues
- Troubleshooting Minecraft VR Java Edition
- Troubleshooting Minecraft VR Bedrock Edition
So without wasting any more time, let does get right into it!
First Steps When Minecraft VR is Not Working (Crashing, Not Launching, etc)
The truth is that there are so many different reasons why Minecraft VR might not be working properly. Whether the game doesn’t launch at all, throws a specific error message, or crashes right after you have started it.
In this specific section, I have included the most general guidelines and checks that are applicable both for Minecraft Java as well as the Bedrock edition. Later on, I will be diving into both of the different Minecraft editions separately to give more specific advice.
1) Check PC Requirements
In order to play Minecraft in VR, you are going to have to own a semi-decent gaming PC. The minimum requirements to run PC VR (Oculus Link / Air Link) with a Quest 2 are approximately following:
| Component | Recommended Specs |
| Processor | Intel i5-4590 / AMD Ryzen 5 1500X or greater |
| Graphics Card | NVIDIA GeForce GTX 970 comparable or better |
| Memory | 8 GB+ RAM |
| Operating System | Windows 10 |
The most important part here is that your PC should have a dedicated graphics card. VR games simply won’t run on a laptop with an integrated graphics card for example. If you are interested, I have made a more detailed article about Quest 2 PC VR requirements along with compatible GPUs.
With that being said, for Minecraft VR you can probably even get away with a PC slightly under the minimum requirements. Do also take into account here that the Minecraft Bedrock edition is easier to run than the Java edition. So if you know your PC is not that good, test Minecraft Bedrock edition first.
2) Run the Game in Regular Mode
Most of you have probably done this already, but before trying to launch Minecraft in VR, make a test run of the game in regular flat screen mode. Especially if you just installed the game.
By running the game, it will automatically create all the necessary configuration files and folders.
Secondly, you can verify that the game does indeed work in regular flat screen mode. If it doesn’t, there is no point in trying it in VR, is it?
3) Establish PC VR Connection Before Running Minecraft
Since your PC will be doing all the hard work of running the game, then before running Minecraft you are going to have to establish a PCVR connection between your headset and PC.
For the Quest 2, this means that you establish a regular wired Link or Air Link (wireless) connection and then launch either Minecraft Java Edition (Vivecraft) or Bedrock edition. For the Minecraft Java Edition, Virtual Desktop will work as well.
If you launch Minecraft before connecting your headset and PC, the game will understandably only start on your PC (and will not probably work as expected)
4) Try other PC VR methods
I have learned from my personal experience and the comments/questions voiced by other VR users that if you are having trouble with one PC VR method, it is almost always a good idea to try another one.
If Minecraft Java edition does not work for you with Air Link, try Virtual Desktop or wired Link connection. When Minecraft Bedrock Edition does not work with your preferred Link connection, try the other one.
There are two potential outcomes here. You either get the game working by trying an alternative method or you get additional information you can use for further troubleshooting.
5) Restart your PC & Headset
Restarting your devices is such an easy, yet one of the most effective ways to solve different problems. I can not count the number of times that restarting my Quest 2 and PC has solved unexpected PC VR issues I have faced.
So just go ahead and restart both your PC and headset and try launching the game again. You might be surprised!
Now it is time to get more specific and discuss the problems you might face with both of the different Minecraft editions separately.
Before we start, make sure to read my step-by-step Minecraft Java Edition installation article or watch my tutorial video below, so you can make sure that you took all the required steps and didn’t miss anything important!
If you seem to have done the installation process correctly but still couldn’t get the game running properly, then let’s go ahead and proceed with specific troubleshooting steps.
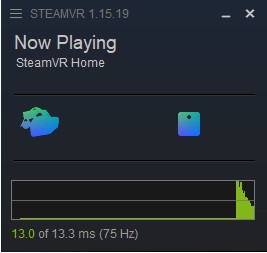
1) Check that SteamVR is Installed & Running Properly
Vivecraft, the custom mod that transforms Minecraft into a VR experience, uses SteamVR to commincate with your VR hardware. For this reason, SteamVR must be installed (along with Steam client) and configured properly in a way that it is able to detect your headset and controllers.
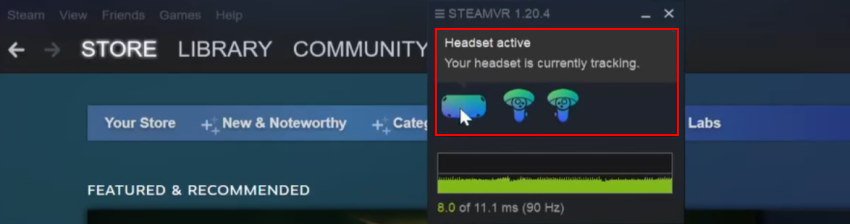
I personally did not have to launch SteamVR separately before starting the game. By establishing an Oculus Air Link connection and then launching Vivecraft from the Minecraft Launcher, it automatically started SteamVR and Minecraft Java Edition after that.
But in case you are having trouble, try launching SteamVR (make sure the headset is detected properly) before launching the game in VR.
2) Make Sure Java is Installed (if Vivecraft Installer Not Launching)
In case you download the Vivecraft installer, but it prompts you for an application to use or throws an error, you likely don’t have the proper Java Runtime Environment installed.
Minecraft Java Edition (with Vivecraft) requires you to have Java 8+ installed. The easiest way to check your current Java version is to open the Windows Command Prompt and type the command “java -version” (see an example below)
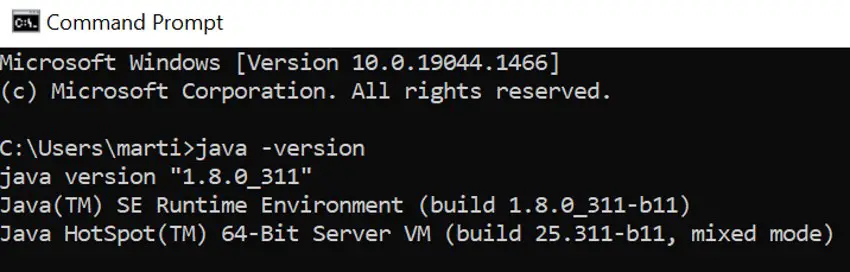
If you get a “java is not recognized as an internal or external command”, go to Java.com and download the latest Java RE. Install it and then try running the Vivecraft installer again.
3) Make Sure You Didn’t Install the Non-VR Version of Vivecraft
When you go to the Vivecraft download page, it gives you the option to download the “VR” and the “non-VR” version of the application. Make sure that you have actually downloaded and installed the VR version of Vivecraft.
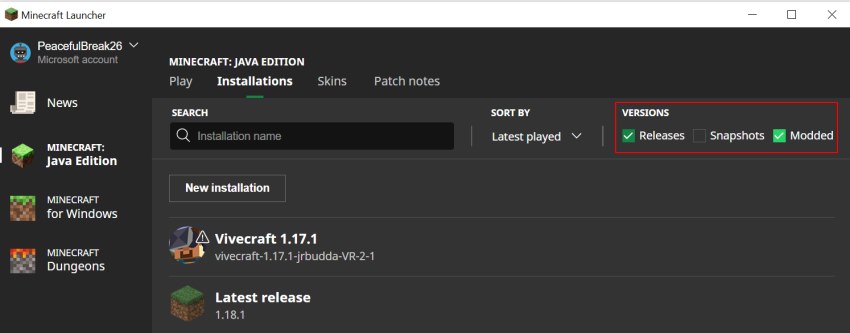
4) Launch “Vivecraft” from Minecraft Launcher
In order to get Minecraft Java Edition to launch in VR, you have to select the “Vivecraft X.XX.X” as the “game” you want to play.
If for some reason you can not see the Vivecraft version listed, navigate to the “Installations” tab and make sure the option to show “Modded” versions is enabled.
5) Configure Vivecraft to Use Dedicated GPU (Laptops)
This section is for people using a PC with dual graphics cards. For example, gaming laptops often have an integrated GPU as well as the more powerful dedicated GPU that is meant for gaming.
If you have a computer with dual GPUs and Minecraft Java Edition only loads up on the desktop but not in the headset, the problem might be that Minecraft is using the integrated GPU which is not suitable for VR gaming.
In order to force Minecraft to use the more powerful dedicated GPU, follow these steps:
- Launch Vivecraft from Minecraft Launcher
- Open Task Manager and navigate to “Details” tab
- Press “j” on your keyboard and locate “javaw.exe” process
- Right-click on the process and select “Open file location“
- Copy the folder location
- Right-click on Desktop and select “Display settings“
- Scroll down and select “Graphics settings“
- Click on “Browse” (in “Graphics performance preference” section)
- Paste the location you copied earlier and select the “javaw.exe” executable
- Select “High performance” and save.
If anything was left unclear, go ahead and watch my step-by-step Youtube video about this below:
Note! Different Vivecraft versions might use different javaw executables. So if you have several versions of Vivecraft installed and/or are installing a new version, you will have to repeat this process.
6) Check Minecraft Logs
Oftentimes if you are having problems launching Minecraft or the game crashes (or something entirely else) it is a good idea to check for additional information from log files.
You can potentially find useful troubleshooting information from the following Minecraft log file destinations:
- %APPDATA%/.minecraft/crash-reports/
- %APPDATA%/.minecraft/logs/latest.log
- %APPDATA%/.minecraft/launcher_log
- %APPDATA%/.minecraft/hs_err_pidXXX.log
You can investigate these logs yourself and google for solutions. If you are having trouble, go ask for help in the Vivecraft Forum and/or Discord.
7) Reinstall Minecraft & Vivecraft
Sometimes after a cascade of changes, updates and various things you have might tried, it would simply be the best idea to start from a blank sheet.
You can remove “Minecraft” by using the Windows “Add or remove programs” utility. After that you can reinstall Minecraft and Vivecraft using my tutorial or any other one you can find.
 Check Vivecraft FAQ
 Check Vivecraft FAQ
 If you are able to run Minecraft Java Edition properly on your PC flat screen but can not get it working in VR, the issue most likely has something to do with Vivecraft. Go ahead and check Vivecraft FAQ for matching symptoms/errors and potential solutions to your problem.
9) Try Minecraft Bedrock Edition Instead
If you can not get Minecraft Java Edition to work and you are willing to switch, it might be a good idea to also give Minecraft Bedrock Edition a try.
Minecraft Windows (Bedrock) is easier to run (you might get away with a below-average PC) and is different in terms of the technology stack it utilizes. For this reason, it might very well be that you will have more luck getting it to work compared to Java Edition.
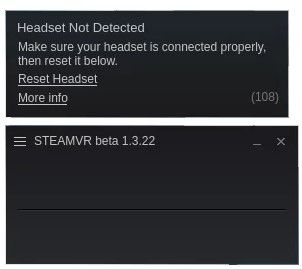
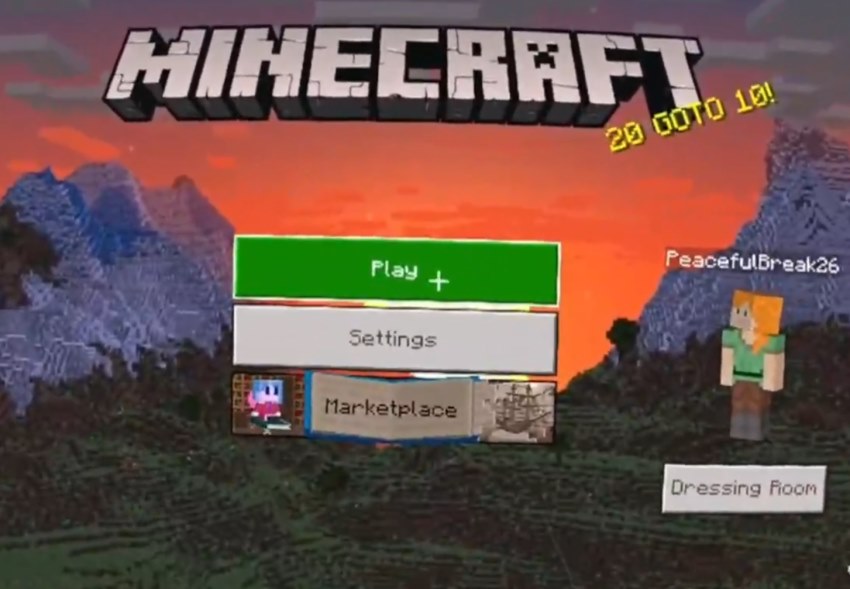
“Hmd Not Found (108)” When Launching Minecraft
When you launch Vivecraft from Minecraft launcher and it ends up with a “Render setup failed: Hmd Not Found 108) error” your headset is not properly connected to your PC.
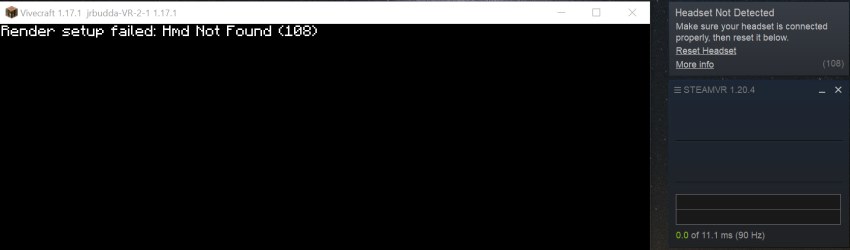
If you receive the “Hmd not found (108)” error:
- Make sure your preferred PCVR method (Oculus Link / Air Link / Virtual Desktop) is configured and working correctly.
- Connect your PC and headset before launching Minecraft
- Make sure SteamVR is installed and able to detect your headset. Sometimes “Reset Headset” is enough for it correctly detect your headset.
Minecraft VR Java Edition Lagging
In case you are facing lagging issues with Minecraft Java Edition using Vivecraft, try the following steps:
- Adjust the value of “draw distance” to 10 and lower (Video Settings)
- Lower the “Render scale” value (VR settings)
- Remove unnecessary shaders and texture packs (Video settings)
- Make sure SteamVR resolution is set it to 100% (or lower)
- Make sure to allocate enough RAM for Vivecraft (2GB is usually enough)
- Close any unnecessary applications and background processes
- Check if there are problems with other SteamVR games
Minecraft VR Bedrock Edition Problems
In this section, I am going to address various issues and solutions that are specific to running Minecraft Windows (Bedrock) edition in virtual reality.
Before you start diving into the problems and troubleshooting steps, make sure you watch my Minecraft Bedrock VR step-by-step installation video (or read my article) and verify that you didn’t miss anything important required to get the game running.
1) Set OpenXR Runtime to Oculus
Open the Oculus PC Software, navigate to “Settings” and open the “General” tab. Make sure that the value of “OpenXR Runtime” is set to Oculus (and not Steam or something else).
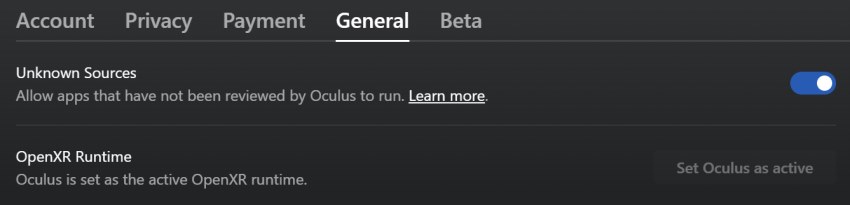
2) Allow Unknown Sources
Similar to the last point, navigate to the “General” settings tab and make sure that “Unkown Sources” is enabled.
3) Don’t Use Virtual Desktop
Minecraft Bedrock Edition does not work properly with Virtual Desktop. I tried and it opens in flat screen mode with the control mapping messed up. For this reason, use either wired Oculus Link or Air Link.
Some people have actually claimed that they were able to get Bedrock running with Virtual Desktop by adjusting the installation process and modifying different settings. However, I haven’t found a manual for that nor had the time to dive deeper into this myself.
So currently since you are having problems, it’s probably best to stick with what’s known to work.
4) Change OpenXR Registry Entry from Steam to Oculus
One solution to Minecraft Bedrock VR issues that is passed around in forums and Reddit threads is to check the OpenXR registry entry value in Windows Registry Editor. If it is currently set to Steam, change it to Oculus by following the video below:
This shouldn’t be necessary if you are using a Quest 2 and adjusted the OpenXR value in the Oculus PC software. However, I am not sure about other headsets, so I decided to include this troubleshooting step in the list as well.
5) Try Launching Minecraft from PC and VR
In my video tutorial, I have suggested opening the Minecraft Bedrock VR launcher from your PC and it should automatically pop up the game in your headset. In case you are having problems, try opening your Desktop in VR and also launching the shortcut there.
6) Reinstall Minecraft
Sometimes if you have been stuck for a long time (and possibly made unwanted changes), it is just best to start from a blank sheet. Go ahead and try uninstalling and then complete the installation by following my setup tutorial.
7) Try Minecraft Java Edition instead
If you simply can not get the Bedrock edition of Minecraft to work, I recommend you have a go at the Java Edition instead. Since the two versions run on completely different software stacks, you might just get it running.
Minecraft Missing from Oculus Store
The Minecraft client (originally created for Oculus Rift) that turns regular Minecraft into a proper VR experience was removed from Oculus Store at some point in 2021. The workaround is to create your own Minecraft VR launcher:
- Right-click on your Desktop and select New > Shortcut
- In the shortcut location box, copy and paste minecraft://Mode/?OpenXR=true and select “Next”
- Name the shortcut (e.g Minecraft VR) and click “Finish”
If anything was left unclear, I have also demonstrated the process in the Minecraft Bedrock installation video earlier in the article.
And that is it from me now. I do hope this article was useful and you got your Minecraft issues solved. In case you are still having problems, feel free to drop a comment on my Youtube channel and I’ll try to help if I can.

Are you trying to get Minecraft working in VR but are facing problems? If that’s the case, you have arrived at the right place!
In this article, I am going to share a variety of different steps you can take when you are having issues playing either Minecraft Java or Bedrock edition in VR.
I personally used a Meta (Oculus) Quest 2 headset for testing and installing both Minecraft editions (see my step-by-step setup guides), but most of the solutions should be applicable to other VR headsets as well.
The article is divided into the following sections:
- General checks and steps to solve Minecraft VR issues
- Troubleshooting Minecraft VR Java Edition
- Troubleshooting Minecraft VR Bedrock Edition
So without wasting any more time, let does get right into it!
First Steps When Minecraft VR is Not Working (Crashing, Not Launching, etc)
The truth is that there are so many different reasons why Minecraft VR might not be working properly. Whether the game doesn’t launch at all, throws a specific error message, or crashes right after you have started it.
In this specific section, I have included the most general guidelines and checks that are applicable both for Minecraft Java as well as the Bedrock edition. Later on, I will be diving into both of the different Minecraft editions separately to give more specific advice.
1) Check PC Requirements
In order to play Minecraft in VR, you are going to have to own a semi-decent gaming PC. The minimum requirements to run PC VR (Oculus Link / Air Link) with a Quest 2 are approximately following:
| Component | Recommended Specs |
| Processor | Intel i5-4590 / AMD Ryzen 5 1500X or greater |
| Graphics Card | NVIDIA GeForce GTX 970 comparable or better |
| Memory | 8 GB+ RAM |
| Operating System | Windows 10 |
The most important part here is that your PC should have a dedicated graphics card. VR games simply won’t run on a laptop with an integrated graphics card for example. If you are interested, I have made a more detailed article about Quest 2 PC VR requirements along with compatible GPUs.
With that being said, for Minecraft VR you can probably even get away with a PC slightly under the minimum requirements. Do also take into account here that the Minecraft Bedrock edition is easier to run than the Java edition. So if you know your PC is not that good, test Minecraft Bedrock edition first.
2) Run the Game in Regular Mode
Most of you have probably done this already, but before trying to launch Minecraft in VR, make a test run of the game in regular flat screen mode. Especially if you just installed the game.
By running the game, it will automatically create all the necessary configuration files and folders.
Secondly, you can verify that the game does indeed work in regular flat screen mode. If it doesn’t, there is no point in trying it in VR, is it?
3) Establish PC VR Connection Before Running Minecraft
Since your PC will be doing all the hard work of running the game, then before running Minecraft you are going to have to establish a PCVR connection between your headset and PC.
For the Quest 2, this means that you establish a regular wired Link or Air Link (wireless) connection and then launch either Minecraft Java Edition (Vivecraft) or Bedrock edition. For the Minecraft Java Edition, Virtual Desktop will work as well.
If you launch Minecraft before connecting your headset and PC, the game will understandably only start on your PC (and will not probably work as expected)
4) Try other PC VR methods
I have learned from my personal experience and the comments/questions voiced by other VR users that if you are having trouble with one PC VR method, it is almost always a good idea to try another one.
If Minecraft Java edition does not work for you with Air Link, try Virtual Desktop or wired Link connection. When Minecraft Bedrock Edition does not work with your preferred Link connection, try the other one.
There are two potential outcomes here. You either get the game working by trying an alternative method or you get additional information you can use for further troubleshooting.
5) Restart your PC & Headset
Restarting your devices is such an easy, yet one of the most effective ways to solve different problems. I can not count the number of times that restarting my Quest 2 and PC has solved unexpected PC VR issues I have faced.
So just go ahead and restart both your PC and headset and try launching the game again. You might be surprised!
Now it is time to get more specific and discuss the problems you might face with both of the different Minecraft editions separately.
Before we start, make sure to read my step-by-step Minecraft Java Edition installation article or watch my tutorial video below, so you can make sure that you took all the required steps and didn’t miss anything important!
If you seem to have done the installation process correctly but still couldn’t get the game running properly, then let’s go ahead and proceed with specific troubleshooting steps.
1) Check that SteamVR is Installed & Running Properly
Vivecraft, the custom mod that transforms Minecraft into a VR experience, uses SteamVR to commincate with your VR hardware. For this reason, SteamVR must be installed (along with Steam client) and configured properly in a way that it is able to detect your headset and controllers.
I personally did not have to launch SteamVR separately before starting the game. By establishing an Oculus Air Link connection and then launching Vivecraft from the Minecraft Launcher, it automatically started SteamVR and Minecraft Java Edition after that.
But in case you are having trouble, try launching SteamVR (make sure the headset is detected properly) before launching the game in VR.
2) Make Sure Java is Installed (if Vivecraft Installer Not Launching)
In case you download the Vivecraft installer, but it prompts you for an application to use or throws an error, you likely don’t have the proper Java Runtime Environment installed.
Minecraft Java Edition (with Vivecraft) requires you to have Java 8+ installed. The easiest way to check your current Java version is to open the Windows Command Prompt and type the command “java -version” (see an example below)
If you get a “java is not recognized as an internal or external command”, go to Java.com and download the latest Java RE. Install it and then try running the Vivecraft installer again.
3) Make Sure You Didn’t Install the Non-VR Version of Vivecraft
When you go to the Vivecraft download page, it gives you the option to download the “VR” and the “non-VR” version of the application. Make sure that you have actually downloaded and installed the VR version of Vivecraft.
4) Launch “Vivecraft” from Minecraft Launcher
In order to get Minecraft Java Edition to launch in VR, you have to select the “Vivecraft X.XX.X” as the “game” you want to play.
If for some reason you can not see the Vivecraft version listed, navigate to the “Installations” tab and make sure the option to show “Modded” versions is enabled.
5) Configure Vivecraft to Use Dedicated GPU (Laptops)
This section is for people using a PC with dual graphics cards. For example, gaming laptops often have an integrated GPU as well as the more powerful dedicated GPU that is meant for gaming.
If you have a computer with dual GPUs and Minecraft Java Edition only loads up on the desktop but not in the headset, the problem might be that Minecraft is using the integrated GPU which is not suitable for VR gaming.
In order to force Minecraft to use the more powerful dedicated GPU, follow these steps:
- Launch Vivecraft from Minecraft Launcher
- Open Task Manager and navigate to “Details” tab
- Press “j” on your keyboard and locate “javaw.exe” process
- Right-click on the process and select “Open file location“
- Copy the folder location
- Right-click on Desktop and select “Display settings“
- Scroll down and select “Graphics settings“
- Click on “Browse” (in “Graphics performance preference” section)
- Paste the location you copied earlier and select the “javaw.exe” executable
- Select “High performance” and save.
If anything was left unclear, go ahead and watch my step-by-step Youtube video about this below:
Note! Different Vivecraft versions might use different javaw executables. So if you have several versions of Vivecraft installed and/or are installing a new version, you will have to repeat this process.
6) Check Minecraft Logs
Oftentimes if you are having problems launching Minecraft or the game crashes (or something entirely else) it is a good idea to check for additional information from log files.
You can potentially find useful troubleshooting information from the following Minecraft log file destinations:
- %APPDATA%/.minecraft/crash-reports/
- %APPDATA%/.minecraft/logs/latest.log
- %APPDATA%/.minecraft/launcher_log
- %APPDATA%/.minecraft/hs_err_pidXXX.log
You can investigate these logs yourself and google for solutions. If you are having trouble, go ask for help in the Vivecraft Forum and/or Discord.
7) Reinstall Minecraft & Vivecraft
Sometimes after a cascade of changes, updates and various things you have might tried, it would simply be the best idea to start from a blank sheet.
You can remove “Minecraft” by using the Windows “Add or remove programs” utility. After that you can reinstall Minecraft and Vivecraft using my tutorial or any other one you can find.
Check Vivecraft FAQ
 Check Vivecraft FAQ
If you are able to run Minecraft Java Edition properly on your PC flat screen but can not get it working in VR, the issue most likely has something to do with Vivecraft. Go ahead and check Vivecraft FAQ for matching symptoms/errors and potential solutions to your problem.
9) Try Minecraft Bedrock Edition Instead
If you can not get Minecraft Java Edition to work and you are willing to switch, it might be a good idea to also give Minecraft Bedrock Edition a try.
Minecraft Windows (Bedrock) is easier to run (you might get away with a below-average PC) and is different in terms of the technology stack it utilizes. For this reason, it might very well be that you will have more luck getting it to work compared to Java Edition.
“Hmd Not Found (108)” When Launching Minecraft
When you launch Vivecraft from Minecraft launcher and it ends up with a “Render setup failed: Hmd Not Found 108) error” your headset is not properly connected to your PC.
If you receive the “Hmd not found (108)” error:
- Make sure your preferred PCVR method (Oculus Link / Air Link / Virtual Desktop) is configured and working correctly.
- Connect your PC and headset before launching Minecraft
- Make sure SteamVR is installed and able to detect your headset. Sometimes “Reset Headset” is enough for it correctly detect your headset.
Minecraft VR Java Edition Lagging
In case you are facing lagging issues with Minecraft Java Edition using Vivecraft, try the following steps:
- Adjust the value of “draw distance” to 10 and lower (Video Settings)
- Lower the “Render scale” value (VR settings)
- Remove unnecessary shaders and texture packs (Video settings)
- Make sure SteamVR resolution is set it to 100% (or lower)
- Make sure to allocate enough RAM for Vivecraft (2GB is usually enough)
- Close any unnecessary applications and background processes
- Check if there are problems with other SteamVR games
Minecraft VR Bedrock Edition Problems
In this section, I am going to address various issues and solutions that are specific to running Minecraft Windows (Bedrock) edition in virtual reality.
Before you start diving into the problems and troubleshooting steps, make sure you watch my Minecraft Bedrock VR step-by-step installation video (or read my article) and verify that you didn’t miss anything important required to get the game running.
1) Set OpenXR Runtime to Oculus
Open the Oculus PC Software, navigate to “Settings” and open the “General” tab. Make sure that the value of “OpenXR Runtime” is set to Oculus (and not Steam or something else).
2) Allow Unknown Sources
Similar to the last point, navigate to the “General” settings tab and make sure that “Unkown Sources” is enabled.
3) Don’t Use Virtual Desktop
Minecraft Bedrock Edition does not work properly with Virtual Desktop. I tried and it opens in flat screen mode with the control mapping messed up. For this reason, use either wired Oculus Link or Air Link.
Some people have actually claimed that they were able to get Bedrock running with Virtual Desktop by adjusting the installation process and modifying different settings. However, I haven’t found a manual for that nor had the time to dive deeper into this myself.
So currently since you are having problems, it’s probably best to stick with what’s known to work.
4) Change OpenXR Registry Entry from Steam to Oculus
One solution to Minecraft Bedrock VR issues that is passed around in forums and Reddit threads is to check the OpenXR registry entry value in Windows Registry Editor. If it is currently set to Steam, change it to Oculus by following the video below:
This shouldn’t be necessary if you are using a Quest 2 and adjusted the OpenXR value in the Oculus PC software. However, I am not sure about other headsets, so I decided to include this troubleshooting step in the list as well.
5) Try Launching Minecraft from PC and VR
In my video tutorial, I have suggested opening the Minecraft Bedrock VR launcher from your PC and it should automatically pop up the game in your headset. In case you are having problems, try opening your Desktop in VR and also launching the shortcut there.
6) Reinstall Minecraft
Sometimes if you have been stuck for a long time (and possibly made unwanted changes), it is just best to start from a blank sheet. Go ahead and try uninstalling and then complete the installation by following my setup tutorial.
7) Try Minecraft Java Edition instead
If you simply can not get the Bedrock edition of Minecraft to work, I recommend you have a go at the Java Edition instead. Since the two versions run on completely different software stacks, you might just get it running.
Minecraft Missing from Oculus Store
The Minecraft client (originally created for Oculus Rift) that turns regular Minecraft into a proper VR experience was removed from Oculus Store at some point in 2021. The workaround is to create your own Minecraft VR launcher:
- Right-click on your Desktop and select New > Shortcut
- In the shortcut location box, copy and paste minecraft://Mode/?OpenXR=true and select “Next”
- Name the shortcut (e.g Minecraft VR) and click “Finish”
If anything was left unclear, I have also demonstrated the process in the Minecraft Bedrock installation video earlier in the article.
And that is it from me now. I do hope this article was useful and you got your Minecraft issues solved. In case you are still having problems, feel free to drop a comment on my Youtube channel and I’ll try to help if I can.
3 способа исправить ошибку SteamVR 108 (06.21.23)
steamvr error 108
Многие пользователи, вероятно, уже знакомы со SteamVR, режимом виртуальной реальности, предлагаемым Steam, который позволяет пользователям играть во все свои любимые игры в VR, если они поддерживают эту функцию. Это удобная функция, но она не лишена недостатков. Существует множество ошибок, с которыми можно столкнуться при его использовании по разным причинам, одна из основных — ошибка SteamVR 108. Это ошибка, которая возникает, когда система не может идентифицировать гарнитуру виртуальной реальности пользователя. Если вы тоже сталкиваетесь с этим, вот несколько возможных решений, которые стоит попробовать.
Лучшие способы решения ошибки SteamVR 108:
Как мы уже упоминали, ошибка SteamVR 108 возникает, когда система не может определить гарнитуру VR, которую подключили пользователи. Это обычное дело, и не о чем беспокоиться. Самое простое решение, которое подходит большинству пользователей, — просто выключить компьютер, пока к нему подключена гарнитура. Теперь просто включите его и подождите некоторое время, прежде чем запускать какие-либо приложения. Система сможет идентифицировать набор виртуальной реальности как устройство вывода, и после этого ошибка не возникнет.
Практически для всех VR-гарнитур, которые используются с компьютерами, есть соединительный блок, который позволяет использовать устройство с ПК. Переключение и включение питания этого блока должно быть более чем достаточно, чтобы сбросить соединение и исправить ошибку. Примером таких ящиков может служить Link Box, с которым наверняка знакомы пользователи гарнитуры Oculus. Независимо от того, какой у вас есть, метод включения и выключения питания у них очень похож.
Просто отсоедините разъем от компьютера и подождите минуту или две. По прошествии этого небольшого времени подключите его снова. Убедитесь, что SteamVR отключен и не работает в фоновом режиме на протяжении всего процесса. Это завершит цикл питания, и в систему могут быть установлены некоторые новые драйверы, которые гарантируют, что игроки больше не столкнутся с этой проблемой.
Говоря о драйверах, если последнего решения было недостаточно для исправления ошибки 108, мы рекомендуем вам попробовать последний метод, который немного более экстремален. Это требует от пользователей избавиться от всех драйверов, связанных со SteamVR, в настройках Windows и убедиться, что все они удалены. Как только это будет сделано, отключите гарнитуру и выключите компьютер.
Перед повторным включением подключите гарнитуру. После перезагрузки системы и идентификации гарнитуры она автоматически загрузит все необходимые драйверы. Если какие-то из них, связанные со SteamVR, все еще отсутствуют после этого, их можно легко загрузить через официальный сайт Steam. Ошибка должна быть устранена после выполнения всех этих действий.
YouTube видео: 3 способа исправить ошибку SteamVR 108
06, 2023
SteamVR Error 108 or Steam vr headset not detected is a generic HMD error message. HTC Vive is developed by HTC and Valve for virtual reality experience as a fully immersive virtual reality headset. It uses the room-scale tracking technology that makes it possible for users to move and interact with the 3D environment. However, as many other peripheral device it has it’s own issues. Sometimes users cannot connect the HTC Vive headset to the SteamVr. The most common errors they are getting are HTC Vive Error 108 and HTC Vive Error 208. Those errors can have a number of solutions, so please follow our today’s guide to make sure you’ve attempted all available solutions.
SteamVR Error 108
How to fix the Steam vr headset not detected – Hardware Issues
Before beginning with any of the methods how to fix it, you need to check if each cable is connected properly. Also, check that Link Box isn’t connected backward. The HTC fully immersive virtual reality headset will have the power port in the middle and all the cable will be close to. The computer will have the power port on the corner and there’ll be a space between HDMI and USB port. The solutions mentioned below are from the hardware part.
Fix 1 – Restart your computer
The “old trick” in some cases by simply restarting your computer can solve SteamVR error 108. By restarting your computer you also are restarting even your devices or applications. In this way it allows your headset device to reload his resources by solving the connectivity issues.
- Click on the Start menu in your taskbar
- Click on the Power button.
- Choose Restart from the context menu. Or you can choose the Shutdown option and manually power on your computer after it is powered off.
- After your computer has restarted, check if it resolves the problem.
Note: If after the restart the problem is still present, you can try to run your Steam in an administrator mode. Right-click on Steam shortcut and choose Run as administrator option to run steam as admin.
Fix 2 – Connect HTC Vive Headset Directly to Computer
Sometimes the Link Box can be the main cause for the connection problem between HTC Vive headset and your computer. You as a user in this case will get the pop-up message with vive error 108. You can try to skip the Link Box and connect the USB and HDMI direct to PC. However, do not disconnect the power cables from Link Box, as your HTC Vive headset needs the power to run. Before trying to perform the below steps make sure all the cables are connected.
- Unplug the USB and HDMI cables from your PC. Now unplug the HDMI and USB cables from Link Box.
- Do not unplug the Power cable from both sides of the Link Box.
- Now plug the USB and HDMI cable of the HTC Vive headset directly into your PC.
Note: Try connecting the USB cable in USB 2.0 port rather than USB 3.0. - Reboot your computer and then check if the SteamVR error 108 is solved.
Fix 3 – Checking the HTC Vive Headset Connections
Most of the time the USB cable inside the HTC Vive headset is connected to the wrong port. You can open the headset top part and change the cable by performing this simple steps:
- Take the top part of the HTC Vive headset off. Change the USB cable port from the side port to the middle port (USB 2.0).
- If that doesn’t work, then make sure to unplug all the other cables connected to the HTC Vive headset and plug it back again.
- Check if this will solve HTC Vive Error 108.
How to fix the Steam vr headset not detected – Software Issues
Fix 1 – Uninstall the Graphics drivers, and let Windows install its own
Since this is after all a driver issue, one more possible solution is to uninstall the drivers you have installed and let Windows install its own. Windows will find compatible drivers which shouldn’t be causing any issues with your computer, and you will be able to use it without worrying afterward. The steps to doing this are fairly easy.
- Go to “Search”, type device manager, and choose “Device Manager” from the result. Then it opens with your computer name at the top and a list of devices that are installed on your computer beneath your computer name.
- Find and right-click the problematic device and choose “Properties”.
- Click “Driver” and then choose “Update Driver”.
- Click “Search automatically for updated driver software”.
- After the update, restart your computer
- Check if this will solve Vive Error 108.
Fix 2 – Enable Direct Mode on SteamVR
- Go to the Start menu, and launch Steam.
- Start SteamVR by clicking the VR button.
- Click the dropdown arrow, go to Settings, and select Developer.
- Make sure that Direct Mode is enabled, and restart your PC.
- Check if this will solve SteamVR error 108.
Fix 3 – Select the beta version of SteamVR
- Launch Steam, go to Library, and select Tools.
- Right-click on SteamVR, and go to Properties.
- Click on the Betas tab, and navigate to Select the beta you would like to opt into.
- Select None, close the menu, and restart your PC.
- Check if this will solve HTC Vive Error 108 and HTC Vive Error 108 issues.
Fix 4 – Reinstall your SteamVR USB devices
- Unplug all cables from your PC, and launch Steam.
- Open SteamVR, go to Settings, and select Developer.
- Click on Remove all SteamVR USB Device.
- Select Yes, and Continue.
- Restart your PC.
- Check if this will solve the error.
Fix 5 – Re install SteamVR to fix SteamVR error 108
- Launch Steam, go to Library, and select Tools.
- Right–click on SteamVR, select Uninstall, and click Delete.
- Restart your PC, and follow the above steps again, but this time select Install.
- Check if this will solve the error.
Fix 6 – Other fix for SteamVR error 108 from Steam Support
- Make sure that your Vive’s Link Box and the monitor or TV you use as a primary display are plugged into the same graphics card. If you are connected to your onboard display adapter, you will see an Intel HD Graphics device listed in your SteamVR system report. Onboard cards, such as those connected to a PC’s motherboard, will not be powerful enough to use the Vive. Reconnect your Vive to your PC’s dedicated graphics card.
- Check to make sure you are in Direct Display Mode by going to the menu in the upper left of the SteamVR window and then Developer > Developer Settings > Direct Display Mode. Click the button that says “Enable Direct Display Mode.” SteamVR will restart with this setting.
- If Direct Display Mode is not enabled, SteamVR will still work but will run in Extended Mode. For this to work correctly, make sure your displays are extended in Windows > Display Settings
Fix 7 – General fix for SteamVR Error 108
1. Open SteamVR Settings and choose MANAGE ADD-ONS
vive error 108
2. Turn on Pimax and Gamepad Support etc.
htc vive headset not detected
SteamVR Setting
3. Finally,Restart Steam VR
Restart Steam VR
If the settings cannot be saved after restarting Steam VR, please save the settings and restart your computer before opening Steam VR.
Conclusions about SteamVR error 108:
In our step-by-step tutorial, we have provided all the possible solutions for you to fix SteamVR error 108. We hope you will find this methods helpful. Have you managed to solve it? Please let us know in the comments below.
Are you trying to get Minecraft working in VR but are facing problems? If that’s the case, you have arrived at the right place!
In this article, I am going to share a variety of different steps you can take when you are having issues playing either Minecraft Java or Bedrock edition in VR.
I personally used a Meta (Oculus) Quest 2 headset for testing and installing both Minecraft editions (see my step-by-step setup guides), but most of the solutions should be applicable to other VR headsets as well.
The article is divided into the following sections:
- General checks and steps to solve Minecraft VR issues
- Troubleshooting Minecraft VR Java Edition
- Troubleshooting Minecraft VR Bedrock Edition
So without wasting any more time, let does get right into it!
First Steps When Minecraft VR is Not Working (Crashing, Not Launching, etc)
The truth is that there are so many different reasons why Minecraft VR might not be working properly. Whether the game doesn’t launch at all, throws a specific error message, or crashes right after you have started it.
In this specific section, I have included the most general guidelines and checks that are applicable both for Minecraft Java as well as the Bedrock edition. Later on, I will be diving into both of the different Minecraft editions separately to give more specific advice.
1) Check PC Requirements
In order to play Minecraft in VR, you are going to have to own a semi-decent gaming PC. The minimum requirements to run PC VR (Oculus Link / Air Link) with a Quest 2 are approximately following:
| Component | Recommended Specs |
| Processor | Intel i5-4590 / AMD Ryzen 5 1500X or greater |
| Graphics Card | NVIDIA GeForce GTX 970 comparable or better |
| Memory | 8 GB+ RAM |
| Operating System | Windows 10 |
The most important part here is that your PC should have a dedicated graphics card. VR games simply won’t run on a laptop with an integrated graphics card for example. If you are interested, I have made a more detailed article about Quest 2 PC VR requirements along with compatible GPUs.
With that being said, for Minecraft VR you can probably even get away with a PC slightly under the minimum requirements. Do also take into account here that the Minecraft Bedrock edition is easier to run than the Java edition. So if you know your PC is not that good, test Minecraft Bedrock edition first.
2) Run the Game in Regular Mode
Most of you have probably done this already, but before trying to launch Minecraft in VR, make a test run of the game in regular flat screen mode. Especially if you just installed the game.
By running the game, it will automatically create all the necessary configuration files and folders.
Secondly, you can verify that the game does indeed work in regular flat screen mode. If it doesn’t, there is no point in trying it in VR, is it?
3) Establish PC VR Connection Before Running Minecraft
Since your PC will be doing all the hard work of running the game, then before running Minecraft you are going to have to establish a PCVR connection between your headset and PC.
For the Quest 2, this means that you establish a regular wired Link or Air Link (wireless) connection and then launch either Minecraft Java Edition (Vivecraft) or Bedrock edition. For the Minecraft Java Edition, Virtual Desktop will work as well.
If you launch Minecraft before connecting your headset and PC, the game will understandably only start on your PC (and will not probably work as expected)
4) Try other PC VR methods
I have learned from my personal experience and the comments/questions voiced by other VR users that if you are having trouble with one PC VR method, it is almost always a good idea to try another one.
If Minecraft Java edition does not work for you with Air Link, try Virtual Desktop or wired Link connection. When Minecraft Bedrock Edition does not work with your preferred Link connection, try the other one.
There are two potential outcomes here. You either get the game working by trying an alternative method or you get additional information you can use for further troubleshooting.
5) Restart your PC & Headset
Restarting your devices is such an easy, yet one of the most effective ways to solve different problems. I can not count the number of times that restarting my Quest 2 and PC has solved unexpected PC VR issues I have faced.
So just go ahead and restart both your PC and headset and try launching the game again. You might be surprised!
Now it is time to get more specific and discuss the problems you might face with both of the different Minecraft editions separately.
Before we start, make sure to read my step-by-step Minecraft Java Edition installation article or watch my tutorial video below, so you can make sure that you took all the required steps and didn’t miss anything important!
If you seem to have done the installation process correctly but still couldn’t get the game running properly, then let’s go ahead and proceed with specific troubleshooting steps.
1) Check that SteamVR is Installed & Running Properly
Vivecraft, the custom mod that transforms Minecraft into a VR experience, uses SteamVR to commincate with your VR hardware. For this reason, SteamVR must be installed (along with Steam client) and configured properly in a way that it is able to detect your headset and controllers.
I personally did not have to launch SteamVR separately before starting the game. By establishing an Oculus Air Link connection and then launching Vivecraft from the Minecraft Launcher, it automatically started SteamVR and Minecraft Java Edition after that.
But in case you are having trouble, try launching SteamVR (make sure the headset is detected properly) before launching the game in VR.
2) Make Sure Java is Installed (if Vivecraft Installer Not Launching)
In case you download the Vivecraft installer, but it prompts you for an application to use or throws an error, you likely don’t have the proper Java Runtime Environment installed.
Minecraft Java Edition (with Vivecraft) requires you to have Java 8+ installed. The easiest way to check your current Java version is to open the Windows Command Prompt and type the command “java -version” (see an example below)
If you get a “java is not recognized as an internal or external command”, go to Java.com and download the latest Java RE. Install it and then try running the Vivecraft installer again.
3) Make Sure You Didn’t Install the Non-VR Version of Vivecraft
When you go to the Vivecraft download page, it gives you the option to download the “VR” and the “non-VR” version of the application. Make sure that you have actually downloaded and installed the VR version of Vivecraft.
4) Launch “Vivecraft” from Minecraft Launcher
In order to get Minecraft Java Edition to launch in VR, you have to select the “Vivecraft X.XX.X” as the “game” you want to play.
If for some reason you can not see the Vivecraft version listed, navigate to the “Installations” tab and make sure the option to show “Modded” versions is enabled.
5) Configure Vivecraft to Use Dedicated GPU (Laptops)
This section is for people using a PC with dual graphics cards. For example, gaming laptops often have an integrated GPU as well as the more powerful dedicated GPU that is meant for gaming.
If you have a computer with dual GPUs and Minecraft Java Edition only loads up on the desktop but not in the headset, the problem might be that Minecraft is using the integrated GPU which is not suitable for VR gaming.
In order to force Minecraft to use the more powerful dedicated GPU, follow these steps:
- Launch Vivecraft from Minecraft Launcher
- Open Task Manager and navigate to “Details” tab
- Press “j” on your keyboard and locate “javaw.exe” process
- Right-click on the process and select “Open file location“
- Copy the folder location
- Right-click on Desktop and select “Display settings“
- Scroll down and select “Graphics settings“
- Click on “Browse” (in “Graphics performance preference” section)
- Paste the location you copied earlier and select the “javaw.exe” executable
- Select “High performance” and save.
If anything was left unclear, go ahead and watch my step-by-step Youtube video about this below:
Note! Different Vivecraft versions might use different javaw executables. So if you have several versions of Vivecraft installed and/or are installing a new version, you will have to repeat this process.
6) Check Minecraft Logs
Oftentimes if you are having problems launching Minecraft or the game crashes (or something entirely else) it is a good idea to check for additional information from log files.
You can potentially find useful troubleshooting information from the following Minecraft log file destinations:
- %APPDATA%/.minecraft/crash-reports/
- %APPDATA%/.minecraft/logs/latest.log
- %APPDATA%/.minecraft/launcher_log
- %APPDATA%/.minecraft/hs_err_pidXXX.log
You can investigate these logs yourself and google for solutions. If you are having trouble, go ask for help in the Vivecraft Forum and/or Discord.
7) Reinstall Minecraft & Vivecraft
Sometimes after a cascade of changes, updates and various things you have might tried, it would simply be the best idea to start from a blank sheet.
You can remove “Minecraft” by using the Windows “Add or remove programs” utility. After that you can reinstall Minecraft and Vivecraft using my tutorial or any other one you can find.
Check Vivecraft FAQ
 Check Vivecraft FAQ
If you are able to run Minecraft Java Edition properly on your PC flat screen but can not get it working in VR, the issue most likely has something to do with Vivecraft. Go ahead and check Vivecraft FAQ for matching symptoms/errors and potential solutions to your problem.
9) Try Minecraft Bedrock Edition Instead
If you can not get Minecraft Java Edition to work and you are willing to switch, it might be a good idea to also give Minecraft Bedrock Edition a try.
Minecraft Windows (Bedrock) is easier to run (you might get away with a below-average PC) and is different in terms of the technology stack it utilizes. For this reason, it might very well be that you will have more luck getting it to work compared to Java Edition.
“Hmd Not Found (108)” When Launching Minecraft
When you launch Vivecraft from Minecraft launcher and it ends up with a “Render setup failed: Hmd Not Found 108) error” your headset is not properly connected to your PC.
If you receive the “Hmd not found (108)” error:
- Make sure your preferred PCVR method (Oculus Link / Air Link / Virtual Desktop) is configured and working correctly.
- Connect your PC and headset before launching Minecraft
- Make sure SteamVR is installed and able to detect your headset. Sometimes “Reset Headset” is enough for it correctly detect your headset.
Minecraft VR Java Edition Lagging
In case you are facing lagging issues with Minecraft Java Edition using Vivecraft, try the following steps:
- Adjust the value of “draw distance” to 10 and lower (Video Settings)
- Lower the “Render scale” value (VR settings)
- Remove unnecessary shaders and texture packs (Video settings)
- Make sure SteamVR resolution is set it to 100% (or lower)
- Make sure to allocate enough RAM for Vivecraft (2GB is usually enough)
- Close any unnecessary applications and background processes
- Check if there are problems with other SteamVR games
Minecraft VR Bedrock Edition Problems
In this section, I am going to address various issues and solutions that are specific to running Minecraft Windows (Bedrock) edition in virtual reality.
Before you start diving into the problems and troubleshooting steps, make sure you watch my Minecraft Bedrock VR step-by-step installation video (or read my article) and verify that you didn’t miss anything important required to get the game running.
1) Set OpenXR Runtime to Oculus
Open the Oculus PC Software, navigate to “Settings” and open the “General” tab. Make sure that the value of “OpenXR Runtime” is set to Oculus (and not Steam or something else).
2) Allow Unknown Sources
Similar to the last point, navigate to the “General” settings tab and make sure that “Unkown Sources” is enabled.
3) Don’t Use Virtual Desktop
Minecraft Bedrock Edition does not work properly with Virtual Desktop. I tried and it opens in flat screen mode with the control mapping messed up. For this reason, use either wired Oculus Link or Air Link.
Some people have actually claimed that they were able to get Bedrock running with Virtual Desktop by adjusting the installation process and modifying different settings. However, I haven’t found a manual for that nor had the time to dive deeper into this myself.
So currently since you are having problems, it’s probably best to stick with what’s known to work.
4) Change OpenXR Registry Entry from Steam to Oculus
One solution to Minecraft Bedrock VR issues that is passed around in forums and Reddit threads is to check the OpenXR registry entry value in Windows Registry Editor. If it is currently set to Steam, change it to Oculus by following the video below:
This shouldn’t be necessary if you are using a Quest 2 and adjusted the OpenXR value in the Oculus PC software. However, I am not sure about other headsets, so I decided to include this troubleshooting step in the list as well.
5) Try Launching Minecraft from PC and VR
In my video tutorial, I have suggested opening the Minecraft Bedrock VR launcher from your PC and it should automatically pop up the game in your headset. In case you are having problems, try opening your Desktop in VR and also launching the shortcut there.
6) Reinstall Minecraft
Sometimes if you have been stuck for a long time (and possibly made unwanted changes), it is just best to start from a blank sheet. Go ahead and try uninstalling and then complete the installation by following my setup tutorial.
7) Try Minecraft Java Edition instead
If you simply can not get the Bedrock edition of Minecraft to work, I recommend you have a go at the Java Edition instead. Since the two versions run on completely different software stacks, you might just get it running.
Minecraft Missing from Oculus Store
The Minecraft client (originally created for Oculus Rift) that turns regular Minecraft into a proper VR experience was removed from Oculus Store at some point in 2021. The workaround is to create your own Minecraft VR launcher:
- Right-click on your Desktop and select New > Shortcut
- In the shortcut location box, copy and paste minecraft://Mode/?OpenXR=true and select “Next”
- Name the shortcut (e.g Minecraft VR) and click “Finish”
If anything was left unclear, I have also demonstrated the process in the Minecraft Bedrock installation video earlier in the article.
And that is it from me now. I do hope this article was useful and you got your Minecraft issues solved. In case you are still having problems, feel free to drop a comment on my Youtube channel and I’ll try to help if I can.
3 способа исправить ошибку SteamVR 108 (09.21.23)
steamvr error 108
Многие пользователи, вероятно, уже знакомы со SteamVR, режимом виртуальной реальности, предлагаемым Steam, который позволяет пользователям играть во все свои любимые игры в VR, если они поддерживают эту функцию. Это удобная функция, но она не лишена недостатков. Существует множество ошибок, с которыми можно столкнуться при его использовании по разным причинам, одна из основных — ошибка SteamVR 108. Это ошибка, которая возникает, когда система не может идентифицировать гарнитуру виртуальной реальности пользователя. Если вы тоже сталкиваетесь с этим, вот несколько возможных решений, которые стоит попробовать.
Лучшие способы решения ошибки SteamVR 108:
Как мы уже упоминали, ошибка SteamVR 108 возникает, когда система не может определить гарнитуру VR, которую подключили пользователи. Это обычное дело, и не о чем беспокоиться. Самое простое решение, которое подходит большинству пользователей, — просто выключить компьютер, пока к нему подключена гарнитура. Теперь просто включите его и подождите некоторое время, прежде чем запускать какие-либо приложения. Система сможет идентифицировать набор виртуальной реальности как устройство вывода, и после этого ошибка не возникнет.
Практически для всех VR-гарнитур, которые используются с компьютерами, есть соединительный блок, который позволяет использовать устройство с ПК. Переключение и включение питания этого блока должно быть более чем достаточно, чтобы сбросить соединение и исправить ошибку. Примером таких ящиков может служить Link Box, с которым наверняка знакомы пользователи гарнитуры Oculus. Независимо от того, какой у вас есть, метод включения и выключения питания у них очень похож.
Просто отсоедините разъем от компьютера и подождите минуту или две. По прошествии этого небольшого времени подключите его снова. Убедитесь, что SteamVR отключен и не работает в фоновом режиме на протяжении всего процесса. Это завершит цикл питания, и в систему могут быть установлены некоторые новые драйверы, которые гарантируют, что игроки больше не столкнутся с этой проблемой.
Говоря о драйверах, если последнего решения было недостаточно для исправления ошибки 108, мы рекомендуем вам попробовать последний метод, который немного более экстремален. Это требует от пользователей избавиться от всех драйверов, связанных со SteamVR, в настройках Windows и убедиться, что все они удалены. Как только это будет сделано, отключите гарнитуру и выключите компьютер.
Перед повторным включением подключите гарнитуру. После перезагрузки системы и идентификации гарнитуры она автоматически загрузит все необходимые драйверы. Если какие-то из них, связанные со SteamVR, все еще отсутствуют после этого, их можно легко загрузить через официальный сайт Steam. Ошибка должна быть устранена после выполнения всех этих действий.
YouTube видео: 3 способа исправить ошибку SteamVR 108
09, 2023
SteamVR Error 108 or Steam vr headset not detected is a generic HMD error message. HTC Vive is developed by HTC and Valve for virtual reality experience as a fully immersive virtual reality headset. It uses the room-scale tracking technology that makes it possible for users to move and interact with the 3D environment. However, as many other peripheral device it has it’s own issues. Sometimes users cannot connect the HTC Vive headset to the SteamVr. The most common errors they are getting are HTC Vive Error 108 and HTC Vive Error 208. Those errors can have a number of solutions, so please follow our today’s guide to make sure you’ve attempted all available solutions.
SteamVR Error 108
How to fix the Steam vr headset not detected – Hardware Issues
Before beginning with any of the methods how to fix it, you need to check if each cable is connected properly. Also, check that Link Box isn’t connected backward. The HTC fully immersive virtual reality headset will have the power port in the middle and all the cable will be close to. The computer will have the power port on the corner and there’ll be a space between HDMI and USB port. The solutions mentioned below are from the hardware part.
Fix 1 – Restart your computer
The “old trick” in some cases by simply restarting your computer can solve SteamVR error 108. By restarting your computer you also are restarting even your devices or applications. In this way it allows your headset device to reload his resources by solving the connectivity issues.
- Click on the Start menu in your taskbar
- Click on the Power button.
- Choose Restart from the context menu. Or you can choose the Shutdown option and manually power on your computer after it is powered off.
- After your computer has restarted, check if it resolves the problem.
Note: If after the restart the problem is still present, you can try to run your Steam in an administrator mode. Right-click on Steam shortcut and choose Run as administrator option to run steam as admin.
Fix 2 – Connect HTC Vive Headset Directly to Computer
Sometimes the Link Box can be the main cause for the connection problem between HTC Vive headset and your computer. You as a user in this case will get the pop-up message with vive error 108. You can try to skip the Link Box and connect the USB and HDMI direct to PC. However, do not disconnect the power cables from Link Box, as your HTC Vive headset needs the power to run. Before trying to perform the below steps make sure all the cables are connected.
- Unplug the USB and HDMI cables from your PC. Now unplug the HDMI and USB cables from Link Box.
- Do not unplug the Power cable from both sides of the Link Box.
- Now plug the USB and HDMI cable of the HTC Vive headset directly into your PC.
Note: Try connecting the USB cable in USB 2.0 port rather than USB 3.0. - Reboot your computer and then check if the SteamVR error 108 is solved.
Fix 3 – Checking the HTC Vive Headset Connections
Most of the time the USB cable inside the HTC Vive headset is connected to the wrong port. You can open the headset top part and change the cable by performing this simple steps:
- Take the top part of the HTC Vive headset off. Change the USB cable port from the side port to the middle port (USB 2.0).
- If that doesn’t work, then make sure to unplug all the other cables connected to the HTC Vive headset and plug it back again.
- Check if this will solve HTC Vive Error 108.
How to fix the Steam vr headset not detected – Software Issues
Fix 1 – Uninstall the Graphics drivers, and let Windows install its own
Since this is after all a driver issue, one more possible solution is to uninstall the drivers you have installed and let Windows install its own. Windows will find compatible drivers which shouldn’t be causing any issues with your computer, and you will be able to use it without worrying afterward. The steps to doing this are fairly easy.
- Go to “Search”, type device manager, and choose “Device Manager” from the result. Then it opens with your computer name at the top and a list of devices that are installed on your computer beneath your computer name.
- Find and right-click the problematic device and choose “Properties”.
- Click “Driver” and then choose “Update Driver”.
- Click “Search automatically for updated driver software”.
- After the update, restart your computer
- Check if this will solve Vive Error 108.
Fix 2 – Enable Direct Mode on SteamVR
- Go to the Start menu, and launch Steam.
- Start SteamVR by clicking the VR button.
- Click the dropdown arrow, go to Settings, and select Developer.
- Make sure that Direct Mode is enabled, and restart your PC.
- Check if this will solve SteamVR error 108.
Fix 3 – Select the beta version of SteamVR
- Launch Steam, go to Library, and select Tools.
- Right-click on SteamVR, and go to Properties.
- Click on the Betas tab, and navigate to Select the beta you would like to opt into.
- Select None, close the menu, and restart your PC.
- Check if this will solve HTC Vive Error 108 and HTC Vive Error 108 issues.
Fix 4 – Reinstall your SteamVR USB devices
- Unplug all cables from your PC, and launch Steam.
- Open SteamVR, go to Settings, and select Developer.
- Click on Remove all SteamVR USB Device.
- Select Yes, and Continue.
- Restart your PC.
- Check if this will solve the error.
Fix 5 – Re install SteamVR to fix SteamVR error 108
- Launch Steam, go to Library, and select Tools.
- Right–click on SteamVR, select Uninstall, and click Delete.
- Restart your PC, and follow the above steps again, but this time select Install.
- Check if this will solve the error.
Fix 6 – Other fix for SteamVR error 108 from Steam Support
- Make sure that your Vive’s Link Box and the monitor or TV you use as a primary display are plugged into the same graphics card. If you are connected to your onboard display adapter, you will see an Intel HD Graphics device listed in your SteamVR system report. Onboard cards, such as those connected to a PC’s motherboard, will not be powerful enough to use the Vive. Reconnect your Vive to your PC’s dedicated graphics card.
- Check to make sure you are in Direct Display Mode by going to the menu in the upper left of the SteamVR window and then Developer > Developer Settings > Direct Display Mode. Click the button that says “Enable Direct Display Mode.” SteamVR will restart with this setting.
- If Direct Display Mode is not enabled, SteamVR will still work but will run in Extended Mode. For this to work correctly, make sure your displays are extended in Windows > Display Settings
Fix 7 – General fix for SteamVR Error 108
1. Open SteamVR Settings and choose MANAGE ADD-ONS
vive error 108
2. Turn on Pimax and Gamepad Support etc.
htc vive headset not detected
SteamVR Setting
3. Finally,Restart Steam VR
Restart Steam VR
If the settings cannot be saved after restarting Steam VR, please save the settings and restart your computer before opening Steam VR.
Conclusions about SteamVR error 108:
In our step-by-step tutorial, we have provided all the possible solutions for you to fix SteamVR error 108. We hope you will find this methods helpful. Have you managed to solve it? Please let us know in the comments below.