
Create an account on the HP Community to personalize your profile and ask a question
Your account also allows you to connect with HP support faster, access a personal dashboard to manage all of your devices in one place, view warranty information, case status and more.

11-22-2020
05:31 AM

HP Recommended
- Mark as New
- Bookmark
- Subscribe
- Permalink
- Flag Post
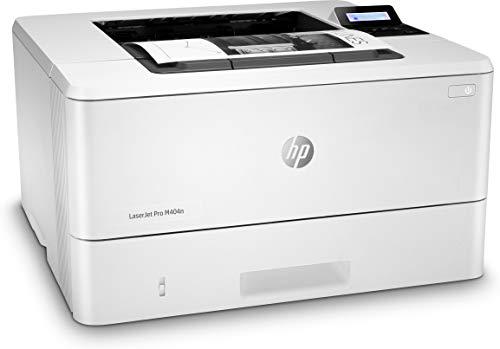
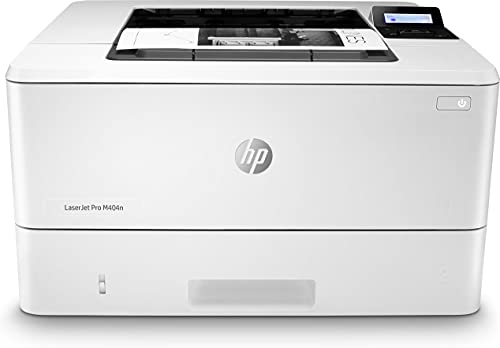
Product: HP LaserJet Pro M404dn
Operating System: Microsoft Windows 10 (64-bit)
Hi,
My printer stuck in MGF Mode, the message is show up just after the HP logo.
i tired the solution below but the problem still exist.
- While the Printer is ON, unplug the Power cord from back of the printer.
- wait for 30 seconds.
- Plug in the Power Cord to the printer.
also i tried to update the firmware but with no result.
1 ACCEPTED SOLUTION

HuolSam
Author
12
0
1
3,746
Level 2
11-22-2020
09:40 AM
— edited
11-22-2020
09:40 AM
HP Recommended
- Mark as New
- Bookmark
- Subscribe
- Permalink
- Flag Post
Hi,
i fixed the problem by doing a cold reset even it’s hard to get the control menu because of the MGF MODE message.
so i clicked to shutdown button ( just click one time on shutdown button) and at same time i kept clicking on right arrow to get the ready and control menu.
just go to troubleshooting menu and chose cold reset.
Was this reply helpful?
Yes
No
1 REPLY 1
HuolSam
Author
12
0
1
3,747
Level 2
11-22-2020
09:40 AM
— edited
11-22-2020
09:40 AM
HP Recommended
- Mark as New
- Bookmark
- Subscribe
- Permalink
- Flag Post
Hi,
i fixed the problem by doing a cold reset even it’s hard to get the control menu because of the MGF MODE message.
so i clicked to shutdown button ( just click one time on shutdown button) and at same time i kept clicking on right arrow to get the ready and control menu.
just go to troubleshooting menu and chose cold reset.
Was this reply helpful?
Yes
No
![]()
Be alert for scammers posting fake support phone numbers and/or email addresses on the community.
If you think you have received a fake HP Support message, please report it to us by clicking on «Flag Post».
† The opinions expressed above are the personal opinions of the authors, not of HP. By using this site, you accept the Terms of Use and Rules of Participation.

-
English
Open Menu

† The opinions expressed above are the personal opinions of the authors, not of HP. By using this site, you accept the <a href=»https://www8.hp.com/us/en/terms-of-use.html» class=»udrlinesmall»>Terms of Use</a> and <a href=»/t5/custom/page/page-id/hp.rulespage» class=»udrlinesmall»> Rules of Participation</a>.
My husband and I have owned an HP Printer for over 8 years and for the most part it has been incredibly reliable. It’s no wonder they are consistently among the top selling printers globally!
Having said that, we have encountered a few issues over the years while working from home. One such issue is a strange error that results in our device getting stuck in what is known as “MFG Mode”.
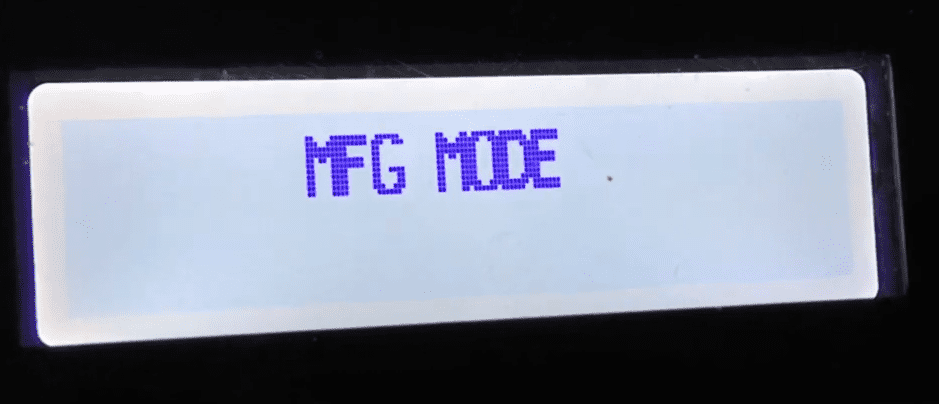
MFG Mode is short for Manufacturing Mode. Many of the HP Printer models have a well know malfunction where the printer will either boot directly into this mode or switch from User Mode to Manufacturing Mode.
This happens involuntary without user interaction and results in the control panel becoming unresponsive or unavailable.
If you are stuck in HP Printer MFG Mode, first turn the printer on and wait until it is idle and silent before continuing. With the printer turned on, disconnect the power cord. Wait 60 seconds. Plug the power cord back in. Turn the printer on. It should be fixed!
Read on for further step-by-step instructions and additional troubleshooting steps you can take to get your printer unstuck today!
Step 1: Perform Hard Reset
In most cases, performing a “hard reset” will be sufficient to solve the problem.
To perform a hard reset, first disconnect the power cord from BOTH the printer and the power source while the printer is ON.
Allow 60 seconds to pass. Then, reconnect the power cord to the back of the printer and the power outlet. Your printer should reset and turn back on automatically.
If your printer does not power up automatically following the hard reset, manually turn the printer back on. It’s really that simple! This should solve the issue for most users.
Step 2: Power Drain Printer
Sometimes performing a power drain is required. First, unplug any USB or cable from the printer. Then, pull the power cord out of the printer and wait 60 seconds or so.
Next, hold down the power button for 10 seconds to drain any remaining power from the system.
Finally, plug the power cord back in and attempt to restart the printer. Do not put any USB or other cables into the printer at this time.
Step 3: Perform Cold Reset
If the hard reset and power drain processes do not work, you can also attempt to “cold reset” your printer.
A cold reset forces the printer to return to its factory default settings. Often times if the printer’s configuration has been corrupted, a cold reset will do the trick.
The cold reset procedure differs depending on the printer model.
Older HP Printer models (including HP4000, 4100, 8000, 8100, 8150):
- Turn off the printer.
- While holding down the Go or Online button, turn the printer on.
- Release the buttons when the printer displays “Cold Reset” or “Resetting”.
Newer HP Printer models (including HP3800DN, 4200, 4250, 4300, 4350, 9000, 4600, 5500, 4700):
- Turn on the printer.
- On the control panel the memory will start counting. When it does, press and hold the Select button.
- Continue holding the Select button until all three Control Panel LED’s are illuminated and on solid, then release Select button.
- The control panel should now say “Select Language”.
- Use the down arrow on the control panel display to locate “Cold Reset” and press Select.
- The printer should now perform a cold reset and then continue its power-on sequence.
HP LaserJet (including 2200, 2200dn, and 2200dtn):
- Press and hold down the Go button.
- While holding down the Go button, turn the printer on. Continue holding Go.
- When the Attention light turns on, release the Go button.
If your model does not have a display panel, the cold reset procedure typically requires using a combination of the Go and Power buttons. Use your model number to look up your printer manual for the exact procedure.
Step 4: Set Printer To “User Mode”
Ok, so the hard reset, power drain and cold reset didn’t do the trick.
Another troubleshooting step to consider is setting your printer to User Mode.
To clear the MFG message and return to User mode, do the following:
- Turn the printer off and wait 10 seconds before turning the printer back on. Allow the the printer to boot up and display MFG Mode.
- Tap the power button. The display should now say Ready. If Ready does not appear, keep pressing the power button until you see the home screen.
- Navigate to the Engineering Menu / Underware Menu. Hit the OK button.
- The Boot code menu should now appear. Hit OK again.
- Use the Right Arrow button to locate the Set to user mode option. Hit OK again.
- Now use the Power button to shut the printer off an wait 10 seconds before turning the printer back on.
- When the printer reboots, the display should say Ready which means you are now in user mode.
If you are having trouble finding the User Mode on your printer, this may be due to your model following a slightly different procedure. Once again, use your model number to look up your device’s manual for the exact procedure.
Step 5: Update Firmware
To get the most out of your printer, you need to update your firmware regularly. HP frequently releases new firmware versions for printer enhancements that often include issue fixes.
Notably, updating your firmware may help prevent this MFG issue, Initializing errors, and others from happening in the future.
Update Firmware Directly From Printer
- First, connect the printer via a Wi-Fi or Ethernet connection.
- Use the control panel to open the Setup, Service, or Settings menu.
- Then, select Preferences, Printer Maintenance, or Tools.
- From there select Web Services, Printer Update, or LaserJet Update.
- If prompted, use the instructions that are displayed to turn on Web Services.
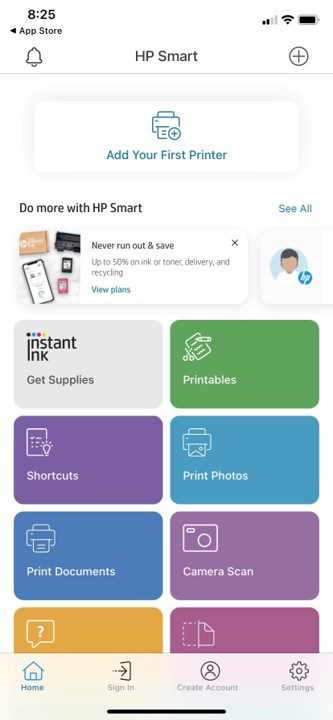
Update Firmware Through HP Smart App
- First, create an HP Smart App account or sign in if you already have an existing account.
- Then, on the home screen of the application, select your printer model.
- Next, navigate to Advanced, and select Advanced Settings or Printer Home Page (EWS).
- Select Tools or Web Services.
- Finally, select Printer Updates or Product Update, and click Check Now. Any available firmware updates will be automatically downloaded and installed onto your printer.
ATTENTION: Do not turn off the printer during the firmware update as this can cause permanent damage to your printer, and lead to your device not printing at all.
Final Word
If you encounter your HP Printer stuck in MFG Mode, follow these five troubleshooting steps in order:
- Perform a hard reset
- Power drain the printer
- Cold reset to factory default settings
- Set printer to User Mode
- Update firmware
As a final measure, you can try contacting HP customer support by using your printer model number. Once you’ve exhausted all of your options, be sure to check your warranty terms and conditions before making any purchases.

Chelsea Ashbrook is a Senior Manager of Corporate Digital Experience at Genentech. Chelsea received her B.A. from the University of Connecticut and has spent the last 11 years working in the technology field.
This article will address and provide solutions to some HP printer mode issues.
In this section, we will answer the question “what is HP MFG mode?” Furthermore, we will guide you on how to get your printer out of MFG mode if your HP printer is stuck in MFG mode.
What Does MFG Mode Mean on an HP Printer? [Answered]
HP printer MFG mode is a malfunction that happens to the HP M404 printer line. Such printers involuntarily boot and go into the MFG (manufacturing) mode. When this happens, the menus and keys on the control panel will become unavailable or unresponsive.
How to Fix HP Printer Stuck In MFG Mode
If your HP printer is stuck in MFG mode, do the steps below to fix the problem:
Step 1: Press your printer’s power button. This action should cause the “Ready” screen of your HP printer to be displayed.
Step 2: Enter the printer’s “Engineering Menu” by pressing the following buttons in this order: cancel, return, return, cancel, return, return.
Step 3: When the “Underware Menu” appears, press “OK”.
Step 4: When “boot code menu” is displayed, press “OK”.
Step 5: When “set to mfg_mode” is displayed, press the printer’s right arrow button.
This action will cause this information to be displayed: “set to user_mode”.
Step 6: Press “OK”.
Step 7: Turn off/on your HP printer. This should return your HP printer to user mode and normal operation.
The HP printer m404dn MFG mode issue can be fixed using the steps above.
Quiet Mode on HP Printer – HP Printer Mode
Quiet mode on HP printers enables printers to print with less noise. When this mode is activated, the printing speed will be reduced; however, the print quality will not be affected.
We recommend that you watch the video below.
How to turn On/Off HP Printer Quiet Mode [HP DeskJet, ENVY, OfficeJet, and All-in-One]
To turn on/off quiet mode on HP Deskjet, Envy, OfficeJet, and All-in-One printers, do the steps below:
Note: Ensure that you are printing on regular paper and that the print quality setting is set to “Normal” when you print in quiet mode.
Step 1: Go to your printer’s control panel.
Step 2: Swipe left.
Step 3: Touch the “Setup” icon.
Step 4: Touch “Preferences”.
Step 5: Turn on the quiet mode by touching the box beside the “Quiet Mode” option.
Step 6: Touch “OK”.
Repeat the above steps to turn off your HP printer quiet mode.
How to turn On/Off HP LaserJet Quiet Mode
To turn on/off quiet mode on HP LaserJet quiet mode, do the following:
1. Update your HP Printer Firmware
This step is necessary to ensure that the quiet mode setting is displayed on the control panel of your HP printer.
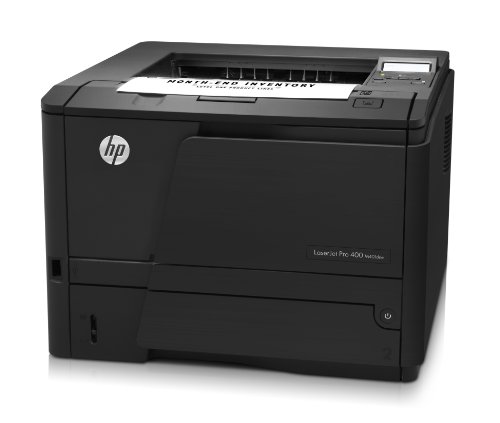
Note: You don’t need to update your printer firmware if your use any of these printers: HP LaserJet Pro 400 MFP M425 and HP LaserJet Pro 400 Printer M401 since they already have the setting for quiet mode.
Go to http://www.hp.com/go/support to update your HP LaserJet printer firmware.
2. Enable Quiet Mode Setting
To enable the quiet mode setting on your HP LaserJet printer, follow the steps below that fit the display of your HP printer control panel.
Note: The default setting for quiet mode is “Off”.
How to Enable Quiet Mode Setting on HP LaserJet Printers with Touchscreen Control Panel Display
To enable the quiet mode setting on HP LaserJet printers with touchscreen control panel display, do the following:
Note: Scroll with the scroll bar, and select an option by touching it.
Step 1: Go to the control panel of your HP printer.
Step 2: Scroll till you see the “Setup” icon.
Step 3: Select the “Setup” icon by touching it.
Step 4: From the “Setup Menu”, select “System Setup”.
Step 5: Scroll down and then select “Quiet Print Mode”.
Step 6: Touch any of these in the setting for “Print Quiet Mode” depending on what you want to do.
- “on” – this will enable the quiet mode on your HP LaserJet printer.
- “off” – this will disable the quiet mode on your HP LaserJet printer.
How to Enable Quiet Mode Setting on HP LaserJet Printers with 2-Line Control Panel Display
To enable the quiet mode setting on HP LaserJet printers with a 2-line control panel display, do the following:
Note: Scroll with the arrow keys, and select an option by pressing the printer’s “OK” button.
Step 1: Go to the control panel of your HP printer.
Step 2: Press your printer’s “OK” button.
Note: Press your printer’s “OK” button twice if your HP printer is in sleep mode.
Step 3: Navigate to “System Setup” with the printer’s arrow keys.
Step 4: Press “OK”.
Step 5: Navigate to “Quiet Print Mode”.
Step 6: Press “OK”.
Step 7: Navigate to any of the following in the menu for “Print Quiet Mode” depending on what you want to do, and then press the printer’s “OK” button.
- “on” – this will enable the quiet mode on your HP LaserJet printer.
- “off” – this will disable the quiet mode on your HP LaserJet printer.
HP Printer Pause Mode [Reasons & Solutions] – HP Printer Mode
Your HP printer is designed to go into pause mode when you don’t use it for a while. When this happens, the printer goes offline and in this mode, you can only scan if your printer has such a function.
Reasons why your HP Printer Goes into Pause Mode
Your HP printer goes into pause mode for the following reasons:
i. Pause mode has been set.
ii. Print spooler issues
iii. Printer software problem
iv. Issues with the paper
v. Faulty ink cartridge
vi. Damaged cables
vii. Paper jam
HP Printer Goes Into Pause Mode [How to Fix]
Choose any of the methods below to fix the problem when your HP printer goes into pause mode.
Method 1
Step 1: Click on the “Start/Windows” menu on your computer’s taskbar.
Step 2: Click on “Settings”.
Step 3: Go to “Printers”.
Step 4: Right-click your HP printer.
Step 5: Click on “Pause Printing” if you see a checkmark beside the option.
Step 6: Print a document to confirm that your printer is now working.
Step 7: Turn off your HP printer.
Step 8: Disconnect your printer from the wired or wireless network it is connected to.
Step 9: Reconnect your HP printer to your computer via a parallel cable.
Step 10: Turn your HP printer on.
Step 11: Print the document again.
Method 2
Step 1: On your HP printer, press and then let go of your printer’s “Pause” button.
Step 2: Do the on-screen instructions.
Step 3: Check your computer’s taskbar for the icon of your HP printer.
Step 4: Double-click on this printer icon.
Step 5: A list showing pending documents will be displayed.
Step 6: Right-click the “Paused” option.
Step 7: Click on “Resume”.
If the above methods fail to get your HP printer out of pause mode, do the following to fix the problem:
Restart Print Spooler
To restart the print spooler, click this link: HP Printer Not Responding in Windows 10 – How to Restart your Windows 10 Print Spooler Service, and then follow the instructions we shared.
Run Windows Troubleshooter
To run Windows Troubleshooter, click this link: HP Printer Not Responding in Windows 10 – How to Run Windows 10 Printer Troubleshooter, and then follow the steps we shared.
Remove and Reinstall your HP Printer Driver
To remove and then reinstall your HP printer driver, click this link: HP Printer Jobs Stuck in Queue – How to Remove and then Reinstall HP Print Driver and then follow the steps we shared.
How to Fix HP Printer Stuck In Initializing Mode – HP Printer Mode
If your HP printer is stuck in initializing mode, try the following solutions:
1. Change your Cartridge
Sometimes, a damaged cartridge might cause your HP printer to get stuck in initializing mode. Therefore, you need to take out the cartridge and check for any form of damage. If the cartridge is damaged, replace it with a new genuine HP cartridge.
2. NVRAM Reset your HP Printer
In some cases, the solution to your HP printer being stuck in initializing mode issue is to perform NVRAM reset on your HP printer.
To perform NVRAM reset on your HP printer, click this link: How to Reset HP Printer – HP Printer NVRAM Reset and follow the instructions we shared.
3. Disable IPv6 on your HP Printer
If you are connected to a wireless router that doesn’t have IPv6 support, then you need to disable the IPv6 setting on your HP printer.
To disable IPv6 on your HP printer, click this link: HP Printer Not Responding to iPhone – Disable Version 6 Internet Protocol (IPv6) on your HP Printer and then follow the instructions depending on the control panel design of your printer.
4. Update your HP Printer Firmware
An outdated printer firmware might be the reason why your HP printer is stuck in initializing mode. Therefore, in such a situation, you need to update your HP printer firmware.
Click this link: HP Printer Not Responding to Ping – How to Update HP Printer Firmware via Printer’s Control Panel to learn how to update your HP printer via its control panel.
Click this link: HP Printer Not Responding to Ping – How to Update HP Printer Firmware via HP Update Utility to learn how to update your HP printer via HP Update Utility.
5. Manually Move the Scanner’s Light Bar to its Normal Position
For HP printers designed with flatbed scanners, sometimes the light bar can get stuck and will refuse to return to its normal position. When this happens, it can cause your HP printer to get stuck in initializing mode.
Therefore, to fix the current problem, you need to manually move the scanner’s light bar to its normal position.
How to Manually Move the Scanner’s Light to its Normal Position
To manually move the scanner’s light to its normal position, do the following steps:
Step 1: Turn off your HP printer.
Step 2: Disconnect the power cable and other connected cables from your HP printer.
Step 3: Open the scanner’s flatbed cover.
When you do this, you will notice that the scanner’s light bar has refused to return to its original position.
Step 4: Get a star-shaped screwdriver.
Step 5: Use the screwdriver to take out the screws that are around the flatbed’s rim.
Step 6: Carefully lift the scanner glass cover. You just need to lift it a bit to access the light bar.
Step 7: Move the scanner’s light bar from its current position to the center.
Step 8: Close the scanner glass cover.
Step 9: Turn on your HP printer.
Step 10: Check if the printer is now out of the initializing mode.
If it is, turn off your HP printer and then put the screws back in place.
6. Contact HP
If none of the above gets your HP printer out of the initializing mode, then you need to contact HP Customer Support for further assistance.
Other HP Printer Mode Issues
We could not cover all the HP printer mode issues that users encounter in this article. Therefore, we have provided links to other articles on this site below that discuss these other HP printer mode issues in detail.
HP Printer Sleep Mode [How To, Issues & Solutions]
How to Restore HP Printer Setup Mode [Detailed Guide]
Prices pulled from the Amazon Product Advertising API on:
Product prices and availability are accurate as of the date/time indicated and are subject to change. Any price and availability information displayed on [relevant Amazon Site(s), as applicable] at the time of purchase will apply to the purchase of this product.
HP M404 Printer INVOLUNTARY BOOT UP TO MANUFACTURING (MFG) MODE W1A52A
The INVOLUNTARY BOOT UP TO MANUFACTURING (MFG) MOD error message is common on the following HP printers.
-
M404n
-
M404dn
-
M404dw

HP M404 Printer W1A52A INVOLUNTARY BOOT UP TO MANUFACTURING (MFG) MODE
In some cases, without any user interaction, a LaserJet M404 printer will switch from the typically used user mode to manufacturing mode and will display “MFG MODE’ on the control panel. When in manufacturing mode, the control panel and menus will be unresponsive/unavailable.
To clear this message and return to user mode, do the following:
Turn the power off, wait ten seconds and turn the power back on. Wait for the printer to boot up and display ‘MFG MODE’.
Hit the ‘X’ button, then hit the Back arrow twice, then hit the ‘X’ button, then hit the Back arrow twice.
Hit the power button. The display should now show ‘READY’.
Hit the ‘X’ button, then hit the Back arrow twice, then hit the ‘X’ button, then hit the Back arrow twice.
The display should now show ‘Engineering Menu / Underware Menu’. Hit the ‘OK’ button.
The display should now show ‘boot code menu’. Hit the ‘OK’ button.
Hit the ‘Right Arrow’ button so that ‘set to user mode’ is displayed. Hit the ‘OK’ button.
Hit the power button to shut the printer off.
Wait ten seconds and turn the printer back on. It should now boot to ‘READY’; you are now in user mode.
More HP LaserJet Printer Maintenance Resources
-
HP Laser Printer Technician Basics
-
Introduction To HP Laser Printer Repair and Troubleshooting
-
Onboarding-Making the Most of Printer Technical Phone Support and Avoiding The Top 5 Profit-Time Wasters
-
How The Laser Printer Works
-
HP Paper Jams and Paper Path Troubleshooting Problems
-
How To Troubleshoot Laser Printing Communication & Connection Problems
About Metrofuser NVRAM Reset Advisors
Metrofuser is a leading global innovator, manufacturer, and marketer of printer parts, equipment, diagnostics, repair information and systems solutions for professional users performing critical tasks. Products and services include remanufactured laser printer parts, remanufactured printers and service training for HP, Lexmark and Canon brands. The company’s customers include office equipment dealerships, online retailers, repair centers and MPS service providers nationwide. Metrofuser has been named to Inc. Magazine’s fastest-growing companies five consecutive years. For more information, visit http://www.metrofuser.com.
My husband and I have owned an HP Printer for over 8 years and for the most part it has been incredibly reliable. It’s no wonder they are consistently among the top selling printers globally!
Having said that, we have encountered a few issues over the years while working from home. One such issue is a strange error that results in our device getting stuck in what is known as “MFG Mode”.

MFG Mode is short for Manufacturing Mode. Many of the HP Printer models have a well know malfunction where the printer will either boot directly into this mode or switch from User Mode to Manufacturing Mode.
This happens involuntary without user interaction and results in the control panel becoming unresponsive or unavailable.
If you are stuck in HP Printer MFG Mode, first turn the printer on and wait until it is idle and silent before continuing. With the printer turned on, disconnect the power cord. Wait 60 seconds. Plug the power cord back in. Turn the printer on. It should be fixed!
Read on for further step-by-step instructions and additional troubleshooting steps you can take to get your printer unstuck today!
Step 1: Perform Hard Reset
In most cases, performing a “hard reset” will be sufficient to solve the problem.
To perform a hard reset, first disconnect the power cord from BOTH the printer and the power source while the printer is ON.
Allow 60 seconds to pass. Then, reconnect the power cord to the back of the printer and the power outlet. Your printer should reset and turn back on automatically.
If your printer does not power up automatically following the hard reset, manually turn the printer back on. It’s really that simple! This should solve the issue for most users.
Step 2: Power Drain Printer
Sometimes performing a power drain is required. First, unplug any USB or cable from the printer. Then, pull the power cord out of the printer and wait 60 seconds or so.
Next, hold down the power button for 10 seconds to drain any remaining power from the system.
Finally, plug the power cord back in and attempt to restart the printer. Do not put any USB or other cables into the printer at this time.
Step 3: Perform Cold Reset
If the hard reset and power drain processes do not work, you can also attempt to “cold reset” your printer.
A cold reset forces the printer to return to its factory default settings. Often times if the printer’s configuration has been corrupted, a cold reset will do the trick.
The cold reset procedure differs depending on the printer model.
Older HP Printer models (including HP4000, 4100, 8000, 8100, 8150):
- Turn off the printer.
- While holding down the Go or Online button, turn the printer on.
- Release the buttons when the printer displays “Cold Reset” or “Resetting”.
Newer HP Printer models (including HP3800DN, 4200, 4250, 4300, 4350, 9000, 4600, 5500, 4700):
- Turn on the printer.
- On the control panel the memory will start counting. When it does, press and hold the Select button.
- Continue holding the Select button until all three Control Panel LED’s are illuminated and on solid, then release Select button.
- The control panel should now say “Select Language”.
- Use the down arrow on the control panel display to locate “Cold Reset” and press Select.
- The printer should now perform a cold reset and then continue its power-on sequence.
HP LaserJet (including 2200, 2200dn, and 2200dtn):
- Press and hold down the Go button.
- While holding down the Go button, turn the printer on. Continue holding Go.
- When the Attention light turns on, release the Go button.
If your model does not have a display panel, the cold reset procedure typically requires using a combination of the Go and Power buttons. Use your model number to look up your printer manual for the exact procedure.
Step 4: Set Printer To “User Mode”
Ok, so the hard reset, power drain and cold reset didn’t do the trick.
Another troubleshooting step to consider is setting your printer to User Mode.
To clear the MFG message and return to User mode, do the following:
- Turn the printer off and wait 10 seconds before turning the printer back on. Allow the the printer to boot up and display MFG Mode.
- Tap the power button. The display should now say Ready. If Ready does not appear, keep pressing the power button until you see the home screen.
- Navigate to the Engineering Menu / Underware Menu. Hit the OK button.
- The Boot code menu should now appear. Hit OK again.
- Use the Right Arrow button to locate the Set to user mode option. Hit OK again.
- Now use the Power button to shut the printer off an wait 10 seconds before turning the printer back on.
- When the printer reboots, the display should say Ready which means you are now in user mode.
If you are having trouble finding the User Mode on your printer, this may be due to your model following a slightly different procedure. Once again, use your model number to look up your device’s manual for the exact procedure.
Step 5: Update Firmware
To get the most out of your printer, you need to update your firmware regularly. HP frequently releases new firmware versions for printer enhancements that often include issue fixes.
Notably, updating your firmware may help prevent this MFG issue, Initializing errors, and others from happening in the future.
Update Firmware Directly From Printer
- First, connect the printer via a Wi-Fi or Ethernet connection.
- Use the control panel to open the Setup, Service, or Settings menu.
- Then, select Preferences, Printer Maintenance, or Tools.
- From there select Web Services, Printer Update, or LaserJet Update.
- If prompted, use the instructions that are displayed to turn on Web Services.
Update Firmware Through HP Smart App
- First, create an HP Smart App account or sign in if you already have an existing account.
- Then, on the home screen of the application, select your printer model.
- Next, navigate to Advanced, and select Advanced Settings or Printer Home Page (EWS).
- Select Tools or Web Services.
- Finally, select Printer Updates or Product Update, and click Check Now. Any available firmware updates will be automatically downloaded and installed onto your printer.
ATTENTION: Do not turn off the printer during the firmware update as this can cause permanent damage to your printer, and lead to your device not printing at all.
Final Word
If you encounter your HP Printer stuck in MFG Mode, follow these five troubleshooting steps in order:
- Perform a hard reset
- Power drain the printer
- Cold reset to factory default settings
- Set printer to User Mode
- Update firmware
As a final measure, you can try contacting HP customer support by using your printer model number. Once you’ve exhausted all of your options, be sure to check your warranty terms and conditions before making any purchases.

Chelsea Ashbrook is a Senior Manager of Corporate Digital Experience at Genentech. Chelsea received her B.A. from the University of Connecticut and has spent the last 11 years working in the technology field.