- Главная
- Наш блог
- Коды ошибок Magner 175
Задайте вопрос — Бесплатная консультация
Возможно наш инженер поможет вам советом, и вам не придется привозить свой аппарат, или же вызывать инженера к себе домой или в офис.
В 2023 году, работаем только на выезде к клиентам! В сервисный центр временно технику не принимаем!!!
![]()
![]()
![]()
+7(495) 998-69-79
Замеченные недостатки:
- Не рекомендуется увеличивать ёмкость режект-кармана выше 30 банкнот. При его переполнении не исключён выброс банкнот. Слегка положение спасает плоская пружинка, надетая на средний выступ прижима банкнот в кармане, прижим не подпружинен, а данная пружинка играет роль его утяжелителя;
- В месте расположения переключателя направления банкнот (дивертора) радиусы изгиба банкноты малы и банкноты большого формата могут заминаться;
- Последовательная подгонка параметров блока детекции, а не калибровка, как таковая. Но уже реализована именно автокалибровка по УФ. Ожидается такое решение и по другим настройкам;
- В комплекте нет соединительных кабелей для принтера и компьютера;
- Возможен сбой ПО при загрузке, в этом случае необходимо перезаписывать ПО в памяти аппарата.
Ошибки:
| HI Code | Low Code | Error | Описание |
| 12 | 1~2 | Chain Error | Цепочка банкнот |
| 3~4 | Skew Error | Перекос | |
| 6~7 | Size Error | Неправильный размер | |
| 8 | Skew Error | Перекос | |
| 9 | Jam Error; | Замятие | |
| 10 | Communication Error | Ошибка связи | |
| 12~14 | Communication Error | Ошибка связи | |
| 15 | Double Error | Сдвоенная банкнота | |
| 24 | POCKET FULL | Карман полный | |
| 25 | BATCH FULL | Полная пачка | |
| 26 | REJECT POCKET FULL | Карман для отбракованных банкнот полный | |
| 27 | Different Denomination | Другой номинал | |
| 28 | Different Face | Другая сторона | |
| 29 | Different Orientation | Другая ориентация | |
| 31 | Different Version | Другая эмиссия | |
| 40 | Notes followed by Chain | Банкноты следуют цепочкой | |
| default | Err-Main12 | ||
| 14 | 1~9 | MG Error | Ошибка MG |
| 10~19 | UV Error | Ошибка УФ | |
| 20~25 | Tape | Скотч | |
| 51 | IR + MG | ИК+Мг | |
| 52 | IR + UV | ИК+УФ | |
| 53 | UV + MG | УФ+Мг | |
| 54 | IR + UV + MG | ИК+УФ+Мг | |
| 55 | IR + Tape | ИК+Скотч | |
| 56 | MG + Tape | Мг+Скотч | |
| 57 | UV + Tape | УФ+Скотч | |
| 58 | IR + MG + Tape | ИК+Мг+Скотч | |
| 59 | IR + UV + Tape | ИК+УФ+Скотч | |
| 60 | UV + MG + Tape | УФ+Мг+Скотч | |
| 61 | IR + UV + MG + Tape | ИК+УФ+Мг+Скотч | |
| default | Err-Main14 | ||
| 16 | 1 | Old Version | Старая эмиссия |
| 2 | New Version | Новая эмиссия | |
| 3 | VeryNew Version | Новейшая эмиссия | |
| 11~20 | User Select Denom | Номинал, выбранный пользователем | |
| default | Err-Main16 | ||
| 22 | 1~2 | Skew Error | Перекос |
| 3~5 | Value Error | Банкнота не распознана | |
| 6~8 | Skew Error | Перекос | |
| 9 | Size Error | Неправильный размер | |
| 10 | Chain Error | Цепочка банкнот | |
| 11 | Double Error | Сдвоенная банкнота | |
| default | Err-DM22 | ||
| 23 | 6~11 | Value Error | Банкнота не распознана |
| 20 | Old Version | Старая эмиссия | |
| 22 | New Version | Новая эмиссия | |
| default | Err-DM23 | ||
| 24 | 1~10 | IR Error | Ошибка ИК |
| 11 | Double Error | Сдвоенная банкнота | |
| 12 | Miss metalthread | Отсутствует металлическая нить | |
| 20 | Different Serial | Разные серийные номера | |
| 21 | Change Serial Number | Серийный номер изменен | |
| default | Err-DM24 | ||
| 28 | 1 | Missing Serial Number | Отсутствует серийный номер |
| 2 | uncertain Serial Number | Серийный номер не определен | |
| 3 | Different Serial Number | Разные серийные номера | |
| default | Err-DM28 | ||
| 29 | 1 | Wrong Side of Barcode | Изнанка штрихкода |
| 2 | Search Error Barcode | Найдена ошибка штрихкода | |
| 3 | Wrong Type Barcode | Другой тип штрихкода | |
| 4 | Exceed Pattern Numbers of Barcode | Числа превышают шаблон штрихкода | |
| default | Err-DM29 |
117214 г. Москва, ул. Большая Черемушкинская, д. 40, корпус 1
тел. +7 (495) 998-69-79
Этот адрес электронной почты защищён от спам-ботов. У вас должен быть включен JavaScript для просмотра.
-
Contents
-
Table of Contents
-
Bookmarks
Quick Links
Currency Fitness Sorter, Authenticator, in a 2 Pocket design
Satisfied with our counterfeit detector?
Here comes a machine with a complete solution using the
most advanced state-of-the-art technology.
Introducing, the new Magner-175V/175FF.
This Machine is designed to make your banknotes safe and
your duties easier than ever before.
Rev. 1.0.6
Date: 2014. 12. 31
Summary of Contents for Magner 175FF
-
Page 1
Satisfied with our counterfeit detector? Here comes a machine with a complete solution using the most advanced state-of-the-art technology. Introducing, the new Magner-175V/175FF. This Machine is designed to make your banknotes safe and your duties easier than ever before. Rev. 1.0.6… -
Page 2: Table Of Contents
Magner175V/175FF USER Guide — Contents – Introduction ……………………3 For Safety Use ……………………Packing List ……………………Options ……………………..Appearance ……………………………………..1. Screen Description ………………….2. Basic Operation ………………….3. Operation Mode 1 ………………….4. Operation Mode 2 ………………….. 5. Fitness Level ……………………
-
Page 3: Introduction
The machine is designed for user’s convenience, optimized for high performance and easy maintenance. MAGNER175V/175FF has high connectivity interfaces and 7” full color graphic LCD display. For Safety Use In this section, the compliance matters are described in order to use the product safely, and to prevent you and other people from the damages brought by the product to the human bodies or properties.
-
Page 4
Magner175V/175FF USER Guide Installation Warning 1. At installation and relocation of the products, please contact our distributor near you or our designated dealers. If installation is not perfect, there is a risk of a falling accident, electric shock, fire and burn injury. -
Page 5
Magner175V/175FF USER Guide The place with high temperature, high humidity, or low temperature. The place with direct sunlight. The place with much dust. When installing the product at the following places, please contact our distributor near you or our designated dealers. -
Page 6
Magner175V/175FF USER Guide Power Supply Warning 1. When using the product, connect it to the power supply specified in the instruction manual. If it is connected to the power supply, other than the product’s specification, it may become a cause of fire, electric shock, and/or electrical leakage. -
Page 7
Magner175V/175FF USER Guide Handling Caution 1. The product should be used under the environment specified in the instruction manual. If it is used under the other environment of the specification, there may cause fie and electric shock. 2. When operating inside the product for error or clearing or cleaning etc., the operation should be made in accordance with the description in the instruction manual. -
Page 8
Magner175V/175FF USER Guide 5. There is a charging part inside. Be sure to open the cover with turning off the power. If the cover is opened without turning off the power, it may cause electric shock. 1. Do not drop any metallic piece such as a clip, staple etc. inside or in a clearance of the product. -
Page 9
Magner175V/175FF USER Guide Maintenance Warning 1. For repairing the product, please contact our distributor near you or our designated dealers. Insufficient repair may cause fire, electric shock, and/or injury. 2. When the product has sunk under the water due to a disaster etc., stop using it and please ask for repair/check to our distributor near you or our designated dealers. -
Page 10: Packing List
Magner175V/175FF USER Guide Packing List Manual Magner175V/175FF Power Cable Options External Display OSD Kit Magner INT…
-
Page 11: Appearance
Magner175V/175FF USER Guide Appearance <Front View> Hopper Guide Hopper LCD Display Operation Keys Reject Pocket Stacker Magner INT…
-
Page 12
Magner175V/175FF USER Guide <Rear View> Gap Adjust Knob Power Supply Socket Power Switch USB-S (Devices) USB-H (PC) Printer External Display Magner INT… -
Page 13: Screen Description
Magner175V/175FF USER Guide 1. Screen Description Counting Operation Counting Value Mode 1 Number Sensors Operation Mode 2 Currency Reject Counting Speed Number 1) Key Operation Magner INT…
-
Page 14
Magner175V/175FF USER Guide Short Key Select Currency CURR Short Key Select Operation Mode. MODE Short Key Enter fitness setup menu. Save the number. Long Key Enter Pincode menu. Long Key Delete characters CLEAR/ESC Short Key Turn on or off ADD… -
Page 15: Basic Operation
Magner175V/175FF USER Guide 2. Basic Operation 2-1. Currency — Change local currency. When long press “CURRENCY”, the installed currencies are shown together and you can select the currency directly with number key. Magner INT…
-
Page 16
Magner175V/175FF USER Guide 2-2. Mode — Select Operation Mode, MIX, SP and SG Mode. Mix — Count all denominations of selected currencies. SP — The first inserted denomination is sent to Stacker Pocket. SG — The selected denomination is sent to Stacker Pocket. -
Page 17
Magner175V/175FF USER Guide 2-3. CF detection There are 4 kinds of sensors for detecting counterfeits. (TDS, UV, MG and IR) By pressing ∨ key, user can turn on or off each sensor. (Pincode is needed.) Press BATCH key -> Press 2 ~ 5 key for turning on or off the sensors. -
Page 18
After count the notes, press PRINT/SEND key and check counting result. Barcode (Russia only) You can connect Barcode Reader to MAGNER175V/175FF via USB port. Press “7” key and scan Barcode. When you press “9” key, the scanned barcode is printed with counting result. … -
Page 19: Operation Mode 1
Magner175V/175FF USER Guide Print When press “9” key, print the counting result via Printer. Reject When press “0” key, you can check the reason of the rejected notes. 3. Operation Mode 1 – Sorts very clean notes. (Magner175FF Only) 3-1.
-
Page 20
Magner175V/175FF USER Guide – Sort clean notes by fitness standards. (Magner175FF Only) 3-2. FIT – Count notes normally. 3-3. VALUE Magner INT… -
Page 21: Operation Mode 2
Magner175V/175FF USER Guide 4. Operation Mode 2 4-1. GT — When GT function is on, machine settles accounts before user clears the accounts. By long pressing “6” key, you can see the result of GT. When you press “0” key, GT result of each operation mode is shown.
-
Page 22
Magner175V/175FF USER Guide You can clear GT Result by pressing “7” key but Pincode is needed. 4-2. ADD — The total counting result is accumulated. Manual Add You can enter counting result about notes and coin manually. When press ADD key, Manual Add menu is shown. -
Page 23
Magner175V/175FF USER Guide After select the denomination by pressing number keys, enter the number of notes and press “SET” key for saving. (For example 10 EUR – 2 notes) Press START/STOP key and exit the Manual Add menu. Magner INT… -
Page 24
Magner175V/175FF USER Guide The added value is shown on Display. 2) Verify function If ADD function is “ON”, you can active verify function. When long press “7” key, verify function is shown as below. If you count the notes in verify function, counting result is not added in the previous counting result. -
Page 25
Magner175V/175FF USER Guide 4-3 Batch 1) Batch number. (5 ~250) When press “BATCH” key, you can enter batch number directly After enter batch number, you need to press SET key for saving. Magner INT… -
Page 26
Magner175V/175FF USER Guide 2) Reject Batch number. (5 ~100) (Pincode is needed.) Long press “SET” key After enter Pincode, try to press “SET’ key. When long press “BATCH” key, you can enter reject batch number directly After enter batch number, you need to press SET key for saving. -
Page 27
Magner175V/175FF USER Guide 3) Preset Batch When long press “8” key, you can set batch number. After press number key, enter batch number and you save batch by “SET” key. Magner INT… -
Page 28
Magner175V/175FF USER Guide When you press “8” key, batch is changed from Preset Batch number. Magner INT… -
Page 29
Magner175V/175FF USER Guide – Select Direction, Serial and Version Mode by pressing “0” key. 4-4. ETC 1) Direction (NONE, Face, ORG) Press “2” key and select Direction mode. Face Sort the notes by face of the notes. Sort the notes by face and orientation together. -
Page 30
Magner175V/175FF USER Guide 2) Image (NONE, Serial) Press “3” key and select the scanned image data for transferring it to PC. Serial: Send serial image to PC. When you select Serial function, 2 menus appear. 2-1) SN Print Timing Auto Batch When Batch is full, print the counting result via Printer automatically. -
Page 31
Magner175V/175FF USER Guide Auto Finish When count is finish regardless of Batch, print counting result via Printer automatically. Manual When you press “PRINT/SEND”, you can print counting result via Printer. 2-2) SN Print Option Text When you print Serial number, output form of Serial number is Text. -
Page 32
Magner175V/175FF USER Guide 3) Version (ON / OFF) Press “4” key and turn on or off version soring operation. ON — Sorts the notes by version. (Old, New and Very New) 4) Old Version Press “5” key and turn Count or Reject old version soring operation. -
Page 33
Magner175V/175FF USER Guide Reject Old version notes are counted. User You can select Count or Reject for each denomination. When you long press “5”key, you can select Count or Reject operation by number key. 5) External (Pincode is needed.) Magner INT… -
Page 34
Magner175V/175FF USER Guide If select “Enternal FND”, you can connect External Display to the machine. OSD NTSC/PAL OSD is for displaying counting result to Monitor. We support NTSC and PAL together. Magner INT… -
Page 35: Fitness Level
Magner175V/175FF USER Guide 5. Fitness Level (Magner175FF Only) After press SET key and “2” key, you can enter Fitness Level mode. Default – Load default value of Fitness and Counterfeit level. Export USB – Send the current Fitness and Counterfeit level to USB Stick.
-
Page 36
Magner175V/175FF USER Guide ① Select Fitness parameter. (for example Tape X) Select Version by pressing “8” key. ② Magner INT… -
Page 37
Magner175V/175FF USER Guide ③ Select Denomination by pressing 1~5 key. ④ Select ATM/FIT by pressing “9” key. ⑤ Enter level by pressing number keys and SET key or select Fitness ON/OFF by pressing “0” key. Magner INT… -
Page 38
Magner175V/175FF USER Guide ⑥ Press START/STOP key twice. ⑦ Save the changed level by pressing “7” key. Magner INT… -
Page 39: Cf Level
Magner175V/175FF USER Guide 6. CF Level After press SET key and “3” key, you can enter Counterfeit Level mode. After select item first, adjust CF level as below. Magner INT…
-
Page 40
Magner175V/175FF USER Guide ① Select CF item. (for example UV) Select Version by pressing “8” key. ② ③ Select Denomination by pressing 1~5 key. Magner INT… -
Page 41
Magner175V/175FF USER Guide ④ Select Lv. by pressing “9” key. ⑤ Enter level by pressing number keys and SET key or select Counterfeit ON/OFF by pressing “0” key. ⑥ Press START/STOP key twice. Magner INT… -
Page 42: Machine Model
Magner175V/175FF USER Guide ⑦ Save the changed level by pressing “7” key. 7. Machine Model When long press START/STOP key and press “1” key, you can check machine information. Magner INT…
-
Page 43: Machine Setting
Magner175V/175FF USER Guide 8. Machine Setting Pincode is needed. When long press START/STOP key and press “3” key, you can enter Machine Setting mode. You can set each sensor by pressing number keys. Magner INT…
-
Page 44: System Setting
Magner175V/175FF USER Guide 9. System Setting When long press START/STOP key and press “4” key, you can enter System Setting mode. Magner INT…
-
Page 45
Magner175V/175FF USER Guide 1) Language Press “1” key -> Press Number key for selecting Language for display. When press START/STOP key, exit the mode and the selected language is displayed. 2) Date/Time Press “2” key -> Press Number key for entering Date and Time. -
Page 46
Magner175V/175FF USER Guide 3) Sound Press “3” key -> Press “>”, “<” key and “∧”, “∨” key for selecting and adjusting Sound and Volume. 4) Print Press “4” key and enter Printer setting mode. Auto Print After finish the counting, the receipt is printed automatically. -
Page 47
When long press “9” key, you can enter or change Bank Name. Branch Print Select to print Branch Name to Receipt. When long press “0” key, you can enter or change Branch Name. 5) Pincode Change Pincode of MAGNER175V/175FF. (Pincode is needed.) Magner INT… -
Page 48
Magner175V/175FF USER Guide 6) Operation Batch Function Continue – When next Batch is started, the displayed value is started from the previous counting result.. Clear – When next Batch is started, the displayed value is started from 0. … -
Page 49
Magner175V/175FF USER Guide Fit Lv Activation Set fitness level, High, Middle and Low. Display Denom Set the display type of face value, Text or Image, from the counting result. Magner INT… -
Page 50: Network Setting
Magner175V/175FF USER Guide 10. Network Setting When long press “∧”key, you can set Network. You can enter the required information by number keys and ADD key. (ADD key — enter “DOT”) After enter each item, press SET key for accepting.
-
Page 51
Magner175V/175FF USER Guide After enter all data, try to press “6” key for saving the information. Magner INT… -
Page 52: Specification
Magner175V/175FF USER Guide 11. Specification Counterfeit Over CIS, IR, MG, UV, FL Hopper Detection Notes Pocket Reject Currency Maximum 10 currencies Capacity 100 Notes Pocket (New/Old) 1200 Count Only Stacker 250 Notes notes/min 1200 Value Dimensions 300(W) x 321(D) x 310(H) mm…
-
Page 53: Error Code
Magner175V/175FF USER Guide 12. Error Code HI Code Low Code Error Chain Error Skew Error Size Error Skew Error Jam Error; Communication Error 12~14 Communication Error Double Error POCKET FULL BATCH FULL REJECT POCKET FULL Different Denomination Different Face Different Orientation…
-
Page 54
Magner175V/175FF USER Guide Old Version New Version VeryNew Version 11~20 User Select Denom default Err-Main16 Skew Error Value Error Skew Error Size Error Chain Error Double Error default Err-DM22 6~11 Value Error Old Version New Version default Err-DM23 1~10 IR Error… -
Page 55: Maintenance
Magner175V/175FF USER Guide 13. Maintenance 13-1. Sensor Structure 13-2. Daily Cleaning The machine has many sensitive sensors to perform high technology functions, for example fitness sorting, detecting counterfeit detection, recognizing denominations, etc. Users are recommended to clean the machine sensors at least once a day.
-
Page 56
Magner175V/175FF USER Guide Up Sensor Module Counter LED Sensor TOP CIS Sensor Tape Sensor UV Sensor MG Sensor Down Sensor Module Counter Sensor Bottom CIS Sensor Tape Sensor Roller UV Sensor Lower Drive Body Reject Sensor Jam 2 sensor Jam 1 sensor… -
Page 57
Magner175V/175FF USER Guide Magner INT…
This manual is also suitable for:
175v
Перейти к контенту
- Главная
- Наш блог
- Коды ошибок Magner 175
Задайте вопрос — Бесплатная консультация
Возможно наш инженер поможет вам советом, и вам не придется привозить свой аппарат, или же вызывать инженера к себе домой или в офис.
![]()
![]()
![]()
+7(495) 998-69-79
Замеченные недостатки:
- Не рекомендуется увеличивать ёмкость режект-кармана выше 30 банкнот. При его переполнении не исключён выброс банкнот. Слегка положение спасает плоская пружинка, надетая на средний выступ прижима банкнот в кармане, прижим не подпружинен, а данная пружинка играет роль его утяжелителя;
- В месте расположения переключателя направления банкнот (дивертора) радиусы изгиба банкноты малы и банкноты большого формата могут заминаться;
- Последовательная подгонка параметров блока детекции, а не калибровка, как таковая. Но уже реализована именно автокалибровка по УФ. Ожидается такое решение и по другим настройкам;
- В комплекте нет соединительных кабелей для принтера и компьютера;
- Возможен сбой ПО при загрузке, в этом случае необходимо перезаписывать ПО в памяти аппарата.
Ошибки:
| HI Code | Low Code | Error | Описание |
| 12 | 1~2 | Chain Error | Цепочка банкнот |
| 3~4 | Skew Error | Перекос | |
| 6~7 | Size Error | Неправильный размер | |
| 8 | Skew Error | Перекос | |
| 9 | Jam Error; | Замятие | |
| 10 | Communication Error | Ошибка связи | |
| 12~14 | Communication Error | Ошибка связи | |
| 15 | Double Error | Сдвоенная банкнота | |
| 24 | POCKET FULL | Карман полный | |
| 25 | BATCH FULL | Полная пачка | |
| 26 | REJECT POCKET FULL | Карман для отбракованных банкнот полный | |
| 27 | Different Denomination | Другой номинал | |
| 28 | Different Face | Другая сторона | |
| 29 | Different Orientation | Другая ориентация | |
| 31 | Different Version | Другая эмиссия | |
| 40 | Notes followed by Chain | Банкноты следуют цепочкой | |
| default | Err-Main12 | ||
| 14 | 1~9 | MG Error | Ошибка MG |
| 10~19 | UV Error | Ошибка УФ | |
| 20~25 | Tape | Скотч | |
| 51 | IR + MG | ИК+Мг | |
| 52 | IR + UV | ИК+УФ | |
| 53 | UV + MG | УФ+Мг | |
| 54 | IR + UV + MG | ИК+УФ+Мг | |
| 55 | IR + Tape | ИК+Скотч | |
| 56 | MG + Tape | Мг+Скотч | |
| 57 | UV + Tape | УФ+Скотч | |
| 58 | IR + MG + Tape | ИК+Мг+Скотч | |
| 59 | IR + UV + Tape | ИК+УФ+Скотч | |
| 60 | UV + MG + Tape | УФ+Мг+Скотч | |
| 61 | IR + UV + MG + Tape | ИК+УФ+Мг+Скотч | |
| default | Err-Main14 | ||
| 16 | 1 | Old Version | Старая эмиссия |
| 2 | New Version | Новая эмиссия | |
| 3 | VeryNew Version | Новейшая эмиссия | |
| 11~20 | User Select Denom | Номинал, выбранный пользователем | |
| default | Err-Main16 | ||
| 22 | 1~2 | Skew Error | Перекос |
| 3~5 | Value Error | Банкнота не распознана | |
| 6~8 | Skew Error | Перекос | |
| 9 | Size Error | Неправильный размер | |
| 10 | Chain Error | Цепочка банкнот | |
| 11 | Double Error | Сдвоенная банкнота | |
| default | Err-DM22 | ||
| 23 | 6~11 | Value Error | Банкнота не распознана |
| 20 | Old Version | Старая эмиссия | |
| 22 | New Version | Новая эмиссия | |
| default | Err-DM23 | ||
| 24 | 1~10 | IR Error | Ошибка ИК |
| 11 | Double Error | Сдвоенная банкнота | |
| 12 | Miss metalthread | Отсутствует металлическая нить | |
| 20 | Different Serial | Разные серийные номера | |
| 21 | Change Serial Number | Серийный номер изменен | |
| default | Err-DM24 | ||
| 28 | 1 | Missing Serial Number | Отсутствует серийный номер |
| 2 | uncertain Serial Number | Серийный номер не определен | |
| 3 | Different Serial Number | Разные серийные номера | |
| default | Err-DM28 | ||
| 29 | 1 | Wrong Side of Barcode | Изнанка штрихкода |
| 2 | Search Error Barcode | Найдена ошибка штрихкода | |
| 3 | Wrong Type Barcode | Другой тип штрихкода | |
| 4 | Exceed Pattern Numbers of Barcode | Числа превышают шаблон штрихкода | |
| default | Err-DM29 |
117214 г. Москва, ул. Большая Черемушкинская, д. 40, корпус 1
тел. +7 (495) 998-69-79
Этот адрес электронной почты защищён от спам-ботов. У вас должен быть включен JavaScript для просмотра.
-
Contents
-
Table of Contents
-
Bookmarks
Quick Links
Currency Fitness Sorter, Authenticator, in a 2 Pocket design
Satisfied with our counterfeit detector?
Here comes a machine with a complete solution using the
most advanced state-of-the-art technology.
Introducing, the new Magner-175V/175FF.
This Machine is designed to make your banknotes safe and
your duties easier than ever before.
Rev. 1.0.6
Date: 2014. 12. 31
Summary of Contents for Magner 175FF
- Page 1
Satisfied with our counterfeit detector? Here comes a machine with a complete solution using the most advanced state-of-the-art technology. Introducing, the new Magner-175V/175FF. This Machine is designed to make your banknotes safe and your duties easier than ever before. Rev. 1.0.6… -
Page 2: Table Of Contents
Magner175V/175FF USER Guide — Contents – Introduction ……………………3 For Safety Use ……………………Packing List ……………………Options ……………………..Appearance ……………………………………..1. Screen Description ………………….2. Basic Operation ………………….3. Operation Mode 1 ………………….4. Operation Mode 2 ………………….. 5. Fitness Level ……………………
-
Page 3: Introduction
The machine is designed for user’s convenience, optimized for high performance and easy maintenance. MAGNER175V/175FF has high connectivity interfaces and 7” full color graphic LCD display. For Safety Use In this section, the compliance matters are described in order to use the product safely, and to prevent you and other people from the damages brought by the product to the human bodies or properties.
- Page 4
Magner175V/175FF USER Guide Installation Warning 1. At installation and relocation of the products, please contact our distributor near you or our designated dealers. If installation is not perfect, there is a risk of a falling accident, electric shock, fire and burn injury. - Page 5
Magner175V/175FF USER Guide The place with high temperature, high humidity, or low temperature. The place with direct sunlight. The place with much dust. When installing the product at the following places, please contact our distributor near you or our designated dealers. - Page 6
Magner175V/175FF USER Guide Power Supply Warning 1. When using the product, connect it to the power supply specified in the instruction manual. If it is connected to the power supply, other than the product’s specification, it may become a cause of fire, electric shock, and/or electrical leakage. - Page 7
Magner175V/175FF USER Guide Handling Caution 1. The product should be used under the environment specified in the instruction manual. If it is used under the other environment of the specification, there may cause fie and electric shock. 2. When operating inside the product for error or clearing or cleaning etc., the operation should be made in accordance with the description in the instruction manual. - Page 8
Magner175V/175FF USER Guide 5. There is a charging part inside. Be sure to open the cover with turning off the power. If the cover is opened without turning off the power, it may cause electric shock. 1. Do not drop any metallic piece such as a clip, staple etc. inside or in a clearance of the product. - Page 9
Magner175V/175FF USER Guide Maintenance Warning 1. For repairing the product, please contact our distributor near you or our designated dealers. Insufficient repair may cause fire, electric shock, and/or injury. 2. When the product has sunk under the water due to a disaster etc., stop using it and please ask for repair/check to our distributor near you or our designated dealers. -
Page 10: Packing List
Magner175V/175FF USER Guide Packing List Manual Magner175V/175FF Power Cable Options External Display OSD Kit Magner INT…
-
Page 11: Appearance
Magner175V/175FF USER Guide Appearance <Front View> Hopper Guide Hopper LCD Display Operation Keys Reject Pocket Stacker Magner INT…
- Page 12
Magner175V/175FF USER Guide <Rear View> Gap Adjust Knob Power Supply Socket Power Switch USB-S (Devices) USB-H (PC) Printer External Display Magner INT… -
Page 13: Screen Description
Magner175V/175FF USER Guide 1. Screen Description Counting Operation Counting Value Mode 1 Number Sensors Operation Mode 2 Currency Reject Counting Speed Number 1) Key Operation Magner INT…
- Page 14
Magner175V/175FF USER Guide Short Key Select Currency CURR Short Key Select Operation Mode. MODE Short Key Enter fitness setup menu. Save the number. Long Key Enter Pincode menu. Long Key Delete characters CLEAR/ESC Short Key Turn on or off ADD… -
Page 15: Basic Operation
Magner175V/175FF USER Guide 2. Basic Operation 2-1. Currency — Change local currency. When long press “CURRENCY”, the installed currencies are shown together and you can select the currency directly with number key. Magner INT…
- Page 16
Magner175V/175FF USER Guide 2-2. Mode — Select Operation Mode, MIX, SP and SG Mode. Mix — Count all denominations of selected currencies. SP — The first inserted denomination is sent to Stacker Pocket. SG — The selected denomination is sent to Stacker Pocket. - Page 17
Magner175V/175FF USER Guide 2-3. CF detection There are 4 kinds of sensors for detecting counterfeits. (TDS, UV, MG and IR) By pressing ∨ key, user can turn on or off each sensor. (Pincode is needed.) Press BATCH key -> Press 2 ~ 5 key for turning on or off the sensors. - Page 18
After count the notes, press PRINT/SEND key and check counting result. Barcode (Russia only) You can connect Barcode Reader to MAGNER175V/175FF via USB port. Press “7” key and scan Barcode. When you press “9” key, the scanned barcode is printed with counting result. … -
Page 19: Operation Mode 1
Magner175V/175FF USER Guide Print When press “9” key, print the counting result via Printer. Reject When press “0” key, you can check the reason of the rejected notes. 3. Operation Mode 1 – Sorts very clean notes. (Magner175FF Only) 3-1.
- Page 20
Magner175V/175FF USER Guide – Sort clean notes by fitness standards. (Magner175FF Only) 3-2. FIT – Count notes normally. 3-3. VALUE Magner INT… -
Page 21: Operation Mode 2
Magner175V/175FF USER Guide 4. Operation Mode 2 4-1. GT — When GT function is on, machine settles accounts before user clears the accounts. By long pressing “6” key, you can see the result of GT. When you press “0” key, GT result of each operation mode is shown.
- Page 22
Magner175V/175FF USER Guide You can clear GT Result by pressing “7” key but Pincode is needed. 4-2. ADD — The total counting result is accumulated. Manual Add You can enter counting result about notes and coin manually. When press ADD key, Manual Add menu is shown. - Page 23
Magner175V/175FF USER Guide After select the denomination by pressing number keys, enter the number of notes and press “SET” key for saving. (For example 10 EUR – 2 notes) Press START/STOP key and exit the Manual Add menu. Magner INT… - Page 24
Magner175V/175FF USER Guide The added value is shown on Display. 2) Verify function If ADD function is “ON”, you can active verify function. When long press “7” key, verify function is shown as below. If you count the notes in verify function, counting result is not added in the previous counting result. - Page 25
Magner175V/175FF USER Guide 4-3 Batch 1) Batch number. (5 ~250) When press “BATCH” key, you can enter batch number directly After enter batch number, you need to press SET key for saving. Magner INT… - Page 26
Magner175V/175FF USER Guide 2) Reject Batch number. (5 ~100) (Pincode is needed.) Long press “SET” key After enter Pincode, try to press “SET’ key. When long press “BATCH” key, you can enter reject batch number directly After enter batch number, you need to press SET key for saving. - Page 27
Magner175V/175FF USER Guide 3) Preset Batch When long press “8” key, you can set batch number. After press number key, enter batch number and you save batch by “SET” key. Magner INT… - Page 28
Magner175V/175FF USER Guide When you press “8” key, batch is changed from Preset Batch number. Magner INT… - Page 29
Magner175V/175FF USER Guide – Select Direction, Serial and Version Mode by pressing “0” key. 4-4. ETC 1) Direction (NONE, Face, ORG) Press “2” key and select Direction mode. Face Sort the notes by face of the notes. Sort the notes by face and orientation together. - Page 30
Magner175V/175FF USER Guide 2) Image (NONE, Serial) Press “3” key and select the scanned image data for transferring it to PC. Serial: Send serial image to PC. When you select Serial function, 2 menus appear. 2-1) SN Print Timing Auto Batch When Batch is full, print the counting result via Printer automatically. - Page 31
Magner175V/175FF USER Guide Auto Finish When count is finish regardless of Batch, print counting result via Printer automatically. Manual When you press “PRINT/SEND”, you can print counting result via Printer. 2-2) SN Print Option Text When you print Serial number, output form of Serial number is Text. - Page 32
Magner175V/175FF USER Guide 3) Version (ON / OFF) Press “4” key and turn on or off version soring operation. ON — Sorts the notes by version. (Old, New and Very New) 4) Old Version Press “5” key and turn Count or Reject old version soring operation. - Page 33
Magner175V/175FF USER Guide Reject Old version notes are counted. User You can select Count or Reject for each denomination. When you long press “5”key, you can select Count or Reject operation by number key. 5) External (Pincode is needed.) Magner INT… - Page 34
Magner175V/175FF USER Guide If select “Enternal FND”, you can connect External Display to the machine. OSD NTSC/PAL OSD is for displaying counting result to Monitor. We support NTSC and PAL together. Magner INT… -
Page 35: Fitness Level
Magner175V/175FF USER Guide 5. Fitness Level (Magner175FF Only) After press SET key and “2” key, you can enter Fitness Level mode. Default – Load default value of Fitness and Counterfeit level. Export USB – Send the current Fitness and Counterfeit level to USB Stick.
- Page 36
Magner175V/175FF USER Guide ① Select Fitness parameter. (for example Tape X) Select Version by pressing “8” key. ② Magner INT… - Page 37
Magner175V/175FF USER Guide ③ Select Denomination by pressing 1~5 key. ④ Select ATM/FIT by pressing “9” key. ⑤ Enter level by pressing number keys and SET key or select Fitness ON/OFF by pressing “0” key. Magner INT… - Page 38
Magner175V/175FF USER Guide ⑥ Press START/STOP key twice. ⑦ Save the changed level by pressing “7” key. Magner INT… -
Page 39: Cf Level
Magner175V/175FF USER Guide 6. CF Level After press SET key and “3” key, you can enter Counterfeit Level mode. After select item first, adjust CF level as below. Magner INT…
- Page 40
Magner175V/175FF USER Guide ① Select CF item. (for example UV) Select Version by pressing “8” key. ② ③ Select Denomination by pressing 1~5 key. Magner INT… - Page 41
Magner175V/175FF USER Guide ④ Select Lv. by pressing “9” key. ⑤ Enter level by pressing number keys and SET key or select Counterfeit ON/OFF by pressing “0” key. ⑥ Press START/STOP key twice. Magner INT… -
Page 42: Machine Model
Magner175V/175FF USER Guide ⑦ Save the changed level by pressing “7” key. 7. Machine Model When long press START/STOP key and press “1” key, you can check machine information. Magner INT…
-
Page 43: Machine Setting
Magner175V/175FF USER Guide 8. Machine Setting Pincode is needed. When long press START/STOP key and press “3” key, you can enter Machine Setting mode. You can set each sensor by pressing number keys. Magner INT…
-
Page 44: System Setting
Magner175V/175FF USER Guide 9. System Setting When long press START/STOP key and press “4” key, you can enter System Setting mode. Magner INT…
- Page 45
Magner175V/175FF USER Guide 1) Language Press “1” key -> Press Number key for selecting Language for display. When press START/STOP key, exit the mode and the selected language is displayed. 2) Date/Time Press “2” key -> Press Number key for entering Date and Time. - Page 46
Magner175V/175FF USER Guide 3) Sound Press “3” key -> Press “>”, “<” key and “∧”, “∨” key for selecting and adjusting Sound and Volume. 4) Print Press “4” key and enter Printer setting mode. Auto Print After finish the counting, the receipt is printed automatically. - Page 47
When long press “9” key, you can enter or change Bank Name. Branch Print Select to print Branch Name to Receipt. When long press “0” key, you can enter or change Branch Name. 5) Pincode Change Pincode of MAGNER175V/175FF. (Pincode is needed.) Magner INT… - Page 48
Magner175V/175FF USER Guide 6) Operation Batch Function Continue – When next Batch is started, the displayed value is started from the previous counting result.. Clear – When next Batch is started, the displayed value is started from 0. … - Page 49
Magner175V/175FF USER Guide Fit Lv Activation Set fitness level, High, Middle and Low. Display Denom Set the display type of face value, Text or Image, from the counting result. Magner INT… -
Page 50: Network Setting
Magner175V/175FF USER Guide 10. Network Setting When long press “∧”key, you can set Network. You can enter the required information by number keys and ADD key. (ADD key — enter “DOT”) After enter each item, press SET key for accepting.
- Page 51
Magner175V/175FF USER Guide After enter all data, try to press “6” key for saving the information. Magner INT… -
Page 52: Specification
Magner175V/175FF USER Guide 11. Specification Counterfeit Over CIS, IR, MG, UV, FL Hopper Detection Notes Pocket Reject Currency Maximum 10 currencies Capacity 100 Notes Pocket (New/Old) 1200 Count Only Stacker 250 Notes notes/min 1200 Value Dimensions 300(W) x 321(D) x 310(H) mm…
-
Page 53: Error Code
Magner175V/175FF USER Guide 12. Error Code HI Code Low Code Error Chain Error Skew Error Size Error Skew Error Jam Error; Communication Error 12~14 Communication Error Double Error POCKET FULL BATCH FULL REJECT POCKET FULL Different Denomination Different Face Different Orientation…
- Page 54
Magner175V/175FF USER Guide Old Version New Version VeryNew Version 11~20 User Select Denom default Err-Main16 Skew Error Value Error Skew Error Size Error Chain Error Double Error default Err-DM22 6~11 Value Error Old Version New Version default Err-DM23 1~10 IR Error… -
Page 55: Maintenance
Magner175V/175FF USER Guide 13. Maintenance 13-1. Sensor Structure 13-2. Daily Cleaning The machine has many sensitive sensors to perform high technology functions, for example fitness sorting, detecting counterfeit detection, recognizing denominations, etc. Users are recommended to clean the machine sensors at least once a day.
- Page 56
Magner175V/175FF USER Guide Up Sensor Module Counter LED Sensor TOP CIS Sensor Tape Sensor UV Sensor MG Sensor Down Sensor Module Counter Sensor Bottom CIS Sensor Tape Sensor Roller UV Sensor Lower Drive Body Reject Sensor Jam 2 sensor Jam 1 sensor… - Page 57
Magner175V/175FF USER Guide Magner INT…
This manual is also suitable for:
175v
-
Contents
-
Table of Contents
-
Bookmarks
Quick Links
Currency Fitness Sorter, Authenticator, in a 2 Pocket design
Satisfied with our counterfeit detector?
Here comes a machine with a complete solution using the
most advanced state-of-the-art technology.
Introducing, the new Magner-175V/175FF.
This Machine is designed to make your banknotes safe and
your duties easier than ever before.
Rev. 1.0.6
Date: 2014. 12. 31
Summary of Contents for Magner 175FF
- Page 1
Satisfied with our counterfeit detector? Here comes a machine with a complete solution using the most advanced state-of-the-art technology. Introducing, the new Magner-175V/175FF. This Machine is designed to make your banknotes safe and your duties easier than ever before. Rev. 1.0.6… -
Page 2: Table Of Contents
Magner175V/175FF USER Guide — Contents – Introduction ……………………3 For Safety Use ……………………Packing List ……………………Options ……………………..Appearance ……………………………………..1. Screen Description ………………….2. Basic Operation ………………….3. Operation Mode 1 ………………….4. Operation Mode 2 ………………….. 5. Fitness Level ……………………
-
Page 3: Introduction
The machine is designed for user’s convenience, optimized for high performance and easy maintenance. MAGNER175V/175FF has high connectivity interfaces and 7” full color graphic LCD display. For Safety Use In this section, the compliance matters are described in order to use the product safely, and to prevent you and other people from the damages brought by the product to the human bodies or properties.
- Page 4
Magner175V/175FF USER Guide Installation Warning 1. At installation and relocation of the products, please contact our distributor near you or our designated dealers. If installation is not perfect, there is a risk of a falling accident, electric shock, fire and burn injury. - Page 5
Magner175V/175FF USER Guide The place with high temperature, high humidity, or low temperature. The place with direct sunlight. The place with much dust. When installing the product at the following places, please contact our distributor near you or our designated dealers. - Page 6
Magner175V/175FF USER Guide Power Supply Warning 1. When using the product, connect it to the power supply specified in the instruction manual. If it is connected to the power supply, other than the product’s specification, it may become a cause of fire, electric shock, and/or electrical leakage. - Page 7
Magner175V/175FF USER Guide Handling Caution 1. The product should be used under the environment specified in the instruction manual. If it is used under the other environment of the specification, there may cause fie and electric shock. 2. When operating inside the product for error or clearing or cleaning etc., the operation should be made in accordance with the description in the instruction manual. - Page 8
Magner175V/175FF USER Guide 5. There is a charging part inside. Be sure to open the cover with turning off the power. If the cover is opened without turning off the power, it may cause electric shock. 1. Do not drop any metallic piece such as a clip, staple etc. inside or in a clearance of the product. - Page 9
Magner175V/175FF USER Guide Maintenance Warning 1. For repairing the product, please contact our distributor near you or our designated dealers. Insufficient repair may cause fire, electric shock, and/or injury. 2. When the product has sunk under the water due to a disaster etc., stop using it and please ask for repair/check to our distributor near you or our designated dealers. -
Page 10: Packing List
Magner175V/175FF USER Guide Packing List Manual Magner175V/175FF Power Cable Options External Display OSD Kit Magner INT…
-
Page 11: Appearance
Magner175V/175FF USER Guide Appearance <Front View> Hopper Guide Hopper LCD Display Operation Keys Reject Pocket Stacker Magner INT…
- Page 12
Magner175V/175FF USER Guide <Rear View> Gap Adjust Knob Power Supply Socket Power Switch USB-S (Devices) USB-H (PC) Printer External Display Magner INT… -
Page 13: Screen Description
Magner175V/175FF USER Guide 1. Screen Description Counting Operation Counting Value Mode 1 Number Sensors Operation Mode 2 Currency Reject Counting Speed Number 1) Key Operation Magner INT…
- Page 14
Magner175V/175FF USER Guide Short Key Select Currency CURR Short Key Select Operation Mode. MODE Short Key Enter fitness setup menu. Save the number. Long Key Enter Pincode menu. Long Key Delete characters CLEAR/ESC Short Key Turn on or off ADD… -
Page 15: Basic Operation
Magner175V/175FF USER Guide 2. Basic Operation 2-1. Currency — Change local currency. When long press “CURRENCY”, the installed currencies are shown together and you can select the currency directly with number key. Magner INT…
- Page 16
Magner175V/175FF USER Guide 2-2. Mode — Select Operation Mode, MIX, SP and SG Mode. Mix — Count all denominations of selected currencies. SP — The first inserted denomination is sent to Stacker Pocket. SG — The selected denomination is sent to Stacker Pocket. - Page 17
Magner175V/175FF USER Guide 2-3. CF detection There are 4 kinds of sensors for detecting counterfeits. (TDS, UV, MG and IR) By pressing ∨ key, user can turn on or off each sensor. (Pincode is needed.) Press BATCH key -> Press 2 ~ 5 key for turning on or off the sensors. - Page 18
After count the notes, press PRINT/SEND key and check counting result. Barcode (Russia only) You can connect Barcode Reader to MAGNER175V/175FF via USB port. Press “7” key and scan Barcode. When you press “9” key, the scanned barcode is printed with counting result. … -
Page 19: Operation Mode 1
Magner175V/175FF USER Guide Print When press “9” key, print the counting result via Printer. Reject When press “0” key, you can check the reason of the rejected notes. 3. Operation Mode 1 – Sorts very clean notes. (Magner175FF Only) 3-1.
- Page 20
Magner175V/175FF USER Guide – Sort clean notes by fitness standards. (Magner175FF Only) 3-2. FIT – Count notes normally. 3-3. VALUE Magner INT… -
Page 21: Operation Mode 2
Magner175V/175FF USER Guide 4. Operation Mode 2 4-1. GT — When GT function is on, machine settles accounts before user clears the accounts. By long pressing “6” key, you can see the result of GT. When you press “0” key, GT result of each operation mode is shown.
- Page 22
Magner175V/175FF USER Guide You can clear GT Result by pressing “7” key but Pincode is needed. 4-2. ADD — The total counting result is accumulated. Manual Add You can enter counting result about notes and coin manually. When press ADD key, Manual Add menu is shown. - Page 23
Magner175V/175FF USER Guide After select the denomination by pressing number keys, enter the number of notes and press “SET” key for saving. (For example 10 EUR – 2 notes) Press START/STOP key and exit the Manual Add menu. Magner INT… - Page 24
Magner175V/175FF USER Guide The added value is shown on Display. 2) Verify function If ADD function is “ON”, you can active verify function. When long press “7” key, verify function is shown as below. If you count the notes in verify function, counting result is not added in the previous counting result. - Page 25
Magner175V/175FF USER Guide 4-3 Batch 1) Batch number. (5 ~250) When press “BATCH” key, you can enter batch number directly After enter batch number, you need to press SET key for saving. Magner INT… - Page 26
Magner175V/175FF USER Guide 2) Reject Batch number. (5 ~100) (Pincode is needed.) Long press “SET” key After enter Pincode, try to press “SET’ key. When long press “BATCH” key, you can enter reject batch number directly After enter batch number, you need to press SET key for saving. - Page 27
Magner175V/175FF USER Guide 3) Preset Batch When long press “8” key, you can set batch number. After press number key, enter batch number and you save batch by “SET” key. Magner INT… - Page 28
Magner175V/175FF USER Guide When you press “8” key, batch is changed from Preset Batch number. Magner INT… - Page 29
Magner175V/175FF USER Guide – Select Direction, Serial and Version Mode by pressing “0” key. 4-4. ETC 1) Direction (NONE, Face, ORG) Press “2” key and select Direction mode. Face Sort the notes by face of the notes. Sort the notes by face and orientation together. - Page 30
Magner175V/175FF USER Guide 2) Image (NONE, Serial) Press “3” key and select the scanned image data for transferring it to PC. Serial: Send serial image to PC. When you select Serial function, 2 menus appear. 2-1) SN Print Timing Auto Batch When Batch is full, print the counting result via Printer automatically. - Page 31
Magner175V/175FF USER Guide Auto Finish When count is finish regardless of Batch, print counting result via Printer automatically. Manual When you press “PRINT/SEND”, you can print counting result via Printer. 2-2) SN Print Option Text When you print Serial number, output form of Serial number is Text. - Page 32
Magner175V/175FF USER Guide 3) Version (ON / OFF) Press “4” key and turn on or off version soring operation. ON — Sorts the notes by version. (Old, New and Very New) 4) Old Version Press “5” key and turn Count or Reject old version soring operation. - Page 33
Magner175V/175FF USER Guide Reject Old version notes are counted. User You can select Count or Reject for each denomination. When you long press “5”key, you can select Count or Reject operation by number key. 5) External (Pincode is needed.) Magner INT… - Page 34
Magner175V/175FF USER Guide If select “Enternal FND”, you can connect External Display to the machine. OSD NTSC/PAL OSD is for displaying counting result to Monitor. We support NTSC and PAL together. Magner INT… -
Page 35: Fitness Level
Magner175V/175FF USER Guide 5. Fitness Level (Magner175FF Only) After press SET key and “2” key, you can enter Fitness Level mode. Default – Load default value of Fitness and Counterfeit level. Export USB – Send the current Fitness and Counterfeit level to USB Stick.
- Page 36
Magner175V/175FF USER Guide ① Select Fitness parameter. (for example Tape X) Select Version by pressing “8” key. ② Magner INT… - Page 37
Magner175V/175FF USER Guide ③ Select Denomination by pressing 1~5 key. ④ Select ATM/FIT by pressing “9” key. ⑤ Enter level by pressing number keys and SET key or select Fitness ON/OFF by pressing “0” key. Magner INT… - Page 38
Magner175V/175FF USER Guide ⑥ Press START/STOP key twice. ⑦ Save the changed level by pressing “7” key. Magner INT… -
Page 39: Cf Level
Magner175V/175FF USER Guide 6. CF Level After press SET key and “3” key, you can enter Counterfeit Level mode. After select item first, adjust CF level as below. Magner INT…
- Page 40
Magner175V/175FF USER Guide ① Select CF item. (for example UV) Select Version by pressing “8” key. ② ③ Select Denomination by pressing 1~5 key. Magner INT… - Page 41
Magner175V/175FF USER Guide ④ Select Lv. by pressing “9” key. ⑤ Enter level by pressing number keys and SET key or select Counterfeit ON/OFF by pressing “0” key. ⑥ Press START/STOP key twice. Magner INT… -
Page 42: Machine Model
Magner175V/175FF USER Guide ⑦ Save the changed level by pressing “7” key. 7. Machine Model When long press START/STOP key and press “1” key, you can check machine information. Magner INT…
-
Page 43: Machine Setting
Magner175V/175FF USER Guide 8. Machine Setting Pincode is needed. When long press START/STOP key and press “3” key, you can enter Machine Setting mode. You can set each sensor by pressing number keys. Magner INT…
-
Page 44: System Setting
Magner175V/175FF USER Guide 9. System Setting When long press START/STOP key and press “4” key, you can enter System Setting mode. Magner INT…
- Page 45
Magner175V/175FF USER Guide 1) Language Press “1” key -> Press Number key for selecting Language for display. When press START/STOP key, exit the mode and the selected language is displayed. 2) Date/Time Press “2” key -> Press Number key for entering Date and Time. - Page 46
Magner175V/175FF USER Guide 3) Sound Press “3” key -> Press “>”, “<” key and “∧”, “∨” key for selecting and adjusting Sound and Volume. 4) Print Press “4” key and enter Printer setting mode. Auto Print After finish the counting, the receipt is printed automatically. - Page 47
When long press “9” key, you can enter or change Bank Name. Branch Print Select to print Branch Name to Receipt. When long press “0” key, you can enter or change Branch Name. 5) Pincode Change Pincode of MAGNER175V/175FF. (Pincode is needed.) Magner INT… - Page 48
Magner175V/175FF USER Guide 6) Operation Batch Function Continue – When next Batch is started, the displayed value is started from the previous counting result.. Clear – When next Batch is started, the displayed value is started from 0. … - Page 49
Magner175V/175FF USER Guide Fit Lv Activation Set fitness level, High, Middle and Low. Display Denom Set the display type of face value, Text or Image, from the counting result. Magner INT… -
Page 50: Network Setting
Magner175V/175FF USER Guide 10. Network Setting When long press “∧”key, you can set Network. You can enter the required information by number keys and ADD key. (ADD key — enter “DOT”) After enter each item, press SET key for accepting.
- Page 51
Magner175V/175FF USER Guide After enter all data, try to press “6” key for saving the information. Magner INT… -
Page 52: Specification
Magner175V/175FF USER Guide 11. Specification Counterfeit Over CIS, IR, MG, UV, FL Hopper Detection Notes Pocket Reject Currency Maximum 10 currencies Capacity 100 Notes Pocket (New/Old) 1200 Count Only Stacker 250 Notes notes/min 1200 Value Dimensions 300(W) x 321(D) x 310(H) mm…
-
Page 53: Error Code
Magner175V/175FF USER Guide 12. Error Code HI Code Low Code Error Chain Error Skew Error Size Error Skew Error Jam Error; Communication Error 12~14 Communication Error Double Error POCKET FULL BATCH FULL REJECT POCKET FULL Different Denomination Different Face Different Orientation…
- Page 54
Magner175V/175FF USER Guide Old Version New Version VeryNew Version 11~20 User Select Denom default Err-Main16 Skew Error Value Error Skew Error Size Error Chain Error Double Error default Err-DM22 6~11 Value Error Old Version New Version default Err-DM23 1~10 IR Error… -
Page 55: Maintenance
Magner175V/175FF USER Guide 13. Maintenance 13-1. Sensor Structure 13-2. Daily Cleaning The machine has many sensitive sensors to perform high technology functions, for example fitness sorting, detecting counterfeit detection, recognizing denominations, etc. Users are recommended to clean the machine sensors at least once a day.
- Page 56
Magner175V/175FF USER Guide Up Sensor Module Counter LED Sensor TOP CIS Sensor Tape Sensor UV Sensor MG Sensor Down Sensor Module Counter Sensor Bottom CIS Sensor Tape Sensor Roller UV Sensor Lower Drive Body Reject Sensor Jam 2 sensor Jam 1 sensor… - Page 57
Magner175V/175FF USER Guide Magner INT…
This manual is also suitable for:
175v
- Главная
- Наш блог
- Коды ошибок Magner 175
Задайте вопрос — Бесплатная консультация
Возможно наш инженер поможет вам советом, и вам не придется привозить свой аппарат, или же вызывать инженера к себе домой или в офис.
![]()
![]()
![]()
+7(495) 998-69-79
Замеченные недостатки:
- Не рекомендуется увеличивать ёмкость режект-кармана выше 30 банкнот. При его переполнении не исключён выброс банкнот. Слегка положение спасает плоская пружинка, надетая на средний выступ прижима банкнот в кармане, прижим не подпружинен, а данная пружинка играет роль его утяжелителя;
- В месте расположения переключателя направления банкнот (дивертора) радиусы изгиба банкноты малы и банкноты большого формата могут заминаться;
- Последовательная подгонка параметров блока детекции, а не калибровка, как таковая. Но уже реализована именно автокалибровка по УФ. Ожидается такое решение и по другим настройкам;
- В комплекте нет соединительных кабелей для принтера и компьютера;
- Возможен сбой ПО при загрузке, в этом случае необходимо перезаписывать ПО в памяти аппарата.
Ошибки:
| HI Code | Low Code | Error | Описание |
| 12 | 1~2 | Chain Error | Цепочка банкнот |
| 3~4 | Skew Error | Перекос | |
| 6~7 | Size Error | Неправильный размер | |
| 8 | Skew Error | Перекос | |
| 9 | Jam Error; | Замятие | |
| 10 | Communication Error | Ошибка связи | |
| 12~14 | Communication Error | Ошибка связи | |
| 15 | Double Error | Сдвоенная банкнота | |
| 24 | POCKET FULL | Карман полный | |
| 25 | BATCH FULL | Полная пачка | |
| 26 | REJECT POCKET FULL | Карман для отбракованных банкнот полный | |
| 27 | Different Denomination | Другой номинал | |
| 28 | Different Face | Другая сторона | |
| 29 | Different Orientation | Другая ориентация | |
| 31 | Different Version | Другая эмиссия | |
| 40 | Notes followed by Chain | Банкноты следуют цепочкой | |
| default | Err-Main12 | ||
| 14 | 1~9 | MG Error | Ошибка MG |
| 10~19 | UV Error | Ошибка УФ | |
| 20~25 | Tape | Скотч | |
| 51 | IR + MG | ИК+Мг | |
| 52 | IR + UV | ИК+УФ | |
| 53 | UV + MG | УФ+Мг | |
| 54 | IR + UV + MG | ИК+УФ+Мг | |
| 55 | IR + Tape | ИК+Скотч | |
| 56 | MG + Tape | Мг+Скотч | |
| 57 | UV + Tape | УФ+Скотч | |
| 58 | IR + MG + Tape | ИК+Мг+Скотч | |
| 59 | IR + UV + Tape | ИК+УФ+Скотч | |
| 60 | UV + MG + Tape | УФ+Мг+Скотч | |
| 61 | IR + UV + MG + Tape | ИК+УФ+Мг+Скотч | |
| default | Err-Main14 | ||
| 16 | 1 | Old Version | Старая эмиссия |
| 2 | New Version | Новая эмиссия | |
| 3 | VeryNew Version | Новейшая эмиссия | |
| 11~20 | User Select Denom | Номинал, выбранный пользователем | |
| default | Err-Main16 | ||
| 22 | 1~2 | Skew Error | Перекос |
| 3~5 | Value Error | Банкнота не распознана | |
| 6~8 | Skew Error | Перекос | |
| 9 | Size Error | Неправильный размер | |
| 10 | Chain Error | Цепочка банкнот | |
| 11 | Double Error | Сдвоенная банкнота | |
| default | Err-DM22 | ||
| 23 | 6~11 | Value Error | Банкнота не распознана |
| 20 | Old Version | Старая эмиссия | |
| 22 | New Version | Новая эмиссия | |
| default | Err-DM23 | ||
| 24 | 1~10 | IR Error | Ошибка ИК |
| 11 | Double Error | Сдвоенная банкнота | |
| 12 | Miss metalthread | Отсутствует металлическая нить | |
| 20 | Different Serial | Разные серийные номера | |
| 21 | Change Serial Number | Серийный номер изменен | |
| default | Err-DM24 | ||
| 28 | 1 | Missing Serial Number | Отсутствует серийный номер |
| 2 | uncertain Serial Number | Серийный номер не определен | |
| 3 | Different Serial Number | Разные серийные номера | |
| default | Err-DM28 | ||
| 29 | 1 | Wrong Side of Barcode | Изнанка штрихкода |
| 2 | Search Error Barcode | Найдена ошибка штрихкода | |
| 3 | Wrong Type Barcode | Другой тип штрихкода | |
| 4 | Exceed Pattern Numbers of Barcode | Числа превышают шаблон штрихкода | |
| default | Err-DM29 |
117214 г. Москва, ул. Большая Черемушкинская, д. 40, корпус 1
тел. +7 (495) 998-69-79
Этот адрес электронной почты защищён от спам-ботов. У вас должен быть включен JavaScript для просмотра.
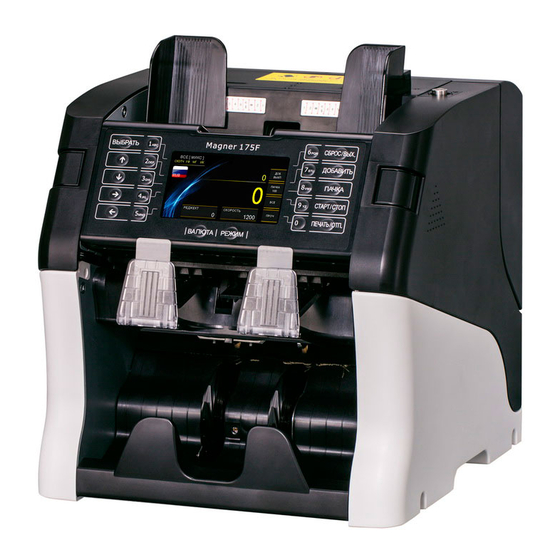
Характерные особенности
Magner 175 FF предназначен для высокоинтенсивной работы с большими объемами наличности и может использоваться в течение 2х рабочих смен подряд.
Для обеспечения эффективной работы счетчика без поломок и продления срока эксплуатации необходимо соблюдение следующих рекомендаций производителя:
- не допускать безостановочной работы счетчика более 18 часов в сутки;
- осуществлять ежедневное и еженедельное обслуживание этой модели счетчика Магнер использующим его оператором, ежемесячно проводить техническое обслуживание с помощью специалиста сервисного центра.
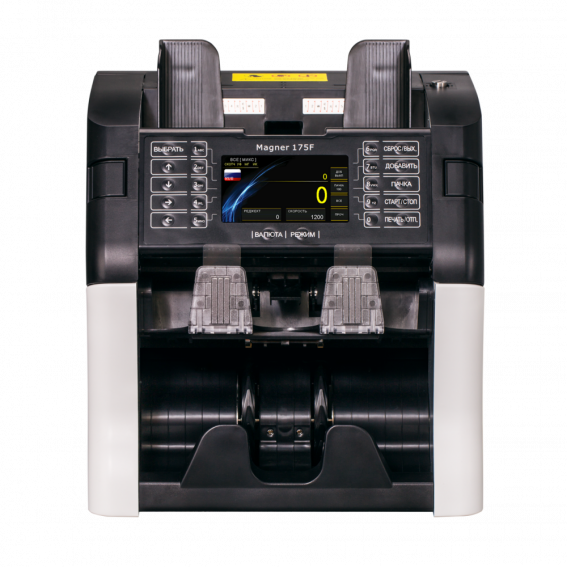
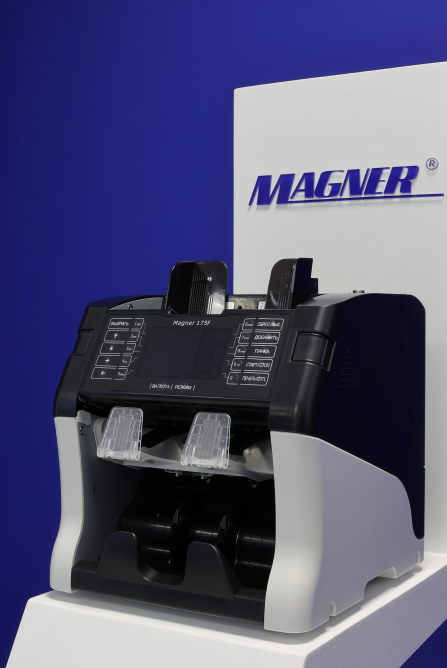
Magner 175 FF обладает компактными размерами, что позволяет разместить его даже в условиях дефицита рабочей поверхности. Для изготовления корпуса счетчика применяется светлосерый пластик, стойкий к внешним воздействиям и легко поддающийся обработке.
Панель управления устройством черного цвета, с расположенными на ней функциональными и цифровыми клавишами, выделенными белым цветом, и поэтому легко различимыми.
ЖКдисплей счетчика плоский, высококонтрастный и отличающийся отсутствием бликов, что делает его безопасным для зрения и позволяет работать с устройством длительное время без перерыва.
В дополнение к сообщениям, появляющимся на дисплее, Magner 175 FF оснащен функцией звуковых оповещений об ошибке, обнаружении подозрительной банкноты, делая тем самым практически невозможным пропуск поддельных либо сдвоенных банкнот.
Помимо подающего и приемного карманов, вмещающих по 300 банкнот, эта модель имеет карман для отбракованных банкнот емкостью до 100 купюр, облегчающий работу оператора благодаря отсутствию необходимости вручную удалять каждую из ?отбракованных купюр.Пластиковые направляющие подающего кармана обеспечивают правильное положение банкнот перед началом пересчета.
В Магнер 175 FF предусмотрено несколько портов для подключения ПК и внешних устройств.
Порты находятся на задней панели счетчика и включают в себя:
- USBS – для соединения с ПК;
- USBH – для подсоединения дополнительных устройств;
- порт для подключения внешнего дисплея;
- два последовательных порта – для соединения с ПК и последовательным принтером;
- порт LAN.

Magner 175 F изначально настроен на работу с тремя наиболее востребованными видами валют – доллары США, российские рубли, евро.
Существует возможность дополнительной установки программного обеспечения, позволяющего обрабатывать до 10, необходимых пользователю, видов валют. Счетчик отличается одной из самых высоких скоростей работы среди устройств своего класса.
Это – 1500 банкнот/мин. для простого пересчета и пересчета с определением номинала и 800 банкнот/мин. для режима распознавания и сверки серийных номеров.
Реализована возможность самостоятельной установки скорости пользователем, путем нажатия и удержания клавиши СТАРТ/СТОП, выбором необходимых параметров и установки скорости при помощи цифровых клавиш и клавиш со стрелками.
Выбранное значение скорости отобразится в правом нижнем углу дисплея.
Режимы пересчета
Режим простого счета (CNT)
РЕЖИМ (короткое нажатие) – выбор режима Простой счет (CNT) при помощи клавиш ? и ?.
В режиме простого счета Магнер 175 FF осуществляет пересчет пачки банкнот без определения их номинала.
Режим пересчета смешанной пачки (VALUE(MIX))
РЕЖИМ (короткое нажатие) – выбор режима VALUE(MIX) при помощи клавиш ? и ?.
Производится пересчет пачки купюр различных номиналов, результат разделения по которым можно увидеть на дисплее нажав клавишу PRINT.
В обоих режимах пересчета возможен как автоматический старт начала пересчета, так и его ручной запуск пользователем.
Автоматический старт пересчета начинается либо сразу же после помещения купюр в подающий карман, либо по прошествии некоторого времени, заданного в настройках пользователем.
Ручной запуск пересчета осуществляется коротким нажатием кнопки СТАРТ/СТОП.
Режимы сортировки
Сортировка по номиналу (DENOM)
РЕЖИМ (короткое нажатие) – выбор режима DENOM (AUTO или SG) при помощи клавиш ? и ?.
Magner 175 FF производит сортировку банкнот по номиналу автоматически либо в соответствии с параметрами заданными пользователем (необходимое значение номинала).
Режим сортировки по ориентации (ORIENT (AUTO))
РЕЖИМ (короткое нажатие) – выбор режима ORIENT (AUTO)при помощи клавиш ? и ?.
Происходит сортировка банкнот по лицевой и оборотной сторонам.
Режим распознавания и сверки серийных номеров (SERIAL N)
РЕЖИМ (короткое нажатие) – выбор режима SERIAL N (AUTO или SG) при помощи клавиш ? и ?.
Автоматический режим распознавания серийных номеров позволяет сканировать и сверять серийные номера банкнот всех номиналов.
Режим SG предполагает распознавание серийных номеров банкнот только заданного пользователем номинала.
Данный режим весьма полезен для определения банкнот, склеенных из разных составных частей, благодаря распознаванию и сравнению серийных номеров правой и левой стороны банкноты.
Сортировка банкнот по степени ветхости (FIT)
РЕЖИМ (короткое нажатие) – выбор режима FIT (FITNESS) при помощи клавиш ? и ?.
Осуществляется сортировка банкнот по степени ветхости.
При работе в данном режиме нажатие клавиши ВЫБРАТЬ и последующее нажатие клавиши 1 цифровой клавиатуры позволяют выбрать номинал банкнот, предназначенных для проверки ветхости, пользуясь для выбора необходимого номинала цифровой клавиатурой панели управления.
Сервисным инженером или пользователем при вводе пароля могут быть установлены требуемые значения параметров ветхости для каждой валюты, и отдельно – параметры уровня загрязнения для каждого номинала. Настройка параметров ветхости осуществляется путем нажатия клавиши ВЫБРАТЬ в режиме FIT и последующим нажатием цифровой клавиши 2.
Возможна установка параметров в соответствии со стандартами ЕЦБ либо отключение режима ЕЦБ (ECB OFF) и ввод индивидуальных параметров.
Пользовательские настройки
В связи с возможностью Magner 175 FF запоминать до 10 пользователей и одновременной работы на нем 2х операторов с выведением раздельных результатов каждого на подключенный к счетчику ПК, в устройстве реализована возможность задания каждым из пользователей собственных настроек.
Они включают в себя:
- имя пользователя и пароль;
- полномочия, доступные конкретному пользователю;
- тема дисплея;
- наличие либо отсутствие звукового сигнала и его громкость;
- язык меню (русский /английский);
- текущая дата и время;
- настройки печати.
Более подробное описание каждой из настроек и пошаговый процесс их установки пользователи могут найти в инструкции по эксплуатации.
Эксплуатация и уход
Для длительной стабильной работы Magner 175 FF необходимо соблюдать рекомендации производителя, касающиеся выбора места для установки счетчика, периодического пользовательского и технического обслуживания сервисным специалистом.
Magner 175 FF необходимо устанавливать на ровной сухой поверхности, в отдалении от отопительных приборов, по возможности избегая попадания на аппарат прямых солнечных лучей. Недопустимо воздействие повышенной влажности.
Параметры электрической сети, используемой для подключения счетчика, должны соответствовать указанным в инструкции значениям. В периоды простоя прибора его необходимо отключать от сети и накрывать специальным чехлом, защищающим от оседания пыли на поверхности.
Ежедневное обслуживание
Осуществляется пользователем, работающим с устройством.
Включает в себя удаление пыли с наружных поверхностей счетчика при помощи мягкой безворсовой салфетки и специальной кисточки.
Еженедельное обслуживание Также производится сотрудником, использующим аппарат. Предполагает более тщательную очистку Magner 175 FF, затрагивающую все датчики прибора, схематичное расположение которых указано в инструкции по эксплуатации.
Периодическое сервисное обслуживание Проводится ежемесячно сертифицированным инженером компаниипроизводителя. Включает в себя тщательную очистку счетчика, диагностику, калибровку датчиков и рекомендации по дальнейшему оптимальному использованию прибора
Обновление программного обеспечения Периодическое обновление ПО Magner 175 FF проводится специалистами сервисного центра и служит для усовершенствования способов выявления фальшивых купюр, адаптации устройства к работе с банкнотами нового образца.
Обновление программного обеспечения производится путем соединения Magner 175 FF с персональным компьютером через соответствующие порты, расположенные на задней панели устройства.
Код
Причина
Способ
устранения
CF
Обнаружена
банкнота с отсутствием магнитной
метки.
Удалите
банкноту. Установите более низкий
уровень настройки магнитной детекции.
Продолжение.
Таблица 4.1
СН
Непрерывная
цепочка: банкноты не могут быть
разделены так, чтобы их можно было
считать.
Настройте
толщину на более низкое значение.
Удалите слипшиеся банкноты.
CSE
CSE1 CSE2
Ошибка
датчика счета. Левый датчик. Правый
датчик.
Выключите
счетчик. Почистите датчик. Включите
счетчик.
CFE
CFE1
CFE2
Ошибка
магнитного датчика. Левый датчик.
Правый датчик.
Перед
началом счета нажмите клавишу «CLR».
DOOR
Не
закрыт узел направляющей банкнот.
Закройте
сзади узел направляющей банкнот.
DBL
Обнаружена
сдвоенная или очень темная банкнота.
Удалите
последнюю банкноту из приемного
кармана. Настройте зазор на более
низкое значение. Установите нужный
уровень плотности.
DDE
DDE1
DDE2
Ошибка
датчика измерения длины банкноты.
Левый датчик. Правый датчик.
Выключите
счетчик. Почистите датчик. Включите
счетчик.
DS1
DS2
Неправильная
ширина банкноты. Неправильная длина
банкноты.
Удалите
отличающуюся по размеру банкноту.
FEED
Не
работает двигатель подачи.
Обратитесь
в сервисную службу.
HF
Обнаружена
согнутая, поврежденная банкнота.
Удалите
банкноту.
HJ
Застревание
банкнот в подающем кармане, счетчик
не может загрузить банкноты из
подающего кармана.
Удалите
банкноты из подающего кармана.
Правильно установите направляющие
банкнот.
JA
Застревание,
машина не может продолжить счет (в
машине произошло защемление банкнот).
Удалите
банкноты из подающего и приемного
карманов. Нажмите клавишу «CLR«.
Устраните защемление вручную.
ОС
Количество
посчитанных банкнот превышает
установленное.
Пересчитайте
пачку заново. При повторении ошибки
обратитесь к сервисную службу.
SE
Перекос
банкноты более чем на 22, 5 градуса (для
модели Magner75S
— 17,5 градусов).
Установите
банкноты ровно. Правильно установите
направляющие банкнот. Нажмите клавишу
«CLR«.
SJ
В
момент включения питания банкноты
находились в приемном кармане или
датчики функционируют неверно.
Удалите
банкноты из приемного кармана. Удалите
посторонние предметы из приемного
кармана.
SC
Недосчет
банкнот, в подающем кармане недостаточное
количество банкнот.
Прибавьте
банкноты в подающий карман и продолжите
счет.
UL
Банкнота
имеет отражение по УФ больше допустимого.
Удалите
подозрительную банкноту — обычно она
последняя, повторите счет.
UEE
Ошибка
УФ датчика.
Перед
началом счета нажмите клавишу «CLR«.
Магнер 175f – это современный устройство, которое широко применяется для различных операций с банкнотами. Однако, как и все технические устройства, оно может иногда выдавать ошибки. Одна из таких ошибок — «Ошибка грязь».
Что же представляет собой эта ошибка и почему она возникает? Ошибка грязь возникает, когда внутренняя часть устройства перекрыта грязью, пылью или другими посторонними материалами. Это может произойти из-за плохой эксплуатации или отсутствия регулярной очистки.
Существует несколько причин, по которым может возникнуть ошибка грязь в Magner 175f. Во-первых, неправильное использование или неправильная установка устройства может привести к проникновению грязи внутрь. Во-вторых, если устройство находится в пыльном помещении или использовалось в условиях повышенной загрязненности, то это может стать причиной появления ошибки грязь.
Если вы столкнулись с ошибкой грязь в Magner 175f, не паникуйте! Существуют способы решения этой проблемы. Во-первых, рекомендуется проводить регулярную очистку устройства, используя специальные средства для чистки. Во-вторых, при работе с устройством следует соблюдать рекомендации по эксплуатации и установке.
Важно отметить, что неправильная очистка или использование некачественных средств для чистки может привести к еще большим проблемам. Поэтому предлагается обращаться к специалистам или использовать только рекомендованные производителем средства.
В итоге, ошибка грязь в Magner 175f может возникнуть по разным причинам, связанным с неправильной эксплуатацией или плохой условиями использования устройства. Однако, соблюдение рекомендаций по чистке и установке, а также правильное использование могут помочь избежать проблемы и обеспечить бесперебойную работу устройства.
Содержание
- Magner 175f ошибка грязь
- Причины возникновения ошибки «грязь»
- Способы устранения ошибки «грязь»
- Заключение
- Причины возникновения проблемы
- Симптомы ошибки «грязь»
- Способы устранения проблемы
- Предупреждение о появлении ошибки «грязь»
Magner 175f ошибка грязь
Ошибка «грязь» на банкнотном счетчике Magner 175f может возникнуть по нескольким причинам. В данной статье мы рассмотрим основные причины возникновения ошибки и способы ее устранения.
Причины возникновения ошибки «грязь»
- Загрязнение датчика: в ходе работы банкнотный счетчик может попадать в пыльные или грязные помещения, что может привести к загрязнению датчика. Загрязнение датчика может вызвать срабатывание ошибки «грязь».
- Повреждение датчика: в некоторых случаях датчик «грязь» может повредиться, например, при неправильной эксплуатации устройства или при попадании твердых предметов внутрь счетчика.
- Проблемы с механизмами счетчика: некорректная работа механизмов счетчика, например, застревание или повреждение приводов, может вызвать ошибку «грязь».
Способы устранения ошибки «грязь»
Для устранения ошибки «грязь» на Magner 175f рекомендуется выполнить следующие шаги:
- Очистка датчика: очистите датчик, который отвечает за определение загрязнения банкнот. Для этого используйте сжатый воздух или мягкую щетку, чтобы удалить пыль и грязь с датчика.
- Проверка наличия повреждений: после очистки датчика внимательно осмотрите его на наличие повреждений. Если датчик поврежден или испорчен, необходимо заменить его на новый.
- Проверка механизмов счетчика: проверьте работу всех механизмов счетчика на предмет застревания или повреждения. Если какие-либо механизмы не функционируют должным образом, обратитесь к сервисному центру для ремонта.
Заключение
Ошибка «грязь» на банкнотном счетчике Magner 175f может быть вызвана загрязнением датчика, его повреждением или проблемами с механизмами счетчика. Если очистка датчика не решила проблему, необходимо обратиться в сервисный центр для диагностики и ремонта устройства.
Причины возникновения проблемы
Ошибки грязи на устройстве Magner 175f могут возникать по разным причинам. Некоторые из основных причин проблемы могут быть следующими:
- Загрязнение деталей и механизмов принтера. Накопление пыли, грязи и остатков печати может привести к снижению качества печати и возникновению ошибки.
- Повреждение или износ роликов и других механизмов. Если ролики или другие детали принтера становятся изношенными или поврежденными, это может привести к неправильной подаче банкнот и, следовательно, к возникновению ошибки грязи.
- Неправильное использование и эксплуатация устройства. Неправильное обращение с принтером или неправильное использование его функций может стать причиной возникновения ошибки грязи. Например, использование некачественных банкнот или неправильное их размещение в принтере может привести к загрязнению механизмов.
- Неисправности или дефекты в работе устройства. Некачественные или неисправные детали, ошибка в процессе сборки или другие технические причины могут привести к возникновению ошибки грязи.
В большинстве случаев причина возникновения ошибки грязи связана с загрязнением принтера и механизмов. Поэтому очистка и регулярное обслуживание устройства являются важными способами предотвращения возникновения данной проблемы. Рекомендуется следовать инструкциям по очистке и обслуживанию, указанным в руководстве пользователя устройства Magner 175f.
Симптомы ошибки «грязь»
Ошибка «грязь» является одной из наиболее распространенных проблем при использовании купюроприемника Magner 175f. Симптомы данной ошибки могут проявляться следующим образом:
- Купюроприемник не принимает купюры
- Купюроприемник отказывается определять достоинство купюры
- Купюроприемник «заедает» при приеме купюр
- Купюроприемник издает необычные звуки во время работы
- Купюроприемник не выплевывает купюры
Если вы столкнулись с подобными симптомами, вероятно, причиной проблемы является запачканность устройства. Пыль, грязь, остатки клея или бумаги могут препятствовать нормальной работе купюроприемника.
Для решения проблемы «грязь» необходимо произвести тщательную чистку и обслуживание купюроприемника. Для этого рекомендуется следовать инструкциям по эксплуатации или обратиться к специалистам сервисного центра, которые смогут провести профессиональную очистку и обслуживание устройства.
Способы устранения проблемы
Если ваша машинка для подсчета купюр Magner 175f выдала ошибку «грязь», вам необходимо принять следующие меры:
- Первоначально, обязательно отключите питание устройства, чтобы избежать возможных повреждений.
- Прочистите промежутки между роликами и сенсорами устройства сухой и мягкой кисточкой. Убедитесь в том, что все остатки грязи или пыли удалены.
- Если проблема не устраняется, воспользуйтесь сжатым воздухом или аэрозольным очистителем для удаления грязи из труднодоступных участков машинки. Внимательно следите за инструкциями производителя, чтобы избежать возможных повреждений.
- Если после прочистки устройства ошибка «грязь» все еще остается, обратитесь в сервисный центр или к профессионалам, чтобы провести более глубокую чистку или ремонт устройства.
Помните, что регулярная чистка и обслуживание вашей машинки для подсчета купюр Magner 175f помогает избежать возникновения проблем и сбоев в работе устройства.
Предупреждение о появлении ошибки «грязь»
Ошибка «грязь» является одной из наиболее распространенных проблем, с которой сталкиваются пользователи популярной валютной счетной машины Magner 175f. Эта ошибка указывает на присутствие загрязнения в механизме машины, что может привести к неправильной работе или полной остановке устройства.
Ошибку «грязь» обычно сопровождают следующие симптомы:
- Несколько купюр проходят через машину без обнаружения;
- Счетная машина работает медленно и с трудом;
- Устройство издает странные звуки или трясется во время работы;
- Показатели на дисплее машины могут мигать или отображаться неправильно.
Наиболее частой причиной появления ошибки «грязь» является неправильное обращение с устройством или недостаточный уход за ним. Части, такие как резиновые ролики и вала, могут собрать пыль и грязь, которые приводят к засорению и неправильной работе машины.
Для решения проблемы с ошибкой «грязь» рекомендуется следующее:
- Периодически очищайте машину от пыли и грязи. Используйте сухую мягкую ткань или специальные чистящие средства для удаления загрязнений;
- Проверьте состояние резиновых роликов и вала на наличие пыли, грязи или износа. Если необходимо, замените эти детали;
- Следуйте инструкциям производителя по правильному использованию и уходу за машиной;
- Если проблема не исчезает, обратитесь за помощью к сервисному центру или специалисту, занимающемуся ремонтом и обслуживанием счетных машин.
Своевременное обнаружение и устранение ошибки «грязь» поможет сохранить надежную и эффективную работу счетной машины Magner 175f. Правильный уход и регулярная очистка устройства помогут продлить его срок службы и избежать проблем с его работой.