Indicator
5-8
Meaning
The toner is running low.
The toner has run out.
Unable to print with the specified
resolution due to insufficient
memory.
CF card is not formatted.
Specified file not found.
The current printing cannot be
continued.
Unable to print due to insufficient
memory.
Unable to print as the data is too
complicated.
If the indicators light or flash repeatedly in manners not described
above for normal or maintenance indication, a service error has
probably occurred. Turn the printer off by the power switch, wait 5
seconds and then turn the printer on again. This may clear the error.
Even if the error is not cleared, contact your service technician.
Remedy
Have a new toner container ready.
Replace with a new toner container.
After replacing the toner container,
clean the inside of the printer.
Add the expansion memory to the
printer.
Format the CF card.
Press [GO] to continue processing.
Press [Cancel] to cancel processing.
Press [GO] to continue processing.
Press [Cancel] to cancel processing.
Install the expansion memory in the
printer. Press [GO] to continue
processing. Press [Cancel] to cancel
processing.
Press [GO] to continue processing.
Press [Cancel] to cancel processing.
Troubleshooting
Коды ошибок Kyocera FS-1300D
Отсчет начинать после того, как загорятся все красные индикаторы без зеленых.
Должно получиться четырехзначное число.
| Code | Description | Causes |
| 0150 | Control PWB EEPROM error Detecting control PWB EEPROM (U300) communication error. |
Improper installation control PWB EEPROM (U300). Defective control PWB. |
| 0420 | Paper feeder communication error Communication error between control PWB and optional paper feeder. |
Improper installation paper feeder. Defective harness between control PWB (YC318) and paper feeder interface connector, or improper connector insertion. Defective control PWB. Defective harness between PF main PWB (YC5) and paper feeder interface connector, or improper connector insertion. Defective PF main- PWB. |
| 2000 | Main motor error The main motor ready input is not given for 2 s during the main motor is ON. |
Defective harness between main motor (CN1) and control PWB (YC305), or improper connector insertion. Defective drive transmission system of the main motor. Defective main motor. Defective control PWB. |
| 2610 | PF paper feed motor error (Paper feeder 1) The PF paper feed motor of paper feeder 1 ready input is not given for 2 s during the PF paper feed motor is ON. |
Defective harness between PF paper feed motor and PF main PWB (YC4), or improper connector insertion. Defective drive transmission system of the PF paper feed motor.YC4). Defective PF main motor. Defective control PWB. |
| 2620 | PF paper feed motor error (Paper feeder 2) The PF paper feed motor of paper feeder 2 ready input is not given for 2 s during the PF paper feed motor is ON. |
Defective harness between PF paper feed motor and PF main PWB (YC4), or improper connector insertion. Defective drive transmission system of the PF paper feed motor. Defective PF main motor. Defective control PWB. |
| 4000 | Polygon motor (laser scanner unit) error The polygon motor ready input is not given for 6 s during the polygon motor is ON. |
Defective harness between polygon motor and control PWB (YC319), or improper connector insertion. Defective laser scanner unit. Defective control PWB. |
| 6000 | Broken fuser heater lamp wire The fuser temperature does not rise after the fuser heater lamp has been turned on. |
Poor contact in the fuser thermistor connector terminals. Poor contact in the fuser heater lamp connector terminals. Fuser thermistor installed incorrectly. Fuser thermal cutout triggered. Fuser heater lamp installed incorrectly. Broken fuser heater lamp wire. |
| 6020 | Abnormally high fuser thermistor temperature Fuser thermistor detects abnormally temperature. |
Shorted fuser thermistor. Defective control PWB. |
| 6030 | Broken fuser thermistor wire Input from fuser thermistor is 0 (A/D value). |
Poor contact in the fuser thermistor connector terminals. Broken fuser thermistor wire. Fuser thermistor installed incorrectly. Fuser thermal cutout triggered. Fuser heater lamp installed incorrectly. Broken fuser heater lamp wire. |
| 6400 | Zero cross signal error The zero cross signal does not reach the control PWB for specified time. |
Defective harness between high voltage PWB (YC202) and control PWB (YC311), or improper connector insertion. Defective harness between power source PWB (YC103) and high voltage PWB (YC201), or improper connector insertion. Defective power source PWB. Defective control PWB. |
| F010 | Control PWB checksum error | Defective code ROM (flash memory). Defective control PWB. |
| F020 | Control PWB RAM checksum error | Defective main memory (RAM) on the control PWB. Defective expanded memory (DIMM). |
| F030 | Control PWB general failure | Defective control PWB. |
| F040 | Control PWB engine communication error | Defective control PWB. |
| F050 | Control PWB engine checksum error |
Some error may have occurred when downloading the firmware of the control PWB. Defective control PWB. |

Популярные сообщения из этого блога
@Echo Off SetLocal EnableDelayedExpansion Set file=e:\Temp1\temp.txt Set newfile=e:\Temp1\newtemp.txt (For /F «tokens=* usebackq delims=» %%a In («%file%») Do ( Set ta=%%a Echo !ta:~0,-1! ))>»%newfile%» Нагло стырено с просторов Интернет
Постоянно забываю как убрать принудительное текстовое форматирование в таблицах OpenOffice, поэтому просто копирую эту статью из базы знаний: Символ «’» (апостроф) Если перед числами в строке ввода стоит символ «’», то в этом случае цифры не распознаются как числа. Символ «’» (апостроф) является символом принудительного форматирования данных «как текст», поэтому он не отображается в ячейках; увидеть его можно только в строке ввода перед данными. «Язык формул» электронных таблиц разработан задолго до появления MS Windows и Microsoft Office. Символ «апостроф» в начале содержимого ячейки всегда был символом принудительного форматирования содержимого «как текст». Данный способ форматирования является преимущественным перед форматом ячейки. Так работали Quatro Pro, Super Calc, таблицы Lotus 1-2-3. Так работают и все современные электронные таблицы. «’» перед цифровыми значениями следует использовать, когда вводятся константы, не являющиеся числами. Например
@echo off SetLocal EnableDelayedExpansion rem Определяем переменные SET CONF=ftp.cnf SET FILELIST=f.txt SET HOST=ftp.host.lan SET USERNAME=ftpuser SET PASSWORD=PaS$w0Rd rem Создаем файл конфигурации для автоматизации работы ftp-клиента rem в котором сканируем файлы по маске с учетом регистра echo.open %HOST%> %CONF% echo.%USERNAME%>> %CONF% echo.%PASSWORD%>> %CONF% echo.binary>> %CONF% echo.ls *_IN.zip>> %CONF% echo.ls *_IN.ZIP>> %CONF% echo.ls *_in.zip>> %CONF% echo.ls *_in.ZIP>> %CONF% echo.bye>> %CONF% rem Запускаем ftp-клиент в автоматическом режиме, rem выводим результаты просмотра каталога в текстовый файл, rem фильтруя выводимые имена файлов ftp -s:%CONF% | findstr /i «[a-z,_,0-9]_IN.zip» > %FILELIST% rem Вторично создаем файл конфигурации echo.open %HOST%> %CONF% echo.%USERNAME%>> %CONF% echo.%PASSWORD%>> %CONF% echo.binary>>%CONF% rem Записываем в конфигу

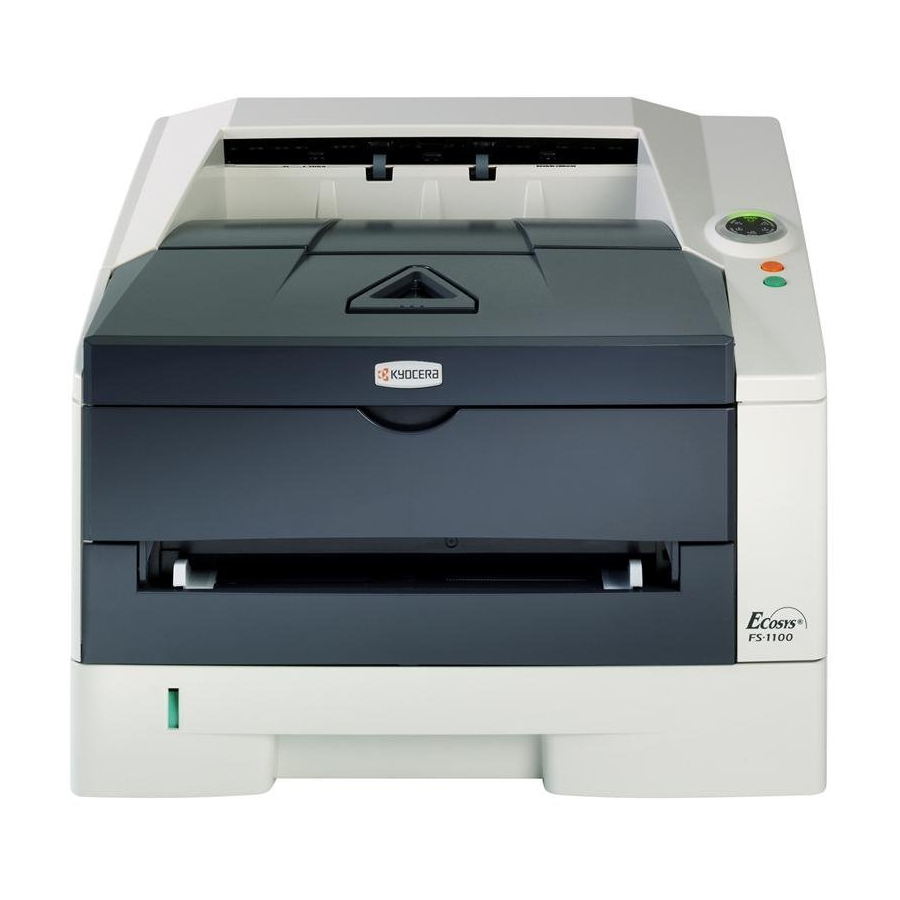
Компоненты аппарата 1-5
Индикаторы
Вверху справа на принтере размещены шесть индикаторов.
Индикаторы используются для определения состояния принтера в
любое время. Для определения состояния принтера проверьте
индикаторы на принтере и затем обратитесь к таблице ниже.
Индикатор Состояние Описание
Ready (Зелёный)Светится Показывает онлайновое состояние (печать возможна).
Быстрое мигание Автономное состояние. Вы не можете печатать, но принтер
может принимать данные.
Медленное
мигание
Принтер находится в режиме ожидания
Выкл.Принтер остановился вследствие ошибки.
Data (Зелёный)Светится Принтер обрабатывает данные или обращается к памяти.
Быстрое мигание Принтер принимает данные.
Выкл.Принтер не обрабатывает данных.
Jam (жёлтый)Светится Произошло застревание бумаги, или кассета неправильно
вставлена.
Выкл.Состояние принтера нормальное.
Paper (Жёлтый)Светится Во время печати закончилась бумага.
Быстрое мигание В заданной кассете или податчике бумаги при состоянии
Ready нет бумаги. Неправильно вставлена кассета.
Выкл.Состояние принтера нормальное.
Attention (Жёлтый)Светится Из—за открытой верхней крышки принтера произошла
ошибка.
При установленном дополнительном податчике бумаги (PF-
100) и выбранном податчике как источнике бумаги кассета с
бумагой в главном блоке (CASS1) не вставлена правильно.
Быстрое мигание Предупреждающее состояние иное, чем Jam, Тоner, Paper и
Attention.
Выкл.Состояние принтера нормальное.
Toner (Жёлтый)Светится Принтер остановился из—за того, что закончился тонер.
Быстрое мигание Тонер заканчивается.
Выкл.Состояние принтера нормальное.
Примечание Относительно других сочетаний шести
индикаторов обращайтесь к сервисной службе. Status Monitor
(программное обеспечение в сочетании с KX driver )
предоставит более подробную информацию о состоянии
принтера.
-
Contents
-
Table of Contents
-
Troubleshooting
-
Bookmarks
Quick Links
OPERATION GUIDE
FS-1100
FS-1300D
Related Manuals for Kyocera FS FS-1300D
Summary of Contents for Kyocera FS FS-1300D
-
Page 1
OPERATION GUIDE FS-1100 FS-1300D… -
Page 2
The following guides are included with this machine. Refer to the proper guide based on your requirements. Operation Guide (This Guide) Describes how to load paper, print, replace toner, clean the printer, and troubleshooting. Installation Guide Explains how to install this printer, as well as connecting cables and… -
Page 3: Table Of Contents
Contents Machine Parts … 1-1 Components at the Front of the Printer … 1-2 Components at the Rear of the Printer … 1-3 Operation Panel … 1-4 Indicators … 1-5 Keys … 1-6 Loading Paper … 2-1 General Guidelines … 2-2 Selecting the Right Paper …
-
Page 5
Legal and Safety Information Please read this information before using your machine. This chapter provides information on the following topics: Legal Information License Agreements Safety Information Symbols Installation Precautions Precautions for Use About the Operation Guide Conventions in This Guide xvii… -
Page 6: Legal Information
This guide, and any copyrightable subject matter sold or provided with or in connection with the sale of the page printer, are protected by copyright. All rights are reserved. Copying or other reproduction of all or part of this guide, or any copyrightable subject matter without the prior written consent of Kyocera Mita Corporation is prohibited.
-
Page 7
This product has been certified by the USB Implementers Forum, Inc. -
Page 8: License Agreements
License Agreements IBM Program License Agreement The following declarations have been provided in English intentionally. THE DEVICE YOU HAVE PURCHASED CONTAINS ONE OR MORE SOFTWARE PROGRAMS (“PROGRAMS”) WHICH BELONG TO INTERNATIONAL BUSINESS MACHINES CORPORATION (“IBM”). THIS DOCUMENT DEFINES THE TERMS AND CONDITIONS UNDER WHICH THE SOFTWARE IS BEING LICENSED TO YOU BY IBM.
-
Page 9
Otherwise, this license is governed by the laws of the country in which you acquired the Program. Typeface Trademark Acknowledgement All resident fonts in this printer are licensed from Monotype Imaging Inc. Helvetica, Palatino and Times are registered trademarks of Linotype-Hell AG. ITC Avant Garde Gothic, ITC Bookman, ITC ZapfChancery and ITC Zapf Dingbats are registered trademarks of International Typeface Corporation. -
Page 10
viii agreement which can be obtained from Monotype Imaging. Monotype Imaging retains all rights, title and interest to the Software and Typefaces and no rights are granted to you other than a License to use the Software on the terms expressly set forth in this Agreement. -
Page 11
14. YOU ACKNOWLEDGE THAT HAVE READ THIS AGREEMENT, UNDERSTAND IT, AND AGREE TO BE BOUND BY ITS TERMS AND CONDITIONS. NEITHER PARTY SHALL BE BOUND BY ANY STATEMENT OR REPRESENTATION NOT CONTAINED IN THIS AGREEMENT. NO CHANGE IN THIS AGREEMENT IS EFFECTIVE UNLESS WRITTEN AND SIGNED BY PROPERLY AUTHORIZED REPRESENTATIVES OF EACH PARTY. -
Page 12: Safety Information
Radio Frequency Transmitter This machine contains a transmitter module. We, the manufacturer (Kyocera Mita Corporation) hereby declare that this equipment (page printer), model FS-1100 and FS-1300D are in compliance with the essential requirements and other relevant provisions of Directive 1999/5/EC.
-
Page 13: Caution Labels
These printers generate ozone gas (O3), which may concentrate in the place of installation and cause an unpleasant smell. To minimize the concentration of ozone gas to less than 0.1ppm, we recommend you not to install the printer in a confined area where ventilation is blocked. FS-1100…
-
Page 14
CE Marking Directive Hereby, Kyocera Mita Corporation, declares that this page printer is in compliance with the essential requirements and other relevant provisions of Directive 1999/5/EC. According to Council Directive 2004/108/EC, 2006/95/EC, and 1999/5/EC Manufacturer: Kyocera Mita Corporation Tamaki Plant Manufacturer’s address: 704-19, Nojino, Tamaki-cho, Watarai-gun, Mie-… -
Page 15: Recycled Paper
This printer comes equipped with a Sleep Mode where printer function remains in a waiting state but power consumption is still reduced to a minimum when there is no activity with the printer within a set amount of time. Sleep Mode This printer automatically enters Sleep Mode when approximately 15 minutes have passed since the printer was last used.
-
Page 16: Symbols
Symbols The sections of this guide and parts of the machine marked with symbols are safety warnings meant to protect the user, other individuals and surrounding objects, and ensure correct and safe usage of the machine. The symbols and their meanings are indicated below. DANGER: Indicates that serious injury or even death will very possibly result from insufficient attention to or incorrect compliance with the related points.
-
Page 17: Installation Precautions
During printing, some ozone is released, but the amount does not cause any ill effect to one’s health. If, however, the printer is used over a long period of time in a poorly ventilated room or when printing an extremely large number of copies, the smell may become unpleasant.
-
Page 18
Power Supply/Grounding the Machine Warning Do not use a power supply with a voltage other than that specified. Avoid multiple connections in the same outlet. These types of situations present a danger of fire or electrical shock. Plug the power cord securely into the outlet. If metallic objects come in contact with the prongs on the plug, it may cause a fire or electric shock. -
Page 19: Precautions For Use
Precautions for Use Cautions when using the machine Warning Do not place metallic objects or containers with water (flower vases, flower pots, cups, etc.) on or near the machine. This situation presents a danger of fire or electrical shock should they fall inside.
-
Page 20
xviii If dust accumulates within the machine, there is a danger of fire or other trouble. It is therefore recommended that you consult with your service representative in regard to cleaning of internal parts. This is particularly effective if accomplished prior to seasons of high humidity. -
Page 21: About The Operation Guide
This chapter explains paper specifications for this printer and how to load paper into the cassette or MP tray. 3 Printing This chapter explains how to install the printer driver, print from your PC, and use the application software included in the CD-ROM. 4 Maintenance This chapter explains how to replace the toner container and how to care for your printer.
-
Page 22: Conventions In This Guide
Note Do not remove the toner container from the carton until you are ready to install it in the printer. Take care not to touch When pulling the paper, pull If you ship the printer,…
-
Page 23
Machine Parts Machine Parts This chapter identifies machine parts, indicators, and operation panel keys. Components at the Front of the Printer Components at the Rear of the Printer Operation Panel Indicators Keys… -
Page 24: Machine Parts
FS-1100 FS-1300D Components at the Front of the Printer Top Cover Paper Stopper Top Tray Operation Panel Right Cover Paper Cassette Front Cover Manual Feed MP Tray 10 Subtray Machine Parts…
-
Page 25: Components At The Rear Of The Printer
Components at the Rear of the Printer 11 Optional Interface Slot Cover 12 USB Interface Connector 13 Rear Cover 14 Power Cord Connector 15 Power Switch Machine Parts…
-
Page 26: Operation Panel
Operation Panel Ready Indicator Attention Indicator Toner Indicator Data Indicator Paper Indicator Jam Indicator [Cancel] Key [GO] Key Machine Parts…
-
Page 27: Indicators
Indicators There are six indicators located on the top right of the printer. The indicators are used to identify the status of the printer at any time. To identify the printer status, check the indicators on the printer and then refer to the table below.
-
Page 28: Keys
Status Cancel At Ready At Error Paper Empty Keys Refer to the following table for the name and description of the basic functions of each key. Operation Press for 1 second or more Press momentarily Press for 3 to 9 seconds Press for 10 seconds or more Press momentarily Press momentarily…
-
Page 29: Loading Paper
Loading Paper Loading Paper This chapter explains paper specifications for this printer and how to load paper into the cassette or MP tray Paper Specifications Preparing the Paper Loading Paper into Cassette Loading Paper into MP (Multi-Purpose)Tray 2-11 2-11 2-14…
-
Page 30: General Guidelines
Differences between paper from different suppliers can also affect the machine’s performance. A high-quality printer cannot produce high- quality results when the wrong paper is used. Low-priced paper is not economical in the long run if it causes printing problems.
-
Page 31: Minimum And Maximum Paper Sizes
Paper cassette Loading Paper Minimum and Maximum Paper Sizes The minimum and maximum paper sizes are as follows. For the paper smaller than JIS B6, postcards, and envelopes, the MP tray must be used. MP tray Minimum Paper Size 105mm (4-1/8 inches) Maximum Paper Size…
-
Page 32: Selecting The Right Paper
216 × 356mm (2-13/16 × 5-13/16 to 8-1/2 × 14 inches)) Note If the length of custom paper is larger than 297mm (11-11/16 inches), the printer can be specified ISO A4, Officio II, Folio, and Legal as the standard paper size. Cassette: Legal, Letter, Statement, Oficio II, Executive, ISO A4, ISO A5, A6 (only for machine’s paper cassette), Folio, ISO B5, JIS B5, Envelope C5, 16…
-
Page 33: Basis Weight
Loading Paper Basis weight Basis weight is the weight of paper expressed in grams per square meter (g/m²). Paper that is too heavy or too light may cause feed errors or paper jams as well as premature wear of the product. Uneven weight of paper, namely uneven paper thickness may cause multiple-sheet feeding or print quality problems such as blurring because of poor toner fusing.
-
Page 34: Paper Grain
The moisture content of the paper varies with the relative humidity in the room. When the relative humidity is high and the paper absorbs moisture, the paper edges expand, becoming wavy in appearance. When the relative humidity is low and the paper loses moisture, the edges shrink and tighten, and print contrast may suffer.
-
Page 35: Special Paper
Before purchasing any type of special paper, test a sample on the machine and check that printing quality is satisfactory. Transparency This printer is available for monochorome printing on transparencies. Transparencies must be fed to the MP Tray. One transparency can be loaded at a time.
-
Page 36
Grain on page 2-6. This direction can easily cause wrinkles and creases when envelopes pass through the printer. Before purchasing envelopes, make a test print to check whether the printer accepts the envelope. • Do not use envelopes that have an encapsulated liquid adhesive. -
Page 37
Loading Paper Thick Paper Fan the stack of paper and align the edges before loading them in the MP tray. Some types of paper have rough edges on the back (those are created when the paper is cut). In this case, put the paper on a flat place and rub the edges once or twice with, for example, a ruler to smooth them. -
Page 38: Paper Type
3-10. 2-10 Paper Type The printer is capable of printing under the optimum setting for the type of paper being used. A different paper type setting can be made for each paper source including the MP tray. Not only can preset paper types be selected, but it is also possible for you to define and select customized paper types.
-
Page 39: Preparing The Paper
250 sheets of 11 × 8 1/2″ or A4 paper (80 g/m²) may be loaded into the Cassette. Pull the cassette completely out of the printer. IMPORTANT When pulling the cassette out of the printer, ensure it is supported and does not fall out. Press the bottom plate down until it locks. 2-11…
-
Page 40
2-12 Adjust the position of the width guides located on the left and right sides of the cassette. Press the release button on the left guide and slide the guides to the paper size required. Note Paper sizes are marked on the cassette. Adjust the paper length guide to the paper size required. -
Page 41
Do not load paper above the triangle mark located on the width guide. Insert the paper cassette into the slot in the printer. Push it straight in as far as it will go. There is a paper gauge on the left side of the front of the paper cassette to indicate the remaining paper supply. -
Page 42: Loading Paper Into Mp (Multi-Purpose)Tray
Feed. Pull the MP tray towards you until it stops.. IMPORTANT When pulling the cassette out of the printer, ensure it is supported and does not fall out. Adjust the position of the paper guides on the MP tray. Standard paper sizes are marked on the MP tray or Manual Feed.
-
Page 43
FS-1100 FS-1300D Correct Incorrect Loading Paper Align the paper with the paper guides and insert as far as it will go. Note Do not load more paper than exceeds the tab of the MP tray (for FS-1300D only). Note If the paper is considerably curled in one direction, for example, if the paper is already printed on one side, try to roll the paper in the opposite direction to counteract the curl. -
Page 44
Correct Correct Incorrect 2-16 When loading envelope, place with the envelope flap closed and keep the printing side face-up. Insert envelope against the guide with the flap on the front or left side until they stop. Specify the paper size and type for MP tray using Configuration Tool. For more information, refer to Configuration Tool on page 3-14. -
Page 45: Connecting And Printing
Connecting and Printing Connecting and Printing This chapter explains how to start up the printer, print from your PC, and use the application software included in the CD-ROM. Connections Installing the Printer Driver Printing Status Monitor Configuration Tool Uninstalling Software…
-
Page 46: Connections
Connect the other end of the USB cable to the computer’s USB interface connector. Connecting the Power Cord Install the printer close to an AC wall outlet. If an extension cord is used, the total length of the power cord plus extension should be 5 meters (16 feet) or less.
-
Page 47: Installing The Printer Driver
Select Express Mode or Custom Mode as the installation method. • Express Mode: If the printer is connected via USB or a network and is turned on, the installer detects the printer. Select Express Mode to perform a standard installation.
-
Page 48: Express Mode
On Installation Method screen, click Express Mode. The installer searches the connected printers on Discover Printing System screen. If no printer is discoverd, ensure the printer is plugged in and connected to the computer’s USB or Network port, then cleck Refresh to search printers again.
-
Page 49
On Installation Method screen, click Custom Mode. On Driver tab and Utility tab of the Custom Installation screen, select the printer driver and utilities you want to install, and click Next. On Printer Port screen, select the printer port connected to the printer, click Next. -
Page 50
Installing the Printer Driver on Mac OS This section explains how to install the printer driver in Mac OS. Ensure the printer is connected to the computer’s USB or Network port before installing software from the CD-ROM. Insert the CD-ROM (Product Library) into the CD-ROM drive. -
Page 51: Printing
From the application File menu, select Print. The Print dialog box appears. Click the drop-down list of printer names. All the installed printers are listed. Click the name of the printer. Use Number of copies to enter the number of copies required. Up to 999 copies can be printed.For Microsoft Word, we recommend that…
-
Page 52
Manual Duplex (For FS-1100 only) Use Manual Duplex if you require printing on both sides of the paper. The even pages are printed first and then reloaded to print the odd pages. An instruction sheet is available to assist with loading the sheets in the correct orientation and order. -
Page 53
Connecting and Printing Load the even pages printed into the paper cassette with the instruction sheet facing up and the arrows pointing toward the printer. Long Edge Binding Note If the paper is considerably curled in one direction, roll the paperin the opposite direction to counteract the curl. -
Page 54: Status Monitor
This window only appears when the 3D View is open on the desktop. 3D View This shows the status of the monitored printer as a 3D image. You can choose whether to show or hide the 3D view from the menu displayed when you right-click the Status Monitor icon.
-
Page 55
Status Monitor Settings on page 3-12. Status Monitor icon The Status Monitor icon is displayed in the taskbar notification area when the Status Monitor is running. When you position the cursor over the icon, the printer name appears. Connecting and Printing 3-11… -
Page 56: Status Monitor Settings
3-12 Status Monitor Settings The Status Monitor has two tabs to configure its settings. Use the Preference option to set up the Status Monitor. Sound Notification Tab The Event Notification tab contains the following items. IMPORTANT To confirm the settings on Sound Notification tab, the computer requirs the sound capabilities such as sound card and speaker.
-
Page 57
Appearance Tab The Appearance tab is contains the following items. Enlarge window Doubles the size of the Status Monitor window. Always on top Positions the Status Monitor in front of other active windows. Transparency Displays the Status Monitor as a transparent window. Connecting and Printing 3-13… -
Page 58: Configuration Tool
Select Configure the Printing System from the menu. The Configuration Tool window appears.. Note When the printer is connected with the network cables, COMMAND CENTER starts instead of the Configuration Tool. Exiting the Configuration Tool Use either of the methods listed below to exit the Configuration Tool.
-
Page 59: Status Tab
Status Tab The Status tab displays current information about the device, such as the model name, system firmware, engine firmware, serial number, total memory, and number of printed pages. Input Tab The Input tab displays information about the paper feeder attached to the machine, such as the current paper level and the maximum paper capacity.
-
Page 60: Printer Tab
JPEG files. Connection Tab You can use the Connection tab to set the emulation. You can also use this tab to change the buffer memory size and buffer mode of the printer for communication processing to the host. Data Tab The Data tab fetches and lists the data stored in the CF card or RAM disk.
-
Page 61: Others Tab
Connecting and Printing Others Tab The Others tab enables you to configure the printer settings shown below. Item Description Auto sleep Configures the amount of time when the printer automatically enters Sleep Mode. Click Advanced to turn Auto sleep On or Off.
-
Page 62: Uninstalling Software
3-18 Uninstalling Software The CD-ROM lets you remove the printer software. Click Remove Software. The Kyocera Uninstaller appears. Select the software package to remove. Click Uninstall. Note In Windows Vista, Remove Driver and Package screen appears. Select Remove driver and driver package, and click OK.
-
Page 63: Maintenance
Maintenance Maintenance This chapter explains how to replace the toner container and clean the printer General Information Toner Container Replacement Cleaning the Printer Prolonged Non-Use and Moving the Printer…
-
Page 64: General Information
7,200 pages (FS-1300D) or 4,000 pages (FS-1100). Starter Toner Container The toner container packed with the new printer is a starter toner container. The starter toner container lasts an average of 3,600 pages (FS-1300D) or 2,000 pages (FS-1100).
-
Page 65: Replacing The Toner Container
If the toner container for another destinations is installed, the printer will stop printing. Note You do not have to turn printer power off before starting the replacement. Any data that may be processing in the printer will be deleted if you turn the printer power off .
-
Page 66
Remove the label from the toner container. Install the new toner container in the printer. Push firmly on the top of the container at the positions marked PUSH, until you hear a click. -
Page 67
Maintenance Turn lock lever to the lock position. Close the top cover. -
Page 68: Cleaning The Printer
Cleaning the Printer To avoid print quality problems, the interior of the printer must be cleaned with every toner container replacement. Open the top cover and front cover. Lift the process unit together with the toner container out of the printer.
-
Page 69
Maintenance Place the drum unit flat on a clean, level surface. IMPORTANT Do not place the drum unit on end. Use a clean, lint free cloth to clean dust and dirt away from the metal registration roller. IMPORTANT Take care not to touch the transfer roller (black) during cleaning. -
Page 70
Return the process unit to its position, aligning the guides at both ends with the slots in the printer. Then, close the front cover and top cover. Maintenance… -
Page 71: Prolonged Non-Use And Moving The Printer
Prolonged Non-Use and Moving the Printer Prolonged Non-use If you ever leave the printer unused for a long period of time, remove the power cord from the wall outlet. We recommend you consult with your dealer about the additional actions you should take to avoid possible damage that may occur when the printer is used next time.
-
Page 72
4-10 Maintenance… -
Page 73: Troubleshooting
Troubleshooting Troubleshooting This chapter explains how to handle printer problems, understand indicator combinations, and clean paper jams General Guidelines Print Quality Problems Understanding Indicators Cleaning Paper Jams…
-
Page 74: General Guidelines
• Restart the computer you are using to send print jobs to the printer. • Obtain and use the latest version of the printer driver. The latest versions of printer drivers and utilities are available at: http://www.kyoceramita.com/download/.
-
Page 75: Print Quality Problems
Check the toner container and if necessary replace. Refer to Toner Container Replacement on page 4-2. Clean the charger wire. Refer to Cleaning the Printer on page 4-6. Check the charger cleaner of the drum unit is in its original…
-
Page 76
Check the toner container and if necessary replace. Refer to Toner Container Replacement on page 4-2. Clean the charger wire. Refer to Cleaning the Printer on page 4-6. Check the toner container and if necessary replace. Refer to Toner Container Replacement on page 4-2. -
Page 77: Understanding Indicators
Player and Adobe Reader (Version 6.01 or more) to your PC. If the animation is not displayed, you should get the latest version from Adobe site (http://www.adobe.com/downloads/). Normal Indication The table below shows the indicator combinations when the printer status is normal. Meaning The printer is canceling data.
-
Page 78
The printer is printing the last page after waiting. Printing is possible. Offline status. You cannot print, but the printer can receive data. The printer returns to online status when the [GO] is pressed. The printer is in sleep mode.The printer returns to online status when the [GO] is pressed, the cover is opened and closed, or the printer receives the print jobs. -
Page 79: Maintenance Indication
Indicator Troubleshooting Maintenance Indication The table below shows the indicator combinations when user intervention is required. It is assumed that the printer is online and is processing data. Meaning There is no paper in the cassette, MP tray, or Manual Feed.
-
Page 80: Error Indication
Turn the printer off by the power switch, wait 5 seconds and then turn the printer on again. This may clear the error. Even if the error is not cleared, contact your service technician.
-
Page 81: Cleaning Paper Jams
Cleaning Paper Jams If paper jams in the paper transport system, or no paper sheets are fed at all, the printer automatically goes offline, and the Jam indicator will light. Status Monitor or COMMAND CENTER can indicate the location of the paper jam (the component where the paper jam has occurred).
-
Page 82: General Considerations For Clearing Jams
If paper jams occur frequently, try using a different type of paper, replace the paper with paper from another ream, or flip the paper stack over. The printer may have problems if paper jams recur after the paper is replaced.
-
Page 83
Do not try to remove paper that has already been partially fed. Proceed to Inside the Printer on page 5-13. Note Check to see if paper is loaded correctly. If not, reload the paper. Push the cassette back in securely. The printer warms up and resumes printing. 5-11… -
Page 84
Open the duplexer’s cover in front of the printer and remove any jammed paper. Open the duplexer’s cover at the rear of the printer and remove any jammed paper. Push the cassette back in securely, and open and close the top cover to clear the error. -
Page 85: Inside The Printer
Troubleshooting Inside the Printer Pull the paper cassette all the way out of the printer. Remove any partially fed paper.. IMPORTANT Do not try to remove paper that has already been partially fed. Proceed to step 2. Open the top cover and front cover, and lift the process unit together with the toner container out of the printer.
-
Page 86
Return the drum unit to its position, aligning the guides at both ends with the slots in the printer. Insert the process unit together with the toner container, back into the machine. Close the top cover and the front cover. The printer warms up and resumes printing. Troubleshooting… -
Page 87: Rear Cover
Open the rear cover and remove the jammed paper by pulling it out. CAUTION The fuser unit inside the printer is hot. Do not touch it, as it may result in burn injury. If the paper is jammed inside the fuser unit, open the fuser cover and remove the paper by pulling it out.
-
Page 88
5-16 Troubleshooting… -
Page 89: Option
Option Option This chapter explains the options for this printer General Information Expansion Memory Modules Paper Feeder (PF-100 ) Network Interface Card (IB-23) CompactFlash (CF) Card…
-
Page 90: General Information
General Information The printers have the following options available to satisfy your printing requirements. Note Install the memory module before installing the optional paper feeder (PF-100). For instructions on installing individual options, refer to the documentation included with the option. Some options are explained in the following sections.
-
Page 91: Expansion Memory Modules
Option Expansion Memory Modules To expand the printer memory for more complex print jobs and faster print speed, you can plug in optional memory module (dual in line memory module) in the memory slot provided on the printer main controller board. You can select additional memory module from 64, 128, 256 or 512MB.
-
Page 92: Installing The Memory Module
Installing the Memory Module Turn off the printer and disconnect the power cord and printer cable. Remove the right cover with a piece of metal similar to coin. Remove the fixing tape in case of the first installation. Then, remove the memory slot cover as shown in the figure.
-
Page 93: Removing A Memory Module
Removing a Memory Module To remove a memory module, remove the right cover and the memory slot cover from the printer. Then, carefully push out the two socket clamps. Ease the memory module out of the socket to remove. Verifying the expanded memory To verify that the memory module is working properly, test it by printing a status page.
-
Page 94: Paper Feeder (Pf-100 )
Paper Feeder (PF-100 ) The PF-100 allows you to add one (for FS-1100) or two (for FS-1300D) more paper cassette to the bottom of the printer for continuous feeding of a large volume of paper. Each paper cassette can hold up to…
-
Page 95: Network Interface Card (Ib-23)
The network interface card must be installed in the option interface slot that is located at the back of the printer. Turn off the printer and disconnect the power cord and printer cable. Open the rear cover. Remove the optional interface slot cover.
-
Page 96: Compactflash (Cf) Card
CompactFlash (CF) Card The printer is equipped with a slot for a CF card with the maximum size of 256MB. A CF card is useful for storing fonts, macros, and overlays. Turn off the printer and disconnect the power cord and printer cable.
-
Page 97
Option Insert the CF Card. Secure it with the screws removed in step 3. Connect the power cord and printer cable and turn on the printer. -
Page 98
6-10 Option… -
Page 99: Appendix
Appendix Appendix This section lists the specifications of this printer. Specifications Environmental Standard Requirements…
-
Page 100: Specifications
Item Type Printing Method Paper Weight Cassette MP Tray Paper Type Cassette MP Tray/Manual Feed Paper Size Cassette Paper Feeder MP Tray/Manual Feed Magnification ratio Printing Speed Simplex Duplex First Print Time (A4, feed from Cassette) Warm-up Time Power on (22°C/71.6°F, Sleep 60%RH)
-
Page 101
Item Continuous printing Resolution Monthly Duty Average Maximum Operating Temperature Environment Humidity Altitude Brightness Controller Supported OS Interface Standard Option Memory Standard Maximum Dimension (W x D x H) Weight (without toner container) Power Requirements Power Maximum Consumption During printing During standby Power off Options… -
Page 102: Environmental Standard Requirements
Environmental Standard Requirements This machine conforms to the following environmental standard requirements. • Time for switching to Sleep mode (default): 15 minutes • Duplex Printing: Standard Equipment • Durable paper for feeding: Paper made of 100% recycled paper NOTE: Contact your Dealer or Service Representative for recommended paper types.
-
Page 103: Index
…5-11 rear cover section …5-15 Colored paper … 2-9 CompactFlash card …6-2, 6-8 Components at the front of the printer … 1-2 at the rear of the printer …1-3 Connection USB cable … 3-2 power cord …3-2 Conventions in this guide …xxi Custom mode installation method …
-
Page 104
Precautions for use …xviii Memory module handling …6-3 Loading paper Cassette …2-11 MP tray …2-14 Lock lever toner container …4-3 Moving printer …4-9 Names Operation panel …1-4 Network interface card …6-7 option …6-2 Operation panel components …1-2 indicators, keys, overview …1-4 Normal indication indicators …5-5… -
Page 105
USB interface connector components … 1-3 Tips … 5-2 Understanding indicators … 5-5 Top cover components … 1-2 Toner container how to replace …4-3 replacement … 4-2 Toner indicator operation panel … 1-4 replacing toner container …4-2 Toner kit toner container, plastic waste bag, installation guide 4-2 Top tray components … -
Page 106
Index-4… -
Page 109
TURKEY…
(Ocr-Read Summary of Contents of some pages of the Kyocera FS-1300D Document (Main Content), UPD: 30 June 2023)
-
16, 2H5/2HS 1-1-4 (2) Operation panel Figure 1-1-2 1 2 3 4 5 6 7 8 1. Ready indicator 2. Attention indicator 3. Toner indicator 4. Data indicator 5. Paper indicator 6. Jam indicator 7. Cancel key 8. GO key
… -
46, 2H5/2HS 1-4-10 (1) Completely blank printout. (2) All-black printout. Print example Causes Check procedures/corrective measures Defective drum unit or developing unit. Open the top cover and check that the drum unit and develop- ing unit are correctly seated. Investigate that the terminals between the main charger unit and the drum unit are not in loose contact (See page 1-5-12 and 1-5-11). Defective transfer bias output or developing bias output. R…
-
13, 2H5/2HS-1 1-1-1 1-1 Specif ications 1-1-1 Specifications Type …………………………………………Desktop Printing method………………………….Electrophotography, laser scan Paper weight (Simplex model)……..Cassette: 60 to 120 g/m 2 Manual feed tray: 60 to 220 g/m 2 Paper weight (Duplex model) ……… Cassette: 60 to 120 g/m 2 (Duplex: 60 to 105 g/m 2 ) MP tray: 60 to 220 g/m 2 Paper type ………………………………..C…
-
54, 2H5/2HS-1 1-5-2 (4) How to tell a genuine Kyocera Mita toner container As a means of brand protection, the Kyocera Mita toner container utilizes an optical security technology to enable visual validation. A validation viewer is required to accomplish this. Hold the validation viewer over the left side part of the brand protection seal on the toner container. Through each window of the validation viewer, the left side pa…
-
70, Kyocera FS-1300D 2H5/2HS 1-5-18 (2) Switching the fuser pressure The fuser pressure may be decreased to suppress the print quality problems such as paper creases and curls. It must be cautioned that decreasing the fuser pressure could cause loose toner fusing. Procedure 1. Remove the cassette (See page 1-5-6). 2. Open the duplex cover (Duplex model only). 3. Slide the fuser lever R and L. Normal: Flush with the fro…
-
118, Kyocera FS-1300D 2H5/2HS 2-4-2 Duplex model YC102 YC105 YC104 YC103 YC202 YC203 YC201 YC101 PF paper feed motor AC input L N 1 3 1 3 YC-TYC-M FEDDRN 7 6 5 4 3 2 1 7 6 5 4 3 2 1 Drum Transfer roller +24V1 SGND FAN THERM +3.3V1 HEATN SLEEP ZCROSS +24V2 +24V2 PGND PGND YC-B Developing roller USB connector 1 2 3 4 5 6 7 8 9 10 11 12 1 2 3 4 5 6 7 8 9 10 11 12 SW1 +24V2 +24V1 +24V2 +24V3 3.3 V DC power off at sleep mode 24 V DC power off at sleep mode +24V3 PGND MMOTRD…
-
102, 2H5/2HS 2-1-12 2-1-7 Fuser section The toner on the paper is molten and pressed into the paper as it passes between the heat roller and the press roller in the fuser unit. The heat roller has a heater lamp inside which continuously turns on and off by the fuser thermistor to maintain the constant temperature onto the heat roller surface. The heat roller is resin coated by florin to prevent toner from accu…
-
115, 2H5/2HS 2-3-5 Connector Pin Signal I/O Voltage Description YC6 1 LED1 O 3.3/0 V DC Paper indicator display: On/Off Connected to the opera- tion panel PWB 2 LED2 O 3.3/0 V DC Jam indicator display: On/Off 3 SW I Analog Cancel key/GO key: On/Off 4 SGND — — Ground 5 LED3 O 3.3/0 V DC Ready indicator display: On/Off 6 LED4 O 3.3/0 V DC Attention indicator display: On/Off 7 LED5 O 3.3/0 V DC Toner indicator display: On/Off 8 L…
-
87, 2H5/2HS 1-6-1 1-6 Firmware 1-6-1 Downloading firmware Firmware files are named after the following codes: Figure 1-6-1 Software ID Compression S2HS_1000001021.cmp Firmware file name example Product code 2H5: Simplex model 2HS: Duplex model Pause (underscore) Pause (period) Build number Update history Classification (Normally: 0) Supplement (Normally: 00) Firmware category 10: Engine controller 30: Main controller
… -
31, 2H5/2HS 1-3-7 Figure 1-3-4Event log (EVENT LOG) Service items Description [EB20MA001/2HS_1000.001.019][40.00SFLB][01] Printed page(s) 12345 SN:SPL0000000 Firmware version: 2HS_30000.001.024 10.48.01.80.01.01 10.48.01.80.01.01 10.48.01.80.01.01 10.48.01.80.01.01 10.48.01.80.01.01 10.48.01.80.01.01 10.48.01.80.01.01 10.48.01.80.01.01 J10: 0 C:6000: 4 T00: 1 J11: 0 C:6020: 1 J12: 0 J20: 0 J21: 0 J22: 0 J30: 0 J31: 0 J32: 0 J40: 0 J41: 0 J42: 0 Released: 13/July/2007 # Count. Event # Count…
-
5, Kyocera FS-1300D Safety precautions This booklet provides safety warnings and precautions for our service personnel to ensure the safety of their customers, their machines as well as themselves during maintenance activities. Service personnel are advised to read this booklet carefully to familiarize themselves with the warnings and precautions described here before engaging in maintenance activities.
… -
38, 2H5/2HS 1-4-2 (2) Paper misfeed detection condition Simplex model Duplex model Figure 1-4-2 Paper feeder 1 (Option) Printer Registration sensor Paper sensor Paper exit sensor PF paper feed senso r PF paper sensor Peper feeder 1 (Option) Peper feeder 2 (Option) Printer Registration sensor Paper sensor MP paper sensor Pape…
-
89, 2H5/2HS 1-6-3 5. Turn printer power on. The printer starts and finishes downloading automatically. Figure 1-6-4 *: 0.8 s *: 0.8 s *: 0.8 s (Repeat) (Repeat) Supervisor mode Deleting and writing data Downloading complete Receiving data Downloading start (Repeat) (Repeat) End End 4.8 s 4.8 s ***** **** * * (Repeat) * (Repeat) * Pattern 1 Pattern 2 Pattern 3 Downloading failed Indication example Sequence of …
-
22, 2H5/2HS-1 1-2-4 1-2-3 Installing the expanded memory (option) <Procedure> 1. Turn off printer power switch. Caution: Do not insert or remove expanded memory while printer power is on. Doing so may cause damage to the printer and the expanded memory. 2. Remove the right side cover. 3. Remove the tape. Figure 1-2-4 4. Open the memory slot cover. 5. Open clamps on both ends of the memory socket on …
-
27, 2H5/2HS-1 1-3-3 Detail of service information Figure 1-3-2Detail of service information Service items Description [XXXXXXXX][XXXXXXXX][01/00] Total page 9690 /t/U00/F00/N00 /0020/0020/1061/0811/ 0/ 0/ 0/ 0/ 0/ 0/ 0/ 0/ 0/ /0000/0000/ /00/300/81/31/81/31/ A:1234567890123456 /02870284/03028003/83030286/86000086/02000000/02020202/02020202/ /03030303/03030303/03030303/03030303/03000000/03030303/03030303/ SPD1:02…
-
29, Kyocera FS-1300D 2H5/2HS-1 1-3-5 Service items Description No. Items Description Fixed asset number (Maximum 16 characters) Paper type attributes Paper type setting value from 1 to 28 (fuser, weight, duplex) (unused paper type are always 0x00.) Paper type attributes Paper type setting value from 1 to 28 (density) (unused paper type are always 0x00.) Memory SPD information (slot 1) 2 to 6 bytes, 8 to 36 bytes, 94 to 95 bytes (total 32 bytes) DRT correction …
-
58, 2H5/2HS 1-5-6 1-5-3 Paper feed section (1) Detaching and refitting the paper feed assembly (paper feed roller and pickup roller) Procedure 1. Remove the cassette. Figure 1-5-7 2. Slide the feed shaft. 3. While pressing the lever and then remove the paper feed roller assembly. Figure 1-5-8 Cassette Paper feed roller assembly Lever Feed shaft
…