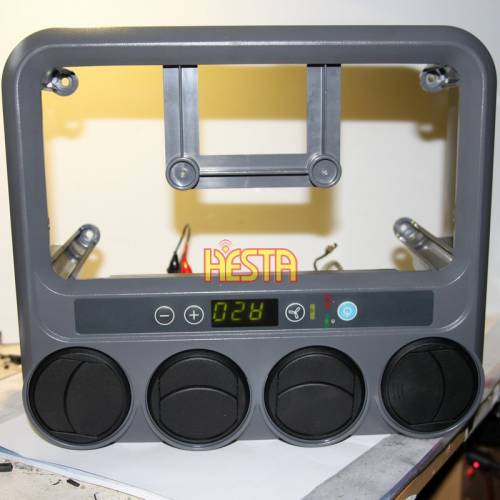
Сообщения на дисплее
7
Сообщения на дисплее
Указание
I
При пуске двигателя автомобиля или при включении
нескольких потребителей на дисплее на короткое время может
появляться сообщение
7.1
Предупреждения на панели управления
Система управления имеет различные функции по защите прибора и
аккумуляторной батареи. Срабатывание одной из защитных функций
сигнализируется на дисплее следующими кодами:
Текст на
Описание
дисплее
Защитное реле
LO
сигнализирует
пониженное напряжение.
Компрессор отключается
незамедлительно, а
вентиляторы
отключаются через
20 — 30 секунд. Вся
система выключается
через 2 минуты.
Система сигнализирует
HI
кратковременное или
постоянное повышенное
напряжение.
Система сигнализирует
HO
кратковременную
электрическую
перегрузку и выключает
компрессор.
Компрессор отключается.
Через 5 минут
отключается вся система.
186
LO
.
Причина
Слишком низкое
подводимое
напряжение. Емкости
батареи больше не
хватает для работы
системы.
Кратковременное
повышение
напряжения может
возникать после
отключения больших
электрических
нагрузок. Постоянное
повышенное
напряжение связано
с неправильным
подводимым
напряжением.
Слишком высокое
потребление тока
компрессором.
Компрессор (кабина)
слишком сильно
наклонен.
Устранение
➤ Кратковременное
понижение напряжения:
никаких действий не
требуется.
➤ Если система отключается:
Зарядите автомобильную
аккумуляторную батарею
или проверьте, правильно
ли настроено защитное
реле.
➤ Кратковременное
повышение напряжения:
никаких действий не
требуется.
➤ При длительном появлении
сообщения «HI»: Проверить
электронные узлы
автомобиля. Убедитесь в
том, что подводимое
напряжение составляет
менее 30 В.
➤ Кратковременная
перегрузка компенсируется
системой отключением
компрессора. Через
некоторое время
компрессор снова
включается.
➤ После того, как компрессор
возвращается в
нормальное положение,
систему снова можно
включить.
RU
- Manuals
- Brands
- Waeco Manuals
- Air Conditioner
- coolair rt880
- Manual
-
Contents
-
Table of Contents
-
Bookmarks
Quick Links
7. WAECO CoolAir RT 880
Contents
7.1
|
7.2
|
7.3
|
7.4
|
7.5
|
Troubleshooting and mending
7.6
|
7.6.1 |
7.6.2 |
7.6.3 |
7.6.4 |
7.6.5 |
Related Manuals for Waeco CoolAir RT 880
Summary of Contents for Waeco CoolAir RT 880
-
Page 1: Table Of Contents
7. WAECO CoolAir RT 880 Contents Unit identification code List of spare parts Circuit diagram Recommendations and special notes Troubleshooting and mending Repair instructions 7.6.1 | Replacing the display PCB 7.6.2 | Replacing the condenser fan 7.6.3 | Replacing the (internal) control PCB 7.6.4 |…
-
Page 2: Unit Identification Code
7.1 Unit identification code WAECO CoolAir RT 880 The PNC replaces the former version number. It specifies the production status of the unit. The serial number identifies the year and the month the unit was made. 20201 This box gives you the type and Year Week Running number amount of refrigerant used.
-
Page 3: List Of Spare Parts
7.2 List of spare parts SKU 9105305551, PNC 936000849 SKU 9105305547, PNC 936000112 7.2 | 6/14…
-
Page 4
Ejot Delta PT 50 x 18 screw for 4450000893 Fastening of the air outlet unit to the base plate plastic Cover plate RT 880 WAECO 4450001317 Air inlet grill (evaporator side) Ejot Delta PT 30 x 14 screw for 4450000895… -
Page 5
Components not shown in the exploded view Bus cable CA 4441300153 Bus cable from the display PCB to the control PCB Self-cutting M6 thread insert with 4445200069 Fastening of the unit or cover frame to the truck. flanget Quantity required depends on the type of truck. 7.2 | 6/14… -
Page 6: Circuit Diagram
7.3 Circuit diagram Connector wiring Item Designation bl = blue Display PCB br = brown Bus cable gl = yellow Temperature sensor / NTC gr = green ro = red Earth sw = black Klixon w = white Compressor Condenser fan Evaporator fan Earth Main fuse 25 A…
-
Page 7: Recommendations And Special Notes
7.4 Recommendations and special notes Things to note for trucks with power management When doing repairs on CoolAir stationary air conditioners only use the spare parts specified by the manufacturer. Do not use third-party spares for repairs, since otherwise you will lose your product liability and warranty rights. Special notes for vehicles with a power management system You can connect the unit to the truck’s multiplier or directly to the battery.
-
Page 8
7.5 Troubleshooting Display messages Note When the vehicle is started or when several loads are switched on the display may briefly show the text mes- sage “LO ” indicating the voltage drop. 1. Control panel warnings The air conditioner control system features various functions to protect the unit or the battery. The activation of a protective function is indicated on the display by the following codes. -
Page 9
2. Error messages on the control panel A red flashing error LED indicates an error has occurred on the stationary air conditioner. The type of error is indicated on the display by the following error codes. Message Description Cause Remedy Further measures The compressor doesn’t Compressor overloaded or… -
Page 10: Repair Instructions
7.6.1 Repair instructions Replacing the display PCB Diese Reparatur kann im eingebauten Zustand vom Fahrzeuginneren vorgenommen werden! This repair can be done from inside the vehicle with air conditioner fitted in place. Achtung! Unterbrechen Sie bei Arbeiten an der Standklimaanlage alle Stromversorgungen! Caution! Disconnect all power supplies when working on the stationary air conditioner! Abbildung 1: Figure 1:…
-
Page 11
Abbildung 4: Figure 4: Lösen Sie die 3 Befestigungsschrauben der ➢ Displayplatine. Ziehen Sie das Anschlusskabel von der ➢ Displayplatine ab. Stecken Sie das Anschlusskabel an die neue Platine. ➢ Release the 3 fastening screws of the ➢ display PCB. Remove the connection cable from the ➢… -
Page 12: Replacing The Condenser Fan
7.6.2 Replacing the condenser fan Diese Reparatur kann im eingebauten Zustand auf dem Fahrerhausdach vorgenommen werden! This repair can be done with air conditioner fitted in place on the cabin roof. Achtung! Unterbrechen Sie bei Arbeiten an der Standklimaanlage alle Stromversorgungen! Caution! Disconnect all power supplies when working on the stationary air conditioner! Abbildung 1: Figure 1:…
-
Page 13
Abbildung 4: Figure 4: Lösen Sie die 3 Befestigungsschrauben, ➢ und ziehen Sie den Lüfter nach oben heraus. Für die Montage des neuen Lüfters ➢ führen Sie bitte die Arbeitsschritte in umgekehrter Reihenfolge durch. Release the 3 fastening screws, and lift off ➢… -
Page 14: Replacing The (Internal) Control Pcb
7.6.3 Replacing the (internal) control Diese Reparatur kann im eingebauten Zustand vom Fahrzeuginneren vorgenommen werden! This repair can be done from inside the vehicle with air conditioner fitted in place. Achtung! Unterbrechen Sie bei Arbeiten an der Standklimaanlage alle Stromversorgungen! Caution! Disconnect all power supplies when working on the stationary air conditioner! Abbildung 1: Figure 1:…
-
Page 15
Abbildung 4: Figure 4: Durchtrennen Sie den Kabelbinder und klappen ➢ Sie das Gitter runter. Cut the cable tie and fold down the screen. ➢ Abbildung 5: Figure 5: Lösen Sie die 2 Befestigungsschrauben der ➢ Steuerplatine. Release the 2 fastening screws of the ➢… -
Page 16
Abbildung 7: Figure 7: Durchtrennen Sie die beiden Kabelbinder, um ➢ die Steuerplatine auszutauschen. Befestigen Sie die neue Steuerplatine in gleicher ➢ Art und Weise an dem Halter wie die ausgebaute. Cut the two cable ties to replace the control PCB. ➢… -
Page 17: Replacing The Evaporator Fan
7.6.4 Replacing the evaporator fan Diese Reparatur kann im eingebauten Zustand auf dem Fahrerhausdach vorgenommen werden! This repair can be done with air conditioner fitted in place on the cabin roof. Achtung! Unterbrechen Sie bei Arbeiten an der Standklimaanlage alle Stromversorgungen! Caution! Disconnect all power supplies when working on the stationary air conditioner! Abbildung 1: Figure 1:…
-
Page 18
Abbildung 4: Figure 4: Lösen Sie alle 10 Befestigungsschrauben. ➢ Sie können den Lüfter nun nach oben herausnehmen. Release all 10 fastening screws. You can now ➢ lift up the fan to remove it. Achtung! Ziehen Sie bei der Montage des neuen Lüfters die Befestigungsschrauben nur handfest (max. -
Page 19: Replacing The Compressor Bearing
7.6.5 Replacing the compressor bearing Achtung! Unterbrechen Sie bei Arbeiten an der Standklimaanlage alle Stromversorgungen! Caution! Disconnect all power supplies when working on the stationary air conditioner! Abbildung 1: Figure 1: Befestigungsschrauben der Abdeckhaube ➢ herausdrehen und die Abdeckhaube abheben. Demontieren Sie die vorhandene ➢…
-
Page 20
Abbildung 3: Figure 3: Nach Entfernen der Kompressorlagerung sollte die ➢ Kompressorbefestigung so aussehen wie in diesem Bild. After you remove the compressor bearing, the ➢ compressor attachment should appear as in this figure. Abbildung 4: Figure 4: Legen Sie sich die neuen ➢… -
Page 21
Abbildung 6: Figure 6: Kompressor vorsichtig anheben und den Kopf des ➢ Gummidämpfers von unten in die Halterung des Kompressors eindrücken, dann den Gummidämpfer auf die zuvor aufgeschobene Plastikhülse schieben. Carefully lift the compressor and press the head of ➢ the rubber damper from below into the compressor holder, then slide the rubber damper onto the previously attached plastic sleeve. -
Page 22
Abbildung 9: Figure 9: Befestigen Sie das zuvor gelöste Kapillarrohr wieder ➢ mit einem Kabelbinder. Alle Kältemittelleitungen wieder vorsichtig in die alte ➢ Position zurückbiegen. Refasten the previously detached capillary tube using ➢ a cable binder. Carefully bend all refrigerant lines back into the old ➢…
Pемонт кондиционера Waeco
Oбслуживание, pемонт cтояночный кондиционер Waeco
Показано 1 — 2 из 2 товаров
-
Ремонт кондиционера WAECO CoolAir CA 850S Ремонт кондиционера WAECO CoolAir CA 850S
WAECO CoolAir CA 850S Крышный кондиционер, Накрышный, ремонт, сервис CA850, CA850S, 4442700222, 9100100027, 9100100024, 9100100026, VA31-B100 / HD / IE-106A / SH 24V, BSA645CR-R1, G41BC10UD, IRF1010N, IRFI3205, 11196012 WAECO CoolAir CA 850S Крышный кондиционер, Накрышный, ремонт, сервис CA850, CA850S, 4442700222,…
Еще
Стоимость электронной почты -
Ремонт парковочного кондиционера Dometic, WAECO CoolAir RT880 Ремонт парковочного кондиционера Dometic, WAECO…
Пемонт, обслуживание Крышный кондиционер Dometic, WAECO CoolAir RT880, регенерация, не охлаждает, нагревается, коды ошибок, выключается, не включается, ошибка LO, 04, 07, отверстие в системе, установка сервисных клапанов, добавление газа в клапан , заправка газовых кондиционеров в грузовиках, грузовиках, тракторах, паркинг компрессоров, поворотов… Пемонт, обслуживание Крышный кондиционер Dometic, WAECO CoolAir RT880, регенерация, не охлаждает,…
Еще
Стоимость электронной почты
Показано 1 — 2 из 2 товаров
Re: не работает кондиционер!
Сообщение
nomercy » 13 сен 2019, 14:47
Привет всем , а у меня с кондиционированием как оказалось, все плохо , при покупке машины хозяин отдал компрессор с кронштейном и сказал что компрессор заклинивший а так все ок покупай новый ставь и в путь , но как сразу не восстановил так и потихоньку снял с машины все что касается кондиционера , трубки так уже и не найду где , ну не столь важно , счас купить все можно , компрессор вот недавно достал из гаража он крутиться , электромуфта срабатывает , внутри маслице даже было, короче на вид все норм с ним , так вот полез сегодня притулить кронштейн компрессора а там косяк , 2 болта в блоке обломанные , на рисунке их пометил красным , зеленый целый , короче так думаю что можно оставшееся барахло( компрессор , испаритель еще там мелочевка всякая ) на авито выкладывать потому как долесть туда и высверлить нереально , кроме мотор вытягивать , ради кондиционера , как то неоправданно.
Авторизуйтесь, чтобы видеть гиперссылки и изображения


