Команда CHKDSK предназначена для проверки и устранения логических ошибок на жестком диске. Ниже мы рассмотрим особенности её работы и другие функции утилиты.
Содержание
- Проверка жесткого диска в работающей Windows
- Проверка диска из командной строки
- Команды для работы с CHKDSK в командной строке
- Восстановление информации с проблемного жесткого диска
Команда CHKDSK является встроенной утилитой, основная функция которой заключается в проверке и исправлении ошибок жесткого диска. Помимо этого, при помощи CHKDSK можно быстро находить и исправлять поврежденные сектора, а также ошибки в файловой системе накопителя.
Таким образом, CHKDSK – важная утилита, позволяющая продлить строк службы жесткого диска, а также увеличить скорость его работы, поэтому абсолютно каждый пользователь ОС Windows должен уметь пользоваться и проверять свои носители встроенными средствами. Ниже будет представлено несколько способов проверки дисков из работающей ОС и командной строки.
Проверка жесткого диска в работающей Windows
Для проверки логических разделов жесткого диска при помощи CHKDSK в работающей Windows необходимо:
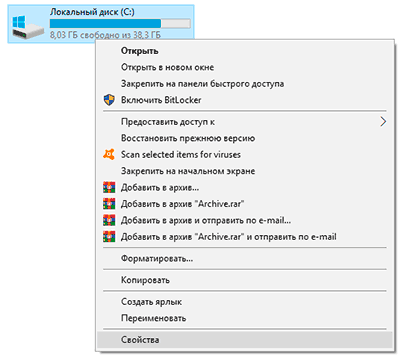
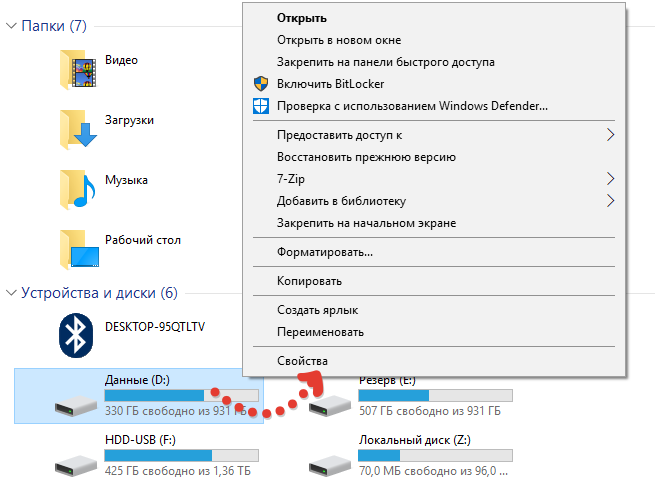
Шаг 1. Открыть каталог «Этот компьютер», нажать правой кнопкой мыши по необходимому логическому разделу и выбрать пункт «Свойства».
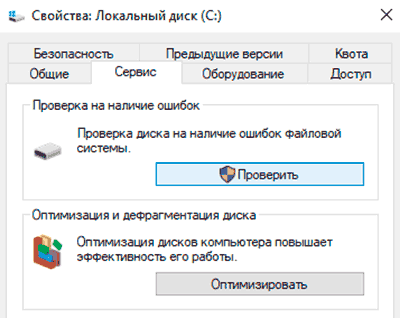
Шаг 2. В открывшемся окне перейти во вкладку «Сервис» и выбрать пункт «Проверить».
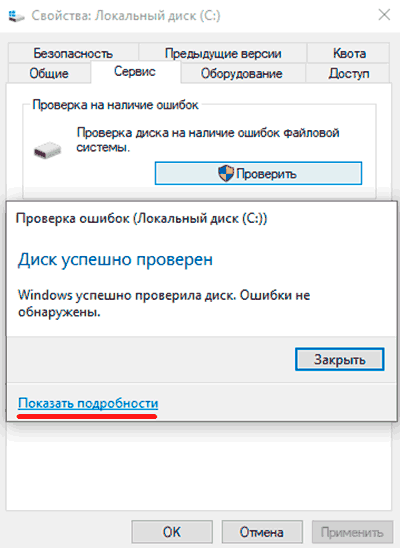
Шаг 3. Подтверждаем проверку диска и после ее завершения нажимаем по кнопке «Показать подробности».
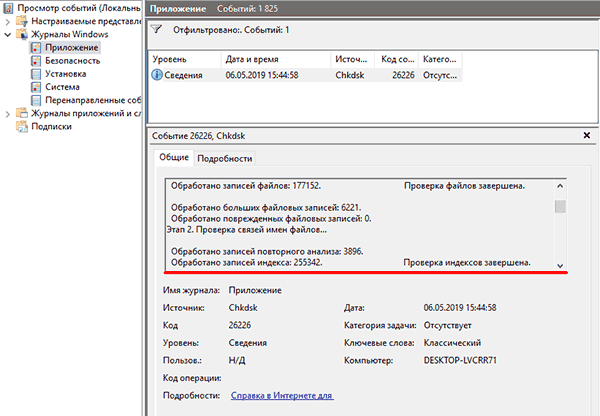
Шаг 4. Вся информация и результаты проверки диска будут доступны в графе «Сведения».
Проверка диска из командной строки
В некоторых ситуациях пользователю может понадобиться запуск утилиты CHKDSK из командной строки. Такая возможность позволит проверить и восстановить диск в том случае, если система не запускается и графический интерфейс Windows остается недоступным.
Чтобы запустить командную строку из среды восстановления ОС, необходимо:
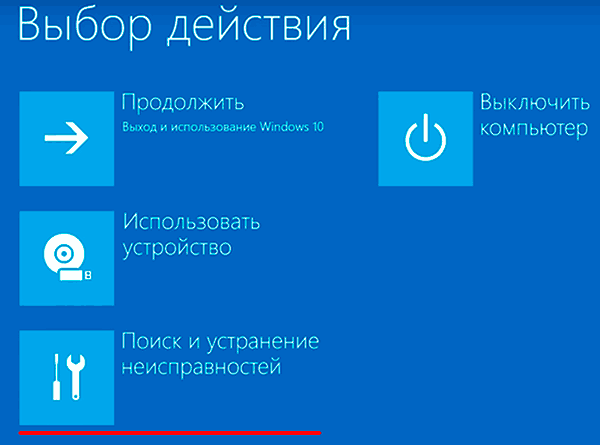
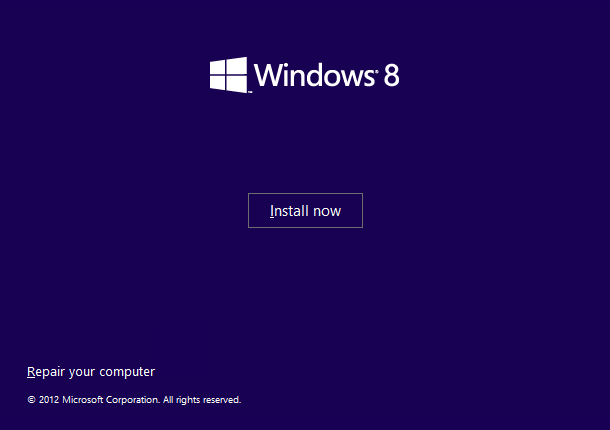
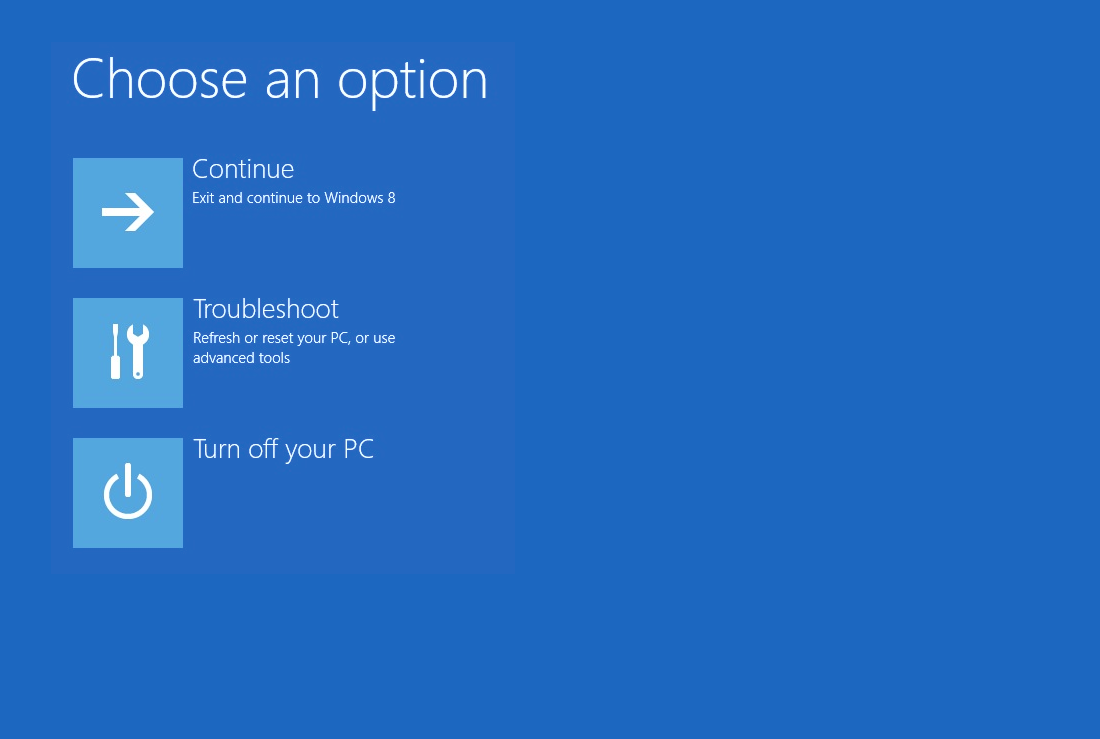
Шаг 1. Воспользоваться установочным диском или загрузочной флешкой Windows и после окна выбора языка нажать по пункту «Восстановление системы». Перейдя в среду восстановления, следует нажать по пункту «Поиск и устранение неисправностей».
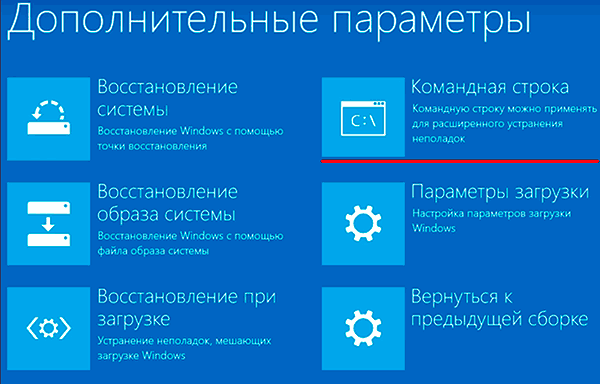
Шаг 2. На следующем окне следует выбрать пункт «Дополнительные параметры», после чего можно обнаружить кнопку «Командная строка».
Также всегда остается возможность запустить утилиту проверки дисков через командную строку из работающей системы. Важно! Для использования полного потенциала CHKDSK следует производить запуск командной строки только с правами администратора. В ином случае утилита CHKDSK проведет проверку без устранения выявленных неполадок.
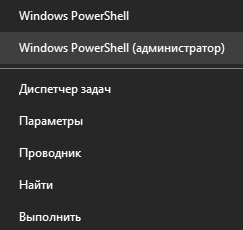
Запустить командную строку или Windows PowerShell от имени администратора можно, нажав правой кнопкой мыши по кнопке «Пуск» и выбрав пункт «Командная строка(администратор)».
Команды для работы с CHKDSK в командной строке
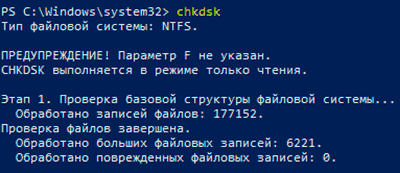
Находясь в командной строке, можно провести быструю проверку жесткого диска (аналогичная проверка была описана в начале) без перезагрузки системы. Для этого достаточно ввести команду «CHKDSK» и подтвердить действие кнопкой Enter.
Для проверки диска и исправления логических ошибок на нем необходимо воспользоваться командой «chkdsk C: /F /R», где С – имя необходимого диска.
Для подтверждения проверки диска после перезагрузки необходимо нажать клавишу «Y».
Помимо полного анализа и по возможности исправления поврежденных секторов, утилита может выполнять проверку и решение ошибок только файловой системы. Для этого следует воспользоваться командой «chkdsk C: /F» и подтвердить действие «Y».
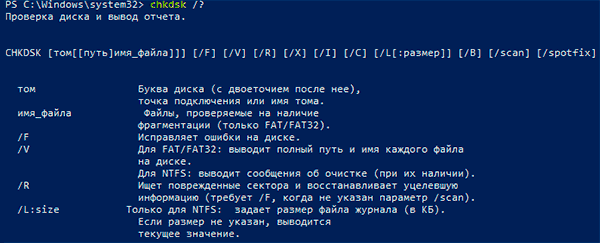
С полным списком и описанием возможностей утилиты можно ознакомится, введя команду «chkdsk /?».
Стоит отметить, что проблемы с диском могут быть вызваны не только программными ошибками, но и физическим износом, механическими повреждениями поверхности и другими факторами, которые невозможно исправить при помощи встроенной утилиты CHKDSK.
Чтобы получить полную картину о состоянии носителя, можно воспользоваться бесплатной программой для проверки дисков Victoria. Узнать о том, как пользоваться, исправлять и проводить диагностику HDD с помощью Victoria Вы сможете в статье: «Используем программу Victoria для тестирования и исправления жесткого диска»
Восстановление информации с проблемного жесткого диска
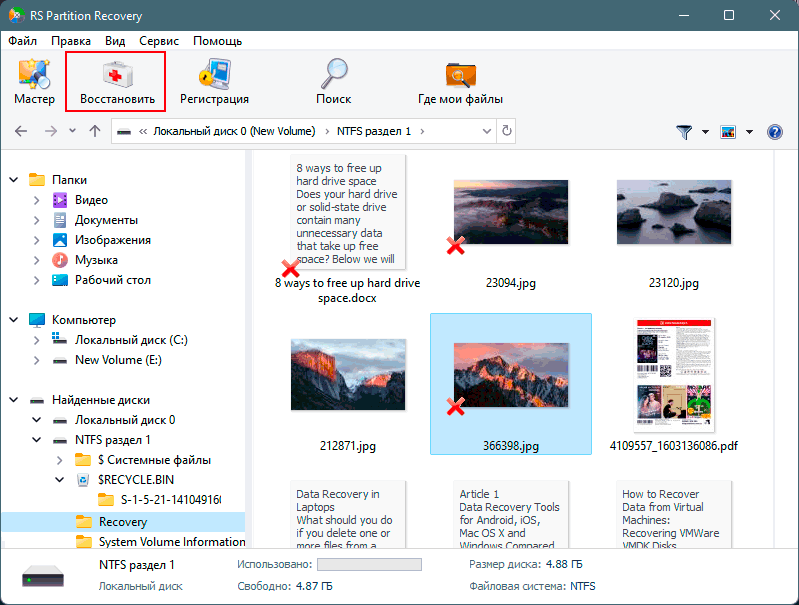
Проблемы с жестким диском – всегда большая угроза для важной информации и документов, хранящихся на компьютере. Чтобы быть готовым к любым обстоятельствам, рекомендуем всегда иметь под рукой специальную программу для эффективного восстановления файлов RS Partition Recovery. Данная утилита поможет восстановить всю утерянную информацию даже в самых сложных случаях.
При помощи RS Partition Recovery можно восстанавливать:
- Случайно удаленные файлы и документы.
- Отформатированные фотографии и медиафайлы.
- Данные, удаленные вирусами.
- Информацию, которая была утеряна при изменении файловой системы и структуры диска.
Часто задаваемые вопросы
CHKDSK это системная утилита, которая предназначена для работы с дисками. CHKDSK не имеет графического интерфейса. Все команды выполняются в командной строке или Windows PowerShell.
Запустите режим Windows Recovery и выберите «Командная строка». Затем выполните командe: «chkdsk C: /F /R». Если нужно просканировать и исправить ошибки на любом другом диске — замените букву «С» на букву вашего диска.
В таких случаях лучше сразу же использовать RS Partition Recovery. Программа создана как раз для таких ситуаций и успешно восстанавливает данные в 99% случаев.
К сожалению нет. CHKDSK занимается поиском и исправлением логических ошибок на диске, в то время как ошибка RAW – это ошибка файловой системы. В таком случае лучше всего восстановить важные данные при помощи RS Partition Recovery, а затем отформатировать диск.
В поиске Windows впишите «Windows Event Viewer» и в открывшейся программе перейдите в Windows Logs -> Application. Затем щелкните правой кнопкой мыши и выберите «Найти». Введите «chkdsk» и нажмите «Enter». В открывшихся результатах поиска найдите последнее событие с Event ID 1001 и источником Wininit. Затем откройте вкладку «General». Там вы найдете подробный лог сканирования накопителя.
CHKDSK is a Windows utility that can check the integrity of your hard disk and can fix various file system errors.
CHKDSK (or chkdsk.exe) is short for “check disk”.
It’s recommended to use this utility when your computer shows various boot errors. The check disk utility can be run if you need a fix for the following errors:
- 0x00000024
- Various blue screen of death errors
- NTDETECT failed
- Fatal error reading boot.ini
- NTOSKRNL.EXE is missing or corrupt
- 0x0000007B
- 0xc0000001 on a Windows Vista computer
- 0xc000014C on a Windows 8 computer
- and others
The check disk utility can repair problems such as:
- bad sectors
- lost clusters
- cross-linked files
- directory errors
Screenshots
The check disk tool can be run via Command Prompt or, if you can boot into Windows from My Computer > Properties > Tools depending on the Windows version you installed on your PC.
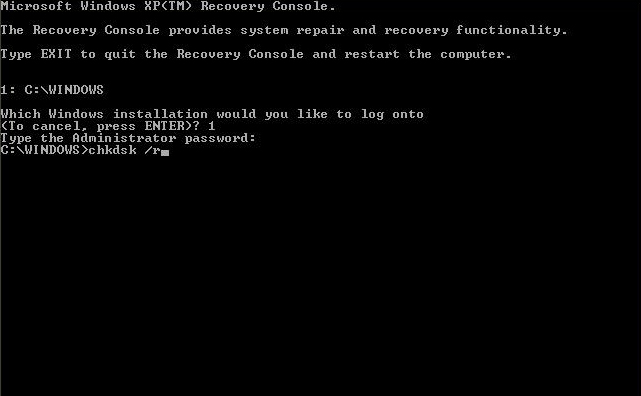
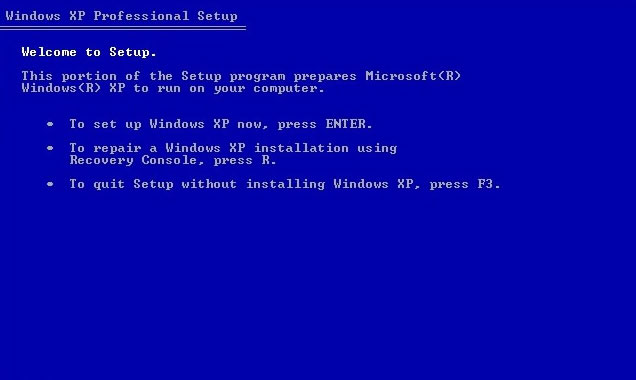
The command line tool can be ran on a Windows XP computer from within the Windows XP Recovery Console:
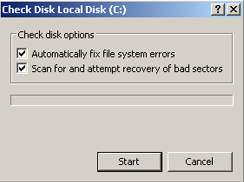
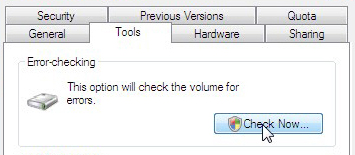
The utility from within Windows XP, from My Computer and not Command Prompt:
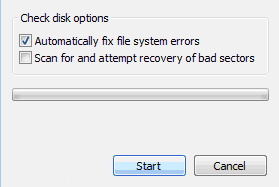
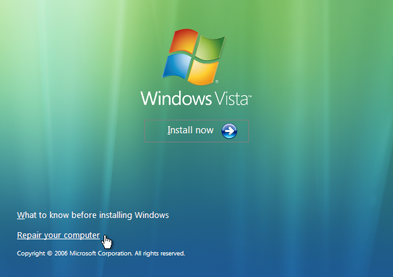
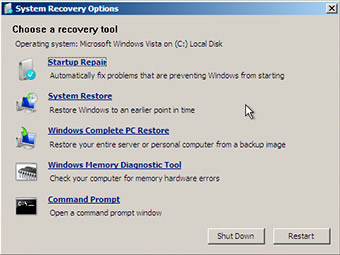
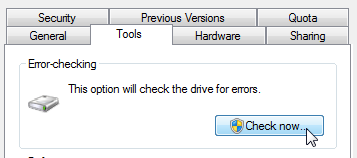
This is how you start a scan with the disk utility if you can boot into Windows Vista:
How to run CHKDSK in Windows
This utility is available for Windows XP, Windows Vista, Windows 7 and Windows 8 or 8.1.
If you can boot into Windows, you can run the check disk utility on each hard drive or partition you have available in My Computer.
If you can’t boot the operating system, you can run the tool from Command Prompt either by booting your computer into the Recovery Mode or by using the original installation disc to run Command Prompt.
CHKDSK in Windows XP
If you can boot into Windows XP, you can run the utility either from the Command Prompt or from My Computer.
From Command Prompt
If you can’t boot into Windows XP to run chkdsk, download Easy Recovery Essentials – our recovery disk for Windows XP – and run Automated Repair or Command Prompt directly. You can burn EasyRE on CDs, DVDs or USBs.
To run the utility from the Command Prompt, follow these steps:
- Boot your computer
- Go to Start
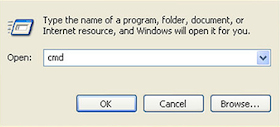
- Click Run
- Type
cmdin the box:
- Press Enter
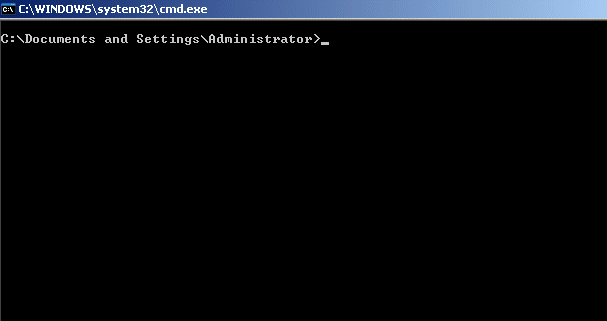
- You can now type
chkdskto open the utility in a read-only mode
- Press Enter
- To repair errors, follow these instructions:
- To repair errors without scanning for any bad sectors, type
chkdsk volume: /fand press Enter, wherevolumeis the letter of the drive you’d like to run a scan for, e.g.C:orD:
Example of a command you need to type if your volume isC:chkdsk C: /f
- To repair errors and scan for bad sectors, type
chkdsk volume: /rand press Enter, where volume is the letter of the drive you’d like to repair, e.g.C:orD:
Example of command you need to type if the volume you want to scan isD:chkdsk D: /r
- To repair errors without scanning for any bad sectors, type
From My Computer
If you can’t boot into Windows XP to run chkdsk, download Easy Recovery Essentials – our recovery disk for Windows XP – and run Automated Repair or Command Prompt directly. You can burn EasyRE on CDs, DVDs or USBs.
To run CHKDSK from within Windows XP, but without Command Prompt, follow these steps:
- Boot your computer
- Go to on My Computer (double-click on the icon)
- Right-click on the hard disk you’d like to run the utility on
- Click Properties
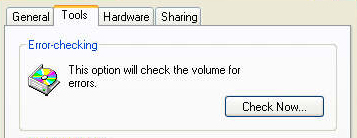
- Click Tools
- At the Error-checking tab, select Check Now
- To run the utility in the read-only mode, simply click Start
- To repair errors, follow these instructions:
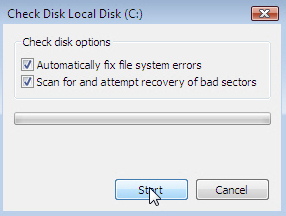
- To repair errors without scanning for bad sectors, select the Automatically fix file system errors box and click Start
- To repair errors and scan for bad sectors, select the Scan for and attempt recovery of bad sectors box and click Start
- Once finished, the utility will notify you if the scan reported errors (Errors were found and fixed.) or not (No errors were found.)
From the installation disc
If you don’t have the installation disc to run chkdsk, download Easy Recovery Essentials – our recovery disk for Windows XP – and run Automated Repair or Command Prompt directly. You can burn EasyRE on CDs, DVDs or USBs.
If you can’t boot into Windows XP to run the utility use your original Microsoft Windows XP installation disc to open Recovery Console.
To do so, follow these steps:
- Insert the installation CD in the disk tray
- Restart your computer to boot from the CD
- At the “Press any key” message, press any key to make sure you boot from the CD
- At the Windows Options menu, press R to open Recovery Console
- Enter the Administrator password
- When Command Prompt appears on your screen, type the command you need:
chkdsk C: /r
where
C:is the letter of the drive where Windows is installed and the/rparameter will try to repair errors and scan for bad sectors.
CHKDSK in Windows Vista
To run this utility on Windows Vista computer, you can choose any of the following methods:
- From Command Prompt, if you can boot into Windows Vista
- From My Computer
- From the Recovery Console of your original installation
disk
From Command Prompt
If you can’t boot into Windows Vista to run chkdsk, download Easy Recovery Essentials – our recovery disk for Windows Vista – and run Automated Repair or Command Prompt directly. You can burn EasyRE on CDs, DVDs or USBs.
If you can boot into your operating system, run Command Prompt:
- Open Windows Vista
- Go to Start > All Programs > Accessories > Command Prompt or in the search box type
Command Promptand double-click the Command Prompt item available in the search results list.
- When Command Prompt launches, type the command:
chkdsk C: /r
- If Windows Vista is installed on another drive that’s not labeled as
C:, replaceC:with the letter of your hard disk:chkdsk D: /r
- Press Enter
If Command Prompt shows errors, try to run the command again until it shows no errors.
From My Computer
If you can’t boot into Windows Vista to run chkdsk, download Easy Recovery Essentials – our recovery disk for Windows Vista – and run Automated Repair or Command Prompt directly. You can burn EasyRE on CDs, DVDs or USBs.
You can also run the utility by going to Computer (My Computer):
- Click the Start button
- Go to Computer
- Right-click on the drive you want check
- Click Properties
- At the Tools tab, under the Error-checking section, click Check Now
- If prompted, enter the Administrator password
- You can now run the disk check tool:
- To automatically repair errors, select Automatically fix file system errors
- To perform a thorough check, select Scan for and attempt recovery of bad sectors
- You can also check both Automatically fix file system errors and Scan for and attempt recovery of bad sectors
- To automatically repair errors, select Automatically fix file system errors
- Click Start
Don’t use the computer until the disk check is done. It may take several minutes depending on the hard disk size.
From the installation disc
If you don’t have the installation disc to run chkdsk, download Easy Recovery Essentials – our recovery disk for Windows Vista – and run Automated Repair or Command Prompt directly. You can burn EasyRE on CDs, DVDs or USBs.
If you can’t boot into Windows Vista, use the original installation disc to open Command Prompt (the Recovery Console) and run the commands you need:
- Insert the install disc and restart your computer
- Press any key when the message appear to boot from the disk
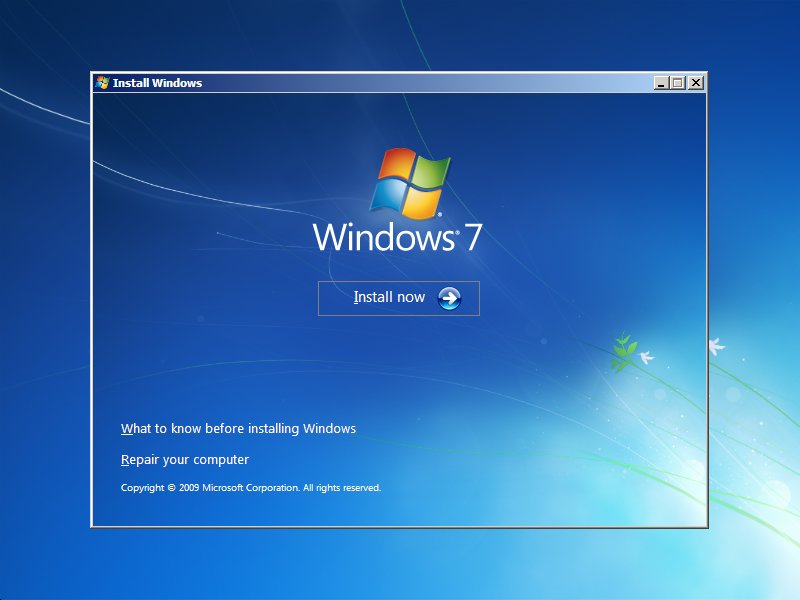
- Click Repair your computer
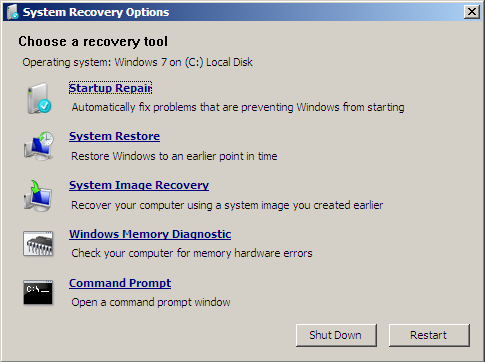
- Select Command Prompt
- Enter the Administrator password, if prompted
- When Command Prompt appears, type the command:
chkdsk c: /r
where
C:is your hard disk drive’s letter (can be different fromC:used here). - Press Enter
CHKDSK in Windows 7
The steps to run this utility in Windows 7 are similar to those of Windows Vista.
From Command Prompt
If you can’t boot into Windows 7 to run chkdsk, download Easy Recovery Essentials – our recovery disk for Windows 7 – and run Automated Repair or Command Prompt directly. You can burn EasyRE on CDs, DVDs or USBs.
If you can boot into Windows 7, run the utility from Command Prompt directly:
- Click Start
- Type
cmdat the Search program and files search box - Right-click on cmd.exe
- Click Run as Administrator
- Type in your Administrator password
- When cmd.exe opens, type the command:
chkdsk
- Press Enter
- You can run the tool with more parameters, like this:
chkdsk c: /r
This will check the drive for errors and will automatically try to fix any found errors.
- If you receive the “Chkdsk cannot run because the volume is in use by another process.” message, type
Yto restart the computer and let the utility to run a scan at the next boot of your PC - After you typed
Y, close the Command Prompt - Restart the computer by going to Start > Shutdown > Restart
- At the next boot, the check disk utility will automatically run a scan
From My Computer
If you can’t boot into Windows 7 to run chkdsk, download Easy Recovery Essentials – our recovery disk for Windows 7 – and run Automated Repair or Command Prompt directly. You can burn EasyRE on CDs, DVDs or USBs.
The check disk utility can also be ran from My Computer to check for errors on your hard disk.
To do so, follow these instructions:
- Right-click on the Start icon
- Click Open Windows Explorer
- On the left side of the window, click Computer
- At the Hard Disk Drives section, right-click on the volume you want to check for errors
- Click Properties
- Go to the Tools Tab
- At the Error-checking section click Check now
- You can now run the check disk utility: select Scan for and attempt recovery of bad sectors to let the utility attempt to repair any hard drive errors found
- Click Start
If the volume you want to check is in use, e.g. C:/ where Windows Vista is installed, you may receive the following error message:
Windows can't check the disk while it's in use

 Do you want to check for hard disk errors the next time you start your computer?

 Schedule disk check | Cancel
If so, follow these steps:
- Click Schedule disk check
- Exit any open programs
- Restart your computer
- Your computer will now restart and automatically boot and the utility will perform a scan automatically
If you receive the “Do you want to dismount this volume first?” message, follow the steps below. This message appears if the volume you want to checked is locked, even if it’s not in use (e.g. the C:/ drive):
Windows can't check the disk while it's in use

 Do you want to dismount this volume first? Note: All opened handles to this volume will become invalid.

 Force a dismount | Cancel
If so, follow these steps:
- Click Force a dismount
- A scan will automatically start now
From the installation disc
If you don’t have the installation disc to run chkdsk, download Easy Recovery Essentials – our recovery disk for Windows 7 – and run Automated Repair or Command Prompt directly. You can burn EasyRE on CDs, DVDs or USBs.
Follow these steps:
- Insert the original Windows disc
- Restart your PC and boot from the disc
- Click Repair your computer
- Choose the operating system from the list
- Click Next
- Choose Command Prompt
- When it opens, type the command:
chkdsk C: /f /r
- Press Enter
CHKDSK in Windows 8 or 8.1
Windows 8 or 8.1 users can run this utility by choosing any of the following methods:
- From Command Prompt
- From My Computer
- From installation disc
From Command Prompt
If you can’t boot into Windows 8/8.1 to run chkdsk, download Easy Recovery Essentials – our recovery disk for Windows 8/8.1 – and run Automated Repair or Command Prompt directly. You can burn EasyRE on CDs, DVDs or USBs.
To run it from Command Prompt, here are the instructions:
- Log into Windows 8/8.1
- Press the
and C key to open the Charm bar
- Select Search
- Type-in
cmd - Right-click on Command Prompt from the search results list
- Click Run as administrator
- Log in as an Administrator
- When Command Prompt launches, type the command:
chkdsk C: /f /r /x
The parameters for this command are:
/foption will attempt to fix any found errors/roption will locate for bad sectors and recovery any readable information/xoption will force the volume you’re about to check to be dismounted before the utility begins a scan If theC:drive is in use, typeYto run a scan at your PC’s next restart. If so, exit Command Prompt and restart the computer.
From My Computer
If you can’t boot into Windows 8/8.1 to run chkdsk, download Easy Recovery Essentials – our recovery disk for Windows 8/8.1 – and run Automated Repair or Command Prompt directly. You can burn EasyRE on CDs, DVDs or USBs.
To run the check disk utility from Computer (My Computer), follow these steps:
- Boot into Windows 8/8.1
- Double-click on Computer (My Computer) to open it
- Select the drive you want to run a check on, e.g.
C:\ - Right-click on the drive
- Click Properties
- Go to the Tools tab
- Select Check, at the Error checking section
- If you receive the following message, click Scan drive to begin the scan:
You don't need to scan this drive We haven't found any errors on this drive. You can still scan the drive for errors if you want. Scan Drive
- You can keep using the drive during the scan. If errors are found, you can decide if you want to fix them. Depending on the results of this scan, the utility will report the results:
If no errors were found, you’ll see this message:
Your drive was successfully scanned Windows successfully scanned the drive. No errors were found.
If errors were found, you’ll see this message instead:
Restart your computer to repair file system. You can restart right away or schedule the error fixing on next restart.
From the installation disc
If you don’t have the installation disc to run chkdsk, download Easy Recovery Essentials – our recovery disk for Windows 8/8.1 – and run Automated Repair or Command Prompt directly. You can burn EasyRE on CDs, DVDs or USBs.
If you can’t boot into Windows 8/8.1 to run Command Prompt, you can use the original Windows 8/8.1 installation disc to run Command Prompt from there.
To do so, follow these instructions:
- Insert the installation disc
- Restart your computer
- Press any key to boot from the disc, at the “Press any key to boot from CD or DVD…” message
- Choose your keyboard layout
- Select your language, time and a keyboard method
- Click Next
- Click Repair your computer
- At the Choose an option screen, click Troubleshoot
- At the Troubleshoot screen, click Advanced options
- At the Advanced options screen, click Command Prompt
- When Command Prompt launches, type the command:
chkdsk C: /f /x /r
- Press Enter
CHKDSK in Windows 10
Windows 10 users can run this utility by choosing any of the following methods:
- From Command Prompt
- From My Computer
- From installation disc
From Command Prompt
If you can’t boot into Windows 10 to run chkdsk, download Easy Recovery Essentials – our recovery disk for Windows 10 – and run Automated Repair or Command Prompt directly. You can burn EasyRE on CDs, DVDs or USBs.
To run it from Command Prompt, here are the instructions:
- Log into Windows 10
- Press the
key to open the Start Menu
- Select Search
- Type-in
cmd - Right-click on Command Prompt from the search results list
- Click Run as administrator
- Log in as an Administrator
- When Command Prompt launches, type the command:
chkdsk C: /f /r /x
The parameters for this command are:
/foption will attempt to fix any found errors/roption will locate for bad sectors and recovery any readable information/xoption will force the volume you’re about to check to be dismounted before the utility begins a scan If theC:drive is in use, typeYto run a scan at your PC’s next restart. If so, exit Command Prompt and restart the computer.
From My Computer
If you can’t boot into Windows 10 to run chkdsk, download Easy Recovery Essentials – our recovery disk for Windows 10 – and run Automated Repair or Command Prompt directly. You can burn EasyRE on CDs, DVDs or USBs.
To run the check disk utility from Computer (My Computer), follow these steps:
- Boot into Windows 10
- Double-click on Computer (My Computer) to open it
- Select the drive you want to run a check on, e.g.
C:\ - Right-click on the drive
- Click Properties
- Go to the Tools tab
- Select Check, at the Error checking section
- If you receive the following message, click Scan drive to begin the scan:
You don't need to scan this drive We haven't found any errors on this drive. You can still scan the drive for errors if you want. Scan Drive
- You can keep using the drive during the scan. If errors are found, you can decide if you want to fix them. Depending on the results of this scan, the utility will report the results:
If no errors were found, you’ll see this message:
Your drive was successfully scanned Windows successfully scanned the drive. No errors were found.
If errors were found, you’ll see this message instead:
Restart your computer to repair file system. You can restart right away or schedule the error fixing on next restart.
From the installation disc
If you don’t have the installation disc to run chkdsk, download Easy Recovery Essentials – our recovery disk for Windows 10 – and run Automated Repair or Command Prompt directly. You can burn EasyRE on CDs, DVDs or USBs.
If you can’t boot into Windows 10 to run Command Prompt, you can use the original Windows 10 installation disc to run Command Prompt from there.
To do so, follow these instructions:
- Insert the installation disc
- Restart your computer
- Press any key to boot from the disc, at the “Press any key to boot from CD or DVD…” message
- Choose your keyboard layout
- Select your language, time and a keyboard method
- Click Next
- Click Repair your computer
- At the Choose an option screen, click Troubleshoot
Commands and parameters
The check disk utility has several parameters that you can use:
/c – applicable to a NTFS volume only
/f – this option fixes errors on a volume
/i – applicable to a NTFS volume only. This option performs a check of index entries
/r – this option also implies the /f and /p option. This option locates the bad sectors of your hard drive and recovers any readable information
Depending if you run the utility from Command Prompt or Recovery Console, the following parameters are different:
/p – this fixes any errors on a volume. In your standard Command Prompt /p is only read-only
The mandatory requirement of this utility is the volume you’re about to check must not be locked. If a volume you’re about to scan is locked, you’ll receive this message:
Chkdsk cannot run because the volume is in use by another process. Would you like to schedule this volume to be checked
 the next time the system restarts? (Y/N)
If so, type Y and press Enter to perform a scan at the next boot of your system.
Download chkdsk
chkdsk can’t be downloaded as it’s a command available with Windows. You can use the original installation disc to run the utility tool.
You can download Easy Recovery Essentials and open Command Prompt to run specific chkdsk commands:
You can burn Easy Recovery Essentials to CDs, DVDs or USBs and run Command Prompt.
- Download Easy Recovery Essentials
- Burn the ISO Image. Follow our instructions on how to burn a bootable ISO image. If you’d like to have a recovery USB instead, follow our instructions on how to make a recovery USB.
- Boot into the recovery media
- Select Launch Command Line
Troubleshooting
Cannot continue in read-only mode
If you receive the “Errors found. CHKDSK cannot continue in read-only mode.” error message after running a check disk command, make sure you run the command with the /r parameter:
chkdsk /f
If the disk check utility must be ran on another volume, update the command with the letter of the drive you want to run a scan for:
chkdsk D: /f
Cannot run because the volume is in the use by another process
If you receive this error message when running the tool:
Chkdsk cannot run because the volume is in the use by another process. Would you like to schedule this volume to be checked the next time the system restarts.
You need to type Y to make sure the utility runs at the next boot. If so, type Y, restart the computer and let the tool to perform the scan.
Cannot lock current drive
If the check disk utility shows the “Cannot lock current drive.” error message, make sure the command you’re performing has the /r option:
chkdsk /r
If this doesn’t work, try disabling System Restore for the entire session you’re trying to run a scan and other protection software, such as: antivirus, firewall, spyware etc.
Another alternative command is:
chkdsk C: /f /r /x
stop chkdsk on every boot
If the utility runs a scan at every boot without stopping, you can try a few solutions.
Before you follow the instructions below, make sure you let the scan to be 100% completed and then restart your computer.
If the check disk runs again, even if the previous scan was 100% complete, continue with the steps below.
Fix #1: Check if there is a scheduled scan. To do so, follow these steps:
- Open Command Prompt
- Type
chkntfs c:, wherec:is the letter of the drive you ran a check - Press Enter
- If the message is the following, then a check scan is scheduled on the c: drive:
The type of file system is NTFS. Chkdsk has been scheduled manually to run on next reboot on volume C:.
- If there isn’t any scheduled scan, the message will be:
The type of the file system is NTFS. C: is not dirty.
- To cancel a scheduled scan, type:
chkntfs /x c:
Fix #2: Another option to fix this issue is to open the Registry Editor:
- Boot into Windows
- Open the Registry Editor
- Go to this key:
HKEY_LOCAL_MACHINE\SYSTEM\CurrentControlSet\Control\Session Manager
- At the BootExecute key, check the value.If the value is
autocheck autochk * /., you need to change it toautocheck autochk *
chkdsk won’t finish
If the utility won’t finish a scan, make sure you run the command with the /r parameter, like this:
chkdsk /r
chkdsk won’t run at startup
If the check disk won’t run a scan at startup after being scheduled to do so, follow any of the following fixes.
Fix #1: Check the BootExecute key in the Registry Editor:
- Open Registry Editor
- Find this key:
HKEY_LOCAL_MACHINE\SYSTEM\CurrentControlSet\Control\Session Manager key
- Check the value for the BootExecute key.If the value is
autocheck autochk * /., you need to change it toautocheck autochk *
Fix #2: Run sfc
You can also run the sfc /scannow command and then run chkdsk /r again:
- Open Command Prompt
- Type the command:
sfc /scannow
- Press Enter
- After the sfc process is complete, run the check disk utility.
More Information
Support Links
- Easy Recovery Essentials for Windows – our repair and recovery disk.
It’s an easy-to-use and automated diagnostics disk. It’s available for Windows 8, Windows 7 and Windows Vista. It’s also available for Windows XP and Windows Server.
Read more at Windows Recovery Disks.
- The NeoSmart Support Forums, member-to-member technical support and troubleshooting.
- Get a discounted price on replacement setup and installation discs: Windows XP, Windows Vista, Windows 7, Windows 8, Windows 10, Windows 11, Windows Server 2022.
Applicable Systems
This Windows-related knowledgebase article applies to the following operating systems:
- Windows XP (all editions)
- Windows Vista (all editions)
- Windows 7 (all editions)
- Windows 8 (all editions)
- Windows 8.1 (all editions)
- Windows 10 (all editions)
- Windows 11 (all editions)
- Windows Server 2003 (all editions)
- Windows Server 2008 (all editions)
- Windows Server 2012 (all editions)
- Windows Server 2016 (all editions)
- Windows Server 2019 (all editions)
- Windows Server 2022 (all editions)
Propose an edit
При работе любого жёсткого диска HDD или современных SSD дисков, рано или поздно на них могут возникать ошибки, что со временем может приводить к различным последствиям: от простых зависаний при запуске программ и подтормаживаний в работе системы до внезапных перезагрузок компьютера.
Ошибки могут быть различными и появляются по разным причинам. К примеру, выполняете копирование файлов с жёсткого диска и внезапно отключается питание и компьютер сразу выключается. Подобное приводит к ошибкам файловой системы.
Также возможно появление так называемых битых секторов (бэд блоков), которые можно разделить на физические и логические. Первые появляются в результате физических повреждений диска, например, при падении, и относятся только к HDD дискам, поскольку у SSD нет механических движущихся частей. Вторые — это последствия вирусных заражений, неправильной записи на диск и подобного рода проблем.
Множество ошибок можно поправить самостоятельно при помощи встроенной в Windows программы, которая в консоли (командной строке CMD) называется CHKDSK (Check Disk). Работает во всех версиях Windows одинаково!
Данная программа не вылечит ваш диск от всех недугов! Например, понятно, что невозможно исправить проблемы с диском HDD, вызванные его физическими повреждениями, но зато можно поправить ошибки файловой системы и подобные как на HDD, так и на SSD. А ведь когда этих ошибок много, то это очень заметно и может существенно сказываться на работе компьютера.
Программу для проверки диска и исправления ошибок на нём можно запустить двумя способами:
-
Через обычный графический интерфейс Windows;
-
Через командную строку (консоль CMD).
В этой статье я покажу оба варианта работы с программой, на всякий случай 
Как часто запустить проверку диска на ошибки?
Если компьютер ваш начал глючить, подтормаживать, то лучше запустите проверку всех локальных дисков, имеющихся к системе (c, d, e и прочих). Но важнее всего проверить системный диск, который, как правило, имеет букву «C:».
Для профилактики можно запускать проверку диска хотя бы раз в 3 месяца (лично мой опыт!).
Вариант 1. Запуск проверки диска из графической оболочки Windows
Это самый простой вариант запуска проверки диска, практически не имеющий никаких настроек. Отлично подойдёт для новичков. Да и для опытных пользователей, которым нужно лишь проверить диск через стандартные настройки.
Для запуска нужно перейти в раздел «Компьютер» вашей системы, где отображаются все локальные диски ваших жёстких дисков и SSD, подключенных к компьютеру. Затем кликнуть правой кнопкой мыши (далее ПКМ) по нужному диску и выбрать «Свойства».
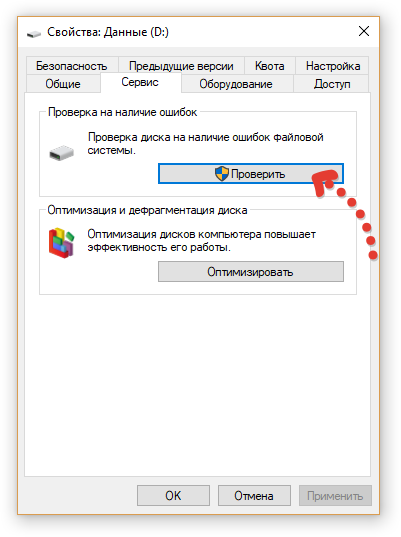
Далее перейдите в подраздел «Сервис» и нажмите «Проверить»:
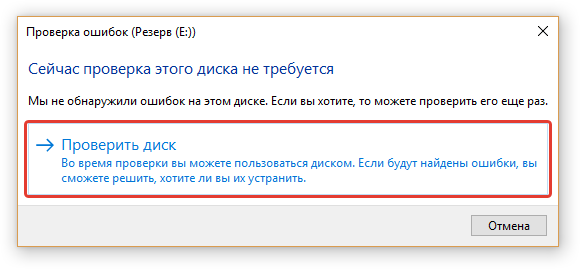
Система сразу подскажет, имеются ли проблемы с выбранным вами разделом диска и если нет, то так и будет сказано «Сейчас проверка этого диска не требуется». Тем не менее можно всё равно запустить проверку диска, нажав «Проверить диск»:
После этого начнётся сканирование диска, которое обычно занимает несколько минут и система выдаст результат.
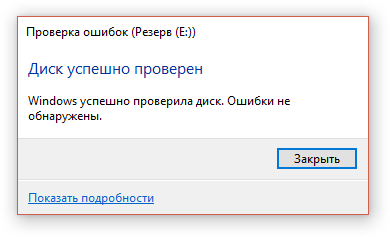
Если ошибок нет, то система сообщит, что диск проверен и ошибки не найдены. В этом случае останется только закрыть окно:
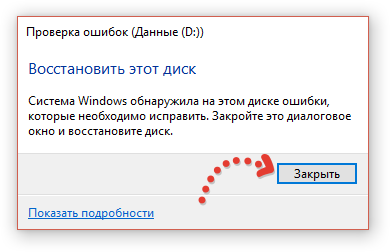
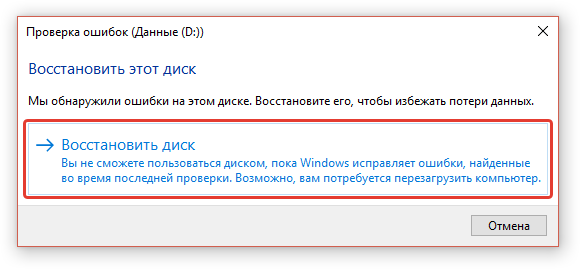
Если же на диске после сканирования будут обнаружены ошибки, то система об этом сообщит в окне «Восстановить диск». В таком случае сначала закройте это окно:
А после, в следующем окне нажмите «Восстановить диск»:
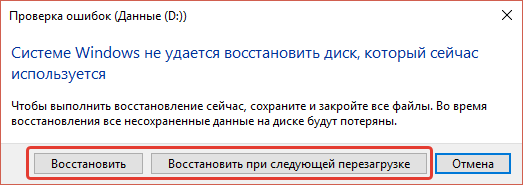
Для того чтобы начать процесс восстановления, нужно чтобы выбранный вами диск никак не был занят системой, т.е. с ним не велось никакой работы. Если диск на данный момент чем-либо занят, то система сможет сама закрыть программы, которые использую на данный момент диск или же проверить его при следующей перезагрузке ПК. Нажмите либо «Восстановить», чтобы система закрыла все процессы, использующие выбранный диск, и начала восстановление, либо «Восстановить при следующей перезагрузке», для того чтобы проверка диска запустилась сразу после того, как перезагрузите компьютер, в удобное вам время.
После восстановления в окошке программы получите соответствующее уведомление.
Вариант 2. Запуск проверки диска из командной строки (консоли). Команда CHKDSK
Этот вариант запуска программы проверки диска имеет больше возможностей различных настроек, но в основном ими пользуются профессионалы. Для новичков достаточно будет варианта №1.
Чтобы запустить проверку через консоль, сначала в эту самую консоль нужно перейти. Откройте поиск Windows, наберите «cmd» [1], после чего кликните правой кнопкой по найденной программе «Командная строка» и выберите «Запуск от имени администратора» [2].
Подробнее о том как запускать и пользоваться поиском в разных версиях Windows читайте здесь »
Для простой проверки нужного вам локального диска и исправления ошибок на нём, в командной строке напишите:
chkdsk c: /f
Где вместо «с:» укажите букву диска, который хотите проверить.
Для запуска проверки, нажмите клавишу Enter.
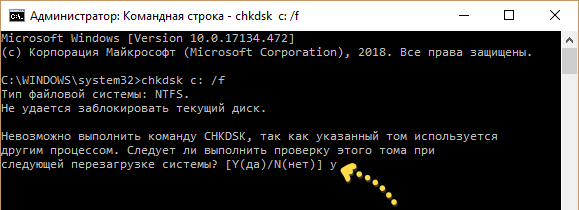
Если диск в данный момент используется какой-либо программой или системой, то появится сообщение, что не удаётся заблокировать диск и будет предложено проверить его после следующей перезагрузки системы (когда вам удобно). В таком случае наберите Y, если согласны или N, если отказываетесь от проверки. Написав нужный символ, нажмите клавишу Enter.
Если ввели Y, то появится сообщение «Этот том будет проверен после следующей перезагрузки системы».
Вам останется перезагрузить компьютер в удобное вам время и система сама запустит проверку.
Также полезной опцией может стать добавление в команду ключа /r, что позволяет проверить диск на наличие ещё и повреждённых секторов. Программа их отметит и диск более не будет пытаться записывать на них информацию.
Внимание! Добавление ключа /r увеличивает время проверки диска многократно! То есть проверка одного диска может занять несколько часов.
Пример:
chkdsk c: /f /r
Команда chkdsk в командной строке имеет также множество других опций, которые вы можете использовать если необходимо. Но, как правило, ими пользуются уже профи.
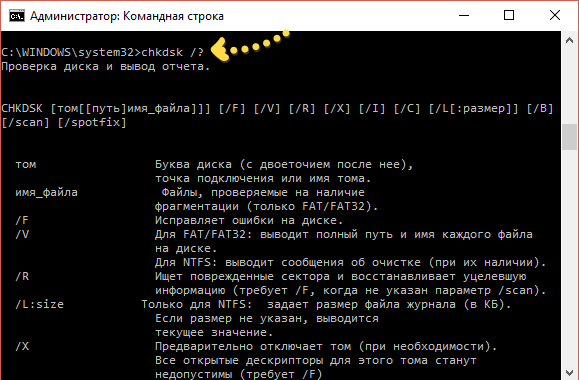
Для вывода полного списка доступных опций для chkdsk, наберите:
chkdsk /?
Заключение
Не игнорируйте средство Windows для проверки диска на ошибки. Есть, конечно, множество специализированных программ для работы с жёсткими и SSD дисками, но для простой проверки и исправления ошибок более чем достаточно встроенной программы в Windows, тем более она очень проста в использовании.
Регулярно запускайте проверку диска, чтобы поддерживать его работу в нормальном режиме.
А вы пользуетесь средством проверки диска на ошибки в Windows? Поделитесь в комментариях 
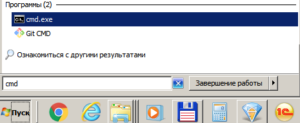
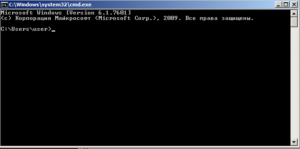
Запуск самой командной строки Windows: Пуск-Выполнить-cmd или Пуск-Поиск-cmd
Для некоторых программ требуются права Администратора, поэтому запускаем от его имени:
Топ 10 команд:
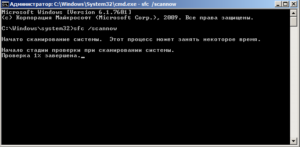
1. SFC – команда проверки и восстановления системных файлов Windows. Может помочь после действий вирусов и неаккуратных пользователей.
В случае, если программа обнаружит изменения, потребуется перезагрузка ОС для восстановления файлов.
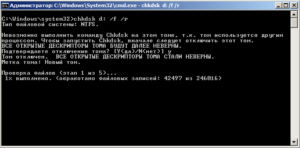
2. CHKDSK- команда проверки и исправления ошибок файловой системы
где D: – диск, который необходимо проверить
/f- параметр, включающий исправление ошибок на диске
/r -параметр, включающий поиск и восстановление поврежденных секторов на диске
Программа CHKDSK – с большой долей вероятности помогает исправить ошибки на винчестерах и решить проблему синего экрана (если он вызван проблемами с жестким диском и файловой системой)
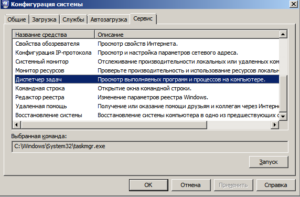
3. MSCONFIG – команда запуска утилиты “Конфигурация системы”
Утилита позволяет управлять параметрами запуска системы, автозапуском программ и служб.
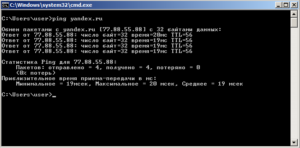
4. PING – команда проверки соединения с удаленными компьютерами и серверами
где yandex.ru – может быть имя или IP адрес конечного хоста
Если вы хотите чтобы команда выполнялась постоянно добавьте параметр -t
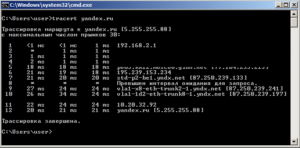
5. TRACERT – команда определения маршрута информационных пакетов
где yandex.ru – может быть имя или IP адрес конечного хоста
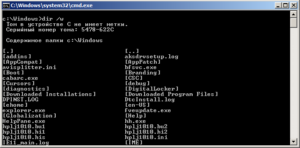
6. DIR – команда вывода на экран содержимого папки
где /w -параметр для отображения данных в несколько столбцов
Может быть использовано когда нет доступа к графической оболочке Windows (например при восстановлении системы)
7. Netstat – команда вывода на экран состояния подключений TCP, портов и процессов инициировавших это подключение
где -o -параметр для отображения активных соединений и PID процесса каждого соединения
8. Explorer – команда запуска проводника Windows
Может помочь, если недоступен проводник и пропало меню Пуск
9. OSK – команда запуска виртуальной клавиатуры
Может понадобиться, когда вышла из строя обычная клавиатура или ее нет вообще
10. RSTRUI – команда запуска восстановления системы
Восстанавливает систему на состояние определенной (выбранной вами ) даты.Главное, чтобы велась запись этих состояний(точки восстановления).За это отвечает запущенная служба Восстановления системы.
P.S. Если в конце любой команды поставить параметр /?, то на экране выведется подсказка по этой команде и описание основных ее параметров
P.S.1 команда cls – очищает командную строку
Поделиться ссылкой:
Похожие записи
Вы статье вы найдете руководство по использованию chkdsk, ссылки на программы, позволяющее всесторонне протестировать жесткий диск, а также инструкции к ним. Кроме того, в статье рассказывается, как выполнить проверку разделов жесткого диска с помощью встроенных средств Windows.
На этой странице
- Утилита проверки диска Windows (chkdsk)
- Запуск проверки диска из графического интерфейса
- Запуск проверки диска из командной строки
- Запуск проверки диска, если система не загружается
- Просмотр результатов проверки диска
- Диагностика жесткого диска сторонними программами
- Утилиты производителей жестких дисков
- Victoria
- MHDD
- Диск в полном порядке — что дальше?
Утилита проверки диска Windows (chkdsk)
В ОС Windows имеется собственная утилита проверки дисков. Ее можно запускать из графического интерфейса или из командной строки.
Запуск проверки диска из графического интерфейса
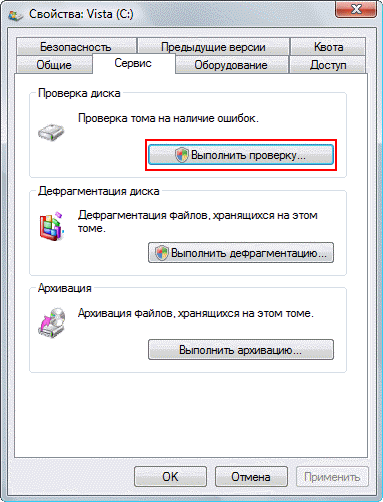
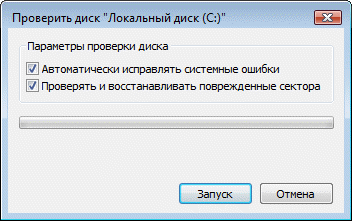
Откройте окно Мой компьютер, щелкните правой кнопкой мыши по диску или разделу, который вы хотите проверить, и выберите из контекстного меню пункт Свойства. В окне свойств диска перейдите на вкладку Сервис и нажмите кнопку Выполнить проверку.
В следующем окне нажмите кнопку Запуск.
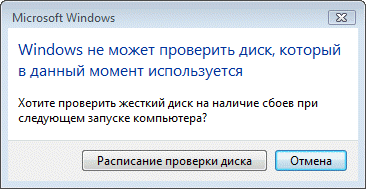
Проверка несистемного раздела начнется сразу. Если вы производите проверку системного раздела Windows 7, вы можете увидеть сообщение о том, что сейчас ее невозможно выполнить.
Это нормально, поскольку системный раздел используется операционной системой. Нажмите кнопку Расписание проверки диска. Чтобы запустить проверку, необходимо перезагрузить компьютер. После перезагрузки компьютера проверка диска будет выполнена до запуска операционной системы.
Запуск проверки диска из командной строки
Пример запуска проверки раздела C на SSD или HDD из командной строки (ее необходимо запускать с правами администратора).
chkdsk c: /f
Пример запуска проверки раздела C на HDD с целью поиска и исправления плохих секторов.
chkdsk c: /r
На SSD это не имеет смысла, а ключ /r включает в себя /f.
Как и в случае с проверкой системного раздела из графического интерфейса, после выполнения этой команды вы увидите сообщение о невозможности выполнения проверки.
Введите Y и перезагрузите компьютер, чтобы начать проверку.
Дополнительную информацию о параметрах командной строки утилиты chkdsk вы можете получить, запустив ее с ключом /?, либо на этой странице.
Запуск проверки диска, если система не загружается
Если операционная система не загружается из-за ошибок на диске, проверку диска можно осуществить с помощью установочного диска Windows.
Windows 7, 8.1, 10
- Загрузитесь в среду восстановления и откройте командную строку (инструкции для Windows 8 и новее, Windows 7)
- В командной строке введите команду
chkdsk c: /r
Windows XP
Если проблема возникла в Windows XP, используйте консоль восстановления. Загрузившись с установочного диска в консоль, выполните команду
chkdsk c: /r
Дополнительную информацию о консоли восстановления вы найдете в статьях базы знаний Microsoft:
- Описание консоли восстановления Windows XP
- Установка и использование консоли восстановления в Windows XP
- Включение автоматического входа администратора в систему при использовании консоли восстановления
Просмотр результатов проверки диска
Читайте Как увидеть результаты проверки диска chkdsk одной командой.
Диагностика жесткого диска сторонними программами
Если после проверки жесткого диска утилитой chkdsk у вас продолжают возникать критически ошибки, связанные с оборудованием, стоит произвести более тщательное тестирование с помощью специализированных программ. Как правило, для диагностики используются утилиты производителей жестких дисков, либо такие программы, как Victoria или MHDD.
Вниманиe! Перед тестированием жесткого диска с помощью сторонних программ необходимо сделать резервное копирование всех данных.
Утилиты производителей жестких дисков
Диагностические утилиты могут находиться на компакт-диске, входящем в комплект поставки жесткого диска. В любом случае их можно загрузить с сайта производителя жесткого диска. Ссылки на страницы загрузки некоторых производителей приводятся ниже.
- Western Digital: Data Lifeguard Tools (необходимо выбрать модель диска).
- Seagate: SeaTools.
- Hitachi: Drive Fitness Test.
- Samsung: Hutil.
Диагностические средства других производителей можно найти на их сайтах.
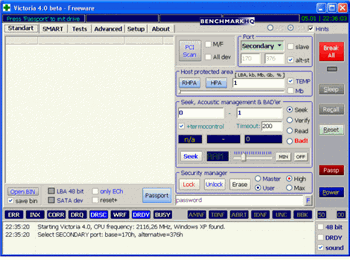
Victoria
Программу Victoria, предназначенную для глубокого тестирования состояния жесткого диска, можно найти на официальном сайте http://hdd.by/victoria.html
Дополнительную информацию вы найдете по следующим ссылкам:
- Старая справка к программе Victoria
- Тема на форуме
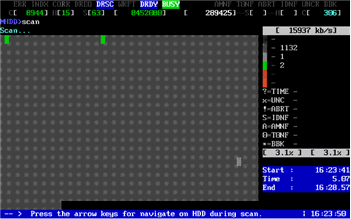
MHDD
Программа MHDD также способна всесторонне протестировать жесткий диск и исправить ошибки на нем. Вы можете загрузить ее по этой ссылке с сайта MHDD.ru.
Дополнительную информацию вы найдете по следующим ссылкам:
- Справка к программе MHDD
Диск в полном порядке — что дальше?
Если ошибок на жестком диске не выявлено, он, скорее всего, не является причиной возникновения критических ошибок. Не исключено, что проблема кроется в неисправной оперативной памяти или блок питания имеет недостаточную мощность для обеспечения работы всех устройств. Вы можете проверить оперативную память и драйверы, как описано в статьях по ссылкам ниже.


