Коды ошибок Xbox 360 S
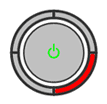
Центральный индикатор горит зелёным: консоль работает нормально.
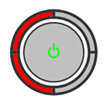
Центральный индикатор мигает красным: консоль перегрелась, аналогично 2 красным огням предыдущей модели консоли.
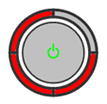
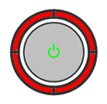
Центральный индикатор горит красным: сбой консоли, аналогично одному или трём красным огням предыдущей модели консоли. На ТВ или мониторе может отображаться код ошибки вида Exx (описание см. в секции «Описание ошибок типа Ехх»). В противном случае необходимо определить вторичный код ошибки (описание вторичных кодов ошибок смотрите в секции «Описание вторичных кодов ошибок вида ХХХХ»).
Повторное подключение HDD часто помогает устранить непрерывное свечение красного индикатора:
- Выключите консоль.
- Отсоедините БП от сети.
- Вытащите HDD.
- Вставьте HDD обратно.
- Вставьте БП в сеть.
- Включите консоль.
- Если индикатор вновь светится красным, то извлеките HDD (повторив шаги 1-3), затем подключите БП к сети и попробуйте включить консоль. Если индикатор стал зелёным и консоль работает, это означает, что проблема заключается в неисправности HDD.
—————————————————
Коды ошибок Xbox 360
Если с консолью какие-то проблемы, то на передней панели вместо привычных зеленых огней будут мигать красные. Расположение мигающих огней может быть различно и поясняет возможные причины неполадок. Если ваша консоль на гарантии, то не пытайтесь ремонтировать ее самостоятельно, а сразу несите в ближайший сервис центр или магазин, где она была приобретена.
Секции 1, 2, 3, 4 мигают красным
http://support.microsoft.com/library/images/support/kbgraphics/PUBLIC/EN-US/XBOX/HW/RoL/4RoL.gif
— не найден AV кабель
Рекомендации:
- Проверьте, вставлен ли AV кабель.
- Отключите и снова подключите AV кабель.
- Проверьте контакты кабеля со стороны, подключаемой к консоли. Удалите пыль и другие загрязнения, а затем подключите кабель к консоли.
- Если 4 секции все равно мигают, то попробуйте заменить ваш AV кабель другим заранее исправным AV кабелем.
—————————————————
Секции 1 и 3 мигают красным
http://support.microsoft.com/library/images/support/kbgraphics/PUBLIC/EN-US/XBOX/HW/RoL/2RoL.gif
— перегрев
Ошибка также может быть вызвана длительным простоем консоли или неисправностью игры. Если подобную ошибку вызывает какой-то определенный момент в игре, то причина в самой игре, а не в перегреве.
Рекомендации:
- Дайте консоли остыть в течение нескольких часов.
- Проверьте, работают ли кулеры и достаточно ли вентилируется пространство вокруг консоли.
Чтобы предотвратить эту проблему в будущем, соблюдайте следующее:
- Не закрывайте вентиляционные отверстия консоли.
- Не кладите консоль на мягкие поверхности, которые могут закрыть вентиляционные отверстия (ковер, кровать и т.д.).
- Не ставьте консоль в плохо вентилируемом пространстве.
- Не располагайте консоль рядом с любыми источниками тепла.
Ни в коем случае не пытайтесь принудительно охладить консоль не предназначенными для этого средствами. Не кладите консоль в холодильник, не выносите на улицу. Подобные методы могут привести к куда большим проблемам, т.к. из-за высокой разности температур на внутренних поверхностях консоли образуется конденсат. Что в свою очередь может привести к короткому замыканию и полному выходу из строя консоли.
Еще одно решение проблемы перегрева, это улучшение штатной системы охлаждения. Это приведет к потере гарантии, так что не пытайтесь осуществлять подобные операции, если консоль все еще на гарантии.
—————————————————
Секция 4 мигает красным
http://support.microsoft.com/library/images/support/kbgraphics/PUBLIC/EN-US/XBOX/HW/RoL/1RoL.gif
-отказ системы
На экране будет показано сообщение с номером ошибки для уточнения ее причин. Если на экране ничего нет или невозможно определить код ошибки, то можно определить вторичный код ошибки (см. секцию).
—————————————————
Секции 1, 3, 4 мигают красным
http://support.microsoft.com/library/images/support/kbgraphics/PUBLIC/EN-US/XBOX/HW/RoL/3RoL.gif
-общий отказ системы
Рекомендации:
- Перезагрузите консоль.
- Если не помогло, то выключите консоль, отключите и снова подключите AV кабель и кабель питания, включите консоль.
- Если п.2 не помог, то попробуйте включить консоль без HDD. Если ошибка исчезнет, то опять подключите его.
- Так же обратите внимание на лампочку на блоке питания консоли. Во время работы консоли она должна быть зеленой, даже если консоль показывает ошибку.
Если все перечисленное не помогло, то нужно определить вторичный код ошибки для уточнения причин проблемы (см. секцию «Определение вторичного кода ошибки вида хххх»).
—————————————————
Описание ошибок вида Ехх
E45: неизвестная ошибка (возможно связано с обновлением дашборда).
E64: ошибка DVD привода… DVD привод не отвечает, неправильная/поврежденная прошивка, отсутствует чип с прошивкой и т.д.
E65: не настроен DMA режим привода. +см. Е64. Так же причиной может быть незакрытый лоток привода во время загрузки консоли.
E66: ошибка DVD привода в процессе обмена данными: модель привода, или версия не соответствует той, которую ожидает дашборд, или версия прошивки старее, чем та, которую ожидает дашборд. Убедитесь в том, что установлен привод той модели и версии, которая изначально поставлялась с консоль, и привод имеет ту же или более новую прошивку в сравнении с той, которая была установлена изначально.
E67: ошибка HDD, жесткий диск не отвечает… Проблема может быть вызвана как самим жестким диском, так и его подключением. Попробуйте отключить HDD и запустить консоль без него.
E68: ошибка питания… Консоли не достаточно мощности, чтобы полноценно функционировать. Проблема может быть вызвана неисправностью HDD или кулерами и другими аксессуарами, которые потребляют слишком большую мощность. Попробуйте отключить все аксессуары. Если к приставке подключены дополнительные кулеры и/или другие девайсы связанные с моддингом и модификацией приставки, то отключите сначала их. Так же одной из причин являются проблемы в настройке DMA режима жесткого диска.
E69: см. E67. Так же может быть вызвано ошибкой при чтении служебных секторов(безопасности) жесткого диска.
E70: не найден HDD.
E71: вероятно ошибка при обновлении дашборда, поврежден xam.xex Попробуйте использовать «коды сброса» (см. Ниже).
E72: ошибка встроенной NAND флэш-памяти, поврежден xam.xex.
E73: невозможно настроить HSIO(high speed input/output) шину EDRAM. Ошибка так же может быть вызвана неисправностью Ethernet порта, нарушением пайки или неисправностью GPU или южного моста. В редких случаях эта ошибка может вызываться неисправным видеокабелем.
E74: ошибка HSIO шины EDRAM, ошибка CRC. Так же может быть вызвана неисправностью ANA/HANA чипа, плохим контактом GPU с платой, неисправным AV выходом или AV кабелем. Самый эффективный способ лечения — реболл GPU и/или других компонентов, если необходимо.
E75: не удалось определить производителя PHY модуля или неправильный производитель ethernet.
E76: ошибка связана с чипом контроллером Ethernet(PHY). ”Мертвый ” чип может не вызывать эту ошибку, но с отпаянным чипом ошибка появляется. Причиной так же могут служить и другие проблемы, связанные с Ethernet. Еще одна причина: невозможно осуществить перезагрузку ethernet.
E77: проблемы с Ethernet: запрос PHY модуля уже обрабатывается; невозможно прочитать или записать регистр.
E78: ошибка при проверке AsicID GPU.
E79: невозможно запустить xam.xex . Ошибка может появиться после неудачного обновления дашборда. +см. 67, так же может быть вызвана повреждением файловой системы.
E80: неверное Lock Down Value(LDV) в NAND флэш-памяти. Вы обновили дашборд, но не припаяли обратно резистор R3T6. Решение:
— сделайте откат на старый дашборд, припаяйте резистор, а затем обновите дашборд;
— если у вас есть CPU ключ, то вы можете сделать образ флэш-памяти и исправить LDV(увеличьте на единицу).
E82: пока неизвестная новая ошибка Xbox 360 S. Причиной может быть не до конца вставленный или неисправный HDD (попробуйте включить консоль без него), а также неконтакт пайки XCGPU.
—————————————————
Определение вторичного кода ошибки вида хххх
Xbox 360 S
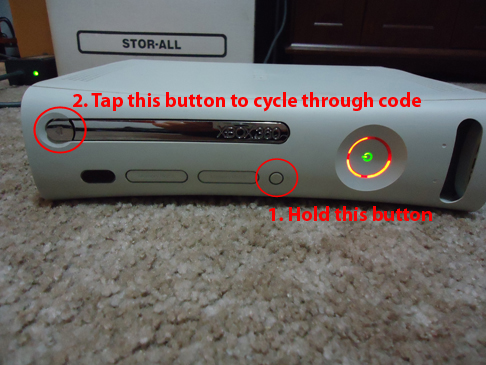
- Включите консоль и дождитесь начала свечения красного индикатора.
- Нажмите и держите кнопку ”sync up”(маленькая кнопка на лицевой панели), затем нажмите кнопку ”eject”(кнопка для извлечения лотка привода) не отпуская ”sync up”.
- Лампочки покажут первую цифру кода ошибки (подробнее внизу).
- Отпустите кнопку ”eject” и нажмите ее снова.
- Лампочки покажут вторую цифру кода ошибки.
- Отпустите кнопку ”eject” и нажмите ее снова.
- Лампочки покажут третью цифру кода ошибки.
- Отпустите кнопку ”eject” и нажмите ее снова.
- Лампочки покажут четвертую цифру кода ошибки.
- Отпустите кнопку ”eject” и нажмите ее снова.
- Лампочки погаснут, останется лишь красный индикатор.
- Вычислите код ошибки вида хххх (см. ниже).
Xbox 360
- Включите консоль и дождитесь появления мигающих 3 красных огней.
- Нажмите и держите кнопку ”sync up”(маленькая кнопка на лицевой панели), затем нажмите кнопку ”eject”(кнопка для извлечения лотка привода) не отпуская ”sync up”.
- Лампочки покажут первую цифру кода ошибки (подробнее внизу).
- Отпустите кнопку ”eject” и нажмите ее снова.
- Лампочки покажут вторую цифру кода ошибки
- Отпустите кнопку ”eject” и нажмите ее снова.
- Лампочки покажут третью цифру кода ошибки
- Отпустите кнопку ”eject” и нажмите ее снова.
- Лампочки покажут четвертую цифру кода ошибки
- Отпустите кнопку ”eject” и нажмите ее снова.
- Лампочки вернутся в исходное положение(3 красных мигающих огня).
- Вычислите код ошибки вида хххх (см. ниже).
Различить 3 мигающих огня и индикацию кода ошибки можно по частоте мигания лампочек.
Если ваша консоль при считывании ошибки не возвращается в исходное состояние(3 красных мигающих огня) и/или ошибка при повторном считывании доп кода ошибки меняется, то загляните в эту тему. Если ничего не помогло, то с большой вероятностью можно сказать, что ваша консоль неремонтопригодна. На данный момент о подобных ошибках ничего не известно, конкретных методов лечения нет.
Вычисление кода ошибки:
- Горят 4 секции – 0.
- Горит 1 секция – 1.
- Горят 2 секции – 2.
- Горят 3 секции – 3.
Вычисление Eхх (Е74 и прочие) кода ошибки:
- Горят 4 секции – 00.
- Горит 1 секция – 01.
- Горят 2 секции – 10.
- Горят 3 секции – 11.
Вторичный код ошибки представляет собой 8 битовое число, т.е. число в двоичной системе счисления. Каждая из 4 индикаций мигающих секций определяет 2 бита этого числа. Получив 8 битовое число, переведите его в десятичную систему счисления. Полученное число и будет обозначать код ошибки типа «Е». К примеру, код ошибки 1031 на самом деле выглядит как 01001101, что при переводе в десятичную систему счисления будет равняться 77, т.е. ошибка E77.
—————————————————
Описание вторичных кодов ошибок вида ХХХХ
0001 проблемы с блоком питания.
0002 проблемы с сетевым интерфейсом (может быть исправлено ослаблением крестообразных креплений); проблема с CPU.
0003 проблема с питанием. Может быть виноват блок питания или GPU/CPU. Так же проверьте целостность элементов на плате.
0010 проблемы с южным мостом или GPU. Вероятно плохой контакт с материнской платой.
0011 перегрев CPU – если вы получили эту ошибку после разборки консоли, то проверьте надежность крепления винтов радиаторов.
0012 перегрев GPU – проверьте, правильно ли установлено крестообразное крепление. Так же стоит проверить конденсаторы и при необходимости заменить.
0013 перегрев чипов памяти (RAM). Также часто вызывается нарушением пайки RAM, вследствие чего консоль ошибочно распознаёт их перегрев.
0020 неисправность GPU(см. 0102). Также ошибка может быть вызвана полным отказом GPU.
0021 может быть вызвано несколькими причинами:
- DVD привод не отвечает – может быть вызвано проблемами с прошивкой. В некоторых случаях виноват южный мост и/или соединение между ним и DVD приводом. Следует проверить конденсаторы вокруг моста, особенно около SATA разъема для привода.
- Ошибка GPU , в большинстве случаев вызвано плохим контактом с платой (см. 0102).
0022 ошибка GPU/CPU: плохой контакт с платой. Так же может быть вызвано неисправностью TSOP.
0023 пока неизвестно.
0030 проблема с температурным контролем.
0031 неправильно вставлен штекер питания DVD привода. Так же может быть вызвано замыканием между радиатором и окружающими конденсаторами.
0032 пока неизвестно.
0033 пока неизвестно .
0100 вероятно плохой контакт GPU или RAM с платой (см. 0102).
0101 нарушен контакт RAM с платой.
0102 обычно вызвано нарушенным контактом GPU/CPU/RAM с материнской платой. Так же стоит проверить конденсаторы и при необходимости заменить.
Возможные способы лечения:
- Прижим. Увеличение давления радиатора на чип, за счет чего восстанавливается контакт.
- Прогрев. Прогрев платы феном или другими средствами до полного расплавления припоя, за счет чего контакты могут восстановиться.
- Реболл. Полная перепайка чипа. Сначала чип отпаивают, все поверхности очищаются от припоя и прочих загрязнений. Далее на чип наносятся шарики припоя с помощью трафарета. Затем чип в таком виде припаивают обратно на плату. Происходит полное восстановление всех контактов. Это наиболее действенный и дорогостоящий метод ремонта.
- В редких случаях практикуется замена неисправного чипа.
0103 плохой контакт GPU с платой (см. 0102).
0110 ошибка RAM/GPU. Обычно вызвана плохим контактом RAM/GPU чипа с платой.
0111 ошибка RAM: замыкание или плохой контакт с платой. Ошибка так же может означать проблемы с GPU.
0122 перегрев XCGPU
0200 пока неизвестно.
0203 перегрев GPU, вероятно из-за высохшей/отсутствующей термопасты.
1000 ядро не может быть запущено/подпись в NAND флэш-памяти повреждена. Может произойти после неудачного обновления дашборда. Ошибка также может быть вызвана неисправным SATA кабелем DVD привода.
1001 ошибка DVD привода. DVD привод не отвечает, либо у привода неправильная прошивка.
1002 ошибка DVD привода. Вероятно ошибка в прошивке привода. При подключении к компьютеру может нормально функционировать, а на консоли вызывать ошибку. Восстановление исходной прошивки может решить проблему.
1003 ошибка HDD… Проблема может быть вызвана как самим жестким диском, так и его подключением. Попробуйте отключить HDD и запустить консоль без него.
1010 ошибка HDD. Также причиной может быть поврежденный или отсутствующий eProm (см. E68).
1011 пока неизвестно
1012 пока неизвестно
1013 пока неизвестно. Вероятно ошибка при обновлении дашборда.
1020 пока неизвестно
1021 пока неизвестно
1022 см. E74.
1023 DVD привод не подключен.
1030 см. E76.
1031 эта ошибка связана с проблемами в питании RAM чипов. Может быть вызвано замыканием между радиатором и элементами на плате, либо более серьезными проблемами с RAM.
1032 пока неизвестно
1033 точные причины пока неизвестны. Предположительно, могут быть виноваты блок питания или чипы GPU/CPU .
1100 см. E80.
—————————————————
Коды сброса
Удаление всех игровых обновлений и очистка кэша(личный профиль, сохранения и другая личная информация не удаляются):
- Зайдите в настройки системы.
- Выберете ”память” (Memory).
- Выделите Жесткий диск(Hard Drive) и нажмите Y.
- Начиная с версии 8495 дашборда(обновления за 11 августа 2009) для очистки кэша можно использовать соответствующую опцию в этом меню. Если же у Вас более старая версия:
- Нажмите X, X, LB, RB, X, X.
- Появится сообщение ”Будет произведено текущее обслуживание запоминающих устройств. Продолжить?” (This will perform maintenance on your Xbox 360 storage devices. Do you want to continue?).
- Нажмите ”Да” (Yes).
Удаление всех неудачных системных обновлений, которые вызывают ошибку:
- Нажмите и удерживайте кнопку ”sync up”(маленькая кнопка на лицевой панели) на выключенной консоли.
- Продолжая удерживать кнопку ”sync up”, включите консоль нажатием кнопки вкл/выкл консоли.
- Продолжайте удерживать кнопку ”sync up” пока консоль не загрузится до конца.
- Во время загрузки консоль должна удалить все неудачные обновления.
Сброс видео настроек:
- Выньте диск из консоли и выключите ее.
- Включите консоль с джойстика. Если у вас беспроводной джойстик, то подождите, пока консоль не определит его.
- Зажмите на джойстике Y и RT.
—————————————————
Индикация режима работы блока питания
Блок питания имеет индикатор около кабеля питания, подключаемого к консоли, который сигнализирует о текущем режиме работы.
Индикатор не горит
http://support.microsoft.com/library/images/support/kbgraphics/Public/EN-US/XBOX/Nolightilluminated.jpg
— блок питания не подключен к сети
Проверьте, подключен ли блок питания к сети. Если подключен, то
попробуйте следующее:
- Определите, есть ли выключатель, от которого зависит подача напряжения в розетку.
- Если блок питания подключен плотно, а выключателя для розетки нет, воспользуйтесь другой розеткой.
- Если розетка исправна, а консоль не включается, то, возможно, повреждены шнуры питания. Отсоедините сетевой шнур от розетки и от блока питания консоли. Проверьте, не поврежден ли сетевой шнур. Проверьте, не поврежден ли шнур постоянного тока, присоединенный к блоку питания. Если какой-либо из шнуров поврежден, не используйте его.
- Дайте блоку питания остыть в течение нескольких часов. Возможно, блок питания перегрелся. После охлаждения блок питания должен снова работать. Охлаждение до приемлемой температуры может занять несколько часов. При охлаждении блока питания обеспечьте достаточную вентиляцию. Не включайте консоль во время охлаждения.
- Если есть другой шнур питания и блок питания, проверьте консоль с их помощью. Если после этого консоль включится, то, возможно, требуется заменить блок питания.
—————————————————
Индикатор горит зеленым светом
http://support.microsoft.com/library/images/support/kbgraphics/Public/EN-US/XBOX/Greenlight.jpg
— блок питания работает в нормальном режиме
—————————————————
Индикатор горит оранжевым светом
http://support.microsoft.com/library/images/support/kbgraphics/Public/EN-US/XBOX/Orangelight.jpg
— блок питания находится в режиме ожидания
Консоль выключена, либо не подключена к блоку питания. В таком режиме работы напряжение все равно подается на консоль. Если консоль подключена к блоку питания и не включается, а индикатор продолжает гореть оранжевым, это может означать неисправность консоли.
Рекомендации:
- Отсоедините и подсоедините все шнуры и еще раз попробуйте включить консоль.
- Проверьте кабель питания, подключаемый к консоли.
- Проверьте разъем питания консоли на предмет повреждений и загрязнений.
- Если есть другой шнур питания и блок питания, проверьте консоль с их помощью. Если после этого консоль включится, то, возможно, требуется заменить блок питания.
- Если консоль все равно не включается, то скорее всего цепь питания материнской платы неисправна. Следуйте инструкциям в секции «Индикатор горит красным светом».
—————————————————
Индикатор горит красным светом
http://support.microsoft.com/library/images/support/kbgraphics/Public/EN-US/XBOX/Redlight.jpg
— блок питания обнаружил неисправность
Блок питания имеет встроенную защиту и автоматически отключается для предотвращения повреждения консоли или самого блока питания. Встроенная защита срабатывает в случае перегрузок в сети, сильного нагрева или в случае замыкания в цепи блока питания или консоли.
Рекомендации:
- Дайте блоку питания остыть.
- Отсоедините и подсоедините все шнуры и проверьте индикатор.
- Проверьте все кабели питания, розетку и разъемы.
- Если есть другой шнур питания и блок питания, проверьте консоль с их помощью. Если после этого консоль включится, то, возможно, требуется заменить блок питания.
- Если ничего не помогает, то скорее всего консоль неисправна. Если возможно, то разберите консоль и проверьте визуально(и, по возможности, с помощью спец оборудования) плату и ее элементы на предмет замыкания, повреждения, выхода из строя(пробой элемента, взбухшие конденсаторы и т.д.). Если возможно, то проблемные элементы нужно заменить на эквивалентные по характеристикам самостоятельно, либо обратиться к специалисту.
Изменено 23 июня 2011 пользователем creker
-
Home
-
Forums
-
Gaming Platforms
-
Consoles & Platform Support
-
Xbox Support and Help Questions
You are using an out of date browser. It may not display this or other websites correctly.
You should upgrade or use an alternative browser.
-
#1
Kickenwing
VIP

- Messages
- 329
- Reaction score
- 98
- Points
- 120
Description:
When you attempt to boot, a ‘you need service’ message comes up, and has a LED style number on the top left hand corner. Here is what they mean.

Disclaimer:
This information is a believed to be correct, should be as close as it gets;
Also:
Bootloader stuff you should never see, since if it fails kernel doesn’t boot. (thus you see no message)
Error Code 02
Problem: EEPROM check failed. This error is triggered by the bootloader and as a result does not display an error code on screen. You will see the Xbox rebooting and flashing red and green lights (FRAG).
Cause/Solution: You flashed something wrong or caused a short somewhere on your motherboard (possibly while soldering). If you’re using a modchip and you just flashed it, try again using a different BIOS. If you recently did some soldering to your Xbox, check for any stray solder balls that may be present and carefully remove them.
Error Code 04
Problem: RAM check failed. This error is triggered by the bootloader and as a result does not display an error code on screen. You will see the Xbox rebooting and flashing red and green lights (FRAG).
Cause/Solution: RAM chip failure. This could be from pins on the RAM chip(s) becoming bridged, possibly from an accidental splash of solder or a failed 128MB RAM upgrade. Remember, electrostatic shock can sometimes damage integrated circuit chips like RAM chips, so even if you can’t see a problem, the RAM could still be fried. Replacing the RAM chips could be a solution but is risky and time consuming.
Error Code 05
Problem: Hard disk drive (HDD) not locked.
Cause/Solution: If you have not replaced your Xbox’s BIOS via a modchip/TSOP flash, then your HDD needs to be locked using a special password that is generated based on your Xbox’s EEPROM, which is unique per each individual Xbox. Microsoft designed it this way to prevent people from being able to plug the drive into a computer and have access to its contents and thus hacking it. Virtually all non-retail BIOSes (including modchip/TSOP) will not require the hard drive to be locked in order to start. If you’re seeing this error on a non-retail BIOS, then chances are your modchip/TSOP flash process had issues and for some reason you are now using a stock BIOS which is now requiring a password-locked hard drive again. If you’re seeing this error and your Xbox has been softmodded (through gamesave/font/audio expoits), then you just need to lock your drive again. Hopefully you have your EEPROM backed up at this point because if not, things get a lot more complicated. If you unlocked your HDD on the Xbox itself (using ConfigMagic for example), chances are the app you used made a backup of your EEPROM for you and it’s now sitting on your E: drive called «eeprom.bin» or something similar. You can plug the HDD into a computer at this point and use an Xbox hard drive explorer program like «Xplorer360» (Windows only) to view its files to copy your EEPROM backup. There are multiple ways to lock a HDD, one of which is by using XboxHDM by author ldotsfan. XboxHDM runs on a PC and one of its features is the ability to lock hard drives if you have an EEPROM backup. Choose option «3» from XboxHDM and follow the on-screen instructions to lock the HDD.

Error Code 06
Problem: Incorrect hard drive password.
Cause/Solution: The hard disk drive (HDD) is locked but it is locked with a password that belongs to a different Xbox. You will need to unlock the HDD and then re-lock it using the correct password. As stated above, each Xbox is locked using a password that is generated based on each Xbox’s unique EEPROM. Assuming you have the EEPROM of your Xbox backed up, you will just need to unlock the drive and re-lock it using your EEPROM backup. See the solution for error 05 for more info.
Error Code 07
Problem: Hard drive timeout / HDD took too long to become ready.
Cause/Solution: The Xbox seems to know the HDD is present but it times-out waiting for the drive to become ready and respond to commands. This is probably due to a loose connection or faulty wire. See the solution for code 08. Note: If you’re using a SATA to IDE adapter, it’s possible that the adapter you’re using is not compatible with the drive you’re using or isn’t compatible with the Xbox at all. Try another SATA to IDE adapter / HDD combination. Some «green» drives are temperamental with certain SATA adapters.
Error Code 08
Problem: No hard drive found.
Cause/Solution: The Xbox can’t find the hard disk drive (HDD) while booting up. Try the following:
- Make sure the IDE ribbon cable (flat grey cable) is securely connected to the HDD, the DVD drive, AND the motherboard itself.
- Check the IDE cable for signs of damage. If the cable looks like it has been scraped or has evidence of any damage then replace it.
- Check the HDD’s power cable and make sure it’s securely plugged in.
- If you can wiggle the HDD power cable around and make the Xbox work at certain times, then the leads coming from the power supply are loose and the power supply should be replaced.
- Take the HDD out and make sure the jumper is set correctly. There should be a diagram printed on the drive’s label that shows how the jumper should be connected. Make sure its set to Cable Select (CS), Master, or isn’t present at all. If the drive is set to Slave then you will run into issues!
- If all other cables are in fact securely connected and not damaged, you can try replacing the IDE cable any way. It’s possible that it is damaged in a way that isn’t visible and IDE cables are cheap to come by.
- If all else fails, your hard drive is probably to blame and is faulty and needs to be replaced.
Error Code 09
Problem: Hard drive parameters are missing or incorrect.
Cause/Solution: Very uncommon error. The hard drive might be in the wrong transfer mode (PIO/DMA) or, if it’s a debug console, the size isn’t correct (minimum size is required for debug). Replace the hard drive.
Error Code 10
Problem: DVD drive timeout.
Cause/Solution: Similar to error codes 07 and 08, this is usually caused by a loose/faulty cable. The Xbox seems to know the DVD drive is present but it times-out waiting for the drive to become ready and respond to commands. Check the yellow DVD cable running from the motherboard to the DVD drive. If all else fails, replace the DVD drive.
Error Code 11
Problem: No DVD drive found.
Cause/Solution: The Xbox cannot find the DVD drive. Similar to error 10, this is usually from a loose/faulty cable. See solutions for error 10. Note: many non-retail BIOSes can configured to skip using a DVD drive entirely.
Error Code 12
Problem: DVD drive parameters are missing or incorrect.
Cause/Solution: Not very common. Try solutions for error 10.
Error Code 13
Problem: Dashboard failed to launch due to missing/bad key, or anything else that would prevent it from running and the dashboard didn’t specify why it failed.
Cause/Solution: This can be caused by a kernel version issue but is a lot less common in recent years. Make sure you’re running the latest kernel. If you’re using a softmod, make sure your dashboard and softmod files are installed correctly. You might have luck using SID5 as your softmod installer if you’re using something else currently.
Error Code 14
Problem: Dashboard failed to launch (generic error).
Cause/Solution: Same as error 12 basically. This can also result from changing names of files or messing with files on the HDD without knowing the repercussions. A common cause is from changing the boot orders or names of startup files on the HDD. It can also happen when you are rebuilding your HDD with a Slayer CD and the power was cut.
Error Code 16
Problem: Internal clock cannot be set.
Cause/Solution: This happens when the Xbox tries to boot to the stock dashboard in order to have you set the current date/time but fails to load the menu. This happens people that erase their HDD or stock dashboard files and afterwards don’t immediately install the HDD but instead leave the Xbox without power for longer than 5 hours. The Xbox has capacitors in it that allow it to keep its clock set but it only has enough charge for about 3-5 hours before the clock clears and it asks you to set it again. This used to be a more common problem before people figured out how to get around it in later years. Virtually all modern (made after 2005) softmods and non-retail BIOSes will account for the clock reset problem. To fix this, try putting the stock dashboard back on your HDD’s C: partition. After the Xbox boots up and is able to set the clock successfully, then you can continue on. If you DON’T have an eeprom backup and can’t access the hard drive from a PC to put the stock dashboard back on it, then you can do a hotswap to gain access to the drive and continue with copying the stock dashboard over. Once you fix the issue, update your BIOS or softmod to a more recent version to avoid this in the future.
Error Code 20
Problem: Dashboard failed to launch.
Cause/Solution: It was a cold boot, and the dashboard didn’t specify why it failed, but it needed to be noted that the DVD passed the challenge/response authentication during boot.
Error Code 21
Problem: Unspecific/generic error.
Cause/Solution: The Xbox was instructed (possibly by an XBE you launched) to reboot the Xbox and display this error. This occurs frequently when the Xbox is unable to boot due to dashboard changes being made (i.e. an XBE hasn’t been signed correctly OR parts of the stock dashboard (C:) are missing. Also, if you’re using XbeShortcutMaker and seeing this error code then you might try regenerating the shortcut XBE file as it could be corrupted.
Credit: OCnewB [Xbox-Scene forums] & Superfro [Xbox-Scene forums] for compiling the list. deezp1 [Afterdawn forums] for more compiling and organization. GoTeamScotch [xbmc4xbox forums] for clean-up.
Last edited by a moderator: Oct 21, 2018
-
#2
-
#3
Siege Soldier
Enthusiast

- Messages
- 255
- Reaction score
- 17
- Points
- 80
Xbox Error Lights
you can find the fixes almost anywhere and most are pretty self explainitory
-
#4
IOM Terminus
Newbie

- Messages
- 55
- Reaction score
- 0
- Points
- 45
Like where… Im looking for how to fix Error … 06 call customer support??/
[email protected]
-
#5
racerdude404
Newbie
- Messages
- 7
- Reaction score
- 0
- Points
- 35
u just cannot unlock your hd, it needs to be replace, get a chip…
-
#6
IOM Terminus
Newbie
- Messages
- 55
- Reaction score
- 0
- Points
- 45
Dude i totally almost just ****ed my xbox to hell… But i got it fixed so … yeah woo that was close … Darn now i have a totally unmodded box ): boo
-
#7
digitalhigh
VIP

- Messages
- 852
- Reaction score
- 166
- Points
- 235
STUCK…IDK why this wasn’t done sooner. This answers a lot of questions for people.
-
#8
Tecno Monkey
Enthusiast
- Messages
- 59
- Reaction score
- 0
- Points
- 60
-
#9
LGC
Banned

- Messages
- 3,305
- Reaction score
- 317
- Points
- 335
is your xbox softmodded? error 6 is easy to fix actually the majority of errors are easy to fix but if you make a mistake in trying to fix them you will have a 10GB paper weight. What i would suggest is get a chip because there is always a backup on your chip and things are alot easier to fix that way.
ChopShop offers the Xecuter 3 for a really good deal so go there and check it out.
-
#10
Tecno Monkey
Enthusiast
- Messages
- 59
- Reaction score
- 0
- Points
- 60
-
#11
LGC
Banned
- Messages
- 3,305
- Reaction score
- 317
- Points
- 335
-
#12
TomAss
Premium

- Messages
- 632
- Reaction score
- 16
- Points
- 130
How do you fix these codes? I just got a 13. I don’t know why. Everything highlighted on my ftp and froze. i couldn’t do anything. i rebooted and got the 13
yeah i think i accidentally tried to pull all of my files on my xbox off and send them to the comp. like a reversed ftp. the arrows are all pointing down on the qued hist. i can’t reconnect to it. can i fix it? put the xbox back to stock if i have to. what the heck happened? want a print screen anyone?
okay, i put the cd in that was used to mod my xbox (splinter cell) and got it to load over the error screen (hint for others) I started the game loading the checkpoints and got a dash to load. Now all of my dashboards have diff ip addresses for ftp’ing I had to go into unleash X cause that is what I got ftp to work on before. I put in the IP addy that it had and i could ftp again. Now.. (takes a breath) My problem to what I screwed up to get code 13..I accidentally went into C/sid/files and apparently tried to zip all the files in there. ex c,e,evox,f,g,unleash all turned into .zip Now, how do I bring them to the computer and unzip them to remove the code 13? Anyone? please? If not, i’m sure I can dig around further like I have been, reading all of you old posts( You are some smart people ) and figure it out. Let me know and I will do the same.
nope, well i didn’t zip the files. they say zip but the file still opens. I still have the code 13. I can load my xbox using splinter cell to get into my dash. I don’t know what happened but it wont load without it. I don’t know what i have to delete and reload. I am looking everywhere and will wait to hear from someone. Someone please be patient and help me. I have the ftp working again. I can work with what you need to know.
-
#13
-
#14
ForrrestMaster
Guest
I have a softmodded xbox with error 16. Any Ideas on how to fix it?
-
#15
Mayhem51
Premium
- Messages
- 1,166
- Reaction score
- 58
- Points
- 170
follow the same tut that Pan5y provided
-
#16
ForrrestMaster
Guest
That is for a hardmodded xbox
-
#17
Mayhem51
Premium
- Messages
- 1,166
- Reaction score
- 58
- Points
- 170
no its for any knid of xbox soft, hard, or normal
-
#18
ForrrestMaster
Guest
Ive looked everywhere can you give me a link?
-
#19
Mayhem51
Premium
- Messages
- 1,166
- Reaction score
- 58
- Points
- 170
-
#20
ForrrestMaster
Guest
no for the fixing error 16 you said pan5y did it without a chip
Similar threads
-
Home
-
Forums
-
Gaming Platforms
-
Consoles & Platform Support
-
Xbox Support and Help Questions
В зависимости от типа ошибки консоль будет выдавать различные сигналы. По этим сигналам и определяется причина неполадки.
Если причину неполадки невозможно устранить без вскрытия консоли — воспользуйтесь услугами гарантийного сервисного центра.
При отсуствии гарантии доверьте ремонт компетентным людям.
Все самостоятельные попытки устранить исправность вы делаете только на свой страх и риск.
Секции 1, 2, 3, 4 мигают красным

не найден AV кабель
Рекомендации:
- Проверьте, вставлен ли AV кабель.
- Отключите и снова подключите AV кабель.
- Проверьте контакты кабеля со стороны, подключаемой к консоли. Удалите пыль и другие загрязнения, а затем подключите кабель к консоли.
- Если 4 секции все равно мигают, то попробуйте заменить ваш AV кабель другим заранее исправным AV кабелем.
Секции 1 и 3 мигают красным

перегрев
Ошибка также может быть вызвана длительным простоем консоли или неисправностью игры.
Если подобную ошибку вызывает какой-то определенный момент в игре, то причина в самой игре, а не в перегреве.
Рекомендации:
- Дайте консоли остыть в течение нескольких часов.
- Проверьте, работают ли кулеры и достаточно ли вентилируется пространство вокруг консоли.
Чтобы предотвратить эту проблему в будущем, соблюдайте следующее:
- Не закрывайте вентиляционные отверстия консоли.
- Не кладите консоль на мягкие поверхности, которые могут закрыть вентиляционные отверстия (ковер, кровать и т.д.).
- Не ставьте консоль в плохо вентилируемом пространстве.
- Не располагайте консоль рядом с любыми источниками тепла.
Ни в коем случае не пытайтесь принудительно охладить консоль не предназначенными для этого средствами. Не кладите консоль в холодильник, не выносите на улицу. Подобные методы могут привести к куда большим проблемам, т.к. из-за высокой разности температур на внутренних поверхностях консоли образуется конденсат. Что в свою очередь может привести к короткому замыканию и полному выходу из строя консоли.
Еще одно решение проблемы перегрева, это улучшение штатной системы охлаждения. Это приведет к потере гарантии, так что не пытайтесь осуществлять подобные операции, если консоль все еще на гарантии.
Секция 4 мигает красным
отказ системы
На экране будет показано сообщение с номером ошибки для уточнения ее причин. Если на экране ничего нет или невозможно определить код ошибки, то можно определить дополнительный код ошибки (см. ниже).
E45: неизвестная ошибка (возможно связано с обновлением дашборда).
E64: ошибка DVD привода… DVD привод не отвечает, неправильная/поврежденная прошивка, отсутствует чип с прошивкой и т.д.
E65: не настроен DMA режим привода. +см. Е64. Так же причиной может быть незакрытый лоток привода во время загрузки консоли.
E66: ошибка DVD привода в процессе обмена данными: модель привода, или версия не соответствует той, которую ожидает дашборд, или версия прошивки старее, чем та, которую ожидает дашборд. Убедитесь в том, что установлен привод той модели и версии, которая изначально поставлялась с консоль, и привод имеет ту же или более новую прошивку в сравнении с той, которая была установлена изначально.
E67: ошибка HDD, жесткий диск не отвечает… Проблема может быть вызвана как самим жестким диском, так и его подключением. Попробуйте отключить HDD и запустить консоль без него.
E68: ошибка питания… Консоли не достаточно мощности, чтобы полноценно функционировать. Проблема может быть вызвана неисправностью HDD или кулерами и другими аксессуарами, которые потребляют слишком большую мощность. Попробуйте отключить все аксессуары. Если к приставке подключены дополнительные кулеры и/или другие девайсы связанные с моддингом и модификацией приставки, то отключите сначала их. Так же одной из причин являются проблемы в настройке DMA режима жесткого диска.
E69: см. E67. Так же может быть вызвано ошибкой при чтении служебных секторов(безопасности) жесткого диска.
E70: не найден HDD.
E71: вероятно ошибка при обновлении дашборда, поврежден xam.xex Попробуйте использовать «коды сброса» (см. Ниже).
E72: ошибка встроенной NAND флэш-памяти, поврежден xam.xex.
E73: невозможно настроить HSIO(high speed input/output) шину EDRAM. Ошибка так же может быть вызвана неисправностью Ethernet порта.
E74: ошибка HSIO шины EDRAM, ошибка CRC. Так же может быть вызвана неисправностью ANA/HANA чипа, плохим контактом GPU с платой, неисправным AV выходом или AV кабелем. Возможным решением является замена/перепайка/реболл/прижим ANA/HANA чипа, замена/перепайка/реболл/прижим GPU.
E75: не удалось определить производителя PHY модуля или неправильный производитель ethernet.
E76: ошибка связана с чипом контроллером Ethernet. ”Мертвый ” чип может не вызывать эту ошибку, но с отпаянным чипом ошибка появляется. Причиной так же могут служить и другие проблемы, связанные с Ethernet. Еще одна причина: невозможно осуществить перезагрузку ethernet.
E77: проблемы с Ethernet: запрос PHY модуля уже обрабатывается; невозможно прочитать или записать регистр.
E78: ошибка при проверке AsicID GPU.
E79: невозможно запустить xam.xex . Ошибка может появиться после неудачного обновления дашборда. +см. 67, так же может быть вызвана повреждением файловой системы.
E80: неверное Lock Down Value(LDV) в NAND флэш-памяти. Вы обновили дашборд, но не припаяли обратно резистор R3T6. Решение:
- сделайте откат на старый дашборд, припаяйте резистор, а затем обновите дашборд;
- если у вас есть CPU ключ, то вы можете сделать образ флэш-памяти и исправить LDV(увеличьте на единицу).
Секции 1, 3, 4 мигают красным
общий отказ системы
Рекомендации:
- Перезагрузите консоль.
- Если не помогло, то выключите консоль, отключите и снова подключите AV кабель и кабель питания, включите консоль.
- Если п.2 не помог, то попробуйте включить консоль без HDD. Если ошибка исчезнет, то опять подключите его.
- Так же обратите внимание на лампочку на блоке питания консоли. Во время работы консоли она должна быть зеленой, даже если консоль показывает ошибку.
Если все перечисленное не помогло, то нужно определить дополнительный ”скрытый” код ошибки для уточнения причин проблемы:

- Включите консоль и дождитесь появления мигающих 3 красных огней.
- Нажмите и держите кнопку ”sync up”(маленькая кнопка на лицевой панели), затем нажмите кнопку ”eject”(кнопка для извлечения лотка привода) не отпуская ”sync up”.
- Лампочки покажут первую цифру кода ошибки (подробнее внизу).
- Отпустите кнопку ”eject” и нажмите ее снова.
- Лампочки покажут вторую цифру кода ошибки
- Отпустите кнопку ”eject” и нажмите ее снова.
- Лампочки покажут третью цифру кода ошибки
- Отпустите кнопку ”eject” и нажмите ее снова.
- Лампочки покажут четвертую цифру кода ошибки
- Отпустите кнопку ”eject” и нажмите ее снова.
- Лампочки вернутся в исходное положение(3 красных мигающих огня).
Различить 3 мигающих огня и индикацию кода ошибки можно по частоте мигания лампочек.
Если ваша консоль при считывании ошибки не возвращается в исходное состояние(3 красных мигающих огня) и/или ошибка при повторном считывании доп кода ошибки меняется, то загляните в эту тему. Если ничего не помогло, то с большой вероятностью можно сказать, что ваша консоль неремонтопригодна. На данный момент о подобных ошибках ничего не известно, конкретных методов лечения нет.
Определение кода ошибки:
- Горят 4 секции – 0.
- Горит 1 секция – 1.
- Горят 2 секции – 2.
- Горят 3 секции – 3.
Определение E[XX](Е74 и прочие) кода ошибки:
- Горят 4 секции – 00.
- Горит 1 секция – 01.
- Горят 2 секции – 10.
- Горят 3 секции – 11.
Вторичный код ошибки представляет собой 8 битовое число, т.е. число в двоичной системе счисления. Каждая из 4 индикаций мигающих секций определяет 2 бита этого числа. Получив 8 битовое число, переведите его в десятичную систему счисления. Полученное число и будет обозначать код ошибки типа «Е». К примеру, код ошибки 1031 в привычной форме на самом деле выглядит как 01001101, что при переводе в десятичную систему счисления будет равняться 77, т.е. ошибка E77.
0001 проблемы с блоком питания.
0002 проблемы с сетевым интерфейсом (может быть исправлено ослаблением крестообразных креплений).
0003 проблема с питанием. Может быть виноват блок питания или GPU/CPU. Так же проверьте целостность элементов на плате.
0010 проблемы с южным мостом или GPU. Вероятно плохой контакт с материнской платой.
0011 перегрев CPU – если вы получили эту ошибку после разборки консоли, то проверьте надежность крепления винтов радиаторов.
0012 перегрев GPU – проверьте, правильно ли установлено крестообразное крепление. Так же стоит проверить конденсаторы и при необходимости заменить.
0013 перегрев чипов памяти (RAM).
0020 неисправность GPU(см. 0102). Также ошибка может быть вызвана полным отказом GPU.
0021 может быть вызвано несколькими причинами:
- DVD привод не отвечает – может быть вызвано проблемами с прошивкой. В некоторых случаях виноват южный мост и/или соединение между ним и DVD приводом. Следует проверить конденсаторы вокруг моста, особенно около SATA разъема для привода.
- Ошибка GPU , в большинстве случаев вызвано плохим контактом с платой (см. 0102).
0022 ошибка CPU, в большинстве случаев вызвано плохим контактом с платой. Так же может быть вызвано неисправностью TSOP.
0023 пока неизвестно.
0030 проблема с температурным контролем.
0031 неправильно вставлен штекер питания DVD привода. Так же может быть вызвано замыканием между радиатором и окружающими конденсаторами.
0032 пока неизвестно.
0033 пока неизвестно .
0100 вероятно плохой контакт GPU или RAM с платой (см. 0102).
0101 нарушен контакт RAM с платой.
0102 обычно вызвано нарушенным контактом GPU/CPU/RAM с материнской платой. Так же стоит проверить конденсаторы и при необходимости заменить.
Возможные способы лечения:
- Прижим. Увеличение давления радиатора на чип, за счет чего восстанавливается контакт.
- Прогрев. Прогрев платы феном или другими средствами до полного расплавления припоя, за счет чего контакты могут восстановиться.
- Реболл. Полная перепайка чипа. Сначала чип отпаивают, все поверхности очищаются от припоя и прочих загрязнений. Далее на чип наносятся шарики припоя с помощью трафарета. Затем чип в таком виде припаивают обратно на плату. Происходит полное восстановление всех контактов. Это наиболее действенный и дорогостоящий метод ремонта.
- В редких случаях практикуется полная замена неисправного чипа на новый.
0103 плохой контакт GPU с платой (см. 0102).
0110 ошибка RAM/GPU. Обычно вызвана плохим контактом RAM/GPU чипа с платой.
0200 пока неизвестно.
0203 перегрев GPU, вероятно из-за высохшей/отсутствующей термопасты.
1000 ядро не может быть запущено/подпись в NAND флэш-памяти повреждена. Может произойти после неудачного обновления дашборда. Ошибка также может быть вызвана неисправным SATA кабелем DVD привода.
1001 ошибка DVD привода. DVD привод не отвечает, либо у привода неправильная прошивка.
1002 ошибка DVD привода. Вероятно ошибка в прошивке привода. При подключении к компьютеру может нормально функционировать, а на консоли вызывать ошибку. Восстановление исходной прошивки может решить проблему.
1003 ошибка HDD… Проблема может быть вызвана как самим жестким диском, так и его подключением. Попробуйте отключить HDD и запустить консоль без него.
1010 ошибка HDD. Также причиной может быть поврежденный или отсутствующий eProm (см. E68).
1011 пока неизвестно
1012 пока неизвестно
1013 пока неизвестно. Вероятно ошибка при обновлении дашборда.
1020 пока неизвестно
1021 пока неизвестно
1022 см. E74.
1023 DVD привод не подключен.
1030 см. E76.
1031 эта ошибка связана с проблемами в питании RAM чипов. Может быть вызвано замыканием между радиатором и элементами на плате, либо более серьезными проблемами с RAM.
1032 пока неизвестно
1033 точные причины пока неизвестны. Предположительно, могут быть виноваты блок питания или чипы GPU/CPU .
1100 см. E80.
Коды сброса
Удаление всех игровых обновлений и очистка кэша(личный профиль, сохранения и другая личная информация не удаляются):
- Зайдите в настройки системы.
- Выберете ”память” (Memory).
- Выделите Жесткий диск(Hard Drive) и нажмите Y.
- Начиная с версии 8495 дашборда(обновления за 11 августа 2009) для очистки кэша можно использовать соответствующую опцию в этом меню. Если же у Вас более старая версия:
- Нажмите X, X, LB, RB, X, X.
- Появится сообщение ”Будет произведено текущее обслуживание запоминающих устройств. Продолжить?” (This will perform maintenance on your Xbox 360 storage devices. Do you want to continue?).
- Нажмите ”Да” (Yes).
Удаление всех неудачных системных обновлений, которые вызывают ошибку:
- Нажмите и удерживайте кнопку ”sync up”(маленькая кнопка на лицевой панели) на выключенной консоли.
- Продолжая удерживать кнопку ”sync up”, включите консоль нажатием кнопки вкл/выкл консоли.
- Продолжайте удерживать кнопку ”sync up” пока консоль не загрузится до конца.
- Во время загрузки консоль должна удалить все неудачные обновления.
Сброс видео настроек:
- Выньте диск из консоли и выключите ее.
- Включите консоль с джойстика. Если у вас беспроводной джойстик, то подождите, пока консоль не определит его.
- Зажмите на джойстике Y и RT.
Индикация режима работы блока питания
Блок питания имеет индикатор около кабеля питания, подключаемого к консоли, который сигнализирует о текущем режиме работы.
Индикатор не горит

блок питания не подключен к сети
Проверьте, подключен ли блок питания к сети. Если подключен, то попробуйте следующее:
- Определите, есть ли выключатель, от которого зависит подача напряжения в розетку.
- Если блок питания подключен плотно, а выключателя для розетки нет, воспользуйтесь другой розеткой.
- Если розетка исправна, а консоль не включается, то, возможно, повреждены шнуры питания. Отсоедините сетевой шнур от розетки и от блока питания консоли. Проверьте, не поврежден ли сетевой шнур. Проверьте, не поврежден ли шнур постоянного тока, присоединенный к блоку питания. Если какой-либо из шнуров поврежден, не используйте его.
- Дайте блоку питания остыть в течение нескольких часов. Возможно, блок питания перегрелся. После охлаждения блок питания должен снова работать. Охлаждение до приемлемой температуры может занять несколько часов. При охлаждении блока питания обеспечьте достаточную вентиляцию. Не включайте консоль во время охлаждения.
- Если есть другой шнур питания и блок питания, проверьте консоль с их помощью. Если после этого консоль включится, то, возможно, требуется заменить блок питания.
Индикатор горит зеленым светом

блок питания работает в нормальном режиме
Индикатор горит оранжевым светом

блок питания находится в режиме ожидания
Консоль выключена, либо не подключена к блоку питания. В таком режиме работы напряжение все равно подается на консоль.
Если консоль подключена к блоку питания и не включается, а индикатор продолжает гореть оранжевым, это может означать неисправность консоли.
Рекомендации:
- Отсоедините и подсоедините все шнуры и еще раз попробуйте включить консоль.
- Проверьте кабель питания, подключаемый к консоли.
- Проверьте разъем питания консоли на предмет повреждений и загрязнений.
- Если есть другой шнур питания и блок питания, проверьте консоль с их помощью. Если после этого консоль включится, то, возможно, требуется заменить блок питания.
- Если консоль все равно не включается, то скорее всего цепь питания материнской платы неисправна. Следуйте инструкциям в секции «Индикатор горит красным светом».
Индикатор горит красным светом

блок питания обнаружил неисправность
Блок питания имеет встроенную защиту и автоматически отключается для предотвращения повреждения консоли или самого блока питания.
Встроенная защита срабатывает в случае перегрузок в сети, сильного нагрева или в случае замыкания в цепи блока питания или консоли.
Рекомендации:
- Дайте блоку питания остыть.
- Отсоедините и подсоедините все шнуры и проверьте индикатор.
- Проверьте все кабели питания, розетку и разъемы.
- Если есть другой шнур питания и блок питания, проверьте консоль с их помощью. Если после этого консоль включится, то, возможно, требуется заменить блок питания.
- Если ничего не помогает, то скорее всего консоль неисправна. Если возможно, то разберите консоль и проверьте визуально(и, по возможности, с помощью спец оборудования) плату и ее элементы на предмет замыкания, повреждения, выхода из строя(пробой элемента, взбухшие конденсаторы и т.д.). Если возможно, то проблемные элементы нужно заменить на эквивалентные по характеристикам самостоятельно, либо обратиться к специалисту.
Если с консолью какие-то проблемы, то на передней панели вместо привычных зеленых огней будут мигать красные. Расположение мигающих огней может быть различно и поясняет возможные причины неполадок. Если ваша консоль на гарантии, то не пытайтесь ремонтировать ее самостоятельно, а сразу несите в ближайший сервис центр или магазин, где она была приобретена.Существуют специальные коды ошибок, узнать которые можно следуя следующем алгоритму:
1. Включите консоль, и дождитесь моргания трёх огней на кольце.
2. Нажмите и удерживайте кнопку синхронизацияя на передней панели консоли, после чего нажмите кнопку вытаскивания диска из привода.
3. Кольцо зажгёт первый номер кода ошибки. Запомните. (описаны ниже)
4. Нажмите снова кнопку привода. После его закратия нажмите её вновь.
5. Кольцо зажгёт второй номер кода ошибки. Запомните.
6. Нажмите снова кнопку привода. После его закратия нажмите её вновь.
7. Кольцо зажгёт третий номер кода ошибки. Запомните.
8. Нажмите снова кнопку привода. После его закратия нажмите её вновь.
9. Кольцо зажгёт четвёртый номер кода ошибки. Запомните.
10. Нажмите снова кнопку привода. После его закратия нажмите её вновь.
11. Кольцо вернётся в исходное состояние, загорятся 3 огня.
Определение кода ошибки: Все 4 огня светились — 0
1 огонь светился — 1
2 огня светилось — 2
3 огня светились — 3
Секции 1, 2, 3, 4 мигают красным(все)[]
— AV кабель не определяется, не найден, не распознаётся. (The AV cable cannot be detected)
Рекомендации:
Проверьте, вставлен ли AV кабель.
Отключите и снова подключите AV кабель.
Проверьте контакты кабеля со стороны, подключаемой к консоли. Удалите пыль и другие загрязнения, а затем подключите кабель к консоли.
Если 4 секции все равно мигают, то попробуйте заменить ваш AV кабель другим заранее исправным AV кабелем.
Секции 1 и 3 мигают красным[]
— Перегрев (Overheating)
Ошибка также может быть вызвана длительным простоем консоли или неисправностью игры. Если подобную ошибку вызывает какой-то определенный момент в игре, то причина в самой игре, а не в перегреве.
Рекомендации:
Дайте консоли остыть в течение нескольких часов.
Проверьте, работают ли кулеры и достаточно ли вентилируется пространство вокруг консоли.
Чтобы предотвратить эту проблему в будущем, соблюдайте следующее:
Не закрывайте вентиляционные отверстия консоли.
Не кладите консоль на мягкие поверхности, которые могут закрыть вентиляционные отверстия (ковер, кровать и т.д.).
Не ставьте консоль в плохо вентилируемом пространстве.
Не располагайте консоль рядом с любыми источниками тепла.
Ни в коем случае не пытайтесь принудительно охладить консоль не предназначенными для этого средствами. Не кладите консоль в холодильник, не выносите на улицу. Подобные методы могут привести к куда большим проблемам, т.к. из-за высокой разности температур на внутренних поверхностях консоли образуется конденсат. Что в свою очередь может привести к короткому замыканию и полному выходу из строя консоли.
Еще одно решение проблемы перегрева, это улучшение штатной системы охлаждения. Это приведет к потере гарантии, так что не пытайтесь осуществлять подобные операции, если консоль все еще на гарантии.
Секция 4 мигает красным[]

-Отказ системы
На экране будет показано сообщение с номером ошибки для уточнения ее причин. Если на экране ничего нет или невозможно определить код ошибки, то можно определить дополнительный код ошибки (см. ниже).В таких случаях на вашем дисплее/экране отображется код ошибки, тем самым указывая какое именно оборудование отказало:
E45 — пока неизвестно (возможно в результате обновления Dashboard)
E64 — DVD Drive Error (Таймаут DVD привода, неправильная прошивка привода)
E65 — DVD Drive Error (Таймаут DVD привода, неправильная прошивка привода, либо также может быть вызвано не плотным закрыванием лотка при включении консоли)
E66 — DVD Drive Error (Модель DVD привода не совпадает, либо не совместима с версией Dashboard, либо версия прошивка более поздняя чем ожидается в Dashboard-е. Обычно проблема возникает при перепрошивке привода)
E67 — Hard Drive Error (Проблема вызвана либо с работоспособностью внутри самого винчестера, либо не плотным его закрытием. Отключите его и вновь включите при выключенной консоли)
E68 — Voltage Error (Недостаточно напряжения для работы консоли, обычно возникает в результате подключения дополнительный устройств к консоли таких как дополнительные вентиляторы и других USB устройств. Попробуйте отключить всё лишнее)
E69»— Hard Drive Error (Проблема вызвана либо с работоспособностью внутри самого винчестера, либо не плотным его закрытием. Отключите его и вновь включите при выключенной консоли)
E71 — (ошибка в работе Dashboard, попробуйте провести Очистку кэша Xbox 360 )
E72 — ошибка с NAND носителем
E73 — General Hardware Error (ошибка вызвана сработойпорта Ethernet)
E74 — Ошибка вызвана при работе с процессором, либо также AV кабеля, в некоторых случаях видеокарты. На данный момент решение её не известно. В последнее во многих источниках делают ссылки на её возникновение после обновление до NXE)
E76 — Ошибка вызвана в результате работы с Ethernet портом, сгорание процессора в порте не является этой причиной, но его удаление вполне возможно.
E79 — Hard Drive Error (Проблема вызвана либо с работоспособностью внутри самого винчестера, либо не плотным его закрытием. Отключите его и вновь включите при выключенной консоли. Также причиной может являться не старт xam.xex, т.е. нарушения файловой системы винчестера)
E80 — Не верная версия LDV в NAND носителе. (Вызвано обновлением Dashboard)
Секции 1, 3, 4 мигают красным[]
-Общий отказ системы
Рекомендации:
Перезагрузите консоль.
Если не помогло, то выключите консоль, отключите и снова подключите AV кабель и кабель питания, включите консоль.
Если п.2 не помог, то попробуйте включить консоль без HDD. Если ошибка исчезнет, то опять подключите его.
Так же обратите внимание на лампочку на блоке питания консоли. Во время работы консоли она должна быть зеленой, даже если консоль показывает ошибку.
Если все перечисленное не помогло, то нужно определить дополнительный ”скрытый” код ошибки для уточнения причин проблемы:
Включите консоль и дождитесь появления мигающих 3 красных огней.
Нажмите и держите кнопку ”sync up”(маленькая кнопка на лицевой панели), затем нажмите кнопку ”eject”(кнопка для извлечения лотка привода) не отпуская ”sync up”.
Лампочки покажут первую цифру кода ошибки (подробнее внизу).
Отпустите кнопку ”eject” и нажмите ее снова.
Лампочки покажут вторую цифру кода ошибки
Отпустите кнопку ”eject” и нажмите ее снова.
Лампочки покажут третью цифру кода ошибки
Отпустите кнопку ”eject” и нажмите ее снова.
Лампочки покажут четвертую цифру кода ошибки
Отпустите кнопку ”eject” и нажмите ее снова.
Лампочки вернутся в исходное положение(3 красных мигающих огня).
0001 проблемы с блоком питания.
0002 проблемы с сетевым интерфейсом (может быть исправлено ослаблением крестообразных креплений); проблема с CPU.
0003 проблема с питанием. Может быть виноват блок питания или GPU/CPU. Так же проверьте целостность элементов на плате.
0010 проблемы с южным мостом или GPU. Вероятно плохой контакт с материнской платой.
0011 перегрев CPU – если вы получили эту ошибку после разборки консоли, то проверьте надежность крепления винтов радиаторов.
0012 перегрев GPU – проверьте, правильно ли установлено крестообразное крепление. Так же стоит проверить конденсаторы и при необходимости заменить.
0013 перегрев чипов памяти (RAM).
0020 неисправность GPU(см. 0102). Также ошибка может быть вызвана полным отказом GPU.
0021 может быть вызвано несколькими причинами:
DVD привод не отвечает – может быть вызвано проблемами с прошивкой. В некоторых случаях виноват южный мост и/или соединение между ним и DVD приводом. Следует проверить конденсаторы вокруг моста, особенно около SATA разъема для привода.
Ошибка GPU , в большинстве случаев вызвано плохим контактом с платой (см. 0102).
0022 ошибка GPU/CPU: плохой контакт с платой. Так же может быть вызвано неисправностью TSOP.
0023 пока неизвестно.
0030 проблема с температурным контролем.
0031 неправильно вставлен штекер питания DVD привода. Так же может быть вызвано замыканием между радиатором и окружающими конденсаторами.
0032 пока неизвестно.
0033 пока неизвестно .
0100 вероятно плохой контакт GPU или RAM с платой (см. 0102).
0101 нарушен контакт RAM с платой.
0102 обычно вызвано нарушенным контактом GPU/CPU/RAM с материнской платой. Так же стоит проверить конденсаторы и при необходимости заменить.
Возможные способы лечения:
Прижим. Увеличение давления радиатора на чип, за счет чего восстанавливается контакт.
Прогрев. Прогрев платы феном или другими средствами до полного расплавления припоя, за счет чего контакты могут восстановиться.
Реболл. Полная перепайка чипа. Сначала чип отпаивают, все поверхности очищаются от припоя и прочих загрязнений. Далее на чип наносятся шарики припоя с помощью трафарета. Затем чип в таком виде припаивают обратно на плату. Происходит полное восстановление всех контактов. Это наиболее действенный и дорогостоящий метод ремонта.
В редких случаях практикуется полная замена неисправного чипа на новый.
0103 плохой контакт GPU с платой (см. 0102).
0110 ошибка RAM/GPU. Обычно вызвана плохим контактом RAM/GPU чипа с платой.
0111 ошибка RAM: замыкание или плохой контакт с платой. Ошибка так же может означать проблемы с GPU.
0200 пока неизвестно.
0203 перегрев GPU, вероятно из-за высохшей/отсутствующей термопасты.
1000 ядро не может быть запущено/подпись в NAND флэш-памяти повреждена. Может произойти после неудачного обновления дашборда. Ошибка также может быть вызвана неисправным SATA кабелем DVD привода.
1001 ошибка DVD привода. DVD привод не отвечает, либо у привода неправильная прошивка.
1002 ошибка DVD привода. Вероятно ошибка в прошивке привода. При подключении к компьютеру может нормально функционировать, а на консоли вызывать ошибку. Восстановление исходной прошивки может решить проблему.
1003 ошибка HDD… Проблема может быть вызвана как самим жестким диском, так и его подключением. Попробуйте отключить HDD и запустить консоль без него.
1010 ошибка HDD. Также причиной может быть поврежденный или отсутствующий eProm (см. E68).
1013 пока неизвестно. Вероятно ошибка при обновлении дашборда.
1022 см. E74.
1023 DVD привод не подключен.
1030 см. E76.
1031 эта ошибка связана с проблемами в питании RAM чипов. Может быть вызвано замыканием между радиатором и элементами на плате, либо более серьезными проблемами с RAM.
1033 точные причины пока неизвестны. Предположительно, могут быть виноваты блок питания или чипы GPU/CPU .
1100 см. E80.
Коды сброса[]
Удаление всех игровых обновлений и очистка кэша(личный профиль, сохранения и другая личная информация не удаляются):
Зайдите в настройки системы.
Выберете ”память” (Memory).
Выделите Жесткий диск(Hard Drive) и нажмите Y.
Начиная с версии 8495 дашборда(обновления за 11 августа 2009) для очистки кэша можно использовать соответствующую опцию в этом меню. Если же у Вас более старая версия:
Нажмите X, X, LB, RB, X, X.
Появится сообщение ”Будет произведено текущее обслуживание запоминающих устройств. Продолжить?” (This will perform maintenance on your Xbox 360 storage devices. Do you want to continue?).
Нажмите ”Да” (Yes).
Удаление всех неудачных системных обновлений, которые вызывают ошибку:
Нажмите и удерживайте кнопку ”sync up”(маленькая кнопка на лицевой панели) на выключенной консоли.
Продолжая удерживать кнопку ”sync up”, включите консоль нажатием кнопки вкл/выкл консоли.
Продолжайте удерживать кнопку ”sync up” пока консоль не загрузится до конца.
Во время загрузки консоль должна удалить все неудачные обновления.
Сброс видео настроек:
Выньте диск из консоли и выключите ее.
Включите консоль с джойстика. Если у вас беспроводной джойстик, то подождите, пока консоль не определит его.
Зажмите на джойстике Y и RT.
Если с консолью какие-то проблемы, то на передней панели вместо привычных зеленых огней будут мигать красные. Расположение мигающих огней может быть различно и поясняет возможные причины неполадок. Если ваша консоль на гарантии, то не пытайтесь ремонтировать ее самостоятельно, а сразу несите в ближайший сервис центр или магазин, где она была приобретена.Существуют специальные коды ошибок, узнать которые можно следуя следующем алгоритму:
1. Включите консоль, и дождитесь моргания трёх огней на кольце.
2. Нажмите и удерживайте кнопку синхронизацияя на передней панели консоли, после чего нажмите кнопку вытаскивания диска из привода.
3. Кольцо зажгёт первый номер кода ошибки. Запомните. (описаны ниже)
4. Нажмите снова кнопку привода. После его закратия нажмите её вновь.
5. Кольцо зажгёт второй номер кода ошибки. Запомните.
6. Нажмите снова кнопку привода. После его закратия нажмите её вновь.
7. Кольцо зажгёт третий номер кода ошибки. Запомните.
8. Нажмите снова кнопку привода. После его закратия нажмите её вновь.
9. Кольцо зажгёт четвёртый номер кода ошибки. Запомните.
10. Нажмите снова кнопку привода. После его закратия нажмите её вновь.
11. Кольцо вернётся в исходное состояние, загорятся 3 огня.
Определение кода ошибки: Все 4 огня светились — 0
1 огонь светился — 1
2 огня светилось — 2
3 огня светились — 3
Секции 1, 2, 3, 4 мигают красным(все)[]
— AV кабель не определяется, не найден, не распознаётся. (The AV cable cannot be detected)
Рекомендации:
Проверьте, вставлен ли AV кабель.
Отключите и снова подключите AV кабель.
Проверьте контакты кабеля со стороны, подключаемой к консоли. Удалите пыль и другие загрязнения, а затем подключите кабель к консоли.
Если 4 секции все равно мигают, то попробуйте заменить ваш AV кабель другим заранее исправным AV кабелем.
Секции 1 и 3 мигают красным[]
— Перегрев (Overheating)
Ошибка также может быть вызвана длительным простоем консоли или неисправностью игры. Если подобную ошибку вызывает какой-то определенный момент в игре, то причина в самой игре, а не в перегреве.
Рекомендации:
Дайте консоли остыть в течение нескольких часов.
Проверьте, работают ли кулеры и достаточно ли вентилируется пространство вокруг консоли.
Чтобы предотвратить эту проблему в будущем, соблюдайте следующее:
Не закрывайте вентиляционные отверстия консоли.
Не кладите консоль на мягкие поверхности, которые могут закрыть вентиляционные отверстия (ковер, кровать и т.д.).
Не ставьте консоль в плохо вентилируемом пространстве.
Не располагайте консоль рядом с любыми источниками тепла.
Ни в коем случае не пытайтесь принудительно охладить консоль не предназначенными для этого средствами. Не кладите консоль в холодильник, не выносите на улицу. Подобные методы могут привести к куда большим проблемам, т.к. из-за высокой разности температур на внутренних поверхностях консоли образуется конденсат. Что в свою очередь может привести к короткому замыканию и полному выходу из строя консоли.
Еще одно решение проблемы перегрева, это улучшение штатной системы охлаждения. Это приведет к потере гарантии, так что не пытайтесь осуществлять подобные операции, если консоль все еще на гарантии.
Секция 4 мигает красным[]
-Отказ системы
На экране будет показано сообщение с номером ошибки для уточнения ее причин. Если на экране ничего нет или невозможно определить код ошибки, то можно определить дополнительный код ошибки (см. ниже).В таких случаях на вашем дисплее/экране отображется код ошибки, тем самым указывая какое именно оборудование отказало:
E45 — пока неизвестно (возможно в результате обновления Dashboard)
E64 — DVD Drive Error (Таймаут DVD привода, неправильная прошивка привода)
E65 — DVD Drive Error (Таймаут DVD привода, неправильная прошивка привода, либо также может быть вызвано не плотным закрыванием лотка при включении консоли)
E66 — DVD Drive Error (Модель DVD привода не совпадает, либо не совместима с версией Dashboard, либо версия прошивка более поздняя чем ожидается в Dashboard-е. Обычно проблема возникает при перепрошивке привода)
E67 — Hard Drive Error (Проблема вызвана либо с работоспособностью внутри самого винчестера, либо не плотным его закрытием. Отключите его и вновь включите при выключенной консоли)
E68 — Voltage Error (Недостаточно напряжения для работы консоли, обычно возникает в результате подключения дополнительный устройств к консоли таких как дополнительные вентиляторы и других USB устройств. Попробуйте отключить всё лишнее)
E69»— Hard Drive Error (Проблема вызвана либо с работоспособностью внутри самого винчестера, либо не плотным его закрытием. Отключите его и вновь включите при выключенной консоли)
E71 — (ошибка в работе Dashboard, попробуйте провести Очистку кэша Xbox 360 )
E72 — ошибка с NAND носителем
E73 — General Hardware Error (ошибка вызвана сработойпорта Ethernet)
E74 — Ошибка вызвана при работе с процессором, либо также AV кабеля, в некоторых случаях видеокарты. На данный момент решение её не известно. В последнее во многих источниках делают ссылки на её возникновение после обновление до NXE)
E76 — Ошибка вызвана в результате работы с Ethernet портом, сгорание процессора в порте не является этой причиной, но его удаление вполне возможно.
E79 — Hard Drive Error (Проблема вызвана либо с работоспособностью внутри самого винчестера, либо не плотным его закрытием. Отключите его и вновь включите при выключенной консоли. Также причиной может являться не старт xam.xex, т.е. нарушения файловой системы винчестера)
E80 — Не верная версия LDV в NAND носителе. (Вызвано обновлением Dashboard)
Секции 1, 3, 4 мигают красным[]
-Общий отказ системы
Рекомендации:
Перезагрузите консоль.
Если не помогло, то выключите консоль, отключите и снова подключите AV кабель и кабель питания, включите консоль.
Если п.2 не помог, то попробуйте включить консоль без HDD. Если ошибка исчезнет, то опять подключите его.
Так же обратите внимание на лампочку на блоке питания консоли. Во время работы консоли она должна быть зеленой, даже если консоль показывает ошибку.
Если все перечисленное не помогло, то нужно определить дополнительный ”скрытый” код ошибки для уточнения причин проблемы:
Включите консоль и дождитесь появления мигающих 3 красных огней.
Нажмите и держите кнопку ”sync up”(маленькая кнопка на лицевой панели), затем нажмите кнопку ”eject”(кнопка для извлечения лотка привода) не отпуская ”sync up”.
Лампочки покажут первую цифру кода ошибки (подробнее внизу).
Отпустите кнопку ”eject” и нажмите ее снова.
Лампочки покажут вторую цифру кода ошибки
Отпустите кнопку ”eject” и нажмите ее снова.
Лампочки покажут третью цифру кода ошибки
Отпустите кнопку ”eject” и нажмите ее снова.
Лампочки покажут четвертую цифру кода ошибки
Отпустите кнопку ”eject” и нажмите ее снова.
Лампочки вернутся в исходное положение(3 красных мигающих огня).
0001 проблемы с блоком питания.
0002 проблемы с сетевым интерфейсом (может быть исправлено ослаблением крестообразных креплений); проблема с CPU.
0003 проблема с питанием. Может быть виноват блок питания или GPU/CPU. Так же проверьте целостность элементов на плате.
0010 проблемы с южным мостом или GPU. Вероятно плохой контакт с материнской платой.
0011 перегрев CPU – если вы получили эту ошибку после разборки консоли, то проверьте надежность крепления винтов радиаторов.
0012 перегрев GPU – проверьте, правильно ли установлено крестообразное крепление. Так же стоит проверить конденсаторы и при необходимости заменить.
0013 перегрев чипов памяти (RAM).
0020 неисправность GPU(см. 0102). Также ошибка может быть вызвана полным отказом GPU.
0021 может быть вызвано несколькими причинами:
DVD привод не отвечает – может быть вызвано проблемами с прошивкой. В некоторых случаях виноват южный мост и/или соединение между ним и DVD приводом. Следует проверить конденсаторы вокруг моста, особенно около SATA разъема для привода.
Ошибка GPU , в большинстве случаев вызвано плохим контактом с платой (см. 0102).
0022 ошибка GPU/CPU: плохой контакт с платой. Так же может быть вызвано неисправностью TSOP.
0023 пока неизвестно.
0030 проблема с температурным контролем.
0031 неправильно вставлен штекер питания DVD привода. Так же может быть вызвано замыканием между радиатором и окружающими конденсаторами.
0032 пока неизвестно.
0033 пока неизвестно .
0100 вероятно плохой контакт GPU или RAM с платой (см. 0102).
0101 нарушен контакт RAM с платой.
0102 обычно вызвано нарушенным контактом GPU/CPU/RAM с материнской платой. Так же стоит проверить конденсаторы и при необходимости заменить.
Возможные способы лечения:
Прижим. Увеличение давления радиатора на чип, за счет чего восстанавливается контакт.
Прогрев. Прогрев платы феном или другими средствами до полного расплавления припоя, за счет чего контакты могут восстановиться.
Реболл. Полная перепайка чипа. Сначала чип отпаивают, все поверхности очищаются от припоя и прочих загрязнений. Далее на чип наносятся шарики припоя с помощью трафарета. Затем чип в таком виде припаивают обратно на плату. Происходит полное восстановление всех контактов. Это наиболее действенный и дорогостоящий метод ремонта.
В редких случаях практикуется полная замена неисправного чипа на новый.
0103 плохой контакт GPU с платой (см. 0102).
0110 ошибка RAM/GPU. Обычно вызвана плохим контактом RAM/GPU чипа с платой.
0111 ошибка RAM: замыкание или плохой контакт с платой. Ошибка так же может означать проблемы с GPU.
0200 пока неизвестно.
0203 перегрев GPU, вероятно из-за высохшей/отсутствующей термопасты.
1000 ядро не может быть запущено/подпись в NAND флэш-памяти повреждена. Может произойти после неудачного обновления дашборда. Ошибка также может быть вызвана неисправным SATA кабелем DVD привода.
1001 ошибка DVD привода. DVD привод не отвечает, либо у привода неправильная прошивка.
1002 ошибка DVD привода. Вероятно ошибка в прошивке привода. При подключении к компьютеру может нормально функционировать, а на консоли вызывать ошибку. Восстановление исходной прошивки может решить проблему.
1003 ошибка HDD… Проблема может быть вызвана как самим жестким диском, так и его подключением. Попробуйте отключить HDD и запустить консоль без него.
1010 ошибка HDD. Также причиной может быть поврежденный или отсутствующий eProm (см. E68).
1013 пока неизвестно. Вероятно ошибка при обновлении дашборда.
1022 см. E74.
1023 DVD привод не подключен.
1030 см. E76.
1031 эта ошибка связана с проблемами в питании RAM чипов. Может быть вызвано замыканием между радиатором и элементами на плате, либо более серьезными проблемами с RAM.
1033 точные причины пока неизвестны. Предположительно, могут быть виноваты блок питания или чипы GPU/CPU .
1100 см. E80.
Коды сброса[]
Удаление всех игровых обновлений и очистка кэша(личный профиль, сохранения и другая личная информация не удаляются):
Зайдите в настройки системы.
Выберете ”память” (Memory).
Выделите Жесткий диск(Hard Drive) и нажмите Y.
Начиная с версии 8495 дашборда(обновления за 11 августа 2009) для очистки кэша можно использовать соответствующую опцию в этом меню. Если же у Вас более старая версия:
Нажмите X, X, LB, RB, X, X.
Появится сообщение ”Будет произведено текущее обслуживание запоминающих устройств. Продолжить?” (This will perform maintenance on your Xbox 360 storage devices. Do you want to continue?).
Нажмите ”Да” (Yes).
Удаление всех неудачных системных обновлений, которые вызывают ошибку:
Нажмите и удерживайте кнопку ”sync up”(маленькая кнопка на лицевой панели) на выключенной консоли.
Продолжая удерживать кнопку ”sync up”, включите консоль нажатием кнопки вкл/выкл консоли.
Продолжайте удерживать кнопку ”sync up” пока консоль не загрузится до конца.
Во время загрузки консоль должна удалить все неудачные обновления.
Сброс видео настроек:
Выньте диск из консоли и выключите ее.
Включите консоль с джойстика. Если у вас беспроводной джойстик, то подождите, пока консоль не определит его.
Зажмите на джойстике Y и RT.
At the time of its release, the original Xbox was a gaming powerhouse. It featured a cutting-edge custom 733 MHz Intel Pentium III processor and had its own 233 MHz NVIDIA GPU to boot – a first for any console released at that time. Not only that, the console was also majorly responsible for the birth of console multiplayer gaming because of its broadband connectivity and the release of Xbox Live.
It wouldn’t be an understatement to say that the Original Xbox revolutionized several aspects of console gaming for good. Take the console’s first-of-a-kind hard drive integration for example. It seems a no-brainer now but back then it was a ‘Eureka!’ moment for many gamers. The HDD meant that players no longer had to rely on their CDs and memory cards to play games and could enjoy faster loading times as well.
The Original Xbox set the stage for Microsoft’s continued success with the Xbox series till date. They released the console and sold all units at a massive loss of $4 billion, but their gamble paid off in dividends considering the latest successor generated an annual revenue of $16.28 billion during 2021.
Even with all its glory, it has been over 2 decades since Dwayne “The Rock” Johnson announced the Original Xbox release. Even if machines back then were built to survive an apocalypse, there is no changing the fact that the console has highly outdated components. And what do outdated components result in? Tons of complicated error codes.
The system, like it’s older brother which we covered in our article on Xbox 360 Error Codes, is notorious for its errors which is why we are covering all of them in this detailed guide so that you too can breathe new life into your first console friend.
What Are the First Steps Towards Solving Most Original Xbox Issues?
We would love to head into specifics as much as you, but these basic steps below can save you tons of hassle and free time if you’d ever counter another error in the future.
- If your Xbox starts burning up after powering it on, turn it off and repair it as soon as possible. If you are especially trying to run an OG Xbox after years of disuse, you should be double checking everything power related. Check if you have the proper power cable for the Xbox, check the Xbox’s PSU either by opening it up or checking the model online and plugging it in a safe connection. Older Xbox Foxlink PSUs are notorious to have bad soldering for their capacitors and have full potential to cause a house fire if given the chance. If your console has a Foxlink PSU, get it replaced through Ebay or your local repair shops. In case you have a different brand, try opening up the console and thoroughly cleaning the inside of your motherboard with isopropyl alcohol. If you can get one, a power cable replacement will also go a long way ensuring your console’s safety.
- If your console can’t detect your game disc, try cleaning the drive lens. A console sitting idle can accumulate tons of dust and grime inside and if your system won’t detect your game disc when you use it after years, a dirty disk drive lens might be the culprit. A simple solution to this is opening up your device, taking out the disc drive and manually cleaning the lens yourself. A simple wipe from a microfiber cloth and some isopropyl alcohol should do the trick.
- If your console’s disk drive won’t open or makes a cranking noise, try manually opening it or replacing it entirely. All DVD players come with a tiny hole that can be used to manually open the drives. If your game disc is stuck and your system isn’t cooperating, inserting a safety pin or a paperclip in the gap to the left of your eject button should do the trick and get your CD out. Once open, clean the drive out and see if there are any obstructions that are making the sound and blocking the drive from opening up. Alternatively, you can take the console to a repair shop and get the entire drive replaced itself.
- If your console keeps freezing or crashing mid-gameplay, you need to clean it up and take it to a cooler place. Even the most well-maintained consoles can gather dust inside and in an environment that is already hot, this can result in your console reaching unbearably hot temperatures. When this starts happening mid-gameplay, your game will start freezing and crashing suddenly. The only way to fix this issue is opening up your Xbox and thoroughly cleaning it from the inside with isopropyl alcohol, compressed air, brushes and a screwdriver. Here is a great YouTube tutorial on how to do it.
- If you don’t get any audio or video from your console but it powers on, try using standard A/V cables instead of the HD ones. If your Xbox powers up but you are not getting any audio or display signal, turn off your console and replace your high definition A/V cables with standard A/V cables. Turn your console on again and the issue should be resolved. This might lower the overall resolution and picture quality on your screen but at the very least there is a chance you’ll get a display and audio signal.
- If you want to identify your Xbox’s model version, follow our steps. Identifying what version of Xbox you have is a crucial step to repairing it and modifying it. The model versions are not inter-compatible and modchips made for one revision DO NOT work with another. Since the hardware is also different, our guide also features version specific solutions (such as the pre-1.6 solution just below this) which makes it all the more important to figuring out what version your Xbox has. Fortunately, the Original Xbox community has come up with several incredible resources on how to identify your exact Xbox model. ConsoleMods’s amazing wiki has several different methods on how you can figure out your Xbox version. Additionally, Tinker Mods lists several motherboard parts that are revision specific and GamingDoc lists DVD drives and hard drive brands that were made for each specific revision.
- If you have an original Xbox with a pre-1.6 model, open it up and save your console from rotting away. The Original Xbox consoles with pre 1.6 model versions featured real time clocks but they didn’t do it with a battery like their successor consoles did – instead, they opted for capacitors that remembered the device’s time for at least a few hours without electricity. The problem is, these capacitors were made during the capacitor plague of 2001 where they had a destructive tendency to leak. When they leak, they also corrode all the nearby parts which has brought ruin for countless motherboards and internal parts. We can write out the steps to resolve the issue, but, honestly, you are way better off going through this video that not only goes over the topic in detail but tells you exactly how to remove the capacitor (and replace it need be).
- If your Xbox specifications are lacking, try using a modchip. Modchips allow you to install custom BIOS that circumvents the device’s original one and allows you to install more RAM, more storage and better security in case of hard drive failure. Installing modchips, also known as hard modding, isn’t essential to run the console today but it does serve as a solution to the console’s BIOS errors. If you’re interested, all you need to do is figure out your console’s model version and then get a compatible modchip for it – for example, this Aladdin XT modchip works with the Original Xbox 1.6. Do note that installing any modchip will screw up the LED as well as the normal error codes.
- If your console’s EEPROM chip has gone bad, reflash a new one and plug it inside. To flash your EEPROM chip, you can take the easy way out and take it to a repair shop or fix it yourself if you are confident in your DIY skills. The process is complicated because you’ll need to learn how to extract a working chip, buy a raspberry pi that can read/write it, change the values and then plug it back in your own console. You also need to ensure that the EEPROM chip you’ll be getting is from the same model version of the console that you are trying to repair since they have different data formats. Thankfully, there are guides and resources for everything and also an amazing community at r/originalxbox to guide you. Here is a beginner’s guide to get started.
Original Xbox LED Error Codes
Unlike modern consoles, the Original Xbox did not have innovative solutions to indicate error codes of their video output – all they had were LED error codes. By checking the LED around the eject button, one can determine what type of display error the Xbox has even without a video output.
One thing to note here is that these LED codes have a very specific pattern for their respective errors. If the light is ‘flashing’, it means that it’ll blink its respective color in short bursts. If it’s ‘solid’, it means that it’ll remain one constant color till the end. But for errors like Flashing Red 25% and Green 75%, for example, it means that the light will blink red and green alternately for half the time and then blink green till the end. With that clarification out of the way, let’s get started with our first LED error code – Solid Green.
LED Error Solid Green
- Severity: Moderate to Severe
- Problem Category: LED error
LED Error Solid Green Explained: This error indicates that there is either a bad video connection or the BIOS is corrupt.
How to solve LED Error Solid Green: First, reseat the cables once firmly and restart again to see if it helps. If it doesn’t, and you are using HD A/V cables, replace them with standard ones to see if that helps. If that doesn’t work either, the issue is likely with the motherboard. Here’s where things get complicated –
Find out if you are using a 1.0 or a 1.1 console by checking our section above on how to find out your Original Xbox revision. If you do, open up your device, carefully remove all the parts, unscrew the motherboard and remove it intact. Then, flip the board carefully and find Capacitor C6R3 and Resistor R7R2. The A18 and A19 points should be around them. Solder a jumper wire from A18 to the right side of the capacitor to ground it. Put your console back together and see if that resolved the issue. If it didn’t, repeat the same steps as above with the A19 point, disconnecting the A18 one. If that doesn’t work either, connect BOTH A18 and A19 and try again to see if that works.
If the issue persists: Or if you have a different Xbox model, the issue is most likely to be BIOS related in which case you can try installing a modchip. Feel free to take a look through our first steps section to check how to do that.
LED Error Solid Red
- Severity: Minor to Moderate
- Problem Category: LED error
LED Error Solid Red Explained: This error indicates that either your console is either overheating or your EEPROM chip has been destroyed by said heat. If you recently installed a modchip, the error could also indicate an improper mod installation.
How to solve LED Error Solid Red: If you did install a modchip recently and got this LED error, reinstall it and make sure to follow the instructions of whatever guide you are using to a T. But in case you didn’t, and you get this error out of the blue for the first time, immediately take it to a cooler and well-ventilated place and let it cool down. Once the room temperature is amicable, try turning your console on again.
If the issue persists: If the LED still stays red, your hardware i.e. most likely your EEPROM chip, has been fried. You can replace the fried chip with a new one that is flashed for your console or you can install a modchip and circumvent the issue altogether by eliminating its usage. We have guides for both in our ‘first steps’ section.
LED Error Flashing Green
- Severity: Moderate
- Problem Category: LED error
LED Error Flashing Green Explained: This error indicates that your EEPROM chip has been fried or your BIOS isn’t loading correctly, with the prior being most likely.
How to solve LED Error Flashing Green: Similar to the error above, to resolve the issue you need to flash a EEPROM chip through a console repair shop or DIY with a working chip, raspberry pi and tons of patience. If that doesn’t help, install a modchip compatible with your console version – make sure to go through our detailed ‘first steps’ section to figure out your Xbox revision and how to install a modchip.
LED Error Flashing Orange
- Severity: Severe
- Problem Category: LED Error
LED Error Flashing Orange Explained: This error can mostly indicate that your components have been damaged – either by a capacitor discharge or by you during soldering.
How to solve LED Error Flashing Orange: If you soldered recently, you already have a pretty good starting point to work with since the problem most likely was caused by a solder splash or a solder bridge. Open your console up and go over the motherboard carefully desoldering everything that isn’t required by your modchip or motherboard repair and sucking them up with a plunger. Alternatively, if you haven’t tinkered with your console then a thorough cleaning with isopropyl alcohol, brushes, compressed air, and a screwdriver should fix the issue.
LED Error Flashing Red
- Severity: Moderate
- Problem Category: LED error
LED Error Flashing Red Explained: Your EEPROM chip is definitely fried.
How to solve LED Error Flashing Red: Just like the previous errors, the only solution to a fried EEPROM chip is to reflash a new one for your console using a raspberry pi and basic soldering or installing a modchip that removes the necessity of a EEPROM chip altogether. For both of these solutions, we’d heavily recommend giving your Xbox to a console repair shop if you find yourself utterly confused throughout any part of the process.
LED Error Flashing Orange – Overheating
- Severity: Moderate to Severe
- Problem Category: LED error
LED Error Flashing Orange (Overheating) Explained: This error indicates that your console is rapidly overheating while it’s powering on.
How to solve LED Error Flashing Orange (Overheating): Unlike the previous flashing orange LED error, this one will also make your fans go at 100% speed until your Xbox eventually powers off. The first thing you should do is keep your console at a cool, well-ventilated place to ensure the temperatures are regulated. There is also a very high chance that the thermal paste for your GPU and CPU heatsinks might’ve dried up. Buy any decent thermal paste from the market, open up the heatsinks, clean the old paste with isopropyl alcohol and replace it with the new paste – here’s a handy guide to help you out. While your system is opened up, find the U6F1 sensor chip, clean it with isopropyl alcohol and inspect it for any damage. If it looks damaged, either solder it yourself if you know what you are doing or hand it over to a console repair shop to get the sensor replaced.
LED Error Flashing Orange 50% And Green 50%
- Severity: Minor to Moderate
- Problem Category: LED error
LED Error Flashing Orange and Green Explained: This error indicates that there is some problem with your A/V connection.
How to solve LED Error Flashing Orange and Green: First things first, check if the cables are properly seated in their connectors. If that doesn’t help and you are using HD A/V cables, revert back to standard ones to see if it helps. If even that doesn’t help, try brand-new HD as well as standard wires to see if they fix the issue.
If the issue persists: There is a chance that the traces between your A/V connectors and your IC have been damaged. You can try your hand at repairing the traces yourself using a conductive pen, give it to your console repair shop or just get a new Xbox.
LED Error Flashing Red 50% And Orange 50%
- Severity: Moderate to Severe
- Problem Category: LED error
LED Error Flashing Red and Orange Explained: Depending on your console version, this error either indicates there is an uplifted trace, RAM failure, or a problem with the video hardware.
How to solve LED Error Flashing Red and Orange: If you have an older revision like the 1.0, which we hope you’ve found out already by referring to our ‘first steps’ section, there is a likely chance that it’s a trace error or RAM failure. To resolve the prior, follow this guide to a tee – you’ll need a conductive pen. If that doesn’t help, replace the RAM chip on your console by following any of the simple tutorials out there – it’ll also help you get a nice upgrade over your previous RAM.
If the issue persists: There might be an issue with the video hardware. Swap HD cables to standard ones and see if they help. Some users have also reported getting a RF adapter cord and switching up the video mode as a potential solution.
LED Error Flashing Red 50% And Green 50% (FRAG)
- Severity: Severe
- Problem Category: LED error
LED Error Flashing Red 50% and Green 50% Explained: This error indicates a general hardware failure either caused by an improper mod installation or the notorious leaking capacitor.
How to solve LED Error Flashing Red 50% and Green 50%: If you recently installed a mod, redo it again properly and check for any solder splashes or bridges. If there are, desolder them immediately. If you haven’t modded your console, open it up and remove the leaking capacitor and clean any discharge around it – we have a guide to this in our first steps section. If that doesn’t help either, try installing a compatible modchip to navigate around faulty parts using our ‘first steps’ section.
If the issue persists: Your motherboard is most likely dead but you can still try installing a new thermal paste on your GPU to see if that helps the console boot up.
LED Error Flashing Red 75% And Green 25% (FRAG)
- Severity: Minor to Moderate
- Problem Category: LED error
LED Error Flashing Red 75% and Green 25% Explained: This error indicates that there is some major problem with your Hard Drive.
How to solve LED Error Flashing Red 75% and Green 25%: Please refer to our ‘hard drive related error codes’ section below which specifically targets each potential hard disk error and resolves them.
LED Error Flashing Red 25% And Green 75% (FRAG)
- Severity: Minor
- Problem Category: LED error
LED Error Flashing Red 25% and Green 75% Explained: This error indicates that there is a major problem with your DVD drive.
How to solve LED Error Flashing Red 25% and Green 75%: Similar to the previous FRAG error, check out error codes 10, 11, and 12 below which target specific DVD errors and provide their solutions.
LED Error 3x Boot Fail Then FRAG
- Severity: Moderate
- Problem Category: LED error
LED Error 3x Boot Fail then FRAG Explained: This error indicates that either you have a bad PSU, or an incorrectly placed modchip or IDE cable.
How to solve LED Error 3x Boot Fail then FRAG: If you modded your Xbox recently, the first thing you should do is go over your motherboard carefully looking for solder splashes and bridges and then desolder them while making sure the modchip is properly installed. If you haven’t modded your console, find the IDE cable which is usually attached to your hard drive and make sure that it’s plugged in with the correct alignment.
If the issue persists: Replace your PSU yourself or take it to a console repair shop to get repaired.
LED Error 3x Boot Fail Then FRAG Then Power Off
- Severity: Moderate to Severe
- Problem Category: LED error
LED Error 3x Boot Fail then FRAG then power off Explained: This error indicates that the EEPROM chip inside your system is corrupted (not fried).
How to solve LED Error 3x Boot Fail then FRAG then power off: A EEPROM chip can only be corrupted if it’s not formatted correctly, not hashed properly or flashed with the wrong Xbox version. The only solution to this is reflashing your EEPROM chip with the correct version this time and following a detailed guide to do the steps properly. Alternatively, you can just hand the work off to a console repair shop.
Any Other LED Error
- Severity: Moderate
- Problem Category: LED error
Miscellaneous LED Error Explained: Any other LED error than the ones listed above is likely to be an EEPROM chip error.
How to solve Miscellaneous LED Errors Explained: Refer to LED Error Flashing Red and follow the instructions in the solution.
Original Xbox Motherboard Related Error Codes
The Original Xbox motherboard was a one-of-a-kind component for its time and went through several revisions that fixed its several faulty chips and connectors. This section will help you resolve the issues that stem from broken components and hopefully give your Xbox a few more years of life.
Error Code 01
- Severity:
- Problem Category: Motherboard error
Error Code 01 Explained: This is a general system failure error indicating that your motherboard is not functionable anymore.
How to solve Error Code 01: Unless you are an electronic engineer and are a genius with PCB machines, it’s extremely difficult to resolve this issue. We’d highly recommend replacing the motherboard entirely or getting a new Original Xbox.
Error Code 02
- Severity:
- Problem Category: Motherboard error
Error Code 02 Explained: This error indicates that your EEPROM check failed.
How to solve Error Code 02: If you recently installed a newly flashed EEPROM chip, flash it again and make sure it’s the correct version for your console this time. If you recently modified your Xbox or installed a modchip, open it up and look for any solder bridges or splashes. Desolder any of them you find and try again. If that doesn’t work, you might need to replace your motherboard.
Error Code 03
- Severity:
- Problem Category: Motherboard error
Error Code 03 Explained: This error indicates a general system failure with your motherboard.
How to solve Error Code 03: Similar to Error Code 01, we highly recommend replacing the motherboard entirely or getting a new console.
Error Code 04
- Severity:
- Problem Category: Motherboard error
Error Code 04 Explained: This error indicates that there is something with your RAM chip.
How to solve Error Code 04: S If you modified your console, check for any solder splashes or bridges and desolder them. On a similar note, if you upgraded your RAM chip to 128MB, remove it, verify the chip’s functionality and retry the installation with an alternative guide. If you haven’t done any modification, your chip is fried and likely needs to be replaced. You can either do it yourself through guides like these or hand it off to a console repair shop.
Original Xbox Hard Drive Related Error Codes
While the Original Xbox was the first console to feature hard drives, it had a severe storage limitation of 128Mb. As time went on, this limitation annoyed users enough to force them to mod their Original Xbox to have larger storage limits. Problem is, inexperienced modders can often mess up the process and lock their hard drives or make them undetectable. This section serves to undo these mistakes and resolve all potential all hard drive related error codes.
Error Code 05
- Severity: Moderate
- Problem Category: Hard Drive error
Error Code 05 Explained: This error indicates that your Hard Drive isn’t locked.
How to solve Error Code 05: Microsoft used to lock the HDDs on the Original Xbox with an unique password to prevent people from hacking and accessing its contents. If you recently installed a modchip, and started seeing this error, it means that your modchip flash process had issues. Redo the modchip installation, confirming the BIOS version’s compatibility this time. Alternatively, if you or someone else softmodded your console before, then you need to find your EEPROM backup which is most likely sitting in your E: drive. Plug the HDD in your PC, download and run XboxHDM and choose option ‘3’. Follow the on-screen instructions to lock your HDD and resolve the issue.
Error Code 06
- Severity: Moderate to Severe
- Problem Category: Hard Drive error
Error Code 06 Explained: Related to the error above, this code indicates that the password on your EEPROM doesn’t match the password on the BIOS.
How to solve Error Code 06: Remove your EEPROM chip and reflash it with the EEPROM backup from your hard drive. See the solution to the error just above this one to check how to do this.
Error Code 07
- Severity: Minor
- Problem Category: Hard Drive error
Error Code 07 Explained: This error occurs when your HDD takes too long to boot or times out suddenly.
How to solve Error Code 07: Go through your cables and wires as specified in the solution to Error Code 08 below, making sure the jumpers are in the right place. If you have a SATA to IDE adapter, try another adapter and another HDD to check if any of them is the issue. It’s also likely that your DVD drive is preventing power access from your IDE bus to the hard drive. Try swapping the disk drive to see if it fixes anything.
Error Code 08
- Severity: Moderate
- Problem Category: Hard Drive error
Error Code 08 Explained: This error occurs when your console is unable to detect your hard drive.
How to solve Error Code 08: Open up your console and find the gray and flat IDE ribbon cable that should be connecting your HDD, DVD drive and motherboard. Inspect it thoroughly for any cuts or scraping and if you find any, replace the wire entirely. Alternatively, if you recently purchased a SATA to IDE adapter, make sure you are using a 80-wire IDE ribbon cable not the 40-wire default one. If that doesn’t help, check if your hard drive’s power cable is properly connected and isn’t wiggling around. If it is and wiggling around the cable resolves your issue temporarily, you need to replace your PSU. If even that doesn’t help, take your HDD out and check where the HDD’s jumper cable is connected. There should be a diagram on your HDD that tells you how to connect your jumper wire in different ways, like this. Either set it to CS or Master or disconnect the cable itself.
If the issue persists: Try replacing your IDE cables even if they are intact to see if that helps. If it doesn’t, your hard drive might have just succumbed to old age warranting a storage upgrade from your console.
Error Code 09
- Severity: Severe
- Problem Category: Hard Drive error
Error Code 09 Explained: The error indicates that there is some hardware issue with your hard drive.
How to solve Error Code 09: Check if the power cable is plugged in properly and not wiggling in the power supply. Referring to the solution to the error above, check if the jumper cable is in the right spot in CS or Master.
If the issue persists: Unfortunately, your hard drive might be beyond repair and it’s best to replace it.
Original Xbox DVD Drive Related Error Codes
The DVD drive is one of the most fragile components in a Original Xbox and even the slightest cable scratches or damage can permanently lead to tons of unique error codes. This section will help you identify these errors, resolve them and guide you in alternative ways to run your games without using your disc drive, starting off with Error Code 10 –
Error Code 10
- Severity: Minor to Moderate
- Problem Category: DVD drive error
Error Code 10 Explained: This error occurs when your DVD drive keeps timing out and doesn’t load properly.
How to solve Error Code 10: The likely culprit for this error is a loose/faulty cable similar to the errors before this. Open up your Xbox and find the yellow cable connecting your motherboard and DVD drive. Make sure it’s connected properly to either end and check it for scratches, cuts or any damage along its length. If you find any scratches or the like, replace the cable immediately.
If the issue persists: Replace the cable entirely even if it’s not damaged. If that doesn’t fix the issue either, you’ll need to replace the DVD drive.
Error Code 11
- Severity: Moderate to Severe
- Problem Category: DVD drive error
Error Code 11 Explained: This error indicates that your console was unable to detect your DVD drive.
How to solve Error Code 11: The issue likely stems from a damaged or loose cable which is why we’d recommend going through Error Code 10 to see how to resolve the issue. If nothing else works, try replacing the DVD drive itself. While there is a very slim chance of it happening, your disk drive itself might have gone bad and replacing it might fix the issue.
If the issue persists: You can try softmodding your console which will allow you to play games without the help of a DVD drive. Here is a handy guide on how to do it.
Error Code 12
- Severity: Moderate
- Problem Category: DVD drive error
Error Code 12 Explained: This error occurs when your system can’t detect your DVD drive’s parameters.
How to solve Error Code 12: Refer to the solution to Error Code 10. If that doesn’t work, try a replacement drive to see if that fixes the issue. Alternatively, you can always softmod your console to allow you to install games without your DVD drive or a modchip that allows you to access games that are already present on the hard drive.
Original Xbox Software Related Error Codes
Error Code 13
- Severity: Minor
- Problem Category: Software error
Error Code 13 Explained: This error indicates that the dashboard failed to launch properly due to a missing key or an unspecified error.
How to solve Error Code 13: This error is usually caused by a kernel version mismatch and you’ll need to softmod your console if you haven’t done so already. Here is an extremely detailed guide on how to do it using Rocky5. If you did softmod previously, go through the installation again and make sure to use Rocky5 as your installer if you weren’t using it before. Alternatively, if you receive this error only when you launch games, access your Xbox’s hard drive through your PC and try deleting the E: drive, if it exists, to see if it fixes the issue.
Error Code 14
- Severity: Moderate
- Problem Category: Software error
Error Code 14 Explained: Similar to Error Code 13, this error indicates that the dashboard failed to launch because of a generic error.
How to solve Error Code 14: Problem: Dashboard failed to launch (generic error).
If you recently plugged in the HDD on your console and changed the file names, plug it in again and revert all the changes. Changing the boot order or the names and types of the files in your Original Xbox hard drive can wreck your hard drive. If you didn’t mess with your hard drive, we’d recommend softmodding your console using the steps above.
Error Code 16
- Severity: Minor to Moderate
- Problem Category: Software error
Error Code 16 Explained: This error occurs when you run into a generic error while trying to set your internal clock.
How to solve Error Code 16: To fix this, start the Xbox with the Eject button if your console supports dual-boot. In case it doesn’t, but your system is modded, you can also try booting into AID or Slayers from your PC and then trying to install the stock dashboard on the console’s C: drive. If that doesn’t help, find someone who has a working Xbox, and plug in your HDD to the working system to reinstall Microsoft stock dashboard. Once your console is back working again, make sure to softmod your console to the latest version to avoid something like this happening again.
Error Code 20
- Severity: Severe
- Problem Category: Software error
Error Code 20 Explained: This error indicates a general system failure when starting the dashboard.
How to solve Error Code 20: When this error occurs, it means that your console couldn’t boot at all and could only verify that your DVD drive is responsive. You can try replacing the console’s HDD with a new one that is softmodded according to your system’s kernel version – you can refer the solution to Error Code 13 to see how to do it.
If the issue persists: You can try giving your Xbox to a console repair shop but if even that doesn’t work out, you might need to replace your console.
Original Xbox Miscellaneous Related Error Code
If your Xbox encounters an unspecified issue in your system, the console’s first response is to display this error. This section will help you resolve the issue on both the hardware and software side of things.
Error Code 21
- Severity: Moderate to Severe
- Problem Category: Miscellaneous
Error Code 21 Explained: This error indicates that your Xbox couldn’t boot due to an unspecified dashboard or motherboard error.
How to solve Error Code 21: If this error occurs after you’ve softmodded your console, a reinstallation is in order. This time, make sure that the USB device you are using works properly. If you used XBEShortcutMaker, regenerate the shortcut file as it could’ve gotten corrupted. If you suddenly encounter this error when playing a game, plug in your hard drive to your PC and delete the E: partition if it exists.
If the issue persists: Xbox’s notorious clock capacitor might be behind the issue and we’d highly recommend removing it if you haven’t done so already.
I sure hope this helps someone. Credit goes to deezp1 at the Afterdawn forums for this.
Quote:
OK, I have seen many times people ask about error codes and have to wait for someone to tell them what it means. To make everyone’s life easier (Mods, Members, and n00bs), I am going to post a listing of all of the error codes with some explaination of what they mean and how to fix them. I hope this thread will help everyone with there Xbox error problems.
Also, I dont want to take credit for compiling the information (but I will take credit posting it!). I have to credit OCnewB and Superfro of the Xbox-Scene forums. He is the one who orignally compiled all the information, I just put it here on our forum, but I did clean it up a little, added some imput, and kept only the most recent updated fixes(the original had a lot of fixes that were out of date).
So with all that being said, Behold:
XBOX ERROR CODES EXPLAINED
For those of you that don’t know or are not sure if or when you have seen an error, you will see an error during the normal boot up sequence. Instead of your booting the M$ dashboard or Hacked Dashboard (Evox, UnleashX, Avalaunch, etc.), there will be an message on the screen that says, «Your Xbox Requires Service» and you will see a number on the upper left hand corner of the screen <- this is your error code number. The error codes are listed below
Beware, you wont see the bootldr error’s because (thanks to: Lordvader129) : «when you see this» is not entirely accurate, you never see the bootloader errors, as they are one that cause the reboot/FRAGs
2 — bootldr — Eeprom check failed
When you see this error most of the times you have flashed something wrong. Or you dropped solder on your eeprom chips.
4 — bootldr — Ram check failed
Your Xbox ram chips are wasted.
Maybe you dropped a little solder on it (try to remove it CAREFULLY!). Note, if they are fried, removing solder won’t fix them). Maybe you were static when you touched the ram chips. They are kind off sensitive. If they are, they are fried, sell your xbox for spare parts.
5 — kernel — HDD not locked (The retail xbox bioses require the hd to be locked)
When you upgrade your hard disk drive for one that is larger, you most of the times use a new hard drive that you bought in the shop. Now, when you put this hdd in your xbox and you try to boot up with your chip off. It gives you error 5. Why you ask? Well i will try to explain it simple.
The original (also called «Retail») hard drive is locked by MS. Why did they lock the harddrive?
Well if it wasn’t it wouldve been more than easy (in the start of xbox hacking)
for hackers to change content on it. Thats why MS locks it. It is just a security measure.
This locking proces uses information thats on the motherboard. The «Lock» on a xbox hard drive contains information that is based on the harddrive itself and the motherboard it came with.
One thing that makes this clear: You can not change a retail harddrive with another one from an other not modded xbox. With every xbox there is only ONE i repeat ONE compatible harddisk drive. That is, if they are locked.
If you don’t mod your xbox (tsop or modchips) you can not change harddrives. Not even from another xbox. However when your xbox IS modified you can change your harddisk for almost every other harddisk (thats UNLOCKED). This means that even when your xbox is modified, you can not just put another (retail) XBOX harddisk in your xbox. However some smart people made programs that can lock or unlock your xbox harddisk on the fly.
So when does the error occur? The only time this error should occur is when you boot up your xbox in original mode AND you have a harddisk in your xbox that is not yet locked. So now you ask what do i have to do to make your xbox work again?
Well the answer is pretty easy. Boot up your xbox with the chip on. Preferably with a slayer evo-x cd. Now you choose «Eeprom management.» Than you choose: «Lock hdd.» It takes one second. After its ready it should say something like «Done»
When it is «Done» just turn off your xbox. Disable your chip and try to boot in original mode. Now there should be no more error 5.
6 — kernel — Cannot unlock HDD
If you understand the above, you should be able to understand what this means. It means you are trying to boot up the xbox with an harddisk that is locked in combination with ANOTHER motherboard than you are using it with right now.
What can i do about it, you ask? Well place the harddisk back in the xbox where it came from. After that, UNLOCK the harddisk with the same procedure i explained above (see error 5). Now when the harddisk is UNLOCKED, put it in the xbox which gave you the error. Now when you boot up with the chip ON it should not give you an error anymore.
However when you put the xbox on with the chip OFF your xbox will give you an error. (error 5) So to make sure you can boot original and boot with the chip ON. Next do the same as above: «Boot up your xbox with the chip on. Preferrably with a slayer evo-x cd. Now you choose «Eeprom management.» Than you choose: «Lock hdd.» It takes one second. After its ready it should say something like «Done»
When it is ready just turn off your xbox. Disable your chip and try to boot original. Now there should be no more error.
7 — kernel — HDD timeout
Most of the times, the IDE cable is not properly connected when you see this error. Please reattach the ide cable. Not only to the harddisk drive but also to the dvd drive. ALso try to reconnect the ide cable to the motherboard.
Press pretty hard so it goes all the way in. Make sure it is seated straight and proper in the drives and the motherboard. If you still have an error 7. Try another ide cable. If that won’t work try another harddisk. If there is still no go, try to set the jumpers on the rearside of the harddisk drive. Set it to master or cable select. If still no succes, good luck and sell your xbox to me rolleyes.gif
8 — kernel — No HDD found
Please make sure your xbox hdd is attached properly. Most of the times the Ide cable came loose, or isn’t seated properly in the IDE port of your harddisk. ALso make sure the power supply cables are intact and working.
Make sure the ide cable is also connected properly to the rest of the hardware (dvd and motherboard).
9 — kernel — HDD parameters (PIO/DMA/or size {debug}, certain size minimum is required for debug)
Not very common error, please try another harddisk.
10 — kernel — DVD timeout
Actually its almost the same as error 6/7/8. But also make sure the yellow cables are properly connected to the motherboard and the dvd drive.
1. Make sure ide cables are connected good.
2. Make sure the yellow cables are good and properly connected.
3. Still no succes? Try another dvd drive of which you are sure it is working.
11 — kernel — No DVD Found
Same as #10 So read up please!
12 — kernel — DVD parameters (PIO/DMA)
Same as #10, only not very common.
13 — kernel — Dashboard launch fail (due to missing/bad key, or anything else that would prevent it from running) and the dashboard didn’t specify why it failed.
The error it gives is because of the incompatibility between the (older) dashboard (4920) that older slayer cd installs and the new dashboard/kernel versions found in some new xbox’s and found in xbox’s that have been connected to xbox live (when you go on xbox-live, it’ll upgrade your dashboard file to i believe it is now 5659.03. This dasboard is incompatible with the dash that (old) slayer cd installs (for example 2.5 or lower) for you.
(In detail, in the eeprom chip there is a kernel which is incompatible with the dashboard (4920) that slayer installs.)
So what do you do to fix it? You can use the dashupdate found on most new xbox games! Be sure to 1st unplug your ethernet cable before you do so!!!
Besides that, just use a good installation disc and all is fine. Use a 2.6 slayer or something similar
14 — dashboard — Error loading dashboard (dashboard generic error)
Same thing as above (error 13). This time it is also a little mistake from you on changing names or having played around with files on the xbox harddisk. Error 14 is most often because you changed boot orders or names of startup files on the harddisk. It can also happen when you are rebuilding your xbox harddisk with a slayer cd and the power was cut.
16 — dashboard — Clock cannot be set.
Basically it comes down to this. Error 16 has to do with not finding the menu setting with which you can set the clock of the hdd. This happens to a lot of people that erase their hdd (original/upgraded) or MS dashboard files and after that they don’t immediatly install the hdd but leave the xbox without power longer than 5 hours.
It’s all about the hdd can’t find the menu with which it can set the clock. This is mostly because the xbox hdd is empty (you removed dashboard or fux0red it via ftp). The problem arises when xbox searches for menu to set clock with, can’t find it and voila: error 16. Well read on please!
So you have an error 16 huh? Don’t worry «nothing» is broken!
You have an xbox hdd that is locked. And normally you can boot in original and modded mode. Retail or upgraded doesn’t matter. You start playing around with xboxdash.xbe etc. using ftp programs. While doing this you «accidently» remove your MS dashboard and also your alternate dashboard (Evox, etc.) so there is no dash anymore on the xbox hdd.
You end the ftp session and after that you shut off your xbox. Normally when you would start up again it gives you an error 13/14 ( no dashboard found). No worries with a slayer Evox cd (and a hardmod), all is ok. BUT this is only WITHIN 3 hours or so.
This is because the internal clock of the xbox will only be kept alive by the capacitors for only 3 or 4 hours. So when you leave your xbox unplugged from electricity for over 5 hours after you have played with the .xbe’s AND you have removed your (ms and evo-x) dash from your xbox than you are fux0red. Why do you ask?
Why can’t I boot from disc?
Its as follows Xbox starts booting==> (almost 1st thing a xbox does is) searches for internal clock==> doesnt find internal clock because there hasn’t been any electricity on the xbox for 5 hours so battery that kept clock alive is empty and clock is gone==> searches for the proper dashboard menu to set clock with ==> doesnt find msdashboard or evo-x dashboard menu becuz you have removed it from the hdd for whatever reasons you had==> xbox gives error 16: cannot set clock.
So what do you do about it? Two options!
1. There are some bios’es around that allow the chip to boot past the clocksetting. (do a search!). So how do you get that bios on your chip because you cant boot to a flash program or something? Well you need to have an external flasher.
It seems the m8 bios will take care for you of booting past the clocksetting. Or use the latest Xecutor bios
2. This is the more easy and newbie friendly strategy
-Get a friend with a modded xbox.
-Unlock his hdd with eeprom management from a slayer evo-x cd.
-Than, place his hdd in your xbox.
-Boot with your chip on.
-Now the xbox DOES find a dashboard when you boot in original mode and you can set the time in the msdashboard clock settings.
-Shut off xbox and remove your friends hdd
-PLace his hdd back in his xbox and lock it again
-Install your hdd
-(clock has been set) So boot up with slayer cd.
-Install normally whatever you wanna install
-lock hdd
If you get an error 13 after this, please read up on the error 13 explanation!
20 — kernel — The dashboard was attempted to load and failed
It was a cold boot, and the dashboard didn’t specify why it failed, but it
(for some reason) needed to be noted that the dvd passed the challenge/response authentication
21 — anywhere —
This error says that the machine was booted to display a error, basically someone told the machine to reboot (or launch a xbe) with this flag, and the error code just means its been rebooted by the flag
This occurs frequently when the xbox is unable to boot due to dashboard changes being made (ie Gcue true blue hasnt been resigned, parts of the stock dash are missing — incomplete FTP backups copied to a new HDD for example).
Halo LE Blue (Japan Black jewel) v1.0 1.0GHZ Trusty 128 RAM 640GB Blue-White P/E LED’s
White v1.4 X3 CE with X3 CP 500GB Blue-white P/E LED’s Blue Jewel
Debug kit untouched
Description:
When you attempt to boot, a ‘you need service’ message comes up, and has a LED style number on the top left hand corner. Here is what they mean.
Disclaimer:
This information is a believed to be correct, should be as close as it gets;
Also:
Bootloader stuff you should never see, since if it fails kernel doesn’t boot. (thus you see no message)
Code Who sets it — Description
0 — any — No error (duh)
1 — bootldr — Unknown exactly, something to do with checking the motherboard
2 — bootldr — Eeprom check failed
3 — bootldr — ??/not used
4 — bootldr — Ram check failed
5 — kernel — HDD not locked (retail bioses require the hd to be locked)
6 — kernel — Cannot unlock HDD
7 — kernel — HDD timeout
8 — kernel — No HDD found
9 — kernel — HDD parameters (PIO/DMA/or size {debug}, certain size minimum is required for debug)
10 — kernel — DVD timeout
11 — kernel — No DVD Founnd
12 — kernel — DVD parameters (PIO/DMA)
13 — kernel — Dashboard launch fail (due to missing/bad key, or anything else that would prevent it from running) and the dashboard didn’t specify why it failed.
14 — dashboard — Error loading dashboard (dashboard generic error)
15 — — ??/not used
16 — dashboard — Other files to do with dashboard / dashboard settings (specific dashboard error)
17 — — ??/not used
18 — — ??/not used
19 — — ??/not used
20 — kernel — The dashboard was attempted to load and failed; It was a cold boot, and the dashboard didn’t specify why it failed, but it (for some reason) needed to be noted that the dvd passed the challenge/response authentication
21 — anywhere — This error says that the machine was booted to display a error, basically someone told the machine to reboot (or launch a xbe) with this flag, and the error code just means its been rebooted by the flag
In closing:
21 was the highest number I could find, I dont think anynthing is past that. And for the unknown ones, I couldn’t find anyreference to them at all, I don’t believe they are used.
Source: xbox-scene.com
Due to a variety of reasons, an Xbox may display an error screen with an error code number in the top left corner. Below are the meanings of each number, possible causes, and a suggested course of action.
«Your Xbox requires service»
If you receive the message: «Your Xbox requires service. Please call the Customer Care number listed in your Instruction Manual», with an «OK» button. This is just a warning that indicates that your DVD drive is going out or, if you have been messing with the hardware, that a cable is not plugged all the way in. You can continue using the console as normal, and if your DVD drive does completely break, you can use tips from this page to try and fix it.
LED Error Codes
1.0 Xbox systems never display error codes in their video output, but they do have LED error codes. Any Xbox may experience issues that cause them to not output video. In these cases, look at the LED around the eject button to determine possible problems and solutions.
An LED code described with percentages next to each color indicates how long each color is on. For example, «Flashing Red 75% and Green 25%» means that red stays on for 75% of the time, and green is on for the remaining 25% of the time.
Note that modified consoles may have a custom LED color set. So, if the console is working normally, then a non-green light should not be interpreted as an error code.
| LED Code | Reason | Solution |
|---|---|---|
| Solid Green (Coma Console) | Corrupt BIOS bank or unseated video cable. | Try another video cable. If 1.0 or 1.1 motherboard, solder A18 and/or A19 to ground. If all else fails, install a modchip. |
| Solid Red | Bad EEPROM or improper modchip install. | Flash EEPROM or install modchip. |
| Flashing Green | Bad EEPROM. | Flash EEPROM or install modchip. |
| Flashing Orange | Damaged trace or solder splashed on components. | Try cleaning the inside of your Xbox and inspect the motherboard to find the issue. |
| Flashing Red | Bad EEPROM. | Flash EEPROM or install modchip. |
| Flashing Orange, fan speed increases to 100%, console eventually turns off | Overheating, or there may be an issue near the temperature sensor chip at location U6F1. | Verify that fans are working. Replace the old thermal paste under the CPU and GPU heatsinks. Clean and inspect the temperature sensor. |
| Flashing Orange 50% and Green 50% | Missing or broken video cable. | Try reseating or replacing the video cable. May be bad video hardware. |
| Flashing Red 50% and Orange 50% | General system failure. Often caused by an improper modchip install. May indicate a RAM error. | Try cleaning the inside of your Xbox and inspect the motherboard to find the issue. |
| Flashing Red 50% and Green 50% (FRAG) | General system failure. Often caused by an improper modchip install. | Try cleaning the inside of your Xbox and inspect the motherboard to find the issue. Clock capacitor may be leaking. |
| Flashing Red 75% and Green 25% (FRAG) | HDD error. | See error codes 5, 6, 7, 8, and 9. |
| Flashing Red 25% and Green 75% (FRAG) | DVD error. | See error codes 10, 11, and 12. |
| Tries to Boot 3x then FRAG (Christmas Lights) | Usually due to a failed or improperly installed modchip or the IDE cable being plugged in upside down somewhere. | Check modchip wiring and IDE cables. If you did not do any soldering, it could be a bad PSU. |
| Tries to Boot 3x then FRAG (Christmas Lights) and Turns Off | Corrupt EEPROM. | Usually wrong EEPROM version flashed to Xbox. Also can be caused by wiping the EEPROM or not hashing it properly. |
| Other | Likely bad EEPROM. | Likely need to flash EEPROM or install modchip. |
Error Code 01
Problem: General motherboard issue.
Cause/Solution: Cause is unknown; it is recommended to replace the motherboard.
Error Code 02
Problem: EEPROM check failed. This error is triggered by the bootloader and as a result does not display an error code on screen. You will see the Xbox rebooting and flashing red and green lights (FRAG).
Cause/Solution: You flashed something wrong or caused a short somewhere on your motherboard (possibly while soldering). If you’re using a modchip and you just flashed it, try again using a different BIOS. If you recently did some soldering to your Xbox, check for any stray solder balls that may be present and carefully remove them.
Error Code 03
Problem: General motherboard issue.
Cause/Solution: Cause is unknown; it is recommended to replace the motherboard.
Error Code 04
Problem: RAM check failed. This error is triggered by the bootloader and as a result does not display an error code on screen. You will see the Xbox rebooting and flashing red and green lights (FRAG).
Cause/Solution: RAM chip failure. This could be from pins on the RAM chip(s) becoming bridged, possibly from an accidental splash of solder or a failed 128MB RAM upgrade. Remember, electrostatic shock can sometimes damage integrated circuit chips like RAM chips, so even if you can’t see a problem, the RAM could still be fried. Replacing the RAM chips could be a solution but is risky and time consuming.
Error Code 05
Problem: Hard disk drive (HDD) not locked.
Cause/Solution: If you have not replaced your Xbox’s BIOS via a modchip/TSOP flash, then your HDD needs to be locked using a special password that is generated based on your Xbox’s EEPROM, which is unique per each individual Xbox. Microsoft designed it this way to prevent people from being able to plug the drive into a computer and have access to its contents and thus hacking it. Virtually all non-retail BIOSes (including modchip/TSOP) will not require the hard drive to be locked in order to start. If you’re seeing this error on a non-retail BIOS, then chances are your modchip/TSOP flash process had issues and for some reason you are now using a stock BIOS which is now requiring a password-locked hard drive again. If you’re seeing this error and your Xbox has been softmodded (through gamesave/font/audio exploits), then you just need to lock your drive again. Hopefully you have your EEPROM backed up at this point because if not, things get a lot more complicated. If you unlocked your HDD on the Xbox itself (using ConfigMagic for example), chances are the app you used made a backup of your EEPROM for you and it’s now sitting on your E: drive called «eeprom.bin» or something similar. You can plug the HDD into a computer at this point and use an Xbox hard drive explorer program like «Xplorer360» (Windows only) to view its files to copy your EEPROM backup. There are multiple ways to lock a HDD, one of which is by using XboxHDM by author ldotsfan. XboxHDM runs on a PC and one of its features is the ability to lock hard drives if you have an EEPROM backup. Choose option «3» from XboxHDM and follow the on-screen instructions to lock the HDD.
Error Code 06
Problem: Incorrect hard drive password.
Cause/Solution: The hard disk drive (HDD) is locked but it is locked with a password that belongs to a different Xbox. You will need to unlock the HDD and then re-lock it using the correct password. As stated above, each Xbox is locked using a password that is generated based on each Xbox’s unique EEPROM. Assuming you have the EEPROM of your Xbox backed up, you will just need to unlock the drive and re-lock it using your EEPROM backup. See the solution for Error Code 05 for more info.
Error Code 07
Problem: Hard drive timeout / HDD took too long to become ready.
Cause/Solution: The Xbox seems to know the HDD is present but it times-out waiting for the drive to become ready and respond to commands. This is probably due to a loose connection or faulty wire. See the solution for Error Code 08. If you’re using a SATA to IDE adapter, it’s possible that the adapter you’re using is not compatible with the drive you’re using or isn’t compatible with the Xbox at all. Try another SATA to IDE adapter / HDD combination. Some «green» drives are temperamental with certain SATA adapters. This error may also be caused if you have a SATA to IDE adapter and you are not using an 80 wire IDE cable (by default, they are 40 wire cables). Or, the console’s DVD drive is bad preventing access to the hard drive via the IDE bus. Swap the DVD drive with one from a different Xbox. They are all interchangeable.
Error Code 08
Problem: No hard drive found.
Cause/Solution: The Xbox can’t find the hard disk drive (HDD) while booting up. Try the following:
- If you are using a SATA to IDE adapter, you will need an 80 wire IDE cable. By default, it will be a 40 wire cable.
- Make sure the IDE ribbon cable (flat grey cable) is securely connected to the HDD, the DVD drive, and the motherboard itself.
- Check the IDE cable for signs of damage. If the cable looks like it has been scraped or has evidence of any damage then replace it.
- Check the HDD’s power cable and make sure it’s securely plugged in.
- If you can wiggle the HDD power cable around and make the Xbox work at certain times, then the leads coming from the power supply are loose and the power supply should be replaced.
- Take the HDD out and make sure the jumper is set correctly. There should be a diagram printed on the drive’s label that shows how the jumper should be connected. Make sure its set to Cable Select (CS), Master, or isn’t present at all. If the drive is set to Slave then you will run into issues!
- If all other cables are in fact securely connected and not damaged, you can try replacing the IDE cable anyway. It’s possible that it is damaged in a way that isn’t visible and IDE cables are cheap to come by.
- If all else fails, your hard drive is probably to blame and is faulty and needs to be replaced.
Error Code 09
Problem: Hard drive parameters are missing or incorrect.
Cause/Solution: Very uncommon error. The hard drive power cable may be unplugged, it might be in the wrong transfer mode (PIO/DMA), or the jumper is set to slave instead of master. If it’s a debug console, the size may be incorrect (minimum size is required for debug). Replace the hard drive otherwise.
Error Code 10
Problem: DVD drive timeout.
Cause/Solution: Similar to error codes 07 and 08, this is usually caused by a loose/faulty cable. The Xbox seems to know the DVD drive is present but it times-out waiting for the drive to become ready and respond to commands. Check the yellow cable running from the motherboard to the DVD drive. If all else fails, replace the DVD drive.
Error Code 11
Problem: No DVD drive found.
Cause/Solution: The Xbox cannot find the DVD drive. Similar to Error Code 10, this is usually from a loose/faulty cable. See solutions for Error Code 10. Note that many non-retail BIOSes can be configured to skip using a DVD drive entirely.
Error Code 12
Problem: DVD drive parameters are missing or incorrect.
Cause/Solution: This is an uncommon error. Try solutions for Error Code 10.
Error Code 13
Problem: Dashboard failed to launch due to missing/bad key, or anything else that would prevent it from running and the dashboard didn’t specify why it failed.
Cause/Solution: This can be caused by a kernel version issue but is a lot less common in recent years. Make sure you’re running the latest kernel. If you’re using a softmod, make sure your dashboard and softmod files are installed correctly. It is recommended to use JCRocky5’s Xbox Softmodding Tool as your softmod installer, if you’re using something else currently. If you are receiving this error only when launching games, try deleting E:, if it exists.
Error Code 14
Problem: Dashboard failed to launch (generic error).
Cause/Solution: Similar to Error Code 13. This can also result from changing names of files or messing with files on the HDD without knowing the repercussions. A common cause is from changing the boot orders or names of startup files on the HDD. It can also happen when you are rebuilding your HDD with a Slayer CD and the power was cut, or if your DVD drive is going bad when attempting to load a disc that uses PBL, such as Hexen.
Error Code 16
Problem: Internal clock cannot be set.
Cause/Solution: This happens when the Xbox tries to boot to the stock dashboard in order to have you set the current date/time. but fails to load the menu. This happens if you:
- Just replaced the HDD and are missing your clock capacitor or left your Xbox unplugged for a few hours.
- Erased the Microsoft dashboard files (which contain the clock setting) and are missing your clock capacitor or left your Xbox unplugged for a few hours.
- Have a revision 1.6 Xbox and an old (before 2004) BIOS installed without a clock loop patch and are missing your clock capacitor.
Try starting the Xbox with the Eject button instead of the power button in case it has a dual-boot configuration. If that fails, but you do have a modchip installed, boot into AID or Slayers and try installing the stock dashboard back on your HDD’s C: partition. You can also hotswap your HDD with another Xbox to reinstall the Microsoft dashboard. After the Xbox boots up and is able to set the clock successfully, update your BIOS or softmod to a more recent version to avoid this in the future.
Error Code 20
Problem: Dashboard failed to launch.
Cause/Solution: It was a cold boot, and the dashboard didn’t specify why it failed, but it needed to be noted that the DVD passed the challenge/response authentication during boot.
Error Code 21
Problem: Unspecific/generic error.
Cause/Solution: The Xbox was instructed (possibly by an XBE you launched) to reboot the Xbox and display this error. This occurs frequently when the Xbox is unable to boot due to dashboard changes being made (i.e. an XBE hasn’t been signed correctly or parts of the stock dashboard are missing). Also, if you’re using XbeShortcutMaker and seeing this error code then you might try regenerating the shortcut XBE file as it could be corrupted. If you are receiving this error only when launching games, try deleting E:if it exists. If you are trying to softmod, it may be a bad USB device. In very rare cases, a failing clock capacitor on 1.0-1.5 Xboxes may cause this issue, so removing it would be a wise path to explore as it is also a great risk to the health of your Xbox.