

С0000
Main Motor malfunction
Ошибка главного двигателя
162/210/163/211
C0070
Toner Replenishing Motor malfunction
Проблема с вращением банки тонера
162/210/163/211
223/283/363/423
224Е/284Е/364Е/454Е/554Е
Решение
C0202
C0204
C0206
C0208
Elevator Failure Tray 1/2/3/4
Проблема с подъемом бумаги лоток 1/2/3/4
162/210/163/211
Решение
C0211
C0204
C0206
C0208
Bypass Lifting Motion Failure
Проблема с подъемом бумаги лотка ручной подачи
165/185/195/215
222/282/362/223/283/363/423
224Е/284Е/364Е/454Е/554Е
227/287/367
С220/С280/С360
С224/С284/С364/С454/С554
С224Е/С284Е/С364Е/С454Е/С554Е
C227/C287/C367
C258/C308/C368/C458/C558/C658
C0320
LU-202m, LU-202XL fan abnormalitye
Ошибка вентилятора кассеты LU-202m, LU-202XL
AccurioPress C2060/C2070/C2070P
C3070/C3080/C3080P
C05хх
Fusing temperature failure
Проблема с температурой узла закрепления
162/210/163/211
Решение
C0F32
Faulty ATDC Sensor
Ошибка концентрации тонера
162/210/163/211
Решение
C133D
ROM check error
Проблема с платой EEPROM
162/210/163/211
C2152
Transfer belt pressure welding alienation
Проблема с узлом ленты переноса
С220/С280/С360
С224/С284/С364/С454/С554
С224Е/С284Е/С364Е/С454Е/С554Е
C227/C287/C367
C258/C308/C368/C458/C558/C658
C2241
C2242
C2243
C2244
Drum motor abnormality Y/M/C/K
Ошибка мотора барабана Y/M/C/K
PRO/PRESS
C6000L/C6000/C7000/C7000P/C70hc
C1060L/C1060/C1070/C1070P
Accurio Press C2060/C2070/C2070P
C3070/C3080/C3080P
Решение
C2253
C2254
Color PC motor`s failure
Ошибка привода барабанов
227/287/367
С220/С280/С360
С224/С284/С364/С454/С554
С224Е/С284Е/С364Е/С454Е/С554Е
C227/C287/C367
C258/C308/C368/C458/C558/C658
Решение
C2351
Fusing cooling fan motor malfunction
Ошибка главного вентилятора охлаждения
164/165/185/195
215/222/282/362
C2411
C2412
C2413
C2414
Developing unit C/M/Y/K new article release
Ошибка определения нового блока проявки
227/287/367
С220/С280/С360
С224/С284/С364/С454/С554
С224Е/С284Е/С364Е/С454Е/С554Е
C227/C287/C367
C258/C308/C368/C458/C558/C658
C2551
C2552
C2553
C2554
C2555
C2556
C2557
C2558
Abnormally low toner density C/M/Y/K
Ошибка концентрации тонера в блоке проявки
165/185/195/215
227/287/367
С220/С280/С360
С224/С284/С364/С454/С554
С224Е/С284Е/С364Е/С454Е/С554Е
C227/C287/C367
C258/C308/C368/C458/C558/C658
C2654
EEPROM Failure
Проблема с платой EEPROM
222/282/362
C2A11
C2A12
C2A13
C2A1
Drum unit C/M/Y/K new release failure
Ошибка определения нового блока барабана
С220/С280/С360
С224/С284/С364/С454/С554
С224Е/С284Е/С364Е/С454Е/С554Е
C227/C287/C367
C258/C308/C368/C458/C558/C658
C3201
C3202
Fusing motor failure
Ошибка мотора привода узла закрепления
224Е/284Е/364Е/454Е/554Е
С220/С280/С360
С224/С284/С364/С454/С554
С224Е/С284Е/С364Е/С454Е/С554Е
C258/C308/C368/C458/C558/C658
C34хх
C37хх
C38хх
C39хх
Fusing temperature failure
Проблема с температурой узла закрепления
164/165/185/195/215
221/282/362/223/283/363/423
224Е/284Е/364Е/454Е/554Е
227/287/367
С220/С280/С360
С224/С284/С364/С454/С554
С224Е/С284Е/С364Е/С454Е/С554Е
C227/C287/C367
C258/C308/C368/C458/C558/C658
Решение
C3508
Fusing high temperature abnormality
Повышенная температура узла фиксации
PRO/PRESS C6000L/C6000/C7000/C7000P/C70hc
C1060L/C1060/C1070/C1070P
Accurio Press C2060/C2070/C2070P
C3070/C3080/C3080P
Решение
C3924
Fusing sensor wire breaks detection
Проблема с термистором узла фиксации
C452/C552/C652
C451/C550/C650
C4101
Polygon Motor Failure
Проблема с блоком лазера
164/185/195/215
222/282/362/223/283/363/423
224Е/284Е/364Е/454Е/554Е
227/287/367
С220/С280/С360
С224/С284/С364/С454/С554
С224Е/С284Е/С364Е/С454Е/С554Е
C227/C287/C367
C258/C308/C368/C458/C558/C658
C4661
C4662
C4663
Color registration correction abnormality Y/M/C
Ошибка регистрации цветов Y/M/C
PRO C6000L/C6000/C7000/C7000P/C70hc
C1060L/C1060/C1070/C1070P
Решение
C5102
C5103
Main Motor malfunction
Ошибка главного двигателя
164/165/185/195/2
222/282/362/223/283/363/4
224Е/284Е/364Е/454Е/55
С220/С280/С3
С224/С284/С364/С454/С5
С224Е/С284Е/С364Е/С454Е/С554Е
C5370
MFP control board cooling fan motor`s failure to turn
Ошибка включения вентилятора платы MFP
223/283/363/423
224E/284E/364E/454E/554E
227/287/367
С220/С280/С360
С224/С284/С364/С454/С554
С224Е/С284Е/С364Е/С454Е/С554Е
C258/C308/C368/C458/C558/C658
C6755
CIS Gain adjustment abnormality
Ошибка настройки модуля CIS
AccurioPress C2060/C2070
C3070/C3080
C8001
DF communication error
Ошибка коммуникации с автоподатчиком
AccurioPress C2060/C2070
C3070/C3080
C9401
C9402
IR exposure lump malfunction
Проблема с узлом сканера
164/165/185/195/215
222/282/362/223/283/363/423
224Е/284Е/364Е/454Е/554Е
227/287/367
C227/C287/C367
C258/C308/C368/C458/C558/C658
CC151
Flash ROM error
Проблема с платой EEPROM
164/165/185/195/215
226/287/367
C227/C287/C367
C258/C308/C368/C458/C558/C658
CC163
CC164
CC165
ROM contents error
Ошибка программного обеспечения аппарата
С220/С280/С360
С224/С284/С364/С454/С554
С224Е/С284Е/С364Е/С454Е/С554Е
CD004
HDD error
Ошибка жесткого диска
222/282/362
227/287/367
C227/C287/C367
C258/C308/C368/C458/C558/C658
CD0xx
Hard disk error
Проблема с жестким диском
223/283/363/423
224Е/284Е/364Е/454Е/554Е
227/287/367
С220/С280/С360
С224/С284/С364/С454/С554
С224Е/С284Е/С364Е/С454Е/С554Е
C227/C287/C367
C258/C308/C368/C458/C558/C658
Решение
CD3xx
NVRAM data error
Проблема с платой NVRAM
165/185/195/215
222/282/362/223/283/363/423
224Е/284Е/364Е/454Е/554Е
С220/С280/С360
С224/С284/С364/С454/С554
С224Е/С284Е/С364Е/С454Е/С554Е
C227/C287/C367
C258/C308/C368/C458/C558/C658
CE020
Browser abnormality detection
Внезапное выключение браузера
AccurioPress C2060/C2070/C2070P
C3070/C3080/C3080P
CE301
Referring incorrect memory
Ошибка обработки данных (ошибка памяти)
224E/284E/364E/454E/554E
227/287/367
С224/С284/С364/С454/С554
С224Е/С284Е/С364Е/С454Е/С554Е
C258/C308/C368/C458/C558/C658
P-5
PRT/IR ERROR
C200/C203/C220/C224/C250
C252/C253/C258/C284
C277/C287/C257i
C300/C308/C352/C350/C353
C360/C364/C368
C450/C451/C452/C454/C458
C550/C552/C554/C558
C650/C652/C654/C658/C659/C754/C759
C224E/C284E/C364E/C454E
C554E/C654E/C754E
C250P/C252P/C352P
C353P/C450P
C250i/C300i/C360i
C450i/C550i/C650i
C3300i/C3320i/C3350i
C4000i/C4050i
Решение
P-6
P-7
P-8
P-9
C/M/Y/K Imaging Unit failure
C200/C203/C220/C224/C250
C252/C253/C258/C284
C277/C287/C257i
C300/C308/C352/C350/C353
C360/C364/C368
C450/C451/C452/C454/C458
C550/C552/C554/C558
C650/C652/C654/C658/C659
C754/C759
C224E/C284E/C364E/C454E
C554E/C654E/C754E
C250P/C252P/C352P
C353P/C450P
C250i/C300i/C360i
C450i/C550i/C650i
C3300i/C3320i/C3350i
C4000i/C4050i
Решение
P-21
C224e/C224/C220/C652/C200/C203/C227/C250/C250i/C257i/C250P
C252/C252P/C253/C258/C280/C284/C284e/C287/C300/C300i/C308 C352/C350/C352P/C353/C353P/C360/C360i/C364/C364e/C368
C450/C450P/C450i/C451/C452/C454/C454e/C458/C550/C550i/C552 C554/C554e/C558/C650/C650i/C654/C654e/C658/C659/C754 C754e/C759
C3300i/C3320i/C3350i/C4000i/C4050i
Решение
P-28
C224e/C224/C220/C652/C200/C203/C227/C250/C250i/C257i/C250P
C252/C252P/C253/C258/C280/C284/C284e/C287/C300/C300i/C308 C352/C350/C352P/C353/C353P/C360/C360i/C364/C364e/C368
C450/C450P/C450i/C451/C452/C454/C454e/C458/C550/C550i/C552 C554/C554e/C558/C650/C650i/C654/C654e/C658/C659/C754 C754e/C759
Решение
Если вы не нашли на этой странице ваш код ошибки, то нажмите на кнопку «Запросить код ошибки», которая находится под этим текстом, заполните данные, после этого мы отправим информацию на указанную вами электронную почту, а также возможно, что мы добавим вашу ошибку в наш список.
Инфа сотка
-

Bizhub hack
Серия подсказок «bizhub hack» сделает ваше общение с техникой Konica Minolta …
-
5партнер на связи
Компания Пятый партнер не ушла с Российского рынка и продолжает работать. …
-
5partner награды в 2022
Очередной год подряд самый большой объем продаж оборудования Konica Minolta …
-
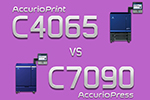
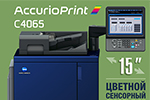
C4065 vs C7090
В этой статье мы наглядно покажем чем отличается профессиональная модель …
-
-
-
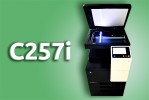
C257i офис в цвете
Konica Minolta в 2021 году выпустила очередной хит цветной офисной бюджетной …
-
-
-
-
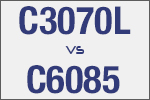
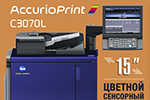
C3070L vs C6085
В этой статье мы наглядно покажем чем отличается профессиональная модель …
-
-
-
-
-
-
-
-
-
-
-
-
-
-
-
-
-


С0000
Main Motor malfunction
Ошибка главного двигателя
162/210/163/211
C0070
Toner Replenishing Motor malfunction
Проблема с вращением банки тонера
162/210/163/211/223/283/363/423/224Е/284Е/364Е/454Е/554Е
Решение
Шаг 1
Откройте переднюю крышку.
Шаг 2
Убедитесь, что туба с тонером установлена корректно.
C0202
C0204
C0206
C0208
Elevator Failure Tray 1/2/3/4
Проблема с подъемом бумаги лоток 1/2/3/4
162/210/163/211
Решение
Шаг 1
Выдвиньте соответствующий ошибке лоток.
Шаг 2
Убедитесь, что в нише за лотком отсутствует препятствующий подъёму лифта лист бумаги, выскочивший из ёмкости лотка.
C0211
C0204
C0206
C0208
Bypass Lifting Motion Failure
Проблема с подъемом бумаги лотка ручной подачи
165/185/195/215/222/282/362/223/283/363/423/224Е/284Е/364Е/454Е/554Е/227/287/367С220/С280/С360/С224/С284/С364/С454/С554/С224Е/С284Е/С364Е/С454Е/С554Е/C227/C287/C367/C258/C308/C368/C458/C558/C658
C0320
LU-202m, LU-202XL fan abnormalitye
Ошибка вентилятора кассеты LU-202m, LU-202XL
AccurioPress C2060/C2070/C2070P
C3070/C3080/C3080P
C05хх
Fusing temperature failure
Проблема с температурой узла закрепления
162/210/163/211
Решение
Шаг 1
Выключите главный выключатель аппарата.
Шаг 2
Нажмите кнопку стоп и, удерживая её, вновь включите главный выключатель аппарата.
C0F32
Faulty ATDC Sensor
Ошибка концентрации тонера
162/210/163/211
Решение
Шаг 1
Войдите в сервисный режим аппарата.
Шаг 2
В меню Adjust установите другое значение TCR Gain.
Шаг 3
Выйдите из сервисного режима.
Шаг 4
Попробуйте провести пробную печать.
C133D
ROM check error
Проблема с платой EEPROM
162/210/163/211
C2152
Transfer belt pressure welding alienation
Проблема с узлом ленты переноса
С220/С280/С360/С224/С284/С364/С454/С554/С224Е/С284Е/С364Е/С454Е/С554Е/C227/C287/C367/C258/C308/C368/C458/C558/C658
C2241
C2242
C2243
C2244
Drum motor abnormality Y/M/C/K
Ошибка мотора барабана Y/M/C/K
PRO/PRESS C6000L/C6000/C7000/C7000P/C70hc/C1060L/C1060/C1070/C1070P
Accurio Press C2060/C2070/C2070P/C3070/C3080/C3080P
Решение
Шаг 1
Войдите в сервисный режим аппарата.
Шаг 2
В режиме State confirmation проведите проверку соответствующего ошибке двигателя фотобарабана.
C2253
C2254
Color PC motor`s failure
Ошибка привода барабанов
227/287/367/С220/С280/С360/С224/С284/С364/С454/С554/С224Е/С284Е/С364Е/С454Е/С554Е/C227/C287/C367/C258/C308/C368/C458/C558/C658
Решение
Шаг 1
Откройте переднюю крышку.
Шаг 2
Извлеките ёмкость для отработанного тонера и цветные фотобарабаны.
Шаг 3
Проверьте целостность и равномерность магнитной кисти блоков проявки.
Шаг 4
Проверьте корректность установки фотобарабанов.
C2351
Fusing cooling fan motor malfunction
Ошибка главного вентилятора охлаждения
164/165/185/195/215/222/282/362
C2411
C2412
C2413
C2414
Developing unit C/M/Y/K new article release
Ошибка определения нового блока проявки
227/287/367/С220/С280/С360/С224/С284/С364/С454/С554/С224Е/С284Е/С364Е/С454Е/С554Е/C227/C287/C367/C258/C308/C368/C458/C558/C658
C2551
C2552
C2553
C2554
C2555
C2556
C2557
C2558
Abnormally low toner density C/M/Y/K
Ошибка концентрации тонера в блоке проявки
165/185/195/215/227/287/367/С220/С280/С360/С224/С284/С364/С454/С554/С224Е/С284Е/С364Е/С454Е/С554Е/C227/C287/C367/C258/C308/C368/C458/C558/C658
C2654
EEPROM Failure
Проблема с платой EEPROM
222/282/362
C2A11
C2A12
C2A13
C2A1
Drum unit C/M/Y/K new release failure
Ошибка определения нового блока барабана
С220/С280/С360/С224/С284/С364/С454/С554/С224Е/С284Е/С364Е/С454Е/С554Е/C227/C287/C367/C258/C308/C368/C458/C558/C658
C3201
C3202
Fusing motor failure
Ошибка мотора привода узла закрепления
224Е/284Е/364Е/454Е/554Е/С220/С280/С360/С224/С284/С364/С454/С554/С224Е/С284Е/С364Е/С454Е/С554Е/C258/C308/C368/C458/C558/C658
C34хх
C37хх
C38хх
C39хх
Fusing temperature failure
Проблема с температурой узла закрепления
164/165/185/195/215/221/282/362/223/283/363/423/224Е/284Е/364Е/454Е/554Е/227/287/367/С220/С280/С360/С224/С284/С364/С454/С554/С224Е/С284Е/С364Е/С454Е/С554Е/C227/C287/C367/C258/C308/C368/C458/C558/C658
Решение
Шаг 1
Выключите главный выключатель.
Шаг 2
В зависимости от модели нажмите кнопку стоп или кнопку reset (желтая кнопка), и, удерживая её, включите главный выключатель аппарата.
Шаг 3
При появлении на экране кнопки trouble reset, нажмите её.
Шаг 4
Выключите и через 10 секунд включите главный выключатель аппарата.
Шаг 5
Если ошибка не сбросилась, требуется диагностика цепи узла фиксации.
C3508
Fusing high temperature abnormality
Повышенная температура узла фиксации
PRO/PRESS C6000L/C6000/C7000/C7000P/C70hc/C1060L/C1060/C1070/C1070P
Accurio Press C2060/C2070/C2070P/C3070/C3080/C3080P
Решение
Шаг 1
Войдите в сервисный режим по процедуре сброса ошибок узла фиксации.
Шаг 2
В режиме System settings переустановите значение программного переключателя 03-1 в состояние выключено (0).
Шаг 3
Выйдите из сервисного режима и перезапустите систему.
Шаг 4
При повторном возникновении ошибки требуется диагностика цепей узла фиксации.
C3924
Fusing sensor wire breaks detection
Проблема с термистором узла фиксации
C452/C552/C652/C451/C550/C650
C4101
Polygon Motor Failure
Проблема с блоком лазера
164/185/195/215/222/282/362/223/283/363/423/224Е/284Е/364Е/454Е/554Е/227/287/367/С220/С280/С360/С224/С284/С364/С454/С554/С224Е/С284Е/С364Е/С454Е/С554Е/C227/C287/C367/C258/C308/C368/C458/C558/C658
C4661
C4662
C4663
Color registration correction abnormality Y/M/C
Ошибка регистрации цветов Y/M/C
PRO C6000L/C6000/C7000/C7000P/C70hc/C1060L/C1060/C1070/C1070P
Решение
Шаг 1
Проверьте ресурсы работы основных расходных материалов (фотобарабан, узел проявки, лента переноса) используя меню «Утилиты» или веб-интерфейс. В случае превышения ресурса замените, ресурс которого превышен.
Шаг 2
Если счетчики расходных материалов не превышены, выполните режим «Стабилизации», используя меню «Утилиты». Настройки администратора — настройки системы — настройки специалиста — регулировка принтера — стабилизация, инициализация + стабилизация.
Шаг 3
Если пункт 2 не дал положительного результата, выполните очистку коротронов заряда. Для этого откройте переднюю крышку аппарата и при помощи шомпола очистите коротрон заряда.
C5102
C5103
Main Motor malfunction
Ошибка главного двигателя
164/165/185/195/2/222/282/362/223/283/363/4/224Е/284Е/364Е/454Е/55/С220/С280/С3/С224/С284/С364/С454/С5/С224Е/С284Е/С364Е/С454Е/С554Е
C5370
MFP control board cooling fan motor`s failure to turn
Ошибка включения вентилятора платы MFP
223/283/363/423/224E/284E/364E/454E/554E/227/287/367/С220/С280/С360/С224/С284/С364/С454/С554/С224Е/С284Е/С364Е/С454Е/С554Е/C258/C308/C368/C458/C558/C658
C6755
CIS Gain adjustment abnormality
Ошибка настройки модуля CIS
AccurioPress C2060/C2070/C3070/C3080
C8001
DF communication error
Ошибка коммуникации с автоподатчиком
AccurioPress C2060/C2070/C3070/C3080
C9401
C9402
IR exposure lump malfunction
Проблема с узлом сканера
164/165/185/195/215/222/282/362/223/283/363/423/224Е/284Е/364Е/454Е/554Е/227/287/367/C227/C287/C367/C258/C308/C368/C458/C558/C658
CC151
Flash ROM error
Проблема с платой EEPROM
164/165/185/195/215/226/287/367/C227/C287/C367/C258/C308/C368/C458/C558/C658
CC163
CC164
CC165
ROM contents error
Ошибка программного обеспечения аппарата
С220/С280/С360/С224/С284/С364/С454/С554/С224Е/С284Е/С364Е/С454Е/С554Е
CD004
HDD error
Ошибка жесткого диска
222/282/362/227/287/367/C227/C287/C367/C258/C308/C368/C458/C558/C658
CD0xx
Hard disk error
Проблема с жестким диском
223/283/363/423/224Е/284Е/364Е/454Е/554Е/227/287/367/С220/С280/С360/С224/С284/С364/С454/С554/С224Е/С284Е/С364Е/С454Е/С554Е/C227/C287/C367/C258/C308/C368/C458/C558/C658
Решение
Шаг 1
Смените текущую версию прошивки.
Шаг 2
Если ошибка повторится, войдите в сервисный режим и проведите процедуру физического форматирования жёсткого диска в меню System2.
CD3xx
NVRAM data error
Проблема с платой NVRAM
165/185/195/215/222/282/362/223/283/363/423/224Е/284Е/364Е/454Е/554Е/С220/С280/С360/С224/С284/С364/С454/С554/С224Е/С284Е/С364Е/С454Е/С554Е/C227/C287/C367/C258/C308/C368/C458/C558/C658
CE020
Browser abnormality detection
Внезапное выключение браузера
AccurioPress C2060/C2070/C2070P/C3070/C3080/C3080P
CE301
Referring incorrect memory
Ошибка обработки данных (ошибка памяти)
224E/284E/364E/454E/554E/227/287/367/С224/С284/С364/С454/С554/С224Е/С284Е/С364Е/С454Е/С554Е/C258/C308/C368/C458/C558/C658
P-5
PRT/IR ERROR
C200/C203/C220/C224/C250/C252/C253/C258/C284/C277/C287/C257i/C300/C308/C352/C350/C353/C360/C364/C368/C450/C451/C452/C454/C458/C550/C552/C554/C558/C650/C652/C654/C658/C659/C754/C759/C224E/C284E/C364E/C454E/C554E/C654E/C754E/C250P/C252P/C352P/C353P/C450P/C250i/C300i/C360i/C450i/C550i/C650i/C3300i/C3320i/C3350i/C4000i/C4050i
Решение
Шаг 1
Проверить поверхность ленты переноса.
Шаг 2
Заменить ленту переноса.
P-6
P-7
P-8
P-9
C/M/Y/K Imaging Unit failure
C200/C203/C220/C224/C250/C252/C253/C258/C284/C277/C287/C257i/C300/C308/C352/C350/C353/C360/C364/C368/C450/C451/C452/C454/C458/C550/C552/C554/C558/C650/C652/C654/C658/C659/C754/C759/C224E/C284E/C364E/C454E/C554E/C654E/C754E/C250P/C252P/C352P/C353P/C450P/C250i/C300i/C360i/C450i/C550i/C650i/C3300i/C3320i/C3350i/C4000i/C4050i
Решение
Шаг 1
Проверить состояние расходных материалов по желтому каналу.
Шаг 2
Заменить расходные материалы по желтому каналу.
P-21
C224e/C224/C220/C652/C200/C203/C227/C250/C250i/C257i/C250P/C252/C252P/C253/C258/C280/C284/C284e/C287/C300/C300i/C308 C352/C350/C352P/C353/C353P/C360/C360i/C364/C364e/C368/C450/C450P/C450i/C451/C452/C454/C454e/C458/C550/C550i/C552 C554/C554e/C558/C650/C650i/C654/C654e/C658/C659/C754 C754e/C759/C3300i/C3320i/C3350i/C4000i/C4050i
Решение
Шаг 1
Проверить состояние расходных материалов по желтому каналу.
Шаг 2
Провести калибровку.
P-28
C224e/C224/C220/C652/C200/C203/C227/C250/C250i/C257i/C250P/C252/C252P/C253/C258/C280/C284/C284e/C287/C300/C300i/C308 C352/C350/C352P/C353/C353P/C360/C360i/C364/C364e/C368/C450/C450P/C450i/C451/C452/C454/C454e/C458/C550/C550i/C552 C554/C554e/C558/C650/C650i/C654/C654e/C658/C659/C754 C754e/C759
Решение
Шаг 1
Проверить состояние расходных материалов по желтому каналу.
Шаг 2
Заменить ленту переноса.
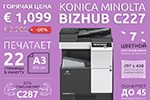
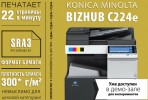
– Compatible Printer model: Konica-Minolta bizhub C224e
– Konica-Minolta bizhub C224e Error Codes with quick guides:
- Code: C0002
- Description: Paper feed communication error
When the printer control board (PRCB) is receiving data, a communication error is detected. - Troubleshooting Guides: 1 Turn OFF the main power switch, disconnect and then connect the power cord. Wait for 10 sec. or more after connect the power cord, and turn ON the main power switch. 2 Rewrite the firmware. 3 Replace PRCB.
- Code: C0106
- Description: Tray 3/LCT paper feed motor turning at abnormal timing
• The motor lock signal remains HIGH for a predetermined continuous period of time while the motor remains stationary. • The motor lock signal remains LOW for a predetermined continuous period of time while the motor remains stationary. - Troubleshooting Guides: When PC-110 or PC-210 is installed: 1 Check the connector between M111-PCCB CN5 for proper connection and correct as necessary. 2 Check the connector of M111 for proper drive coupling and correct as necessary. 3 M111 operation check PCCB CN5-5 (CW/CCW) PC-110/PC-210 4-C. 4 Replace M111. 5 Replace PCCB.
When PC-410 is installed: 1 Check the connector between M131-PCCB CN5 for proper connection and correct as necessary. 2 Check the connector of M131 for proper drive coupling and correct as necessary. 3 M131 operation check PCCB CN5-5 (CW/CCW) PC-410 5-J 4 Replace M131. 5 Replace PCCB.
- Code: C0107
- Description: Tray 3/LCT vertical transport motor turning at abnormal timing
• The motor lock signal remains HIGH for a predetermined continuous period of time while the motor remains stationary. • The motor lock signal remains LOW for a predetermined continuous period of time while the motor remains stationary. - Troubleshooting Guides: When PC-110 or PC-210 is installed: 1 Check the connector between M112-PCCB CN5 for proper connection and correct as necessary. 2 Check the connector of M112 for proper drive coupling and correct as necessary. 3 M112 operation check PCCB CN5-13 (CW/CCW) PC-110/PC-210 3 to 4-C. 4 Replace M112. 5 Replace PCCB.
When PC-410 is installed: 1 Check the connector between M132-PCCB CN5 for proper connection and correct as necessary. 2 Check the connector of M132 for proper drive coupling and correct as necessary. 3 M132 operation check PCCB CN5-13 (CW/CCW) PC-410 4-J. 4 Replace M132. 5 Replace PCCB.
- Code: C0108
- Description: Tray 4 paper feed motor turning at abnormal timing
<When PC-210 is installed> • The motor lock signal remains HIGH for a predetermined continuous period of time while the motor remains stationary. • The motor lock signal remains LOW for a predetermined continuous period of time while the motor remains stationary. - Troubleshooting Guides: 1 Check the connector between M121-PCCB CN9 for proper connection and correct as necessary. 2 Check the connector of M121 for proper drive coupling and correct as necessary. 3 M121 operation check PCCB CN9-5 (CW/CCW) PC-210 6-K. 4 Replace M121. 5 Replace PCCB
- Code: C0109
- Description: Tray 4 vertical transport motor turning at abnormal timing
<When PC-210 is installed> • The motor lock signal remains HIGH for a predetermined continuous period of time while the motor remains stationary. • The motor lock signal remains LOW for a predetermined continuous period of time while the motor remains stationary. - Troubleshooting Guides: 1 Check the connector between M122-PCCB CN9 for proper connection and correct as necessary. 2 Check the connector of M122 for proper drive coupling and correct as necessary. 3 M122 operation check PCCB CN9-13 (CW/CCW) PC-210 6-K. 4 Replace M122. 5 Replace PCCB.
- Code: C0202
- Description: Tray 1 feeder up/down abnormality
The tray 1 upper limit sensor (PS22) is not blocked even after the lapse of a given period of time after the lifting motion has been started. - Troubleshooting Guides: 1 Check the connector between M12-PRCB CN25 for proper connection and correct as necessary. 2 Check the connector of M12 for proper drive coupling and correct as necessary. 3 Check the connector between PS25-relay CN30- PRCB CN26 for proper connection and correct as necessary. 4 PS25 I/O check, sensor check PRCB CN26-3 (ON). 5 M12 operation check PRCB CN25-5 (REM). 6 Replace M12. 7 PRCB ICP5 conduction check. 8 Replace PRCB.
- Code: C0204
- Description: Tray 2 feeder up/down abnormality
The tray 2 upper limit sensor (PS22) is not blocked even after the lapse of a given period of time after the lifting motion has been started. - Troubleshooting Guides: 1 Check the connector between M13-PRCB CN20 for proper connection and correct as necessary. 2 Check the connector of M13 for proper drive coupling and correct as necessary. 3 Check the connector between PS22-relay CN40- PRCB CN19 for proper connection and correct as necessary. 4 PS22 I/O check, sensor check PRCB CN19-9 (ON). 5 M13 operation check PRCB CN20-5 (REM). 6 Replace M13. 7 PRCB ICP4 conduction check. 8 Replace PRCB.
- Code: C0206
- Description: Tray 3 lift-up failure
The tray 3 upper limit sensor (PS116) is not blocked even after the set period of time has elapsed after the paper lift-up operation for the drawer began. - Troubleshooting Guides: 1 Check the connector between M113-PCCB CN6 for proper connection and correct as necessary. 2 Check the connector of M113 for proper drive coupling and correct as necessary. 3 Check the connector between PS116-relay CN24- PCCB CN4 for proper connection and correct as necessary. 4 PS116 I/O check, sensor check PCCB CN4-3 (ON). 5 M113 operation check PCCB CN6-8 to 9. 6 Replace M113. 7 Replace PCCB. 8 Replace MFPB.
- Code: C0208
- Description: Tray 4 lift-up failure
The tray 4 upper limit sensor (PS126) is not blocked even after the set period of time has elapsed after the paper lift-up operation for the drawer began. - Troubleshooting Guides: 1 Check the connector between M123-PCCB CN8 for proper connection and correct as necessary. 2 Check the connector of M123 for proper drive coupling and correct as necessary. 3 Check the connector between PS126-relay CN47- PCCB CN7 for proper connection and correct as necessary. 4 PS126 I/O check, sensor check PCCB CN7-3. 5 M123 operation check PCCB CN8-8 to 9. 6 Replace M123. 7 Replace PCCB. 8 Replace MFPB.
- Code: C0210
- Description: LCT lift failure
• The main tray upper limit sensor (PS136) is not blocked even after the set period of time has elapsed after the paper lift-up operation for the drawer began. • The shifter stop / lower limit position sensor (PS138) is not unblocked even after the set period of time has elapsed after the paper lift-up operation for the drawer began. • The main tray upper limit sensor (PS136) is not blocked even after the set period of time has elapsed after the paper lift-up operating. • The main tray upper limit sensor (PS136) is not unblocked even after the set period of time has elapsed after the paper lift-down operation began. • The shifter stop / lower limit position sensor (PS138) is not blocked even after the set period of time has elapsed after the paper lift-down operation began. - Troubleshooting Guides: 1 Check the connector between M134-PCCB CN10 for proper connection and correct as necessary. 2 Check the connector of M134 for proper drive coupling and correct as necessary. 3 Check the connector between PS136-relay CN1- PCCB CN4 for proper connection and correct as necessary. 4 Check the connector between PS138-relay CN16- PCCB CN14 for proper connection and correct as necessary. 5 PS136 I/O check, sensor check PCCB CN4-3 (ON) PC-410 8-J. 6 PS138 I/O check, sensor check PCCB CN14-6 (ON) PC-410 4-J. 7 M134 operation check PCCB CN10-1 to 2 PC-410 6-J. 8 Replace M134. 9 PCCB IC2 conduction check. 10 Replace PCCB.
- Code: C0211
- Description: Manual feed up/down abnormality
• Paper does not unblock the bypass lift-up position sensor (PS26) even after the transport motor (M1) rotates for a given period of time after the position is switched from stand by position at lift-up plate to the feed position. • The bypass lift-up position sensor (PS26) is not blocked even after the transport motor (M1) rotates for a given period of time after the position is switched from stand by position at lift-up plate to the feed position. - Troubleshooting Guides: 1 Check the connector between M1-PRCB CN31 for proper connection and correct as necessary. 2 Check the connector of M1 for proper drive coupling and correct as necessary. 3 Check the connector between PS26-relay CN19- PRCB CN27 for proper connection and correct as necessary. 4 Check the connector between SD1-relay CN21-relay CN19-PRCB CN27 for proper connection and correct as necessary. 5 PS26 I/O check, sensor check PRCB CN27-13 (ON) 4-C. 6 SD1 operation check PRCB CN27-10 (ON) 4-C 7. M1 operation check PRCB CN31-2 (REM) PRCB CN31-5 (LOCK). 8 Replace M1. 9 PRCB ICP5 conduction check. 10 Replace PRCB.
- Code: C0214
- Description: LCT shift failure
• The shifter stop / lower limit position sensor (PS138) is not blocked even after the set period of time has elapsed after the shift operation began (shift to the right). • The shifter home sensor (PS139) is not unblocked even after the set period of time has elapsed after the shift operation began (shift to the right). • The shifter stop / lower limit position sensor (PS138) is not unblocked even after the set period of time has elapsed after the return operation began (shift to the left). • The shifter home sensor (PS139) is not blocked even after the set period of time has elapsed after the return operation began (shift to the left). - Troubleshooting Guides: 1 Check the connector between M133-PCCB CN10 for proper connection and correct as necessary. 2 Check the connector of M133 for proper drive coupling and correct as necessary. 3 Check the connector between PS138-relay CN16- PCCB CN14 for proper connection and correct as necessary. 4 Check the connector between PS139-relay CN16- PCCB CN14for proper connection and correct as necessary. 5 PS138 I/O check, sensor check PCCB CN14-6 (ON) PC-410 4-J. 6 PS139 I/O check, sensor check PCCB CN14-3 (ON) PC-410 4-J. 7 M133 operation check PCCB CN10-3 to 4 PC-410 6-J. 8 Replace M133. 9 PCCB IC2 conduction check. 10 Replace PCCB.
- Code: C1004
- Description: FNS communication error
<When FS-533 or FS-534 is installed> When the FS control board (FSCB) is receiving data, a communication error is detected.
<When JS-506 is installed> When the JS control board (JSCB) is receiving data, a communication error is detectedce M121. - Troubleshooting Guides: 1 Turn OFF the main power switch, disconnect and then connect the power cord. Wait for 10 sec. or more after connect the power cord, and turn ON the main power switch. 2 Rewrite the firmware. 3 Replace FSCB (FS-533/FS-534) When JS-506 is installed Step Action Control signal Location of electrical components 1 Turn OFF the main power switch, disconnect and then connect the power cord. Wait for 10 sec. or more after connect the power cord, and turn ON the main power switch. 2 Rewrite the firmware. 3 Replace JSCB.
- Code: C1081
- Description: SD communication error
<When FS-534+SD-511 is installed> When a communication error is detected between the FS control board (FSCB) and the SD control board (SDDB). - Troubleshooting Guides: 1 Turn OFF the main power switch, disconnect and then connect the power cord. Wait for 10 sec. or more after connect the power cord, and turn ON the main power switch. 2 Rewrite the firmware. 3 Replace SDDB. 4 Replace FSCB.
- Code: C1102
- Description: Main tray up/down motor’s drive malfunction
<When FS-533 is installed> • While the exit tray is being lifted, the stapler movement motor (M107) is not unblocked after the set period of time has elapsed after the tray lift up motor (M109) is turned ON. • While the exit tray is being lowered, the stapler movement motor (M107) is not blocked after the set period of time has elapsed after the tray lift up motor (M109) is turned ON
<When FS-534 is installed> • While the exit tray is being lifted, the main tray upper position sensor (PS26/PS27) is not blocked and the main tray upper position detect switch (SW2) is not turned ON, even after the main tray up/down motor (M11) turns by the set number of times. • While the exit tray is being lowered, the main tray full detection sensor (PS29) is not blocked after the set period of time has elapsed after the main tray up/down motor (M11) is turned ON.c - Troubleshooting Guides: When FS-533 is installed: 1 Check the connector between M109-FSCB CN108 for proper connection and correct as necessary. 2 Check the connector of M109 for proper drive coupling and correct as necessary. 3 Check the connector between PS107-FSCB CN110 for proper connection and correct as necessary. 4 PS107 I/O check, sensor check FSCB CN110 FS-533 7-D to E 5 M109 operation check FSCB CN108 FS-533 10-E. 6 Replace M109. 7 FSCB CP109 conduction check. 8 Replace FSCB.
When FS-534 is installed: 1 Check the motor and sensor connectors for proper connection, and correct as necessary. 2 Check the connector of M11 for proper drive coupling, and correct as necessary. 3 PS26 I/O check, sensor check FSCB J14<A>-5 (ON) FS-534 2-C. 4 PS27 I/O check, sensor check FSCB J14<B>-8 (ON) FS-534 3-C. 5 PS29 I/O check, sensor check FSCB J14<A>-8 (ON) FS-534 4-C. 6 SW2 operation check. 7 M11 operation check FSCB J9<A>-9 to 10 FS-534 10-C to D. 8 Replace M11. 9 Replace FSCB.
- Code: C1103
- Description: Alignment plate motor/Fr’s malfunction
<When FS-533 is installed> • The alignment plate home sensor/F (PS108) is not unblocked after the set period of time has elapsed after the plate drive starts from the home position. • The alignment plate home sensor/F (PS108) is not blocked after the set period of time has elapsed after the alignment motor/F (M105) is turned ON to return the plate to the home position.
<When FS-534 is installed> • The alignment plate/F home sensor (PS12) is not unblocked after the set period of time has elapsed after the plate drive starts from the home position. • The alignment plate/F home sensor (PS12) is not blocked after the set period of time has elapsed after the alignment motor/front (M7) is turned ON to return the plate to the home position. • The alignment plate/F does not reach the specified position within the set period of time - Troubleshooting Guides: When FS-533 is installed: 1 Check the connector between M105-FSCB CN102 for proper connection and correct as necessary. 2 Check the connector of M105 for proper drive coupling and correct as necessary. 3 Check the connector between PS108-FSCB CN102 for proper connection and correct as necessary. 4 PS108 I/O check, sensor check FSCB CN102 FS-533 7-J. 5 M105 operation check FSCB CN102 FS-533 7-J. 6 Replace M105. 7 FSCB CP105 conduction check. 8 Replace FSCB.
When FS-534 is installed: 1 Check the connector between M7-FSCB J4 for proper connection and correct as necessary. 2 Check the connector of M7 for proper drive coupling, and correct as necessary. 3 Check the connector between PS12-FSCB J4 for proper connection and correct as necessary. 4 PS12 I/O check, sensor check FSCB J4<B>-4 (ON) FS-534 13-C. 5 M7 operation check FSCB J4<A>-5 to 8 FS-534 11-C to D. 6 Replace M7. 7 Replace FSCB.
- Code: C1105
- Description: Bundle eject motor’s drive malfunction
<When FS-534 is installed> • The gripper home position sensor (PS18) does not block even after the set period of time has elapsed after the gripper position detection sensor (PS19) unblocked. • The gripper position detection sensor (PS19) does not block even after the set period of time has elapsed after it unblock • The gripper position detection sensor (PS19) does not block even after the set period of time has elapsed after the gripper home position sensor (PS18) unblocked. • The gripper home position sensor (PS18) does not block even after the set period of time has elapsed after the bundle eject motor (M10) unblocked. • The gripper home position sensor (PS18) and the gripper position detection sensor (PS19) are blocked at the same time. - Troubleshooting Guides: 1 Check the motor and sensor connectors for proper connection, and correct as necessary. 2 Check the connector of M10 for proper drive coupling, and correct as necessary. 3 PS18 I/O check, sensor check FSCB J13-13 (ON) FS-534 7-C. 4 PS19 I/O check, sensor check FSCB J12-3 (ON) FS-534 7-C. 5 M10 operation check FSCB J13-1 to 2 FS-534 8-C to D. 6 Replace M10. 7 Replace FSCB.
- Code: C1106
- Description: Stapler movement motor’s malfunction
<When FS-533 is installed> • The stapler home sensor (PS110) is not unblocked after the laps of given time after it started operating from the home position. • The stapler home sensor (PS110) is not unblocked after the laps of give time after the stapler movement motor (M107) turned ON when it returned to the home position.
<When FS-534 is installed> • The stapler home position sensor (Rear) (PS23) is not blocked or unblocked even after the set period of time has elapsed after the side stapler movement motor (M13) turned ON. • The stapler does not reach the specified position within the set period of time. J - Troubleshooting Guides: When FS-533 is installed: 1 Check the connector between M107-STREYB CN123 for proper connection, and correct as necessary. 2 Check the connector of M107 for proper drive coupling, and correct as necessary. 3 Check the connector between PS110-FSCB CN110 for proper connection, and correct as necessary. 4 PS110 I/O check, sensor check FSCB CN110 FS-533 8-D to E. 5 M107 operation check STREYB CN123-5 to 8 FS-533 5-L. 6 Replace M107. 7 Replace STREYB. 8 FSCB CP107 conduction check. 9 Replace FSCB.
When FS-534 is installed: 1 Check the connector between M13-relay CN3-FSCB J11 for proper connection, and correct as necessary. 2 Check the connector of M13 for proper drive coupling, and correct as necessary. 3 Check the connector between PS23-relay CN3-FSCB J11 for proper connection, and correct as necessary. 4 PS23 I/O check, sensor check FSCB J11<B>-3 (ON) FS-534 4-C. 5 M13 operation check FSCB J11<A>-1 to 4 FS-534 4-C to D. 6 Replace M13. 7 Replace FSCB.
- Code: C1109
- Description: Stapler motor’s drive malfunction
<When FS-533 is installed> The stapler home sensor (PS110) is not blocked even after the set period of time has elapsed after the stapler motor turned ON.
<When FS-534 is installed> • The stapler home position sensor (Rear) (PS23) is not blocked or unblocked even after the set period of time has elapsed after the stapler motor (M14) turned ON. • The stapler position sensor (Center) (PS24) is blocked, when the stapler motor (M14) is running. - Troubleshooting Guides: When FS-533 is installed: 1 Check the connector between the stapler unit- STREYB CN122 and CN123 for proper connection and correct as necessary. 2 Check the connector of the stapler unit for proper drive coupling and correct as necessary. 3 Check the connector between PS110-FSCB CN110 for proper connection and correct as necessary. 4 PS110 I/O check, sensor check FSCB CN110 FS-533 8-D to E. 5 Replace the stapler unit. 6 Replace STREYB. 7 Replace FSCB.
When FS-534 is installed: 1 Check the connector between the stapler unit-relay CN4-FSCB J11 for proper connection and correct as necessary. 2 Check the connector of the stapler unit for proper drive coupling, and correct as necessary. 3 Check the connector between PS23-relay CN3-FSCB J11 for proper connection and correct as necessary. 4 Check the connector between PS24-relay CN3-FSCB J11 for proper connection and correct as necessary. 5 PS23 I/O check, sensor check FSCB J11<B>-3 (ON) FS-534 4-C. 6 PS24 I/O check, sensor check FSCB J11<B>-6 (ON) FS-534 4 to 5-C. 7 Replace the stapler unit. 8 Replace FSCB.
- Code: C1112
- Description: Stapler motor’s malfunction
<When FS-534+SD-511 is installed> • The stapler home sensor is not turned ON even after the set period of time has elapsed while the stapler motor is energized. • The stapler home sensor is not turned OFF even after the set period of time has elapsed after the stapler home sensor is turned ON. - Troubleshooting Guides: 1 Check the connector between the staple unit-SDDB J4 for proper connection and correct as necessary. 2 Check the connector of the staple unit for proper drive coupling and correct as necessary. 3 Replace the staple unit. 4 Replace SDDB. 5 Replace FSCB.
- Code: C1113
- Description: Center-staple lead edge stopper motor malfunction
<When FS-534+SD-511 is installed> The stopper home sensor (PS6) is not blocked or unblocked even after the set period of time has elapsed after the stopper drive motor (M4) is turned ON. - Troubleshooting Guides: 1 Check the connector between M4-SDDB J10 for proper connection and correct as necessary. 2 Check the connector of M4 for proper drive coupling, and correct as necessary. 3 Check the connector between PS6-SDDB J10 for proper connection, and correct as necessary. 4 PS6 I/O check, sensor check SDDB J10-5 (ON) SD-511 2-G. 5 M4 operation check SDDB J10-6 to 9 SD-511 1 to 2-F to G. 6 Replace M4. 7 Replace SDDB. 8 Replace FSCB.
- Code: C1114
- Description: Center-staple front adjust drive motor malfunction
<When FS-534+SD-511 is installed> The alignment home sensor (PS4) is not blocked or unblocked even after the set period of time has elapsed after the alignment motor (M3) is turned ON. - Troubleshooting Guides: 1 Check the connector between M3-relay CN10-SDDB J7 for proper connection and correct as necessary. 2 Check the connector of M3 for proper drive coupling, and correct as necessary. 3 Check the connector between PS4-relay CN10-SDDB J7 for proper connection, and correct as necessary. 4 PS4 I/O check, sensor check SDDB J7-6 (ON) SD-511 6-F. 5 M3 operation check SDDB J7 7 to 10 SD-511 5-F to G. 6 Replace M3. 7 Replace SDDB. 8 Replace FSCB.
- Code: C1115
- Description: Center-staple knife drive motor malfunction
<When FS-534+SD-511 is installed> The center fold knife home sensor (PS8) is not blocked or unblocked even after the set period of time has elapsed after the center fold knife motor (M9) is turned ON. - Troubleshooting Guides: 1 Check the connector between M9-SDDB J11 for proper connection and correct as necessary. 2 Check the connector of M9 for proper drive coupling, and correct as necessary. 3 Check the connector between PS8-relay CN10-SDDB J7 for proper connection, and correct as necessary. 4 PS8 I/O check, sensor check SDDB J7-3 (ON) SD-511 6-G. 5 M9 operation check SDDB J11 11 to 20 SD-511 1 to 2-B. 6 Replace M9. 7 Replace SDDB. 8 Replace FSCB.
- Code: C1132
- Description: Punch drive motor’s malfunction
<When FS-533+PK-519 is installed> • The puncher drive cam sensor (PS203) or puncher home sensor (PS204) is not blocked or unblocked even after the set period of time has elapsed while the punch motor (M201) is energized. • The punch motor sensor (PS202) does not turn ON after the punch motor (M201) stopped. • The holes with other marketing area is set in [Service Mode] – [Finisher] – [Punch Option Setting]
<When FS-534+PK-520 is installed> The punch home sensor (PS1) is not blocked or unblocked even after the set period of time has elapsed while the punch drive motor (M1) is energized. - Troubleshooting Guides: When FS-533+PK-519 is installed: 1 Check the number of the holes in [Service Mode] – [Finisher] – [Punch Option Setting]. 2 Check the connector between M201-PKCB CN203 for proper connection, and correct as necessary. 3 Check the connector of M201 for proper drive coupling, and correct as necessary. 4 Check the connector between PS202-PKCB CN204 for proper connection, and correct as necessary. 5 Check the connector between PS203-PKCB CN204. for proper connection, and correct as necessary. 6 Check the connector between PS204-PKCB CN204 for proper connection, and correct as necessary. 7 PS202 I/O check, sensor check PKCB CN204 FS-533 (PK-519) 5-C. 8 PS203 I/O check, sensor check PKCB CN204 FS-533 (PK-519) 6-C. 9 PS204 I/O check, sensor check PKCB CN204 FS-533 (PK-519) 6-C. 10 M201 operation check PKCB CN203-1 to 2 FS-533 (PK-519) 4-C. 11 Replace M201. 12 PKCB F201 conduction check. 13 Replace PKCB. 14 Replace FSCB.
When FS-534+PK-520 is installed: 1 Check the connector between M1-relay CN351-FSCB J7 for proper connection, and correct as necessary. 2 Check the connector of M1 for proper drive coupling, and correct as necessary. 3 Check the connector between PS1-FSCB J7 for proper connection, and correct as necessary. 4 PS1 I/O check, sensor check FSCB J7-5 (ON) FS-534 (PK-520) 7-K. 5 M1 operation check FSCB J7 7 to 8 FS-534 (PK-520) 7-K 6 Replace M1. 7 Replace FSCB.
- Code: C1140
- Description: Alignment plate motor/Rr’s malfunction
<When FS-533 is installed> • The alignment plate home sensor/R (PS109) is not unblocked after the set period of time has elapsed after the plate drive starts from the home position. • The alignment plate home sensor/R (PS109) is not blocked after the set period of time has elapsed when the plate returns to the home position.
<When FS-534 is installed> The alignment plate/R home sensor (PS13) is not blocked or unblocked even after the set period of time has elapsed while the alignment motor/Rr (M8) is energized. - Troubleshooting Guides: When FS-533 is installed: 1 Check the connector between M106-FSCB CN102 for proper connection and correct as necessary. 2 Check the connector of M106 for proper drive coupling and correct as necessary. 3 Check the connector between PS109-relay CN106- FSCB CN102 for proper connection and correct as necessary. 4 PS109 I/O check, sensor check FSCB CN102 FS-533 7-J 5 M106 operation check FSCB CN102 FS-533 8-J 6 Replace M106. 7 FSCB CP105 conduction check. 8 Replace FSCB.
When FS-534 is installed: 1 Check the connector between M8-FSCB J12 for proper connection, and correct as necessary. 2 Check the connector of M8 for proper drive coupling, and correct as necessary. 3 Check the connector between PS13-FSCB J9 for proper connection, and correct as necessary. 4 PS13 I/O check, sensor check FSCB J9<B>-9 (ON) FS-534 9-C. 5 M8 operation check FSCB J12-13 to 16 FS-534 5~6-C to D 6 Replace M8. 7 Replace FSCB.
- Code: C1141
- Description: Paddle motor’s drive malfunction
<When FS-534 is installed> The upper paddle homeposition detection sensor (PS14) is not blocked or unblocked even after the set period of time has elapsed while the FNS paddle motor (M5) is turning. - Troubleshooting Guides: 1 Check the connector between M5-FSCB J4 for proper connection, and correct as necessary. 2 Check the connector of M5 for proper drive coupling, and correct as necessary. 3 Check the connector between PS14-FSCB J4 for proper connection, and correct as necessary. 4 PS14 I/O check, sensor check FSCB J4<B>-7 (ON) FS-534 13-C. 5 M5 operation check FSCB J4<A>-5 to 8 FS-534 12-C to D. 6 Replace M5. 7 Replace FSCB.
- Code: C1144
- Description: Pre-eject drive motor’s malfunction
<When FS-534 is installed> • The pre-eject home sensor (PS21) is not blocked or unblocked even after the set period of time has elapsed after the pre-eject drive motor (M9) is turned ON. • The pre-eject away sensor (PS22) is not blocked or unblocked even after the set period of time has elapsed after the pre-eject drive motor (M9) is turned ON.k - Troubleshooting Guides: 1 Check the connector between M9-relay CN7<A>- FSCB J13 for proper connection, and correct as necessary. 2 Check the connector of M9 for proper drive coupling, and correct as necessary. 3 Check the connector between PS21-relay CN8-relay CN7<B>-FSCB J12 for proper connection, and correct as necessary. 4 Check the connector between PS22-relay CN8-relay CN7<B>-FSCB J12 for proper connection, and correct as necessary. 5 PS21 I/O check, sensor check FSCB J12-6 (ON) FS-534 6-C. 6 PS22 I/O check, sensor check FSCB J12-9 (ON) FS-534 6-C. 7 M9 operation check FSCB J13-3 to 4 FS-534 8-C to D. 8 Replace M9. 9 Replace FSCB.
- Code: C1145
- Description: Trailing edge stopper motor’s malfunction
<When FS-534 is installed> The trailing edge stopper home position detection sensor (PS20) is not blocked or unblocked even after the set period of time has elapsed after the trailing edge stopper motor (M6) is turned ON. - Troubleshooting Guides: 1 Check the connector between M6-FSCB J5 for proper connection, and correct as necessary. 2 Check the connector of M6 for proper drive coupling, and correct as necessary. 3 Check the connector between PS20-relay CN22-FSCB J5 for proper connection, and correct as necessary. 4 PS20 I/O check, sensor check FSCB J5-9 (ON) FS-534 9-K. 5 M6 operation check FSCB J5-13 to 16 FS-534 9-K. 6 Replace M6. 7 Replace FSCB.
- Code: C1156
- Description: Center-staple paddle roller motor malfunction (trailing edge)
<When FS-534+SD-511 is installed> The paddle home sensor (PS5) is not blocked or unblocked even after the set period of time has elapsed while the SD paddle motor (M7) is energized. - Troubleshooting Guides: 1 Check the connector between M7-SDDB J8 for proper connection and correct as necessary. 2 Check the connector of M7 for proper drive coupling, and correct as necessary. 3 Check the connector between PS5-SDDB J8 for proper connection and correct as necessary. – – 5 PS5 I/O check, sensor check SDDB J8-3 (ON) SD-511 3 to 4-G. 7 M7 operation check SDDB J8 4 to 7 SD-511 3-F to G. 8 Replace M7. 9 Replace SDDB. 10 Replace FSCB.
- Code: C1182
- Description: Shift motor drive malfunction
<When JS-506 is installed> • The tray shift home sensor (PS1) is not unblocked after the set period of time has elapsed after the tray shift motor (M1) is turned ON (start of moving to the home position.) • The tray shift home sensor (PS1) is not blocked after the set period of time has elapsed after the tray shift motor (M1) is turned ON (start of moving to the shift position.) - Troubleshooting Guides: 1 Check the connector between M1-JSCB CN208 for proper connection and correct as necessary. 2 Check the connector of M1 for proper drive coupling, and correct as necessary. – – 3 Check the connector between PS1-JSCB CN208 for proper connection and correct as necessary. 4 PS1 I/O check, sensor check JSCB CN208-5 (ON) JS-506 5-C. 5 M1 operation check JSCB CN208 1 (DRV) JS-506 4 to 5-C. 6 Replace M1. 7 JSCB ICP3 conduction check. 8 Replace JSCB.
- Code: C1184
- Description: Paper discharge control motor’s malfunction
<When FS-534 is installed> The paper delivery control sensor (PS28) is not blocked or unblocked even after the set period of time has elapsed while the paper receiving control motor (M12) is energized. - Troubleshooting Guides: 1 Check the connector between M12-relay CN1-FRCB J14 for proper connection, and correct as necessary. 2 Check the connector of M12 for proper drive coupling, and correct as necessary. 3 Check the connector between PS28-relay CN1-FRCB J14 for proper connection, and correct as necessary. 4 PS28 I/O check, sensor check FSCB J14<B>-3 (ON) FS-534 2~3-C. 5 M12 operation check FSCB J14<A>-9 to 12 FS-534 2-C to D. 6 Replace M12. 7 Replace FSCB.
- Code: C1195
- Description: Paper discharge control motor’s malfunction
<When FS-534+SD-511 is installed> The curl cover detection sensor (PS2) is not blocked or unblocked even after the set period of time has elapsed after the paper discharge control motor (M2) is turned ON. - Troubleshooting Guides: 1 Check the connector between M2-relay CN3-relay CN2-SDDB J5 for proper connection, and correct as necessary. 2 Check the connector of M2 for proper drive coupling, and correct as necessary. 3 Check the connector between PS2-relay CN3-relay CN2-SDDB J5 for proper connection, and correct as necessary. 4 PS2 I/O check, sensor check SDDB J5 3 (ON) SD-511 3-B 5 M2 operation check SDDB J5 4 to 7 SD-511 3-B. 6 Replace M2. 7 Replace SDDB. 8 Replace FSCB.
- Code: C1196
- Description: Center fold roller motor’s malfunction
<When FS-534+SD-511 is installed> The guide home sensor (PS7) is not blocked or unblocked even after the set period of time has elapsed after the center fold roller motor (M8) is turned ON. - Troubleshooting Guides: 1 Check the connector between M8-SDDB J8 for proper connection, and correct as necessary. 2 Check the connector of M8 for proper drive coupling, and correct as necessary. 3 Check the connector between PS7-SDDB J9 for proper connection, and correct as necessary. 4 PS7 I/O check, sensor check SDDB J9-6 (ON) SD-511 4-G. 5 M8 operation check SDDB J10 6 to 9 SD-511 1 to 2-F to G. 6 Replace M8. 7 Replace SDDB. 8 Replace FSCB.
- Code: C1197
- Description: Tri-folding guide motor’s malfunction
<When FS-534+SD-511 is installed> The tri-folding gate home sensor (PS11) is not blocked or unblocked even after the set period of time has elapsed while the tri-folding guide motor (M6) is energized. - Troubleshooting Guides: 1 Check the connector between M6-SDDB J9 for proper connection, and correct as necessary. – – 2 Check the connector of M6 for proper drive coupling, and correct as necessary. 3 Check the connector between PS11-SDDB J8 for proper connection, and correct as necessary. 4 PS11 I/O check, sensor check SDDB J8-10 (ON) SD-511 3-G. 5 M6 operation check SDDB J9 7 to 10 SD-511 4-F to G. 6 Replace M6. 7 Replace SDDB. 8 Replace FSCB.
- Code: C11A1
- Description: Exit roller pressure/ retraction malfunction
<When FS-533 is installed> The pick up roller position sensor (PS105) is turned neither ON nor OFF even after the set period of time has elapsed after the exit roller lift up motor (M104) is turned ON. - Troubleshooting Guides: 1 Check the connector between M104-FSCB CN109 for proper connection and correct as necessary. 2 Check the connector of M104 for proper drive coupling, and correct as necessary. 3 Check the connector between PS105-FSCB CN110 for proper connection and correct as necessary. 4 PS105 I/O check, sensor check FSCB CN110 FS-533 7-D to E. 5 M104 operation check FSCB CN109 FS-533 9-D to E. 6 Replace M104. 7 FSCB CP104 conduction check. 8 Replace FSCB.
- Code: C11A2
- Description: Accommodation roller pressure/ retraction malfunction
<When FS-534 is installed> The receiving roller retraction sensor (PS11) is not blocked or unblocked even after the set period of time has elapsed after the receiving roller retraction motor (M4) is turned ON. - Troubleshooting Guides: 1 Check the connector between M4-FSCB J4 for proper connection and correct as necessary. 2 Check the connector of M4 for proper drive coupling, and correct as necessary. 3 Check the connector between PS11-FSCB J4 for proper connection, and correct as necessary. 4 PS11 I/O check, sensor check FSCB J4<B>-16 (ON) FS-534 13-C. 5 M4 operation check FSCB J4<A>-1 to 4 FS-534 11-C to D. 6 Replace M4. 7 Replace FSCB.
- Code: C11E1
- Description: Paper exit switching drive malfunction
<When FS-534 is installed> The exchange folded knife home position sensor (PS30) is not blocked or unblocked even after the set period of time has elapsed after the FNS entry transport motor (M2) is turned ON. - Troubleshooting Guides: 1 Check the connector between M2-FSCB J9 for proper connection and correct as necessary. 2 Check the connector of M2 for proper drive coupling, and correct as necessary. 3 Check the connector between PS30-FSCB J4 for proper connection, and correct as necessary. 4 PS30 I/O check, sensor check FSCB J4<A>-15 (ON) FS-534 12-C. 5 M2 operation check FSCB J9<A>-1 to 4 FS-534 10 to 11-B to C. 6 Replace M2. 7 Replace FSCB.
- Code: C1402
- Description: FS nonvolatile memory error
<When FS-533 is installed> When the main power switch is turned ON, malfunctioning of the nonvolatile memory on the FS control board (FSCB) is detected. - Troubleshooting Guides: 1 Disconnect and then connect the power cord. Turn OFF the main power switch, wait for 10 sec. or more, and turn ON the main power switch. 2 Rewrite the firmware. 3 Replace FSCB.
- Code: C2152
- Description: Transfer belt pressure welding alienation
• The 1st transfer pressure sensor (PS39) does not detect “switch from retraction to pressure” within a given period time after 1st transfer pressure clutch (CL5) has stared engagement. • The 1st transfer pressure sensor (PS39) is unblocked after the laps of given time after the 1st transfer pressure clutch (CL5) turned OFF when the pressing operation is finished. • The 1st transfer pressure sensor (PS39) does not detect “switch from pressure to retraction” within a given period time after 1st transfer pressure clutch (CL5) has stared engagement. • The 1st transfer pressure sensor (PS39) is blocked after the lamps of given time after the 1st transfer pressure clutch (CL5) turned OFF when the release operation is finished. - Troubleshooting Guides: 1 Check the connector between M3-PRCB CN2 for proper connection and correct as necessary. 2 Check the connector of M3 for proper drive coupling and correct as necessary. 3 Check the connector between PS39-relay CN113- PRCB CN13 for proper connection and correct as necessary. 4 Check the connector between CL5-relay CN118-PRCB CN13 for proper connection and correct as necessary. 5 PS39 I/O check, sensor check PRCB CN13-7 (ON) 24-C. 6 CL5 operation check PRCB CN13-14 (ON) 23 to 24-C. 7 M3 operation check PRCB CN2-9 (REM) PRCB CN2-12 (LOCK) 27-I to J. 8 Replace M3. 9 PRCB ICP3 conduction check. 10 Replace PRCB.
- Code: C2253
- Description: PC motor’s failure to turn
The motor lock signal remains HIGH for a predetermined continuous period of time while the motor is turning. - Troubleshooting Guides: 1 Check the connector between M2-PRCB CN31 for proper connection and correct as necessary. 2 Check the M2 connector for proper drive coupling and correct as necessary. 3 M2 operation check PRCB CN31-9 (REM) PRCB CN31-12 (LOCK) 4 Replace M2. 5 Replace PRCB.
- Code: C2254
- Description: PC motor’s turning at abnormal timing
The motor lock signal remains LOW for a predetermined continuous period of time while the motor remains stationary. - Troubleshooting Guides: 1 Check the connector between M2-PRCB CN31 for proper connection and correct as necessary. 2 Check the M2 connector for proper drive coupling and correct as necessary. 3 M2 operation check PRCB CN31-9 (REM) PRCB CN31-12 (LOCK) 4 Replace M2. 5 Replace PRCB.
- Code: C2255
- Description: Developing motor’s failure to turn
The motor lock signal remains HIGH for a predetermined continuous period of time while the motor is turning. - Troubleshooting Guides: 1 Check the connector between M21-PRCB CN32 for proper connection and correct as necessary. 2 Check the M21 connector for proper drive coupling and correct as necessary. 3 M21 operation check PRCB CN32-2 (REM) PRCB CN32-5 (LOCK). bizhub C224 25-I to J 4 Replace M21. 5 Replace PRCB.

Solve Konica-Minolta bizhub C224e Error codes
- Code: C2256
- Description: Developing motor’s turning at abnormal timing
The motor lock signal remains LOW for a predetermined continuous period of time while the motor remains stationary. - Troubleshooting Guides: 1 Check the connector between M21-PRCB CN32 for proper connection and correct as necessary. 2 Check the M21 connector for proper drive coupling and correct as necessary. 3 M21 operation check PRCB CN32-2 (REM) PRCB CN32-5 (LOCK). bizhub C224 25-I to J 4 Replace M21. 5 Replace PRCB.
- Code: C2355
- Description: Transfer belt cleaner cooling fan motor’s failure to turn
The fan lock signal remains HIGH for a predetermined continuous period of time while the fan is turning. - Troubleshooting Guides: 1 Check the connector between FM2-relay CN115- PRCB CN13 for proper connection and correct as necessary. 2 Check the fan for possible overload and correct as necessary. 3 FM2 operation check PRCB CN13-8 (REM) PRCB CN13-10 (LOCK) 24-C. 4 Replace FM2. 5 PRCB ICP3 conduction check. 6 Replace PRCB.
- Code: C2411
- Description: Developing unit/C new article release
The status with the new unit is not cleared after the new developing unit is set. - Troubleshooting Guides: 1 Reinstall developing unit. 2 Check the connector between developing unit-FRB CN13, CN14, CN15, CN16 for proper connection and correct as necessary. 3 Check the connector between FRB CN1, CN3-PRCB CN7, CN9 for proper connection and correct as necessary. 4 Replace the developing unit. 5 Replace FRB. 6 Replace PRCB.
- Code: C2412
- Description: Developing unit/M new article release
The status with the new unit is not cleared after the new developing unit is set. - Troubleshooting Guides: 1 Reinstall developing unit. 2 Check the connector between developing unit-FRB CN13, CN14, CN15, CN16 for proper connection and correct as necessary. 3 Check the connector between FRB CN1, CN3-PRCB CN7, CN9 for proper connection and correct as necessary. 4 Replace the developing unit. 5 Replace FRB. 6 Replace PRCB.
- Code: C2413
- Description: Developing unit/Y new article release
The status with the new unit is not cleared after the new developing unit is set. - Troubleshooting Guides: 1 Reinstall developing unit. 2 Check the connector between developing unit-FRB CN13, CN14, CN15, CN16 for proper connection and correct as necessary. 3 Check the connector between FRB CN1, CN3-PRCB CN7, CN9 for proper connection and correct as necessary. 4 Replace the developing unit. 5 Replace FRB. 6 Replace PRCB.
- Code: C2414
- Description: Developing unit/K new article release
The status with the new unit is not cleared after the new developing unit is set. - Troubleshooting Guides: 1 Reinstall developing unit. 2 Check the connector between developing unit-FRB CN13, CN14, CN15, CN16 for proper connection and correct as necessary. 3 Check the connector between FRB CN1, CN3-PRCB CN7, CN9 for proper connection and correct as necessary. 4 Replace the developing unit. 5 Replace FRB. 6 Replace PRCB.
- Code: C2551
- Description: Abnormally low toner density detected cyan TCR sensor
When sampling data is determined in TC ratio calculation control, TCR sensor output is higher than a predetermined value for a predetermined number of times in a row even though there is toner in the sub hopper - Troubleshooting Guides: 1 Perform image troubleshooting procedure if image density is low. 2 Reinstall developing unit. 3 Reinstall toner cartridge. 4 Check the connector between developing unit-FRB CN13, CN14, CN15, CN16 for proper connection and correct as necessary. 5 Check the connector between FRB CN1, CN3-PRCB CN7, CN9 for proper connection and correct as necessary. 6 M10 operation check M10 PRCB CN14-13 to 16 20-C 7 M6, M7. M8, M9 operation check PRCB CN14-13 to 16 (M6) PRCB CN14-9 to 12 (M7) PRCB CN14-5 to 8 (M8) PRCB CN14-1 to 4 (M9) 19 to 20-C. 8 If the toner empty sensor and its surroundings inside the sub hopper are dirtied with toner, clean them. 9 Replace the developing unit – – 10 Replace FRB. 11 PRCB ICP21, ICP40, ICP41, ICP44, ICP46 conduction check. 12 Replace PRCB.
- Code: C2552
- Description: Abnormally high toner density detected cyan TCR sensor
The TC ratio of the toner determined by the toner replenishment control is detected to be the predetermined value or over for consecutive times. - Troubleshooting Guides: 1 Reinstall developing unit. 2 Reinstall toner cartridge. 3 Check the connector between developing unit-FRB CN13, CN14, CN15, CN16, CN10 for proper connection and correct as necessary. 4 Check the connector between FRB CN1, CN3-PRCB CN7, CN9 for proper connection and correct as necessary. 5 Replace the developing unit. 6 Replace FRB. 7 Replace PRCB.
- Code: C2553
- Description: Abnormally low toner density detected magenta TCR sensor
When sampling data is determined in TC ratio calculation control, TCR sensor output is higher than a predetermined value for a predetermined number of times in a row even though there is toner in the sub hopper - Troubleshooting Guides: 1 Perform image troubleshooting procedure if image density is low. 2 Reinstall developing unit. 3 Reinstall toner cartridge. 4 Check the connector between developing unit-FRB CN13, CN14, CN15, CN16 for proper connection and correct as necessary. 5 Check the connector between FRB CN1, CN3-PRCB CN7, CN9 for proper connection and correct as necessary. 6 M10 operation check M10 PRCB CN14-13 to 16 20-C 7 M6, M7. M8, M9 operation check PRCB CN14-13 to 16 (M6) PRCB CN14-9 to 12 (M7) PRCB CN14-5 to 8 (M8) PRCB CN14-1 to 4 (M9) 19 to 20-C. 8 If the toner empty sensor and its surroundings inside the sub hopper are dirtied with toner, clean them. 9 Replace the developing unit – – 10 Replace FRB. 11 PRCB ICP21, ICP40, ICP41, ICP44, ICP46 conduction check. 12 Replace PRCB.
- Code: C2554
- Description: Abnormally high toner density detected magenta TCR sensor
The TC ratio of the toner determined by the toner replenishment control is detected to be the predetermined value or over for consecutive times. - Troubleshooting Guides: 1 Reinstall developing unit. 2 Reinstall toner cartridge. 3 Check the connector between developing unit-FRB CN13, CN14, CN15, CN16, CN10 for proper connection and correct as necessary. 4 Check the connector between FRB CN1, CN3-PRCB CN7, CN9 for proper connection and correct as necessary. 5 Replace the developing unit. 6 Replace FRB. 7 Replace PRCB.
- Code: C2555
- Description: Abnormally low toner density detected yellow TCR sensor
When sampling data is determined in TC ratio calculation control, TCR sensor output is higher than a predetermined value for a predetermined number of times in a row even though there is toner in the sub hopper - Troubleshooting Guides: 1 Perform image troubleshooting procedure if image density is low. 2 Reinstall developing unit. 3 Reinstall toner cartridge. 4 Check the connector between developing unit-FRB CN13, CN14, CN15, CN16 for proper connection and correct as necessary. 5 Check the connector between FRB CN1, CN3-PRCB CN7, CN9 for proper connection and correct as necessary. 6 M10 operation check M10 PRCB CN14-13 to 16 20-C 7 M6, M7. M8, M9 operation check PRCB CN14-13 to 16 (M6) PRCB CN14-9 to 12 (M7) PRCB CN14-5 to 8 (M8) PRCB CN14-1 to 4 (M9) 19 to 20-C. 8 If the toner empty sensor and its surroundings inside the sub hopper are dirtied with toner, clean them. 9 Replace the developing unit – – 10 Replace FRB. 11 PRCB ICP21, ICP40, ICP41, ICP44, ICP46 conduction check. 12 Replace PRCB.
- Code: C2556
- Description: Abnormally high toner density detected yellow TCR sensor
The TC ratio of the toner determined by the toner replenishment control is detected to be the predetermined value or over for consecutive times. - Troubleshooting Guides: 1 Reinstall developing unit. 2 Reinstall toner cartridge. 3 Check the connector between developing unit-FRB CN13, CN14, CN15, CN16, CN10 for proper connection and correct as necessary. 4 Check the connector between FRB CN1, CN3-PRCB CN7, CN9 for proper connection and correct as necessary. 5 Replace the developing unit. 6 Replace FRB. 7 Replace PRCB.
- Code: C2557
- Description: Abnormally low toner density detected black TCR sensor
When sampling data is determined in TC ratio calculation control, TCR sensor output is higher than a predetermined value for a predetermined number of times in a row even though there is toner in the sub hopper - Troubleshooting Guides: 1 Perform image troubleshooting procedure if image density is low. 2 Reinstall developing unit. 3 Reinstall toner cartridge. 4 Check the connector between developing unit-FRB CN13, CN14, CN15, CN16 for proper connection and correct as necessary. 5 Check the connector between FRB CN1, CN3-PRCB CN7, CN9 for proper connection and correct as necessary. 6 M10 operation check M10 PRCB CN14-13 to 16 20-C 7 M6, M7. M8, M9 operation check PRCB CN14-13 to 16 (M6) PRCB CN14-9 to 12 (M7) PRCB CN14-5 to 8 (M8) PRCB CN14-1 to 4 (M9) 19 to 20-C. 8 If the toner empty sensor and its surroundings inside the sub hopper are dirtied with toner, clean them. 9 Replace the developing unit – – 10 Replace FRB. 11 PRCB ICP21, ICP40, ICP41, ICP44, ICP46 conduction check. 12 Replace PRCB.
- Code: C2558
- Description: Abnormally high toner density detected black TCR sensor
The TC ratio of the toner determined by the toner replenishment control is detected to be the predetermined value or over for consecutive times. - Troubleshooting Guides: 1 Reinstall developing unit. 2 Reinstall toner cartridge. 3 Check the connector between developing unit-FRB CN13, CN14, CN15, CN16, CN10 for proper connection and correct as necessary. 4 Check the connector between FRB CN1, CN3-PRCB CN7, CN9 for proper connection and correct as necessary. 5 Replace the developing unit. 6 Replace FRB. 7 Replace PRCB.
- Code: C2559
- Description: Cyan TCR sensor adjustment failure
TCR sensor automatic adjustment does not function properly, failing to adjust to an appropriate value. - Troubleshooting Guides: 1 Reinstall developing unit. 2 Check the connector between developing unit-FRB CN13, CN14, CN15, CN16 for proper connection and correct as necessary. 3 Check the connector between FRB CN1, CN3-PRCB CN7, CN9 for proper connection and correct as necessary. 4 M10 operation check PRCB CN14-17 to 20 20-C 5 M6, M7, M8, M9 operation check PRCB CN14-13 to 16 (M6) PRCB CN14-9 to 12 (M7) PRCB CN14-5 to 8 (M8) PRCB CN14-1 to 4 (M9) 19 to 20-C. 6 Replace the developing unit. 7 Replace FRB. 8 PRCB ICP21, ICP40, ICP43, ICP44, ICP46 conduction check. 9 Replace PRCB.
- Code: C255A
- Description: Magenta TCR sensor adjustment failure
TCR sensor automatic adjustment does not function properly, failing to adjust to an appropriate value. - Troubleshooting Guides: 1 Reinstall developing unit. 2 Check the connector between developing unit-FRB CN13, CN14, CN15, CN16 for proper connection and correct as necessary. 3 Check the connector between FRB CN1, CN3-PRCB CN7, CN9 for proper connection and correct as necessary. 4 M10 operation check PRCB CN14-17 to 20 20-C 5 M6, M7, M8, M9 operation check PRCB CN14-13 to 16 (M6) PRCB CN14-9 to 12 (M7) PRCB CN14-5 to 8 (M8) PRCB CN14-1 to 4 (M9) 19 to 20-C. 6 Replace the developing unit. 7 Replace FRB. 8 PRCB ICP21, ICP40, ICP43, ICP44, ICP46 conduction check. 9 Replace PRCB.
- Code: C255B
- Description: Yellow TCR sensor adjustment failure
TCR sensor automatic adjustment does not function properly, failing to adjust to an appropriate value. - Troubleshooting Guides: 1 Reinstall developing unit. 2 Check the connector between developing unit-FRB CN13, CN14, CN15, CN16 for proper connection and correct as necessary. 3 Check the connector between FRB CN1, CN3-PRCB CN7, CN9 for proper connection and correct as necessary. 4 M10 operation check PRCB CN14-17 to 20 20-C 5 M6, M7, M8, M9 operation check PRCB CN14-13 to 16 (M6) PRCB CN14-9 to 12 (M7) PRCB CN14-5 to 8 (M8) PRCB CN14-1 to 4 (M9) 19 to 20-C. 6 Replace the developing unit. 7 Replace FRB. 8 PRCB ICP21, ICP40, ICP43, ICP44, ICP46 conduction check. 9 Replace PRCB.
- Code: C255C
- Description: Black TCR sensor adjustment failure
TCR sensor automatic adjustment does not function properly, failing to adjust to an appropriate value. - Troubleshooting Guides: 1 Reinstall developing unit. 2 Check the connector between developing unit-FRB CN13, CN14, CN15, CN16 for proper connection and correct as necessary. 3 Check the connector between FRB CN1, CN3-PRCB CN7, CN9 for proper connection and correct as necessary. 4 M10 operation check PRCB CN14-17 to 20 20-C 5 M6, M7, M8, M9 operation check PRCB CN14-13 to 16 (M6) PRCB CN14-9 to 12 (M7) PRCB CN14-5 to 8 (M8) PRCB CN14-1 to 4 (M9) 19 to 20-C. 6 Replace the developing unit. 7 Replace FRB. 8 PRCB ICP21, ICP40, ICP43, ICP44, ICP46 conduction check. 9 Replace PRCB.
- Code: C2561
- Description: Cyan TCR sensor failure
TCR sensor automatic adjustment does not function properly, failing to adjust to an appropriate value. - Troubleshooting Guides: 1 Reinstall developing unit. 2 Check the connector between developing unit-FRB CN13, CN14, CN15, CN16 for proper connection and correct as necessary. 3 Check the connector between FRB CN1, CN3-PRCB CN7, CN9 for proper connection and correct as necessary. 4 Replace the developing unit. 5 Replace FRB. 6 Replace PRCB.
- Code: C2562
- Description: Magenta TCR sensor failure
TCR sensor automatic adjustment does not function properly, failing to adjust to an appropriate value. - Troubleshooting Guides: 1 Reinstall developing unit. 2 Check the connector between developing unit-FRB CN13, CN14, CN15, CN16 for proper connection and correct as necessary. 3 Check the connector between FRB CN1, CN3-PRCB CN7, CN9 for proper connection and correct as necessary. 4 Replace the developing unit. 5 Replace FRB. 6 Replace PRCB.
- Code: C2563
- Description: Yellow TCR sensor failure
TCR sensor automatic adjustment does not function properly, failing to adjust to an appropriate value. - Troubleshooting Guides: 1 Reinstall developing unit. 2 Check the connector between developing unit-FRB CN13, CN14, CN15, CN16 for proper connection and correct as necessary. 3 Check the connector between FRB CN1, CN3-PRCB CN7, CN9 for proper connection and correct as necessary. 4 Replace the developing unit. 5 Replace FRB. 6 Replace PRCB.
- Code: C2564
- Description: Black TCR sensor failure
TCR sensor automatic adjustment does not function properly, failing to adjust to an appropriate value. - Troubleshooting Guides: 1 Reinstall developing unit. 2 Check the connector between developing unit-FRB CN13, CN14, CN15, CN16 for proper connection and correct as necessary. 3 Check the connector between FRB CN1, CN3-PRCB CN7, CN9 for proper connection and correct as necessary. 4 Replace the developing unit. 5 Replace FRB. 6 Replace PRCB.
- Code: C2650
- Description: Main backup media access error
• The re-written data, which has been read out, checked and founded as error, is read out again and found as error. • The error was found when reading out the counter value. • MFP detects that the SSD board is not mounted. - Troubleshooting Guides: 1 Check the connector from SSDB to MFPB for proper connection and correct as necessary. 2 Check the harness from MFPB to PRCB for proper connection and correct as necessary. 3 Replace MFPB. 4 Replace PRCB. 4.1. Check that the trouble code “C4802” appears and then display service mode. 4.2. Call the Enhanced Security to the screen. 4.3. Touch [Engine Data Backup]. 4.4. Touch [Engine Data Load mode], and press the Start key. 4.5. Select [Yes], and press the Start key again. 4.6. Check that the result “OK” appears. 4.7. Turn OFF the main power switch and turn it ON again more than 10 seconds after. 4.8. Update the PRCB firmware. 4.9. Make the specified readjustments. 5 If the above actions do not solve the problem, contact KMBT.
- Code: C2A11
- Description: Drum unit/C new release failure
The status with the new unit is not cleared after the new drum unit is set. - Troubleshooting Guides: 1 Clean the connection between the drum unit and the machine if dirty. 2 Reinstall drum unit. 3 Check the connector between drum unit-FRB CN12 for proper connection and correct as necessary. 4 Check the connector between FRB CN1, CN3-PRCB CN7, CN9 for proper connection and correct as necessary. 5 Replace the drum unit. 6 Replace FRB. 7 Replace PRCB.
- Code: C2A12
- Description: Drum unit/M new release failure
The status with the new unit is not cleared after the new drum unit is set. - Troubleshooting Guides: 1 Clean the connection between the drum unit and the machine if dirty. 2 Reinstall drum unit. 3 Check the connector between drum unit-FRB CN12 for proper connection and correct as necessary. 4 Check the connector between FRB CN1, CN3-PRCB CN7, CN9 for proper connection and correct as necessary. 5 Replace the drum unit. 6 Replace FRB. 7 Replace PRCB.
- Code: C2A13
- Description: Drum unit/Y new release failure
The status with the new unit is not cleared after the new drum unit is set. - Troubleshooting Guides: 1 Clean the connection between the drum unit and the machine if dirty. 2 Reinstall drum unit. 3 Check the connector between drum unit-FRB CN12 for proper connection and correct as necessary. 4 Check the connector between FRB CN1, CN3-PRCB CN7, CN9 for proper connection and correct as necessary. 5 Replace the drum unit. 6 Replace FRB. 7 Replace PRCB.
- Code: C2A14
- Description: Drum unit/K new release failure
The status with the new unit is not cleared after the new drum unit is set. - Troubleshooting Guides: 1 Clean the connection between the drum unit and the machine if dirty. 2 Reinstall drum unit. 3 Check the connector between drum unit-FRB CN12 for proper connection and correct as necessary. 4 Check the connector between FRB CN1, CN3-PRCB CN7, CN9 for proper connection and correct as necessary. 5 Replace the drum unit. 6 Replace FRB. 7 Replace PRCB.
- Code: C3101
- Description: Fusing roller separation failure
• With the fusing roller being retracted, the fusing pressure home sensor (PS38) is not unblocked even after the specified period of time has passed after the fusing pressure motor (M11) started rotating. • With the fusing roller being pressed, the fusing pressure home sensor (PS38) is not blocked even after the specified period of time has passed after the fusing pressure motor (M11) started rotating. - Troubleshooting Guides: 1 Check the connector between M11-PRCB CN13 for proper connection and correct as necessary. 2 Check the connector between fusing unit-relay CN98, CN99, CN104-PRCB CN5 for proper connection and correct as necessary. 3 PS38 I/O check, sensor check PRCB CN5-12 (ON) 27 to 28-C. 4 M11 operation check PRCB CN13-1 to 4 25-C. 5 Replace M11. 6 Replace the fusing unit. 7 PRCB IC26 conduction check. 8 Replace PRCB.
- Code: C3201
- Description: Fusing motor failure to turn
The motor lock signal remains HIGH for a predetermined continuous period of time while the motor remains stationary. - Troubleshooting Guides: 1 Check the connector between M3-PRCB CN2 for proper connection and correct as necessary. 2 Check the loading status of the fusing unit drive, and correct the error as necessary. 3 M3 operation check PRCB CN2-9 (REM) PRCB CN2-12 (LOCK) 27-I to J. 4 Replace M3. 5 Replace PRCB.
- Code: C3202
- Description: Fusing motor turning at abnormal timing
The motor lock signal remains LOW for a predetermined continuous period of time while the motor remains stationary. - Troubleshooting Guides: 1 Check the connector between M3-PRCB CN2 for proper connection and correct as necessary. 2 Check the loading status of the fusing unit drive, and correct the error as necessary. 3 M3 operation check PRCB CN2-9 (REM) PRCB CN2-12 (LOCK) 27-I to J. 4 Replace M3. 5 Replace PRCB.
- Code: C3302
- Description: Paper cooling fan failure to turn
The fan lock signal remains HIGH for a predetermined continuous period of time while the fan remains stationary. - Troubleshooting Guides: 1 Check the connector between FM8-relay CN106- PRCB CN12 for proper connection and correct as necessary. 2 Check the fan for possible overload and correct as necessary. 3 FM8 operation check PRCB CN12-1 (REM) PRCB CN12-3 (LOCK) 26-C. 4 Replace FM8. 5 PRCB ICP3 conduction check. 6 Replace PRCB.
- Code: C3425
- Description: Fusing warm-up trouble
• Detected temperature of the heating roller temperature sensor (TEMS) does not go up a given range of temperature even after a lapse of given period of time at warm up. • The warm-up is not completed even after the set period of time has elapsed after the warm-up is started. • Less than the predetermined temperature of the heating roller temperature sensor (TEMS), even after a predetermined period of time after warm-up is complete. - Troubleshooting Guides: 1 Check the fusing unit for correct installation (whether it is secured in position). 2 Check the open/close operation of the right door. 3 Check the fusing unit, DCPU and PRCB for proper connection and correct or change as necessary. 4 Replace the fusing unit. 5 Replace PRCB. 6 Replace DCPU.
- Code: C3722
- Description: Fusing abnormally high temperature detection (Edge of the heating side)
Detected temperature of the heating roller thermistor/1 (TH1) goes beyond a given temperature for a given period of time consecutively. - Troubleshooting Guides: 1 Check the fusing unit for correct installation (whether it is secured in position). 2 Check the open/close operation of the right door. 3 Check the fusing unit and PRCB for proper connection and correct or change as necessary. 4 Replace the fusing unit. 5 Replace PRCB.
- Code: C3725
- Description: Fusing abnormally high temperature detection (Main of the heating side)
• Detected temperature of the heating roller temperature sensor (TEMS) goes beyond a given temperature for a given period of time consecutively. • The hard protector signal error is detected for a given period of time consecutively. - Troubleshooting Guides: 1 Check the fusing unit for correct installation (whether it is secured in position). 2 Check the open/close operation of the right door. 3 Check the fusing unit and PRCB for proper connection and correct or change as necessary. 4 Replace the fusing unit. 5 Replace PRCB.
- Code: C3726
- Description: Fusing abnormally high temperature detection (Center of the heating side)
Detected temperature of the heating roller thermistor/2 (TH2) goes beyond a given temperature for a given period of time consecutively. - Troubleshooting Guides: 1 Check the fusing unit for correct installation (whether it is secured in position). 2 Check the open/close operation of the right door. 3 Check the fusing unit and PRCB for proper connection and correct or change as necessary. 4 Replace the fusing unit. 5 Replace PRCB.
- Code: C3825
- Description: Fusing abnormally low temperature detection (Main of the heating roller)
The heating roller temperature sensor (TEMS) continues to detect a temperature lower than a predetermined one for a predetermined period of time. - Troubleshooting Guides: 1 Check the fusing unit for correct installation (whether it is secured in position). 2 Check the open/close operation of the upper right door. 3 Check the fusing unit and PRCB for proper connection and correct or change as necessary. 4 Replace the fusing unit. 5 PRCB ICP15 conduction check. 6 Replace PRCB.
- Code: C3826
- Description: Fusing abnormally low temperature detection (Center of the heating roller)
The heating roller thermistor/2 (TH2) continues to detect a temperature lower than a predetermined one for a predetermined period of time. - Troubleshooting Guides: 1 Check the fusing unit for correct installation (whether it is secured in position). 2 Check the open/close operation of the upper right door. 3 Check the fusing unit and PRCB for proper connection and correct or change as necessary. 4 Replace the fusing unit. 5 PRCB ICP15 conduction check. 6 Replace PRCB.
- Code: C3922
- Description: Fusing sensor wire breaks detection (Edge of the heating roller)
After a predetermined period of time after the warm-up stage is started, the heating roller thermistor/1 (TH1) voltage does not decrease by predetermined steps (temperature rise) within a predetermined period of time. - Troubleshooting Guides: 1 Check the fusing unit for correct installation (whether it is secured in position). 2 Check the open/close operation of the upper right door. 3 Check the fusing unit and PRCB for proper connection and correct or change as necessary. 4 Replace the fusing unit. 5 Replace PRCB.
- Code: C3925
- Description: Fusing sensor wire breaks detection (Center of the heating roller)
After a predetermined period of time after the warm-up stage is started, the heating roller temperature sensor (TEMS) voltage does not increase by predetermined steps (temperature rise) within a predetermined period of time. - Troubleshooting Guides: 1 Check the fusing unit for correct installation (whether it is secured in position). 2 Check the open/close operation of the upper right door. 3 Check the fusing unit and PRCB for proper connection and correct or change as necessary. 4 Replace the fusing unit. 5 Replace PRCB.
- Code: C3926
- Description: Fusing sensor wire breaks detection (Middle of the heating roller)
• After a predetermined period of time after the warm-up stage is started, the heating roller thermistor/2 (TH2) voltage does not decrease by predetermined steps (temperature rise) within a predetermined time. • When a temperature detected by the heating roller thermister/1 (TH1) is compared with the temperature detected by the heating roller thermister/2 (TH2) to find out that the difference exceeded the predetermined temperature. - Troubleshooting Guides: 1 Check the fusing unit for correct installation (whether it is secured in position). 2 Check the open/close operation of the upper right door. 3 Check the fusing unit and PRCB for proper connection and correct or change as necessary. 4 Replace the fusing unit. 5 Replace PRCB.
- Code: C4101
- Description: Polygon motor rotation trouble
• The polygon motor fails to turn stably even after the lapse of a given period of time after activating and changing rotation speed the polygon motor. • Motor lock signal detects HIGH for a given period time consecutively during the polygon motor is rotating. - Troubleshooting Guides: 1 Check the connector between PH unit-FRB CN17 for proper connection and correct as necessary. 2 Replace the PH unit. 3 FRB fuse conduction check 4 Replace FRB. 5 Replace PRCB.
- Code: C4501
- Description: Laser malfunction
• SOS signal is not detected even after the lapse of a given period of time after starting the laser output. • SOS signal is not detected for a given period of time during printing or IDC sensor adjustment. - Troubleshooting Guides: 1 Check the connector between PH unit-PRCB CN24 for proper connection and correct as necessary. 2 Replace the PH unit. 3 Replace PRCB.
- Code: C4801
- Description: Main unit board failure
MFP detects simultaneous replacement of multiple boards. - Troubleshooting Guides: 1 Reinstall the old PRCB. 2 Back up data. 1. Call the Service Mode to the screen. 2. Call the Enhanced Security to the screen. 3. Touch [Engine Data Backup]. 2. Touch [Engine Data Save mode], and press the Start key. 3. Select [Yes], and press the Start key again. 4. Check that the result “OK” appears. 3 Replace PRCB Turn OFF the main power switch and replace the current PRCB with a new one. (When using a PRCB of another machine in service, be sure to use a PRCB installed in the same model.) 4 Restore back up data. 1. Turn ON the main power switch. 2. Check that the trouble code “C4802” appears and then display service mode. 3. Call the Enhanced Security to the screen. 4. Touch [Engine Data Backup]. 5. Touch [Engine Data Load mode], and press the Start key. 6. Select [Yes], and press the Start key again. 7. Check that the result “OK” appears. 8. Turn OFF the main power switch and turn it ON again more than 10 seconds after. 5 Update the PRCB firmware. 6 If the above actions do not solve the problem, contact KMBT.
- Code: C4802
- Description: Main unit backup data miscompare
The replacement of the printer control board is detected. - Troubleshooting Guides: 1 1.1. Check that the trouble code “C4802” appears and then display service mode.1. 2. Call the Enhanced Security to the screen. 1.3. Touch [Engine Data Backup]. 1.4. Touch [Engine Data Load mode], and press the Start key. 1.5. Select [Yes], and press the Start key again. 1.6. Check that the result “OK” appears. 1.7. Turn OFF the main power switch and turn it ON again more than 10 seconds after. 2 Update the PRCB firmware. 3 If the above actions do not solve the problem, contact KMBT.
- Code: C5102
- Description: Transport motor’s failure to turn
The motor lock signal remains HIGH for a predetermined continuous period of time while the motor remains stationary. - Troubleshooting Guides: 1 Check the connector between M1-PRCB CN31 for proper connection and correct as necessary. 2 Check M1 for proper drive coupling and correct as necessary. 3 M1 operation check PRCB CN31-2 (REM) PRCB CN31-5 (LOCK). 4 Replace M1. 5 Replace PRCB.
- Code: C5103
- Description: Transport motor’s turning at abnormal timing
The motor lock signal remains LOW for a predetermined continuous period of time while the motor remains stationary. - Troubleshooting Guides: 1 Check the connector between M1-PRCB CN31 for proper connection and correct as necessary. 2 Check M1 for proper drive coupling and correct as necessary. 3 M1 operation check PRCB CN31-2 (REM) PRCB CN31-5 (LOCK). 4 Replace M1. 5 Replace PRCB.
- Code: C5351
- Description: Power supply cooling fan motor’s failure to turn
The fan lock signal remains HIGH for a predetermined continuous period of time while the fan remains stationary. - Troubleshooting Guides: 1 Check the connector between FM1-relay CN26-PRCB CN18 for proper connection and correct as necessary. 2 Check the fan for possible overload and correct as necessary. 3 FM1 operation check PRCB CN18-13 (REM) PRCB CN18-15 (LOCK) 6-C. 4 Replace FM1. 5 PRCB ICP2 conduction check. 6 Replace PRCB.
- Code: C5354
- Description: Ozone fan’s failure to turn
The fan lock signal remains HIGH for a predetermined continuous period of time while the fan remains stationary. - Troubleshooting Guides: 1 Check the connector between FM13-relay CN158- PRCB CN23 for proper connection and correct as necessary. 2 Check the fan for possible overload and correct as necessary. 3 FM13 operation check PRCB CN23-10 (REM) PRCB CN23-12 (LOCK) 5-C. 4 Replace FM13. 5 PRCB ICP19 conduction check. 6 Replace PRCB.
- Code: C5355
- Description: Toner bottle cooling fan’s failure to turn
The fan lock signal remains HIGH for a predetermined continuous period of time while the fan remains stationary. - Troubleshooting Guides: 1 Check the connector between FM4-relay CN157- PRCB CN34 for proper connection and correct as necessary. 2 Check the fan for possible overload and correct as necessary. 3 FM4 operation check PRCB CN34-1 (REM) PRCB CN34-3 (LOCK) 27-C. 4 Replace FM4. 5 PRCB ICP18 conduction check. 6 Replace PRCB.
- Code: C5370
- Description: Rear side cooling fan’s failure to turn
The fan lock signal remains HIGH for a predetermined continuous period of time while the fan remains stationary. - Troubleshooting Guides: 1 Check the connector between FM3-MFPB PJ26 for proper connection and correct as necessary. 2 Check the fan for possible overload and correct as necessary. 3 FM3 operation check MFPB PJ26 (LOCK) 7-P. 4 Replace FM3. 5 Replace MFPB.
- Code: C5372
- Description: MFP control board CPU temperature failure
Temperature failure of CPU on the MFP board was detected. - Troubleshooting Guides: 1 Reboot the machine. 2 Check the fan connector for proper connection and correct as necessary. 3 Check the fan for possible overload and correct as necessary. 4 Fan motor operation check. 5 Replace MFPB.
- Code: C5501
- Description: AC signal abnormality
The zero cross signal is not input during fusing phase control. - Troubleshooting Guides: 1 Check the fusing unit for correct installation (whether it is secured in position). 2 Check the fusing unit, DCPU and PRCB for proper connection and correct or change as necessary. 3 Replace fusing unit. 4 Replace PRCB. 5 Replace DCPU.
- Code: C5601
- Description: Engine control malfunction
Engine control malfunction is detected with port monitor control. - Troubleshooting Guides: 1 Check the connectors on the PRCB for proper connection and correct or change as necessary. 2 Rewrite the firmware. 3 Replace PRCB.
- Code: C6001
- Description: DF related configuration error 1
Inconsistency in the configuration with the installed DF is detected on the main body. - Troubleshooting Guides: 1 Check the type of the installed DF and replace it if it is a wrong one. 2 Check to see if the correct firmware is installed and rewrite with the correct one as necessary. 3 Correct the harness connection between DFCB and DSIPB if faulty. 4 Correct the harness connection between DSIPB and MFPB if faulty. 5 Replace DFCB. 6 Replace DSIPB. 7 Replace MFPB.
- Code: C6002
- Description: DF related configuration error 2
Inconsistency in the configuration with the installed DF is detected on the DF. - Troubleshooting Guides: 1 Check the type of the installed DF and replace it if it is a wrong one. 2 Correct the harness connection between DFCB and DSIPB if faulty. 3 Check the connectors of the dual scan image processing board (DSIPB) for proper connection, and correct as necessary. (Direction of the point of contact and connection state of the flat cable in particular)
- Code: C6102
- Description: Drive system home sensor malfunction
• The scanner home sensor (PS201) is unable to detect the scanner located at its home position. • The scanner home sensor (PS201) is unable to detect a scanner even when the scanner motor has been driven to move the scanner over the maximum travelling distance. • The scanner home sensor (PS201) detects the scanner when the scanner has moved the maximum travelling distance from the position, at which it blocks the scanner home sensor (PS201). - Troubleshooting Guides: 1 Correct or change the scanner drive (pulley, gear, belt) if it is faulty. 2 Correct the scanner motor set screw if loose. 3 Adjust [Image Position Leading Edge] and [Feed Direction Adjustment]. 4 Check the connector between M201-SCDB PJ4 for proper connection and correct as necessary. 5 Check the connector between PS201-SCDB PJ6 for proper connection and correct as necessary. 6 Check the connector between SCDB PJ2-PRCB CN43 for proper connection and correct as necessary. 7 PS201 I/O check, sensor check SCDB PJ6-3 (ON) 25-P. 8 M201 operation check SCDB PJ4-1 to 4 26-P. 9 Replace SCDB. 10 Replace PRCB.
- Code: C6103
- Description: Slider over running
The scanner home sensor (PS201) detects the scanner at its home position during a period of time that begins with the time when a prescan command and a scan preparation command are executed and ends when a home return command is executed. - Troubleshooting Guides: 1 Correct or change the scanner drive (pulley, gear, belt) if it is faulty. 2 Correct the scanner motor set screw if loose. 3 Adjust [Image Position Leading Edge] and [Feed Direction Adjustment]. 4 Check the connector between M201-SCDB PJ4 for proper connection and correct as necessary. 5 Check the connector between PS201-SCDB PJ6 for proper connection and correct as necessary. 6 Check the connector between SCDB PJ2-PRCB CN43 for proper connection and correct as necessary. 7 PS201 I/O check, sensor check SCDB PJ6-3 (ON) 25-P. 8 M201 operation check SCDB PJ4-1 to 4 26-P. 9 Replace SCDB. 10 Replace PRCB.
- Code: C6104
- Description: Back side cleaning home sensor abnormality (initial)
<When DF-701 is installed> • The CIS cleaning sensor (PS7) does not change from H to L even after the lapse of a given period of time after the home position detecting operation is started at the initial operation. • The CIS cleaning sensor (PS7) does not change from L to H even after the lapse of a given period of time after the home position detecting operation is started at the initial operation. - Troubleshooting Guides: 1 Check if the opening and closing guide is firmly closed. 2 Check the connector between M5-DFCB J9 for proper connection, and correct as necessary. 3 Check the connector of M5 for proper drive coupling, and correct as necessary. 4 Check the connector between PS7-DFCB J13 for proper connection, and correct as necessary. 5 PS7 I/O check, sensor check DRCB J13-3 (ON) DF-701 1-G. 6 M5 operation check DRCB J9-1 to 4 DF-701 6-G. 7 Replace M5. 8 Replace DFCB.
- Code: C6105
- Description: Back side cleaning home sensor abnormality (normal)
<When DF-701 is installed> At the time of operation other than the initial operation, the CIS cleaning sensor (PS7) error is detected. - Troubleshooting Guides: 1 Check if the opening and closing guide is firmly closed. 2 Check the connector between M5-DFCB J9 for proper connection, and correct as necessary. 3 Check the connector of M5 for proper drive coupling, and correct as necessary. 4 Check the connector between PS7-DFCB J13 for proper connection, and correct as necessary. 5 PS7 I/O check, sensor check DRCB J13-3 (ON) DF-701 1-G. 6 M5 operation check DRCB J9-1 to 4 DF-701 6-G. 7 Replace M5. 8 Replace DFCB.
- Code: C6704
- Description: Image input time out
Image data is not input from the scanner to the MFP board (MFPB). - Troubleshooting Guides: 1 Select [Service Mode] – [State Confirmation] – [Memory/HDD Adj.] – [Memory Bus Check] – [Scanner – Memory], and conduct the memory bus function. 2 Check the connectors between scanner section and MFPB for proper connection and correct as necessary. 3 Replace MFPB. 4 Replace CCDB.
- Code: C6751
- Description: CCD clamp/gain adjustment failure
• The adjustment value is 0 or 255 during a CCD clamp adjustment. • The peak value of the output data is 64 or less during a CCD gain adjustment. - Troubleshooting Guides: 1 Check the connector between CCDB PJ3-MFPB PJ01 for proper connection and correct as necessary. 2 Check for possible extraneous light and correct as necessary. 3 Clean the lens, mirrors, CCD surface, and shading sheet if dirty. 4 Correct reflective mirror of the scanner if faulty, or change scanner mirror. 5 Replace CCDB. 6 Replace MFPB.
- Code: C6752
- Description: ASIC clock input error (front side)
When starting the machine, verification on reading and writing the predetermined value for image processing ASIC on CCD board (CCDB) was conducted, and verification failure was detected. - Troubleshooting Guides: 1 Correct the harness connection of CCDB if faulty. 2 Replace CCDB. 3 Replace MFPB.
- Code: C6753
- Description: ASIC clock input error (back side)
<When DF-701 is installed> When starting the machine, verification on reading and writing the predetermined value for image processing ASIC on dual scan image processing board (DSIPB) was conducted, and verification failure was detected. - Troubleshooting Guides: 1 Correct the harness connection between DF and DSIPB if faulty. 2 Correct the harness connection between DSIPB and MFPB if faulty. 3 Replace CIS. 4 Replace DSIPB. 5 Replace MFPB.
- Code: C6754
- Description: CIS clamp adjustment failure
<When DF-701 is installed> After the gain adjustment is performed at the start-up, the CIS clamp adjustment value is too high or too low. - Troubleshooting Guides: 1 Correct the harness connection between CIS and DSIPB if faulty. 2 Correct the harness connection between CIS and CISPU if faulty. 3 Check for possible extraneous light and correct as necessary. 4 Clean the back side reading glass and the shading sheet if dirty. 5 Replace CIS. 6 Replace DSIPB. 7 Replace CISPU. 8 Replace MFPB.
- Code: C6755
- Description: CIS gain adjustment failure
<When DF-701 is installed> After the gain adjustment is performed at the start-up, the peak value of the output data is lower than a given value. - Troubleshooting Guides: 1 Correct the harness connection between CIS and DSIPB if faulty. 2 Correct the harness connection between CIS and CISPU if faulty. 3 Check for possible extraneous light and correct as necessary. 4 Clean the back side reading glass and the shading sheet if dirty. 5 Replace CIS. 6 Replace DSIPB. 7 Replace CISPU. 8 Replace MFPB.
- Code: C6756
- Description: CCD power-supply voltage malfunction
Power is not supplied to CCD after the lapse of a given period of time after the main power switch or sub power key is turned ON or the machine recovers from the sleep mode. - Troubleshooting Guides: 1 Correct the harness connection between CCDB and SCDB if faulty. 2 Correct the harness connection between SCDB and DCPU if faulty. 3 Replace CCDB. 4 Replace SCDB. 5 Replace DCPU.
- Code: C6901
- Description: DSC board mount failure 1
When MFP detects that DSC board/1 (front side) is not properly installed. - Troubleshooting Guides: 1 Correct the harness connection of DSCB/1 if faulty. 2 Replace DSCB/1. 3 Replace MFPB
- Code: C6902
- Description: DSC board bus check NG1-1
When DSC bus check (front side) detects an error. - Troubleshooting Guides: 1 Correct the harness connection of DSCB/1 if faulty. 2 Replace DSCB/1. 3 Replace MFPB
- Code: C6903
- Description: DSC board bus check NG1-2
When DSC bus check (front side) detects an error. - Troubleshooting Guides: 1 Correct the harness connection of DSCB/1 if faulty. 2 Replace DSCB/1. 3 Replace MFPB
- Code: C6911
- Description: DSC board mount failure 2
<When DF-701 is installed> When MFP detects that DSC board/2 (back side) is not properly installed. - Troubleshooting Guides: 1 Correct the harness connection of DSCB/2 if faulty. 2 Correct the harness connection of DSIPB if faulty. 3 Replace DSCB/2. 4 Replace DSIPB. 5 Replace MFPB.
- Code: C6912
- Description: DSC Bus check NG2-1
<When DF-701 is installed> When MFP detects that DSC board/2 (back side) is not properly installed. - Troubleshooting Guides: 1 Correct the harness connection of DSCB/2 if faulty. 2 Correct the harness connection of DSIPB if faulty. 3 Replace DSCB/2. 4 Replace DSIPB. 5 Replace MFPB.
- Code: C6913
- Description: DSC Bus check NG2-2
<When DF-701 is installed> When MFP detects that DSC board/2 (back side) is not properly installed. - Troubleshooting Guides: 1 Correct the harness connection of DSCB/2 if faulty. 2 Correct the harness connection of DSIPB if faulty. 3 Replace DSCB/2. 4 Replace DSIPB. 5 Replace MFPB.
- Code: C6F01
- Description: Scanner sequence trouble 1
The original transport interval becomes shorter than the predetermined value due to an original transport control error in original reading in DF. - Troubleshooting Guides: 1 Correct the harness connection between main body and DF if faulty. 2 Replace DFCB (DF-624/DF-701). 3 Replace MFPB.
- Code: C8101
- Description: Before reading pressure welding alienation mechanism
<When DF-624 is installed> • During a pressure motion being performed, the document reading sensor (PS4) output does not change from H to L. • During a retraction motion being performed, the document reading sensor (PS4) output does not change from L to H.
<When DF-701 is installed> • During a pressure motion being performed, the document reading sensor (PS6) output does not change from H to L. • During a retraction motion being performed, the document reading sensor (PS6) output does not change from L to H. - Troubleshooting Guides: When DF-624 is installed: 1 Check the connector between M5-DFCB J18 for proper connection and correct as necessary. 2 Check the connector of M5 for proper drive coupling, and correct as necessary. 3 Check the connector between PS4-DFCB J10 for proper connection and correct as necessary. 4 PS4 I/O check, sensor check DFCB J10-3 (ON) DF-624 2-G. 5 M5 operation check DFCB J18-4 to 5 DF-624 2-G. 6 Replace M5. 7 FSCB F8 conduction check. 8 Replace DFCB.
When DF-701 is installed: 1 Check the connector between M4-DFCB J18 for proper connection and correct as necessary. 2 Check the connector of M4 for proper drive coupling, and correct as necessary. 3 Check the connector between PS6-DFCB J10 for proper connection and correct as necessary. 4 PS6 I/O check, sensor check DFCB J10-3 (ON) DF-701 2-G. 5 M4 operation check DFCB J18-4 to 5 DF-701 1-G. 6 Replace M4. 7 FSCB F8 conduction check. 8 Replace DFCB.
- Code: C8107
- Description: Glass cleaning mechanism trouble
<When DF-624 is installed> The document reading glass cleaning sensor (PS12) is not turned ON after the set period of time has elapsed after the glass cleaning motor (M4) is turned ON.
<When DF-701 is installed> The document reading glass cleaning sensor (PS13) is not turned ON after the set period of time has elapsed after the document reading glass cleaning motor (M6) is turned ON. - Troubleshooting Guides: When DF-624 is installed: 1 Check the connector between M4-DFCB J8 for proper connection and correct as necessary. 2 Check the connector of M4 for proper drive coupling, and correct as necessary. 3 Check the connector between PS12-DFCB J15 for proper connection and correct as necessary. 4 PS12 I/O check, sensor check DFCB J15-5 (ON) DF-624 3-G. 5 M4 operation check DFCB J8-1 to 4 DF-624 1 to 2-B. 6 Replace M4. 7 Replace DFCB.
When DF-701 is installed: 1 Check the connector between M6-DFCB J8 for proper connection and correct as necessary. 2 Check the connector of M6 for proper drive coupling, and correct as necessary. 3 Check the connector between PS13-DFCB J15 for proper connection and correct as necessary. 4 PS13 I/O check, sensor check DFCB J15-5 (ON) DF-701 3-G. 5 M6 operation check DFCB J8-1 to 4 DF-701 1-B. 6 Replace M6. 7 Replace DFCB.
- Code: C8302
- Description: Cooling fan trouble
<When DF-624 is installed> <When DF-701 is installed> • The lock signal continues to detect H during a given time while the DF cooling fan motor (FM1) is spinning. • The lock signal continues to detect L during a given time while the cooling fan (FM1) is during halts. - Troubleshooting Guides: When DF-624 is installed: 1 Check the connector between FM1-DFCB J16 for proper connection and correct as necessary. 2 Check the fan for possible overload and correct as necessary. 3 FM1 operation check DFCB J16-3 (ON) DF-624 3-B 4 Replace FM1. 5 DFCB F6 conduction check. 6 Replace DFCB.
When DF-701 is installed: 1 Check the connector between FM1-DFCB J16 for proper connection and correct as necessary. 2 Check the fan for possible overload and correct as necessary. 3 FM1 operation check DFCB J16-3 (ON) DF-701 7-G. 4 Replace FM1. 5 DFCB F6 conduction check. 6 Replace DFCB.
- Code: C9401
- Description: Exposure LED lighting failure
The output from the CCD sensor is a predetermined value or less during CCD sensor gain adjustment. - Troubleshooting Guides: 1 Check the connection between SCDB-LU201, and correct if necessary. 2 Check the connector between SCDB PJ1-PRCB CN43 for proper connection and correct as necessary. 3 Check the connector between CCDB PJ3-MFPB PJ01 for proper connection and correct as necessary. 4 Replace the LED exposure unit. 5 Replace CCDB. 6 Replace SCDB. 7 Replace PRCB. 8 Replace MFPB.
- Code: C9402
- Description: Exposure LED lighting abnormally
The average output value of the CCD sensor with the scanner at its standby position is a predetermined value or more at the end of a scan job. - Troubleshooting Guides: 1 Check the connection between SCDB-LU201, and correct if necessary. 2 Check the connector between SCDB PJ1-PRCB CN43 for proper connection and correct as necessary. 3 Check the connector between CCDB PJ3-MFPB PJ01 for proper connection and correct as necessary. 4 Replace the LED exposure unit. 5 Replace CCDB. 6 Replace SCDB. 7 Replace PRCB. 8 Replace MFPB.
- Code: C9403
- Description: CIS LED lighting failure
<When DF-701 is installed> At the CIS gain adjustment, the machine detected that the output of the CIS LED is lower than the specified value. - Troubleshooting Guides: 1 Correct the harness connection between CIS and DSIPB if faulty. 2 Correct the harness connection between CIS and CISPU if faulty. 3 Replace CIS. 4 CISPU F1, F2 conduction check. 5 Replace CISPU. 6 Replace DSIPB. 7 Replace MFPB.
- Code: C9404
- Description: CIS LED lighting abnormally
<When DF-701 is installed> After a scan job is completed, the machine detected that the average output of the CIS LED is greater than the specified value. - Troubleshooting Guides: 1 Correct the harness connection between CIS and DSIPB if faulty. 2 Correct the harness connection between CIS and CISPU if faulty. 3 Replace CIS. 4 CISPU F1, F2 conduction check. 5 Replace CISPU. 6 Replace DSIPB. 7 Replace MFPB.
- Code: CA051
- Description: Standard controller configuration failure
The controller of the MFP board (MFPB) is faulty. - Troubleshooting Guides:
- Code: CA052
- Description: Controller hardware error
A controller hardware error is detected in the network interface. - Troubleshooting Guides: 1 Check to see if the following setting has been correctly made: [Service Mode] – [System 2] – [Image Controller Setting]. If changing the setting, turn OFF the main power switch and turn it ON again after 10 seconds or more. 2 Check the connectors of the MFPB for proper connection and correct as necessary. 3 Replace MFPB.
- Code: CA053
- Description: Controller start failure
A controller start failure is detected in the controller interface. - Troubleshooting Guides: 1 Check to see if the following setting has been correctly made: [Service Mode] – [System 2] – [Image Controller Setting]. If changing the setting, turn OFF the main power switch and turn it ON again after 10 seconds or more. 2 Check the connectors of the MFPB for proper connection and correct as necessary. 3 Replace MFPB.
- Code: CB001 … CB119
- Description: FAX board error
- Troubleshooting Guides:
- Code: CB120 … CB196
- Description: Controller error
- Troubleshooting Guides:
- Code: CC001
- Description: Vendor connection failure
- Troubleshooting Guides:
- Code: CC151 … CC165
- Description: ROM contents error
- Troubleshooting Guides:
- Code: CD004 … CD047
- Description: Hard disk error
- Troubleshooting Guides:
– Get more error code list with quick guide to fix printer product, click here
– About get help with reseting Epson inkpad or others, click here
– Get more information about Epson XP 15000 troubleshooting, click here
– Buy cheap key of Epson WIC Reset Tool, CLICK HERE
– Key Epson Adjustment Program, CLICK HERE
– Download Epson printer driver, CLICK HERE
– Download Epson XP-6100 Driver, Firmware and Manuals, CLICK HERE
Contact us to get support with Konica-Minolta bizhub C224e Error case
Telegram: https://t.me/hyperaktiv
Facebook: https://www.facebook.com/dngnm/
Or click here to get more ways.
Если код ошибки
отмечен * перезагрузите машину переключателем (SW2)
| Код | Классификация | Вероятные причины | Предполагаемые неисправные детали |
| C‐0001* | Проблемы с коммуникацией |
Проблема с соединением между платами printer control board (PRCB) и PF drive board (PFDB) или LU drive board (LUDB). |
Printer control board (PRCB) PF drive board (PFDB) LU drive board (LUDB |
| C‐0002* |
Проблема с соединением между платами printer control board (PRCB) и conveyance drive board (CDB). |
Printer control board (PRCB) Conveyance drive board (CDB) |
|
| C‐0003* |
Проблема с соединением между платами printer control board (PRCB) и conveyance drive board (CDB). |
Printer control board (PRCB) Conveyance drive board (CDB) |
|
| C‐0101 |
Проблемы с двигателем подачи бумаги |
Обнаружен сигнал неисправности двигателя подачи бумаги М41 |
Printer control board (PRCB) Paper feed motor (M41) |
| C‐0102 |
Проблемы с двигателем подачи бумаги кассеты большой емкости |
Обнаружен сигнал неисправности двигателя подачи бумаги М1 |
LU drive board (LUDB) Paper feed motor (M1) |
| C‐0201 | Проблемы с лотком подачи бумаги |
Через определенное время после подачи команды на включение двигателя подъема/1 (M38), датчик верхнего предела/1 (PS30) не переходит во включенное состояние. |
Printer control board (PRCB) Paper lift motor/1 (M38) Upper limit sensor/1 (PS30) |
| C‐0202 |
Через определенное время после подачи команды на включение двигателя подъема/2 (M39), датчик верхнего предела/2 (PS36) не переходит во включенное состояние. |
Printer control board (PRCB) Paper lift motor/2 (M39) Upper limit sensor/2 (PS36) |
|
| C‐0203 |
Через определенное время после подачи команды на включение двигателя подъема/3 (M40), датчик верхнего предела/3 (PS42) не переходит во включенное состояние. |
Printer control board (PRCB) Paper lift motor/3 (M40) Upper limit sensor/3 (PS42) |
|
| C‐0204 |
Проблемы с двигателем подъема бумаги кассеты большой емкости |
Обнаружен сигнал блокировки, при включении двигателя подъема бумаги. |
LU drive board (LUDB) Paper lift motor (M100) |
| C‐0205 |
Отсутствуют сигналы от датчиков PS101 или PS109 через определенное время после подачи команды на включение двигателя подъема бумаги (M100) |
LU drive board (LUDB) Paper lift motor (M100) Upper limit sensor (PS109) Lower limit sensor (PS101) |
|
| C‐0213** | Проблемы с выходом бумаги |
Датчик выхода бумаги (PS10) не возвращается во включенное состояние через необходимое время |
AC drive board (ACDB) Printer control board (PRCB) Paper exit motor (M54) Paper exit pressure sensor(PS10) |
| C‐0301 | Проблемы с вентилятором | Обнаружен сигнал неисправности вентилятора(M47) |
Printer control board (PRCB) main body fan (M47) |
| C‐0302 |
Обнаружен сигнал неисправности одного из вентиляторов M26, M27 или M28 |
Printer control board (PRCB) Tucking fan/1 (M26) Tucking fan/2 (M27) Tucking fan/3 (M28) |
|
| C‐0303 | Обнаружен сигнал неисправности вентилятора ADU (M66) |
Conveyance drive board (CDB) ADU fan/1 (M66) |
|
| C‐0304 |
Обнаружен сигнал неисправности одного из вентиляторов M61, M62 или M63 |
Printer control board (PRCB) Paper exit fan/1 (M61) Paper exit fan/2 (M62) Paper exit fan/3 (M63) |
|
| C‐0305 | Обнаружен сигнал неисправности вентилятора (M36) |
Printer control board (PRCB) Deodorization fan (M36) |
|
| C‐0322 | Обнаружен сигнал неисправности вентилятора (M67) |
Conveyance drive board (CDB) ADU fan /2 (M67) |
|
| C‐0306 |
Проблемы с вентилятором лотка большой емкости |
Обнаружен сигнал неисправности вентилятора раздува (M36) |
LU drive board (LUDB) Paper feed assist fan/Rr (M137) |
| C‐0307 |
Обнаружен сигнал неисправности вентилятора раздува (FM1) |
LU drive board (LUDB) Paper feed assist fan/Fr (FM1) |
|
| C‐0401 |
Проблемы с напряжением питания лотка большой емкости |
Отсутствует напряжение 24V |
LU drive board (LUDB) DC power unit/1 (DCPS/1) DC power unit/2 (DCPS/2) |
| C‐0402 | Отсутствует напряжение 12V |
LU drive board (LUDB) DC power unit/1 (DCPS/1) |
|
| C‐2001 | Проблемы с коммуникацией |
Проблема с соединением между платой (PRCB) и двигателем вращения фотобарабана Y(M14) или M (M15). |
Printer control board (PRCB) Drum motor /Y (M14) Drum motor /M (M15) |
| C‐2002 |
Проблема с соединением между платой (PRCB) и двигателем вращения фотобарабана C(M16) или K (M17) |
Printer control board (PRCB) Drum motor /C (M16) Drum motor /K (M17) |
|
| C‐2003 |
Проблема с соединением между платой (PRCB) и двигателем вращения ремня переноса (M18). |
Printer control board (PRCB) Transfer belt motor (M18) |
| C‐2004 | Проблемы с коммуникацией |
Проблема с соединением между платой (PRCB) и двигателем вращения фотобарабана Y(M14) или M (M15). |
Printer control board (PRCB) Drum motor /Y (M14) Drum motor /M (M15) |
| C‐2005 |
Проблема с соединением между платой (PRCB) и двигателем вращения фотобарабана C(M16) или K (M17) |
Printer control board (PRCB) Drum motor /C (M16) Drum motor /K (M17) |
|
| C‐2006 |
Проблема с соединением между платой (PRCB) и двигателем вращения ремня переноса (M18). |
Printer control board (PRCB) Transfer belt motor (M18) |
|
| C‐2201 | Проблемы с двигателем девелопера |
Обнаружен сигнал неисправности двигателя девелопера Y (M20) |
Printer control board (PRCB) Developing motor /Y (M20) |
| C‐2202 |
Обнаружен сигнал неисправности двигателя девелопера M (M21) |
Printer control board (PRCB) Developing motor /M (M21) |
|
| C‐2203 |
Обнаружен сигнал неисправности двигателя девелопера C (M22) |
Printer control board (PRCB) Developing motor /C (M22) |
|
| C‐2204 |
Обнаружен сигнал неисправности двигателя девелопера K (M23) |
Printer control board (PRCB) Developing motor /K (M23) |
|
| C‐2211** |
Проблемы с двигателем вращения фотобарабана |
Обнаружен сигнал неисправности двигателя Y (M14) |
Printer control board (PRCB) Drum motor /Y (M14) |
| C‐2212** | Обнаружен сигнал неисправности двигателя М(M15) |
Printer control board (PRCB) Drum motor /M (M15) |
|
| C‐2213** | Обнаружен сигнал неисправности двигателя С(M16) |
Printer control board (PRCB) Drum motor /C (M16) |
|
| C‐2214** | Обнаружен сигнал неисправности двигателя К (M17) |
Printer control board (PRCB) Drum motor /K (M17) |
|
| C‐2220 | Проблемы с узлом ремня переноса | Обнаружен сигнал неисправности двигателя К (M18) |
Printer control board (PRCB) Transfer belt motor (M18) |
| C‐2221** |
Датчик положения роликов 1‐ого переноса (PS15) не меняет свое состояние через заданное время после включения двигателя(M19) |
Printer control board (PRCB) 1st transfer pressing/releasing motor (M19) 1st transfer HP sensor (PS15) |
|
| C‐2222 | Проблемы с подачей тонера |
Обнаружен сигнал неисправности любого из двигателей подачи тонера /Y, /M, /C, /K (M49, M50,M51, M52) или муфты /Y, /M, /C, /K (MC14, MC15, MC16, MC17) |
Printer control board (PRCB) Toner supply drive board (TSDB) Toner supply motor/Y (M49) Toner supply motor/M (M50) Toner supply motor/C (M51) Toner supply motor/K (M52) Toner bottle motor (M53) Toner bottle clutch/Y (MC14) Toner bottle clutch/M (MC15) Toner bottle clutch/C (MC16) Toner bottle clutch/K (MC17) |
| C‐2301 | Проблемы с вентилятором | Обнаружен сигнал неисправности вентилятора (M48) |
Printer control board (PRCB) Toner supply drive board (TSDB) Charge intake fan (M48) |
| C‐2302 |
Обнаружен сигнал неисправности вентиляторов (M12) или (M13) |
Printer control board (PRCB) Drum fan/1 (M12) Drum fan/2 (M13) |
|
| C‐2303 | Обнаружен сигнал неисправности вентилятора (M11) |
Printer control board (PRCB) Transfer belt fan (M11) |
|
| C‐2304 |
Обнаружен сигнал неисправности вентиляторов (M45, M46 и M64) |
Printer control board (PRCB) Developing fan/1 (M45) Developing fan/2 (M46) Developing fan/3 (M64) |
|
| C‐2401 |
Проблемы с лампой снятия остаточного заряда |
лампа/Y не обнаружена |
Printer control board (PRCB) Erase lamp/Y (EL/Y) |
| C‐2402 | лампа/М не обнаружена |
Printer control board (PRCB) Erase lamp/M (EL/M) |
|
| C‐2403 | лампа/С не обнаружена |
Printer control board (PRCB) Erase lamp/C (EL/C) |
|
| C‐2404 | лампа/К не обнаружена |
Printer control board (PRCB) Erase lamp/K (EL/K) |
|
| C‐2411 | Проблемы с датчиком TCR |
отсутствует управление выходным сигналом датчика TCR/Y |
Printer control board (PRCB) TCR sensor/Y (TCRS/Y) |
| C‐2412 |
отсутствует управление выходным сигналом датчика TCR/М |
Printer control board (PRCB) TCR sensor/M (TCRS/M) |
|
| C‐2413 |
отсутствует управление выходным сигналом датчика TCR/С |
Printer control board (PRCB) TCR sensor/C (TCRS/C) |
|
| C‐2414 |
отсутствует управление выходным сигналом датчика TCR/К |
Printer control board (PRCB) TCR sensor/K (TCRS/K) |
| C‐2421** | Проблемы с приводом девелопера |
после включения двигателя девелопера или после начала настройки датчика TCR/Y, значения показаний датчика TCR/Y ниже заданной величины |
Printer control board (PRCB) Developing motor/Y (M20) TCR sensor/Y (TCRS/Y) |
| C‐2422** |
после включения двигателя девелопера или после начала настройки датчика TCR/М, значения показаний датчика TCR/М ниже заданной величины |
Printer control board (PRCB) Developing motor/M (M21) TCR sensor/M (TCRS/M) |
|
| C‐2423** |
после включения двигателя девелопера или после начала настройки датчика TCR/С, значения показаний датчика TCR/С ниже заданной величины |
Printer control board (PRCB) Developing motor/C (M22) TCR sensor/C (TCRS/C) |
|
| C‐2424** |
после включения двигателя девелопера или после начала настройки датчика TCR/К, значения показаний датчика TCR/К ниже заданной величины |
Printer control board (PRCB) Developing motor/K (M23) TCR sensor/K (TCRS/K) |
|
| C‐2431 |
Проблемы с настройкой датчика TCR (низкая плотность) |
обнаружены проблемы в настройке датчика TCR/Y при минимальном контрольном напряжении |
Printer control board (PRCB) Developing motor/Y (M20) TCR sensor/Y (TCRS/Y) |
| C‐2432 |
обнаружены проблемы в настройке датчика TCR/М при минимальном контрольном напряжении |
Printer control board (PRCB) Developing motor/M (M21) TCR sensor/M (TCRS/M) |
|
| C‐2433 |
обнаружены проблемы в настройке датчика TCR/С при минимальном контрольном напряжении |
Printer control board (PRCB) Developing motor/C (M22) TCR sensor/C (TCRS/C) |
|
| C‐2434 |
обнаружены проблемы в настройке датчика TCR/К при минимальном контрольном напряжении |
Printer control board (PRCB) Developing motor/K (M23) TCR sensor/K (TCRS/K) |
|
| C‐2441 |
Проблемы с настройкой датчика TCR (высокая плотность) |
обнаружены проблемы в настройке датчика TCR/Y при максимальном контрольном напряжении |
Printer control board (PRCB) Developing motor/Y (M20) TCR sensor/Y (TCRS/Y) |
| C‐2442 |
обнаружены проблемы в настройке датчика TCR/М при максимальном контрольном напряжении |
Printer control board (PRCB) Developing motor/M (M21) TCR sensor/M (TCRS/M) |
|
| C‐2443 |
обнаружены проблемы в настройке датчика TCR/С при максимальном контрольном напряжении |
Printer control board (PRCB) Developing motor/C (M22) TCR sensor/C (TCRS/C) |
|
| C‐2444 |
обнаружены проблемы в настройке датчика TCR/К при максимальном контрольном напряжении |
Printer control board (PRCB) Developing motor/K (M23) TCR sensor/K (TCRS/K) |
|
| C‐2451** |
Черезмерно низкая концентрация тонера |
после запуска двигателя девелопера /Y (M20) превышен предел между значениями максимальной и минимальной плотности |
Printer control board (PRCB) Developing motor/Y (M20) TCR sensor/Y (TCRS/Y) |
| C‐2452** |
после запуска двигателя девелопера /М (M21) превышен предел между значениями максимальной и минимальной плотности |
Printer control board (PRCB) Developing motor/M (M21) TCR sensor/M (TCRS/M) |
|
| C‐2453** |
после запуска двигателя девелопера /С (M22) превышен предел между значениями максимальной и минимальной плотности |
Printer control board (PRCB) Developing motor/C (M22) TCR sensor/C (TCRS/C) |
|
| C‐2454** |
после запуска двигателя девелопера /К (M23) превышен предел между значениями максимальной и минимальной плотности |
Printer control board (PRCB) Developing motor/K (M23) TCR sensor/K (TCRS/K) |
|
| C‐2461 |
Проблема с контактом коротрона, либо заряд фотобарабана измерен некорректно |
отсутствует контакт коротрона /Y, либо датчик измерения потенциала (DPRS/Y) показывает неверные значения |
Printer control board (PRCB) High voltage unit/1 (HV/1) Drum potential sensor board/Y (DRPSB/Y) Drum potential sensor/Y(DRPS/Y) |
| C‐2462 |
отсутствует контакт коротрона /М, либо датчик измерения потенциала (DPRS/М) показывает неверные значения |
Printer control board (PRCB) High voltage unit/1 (HV/1) Drum potential sensor board/M (DRPSB/M) Drum potential sensor/M(DRPS/M) |
|
| C‐2463 |
отсутствует контакт коротрона /С, либо датчик измерения потенциала (DPRS/С) показывает неверные значения |
Printer control board (PRCB) High voltage unit/1 (HV/1) Drum potential sensor board/C (DRPSB/C) Drum potential sensor/C(DRPS/C) |
|
| C‐2464 |
отсутствует контакт коротрона /К, либо датчик измерения потенциала (DPRS/К) показывает неверные значения |
Printer control board (PRCB) High voltage unit/1 (HV/1) Drum potential sensor board/K (DRPSB/K) |
|
| C‐2470 | Проблема с контактом Process unit | Process unit не подключен |
Printer control board (PRCB) Process unit |
| C‐2701 |
Проблема с высоковольтным блоком/1 |
Обнаружен сигнал неисправности коротрона/Y |
High voltage unit/1 (HV/1) Charging coronas/Y |
| C‐2702 | Обнаружен сигнал неисправности коротрона/М |
High voltage unit/1 (HV/1) Charging coronas/M |
|
| C‐2703 | Обнаружен сигнал неисправности коротрона/С |
High voltage unit/1 (HV/1) Charging coronas/C |
|
| C‐2704 | Обнаружен сигнал неисправности коротрона/К |
High voltage unit/1 (HV/1) Charging coronas/K |
| C‐2711 |
Проблема с высоковольтным блоком/2 |
Обнаружен сигнал неисправности первичного переноса/Y |
High voltage unit/2 (HV/2) First transfer roller/Y |
| C‐2712 |
Обнаружен сигнал неисправности первичного переноса/М |
High voltage unit/2 (HV/2) First transfer roller /M |
|
| C‐2713 | Обнаружен сигнал неисправности первичного переноса/С |
High voltage unit/2 (HV/2) First transfer roller /C |
|
| C‐2714 | Обнаружен сигнал неисправности первичного переноса/К |
High voltage unit/2 (HV/2) First transfer roller/K |
|
| C‐2720 | Обнаружен сигнал неисправности вторичного переноса |
High voltage unit/2 (HV/2) Second transfer roller |
|
| C‐2721** | Обнаружен сигнал неисправности поля отделения |
High voltage unit /2 (HV/2) Separation pole |
|
| C‐2801 | Проблема с гамма коррекцией |
Гамма корреция/Y прервана, выходное напряжение измеренного патча слишком низкое.(Error 1) |
Printer control board (PRCB) Developing unit /Y PGC sensor (PS11) |
| C‐2802 |
Гамма корреция/М прервана, выходное напряжение измеренного патча слишком низкое.(Error 1) |
Printer control board (PRCB) Developing unit /M PGC sensor (PS11) |
|
| C‐2803 |
Гамма корреция/С прервана, выходное напряжение измеренного патча слишком низкое.(Error 1) |
Printer control board (PRCB) Developing unit /C PGC sensor (PS11) |
|
| C‐2804 |
Гамма корреция/К прервана, выходное напряжение измеренного патча слишком низкое. |
Printer control board (PRCB) Developing unit /K PGC sensor (PS11) |
|
| C‐2811 |
Ненормальный потенциал заряда фотобарабана |
В процессе контроля, поверхностный потенциал барабана/Y выходит за установленные значения |
Printer control board (PRCB) Drum potential sensor board/Y (DRPSB/Y) Drum potential sensor /Y(DRPS/Y) |
| C‐2812 |
В процессе контроля, поверхностный потенциал барабана/М выходит за установленные значения |
Printer control board (PRCB) Drum potential sensor board/M (DRPSB/M) Drum potential sensor /M (DRPS/M) |
|
| C‐2813 |
В процессе контроля, поверхностный потенциал барабана/С выходит за установленные значения |
Printer control board (PRCB) Drum potential sensor board/C (DRPSB/C) Drum potential sensor /C (DRPS/C) |
|
| C‐2814 |
В процессе контроля, поверхностный потенциал барабана/К выходит за установленные значения |
Printer control board (PRCB) Drum potential sensor board/K (DRPSB/K) Drum potential sensor /K (DRPS/K) |
|
| C‐2821 |
Проблема с коррекцией потенциала фотобарабана |
коррекция потенциала Vh/Y прервана |
Printer control board (PRCB) Drum potential sensor board/Y (DRPSB/Y) Drum potential sensor /Y (DRPS/Y) |
| C‐2822 | коррекция потенциала Vh/М прервана |
Printer control board (PRCB) Drum potential sensor board/M (DRPSB/M) Drum potential sensor/M(DRPS/M) |
|
| C‐2823 | коррекция потенциала Vh/С прервана |
Printer control board (PRCB) Drum potential sensor board/C (DRPSB/C) Drum potential sensor /C(DRPS/C) |
|
| C‐2824 | коррекция потенциала Vh/К прервана |
Printer control board (PRCB) Drum potential sensor board /K (DRPSB/K) Drum potential sensor /K(DRPS/K) |
|
| C‐2831** | коррекция потенциала Vm/Y прервана |
Printer control board (PRCB) Drum potential sensor board/Y (DRPSB/Y) Drum potential sensor/Y(DRPS/Y) |
|
| C‐2832** | коррекция потенциала Vm/М прервана |
Printer control board (PRCB) Drum potential sensor board/ (DRPSB/M) Drum potential sensor /M(DRPS/M) |
|
| C‐2833** | коррекция потенциала Vm/С прервана |
Printer control board (PRCB) Drum potential sensor board /C (DRPSB/C) Drum potential sensor /C(DRPS/C) |
|
| C‐2834** | коррекция потенциала Vm/К прервана |
Printer control board (PRCB) Drum potential sensor board /K (DRPSB/K) Drum potential sensor /K(DRPS/K) |
|
| C‐2840** | Проблема с гамма коррекцией | сбой в процессе контроля максимальной плотности |
Printer control board (PRCB) PGC sensor (PS11) |
| C‐2841 | сбой в процессе гамма контроля |
Printer control board (PRCB) PGC sensor (PS11) |
|
| C‐2851 |
гамма коррекция/Y прекращена, напряжение измеренного патча слишком высокое. (Error 2) |
Printer control board (PRCB) Developing unit/Y PGC sensor (PS11) |
| C‐2852 | Проблема с гамма коррекцией |
гамма коррекция/М прекращена, напряжение измеренного патча слишком высокое. (Error 2) |
Printer control board (PRCB) Developing unit/M PGC sensor (PS11) |
| C‐2853 |
гамма коррекция/С прекращена, напряжение измеренного патча слишком высокое. (Error 2) |
Printer control board (PRCB) Developing unit/C PGC sensor (PS11) |
|
| C‐2861 |
гамма коррекция/Y прекращена, напряжение измеренного патча слишком высокое. (Error 3) |
Printer control board (PRCB) Developing unit/Y PGC sensor (PS11) |
|
| C‐2862 |
гамма коррекция/М прекращена, напряжение измеренного патча слишком высокое. (Error 3) |
Printer control board (PRCB) Developing unit/M PGC sensor (PS11) |
|
| C‐2863 |
гамма коррекция/С прекращена, напряжение измеренного патча слишком высокое. (Error 3) |
Printer control board (PRCB) Developing unit/C PGC sensor (PS11) |
|
| C‐2871 |
гамма коррекция/Y прекращена, напряжение измеренного патча слишком высокое. (Error 4) |
Printer control board (PRCB) Developing unit/Y PGC sensor (PS11) |
|
| C‐2872 |
гамма коррекция/М прекращена, напряжение измеренного патча слишком высокое. (Error 4) |
Printer control board (PRCB) Developing unit/M PGC sensor (PS11) |
|
| C‐2873 |
гамма коррекция/С прекращена, напряжение измеренного патча слишком высокое. (Error 4) |
Printer control board (PRCB) Developing unit/C PGC sensor (PS11) |
|
| C‐3101 | Проблемы с двигателем | Обнаружен сигнал неисправности двигателя печки (M29) |
Conveyance drive board (CDB) Fusing motor (M29) |
| C‐3102** |
Через определенное время после включения двигателя М29, датчик PS16 не меняет свое состояние |
Conveyance drive board (CDB) Fusing motor (M29) Fusing release home sensor(PS16) |
|
| C‐3103 |
Мотор прижима ролика 2‐ого переноса (M34) не отключается через заданное время после включения. |
Conveyance drive board(CDB) 2nd transfer pressure/release motor (M34) |
|
| C‐3301 | Проблемы с вентилятором |
Обнаружен сигнал неисправности вентилятора печки (M37) |
Printer control board (PRCB) Fusing ventilation fan (M37) |
| C‐3302 |
Обнаружен сигнал неисправности вентилятора печки (M10) |
Printer control board (PRCB) Fusing belt ventilation fan (M10) |
|
| C‐3303 |
Обнаружен сигнал неисправности вентилятора печки (M65) |
Conveyance drive board (CDB) Fusing fan/Lw (M65) |
|
| C‐3501 |
Проблемы с температурой нагрева печки |
Показания датчика температуры (TEMS/1), длительное время превышают 250 °C |
Printer control board (PRCB) AC drive board (ACDB) Fusing heater lamp1/ (L2) Fusing heater lamp2/ (L3) Fusing heater lamp3/ (L4) Fusing heater lamp4/ (L5) Temperature sensor/1 (TEMS/1) Temperature sensor/2 (TEMS/2) Temperature sensor/3 (TEMS/3) Temperature sensor/4 (TEMS/4) ВНИМАНИЕ ! После появления ошибок C35**, C38** или C39**, убедитесь, что заменили неисправные детали прежде чем переключить DipSW3‐1 в 0 |
| C‐3502 |
Показания датчика температуры (TEMS/3), длительное время превышают 250 °C |
||
| C‐3503 |
Показания датчика температуры (TEMS/2), длительное время превышают 250 °C |
||
| C‐3504 |
Показания датчика температуры (TEMS/4), длительное время превышают 250 °C |
||
| C‐3505 |
Показания датчика температуры (TEMS/1), длительное время превышают 150 °C |
||
| C‐3506 |
Показания датчика температуры (TEMS/2), длительное время превышают 150 °C |
||
| C‐3507 | Показания датчика (TEMS/3) на 25 °C больше чем (TEMS/1). | ||
| C‐3508 | Ошибка замятия бумаги J‐3102 постоянно присутствует | ||
| C‐3801 |
Показания датчика температуры (TEMS/1), длительное время менее 150 °C |
||
| C‐3802 |
Показания датчика температуры (TEMS/3), длительное время менее 150 °C |
||
| C‐3803 |
Показания датчика температуры (TEMS/2), длительное время менее 150 °C |
||
| C‐3804 |
Показания датчика температуры (TEMS/4), длительное время менее 150 °C |
||
| C‐3805 |
Показания датчика температуры (TEMS/1), длительное время менее 20 °C |
||
| C‐3806 |
Показания датчика температуры (TEMS/2), длительное время менее 20 °C |
||
| C‐3901 | Проблемы с датчиками температуры |
Повышенная температура. Обнаружен сигнал неисправности датчика температуры (TEMS/3) |
|
| C‐3902 |
Повышенная температура. Обнаружен сигнал неисправности датчика температуры (TEMS/4) |
||
| C‐3903 |
Повышенная температура. Обнаружен сигнал неисправности датчика температуры (TEMS/1) |
| C‐3904 | Проблемы с датчиками температуры |
Повышенная температура. Обнаружен сигнал неисправности датчика температуры (TEMS/3) |
Printer control board (PRCB) AC drive board (ACDB) Fusing heater lamp1/ (L2) Fusing heater lamp2/ (L3) Fusing heater lamp3/ (L4) Fusing heater lamp4/ (L5) Temperature sensor/1 (TEMS/1) Temperature sensor/2 (TEMS/2) Temperature sensor/3 (TEMS/3) Temperature sensor/4 (TEMS/4) ВНИМАНИЕ! После появления ошибок C35**, C38** или C39**, убедитесь, что заменили неисправные детали прежде чем переключить DipSW3‐1 в 0 |
| C‐3905 |
Пониженная температура.Обнаружен сигнал неисправности датчика температуры (TEMS/2) |
||
| C‐3906 |
Пониженная температура. Обнаружен сигнал неисправности датчика температуры (TEMS/4) |
||
| C‐3907 |
Повышенная температура. Обнаружен сигнал неисправности датчика температуры (TEMS/1) |
||
| C‐3908 |
Пониженная температура. Обнаружен сигнал неисправности датчика температуры (TEMS/1) |
||
| C‐3909 |
Повышенная температура. Обнаружен сигнал неисправности датчика температуры (TEMS/2) |
||
| C‐3910 |
Пониженная температура. Обнаружен сигнал неисправности датчика температуры (TEMS/2) |
||
| C‐3911 |
После включения тумблера (SW2), показания датчика (TEMS/1) не достигают 100°C за определенное время |
||
| C‐3912** |
После включения тумблера (SW2), показания датчика (TEMS/3) не достигают 100°C за определенное время |
||
| C‐3913 | Печка не установлена | ||
| C‐3914 |
Повышенная температура.Обнаружен сигнал неисправности датчика температуры (TEMS/1) |
||
| C‐3915 |
Повышенная температура.Обнаружен сигнал неисправности датчика температуры (TEMS/2) |
||
| C‐3916 |
После включения тумблера (SW2), показания датчика (TEMS/4) не достигают 100°C за определенное время |
||
| C‐4101 | Проблемы с полигон‐мотором |
Не обнаружен сигнал блокировки, когда полигон‐мотор/Y (M3) начинает работать или в момент переключения скорости. |
Printer control board (PRCB) Polygon motor/Y (M3) |
| C‐4102 |
Не обнаружен сигнал блокировки, когда полигон‐мотор/М (M4) начинает работать или в момент переключения скорости. |
Printer control board (PRCB) Polygon motor/M (M4) |
|
| C‐4103 |
Не обнаружен сигнал блокировки, когда полигон‐мотор/С (M5) начинает работать или в момент переключения скорости. |
Printer control board (PRCB) Polygon motor/C (M5) |
|
| C‐4104 |
Не обнаружен сигнал блокировки, когда полигон‐мотор/К (M6) начинает работать или в момент переключения скорости. |
Printer control board (PRCB) Polygon motor/K (M6) |
|
| C‐4111 | Аварийная температура полигон‐мотора/Y (M3) |
Printer control board (PRCB) Polygon motor/Y (M3) |
|
| C‐4112 | Аварийная температура полигон‐мотора/М (M4) |
Printer control board (PRCB) Polygon motor/M (M4) |
|
| C‐4113 | Аварийная температура полигон‐мотора/С (M5) |
Printer control board (PRCB) Polygon motor/C (M5) |
|
| C‐4114 | Аварийная температура полигон‐мотора/К (M6) |
Printer control board (PRCB) Polygon motor/K (M6) |
|
| C‐4120 |
Температурная плата(TEMSB) обнаружила аварийную температуру внутри блока лазера/К |
Printer control board (PRCB) Temperature sensor board (TEMSB) |
|
| C‐4301 | Проблемы с вентилятором | Обнаружен сигнал неисправности вентиляторов M43, M44, M45, M46 или M64 |
Printer control board (PRCB) Writing intake fan/1 (M43) Writing intake fan/2 (M44) Developing fan/1 (M45) Developing fan/2 (M46) Developing fan/3 (M64) |
| C‐4501 | Проблемы с Color registration |
Во время включения мотора коррекции лазера/Y (M7), датчик коррекции (PS5) отключен |
Printer control board (PRCB) Laser correction motor/Y (M7) Laser correction sensor/Y (PS5) |
| C‐4502 |
Во время включения мотора коррекции лазера/М (M8), датчик коррекции (PS6) отключен |
Printer control board (PRCB) Laser correction motor/M (M8) Laser correction sensor/M (PS6) |
|
| C‐4503 |
Во время включения мотора коррекции лазера/С (M9), датчик коррекции (PS7) отключен |
Printer control board (PRCB) Laser correction motor/C (M9) Laser correction sensor/C (PS7) |
|
| C‐4504 |
Во время включения мотора коррекции лазера/К (M58), датчик коррекции (PS59) отключен |
Printer control board (PRCB) Laser correction motor/K (M58) Laser correction sensor/K (PS59) |
|
| C‐4511 |
Мотор коррекции лазера/Y (M7) не отключается через заданное время после включения, или датчик коррекции (PS5) установлен неправильно. |
Printer control board (PRCB) Laser correction motor/Y (M7) Laser correction sensor/Y (PS5) |
| C‐4512 | Проблемы с Color registration |
Мотор коррекции лазера/М (M8) не отключается через заданное время после включения, или датчик коррекции (PS6) установлен неправильно. |
Printer control board (PRCB) Laser correction motor/M (M8) Laser correction sensor/M (PS6) |
| C‐4513 |
Мотор коррекции лазера/С(M9) не отключается через заданное время после включения, или датчик коррекции (PS7) установлен неправильно. |
Printer control board (PRCB) Laser correction motor/C (M9) Laser correction sensor/C (PS7) |
|
| C‐4514 |
Мотор коррекции лазера/К (M58) не отключается через заданное время после включения, или датчик коррекции (PS59) установлен неправильно. |
Printer control board (PRCB) Laser correction motor/K (M58) Laser correction sensor/K (PS59) |
|
| C‐4520** | Коррекция Color registration прервана |
Printer control board (PRCB) Color registration sensor/Fr (PS8) Color registration sensor/Rr (PS9) |
|
| C‐4521** | Считывание линий регистрации/Fr прервано |
Printer control board (PRCB) Color registration sensor/Fr (PS8) |
|
| C‐4522 | Считывание линий регистрации/Rr прервано |
Printer control board (PRCB) Color registration sensor/Rr (PS9) |
|
| C‐4701* |
Проблемы с процессом формирования изображения |
Неправильный адрес FIFO для принтера. Некорректные данные отсканированного изображения |
Printer control board (PRCB) Image processing board (IPB) I/F board (IFB) Image memory control board (IMCB) |
| C‐4702* | FIFO внезапная ошибка сжатия/расширения |
Image processing board (IPB) I/F board (IFB) Image memory control board (IMCB) |
|
| C‐4703* | Неправильное восстановление данных изображения |
Image processing board (IPB) I/F board (IFB) Image memory control board (IMCB) |
|
| C‐4705* |
В момент сканирования, процесс восстановления данных из памяти к принтеру не завершен за заданное время. PVV не обнаружен в пределах указанного времени. |
Printer control board (PRCB) Image processing board (IPB) I/F board (IFB) Image memory control board(IMCB) Write unit/Y Write unit/M Write unit/C Write unit/K |
|
| C‐4706* |
В момент сканирования, имел место доступ к устройству восстановления данных или другой неуместный процесс, при условии отсутствия какого либо ресурса. |
Image processing board (IPB) I/F board (IFB) Image memory control board(IMCB) Program of overall control board (OACB) |
|
| C‐4708* |
Обнаружена программная ошибка при доступе к устройству памяти |
||
| C‐4709* |
Процесс распространения от Мemory к Рage memory не завершен в течении заданного времени. Процесс сжатия от Рage memory к Мemory не завершен в течении заданного времени. Извлечение из Мemory в Рage memory не завершено в течении заданного времени. Передача данных из памяти в память не завершена за заданное время. |
||
| C‐4711* |
Программный сбой. Несовместимая IROM версия после замены платы CCD. Поврежден разъем платы CCD |
Image processing board (IPB) IROM program CCD board (CCDB) Соединительный кабель между IPB и CCDB |
|
| C‐4712* | |||
| C‐4713* | Рage memory не может обеспечить печать |
Image processing board (IPB) I/F board (IFB) Image memory control board(IMCB) Overall control board (OACB) NVRAM board (NRB) |
|
| C‐4714* |
Выход Index‐сенсора не изменяется при выполнении APC. Index‐сенсор не может определить лазер потому что многоугольное зеркало не вращается, либо Index‐сенсор неисправен или его положение некорректно. |
Printer control board (PRCB) Image processing board(IPB) I/F board (IFB) Image memory control board(IMCB) Write unit/Y Write unit/M Write unit/C Write unit/K |
|
| C‐4715* | |||
| C‐4716* | |||
| C‐4717* | |||
| C‐4718* |
Сбой APC. Лазер не рботает из‐за отсутствия напряжения 12VDC. МРС неправилен из‐за ошибки лазера. |
Image processing board (IPB) Write unit/Y Write unit/M Write unit/C Write unit/K |
|
| C‐4719* | |||
| C‐4720* | |||
| C‐4721* |
| C‐4722* |
Проблемы с процессом формирования изображения |
Отсутствует соединение между Index‐платой (INDEXB/Y, /M, /C, /K) или laser drive‐платой (LASDB/Y, /M, /C, /K) и платой image process board (IPB). |
Image processing board (IPB) Write unit/Y Write unit/M Write unit/C Write unit/K |
| C‐4723* | |||
| C‐4724* | |||
| C‐4725* | |||
| C‐4840 |
Механизм продолжает операцию без подготовки изображения. |
Printer control program | |
| C‐4850 |
Программа управления обратилась к недопустимому адресу |
Overall control board (OACB) | |
| C‐5001 | Коммуникационные проблемы | Нарушение 12VDC | DC power unit/1 (DCPS/1) |
| C‐5002 |
Нарушение 24VDC. Обнаружен сигнал неисправности через определенное время послевключения REN/2 |
DC power unit/2 (DCPS/2) | |
| C‐5003 | Нарушение 24VDC на плате Conveyance drive board (CDB) |
DC power unit/2 (DCPS/2) Conveyance drive board (CDB) |
|
| C‐5004 |
Нарушение 5VDC мотора коррекции лазера /Y, /M, /C, /K (M7,M8, M9 и M58) |
DC power unit/1 (DCPS/1) | |
| C‐5005 | Нарушение 12VDC на плате Conveyance drive board (CDB) |
DC power unit/1 (DCPS/1) Conveyance drive board (CDB) |
|
| C‐5010 |
Обнаружена ошибка состояния и контрольной суммы между платами (OACB) и (IPB). Запрос на повторную передачу посылался, но восстановление не было достигнуто. |
Image processing board (IPB) I/F board (IFB) Image memory control board(IMCB) Overall control board (OACB) |
|
| C‐5011 |
Overall control board (OACB) Coin vendor/1 |
||
| C‐5301 | Проблемы с вентилятором | Обнаружен сигнал неисправности вентилятора DCPS fan (M42) |
Printer control board (PRCB) DCPS fan (M42) |
| C‐5302 |
Обнаружен сигнал неисправности вентилятора IPB fan/1 (M24) |
Printer control board (PRCB) IPB fan/1 (M24) |
|
| C‐5303 |
Обнаружен сигнал неисправности вентилятора IPB fan/2 (M25) |
Printer control board (PRCB) IPB fan/2 (M25) |
|
| C‐6101** | Проблемы со сканером |
HP sensor (PS1) не срабатывает через заданное время после включения мотора (M1) |
Scanner drive board (SCDB) Scanner motor (M1) Scanner HP sensor (PS1) |
| C‐6102* |
HP sensor (PS1) не срабатывает через заданное время после включения мотора (M1) |
Scanner drive board (SCDB) Scanner motor (M1) Scanner HP sensor (PS1) |
|
| C‐6301* | Проблемы с вентилятором | Обнаружен сигнал неисправности вентилятора (M2) |
Scanner drive board (SCDB) Scanner fan (M2) |
| C‐6701* |
Проблемы с процессом формирования изображения |
При обработке изображения, коэффициент фильтрации не готов должным образом |
Image processing board (IPB) I/F board (IFB) Image memory control board (IMCB) |
| C‐6702* |
Ошибка адреса FIFO для сканера. Некорректное сжатие данных в процессе сканирования. |
Image processing board (IPB) I/F board (IFB) Image memory control board(IMCB) |
|
| C‐6703* |
Не завершено сжатие изображения и выделение page memory. |
Image processing board (IPB) I/F board (IFB) Image memory control board(IMCB) Overall control board (OACB) |
|
| C‐6704* |
При сканировании,процесс от сканера к памяти не закончен. Передача от сканера к page memory не выполнена в течении заданного времени. |
Image processing board (IPB) I/F board (IFB) Image memory control board(IMCB) Overall control board (OACB) |
|
| C‐6705* |
При сканировании, имело место обращение к устройству сжатия или другой неподходящий процесс. |
Image processing board(IPB) I/F board (IFB) Image memory control board(IMCB) |
|
| C‐6706* |
Сканирование следующей страницы не может быть начато, т.к SVV не может переключиться в OFF |
Image processing board (IPB) I/F board (IFB) Image memory control board(IMCB) Overall control board (OACB) |
|
| C‐6707* | Отклонения в коррекции затенения |
Image processing board (IPB) I/F board (IFB) |
|
| C‐6708*** |
Отклонения в настройке AOC/AGC. Кожуха и крышки линз сканера расположены не на месте. Отсутствует соединение платы (CCDB). Кабель платы (CCDB) отсоединен. CCDB IC protector поврежден. Черезмерное свечение лампы (L1). Лампа (L1) не светит. |
Image processing board (IPB) I/F board (IFB) Image memory control board(IMCB) Overall control board (OACB) Scanner drive board (SCDB) Printer control board (PRCB) Inverter board/1 (INVB1) |
| C‐6709 |
Проблемы с процессом формирования изображения |
Отсутствуют данные определения разрешеающей способности. |
Image processing board (IPB) I/F board (IFB) Image memory control board (IMCB) Program of overall control board (OACB) |
| C‐6710 | Gamma кривые не подготовлены должным образом. |
Image processing board (IPB) I/F board (IFB) Image memory control board(IMCB) Program of overall control board (OACB) |
|
| C‐6711* |
Стартовая ошибка калибровки широтно‐импульсной модуляции IC. |
mage processing board (IPB) I/F board (IFB) Image memory control board(IMCB) Overall control board (OACB) |
|
| C‐6712* |
Ошибка конца калибровки широтно‐импульсной модуляции IC. |
||
| C‐6713* |
Даже при том, что MPC не был закончен, было предпринято выполнение начального контроля APC. |
Image processing board (IPB) | |
| C‐6714* |
Выполнение MPC было предпринято в течение выполнения APC. |
Image processing (IPB) | |
| C‐6715* |
Выполнение коррекции в направлении дополнительной развертки было предпринято прежде завершения APC или MPC. |
||
| C‐6716* |
Выполнение коррекции в направлении дополнительной развертки было предпринято, когда время записи было нарушено из‐за неполной инициализации AD9561. |
||
| C‐6717* |
Изображение не может быть выделено в памяти из‐за неправильный зоны изображения в памяти. |
||
| C‐6718 |
При проведении настройки, шаг луча в направлении дополнительной развертки не соответствует заданным значениям. |
||
| C‐6719 |
Операция сканирования началась прежде чем была выполнена регулировка отклонения. |
Printer control board (PRCB) Image processing board (IPB) I/F board (IFB) Scanner drive board (SCDB) |
|
| C‐6720 |
Операция сканирования началась прежде чем была выполнена регулировка центрирования. |
||
| C‐6721 |
После того как величина экспозиции лампы (L1) была уменьшена, AGC был повторен, хотя ошибка не появлялась. |
CCD board (CCDB) Image processing board (IPB) I/F board (IFB) Image memory control board(IMCB) Overall control board (OACB) |
|
| C‐6723* |
Проблема с соединением между платами (CCDB) и image processing board (IPB). |
Image processing board (IPB) CCD board (CCDB) CCD жгут проводов |
|
| C‐6724* |
Неудача в проверке соединения платы сканера, когда перключатель (SW2) был включен. |
Image processing board (IPB) I/F board (IFB) Image memory control board(IMCB) Overall control board (OACB) Scanner drive board (SCDB) Printer control board (PRCB) |
|
| C‐6725* |
В процессе подготовки сканера не достигаются нужные параметры. |
Image processing board (IPB) I/F board (IFB) Image memory control board(IMCB) Overall control board (OACB) |
|
| C‐6801* | Коммуникационные проблемы |
После включения переключателя (SW2) отсутствует соединение между платами printer control board (PRCB), overall control board (OACB), и operation board/1 (OB/1) |
Printer control board (PRCB) Overall control board (OACB) Operation board/1 (OB/1) |
| C‐C101* |
После включения переключателя (SW2), нету ответа от платы printer control board (PRCB) |
Printer control board (PRCB) I/F board (IFB) Image memory control board(IMCB) Overall control board (OACB) |
|
| C‐C102* | Проблема с соединением Printer control board (PRCB) | Printer control board (PRCB) | |
| C‐C103* | Проблема с панелью управления | Operation board/1 (OB/1) | |
| C‐C104 |
Проблема с программным обеспечением |
Незаписанный диапазон был обнаружен в управляющаей программе принтера или в VIF программе. |
Printer control program VIF control program |
| C‐C106 |
При передаче данных ISW, содержимое заголовка не может быть получено в пределах указанного времени. |
Printer cable UBS cable PC parallel port PC USB port |
| C‐C107 |
Проблема с программным обеспечением |
При передаче данных ISW, были обнаружены ошибка контрольной суммы или ошибка заголовка. |
Printer cable UBS cable Program file abnormality |
| C‐C108 |
При передаче данных ISW, данные не могут быть правильно записаны на перепрограммируемый ROM. |
Printer cable UBS cable Program transferred board |
|
| C‐C109 | Обнаружена пустая область в программе FS | FS control firmware | |
| C‐C120 |
Сбой встроенного программного обеспечения printer control board (PRCB) |
Printer control firmware | |
| C‐D0E0 | Проблемы с HDD |
Проблема инициализации жесткого диска. Выход из строя жесткого диска или плохой контакт в разъеме. |
Overall control board (OACB) Image memory control board(IMCB) Hard disk/C (HDD/C) Hard disk/M (HDD/M) Hard disk/Y (HDD/Y) Hard disk/K (HDD/K) |
| C‐D0E1 |
Hard disk/K (HDD/K) отсутствует контакт либо диск поврежден. |
Hard disk/K (HDD/K) |
|
| C‐D0E2 |
Hard disk/C (HDD/C) отсутствует контакт либо диск поврежден. |
Hard disk/C (HDD/C) |
|
| C‐D0E3 |
Hard disk/K (HDD/K), /C (HDD/C) отсутствует контакт либо диск поврежден. |
Hard disk/K (HDD/K) Hard disk/C (HDD/C) |
|
| C‐D0E4 |
Hard disk/M (HDD/M) отсутствует контакт либо диск поврежден. |
Hard disk/M (HDD/M) |
|
| C‐D0E5 |
Hard disk/K (HDD/K), /M (HDD/M) отсутствует контакт либо диск поврежден. |
Hard disk/K (HDD/K) Hard disk/M (HDD/M) |
|
| C‐D0E6 |
Hard disk/C (HDD/C), /M (HDD/M) отсутствует контакт либо диск поврежден. |
Hard disk/C (HDD/C) Hard disk/M (HDD/M) |
|
| C‐D0E7 |
Hard disk/K (HDD/K), /C (HDD/C), /M (HDD/M) отсутствует контакт либо диск поврежден. |
Hard disk/K (HDD/K) Hard disk/C (HDD/C) Hard disk/M (HDD/M) |
|
| C‐D0E8 |
Hard disk/Y (HDD/Y) отсутствует контакт либо диск поврежден. |
Hard disk/Y (HDD/Y) |
|
| C‐D0E9 |
Hard disk/K (HDD/K), /Y (HDD/Y) отсутствует контакт либо диск поврежден. |
Hard disk/K (HDD/K) Hard disk/Y (HDD/Y) |
|
| C‐D0EA |
Hard disk/C (HDD/C), /Y (HDD/Y) отсутствует контакт либо диск поврежден. |
Hard disk/C (HDD/C) Hard disk/Y (HDD/Y) |
|
| C‐D0EB |
Hard disk/K (HDD/K), /C (HDD/C), /Y (HDD/Y) отсутствует контакт либо диск поврежден. |
Hard disk/K (HDD/K) Hard disk/C (HDD/C) Hard disk/Y (HDD/Y) |
|
| C‐D0EC |
Hard disk/Y (HDD/Y), /M (HDD/M) отсутствует контакт либо диск поврежден. |
Hard disk/Y (HDD/Y) Hard disk/M (HDD/M) |
|
| C‐D0ED |
Hard disk/K (HDD/K), /M (HDD/M), /Y (HDD/Y) отсутствует контакт либо диск поврежден. |
Hard disk/K (HDD/K) Hard disk/M (HDD/M) Hard disk/Y (HDD/Y |
|
| C‐D0EE |
Hard disk/C (HDD/C), /M (HDD/M), /Y (HDD/Y) отсутствует контакт либо диск поврежден. |
Hard disk/C (HDD/C) Hard disk/M (HDD/M) Hard disk/Y (HDD/Y) |
|
| C‐D0EF |
Hard disk/K (HDD/K), /C (HDD/C), /M (HDD/M), /Y (HDD/Y) отсутствует контакт либо диск поврежден. |
Hard disk/C (HDD/C) Hard disk/M (HDD/M) Hard disk/Y (HDD/Y) Hard disk/K (HDD/K) |
|
| C‐D0F0 | HDD неправильный пароль, пароль сброшен, или защита выключена. | ||
| C‐E001* |
Проблемы с процессом формирования изображения |
Недостаточно данных |
Image processing board (IPB) I/F board (IFB) Image memory control board(IMCB) Program of overall control board (OACB) |
| C‐E002* | Значение параметра превышает допустимый диапазон. | ||
| C‐E003* |
Отправленные данные имееют неопределенный идентификатор. |
||
| C‐E004* | Получены неопределенные данные | ||
| C‐E005* | Сбой доступа к памяти. |
Image processing board (IPB) I/F board (IFB) Image memory control board(IMCB) Overall control board (OACB) |
|
| C‐E006* | Сбой адреса заголовка | ||
| C‐E007* | Сбой инициализации Image memory (DRAM) |
C-2211 ,
C-2212, C-2213 или
C-2214
Ошибка связанная с вращением
фотобарабана. Обычно появляется при печати на плотных материалах.
Перед решением проблемы,
убедитесь, что мотор барабана исправен. ВЕРОЯТНЫЕ ПРИЧИНЫ:
- Некорректная скорость
вращения барабана.
Удостоверьтесь, что версия
firmware не ниже v40. После переустановки программного обеспечения установите
DipSW21 в рекомендуемое положение:
bit 6 bit 7
0 0 Default 1 0 0.1% up
0 1 0.2% up (Recommended) 1 1 0.3% up
Если симптомы повторяются,
установите значения соответствующие 0.3% UP
- Закусило лезвие очистки фотобарабана.
- Некорректная настройка
скорости вращения ремня переноса. Проверьте настройки, описанные в 9.3.8 Belt
Line Speed Adj. (Printer Adjustment) в
Service Manual. Если оптимальных
результатов не удается достичь в диапазонах настройки от -5 до -35, выполните
п. 9.3.3. FD Mag. Adjustment (Printer Adjustment).
C-2221
- Плохой контакт датчика first transfer pressure/release.
Проверьте контакт.
- Неисправность фотодатчика PS15 (p/n
08AA85512).
Проверьте PS15. I/O State Confirmation Mode,
48-0 HIGH = home position или
LOW = Other than home
position), transfer pressure/release motor, 48-0, 48-1, 48-2, 48-3. При
необходимости замените фотосенсор или мотор. Проверьте предохранители ICP3 (5V
DC) и ICP4 (24V DC) на AC drive board (p/n A03U H520 01).
C-2451,
2452, 2453, 2454
- Auto Refresh Interval был отключен.
Установите должным образом Auto
Refresh Interval (Interval/Quantity Adj) Выберите интервал выполнения и
величину потребления тонера при выполнении toner refresh mode.
Из Service Mode Menu:
- [02 Process Adjustment].
- [05 Interval/Quantity Adj.].
- [02 Auto. Refresh Interval].
- В окне Automatic Refresh Interval установите:
Execution existence: ON
Execution frequency (частота выполнения):
[small] — эквивалентно 1000 отпечатков А4 [middle] —
эквивалентно 500 отпечатков А4 [large] —
эквивалентно 330 отпечатков А4 Refresh quantity (величина обновления):
[small] —
эквивалентно печати 3 листов со 100% заливкой А3 формата [middle] —
эквивалентно печати 5 листов со 100% заливкой А3 формата [large] — эквивалентно
печати 8 листов со 100% заливкой А3 формата
- Неисправность Developing Unit.
Замените Developing Unit (p/n A03U R706 00).
- Неисправность DCPS2.
Проверьте наличие 24V на выходе
DCPS2. Напряжение измеряется на выводе 1 разъема CN112 и выводе 2 разъема
CN113. Если напряжение отсутствует, замените DCPS2 (p\nA03U M402 01).
C-2451,
C-2452, C-2453 или
C-2454.
Датчик плотности тонера неисправен
или работает некорректно. РЕШЕНИЕ:
Поменяйте местами проблемный
developing unit с другим (предварительно заклейте пленкой отверстие подачи
тонера либо оставьте открытым узел подачи тонера, чтобы не допустить смешивания
тонера с другим цветом.) и включите машину. Если код ошибки сменится на другой,
то возможно TDS sensor (p/n A03UM50801) неисправен.
Для контроля, проверьте показания датчика в Service mode =>Process adjustment
=> Sensor output check =>TCR sensors. Показания датчика должны
быть в районе 130. Более высокие значения означают, что концентрация тонера в
developing unit недостаточна. Более низкие значения означают, что концентрация
тонера в developing unit черезмерна.
При повышенной концентрации,
попытайтесь понизить содержание тонера, путем печати test pattern №53
плотностью 255 (оставьте toner hopper unit открытым, чтобы исключить подачу
тонера в developing unit). Добейтесь, чтобы показания датчика соответствовали
130. При пониженной концентрации, поднимите содержание тонера. Из I/O mode
(54-4 для Yellow, 54-5 для Magenta, 54-6 для Cyan и 54-7 для Black)
контролируйте, чтобы показания датчика достигли 130.
C-2421,
C-2422, C-2423, C-2424 после замены девелопера. Выполните настройку Toner Density Sensor Initial.
Service mode =>Process Adjustment =>Drum
Peculiarity Adjustment =>Toner Density Sensor Init.
C-2721
- Неисправность блока HV2 (p/n A03UM40400).
- Плохой контакт. Проверьте
контакт электрода в separation discharge section.
Note : Ошибка не появляется сразу
после начала печати, а возникает, когда бумага останавливается в separation
section.
- Плохой контакт между Powering Block Assembly (p/n 65AAR74600) и
Powering Block 1 Assembly (p/n 65AA R72700) или Separation Wire (p/n 65AA90250).
C-2840 at
startup.
Датчик PGC работает некорректно.
РЕШЕНИЕ:
Установите значения по умолчанию Service mode=>Process Adjustment=>Recall
Standard Data
C-3102 (
может сопровождаться ненормальным шумом) ВЕРОЯТНЫЕ ПРИЧИНЫ:
- Повреждена одна из шестерней блока фиксации.
- Машина не может установить
separation cam в исходную позицию. Проверьте следующие детали: датчик PS16 (p/n
08AA 8551 2) и Release Actuator flag (p/n
A03U724400). Проверьте контакт датчика. Проверьте шестерню, связанную с M30
(p/n 27LA8003 0).
- Проскальзывает шестерня (p/n A03U 8093
00)
- Поврежден fixing limiter.
- Машина не может установить
Замените fixing limiter (p/n 65AA53651).
- Поврежден ICP14 на плате Conveyance Drive Board.
Замените Conveyance Drive Board (p/n A03U H050 04).
C-3912 при
включении машины или выводится сообщение»Machine warming up please
wait»
- Неисправность ACDB (p/n A03UH52002).
Note : Перед заменой ACDB,
убедитесь в исправности датчика температуры TH3.
- Неисправна лампа нагрева. Проверьте лампы L2, L3 или L4 и замените неисправные.
C-4520
Возможна совместно с C-2714
(отсутствует видимое изображение на ремне переноса) Возможна совместно с
C-4501, C-4502, C-4503 и C-4504.
Возможна совместно с C-4521 или
C-4522.
Если ошибка появляется при
включении питания.
Обнаружено частичное перекрытие 10
пикселов Color registration при сравнении с предидущим выполнением Color
registration.
РЕШЕНИЕ:
- Установите firmware version v.60
- DIPSW 23-1
0 : SC detected condition 10 pixels (Default) 1
: SC detected condition 60 pixels
Переключение DIP switch позволяет
снизить вероятность возникновения ошибки, однако не устраняет проблему с Color
registration.
Если ошибка сопровождается
бледными оттисками, линиями или морщинами, то это может быть связано со
скольжением ремня переноса из стороны в сторону.
РЕШЕНИЕ:
- Выньте и переверните передний подшипник (p/n 540076050 стр. 32, п.5 в
Parts Manual)
это позволит приложить к нему
большее давление.
- Натяжной ролик в Intermediate Transfer Assembly сместился, что
позволяет «гулять»
ленте переноса, либо верхний и
нижний натяжные ролики не выровнены корректно.
Установите дополнительные шайбы с
обоих сторон натяжного ролика это предотвратит высвобождение ролика из
кронштейна. Аналогично отрегулируйте нижний натяжной ролик.
- После тех. обслуживания
появился зазор между Tension Plate Rear Caulking (p/n 65AA-2730) и Plate/Rear
(p/n 65AA26250E).
Установите Tension Plate Rear
Caulking таким образом, чтобы исключить зазор и крепко зафиксируйте винтом.
Выполните настройку Color registration.
Если ошибка
появляется в процессе выполнения Color registration. Это может быть связано с
неисправностью датчиков PS8 или PS9. РЕШЕНИЕ:
Очистите или
замените датчики PS8 или PS9, замените color registration assembly
Если ошибка
появляется после выполнения Color registration. Настройка Color Registration не
выполнена должным образом. РЕШЕНИЕ:
Повторите выполнение Color registration.
Service Mode => Machine Adjustment =>
Printer Adjustment => Color Registration Adjustment
Если ошибка появляется совместно с
C-2714 (отсутствует видимое изображение на ремне переноса).
Пружина соединительной шестерни
двигателя М19 перегружена, и может вставать в обратную позицию.
Если ошибка
появляется совместно с C-4501, C-4502, C-4503 и C-4504.
РЕШЕНИЕ:
- Проверьте предохранители
ICP17, ICP20, и ICP21 на плате Printer Control Board (PRCB). Проверьте наличие
24V на каждой ножке предохранителя. Наличие
напряжения только на одной из
ножек указывает, что предохранитель пробит и плата
(p/n A03U R759 00) нуждается в
замене.
- Если не выполнена настройка
[09 Writing Init. Pos. Memory], то регулировочные края могут быть уменьшены.
Если блок лазера был заменен,
выполните регулировки в следующем порядке.
- Writing Init Pos. Memory
- LD Bias Adjustment
- I/O check mode
- CD Skew Adjustment
- Restart Timing Adjustment
- Color Registration Adjustment
- Color Registration/Manual (Adjustment)
- Auto Gamma Adjustment
Если ошибка появляется совместно
с C-4521 или C-4522.
Пробит предохранитель ICP17 на
плате Printer Control Board. Провод между Printer Control Board и hardware counters может быть пережат. Если
провод закорочен на массу, то предо- хранитель ICP17 сгорает в результате чего
появляется ошибка. Если провод поврежден, но короткое замыкание отсутствует,
машина будет функционировать, однако счетчик работать не будет.
РЕШЕНИЕ: Проверьте соединение
между PRCB и Total Counter. Если обнаружено короткое замыкание, замените PRCB
(p/n A03U R759 00).
C-4521 color registration error code.
Возможно, что отложения тонера или
пыли образовались между датчиками PS8 ,PS9 и их защитной планкой. Простой
протиркой не решить этой проблемы.
РЕШЕНИЕ:
Демонтируйте color registration
assembly (p/n A03UR79800) и осмотрите датчики. Если имеются отложения тонера
или пыли между датчиками PS8 ,PS9 и их защитной планкой, то необходима замена
color registration assembly.
C-6101
Проверьте с помощью I/O State Confirmation Mode работоспособность мотора M1 (38-5 =home position search) и Home Position Sensor PS1 (30-0 =
1). Проверьте предохранители ICP1, ICP2 или ICP3 на плате scanner drive
board. Замените при необходимости плату SCDB (p/n 65AA9071E) и мотор M1 (p/n
65AA80131
C-6708 при
включении питания
- После включения питания
лампа сканера двигается в лево для выполнения коррекции, но не горит. Возможна
неисправность лампы (p/n A03UM30101) или Inverter board (p/n A03UM40500). - Сгорели предохранители ICP1 или ICP2 на CCD (p/n A03UA29000).
- Сгорел предохранитель ICP2 на IFB (p/n
A03UH10001). - Сгорели предохранители ICP1 или ICP2 на IPB (p/n A03UH02015)
- Провода CCD повреждены или
имеют плохой контакт. Проверьте кабель, соединяющий CCD и IPB и замените при необходимости.
C-0213
- Проверьте и замените при необходимости paper exit gear /2 (p/n A03U909800), paper exit gear /3 (p/n
A03U909701), paper exit gear /4 (p/n A03U909600), or paper exit gear /5 (p/n
A03U9095 02). - Очистите или замените фотодатчик
PS10 (p/n 08AA55120).
C-2831,
C-2832, C-2833, C2834
происходит после
отображения «Adjusting» на панели оператора или выплнения auto gamma
adjustment вручную.
Откорректируйте экспозицию.
Utility/Counter => [03 Machine Admin.
Setting] => [01 System Setting]] => [05 Expert Adjustment] =>
[06 Process Adjustment] => [03 Toner
Quantity/Exposure] (Уменьшите величину экспозиции)
Если проблема
сохраняется, замените барабан, так как причина в характеристиках барабана и
влажности.
These instructions describe error code C-6102, c6103, C6104 and C6105 solution for a Konica Minolta bizhub C224e, C284e, and C364e Copier series. We are sharing a few methods to fix the error, so check them one by one until it gets solved.
Konica Minolta bizhub C224e, C284e and C364e error code C-6102 reset
These instructions describe error code C-6102, c6103, C6104 and C6105 solution for a Konica Minolta bizhub C224e, C284e, and C364e Copier series. We are sharing a few methods to fix the error, so check them one by one until it gets solved.
Meaning of the C-6102 Error Code:
Konica Minolta C224e error C-6102, c6103, C6104, and C6105 codes scanner home sensor cannot detect the scanner located in its home position. The scanner home sensor cannot detect a scanner even when the scanner motor is turned on to move the scanner to the maximum travel distance. Turn off the Power and back on and see if it works. If not working check the scanner drive cable or pulley, gear, and belt.
Some possible causes:
- Check the PC 201, M 201, PCB-IC and PCB-C connector for proper connection and repair as needed.
- Replace the scanner motor.
- Check the scanner drive board.
- Check the printer control board.
If you find your parts, then replace the parts and error still remains, after resetting the error code.
If the error is still showing even after the above solutions, then you have no choice other than calling Konica Minolta service technician.