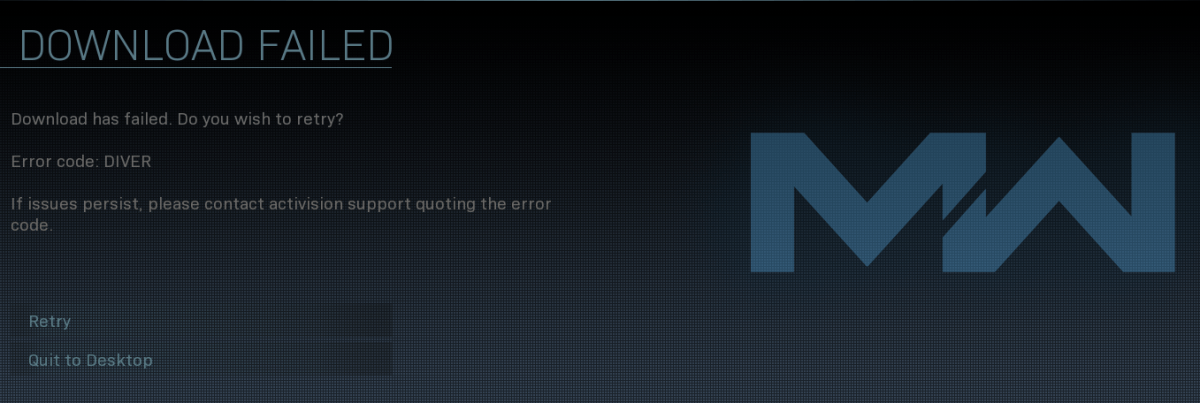
For most Call of Duty: Warzone and Call of Duty: Modern Warfare players, Error Code 6 Diver is not an uncommon occurrence. Every once in a while, it raises its ugly head, preventing players from downloading the latest update.
If you encounter this very same issue, don’t worry. Here are six fixes that have helped other players resolve the problem. Just work your way down the list until you find the one that works for you.
How to fix Error Code 6 Diver in Warzone/Modern Warfare
- Fix 1: Reset your network devices
- Fix 2: Scan and repair your game files
- Fix 3: Update your device drivers
- Fix 4: Allow your game through Windows Firewall
- Fix 5: Use a VPN
- Fix 6: Repair system files
- Repair & replace corrupt system files with Fortect
- Run SFC scan
- Fix 7: Contact Activision Support
Fix 1: Reset your network devices
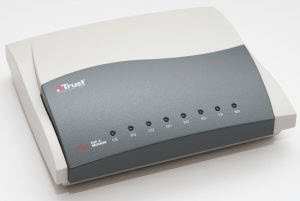
When faced with the Diver error, the first thing you should check whether it’s a local network issue. It is possible that your router or modem has been overloaded with data, grinding your internet to such a halt that the download has failed. In this case, restarting your network devices may fix it.
Here’s how you can restart your modem & router:
- Unplug your modem (and your router, if it’s a separate device) from the power socket.
 (a modem)
 (a router)
 - Wait 60 seconds for your modem (and your router) to cool off.
- Plug the network devices back in again and wait until the indicator lights are back to the normal state.
- Restart your computer.
- Connect your PS4/Xbox One/PC to the internet.
- Launch Warzone, then check to see if the download has been successful and the error is resolved. If yes, then great! If the error persists, please try Fix 2, below.
 (a modem)
 (a router)
Using WiFi may be handy, but it often comes at the expense of stability. If you’re on a wireless connection, consider switching to a wired one. While you’re at it, also make sure you move your router to a more central location for more stable internet connection.
Fix 2: Scan and repair your game files
The download failure Diver error could happen if certain game files are missing or corrupt. To see if this is the case, you can run a scan & repair in Battle.net client.
Here is how to do it:
- Open Battle.net client.
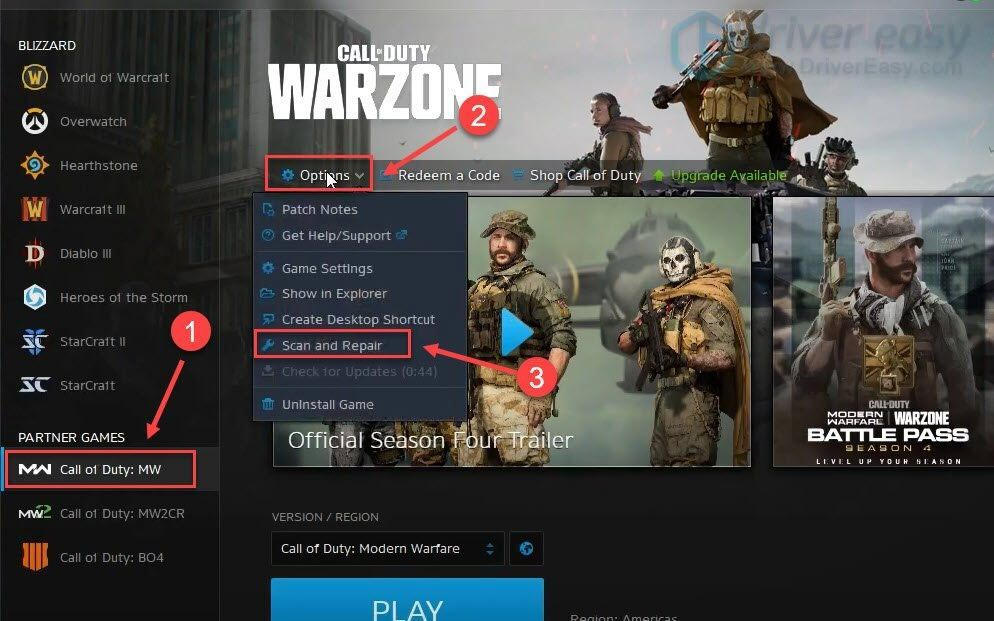
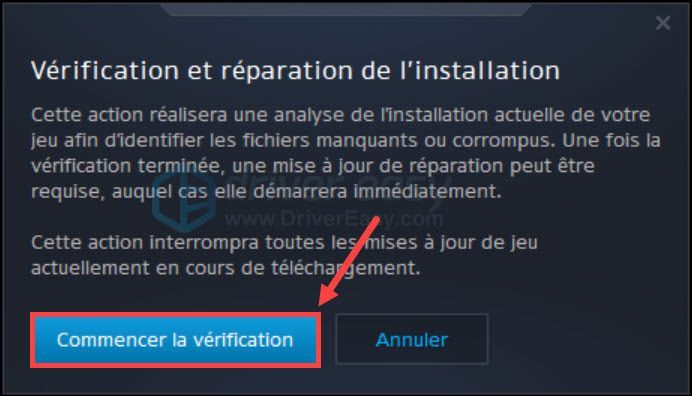
- In the left menu, choose Call of Duty: MW. Then click Options > Scan and Repair.

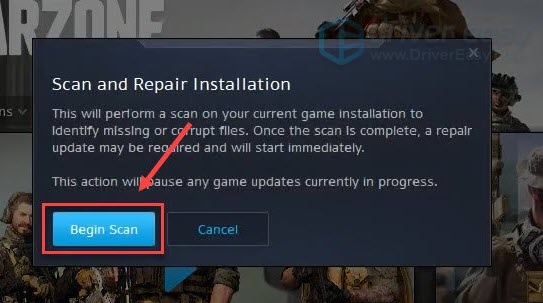
- Click Begin Scan, then wait a while as the tool scans and repairs your game installation.

- Launch Warzone again and check to see if the Diver error is solved.
Error still persists? Please try Fix 3, below.
Fix 3: Update your device drivers
Device drivers are essential to the proper functioning of the hardware components on your computer. If you encounter Error Code Diver in Warzone, it is very likely that the drivers you’ve installed on your computer are corrupt, outdated or in other ways incompatible. So you should update your drivers to see if it fixes the issue. If you don’t have the time, patience or skills to update the driver manually, you can do it automatically with Driver Easy.
Driver Easy will automatically recognize your system and find the correct drivers for it. You don’t need to know exactly what system your computer is running, you don’t need to be troubled by the wrong driver you would be downloading, and you don’t need to worry about making a mistake when installing. Driver Easy handles it all.
You can update your drivers automatically with either the FREE or the Pro version of Driver Easy. But with the Pro version it takes just 2 steps (and you get full support and a 30-day money back guarantee):
- Download and install Driver Easy.
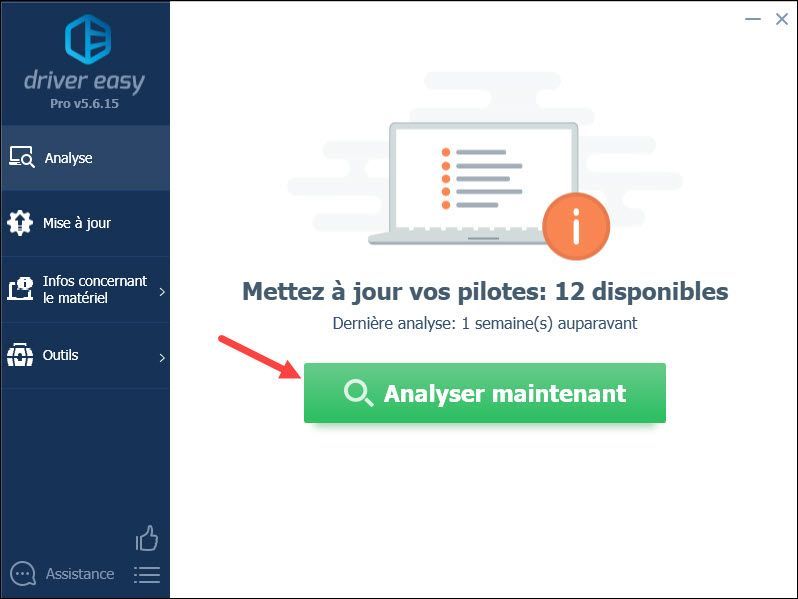
- Run Driver Easy and click the Scan Now button. Driver Easy will then scan your computer and detect any problem drivers.

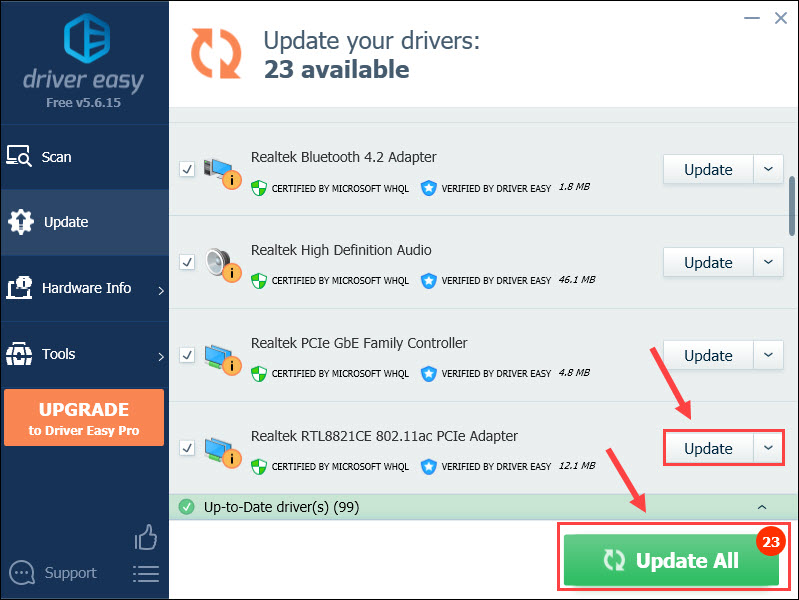
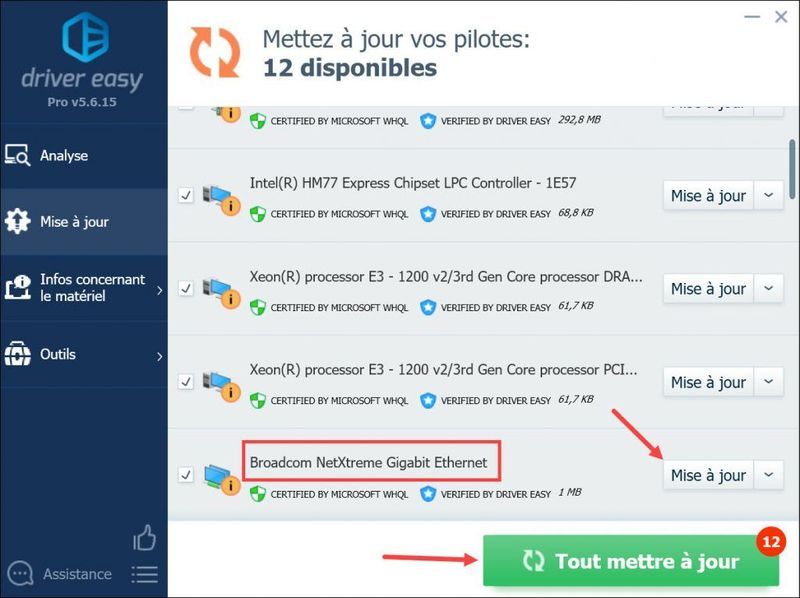
- Click Update All to automatically download and install the correct version of all the drivers that are missing or out of date on your system (this requires the Pro version– you’ll be prompted to upgrade when you click Update All).

Note: You can do it for free if you like, but it’s partly manual. - Restart your computer for the changes to take effect.
- Fire up COD and check if Error Code Diver has been fixed. If yes, congrats! If it still occurs, continue with Fix 4, below.
Fix 4: Allow your game through Windows Firewall
Windows Firewall is a built-in Windows feature that protects your network security by preventing outside requests for data from your local computer, unless the requests are from the apps on its exceptions’ list. It is likely that your game is currently not allowed through Windows Firewall, triggering Error Code 6 Diver in Modern Warfare or Warzone error. So you should make sure that you’ve allowed your game to communicate through Windows Firewall.
Here is how you can do it:
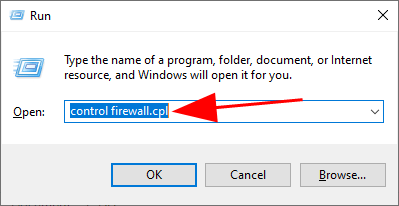
- On your keyboard, press the Windows logo key and R at the same time to invoke the Run box. Then type control firewall.cpl into the box and press Enter.

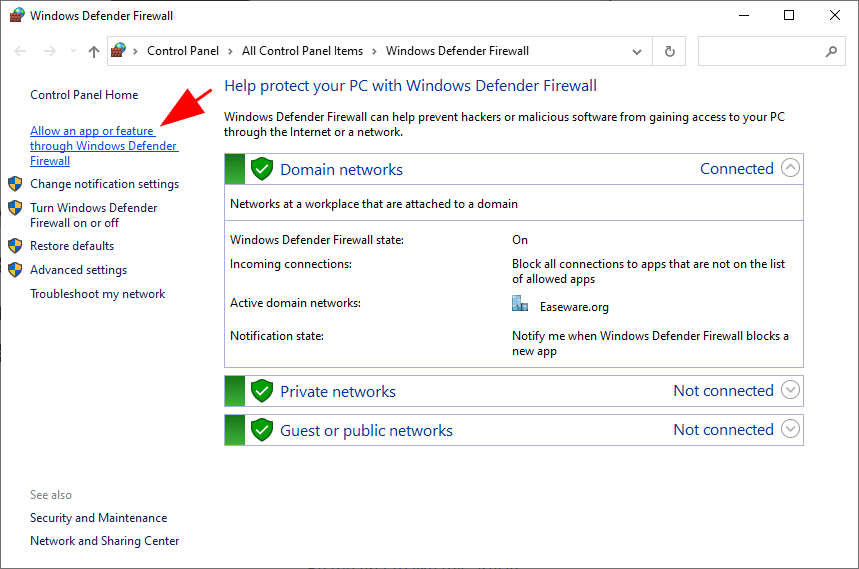
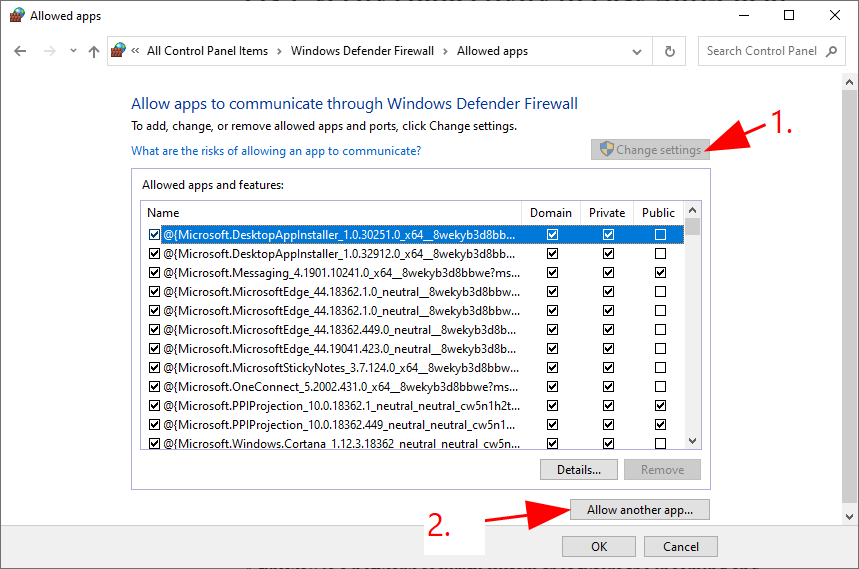
- In the window that pops up, click Allow an app or feature through Windows Defender Firewall.

- Browse through the list of Allowed apps and features to see if Steam is included. If not, click Change settings, click Allow another app…, then follow the on-screen instructions to add Modern Warfare or Warzone .exe to the allowed apps list.
- Once completed, click OK.
- Launch the game once again and see if Error Code 6 still throws up. If it’s still on-going, please move on to Fix 5.
If you have anti-virus software running in your computer, make sure you disable it temporarily too. During this time, be extra careful about what sites you visit, what emails you open and what files you download.
Fix 5: Use a VPN
Some players have managed to download the update with the use a VPN, so you could give it a shot to see if this does the trick for you. It can be tempting to use a free VPN service, we do not recommend it since a free VPN may not provide secure, fast or private enough connections.
Below is a list of VPNs that works with CoD:
- NordVPN
- CyberGhost
- HMA
- Surfshark
According to CoD’s Terms & Conditions, you may only face being banned if you use a VPN to gain “unfair” advantage during gameplay or to manipulate stats and game data. This means that so long as you don’t cheat in the game, you will likely be fine. If you want to be on the safe side, you can use a VPN with strong encryption and leak protection.
Fix 6: Repair system files
Error Code 6 Diver is probably caused by corrupt or missing game files. Many Warzone/Modern Warfare players find restoring system files helps them get rid of random crashes.
There are two ways you can run a system repair:
- Repair & replace corrupt system files with Fortect
- Run SFC scan
Repair & replace corrupt system files with Fortect
Fortect is an all-in-one system solution. It scans your PC’s operating system for viruses, flags dangerous websites, frees up precious disk space, and replaces any problematic files found with new healthy ones. Running a system repair with Fortect is like a clean reinstall of your operating system, and all personal user data, programs, and settings will remain intact.
Here’s how to use Fortect to run a Windows repair:
- Download and install Fortect.
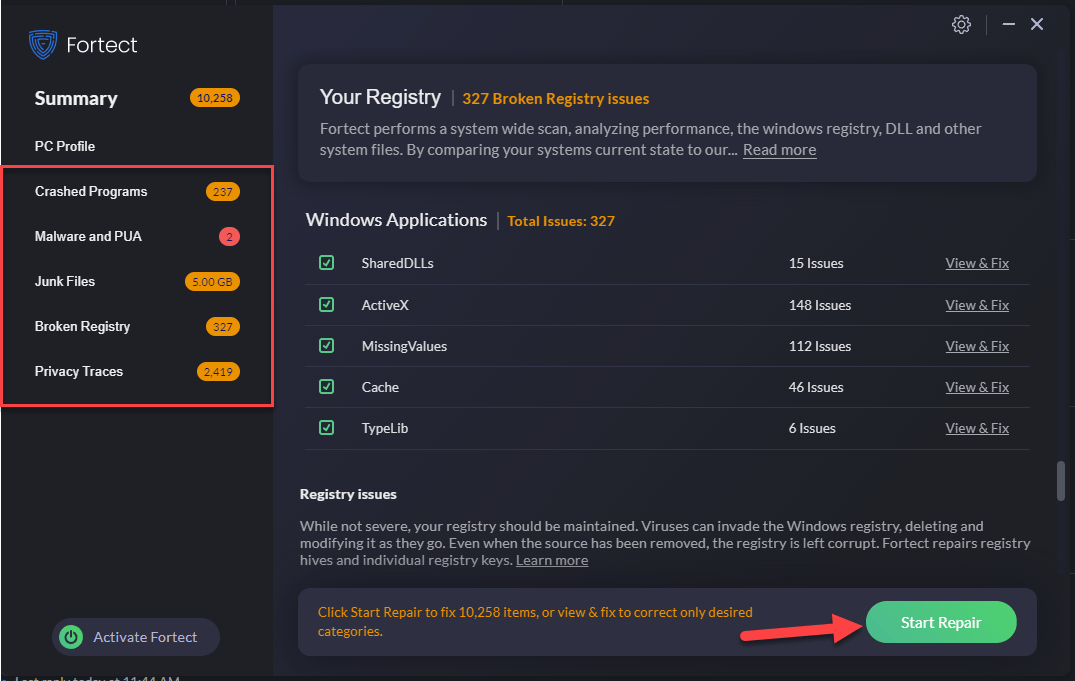
- Fire up Fortect and run a free scan.
- Once finished, Fortect will generate a detailed report of your computer health, which includes all issues detected.
 To fix all the issues automatically, click Start Repair (You’ll need to purchase the full version. It comes with a 60-day Money-Back Guarantee so you can refund anytime if Fortect doesn’t fix your problem).
 To fix all the issues automatically, click Start Repair (You’ll need to purchase the full version. It comes with a 60-day Money-Back Guarantee so you can refund anytime if Fortect doesn’t fix your problem).
If you run into any problems while using Fortect, or if it doesn’t work for you, don’t hesitate to contact Fortect support team.
5) Restart your computer for the changes to take effect.
6) Check your computer to see if the game works properly.
Run SFC scan
System File Checker (SFC) is a handy feature in Windows that helps scan your system files and repair missing or corrupted system files(including those related to BSOD). To run the SFC scan:
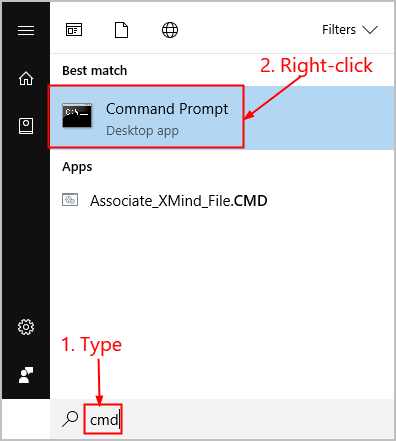
- On your keyboard, press the Windows logo key and type cmd. Then right-click on Command Prompt and click Run as administrator.

- Click Yes when prompted to confirm.
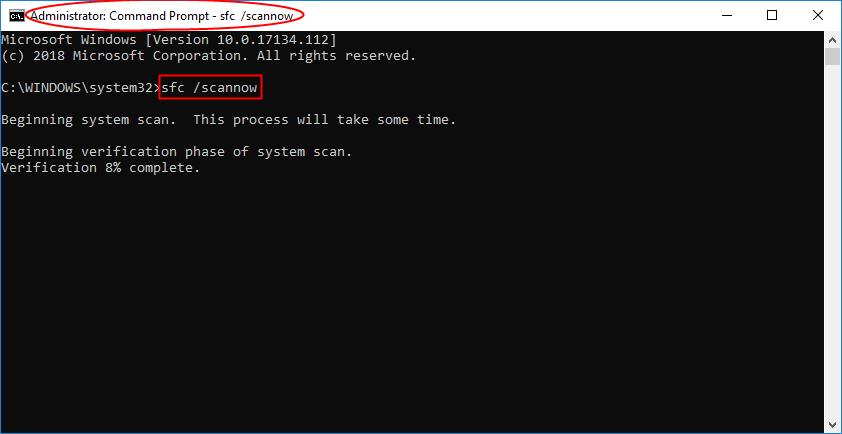
- In the command prompt window, type sfc /scannow and press Enter.

It’ll take some time for the SFC to replace the corrupted system files with new ones if it detects any, so please be patient. - Restart your computer for the changes to take effect.
- Check your computer to see if the game works properly.
If you’ve tried every possible fix but the error still lingers on, it is time to check Activision Support for the online status of the platform you’re on and see if it’s experiencing downtime or connectivity issues. If this indeed goes on, there’s not much you can do but wait for the servers to be recovered.
That’s the end of this post. Hopefully, it has pointed you in the right direction in fixing Error Code Diver Warzone On PC issue. If you have any questions, ideas, or suggestions, you’re more than welcome to leave us a comment below.
22
22 people found this helpful
Available in other languages
Zeigt Call of Duty: Modern Warfare oder Warzone den Fehlercode 6 Diver an? Keine Sorge. Hier sind 5 Lösungen.
Si vous rencontrez le code d’erreur 6 ou DIVER dans le jeu Warzone, vous pouvez lire ce texte pour trouver une solution.
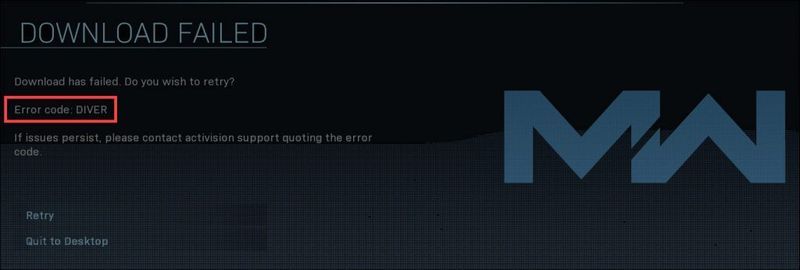
Many users reported seeing Warzone error code Diver when the game was launched. The issue is mainly reported to occur on PC or PS4. In some cases, the issue is reported to occur after or during a game’s update. The following type of message is shown:

Warzone might show Diver error code due to many reasons but the following can be regarded as the core ones:
- Network Issues: If the ISP is hindering the traffic essential for Warzone or if a router’s misconfiguration is restricting Warzone’s access to an essential online source, then Warzone may show error Diver.
- Interference from the System’s Security Application: Interference from the system’s security products (like an antivirus or a firewall), that is blocking Warzone access to an essential online resource (or a local directory), may cause Warzone Diver error.
- Corruption of Essential System Files: You may encounter Warzone error code Diver if the essential system files are corrupt (e.g., due to a sudden power failure). This can restrict Warzone’s access to a resource vital for its operation, resulting in the Diver error.
- Corrupt Installation of Modern Warfare: Warzone might show error code Diver if its installation has gone corrupt. This might be due to the removal of essential game files as a false-positive from the security applications.
Relaunch Game or Restart the System/Console and Router
A temporary communication glitch might be causing the error code Diver in Warzone and performing a restart of the game, system, and router (which will also renew the system’s IP) may solve the problem. But before diving into more technical solutions, make sure the installation drive of Warzone has enough space available to download and install the game.
- Firstly, close the game/launcher and right-click on Windows.
- Now, select Task Manager and end all the processes related to Warzone/Modern Warfare.

Open the Task Manager of the System Through the Quick Access Menu - Then launch Warzone and check if it is working fine.

End Battle.net Process - If not, close the game and power down the system.
- Now unplug the power cable of the system from its source and power down the router.
- Then unplug the router’s power cable from its source and wait for 5 minutes.

Unplug Router from the Power Source - Now plug back the power cables to the respective power source and power on the router.
- Once the router is properly powered on, power on the system, and once the system is powered on, launch Warzone to check if it is clear of the error code Diver.


Update the Warzone Game to the Latest Build
Warzone might fail to work if the game is not updated to the latest build as it can create incompatibility with other OS modules. Here, updating the Warzone game to the latest build may solve the problem.
- Exit the Warzone game and make sure to end Warzone-related processes in the Task Manager.
- Now open the Battle.net launcher and select Warzone.
- Then expand its Options and click on Check for Updates.

Check for Call of Duty Warzone’s Updates - Wait till the update is applied (if any) and afterward, check if the error code Diver is cleared.
- If not, check if letting the game shaders reinstall (when the error message is opened) solves the problem.

Change the Regional Server of Warzone
Warzone error Diver could be a result of a glitch in the regional server of the Modern Warfare and selecting a different region may clear the error Diver in Warzone.
- Open the Battle.net launcher and select COD Warzone.
- Now, click on the globe icon (near the Play button), and in the mini-menu, choose a different region (e.g., if you are in America, select Europe or vice versa).

Change Region in Warzone - Then click on Play and if the game asks to update, let it update.
- Afterward, when the game is launched, check if Warzone is working fine without error Diver.

Try Another Network or Network Type
Warzone might show the error code Diver if the network is restricting the game’s access to a resource essential for Warzone. Moreover, an issue with a network connection type like a failing Wi-Fi card or interference with the wireless signals from other electronics-based equipment might also cause the issue. Here, you can fix the Diver error by trying another network or network type.
- Firstly, exit the Warzone game and kill all of its related tasks in the Task Manager.
- Now, connect the system through a VPN (if not present, you may install a VPN) and launch Warzone.
- If the game tries to update, let it update, and then check if the Warzone is operating fine.
- If not, check if using a different network type (e.g., if using a Wi-Fi connection, try an Ethernet cable, or vice versa) solves the problem.
- If the issue persists, exit Warzone and end its related tasks in the Task Manager.
- Now, disconnect the system from the current network and connect it to another network (like a phone’s hotspot).

Enable Hotspot of Your Phone - Then launch Warzone and if it tries to update, let it update.
- Afterward, launch Warzone and check if the error code Diver is cleared.

Perform an SFC Scan of the System
You may encounter error code Diver in Warzone if the essential system files are corrupt which may make an essential resource or directory unreachable for Warzone. In this context, performing an SFC scan of the system may clear the Warzone error under discussion.
- Exit Warzone game and end the related processes in the Task Manager.
- Now, perform an SFC scan of the system (make sure to launch Command Prompt as Administrator). Keep in mind this may take some time to complete, so, try it when the system can be spared for some time (like overnight).

Perform an SFC Scan - Once the scan is complete, launch Warzone and check if it is clear of Diver error.

Disable the System’s Security Application
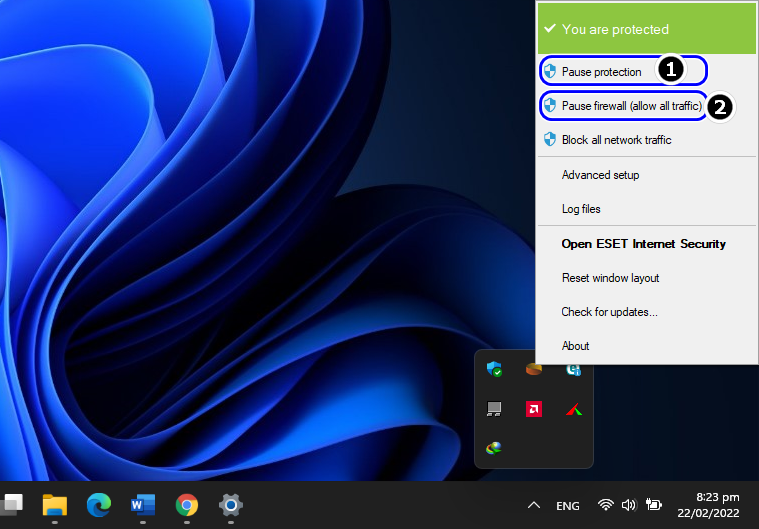
Warzone might not work or fail to update with error code Diver if the system’s security software (like an antivirus or firewall) is hindering the operation of the game and blocking its access to essential online sources as well as to local system directories. In this scenario, disabling the system’s security product (like ESET) may solve the problem. Before proceeding, make sure to remove any exemptions of Warzone in the antivirus/firewall settings (if added earlier).
Warning:
Advance at your own risk as disabling or editing the settings of the security application may expose the system and data on it to threats.
- Firstly, exit the Warzone game and close its launcher. Do not forget to end the Warzone-related processes in the system’s Task Manager.
- Then expand the hidden icons in the system’s tray and right-click on the security software (like ESET).

Pause ESET Protection and Firewall - Now select Pause Projection and if a UAC prompt is shown, click on Yes.
- Then confirm to disable the security protection and agarin, right-click on the security product in the hidden icons of the system tray
- Now select Pause Firewall and then confirm to disable the system’s security application.
- Then open Battle.net and launch Warzone to check if its Diver error is cleared. If so, then you may exempt the Warzone installation directory in the settings of the system’s security application.
- If not, repeat step 1 and then disable Windows Defender.
- Now launch Warzone and check if it is working fine.
If the security product or system’s firewall (3rd party or Windows Defender) was already disabled, check if enabling it resolves the Warzone issue.
Disable Static IP in the Router’s Settings
If Warzone servers are blocking traffic from the system’s IP, then that can cause Warzone Diver error at hand. Usually, restarting a router refreshes the IP but if the router is using a static IP, then that may fail and a user may keep facing Warzone error code Diver on his system.
Here, disabling the static IP in the router’s settings may solve the problem. The process may differ for some users. In some instances, a user might have to contact his ISP to disable or refresh the static IP. We will go through the general guidelines below. Keep in mind, disabling static IP may break other operations on the network or system.
- Launch a web browser and steer to the web portal of the router (like 192.168.1.254 for BT Business Hub 2700/2701). You may have to enter your credentials.
- Now head to the Settings tab and click on Broadband.

Open Link Configuration Tab in the Router’s Web Portal - Then steer to the Link Configuration tab and in the Public IP Address section, uncheck Enable for Add Additional Network. Do not uncheck Enable for Routing, otherwise, the router may stop working.

Uncheck Add Additional Network to Disable Static IP - Now apply the changes made and open Warzone to check if it is clear of the Diver error.


Reset Router to the Factory Defaults
COD Warzone might show the error code Diver if the router is not properly configured or if the router’s firmware is corrupt. In this context, resetting the router to the factory default may clear the Warzone error. Before moving on, make sure to note down the info required to set up the router after factory resetting it. Although the reset process for different make/models may differ a bit, the general guidelines will be as under:
- First, locate the physical reset button on the router, usually, at the bottom or back of the router. In some routers, the power button also works as a reset button, if held for a certain time.
- Once the reset button is located, press/hold the reset button with a pointy object (like a paperclip) and wait for 30 seconds.

Reset Your Router - Now release the reset button and wait till the router is powered on.
- Then configure the router (as per the ISP instructions) and afterward, check if Warzone error code Diver is cleared.
- If the issue persists, check if changing the NAT type of the system/console (by opening or forwarding the Warzone required ports) solves the Warzone problem.
- If that did not work, you may set up a DMZ (strictly not recommended) for the system or console’s IP to clear the Warzone Diver error.

Delete the Contents in the Modern Warfare Folder
You may encounter Warzone error code Diver if the certain game configurations files (in the Documents directory) are corrupt or if the essential game files (in the installation directory) are corrupt. In this scenario, deleting the contents of the Modern Warfare folder in the Documents directory or the installation directory may solve the problem.
Delete the Contents of the Modern Warfare Folder in the Documents Directory
- Firstly, exit the Warzone game and end the related processes in the Task Manager.
- Then, right-click Windows and open Run.

Open the Run Command Box from the Quick Access Menu - Now, navigate to the following path:
Documents

Open Documents Folder Through the Run Command Box - Then open the Call of Duty Modern Warfare folder and delete all its contents (files, folders, etc.). If you want to play safe, then copy the contents to someplace safe. Keep in mind, on the relaunch of Warzone, these will be recreated with the default values.

Delete the Modern Warfare Folder in the Documents Directory - Now launch Warzone and if it asks to update, let the game update.
- Afterward, check if Warzone is operating fine. If so, then you may paste back the old files (if backed up and required) to the Modern Warfare folder.


Delete the Files in the Installation Directory of Warzone
- Open the Battle.net launcher and select Warzone.
- Now, expand Options and click on Show in Explorer.

Show Warzone in Explorer - Then, steer to the Data folder, usually, the following path:
C:\Program Files (x86)\Call of Duty Modern Warfare\Data\data\

Open the Data Folder of COD Warfare Installation Directory - Now delete all the files with IDX extension up to 1KB in size.
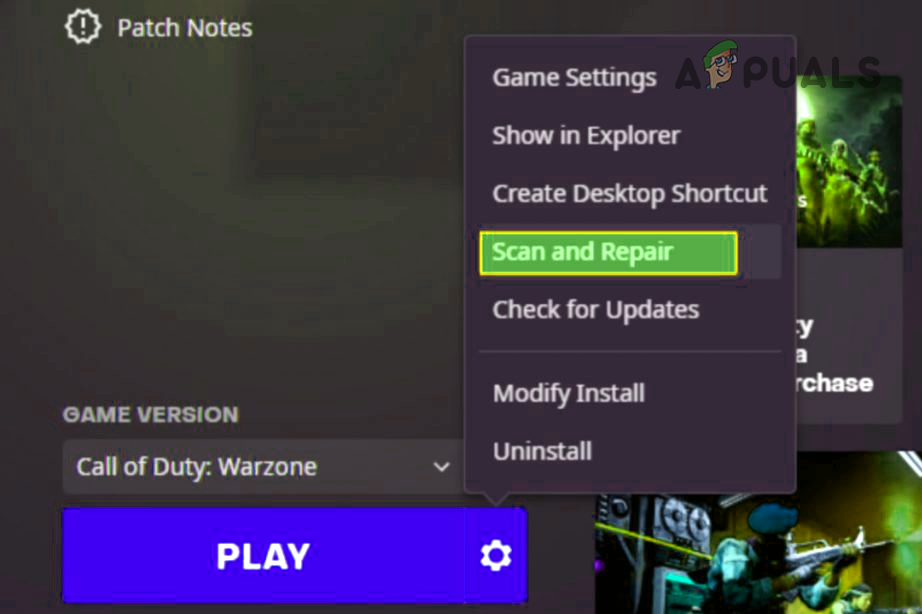
- Then open the Battle.net launcher and select Warzone.
- Now click on the gear icon and select Scan and Repair.

Scan and Repair Warzone - Then wait till the scan process is complete and afterward, launch Warzone to check if it is operating fine.
- If not, steer to the Warzone installation directory and open the Data folder.
- Now delete the files (not folders) less than 2MB in size and Scan and Repair Warzone in Battle.net launcher to check if Warzone is clear of Diver error.
- If the issue persists, delete all the files (not folders) in the installation directory except ModernWarfare and ModernWarfare Launcher.

Delete Files (not Folders) Except ModernWaarfare and Modern Warfare Launcher in the Installation Directory of Warzone - Now perform the Scan and Repair of Warzone in the Battle.net client.
- Afterward, launch Warzone and check if it is clear of error Diver.
- If the issue is still there, check if installing (or reinstalling) Modern Warfare Pack 1, 2, and 3 clear the Diver error.


Reinstall Warzone
If none of the above methods work, then the Diver error could be a result of the corrupt installation of Warzone that is beyond repair. In this case, the tedious and data-consuming task (100GB+ size download) of reinstalling Warzone may solve the problem. Before moving on, make sure to back up the essential data/info of Warzone.
- Launch the Battle.net client and select Warzone.
- Now, click on Settings and select Uninstall.

Uninstall Call of Duty Warzone - Then confirm to uninstall the game and wait till Warzone is uninstalled.
- Now restart your PC and upon restart, reinstall Warzone.
- Once installed, launch it as administrator and hopefully, it will be clear of the error code Diver.


Kevin Arrows
Kevin Arrows is a highly experienced and knowledgeable technology specialist with over a decade of industry experience. He holds a Microsoft Certified Technology Specialist (MCTS) certification and has a deep passion for staying up-to-date on the latest tech developments. Kevin has written extensively on a wide range of tech-related topics, showcasing his expertise and knowledge in areas such as software development, cybersecurity, and cloud computing. His contributions to the tech field have been widely recognized and respected by his peers, and he is highly regarded for his ability to explain complex technical concepts in a clear and concise manner.
Попробуйте наш инструмент устранения неполадок
Выберите операционную систему
Выберите язык програмирования (опционально)
Код ошибки 6 и код ошибки ДРАЙВЕР в Call Of Duty Warzone часто вызывают одни и те же последствия и блокируют загрузку и установку обновления игры.Обе ошибки появлялись в основном на платформе ПК , хотя некоторые пользователи Xbox One и PS4 также испытали то же самое проблема.
Если вы столкнулись с той же проблемой, не волнуйтесь, здесь я предлагаю некоторые исправления, которые помогли другим игрокам решить проблему.
Содержание
Здесь я предлагаю вам некоторые решения, которые помогли многим игрокам решить эту проблему с загрузкой, просто прочитайте эту статью по порядку, и вы найдете подходящее решение для вашего случая.
- Проверьте и восстановите файлы игры. Перезапустите сеть Обновите драйвер сетевой карты Установите доступные обновления Windows Используйте VPN
Решение 1. Проверьте и восстановите файлы игры
Поврежденные игровые файлы могут вызвать всевозможные проблемы, включая некоторые ошибки. Когда вы сталкиваетесь с кодом ошибки 6 или DIVER в Warzone, вы можете сначала проверить целостность ваших игровых файлов, а затем восстановить любые поврежденные файлы.
1) Войдите в Battle.net.
2) Выберите Warzone из списка ваших игр. Затем нажмите Опции и дальше Проверка и ремонт в списке.
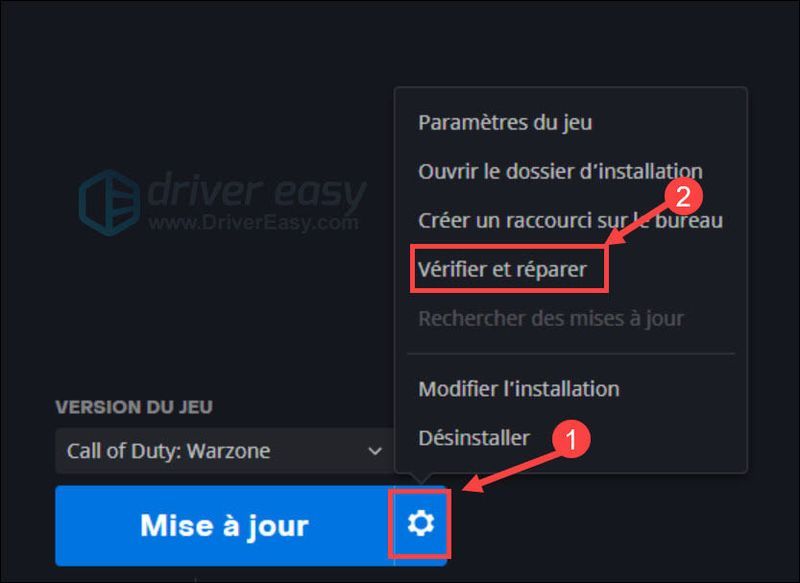
3) Нажмите Начать проверку чтобы начать анализ.
4) Дождитесь завершения процесса и проверьте, возвращается ли ваша игра в нормальное состояние.
Решение 2. Перезапустите сеть
Эти две ошибки также могут быть связаны с вашим интернет-соединением. Если ваш интернет нестабилен или имеет проблемы, это также может повлиять на загрузку обновления игры и могут возникнуть ошибки.
Чтобы избежать влияния вашей сети, вы можете выполнить следующие шаги, чтобы перезапустить сеть.
1) Выключите ноутбук, затем отсоедините кабель питания.
2) Выключите маршрутизатор/модем, затем отсоедините кабель питания.
3) Выключите все внешние устройства и подождите хотя бы минуту, ничего не делая.
4) Подключите кабели питания к ноутбуку и маршрутизатору/модему.
5) Перезагрузите маршрутизатор/модем и ноутбук.
6) Перезапустите игру и проверьте, нормально ли она работает.
Решение 3. Обновите драйвер сетевой карты
Драйвер сетевой карты необходим для нормальной работы вашей сетевой карты. Если драйвер неверен, устарел или поврежден, это может повлиять на ваше интернет-соединение, и вы можете столкнуться с этой ошибкой игры Warzone. Поэтому рекомендуется регулярно обновлять драйверы, и обычно вы можете выбрать метод руководство или метод Автоматический в соответствии с вашими предпочтениями.
Вариант 1. Обновите сетевой драйвер вручную
Если вы хорошо знаете модель вашего сетевого устройства, вы можете попробовать обновить его драйвер вручную. Для этого зайдите на официальный сайт производителя вашей материнской платы и найдите свою модель.
Драйвера обычно находятся на странице поддержки. Обязательно загрузите драйвер, совместимый с вашей системой Windows, иначе ваше устройство не будет нормально работать.
Вариант 2. Обновите сетевой драйвер автоматически.
Если у вас нет времени, терпения или навыков работы с компьютером для обновления драйверов вручную, мы рекомендуем вам сделать это. автоматически с участием Драйвер Легкий .
Драйвер Легкий автоматически распознает вашу систему и найдет для вас последние правильные драйверы. Вам не нужно точно знать, какая система работает на вашем компьютере, и больше нет риска, что вы загрузите неправильные драйверы или допустите ошибки во время установки драйвера.
Вы можете легко обновить свои драйверы с помощью версии БЕСПЛАТНО Где ЗА от Driver Easy. Но с версия PRO , обновление драйвера занимает всего 2 клика, и вы можете наслаждаться полная техническая поддержка и один 30-дневная гарантия возврата денег .
один) Скачать и установить Легкий драйвер.
два) Бегать Driver Easy и нажмите кнопку Проанализируйте сейчас . Driver Easy просканирует ваш компьютер и обнаружит все проблемные драйверы.
3) Нажмите кнопку Обновлять рядом с указанным сетевым устройством, чтобы загрузить его последний драйвер, затем вам необходимо установить его вручную на свой компьютер.
Вы также можете нажать кнопку Обновить все для автоматического обновления за один раз все поврежденные, устаревшие или потерянные драйверы на вашем ПК. (Эта операция требует версия PRO и вам будет предложено обновить Driver Easy, когда вы нажмете Обновить все .)
4) После обновления драйверов перезагрузите компьютер и перезапустите игру, затем проверьте, успешно ли решена ваша проблема.
Решение 4. Установите доступные обновления Windows
Помимо драйверов в вашей системе, вы также должны всегда обновлять свою систему, поскольку обновления Windows часто включают новые функции и исправления для определенных проблем совместимости. Выполните следующие шаги и проверьте, работает ли он.
- Для Windows 10 Для Windows 7
Для Windows 10
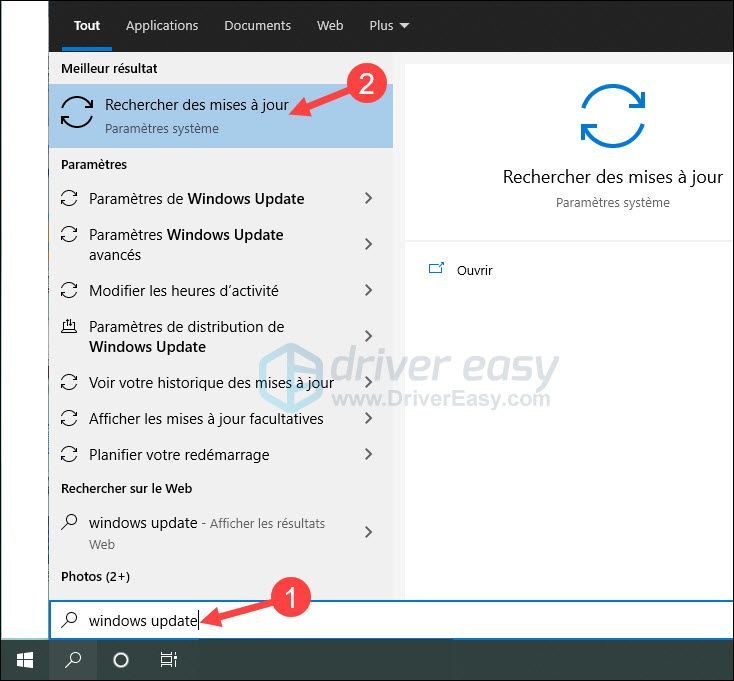
1) Одновременно нажать клавиши Виндовс + С на клавиатуре введите Центр обновления Windows в поле этого поиска Windows и нажмите на Проверить наличие обновлений .
2) Нажмите Центр обновления Windows на левой панели, а затем щелкните Проверить наличие обновлений .
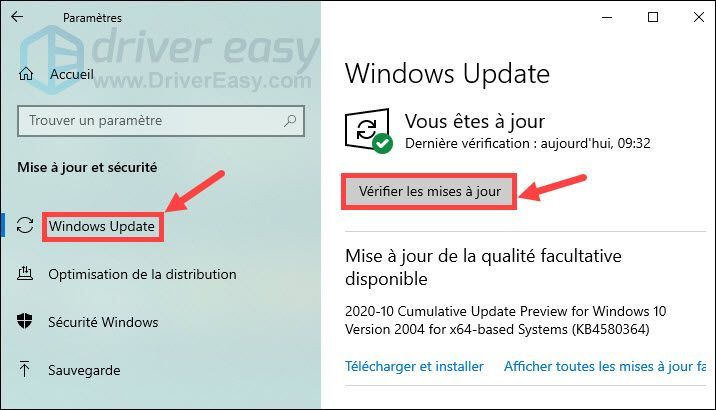
3) Ваш компьютер автоматически выполнит поиск и установит последние обновления Windows на свой компьютер. После завершения процесса перезагрузите компьютер и проверьте, может ли ваша игра нормально работать.
Для Windows 7
1) Нажмите клавишу Окна на клавиатуре и выберите Панель управления .
2) Нажмите Система и безопасность .
3) Нажмите Центр обновления Windows .
4) Нажмите Установить обновления . Дождитесь завершения процесса поиска и установки обновлений и проверьте, решена ли уже ваша проблема.
Решение 5. Используйте VPN
Следует отметить, что использование VPN может привести к приостановке действия вашей игровой учетной записи, если вы используете ее для получения нечестного преимущества во время игры или для манипулирования игровой статистикой и данными, поэтому будьте осторожны в своих действиях после запуска игры.
Когда загрузка обновления игры заблокирована в вашем регионе, вы можете попробовать изменить свой регион виртуально на с помощью VPN , так как некоторые страны блокируют запросы DNS для определенных сайтов, и вы можете обойти запросы блокировки DNS с помощью VPN.
Типы VPN на рынке разнообразны, для вас важно выбрать надежную и безопасную VPN, например НордВПН . Чтобы получить этот продукт по более доступной цене, вы также можете найти купон в какой сайт .
Благодарим вас за внимание к этой статье, и я надеюсь, что одно из приведенных выше решений успешно решило вашу проблему, но если решения не работают в вашем случае, вы можете связаться с поддержка d’Activision чтобы получить больше информации.
- Служебный долг: Зона боевых действий
Эти ошибки одинаковы, но называются по разному.
Возникает у юзеров после очередного обновления, после первой установки игры.
Фикс довольно прост.
Вручную выставите DNS Google:
Зайдите в «Центр управления сетями и общим доступом«, выбираете «Изменения параметров сетевого адаптера«. Далее зайдите в «сетевые подключения», нажмите ПКМ на активном подключении к интернету, выберите свойства. Здесь вы увидите список протоколов, выбираете «TCP/IPv4» и нажимаете «свойства». Во вкладке «общее» выставляете «Использовать следующие адреса DNS-серверов» и вписываете в поле «предпочитаемый» — 8.8.8.8, в поле «альтернативный» — 8.8.4.4.
После этих манипуляций перезайдите в игру, попутно перезапустив battle.net. Доп.файлы обновления должны будут подгрузиться и проблем в дальнейшем не должно быть.
Если же это не помогло — используйте VPN.
Перед тем, как его запустить выйдите из игры и закройте battle.net, чтобы у приложения не было активных сетевых подключений.
Вообще, практически любые проблемы, связанные с загрузкой файлов в MW 2019 исправляются с помощью VPN.
Далее по мере возникновения проблем в колде буду выкладывать рабочие способы их решения.
Вылазит какой-то код ошибки Diver, когда запускаю Warzone 2.0. Товарищи в сети чего только не насоветовали. И перезагрузка ПК, и переустановка игры, и переустановка всей Винды целиком. Первые два я попробовал, конечно. ОС перебивать не собирают и никому не советую, не ради игры.
Решение
Код ошибки Diver — это крайне распространенная ошибка среди игроков Call of Duty Modern Warfare 2 и Warzone 2.0. Как показывает практика, избавиться от ошибки помогают два метода:
- изменить адреса DNS-сервера в настройках сетевого подключения;
- запуск игры через VPN.
Чтобы изменить DNS для своего сетевого подключения, нужно сделать следующее:
- откройте классическую панель управления (WIN+R→control);
- перейдите в раздел «Центр управления сетями и общим доступом»;
- кликните на пункт «Изменение параметров адаптера»;
- дважды кликните на название своего сетевого подключения;
- нажмите «Свойства» и дважды кликните на компонент «IP версии 4 (TCP/IPv4)»;
- активируйте опцию «Использовать следующие адреса DNS-серверов»;
- выставьте следующие адреса (или любые другие публичные DNS):
- 4.2.2.1
- 4.2.2.2
- сохраните изменения.
Выбор VPN зависит сугубо от предпочтений самого пользователя. Платить или нет — тоже личный выбор. В сети можно найти неплохие бесплатные VPN, однако они дают крайне ограниченный объем трафика. Заручившись помощью проверенного VPN, код ошибки Diver гарантировано исчезнет из Modern Warfare 2 и Warzone 2.0.