Since Minecraft is such a massive sandbox title, it is bound to have several issues and bugs, even though Mojang constantly pushes new updates with loads of fixes. One of the most common errors is called ‘Exit Code 1’. This error crashes the game and shows a dialog box saying, «Game Ended with Bad State: Exit Code 1». Thankfully, this is a well-known issue, and the community has found several methods to solve it easily.
While one of these methods might not work, if users try all of them, they will most likely solve the problem.

Top 5 methods to solve Minecraft’s ‘Exit Code 1’ error
1) Repair Minecraft Launcher
Players can start by repairing the official game launcher, through which the sandbox title actually starts. They can follow these simple steps to do so:
- Open Windows Settings.
- Open the ‘Apps’ tab in the left pane.
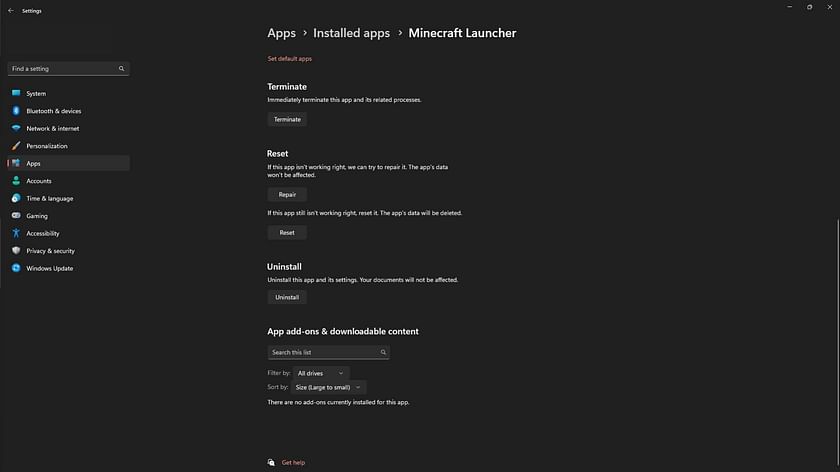
- Click on Installed Apps and search for Minecraft Launcher.
- Next, click the three-dot menu beside the app name and select Advanced Options.
- Scroll down to the Reset section and click Repair.
Windows will perform a quick repair and show a checkmark beside the button once the repair is complete. Once the process is complete, open the launcher and start the game to check whether the issue persists.
2) Change Java Executable name
There are high chances that the Java installed on a player’s computer might not be working correctly with the game. Hence, they must reconnect Java with the game that opens. To do this, they must follow these steps:
- Open the game launcher.
- Select the ‘Java Edition’ tab in the left panel.
- Open the ‘Installations’ tab in the toolbar.
- Hover the mouse over any desired game version and click the three-dot menu.
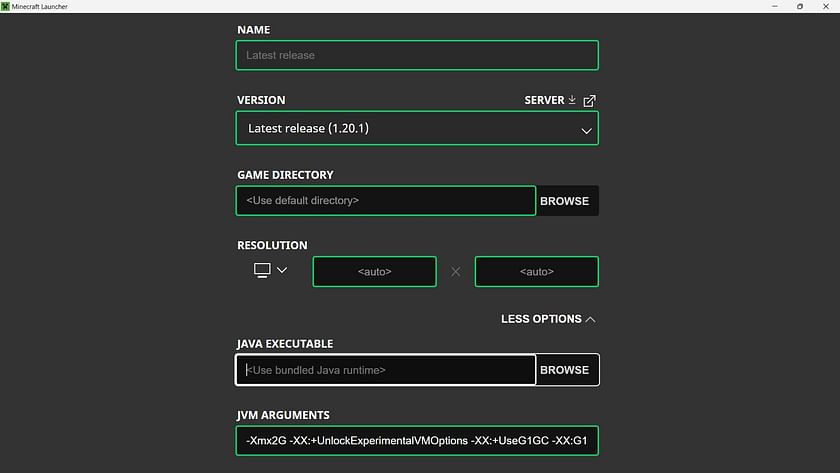
- Select Edit from the menu and click More Options to view additional options.
- Click Browse to add a Java Executable.
- Navigate to the Java installation. By default, the JRE file path is: C:Program Files (x86)Javajre1.8.0_361bin.
- Select the Java.exe file and click Open.
- Click Save to apply the changes.
After this, players can reopen the official game launcher and open the game to check.
3) Play the game without mods
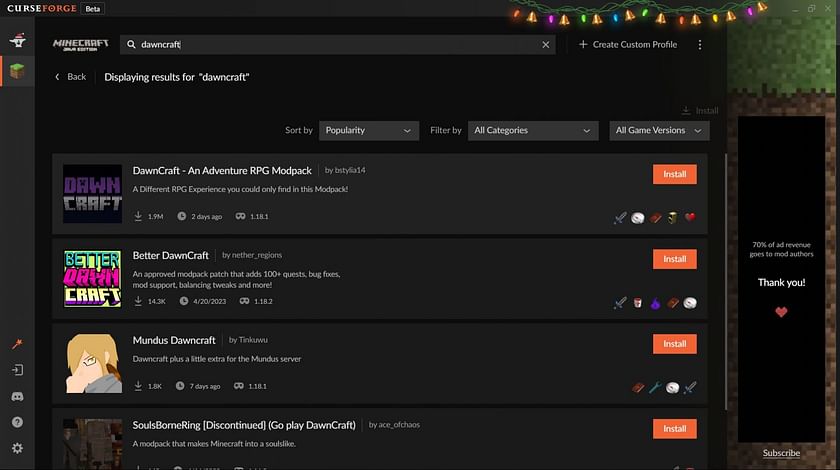
On certain occasions, Java Edition mods can also cause this particular error. Since they are third-party software that runs on the official sandbox title, they can also cause the ‘Exit Code 1’ crash.
Though players can simply remove or completely disable the mods, they can open the regular vanilla version of the game and play in their worlds. Furthermore, they can try and test each and every mod they use to pinpoint which one is causing the crash.
4) Update graphics card drivers
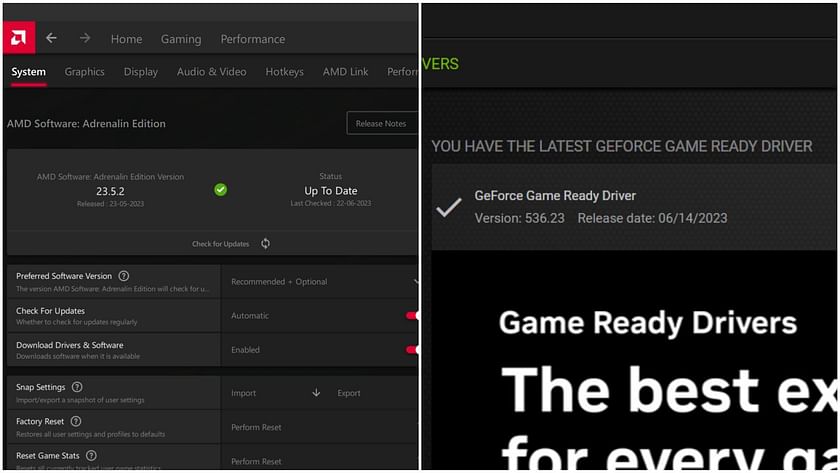
Players could also encounter the error and crashes due to an outdated graphics card driver. Graphics card companies constantly push the latest driver updates that improve the gameplay of many games. Hence, they must be updated at all times.
Users can head to the Nvidia GeForce Experience or AMD Adrenaline Edition apps to update their graphics drivers.
5) Reinstall the game and Java
The final solution to solving the Exit Code 1 error is to simply reinstall both Java and the game on any computer. Make sure to back up all the single-player worlds from the .minecraft folder before uninstalling the game.
A fresh reinstall of the launcher, game, and Java version will likely solve several bugs and errors.
Edited by Anirudh Padmanabhan
Thank You!
GIF
❯
Ошибка 1 в Minecraft обычно имеет вид «Minecraft closed with exit code 1» и не содержит какой-либо уточняющей информации в отношении причины появления сбоя. Однако запустить игру нельзя спустя любое количество попыток. Проблема действительно есть и ее нужно исправлять. Вот только в каждом случае сбой может появляться по разным причинам. Мы же проанализировали массу пользовательских отчетов и готовы предложить лучшие способы, которые работают у большинства.
Причины ошибки 1 в Minecraft
В Minecraft ошибка 1 может появляться по следующим причинам:
- Проблема во временных файлах. Они могли быть поврежденными.
- Устаревшая версия Java.
- Некорректные символы в пути. Если где-то установлены специальные символы, это может вызывать проблемы.
Как исправить ошибку 1 в Minecraft?
Вот несколько способов решения проблемы, которые получили много положительных отзывов от затронутых игроков:
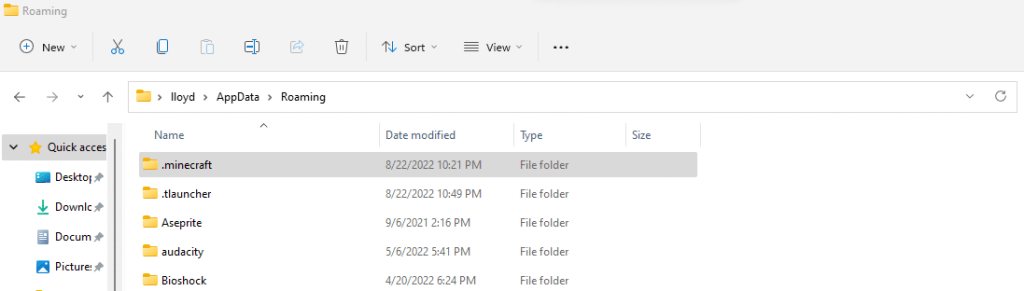
- Удалить TempOptifineStore-1.0.json. Нужно ввести в строку «Выполнить» %appdata% и нажать Enter. Далее переходим в Roaming, затем — .minecraft. Удаляем файл TempOptifineStore-1.0.json и пробуем запустить игру.
- Удалить временные файлы. Тоже переходим по пути AppData/Roaming/.minecraft, только удаляем все файлы внутри папки.
- Переустановить Java. Удаляем Java версию через «Программы и компоненты» в системе, а затем с официального сайта Java скачиваем и устанавливаем приложение. Желательно, до момента установки удалить еще все упоминания Java из реестра.
- Добавить атрибут к файлу. Если в пути к файлу используются символы !, @, « и другие, в этом может быть проблема. Открываем «Свойства» файла, в конец строки «Объект» через пробел вставляем —workDir %ProgramData%\.minecraft – точно в таком виде (в начале 2 минуса).
Ошибка Minecraft с кодом 1 должна быть исправлена одной из перечисленных выше процедур. Однако есть очень много противоречивых сведений о ней. Будем очень благодарны, если вы опишете вашу ошибку, что вы сделали для решения проблемы и каков результат процедур.
Frustrated by Minecraft crashing continuously and displaying the exit code 1 error? In this guide, we describe 5 solutions to fix the issue.
Minecraft has been around for over a decade now, with its customer base continuing to expand monthly. The game records an estimated 140 million monthly unique players, the largest of any video game in the world. This record is amazing for players like you who strive to improve in achievements as you play.
However, the pros of being part of such a large community come with cons too. The large user base of the video game makes the developers sometimes struggle to maintain the website. As a player, you may experience some difficulties, such as the exit code 1 error. When this error pops up on your screen, you can fix it by following the solutions we have provided in this guide.
We also have guides on fixing other problems, such as the exit code 0 and server connection timed-out errors.
What does the Minecraft Exit Code 1 Mean?
When you receive the error code Game Ended with Bad State: Exit Code 1, it means that there is a problem with either Java, your Minecraft configuration, or your PC. To fix it, you have to edit the Java Executable Path, correct the Minecraft launcher path, reinstall Java, disable mods, or update your graphics card driver.
- Edit the Java Executable Path
- Fix the Minecraft Launcher Path
- Reinstall Java
- Disable Mods
- Update Graphics Card Drivers
1. Change the Java Executable Path
In most instances, when you receive the code 1 error, the problem is with the working directory of Java. More specifically, the problem is caused by a single character in the Java path used by Minecraft.
To fix this, you have to edit the Java executable path in Minecraft’s settings:
- First, open the Minecraft launcher on your PC and click on Launch Options.
- Next, turn on the Java executable toggle.
- You can now edit the Java executable path. The original path shows the Java filename as javaw.exe and this is where the problem lies. You have to remove the ‘w’ character from the Java path such that it becomes java.exe. Here’s an example (only change the Java name as shown below, don’t change the entire path):
- Old: C:\Program Files (x86)\Minecraft\runtime\jre-x64\1.8.0 25\bin\javaw.exe
- New: C:\Program Files (x86)\Minecraft\runtime\jre-x64\1.8.0 25\bin\java.exe
- Click the Save button.
Relaunch the game and that should fix the problem. If it hasn’t, you can move on to other solutions explained in this guide.
2. Fix the Minecraft Launcher Path
If you’re playing Minecraft on Windows, one of the causes of the issue is when the Windows account username contains special characters, such as an exclamation mark or a hashtag.
If that is the case, you should change the Minecraft launcher path on your PC to a path that does not have a special character. Here is how to go about it:
- Close Minecraft.
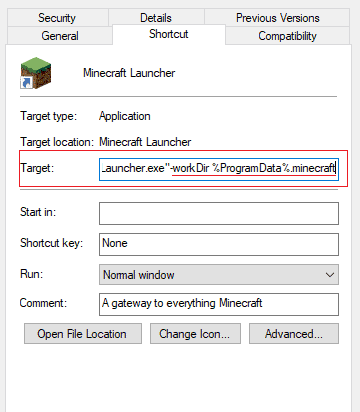
- Right-click on the Minecraft shortcut on your desktop and select Properties.
- If there’s no shortcut on your desktop, then go to the installation directory of Minecraft, right-click on Minecraft.exe, and create a shortcut.
- From the Properties window, go to the Shortcut tab.
- Edit the Target input by adding the following to the end of the path:-workDir %ProgramData%.minecraft
- Click on OK.
- Open the Minecraft Launcher again and see if it works. If it does not, you will have to create another Windows account with no special characters.
3. Reinstall Java
If, after trying the two fixes above, the problem persists, you can go ahead and remove all versions of Java from your computer entirely, including old versions, and then reinstall it.
- Search for and open Apps & Features.
- From the list, find Java. Right-click on it and select Uninstall.
- Once you have successfully uninstalled Java, go to this page to download the latest version of Java and install it.
- Check to see if you can start playing Minecraft without getting an exit code 1 error.
4. Disable Mods
Mods make playing Minecraft fun, but if they develop a problem, it affects your game and can cause problems such as the one that you’re facing now. Also, whenever Minecraft releases a new version, some mods become incompatible with the new version.
To know if your mods are the problem, you should try disabling any mod you may have installed on your computer. You can also remove it totally, to be sure. If you do not want to go to such an extent, you can check the error logs to see if a particular mod is causing the problem. Here is how to check the error logs for unstable mods:
- Open the Run dialog by pressing the Windows + R keys.
- Type %AppData% and click on Enter.
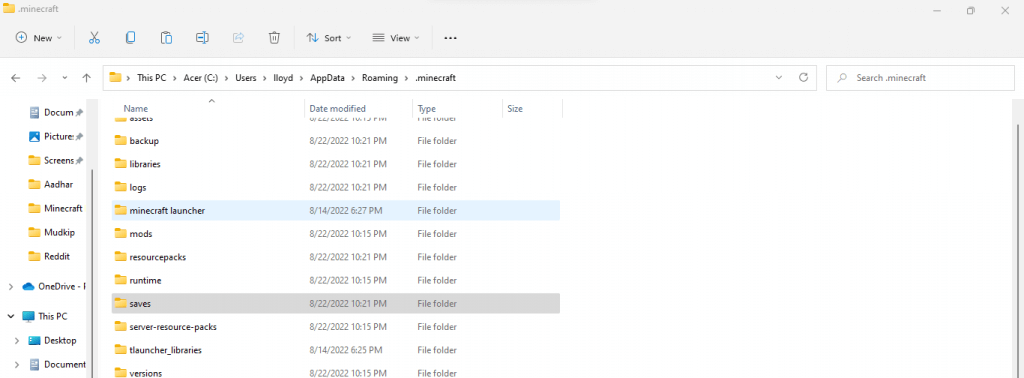
- Open the .minecraft folder.
- Click on the logs folder.
- Open the file titled latest.txt.
- Look over the log files carefully to see if there is any problem with any mod. If there is any such mod, remove it from Minecraft.
5. Update Graphics Card Drivers
The reason Minecraft is displaying an error may be because your graphics card driver is outdated. So what you have to do is update the graphics card driver to the latest version available. You can do this by following the simple steps explained below:
- Open the Run dialog by pressing the Windows + R keys.
- Next, type dxdiag in the box and press Enter.
- Go to the Display tab to see the graphics card driver information. There, you will see the version of the card driver you are using.
- Go to the website of the driver manufacturer and look for the latest version available. If yours is not the same, you should download the latest version and install it on your PC.
Open Minecraft and see if the error has been fixed.
Wrapping Up
When you receive an error in Minecraft stating that the “Game ended with bad state (exit code 1)”, you do not need to panic. What you should do, instead, is go through each of the solutions provided in this guide and see which works for the problem.
Nothing is more disappointing than trying to launch Minecraft, only to be presented with an error. Since it’s one of the most common error codes, let’s check out how to fix Minecraft error 1.
What Kind of Error Is Exit Code 1?
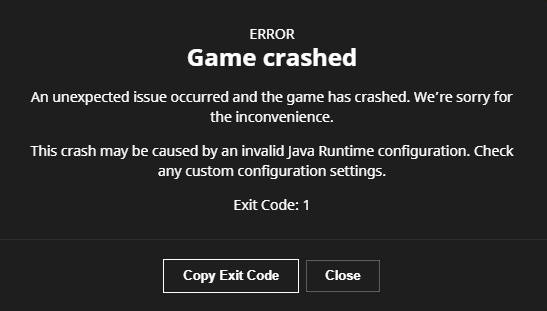
Game Crashed: Exit Code 1
Minecraft error 1, also known as exit code 1, simply means that the game couldn’t boot up. While this is very vague, 3 key aspects are usually at fault: your Minecraft settings, Java, or your PC.
As with most Minecraft errors, you should start by doing the following:
- Restart the Minecraft Launcher.
- Reboot your computer.
If these didn’t fix Minecraft error 1, you need to get into more advanced troubleshooting. Thankfully, we’ve narrowed down the solutions to just 4!
Disable Minecraft Mods
At first, you’ll have to check out if one of your Minecraft mods is preventing it from working. This is often an issue after an update since some mods are initially incompatible with the newer version.
To spot the mod that’s creating the issue, you’ll have to navigate to the logs:
- Press the Windows+R key, type “%AppData%” on the Run window, and press Enter.
- Navigate to the “.minecraft” folder.
- Click on logs → latest.log (or latest.txt)
Update Your Graphics Card Drivers
As with error 502, you’ll need to first update your GPU’s drivers. If you don’t have your card’s manufacturer program installed, you can find the drivers online:
Nvidia: https://www.nvidia.com/Download/index.aspx
AMD: https://www.amd.com/en/support
Intel: https://www.intel.com/content/www/us/en/download-center/home.html
Change the Java Executable Path
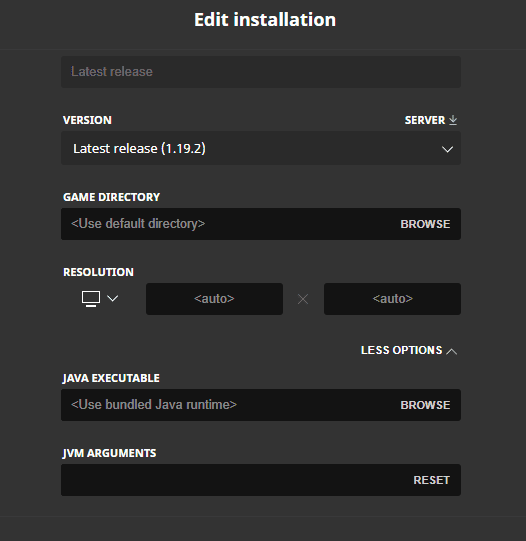
Changing the Java Executable Path on the Minecraft Launcher
If you’ve not managed to fix Minecraft error 1 yet, the issue might be Java-related. Exit code 1 often occurs when the Minecraft Launcher executes “javaw.exe” instead of “java.exe”.
To change the Java executable path, you’ll need to:
- Launch the Minecraft Launcher and navigate to “Installations”.
- Hover over the version you’re playing on, click on the 3 dots, and select “Edit”.
- At the bottom of the page, select “More Options”.
- Click on “Browse” under Java Executable.
- Select “java.exe” on the Minecraft Launcher folder (Minecraft Launcher\runtime\java-runtime-gamma\windows-x64\java-runtime-gamma\bin)
Reinstall Java
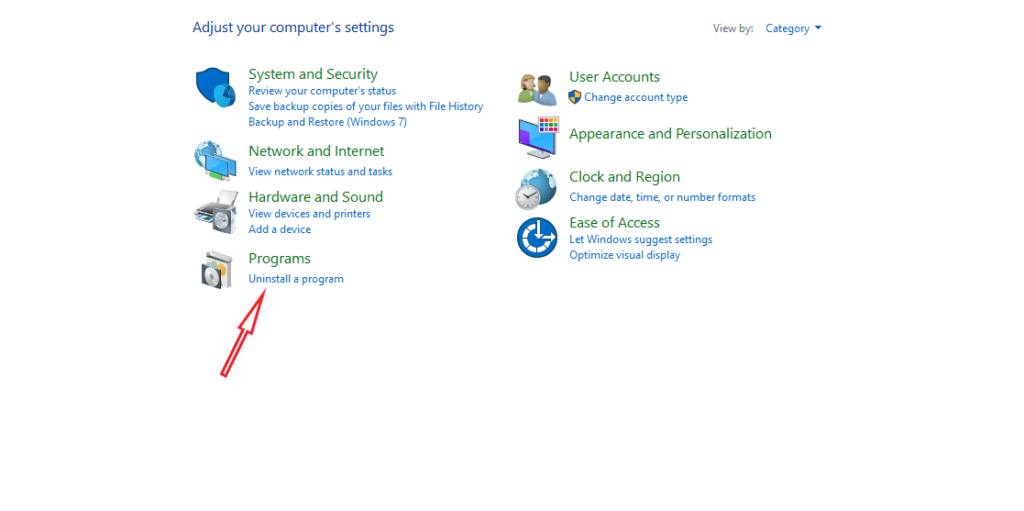
Uninstalling Java through the Control Panel on Windows
In case the above fix doesn’t work, you should reinstall Java. You can either do that by downloading Java’s uninstall tool or through the Control Panel, as shown above.
Change the Minecraft Launcher Path
Error 1 might come up if your Windows username has a special character. Fortunately, you can sort of bypass this issue by taking a “different route” to reach the Minecraft folder:
- Create a shortcut for “MinecraftLauncher.exe”.
- Right-click on the shortcut and click on “Properties”.
- Navigate to the “Shortcut” tab and spot the “Target” line.
- You’ll need to add the following at the end of the line and click OK: -workDir %ProgramData%.minecraft
Fixing the Minecraft Launcher Path
Reinstall Minecraft
If the issue persists, your last resort is to reinstall Minecraft. To do this, you must navigate to the Control Panel and uninstall the launcher. Then, you simply download your desired Minecraft version.
Conclusion
Hopefully, these fixes fix Minecraft error 1 and allow you to enjoy the game again. If you face any similar issues or want extra help, be sure to check out Minecraft Forum.
Minecraft is no stranger to crashes, and the “Exit Code: 1” error is a common issue. It usually indicates a problem with Java configuration. However, this glitch is relatively easy to fix.
A game crash with exit code 1 can also be caused by things like outdated video drivers or mod conflicts, or even an incorrect launcher path. So here are all the methods of fixing these issues in Minecraft Java Edition.
Fix 1: Reinstall Java
As the error code 1 primarily pertains to a Java configuration issue, that is the first thing to fix. Many guides will tell you to modify the Java executable path, though we recommend simply reinstalling Java completely.
This fixes any odd configuration problems, apart from upgrading the Java version. And to be clear, when we talk about reinstalling Java, we are referring to the Java Runtime Environment (JRE).
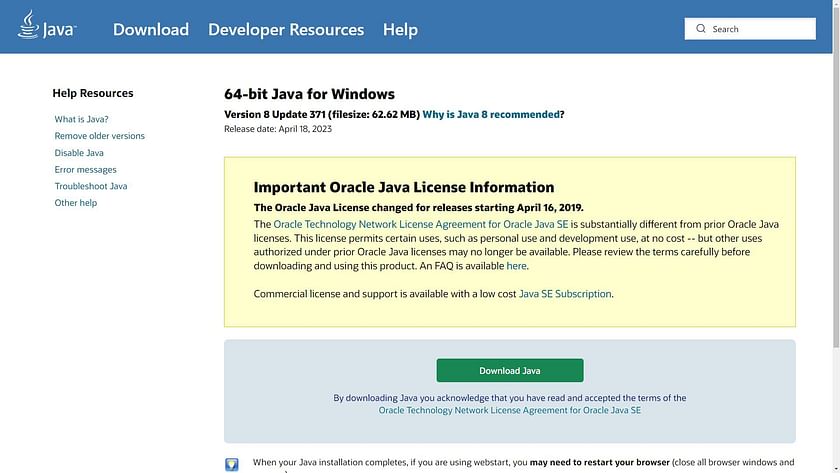
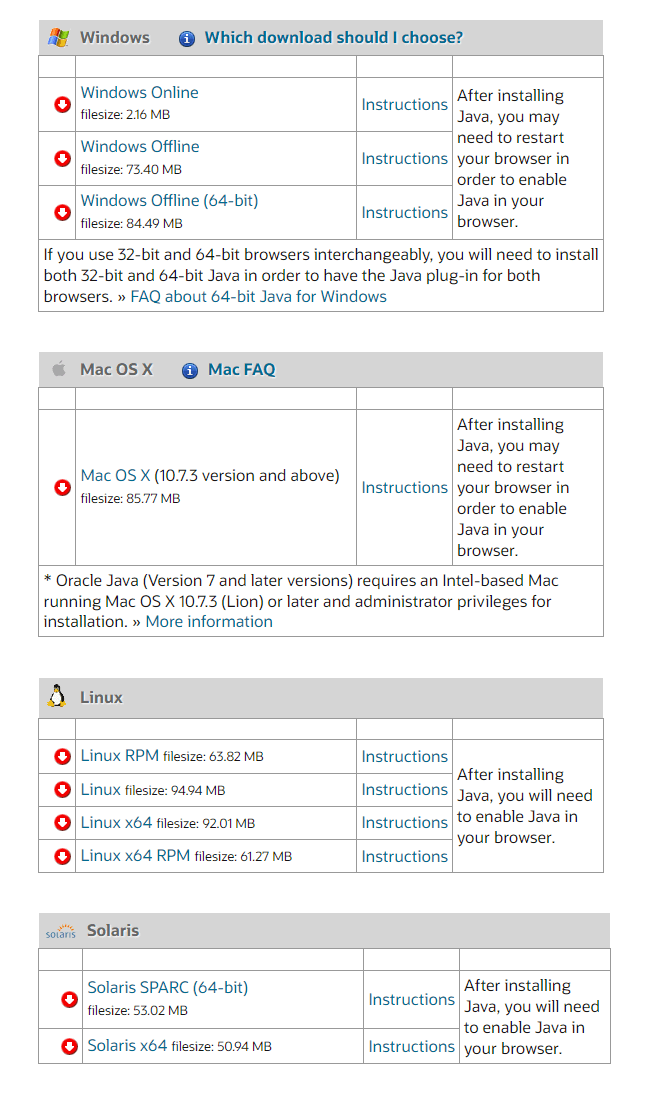
- To update Java, download the latest installer from the official download page. You can also get the same from Oracle’s website.
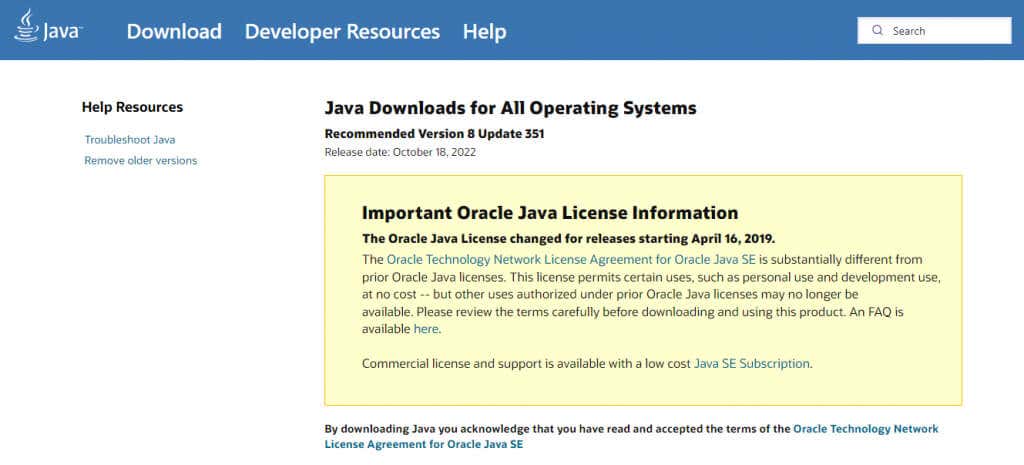
- There are versions of Java available for Microsoft Windows, Linux, and Mac OS. Choose the correct installer for your computer, getting the 64-bit version if applicable.
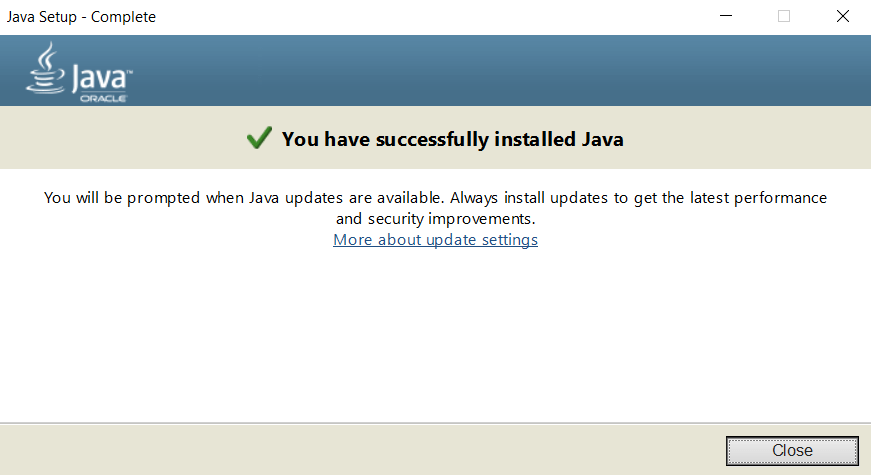
- Run the downloaded setup to install Java on your computer.
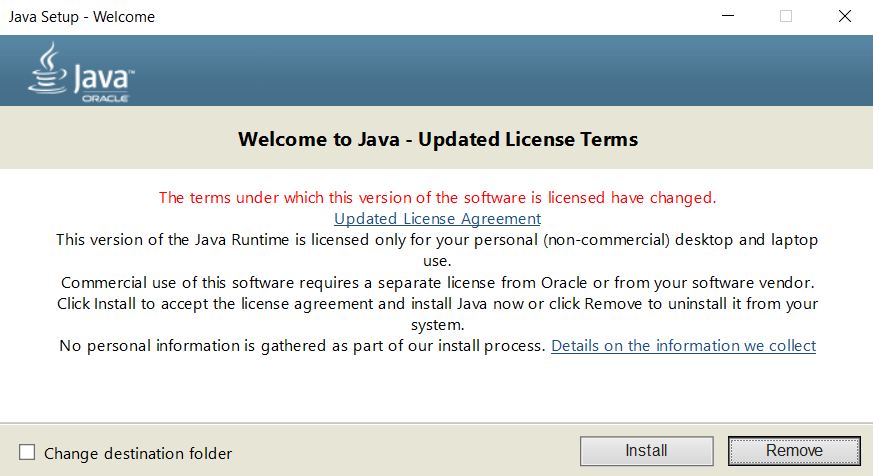
- Close the setup once the installation is complete.
Fix 2: Modify the Minecraft Launcher Path
The Minecraft game files aren’t the only component in the smooth running of the game. The Minecraft launcher is equally important and can cause crashes if it fails to connect with the exe file properly.
A very common glitch is for special characters in your User ID to mess up the Launcher path, preventing it from finding the game directory. Thankfully it’s easy to fix, requiring just a small addition to the shortcut target.
- To edit the Minecraft Launcher’s path, right-click on its shortcut on the desktop and select Properties.
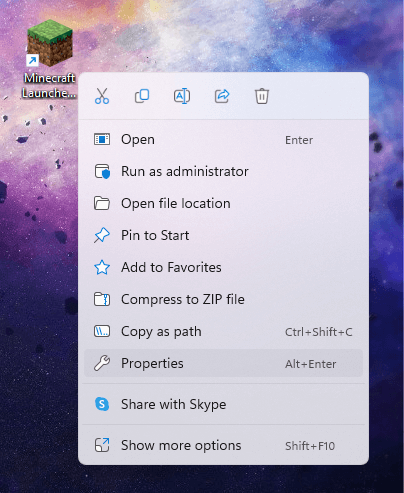
- Switch to the Shortcut tab in the Properties window.
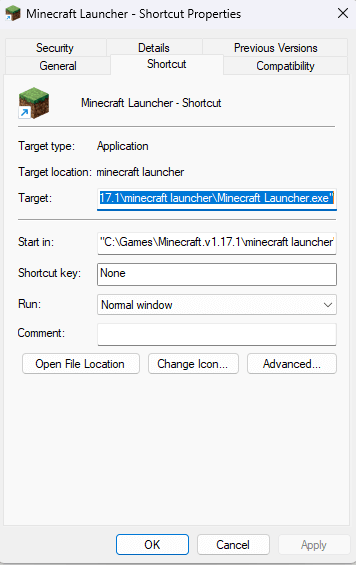
- Select the entry of the Target field and append –workDir %ProgramData%.minecraft at the end. Make sure not to wipe out the existing text. If you do, press Ctrl + Z to restore it.
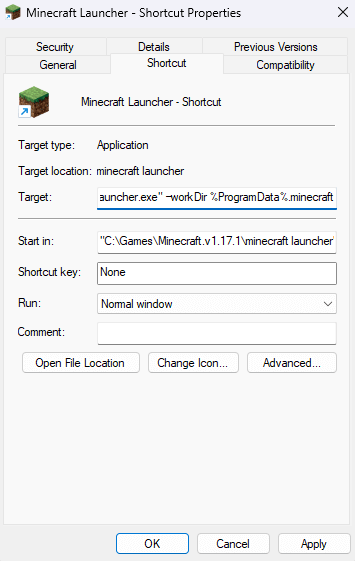
- Click on OK to close Properties and apply the changes.
Fix 3: Disable Mods
Minecraft is one of the most modded games out there. While the right mods can greatly elevate your gameplay experience, too many mods can crash the game as well.
Mod errors tend to be hard to diagnose, with the cumulative changes from multiple mod files triggering rare issues. This is why it’s always recommended to keep your mod list short.
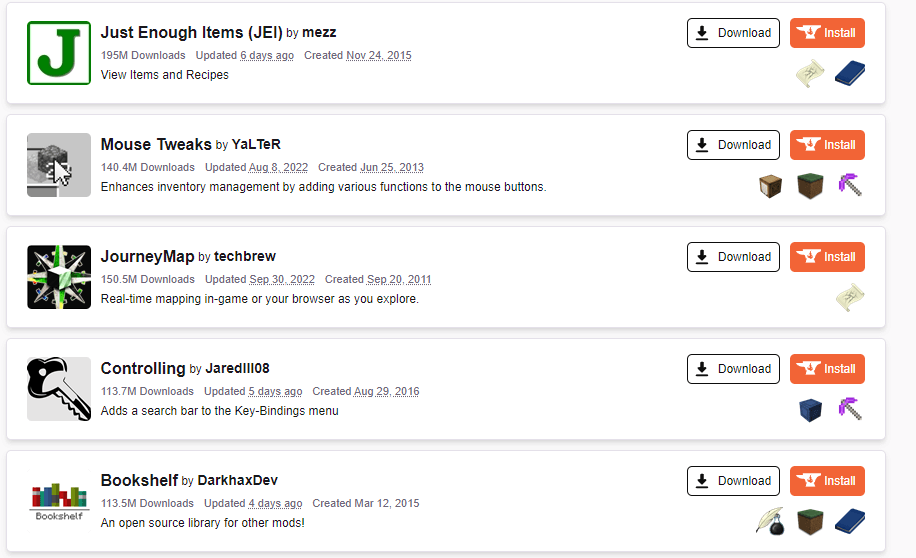
It’s a good idea to try running Minecraft without any mods whenever you’re facing any problems with the game. If things work out, you can try adding them back in one at a time until you find the mod causing the error.
Fix 4: Update GPU Drivers
Driver issues are a common cause of gaming errors, and Minecraft is no exception. Updating your graphic drivers to the latest version can fix many potential bugs with the game.
There are two main ways of updating the GPU drivers – uninstalling and reinstalling the video card in the Device Manager, or finding a package manually. We recommend the second method as it optimizes your drivers for your specific hardware.
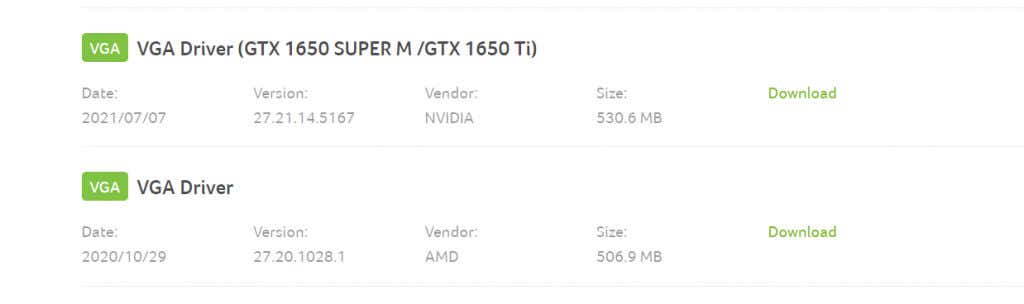
- To manually install the latest VGA drivers, navigate to the manufacturer’s website. Laptop brands like Acer, Lenovo, HP, etc. offer driver downloads for all of their models, while desktop users can head to Nvidia or AMD for their graphics card’s driver.
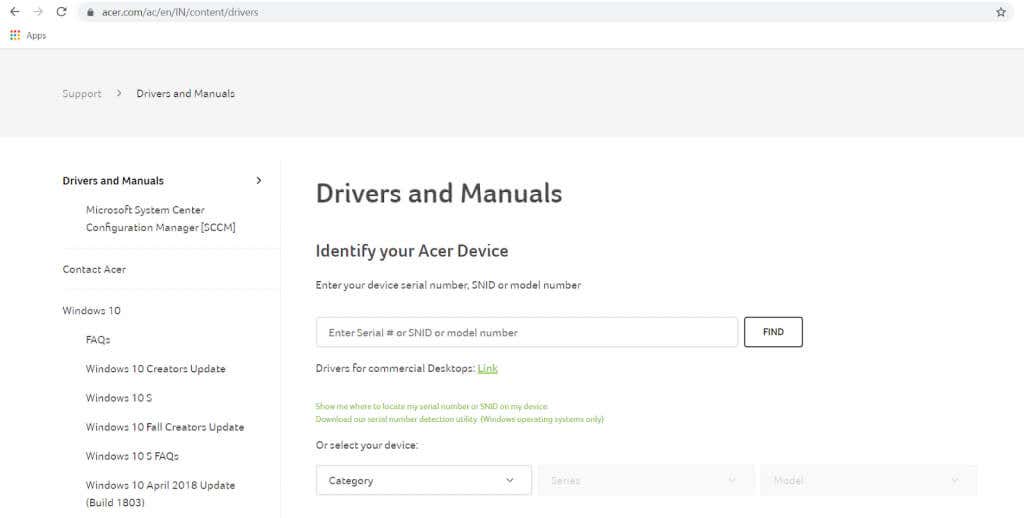
- You’ll need the model number of your laptop (or the graphics card) to find the correct drivers. You can find this underneath the laptop, or on the product box of your GPU.
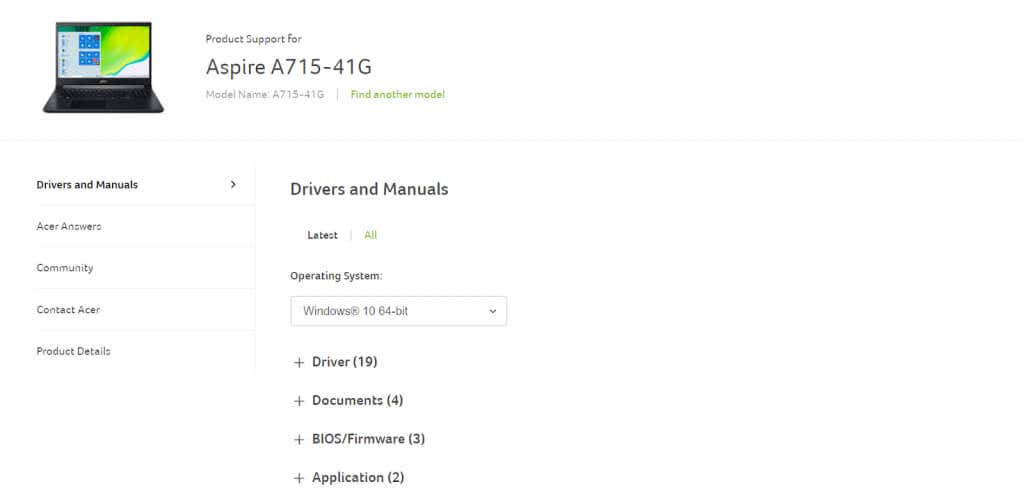
- Searching the manufacturer’s website for your laptop model should bring up a list of all compatible drivers. Scroll through to find the VGA drivers, often including the name of the graphic card.
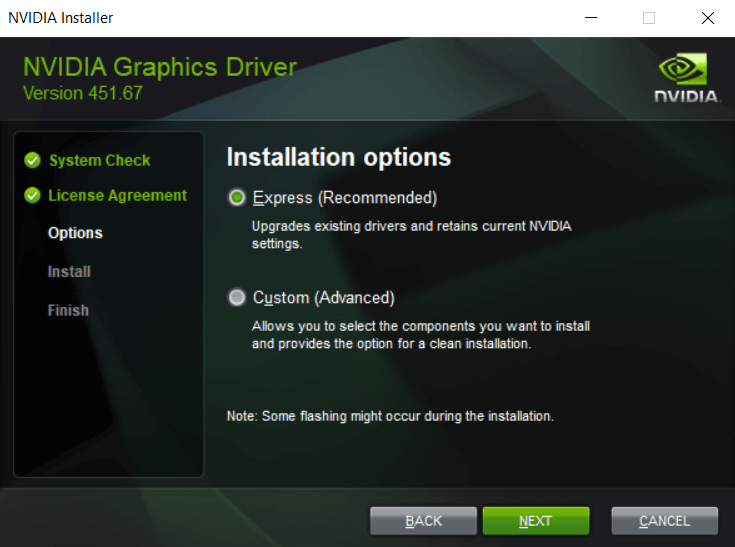
- No matter where you downloaded it from, the driver setup will be from the GPU manufacturer.
- There’s no risk of getting the wrong package – the setup automatically detects if your hardware is compatible with the driver, and only gives the option to proceed if everything lines up.
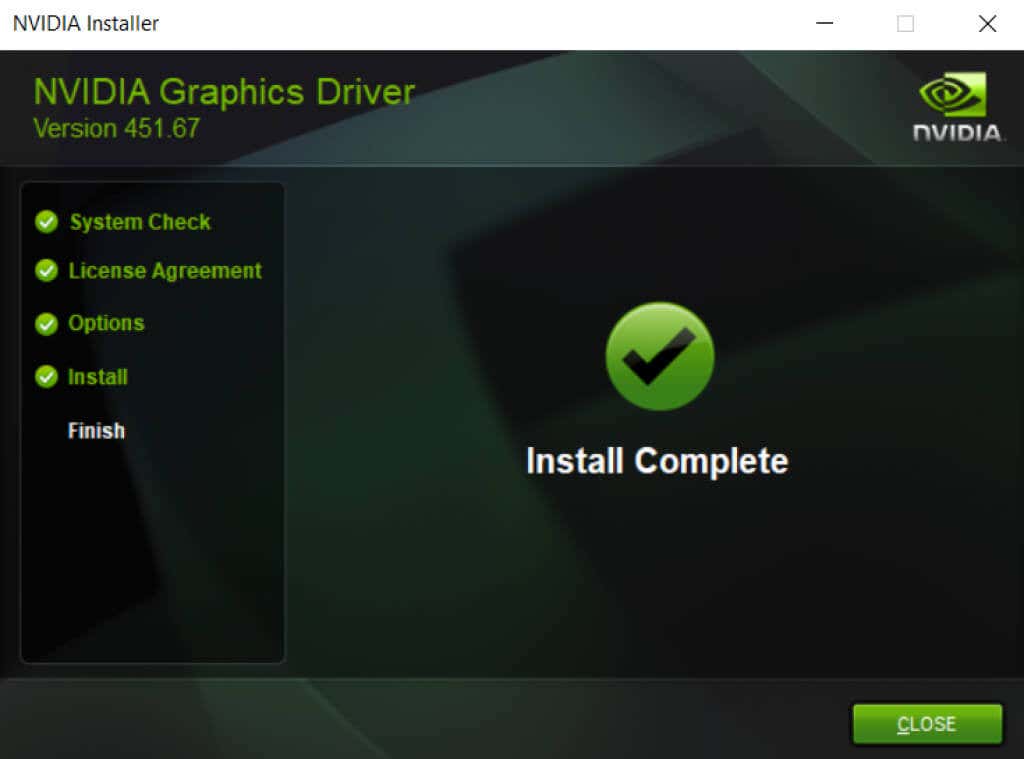
- Once installation is complete, restart your computer.
Fix 5: Reinstall Minecraft
No matter what the error is, reinstalling the game tends to fix many issues. And that’s true for all video games, not just Minecraft.
But Minecraft does not come with a convenient uninstaller to cleanly remove the game. You have to manually locate the game folder and delete it yourself.
- The Minecraft game folder is located in “C:\Users\UserName\AppData\Roaming\.minecraft,” where UserName should be replaced with your Windows account name. Note that the AppData folder is normally hidden, so you need to Show Hidden Files to be able to navigate to it manually.
- You can also use Run to open the game folder straightaway. Open the Run utility by searching the Start Menu and enter %appdata%\.minecraft.
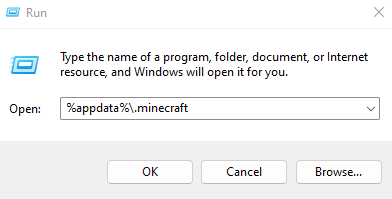
- Though our aim is to delete the Minecraft folder, take a moment to first copy the saves folder to another location on the disk. This backup will be useful to restore your progress after reinstalling Minecraft.
- Now delete the folder and install Minecraft again from Mojang’s official website.
What Is the Best Way of Fixing Minecraft Exit Code: 1?
There is no silver bullet that can fix every possible cause of the Minecraft 1 error code. What you need is to try multiple solutions until the game works smoothly again.
The first step is to update things. Update Java, update the GPU drivers, and update Minecraft. That fixes a majority of problems with the game.
If Minecraft still crashes with an exit code 1, try reinstalling the game to replace any potentially corrupted files. Make sure the launcher can find the game directory, and you shouldn’t have any issues.