The 0x8024401f error code is usually due to connectivity issues
by Matthew Adams
Matthew is a freelancer who has produced a variety of articles on various topics related to technology. His main focus is the Windows OS and all the things… read more
Updated on
- The Windows Update error 0x8024401f is usually caused by network connectivity problems.
- Resetting the Windows Update service may fix the problem quickly.
XINSTALL BY CLICKING THE DOWNLOAD FILE
Repair all Windows Updates Errors with Fortect:
SPONSORED
Windows update failures can be annoying! With Fortect, you will get rid of errors caused by missing or corrupted files after an update. The utility maintains a repository of the original Windows system file versions, and it uses a reverse algorithm to swap out the damaged ones for good ones.
- Download Fortect and install it on your PC
- Start the tool’s scanning process to look for corrupt files that are the source of the issues
- Right-click on Start Repair to resolve security and performance issues with your computer
- Fortect has been downloaded by 0 readers this month, rated 4.4 on TrustPilot
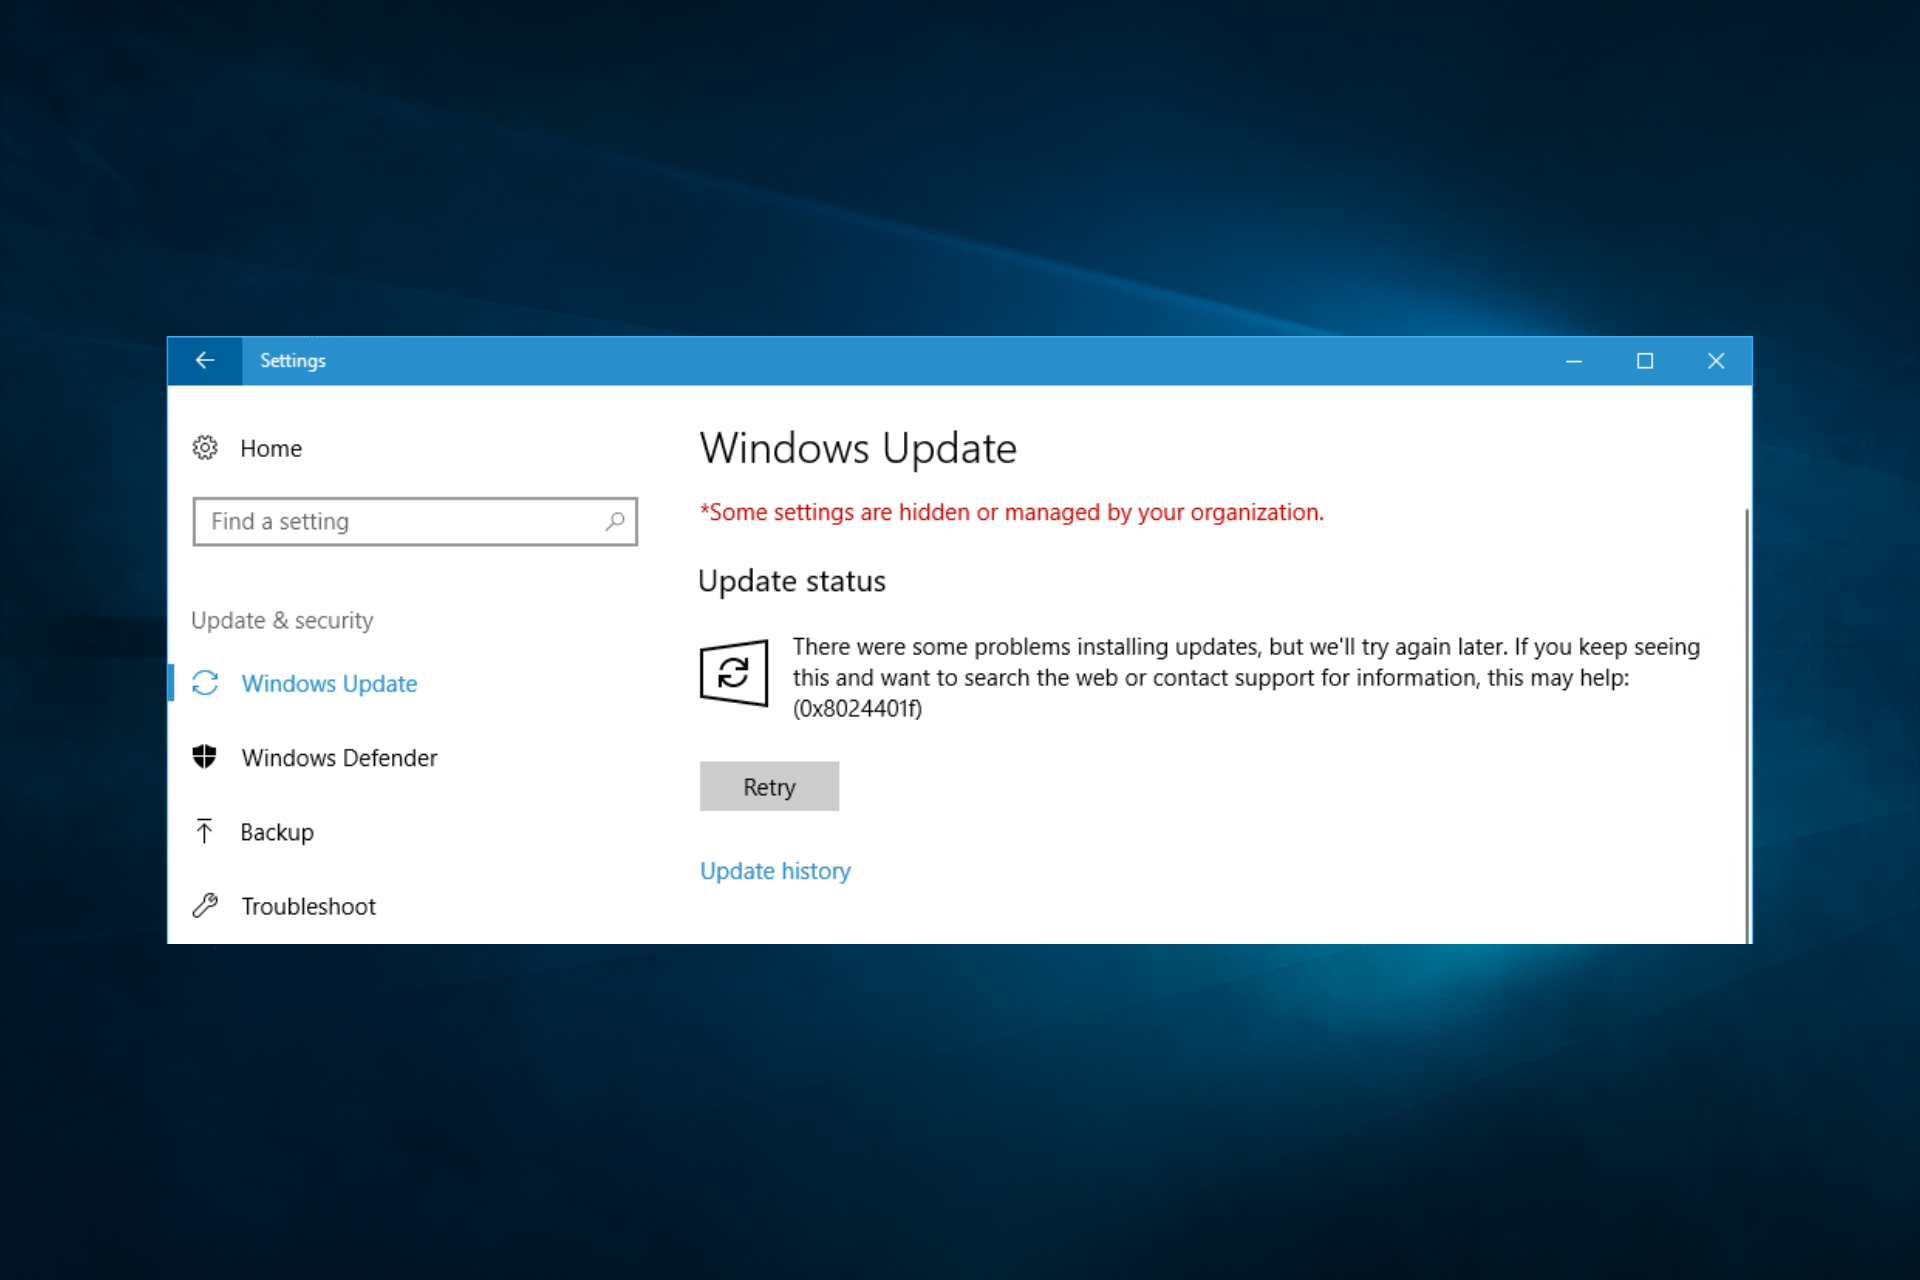
The Windows Update error 0x8024401f has been discussed in numerous Microsoft forum threads. That issue arises when users check for Windows updates via Settings. Error 0x8024401f can also arise when users try to update apps via Microsoft Store.
As a result, Windows and app updates aren’t installed. The resolutions below are primarily for fixing error 0x8024401f in Windows 10, they might also resolve the issue in 8.1 and 11 using this guide.
What causes the Windows Update Error 0x8024401f?
Several potential causes for a Windows update error with the code 0x8024401f. Here are some common ones:
- Network connectivity issues – If your computer cannot connect to the internet or the update servers, it can cause the update to fail with this error.
- Firewall or antivirus software – If your firewall or antivirus software is blocking the update, it can cause this error. You may need to temporarily disable these programs to see if they are causing the issue.
- Insufficient hard drive space – If your hard drive is full or almost full, it can cause the update to fail. Make sure you have enough free space on your hard drive before installing the update again.
- Corrupted update files – Sometimes, the update files can become corrupted during the download process. You may need to delete the temporary update files and try downloading the update again.
- Corrupted system files – If your system files are corrupt, it can cause the update to fail. You may be able to fix this by running the System File Checker tool.
- Pending updates – If other updates are waiting to be installed, it can cause this error. Make sure to install any pending updates before installing the update causing the issue.
These are some of the most common causes of this error. I hope this helps!
How do I fix the Windows Update error 0x8024401f?
- What causes the Windows Update Error 0x8024401f?
- How do I fix the Windows Update error 0x8024401f?
- 1. Run the Windows Update troubleshooter
- 2. Turn off third-party antivirus software
- 3. Don’t utilize a proxy server
- 4. Reset Windows Update
- 5. Reset the Microsoft Store cache
- 6. Reset your Windows OS
1. Run the Windows Update troubleshooter
Windows Update troubleshooter doesn’t always fix update errors, but it’s still worth a shot nonetheless.
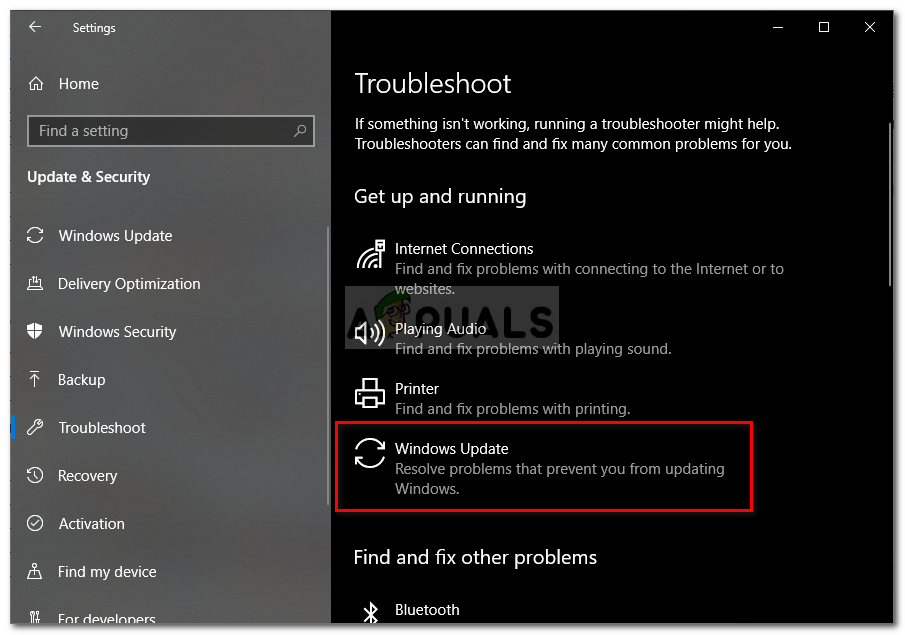
- Press the Windows key + S keyboard shortcut to open the Type here to search box.
- Input troubleshoot in the search box, and click Troubleshoot settings.

- Next, click Windows Update and select its Run the troubleshooter option.

- Click the Apply this fix option if the troubleshooter presents a resolution to you.


2. Turn off third-party antivirus software
Some users have said they fixed error 0x8024401f by disabling their third-party antivirus software, such as Comodo, McAfee, and Sophos. To do so, right-click the system tray icon for your antivirus software to open a context menu.
You can usually select a disable or turn off option on an antivirus utility’s context menu. In addition, select an option to disable the utility’s firewall if its context menu includes one.

If you discover that the antivirus is causing the problem, then you should consider getting a better antivirus.
- Windows 11 23H2: Top Features, coming September 26
- Adding layers in Windows 11’s Paint greatly increases RAM usage
- How to copy texts from images with Snipping Tool’s Text Action
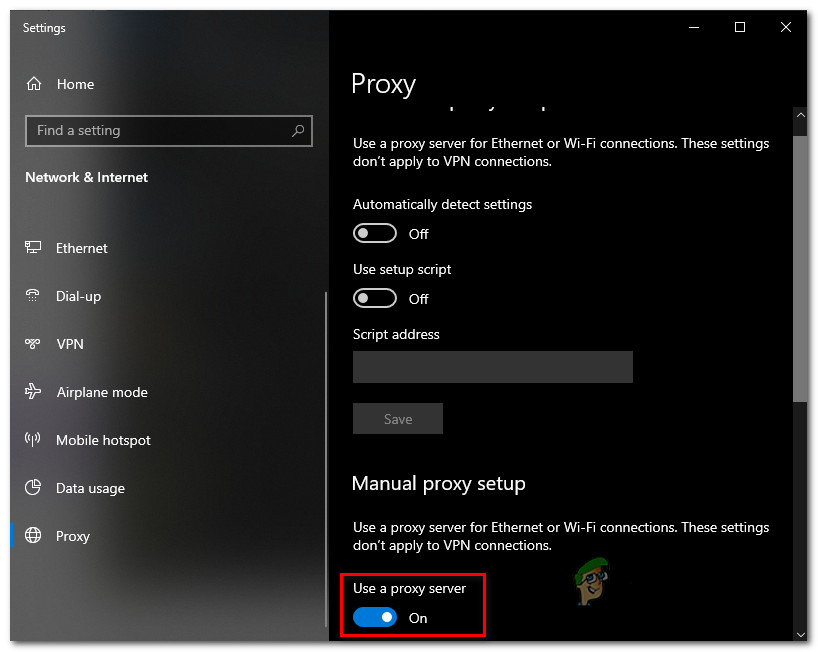
3. Don’t utilize a proxy server
- Click the Type here to search button (with the magnify glass icon) on the taskbar and type proxy.
- Click Proxy settings to open the window in the shot directly below.
- Toggle the Use a proxy server option off.

4. Reset Windows Update
- To do that, enter Command Prompt in the Type here to search box.
- Right-click Command Prompt and choose the Run as administrator option.
- Input these separate commands:
net stop wuauserv net stop cryptSvc net stop bits net stop msiserver
- Open the C: > Windows folder within File Explorer.
- Right-click the SoftwareDistribution subfolder there to select Rename.

- Input SoftwareDistribution.old as the new folder title, and press the Return key.
- Open the System32 folder, which is in the Windows folder.

- Then rename the catroot2 subfolder to Catroot2.old.
- Open an elevated Command Prompt window again.
- Enter these commands to restart the services:
net start wuauserv net start cryptSvc net start bits net start msiserver
- Close the Command Prompt, and restart Windows.


5. Reset the Microsoft Store cache
If you need to fix error 0x8024401f for MS Store app updates, open the Command Prompt as administrator. Then enter this command: wsreset.exe. Press the Return key after entering that command.

6. Reset your Windows OS
- Type the keyword reset in Windows 10’s search box.
- Click Reset this PC to open the Recovery tab in Settings.
- Click Get started to open Reset this PC.

- Click the Keep my files option.
- Click Next to continue, and press the Reset button.


A few users have also confirmed that resetting Windows 10 can fix error 0x8024401f.
Those are some of the most likely fixes for error 0x8024401f. We would like to know which solutions worked best for you, so leave us your feedback in the form of a message in the comments section below.
![]()
Сообщение с ошибкой 0x8024401f появляется при установке обновлений Wndows. Она означает, что в серверном наборе Internet Information Services (IIS) возник сбой во время обработки запроса на загрузку файлов апдейтов. Чаще всего ошибка возникает при обновлении не с общедоступных серверов Microsoft, а с хранилищ внутри рабочих сетей
Как исправить ошибку 0x8024401f?
Решается неисправность следующими методами:
- Убедитесь, что внутри IIS нет дублей MIME-типов. Для этого обратитесь к администратору корпоративной сети, чтобы он удалил все дубликаты. Рекомендуем приложить к этому скриншот с ошибкой — в развернутом виде там должны быть указаны, касательно каких именно MIME-типов есть лишние копии.
- Проверьте, что рабочий ПК имеет доступ к корпоративному серверу WSUS. Для этого введите в адресную строку стандартного Проводника ОС следующий адрес и перейдите по нему: \\ххх\WsusContent, где ххх — обозначение сервера WSUS рабочей сети. Если это не увенчалось успехом, то необходимо обратиться к администратору с просьбой о предоставлении соответствующего доступа. Если же ресурс доступен, но ошибка не исчезает, то опять не обойтись без администратора сети. Пусть он запустит на сервере через Командную строку запрос C:\Program Files\Update Services\Tools\wsusutil reset. Далее на проблемном ПК в Командной строке под правами администратора нужно ввести запрос run net stop wuauserv, и подтвердить выполнение действия нажатием на Enter. После перегрузки ОС это должно устранить ошибку 0x8024401f.
Some Windows users have been reaching us with questions after being unable to update their OS build to the latest version available. Most users are reporting that they see the error message 0x8024401f after they click the Check for Updates button. Other users are encountering this issue while trying to update a UWP app via the Windows Store. As it turns out, the issue is not exclusive to a certain Windows version as it’s confirmed to appear on Windows 7, Windows 8.1 and Windows 10.
What is causing the Windows Update error 0x8024401f?
We investigated this particular by analyzing various user reports and by trying out different fixes that other users in a similar situation have successfully deployed to fix this particular problem. As it turns out, this error code can be caused by a collection of different culprits. Here’s a shortlist of scenario in which the 0x8024401f error code might occur:
- 3rd party security interference – An overprotective suite can also be responsible for this particular error code. Sophos, McAfee and a couple of others are potential suspects that are commonly pointed out as culprits that will trigger this behavior. If this scenario is applicable, you can fix the issue entirely bu disabling the real-time protection while installing the update or by uninstalling the security suite altogether.
- Bad Windows update – There are a couple of bad Windows updates with the potential of introducing this particular error. Fortunately, Microsoft has released a hotfix for this issue several weeks after the problem was first introduced. To take advantage of it, simply run the Windows Update troubleshooter and apply the recommended hotfix.
- Corrupted Windows Store cache – If you’re seeing this particular error code while trying to update a UWP application, chances are you’re dealing with a corrupted Windows Store cache. If this scenario is applicable, you will be able to resolve the issue by resetting the Windows Store cache. You can do this either via the Windows GUI or via a CMD terminal.
- Interfering Proxy or VPN connection – A private connection maintained via a proxy server or a VPN solution might prompt the Windows installation agent to determined that your connection is unsafe and refuse to update through the official channels. In this case, you can eliminate the security roadblocks and allow the installation to take place by disabling/ uninstalling the Proxy server or VPN client.
If you’re currently struggling to resolve the very same 0x8024401f error code, this article will provide you with a couple of different repair strategies that you can use to troubleshoot the issue away. Down below. you’ll find several different methods that have been confirmed to be effective by other affected users.
To remain as efficient as possible, we advise you to follow the potential fixes below in the same order that they are arranged in. To make the whole process as efficient as possible, we arranged the methods based on difficulty and efficiency. Eventually, you should stumble upon a fix that will fix the problem regardless of the culprit responsible for the error.
Method 1: Disabling / Uninstalling 3rd party AV
One of the most probable causes that will trigger the 0x8024401f error code when trying to install a pending Windows update is an overprotective AV suite. Sophos, McAfee, AVAST, Comodo and a couple of other 3rd party security suite we’re singled out by affected users as being responsible for this issue.
If this scenario is applicable, you will be able to resolve the issue by either disabling the real-time protection of the AV or by uninstalling it all together and revert to the default security program (Windows Defender).
If you’re currently using a 3rd party suite and you’re suspecting that it might be responsible for the apparition of the 0x8024401f error code, you should start by disabling the real-time protection. Of course, the steps of this procedure will be different depending on which AV suite you’re using, but you can typically do it directly from the taskbar context menu.

If disabling the real-time protection didn’t resolve the issue for you, it doesn’t mean that the issue is not being caused by an overprotective AV suite. Certain security solutions (particularly ones that include a Firewall) will maintain some security suites even in those instances where the user disables the real-time protection.
With this in mind, the only way to ensure that the issue is not being caused by a 3rd party suite is to uninstall the program altogether and follow the steps necessary to ensure that you’re not leaving behind any leftover files. If you decide to go the radical route, you can follow this article (here) to completely uninstall your AV suite without leaving behind any leftover files.
Once you remove the 3rd party AV, restart your computer and see if the issue is resolved at the next system startup. If the 0x8024401f error code is still occurring when you try to install a pending update, move down to the next method below.
Method 2: Running the Windows Update troubleshooter
As it turns out, if the issue was introduced by another bad Windows Update, chances are your OS is capable of resolving the issue automatically. On Windows 10, Microsoft has released a hotfix for this particular issue via an automated repair strategy included inside the Windows Update troubleshooter.
Several users that were also struggling to resolve the 0x8024401f error code have reported that the issue was resolved entirely after they ran the Windows Update troubleshooter. For some of them, this procedure ended up fixing the problem automatically.
The Windows Update troubleshooter is a built-in utility that contains a wide selection of repair strategies that will be enforced automatically if a covered problem is identified. Here’s a short guide on running the Windows Update troubleshooter:
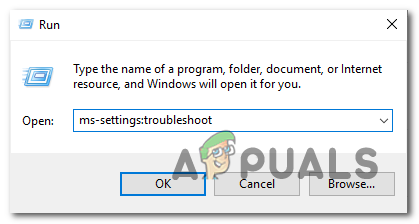
- Press Windows key + R to open up a Run dialog box. Next, type “ms-settings:troubleshoot” and press Enter to open up the Troubleshooting tab of the Settings app.

Opening the Troubleshooting tab of the Settings app via a Run box - Once you’re inside the Troubleshooting tab, move your mouse cursor to the right-hand section of the screen and navigate to the Get up and running section. When you get there, click on Windows Update, then click on Run the troubleshooter.

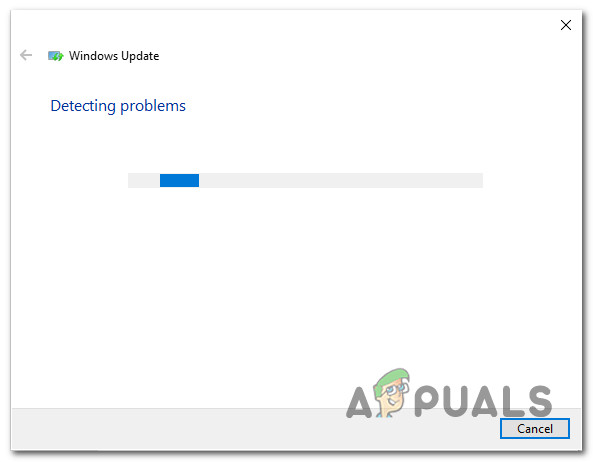
Running Windows Update Troubleshooter - Once the utility is started, wait patiently until the initial scan is complete. This process will determine whether any of the repair strategies included with the utility apply to the problem that you’re dealing with.

Detecting problem with Windows Update - If a suitable fix is identified, you will be presented with a window in which you can click on Apply this Fix to enforce the repair strategy. Depending on the type of fix, you might need to follow some additional steps to enforce the repair strategy.

Apply this fix - Once the fix is enforced, restart your computer once again and see if the issue is resolved at the next system startup.

If the same 0x8024401f error code is still occurring, move down to the next method below.
Method 3: Resetting the Windows Store cache
If you’re encountering the 0x8024401f error code while trying to update a UWP (Universal Windows Platform) app via Windows Store, chances are the updating process is being stopped by some degree of corrupted system files.
After looking at various occurrences of this kind, it seems like in most cases, the issue appears after a security scanner ends up quarantining some items essential to the updating process. Another possible scenario is a botched update that ended up botching the installation of the new Microsoft Store version.
Several users that were also encountering this issue have reported that they managed to fix the 0x8024401f error by resetting Windows Store and all associated components.
There are two ways of resetting the Windows Store cache on Windows 10. Even though the first option is quicker, it involves doing things from a CMD terminal. If you’re not confident with the CMD terminal or using commands to get the job done, then the second option might be more appealing since it allows you to perform the whole operation from the Windows GUI.
Feel free to follow whichever method you feel more comfortable with:
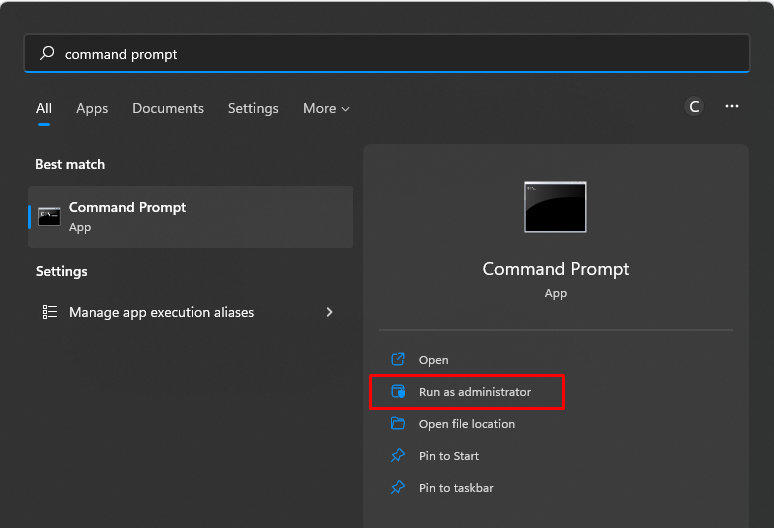
Resetting Windows Store cache via CMD
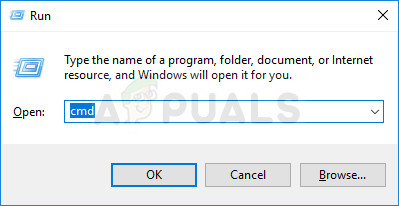
- Press Windows key + R to open up a Run dialog box. Next, type ‘cmd’ inside the text box and press Ctrl + Shift + Enter to open up a Command Prompt with administrative privileges. When prompted by the UAC (User Account Control), click Yes to grant admin access.

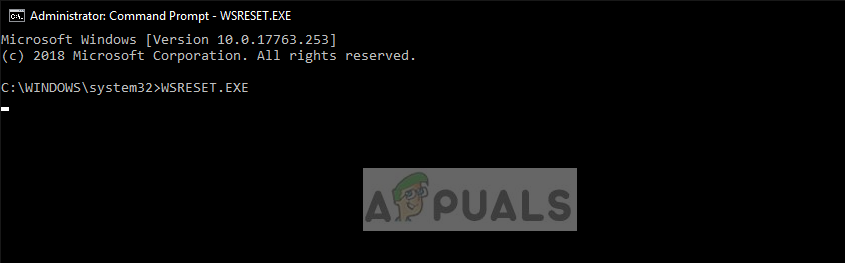
Running Command Prompt as an administrator - Once you’re inside the elevated Command Prompt, type the following command and hit Enter to reset Windows Store along with all dependencies:
wsreset.exe

Resetting Windows Store - After the command is processed successfully, restart your computer and see if the issue is being resolved at the next system startup.
Resetting the Windows Store cache via the Settings app
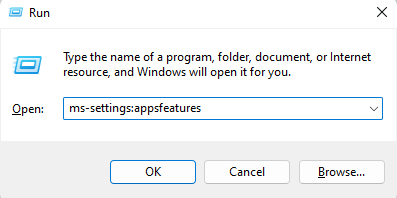
- Open a Run dialog box by pressing Windows key + R. Then, type “‘ms-settings:appsfeatures” and press Enter to open up the Apps & Features menu of the Settings app.
- Once you’re inside the App & Features screen, scroll down through the list of installed UWP applications and locate the Microsoft Store entry.
- After you manage to find the correct application, click on the Advanced options hyperlink associated with it (under Microsoft Corporation).
- Once you’re inside the Advanced options menu of the Microsoft Store, scroll down to the Reset tab and click on the Reset button to initiate the process of clearing the cache.
- Wait until the process is complete, then reboot your machine and see if the issue is resolved at the next system startup.

If you’re still encountering the 0x8024401f error code even after resetting the cache of Windows Store, move down to the next method below.
Method 4: Disabling Proxy server VPN client (if applicable)
If you’ve come this far without a result and you’re using a proxy server or a VPN solution to maintain your surfing anonymity, chances are your proxy/VPN is conflicting with the Windows Update client. You may be encountering the 0x8024401f error code because the Windows installation agent does not trust your private connection, so the update is never allowed to be installed.
If this scenario applies to your current scenario, you will be able to resolve the issue by disabling/ uninstalling the Proxy server or VPN client. After doing this and restarting your computer, the installation agent will have no reason not to trust your connection and will allow the Windows/ app update to be installed.
Depending on if you’re using a Proxy server or a VPN client, follow the guide applicable towards stopping the private connection:
Disabling the Proxy Server
- Press Windows key + R to open up a Run dialog box. Next, type “ms-settings:network-proxy” inside the text box and press Enter to open up the Proxy tab of the Network & Internet settings menu.

Opening the Proxy menu via a Run command - Once you’re inside the proxy menu, move to the right section of the screen, then scroll down to Manual Proxy Setup.
- When you arrive at the Manual proxy setup section, simply disable the toggle associated with Use a proxy server.

Disabling the use of a proxy server - Restart your computer and see if the error is resolved at the next system startup.

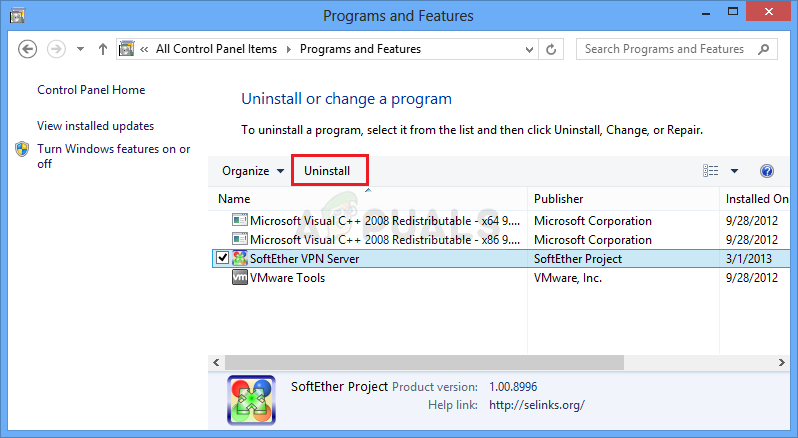
Uninstalling the VPN client
- Open a Run dialog box by pressing Windows key + R. Then, type “appwiz.cpl’ and press Enter to open up the Programs and Features window.
Type appwiz.cpl and Press Enter to Open Installed Programs List - Once you’re inside the Programs and Features screen, scroll down through the list of installed applications and locate the 3rd party VPN client solution that you’re currently using. When you see it, right-click on it and choose Uninstall from the context menu.

Uninstalling a VPN tool - From the uninstallation screen, follow the on-screen prompt to complete the uninstallation, then restart your computer and see if the issue has been resolved at the next system startup.

Question
Issue: How to fix Windows update error 0x8024401F?
Hello, I have issues with installing Windows updates because of the 0x8024401F error. Any ideas on how to fix this? I’m running Windows 10 version 21H2.
Solved Answer
Windows updates are an integral part of maintaining the efficiency, security, and smooth performance of your computer. Microsoft routinely rolls out these updates to provide new features, fix bugs, and patch potential security threats. However, at times, users might encounter hiccups in this seemingly simple process due to various issues. One such common stumbling block is the Windows update error 0x8024401F.
This error is typically caused by a miscommunication between your computer and the Microsoft update service, or it may be due to corrupted system files preventing the download or installation of updates. A myriad of other factors like network issues, firewall or antivirus settings, and misconfigured system settings can also lead to this problem, making it sometimes challenging to pinpoint the exact cause.
Despite the complications, the solutions to resolve this issue are straightforward and often successful. A preliminary step includes running the Windows Update Troubleshooter, a tool integrated into the Windows operating system designed to detect and fix common issues related to Windows updates automatically.
If the troubleshooter doesn’t fix the problem, you might need to dive a little deeper by resetting the Windows update components manually. This process involves stopping the Windows Update Services, clearing the SoftwareDistribution folder, and then restarting the Update Service.
Another potential solution is performing a Clean Boot. This action minimizes the number of applications and services that start when Windows boots up, enabling you to identify and solve conflicts that may occur between programs, services, and update processes.

Detailed instructions for each of these solutions can be found below the article. They will guide you through each process step-by-step, so you don’t need to be a tech whiz to fix the issue.
In case the manual troubleshooting seems a bit too overwhelming or doesn’t solve the problem, you can utilize a PC repair tool like FortectMac Washing Machine X9. This software can automate several of the troubleshooting steps mentioned above, simplifying the process and increasing the chances of fixing the Windows update error 0x8024401F, ensuring a smooth and hassle-free update experience.
Fix 1. Run the Windows Update Troubleshooter
Fix it now!
Fix it now!
To repair damaged system, you have to purchase the licensed version of Fortect Mac Washing Machine X9.
The Windows Update Troubleshooter is an in-built tool that can automatically find and fix some common problems with Windows Update. Here’s how to use it:
- Type Troubleshoot into the Windows search bar and press Enter.
- Next, on the right side of the window, select Additional troubleshooters/Other troubleshooters.
- Scroll down to locate the Windows update option and click on it.
- Click on Run the troubleshooter/Run and allow the process to complete.
- Once it is finished, implement any recommended fixes and restart your PC.

Fix 2. Reset Windows Update Components
Fix it now!
Fix it now!
To repair damaged system, you have to purchase the licensed version of Fortect Mac Washing Machine X9.
Resetting Windows Update components involves manually stopping services that Windows Update relies on, clearing temporary files, and restarting the services.
- Type cmd in Windows search.
- Right-click on Command Prompt and pick Run as administrator.
- Copy and paste the following commands one by one in Command Prompt and press Enter after each:
net stop wuauserv
net stop cryptSvc
net stop bits
net stop msiserver
Ren C:\Windows\SoftwareDistribution SoftwareDistribution.old
Ren C:\Windows\System32\catroot2 Catroot2.old - When these commands are executed, the last thing to do is to re-enable relevant services:
net start wuauserv
net start cryptSvc
net start bits
net start msiserver - Reboot your device.

Fix 3. Perform a Clean Boot
Fix it now!
Fix it now!
To repair damaged system, you have to purchase the licensed version of Fortect Mac Washing Machine X9.
A Clean Boot starts the system with minimal drivers and startup programs. This helps eliminate software conflicts that occur when you install a program or an update.
- Press Win + R, type msconfig, then press Enter.
- Select the Services tab and tick the Hide all Microsoft services checkbox.
- Pick Disable all.
- Go to the Startup tab and click Open Task Manager.
- Here, right-click on each of the non-Windows entries and select Disable.
- Close down the Task Manager.
- Go to the Boot tab and tick the Safe boot option
- Restart your system.

Fix 4. Clean temp files
Fix it now!
Fix it now!
To repair damaged system, you have to purchase the licensed version of Fortect Mac Washing Machine X9.
Disk Cleanup is a built-in tool in Windows that removes unnecessary files from your hard drive. It can also help in resolving the Windows Update error by clearing out old, unnecessary update files.
- Type Disk Cleanup in Windows search and hit Enter.
- If your Windows is installed on drive C, pick it from the list (it should be by default) and press OK.
- Click Clean up system files.
- Select your main disk again and click OK.
- Here, select the largest portions of the data used – these typically include Temporary Internet Files, Windows Update, Temporary Files, Recycle Bin, Delivery Optimization Files, and others.
- Click OK – the process should be finished shortly.
Fix 5. Temporarily disable antivirus
Fix it now!
Fix it now!
To repair damaged system, you have to purchase the licensed version of Fortect Mac Washing Machine X9.
Sometimes, your antivirus software can interfere with the Windows Update process. Disable it temporarily and see if the error persists.
- Locate your antivirus icon in the system tray, right-click on it, and select “Disable,” “Stop,” “Shut down,” or something similar (each antivirus has its way of disabling it).
- Try updating Windows again.
Fix 6. Update Drivers
Fix it now!
Fix it now!
To repair damaged system, you have to purchase the licensed version of Fortect Mac Washing Machine X9.
Outdated drivers can cause conflicts with Windows Update. Make sure all your drivers are updated.
- Right-click on the Start button and select Device Manager.
- Expand one of the categories to find the name of your device, then right-click it and select Update Driver.
- Select Search automatically for updated driver software.
- Repeat the process for all devices.
- Once done, reboot your PC.

Fix 7. Install the update manually
Fix it now!
Fix it now!
To repair damaged system, you have to purchase the licensed version of Fortect Mac Washing Machine X9.
If installing the update automatically doesn’t work, use the manual method instead:
- Type in Updates in Windows search and press Enter.
- Select View update history.
- Find the update that failed with the 0x8024401F error code and copy its KB number.
- Open your browser and go to Microsoft Update Catalog.
- Within the search bar, type in the KB number and clicks Search.
- Find the correct version of the update for your operating system (to check this, right-click on Start and pick System. Under Device specifications and check the System type) and click Download.
- Use on-screen guidelines to finish the installation process and restart your computer.

Repair your Errors automatically
ugetfix.com team is trying to do its best to help users find the best solutions for eliminating their errors. If you don’t want to struggle with manual repair techniques, please use the automatic software. All recommended products have been tested and approved by our professionals. Tools that you can use to fix your error are listed bellow:
do it now!
Download Fix
Happiness
Guarantee
do it now!
Download Fix
Happiness
Guarantee
Compatible with Microsoft Windows
Compatible with OS X
Still having problems?
If you failed to fix your error using FortectMac Washing Machine X9, reach our support team for help. Please, let us know all details that you think we should know about your problem.
Fortect — a patented specialized Windows repair program. It will diagnose your damaged PC. It will scan all System Files, DLLs and Registry Keys that have been damaged by security threats.Mac Washing Machine X9 — a patented specialized Mac OS X repair program. It will diagnose your damaged computer. It will scan all System Files and Registry Keys that have been damaged by security threats.
This patented repair process uses a database of 25 million components that can replace any damaged or missing file on user’s computer.
To repair damaged system, you have to purchase the licensed version of Fortect malware removal tool.To repair damaged system, you have to purchase the licensed version of Mac Washing Machine X9 malware removal tool.
A VPN is crucial when it comes to user privacy. Online trackers such as cookies can not only be used by social media platforms and other websites but also your Internet Service Provider and the government. Even if you apply the most secure settings via your web browser, you can still be tracked via apps that are connected to the internet. Besides, privacy-focused browsers like Tor is are not an optimal choice due to diminished connection speeds. The best solution for your ultimate privacy is Private Internet Access – be anonymous and secure online.
Data recovery software is one of the options that could help you recover your files. Once you delete a file, it does not vanish into thin air – it remains on your system as long as no new data is written on top of it. Data Recovery Pro is recovery software that searchers for working copies of deleted files within your hard drive. By using the tool, you can prevent loss of valuable documents, school work, personal pictures, and other crucial files.
Reading time: 10 Minutes
Resolving the Windows Update 0x8024401F error on Windows 10/11 might seem challenging, but it’s manageable with proper guidance. This guide will provide you with an efficient and time-saving solution to fix this specific Windows Update error on your system.
DISCLAMER: This guide provides step-by-step instructions for troubleshooting and resolving a specific Windows Update error. While these instructions are intended to be comprehensive, users should always exercise caution when modifying system files or implementing fixes. We strongly recommend backing up important data before making any changes.
What Causes Windows Update Error 0x8024401f?
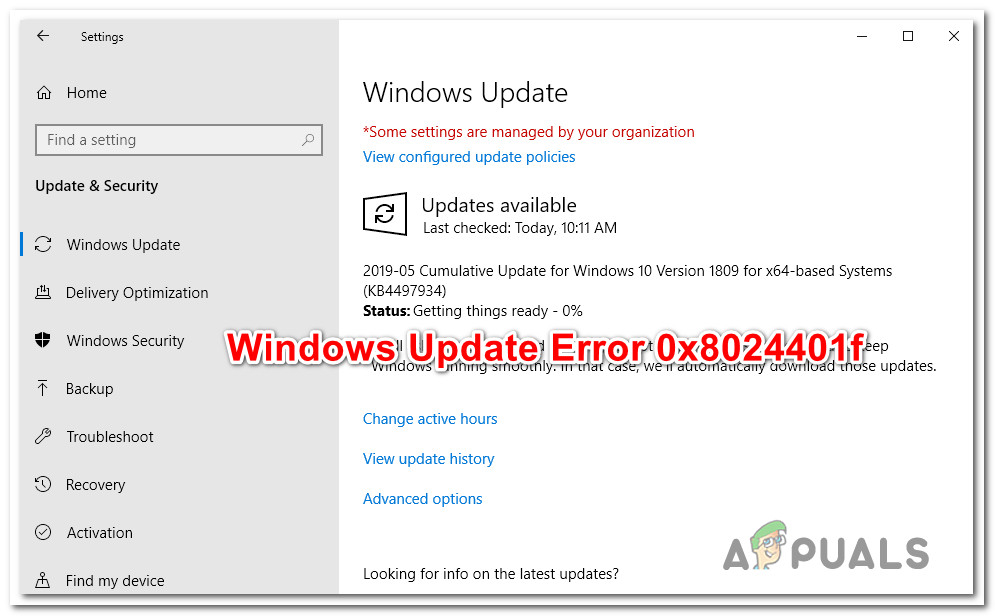
The Windows Update 0x8024401f is one of the most common errors that you can encounter while updating your operating system. It usually comes with the “Windows server 2016 update status 0x8024401f” error message and occurs when there is some kind of problem with the update installation process.
There are a few reasons that might cause this error code, and you should always try to identify the source before attempting any fixes. For example, if you have a third-party antivirus or firewall installed on your computer, then one of these programs may be blocking the update process. You will need to temporarily disable these security programs or set them in inactive mode for a time period during which you can perform this update installation procedure.
If you don’t know how to do that, just consult the program’s user guide. Additionally, ensure that you have enough disk space available on your C drive (usually around 20 GB). If not, delete some unused files and folders from the drive or transfer them to an external storage device like an SD card.
If all else fails, then you’ll need to contact Microsoft directly by opening an online chat session with their support team and asking for steps to resolve the Windows 10/11 update error 0x8024401f.
Below is a list of the most common culprits behind this error:
- Security Interference – Security Interference – Occasionally, an overactive antivirus suite can contribute to this error. If you suspect that your antivirus might be causing this issue, consider temporarily disabling it or uninstalling it.
- Problematic Windows Update – There are times when the Windows update itself is the problem. And fortunately, Microsoft acts quickly in such scenarios. They usually release a hotfix for the problem. To get it, run the Windows Update troubleshooter and apply the recommended fix.
- Corrupted Cache – If you see this error while using an application, it is likely that your Windows Store cache is corrupted. To resolve this, reset the Windows Store cache using the CMD prompt.
- VPN Connection – If your system finds your connection unsafe or suspicious, it may throw error messages like the Windows Update error code 0x8024401F. To resolve this, uninstall your VPN client or proxy server.
Preliminary Troubleshooting Steps
There are a few ways you can try to fix this error. Follow the steps below and see if any of them work for you.
- Restart your device.
- Make sure your network is connected properly, and restart your device.
- Close any antivirus programs that might be running in the background and restart your device.
- Ensure your Windows operating system is up-to-date by checking for any available updates through your system settings or Microsoft’s official website. Restart your computer after any updates have been installed.
- Restart your computer in safe mode (with networking), then restart again normally, which may solve the issue without needing to reinstall anything or update anything else.
If none of these steps works, proceed with the solutions below.
Solution 1 – Reset the Windows Update Components
Windows Update is an integral component of Windows 10 because it allows you to download and install the latest updates with the most recent drivers, security patches, and bug fixes. However, it is not without a flaw. This mechanism may not always function accordingly and throw the Windows update error code 0x8024401F.
In such a case, the first solution to try is to reset the components of Windows Update. The easiest way to do this is by using the Command Prompt.
- To access the Command Prompt in Windows 10, search for Command Prompt in the Start menu and then right-click it and select Run as administrator. However, in order to do so, you need to be logged into your computer with an administrator account.
- Then type the following commands and press Enter.
- net stop bits
- net stop wuauserv
- net stop appidsvc
- net stop cryptsvc
- Next, input this command: Del “%ALLUSERSPROFILE%\ApplicationData\Microsoft\Network\Downloader\*.*”
- Then type this command: Del “%ALLUSERSPROFILE%\Application Data\Microsoft\Network\Downloader\*.*”
- Now, clear the Windows Update cache by entering these commands:
- rmdir %systemroot%\SoftwareDistribution /S /Q
- rmdir %systemroot%\system32\catroot2 /S /Q
- We will then reset the services we stopped by using this command:
- exe sdset bits D:(A;;CCLCSWRPWPDTLOCRRC;;;SY)(A;;CCDCLCSWRPWPDTLOCRSDRCWDWO;;;BA)(A;;CCLCSWLOCRRC;;;AU)(A;;CCLCSWRPWPDTLOCRRC;;;PU)
- exe sdset wuauserv D:(A;;CCLCSWRPWPDTLOCRRC;;;SY)(A;;CCDCLCSWRPWPDTLOCRSDRCWDWO;;;BA)(A;;CCLCSWLOCRRC;;;AU)(A;;CCLCSWRPWPDTLOCRRC;;;PU)
- Go to the System32 folder by typing: cd /d %windir%\system32.
- Then register all the necessary DLL files on the registry by entering:
- exe /s atl.dll
- exe /s urlmon.dll
- exe /s mshtml.dll
- exe /s shdocvw.dll
- exe /s browseui.dll
- exe /s jscript.dll
- exe /s vbscript.dll
- exe /s scrrun.dll
- exe /s msxml.dll
- exe /s msxml3.dll
- exe /s msxml6.dll
- exe /s actxprxy.dll
- exe /s softpub.dll
- exe /s wintrust.dll
- exe /s dssenh.dll
- exe /s rsaenh.dll
- exe /s gpkcsp.dll
- exe /s sccbase.dll
- exe /s slbcsp.dll
- exe /s cryptdlg.dll
- exe /s oleaut32.dll
- exe /s ole32.dll
- exe /s shell32.dll
- exe /s initpki.dll
- exe /s wuapi.dll
- exe /s wuaueng.dll
- exe /s wuaueng1.dll
- exe /s wucltui.dll
- exe /s wups.dll
- exe /s wups2.dll
- exe /s wuweb.dll
- exe /s qmgr.dll
- exe /s qmgrprxy.dll
- exe /s wucltux.dll
- exe /s muweb.dll
- exe /s wuwebv.dll
- After that, reset network configurations by typing:
- netsh winsock reset
- netsh winsock reset proxy
- Finally, restart the services you stopped earlier. Enter this:
- net start bits
- net start wuauserv
- net start appidsvc
- net start cryptsvc
- After doing that, restart your computer and run Windows Update again.
Solution 2 – Perform a Clean Boot
A clean boot is a troubleshooting step that is sometimes used as a last resort. A clean boot will help you identify if any third-party apps or startup items are interfering with the installation of your updates. To perform a clean boot on Windows 10, follow these steps:
- Right-click the Windows menu or Start button.
- Click Search and type ‘msconfig’. Hit Enter.
- Next, click Services, and tick the Hide all Microsoft services checkbox.
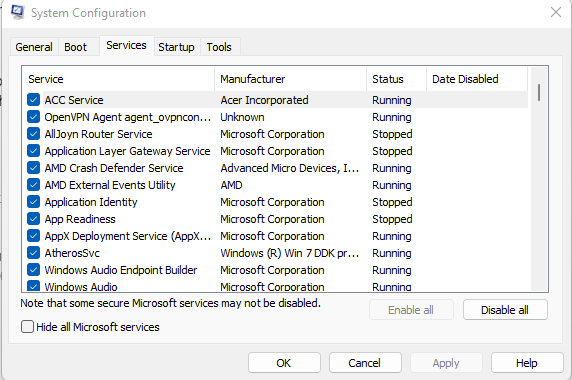
- Click Disable all and choose Startup.
- Then click Open Task Manager.
- Have a closer look at the list and click any startup program you suspect might be interfering. Then click Disable. Repeat this for all suspicious Startup programs.
- Click the X to close Task Manager.
- Click OK in the System Configuration window.
- Restart the system.
Solution 3 – Update Your Device Drivers
Many users have reported that updating their device drivers is the way to go when encountering this error code. To do so, open Device Manager and look for any yellow exclamation points. If you find one, right-click and select Update Driver Software. Make sure you select the option that is appropriate for your computer. Once finished, restart your computer and see if the problem persists.
Alternatively, you can use a driver updater tool to update your device drivers. Using a driver updater tool can automatically update outdated and missing drivers on your device to prevent them from causing this error. There are many options for how to use driver updater tools, with many of them being free or only a few dollars a month.
To ensure that device drivers don’t cause Windows update errors, experts suggest regularly scanning for any new updates or downloaded drivers that you may not have been aware of and downloading them before you try to install anything. This way, you won’t have to download the driver separately while your computer is frozen, and it could actually help fix the problem if it’s just an outdated driver.
Solution 4 – Use a PC Repair Tool
PC repair tools are utilities designed to scan your computer for known issues and automatically fix them. They can be particularly helpful when troubleshooting systems that aren’t functioning as expected. A lot of times, these programs will fix the issue with no user input required. Other times, they may require you to choose between two or three potential solutions. The best part about these types of tools is that they can be used for free!
One example of such a tool is the Outbyte PC Repair Tool. This utility provides a user-friendly interface and a range of features, including junk file cleanup, hard drive optimization, memory card defragmentation, and virus or malware removal. Please remember that while these tools can be very helpful, it’s still crucial to ensure you’re using a trusted and reputable tool to avoid potential file damage.
To use it, you need to install the Outbyte PC Repair Tool first. The installation process is pretty standard; just click Next until it’s done, then follow any prompts if you want to run a quick scan before starting for real. Note that although running a quick scan is not required, we do recommend doing so in order to find any files or programs that may be causing issues with your system.
Solution 5 – Reset the Windows Store Cache
If you encounter the 0x8024401f error while updating the Universal Windows Platform app through Windows Store, it is possible that the update process may be interrupted by some corrupted system files.
In order to fix this, some users had to reset the Windows Store cache and its components. And to reset the Windows Store cache, you have two available options: via CMD or the Windows GUI.
via the CMD Prompt
- Press the Windows + R buttons on your keyboard to launch the Run applet. Then input cmd into the text field. After that, press the Ctrl + Shift + Enter buttons simultaneously. When prompted, hit Yes to grant administrator rights.
- Into the command line, input the wsreset.exe command and hit Enter. This will reset the Windows Store app and its dependencies.
- Lastly, restart your Windows 10/11 computer to see if the error is gone.
via the Settings App
- Launch the Run applet by pressing the Windows + R keys simultaneously. And then, input the ms-settings:appsfeatures command.
- Press Enter to launch and open the Apps and Features section of the Settings app.
- Scroll down the list of installed applications and find Microsoft Store.
- Once you find it, select Advanced Options.
- Then find the Reset tab and click the Reset button here. This will start the cache clearing process.
- Wait for the cache clearing process to complete, then restart your Windows 10/11 device.
Solution 6 – Disable the Proxy Server
A proxy server is a computer server that acts as an intermediary between an endpoint device, such as a personal computer, and another server from which a user or program may obtain resources. Proxy servers are commonly used to increase security and anonymity on the Internet.
To disable your Windows device’s proxy server, follow these easy steps:
- Open the Settings window and navigate to Network & Internet.
- Click Internet Options.
- Navigate to the Connections tab and select LAN settings.
- Find Use a proxy server for your LAN option and set it to No by unchecking it.
- Change Automatic configuration script (PAC) file to off in Automatic Configuration Scripts (PAC) file field and click Apply.
- You will be prompted with a warning message – please read carefully before proceeding.
- Click Yes.
- Reboot your Windows 10/11 PC.
Solution 7 – Seek Help from Certified Windows Technicians
Some of the most common causes for this error code are faulty hardware components, software programs, and network connectivity. So, if you are not familiar with these things or are not confident with your technical skills, do not hesitate to seek help from certified and authorized Windows technicians. They will analyze the problem and provide suitable solutions that can fix the issue in an effective manner.
However, many people opt to handle these issues themselves instead of seeking professional help due to cost concerns. Considering all the benefits associated with hiring a qualified technician and their abilities to diagnose and solve problems efficiently, it’s better to spend some money now instead of spending even more later.
You should only resort to solving the problem by yourself when you have time at hand, plenty of patience and know what you are doing. If any task seems too complicated for you or appears like a risk, then immediately hire professionals who will resolve all your queries at once!
Fix Error 0x8024401F in No Time!
Getting Windows Update error code 0x8024401F on your Windows 10 or Windows 11 computer can be an annoyance, but it doesn’t have to be a problem that you can’t fix quickly and easily. Follow these simple solutions to get rid of the error code and get back to updating your computer without any issues!
Give us some love and rate our post!