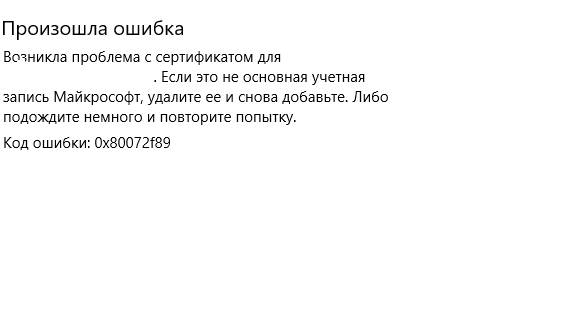
Ошибка с кодом 0x80072f89 обычно возникает у пользователей операционной системы Windows 10 во время получения или отправления электронного письма через программу Windows Mail. Однако, в сети вы можете найти уведомления о том, что данная ошибка временами появляется и на Windows 8.1.
После проведения небольшого исследования различных тематических форумов выяснилось, что ошибка 0x80072f89 возникает по причине проблемы с SSL-сертификатом. Однако, данное утверждение работает только в том случае, если ошибка появляется непосредственно в приложении Windows Mail.
В сегодняшней статье мы посмотрим с вами, как можно избавиться от этой ошибки и продолжить использовать почтовое приложение системы Windows 10.
Устранение ошибки 0x80072f89 в Windows Mail
Метод №1 Запуск средства устранения неполадок Магазина Windows
Некоторые пользователи смогли разрешить ошибку 0x80072f89, запустив в работу средство устранения неполадок для Магазина Windows. Если данная ошибка возникает в результате каких-то сбоев с данными приложения — средство должно засечь их и устранить.
Заметка: этот метод сработает только для пользователей операционной системы Windows 10. Если вы обладатель старшей Windows, то сразу же переходите ко второму методу.
Вот как можно запустить средство устранения неполадок Магазина Windows:
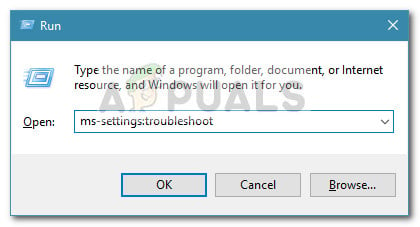
- нажмите комбинацию клавиш Windows+R;
- впишите в пустую строку значение ms-settings:troubleshoot;
- нажмите Enter;
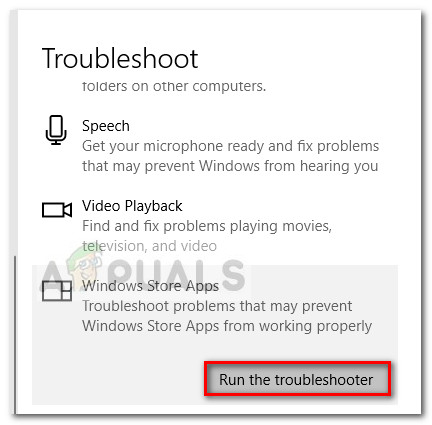
- опуститесь в самый низ списка и выберите пункт «Приложения из Магазина Windows»;
- нажмите на кнопку «Запустить средство устранения неполадок»;
Дождитесь окончания сканирования, а затем нажмите на кнопку «Применить исправление» для решения найденных проблем с приложениями Магазина Windows, а в нашем случае — Windows Mail. Перезагрузите свой компьютер и проверьте, была ли устранена ошибка 0x80072f89.
Метод №2 Выставление портов
Учитывая, что проблема скорее всего основана на SSL-сертификате, вы можете попробовать разрешить ошибку, добавив определенные порты для серверов входящей и исходящей почты. Сделать это можно следующим образом с помощью встроенных настроек приложения Mail:
- откройте приложение Mail;
- кликните на значок шестеренки «Settings» для открытия настроек;
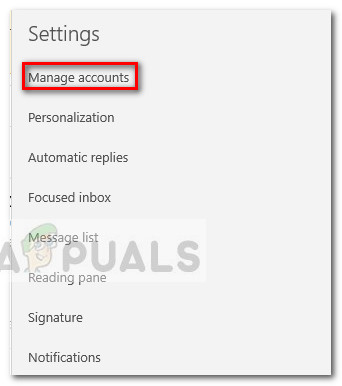
- далее кликните на пункт «Manage Accounts»;
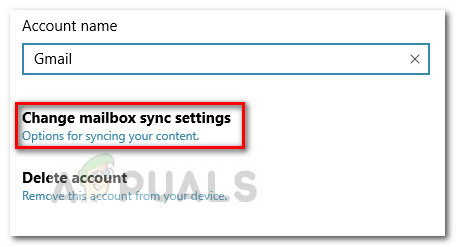
- в настройках своей учетной записи выберите «Change mailbox sync settings»;
- опуститесь в самый низ в новом окошке и кликните на «Incoming and outgoing mail server info»(под пунктом «Advanced mailbox settings»);
- добавьте порт pop.**********:995 для сервера входящей почты(где ********** — имя вашего почтового сервера);
- добавьте порт smtpout.**********:465 для сервера исходящей почты;
- сохраните изменения и перезагрузите свой компьютер.
Попробуйте снова воспользоваться приложением Windows Mail и посмотрите, была ли устранена ошибка 0x80072f89.
Метод №3 Повторное создание учетной записи Windows Mail
Некоторым пользователям удалось избавиться от этой надоедливой проблемы, попросту повторно создав учетную запись в приложении Windows Mail. Однако, на этот раз при добавлении почты вы не будете указывать параметры SSL.
- откройте приложение Mail;
- кликните на значок шестеренки «Settings» для открытия настроек;
- далее кликните на пункт «Manage Accounts»;
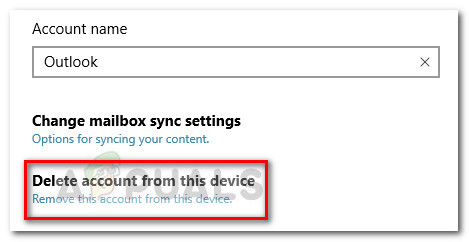
- кликните на пункт «Delete account from this device»;
- нажмите на кнопку «Delete» для подтверждения своих намерений и кнопку «Done»;
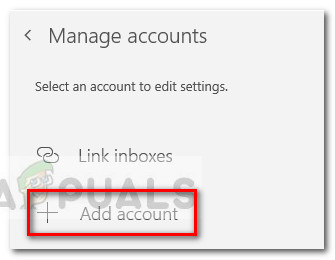
- затем снова пройдите в раздел по управлению учетными записями(Manage Accounts) и нажмите на кнопку «Add account»;
- выберите провайдера своей электронной почты и введите личные данные от нее для завершения процесса добавления. Убедитесь, что вы убрали все галочки напротив опций, относящихся к SSL-сертификатам.
Попробуйте отослать или получить какое-то электронное письмо, чтобы проверить, была ли исправлена ошибка 0x80072f89.
The error code 0x80072f89 is typically encountered by Windows users when they are unable to send or receive new email through the Windows Email app. The error is mostly reported on Windows 10 but there are scarce reports of it occurring on Windows 8.1.
After investigating the issue and looking at various user reports, it seems like the error code is related to a problem with the SSL certificate. But keep in mind that this is only true if you’re getting the 0x80072f89 error code inside the Windows Mail App.
If you’re currently struggling with this particular issue, this article will help you troubleshoot the issue away. Below you have a collection of methods that other users in a similar situation have used to resolve the error code 0x80072f89. Please follow the methods in order until you find a fix that is effective in eliminating the issue.
Method 1: Running the Windows Store Apps Troubleshooter
Some users have managed to resolve the issue by running the Windows Store Apps Troubleshooter utility. If the error occurs due some application data, the troubleshooter should be able to detect it and take care of the issue.
Note: This method is only applicable on Windows 10. If you have an older Windows version, download the utility from this link (here) or jump straight to Method 2.
Here’s a quick guide on running the Windows Store Apps Troubleshooter:
- Press Windows key + R to open up a Run box. Type “ms-settings:troubleshoot” and hit Enter to open the Troubleshooting tab of the Settings menu.

- In the Troubleshoot tab, scroll down to Find and fix other problems, select Windows Store Apps and click on Run the troubleshooter.

- Wait until the scan is complete, then click on Apply this fix to resolve any identified issues.
- Restart your computer and see if the issue is resolved at the next startup. If you’re still encountering the issue, continue with the next method below.
Method 2: Porting Incoming and Outgoing Mail Servers
Since the issue is mostly related to the SSL certificate, the issue will most likely be fixed if you decide to port incoming and outgoing mail servers. Some users encountering the error code 0x80072f89 have fixed it promptly by using the built-in Mail settings to port the connections. Here’s a quick on how to do this:
- Open the Mail App and click on the Settings icon (gear icon). Next, click on Manage Accounts and click on your account.
- In the account settings of your email, click on Change mailbox sync settings.

- In the next window, scroll all the way down and click on Incoming and outgoing mail server info (under Advanced mailbox settings).
- Add port :995 to your incoming mailserver. Here’s one example:
pop.*myserver.net*:995
Note: Keep in mind that *myserver.net* is simply a placeholder. Replace it with your mailserver name.
- Add port :465 to your outgoing server(smtp). Here’s one example:
smtpout.*myserver.net*:465
Note: The same as above, *myserver.net* is simply a placeholder. Replace it with your mailserver name.
- Save the changes, reboot your computer and see if the issue has been resolved at the next startup. If the issue is still there, move down to the final method.
Method 3: Re-creating the mail account in Windows Mail
If the problem is caused by a security certificate on your email server that Windows regards as invalid, the issue will be resolved by re-creating your email account in Windows Mail.
Some users have managed to resolve the issue after deleting the mail account from Windows Mail and setting it up again without the SLL options. This might loosen the anti-spam security of your email, but it’s usually effective in eliminating the 0x80072f89 error code.
Here’s a quick guide on how to do delete the email account and set it up again without the SLL options:
- Open Windows Email, click on the Settings wheel and choose Manage accounts.

- Click on your account and then choose Delete account from this device.

- Click the Delete button to confirm your choice. Once the account is deleted, click on Done to complete the process.
- Click the settings wheel again, go to Manage accounts and click on Add account.

- Choose your email provider, then enter your email credentials to complete the process. Make sure to uncheck every box related to SSL certificates so that the same certificate won’t be a problem anymore.
- Try to send an email from your newly re-created email account and see if the issue repeats.

Kevin Arrows
Kevin Arrows is a highly experienced and knowledgeable technology specialist with over a decade of industry experience. He holds a Microsoft Certified Technology Specialist (MCTS) certification and has a deep passion for staying up-to-date on the latest tech developments. Kevin has written extensively on a wide range of tech-related topics, showcasing his expertise and knowledge in areas such as software development, cybersecurity, and cloud computing. His contributions to the tech field have been widely recognized and respected by his peers, and he is highly regarded for his ability to explain complex technical concepts in a clear and concise manner.
- Remove From My Forums
-
Question
-
Hi,
I am receiving the following error code and cannot send or receive email, can anyone assist please?
Answers
-
These procedures can be used to fix issues with These win 10 apps. Mail, Calendar, Cortana, Start menu, and Settings. It probably will work for others but I have only tested it with these.
Solution 1: Re-register this App:
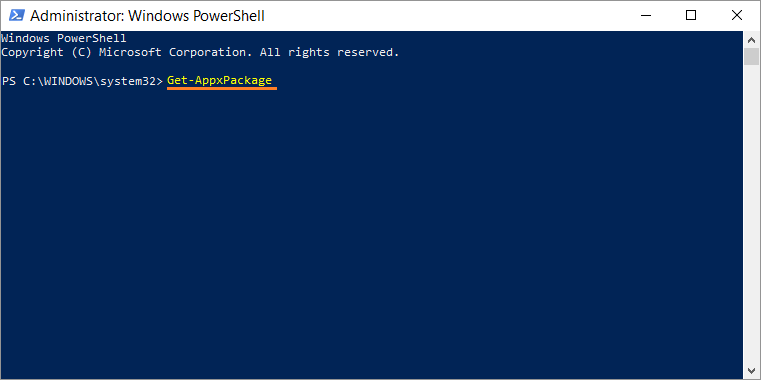
- Run Windows PowerShell as Administrator.
- Type
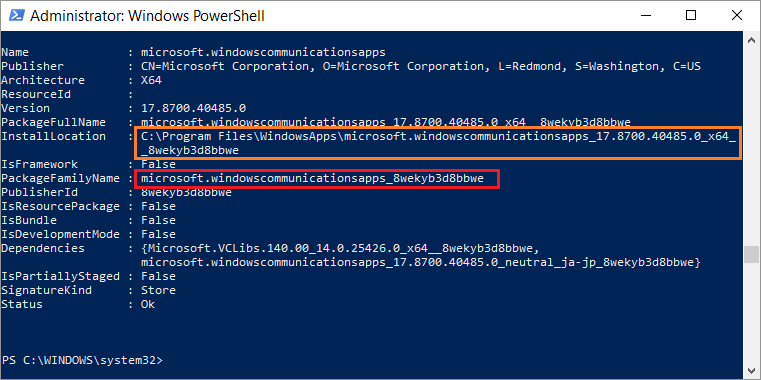
Get-AppxPackage, press Enter. - From the output list, find the Mail App and remember the
InstallLocation. - Type this command:
Get-AppXPackage | Foreach {Add-AppxPackage -DisableDevelopmentMode -Register «C:\Program Files\WindowsApps\microsoft.windowscommunicationsapps_17.6120.42011.0_x64__8wekyb3d8bbwe\AppxManifest.xml»} - It would run as below:
Solution 2: If re-register App cannot resolve your issue, Please reinstall the App.
Step 1: Uninstall it completely
- Run Windows PowerShell as Administrator.
- Type
Get-AppxPackage, press Enter. - From the output list, find Mail App package and remember its
PackageFullName as below: - And then type the following command: Remove-Appxpackage
–Package microsoft.windowscommunicationsapps_17.6120.42011.0_x64__8wekyb3d8bbwe
Note: After running this command
in Windows 10, the Mail icon still appear in the App list and Start menu. However, you cannot click to launch it. Just ignore and continue next step.Step 2: Reinstall the App from Windows Store
Thanks to ForumFaq@Technet.
Wanikiya and Dyami—Team Zigzag
-
Proposed as answer by
Thursday, October 8, 2015 1:17 AM
-
Marked as answer by
Bruce Wooding
Saturday, October 10, 2015 12:09 AM
-
-
Proposed as answer by
Deason Wu
Thursday, October 8, 2015 1:17 AM -
Marked as answer by
Bruce Wooding
Saturday, October 10, 2015 12:09 AM
-
Proposed as answer by
Learn how to resolve email error code 0x80072f89 in three different ways. Our Server Management Support team is here to help you with your questions and concerns.
Email error code 0x80072f89 | 3 Solutions
Windows users often come across the error code 0x80072f89 when they cannot send or receive new emails via the Windows Email app. Interestingly, the error is commonly seen on Windows 10 and scarcely on Windows 8.1.

According to our experts, the root cause behind this error in most cases is related to the SSL certificate. If you have been facing the error code 0x80072f89, our experts are here to help.
Let’s take a look at three different ways to resolve this error.
Run the Windows Store Apps Troubleshooter
- First, open the Run box and enter ms-settings:troubleshoot to open the Troubleshooting tab of the Settings menu.
- Then, scroll to Find and fix other problems and choose Windows Store Apps.
- Next, click Run the troubleshooter.
- After the scan is finished, click Apply this fix to resolve any identified issues.
- Finally, restart the computer and check if the error reappears. If yes, try the next solution offered by our experts.
Our experts would like to point out that this solution is applicable only to Windows 10.
Port Incoming and Outgoing Mail Servers
- First, open the Windows Mail app and click Settings.
- Then, click our account under Manage Accounts section.
- Now click Change mailbox sync settings.
- After that, scroll to the bottom of the next window and click Incoming and outgoing mail server info. It is located under Advanced mailbox settings.
- Then, we have to add port:995 to our incoming mailserver as seen below:
pop.*bobcares_server.net*:995 - Next, we have to add port:465 to our outgoing server(SMTP) as seen below:
smtpout.*bobcares_server.net*:465 - Finally, save the changes we made and reboot the computer. If the error still persists try the next solution.
Re-create the mail account in Windows Mail
In case the error is due to an invalid security certificate on our email, we have to re-create our email account in Windows Mail.
- First, open Windows Email and choose Manage accounts on the Settings wheel.
- Then, we have to select our account and click Delete account from this device.
- After that, click the Delete button to confirm. After the account is deleted, we have to click Done to complete the process.
- Then, head back to the Setting wheel again and choose Add Account under Manage Accounts.
- Next, we have to choose our email provider and enter the email credentials to complete the process. Our experts would like to point out that we have to uncheck every box related to SSL certificates to avoid the error from popping up again.
- Finally, try sending an email from our new account to see if the error appears again.
Let us know in the comments which one of the above solution helped you resolve email error code 0x80072f89.
[Need assistance with a different issue? Our team is available 24/7.]
Conclusion
In summary, our Support Techs demonstrated three different ways to resolve the email error code 0x80072f89.
PREVENT YOUR SERVER FROM CRASHING!
Never again lose customers to poor server speed! Let us help you.
Our server experts will monitor & maintain your server 24/7 so that it remains lightning fast and secure.
GET STARTED
![]()
The blog of Windows Wally, a Windows Support Technician helping common people solve frustrating computer problems.
Reader Question:
“Hi Wally, I am getting Error Code 0x80072f89 whenever I try to send or receive email messages through the Mail application in Windows 10. Can anyone assist me please? ” – Courtney B., United Kingdom
Before addressing any computer issue, I always recommend scanning and repairing any underlying problems affecting your PC health and performance:
- Step 1 : Download PC Repair & Optimizer Tool (WinThruster for Win 10, 8, 7, Vista, XP and 2000 – Microsoft Gold Certified).
- Step 2 : Click “Start Scan” to find Windows registry issues that could be causing PC problems.
- Step 3 : Click “Repair All” to fix all issues.
Setting up weekly (or daily) automatic scans will help prevent system problems and keep your PC running fast and trouble-free.
Wally’s Answer: Windows 10 apps come installed with Windows 8 and Windows 10. They have simple features and a clean interface which makes them ideal for touch screens in particular. However, it can be annoying when they don’t work.
Here, we will discuss how you can fix the 0x80072f89 error when trying to run the Mail application.
Problem
The Mail app stopped working in Windows 10 and gave error code 0x80072f89
Solution
Here are two ways to fix the 0x80072f89 error of the Mail application in Windows 10.
Re-Register The Mail Application in Windows 10 Using The PowerShell
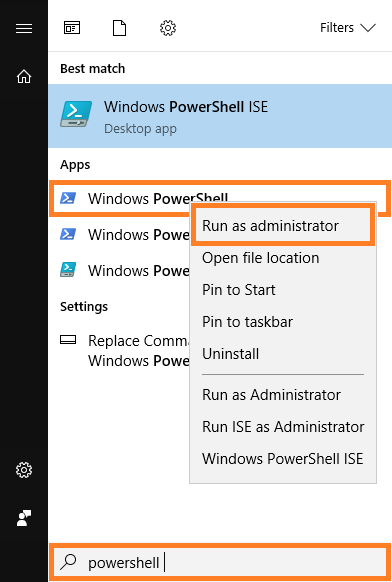
Run Windows PowerShell as an Administrator. You can do this by pressing the Windows Key and typing powershell to search for it. Right-click Windows PowerShell and click Run as Administrator as shown in the image below
In the PowerShell window, type Get-AppxPackage, and press Enter to execute the command. It should load a lot of text.

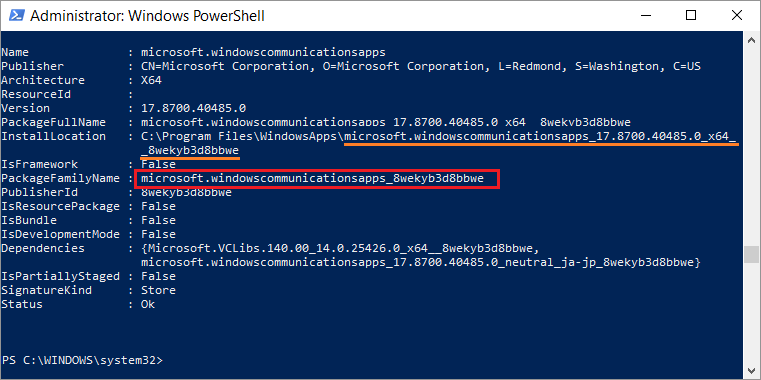
The last result should be the Mail app. You can identify it from its PackageFamilyName (Highlighted in Red). Please copy its InstallLocation (Highlighted in Orange). You will need the InstallLocation in the next command
Run the following command and replace InstallLocation:
Get-AppXPackage | Foreach {Add-AppxPackage -DisableDevelopmentMode -Register “InstallLocation\AppxManifest.xml”}
For example:
Get-AppXPackage | Foreach {Add-AppxPackage -DisableDevelopmentMode -Register “C:\Program Files\WindowsApps\microsoft.windowscommunicationsapps_17.8700.40485.0_x64
__8wekyb3d8bbwe\AppxManifest.xml”}
The command should run and re-register the app
Uninstall and Then Reinstall The Mail Application in Windows 10
You can uninstall the Mail app by following these steps.
First, Run the Powershell as Administrator. You can do this by pressing the Windows Key and typing powershell to search for it.
Right-click Windows PowerShell and click Run as Administrator as shown in the image below
Now, run the Get-AppxPackage command and press Enter
Copy the line underlined in Orange
Now, run the following command and paste the text you just copied in the command
Remove-Appxpackage –Package microsoft.windowscommunicationsapps_17.6120.42011.0_x64__8wekyb3d8bbwe
The Mail app icon will still appear but it won’t work because it is uninstalled.
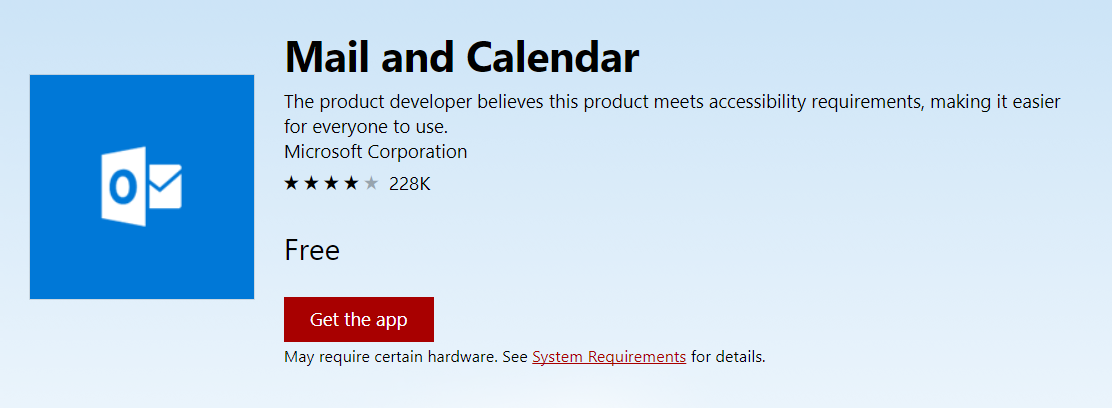
Now, Reinstall the Mail app from the Windows Store by clicking this link
Try using the SFC or DISM Tool To Fix The Problem
The DISM and SFC tools are built into Windows. You can run a simple command to run a scan using each of them. This will scan for and fix missing and/or corrupt Windows system files. This should fix whatever might be causing the app to not function correctly.
I Hope You Liked This Blog Article! If You Need Additional Support on This Issue Then Please Don’t Hesitate To Contact Me On Facebook.
Is Your PC Healthy?
I always recommend to my readers to regularly use a trusted registry cleaner and optimizer such as WinThruster or CCleaner. Many problems that you encounter can be attributed to a corrupt and bloated registry.
Happy Computing! ![]()

Quick Solution (How fast can you do it?)
Easy Solution (How easy is it?)
Beginner-Friendly (Recommended for beginners?)
Summary: Every Windows Wally blog post is evaluated on these three criteria. The average of all three elements determines an «Overall Rating» for each blog post.
4.2
Overall Rating
Tags: 0x80072f89 email, 0x80072f89 error, 0x80072f89 mail, 0x80072f89 outlook, 0x80072f89 phone, 0x80072f89 windows 10 mail, 0x80072f89 windows phone, error code 0x80072f89 windows 10
About the Author

Windows Wally is a helpful guy. It’s just in his nature. It’s why he started a blog in the first place. He heard over and over how hard it was to find simple, plain-English solutions to Windows troubleshooting problems on the Internet. Enter: Windows Wally. Ask away, and he will answer.
© 2012 WindowsWally.com. All rights reserved. Trademarks: Microsoft and Windows are registered trademarks of Microsoft Corporation. Disclaimer: WindowsWally.com is not affiliated with Microsoft Corporation, nor claim any such implied or direct affiliation. The information contained on this site is for informational purposes only. The owners of this site are compensated by relationships with the recommended software products.