Рассмотрим ошибку активации Windows 10 / Windows 11 — 0x8007023e. Как исправить ошибку и в чем может быть причина?
1) Первым делом попробуйте активировать Ваш ключ через терминал по инструкции. Часто данный способ активации помогает в большинстве ошибок активации Windows.
2) Если же данный способ не помог, скорее всего Ваш ключ не валидный, т.е он может быть заблокирован, или устарел. Обратитесь к Вашему продавцу данной лицензии.
Если же у Вас нет в наличие оригинального ключа активации для Вашей версии Windows, приобрести его можете в нашем каталоге:
— Windows 11
или
— Windows 10
Доставка ключа моментальная в автоматическом режиме сразу после оплаты на Вашу электронную почту. Гарантия и круглосуточная техподдержка.
If you receive the Error code 0x8007023E during Windows activation after maybe, you clean install Windows 11/10 on your device, as reported by some affected PC users, then this post is intended to help you fix the error.

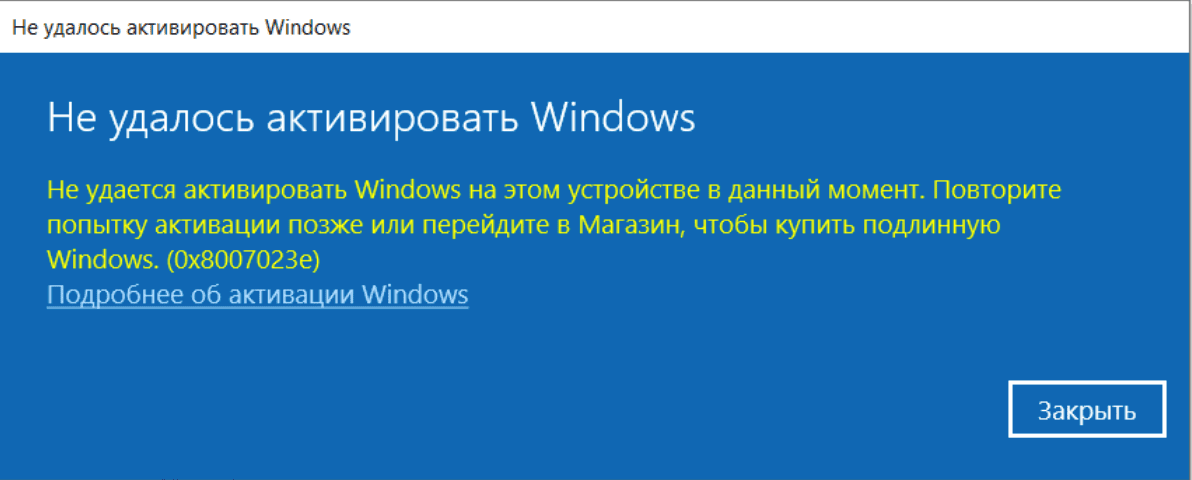
Windows is not activated
We can’t activate Windows on this device right now. You can try activating again later or go to the Store to buy genuine Windows.
Error code: 0x8007023E
You are likely to encounter activation issues due to various reasons including the following:
- Internet Connectivity or an outage (Network driver not native to the system, power outage locally, etc.)
- Hardware change in the system
- Incorrect Windows edition or product key
Activation ensures that the software is obtained from and licensed by Microsoft. Users of unactivated Windows aren’t eligible for crucial security updates, bug fixes, or patches. In addition, you won’t get to personalize your lock screen. So, if you get the Activation Error code 0x8007023E during activation of Windows 11/10 on your computer, then our recommended solutions provided below should help you resolve the issue on your device.
- Wait a while and try again
- Make sure you installed the right Windows edition for the product key
- Run Windows Activation Troubleshooter
- Connect PC to another network
- Run Microsoft Support and Recovery Assistant
- Contact Microsoft Support
Let’s see these suggestions in brief detail.
1] Wait a while and try again
Sometimes, activation issues like the one you’re currently facing are usually Microsoft Activation servers-related and certainly no cause for alarm. So, if you know your Windows is genuine and you have verified the product key matches the correct Windows edition you have installed on your device, you can wait a while and try again or just ignore the activation message provided the Windows activation watermark has not appeared on your desktop. In some cases, as explained, the error message will go away, and your Windows 11/10 will be activated automatically as soon as Microsoft activation servers are back online again.
Read: Disadvantages and Limitations of using Unactivated Windows
2] Make sure you installed the right Windows edition for the product key
This simply requires you to make sure it is the right edition of Windows for the product key you’re using for activation. For example, you may be using an OEM or Retail key to try to activate Windows 11/10 Pro Education. You can open a command prompt in admin mode, and then type the command below and hit Enter to get the full licensing information.
slmgr /dlv
Most Education keys are Volume Licenses which are activated by the organization’s on-site server. So, if you’re in an organizational environment and get this error code on your Windows machine, you should contact your organization’s IT desk to see if that’s the case here.
Read: Check Licensing Status and Activation ID of your Windows
3] Run Windows Activation Troubleshooter
The Windows operating system ships with a native troubleshooting pack for Windows Activation issues. Once any Internet connectivity issues have been resolved, if activation issues persist, you can use the Windows Activation Troubleshooter to troubleshoot your activation issue on your system.
To run the Activation Troubleshooter on your Windows 11 device, do the following:

- Press the Windows key + I to open the Settings app.
- Navigate to System > Activation.
- Click on the Troubleshoot link.
To run the Activation Troubleshooter on your Windows 10 device, do the following:

- Press the Windows key + I to open the Settings app.
- Go to Update & Security > Activation.
- Click on the Troubleshoot link.
Read: Windows is activated but still keeps asking for Activation
4] Connect PC to another network
It appears the issue at hand is a network error as reported by some affected PC users that the problem solved itself when they connected to a completely different network using the same computer, signifying that access to the Windows Activation server, somehow must have been blocked on the other network. It should be noted that a VPN client or a Proxy server, or even your security software (especially from third-party vendors) could be the culprit here due to some kind of interference that ends up blocking communications between your Windows 11/10 client machine and the Windows Activation server.
So, make sure this isn’t the case for you. If this applies to you, you can temporarily disable your VPN software or security software {antivirus and/or firewall) and see if you can successfully activate Windows on your device. Otherwise, continue with the next solution.
Read: Windows Activation Errors: Error codes, description, fixes
5] Run Microsoft Support and Recovery Assistant

The Microsoft Support and Recovery Assistant is an automated tool designed to help PC users resolve issues with Windows 11/10 and is useful even if you can’t activate Windows.
7] Contact Microsoft Support
As this is an activation problem, if you tick the boxes for all requirements for running a genuine Windows copy on your device and have waited for a reasonable amount of time but the activation error isn’t fixed, you can contact Microsoft Support to activate it by phone assuming there’s no current in-house issues or server maintenance underway.
I hope this helps!
Why is my Windows 11/10 suddenly not activated?
If on your device, Windows 11/10 suddenly becomes unactivated, you have to verify if the product key you used to earlier activate Windows is the same as the one you purchased or not. If not, open the Settings app and go to Update & Security > Activation. Then, click the Change product key option, and enter your original product key to activate Windows correctly. If you made your purchase online, your product key should be in the email sent to you by the vendor.
Read: How long can you use Windows without Activation?
How many times can a Windows key be used?
As per the End User License Terms for Microsoft Software, you can only use a Windows 11/10 key once on a PC or laptop. If you need to reinstall the operating system for any reason, you’ll need to enter the key again. And if you are wondering if Windows keys ever expire, the answer is no. Legitimate retail Windows 10 keys, actually issued by Microsoft, never expire.
Did Windows 11/10 fail to update to its next available Build version because of an error 0x8007023e? If yes, then read and apply the three workarounds discussed in this tutorial.
The error 0x8007023e mostly occurs due to corruption inside the Windows Components or certain update-related services being disabled. Running Windows Update Troubleshooter will provide a fix applying which you can easily get rid of this issue. If the error persists even after this, reset the update folders, and restart the essential services.

Note: If you are facing this bug while playing Xbox games, read this guide instead.
Update Error 0x8007023e Solutions
To solve the update error 0x8007023e in Windows 11/10, go through the below suggestions –
1] Run Windows Update Troubleshooter
This is the best tool to find and repair the probable causes that are preventing Windows 10 updates to occur normally. Here’s how to troubleshoot Windows 10 –
- Press Win + I.
- Select
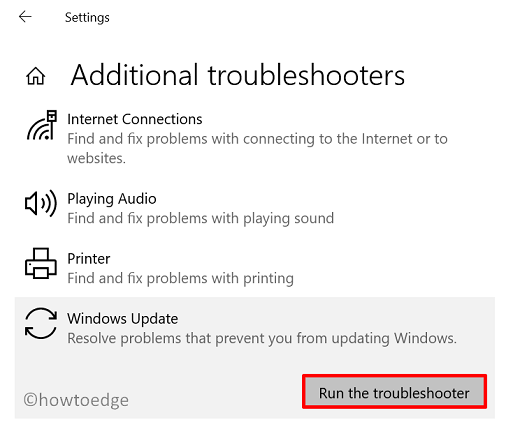
Update & Security > Troubleshoot. - Click Additional troubleshooters.
- Click to expand Windows Update, and hit Run the troubleshooter.
- Next, follow the on-screen instructions to complete the remaining steps.
Note: If you are getting this error code while on Windows 11 PC, navigate to this alternate path, and hit the Run button.
Settings (Win + I) > System > Troubleshoot > Other Troubleshooters

2] Rename Windows Update Folders
Often, the update process fails because of corruption inside the Windows Components. In order to fix this, you should purge out the cache inside the update folders. Here’s how to perform this task –
- First of all, open Command Prompt as administrator.
- On the elevated console, run these codes to stop update-related services –
net stop wuauserv
net stop cryptSvc
net stop bits
net stop msiserver
- Next, rename the Windows 10 Cache folders by running these two commands –
Ren C:\Windows\SoftwareDistribution SoftwareDistribution.old
Ren C:\Windows\System32\catroot2 Catroot2.old
- Now that you have renamed the update folders, restart the services that you stopped earlier. To do so, use these codes –
net start wuauserv
net start cryptSvc
net start bits
net start msiserver
- Restart Windows 10 so that the new update folders get generated at their respective locations.
Now try updating to Windows 10. This should work without getting into the error 0x8007023e.
3] Manually Install Windows 11/10 updates
If the error 0x8007023e occurs again while updating Windows 10, manually download and install the latest cumulative update on your computer.
While doing so, make sure to apply the recent SSU so that the update process finishes without getting into any new issues.
Ошибка 0x8007023e является одной из наиболее распространенных ошибок при активации, обновлении или установке обновления Windows. Чтобы исправить эту ошибку, рекомендуется следовать следующим шагам:
- Перезагрузите компьютер и попробуйте активировать Windows снова.
- Убедитесь, что ваш компьютер имеет стабильное подключение к Интернету.
- Проверьте, есть ли доступные обновления для Windows и установите их, если необходимо.
- Временно отключите антивирусную защиту и брандмауэр и попробуйте снова активировать Windows.
- Запустите программу для устранения неполадок с обновлением Windows и проверьте, устраняет ли она проблему.
- Попробуйте активировать Windows с помощью телефонной активации.
- Если ничего не помогает, попробуйте выполнить чистую установку Windows.
Если ошибка 0x8007023e продолжает возникать, это может указывать на более серьезные проблемы с вашей системой, поэтому рекомендуется искать дополнительную техническую помощь.
У нас есть оригинальные ключи для Вашей версии Windows, приобрести его можете в нашем каталоге:
– Windows 11 pro
или
– Windows 10 pro
Дистрибутивы Linux — это важные инструменты, которые помогают разработчикам компилировать исходные коды из открытых проектов, однако иногда после запуска любого дистрибутива Linux вы можете столкнуться с ошибкой Wslregisterdistribution error failed with error 0x8007023e. К счастью, вы’не одиноки. 
Ошибка Wslregisterdistribution является распространенной и хорошо документированной ошибкой, давайте рассмотрим возможные причины этой проблемы.
- Настройки виртуальной машины – Опции виртуальной машины, такие как WSl и платформы VM, которые позволяют работать с дистрибутивами Linux, также иногда могут оказаться вредными и вызвать такие ошибки, как WslRegisterDistribution Failed.
- Неправильная установка WSl – Если сама подсистема windows повреждена, это вызовет множество проблем, включая ошибку WslRegisterDistribution Failed при запуске любого дистрибутива Linux.
- Неисправность Windows Update – Если что-то во время обновления windows до версии 2004 (Build 19041 и выше) и выше, это может вызвать проблемы с подсистемой windows для Linux и вызвать ошибку WslRegisterDistribution Failed.
Теперь, когда мы знаем наиболее вероятные причины возникновения ошибки Wslregisterdistribution, давайте рассмотрим, как их устранить.
Отключение и повторное включение параметров виртуальной машины
По сообщениям, многие пользователи исправили ошибку WslRegisterDistribution 0x8007023e, отключив все настройки виртуальной машины, а затем снова включив их после перезагрузки компьютера. Это можно сделать с помощью функции “Включить или выключить функции Windows” в панели управления:
- Откройте строку поиска и введите ‘Включить или выключить функции Windows и открыть функцию панели управления.

- Отключите оттуда очень похожие на VM опции, такие как WSL, платформа VM, hyper-v, платформа гипервизора windows и т.д. После этого перезагрузите устройство.

Использование функций WIndows для отключения Hyper-V 
Отключите платформу виртуальной машины 
Поиск и отключение подсистемы Windows для Linux.
- После перезагрузки снова откройте Функции Windows и включите все заново. После этого запустите дистрибутив Linux и проверьте, сохраняется ли проблема.


Если это не помогло решить проблему WslRegisterDistribution, просто перейдите к следующему пункту.
Неправильная установка WSL
Учитывая, что предыдущее исправление не сработало, возможно, виноват сам WSL, что потребует от нас новой установки на ваше устройство, то есть сначала мы должны удалить WSL.
Как удалить WSL
Перед удалением WSL необходимо удалить любой и все дистрибутивы Linux до. После удаления всех дистрибутивов Linux мы можем начать процесс удаления WSL.
- Нажмите кнопку Windows ключ, введите и откройте приложение настроек.

- В разделе Настройки нажмите на Приложения а затем перейдите к Приложения и функции.

- В Приложениях и функциях найдите и удалите Подсистему Windows для Linux.


После выполнения этих шагов мы можем перейти к удалению отключению компонентов WSL WSL и Гипервизорная платформа Windows в ‘Включить или выключить функции Windows’, как это было сделано ранее. На этом удаление завершено, теперь мы можем перейти к свежей установке WSL для windows.
Установите WSL для Windows
Если вы используете windows 10 версии 2004 и выше (Build 19041 и выше) или Windows 11, то установка WSL — это очень простой процесс.
- Нажмите кнопку Ключ Windows откройте строку поиска, затем введите и откройте окна Power Shell от имени администратора.

- После открытия PowerShell введите следующую команду.
wsl --установка


Эта команда включит необходимые дополнительные компоненты и загрузит последнее ядро Linux. После завершения перезагрузите устройство, установите дистрибутив Linux по вашему выбору и запустите, чтобы проверить, сохраняется ли ошибка.
Если же вы используете более старую сборку Windows или просто предпочитаете не использовать команду установки, вы можете сделать это вручную, выполнив следующие шаги.
- Снова откройте Powershell от имени администратора и введите следующий ключ, после чего перезагрузите устройство.
dism.exe /onlineenable-feature /featurename:Microsoft-Windows-Подсистема-Linux /all /norestart
- После перезагрузки откройте магазин Microsoft и установите дистрибутив Linux по вашему выбору.
После завершения шагов запустите только что установленный дистрибутив Linux и проверьте, устранена ли ошибка WslRegisterDistribution. Если проблема все еще сохраняется, просто перейдите к следующему способу устранения.
Переустановить Windows
Многие пользователи сообщили, что переустановка windows устранила ошибку WslRegisterDistribution Failed Error. К сожалению, это может быть единственным применимым решением для вас. Перед выполнением чистая установка для ваших windows убедитесь, что у вас есть резервная копия на случай, если вам понадобится вернуться к предыдущей версии windows. После переустановки windows установите и запустите дистрибутив Linux, надеясь, что он не выдаст ошибку WslRegisterDistribution.