Kernel Mode heap corruption is a BSOD-type error with bug check value 0x0000013A. This blue screen error usually occurs due to corrupted device drivers, obsolete graphics cards, memory issues, or malfunctioning hardware. A few users recently encounter this bug after performing an in-place upgrade on their devices.
Well, in this guide, we present detailed information on how the Stop Error 0x13A occurs in the first place. Besides, we also discussed eight solutions that help in getting rid of the KERNEL_MODE_HEAP_CORRUPTION bug. Let’s explore the workarounds in detail –

How to Fix BSOD Error 0x13A in Windows 10
To solve the KERNEL_MODE_HEAP_CORRUPTION Error 0x0000013A, try the following suggestions –
Boot Windows 10 into Safe Mode
Since you are getting the Blue Screen, you won’t be able to log into Windows normally. So, you need to first boot into Safe Mode and then perform the below workarounds. Only a handful of Windows 10 programs and services run on this mode preventing any kind of conflicts from third-party apps.
Here are the essential steps to enter Safe Mode –
- Press the Power button for 5 seconds and wait till it shuts down successfully.
- Repeat this process 2-3 times until the Preparing Automatic Repair screen comes into view.
- Let the system diagnoses this error for a few seconds thereafter click Advanced options.
- On the Windows Recovery Environment (WinRE), go to – Troubleshoot > Advanced options.
- Hit Startup Settings on the next screen followed by the Restart button.
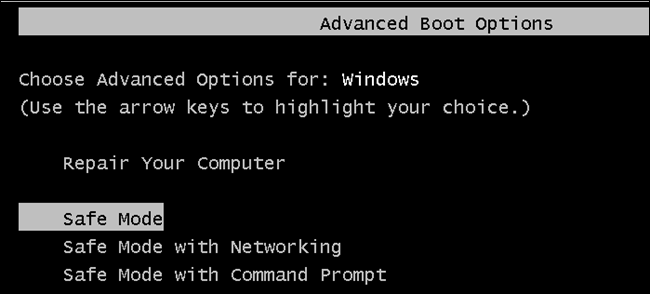
When Windows reboots, press F5 to boot into Safe Mode with Networking.

Note: Selecting “Safe Mode with Networking” is essential to fix black or blue screen issues. If not, this won’t connect to the Internet causing problems in troubleshooting the actual problem.
Check Event Viewer
Knowing the reasons that might have led to the bug at hand provides an opportunity to solve the BSOD error correctly. Interestingly, the system contains a log of all bugs and errors that ever occur on Windows 10. One can access the Windows log at Event Viewer containing information like Source and Event ID.
Now that you are already inside the Safe boot, use the below guideline to get the Windows log file –
- Use Win + S shortcut to start the Search UI.
- Type “event viewer” in the text field, and click the top result.
- Select Windows Logs > System from the left column.
- In the mid-section, scroll down and locate the log titled “Kernel Mode Heap corruption“.
- Once you find this file, double-click the same to read the description.
The log enlists the exact cause that might have caused this BSOD Error 0x13A. Usually, this error arises because of these three reasons –
- Corrupted Graphics Driver
- Software/Hardware Error
- Memory Issues
1] Check Graphics Drivers for issues
If you encounter the BSOD error 0x13A just after starting a heavy game, this problem might lie inside the graphics driver. A corrupted or obsolete graphics driver often causes the KERNEL_MODE_HEAP-CORRUPTION error on Windows 10. To fix this, you must try updating the existing graphics card driver.
Note: In case the update process fails, you may use the rollback feature. If this method fails as well, uninstall the graphics driver, restart the device, then reinstall the graphics card back.
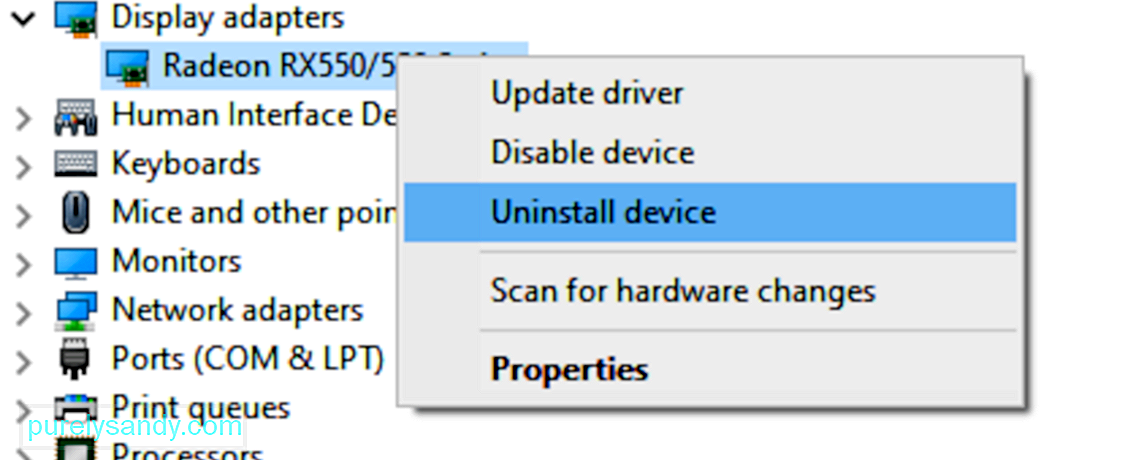
- Right-click on the Windows icon and select Device Manager.
- Click “>” next to the display adapters and right-click again on the available graphics card.
- Now, select the correct option depending on what are you trying to do with this.
For Example:
- Update: Hit update driver option then choose “Search automatically for updated driver software“.
- Roll Back: Click Properties, switch to the Driver tab, and hit Roll back driver.
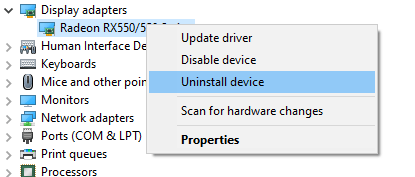
- Reinstall a New Driver: Click uninstall device then visit the manufacturer’s Site to download the latest version of the uninstalled graphics card. When the download completes, double-click the setup file to start the installation.
2] Run Driver Verifier Manager
Driver Verifier Manager is a great tool to discover the problematic drivers on Windows 10. So, if you are still getting the Kernel Mode Heap Corruption 0x0000013A error, you should run this tool to check the obsolete device drivers. Here’s how to perform this task –
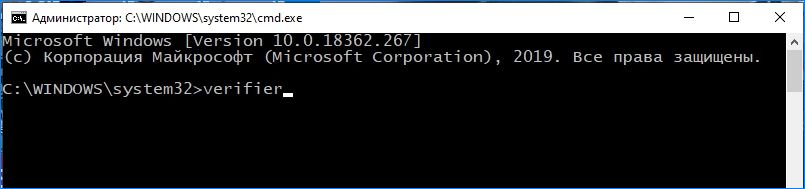
- Launch Windows PowerShell (Admin).
- On the elevated console, type “
verifier“, and hit Enter.

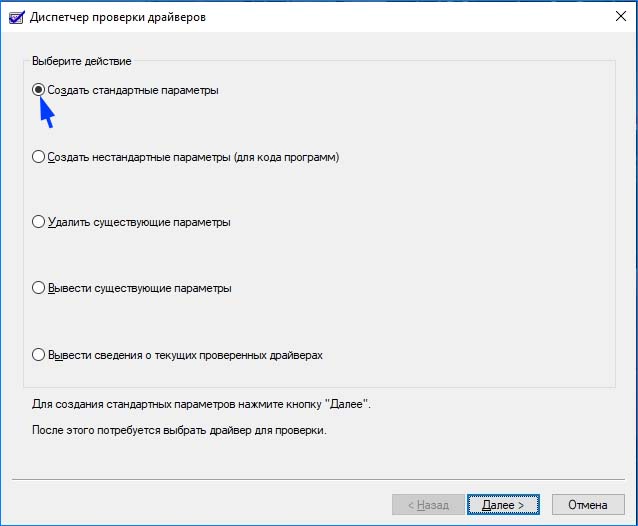
- Subsequently, mark the “Create Standard Settings” checkbox followed by Next.
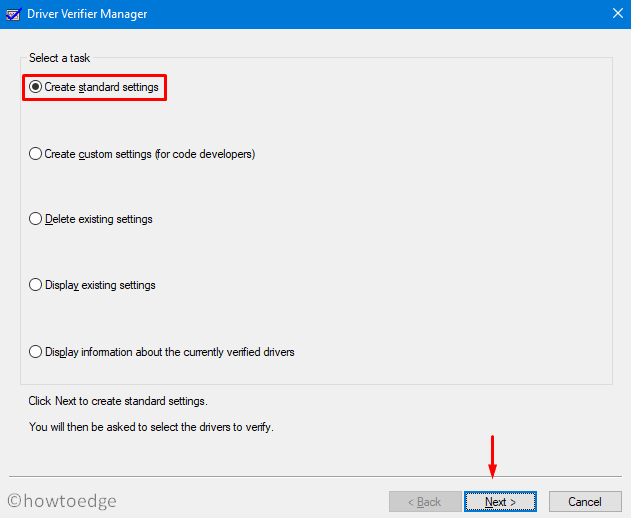
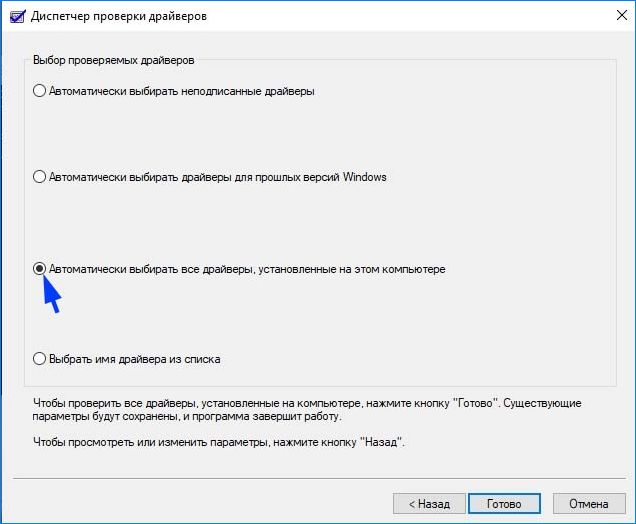
- Now, mark “Automatically select all drivers installed on this computer” and hit Finish.

- The system prompts to “Restart PC” so as to start scanning for any corrupted or damaged drivers.
- After the reboot, Windows will display a list of drivers that are found to have some errors.
You may now re-follow method #2 to update, rollback, or uninstall-reinstall the above-displayed device drivers.
3] Run Blue Screen Troubleshooter
This is another interesting tool designed to help users fix BSOD-type errors on Windows 10. Isn’t it great that one can address the blue screen issue possibly by running a simple troubleshooter? Indeed, this is an easy way to resolve different Stop Error codes on Windows 10 PC. Here’s how to use this tool –
- First of all, navigate to the below path –
Win + I > Update & Security > Troubleshoot
- Click to reveal the Blue Screen box and hit Run the troubleshooter.

4] Perform Disk Cleanup
The presence of unnecessarily stored cache, log files, Windows Prior Installation files, and other irrelevant data may also cause the 0x0000013A error. To solve this, perform a disk Cleanup on Windows 10.
5] Run CHKDSK Utility
If the BSOD error 0x0000013A still persists, this must be due to hardware-related issues. To check whether this indeed is the case or not, run the CHKDSK command line on the Windows Console. All you need is to follow these easy steps –
- Get access to the Command Prompt with administrative privileges.
- Near the blinking cursor, type the command –
chkdsk C: /f /r /x - Hit the Enter key on your keyboard to initiate a disk check.
- This probably won’t run and prompts doing this when the system reboots.
- Type “Y” and press Enter again.

- Now, restart Windows 10 to finally initiate the disk check.
When this completes scanning, Windows 10 OS loads containing a list of bugs and errors that it encountered.
For Desktop Users Only
In case running the CHKDSK command doesn’t reveal any issue, we suggest doing the following –
- Unplug all the HDD cables and wires, clean them for possible dirt, attach the connecting wires back, and then restart Windows.
Many a time, following this simple procedure, fixes BSOD Errors on Windows 10 PC.
6] Repair Missing or Damaged System Files
The presence of corrupted data inside Windows 10 may also lead to different bugs and errors. Kernel Mode Heap Corruption Error 0x0000013A is one such bug. System File Checker is an in-built tool by Microsoft that can replace corrupted, lost, or missing DLL files. One can use this utility program even when you are not able to boot into Windows normally. Here’s how to proceed –
Case 1: When you can’t enter Windows or Safe Mode
- Enter WinRE then follow
Troubleshoot > Advanced Options > Command Prompt.
Case 2: When you can enter Windows or Safe Mode
- Use Win + R to start Run, type cmd, and jointly press Ctrl + Shift + Enter keys.
- Now that you have entered Windows Console, type “
sfc/scannow” and hit Enter.
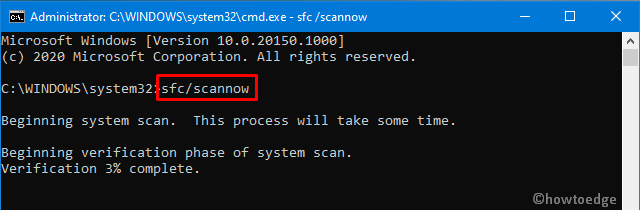
- Wait for the SFC to find and repair corrupted DLL files. Usually, this takes 10-15 minutes.
- Once over, Restart PC to incorporate the above changes.
Sign back into Windows and check whether you still encounter the BSOD Error 0x0000013A or if it has already been fixed.
7] Look for Memory Issues
Having a bad RAM slot is another faulty reason that may erupt the KERNEL_MODE_HEAP_CORRUPTION error. This situation may arise due to sudden power surges, excessive heating, or simply motherboard issues. So, you must consider the “Memory issues” as a possibility and try fixing them (if possible). Here’s how to check for bad memory issues on Windows 10 –
- Hit the Start Menu and start typing “memory” in the search box.
- Click the well-matching result to enter Windows Memory Diagnostic.
- Choose to Restart now and check for problems.

Note: Make sure to save any ongoing process on the computer.
- The system reboots and checks for any memory issues on the computer.
- After scanning for memory problems successfully, the device restarts with a list of all “detected issues”.
Tip: You may also use the Event viewer to view the complete diagnosis report.
- Use the Filter current log available on the right side inside the Event Viewer.

- Scroll down and Select MemoryDiagnostics-Results using the Event sources drop-down menu.

- Hit OK to view all result logs of the recently performed memory test.
- Now, double-click the latest result to see whether the diagnosis passed or not.
In case, the diagnosis doesn’t pass, you need to take appropriate measures to solve the persisting memory issues.
8] Use System Restore Points
If none of the above solutions work to resolve the 0x0000013A error, use restore points to revert back your system to an earlier state when everything was working fine. In case, you don’t have a restore point or haven’t created any system backup, perform a clean installation of Windows 10.
That’s it, if you have any queries or suggestions related to this article, ping us in the comment section.
11 методов борьбы с синим экраном повреждения кучи режима ядра в Windows 10 (09.22.23)
Ошибка синего экрана в Windows может расстраивать, особенно если вы что-то делаете. Это приведет к тому, что вы потеряете весь прогресс в том, над чем вы работаете, и даже можете повредить файлы на своем компьютере. В Windows есть длинный список ошибок BSOD, и некоторые из них были рассмотрены на этом веб-сайте, в том числе:
- VIDEO_DXGKRNL_FATAL_ERROR
- WHEA_UNCORRECTABLE_ERROR
- Netwsw00. Ошибка BSOD Sys
- Ошибка BSOD LGBusEnum.sys
- Ошибка BSOD Ndistpr64.sys
- Ошибка BSOD Dxgmms2.sys
- ИСКЛЮЧЕНИЕ KMODE НЕ ОБРАБОТАНО (e1d65x64.sys) BSOD
- Ошибка IRQL_NOT_LESS_OR_EQUAL BSOD
- DATA_BUS_ERROR
- Ошибка DRIVER_POWER_STATE_FAILURE
- Ошибка BAD_POOL_HEADER
- ВИДЕО ВНУТРЕННЯЯ ошибка BSOD управления памятью
Это лишь краткий список того, что может пойти не так в Windows 10. В этой статье мы обсудим еще одну ошибку BSOD, с которой часто сталкиваются пользователи Windows: синий экран повреждения кучи режима ядра в Windows 10.
Что такое повреждение кучи режима ядра «синий экран» в Windows 10?
 Проверка ошибки KERNEL_MODE_HEAP_CORRUPTION имеет значение 0x0000013A. Это указывает на то, что диспетчер кучи режима ядра обнаружил повреждение в куче.
Повреждение кучи режима ядра является одним из кодов остановки, предоставляемых Windows, когда вы сталкиваетесь с ошибкой BSOD «синий экран смерти». Как и в случае с другими кодами, «повреждение кучи режима ядра» создается уникальным образом, чтобы помочь пользователям идентифицировать проблемы, вызывающие сбои системы. Обычно ошибка вызвана проблемами с драйверами (особенно драйверами видеокарты) или конфликтами программного обеспечения, но также может быть вызвана неисправностью оборудования.
Совет профессионала: просканируйте свой компьютер на наличие проблем с производительностью, ненужных файлов, вредоносных программ. приложения и угрозы безопасности
которые могут вызвать проблемы в системе или снизить производительность.
Проблемы с бесплатным сканированием для ПК. Об Outbyte, инструкции по удалению, лицензионное соглашение, политика конфиденциальности.
Люди сталкивались с ошибкой повреждения кучи режима ядра в разных ситуациях. Некоторые заявили, что ошибка произошла при запуске Windows 10, а другие — в момент запуска определенных программ, таких как видеоигра.
В режиме ядра вашего компьютера программы имеют неограниченный доступ к основным компонентам оборудования. . Когда происходит повреждение кучи режима ядра, это означает, что ошибка в коде работающей программы изменила содержимое кучи данных. Это также означает, что был затронут дескриптор кучи распределителя.
Некоторые возможные результаты — критические сбои памяти в самом распределителе и утечки памяти, когда некоторые части памяти становятся недоступными в будущем.
Что вызывает синий экран повреждения кучи режима ядра в Windows 10?
Ошибка возникает в основном, когда компьютер перегружен или используется в течение длительного периода. Чаще всего это связано с системными драйверами компьютера. Однако пользователи определили множество других причин, вызывающих проблему.
- Неисправности оборудования. Неисправный компонент оборудования на вашем компьютере, например поврежденная оперативная память, может вызвать ошибку.
- Проблемы с драйверами. По сообщениям нескольких пользователей Windows 10, проблема возникла после того, как они обновили свои системные драйверы. В этом случае все, что вам нужно сделать, это отменить обновления. Также возможно, что драйверы уже устарели.
- Проблемы совместимости программного обеспечения — Проблемы совместимости между определенным программным обеспечением на вашем ПК могут привести к нестабильному поведению системы, вызывая ошибку BSOD.
- Система Видеокарта. Возможно, вы попытались открыть какое-то программное обеспечение с интенсивной графикой, которое слишком тяжело для вашей видеокарты.
- Поврежденные файлы. Если в вашей системе есть поврежденные файлы, они также могут вызвать проблему повреждения кучи в режиме ядра. Обратите внимание, что вы должны диагностировать причину проблемы с помощью встроенного средства просмотра событий.
Чтобы узнать больше о причине ошибки, следуйте приведенному ниже руководству:
Нажмите клавиши с логотипом Windows + R и нажмите Enter, чтобы открыть диалоговое окно «Выполнить».
Как исправить BSOD повреждения кучи режима ядра в Windows 10
Возникает ошибка синего экрана KERNEL_MODE_HEAP_CORRUPTION? Не паникуйте — вы не одиноки. Это довольно распространенная ошибка, и ее, как правило, не так уж и сложно исправить. Вот несколько способов исправить эту ошибку:
Метод 1. Загрузите Windows 10 в безопасном режиме.
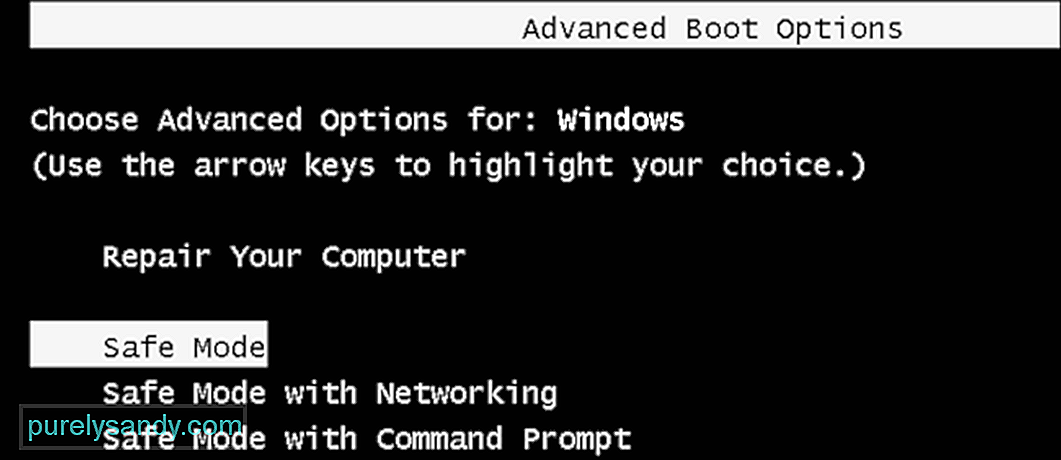 Поскольку отображается синий экран, вы не сможете войти в Windows в обычном режиме. Итак, вам нужно сначала загрузиться в безопасном режиме, а затем выполнить следующие обходные пути. Только несколько программ и служб Windows 10 работают в этом режиме, предотвращая любые конфликты со сторонними приложениями.
Вот шаги, чтобы войти в безопасный режим:
Выбор «Безопасный режим с загрузкой сетевых драйверов». ”Необходимо для устранения проблем с черным или синим экраном. В противном случае это не приведет к подключению к Интернету, что приведет к проблемам при устранении реальной проблемы.
Метод 2: откатите драйверы видеокарты.
Некоторые пользователи Windows сообщили, что они столкнулись с этим «синим экраном смерти». (BSOD) сразу после обновления драйверов видеокарты (или обновления Windows). Если вы получили ошибку именно в этом случае, вам следует восстановить видеодрайвер до предыдущей версии, чтобы обеспечить стабильность работы вашего оборудования. Вот как это сделать:
После восстановления видеодрайвера до предыдущей версии проверьте, сохраняется ли ошибка «Повреждение кучи режима ядра». Если это так, попробуйте следующее исправление, указанное ниже.
Метод 3. Обновите драйверы устройства.
 Ошибка повреждения кучи режима ядра может быть вызвана устаревшим или поврежденным драйвером устройства. Если вы не уверены, что все драйверы вашего устройства (особенно драйверы видеокарты) обновлены, вам следует проверить.
Вы можете сделать это в диспетчере устройств Windows, по одному устройству за раз. Но это требует много времени и терпения, и если какой-либо из ваших драйверов действительно устарел, вам придется обновить их вручную, что сложно и рискованно. Если у вас нет времени, терпения или компьютерных навыков для обновления драйверов устройств вручную, вы можете сделать это автоматически с помощью Outbyte Driver Updater.
Это автоматически распознает вашу систему и найдет для нее правильные драйверы. . Вам не нужно точно знать, в какой системе работает ваш компьютер, вам не нужно рисковать загрузкой и установкой неправильного драйвера, и вам не нужно беспокоиться об ошибке при установке. Driver Updater позаботится обо всем.
Метод 4. Проверьте видеокарту на наличие проблем.
Как мы упоминали ранее, основной причиной являются драйверы, а графическая карта входит в число драйверов, вызывающих эту ошибку. Поэтому нам нужно сначала определить, есть ли проблемы с драйверами дисплея, прежде чем приступать к устранению любых других неполадок. Вот шаги, которые необходимо выполнить, чтобы подтвердить это:
Метод 5. Запустите диспетчер проверки драйверов. .
Диспетчер проверки драйверов — отличный инструмент для обнаружения проблемных драйверов в Windows 10. Итак, если вы все еще получаете ошибку 0x0000013A повреждения кучи режима ядра, вам следует запустить этот инструмент, чтобы проверить устаревшие драйверы устройств. Вот как выполнить эту задачу:
Метод 6. Запустите средство устранения неполадок BSOD Windows (для версии Windows до 1809).
Средство устранения неполадок синего экрана (BSOD) интерпретирует коды проверки ошибок и сообщает вам, если синий экран дает сбой было вызвано:
- неисправным оборудованием
- отказом жесткого диска
- вредоносным ПО
- отказом памяти
- Службы
- Драйверы устройств
К сожалению, средство устранения неполадок синего экрана больше недоступно, начиная с Windows 10 версии 1809. Но если вы используете более раннюю версию, это шаги по использованию этого инструмента:
Вы также можете использовать «Устранение ошибок синего экрана» в Microsoft. Просто перейдите на веб-страницу «Устранение ошибок синего экрана» в Microsoft и следуйте инструкциям, чтобы ответить на вопросы по устранению ошибки синего экрана.
Метод 7. Запустите средство диагностики памяти Windows.
 Средство диагностики памяти Windows проверит, есть ли проблема с вашей оперативной памятью (RAM):
Если вы не видите здесь ошибок, это означает, что с памятью вашего компьютера все в порядке. В противном случае вам следует заменить оперативную память или просто обратиться за помощью к производителю оборудования.
Метод 8: Восстановите поврежденные системные файлы.
Иногда эта ошибка типа «синий экран» вызвана поврежденными системными файлами. Чтобы исправить их, вам нужно сделать две вещи:
- Сканировать с помощью средства проверки системных файлов
- Сканировать с помощью Dism.exe
Чтобы сканировать с помощью средства проверки системных файлов, следуйте приведенным ниже инструкциям:
Средство проверки системных файлов (sfc) — это служебная программа Windows, которая определяет и восстанавливает поврежденные системные файлы: 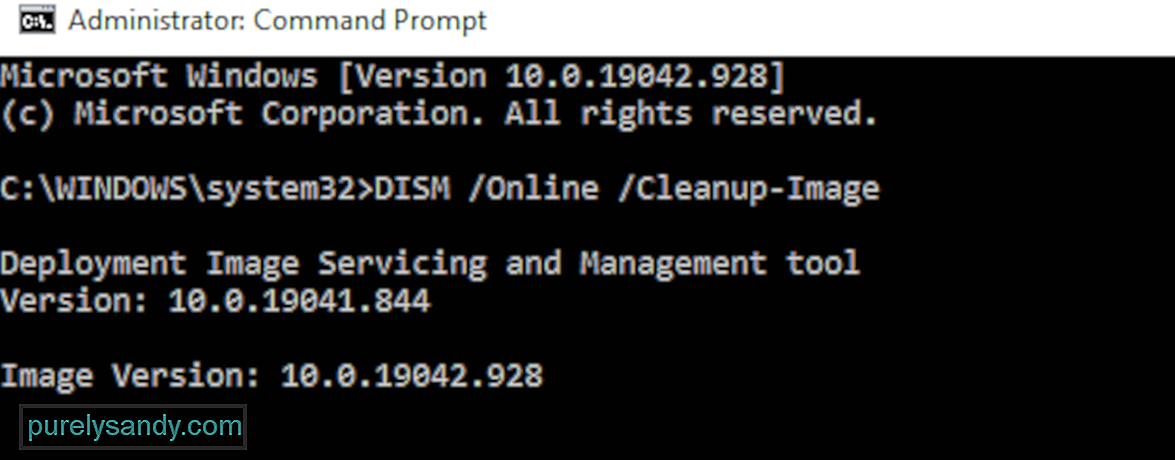
Если вы по-прежнему сталкиваетесь с ошибкой повреждения кучи режима ядра, попробуйте запустить disc.exe, как описано ниже.
Чтобы сканировать с DISM .exe:
Дождитесь завершения процесса. Затем перезагрузите компьютер и посмотрите, не повторится ли ошибка повреждения кучи режима ядра.
Метод 9. Устраните все конфликты программного обеспечения.
Другой возможной причиной ошибки повреждения кучи режима ядра является конфликт программного обеспечения. Это особенно вероятно, если вы получаете сообщение об ошибке после установки нового приложения или когда пытаетесь запустить определенную программу, например видеоигру.
Нет быстрого способа определить, какие приложения конфликтуют. Вы должны полностью закрыть все ненужные программы (включая все связанные фоновые процессы) и подождать, чтобы увидеть, повторится ли ошибка снова.
Для этого вам необходимо:
- Проверить чтобы узнать, есть ли у вас какие-либо конфликты программного обеспечения.
- Выясните, какие программы вызывают их.
- Отмените приоритет, отключите и удалите эти программы.
Проверьте, не у вас есть конфликты программного обеспечения
Закройте все программы. Для этого переключитесь в программу и закройте ее, как обычно (например, щелкнув × в правом верхнем углу программы). Завершите все ненужные фоновые процессы, выполнив следующую процедуру:
Узнайте, какие программы вызывают ваши конфликты.
Если закрытие всех ненужных программ остановило повторение ошибки, вы знаете, что одна из этих программ вызвала ошибку. Теперь вам просто нужно выяснить, какая именно.
Для этого перезапустите одну из ваших программ и подождите, чтобы увидеть, вернется ли ошибка. Если этого не произошло, перезапустите следующую программу и снова дождитесь появления ошибки. Затем следующая, следующая и так далее.
Когда ошибка в конечном итоге повторяется, вы знаете, что программа, которую вы перезапустили последней, является проблемой.
Но имейте в виду, это может быть не единственная проблема. На самом деле он может конфликтовать с другой программой — той, которую вы перезапустили ранее — и именно этот конфликт вызывает ошибку.
Если вам действительно не нужна вредоносная программа, вы можете просто отключить или удалить ее немедленно как описано ниже. Но если вам действительно нужна программа-нарушитель, вы должны проверить, не конфликтует ли она с чем-то еще (потому что тогда вы можете вместо этого отключить / удалить другую программу).
Для этого оставьте проблемную программу открытой, но снова закройте все другие программы. Если ошибка повторяется, вы знаете, что программа является единственной причиной. Если ошибка больше не возникает, вы знаете, что программа конфликтует с другой программой. Чтобы выяснить, какая из них, перезапустите каждую программу снова, по очереди, и дождитесь появления ошибки.
Когда вы обнаружите, какие программы конфликтуют друг с другом, вы можете отключить или удалить одну вам нужно меньше всего.
Отменить приоритет, отключить или удалить конфликтующие программы
После того, как вы определите программы, вызывающие конфликт, у вас есть три варианта:
- Установить низкий приоритет программы
- Отключить программу навсегда
- Удалить программу
Если вы не хотите отключать или удалять вредоносную программу, сначала попробуйте отменить приоритет. Это устранило ошибку для некоторых пользователей. Чтобы отменить приоритет программы:
Чтобы навсегда отключить программу:
Чтобы удалить программу:
Если после отмены приоритета отключение или при удалении конфликтующих программ ошибка повторяется, попробуйте другие исправления, указанные ниже.
Метод 10. Проверьте наличие других проблем, таких как перегрев.
Не так-то просто повозиться с оборудованием, если вы компьютерный новичок. Вам нужно разобрать корпус компьютера, найти проблемы в каждом отдельном компоненте и найти способы их исправить — и все это самостоятельно. Достаточно ужасно просто думать об этом, не говоря уже о том, чтобы применять это на практике. В любом случае, если у вас нет особого интереса к изучению навыков, вам следует обратиться к местному техническому специалисту за дополнительной помощью.
Если вы проверили наличие проблем с оборудованием, но по-прежнему получаете сообщение об ошибке, у вас все еще есть еще одно исправление, которое нужно попробовать — переустановить систему Windows.
Метод 11: Переустановите систему Windows
Если ни одно из указанных выше исправлений не помогло вам, вам может потребоваться сбросить или переустановить операционную систему Windows.
Сброс Windows вернет вашу систему в исходное состояние, как если бы вы включали компьютер впервые. Он удаляет все приложения, которых не было на вашем компьютере, но вы можете решить, сохранять ли ваши личные данные или нет. Кроме того, вам не нужны внешние запоминающие устройства для выполнения сброса, потому что Windows завершит весь процесс самостоятельно.
Чистая установка Windows сотрет все (включая все установленные вами приложения и ваши личные данные) с диска, на котором установлена ваша система. Вам нужно внешнее запоминающее устройство, например USB-накопитель, чтобы выполнить чистую установку. По сравнению с описанным выше вариантом чистая установка кажется более сложной, но более эффективной.
Ниже перечислены некоторые полезные статьи, которые научат вас, как сбросить или переустановить Windows 10 шаг за шагом:
Чтобы перезагрузить компьютер, выполните следующие действия:
- Просто удалите мои файлы, чтобы выполнить быстрое форматирование, и это не займет много времени. Ваши файлы могут быть восстановлены кем-то другим, поскольку они помечаются только как удаленные. Рекомендуется выбрать этот вариант, если вы оставляете свой компьютер.
- При полной очистке диска выполняется безопасное стирание, чтобы полностью очистить диск, и ваши файлы не могут быть легко восстановлены. Это может занять несколько часов. Рекомендуется выбрать этот вариант, если вы перерабатываете или продаете свой компьютер.
После настройки ваш компьютер будет в порядке.
Чтобы выполнить чистую установку Windows 10, выполните следующие действия:
Обычно ваш компьютер активируется автоматически, когда у вас есть доступ к Интернету. Если активация не происходит, вы можете принудительно выполнить активацию, выполнив следующую команду.
- Введите cmd в поле поиска, затем выберите Командная строка из списка вариантов.
- Введите команду slmgr.vbs / ato и нажмите клавишу Enter.
Возможно, вам придется попробовать эту команду несколько раз. Если вы видите какие-либо ошибки, перезагрузите компьютер и снова выполните эту команду. Или вы можете просто подождать, пока Microsoft поможет вам активировать вашу систему автоматически.
Заключение
Синий экран повреждения кучи режима ядра в Windows 10 может быть знакомой проблемой для большинства пользователей Windows, но это не значит что это менее хлопотно. В некоторых случаях вы не сможете нормально загрузиться, поэтому некоторые методы устранения неполадок неприменимы. Так что, если вы столкнулись с этим BSOD, продвигайтесь вниз по списку решений выше, пока не найдете то, которое работает для вас.
YouTube видео: 11 методов борьбы с синим экраном повреждения кучи режима ядра в Windows 10
09, 2023
Синий экран с кодом остановки «Kernel Mode Heap Corruption» в Windows 10 может возникнуть при запуске игр и приложений, которые начинают интенсивно использовать ресурсы процессора. Ошибка очень распространена и не указывает на серьезные проблемы с операционной системой. Но в последнее время возникают случаи, когда синий экран BSOD возникает снова и снова при выполнении одного и того же действия, которое первоначально вызвало ошибку.

Причины ошибки
Синий экран Kernel_Mode_Heap_Corruption может возникнуть по ряду причин.
Устаревшие драйвера видеокарты. Часто причиной этой ошибки являются поврежденные или устаревшие графические драйвера. Поэтому, когда запускаем игру или «тяжелое» приложение сталкивается с синим экраном.
Поврежденные системные файлы. Для решения проблемы можно запустить утилиту проверки системных файлов sfc /scannow или Dism /Online /Cleanup-Image /RestoreHealth из командной строки, запущенной от имени администратора.
Несовместимое программное обеспечение. После установки несовместимого приложения может возникнуть конфликт с ОС. Если приложение вносит изменения в системные параметры, Windows может аварийно прекратить работу и выбросить синий экран.
Аппаратные ошибки. При возникновении ошибок в работе оперативной памяти или в случае ее неисправности, Windows не сможет правильно взаимодействовать с устройством и аварийно прерывает работу.
Перейдем к решениям, но для начала войдите в систему с учетной записью администратора и проверьте подключение к интернету.
Удаление несовместимых приложений
Очень часто синий экран с кодом Kernel_Mode_Heap_Corruption возникает по причине программного конфликта. Некоторые приложения могут внести изменения в основные параметры, что приведет к нестабильной работе Windows. Поэтому сначала нужно их определить. Это могут быть программы, установленные перед появлением ошибки или при запуске которых, отображается синий экран.
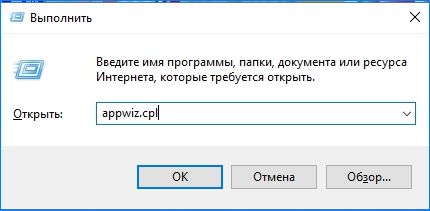
Откройте окно «Выполнить» нажатием на клавиши Windows + R, наберите команду appwiz.cpl и подтвердите ее выполнение на Enter.
Отобразится список всех программ, установленных на компьютере. Если уверены, что ошибка появилась после установки последней программы, отсортируйте список по дате, кликните на ней правой кнопкой мыши и выберите «Удалить».

Когда синий экран возникает при запуске определенной программы, также найдите ее в списке и удалить.
Проверка драйверов на наличие ошибок
Драйвера являются основными компонентами, которые взаимодействуют между операционной системой и оборудованием. Если они повреждены, то будете сталкиваться с многочисленными ошибками, в частности, с Kernel_Mode_Heap_Corruption. Поэтому попробуем их обновить до последней сборки.
Прежде чем перейти к решению, сделайте точку восстановления на случай возникновения ошибок в работе утилиты.
Откройте строку поиска клавишами Windows + S и наберите «командная строка». Кликните на найденный результат правой кнопкой мыши и выберите «Запуск от имени администратора».

В окне командной строки наберите команду:
verifier
Выберите «Создать стандартные настройки»и нажмите Далее.
Затем выберите «Автоматически выбирать все драйверы, установленные на этом компьютере» и нажмите «Готово». Подтвердите перезагрузку компьютера.
После перезагрузки сразу начнется проверка. При обнаружении неисправных их нужно обновить, выполнив следующие шаги.
Обновление драйверов
Если какие-то драйвера оказались неисправными в ходе проверки предыдущим решением, обновите их вручную до последней версии.
Первое, что нужно сделать, загрузить требуемые драйвера с официального сайта в указанную папку на диске и запустить их установку.
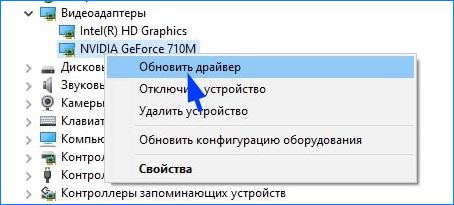
Откройте окно «Выполнить» (Win + R), впишите команду devmgmt.msc для входа в «Диспетчер устройств». В случае повреждения драйверов видеокарты, разверните вкладку «Видеоадаптеры», кликните правой кнопкой мыши на ней и выберите «Обновить».
Выберите второй вариант обновления вручную.
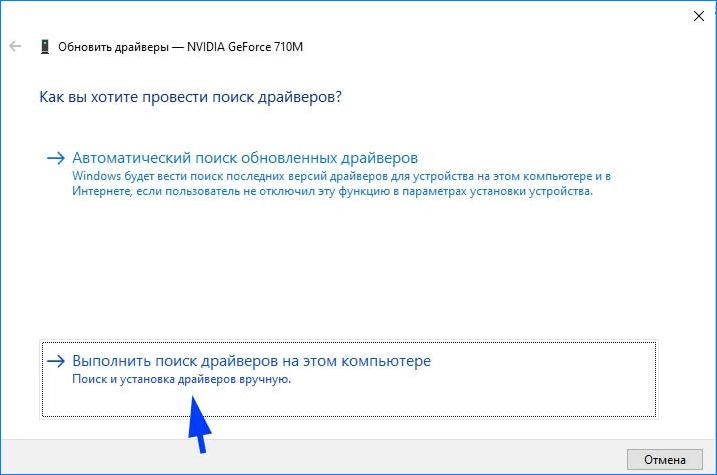
Затем нажмите на кнопку «Обзор», перейдите в папку с загруженными драйверами. Следуйте инструкциям до завершения установки.
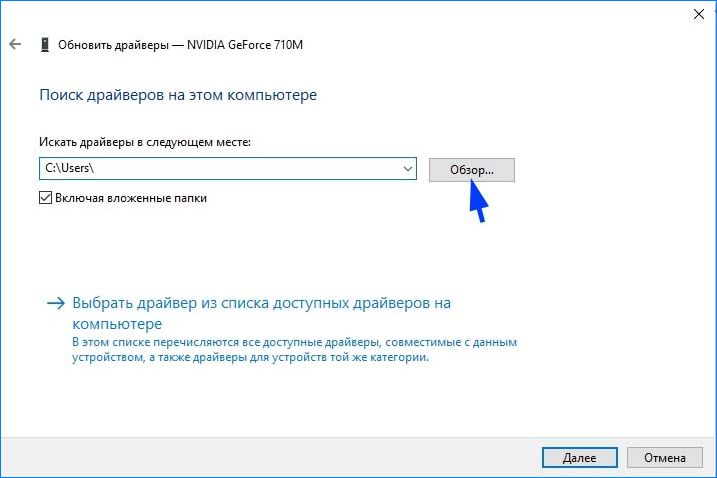
Обновите все устройства, драйверы которых были повреждены и перезагрузите компьютер. Если продолжаете сталкиваться с ошибкой Kernel_Mode_Heap_Corruption перейдите к следующему способу.
Проверка оперативной памяти
Ошибка также может возникнуть из-за неполадок планок памяти. Перед запуском теста ОЗУ, нужно извлечь планки из слотов, и аккуратно протереть контакты ластиком. Затем вернуть их обратно, проверить плотность контакта и фиксацию защелок. Проверьте также размещение планок (например, нужно использовать 1 и 3 слот, если на материнской плате есть 2 модуля оперативной памяти).
Для проверки памяти загрузите программу MemTest86+ с официального сайта. Установите флешку и запустите установку программы. Имейте в виду, что при создании загрузочного диска для memtest все содержимое флешки будет удалено.
Переключите в БИОС приоритет на загрузку системы с USB-накопителя. После загрузки запустите проверку ОЗУ. Модули оперативной памяти будут протестированы в несколько циклов.
Запуск восстановления системы
Если не удалось устранить ошибку Kernel_Mode_Heap_Corruption перечисленными способами, попробуйте вернуть Windows в предыдущее состояние до возникновения синего экрана.
Нажмите Windows + S для вызова строки системного поиска, введите «восстановление» и кликните на найденный результат.

Перейдите в настройки восстановления, затем на вкладке «Защита системы» нажмите кнопку «Восстановить».
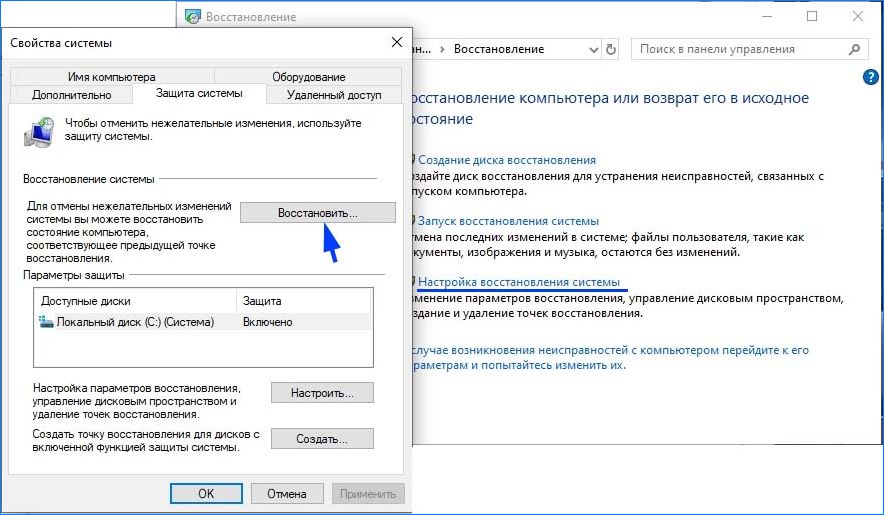
На первом экране нажмите на кнопку «Далее». На следующем отметьте флажком «Показать другие точки». Выберите точку восстановления, которая была создана до появления сбоя системы Kernel_Mode_Heap_Corruption.
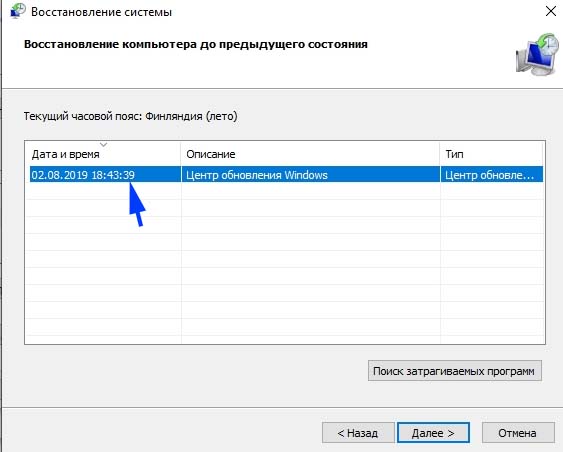
На экране подтверждения нажмите кнопку «Готово».
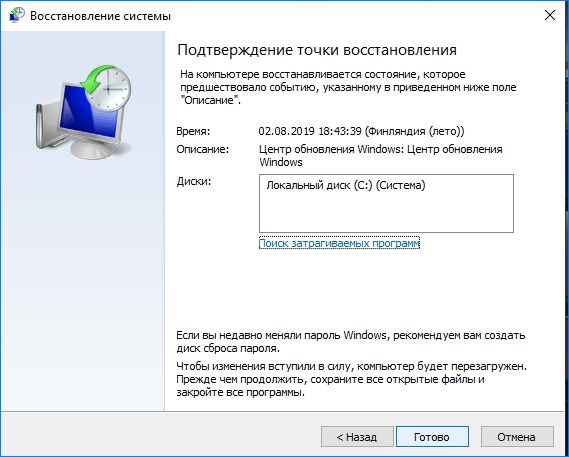
После начнется процесс восстановления. При успешном завершении проверьте, возникает ли ошибка.
Kernel Mode heap corruption is a BSOD-type error with bug check value 0x0000013A. This blue screen error usually occurs due to corrupted device drivers, obsolete graphics card, memory issues, or malfunctioning hardware. A few users recently encounter this bug after performing an in-place upgrade on their devices.
Well, in this guide, we present detailed information on how the Stop Error 0x13A occurs in the first place. Besides, we also discussed eight solutions that help in getting rid of the KERNEL_MODE_HEAP_CORRUPTION bug. Let’s explore the workarounds in detail –
How to Fix BSOD Error 0x13A in Windows 10
To solve the KERNEL_MODE_HEAP_CORRUPTION Error 0x0000013A, try the following suggestions –
Boot Windows 10 into Safe Mode
Since you are getting the Blue Screen, you won’t be able to log into Windows normally. So, you need to first boot into Safe Mode then perform the below workarounds. Only a handful of Windows 10 programs and services run on this mode preventing any kind of conflicts from third-party apps.
Here are the essential steps to enter Safe Mode –
- Press the Power button for 5 seconds and wait till it shuts down successfully.
- Repeat this process for 2-3 times until the Preparing Automatic Repair screen comes into view.
- Let the system diagnoses this error for a few seconds thereafter click Advanced options.
- On the Windows Recovery Environment (WinRE), go to – Troubleshoot > Advanced options.
- Hit Startup Settings on the next screen followed by the Restart button.
When Windows reboots, press F5 to boot into Safe Mode with Networking.
Note: Selecting “Safe Mode with Networking” is essential to fix black or blue screen issues. If not, this won’t connect to the Internet causing problems in troubleshooting the actual problem.
Check Event Viewer
Knowing the reasons that might have lead to the bug at hand provides an opportunity to solve the BSOD error correctly. Interestingly, the system contains a log of all bugs and errors that ever occur on Windows 10. One can access the Windows log at Event Viewer containing information like Source and Event ID.
Now that you are already inside the Safe boot, use the below guideline to get the Windows log file –
- Use Win + S shortcut to start the Search UI.
- Type “event viewer” in the text field, and click the top result.
- Select
Windows Logs > Systemon the left column. - In the mid-section, scroll down and locate the log titled “Kernel Mode Heap corruption“.
- Once you find this file, double-click the same to read the description.
The log details the exact cause that has generated the BSOD Error 0x13A. Usually, this error arises owing to below three reasons –
- Corrupted Graphics Driver
- Software/Hardware Error
- Memory Issues
1] Check Graphics Drivers for issues
If you encounter the BSOD error 0x13A just after starting a heavy game, this problem might lie inside the graphics driver. A corrupted or obsolete graphics driver often causes the KERNEL_MODE_HEAP-CORRUPTION error on Windows 10. To fix this, you must try updating the existing graphics card driver.
Note: In case the update process fails, you may use the rollback feature. If this method fails as well, uninstall the graphics driver, restart the device, then reinstall the graphics card back.
- Make a right-click on the Windows icon and select Device Manager.
- Click “>” next to the display adapters and right-click again on the available graphics card.
- Now, select the correct option depending upon what are you trying to do with this.
For Example:
- Update: Hit update driver option then choose “Search automatically for updated driver software“.
- Roll Back: Click Properties, switch to the Driver tab and hit Roll back driver.
- Reinstall a New Driver: Click uninstall device then visit the manufacturer’s Site to download the latest version of the uninstalled graphics card. When the download completes, double-click the setup file to start the installation.
2] Run Driver Verifier Manager
Driver Verifier Manager is a great tool to discover the problematic drivers on Windows 10. So, if you are still getting the Kernel Mode Heap Corruption 0x0000013A error, you should run this tool to check the obsolete device drivers. Here’s how to perform this task –
- Launch Windows PowerShell (Admin).
- On the elevated console, type “
verifier“, and hit Enter.
- Subsequently, mark the “Create Standard Settings” checkbox followed by Next.
- Now, mark “Automatically select all drivers installed on this computer” and hit Finish.
- The system prompts to “Restart PC” so as to start scanning for any corrupted or damaged drivers.
- After the reboot, Windows will display a list of drivers that are found to have some errors.
You may now re-follow method #2 to update, rollback, or uninstall-reinstall the above-displayed device drivers.
3] Run Blue Screen Troubleshooter
This is another interesting tool designed to help users fixing BSOD-type errors on Windows 10. Isn’t it great that one can address the blue screen issue possibly by running a simple troubleshooter? Indeed, this is an easy way to resolve different Stop Error codes on Windows 10 PC. Here’s how to use this tool –
- First of all, browse to the below path –
Win + I > Update & Security > Troubleshoot
- Click to reveal the Blue Screen box and hit Run the troubleshooter.
4] Perform Disk Cleanup
The presence of unnecessarily stored cache, log files, Windows Prior Installation files, and other irrelevant data may also cause the 0x0000013A error. To solve this, perform a disk Cleanup on Windows 10.
5] Run CHKDSK Utility
If the BSOD error 0x0000013A still persists, this must be due to hardware-related issues. To check whether this indeed is the case or not, run the CHKDSK command-line on the Windows Console. All you need is to follow these easy steps –
- Get access to the Command Prompt with administrative privileges.
- Near the blinking cursor, type the command –
chkdsk C: /f /r /x - Hit the Enter key on your keyboard to initiate a disk check.
- This probably won’t run and prompts doing this when the system reboots.
- Type “Y” and press Enter again.
- Now, restart Windows 10 to finally initiate the disk check.
When this completes scanning, Windows 10 OS loads containing a list of bugs and errors that it encountered.
For Desktop Users Only
In case running the CHKDSK command doesn’t reveal any issue, we suggest unplugging all the HDD cables, clean for possible dirt, re-attach the connecting wires, and start Windows.
Many a time, following this simple procedure, fixes BSOD Errors on Windows 10 PC.
6] Repair Missing or Damaged System Files
The presence of corrupted data inside Windows 10 may also lead to different bugs and errors. Kernel Mode Heap Corruption Error 0x0000013A is one such bug. System File Checker is an in-built tool by Microsoft that can replace corrupted, lost, or missing DLL files. One can use this utility program even when you are not able to boot into Windows normally. Here’s how to proceed –
Case 1: When you can’t enter Windows or Safe Mode
- Enter WinRE then follow
Troubleshoot > Advanced Options > Command Prompt.
Case 2: When you can enter Windows or Safe Mode
- Use Win + R to start Run, type cmd, and jointly press Ctrl+Shift+Enter keys.
- Now that you have entered Windows Console, type “
sfc/scannow” and hit Enter.
- Wait for the SFC to find and repair corrupted DLL files. Usually, this takes 10-15 minutes.
- Once over, Restart PC to incorporate the above changes.
Sign back into Windows and check whether you still encounter the BSOD Error 0x0000013A or it has been fixed.
7] Look for Memory Issues
Having a bad RAM slot is another faulty reason that may erupt the KERNEL_MODE_HEAP_CORRUPTION error. This situation may arise due to sudden power surge, excessive heating, or simply motherboard issues. So, you must consider the “Memory issues” as a possibility and try fixing them (if possible). Here’s how to check for bad memory issues on Windows 10 –
- Hit the Start Menu and start typing “memory” in the search box.
- Click the well-matching result to enter Windows Memory Diagnostic.
- Choose to Restart now and check for problems.
Note: Make sure to save any ongoing process on the computer.
- The system reboots and checks for any memory issues on the computer.
- After scanning for memory problems successfully, the device restarts with a list of all “detected issues”.
Tip: You may also use the Event viewer to view the complete diagnosis report.
- Use the Filter current log available at the right side on the Event Viewer.
- Scroll down and Select MemoryDiagnostics-Results using the Event sources drop-down menu.
- Hit OK to view all result logs of the recently performed memory test.
- Now, double-click the latest result to see whether the diagnosis passed or not.
In case, the diagnosis doesn’t pass, you need to take appropriate measures to solve the persisting memory issues.
8. Use System Restore Points
If none of the above solutions work to resolve the 0x0000013A error, use restore points to revert back PC to an earlier state when everything was working pretty normal. In case, you haven’t created any system backup, clean install Windows 10.
That’s it, if you have any queries or suggestions related to this article, ping us in the comment section.
Tip: If you are facing update, activation, or driver issues on your Windows PC, try RESTORO PC Repair Tool. This software will scan your device for potential issues and resolve them automatically.
11 методов борьбы с синим экраном повреждения кучи режима ядра в Windows 10 (03.13.23)
Ошибка синего экрана в Windows может расстраивать, особенно если вы что-то делаете. Это приведет к тому, что вы потеряете весь прогресс в том, над чем вы работаете, и даже можете повредить файлы на своем компьютере. В Windows есть длинный список ошибок BSOD, и некоторые из них были рассмотрены на этом веб-сайте, в том числе:
- VIDEO_DXGKRNL_FATAL_ERROR
- WHEA_UNCORRECTABLE_ERROR
- Netwsw00. Ошибка BSOD Sys
- Ошибка BSOD LGBusEnum.sys
- Ошибка BSOD Ndistpr64.sys
- Ошибка BSOD Dxgmms2.sys
- ИСКЛЮЧЕНИЕ KMODE НЕ ОБРАБОТАНО (e1d65x64.sys) BSOD
- Ошибка IRQL_NOT_LESS_OR_EQUAL BSOD
- DATA_BUS_ERROR
- Ошибка DRIVER_POWER_STATE_FAILURE
- Ошибка BAD_POOL_HEADER
- ВИДЕО ВНУТРЕННЯЯ ошибка BSOD управления памятью
Это лишь краткий список того, что может пойти не так в Windows 10. В этой статье мы обсудим еще одну ошибку BSOD, с которой часто сталкиваются пользователи Windows: синий экран повреждения кучи режима ядра в Windows 10.
Что такое повреждение кучи режима ядра «синий экран» в Windows 10?
Проверка ошибки KERNEL_MODE_HEAP_CORRUPTION имеет значение 0x0000013A. Это указывает на то, что диспетчер кучи режима ядра обнаружил повреждение в куче.
Повреждение кучи режима ядра является одним из кодов остановки, предоставляемых Windows, когда вы сталкиваетесь с ошибкой BSOD «синий экран смерти». Как и в случае с другими кодами, «повреждение кучи режима ядра» создается уникальным образом, чтобы помочь пользователям идентифицировать проблемы, вызывающие сбои системы. Обычно ошибка вызвана проблемами с драйверами (особенно драйверами видеокарты) или конфликтами программного обеспечения, но также может быть вызвана неисправностью оборудования.
Совет профессионала: просканируйте свой компьютер на наличие проблем с производительностью, ненужных файлов, вредоносных программ. приложения и угрозы безопасности
которые могут вызвать проблемы в системе или снизить производительность.
Проблемы с бесплатным сканированием для ПК. Об Outbyte, инструкции по удалению, лицензионное соглашение, политика конфиденциальности.
Люди сталкивались с ошибкой повреждения кучи режима ядра в разных ситуациях. Некоторые заявили, что ошибка произошла при запуске Windows 10, а другие — в момент запуска определенных программ, таких как видеоигра.
В режиме ядра вашего компьютера программы имеют неограниченный доступ к основным компонентам оборудования. . Когда происходит повреждение кучи режима ядра, это означает, что ошибка в коде работающей программы изменила содержимое кучи данных. Это также означает, что был затронут дескриптор кучи распределителя.
Некоторые возможные результаты — критические сбои памяти в самом распределителе и утечки памяти, когда некоторые части памяти становятся недоступными в будущем.
Что вызывает синий экран повреждения кучи режима ядра в Windows 10?
Ошибка возникает в основном, когда компьютер перегружен или используется в течение длительного периода. Чаще всего это связано с системными драйверами компьютера. Однако пользователи определили множество других причин, вызывающих проблему.
- Неисправности оборудования. Неисправный компонент оборудования на вашем компьютере, например поврежденная оперативная память, может вызвать ошибку.
- Проблемы с драйверами. По сообщениям нескольких пользователей Windows 10, проблема возникла после того, как они обновили свои системные драйверы. В этом случае все, что вам нужно сделать, это отменить обновления. Также возможно, что драйверы уже устарели.
- Проблемы совместимости программного обеспечения — Проблемы совместимости между определенным программным обеспечением на вашем ПК могут привести к нестабильному поведению системы, вызывая ошибку BSOD.
- Система Видеокарта. Возможно, вы попытались открыть какое-то программное обеспечение с интенсивной графикой, которое слишком тяжело для вашей видеокарты.
- Поврежденные файлы. Если в вашей системе есть поврежденные файлы, они также могут вызвать проблему повреждения кучи в режиме ядра. Обратите внимание, что вы должны диагностировать причину проблемы с помощью встроенного средства просмотра событий.
Чтобы узнать больше о причине ошибки, следуйте приведенному ниже руководству:
Нажмите клавиши с логотипом Windows + R и нажмите Enter, чтобы открыть диалоговое окно «Выполнить».
Как исправить BSOD повреждения кучи режима ядра в Windows 10
Возникает ошибка синего экрана KERNEL_MODE_HEAP_CORRUPTION? Не паникуйте — вы не одиноки. Это довольно распространенная ошибка, и ее, как правило, не так уж и сложно исправить. Вот несколько способов исправить эту ошибку:
Метод 1. Загрузите Windows 10 в безопасном режиме.
Поскольку отображается синий экран, вы не сможете войти в Windows в обычном режиме. Итак, вам нужно сначала загрузиться в безопасном режиме, а затем выполнить следующие обходные пути. Только несколько программ и служб Windows 10 работают в этом режиме, предотвращая любые конфликты со сторонними приложениями.
Вот шаги, чтобы войти в безопасный режим:
Выбор «Безопасный режим с загрузкой сетевых драйверов». ”Необходимо для устранения проблем с черным или синим экраном. В противном случае это не приведет к подключению к Интернету, что приведет к проблемам при устранении реальной проблемы.
Метод 2: откатите драйверы видеокарты.
Некоторые пользователи Windows сообщили, что они столкнулись с этим «синим экраном смерти». (BSOD) сразу после обновления драйверов видеокарты (или обновления Windows). Если вы получили ошибку именно в этом случае, вам следует восстановить видеодрайвер до предыдущей версии, чтобы обеспечить стабильность работы вашего оборудования. Вот как это сделать:
После восстановления видеодрайвера до предыдущей версии проверьте, сохраняется ли ошибка «Повреждение кучи режима ядра». Если это так, попробуйте следующее исправление, указанное ниже.
Метод 3. Обновите драйверы устройства.
Ошибка повреждения кучи режима ядра может быть вызвана устаревшим или поврежденным драйвером устройства. Если вы не уверены, что все драйверы вашего устройства (особенно драйверы видеокарты) обновлены, вам следует проверить.
Вы можете сделать это в диспетчере устройств Windows, по одному устройству за раз. Но это требует много времени и терпения, и если какой-либо из ваших драйверов действительно устарел, вам придется обновить их вручную, что сложно и рискованно. Если у вас нет времени, терпения или компьютерных навыков для обновления драйверов устройств вручную, вы можете сделать это автоматически с помощью Outbyte Driver Updater.
Это автоматически распознает вашу систему и найдет для нее правильные драйверы. . Вам не нужно точно знать, в какой системе работает ваш компьютер, вам не нужно рисковать загрузкой и установкой неправильного драйвера, и вам не нужно беспокоиться об ошибке при установке. Driver Updater позаботится обо всем.
Метод 4. Проверьте видеокарту на наличие проблем.
Как мы упоминали ранее, основной причиной являются драйверы, а графическая карта входит в число драйверов, вызывающих эту ошибку. Поэтому нам нужно сначала определить, есть ли проблемы с драйверами дисплея, прежде чем приступать к устранению любых других неполадок. Вот шаги, которые необходимо выполнить, чтобы подтвердить это:
Метод 5. Запустите диспетчер проверки драйверов. .
Диспетчер проверки драйверов — отличный инструмент для обнаружения проблемных драйверов в Windows 10. Итак, если вы все еще получаете ошибку 0x0000013A повреждения кучи режима ядра, вам следует запустить этот инструмент, чтобы проверить устаревшие драйверы устройств. Вот как выполнить эту задачу:
Метод 6. Запустите средство устранения неполадок BSOD Windows (для версии Windows до 1809).
Средство устранения неполадок синего экрана (BSOD) интерпретирует коды проверки ошибок и сообщает вам, если синий экран дает сбой было вызвано:
- неисправным оборудованием
- отказом жесткого диска
- вредоносным ПО
- отказом памяти
- Службы
- Драйверы устройств
К сожалению, средство устранения неполадок синего экрана больше недоступно, начиная с Windows 10 версии 1809. Но если вы используете более раннюю версию, это шаги по использованию этого инструмента:
Вы также можете использовать «Устранение ошибок синего экрана» в Microsoft. Просто перейдите на веб-страницу «Устранение ошибок синего экрана» в Microsoft и следуйте инструкциям, чтобы ответить на вопросы по устранению ошибки синего экрана.
Метод 7. Запустите средство диагностики памяти Windows.
Средство диагностики памяти Windows проверит, есть ли проблема с вашей оперативной памятью (RAM):
Если вы не видите здесь ошибок, это означает, что с памятью вашего компьютера все в порядке. В противном случае вам следует заменить оперативную память или просто обратиться за помощью к производителю оборудования.
Метод 8: Восстановите поврежденные системные файлы.
Иногда эта ошибка типа «синий экран» вызвана поврежденными системными файлами. Чтобы исправить их, вам нужно сделать две вещи:
- Сканировать с помощью средства проверки системных файлов
- Сканировать с помощью Dism.exe
Чтобы сканировать с помощью средства проверки системных файлов, следуйте приведенным ниже инструкциям:
Средство проверки системных файлов (sfc) — это служебная программа Windows, которая определяет и восстанавливает поврежденные системные файлы:
Если вы по-прежнему сталкиваетесь с ошибкой повреждения кучи режима ядра, попробуйте запустить disc.exe, как описано ниже.
Чтобы сканировать с DISM .exe:
Дождитесь завершения процесса. Затем перезагрузите компьютер и посмотрите, не повторится ли ошибка повреждения кучи режима ядра.
Метод 9. Устраните все конфликты программного обеспечения.
Другой возможной причиной ошибки повреждения кучи режима ядра является конфликт программного обеспечения. Это особенно вероятно, если вы получаете сообщение об ошибке после установки нового приложения или когда пытаетесь запустить определенную программу, например видеоигру.
Нет быстрого способа определить, какие приложения конфликтуют. Вы должны полностью закрыть все ненужные программы (включая все связанные фоновые процессы) и подождать, чтобы увидеть, повторится ли ошибка снова.
Для этого вам необходимо:
- Проверить чтобы узнать, есть ли у вас какие-либо конфликты программного обеспечения.
- Выясните, какие программы вызывают их.
- Отмените приоритет, отключите и удалите эти программы.
Проверьте, не у вас есть конфликты программного обеспечения
Закройте все программы. Для этого переключитесь в программу и закройте ее, как обычно (например, щелкнув × в правом верхнем углу программы). Завершите все ненужные фоновые процессы, выполнив следующую процедуру:
Узнайте, какие программы вызывают ваши конфликты.
Если закрытие всех ненужных программ остановило повторение ошибки, вы знаете, что одна из этих программ вызвала ошибку. Теперь вам просто нужно выяснить, какая именно.
Для этого перезапустите одну из ваших программ и подождите, чтобы увидеть, вернется ли ошибка. Если этого не произошло, перезапустите следующую программу и снова дождитесь появления ошибки. Затем следующая, следующая и так далее.
Когда ошибка в конечном итоге повторяется, вы знаете, что программа, которую вы перезапустили последней, является проблемой.
Но имейте в виду, это может быть не единственная проблема. На самом деле он может конфликтовать с другой программой — той, которую вы перезапустили ранее — и именно этот конфликт вызывает ошибку.
Если вам действительно не нужна вредоносная программа, вы можете просто отключить или удалить ее немедленно как описано ниже. Но если вам действительно нужна программа-нарушитель, вы должны проверить, не конфликтует ли она с чем-то еще (потому что тогда вы можете вместо этого отключить / удалить другую программу).
Для этого оставьте проблемную программу открытой, но снова закройте все другие программы. Если ошибка повторяется, вы знаете, что программа является единственной причиной. Если ошибка больше не возникает, вы знаете, что программа конфликтует с другой программой. Чтобы выяснить, какая из них, перезапустите каждую программу снова, по очереди, и дождитесь появления ошибки.
Когда вы обнаружите, какие программы конфликтуют друг с другом, вы можете отключить или удалить одну вам нужно меньше всего.
Отменить приоритет, отключить или удалить конфликтующие программы
После того, как вы определите программы, вызывающие конфликт, у вас есть три варианта:
- Установить низкий приоритет программы
- Отключить программу навсегда
- Удалить программу
Если вы не хотите отключать или удалять вредоносную программу, сначала попробуйте отменить приоритет. Это устранило ошибку для некоторых пользователей. Чтобы отменить приоритет программы:
Чтобы навсегда отключить программу:
Чтобы удалить программу:
Если после отмены приоритета отключение или при удалении конфликтующих программ ошибка повторяется, попробуйте другие исправления, указанные ниже.
Метод 10. Проверьте наличие других проблем, таких как перегрев.
Не так-то просто повозиться с оборудованием, если вы компьютерный новичок. Вам нужно разобрать корпус компьютера, найти проблемы в каждом отдельном компоненте и найти способы их исправить — и все это самостоятельно. Достаточно ужасно просто думать об этом, не говоря уже о том, чтобы применять это на практике. В любом случае, если у вас нет особого интереса к изучению навыков, вам следует обратиться к местному техническому специалисту за дополнительной помощью.
Если вы проверили наличие проблем с оборудованием, но по-прежнему получаете сообщение об ошибке, у вас все еще есть еще одно исправление, которое нужно попробовать — переустановить систему Windows.
Метод 11: Переустановите систему Windows
Если ни одно из указанных выше исправлений не помогло вам, вам может потребоваться сбросить или переустановить операционную систему Windows.
Сброс Windows вернет вашу систему в исходное состояние, как если бы вы включали компьютер впервые. Он удаляет все приложения, которых не было на вашем компьютере, но вы можете решить, сохранять ли ваши личные данные или нет. Кроме того, вам не нужны внешние запоминающие устройства для выполнения сброса, потому что Windows завершит весь процесс самостоятельно.
Чистая установка Windows сотрет все (включая все установленные вами приложения и ваши личные данные) с диска, на котором установлена ваша система. Вам нужно внешнее запоминающее устройство, например USB-накопитель, чтобы выполнить чистую установку. По сравнению с описанным выше вариантом чистая установка кажется более сложной, но более эффективной.
Ниже перечислены некоторые полезные статьи, которые научат вас, как сбросить или переустановить Windows 10 шаг за шагом:
Чтобы перезагрузить компьютер, выполните следующие действия:
- Просто удалите мои файлы, чтобы выполнить быстрое форматирование, и это не займет много времени. Ваши файлы могут быть восстановлены кем-то другим, поскольку они помечаются только как удаленные. Рекомендуется выбрать этот вариант, если вы оставляете свой компьютер.
- При полной очистке диска выполняется безопасное стирание, чтобы полностью очистить диск, и ваши файлы не могут быть легко восстановлены. Это может занять несколько часов. Рекомендуется выбрать этот вариант, если вы перерабатываете или продаете свой компьютер.
После настройки ваш компьютер будет в порядке.
Чтобы выполнить чистую установку Windows 10, выполните следующие действия:
Обычно ваш компьютер активируется автоматически, когда у вас есть доступ к Интернету. Если активация не происходит, вы можете принудительно выполнить активацию, выполнив следующую команду.
- Введите cmd в поле поиска, затем выберите Командная строка из списка вариантов.
- Введите команду slmgr.vbs / ato и нажмите клавишу Enter.
Возможно, вам придется попробовать эту команду несколько раз. Если вы видите какие-либо ошибки, перезагрузите компьютер и снова выполните эту команду. Или вы можете просто подождать, пока Microsoft поможет вам активировать вашу систему автоматически.
Заключение
Синий экран повреждения кучи режима ядра в Windows 10 может быть знакомой проблемой для большинства пользователей Windows, но это не значит что это менее хлопотно. В некоторых случаях вы не сможете нормально загрузиться, поэтому некоторые методы устранения неполадок неприменимы. Так что, если вы столкнулись с этим BSOD, продвигайтесь вниз по списку решений выше, пока не найдете то, которое работает для вас.
YouTube видео: 11 методов борьбы с синим экраном повреждения кучи режима ядра в Windows 10
03, 2023
Если вы получаете синий экран KERNEL_MODE_HEAP_CORRUPTION в Windows 10, этот пост поможет вам решить эту проблему. Одна из основных причин этой ошибки — конфликт между Windows и устаревшим драйвером или поврежденным драйвером Windows. К другим известным причинам относятся утечки памяти или сбои оборудования. Однако существует редкая вероятность, что конфликт программного обеспечения может это сделать, если только он не связан с драйверами.
Проверка ошибки КУЧИ В РЕЖИМЕ ЯДРА имеет значение 0x0000013A. Это указывает на то, что диспетчер кучи режима ядра обнаружил повреждение кучи.

Следуйте этим методам, чтобы устранить BOSD, связанный с повреждением кучи режима ядра.
- Запустите ChkDsk
- Используйте диспетчер проверки устройств
- Обновить или откатить драйвер
- Исправить поврежденные системные файлы
- Запустить диагностику памяти
- Запустите средство устранения неполадок оборудования
Вам потребуется четкое понимание того, что здесь делают методы, и разрешение администратора.
Более того, если вы можете войти в систему как обычно, хорошо; в противном случае вам придется загрузиться в безопасном режиме, перейти на экран дополнительных параметров запуска или использовать установочный носитель для загрузки, чтобы выполнить эти инструкции.
1]Запустите ChkDsk
Запустите ChkDsk, используя следующую команду:
chkdsk c: / r
2]Диспетчер проверки устройств
Один из лучших способов проверить, не является ли драйвер проблемой, — запустить диспетчер проверки драйверов. Этот инструмент поможет выявлять и устранять распространенные проблемы с драйверами устройств.
Откройте командную строку «Выполнить» (Win + R), введите верификатор, а затем нажмите клавишу Enter. Когда откроется средство проверки устройства, выберите «Создать стандартные параметры», а затем выберите «Автоматически выбирать неподписанные драйверы». Это сузит проблему, если это происходит из-за неподписанных драйверов. Как только вы его обнаружите, удалите драйвер, а затем переустановите правильный драйвер.
3]Обновить или откатить драйвер
В зависимости от ситуации вы можете обновить или откатить драйвер и проверить, решена ли проблема BSOD.
Если BSOD произошел из-за того, что вы недавно обновили драйвер, вы можете выполнить откат с помощью диспетчера устройств. Используйте Win + X, а затем M, чтобы открыть диспетчер устройств. Затем найдите оборудование, для которого вы обновили драйвер.
Найдя его, дважды щелкните, чтобы открыть окно свойств, а затем выберите вкладку «Драйверы». Если вы недавно обновили драйвер, кнопка «Откатить драйвер» будет активна. Используйте это.
Если BSOD произошел после обновления Windows, возможно, вам необходимо установить последнюю версию драйвера, совместимую с версией Windows.
Откройте диспетчер устройств, найдите устройство, щелкните правой кнопкой мыши и выберите обновление драйвера. Если это не сработает, перейдите на веб-сайт OEM и проверьте наличие обновленного драйвера.
4]Исправить поврежденные системные файлы
Проверка системных файлов и DISM — это два инструмента, которые могут помочь исправить поврежденные системные файлы, которые могут быть причиной экрана BOSD. Следуйте нашему исчерпывающему руководству по их использованию.
Команда SFC:
sfc / scannow
Команда DISM:
Dism / Online / Cleanup-Image / RestoreHealth
Сначала запустите команду SFC; если это не сработает, используйте команду DISM. Обязательно запускайте их в командной строке с повышенными привилегиями.
5]Запустить диагностику памяти
Проверь свою память. Используйте средство диагностики памяти Windows. Перейдите в Панель управления и введите «память» в поле поиска. В разделе «Администрирование» нажмите «Диагностика проблем с памятью вашего компьютера». В показанном здесь средстве диагностики памяти Windows выберите один из вариантов.
6]Запустите средство устранения неполадок оборудования
Microsoft предлагает встроенное средство устранения неполадок оборудования, которое можно вызвать с помощью следующей команды в PowerShell или командной строки с повышенными привилегиями.
msdt.exe -id DeviceDiagnostic
После запуска щелкните ссылку «Дополнительно» и снимите флажок —Применять ремонт автоматически-вариант. Вы можете сделать это, если хотите понять проблему до ее устранения. Щелкните по кнопке Далее.
Затем мастер запустит свою диагностику. Может появиться запрос на включение проверки наличия обновленного драйвера. После этого, если есть проблема с драйвером, он выяснит и предложит решение.
Я надеюсь, что эти решения помогут вам справиться с BSOD, связанным с повреждением кучи режима ядра в Windows 10. Проблема связана с драйверами, но всегда полезно проверить любое недавно установленное программное обеспечение, которое также может вызвать проблему.
Дополнительные советы: исправьте ошибки остановки Windows или синий экран смерти.
.
Синий экран с кодом остановки «Kernel Mode Heap Corruption» в Windows 10 может возникнуть при запуске игр и приложений, которые начинают интенсивно использовать ресурсы процессора. Ошибка очень распространена и не указывает на серьезные проблемы с операционной системой. Но в последнее время возникают случаи, когда синий экран BSOD возникает снова и снова при выполнении одного и того же действия, которое первоначально вызвало ошибку.
Содержание
- 1 Причины ошибки
- 2 Удаление несовместимых приложений
- 3 Проверка драйверов на наличие ошибок
- 4 Обновление драйверов
- 5 Проверка оперативной памяти
- 6 Запуск восстановления системы
Причины ошибки
Синий экран Kernel_Mode_Heap_Corruption может возникнуть по ряду причин.
Устаревшие драйвера видеокарты. Часто причиной этой ошибки являются поврежденные или устаревшие графические драйвера. Поэтому, когда запускаем игру или «тяжелое» приложение сталкивается с синим экраном.
Поврежденные системные файлы. Для решения проблемы можно запустить утилиту проверки системных файлов sfc /scannow или Dism /Online /Cleanup-Image /RestoreHealth из командной строки, запущенной от имени администратора.
Несовместимое программное обеспечение. После установки несовместимого приложения может возникнуть конфликт с ОС. Если приложение вносит изменения в системные параметры, Windows может аварийно прекратить работу и выбросить синий экран.
Аппаратные ошибки. При возникновении ошибок в работе оперативной памяти или в случае ее неисправности, Windows не сможет правильно взаимодействовать с устройством и аварийно прерывает работу.
Перейдем к решениям, но для начала войдите в систему с учетной записью администратора и проверьте подключение к интернету.
Удаление несовместимых приложений
Очень часто синий экран с кодом Kernel_Mode_Heap_Corruption возникает по причине программного конфликта. Некоторые приложения могут внести изменения в основные параметры, что приведет к нестабильной работе Windows. Поэтому сначала нужно их определить. Это могут быть программы, установленные перед появлением ошибки или при запуске которых, отображается синий экран.
Откройте окно «Выполнить» нажатием на клавиши Windows + R, наберите команду appwiz.cpl и подтвердите ее выполнение на Enter.
Отобразится список всех программ, установленных на компьютере. Если уверены, что ошибка появилась после установки последней программы, отсортируйте список по дате, кликните на ней правой кнопкой мыши и выберите «Удалить».
Когда синий экран возникает при запуске определенной программы, также найдите ее в списке и удалить.
Проверка драйверов на наличие ошибок
Драйвера являются основными компонентами, которые взаимодействуют между операционной системой и оборудованием. Если они повреждены, то будете сталкиваться с многочисленными ошибками, в частности, с Kernel_Mode_Heap_Corruption. Поэтому попробуем их обновить до последней сборки.
Прежде чем перейти к решению, сделайте точку восстановления на случай возникновения ошибок в работе утилиты.
Откройте строку поиска клавишами Windows + S и наберите «командная строка». Кликните на найденный результат правой кнопкой мыши и выберите «Запуск от имени администратора».
В окне командной строки наберите команду:
verifier
Выберите «Создать стандартные настройки»и нажмите Далее.
Затем выберите «Автоматически выбирать все драйверы, установленные на этом компьютере» и нажмите «Готово». Подтвердите перезагрузку компьютера.
После перезагрузки сразу начнется проверка. При обнаружении неисправных их нужно обновить, выполнив следующие шаги.
Обновление драйверов
Если какие-то драйвера оказались неисправными в ходе проверки предыдущим решением, обновите их вручную до последней версии.
Первое, что нужно сделать, загрузить требуемые драйвера с официального сайта в указанную папку на диске и запустить их установку.
Откройте окно «Выполнить» (Win + R), впишите команду devmgmt.msc для входа в «Диспетчер устройств». В случае повреждения драйверов видеокарты, разверните вкладку «Видеоадаптеры», кликните правой кнопкой мыши на ней и выберите «Обновить».
Выберите второй вариант обновления вручную.
Затем нажмите на кнопку «Обзор», перейдите в папку с загруженными драйверами. Следуйте инструкциям до завершения установки.
Обновите все устройства, драйверы которых были повреждены и перезагрузите компьютер. Если продолжаете сталкиваться с ошибкой Kernel_Mode_Heap_Corruption перейдите к следующему способу.
Проверка оперативной памяти
Ошибка также может возникнуть из-за неполадок планок памяти. Перед запуском теста ОЗУ, нужно извлечь планки из слотов, и аккуратно протереть контакты ластиком. Затем вернуть их обратно, проверить плотность контакта и фиксацию защелок. Проверьте также размещение планок (например, нужно использовать 1 и 3 слот, если на материнской плате есть 2 модуля оперативной памяти).
Для проверки памяти загрузите программу MemTest86+ с официального сайта. Установите флешку и запустите установку программы. Имейте в виду, что при создании загрузочного диска для memtest все содержимое флешки будет удалено.
Переключите в БИОС приоритет на загрузку системы с USB-накопителя. После загрузки запустите проверку ОЗУ. Модули оперативной памяти будут протестированы в несколько циклов.
Запуск восстановления системы
Если не удалось устранить ошибку Kernel_Mode_Heap_Corruption перечисленными способами, попробуйте вернуть Windows в предыдущее состояние до возникновения синего экрана.
Нажмите Windows + S для вызова строки системного поиска, введите «восстановление» и кликните на найденный результат.
Перейдите в настройки восстановления, затем на вкладке «Защита системы» нажмите кнопку «Восстановить».
На первом экране нажмите на кнопку «Далее». На следующем отметьте флажком «Показать другие точки». Выберите точку восстановления, которая была создана до появления сбоя системы Kernel_Mode_Heap_Corruption.
На экране подтверждения нажмите кнопку «Готово».
После начнется процесс восстановления. При успешном завершении проверьте, возникает ли ошибка.
Encountering a blue screen error on Windows can be frustrating, especially if you’re in the middle of something. This will cause you to lose all progress of what you’re working on and can even corrupt files on your computer. Windows has a long list of BSOD errors, and some of them have been tackled on this website, including:
- VIDEO_DXGKRNL_FATAL_ERROR
- WHEA_UNCORRECTABLE_ERROR
- Netwsw00.Sys BSOD Error
- LGBusEnum.sys BSOD Error
- Ndistpr64.sys BSOD Error
- Dxgmms2.sys BSOD Error
- KMODE EXCEPTION NOT HANDLED (e1d65x64.sys) BSOD
- IRQL_NOT_LESS_OR_EQUAL BSOD Error
- DATA_BUS_ERROR
- DRIVER_POWER_STATE_FAILURE Error
- BAD_POOL_HEADER Error
- VIDEO MEMORY MANAGEMENT INTERNAL BSOD Error
This is just a short list of what can go wrong in Windows 10/11. In this article, we’ll discuss another BSOD error that is commonly encountered by Windows users: the Kernel Mode Heap Corruption Blue Screen on Windows 10/11.
What Is the Windows 10/11 Blue Screen Kernel Mode Heap Corruption?
 The KERNEL_MODE_HEAP_CORRUPTION bug check has a value of 0x0000013A. This indicates that the kernel mode heap manager has detected corruption in a heap.
Kernel Mode Heap Corruption is one of the stop codes presented by Windows when you run into a ‘blue screen error of death’ BSOD error. As is the case with other codes, ‘Kernel Mode Heap Corruption’ is created uniquely to help users identify the problems triggering system crashes. Usually, the error is caused by driver issues (especially graphics card drivers) or software conflicts, but it may also be caused by hardware malfunction.
People have encountered the Kernel Mode Heap Corruption error in different situations. Some said the error happened on startup of Windows 10/11, while others the moment of launching specific programs such as a video game.
In the kernel mode operation of your computer, programs have unrestricted access to the foundational hardware components. When a kernel mode heap corruption occurs, it means a flaw in a running program’s code has modified the contents of a data heap. This also means that the allocator’s handle of the heap has been affected.
Some possible outcomes are critical memory faults within the allocator itself and memory leaks, where some parts of the memory become inaccessible in the future.
What causes Kernel Mode Heap Corruption Blue Screen in Windows 10/11?
The error occurs mostly when a PC is overloaded or used over a long period. Most often, it has to do with the system drivers of a computer. However, users have identified many other conditions that cause the issue.
- Hardware Malfunctions – A faulty hardware component in your computer, such as a corrupt RAM, can trigger the error.
- Driver Problems – According to reports by several Windows 10/11 users, the issue started after they updated their system drivers. In this case, all you need to do is to undo the updates. It’s also possible that the drivers might already be outdated.
- Software Compatibility Issues – Compatibility problems between specific software in your PC can lead to unstable system behaviors, causing the BSOD error.
- System Graphics Card – It might be that you attempted to open some graphics-intensive software too heavy for your graphics card to support.
- Corrupt Files – If there are corrupt files in your system, they can also trigger the Kernel mode heap corruption problem. Note that you must diagnose the cause of the issue using the in-built Event viewer.
To know more about the cause of the error, follow the guide below:
Press the Windows logo + R keys and hit Enter to open the Run dialog box.
- Type “eventvwr” (no quotes) in the Run dialog box and hit Enter.
- In the Event viewer window, navigate Windows logs>System.
- In the System window, find the Kernel Mode Heap Corruption BSOD log from the list table.
- Read the log description displayed under General and Details. The log should describe the cause of the issue, particularly the Event ID and Source information.
Getting the KERNEL_MODE_HEAP_CORRUPTION blue-screen error? Don’t panic – you’re not alone. This is a fairly common error, and it’s usually not very hard to resolve. Here are several ways to fix this error:
Method 1: Boot Windows 10/11 into Safe Mode.
 Since you are getting the Blue Screen, you won’t be able to log into Windows normally. So, you need to first boot into Safe Mode then perform the below workarounds. Only a handful of Windows 10/11 programs and services run on this mode preventing any kind of conflicts from third-party apps.
Here are the steps to enter Safe Mode:
- Press the Power button for 5 seconds and wait till it shuts down successfully.
- Repeat this process for 2-3 times until the Preparing Automatic Repair screen comes into view.
- Let the system diagnose this error for a few seconds thereafter click Advanced options.
- On the Windows Recovery Environment (WinRE), go to – Troubleshoot > Advanced options.
- Hit Startup Settings on the next screen followed by the Restart button.
- When Windows reboots, press F5 to boot into Safe Mode with Networking.
Selecting “Safe Mode with Networking” is essential to fix black or blue screen issues. If not, this won’t connect to the Internet causing problems in troubleshooting the actual problem.
Method 2: Roll back your graphics card drivers.
Some Windows users have reported that they experienced this ‘blue screen of death (BSOD)’ error right after an update of their graphics card drivers (or a Windows Update). If that’s when you got the error, you should restore your video driver to a previous version to secure the stability of your hardware device. Here’s how to do it:
- On your keyboard, press the Windows logo key and R at the same time to invoke the Run dialog box. Then type devmgmt.msc into the box and click OK.
- In the Device Manager window, double-click on the Display adapters node to expand its drop-down list.
- Right-click on your video card and select Properties from the context menu.
- Go to the Driver tab and select Roll Back Driver.
- If the Roll Back Driver option is grayed out, that means there’s no driver to roll back to. In this case you’ll have to try other fixes.
- Choose one of the reasons based on your own situation and click Yes.
- Restart your computer for the changes to take effect.
After you restore your video driver to a previous version, verify if the ‘Kernel Mode Heap Corruption’ error still persists. If it does, try the next fix, below.
Method 3: Update your device drivers.
 The Kernel Mode Heap Corruption error may be caused by an outdated or corrupt device driver. If you’re not sure whether all your device drivers (especially graphics card drivers) are up-to-date, you should check.
You can do this in Windows Device Manager, one device at a time. But this takes a lot of time and patience, and if any of your drivers do happen to be out of date, you’ll need to manually update them, which is difficult and risky. If you don’t have the time, patience or computer skills to update your device drivers manually, you can do it automatically with [sc name=”outbyte-driver-updater”].
This will automatically recognize your system and find the correct drivers for it. You don’t need to know exactly what system your computer is running, you don’t need to risk downloading and installing the wrong driver, and you don’t need to worry about making a mistake when installing. Driver Updater takes care of everything.
Method 4: Check graphics card for problems
As we’ve mentioned earlier the leading cause are drivers, and the graphics card is among the drivers that cause this error. So we need to first identify if there are problems with your display drivers before proceeding with any other troubleshoot. Here are the steps to follow in order to confirm that:
- Open the Run dialogue by typing Windows + R.
- In the dialogue box, you should type msc and hit enter or press OK.
- The device manager will open and you should expand Display Adapters.
- Identify your video card and right-click on it to check for updates.
- When updates are installed the driver will be repaired automatically.
- Windows will search for updates if available and will download the update packs and install them.
- Alternatively, you can check the driver website to see if there are updates available, you can then download manually from the driver site and run the updates on your PC to install them. This should be your option when you receive update error which can happen sometimes.
- After installing updates, you should restart your PC and see if the problem is resolved.
Method 5: Run Driver Verifier Manager.
Driver Verifier Manager is a great tool to discover the problematic drivers on Windows 10/11. So, if you are still getting the Kernel Mode Heap Corruption 0x0000013A error, you should run this tool to check the obsolete device drivers. Here’s how to perform this task –
- Launch Windows PowerShell (Admin).
- On the elevated console, type “verifier“, and hit Enter.
- Open Verifier using PowerShell 0x0000013A
- Subsequently, mark the “Create Standard Settings” checkbox followed by Next.
- 0x0000013A
- Now, mark “Automatically select all drivers installed on this computer” and hit Finish.
- 0x0000013A
- The system prompts to “Restart PC” so as to start scanning for any corrupted or damaged drivers.
- After the reboot, Windows will display a list of drivers that are found to have some errors.
- You may now update, rollback, or uninstall-reinstall the above-displayed device drivers.
Method 6: Run the Windows BSOD Troubleshooter (For Windows version earlier than 1809).
The Blue Screen (BSOD) troubleshooter interprets the bugcheck codes, and tells you if the blue screen crash was caused by:
- Faulty hardware
- Failing disk drive
- Malware
- Memory failure
- Services
- Device drivers
Unfortunately, the Blue Screen troubleshooter is no longer available starting with Windows 10 version 1809. But if you’re running an earlier version, these are the steps to use this tool:
- Open the Control Panel (icons view), and click/tap on the Troubleshooting icon.
- Click/tap on the View all link at the top left in Troubleshooting.
- Right click or press and hold on the Blue Screen troubleshooter, and click/tap on Run as administrator.
- Click/tap on the Advanced link.
- Check the Apply repairs automatically box, and click/tap on Next.
- The troubleshooter will now start detecting problems you may have with blue screen errors.
- If problems were identified, then follow any given instructions to continue troubleshooting.
- If no problems were identified, then you could click/tap on View detailed information to see the troubleshooting report.
You can also use the “Troubleshoot blue screen errors” at Microsoft. Just go to the Troubleshoot blue screen errors web page at Microsoft and follow the steps to answer questions to troubleshoot your blue screen error.
Method 7: Run Windows Memory Diagnostic Tool.
 The Windows Memory Diagnostic tool will check to see if there’s a problem with your Random Access Memory (RAM):
- On your keyboard, press the Windows logo key and R at the same time to invoke the Run dialog box. Type mdsched.exe and hit Enter.
- Select either Restart now and check for problems (recommended) to check your memory straight away, or Check for problems the next time I start my computer if you want to keep working and do the memory check later.
- Remember to save your work before clicking Restart now and check for problems (recommended). It will reboot your computer instantly.
- When the Windows Memory Diagnostic Tool actually runs, you’ll see the following screen that indicates the number of passes it’s doing, along with how far it has progressed.
If you don’t see any errors here, that means the memory in your computer is fine. Otherwise you should replace your RAM or simply contact the hardware manufacturer for assistance.
Method 8: Repair corrupted system files.
Sometimes this blue-screen error is caused by corrupt system files. To repair them, there are two things you should do:
- Scan with System File Checker
- Scan with dism.exe
To scan with System File Checker, follow the instructions below:
System file checker (sfc) is a Windows utility that identifies and repairs corrupted system files: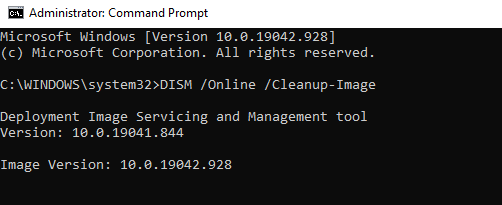
- On your keyboard, press the Windows logo key and R at the same time to open the Run dialog box. Type cmd and press Ctrl+Shift+Enter to run Command Prompt as administrator.
- When Windows asks for permission to make changes to your device, click Yes.
- In the Command Prompt, type the following command (note that there’s a space between sfc and /): sfc /scannow
- After you finish entering the command, hit Enter on your keyboard. Then the sfc tool will begin to scan all system files and repair the corrupted or missing ones.
- Wait until the verification process completes. Then restart your computer for the changes to take effect.
If you continue to experience the Kernel Mode Heap Corruption Error, try running dism.exe as described below.
To scan with dism.exe:
- On your keyboard, press the Windows logo key and R at the same time to open the Run dialog box. Type cmd and press Ctrl+Shift+Enter to run Command Prompt as administrator.
- If prompted for consent, click Yes.
- In Command Prompt, type the following command (note that there’s a space to the left of each slash “/”): dism.exe /online /cleanup-image /restorehealth
- After that, hit Enter on your keyboard. Then the DISM tool will begin to scan for any problems and try to fix them.
Wait for the process to complete. Then, reboot your computer and see whether the Kernel Mode Heap Corruption error reoccurs.
Method 9: Resolve any software conflicts.
Another possible culprit for your Kernel Mode Heap Corruption error is a software conflict. This is particularly likely if you get the error after installing a new app or when you’re trying to launch a certain program, such as a video game.
There’s no quick way to pinpoint which applications are conflicting. You have to fully shut down every unnecessary program (including any associated background processes) and wait to see whether the error reoccurs.
For this, you need to:
- Check to see if you have any software conflicts
- Find out which programs are causing them
- De-prioritize, disable and uninstall those programs
Check to see if you have any software conflicts
Close all programs. To do this, switch to the program, and close it as you normally would (e.g. by clicking the × at the top right of the program). End all unnecessary background processes by the following procedure:
- On your keyboard, press the Windows logo key and X at the same time, then click Task Manager.
- On the Processes tab, select the program that you want to shut down from the list in Task Manager and click End task to force a close. (If it’s a program you’re using, e.g. Microsoft Word, make sure you save any unsaved work first.)
- Do not close any unfamiliar programs. If you mistakenly shut down the important system programs, that may bring about even more problems. Before you take the step, consult a technician or search for information about the program.
- Wait to see whether the error reoccurs:
- If the error DOES reoccur – It’s probably not caused by a software conflict.
- If the error does NOT reoccur – One or more of the programs you shut down is probably causing the error. Now you need to identify which program(s) caused the error, as described in the next step below.
Find out which programs are causing your conflicts
If closing all unnecessary programs stopped the error from reoccurring, you know that one of those programs was causing the error. Now you just need to figure out which one.
To do this, restart one of your programs, and wait to see if the error comes back. If it doesn’t, restart the next program, and wait for the error again. Then the next, and the next, and so on.
When the error eventually reoccurs, you know that the program you restarted most recently is a problem.
But bear in mind, it may not be the only problem. It may actually be conflicting with another program – one you restarted earlier – and that conflict is what’s causing the error.
If you don’t really need the offending program, you can just disable or uninstall it immediately, as described below. But if you do need the offending program, you should check if it’s conflicting with something else (because then you may be able to disable/uninstall the other program instead).
To do this, leave the offending program open, but shut down all other programs again. If the error reoccurs, you know the program is the sole cause. If the error doesn’t reoccur, you know the program is conflicting with another program. To figure out which one, restart each program again, one at a time, and wait for the error to come back.
When you find which programs are conflicting with each other, you can disable or uninstall the one you need the least.
De-prioritize, disable or uninstall conflicting programs
Once you identify the program(s) causing the conflict, you have three options:
- Set the program’s priority to low
- Permanently disable the program
- Uninstall the program
If you don’t want to disable or uninstall the offending program, you can try de-prioritizing it first. This has resolved the error for some users. To de-prioritize the program:
- On your keyboard, press the Windows logo key and R at the same time to invoke the Run dialog box. Type in taskmgr and hit Enter.
- Go to the Details tab. Scroll through the list until you find the process for which you want to change the priority. Right-click on that item and select Set priority > Low.
- Do not change the priorities for any programs that you’re not familiar with. If you mistakenly set the priority of a crucial system process to low, it may lead to system crashes, freezing or other critical problems.
- Click Change priority if prompted for permission.
To permanently disable the program:
- On your keyboard, press the Windows logo key and X at the same time, then click Task Manager.
- On the Processes tab, select the program that you want to shut down from the list in Task Manager and click End task to force a close.
- If the program is also among the startup items, you should stop it from running at startup.
- On your keyboard, press the Windows logo key and R at the same time to invoke the Run dialog box. Type in msconfig and hit Enter.
- Go to the Startup tab, and click Open Task Manager.
- Select the programs you don’t want to start when Windows starts, then click Disable.
To uninstall the program:
- On your keyboard, press the Windows logo key and R at the same time. Type appwiz.cpl and press Enter.
- In Programs and Features, right-click on the program that you want to uninstall and click Uninstall.
If, after de-prioritizing, disabling or uninstalling conflicting programs the error reoccurs, try the other fixes below.
Method 10. Check for other issues such as overheating.
It’s not that easy to tinker with the hardware if you’re a computer newbie. You need to disassemble the computer chassis, look for problems in each separate component, and find ways to fix them – all by yourself. Merely thinking of it is horrible enough, not to mention putting it into practice. Anyway, if you don’t have much interest in learning the skills, you should contact a local technician for further help.
If you’ve checked for hardware issues, and you’re still getting the error, you still have one more fix to try – reinstall the Windows system.
Method 11: Reinstall your Windows system
If none of the fixes above work for you, you may need to reset or reinstall your Windows operating system.
Resetting Windows will revert your system to its initial state as if it’s your first time to turn on the computer. It removes all the apps that didn’t come with your PC, but you can decide whether to retain your personal data or not. Besides, you don’t need any external storage devices to perform the resetting, because Windows will complete the whole process by itself.
A clean install of Windows will erase everything (including all the apps you installed and your personal data) from the drive where your system is installed. You need an external storage device, e.g. a USB drive, to perform the clean install. Compared with the above option, clean install seems more complex, yet more impactful.
Listed below are some useful articles that teach you how to reset or reinstall Windows 10/11 step by step:
To reset your PC, follow these steps:
- Type settings in the search bar, and then choose Settings that comes up.
- Click on the Update & security icon.
- On the left side of the panel, choose Recovery. On the right side of the panel, choose Restart Now under the option Advanced startup.
- Choose Troubleshoot.
- Click Reset this PC.
- Click Remove everything. Please make sure you have backed up your important files and applications because they will be all gone once you complete the reset.
- If prompted to Insert media, you will need to insert your Windows 10/11 installation media or recovery drive to continue.
- If your computer has more than one drive partition on Windows 10/11 disk, you need to select to remove all files from only the Windows driver or from all drives.
- Click on either Just remove my files or Fully clean the drive accordingly. Please make sure that you have backed up your important personal files and software before you go any further.
- Just remove my files will perform a quick format and it won’t take long. Your files might be recoverable by someone else since they are only marked as deleted. It is suggested that you choose this option if you are keeping your computer.
- Fully clean the drive performs a secure erase to fully clean your drive and your files cannot be recovered easily. It could take hours to finish. It is suggested that you choose this option if you are recycling or selling your computer.
- Tab the Reset button for the reset to begin.
- Resetting will now start. It will take a while to finish and your computer will restart a few times during the process. Unless your computer ran into a server problem, or you know pretty well what you are doing, performing a reset on your work computer or home computer is not recommended.
- When finished, you will need to set up your personal preference. Then click Next.
- Click Accept.
- You could choose the Customize settings on the left side corner or Use express settings on the right corner to go to the next step. If you choose Customize settings, you could change the settings as you will.
After the settings, your computer will be good to go.
To perform a clean install of Windows 10/11, follow the steps here:
- First, you need to create an installation media using the Microsoft Media Creation Tool.
- Next, insert the installation media into your computer.
- With your USB drive or DVD inserted, restart your computer. Press a key for Boot Menu. The key to press for Boot Menu varies for different motherboards. Usually, the boot screen will show you which key to press. You can also read the manual for your motherboard to see what specific key to press for Boot Menu. Usually speaking, Acer is F12/ F9/ Esc, ASUS is F8/ Esc, Dell is F12, HP is Esc/ F9, Lenovo is F12/ F8/ F10 etc.
- Alternatively, you can also go to Use a device option in the Advanced startup options.
- Follow the path Start> Settings> Update & security> Recovery> Restart now button under Advanced startup.
- Then click Troubleshoot> Advanced options and you will see this page.
- Some users might not be able to see the Use a device option here. But we find that if the USB flash drive with the ISO files or the DVD disc is connected to the computer, you can boot from the device by clicking the Continue button.
- You will see the activation screen next. If you have installed Windows 10/11 on this computer, please choose I don’t have a product key. If you have never installed Windows 10/11 on this computer before, please type in your valid license key, which could be the key for Windows 7, Windows 8 or Windows 8.1.
- Continue the clean install process normally until you see Which type of installation do you want? Choose Custom option to ensure that you are perform a clean install instead of and upgrade.
- Choose which partition you would like to install your system drive. If you have only one drive, just click Next to continue. If you have multiple drives, choose the primary partition and click Next.
- Then all you need to do is to wait with patience for the installation to end. Some might encounter a few reboots during the process.
Usually, your computer will be activated automatically once you have access to the Internet. If the activation is not happening, you can force an activation by running the following command.
- Type cmd in the search box, then choose Command Prompt from the list of choices.
- Type in the command slmgr.vbs /ato and press Enter key.
You might need to try this command a couple of times. If you see any errors, please reboot your computer and run this command again. Or you can just wait for Microsoft to help you activate your system automatically.
Wrapping Up
The Kernel Mode Heap Corruption Blue Screen on Windows 10/11 might be a familiar issue for most Windows users, but it doesn’t mean that it is less troublesome. In some cases, you won’t be able to boot normally so some troubleshooting methods won’t apply. So if you are faced with this BSOD, work your way down the list of solutions above until you find the one that works for you.

Vic is a tech enthusiast who loves to be up-to-date with the latest and greatest technology in the world. He creates content that educates and helps users with their tech-related questions. Vic manages our website to ensure that our readers have a seamless experience while browsing. He excels in troubleshooting errors and resolving Windows issues for gaming and work purposes.
In this article, we will be talking about KERNEL_MODE_HEAP_CORRUPTION, which is a Windows 10 BSOD error with a bug check code 0x0000013A. A blue screen of death issue, as you might have noticed, crash the device displaying a blue color screen with the message that your PC needs to restart. In the end, there would be a specification error definition you are facing. The problem is, you don’t get to save your work or any changes that you were making and it is quite frustrating.
KERNEL MODE HEAP CORRUPTION isn’t a frequent case. There are multiple reasons for this BSOD error code to occur. An outdated operating system, presence of corrupted system files, missing DLL files, low disk space, RAM issues, and more such problems lead to this error. However, given that you are probably facing it right now, here is a comprehensive explanation of fixes for it. Many of it is such that you can try even if you are a basic or beginner user. Here is a brief of the fixes suggested in this article –
Here is how to fix KERNEL_MODE_HEAP_CORRUPTION BSOD Error in Windows 10 –
1] Stop automatic Restart
Whether due to an error or some other issue, you may notice that the computer freezes or shut down automatically at times. However, it can be quite troublesome for those who have serious work on PC. Frequently running into some errors and crashing may be easily frustrating. So before anything, we thought it might be helpful for you to have this dealt with to fix KERNEL_MODE_HEAP_CORRUPTION. Here is a simple setting you can change which can manage this problem.
Step-1: After saving your work and press Win+D. This is the keyboard shortcut to go to the Windows 10 desktop.
Step-2: The next step is a right-click on This PC icon (if you don’t have This PC on the Desktop, simply search in the Start menu). Select Properties option from the fly-out menu.
Step-3: In the System window that appears, you will see ‘Advanced System Settings‘ in the left section. Select it.
Step-4: As you select it, another box for System Properties will come up. At the bottom of the same, click on the Settings button that you see under the head ‘Startup and Recovery’.
Step-5: The next window that comes up will be the Startup and Recovery one. Here, under the System Failure head, deselect the box corresponding to “Automatically restart” (see snapshot).
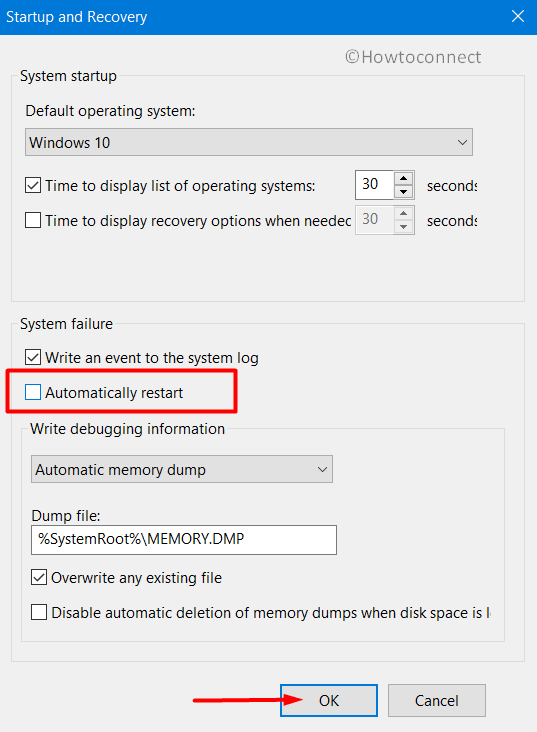
Step-6: Lastly, click on OK and conclude the process.
This should disable automatic restart on system failure Windows 10 PC. This way, you will be able to save all your work and can try fixing KERNEL MODE HEAP CORRUPTION without being bugged by restarts.
2] Download latest Windows updates
In order to keep your computer smoothly functioning and away from errors, keeping the system updated is a must. The monthly and infrequent patches that Microsoft releases mostly contain added security against various bugs and problems. It may even provide a fix for the issues causing the blue screen error in your PC. Therefore, updating Windows is a recommended way of avoiding as well as fixing many kinds of system errors including KERNEL_MODE_HEAP_CORRUPTION. Often, users may postpone system updates, leaving the PC with threats. If that is the case with you too, update the system as soon as possible.
Connect to a high-speed internet/ Wi-Fi when you are updating your system or driver or any such thing. Check out the steps to update the PC manually below –
- Launch the Windows Settings app with the keys “Windows + I”.
- After the app interface opens up, navigate to Update & Security.
- On the right side of the following page, you may either see the due patches or the text “You’re up to date”. However, just click the button that says Check for updates. This would initiate a check for the due or new patches.
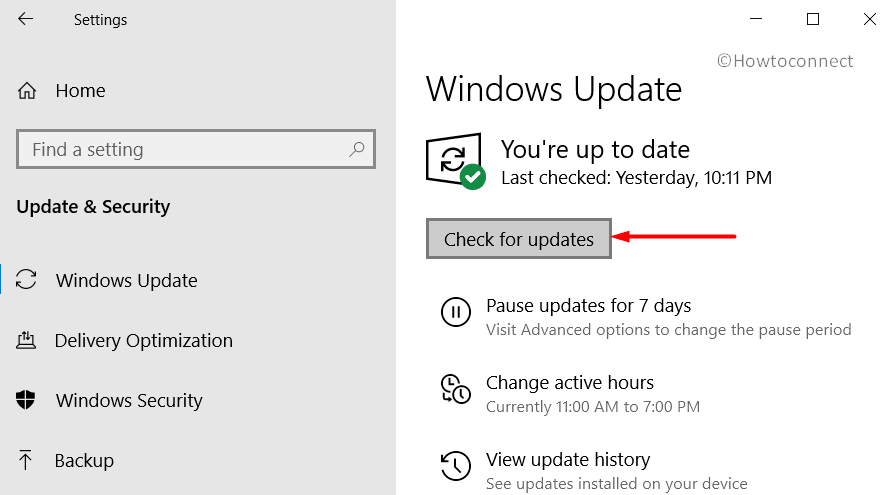
- In case there are any due ones listed, download them.
- Wait and let Windows carry out the installation process. Afterward, the system will prompt for permission to restart the device to wrap up the process.
3] Fix the KERNEL_MODE_HEAP_CORRUPTION – Remove additional Hardware Accessories
In some instances, there can be compatibility problems in some of the hardware connected to your device. It may cause slow processing speed as well as some kind of errors including BSODs like KERNEL MODE HEAP CORRUPTION. To see if this is the problem in your case, just safely disconnect those external hardware components. Then, Restart Windows 10 PC and see whether the issue is still there. You can connect them back once you determine the trouble.
If you have recently added any hardware accessories, you also need to make sure that you update their drivers. You can do this simply by visiting the manufacturer website of that particular hardware component. You should be able to find the guide to update them on the website. Follow those instructions and then see if the issue is resolved. Also, make sure you do a periodic update of those devices too.
4] Run Windows Defender Full Scan
No matter whatever safety rules that you follow in the web-space, malware can always find ways into your computer. While some malicious software isn’t all too buggy, some can cause real turbulence in the system. They may attack and delete important files and may cause various errors like KERNEL MODE HEAP CORRUPTION BSOD. To root them out, you can use Windows security– the default anti-malware utility coming with Windows. Check out the following steps to perform a complete security scan of your device –
- Get access to the Window Security application either by opening it from the system tray (shield icon) or by searching it in the search box.
- Once it appears, navigate to Virus & threat protection => Scan options.
- There are going to be different scan type options with radio button adjoining them. Select the one next to ‘Full scan’. This will trigger a comprehensive scan of each and every file as well as programs on your hard disk.
- Then, the next step is clicking on the Scan now button.
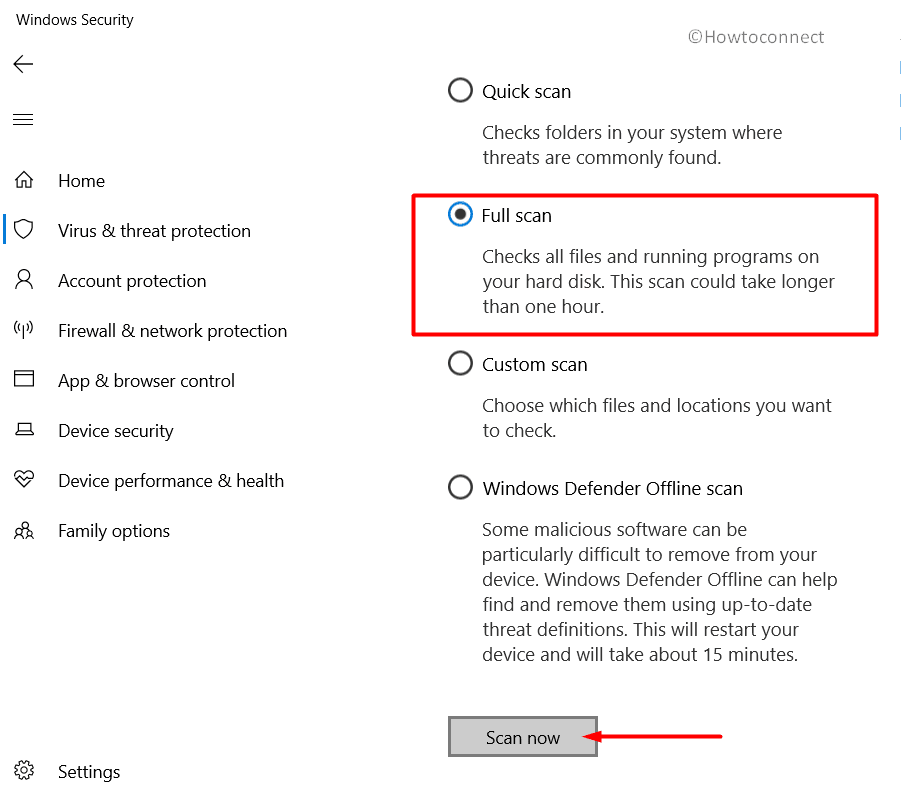
- This starts the scan process, it may take a bit of time, so wait.
- Once the scan is over, the application will display any kind of threats or malware found on the system.
- Now, click on the Clean threats button to clear out the detected malicious components.
- From the dialog box that appears subsequently, select Remove.
- Lastly, click on Start actions to confirm the removal of the viruses.
5] Resolve system memory issues
Random Access Memory is a critically important part of any computer. And, in case of bad RAM slot, results can be a stream of dysfunctions and errors, even BSODs including KERNEL_MODE_HEAP_CORRUPTION. There can be a fair number of reasons which can cause the problem in RAM. Some of them being, power surge, excessive heating and often motherboard issues. Thus, if your computer acting weird, you should consider the possibility of some bad sectors in memory too. You can try out the following fix to resolve the memory-related problems –
- Click on the notification area and from the Action Center, select “All settings”. This would open Windows Settings app on your PC.
- Then, in the text box on the top of the Settings app, type ‘memory’.
- From the results, double click on “Diagnose your computer’s memory problems”.
- When the Memory Diagnostic Tool opens up, select the first option. It is also the recommended option, that says “Restart now and check for problems”. Note to save any unsaved work before you allow a restart.
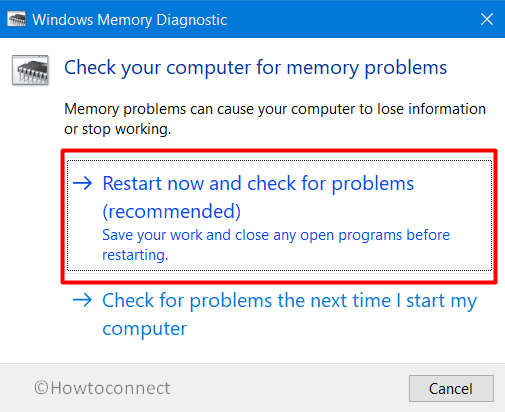
- This will reboot the system. When it powers up, a blue screen will appear which indicate the start of the problem diagnosis.
- The device will restart again after the memory problem scan is over. Any detected issues will be listed after reboot.
6] Remove any third-party antivirus tools
As we discussed above, malware can cause some serious issues in the system. Several users rely upon different security software, both free and paid for managing those threats. However, having more than one antivirus in a system is generally not recommended. Third-party anti malware tools interfere with the functioning of Windows Defender. It may even cause errors like KERNEL_MODE_HEAP_CORRUPTION. Therefore, uninstall any third-party anti malware software from your system when you face any kind of system dysfunctions. Following are the steps to do the same –
- In the Windows search bar, type cp. From the result double-click on Control Panel.
- Go to Programs and Features applet and click on it.
- When it opens you will see the list of various installed apps on your system.
- Go to the list and select the third party anti-malware tool which you need to uninstall.
- Click on the Uninstall button on the top of the window to get rid of those apps.
- Restart the computer and see whether the problem has been resolved.
7] Check the outdated driver and update – KERNEL_MODE_HEAP_CORRUPTION
In a computer system, there would be a lot of drivers. What they do is telling the hardware components on how to work on a particular system. Therefore the role of device drivers is quite critical.
Now, even though in Windows 10 most of the drivers are updated along with the monthly or periodic updates that automatically happen. However, there is a possibility that some of the drivers are not updated. This may cause problems in the functioning of various devices and may ultimately lead to a blue screen of death or other kinds of errors. Given below are the steps that you need to follow –
- Type device manager in the Taskbar search bar and launch the utility.
- When the console opens check through the various devices listed there and see if any of them displays a yellow exclamation mark in device manager.
- In case any of them do have the mark then click on it to expand and see the drivers.
- Right-click on each driver and from the menu that appears, simply select the Update driver option.
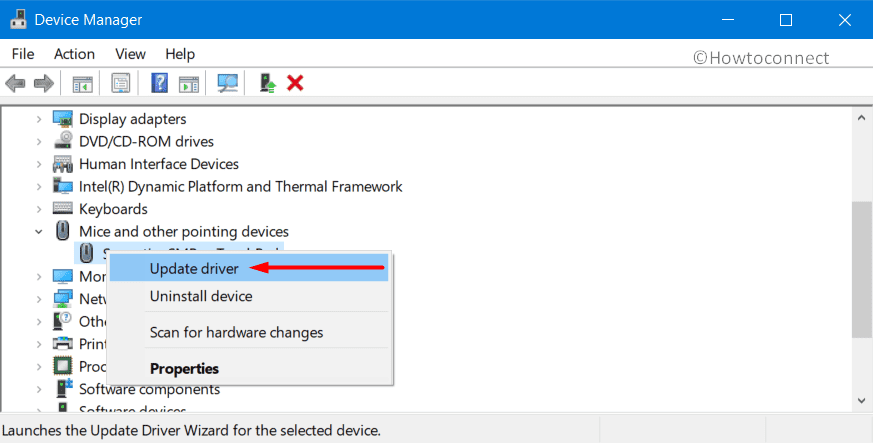
- Let the system find updates. If prompted allow to carry out the process.
- Restart the system and see if the KERNEL MODE HEAP CORRUPTION
error has been resolved.
8] Fix KERNEL_MODE_HEAP_CORRUPTION – Boot OS in Safe Mode
The safe boot is a very effective fix in case of not only the blue screen of death errors but also with most other kinds of issues. It is essentially helpful in gaining limited access to your system when you are facing problem in starting your Windows normally. It is a great way to remove any problematic applications or programs. This is because when in safe mode only the basic and important services or programs and drivers get loaded. No third-party tools work, thereby preventing any kind of interference of those components.
There is more than just one way to initiate the safe boot mode. Given below are the simple steps following which you can start windows 10 in safe mode.
- Click on the Windows icon to access the Start menu.
- Select the “Power” button followed by a hit on “Restart” while holding the “Shift” key.
- Click on the Advanced repair button.
- In the screen that follows select Troubleshoot => Advanced options.
- Select Startup settings. This will present you with a list of Advanced boot options.
- Hit the Restart button. Then, press the respective number on your keyboard which corresponding to the Startup option that you would like to use. To enter Safe mode press F4.
9] Easy BSOD fix with Blue Screen Troubleshooter
Troubleshooting is one of the most recommended ways of fixing any kind of errors. This is true in the case of blue screen errors as well. What makes it even better is that Windows comes with special troubleshooter for blue screens. Isn’t it great that you can resolve the entire blue screen scenario possibly by running a troubleshooter? It is also one of the easiest fixes as well. Here is how you can run a Blue Screen Troubleshooter in Windows 10 –
- In the Settings application (as discussed above), go to the Update & security section. Select Troubleshoot tab available on the left-hand side.
- Select Blue screen option available in the lower half of the panel.
- The option would expand, revealing a Run the Troubleshooter button. Click on it.
10] Save some space and reduce system load by cleaning the junk files
Junk files can cause a load of trouble in an Operating System. Numerous files can get piled up as you browse along with internet and download random files. This can slow down the functioning of your computer and can cause serious errors on the system including various BSODs. Junk and temporary files mean the cache data, the files in your download folder, recycle bin, etc. Therefore it is recommended to occasionally clean up these unwanted or temporary files in order to free up disk space. This way you can ensure an error-free and smooth functioning of your device.
A quick note here is that the cleanup operation may delete some important files from the download folder and even from the recycle bin also. Therefore before you start the clean up make sure that you have moved all the important files from the locations. Here’s what you need to do for using the Disk cleanup utility for this purpose –
- First of all, type cleanmgr in the taskbar search box and hit Enter.
- In the small pop up window that comes up select the drive that you would like to clean-up.
- Click on the Ok button. This will trigger a scan for the amount of space which can be retrieved by deleting junk files and the temporary files.
- Click “Cleanup system files” button and then again choose the same drive as above.
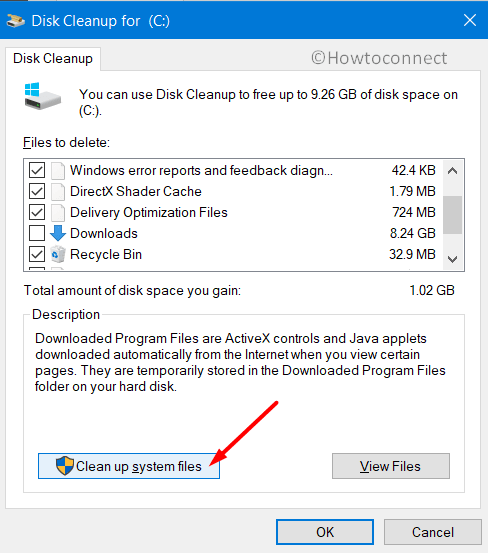
- Then you need to select all the boxes thus allowing the system to clear them out. Click on the Ok button and let the cleanup process trigger.
- Reboot the system after your computer has completed the process and see whether the error KERNEL_MODE_HEAP_CORRUPTION has been solved.
11] Avoid similar or duplicate applications creating conflicts
You read above that having third-party antivirus tools can cause conflicts with Windows Defender since they have similar functioning. Similarly having multiple application serving the same purpose on the system can cause conflict between them eventually leading to KERNEL_MODE_HEAP_CORRUPTION.
You can prevent this situation simply by uninstalling those extra applications. All you need to do is head straight to the Apps Settings page and locate such programs from the list. Once you find them, select it and click Uninstall.
12] Remove any incomplete Windows updates
In one of the above fixes, we mentioned the importance of updating Windows 10 in regular basis. This solution points the problems with some updates. There have been a few instances where some of the recent updates had contained bugs caused problematic functions in the PC. Incomplete Windows updates can cause a lot of troubles in the system. Therefore, in case you have been receiving KERNEL_MODE_HEAP_CORRUPTION post updating of the system, you might want to try to delete windows update files. Follow the steps given below in order to delete the recent updates and fix the BSOD –
- Open the Settings app (Win +I) and thereafter, in the interface, navigate to Update & security.
- In the subsequent page, select Windows Updates from the list of options on the left-hand side.
- Click on ‘View update history’ and then on ‘Uninstall updates’ link corresponding to the latest update.
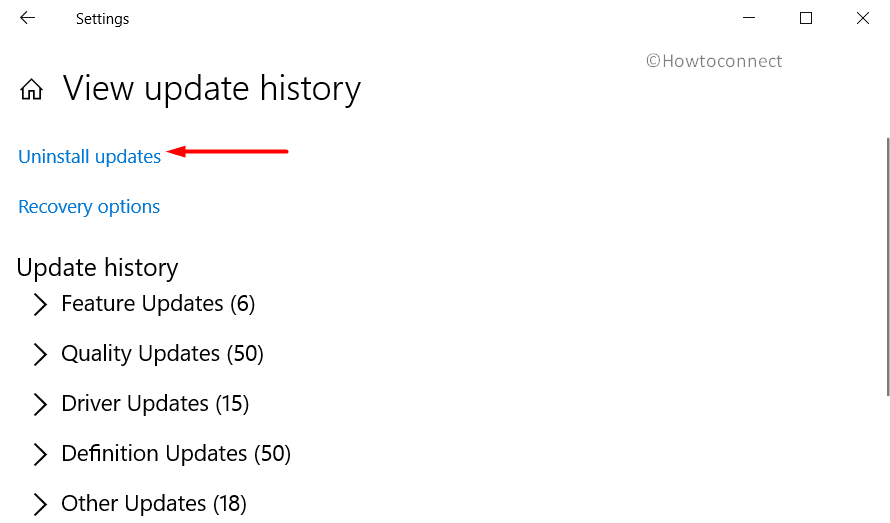
- When the Installed updates in the Control Panel launches, select the latest patches which you’re looking to uninstall. Thereafter, you just need to click on the ‘Uninstall’ button on the top and allow uninstalling in the case prompted.
13] Use system restore to fix KERNEL_MODE_HEAP_CORRUPTION
This is something that you can use in case none of the other fixes seems to be able to better the KERNEL MODE HEAP CORRUPTION BSOD situation. Using this utility would mean undoing any changes made in the system after you created the last restore point. It would thus mean erasing data or deleting programs installed post the point. Of course, for this to work, you need to have created a restore point in the system when it was running all error-free. Also, we recommend to backup files to external hard drive that you recently created or worked on, so that you don’t lose anything important. Given below are the steps to restore your system –
- Press Win+Q and type rstrui in the taskbar search box.
- Hit Enter key and this will instantly show up the System Restore wizard.
- Select Show more restore points on the subsequent screen.
- Choose the latest point and hit Next.
- Click the Finish button and this will initiate the process.
14] Disk Check for Reducing computer Fatigue
Disk checking (chkdsk) is yet another simple option to resolve some system-related issues. Where the errors are being caused by computer fatigue- a situation that arises mainly due to long and continuous use. Disk checking may offer a quick fix.
- Get access to the Command Prompt with administrative authorities.
- When the black window comes up, in the command line, type the command –
chkdsk C: /f /r /x - Press the Enter key on your keyboard to initiate a disk check.
15] Use SFC to fix any corrupted Windows System components
Each of the system components and files is quite crucial and critical for the smooth and uninterrupted working of the PC. Any disturbance in them or a single missing file may leave the PC in trouble at times. If you experience any kind of error, dysfunction or problem in your computer, some missing system file or problematic component can be a reason too. It can be because of malware attacks on the components or files. Anyway, a simple command in the command prompt can possibly fix it. Here is the simple this you need to do –
- First, run command prompt as administrator. To do this, you need to type cmd in the search box. When the results show up, right-click on Command Prompt and then select ‘Run as administrator’.
- The elevated Command Prompt will show up. In the line where the cursor blinks you need to type:
sfc /scannow - This command would start a scan for all and any corrupted components as well as relevant system files. It may be a lengthy process and may take some time.
- After the scan and fix process is complete, simply restart your computer.
Possibly, the KERNEL_MODE_HEAP_CORRUPTION BSOD error may be fixed if it was being caused by any of the affected system components or deleted DLL files.
Methods:
1] Stop automatic Restart
2] Download latest Windows updates
3] Remove additional Hardware Accessories
4] Run Windows Defender Full Scan
5] Resolve system memory issues
6] Remove any third-party antivirus tools
7] Check the outdated driver and update
8] Boot in Safe Mode
9] Easy BSOD fix with Blue Screen Troubleshooter
10] Save space and reduce system load by cleaning the junk files
11] Avoid similar or duplicate applications creating conflicts
12] Remove any incomplete Windows updates
13] Use system restore
14] Disk Check for Reducing computer Fatigue
15] Use SFC to fix any corrupted Windows System components
That’s all!!
Repair any Windows problems such as Blue/Black Screen, DLL, Exe, application, Regisrty error and quickly recover system from issues using Reimage.
Some Windows 11 are dealing with a weird issue where every attempt at putting their PC to sleep ends with a crash. Upon investigating the crash caused using Event Viewer, the error code displayed is 0x0000013A (KERNEL_MODE_HEAP_CORRUPTION).

We’ve investigated this particular issue thoroughly and we’ve discovered that this type of error always indicates a kernel-related issue where the heap manager has detected an underlying corrupted issue in a heap.
Now, when it comes to this issue, there are several underlying possible scenarios that might lead to the apparition of this issue. Here’s a list of possible culprits that you should watch out for:
- Update or Uninstall Dell supporting software – As it turns out, if you’re using a Dell computer and you have the supporting software installed, those programs might be responsible for causing the OS to crash while in hibernation. So far, there isn’t really a solution other than uninstalling the Dell Support Center.
- Generic drivers are causing a kernel crash – Another reason why you might expect to see this error when you attempt to put your Windows 11 to sleep is a series of generic Wi-Fi, Bluetooth, and USB Controller drivers that we’re migrated over from an older Windows version. In this case, the easiest way to fix the issue is to run the Intel Driver assistant and replace the generic drivers with dedicated equivalents from Intel.
- Kernel conflict caused by Paragon software – There is one driver (BioNTDrv_WINK.SYS) that often appears for being responsible for the crash (inside the crash dumps). This is a driver that gets installed with Paragon software, so the easiest solution to fix the kernel conflict is to uninstall the problematic tool altogether.
- Outdated BIOS version – Another scenario in which you might expect to see the 0x0000013A error occurring during hibernation or idle modes is an outdated BIOS version that is unstable when it needs to accommodate Windows 11 low-power mode. In this case, you should see if there is a new version available for your BIOS and install it.
Uninstall the Dell Support Center (If applicable)
In case you’re using Dell hardware, you should know about this weird incompatibility between Windows 11 and the Dell Supporting Center utility.
This might change in the future, but as of now, a lot of Dell desktop, ultrabook, and laptop users are reporting that their Windows 11 installation crashes every time they put it in Sleep mode or after they leave it idle for a long period of time.
Important: If you’re not using any Dell hardware or the Dell Supporting Center tool is not installed, skip this method entirely and move directly to the next method below.
As it turns out, this happens due to a program called Dell Supporting Center that apparently conflicts with a kernel process and causes the OS to crash.
As of now, the only way to resolve this major inconvenience with Windows 11 Dell computers is to simply uninstall the Dell Support Center.
Note: If a new version of the program is released, you can also try installing the latest version and see if the conflict has been patched by Dell’s engineers.
If you’re looking for step by step instructions on fixing this inconvenience, follow the instructions below:
- Press Windows key + R to open up a Run dialog box. Next, type ‘appwiz.cpl’ inside the text box and press Enter to open up the Programs and Features menu.

Opening up the Programs and Features menu - Once you see the User Account Control windows, click Yes to grant admin access.
- Inside the Programs and Features menu, scroll down through the list of installed programs and locate the Dell Supporting Center.
- When you locate the correct program, right-click on it and choose Uninstall from the context menu that just appeared.

Uninstall Dell supporting tool - Inside the uninstallation screen, follow the on-screen instructions to complete the uninstallation of Dell Supporting Center, then reboot your PC and see if the issue has been fixed by putting your PC into hibernation mode once again.


Note: If you’re fond of this tool, you can also go to the official download page of Dell and download the latest rebranded version of this tool – Dell Support Assist. Additionally, here are a few other troubleshooting steps that you can try for Dell computers.
If the same 0x0000013A (KERNEL_MODE_HEAP_CORRUPTION) error is still occurring despite the fact that you uninstalled the Dell Supporting Center tool.
Run Intel Driver Assistant to install every compatible driver
If the first method above was not applicable in your case, the next thing you should worry about is a potentially conflicting generic driver that is forcing the system to crash while in low-power mode.
This is commonly reported to occur with generic drivers that have been migrated to Windows 11 from an older Windows version.
Several other users that have dealt with this particular scenario have confirmed that the crashes with the 0x0000013A error have stopped once they used the Intel Driver Assistant to replace the generic equivalents of the CPU, Bluetooth, and Wi-Fi Card drivers with equivalents from Intel.
If you want to pursue this fix too, follow the instructions below:
- On your Windows 11 computer, open up your default browser and navigate to the official page of Intel Driver & Support assistant.
Note: If it’s the first time you’re using this tool, you will be asked to install a small utility that will scan your system locally for outdated driver and firmware. If asked to do so, install the local tool as instructed.
Downloading the Intel® Driver & Support Assistant - Once the tool is installed locally, wait until it scans your system of possible outdated drivers. If any occurrences are found, click on the Download All button and wait for the utility to download every pending driver.

Downloading all - Next, click on Install all to replace every current generic driver with Intel’s dedicated equivalents.
- When asked to restart your PC, do so and see if the issue is fixed once the next startup is complete.


In case you’re still seeing the same 0x0000013A error after your Windows 11 OS crashes when you put it into sleep, move down to the next method below.
Uninstall Paragon Software & remove BioNTDrv_WINK.SYS (if applicable)
One driver that is commonly mentioned as a potential cause for this type of KERNEL_MODE_HEAP_CORRUPTION crash is BioNTDrv_WINK.SYS. This is a driver that typically gets installed with Paragon software.
BioNTDrv_WINK.SYS is a backup or cloud service software driver that’s known to conflict with certain kernel processes on Windows 11.
If you find yourself in this scenario and you have the Paragon Software package installed, the first thing you should do is go over on the developer’s website and install the latest available version.
In case that’s not an option for you (as you already have the latest driver version installed), the only option for you is to simply uninstall the conflicting software.
Follow the guide below for step by step instructions on how to do this:
- Press Windows key + R to open up a Run dialog box. Next, type ‘appwiz.cpl’ inside the text box, then press Enter to open up the Programs and Features menu.

Open up the Programs and Features menu - Once you see the User Account Control, click Yes to grant admin access.
- Inside the Programs and Features menu, scroll down through the list of currently installed programs and locate the entry associated with Paragon software.
- When you see it, right-click on it and choose Uninstall from the context menu.

Uninstall the Paragon software - Inside the uninstallation screen, follow the on-screen instructions to complete the uninstallation prompts until you manage to get rid of the software.
- Reboot your PC and see if you still get the same kind of crash when you attempt to put your Windows 11 PC to sleep.


If this method was not applicable to you or you already uninstalled the Paragon software and the 0x0000013A (KERNEL_MODE_HEAP_CORRUPTION) error is still occurring, move down to the final potential fix below.
Update BIOS version to the latest
If none of the methods above have been effective in your case, the final culprit that you should investigate is an outdated BIOS driver that is not really compatible with the Windows 11 pre-release that you currently have installed.
Note: Keep in mind that Windows 11 just launched officially, so motherboard manufacturers are only now beginning to roll out BIOS firmware updates to accommodate this new operating system.
As of now, most of the major manufacturers have released BIOS updates to improve kernel stability on Windows 11. Chances are by installing the BIOS update compatible with your motherboard, you will be able to fix the 0x0000013A error appearing when you switch your PC to low power mode.
Of course, BIOS interfaces will vary a lot among different motherboard manufacturers, so we won’t be able to provide you with a dedicated guide that will walk you through the entire process of updating your BIOS version to the latest.
But a good start is to take the time and read the official documentation provided by your motherboard manufacturer in regards to updating your BIOS. Here are a few useful links:
- Dell
- ASUS
- Acer
- Lenovo
Note: If your motherboard is not among the list above, do a Google search on ‘BIOS Update + motherboard model’ and take the time to read the documentation thoroughly to get a grasp of the entire process.
If your motherboard manufacturer recommends that you update via a flash drive, follow the instructions below for a general guideline that will show you how to set up a flash drive and use it to update your current BIOS version:
- First things first, start by ensuring that you have a blank USB flash drive at your disposal. If you have important data on your drive, take the time to store it away before advancing to the next step.
- Next, open File Explorer, right-click on the flash drive and choose Format from the context menu.

Formatting the removable drive - Inside the Format screen, choose FAT32 from the file system options, then click on Quick Format and hit the Start button to commence the process.

Formatting the drive to the required format - Once the operation is complete, visit the website of your motherboard manufacturer website and download the BIOS update after you take the time to read the entire documentation about updating.

Downloading the latest BIOS version - After you download the latest version of the BIOS driver, paste it on your flash drive (by following the instructions).
Important: You might need to place the BIOS update in a specific folder, so take the time to read the documentation properly. - Once you manage to copy the BIOS update on your flash drive, reboot your PC and press the SETUP key at the initial screen to access the BIOS Settings.

Press the Setup screen Note: In case you don’t manage to spot the Setup screen on screen, press the Esc key, the Dell key or one of the following F keys – F2, F4, F6, F8, and F12. Additionally, you can search online for specific instructions on accessing your BIOS settings according to the motherboard model that you’re using.
- Once you’re finally inside the BIOS settings menu, look for the Advanced (Expert) settings and see if you can spot an option similar to Update System BIOS (or similar).

Updating the BIOS - Follow the remaining instructions to complete the BIOS update, then reboot your PC normally and see if the 0x0000013A error is now fixed.
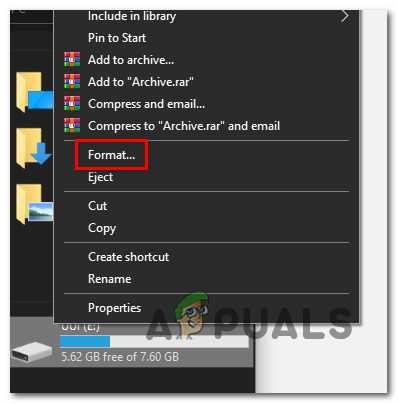
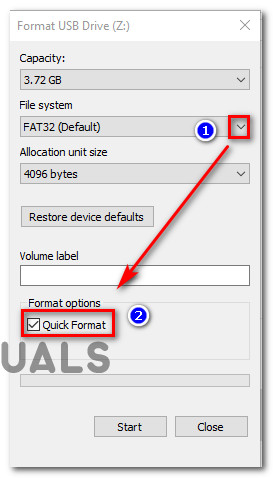


In this article, we will be talking about KERNEL_MODE_HEAP_CORRUPTION, which is a Windows 10 BSOD error with a bug check code 0x0000013A. A blue screen of death issue, as you might have noticed, crash the device displaying a blue color screen with the message that your PC needs to restart. In the end, there would be a specification error definition you are facing. The problem is, you don’t get to save your work or any changes that you were making and it is quite frustrating.
KERNEL MODE HEAP CORRUPTION isn’t a frequent case. There are multiple reasons for this BSOD error code to occur. An outdated operating system, presence of corrupted system files, missing DLL files, low disk space, RAM issues, and more such problems lead to this error. However, given that you are probably facing it right now, here is a comprehensive explanation of fixes for it. Many of it is such that you can try even if you are a basic or beginner user. Here is a brief of the fixes suggested in this article –
Here is how to fix KERNEL_MODE_HEAP_CORRUPTION BSOD Error in Windows 10 –
1] Stop automatic Restart
Whether due to an error or some other issue, you may notice that the computer freezes or shut down automatically at times. However, it can be quite troublesome for those who have serious work on PC. Frequently running into some errors and crashing may be easily frustrating. So before anything, we thought it might be helpful for you to have this dealt with to fix KERNEL_MODE_HEAP_CORRUPTION. Here is a simple setting you can change which can manage this problem.
Step-1: After saving your work and press Win+D. This is the keyboard shortcut to go to the Windows 10 desktop.
Step-2: The next step is a right-click on This PC icon (if you don’t have This PC on the Desktop, simply search in the Start menu). Select Properties option from the fly-out menu.
Step-3: In the System window that appears, you will see ‘Advanced System Settings‘ in the left section. Select it.
Step-4: As you select it, another box for System Properties will come up. At the bottom of the same, click on the Settings button that you see under the head ‘Startup and Recovery’.
Step-5: The next window that comes up will be the Startup and Recovery one. Here, under the System Failure head, deselect the box corresponding to “Automatically restart” (see snapshot).
Step-6: Lastly, click on OK and conclude the process.
This should disable automatic restart on system failure Windows 10 PC. This way, you will be able to save all your work and can try fixing KERNEL MODE HEAP CORRUPTION without being bugged by restarts.
2] Download latest Windows updates
In order to keep your computer smoothly functioning and away from errors, keeping the system updated is a must. The monthly and infrequent patches that Microsoft releases mostly contain added security against various bugs and problems. It may even provide a fix for the issues causing the blue screen error in your PC. Therefore, updating Windows is a recommended way of avoiding as well as fixing many kinds of system errors including KERNEL_MODE_HEAP_CORRUPTION. Often, users may postpone system updates, leaving the PC with threats. If that is the case with you too, update the system as soon as possible.
Connect to a high-speed internet/ Wi-Fi when you are updating your system or driver or any such thing. Check out the steps to update the PC manually below –
- Launch the Windows Settings app with the keys “Windows + I”.
- After the app interface opens up, navigate to Update & Security.
- On the right side of the following page, you may either see the due patches or the text “You’re up to date”. However, just click the button that says Check for updates. This would initiate a check for the due or new patches.
- In case there are any due ones listed, download them.
- Wait and let Windows carry out the installation process. Afterward, the system will prompt for permission to restart the device to wrap up the process.
3] Fix the KERNEL_MODE_HEAP_CORRUPTION – Remove additional Hardware Accessories
In some instances, there can be compatibility problems in some of the hardware connected to your device. It may cause slow processing speed as well as some kind of errors including BSODs like KERNEL MODE HEAP CORRUPTION. To see if this is the problem in your case, just safely disconnect those external hardware components. Then, Restart Windows 10 PC and see whether the issue is still there. You can connect them back once you determine the trouble.
If you have recently added any hardware accessories, you also need to make sure that you update their drivers. You can do this simply by visiting the manufacturer website of that particular hardware component. You should be able to find the guide to update them on the website. Follow those instructions and then see if the issue is resolved. Also, make sure you do a periodic update of those devices too.
4] Run Windows Defender Full Scan
No matter whatever safety rules that you follow in the web-space, malware can always find ways into your computer. While some malicious software isn’t all too buggy, some can cause real turbulence in the system. They may attack and delete important files and may cause various errors like KERNEL MODE HEAP CORRUPTION BSOD. To root them out, you can use Windows security– the default anti-malware utility coming with Windows. Check out the following steps to perform a complete security scan of your device –
- Get access to the Window Security application either by opening it from the system tray (shield icon) or by searching it in the search box.
- Once it appears, navigate to Virus & threat protection => Scan options.
- There are going to be different scan type options with radio button adjoining them. Select the one next to ‘Full scan’. This will trigger a comprehensive scan of each and every file as well as programs on your hard disk.
- Then, the next step is clicking on the Scan now button.
- This starts the scan process, it may take a bit of time, so wait.
- Once the scan is over, the application will display any kind of threats or malware found on the system.
- Now, click on the Clean threats button to clear out the detected malicious components.
- From the dialog box that appears subsequently, select Remove.
- Lastly, click on Start actions to confirm the removal of the viruses.
5] Resolve system memory issues
Random Access Memory is a critically important part of any computer. And, in case of bad RAM slot, results can be a stream of dysfunctions and errors, even BSODs including KERNEL_MODE_HEAP_CORRUPTION. There can be a fair number of reasons which can cause the problem in RAM. Some of them being, power surge, excessive heating and often motherboard issues. Thus, if your computer acting weird, you should consider the possibility of some bad sectors in memory too. You can try out the following fix to resolve the memory-related problems –
- Click on the notification area and from the Action Center, select “All settings”. This would open Windows Settings app on your PC.
- Then, in the text box on the top of the Settings app, type ‘memory’.
- From the results, double click on “Diagnose your computer’s memory problems”.
- When the Memory Diagnostic Tool opens up, select the first option. It is also the recommended option, that says “Restart now and check for problems”. Note to save any unsaved work before you allow a restart.
- This will reboot the system. When it powers up, a blue screen will appear which indicate the start of the problem diagnosis.
- The device will restart again after the memory problem scan is over. Any detected issues will be listed after reboot.
6] Remove any third-party antivirus tools
As we discussed above, malware can cause some serious issues in the system. Several users rely upon different security software, both free and paid for managing those threats. However, having more than one antivirus in a system is generally not recommended. Third-party anti malware tools interfere with the functioning of Windows Defender. It may even cause errors like KERNEL_MODE_HEAP_CORRUPTION. Therefore, uninstall any third-party anti malware software from your system when you face any kind of system dysfunctions. Following are the steps to do the same –
- In the Windows search bar, type cp. From the result double-click on Control Panel.
- Go to Programs and Features applet and click on it.
- When it opens you will see the list of various installed apps on your system.
- Go to the list and select the third party anti-malware tool which you need to uninstall.
- Click on the Uninstall button on the top of the window to get rid of those apps.
- Restart the computer and see whether the problem has been resolved.
7] Check the outdated driver and update – KERNEL_MODE_HEAP_CORRUPTION
In a computer system, there would be a lot of drivers. What they do is telling the hardware components on how to work on a particular system. Therefore the role of device drivers is quite critical.
Now, even though in Windows 10 most of the drivers are updated along with the monthly or periodic updates that automatically happen. However, there is a possibility that some of the drivers are not updated. This may cause problems in the functioning of various devices and may ultimately lead to a blue screen of death or other kinds of errors. Given below are the steps that you need to follow –
- Type device manager in the Taskbar search bar and launch the utility.
- When the console opens check through the various devices listed there and see if any of them displays a yellow exclamation mark in device manager.
- In case any of them do have the mark then click on it to expand and see the drivers.
- Right-click on each driver and from the menu that appears, simply select the Update driver option.
- Let the system find updates. If prompted allow to carry out the process.
- Restart the system and see if the KERNEL MODE HEAP CORRUPTION
error has been resolved.
8] Fix KERNEL_MODE_HEAP_CORRUPTION – Boot OS in Safe Mode
The safe boot is a very effective fix in case of not only the blue screen of death errors but also with most other kinds of issues. It is essentially helpful in gaining limited access to your system when you are facing problem in starting your Windows normally. It is a great way to remove any problematic applications or programs. This is because when in safe mode only the basic and important services or programs and drivers get loaded. No third-party tools work, thereby preventing any kind of interference of those components.
There is more than just one way to initiate the safe boot mode. Given below are the simple steps following which you can start windows 10 in safe mode.
- Click on the Windows icon to access the Start menu.
- Select the “Power” button followed by a hit on “Restart” while holding the “Shift” key.
- Click on the Advanced repair button.
- In the screen that follows select Troubleshoot => Advanced options.
- Select Startup settings. This will present you with a list of Advanced boot options.
- Hit the Restart button. Then, press the respective number on your keyboard which corresponding to the Startup option that you would like to use. To enter Safe mode press F4.
9] Easy BSOD fix with Blue Screen Troubleshooter
Troubleshooting is one of the most recommended ways of fixing any kind of errors. This is true in the case of blue screen errors as well. What makes it even better is that Windows comes with special troubleshooter for blue screens. Isn’t it great that you can resolve the entire blue screen scenario possibly by running a troubleshooter? It is also one of the easiest fixes as well. Here is how you can run a Blue Screen Troubleshooter in Windows 10 –
- In the Settings application (as discussed above), go to the Update & security section. Select Troubleshoot tab available on the left-hand side.
- Select Blue screen option available in the lower half of the panel.
- The option would expand, revealing a Run the Troubleshooter button. Click on it.
10] Save some space and reduce system load by cleaning the junk files
Junk files can cause a load of trouble in an Operating System. Numerous files can get piled up as you browse along with internet and download random files. This can slow down the functioning of your computer and can cause serious errors on the system including various BSODs. Junk and temporary files mean the cache data, the files in your download folder, recycle bin, etc. Therefore it is recommended to occasionally clean up these unwanted or temporary files in order to free up disk space. This way you can ensure an error-free and smooth functioning of your device.
A quick note here is that the cleanup operation may delete some important files from the download folder and even from the recycle bin also. Therefore before you start the clean up make sure that you have moved all the important files from the locations. Here’s what you need to do for using the Disk cleanup utility for this purpose –
- First of all, type cleanmgr in the taskbar search box and hit Enter.
- In the small pop up window that comes up select the drive that you would like to clean-up.
- Click on the Ok button. This will trigger a scan for the amount of space which can be retrieved by deleting junk files and the temporary files.
- Click “Cleanup system files” button and then again choose the same drive as above.
- Then you need to select all the boxes thus allowing the system to clear them out. Click on the Ok button and let the cleanup process trigger.
- Reboot the system after your computer has completed the process and see whether the error KERNEL_MODE_HEAP_CORRUPTION has been solved.
11] Avoid similar or duplicate applications creating conflicts
You read above that having third-party antivirus tools can cause conflicts with Windows Defender since they have similar functioning. Similarly having multiple application serving the same purpose on the system can cause conflict between them eventually leading to KERNEL_MODE_HEAP_CORRUPTION.
You can prevent this situation simply by uninstalling those extra applications. All you need to do is head straight to the Apps Settings page and locate such programs from the list. Once you find them, select it and click Uninstall.
12] Remove any incomplete Windows updates
In one of the above fixes, we mentioned the importance of updating Windows 10 in regular basis. This solution points the problems with some updates. There have been a few instances where some of the recent updates had contained bugs caused problematic functions in the PC. Incomplete Windows updates can cause a lot of troubles in the system. Therefore, in case you have been receiving KERNEL_MODE_HEAP_CORRUPTION post updating of the system, you might want to try to delete windows update files. Follow the steps given below in order to delete the recent updates and fix the BSOD –
- Open the Settings app (Win +I) and thereafter, in the interface, navigate to Update & security.
- In the subsequent page, select Windows Updates from the list of options on the left-hand side.
- Click on ‘View update history’ and then on ‘Uninstall updates’ link corresponding to the latest update.
- When the Installed updates in the Control Panel launches, select the latest patches which you’re looking to uninstall. Thereafter, you just need to click on the ‘Uninstall’ button on the top and allow uninstalling in the case prompted.
13] Use system restore to fix KERNEL_MODE_HEAP_CORRUPTION
This is something that you can use in case none of the other fixes seems to be able to better the KERNEL MODE HEAP CORRUPTION BSOD situation. Using this utility would mean undoing any changes made in the system after you created the last restore point. It would thus mean erasing data or deleting programs installed post the point. Of course, for this to work, you need to have created a restore point in the system when it was running all error-free. Also, we recommend to backup files to external hard drive that you recently created or worked on, so that you don’t lose anything important. Given below are the steps to restore your system –
- Press Win+Q and type rstrui in the taskbar search box.
- Hit Enter key and this will instantly show up the System Restore wizard.
- Select Show more restore points on the subsequent screen.
- Choose the latest point and hit Next.
- Click the Finish button and this will initiate the process.
14] Disk Check for Reducing computer Fatigue
Disk checking (chkdsk) is yet another simple option to resolve some system-related issues. Where the errors are being caused by computer fatigue- a situation that arises mainly due to long and continuous use. Disk checking may offer a quick fix.
- Get access to the Command Prompt with administrative authorities.
- When the black window comes up, in the command line, type the command –
chkdsk C: /f /r /x - Press the Enter key on your keyboard to initiate a disk check.
15] Use SFC to fix any corrupted Windows System components
Each of the system components and files is quite crucial and critical for the smooth and uninterrupted working of the PC. Any disturbance in them or a single missing file may leave the PC in trouble at times. If you experience any kind of error, dysfunction or problem in your computer, some missing system file or problematic component can be a reason too. It can be because of malware attacks on the components or files. Anyway, a simple command in the command prompt can possibly fix it. Here is the simple this you need to do –
- First, run command prompt as administrator. To do this, you need to type cmd in the search box. When the results show up, right-click on Command Prompt and then select ‘Run as administrator’.
- The elevated Command Prompt will show up. In the line where the cursor blinks you need to type:
sfc /scannow - This command would start a scan for all and any corrupted components as well as relevant system files. It may be a lengthy process and may take some time.
- After the scan and fix process is complete, simply restart your computer.
Possibly, the KERNEL_MODE_HEAP_CORRUPTION BSOD error may be fixed if it was being caused by any of the affected system components or deleted DLL files.
Methods:
1] Stop automatic Restart
2] Download latest Windows updates
3] Remove additional Hardware Accessories
4] Run Windows Defender Full Scan
5] Resolve system memory issues
6] Remove any third-party antivirus tools
7] Check the outdated driver and update
8] Boot in Safe Mode
9] Easy BSOD fix with Blue Screen Troubleshooter
10] Save space and reduce system load by cleaning the junk files
11] Avoid similar or duplicate applications creating conflicts
12] Remove any incomplete Windows updates
13] Use system restore
14] Disk Check for Reducing computer Fatigue
15] Use SFC to fix any corrupted Windows System components
That’s all!!
Repair any Windows problems such as Blue/Black Screen, DLL, Exe, application, Regisrty error and quickly recover system from issues using Reimage.