Если вы столкнулись с ошибкой 0x80072f8f 0x20000 при создании загрузочной флешки Windows 10 через официальную утилиту Media Creation Tool, то вероятнее всего у вас установлена Windows 7 либо Windows 8.
Она возникает из-за того что данные версии Windows уже не поддерживаются и необходимо создать загрузочную флешку другим способом.
В данной инструкции мы подробно распишем что необходимо делать в таком случае.
Для создания загрузочной флешки необходимо будет скачать дистрибутив Windows 10:
Версия x32 – https://cdn.keyslab.ru/windows/10/ProAndHome/Win10_22H2_Russian_x32.iso
Версия x64 – https://cdn.keyslab.ru/windows/10/ProAndHome/Win10_22H2_Russian_x64.iso
А так-же программа для того чтобы записать этот образ на флешку мы сделаем это на примере одной из самых популярных программ Rufus – https://github.com/pbatard/rufus/releases/download/v3.22/rufus-3.22.exe
После того как скачается образ запускаем программу, в пункте «Устройство» необходимо выбрать флешку размером от 8ГБ (рекомендуем 16). Обратите внимание что она будет форматироваться, поэтому сохраните все важные файлы. Так-же не рекомендуем использовать внешний жесткий диск, так как часто возникают ошибки при установке с них.

Далее в разделе «Метод загрузки» нажимаем «Выбрать» и находим скачанный образ. Все остальные пункты оставляем по умолчанию.
На данном этапе вы можете выбрать дополнительные параметры установки системы, которые упростят процесс установки, выбирайте их на ваше усмотрение.
Здесь программа сообщает нам о том, что флешка будет форматирована.
Теперь дожидаемся окончания создания, в конце статус изменится на «ГОТОВ». После этого можно закрывать программу.
Теперь вы можете приступить к установке новой системы, мы подробно расписали весь процесс в нашей другой инструкции, вам необходимо будет пропустить пункт про создание загрузочного накопителя, он у вас уже есть — https://keyslab.ru/articles/kak-ustanovit-windows-10-s-fleshki/
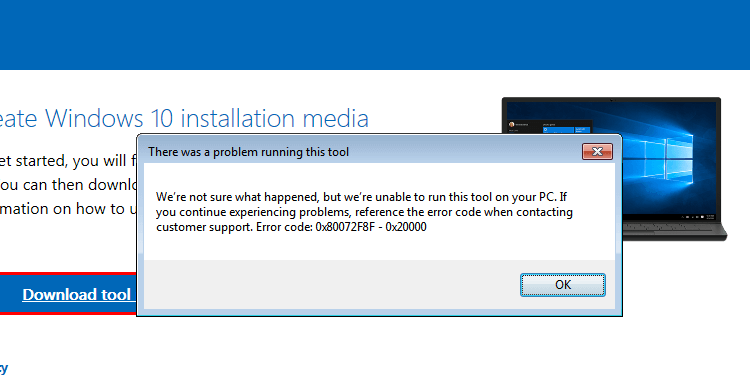
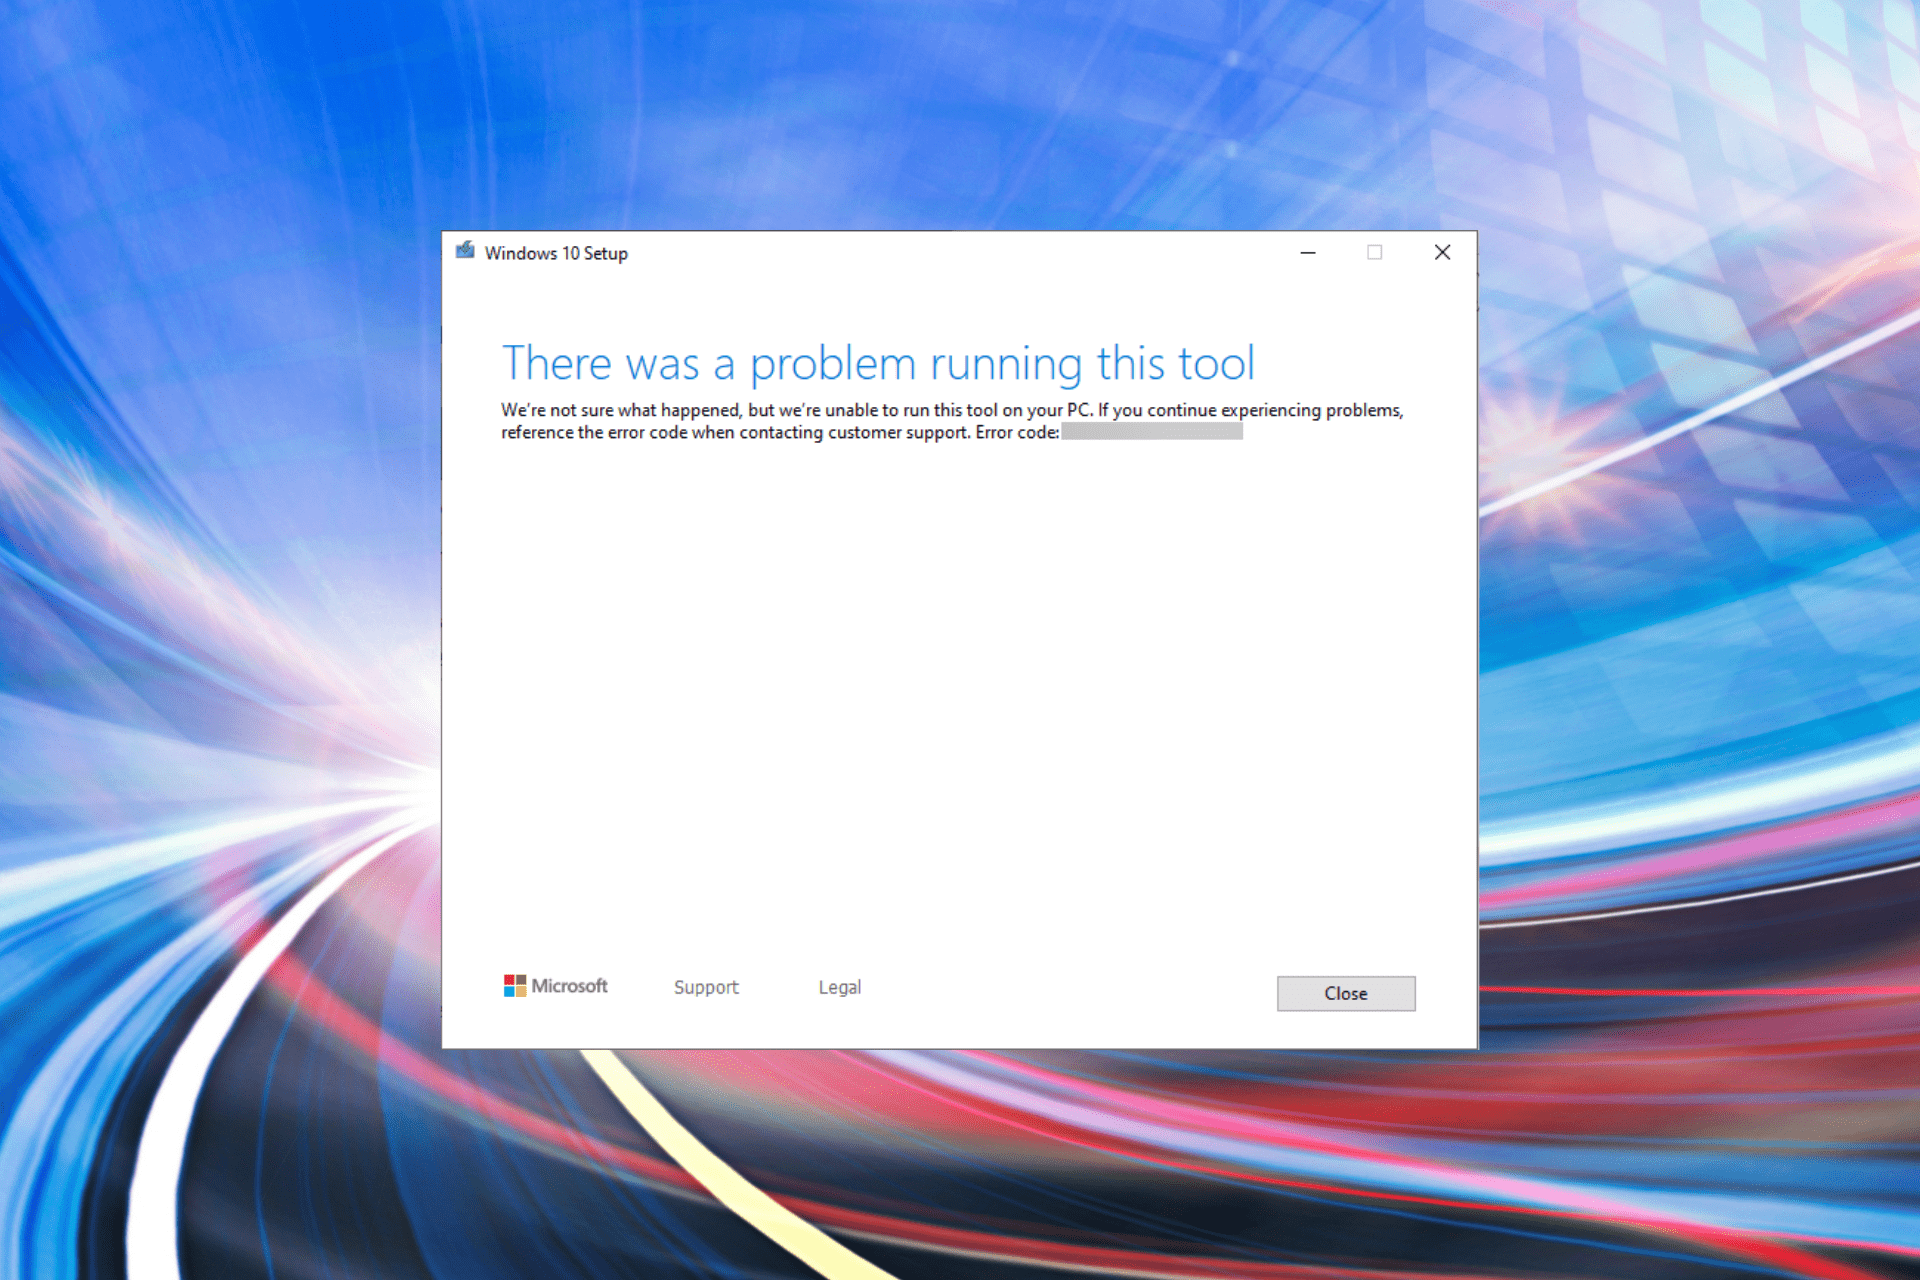
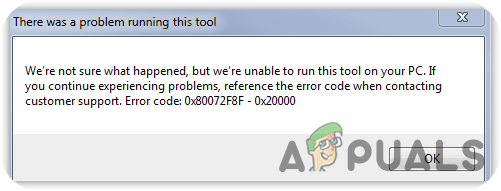
When you attempt to upgrade to Windows 10 from a Windows 7/8 computer using Microsoft’s Media Creation Tool, the error 0x80072F8F - 0x20000 may appear. The full error message verbatim is below:
There was a problem running this tool

We're not sure what happened, but we're unable to run this tool on your PC. If you continue experiencing problems, reference the error code when contacting customer support. Error code: 0x80072F8F - 0x20000
Let’s see how to fix this error on Windows 7 and Windows 8.
Important: Information in this article (and the registry fix) is for Windows 7 SP1 and Windows 8 systems only. They don’t apply to Windows 8.1 and higher!
Cause
The error 0x80072F8F - 0x20000 happens because the Media Creation Tool uses the TLS 1.2 Protocol, but the protocol is disabled by default on Windows 7 and Windows 8 computers. By default, only SSL3 and TLS1 are enabled in Windows 7 and Windows 8. On Windows 8.1 and Windows 10, SSL3, TLS1.0, TLS1.1, and TLS1.2 are enabled by default.
To resolve the Media Creation Tool Error 0x80072F8F – 0x20000 error on Windows 7 and Windows 8 computers, enable the TLS 1.1 and TLS 1.2 protocols. Follow these steps to do so:
Method 1: Enable TLS 1.1 and TLS 1.2 via the registry (Windows 7 & 

- Make sure your system is fully updated.
- Open Notepad.
- Copy the following lines into Notepad.
Windows Registry Editor Version 5.00

[HKEY_LOCAL_MACHINE\SOFTWARE\Microsoft\Windows\CurrentVersion\Internet Settings\WinHttp]
"DefaultSecureProtocols"=dword:00000a00

[HKEY_LOCAL_MACHINE\SOFTWARE\Wow6432Node\Microsoft\Windows\CurrentVersion\Internet Settings\WinHttp]
"DefaultSecureProtocols"=dword:00000a00

[HKEY_LOCAL_MACHINE\SYSTEM\CurrentControlSet\Control\SecurityProviders\SCHANNEL\Protocols\TLS 1.1\Client]
"DisabledByDefault"=dword:00000000
"Enabled"=dword:00000001

[HKEY_LOCAL_MACHINE\SYSTEM\CurrentControlSet\Control\SecurityProviders\SCHANNEL\Protocols\TLS 1.2\Client]
"DisabledByDefault"=dword:00000000
"Enabled"=dword:00000001
- Save the file with a .reg extension — e.g.,
enable_tls.reg - Double-click the
enable_tls.regfile to apply the settings into the registry. Click Yes when asked for confirmation. - Download the KB3140245 package (TLS 1.1/1.2 enablement update) from Microsoft and install it.
- Restart Windows.
- Download registry files: If you wish to download premade registry file(s), download enable-tls.zip. Unzip and run the enclosed file enable_tls.reg. To reverse/undo the setting to Windows 7/8 defaults, run the
undo.regregistry file.
(Credits to Markus for the fix.)
Method 2: Easy Fix (for Windows 7)
The above registry fix was created incorporating the suggestions in the Microsoft article titled Update to enable TLS 1.1 and TLS 1.2 as default secure protocols in WinHTTP
The article talks about the Microsoft Update with will enable TLS 1.1 and TLS 1.2 support via KB3140245 package. Here are the instructions:
- Download the KB3140245 package. Don’t run it yet.
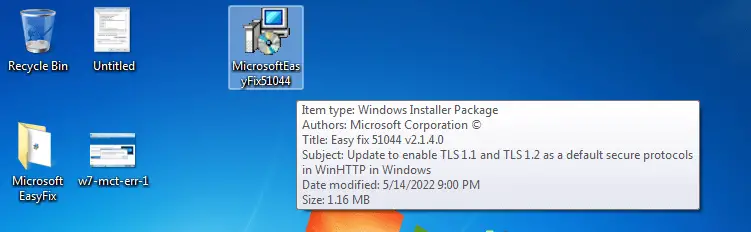
- Download the “Easy Fix” executable via the above link (direct download) and run it. The fix will create the
DefaultSecureProtocolsregistry value which is a prerequisite for the Microsoft update. - Now run the KB3140245 .msi package you downloaded in Step 1.
This automatically enables TLS 1.1 and TLS 1.2 on the computer.
Re-run the Media Creation Tool now. It should work now!
Editor’s note
Note that the Easy Fix sets the “DefaultSecureProtocols” registry value only; it doesn’t write to the SCHANNEL registry location. But the manual registry fix in “Method 1” above does both! So, if you’ve explicitly disabled the TLS 1.1 and TLS 1.2 protocols via the SCHANNEL registry modification (e.g., by using the nisudf.reg registry fix to resolve a game/server connectivity issue), then the “Easy Fix” tool won’t help. You need to use “Method 1” in that case.
One small request: If you liked this post, please share this?
One «tiny» share from you would seriously help a lot with the growth of this blog.
Some great suggestions:
- Pin it!
- Share it to your favorite blog + Facebook, Reddit
- Tweet it!
So thank you so much for your support. It won’t take more than 10 seconds of your time. The share buttons are right below. 
Ramesh Srinivasan is passionate about Microsoft technologies and he has been a consecutive ten-time recipient of the Microsoft Most Valuable Professional award in the Windows Shell/Desktop Experience category, from 2003 to 2012. He loves to troubleshoot and write about Windows.
Ramesh founded Winhelponline.com in 2005.
Make sure you have admin rights or try other quick solutions ✅
by Kazim Ali Alvi
Kazim has always been fond of technology, be it scrolling through the settings on his iPhone, Android device, or Windows. And at times, unscrewing the device to take… read more
Updated on
- Error code 0x80072f8f — 0x20000 tends to pop up while upgrading your OS.
- By all means, conflicting applications or the absence of admin privileges can trigger it.
- Try to run the Media Creation Tool with administrative rights and see how it goes.
XINSTALL BY CLICKING THE DOWNLOAD FILE
To fix Windows PC system issues, you will need a dedicated tool
SPONSORED
Fortect is a tool that does not simply clean up your PC, but has a repository with several millions of Windows System files stored in their initial version. When your PC encounters a problem, Fortect will fix it for you, by replacing bad files with fresh versions. To fix your current PC issue, here are the steps you need to take:
- Download Fortect and install it on your PC.
- Start the tool’s scanning process to look for corrupt files that are the source of your problem
- Right-click on Start Repair so the tool could start the fixing algorythm
- Fortect has been downloaded by 0 readers this month, rated 4.4 on TrustPilot
Upgrading your Windows computer should be a straightforward process, but sometimes an error code like “0x80072f8f – 0x20000” can pop up and make things confusing. This error might happen because of simple things like your computer’s clock being set to the wrong time, or more complex issues like conflicts with other programs on your computer.
Don’t worry, though! This guide is here to help you understand what’s causing the error and how to fix it. Whether you’re using Windows 10 or Windows 7, the solutions provided here are easy to follow and will get you back on track with your Windows upgrade.
🔵What causes error code 0x80072f8f – 0x20000?
There are multiple causes for this error, with these being the most common ones:
- TLS 1.2 turned off – It happens because the Media Creation Tool uses a specific security protocol called TLS 1.2, but this protocol is turned off by default on Windows 7,8 and Windows 10 computers. In simpler terms, the tool is trying to use a security feature that’s not enabled on your computer, causing the error.
- Lack of privileges – Certain tools require administrative privileges, and to use them you need to make apps run as admin.
- App conflicts – Third-party applications can sometimes come into conflict with Media Creation Tool and cause this problem. If that’s the case, you need to find and uninstall those programs.
- Corrupted cache files – Sometimes installation cache can get corrupted. If that happens, deleting the SoftwareDistribution directory might help.
If you have these problems and you’re getting an error message when trying to run Media Creation Tool stating that There was a problem running this tool, check the tested fixes below.
How do I fix error code 0x80072f8f – 0x20000?
- 🔵What causes error code 0x80072f8f — 0x20000?
- How do I fix error code 0x80072f8f — 0x20000?
- 1. Run the Media Creation tool as an administrator ✅
- 2. Enable TLS 1.2 using the Registry
- Step 1: Open the Registry Editor
- Step 2: Navigate to the TLS 1.2 Key
- Step 3: Create Client and Server Keys
- Step 4: Configure Client and Server Keys
- Step 5: Close the Registry Editor and Restart
- 3. Perform a Clean Boot
- 4. Check your date and time
- 5. Clear the software distribution folder
- 6. Modify the registry
- 7. Uninstall antivirus or other conflicting apps
1. Run the Media Creation tool as an administrator ✅
1. Locate and navigate to the folder where the Media Creation Tool is stored.
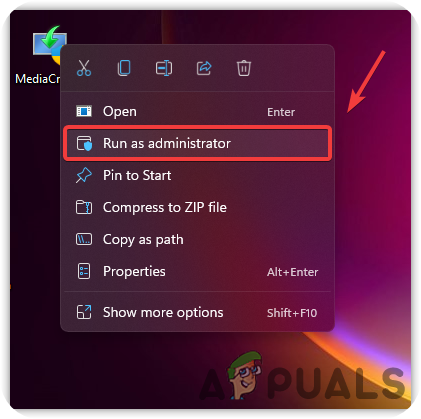
2. Right-click on it to open the context menu.
3. Select Run as administrator from the context menu.

4. Click Yes in the UAC (User Account Control) prompt.
5. Check if the issue persists.
If you are not running the Media Creation tool with administrative privileges, there’s a chance that you are encountering the error code 0x80072f8f – 0x20000 because of that.
Therefore, manually running it as an admin is likely to fix the issue.
If this method doesn’t work in Windows 10, head to the next one.
2. Enable TLS 1.2 using the Registry
Enabling Transport Layer Security (TLS) 1.2 in Windows 7,8 and 10 is essential for secure network communication. This guide, requiring administrative access, will lead you through the process using the Windows Registry Editor. Care must be taken, as incorrect changes to the registry can cause system issues.

NOTE
The steps provided for enabling TLS 1.2 using the Registry Editor are generally applicable to Windows 7 and 8 as well. The process of navigating the registry and creating the necessary keys and values is consistent across different versions of Windows, including Windows 7.
Step 1: Open the Registry Editor
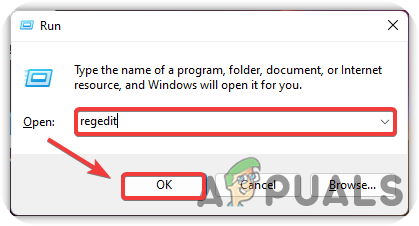
- Press the
Windows Key + Ron your keyboard to open the Run dialog box. - Type
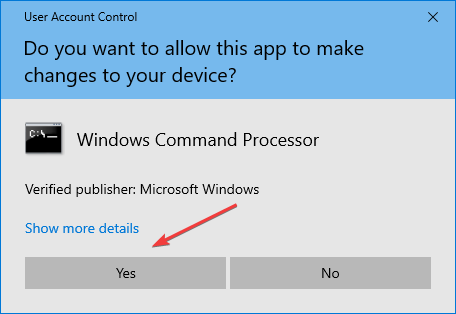
regeditand pressEnter. - If prompted by User Account Control, click
Yesto allow the Registry Editor to make changes to your device.
Step 2: Navigate to the TLS 1.2 Key
- In the Registry Editor, navigate to the following path:
HKEY_LOCAL_MACHINE\SYSTEM\CurrentControlSet\Control\SecurityProviders\SCHANNEL\Protocols - Right-click on the
Protocolsfolder, selectNew, and thenKey. - Name the new key
TLS 1.2.
Step 3: Create Client and Server Keys
- Right-click on the
TLS1.2key, selectNew, and thenKey. - Name this new key
Client. - Repeat the process to create another key under
TLS 1.2and name itServer.
Step 4: Configure Client and Server Keys
- Select the
Clientkey, right-click in the right pane, selectNew, and thenDWORD (32-bit) Value. - Name the new DWORD
DisabledByDefault. - Double-click
DisabledByDefaultand set its value to0. - Right-click in the right pane again, select
New, and thenDWORD (32-bit) Value. - Name this new DWORD
Enabled. - Double-click
Enabledand set its value to1. - Repeat these steps for the
Serverkey.
Step 5: Close the Registry Editor and Restart
- Close the Registry Editor.
- Restart your computer to apply the changes.
Enabling TLS 1.2 in Windows 10 through the Registry Editor is a straightforward process that will help you get rid of 0x80072f8f – 0x20000 Media Creation Tool Error. If this does not solve your issue, please continue with the following fixing method.
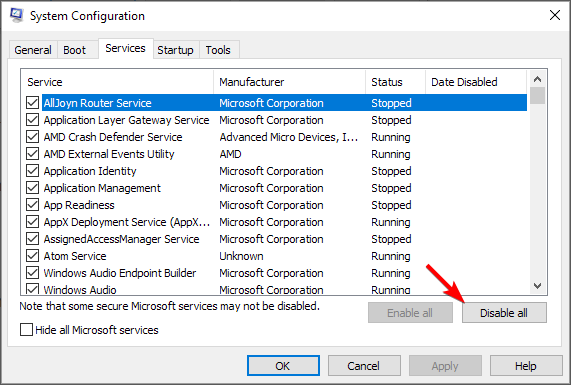
3. Perform a Clean Boot
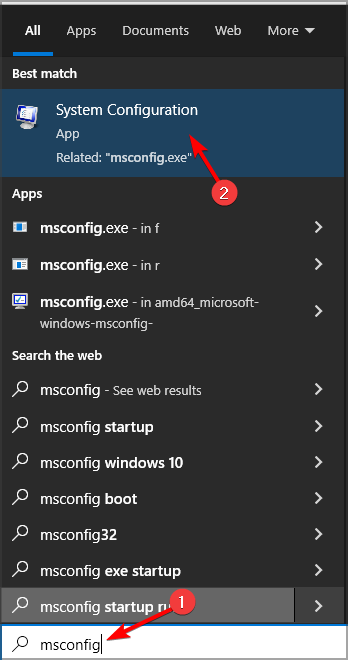
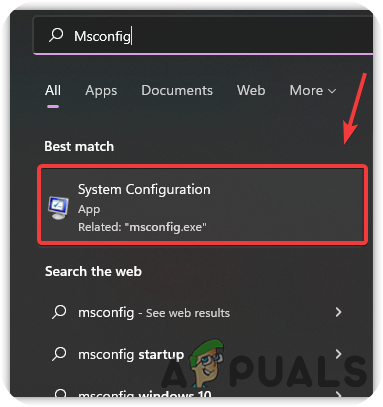
- Type MSConfig in the Start search and select System Configuration.

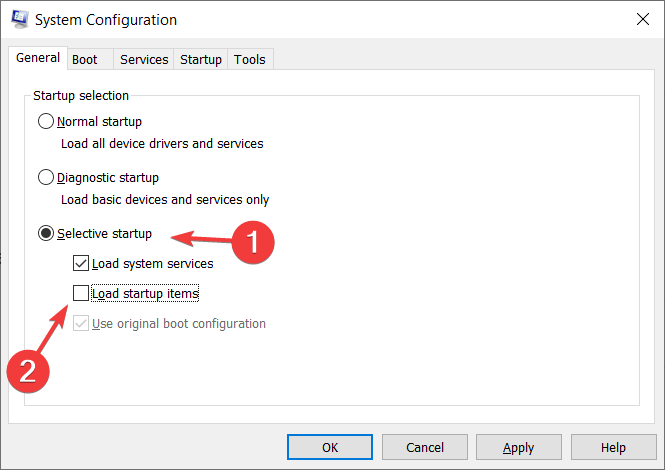
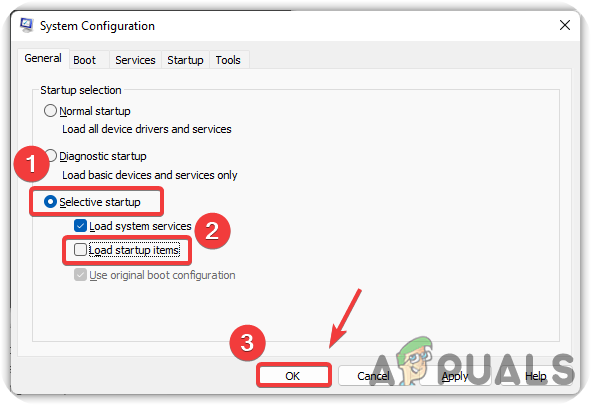
- In the General tab, select Selective Startup.
- Check Load System Services.

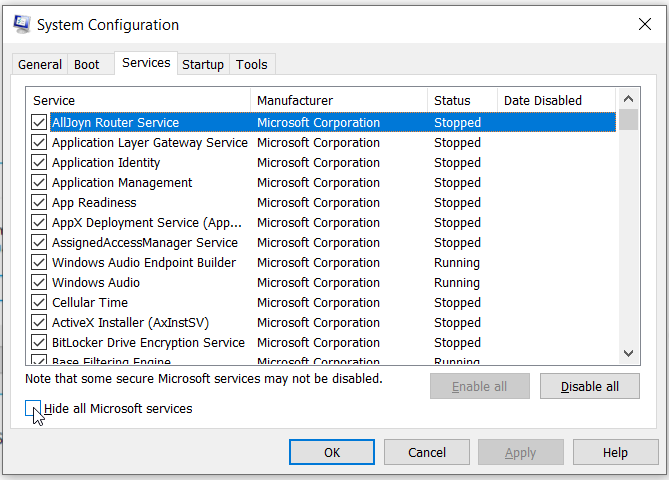
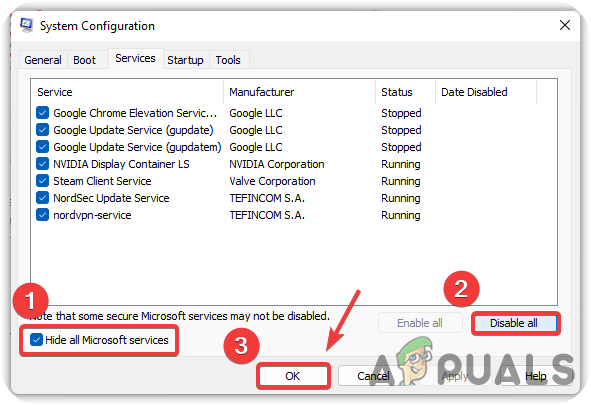
- Click the Services tab and choose to Hide All Microsoft Services.

- Select Disable All.

- Click Apply and OK and restart the computer.
If the problem does not appear with a clean boot, you may now try to locate the culprit program or service.
The simplest method to handle this is using a third-party specialized removal application to remove stubborn apps while in Clean Boot mode.
Otherwise, you could also utilize an automatic PC repair method that is capable of cleaning the Windows OS and thus restoring your system files.
Fortect is the ideal software designed to detect various system issues and repair them quickly with its patented technology. This way, you can get rid of such Media Creation errors.

Fortect
Stay away from Windows OS errors using this full repairing tool capable of fixing media creation issues.
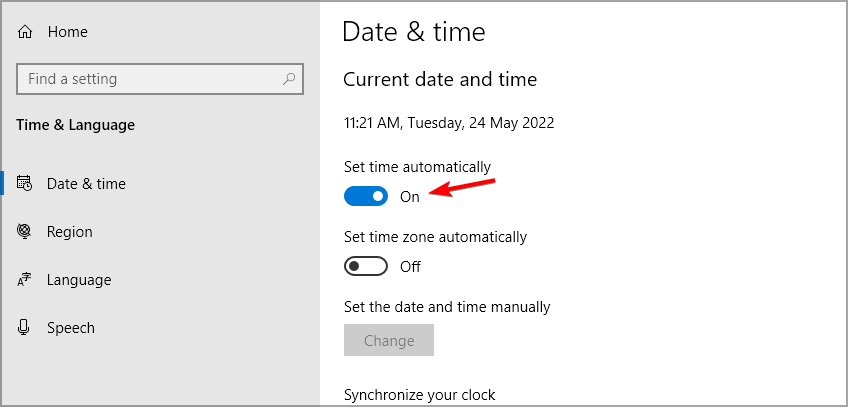
4. Check your date and time
- Right-click the clock in the bottom right. Choose Adjust date/time.

- Disable Set time automatically.


- Wait for a few moments and then enable it again.

- Media Creation Tool: Access denied on Windows 10/11 ISO to USB
- Windows Media Creation Tool Not enough space error [SOLVED]
- How to Change the Hyper-V Display Resolution [Windows 11 Guide]
- Fix: No Internet, Secured Error on Windows 11
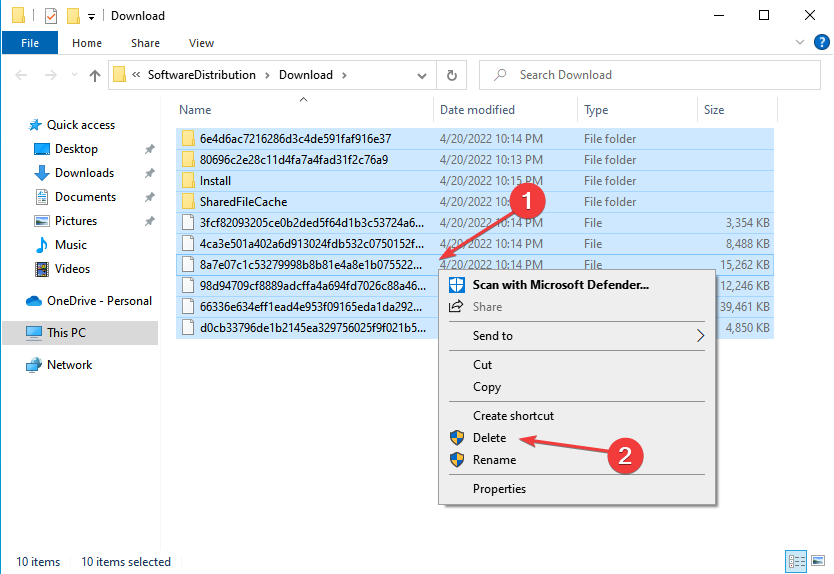
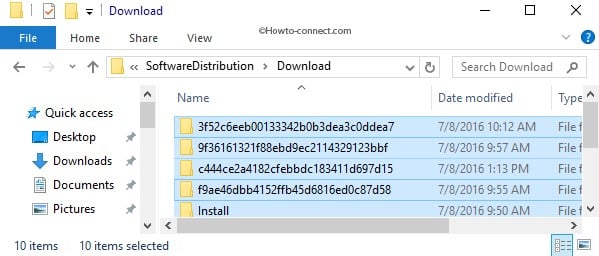
5. Clear the software distribution folder
- Press Windows + R to launch the Run command.
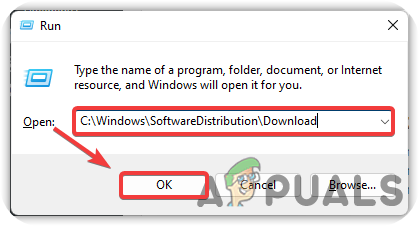
- Paste the following path in the text field, and either click OK or hit Enter to launch the Software Distribution folder.
C:\Windows\SoftwareDistribution\Download
- Press Ctrl + A to select all the files.
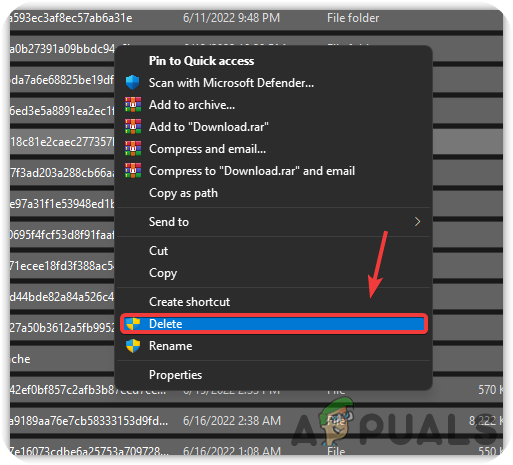
- Then, right-click on them, and select Delete from the context menu. Alternatively, you can pick them up and hit the Delete key.

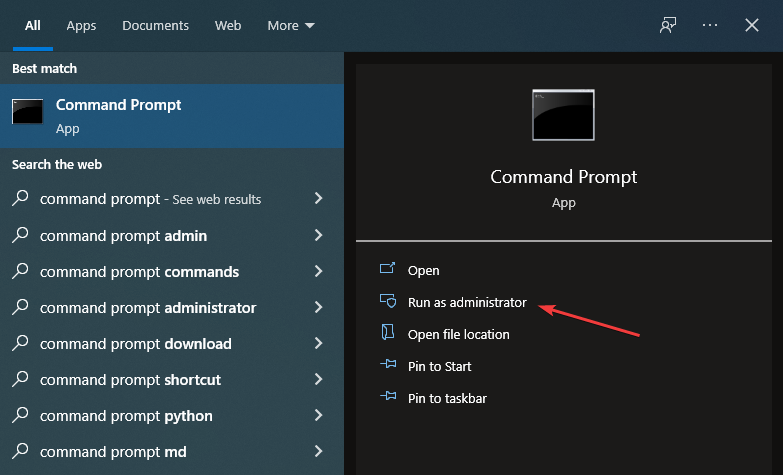
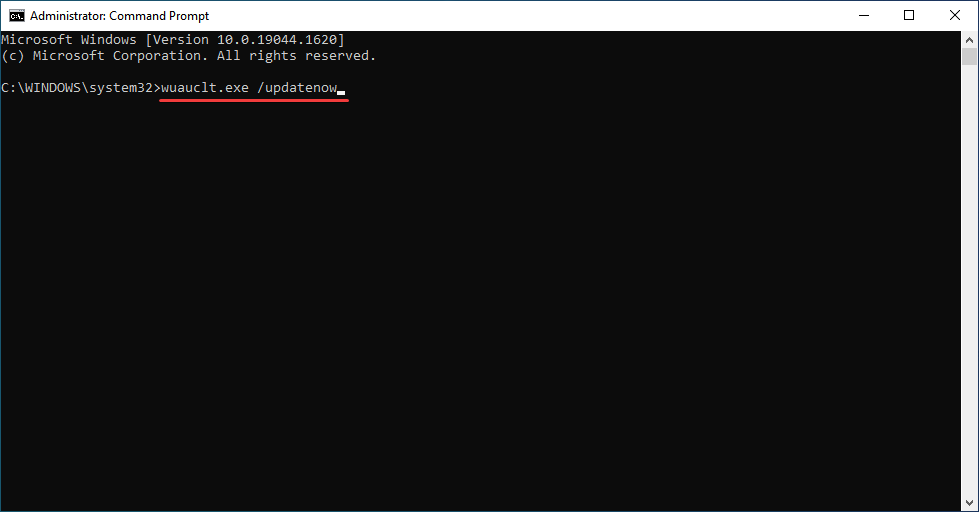
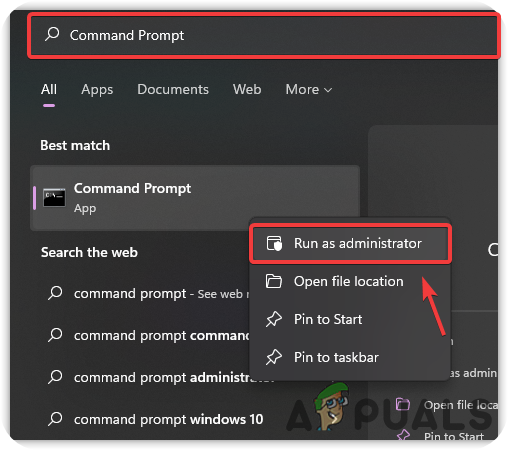
- Once done, press Windows + S to launch the Search menu, enter Command Prompt in the text field, and then click on Run as administrator at the right.

- Click Yes in the UAC prompt that appears.

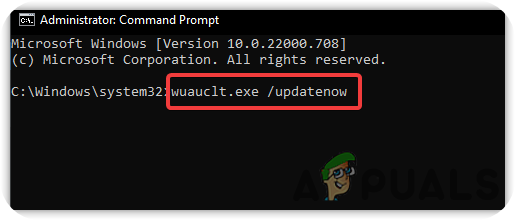
- Paste the following command and hit Enter:
wuauclt.exe /updatenow

After following these steps, restart the computer for the changes to effect, and check if the error code 0x80072f8f – 0x20000 is fixed.
Nite than cleaning up the software distribution folder can also help with Media Creation Tool’s refusal to update your PC.
6. Modify the registry
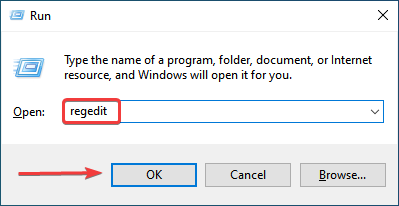
- Press Windows + R to launch the Run command dialog box, type Regedit in the text field, and click on OK to launch the Registry Editor.
- Click Yes in the UAC prompt that pops up.
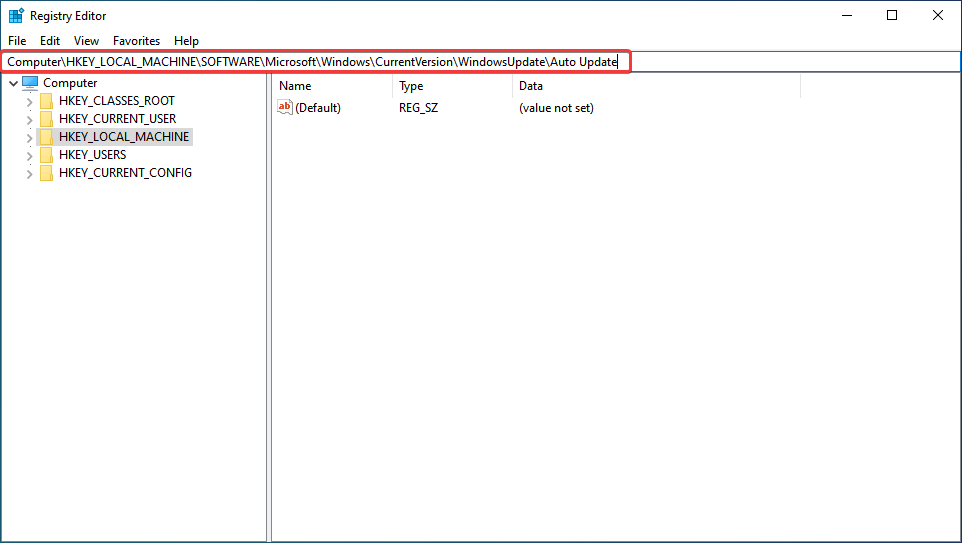
- Paste the following path in the address bar at the top, and hit Enter:
Computer\HKEY_LOCAL_MACHINE\SOFTWARE\Microsoft\Windows\CurrentVersion\WindowsUpdate\Auto Update
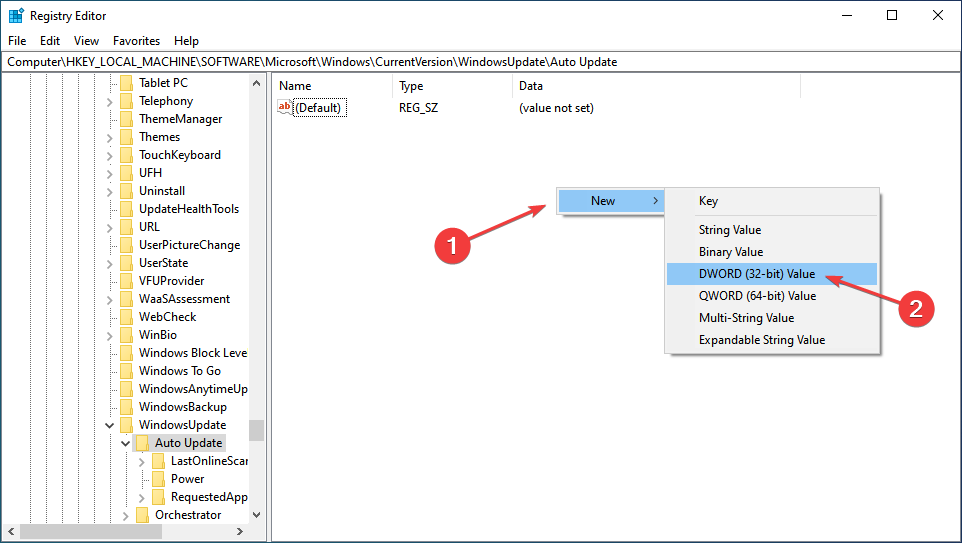
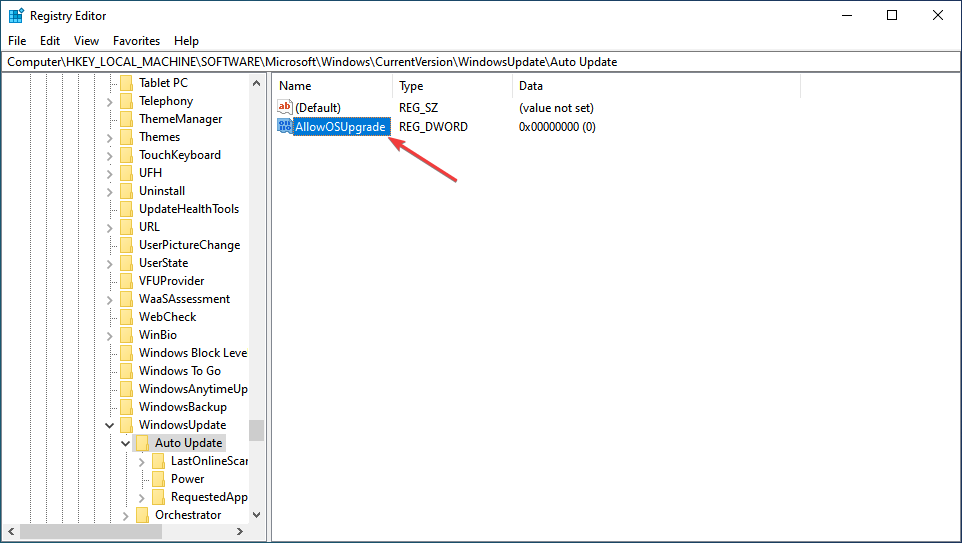
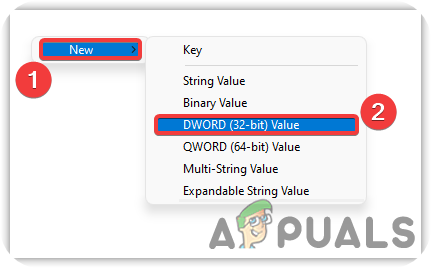
- Now, right-click on the empty portion on the right, hover the cursor over New, select DWORD (32-bit) Value from the context menu, and name it AllowOSUpgrade.
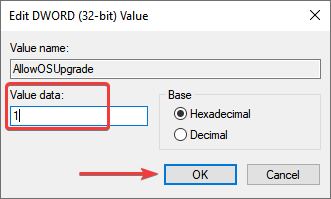
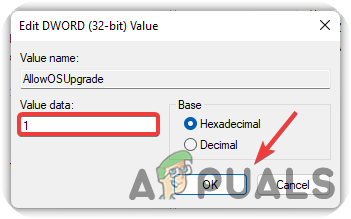
- Double-click on the key you just created to change its value.
- Finally, enter 1 under Value data and click on OK at the bottom to save the changes.


This registry fix has helped many users eliminate the error code 0x80072f8f – 0x20000, so try it in Windows 10. In all likelihood, the error should be fixed after this.
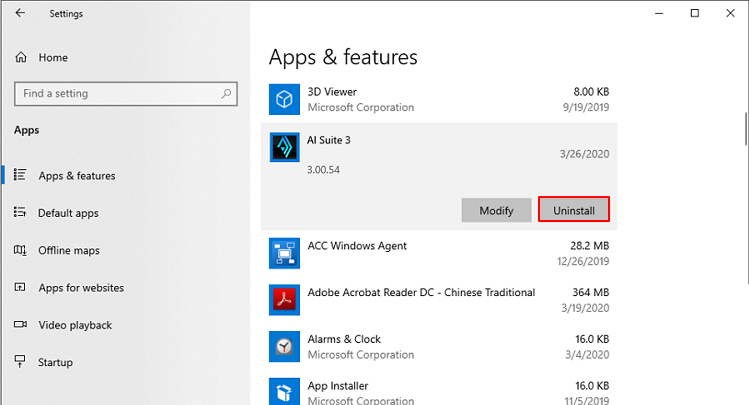
7. Uninstall antivirus or other conflicting apps
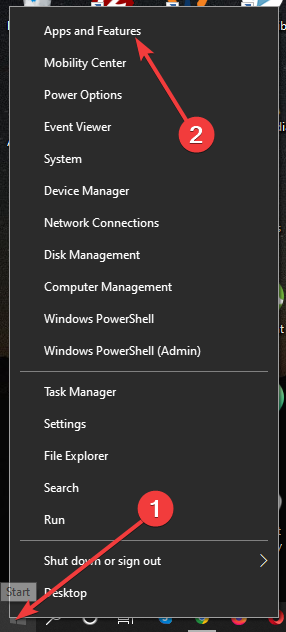
- Press the Windows key + X and select Apps and Features from the menu.

- Then, select your antivirus software and click on Uninstall.

- Follow the instructions on the screen to remove it.
- After removing the software, try to perform the upgrade again.
If you remove your antivirus, you can take a look at these best and most reliable antiviruses for Windows.
Error code 0x80072f8f – 0x20000 is a common issue and it can lead to Windows installation fails, so it’s important that you fix it.
Please tell us which fix worked and the iteration of Windows on which you were facing the problem in the comments section below.
![]()
Ошибка 0x80072f8f 0x20000 появляется при двух распространенных ситуациях. Первая из них – при обновлении с Windows 7 до более свежей версии или просто при установке Windows 10. Вторая частая ситуация заключается в появлении ошибки при запуске Media Creation Tool. Причины появления, как и особенности проявления в каждой них, будут разными. Но есть и хорошая новость, она заключается в том, что есть довольно четкое представление об ошибке и эффективное решение к каждой вариации проблемы.

Почему появляется ошибка 0x80072f8f 0x20000?
Нам придется разделять две ситуации появления ошибки. Хотя они и имеют идентичный код, но во всем остальном сильно отличаются. Основная причина сбой с кодом 0x80072f8f 0x20000 при установке Windows 10 – отсутствие поддержки протоколов безопасности TLS. В Windows 7 Service Pack 1 по умолчанию включена поддержка только TLS 1.0. Сейчас же сервера Microsoft более не поддерживают столь устаревший стандарт. Требуется версия TLS 1.1 и TLS 1.2, которые по умолчанию отключены в старой операционной системе Windows 7. Их включение должно исправить проблему.
Если ошибка появляется при обновлении Windows, в основном через официальную утилиту Media Creation Tool, то проблема в некорректных файлах обновления. Видимо, система пыталась загрузить файлы для апдейта, но они оказались поврежденными. Нужно принудительно удалить их.
Как исправить ошибку 0x80072f8f 0x20000 при установке Windows 10?
Как мы и писали, нам нужно заставить Windows 7 работать с TLS 1.1 и TLS 1.2. Это вполне реально сделать, если подкорректировать реестр операционной системы. Можно запустить Windows в безопасном режиме и сделать необходимые изменения. Это можно сделать вручную, но есть и более быстрый способ – запустить файл. Нам нужен один из файлов Microsoft, вот ссылка. Скачиваем его, запускаем и через пару секунд исправления должны быть внесены. Можно перезагружать ПК и снова пытаться установить Windows 10.
Что нужно сделать вручную:
- Нажимаем комбинацию Win + R, вводим regedit и нажимаем Enter.
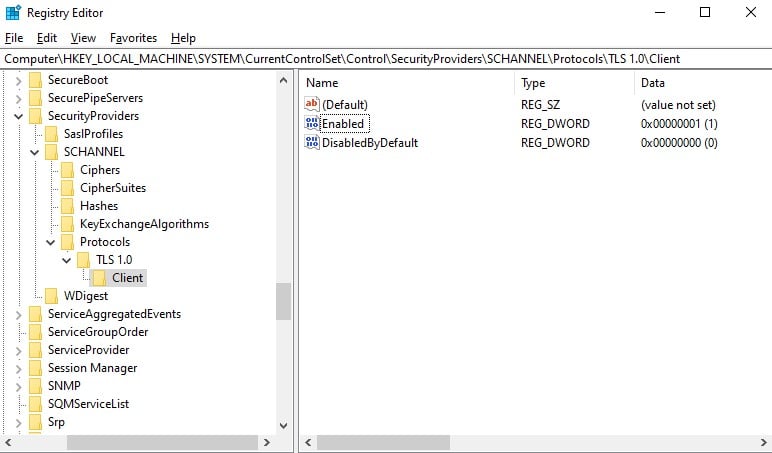
- Идем по пути HKEY_LOCAL_MACHINE\SYSTEM\CurrentControlSet\Control\SecurityProviders\SCHANNEL\Protocols\TLS 1.1\Client.
- Изменяем значение параметра DisabledByDefault на 0 (если его нет, то просто создаем его).
- Переходим в ветку HKEY_LOCAL_MACHINE\SYSTEM\CurrentControlSet\Control\SecurityProviders\SCHANNEL\Protocols\TLS 1.2\Client.
- Тоже создаем или изменяем существующий параметр DisabledByDefault в значение 0.
Важно! Есть еще один интересный способ – запустить установку через ISO. Для этого нужно войти на сайт Microsoft с клиентом Windows и скачать его. Обязательно следует использовать для этого телефон. Затем передаем файл на ПК и запускаем его. У многих такое решение сработало.
Как исправить ошибку при обновлении через Media Creation Tool?
Для решения проблемы нужно зачистить файлы в одной из важных директорий, а также запустить обновление другим способом.
Пошаговая инструкция:
- Переходим по пути C:\Windows\SoftwareDistribution\Download.
- Удаляем все файлы, которые хранятся в этой папке.
- Кликаем правой кнопкой мыши по Пуску и выбираем «Командная строка (администратор).
- Вводим команду wuauclt.exe /updatenow.
Теперь вы знаете, что делать, если появляется ошибка 0x80072f8f 0x20000 при разных обстоятельствах. Включение поддержки TLS 1.1 и новее поможет успешно завершить установку операционной системы, а очистка файлов и обновление через консоль избавит от неполадки при апдейте Windows.
Будем рады увидеть ваши комментарии в отношении данной ошибки. Давайте вместе сделаем статью максимально полной.
The error may arise due to essential services not starting correctly, conflict of applications, and interference of the third-party antivirus, which prevents the installation of Windows. These are the most common contributor factors that can trigger 0X80072F8F – 0X20000.
More reasons can be included for causing this issue. We have listed some main of them below:-
- Not having Administrator Privileges- If you do not have proper administrator privileges, you may not be able to install Windows. Without administrator privileges, you cannot make significant changes to your system.
- TLS 1.1 and TLS 1.2 are Turned Off- TLS provides security for sending data to applications on the internet. As per the research, if the TSL1.1 and TSL 1.2 are disabled, you might face this Error Code 0X80072F8F – 0X20000 while upgrading Windows to the latest.
- Incompatible System Requirements- Having conflicting system requirements can also run users into this issue, so ensure you are not missing any requirements that can cause problems.
- Absence Of Essential Services- If the Windows services don’t start properly at the startup, many problems may occur such as this one.
- Unstable Internet Connection- If your internet is not stable, you may likely get errors like this. So if the internet causes this issue, you have to wait until the internet gets stable.
1. Check Minimum Requirements
Having incompatible system specifications can lead you to this error code. Make sure you are compatible with the minimum requirements of the operating system. You can search on Google to check the minimum requirements.
2. Make sure the Internet Connection is Stable.
The error may arise due to an unresponsive or unstable internet connection. You can check internet speed through your browser. If your internet speed is less than 2 Mbps, you are suffering from a bad network connection. If the speed is good, you can proceed to other solutions; otherwise, wait for the internet to stabilise.
3. Run as Administrator
For doing the significant changes to the computer system, it is mandatory to have proper administrator privileges because when the users don’t have administrator privileges on their accounts, they might not be able to complete major tasks.
Here are the steps to run the programs in administrator mode:-
Right-click on Media Creation Tool and select Run as Administrator from the listed options.
4. Edit Registry File
If we look into the forums, modifying the registry files will help in eliminating Error code 0X80072F8F – 0X20000. To do this, you have to enter into the Registry a database for the operating system to store low-level settings. It is best to create a registry backup before proceeding because if something goes wrong, you will atleast have a backup to restore it. Here are the steps:-
- Press the Windows + R keys simultaneously to open a run dialog box
- Type regedit in the box and press Enter

Launching Registry - Once the Registry is opened, navigate to the following path
Computer\HKEY_LOCAL_MACHINE\SOFTWARE\Microsoft\Windows\CurrentVersion\WindowsUpdate\Auto Update
- Now right-click on the empty space and hover the over New
- Select DWORD (32-bit) from the listed option and name it as AllowOSUpgrade

Select DWORD (32-bit) - Double click on the file and change its value data to 1

Change Value Data to 1 - Once done, press OK to save the changes then check if the issue persists.
5. Perform Clean Boot
Performing a clean boot is the process that is used to eliminate software and driver conflicts. It is a way to start Windows with the essential services and minimum drivers. By performing a clean boot, you can resolve Error Code 0X80072F8F – 0X20000. Here is how you can do this:-
- Click the Start Menu, and type Msconfig in the search bar

Open System Configuration - Open system Configuration and select the Selective Startup, then untick the option Load Startup Items

Performing Clean Boot - After that, go to the Services tab from the top and tick the option Hide All Microsoft Services
- Then click Disable All from the right and press OK
Disabling Irrelevant Services at Startup - Once done, restart your computer and check if the Error code 0X80072F8F – 0X20000 is resolved
6. Clear the Software Distribution Folder
A Software Distribution is a folder that stores temporary Windows files that may require installing Windows Updates. If we look from the other side, sometimes the system cannot access Windows Updates files, which can cause this Error code 0X80072F8F – 0X20000. So clearing the software distribution folder may resolve this issue. Below are the steps:-
- Press the Windows + R keys simultaneously to launch the Run Window.
- Type the following path and hit enter or copy and paste it into the box
C:\Windows\SoftwareDistribution\Download
Launching Software Distribution Folder - Here delete all the files by pressing Ctrl + A and then the Delete button on the keyboard

Removing Software Distribution files - Once you deleted them, click Start Menu and type Command Prompt, then right-click command prompt and choose Run as Administrator

Running Command Prompt with Administrator Privileges - Once the command prompt loads up put the following command and hit enter
wuauclt.exe /updatenow

Forcing Windows to update - Once done, restart your computer for the changes to take effect and check if the Media Creation Tool Error code 0X80072F8F – 0X20000 persists.
7. Enable TLS 1.1 and TLS 1.2
TLS or Transport Layer Security 1.1 and 1.2 are the security protocol versions used to establish encrypted connections to send data into the applications over the network. It has been seen that the error can occur due to disabled TLS 1.1 and TLS 1.2. To fix this, you must enable it by following the instructions below:-
- Create a Registry Backup first, then open the notepad and paste the code mentioned below
Windows Registry Editor Version 5.00

[HKEY_LOCAL_MACHINE\SOFTWARE\Microsoft\Windows\CurrentVersion\Internet Settings\WinHttp]
"DefaultSecureProtocols"=dword:00000a00

[HKEY_LOCAL_MACHINE\SOFTWARE\Wow6432Node\Microsoft\Windows\CurrentVersion\Internet Settings\WinHttp]
"DefaultSecureProtocols"=dword:00000a00

[HKEY_LOCAL_MACHINE\SYSTEM\CurrentControlSet\Control\SecurityProviders\SCHANNEL\Protocols\TLS 1.1\Client]
"DisabledByDefault"=dword:00000000
"Enabled"=dword:00000001

[HKEY_LOCAL_MACHINE\SYSTEM\CurrentControlSet\Control\SecurityProviders\SCHANNEL\Protocols\TLS 1.2\Client]
"DisabledByDefault"=dword:00000000
"Enabled"=dword:00000001
- After copying the code, click File from the top then click Save As

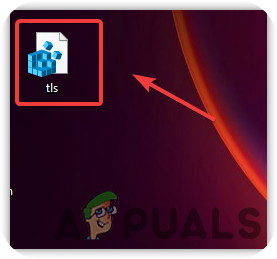
Saving File - Save the file with the .reg extension.
- Once done, double-click on the file to apply the settings in the Registry

Run the Registry File to Apply changes - Click Yes if asked for confirmation and restart Windows, then check if the issue gets resolved.
- For Windows 7 users, download the KB3140245 package from Microsoft that comes with TLS 1.1 and 1.2

8. Restart Relevant Windows Services
Another solution for this is restarting the Windows update service. If the Windows Update service gets stopped due to a conflict of services, this error may appear on the screen. Below are the steps to restart the Windows update:-
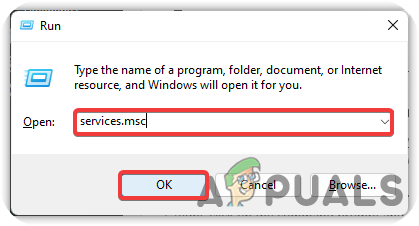
- Press Windows + R keys to open the Run Dialog Box
- Type services.msc and press Enter
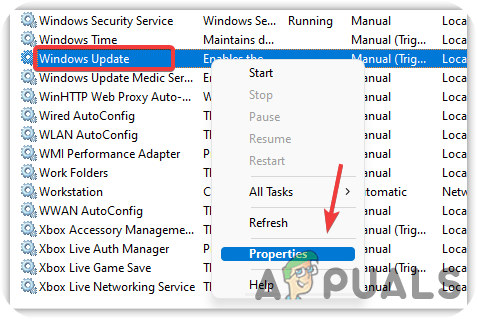
Open Services - Once the service page opened, please scroll down to Windows Update service and right-click on it to select Properties

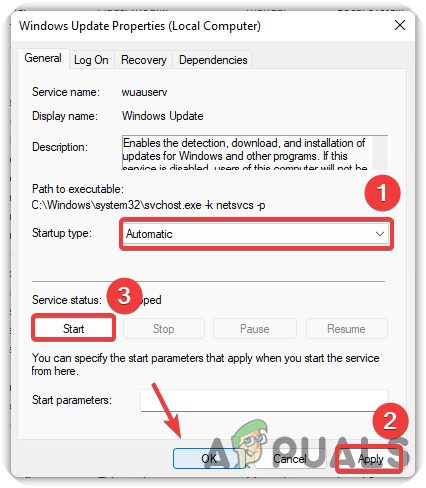
Opening Service Properties - Now change the startup type from Manual to Automatic
- If the service is stopped, click on the Start button, then click Apply and press OK

Change Service Startup Type to Automatic - Now repeat the same process for the mentioned services below
Background Intelligent Transfer Service
Server
Workstation
TCP/IP NetBIOS Helper
IKE and AuthIP IPsec Keying Modules
9. Reset Windows Update Component Services
If none of the methods worked, you could try resetting the Windows Update Component, which is used to update the operating system. Follow the steps to reset Windows component services:-
- Click Start Menu, and type Command Prompt
- Right-click on the command prompt and choose Run as Administrator
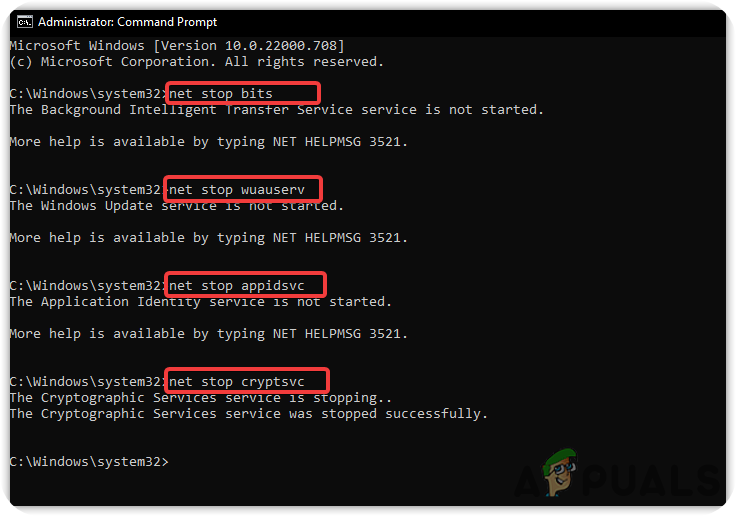
Running Command Prompt with Administrator Privileges - Now insert the following commands to reset Windows services
net stop bits
net stop wuauserv
net stop appidsvc
net stop cryptsvc

Reset Windows Update Component Services
10. Run Disk Cleanup
Disk Cleanup is a utility introduced to counter any corruption in Windows that may lead to errors. It is also used to free up the space by removing the unnecessary files, cache files and the files you rejected, which end up in the recycle bin. Below are the steps to run the Disk Cleanup utility.
- Open File Explorer and right-click on C Drive
- Select Properties from the options menu

Launching Disk Properties - Click Disk Cleanup and wait for the page to load up
- Check mark all the files and press OK to delete

Removing Unnecessary Files From System - Once done, check if the issue persists.


11. Download Windows ISO File
Another solution for this issue is downloading the ISO file from the official website. Downloading the Windows IS0 file will fix this issue. below are the steps that will help you in this:-
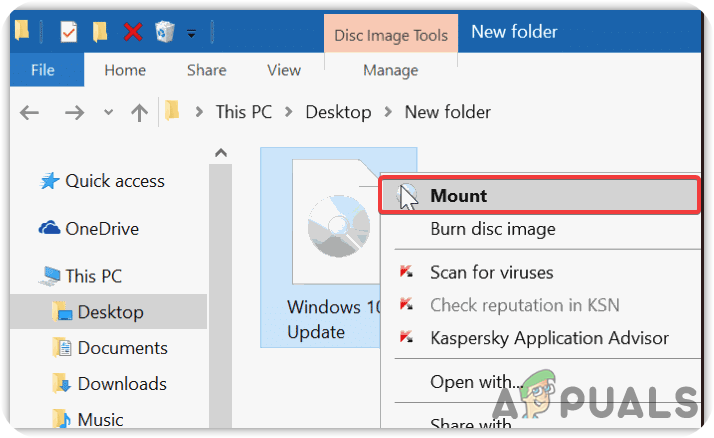
- Download the IOS file of the operating system from the Windows Media Creation Tool
- Once the download is finished, right-click on it and select Mount

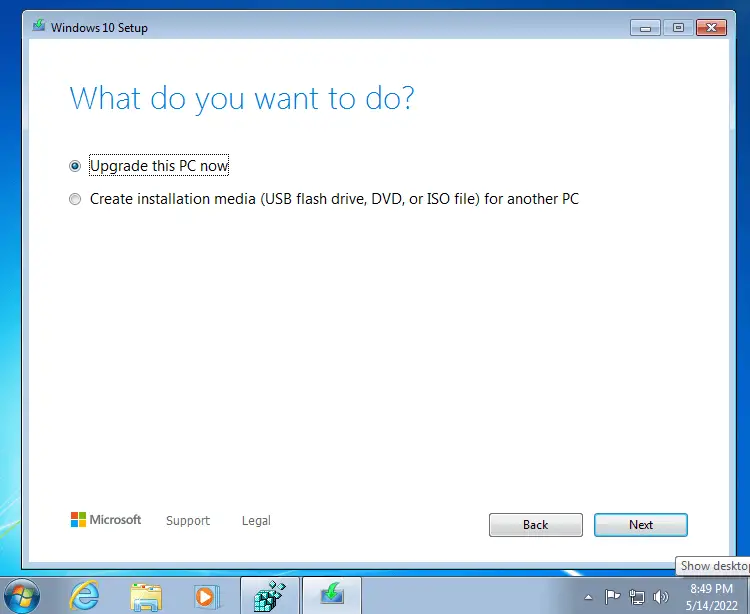
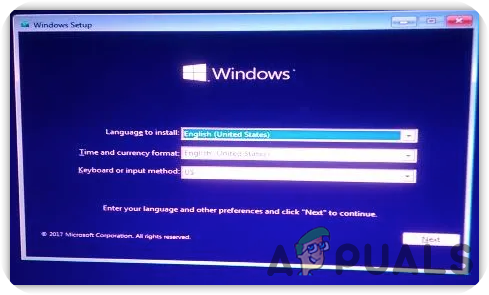
Mount ISO Files - Now run the Windows setup as an administrator, and this will start upgrading Windows to the latest.
12. Install Windows Using External Device
You can install Windows from an external device such as a mobile, laptop or computer. We have mentioned the steps for both devices, that may help you to install Windows through external devices.
12.1. Install Windows Using Mobile Phone
- Download Windows Media Creation Tool
- Once the downloading is finished, run the media creation tool
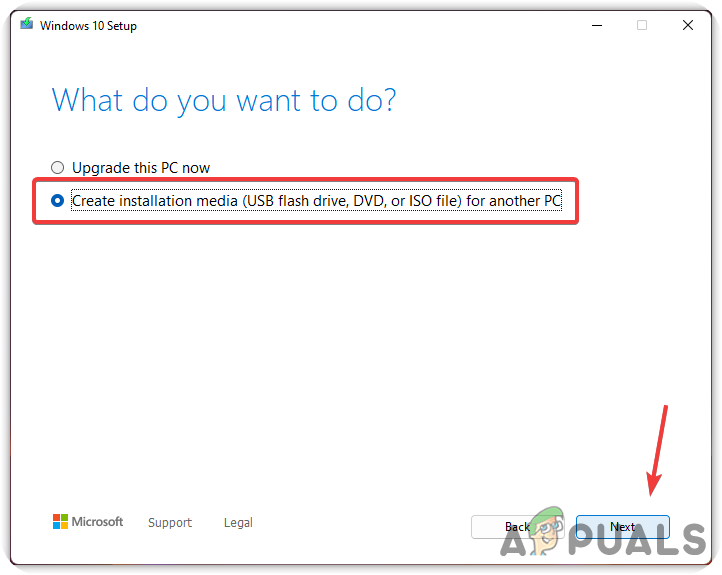
- Accept the notices and license terms, then select the radio option named Create Installation Media for Another PC and press Next

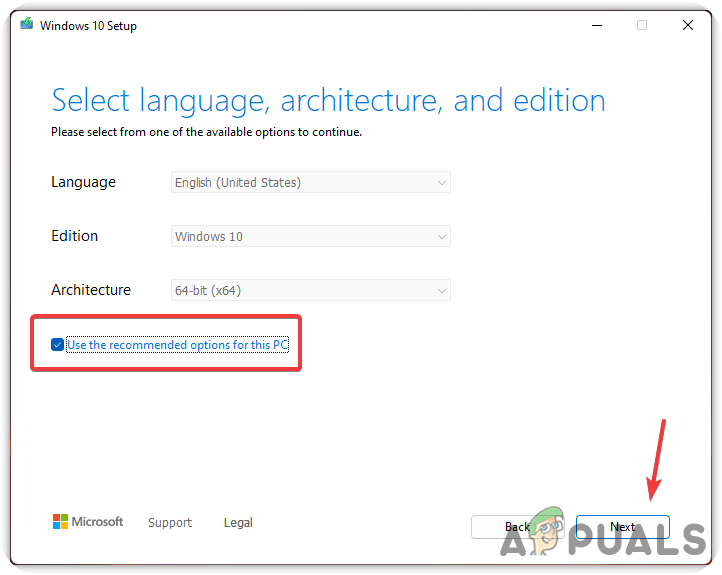
configuring Windows Setup - On the next screen, make sure the option Use the recommended options for this PC is checked, then click Next
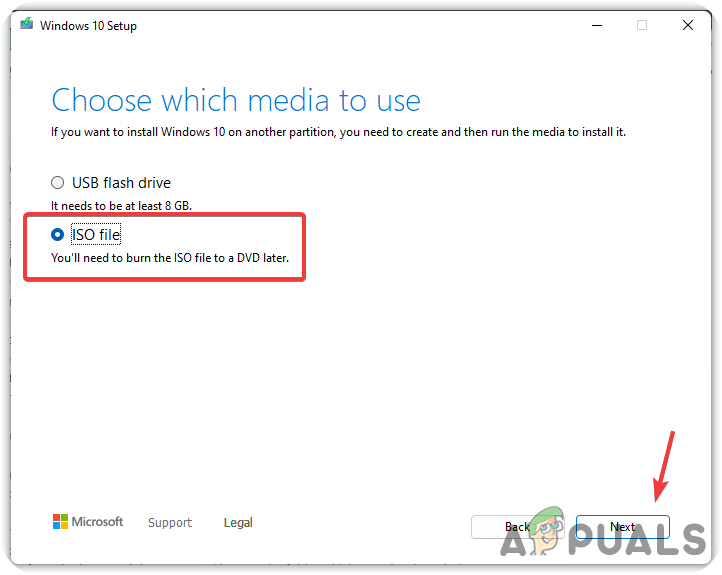
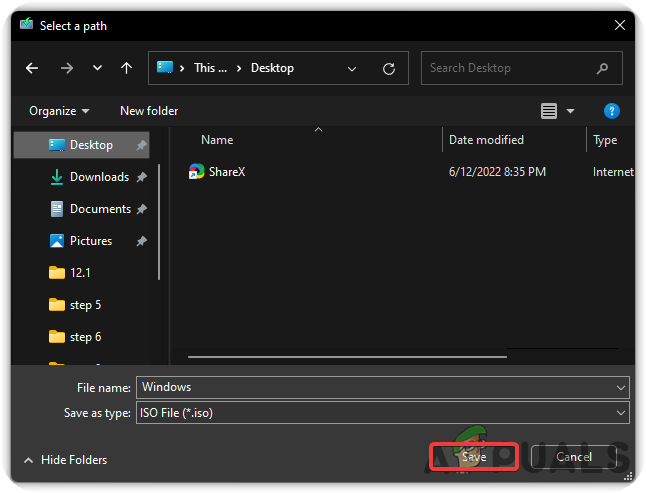
Leave the Recommended option selected - Select the option named IOS File and click Next
Select ISO - Choose the destination where you want to install Windows ISO File

Downloading ISO File - Once done, click Save, and it will start creating Windows ISO.
- Now it’s time to transfer the Windows ISO file to your mobile phone. Use the USB cable to transfer the file to an easily remembered folder.
- Once you transfer it, download DriveDroid

Install DriveDroid - Open the DriveDroid, and it will request the root access that you will grant

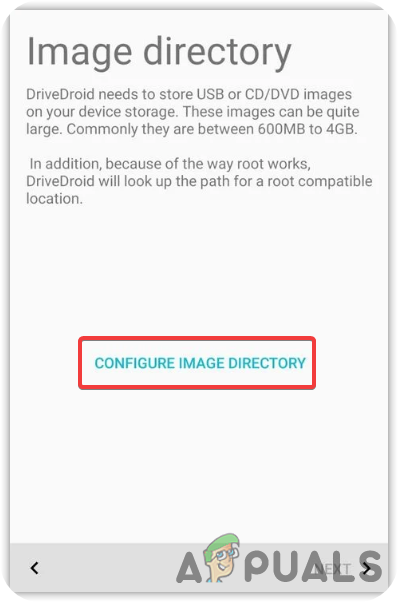
Grant the Root Access - Now tap on CONFIGURE IMAGE DIRECTORY and select the folder where you copied the Windows ISO file

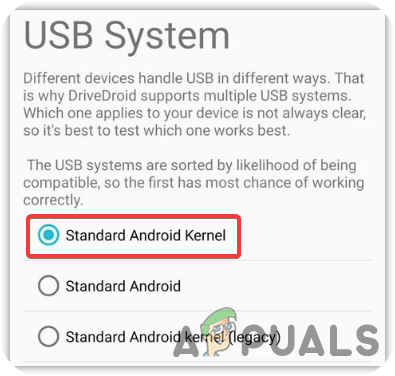
Configure Image Directory - Now connect your mobile phone to your computer and choose the Standard Android Kernel

Selecting Standard Android Kernel - On the next screen, select Android Shows Up On OS and click Next

Select Android Shows Up On OS Note: If the device does not appear on your computer, then select Choose a Different USB System and try again
- Select Booted Successfully using DriveDroid then click Next. Again click Next to finish the process
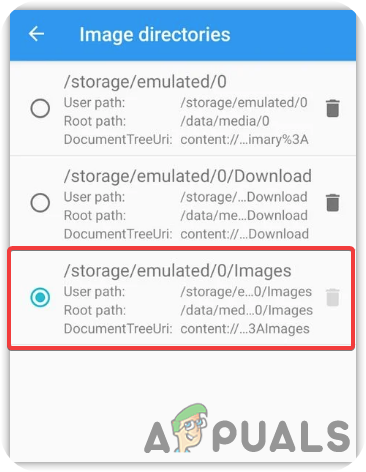
- Now go back to the homepage where Windows 10 ISO might already feature. If not, then tap the Gear Icon from the top right corner and select Image Directories

Select Image Directories - Select the last directory and tap the red circle icon from the bottom right corner then browse the folder which contains the ISO file. Select ISO file.

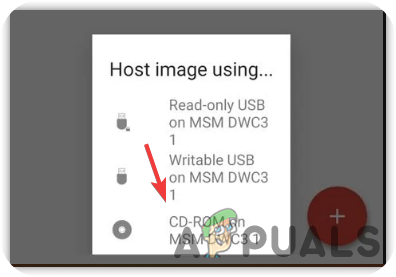
Configure DriveDroid - Go back to the DriveDroid homepage
- Then, select the Windows ISO file and choose Host Image Using CD-ROM

Host Image Using CD-ROM - After that, connect your device to the computer with the USB cable and shut down your computer
- Now turn on the computer and enter a boot menu by pressing the shortcut keys. Usually, F10, F11, F12, and Delete keys are used to access the boot menu
- Note: If you cannot find it, you may need to visit the manufacturer’s website.
- When the boot menu opens, select the boot device named similar to Linux File-CD Gadget, or it can be named as your mobile name
- After that, Windows will boot normally, and you can install a clean version of your Windows.

Installing Windows


12.2. Install Windows from the other Computer
- Download Windows Media Creation Tool and run it on your computer
- Accept the terms and conditions and select Create Create Installation Media for Another PC and press Next
Create Installation Media for Another PC - Make sure the option named Use the recommended options for this PC is checked
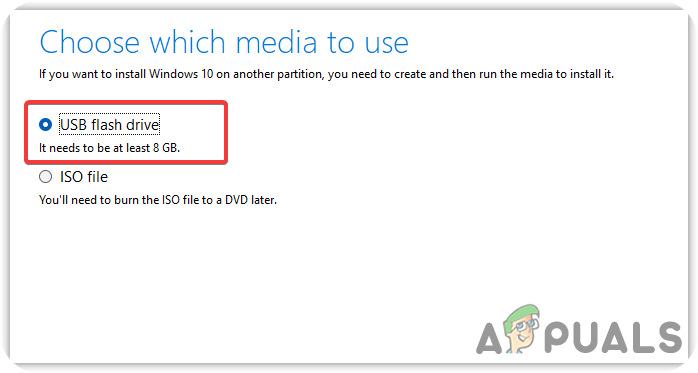
- Leave the USB Flash Drive is selected and press Next

Select USB Flash Drive - It should Start downloading Windows OS. Once done, unplug the USB flash drive from the computer and plug it into the problematic computer
- Shutdown, the computer, then turn it on
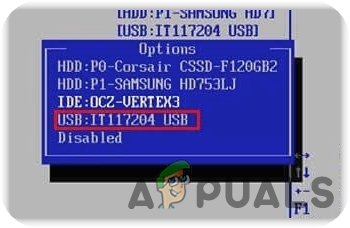
- Once the loading screen appears, press the Boot Menu keys on the keyboard, such as F12 and Delete. If you are not sure, you can go to your manufacturer’s website
- Once the boot menu loads up, select the USB pen driver

Select USB Pen Drive - Then Window will boot, and you can install a clean version of the Windows OS.

Hamza Mohammad Anwar
Hamza Mohammad Anwar is an intermediate JavaScript web developer with a focus on developing high-performance applications using MERN technologies. His skill set includes expertise in ReactJS, MongoDB, Express NodeJS, and other related technologies. Hamza is also a Google IT Certified professional, which highlights his competence in IT support. As an avid problem-solver, he recreates errors on his computer to troubleshoot and find solutions to various technical issues.