Содержание
- Способ 1: Использование средства устранения неполадок
- Способ 2: Перезапуск службы
- Способ 3: Сброс параметров Центра обновления Windows
- Способ 4: Чистка ключей реестра
- Способ 5: Очистка папки с обновлениями
- Способ 6: Проверка компьютера на наличие вирусов
- Способ 7: Проверка целостности системных файлов
- Вопросы и ответы
Способ 1: Использование средства устранения неполадок
Ошибка с кодом 0x80070490 появляется в Windows 10 во время проверки или установки обновлений и означает, что соответствующее средство работает некорректно из-за определенных причин. Для начала рекомендуется использовать автоматическое средство исправления неполадок, чтобы сэкономить время и силы на самостоятельном поиске решения проблемы.
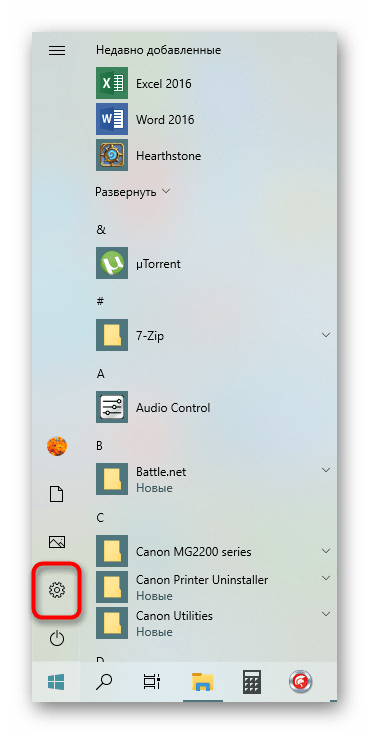
- Для этого откройте «Пуск» и перейдите в «Параметры».
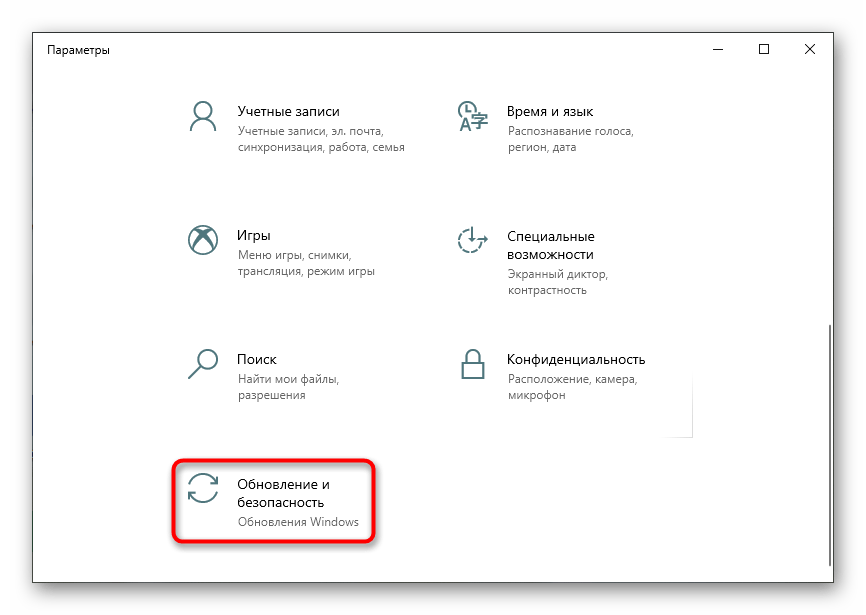
- Там вас интересует категория «Обновление и безопасность».
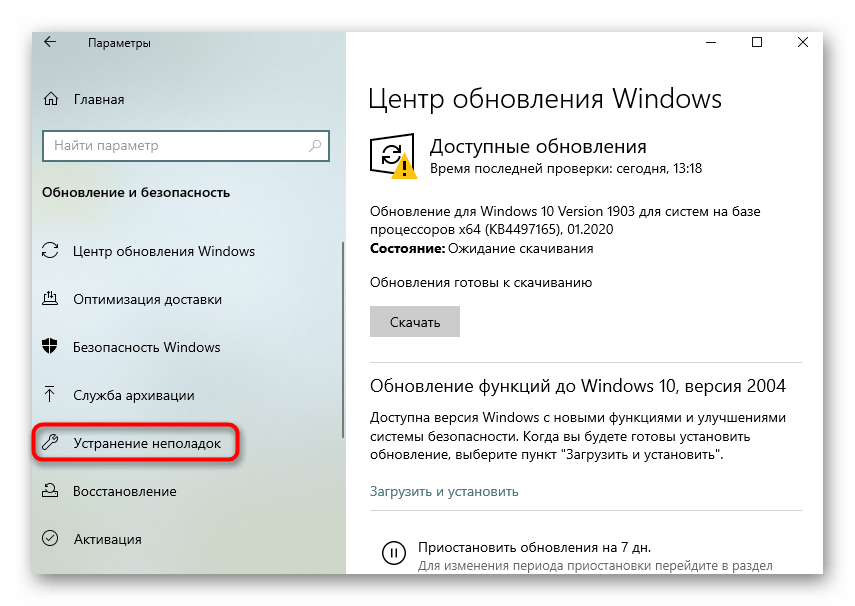
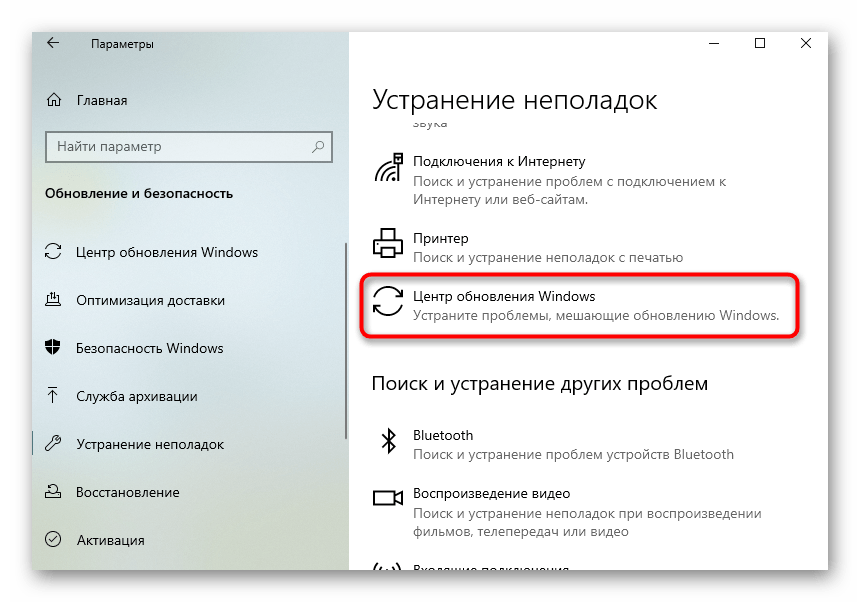
- Через левое меню переместитесь к пункту «Устранение неполадок».
- Выберите категорию «Центр обновления Windows» и запустите это средство обнаружения проблем.
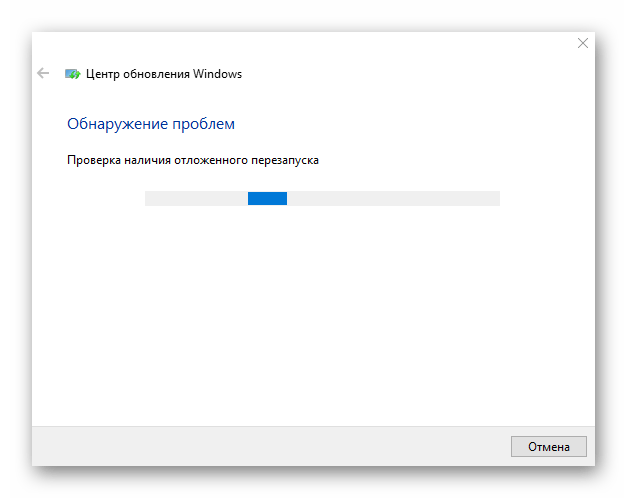
- Дождитесь окончания сканирования и следуйте отобразившимся на экране инструкциям или ознакомьтесь с конечной информацией.
Способ 2: Перезапуск службы
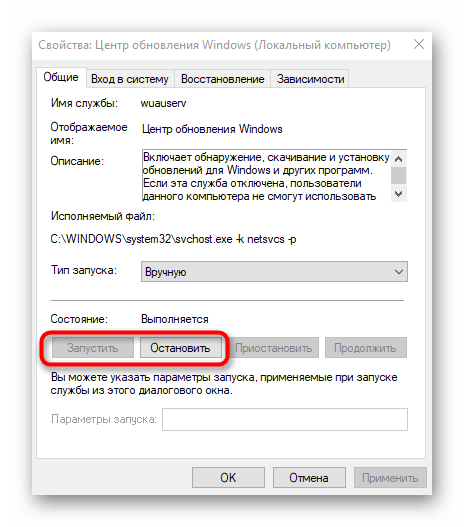
Второй вариант заключается в перезапуске службы, отвечающей за работу Центра обновления Windows. Осуществляется эта операция вручную путем обращения к специально отведенному системному меню, что происходит так:
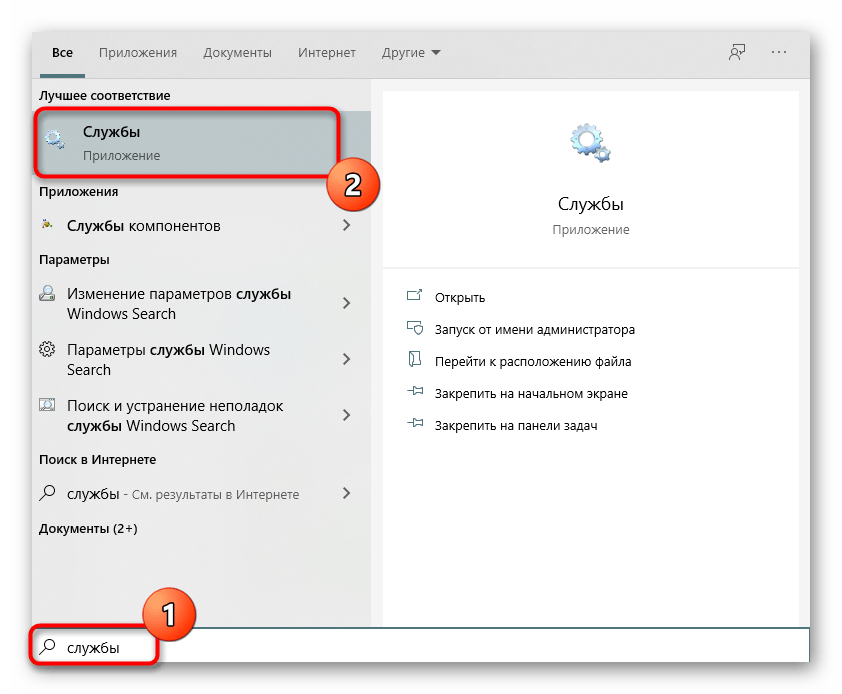
- Запустите приложение «Службы», что можно сделать, например, через поиск в меню «Пуск».
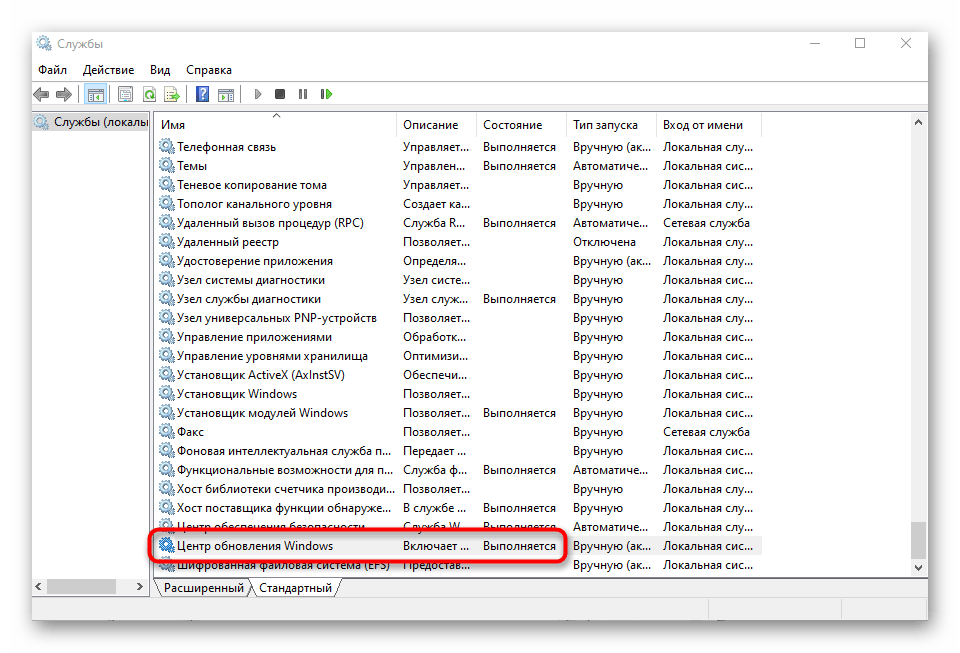
- Там опуститесь вниз по списку, где дважды кликните по строке «Центр обновления Windows».
- Вручную остановите службу, а затем запустите ее, нажимая на находящиеся в окне кнопки.
После этого переходите к проверке апдейтов или перезагрузите компьютер, чтобы этот процесс начался автоматически. Если ошибка снова появится на экране, приступайте к реализации следующих методов.
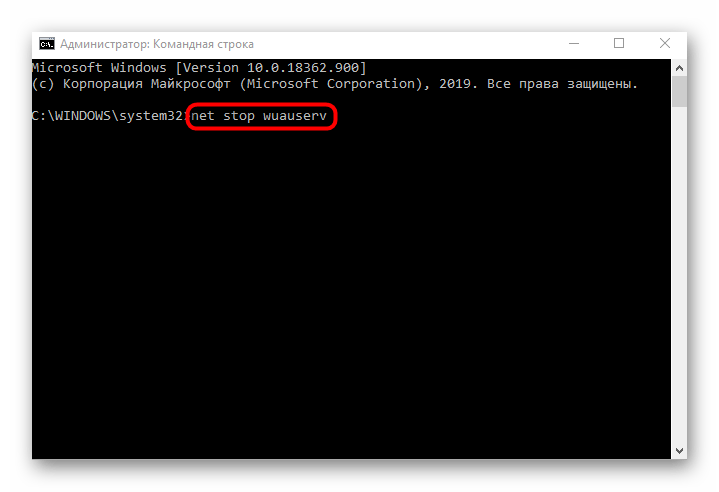
Этот метод заключается в ручном сбросе параметров Центра обновления Windows 10 через консоль путем ввода специальных команд. От вас требуется только запустить саму «Командную строку» от имени администратора, например, отыскав ее через меню «Пуск», а затем поочередно вставить следующие команды.
net stop wuauserv

net stop cryptSvc

net stop bits

net stop msiserver

ren C:\Windows\SoftwareDistribution SoftwareDistribution.old

ren C:\Windows\System32\catroot2 catroot2.old

net start wuauserv

net start cryptSvc

net start bits

net start msiserver
По завершении перезагрузите компьютер, чтобы изменения вступили в силу и проверяйте, насколько эффективными оказались выполненные действия.
Способ 4: Чистка ключей реестра
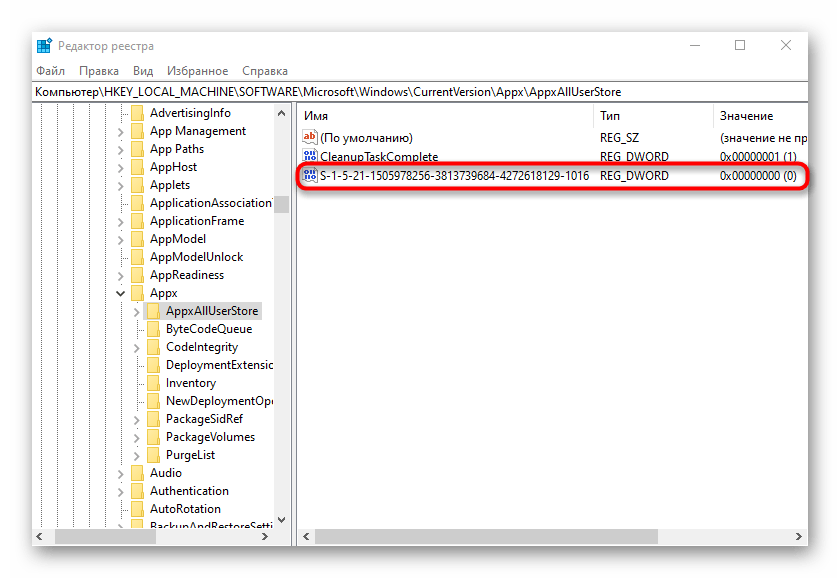
Иногда в «Редакторе реестра» появляются лишние ключи, которые могут мешать корректной работе Центра обновления Windows, из-за чего и возникает ошибка с кодом 0x80070490. Для ручной проверки и удаления ненужных параметров следует выполнить всего пару шагов.
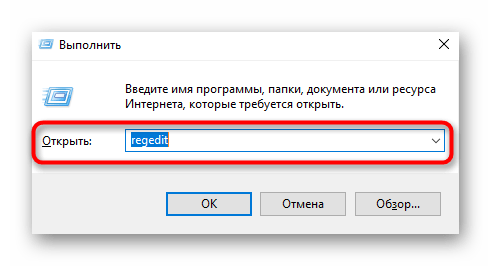
- Откройте утилиту «Выполнить» через стандартную комбинацию клавиш Win + R. Там введите
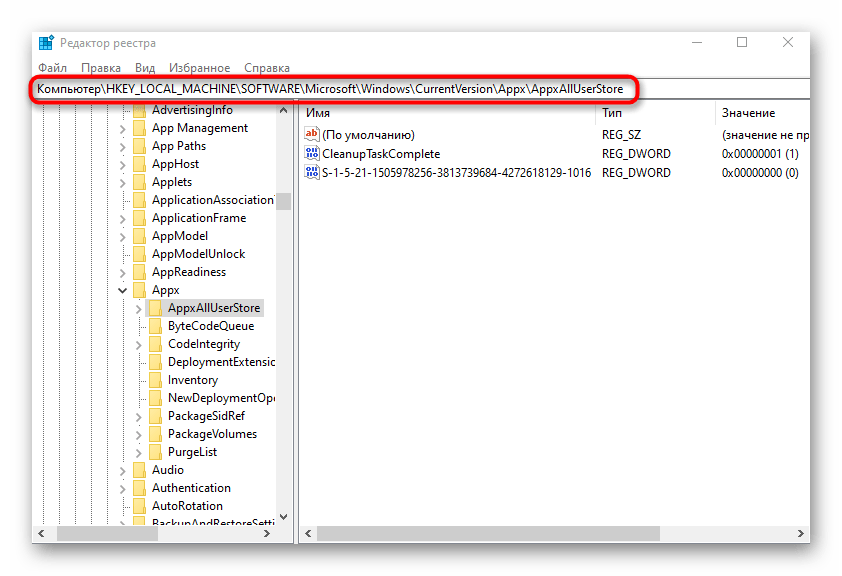
regeditи нажмите на Enter для подтверждения. - Перейдите по пути
HKEY_LOCAL_MACHINE\SOFTWARE\Microsoft\Windows\CurrentVersion\Appx\AppxAllUserStore. - Отыщите там параметры с примерным названием «S-1-7-21-1505974246-3813539684-4277612129-1026» и удалите все их.
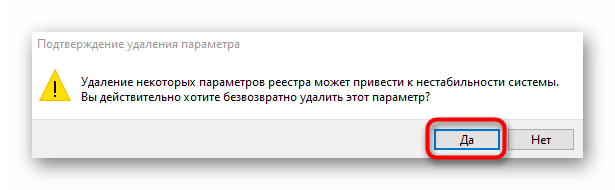
- При появлении системного уведомления подтвердите действие.
Способ 5: Очистка папки с обновлениями
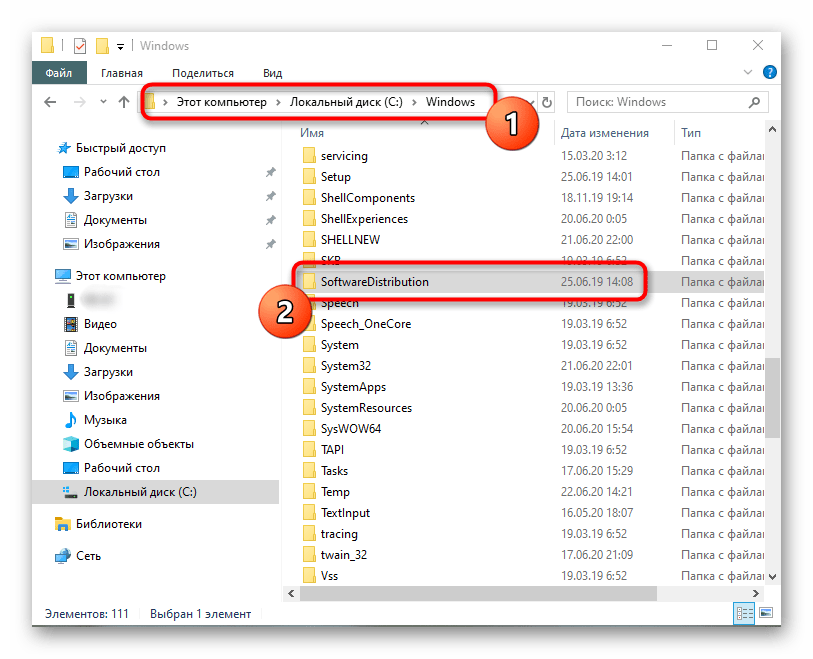
В некоторых случаях ошибка 0x80070490 возникает из-за проблемных файлов апдейтов, которые остались в системной папке. Тогда ее рекомендуется очистить вручную, чтобы исправить все неполадки.
- Для этого откройте системный раздел жесткого диска, перейдите в папку «Windows», щелкните правой кнопкой мыши по директории «SoftwareDistribution» и в появившемся контекстном меню выберите пункт «Переименовать».
- Добавьте в конце
.old, чтобы обозначить старую версию этого каталога, а затем примените изменения нажатием на Enter.
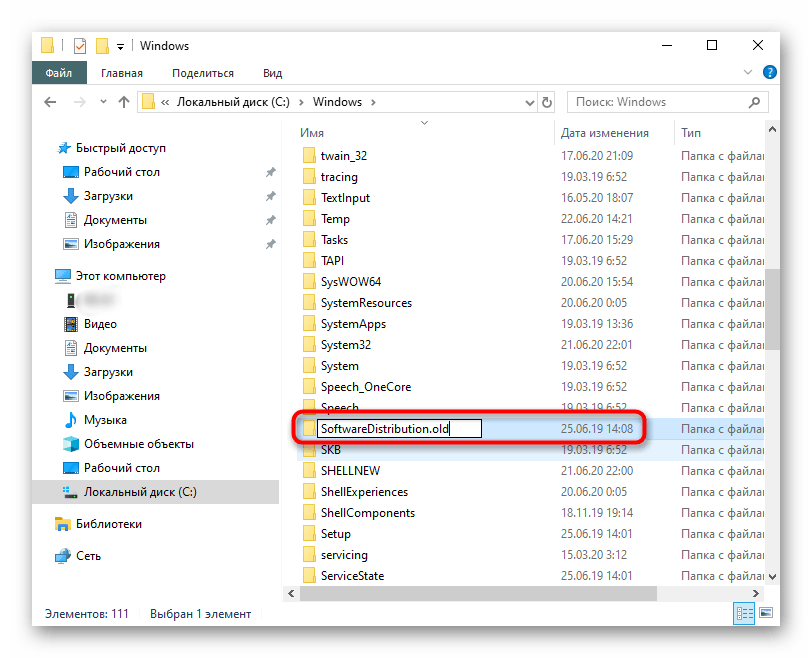
Повторно запустите поиск апдейтов, после чего будет создана еще одна такая же папка. Если все прошло успешно, ее старую версию можно будет удалить. В противном случае ее лучше переименовать обратно.
Способ 6: Проверка компьютера на наличие вирусов
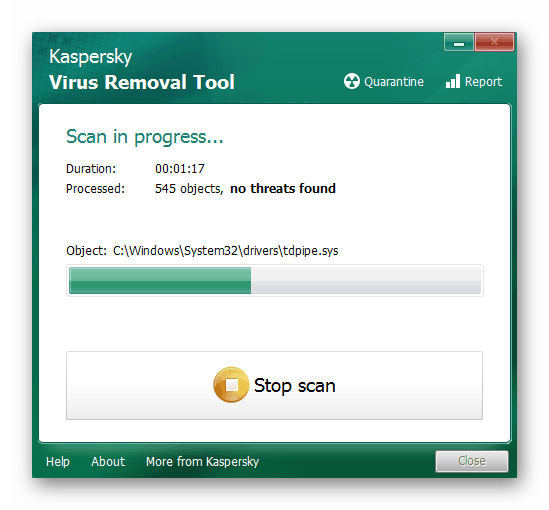
Рассматриваемая неполадка могла появиться из-за заражения компьютера вирусами, которые блокируют доступ к службе обновления или воздействуют на определенные системные файлы. Если ничего из перечисленного выше не помогло, рекомендуется проверить ОС на наличие угроз, задействовав оптимальное для этого программное обеспечение. Детальный разбор данной темы вы найдете в другой статье на нашем сайте далее.
Подробнее: Борьба с компьютерными вирусами
Способ 7: Проверка целостности системных файлов
Последний метод решения — проверка целостности системных файлов. Подобные повреждения встречаются редко, однако ситуация все-таки возможна. Такой анализ осуществляется при помощи системных утилит SFC и DISM. Сначала производится запуск первой, а если сканирование заканчивается ошибкой, придется дополнительно подключить вторую, вернувшись после снова к SFC. Развернуто этом читайте ниже.
Подробнее: Использование и восстановление проверки целостности системных файлов в Windows 10
Еще статьи по данной теме:
Помогла ли Вам статья?
Windows Server 2008 R2 Datacenter Windows Server 2008 R2 Enterprise Windows Server 2008 R2 for Itanium-Based Systems More…Less
Symptoms
Consider the following scenario:
-
You enable the Cluster Shared Volume (CSV) feature on a Windows Server 2008 R2-based failover cluster.
-
You try to enumerate the cluster disk resource by using the Windows Management Instrumentation (WMI) MSCluster_Disk class query.
-
Some CSV resources are in a failed state.
In this scenario, you may receive the following error message:
Element Not found (0x80070490)
Cause
The issue occurs because the Cluster WMI provider for the MSCluster_Disk class does not continue to process disk resources. This error is generated after the Cluster WMI provider does not retrieve the properties of a failed CSV resource.
Resolution
Hotfix information
A supported hotfix is available from Microsoft. However, this hotfix is intended to correct only the problem that is described in this article. Apply this hotfix only to systems that are experiencing the problem described in this article. This hotfix might receive additional testing. Therefore, if you are not severely affected by this problem, we recommend that you wait for the next software update that contains this hotfix.
If the hotfix is available for download, there is a «Hotfix download available» section at the top of this Knowledge Base article. If this section does not appear, contact Microsoft Customer Service and Support to obtain the hotfix.
Note If additional issues occur or if any troubleshooting is required, you might have to create a separate service request. The usual support costs will apply to additional support questions and issues that do not qualify for this specific hotfix. For a complete list of Microsoft Customer Service and Support telephone numbers or to create a separate service request, visit the following Microsoft website:
http://support.microsoft.com/contactus/?ws=supportNote The «Hotfix download available» form displays the languages for which the hotfix is available. If you do not see your language, it is because a hotfix is not available for that language.
Prerequisites
To apply this hotfix, you must be running Windows Server 2008 R2 Service Pack 1 (SP1). Additionally, you must have the Cluster Shared Volume (CSV) feature installed.For more information about how to obtain a Windows Server 2008 R2 service pack, click the following article number to view the article in the Microsoft Knowledge Base:
976932 Information about Service Pack 1 for Windows 7 and for Windows Server 2008 R2
Registry information
To apply this hotfix, you do not have to make any changes to the registry.
Restart requirement
You must restart the computer after you apply this hotfix.
Hotfix replacement information
This hotfix does not replace a previously released hotfix.
File information
The global version of this hotfix installs files that have the attributes that are listed in the following tables. The dates and the times for these files are listed in Coordinated Universal Time (UTC). The dates and the times for these files on your local computer are displayed in your local time together with your current daylight saving time (DST) bias. Additionally, the dates and the times may change when you perform certain operations on the files.
Windows Server 2008 R2 file information notes
Important Windows 7 hotfixes and Windows Server 2008 R2 hotfixes are included in the same packages. However, hotfixes on the Hotfix Request page are listed under both operating systems. To request the hotfix package that applies to one or both operating systems, select the hotfix that is listed under «Windows 7/Windows Server 2008 R2» on the page. Always refer to the «Applies To» section in articles to determine the actual operating system that each hotfix applies to.
-
The files that apply to a specific product, milestone (RTM,SPn), and service branch (LDR, GDR) can be identified by examining the file version numbers as shown in the following table:
Version
Product
Milestone
Service branch
6.1.760
1.22xxxWindows Server 2008 R2
SP1
LDR
-
The MANIFEST files (.manifest) that are installed for each environment are listed separately in the «Additional file information for Windows Server 2008 R2» section. MANIFEST files and the associated security catalog (.cat) files, are extremely important to maintain the state of the updated components. The security catalog files, for which the attributes are not listed, are signed with a Microsoft digital signature.
For all supported x64-based versions of Windows Server 2008 R2
|
File name |
File version |
File size |
Date |
Time |
Platform |
|---|---|---|---|---|---|
|
Cluswmi.dll |
6.1.7601.22013 |
542,208 |
07-Jun-2012 |
05:36 |
x64 |
|
Cluswmi.mof |
Not applicable |
76,752 |
06-Jun-2012 |
23:03 |
Not applicable |
|
Cluswmiuninstall.mof |
Not applicable |
176 |
20-Nov-2010 |
03:54 |
Not applicable |
|
Cluswmi.mfl |
Not applicable |
173,684 |
07-Jun-2012 |
05:41 |
Not applicable |
For all supported IA-64-based versions of Windows Server 2008 R2
|
File name |
File version |
File size |
Date |
Time |
Platform |
|---|---|---|---|---|---|
|
Cluswmi.dll |
6.1.7601.22013 |
887,296 |
07-Jun-2012 |
04:16 |
IA-64 |
|
Cluswmi.mof |
Not applicable |
76,752 |
06-Jun-2012 |
22:49 |
Not applicable |
|
Cluswmiuninstall.mof |
Not applicable |
176 |
20-Nov-2010 |
03:39 |
Not applicable |
|
Cluswmi.mfl |
Not applicable |
173,684 |
07-Jun-2012 |
04:08 |
Not applicable |
Status
Microsoft has confirmed that this is a problem in the Microsoft products that are listed in the «Applies to» section.
More Information
For more information about the MSCluster_Disk class, go to the following Microsoft website:
824684 Description of the standard terminology that is used to describe Microsoft software updates
Additional file information
Additional file information for Windows Server 2008 R2
Additional files for all supported x64-based versions of Windows Server 2008 R2
|
File name |
Amd64_09d4fdc4ce99fa279531eb9e8638e364_31bf3856ad364e35_6.1.7601.22013_none_685b28edc70a4faa.manifest |
|
File version |
Not applicable |
|
File size |
723 |
|
Date (UTC) |
07-Jun-2012 |
|
Time (UTC) |
18:01 |
|
Platform |
Not applicable |
|
File name |
Amd64_16ee61c2b425f1f88e4fe61389538bf5_31bf3856ad364e35_6.1.7601.22013_none_814079b8e2d0dc11.manifest |
|
File version |
Not applicable |
|
File size |
723 |
|
Date (UTC) |
07-Jun-2012 |
|
Time (UTC) |
18:01 |
|
Platform |
Not applicable |
|
File name |
Amd64_1d3186f2aa9e302937cb81c8123932c7_31bf3856ad364e35_6.1.7601.22013_none_b95e4b3a9d4b66fe.manifest |
|
File version |
Not applicable |
|
File size |
728 |
|
Date (UTC) |
07-Jun-2012 |
|
Time (UTC) |
18:01 |
|
Platform |
Not applicable |
|
File name |
Amd64_20b1a718b288b1f0eededc9f7f58137a_31bf3856ad364e35_6.1.7601.22013_none_000988784cf264d4.manifest |
|
File version |
Not applicable |
|
File size |
723 |
|
Date (UTC) |
07-Jun-2012 |
|
Time (UTC) |
18:01 |
|
Platform |
Not applicable |
|
File name |
Amd64_23920b660b10dcfeec57bc0190273ea9_31bf3856ad364e35_6.1.7601.22013_none_ce3fe55cc4c708b3.manifest |
|
File version |
Not applicable |
|
File size |
723 |
|
Date (UTC) |
07-Jun-2012 |
|
Time (UTC) |
18:01 |
|
Platform |
Not applicable |
|
File name |
Amd64_255d46d5a829f679d14603d5a33299fa_31bf3856ad364e35_6.1.7601.22013_none_fed9bdacc98d211a.manifest |
|
File version |
Not applicable |
|
File size |
723 |
|
Date (UTC) |
07-Jun-2012 |
|
Time (UTC) |
18:01 |
|
Platform |
Not applicable |
|
File name |
Amd64_2b7312fb1aaca28c6af5e06f6270cf95_31bf3856ad364e35_6.1.7601.22013_none_16a2ec1b05499684.manifest |
|
File version |
Not applicable |
|
File size |
723 |
|
Date (UTC) |
07-Jun-2012 |
|
Time (UTC) |
18:01 |
|
Platform |
Not applicable |
|
File name |
Amd64_2c5bca4f7c59c18233380ffcc00067b8_31bf3856ad364e35_6.1.7601.22013_none_e418c3ba77d2d738.manifest |
|
File version |
Not applicable |
|
File size |
723 |
|
Date (UTC) |
07-Jun-2012 |
|
Time (UTC) |
18:01 |
|
Platform |
Not applicable |
|
File name |
Amd64_2d80d8a592d34aa82ec4072070041c26_31bf3856ad364e35_6.1.7601.22013_none_d00728d2e36b8eea.manifest |
|
File version |
Not applicable |
|
File size |
723 |
|
Date (UTC) |
07-Jun-2012 |
|
Time (UTC) |
18:01 |
|
Platform |
Not applicable |
|
File name |
Amd64_3167baef5efd66d794a4932352e78988_31bf3856ad364e35_6.1.7601.22013_none_9fd257c92cb86deb.manifest |
|
File version |
Not applicable |
|
File size |
723 |
|
Date (UTC) |
07-Jun-2012 |
|
Time (UTC) |
18:01 |
|
Platform |
Not applicable |
|
File name |
Amd64_3c214e17f825f86ff1a4a92d053c38da_31bf3856ad364e35_6.1.7601.22013_none_9672f27f1c58c054.manifest |
|
File version |
Not applicable |
|
File size |
723 |
|
Date (UTC) |
07-Jun-2012 |
|
Time (UTC) |
18:01 |
|
Platform |
Not applicable |
|
File name |
Amd64_3c7a5b9e973554381cddfcbd3a81d157_31bf3856ad364e35_6.1.7601.22013_none_1bba13868ab63256.manifest |
|
File version |
Not applicable |
|
File size |
723 |
|
Date (UTC) |
07-Jun-2012 |
|
Time (UTC) |
18:01 |
|
Platform |
Not applicable |
|
File name |
Amd64_4266f5c868e8951d26ebce4026c69737_31bf3856ad364e35_6.1.7601.22013_none_ed52de8bad505b56.manifest |
|
File version |
Not applicable |
|
File size |
723 |
|
Date (UTC) |
07-Jun-2012 |
|
Time (UTC) |
18:01 |
|
Platform |
Not applicable |
|
File name |
Amd64_47fe9daecc4f86a2fc26e3dcb1e605d6_31bf3856ad364e35_6.1.7601.22013_none_362ace0c60afffe3.manifest |
|
File version |
Not applicable |
|
File size |
723 |
|
Date (UTC) |
07-Jun-2012 |
|
Time (UTC) |
18:01 |
|
Platform |
Not applicable |
|
File name |
Amd64_5317e8c800557872d6f458e45d6429f8_31bf3856ad364e35_6.1.7601.22013_none_44d2f5a99da88b14.manifest |
|
File version |
Not applicable |
|
File size |
723 |
|
Date (UTC) |
07-Jun-2012 |
|
Time (UTC) |
18:01 |
|
Platform |
Not applicable |
|
File name |
Amd64_55f54f1d051b4fa26b780d9dd6ccb1b8_31bf3856ad364e35_6.1.7601.22013_none_2c7454131376b616.manifest |
|
File version |
Not applicable |
|
File size |
723 |
|
Date (UTC) |
07-Jun-2012 |
|
Time (UTC) |
18:01 |
|
Platform |
Not applicable |
|
File name |
Amd64_5b07c5ac82d43541e149c5e61ad86012_31bf3856ad364e35_6.1.7601.22013_none_d3adbd97b42b957c.manifest |
|
File version |
Not applicable |
|
File size |
715 |
|
Date (UTC) |
07-Jun-2012 |
|
Time (UTC) |
18:01 |
|
Platform |
Not applicable |
|
File name |
Amd64_5bda9b3938888ff12bad94bfb56ffab2_31bf3856ad364e35_6.1.7601.22013_none_390542cd9f4ba9a3.manifest |
|
File version |
Not applicable |
|
File size |
723 |
|
Date (UTC) |
07-Jun-2012 |
|
Time (UTC) |
18:01 |
|
Platform |
Not applicable |
|
File name |
Amd64_63b7e971561113b44ee448fbb8602589_31bf3856ad364e35_6.1.7601.22013_none_68ae333796e11429.manifest |
|
File version |
Not applicable |
|
File size |
723 |
|
Date (UTC) |
07-Jun-2012 |
|
Time (UTC) |
18:01 |
|
Platform |
Not applicable |
|
File name |
Amd64_6d74bc6760be7453ebe8977cecc73f05_31bf3856ad364e35_6.1.7601.22013_none_4738307cc1ae4b9b.manifest |
|
File version |
Not applicable |
|
File size |
723 |
|
Date (UTC) |
07-Jun-2012 |
|
Time (UTC) |
18:01 |
|
Platform |
Not applicable |
|
File name |
Amd64_7613144ef42d70a58193783ebe54ba24_31bf3856ad364e35_6.1.7601.22013_none_f2fefe884045729d.manifest |
|
File version |
Not applicable |
|
File size |
723 |
|
Date (UTC) |
07-Jun-2012 |
|
Time (UTC) |
18:01 |
|
Platform |
Not applicable |
|
File name |
Amd64_78c60d80d5e139323ceaecb8b3f35cf0_31bf3856ad364e35_6.1.7601.22013_none_526a0a6392068170.manifest |
|
File version |
Not applicable |
|
File size |
723 |
|
Date (UTC) |
07-Jun-2012 |
|
Time (UTC) |
18:01 |
|
Platform |
Not applicable |
|
File name |
Amd64_8d70632dc312f9abf568188df97f569f_31bf3856ad364e35_6.1.7601.22013_none_d3eedd643d60f3b1.manifest |
|
File version |
Not applicable |
|
File size |
723 |
|
Date (UTC) |
07-Jun-2012 |
|
Time (UTC) |
18:01 |
|
Platform |
Not applicable |
|
File name |
Amd64_9f43674fe6934bcf8772129a340b7aa0_31bf3856ad364e35_6.1.7601.22013_none_2bd3423a685d9358.manifest |
|
File version |
Not applicable |
|
File size |
723 |
|
Date (UTC) |
07-Jun-2012 |
|
Time (UTC) |
18:01 |
|
Platform |
Not applicable |
|
File name |
Amd64_a05acda769d77f3711862e7fff8161e0_31bf3856ad364e35_6.1.7601.22013_none_0f312cb87ff5f838.manifest |
|
File version |
Not applicable |
|
File size |
723 |
|
Date (UTC) |
07-Jun-2012 |
|
Time (UTC) |
18:01 |
|
Platform |
Not applicable |
|
File name |
Amd64_a23660885e34270cac0bbece1cb3be67_31bf3856ad364e35_6.1.7601.22013_none_4fefb3f0689f8c1d.manifest |
|
File version |
Not applicable |
|
File size |
723 |
|
Date (UTC) |
07-Jun-2012 |
|
Time (UTC) |
18:01 |
|
Platform |
Not applicable |
|
File name |
Amd64_b7312b24591fab4de768162018554f4d_31bf3856ad364e35_6.1.7601.22013_none_407c2139f7184f07.manifest |
|
File version |
Not applicable |
|
File size |
723 |
|
Date (UTC) |
07-Jun-2012 |
|
Time (UTC) |
18:01 |
|
Platform |
Not applicable |
|
File name |
Amd64_cb61dc4ee152f6b0363bf594702d59e2_31bf3856ad364e35_6.1.7601.22013_none_94a499b485cb34c7.manifest |
|
File version |
Not applicable |
|
File size |
723 |
|
Date (UTC) |
07-Jun-2012 |
|
Time (UTC) |
18:01 |
|
Platform |
Not applicable |
|
File name |
Amd64_d933420795e9af4b9a04e34d4b41e709_31bf3856ad364e35_6.1.7601.22013_none_7d72648a0458d313.manifest |
|
File version |
Not applicable |
|
File size |
723 |
|
Date (UTC) |
07-Jun-2012 |
|
Time (UTC) |
18:01 |
|
Platform |
Not applicable |
|
File name |
Amd64_da6347a6207cb5c91aa841414a0b30cc_31bf3856ad364e35_6.1.7601.22013_none_ba879a43d9b580dc.manifest |
|
File version |
Not applicable |
|
File size |
723 |
|
Date (UTC) |
07-Jun-2012 |
|
Time (UTC) |
18:01 |
|
Platform |
Not applicable |
|
File name |
Amd64_e0a4b0f09d3ebe9dadb8e7bcf0c63ced_31bf3856ad364e35_6.1.7601.22013_none_4ea2253d11b9a1fd.manifest |
|
File version |
Not applicable |
|
File size |
723 |
|
Date (UTC) |
07-Jun-2012 |
|
Time (UTC) |
18:01 |
|
Platform |
Not applicable |
|
File name |
Amd64_ec9cc1f33ad1e787543cc5a03ce4a8c1_31bf3856ad364e35_6.1.7601.22013_none_a483f33e4b8e25ff.manifest |
|
File version |
Not applicable |
|
File size |
723 |
|
Date (UTC) |
07-Jun-2012 |
|
Time (UTC) |
18:01 |
|
Platform |
Not applicable |
|
File name |
Amd64_ed139fec5505af4302779fc602553793_31bf3856ad364e35_6.1.7601.22013_none_ef839e51fda30e89.manifest |
|
File version |
Not applicable |
|
File size |
723 |
|
Date (UTC) |
07-Jun-2012 |
|
Time (UTC) |
18:01 |
|
Platform |
Not applicable |
|
File name |
Amd64_ee8af51d35caf910fc894eb41750602e_31bf3856ad364e35_6.1.7601.22013_none_4cfdec2aa078b55a.manifest |
|
File version |
Not applicable |
|
File size |
723 |
|
Date (UTC) |
07-Jun-2012 |
|
Time (UTC) |
18:01 |
|
Platform |
Not applicable |
|
File name |
Amd64_f27382ea8671d74be85a038a8590e898_31bf3856ad364e35_6.1.7601.22013_none_3b4aa1fefa02c418.manifest |
|
File version |
Not applicable |
|
File size |
723 |
|
Date (UTC) |
07-Jun-2012 |
|
Time (UTC) |
18:01 |
|
Platform |
Not applicable |
|
File name |
Amd64_f5b2ce0b9608f8ca56629d9c667441d8_31bf3856ad364e35_6.1.7601.22013_none_a9ebb8a110cf877a.manifest |
|
File version |
Not applicable |
|
File size |
723 |
|
Date (UTC) |
07-Jun-2012 |
|
Time (UTC) |
18:01 |
|
Platform |
Not applicable |
|
File name |
Amd64_fe64861d115b002fdd55a83e2fb40aa4_31bf3856ad364e35_6.1.7601.22013_none_e1e06704eb603890.manifest |
|
File version |
Not applicable |
|
File size |
723 |
|
Date (UTC) |
07-Jun-2012 |
|
Time (UTC) |
18:01 |
|
Platform |
Not applicable |
|
File name |
Amd64_microsoft-windows-f..overcluster-cluswmi_31bf3856ad364e35_6.1.7601.22013_none_1b1e2255cf8fa2e8.manifest |
|
File version |
Not applicable |
|
File size |
6,668 |
|
Date (UTC) |
07-Jun-2012 |
|
Time (UTC) |
06:53 |
|
Platform |
Not applicable |
Additional files for all supported IA-64-based versions of Windows Server 2008 R2
|
File name |
Ia64_0c33530a7b8ef3b696e1dd604917d70a_31bf3856ad364e35_6.1.7601.22013_none_26ca9d4fdc10db2b.manifest |
|
File version |
Not applicable |
|
File size |
721 |
|
Date (UTC) |
07-Jun-2012 |
|
Time (UTC) |
18:01 |
|
Platform |
Not applicable |
|
File name |
Ia64_0ece88f6d08998064944fa31be2f3d48_31bf3856ad364e35_6.1.7601.22013_none_b6247a750c45e44f.manifest |
|
File version |
Not applicable |
|
File size |
721 |
|
Date (UTC) |
07-Jun-2012 |
|
Time (UTC) |
18:01 |
|
Platform |
Not applicable |
|
File name |
Ia64_0f2fa8749fadedc12fa52acb52bcdfd4_31bf3856ad364e35_6.1.7601.22013_none_401dea15fbc43f45.manifest |
|
File version |
Not applicable |
|
File size |
721 |
|
Date (UTC) |
07-Jun-2012 |
|
Time (UTC) |
18:01 |
|
Platform |
Not applicable |
|
File name |
Ia64_2c5179d0901b28a0b8096c7ff8794d3f_31bf3856ad364e35_6.1.7601.22013_none_709d749485f5e786.manifest |
|
File version |
Not applicable |
|
File size |
721 |
|
Date (UTC) |
07-Jun-2012 |
|
Time (UTC) |
18:01 |
|
Platform |
Not applicable |
|
File name |
Ia64_5d327321aaaa68ec3a6ce401aa985164_31bf3856ad364e35_6.1.7601.22013_none_ce5d56e870e6b151.manifest |
|
File version |
Not applicable |
|
File size |
721 |
|
Date (UTC) |
07-Jun-2012 |
|
Time (UTC) |
18:01 |
|
Platform |
Not applicable |
|
File name |
Ia64_becd8ad942d6aacf6627b95c5363b9d3_31bf3856ad364e35_6.1.7601.22013_none_d48d69a117babb5c.manifest |
|
File version |
Not applicable |
|
File size |
721 |
|
Date (UTC) |
07-Jun-2012 |
|
Time (UTC) |
18:01 |
|
Platform |
Not applicable |
|
File name |
Ia64_c8d0ba87d85cdedf6b906271225f95b3_31bf3856ad364e35_6.1.7601.22013_none_7a383d307e90fa69.manifest |
|
File version |
Not applicable |
|
File size |
713 |
|
Date (UTC) |
07-Jun-2012 |
|
Time (UTC) |
18:01 |
|
Platform |
Not applicable |
|
File name |
Ia64_db04546d015b1f24c2cf0736f10873b2_31bf3856ad364e35_6.1.7601.22013_none_deca4dbb98f71469.manifest |
|
File version |
Not applicable |
|
File size |
721 |
|
Date (UTC) |
07-Jun-2012 |
|
Time (UTC) |
18:01 |
|
Platform |
Not applicable |
|
File name |
Ia64_microsoft-windows-f..overcluster-cluswmi_31bf3856ad364e35_6.1.7601.22013_none_bf012ac817303aae.manifest |
|
File version |
Not applicable |
|
File size |
6,666 |
|
Date (UTC) |
07-Jun-2012 |
|
Time (UTC) |
05:58 |
|
Platform |
Not applicable |
Need more help?
Want more options?
Explore subscription benefits, browse training courses, learn how to secure your device, and more.
Communities help you ask and answer questions, give feedback, and hear from experts with rich knowledge.
Данная ошибка может появляться не только при установке операционной системы. Код ошибки 0x80070490 часто возникает при добавлении почты, при чем разных компаний, в свое приложение «Почта и Календарь». Чаще всего жалуются именно на то, что не удалось сохранить профиль от Gmail-аккаунта. В то же время, почта Microsoft 365 регистрируется в системе без проблем. Это можно использовать в качестве обходного способа, сделав пересылку писем со своей основной почты на Microsoft 365. Однако это слишком неудобно, чтобы постоянно использовать активным пользователям. Мы предложим другой выход.
Что-то пошло не так. Сожалеем, но мы не смогли этого сделать. Код ошибки: 0x80070490
Как исправить ошибку 0x80070490?
Код ошибки 0x80070490 при добавлении почты Gmail нередко можно исправить очень просто – обновив приложение «Почта и календарь» через магазин Microsoft Store. Указанное действие является первым на пути к тому, чтобы нормально использовать данный сервис Windows 10, 11. Если даже после подобной процедуры вам не удалось найти параметры 0x80070490 почта, можно попробовать интересное решение, предложенное на форуме Microsoft. У него 20 лайков, поэтому есть хорошие шансы на исправление. Однако оно точно не является панацеей, так как хватает пользователей, у которых оно не сработало. Для них мы разберемся с обходом данной ошибки в последнем решении статьи.
Сброс приложения почты
Чтобы код ошибки 0x80070490 «Почты и Календаря» перестал преследовать, стоит сделать следующее:
- Выйти из своей учетной записи Microsoft, переключившись на локальный профиль Windows. Возможно, вам его придется создать отдельно в «Параметры» — «Учетные записи» — «Семья и другие люди».
- Открыть поисковую строку и следует найти, а затем запустить PowerShell. Важно делать это с правами администратора.
- Ввести и применить команду get-appxpackage -allusers *communi* | remove-appxpackage.
- Нажать комбинацию Win + R и вставить туда ссылку %localappdata%\Сomms.
- Удалить все содержимое папки и перезагружаем систему. Скорее всего только после перезапуска удастся удалить все файлы, так как некоторые из них могут быть заняты.
- Через магазин приложений нужно установить «Почта и Календарь» повторно, а затем вернуться в свою учетную запись.
- Попробовать добавить почту снова.
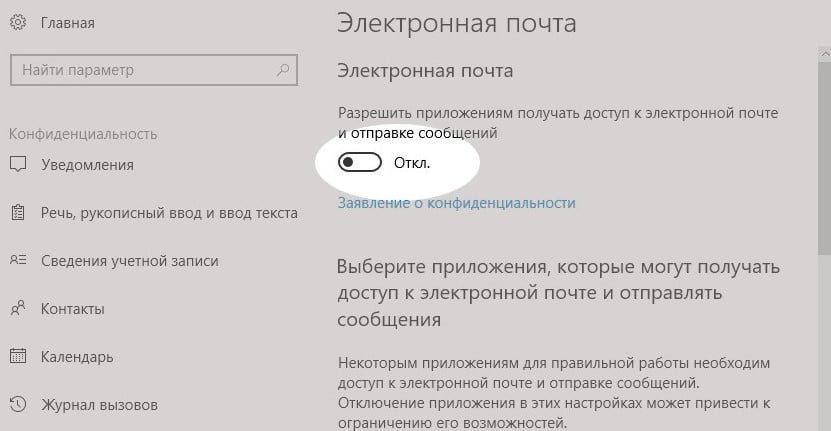
Важно! Обязательно нужно проверить настройки конфиденциальности, возможно, система блокирует доступ к почте данному приложению. Чтобы выполнить задуманное, следует открыть «Параметры» комбинацией Win + I, выбрать «Конфиденциальность», а затем – «Электронная почта». Во-первых, нужно выдать разрешение. Во-вторых, в блоке «Выберите приложения, которые могут получать доступ к электронной почте», следует несколько раз передвинуть ползунок возле «Почта и Календарь». Поигравшись с данным тумблером, может наступить облегчение.
Ручной ввод данных
К сожалению, исправить проблему вручную можно не всегда. По крайней мере, сообщество еще не выработало такое решение, которое бы позволило устранить сбой даже у тех, у кого не сработал предыдущий способ. На этот случай есть вариант добавления почты вручную. Подобная процедура на порядок сложнее, но точно работает.
Пошаговое руководство:
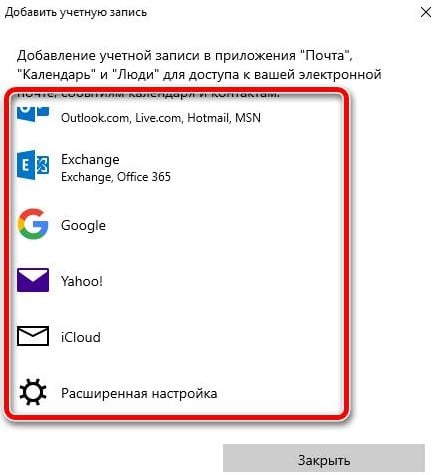
- Открывать сервис «Почта и Календарь», а затем нажать на кнопку «Добавить учетную запись».
- Выбрать строку «Расширенные настройки».
- Нужно указать все данные электронной почты. Сюда относятся как банальные: адрес почты, имя пользователя, пароль, имя профиля, так и данные о сервере, типе учетной записи. Все необходимые данные аккаунта у вас должны быть, а остальное можно найти в сети. Описание каждого пункта есть на официальном сайте Microsoft.
Надеемся, что какое-то из указанных действий поможет вам победить в борьбе с ошибкой 0x80070490 приложения «Почта и Календарь» и вы, наконец-то, сможете использовать все его преимущества.
by Kazim Ali Alvi
Kazim has always been fond of technology, be it scrolling through the settings on his iPhone, Android device, or Windows. And at times, unscrewing the device to take… read more
Updated on
- Many users have been unable to upgrade to the latest iteration and receive the error code 0x80070490 when installing the Windows 11 update.
- It could be due to corrupt system files, issues with the Windows Update Components, or a conflicting third-party app.
- To fix the error, restart the computer, run the built-in troubleshooter, perform DISM and SFC scan, amongst other methods here.
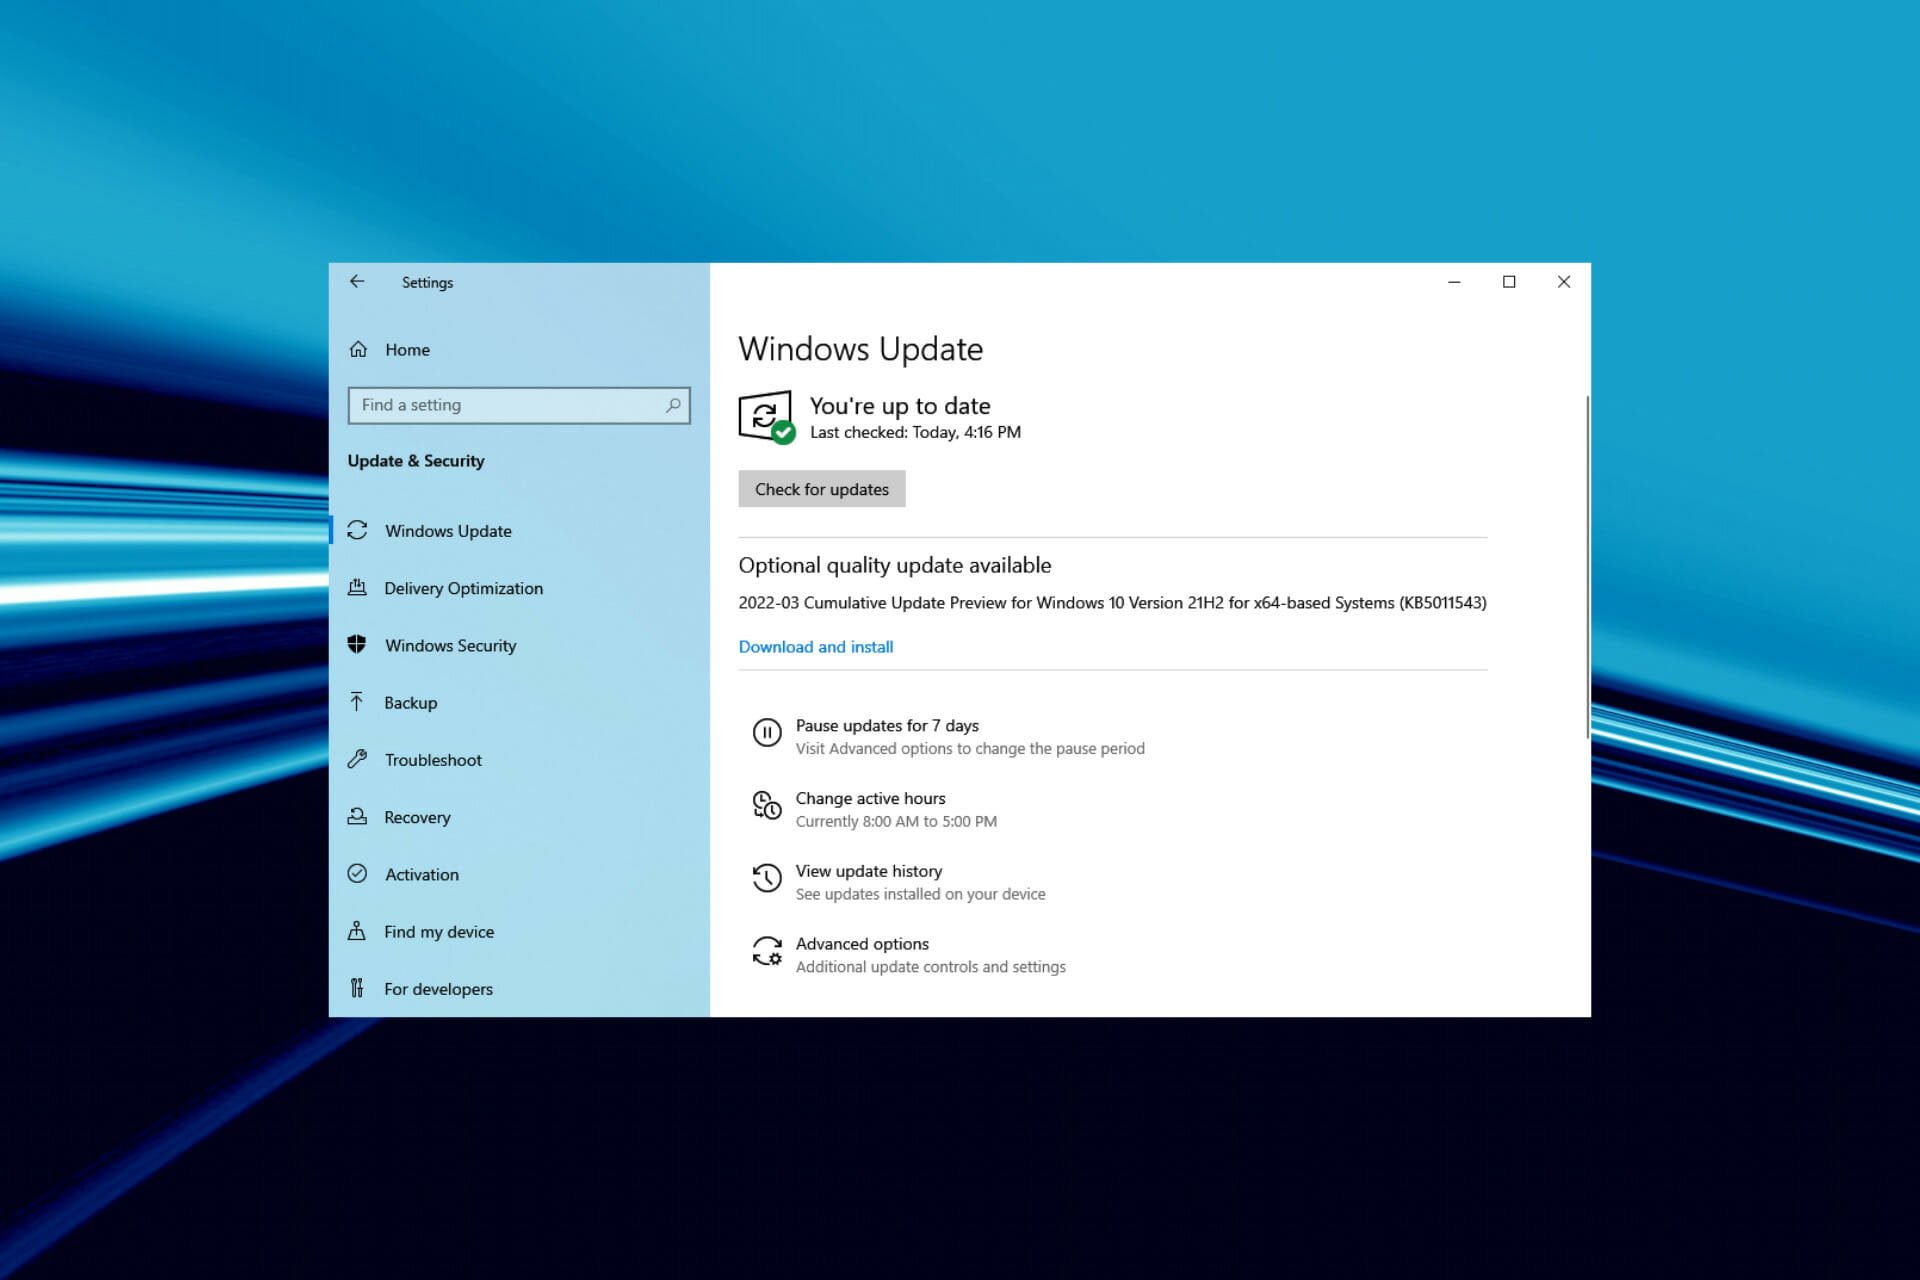
Though you shouldn’t normally come across any, many have reported encountering update errors. And with the option to upgrade to the latest iteration available via Windows Update, the error code 0x80070490 while installing Windows 11 can cause some trouble.
Unlike most update errors, this wouldn’t just prevent you from installing the latest version but basically upgrading to the latest iteration, i.e, Windows 11.
Though the error code 0x80070490 can also be encountered while installing apps in Windows 11, or even when running them, this guide will particularly focus on the update Windows 10 to 11 error 0x80070490 part.
Why do I see the error code 0x80070490 while installing Windows 11?
As is the case with other similar errors, this too can be caused by corrupt system files, third-party antiviruses preventing the upgrade, or a minor bug with the OS.
Other than that, it could also have to do with corrupt Windows Update Components, since these are critical for installing updates, and issues with them can lead to 0x80070490 error code while installing Windows 11.
Whatever the underlying cause in your case, the methods listed below should eliminate the error. Just follow them in the listed sequence for quick troubleshooting.
How can I fix the error code 0x80070490 when upgrading to Windows 11?
1. Use a dedicated repair tool
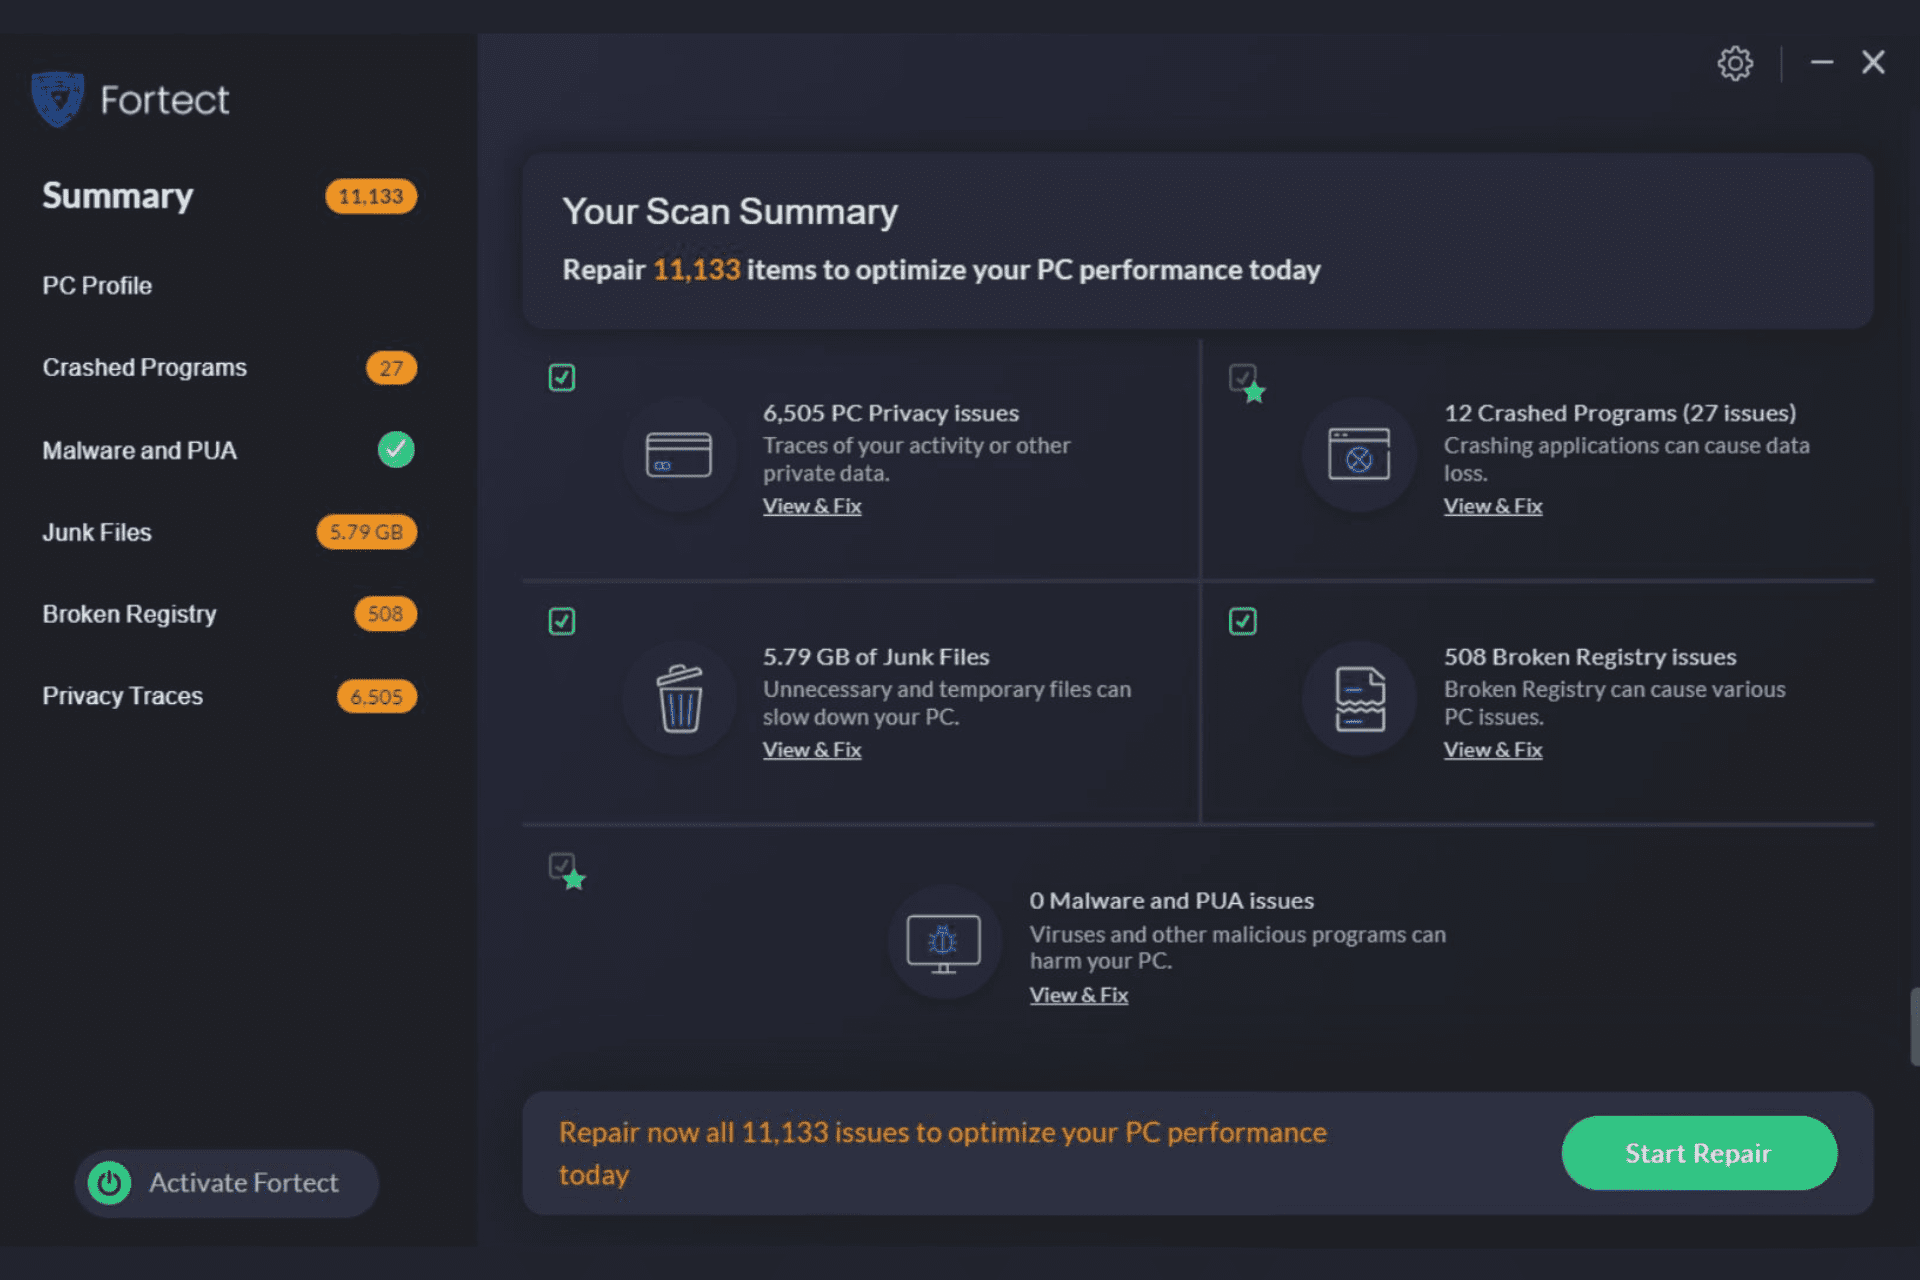
While you could go around manually troubleshooting the error, there is a simpler and quicker alternative, use a dedicated repair tool. We recommend Fortect since it’s one of the best and helps eliminates the maximum errors, including the ones with Windows Update.
Other than that, it also scans for malware infection and after removing it, repairs the damage caused by the malware. In case you are missing critical DLL files and unable to run a program, Fortect comes to your rescue by automatically replacing these.
Be it any issue with the PC, this tool is your full-time companion and will get you the best system performance coupled with the least errors.
⇒ Get Fortect
2. Restart the PC
- Go to the desktop, press Alt + F4 to launch the Shut Down Windows box and select Restart from the dropdown menu.

- Next, click on OK at the bottom to restart the computer.

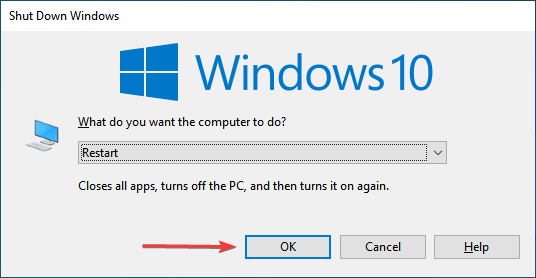
Most windows update errors including error code 0x80070490 when installing Windows 11 can be fixed with a simple restart. If it’s a minor bug, restarting the computer would reboot the OS and eliminate it right away.
2. Run Windows Update troubleshooter
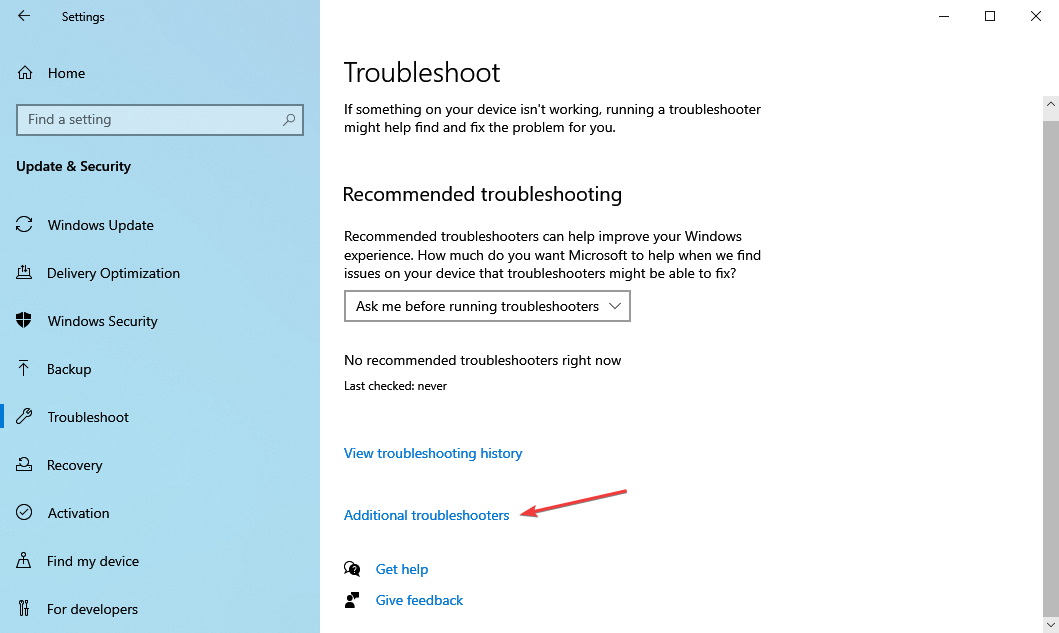
- Press Windows + I to launch the Settings app, and click on Update & Security from the various options listed here.

- Next, select Troubleshoot from the tabs listed in the navigation pane on the left.

- Click on the Additional troubleshooters option on the right.
- Now, select the Windows Update entry here, and then click on the Run the troubleshooter button that appears under it.

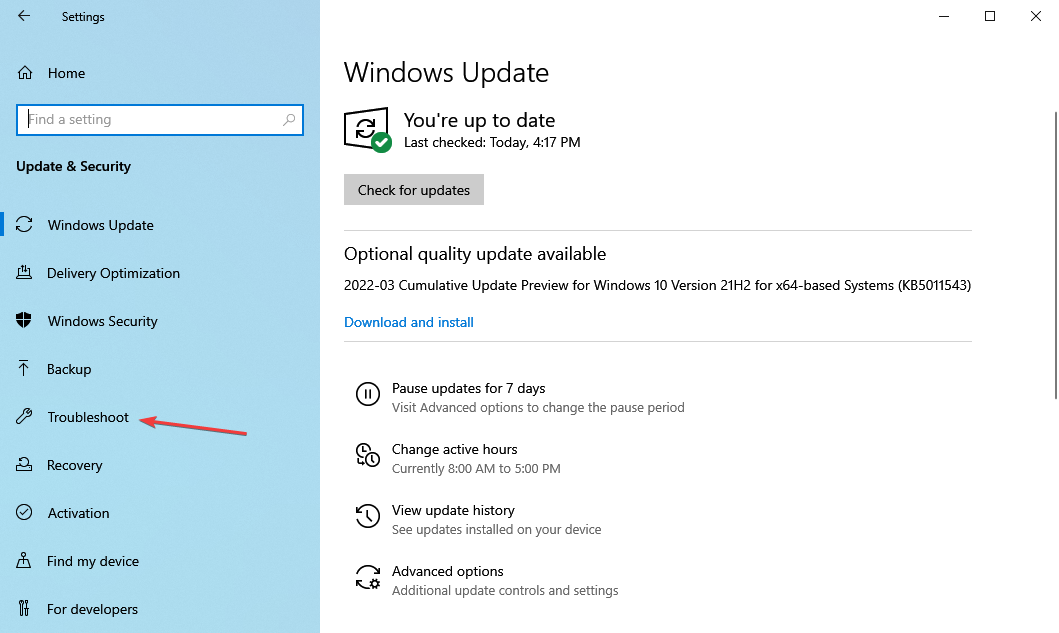
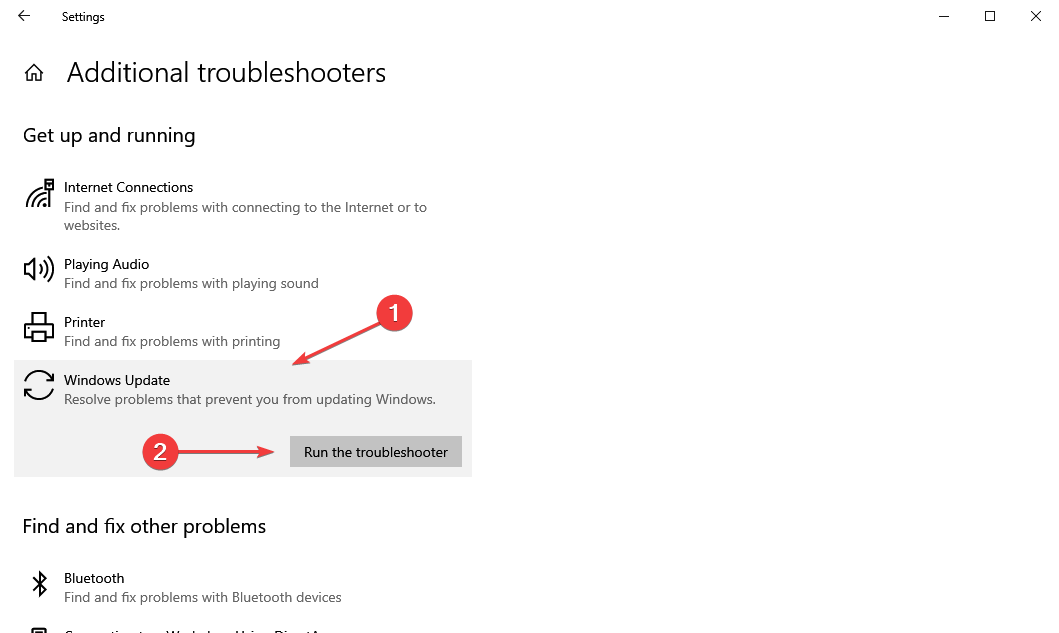
Most errors can be simply fixed by running a dedicated built-in troubleshooter, be it with the OS or an external device. In this case, the Windows Update troubleshooter should come to your rescue.
If you still encounter the error code 0x80070490 while upgrading to Windows 11, head to the next method.
3. Verify that the critical services are running
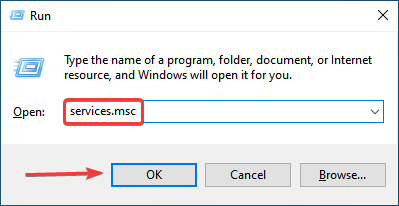
- Press Windows + R to launch the Run command, enter services.msc in the text field, and either click OK or hit Enter to launch the Services app.

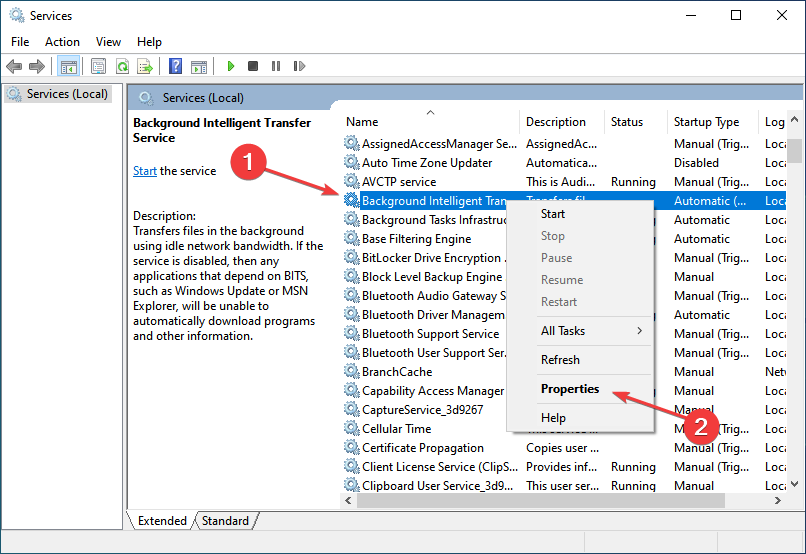
- Now, locate the Background Intelligent Transfer Service, right-click on it and select Properties from the context menu.

- Click on the Startup type dropdown menu, and select Automatic from the list options.

- Next, verify if the Service status says Running. In case it doesn’t click on the Start button and then on OK to save the changes.
- Repeat the same process with Cryptographic and Windows Update services.


After you are done making the changes, restart the computer for these to come into effect, and check if the error code 0x80070490 encountered while installing Windows 11 is fixed.
- Copilot is coming on 9/26 with a new logo and new features
- Windows 11 23H2: Top Features, coming September 26
- How to Find & View Saved Passwords on Windows 11
- How to Permanently Disable Left Swipe on Windows 11
- Fix: Touchpad Clicks but Doesn’t Move on Windows 11
4. Perform DISM and SFC scan
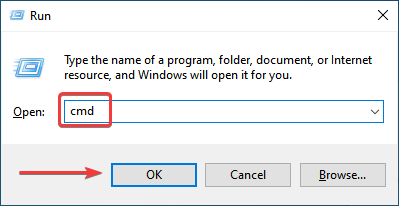
- Press Windows + R to launch the Run command, type cmd in the text field, press and hold Ctrl + Shift, and then either click OK or hit Enter to launch an elevated Command Prompt.
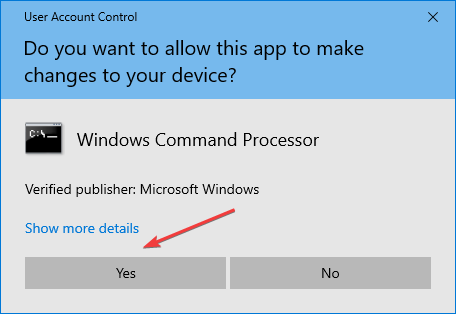
- Click Yes in the UAC (User Account Control) prompt that appears.

- Once here, paste the following command and hit Enter to run the DISM tool.
DISM.exe /Online /Cleanup-image /Restorehealth
- Now, execute the following command to perform a SFC scan.
sfc /scannow - After running the two, restart the computer.


The DISM (Deployment Image Servicing and Management) tool looks for issues with the Windows Image and if required, makes changes to the Windows installation files to fix the error.
The SFC (System File Checker) scan is used to identify corrupt system files and if any are found, these are replaced with their cached copy stored on the system.
Once the two scans are run and the computer restarted, check if you still encounter the error code 0x80070490 while installing the Windows 11 update.
5. Uninstall third-party antivirus
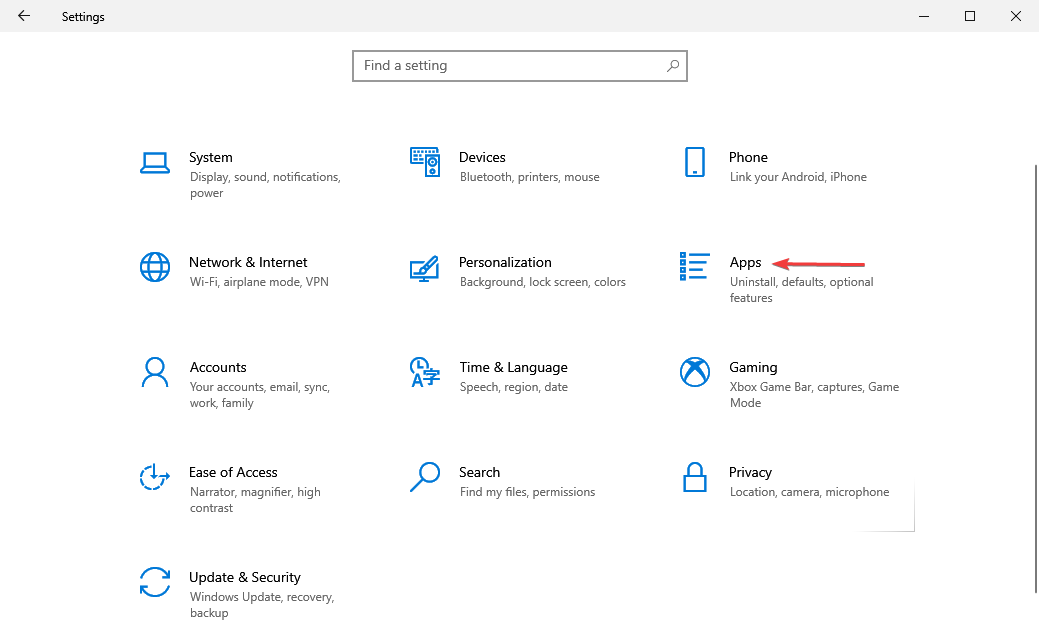
- Press Windows + I to launch Settings, and select Apps from the options listed here.

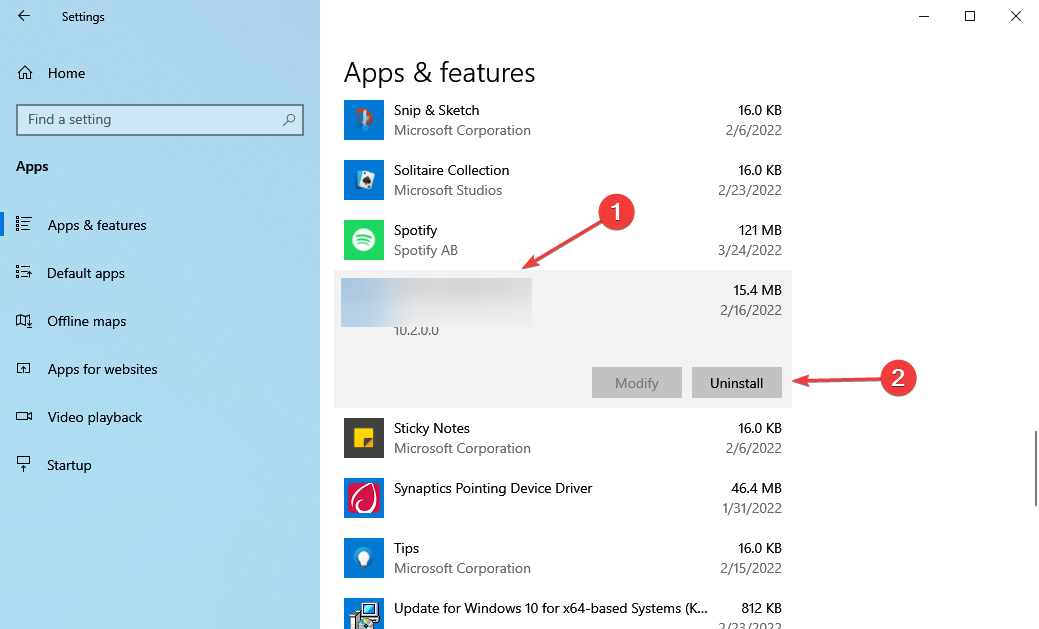
- Now, locate the third-party antivirus from the list on the right, select it, and then click on Uninstall.
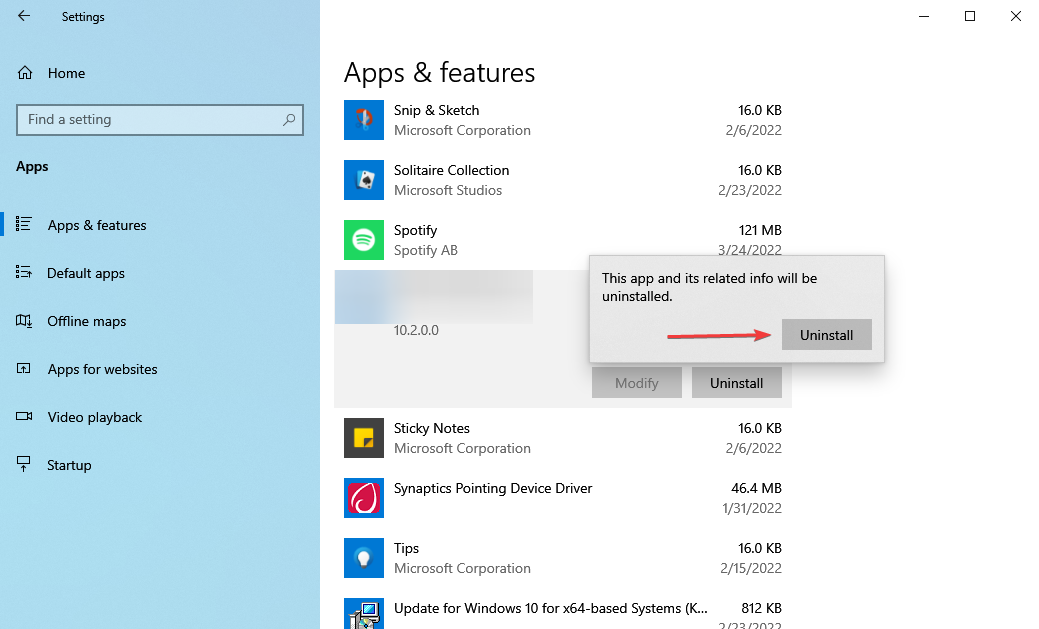
- Again, click Uninstall in the confirmation prompt that pops up.
Certain third-party antiviruses are known to block updates and might lead to the error code 0x80070490 when upgrading to Windows 11. If you have any of these installed, remove them and then try to install the Windows 11 update.
6. Reset Windows Update Components
- Press Windows + R to launch the Run command, enter cmd in the designated text field, hold the Ctrl + Shift keys, and then click on OK at the bottom.
- Click Yes in the UAC prompt that appears.
- Now, paste the following two commands and hit Enter to stop the BITS and Windows Update service.
net stop bitsnet stop wuauserv - Execute the following command to delete the qmgr*.dat files.
Del “%ALLUSERSPROFILE%Application DataMicrosoftNetworkDownloaderqmgr*.dat” - If this is the first attempt at resetting, you skip these three commands. However, if you tried it before, execute these three to rename some critical folders.
Ren %Systemroot%\SoftwareDistribution\DataStore DataStore.bakRen %Systemroot%\SoftwareDistribution\Download Download.bakRen %Systemroot%\System32\catroot2 catroot2.bak - The next step is to reset BITS and Windows Update service, execute the following commands for that.
sc.exe sdset bits D:(A;;CCLCSWRPWPDTLOCRRC;;;SY)(A;;CCDCLCSWRPWPDTLOCRSDRCWDWO;;;BA)(A;;CCLCSWLOCRRC;;;AU)(A;;CCLCSWRPWPDTLOCRRC;;;PU)sc.exe sdset wuauserv D:(A;;CCLCSWRPWPDTLOCRRC;;;SY)(A;;CCDCLCSWRPWPDTLOCRSDRCWDWO;;;BA)(A;;CCLCSWLOCRRC;;;AU)(A;;CCLCSWRPWPDTLOCRRC;;;PU) - Now, paste this and hit Enter.
cd /d %windir%\system32 - Next, execute the following commands individually to reregister some critical files.

regsvr32.exe atl.dll
regsvr32.exe urlmon.dll
regsvr32.exe mshtml.dll
regsvr32.exe shdocvw.dll
regsvr32.exe browseui.dll
regsvr32.exe jscript.dll
regsvr32.exe vbscript.dll
regsvr32.exe scrrun.dll
regsvr32.exe msxml.dll
regsvr32.exe msxml3.dll
regsvr32.exe msxml6.dll
regsvr32.exe actxprxy.dll
regsvr32.exe softpub.dll
regsvr32.exe wintrust.dll
regsvr32.exe dssenh.dll
regsvr32.exe rsaenh.dll
regsvr32.exe gpkcsp.dll
regsvr32.exe sccbase.dll
regsvr32.exe slbcsp.dll
regsvr32.exe cryptdlg.dll
regsvr32.exe oleaut32.dll
regsvr32.exe ole32.dll
regsvr32.exe shell32.dll
regsvr32.exe initpki.dll
regsvr32.exe wuapi.dll
regsvr32.exe wuaueng.dll
regsvr32.exe wuaueng1.dll
regsvr32.exe wucltui.dll
regsvr32.exe wups.dll
regsvr32.exe wups2.dll
regsvr32.exe wuweb.dll
regsvr32.exe qmgr.dll
regsvr32.exe qmgrprxy.dll
regsvr32.exe wucltux.dll
regsvr32.exe muweb.dll
regsvr32.exe wuwebv.dll
10. The penultimate step is to reset Winsock and executing the following command would do it.netsh winsock reset
11. Now, all you have to do is restart the BITS and Windows Update service that you stopped earlier. Execute the following commands for that.net start bits net start wuauserv
Issues with the Windows Update Components can often lead to the 0x80070490 error code when installing the update for Windows 11. Resetting the components should fix the problem.
If this method too doesn’t work, try the next one.
7. Manually install Windows 11
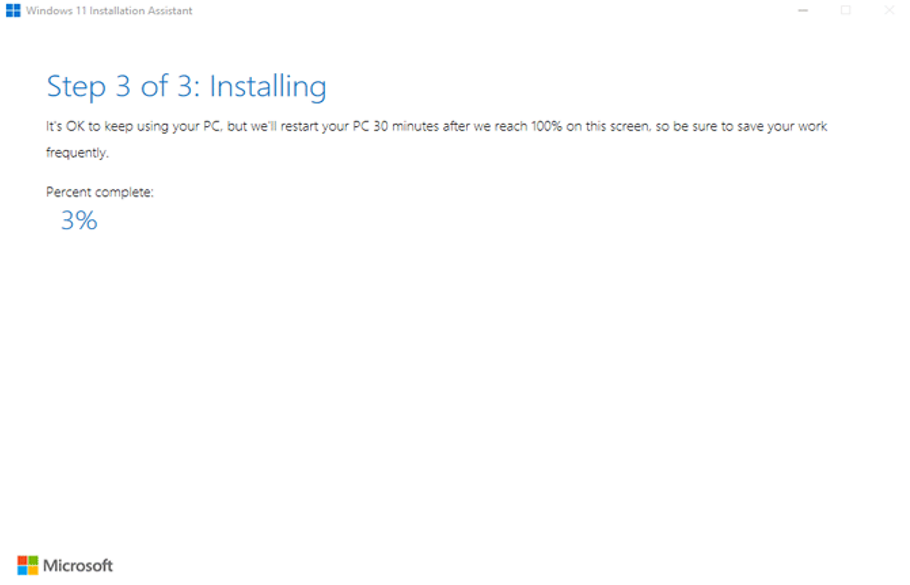
The last option with you, and one that should work for all, is to manually install the latest iteration. Here too, there are a couple of ways to make the upgrade. The simplest one is to upgrade to Windows 11 using the installation assistant.
Another option is to create a bootable USB drive for Windows 11 and then install the OS. You can also use the bootable USB to perform advanced troubleshooting in Windows 11, in case it doesn’t boot.
No matter what lead to the 0x80070490 error code while installing the Windows 11 update, you can always make the upgrade with the methods listed here.
Also, find out how to fix the 0x800f0989 error code, another error that is encountered when upgrading to Windows 11 from the previous iteration through Windows Update.
Tell us which fix worked and your first impression of Windows 11, in the comments section below.
![]()
Ошибка 0x80070490 Windows 7 и 10 возникает по различным причинам и связана с центром обновления. У некоторых пользователей она возникает достаточно часто, поэтому необходимо понимать, как от нее избавиться.
Что это за ошибка?
Каждая ошибка, которая возникает в операционной системе появляется в результате какого-либо сбоя. Название или последовательность цифр часто говорит о том, что именно произошло. Но в большинстве случаев, даже это сообщение не может точно описать всю суть проблемы, поэтому иногда требуется применить несколько способов решения.
Сообщение с кодом ошибки 0x80070490 говорит о поврежденных файлах или процессах, которые находятся в хранилище компонентов системы или в соответствующем обслуживании. Часто она возникает во время обновления ОС. Это происходит автоматически через предназначенный для этого центр. Или же, если пользователь обновляет систему с Windows 7, 8.1 на десятую версию.
Также, подобная ошибка появляется в том случае, когда пользователь пытается скачать или обновить приложение с Microsoft Store. Это тоже относится к важным компонентам операционной системы.
Частые причины возникновения неисправности с кодом 0x80070490 в Windows, из-за которых появляется ошибка:
- антивирусная программа мешает правильному обновлению системы;
- поврежденные файлы компонентов или реестра;
- требуемые службы отключены пользователем.
Так же, как и причин, решений у данной неисправности несколько. Не всегда пользователь может понять, почему возникла подобная ситуация. Поэтому рекомендуется воспользоваться несколькими методами, чтобы сообщение больше не появлялось.
Как исправить ошибку?
Для начала пользователю стоит убедиться, что проблему вызывает не антивирусная программа, которая установлена на компьютере. Для этого ее стоит отключить и проверить работоспособность системы. Если же данный метод не помог, стоит перейти к более радикальным действиям.
Проверка утилитой System File Checker
System File Checker является встроенной утилитой ОС. Она предназначена для полного сканирования компьютера, и проверки его на поврежденные системные файлы. В случае их обнаружения, программа автоматически проводит восстановление.
Если ошибка возникла из-за повреждения системных файлов, значит утилита исправит ситуацию. Для этого следует.
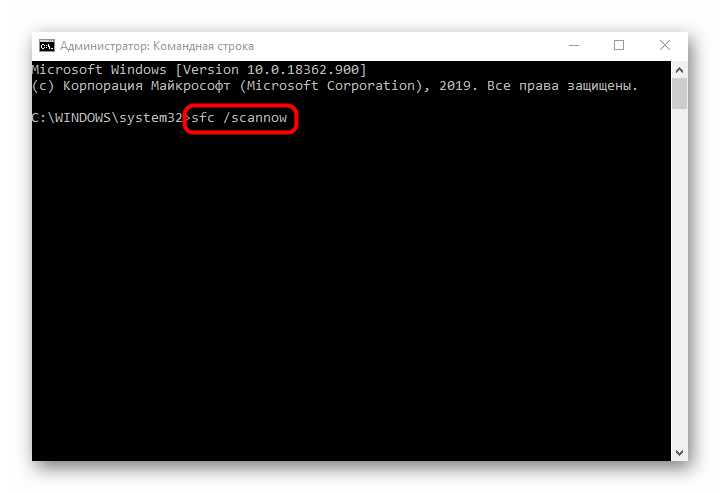
- Запустить командную строку, нажать на сочетание клавиш «Win+R» и ввести «cmd».

- В открытом окне нужно ввести команду, которая запустит сканирование компьютера — «sfc /scannow».

- Дождаться окончания процесса.


После завершения сканирования, необходимо закрыть все окна и перезагрузить компьютер.
Чистим компьютер от системного мусора
Операционная система содержит большое количество мусора, о котором пользователь даже не догадывается. Это старые папки и файлы, которые остаются после удаления программ или игр. В некоторых случаях они могут мешать нормальной работе Windows и вызывать различные сбои.
Чтобы очистить компьютер от мусора, нужно:
- Открыть «Мой компьютер» и кликнуть правой клавишей мыши по разделу, выбрать пункт «Свойства».

- В открытом окне нажать на команду «Очистка диска».

- Запустится процесс оценки файлов, которые можно удалять.

- Отобразится список компонентов, которые можно очистить. Здесь пользователь должен установить галочки рядом с нужными пунктами. После этого можно нажимать на «ОК».


После этого начнется сама очистка диска от временных файлов и ненужного мусора.
Также, для очистки компьютера от мусора можно воспользоваться дополнительным ПО. К таким программам относится CCleaner, Iolo System Mechanic, IObit Advanced SystemCare и другие.
Возврат системы в первичное состояние
Еще одним способом, который поможет устранить неисправность с кодом 0x80070490 при обновлении, будет возврат системы. Для этого в Windows 10 предусмотрена специальная функция. Чтобы вернуть ОС в исходное состояние, нужно:
- Нажать на «Пуск» и открыть «Параметры».
- Перейти к разделу «Обновления и безопасность», затем к «Восстановление».

- Нужно нажать на «Начать», чтобы запустить Восстановление.

Пользователь может сохранить все свои файлы или удалить их. В первом случае останутся все видео, фото и текстовые документы, но игры и приложения удалятся. Если ОС повреждена, для восстановления системы понадобится флешка иди диск с загруженной Windows.
Утилита DISM для исправления ошибки
В некоторых случаях может понадобиться воспользоваться системой обработки образов раскрытия, которая также называется DISM. Утилита запускается через командную строку, которую нужно предварительно открыть. Затем, нужно:
- Ввести команду «DISM.exe /online /cleanup-image /restorehealth».
- Дождаться окончания процесса.


Как только на экране появится сообщение о том, что операция успешно завершена, ошибка должна быть исправлена. Для этой утилиты может понадобиться доступ к интернету. В некоторых случаях может пригодиться диск или флешка с установленной ОС.
Перезапуск службы Windows Update
Для перезапуска данной службы, требуется перейти в «Выполнить», нажав на «Win+R». Затем следует ввести команду «services.msc» и нажать на «ОК». В открытом окне нужно найти «Центр обновления Windows» и открыть свойства двойным нажатием.
Данную службу необходимо «Запустить», если она была отключена. Если же она включена, ее нужно перезапустить. Это поможет исправить неполадку и вернуть работоспособную ОС.
Сброс центра обновления
Сброс данных настроек позволяет исправить множество ошибок, связанных с обновлением. Необходимо запустить командную строку и последовательно ввести следующие команды:
net stop wuauserv
net stop CryptSvc
net stop BITS
net stop msiserver
ren %windir%\SoftwareDistribution SoftwareDistribution.old
ren %windir%\system32\catroot2 catroot2.old
net start wuauserv
net start CryptSvc
net start BITS
net start msiserver

Суть данных команд заключается в том, чтобы остановить выполнение служб, переименовать папки, а затем включить их обратно.
Установка режима UEFi в BIOS
UEFi пришел на смену BIOS и выполняет схожие функции. Установка данного режима позволит исправить ошибку с обновлением. Стоит отметить, что UEFi рассчитан на современные платформы. Поэтому, установить режим на устаревшее оборудование не получится.
Переключаем драйвера контроллера на AHCI
Контроллеры жесткого диска SATA способны работать в двух режимах, AHCI и IDE. Первый разработан для более новых систем. Из-за несовместимости обновления и используемого контроллера, система может выдавать ошибку 0x80070490. Поэтому, следует переставить его в другой режим работы.