Assuming you are in a QWidget from which you want to display an error message, you can simply use QMessageBox.critical(self, "Title", "Message"), replace self by another (main widget for example) if you are not is a QWidget class.
Edit: even if you are not in a QWidget (or don’t want to inherit from it), you can just use None as parent with for instance QMessageBox.critical(None, "Title", "Message").
Edit, here is an example of how to use it:
# -*-coding:utf-8 -*

from PyQt5.QtWidgets import QApplication, QMessageBox
import sys

# In this example, success is False by default, and
#  - If you press Cancel, it will ends with False,
#  - If you press Retry until i = 3, it will end with True


expectedVal = 3


def MyFunction(val: int) -> bool:
    return val == expectedVal


app = QApplication(sys.argv)
i = 1
success = MyFunction(i)
while not success:
    # Popup with several buttons, manage below depending on choice
    choice = QMessageBox.critical(None,
                                  "Error",
                                  "i ({}) is not expected val ({})".format(i, expectedVal),
                                  QMessageBox.Retry | QMessageBox.Cancel)
    if choice == QMessageBox.Retry:
        i += 1
        print("Retry with i = {}".format(i))
        success = MyFunction(i)
    else:
        print("Cancel")
        break

if success:
    # Standard popup with only OK button
    QMessageBox.information(None, "Result", "Success is {}".format(success))
else:
    # Standard popup with only OK button
    QMessageBox.critical(None, "Result", "Success is {}".format(success))
@Meller008
Если я правильно понял вопрос, то например
if error:
    QMessageBox.critical(self, "Ошибка ", "Выделите элемент который хотите изменить", QMessageBox.Ok)
Ответ написан
Комментировать
Комментировать
Assuming you are in a QWidget from which you want to display an error message, you can simply use QMessageBox.critical(self, "Title", "Message"), replace self by another (main widget for example) if you are not is a QWidget class.
Edit: even if you are not in a QWidget (or don’t want to inherit from it), you can just use None as parent with for instance QMessageBox.critical(None, "Title", "Message").
Edit, here is an example of how to use it:
# -*-coding:utf-8 -*

from PyQt5.QtWidgets import QApplication, QMessageBox
import sys

# In this example, success is False by default, and
#  - If you press Cancel, it will ends with False,
#  - If you press Retry until i = 3, it will end with True


expectedVal = 3


def MyFunction(val: int) -> bool:
    return val == expectedVal


app = QApplication(sys.argv)
i = 1
success = MyFunction(i)
while not success:
    # Popup with several buttons, manage below depending on choice
    choice = QMessageBox.critical(None,
                                  "Error",
                                  "i ({}) is not expected val ({})".format(i, expectedVal),
                                  QMessageBox.Retry | QMessageBox.Cancel)
    if choice == QMessageBox.Retry:
        i += 1
        print("Retry with i = {}".format(i))
        success = MyFunction(i)
    else:
        print("Cancel")
        break

if success:
    # Standard popup with only OK button
    QMessageBox.information(None, "Result", "Success is {}".format(success))
else:
    # Standard popup with only OK button
    QMessageBox.critical(None, "Result", "Success is {}".format(success))
Александр Рублев
@Meller008
Если я правильно понял вопрос, то например
if error:
    QMessageBox.critical(self, "Ошибка ", "Выделите элемент который хотите изменить", QMessageBox.Ok)
Ответ написан
более трёх лет назад
Комментировать
Don’t forget to call .exec_() to display the error:
from PyQt5.QtWidgets import QMessageBox

msg = QMessageBox()
msg.setIcon(QMessageBox.Critical)
msg.setText("Error")
msg.setInformativeText('More information')
msg.setWindowTitle("Error")
msg.exec_()
All above options didn’t work for me using Komodo Edit 11.0. Just had returned «1» or if not implemented «-1073741819».
Usefull for me was: Vanloc’s solution.
def my_exception_hook(exctype, value, traceback):
    # Print the error and traceback
    print(exctype, value, traceback)
    # Call the normal Exception hook after
    sys._excepthook(exctype, value, traceback)
    sys.exit(1)

# Back up the reference to the exceptionhook
sys._excepthook = sys.excepthook

# Set the exception hook to our wrapping function
sys.excepthook = my_exception_hook
To show a message box, you can call this def:
from PyQt5.QtWidgets import QMessageBox, QWidget
MainClass(QWidget):
def __init__(self):
super().__init__()
def clickMethod(self):
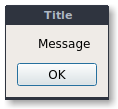
QMessageBox.about(self, "Title", "Message")
Qt includes an error-message specific dialog class QErrorMessage which you should use to ensure your dialog matches system standards. To show the dialog just create a dialog object, then call .showMessage(). For example:
error_dialog = QtWidgets.QErrorMessage()
error_dialog.showMessage('Oh no!')
Here is a minimal working example script:
import PyQt5
from PyQt5 import QtWidgets

app = QtWidgets.QApplication([])

error_dialog = QtWidgets.QErrorMessage()
error_dialog.showMessage('Oh no!')

app.exec_()
Assuming you are in a QWidget from which you want to display an error message, you can simply use QMessageBox.critical(self, "Title", "Message"), replace self by another (main widget for example) if you are not is a QWidget class.
Edit: even if you are not in a QWidget (or don’t want to inherit from it), you can just use None as parent with for instance QMessageBox.critical(None, "Title", "Message").
Edit, here is an example of how to use it:
# -*-coding:utf-8 -*

from PyQt5.QtWidgets import QApplication, QMessageBox
import sys

# In this example, success is False by default, and
#  - If you press Cancel, it will ends with False,
#  - If you press Retry until i = 3, it will end with True


expectedVal = 3


def MyFunction(val: int) -> bool:
    return val == expectedVal


app = QApplication(sys.argv)
i = 1
success = MyFunction(i)
while not success:
    # Popup with several buttons, manage below depending on choice
    choice = QMessageBox.critical(None,
                                  "Error",
                                  "i ({}) is not expected val ({})".format(i, expectedVal),
                                  QMessageBox.Retry | QMessageBox.Cancel)
    if choice == QMessageBox.Retry:
        i += 1
        print("Retry with i = {}".format(i))
        success = MyFunction(i)
    else:
        print("Cancel")
        break

if success:
    # Standard popup with only OK button
    QMessageBox.information(None, "Result", "Success is {}".format(success))
else:
    # Standard popup with only OK button
    QMessageBox.critical(None, "Result", "Success is {}".format(success))
In this article, we will discuss the Message Box Widget of the PyQT5 module. It is used to display the message boxes. PyQt5 is a library used to create GUI using the Qt GUI framework. Qt is originally written in C++ but can be used in Python. The latest version of PyQt5 can be installed using the command:
pip install PyQt5
What is a Message Box?
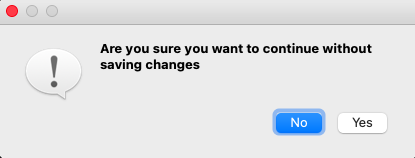
Message Boxes are usually used for declaring a small piece of information to the user. It gives users a pop-up box, that cannot be missed, to avoid important errors and information being missed by the users and in some cases, the user cannot continue without acknowledging the message box.
Based on the applications there are four types of message boxes. The following is the syntax for creating a message box. For any of the boxes, instantiation needs to be done.
Syntax:
msg_box_name = QMessageBox()
Now according to the requirement an appropriate message box is created.
Types of Message Box
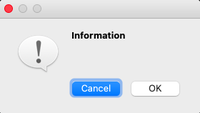
Information Message Box
This type of message box is used when related information needs to be passed to the user.
Syntax:
msg_box_name.setIcon(QMessageBox.Information)
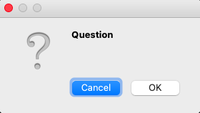
Question Message Box
This message box is used to get an answer from a user regarding some activity or action to be performed.
Syntax:
msg_box_name.setIcon(QMessageBox.Question)
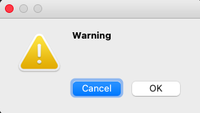
Warning Message Box
This triggers a warning regarding the action the user is about to perform.
Syntax:
msg_box_name.setIcon(QMessageBox.Warning)
Critical Message Box
This is often used for getting the user’s opinion for a critical action.
Syntax:
msg_box_name.setIcon(QMessageBox.Critical)
Creating a simple Message Box using PyQt5
Now to create a program that produces a message box first import all the required modules, and create a widget with four buttons, on clicking any of these a message box will be generated.
Now for each button associate a message box that pops when the respective button is clicked. For this first, instantiate a message box and add a required icon. Now set appropriate attributes for the pop that will be generated. Also, add buttons to deal with standard mechanisms.
Given below is the complete implementation.
Program:
Python
import sys
from PyQt5.QtWidgets import *
def window():
app = QApplication(sys.argv)
w = QWidget()
b1 = QPushButton(w)
b1.setText("Information")
b1.move(45, 50)
b2 = QPushButton(w)
b2.setText("Warning")
b2.move(150, 50)
b3 = QPushButton(w)
b3.setText("Question")
b3.move(50, 150)
b4 = QPushButton(w)
b4.setText("Critical")
b4.move(150, 150)
b1.clicked.connect(show_info_messagebox)
b2.clicked.connect(show_warning_messagebox)
b3.clicked.connect(show_question_messagebox)
b4.clicked.connect(show_critical_messagebox)
w.setWindowTitle("PyQt MessageBox")
w.show()
sys.exit(app.exec_())
def show_info_messagebox():
msg = QMessageBox()
msg.setIcon(QMessageBox.Information)
msg.setText("Information ")
msg.setWindowTitle("Information MessageBox")
msg.setStandardButtons(QMessageBox.Ok | QMessageBox.Cancel)
retval = msg.exec_()
def show_warning_messagebox():
msg = QMessageBox()
msg.setIcon(QMessageBox.Warning)
msg.setText("Warning")
msg.setWindowTitle("Warning MessageBox")
msg.setStandardButtons(QMessageBox.Ok | QMessageBox.Cancel)
retval = msg.exec_()
def show_question_messagebox():
msg = QMessageBox()
msg.setIcon(QMessageBox.Question)
msg.setText("Question")
msg.setWindowTitle("Question MessageBox")
msg.setStandardButtons(QMessageBox.Ok | QMessageBox.Cancel)
retval = msg.exec_()
def show_critical_messagebox():
msg = QMessageBox()
msg.setIcon(QMessageBox.Critical)
msg.setText("Critical")
msg.setWindowTitle("Critical MessageBox")
msg.setStandardButtons(QMessageBox.Ok | QMessageBox.Cancel)
retval = msg.exec_()
if __name__ == '__main__':
window()
Output
In this article, we will discuss the Message Box Widget of the PyQT5 module. It is used to display the message boxes. PyQt5 is a library used to create GUI using the Qt GUI framework. Qt is originally written in C++ but can be used in Python. The latest version of PyQt5 can be installed using the command:
pip install PyQt5
What is a Message Box?
Message Boxes are usually used for declaring a small piece of information to the user. It gives users a pop-up box, that cannot be missed, to avoid important errors and information being missed by the users and in some cases, the user cannot continue without acknowledging the message box.
Based on the applications there are four types of message boxes. The following is the syntax for creating a message box. For any of the boxes, instantiation needs to be done.
Syntax:
msg_box_name = QMessageBox()
Now according to the requirement an appropriate message box is created.
Types of Message Box
Information Message Box
This type of message box is used when related information needs to be passed to the user.
Syntax:
msg_box_name.setIcon(QMessageBox.Information)
Question Message Box
This message box is used to get an answer from a user regarding some activity or action to be performed.
Syntax:
msg_box_name.setIcon(QMessageBox.Question)
Warning Message Box
This triggers a warning regarding the action the user is about to perform.
Syntax:
msg_box_name.setIcon(QMessageBox.Warning)
Critical Message Box
This is often used for getting the user’s opinion for a critical action.
Syntax:
msg_box_name.setIcon(QMessageBox.Critical)
Creating a simple Message Box using PyQt5
Now to create a program that produces a message box first import all the required modules, and create a widget with four buttons, on clicking any of these a message box will be generated.
Now for each button associate a message box that pops when the respective button is clicked. For this first, instantiate a message box and add a required icon. Now set appropriate attributes for the pop that will be generated. Also, add buttons to deal with standard mechanisms.
Given below is the complete implementation.
Program:
Python
import sys
from PyQt5.QtWidgets import *
def window():
app = QApplication(sys.argv)
w = QWidget()
b1 = QPushButton(w)
b1.setText("Information")
b1.move(45, 50)
b2 = QPushButton(w)
b2.setText("Warning")
b2.move(150, 50)
b3 = QPushButton(w)
b3.setText("Question")
b3.move(50, 150)
b4 = QPushButton(w)
b4.setText("Critical")
b4.move(150, 150)
b1.clicked.connect(show_info_messagebox)
b2.clicked.connect(show_warning_messagebox)
b3.clicked.connect(show_question_messagebox)
b4.clicked.connect(show_critical_messagebox)
w.setWindowTitle("PyQt MessageBox")
w.show()
sys.exit(app.exec_())
def show_info_messagebox():
msg = QMessageBox()
msg.setIcon(QMessageBox.Information)
msg.setText("Information ")
msg.setWindowTitle("Information MessageBox")
msg.setStandardButtons(QMessageBox.Ok | QMessageBox.Cancel)
retval = msg.exec_()
def show_warning_messagebox():
msg = QMessageBox()
msg.setIcon(QMessageBox.Warning)
msg.setText("Warning")
msg.setWindowTitle("Warning MessageBox")
msg.setStandardButtons(QMessageBox.Ok | QMessageBox.Cancel)
retval = msg.exec_()
def show_question_messagebox():
msg = QMessageBox()
msg.setIcon(QMessageBox.Question)
msg.setText("Question")
msg.setWindowTitle("Question MessageBox")
msg.setStandardButtons(QMessageBox.Ok | QMessageBox.Cancel)
retval = msg.exec_()
def show_critical_messagebox():
msg = QMessageBox()
msg.setIcon(QMessageBox.Critical)
msg.setText("Critical")
msg.setWindowTitle("Critical MessageBox")
msg.setStandardButtons(QMessageBox.Ok | QMessageBox.Cancel)
retval = msg.exec_()
if __name__ == '__main__':
window()
Output
When creating a Python GUI, you may want to show the message box QMessageBox at some point. The QMessageBox is a dialog that shows an informational message. It can optionally ask the user to click any of the buttons that show inside it.
Pyqt comes with messagebox support in both PyQt4 and PyQt5. The class to be used is QMessageBox.
In this tutorial you’ll learn how to show a message box on buton click.
Related course: Create PyQt Desktop Appications with Python (GUI)
QMessageBox example
The first thing to do, if you haven’t done so, is to install the PyQt GUI module.
Import QMessageBox from the PyQt5 widgets
from PyQt5.QtWidgets import QMessageBox
A messagebox can easily be added to the window using the code:
QMessageBox.about(self, "Title", "Message")
The code below create a window with a button. If you click on the button it shows a messagebox.
The messagebox is created with QMessageBox.about(self,title,message). This sets the window title and message too.
import sys
from PyQt5 import QtCore, QtWidgets
from PyQt5.QtWidgets import QMainWindow, QLabel, QGridLayout, QWidget
from PyQt5.QtWidgets import QPushButton
from PyQt5.QtWidgets import QMessageBox
from PyQt5.QtCore import QSize

class MainWindow(QMainWindow):
    def __init__(self):
        QMainWindow.__init__(self)

        self.setMinimumSize(QSize(300, 200))
        self.setWindowTitle("PyQt messagebox example - pythonprogramminglanguage.com")

        pybutton = QPushButton('Show messagebox', self)
        pybutton.clicked.connect(self.clickMethod)
        pybutton.resize(200,64)
        pybutton.move(50, 50)

    def clickMethod(self):
        QMessageBox.about(self, "Title", "Message")

if __name__ == "__main__":
    app = QtWidgets.QApplication(sys.argv)
    mainWin = MainWindow()
    mainWin.show()
    sys.exit( app.exec_() )
Related course: Create PyQt Desktop Appications with Python (GUI)
QMessageBox types
There are several types of icons that can be set in PyQt messagebox, they are: information, question, warning and critical.
Depending on the type of message box you want to show, you can change it to the one you need for your application.
msg.setIcon(QMessageBox.Information)
msg.setIcon(QMessageBox.Question)
msg.setIcon(QMessageBox.Warning)
msg.setIcon(QMessageBox.Critical)
QMessageBox buttons
You can set the default buttons shown in a message box. You can do that with the method setStandrdButtons(), then add the buttons you need.
msg.setStandardButtons(QMessageBox.Ok | QMessageBox.Cancel)
It comes with a whole range of buttons:
- QMessageBox.Ok
- QMessageBox.Open
- QMessageBox.Save
- QMessageBox.Cancel
- QMessageBox.Close
- QMessageBox.Yes
- QMessageBox.No
- QMessageBox.Abort
- QMessageBox.Retry
- QMessageBox.Ignore
You can test which button is clicked by capturing its return value:
ret = QMessageBox.question(self, 'MessageBox', "Click a button", QMessageBox.Yes | QMessageBox.No | QMessageBox.Cancel, QMessageBox.Cancel)

if ret == QMessageBox.Yes:
    print('Button QMessageBox.Yes clicked.')
If you are new to Python PyQt, then I highly recommend this book.
Download PyQt Examples
Код файла Python:
# -*- coding: utf-8 -*-


import sys
from PyQt5 import QtWidgets

class MessageBox(QtWidgets.QWidget):# Унаследовано от родительского класса QtWidgets.QWidget
    def __init__(self,parent = None):#parent = None означает, что этот QWidget принадлежит самому верхнему окну, то есть MainWindows.
        QtWidgets.QWidget.__init__(self)# Из-за отношения наследования для инициализации родительского класса
# Инициализировать родительский класс через super, функция __init __ () не имеет self, если это непосредственно QtWidgets.QWidget .__ init __ (self), в скобках указано self
        self.setGeometry(300, 300, 1000,1000)  Метод # setGeometry () выполняет две функции: устанавливает положение окна на экране и устанавливает размер самого окна. Его первые два параметра - это координаты x и y окна на экране. Последние два параметра - это ширина и высота самого окна.
        self.setWindowTitle(u'окно')  # Задайте заголовок формы, эта строка не обязательна.
        self.button = QtWidgets.QPushButton(u'контрольная работа', self)  # Создайте кнопку для отображения слова "тест"
        self.button.move(300,300)
        self.button.clicked.connect(self.show_message)  # Сигнальный слот

    def show_message(self):
        QtWidgets.QMessageBox.critical(self, "ошибка", «Системная ошибка, выключите и перезапустите»)
# Содержание должно быть длинным, слишком короткое приведет к неполному отображению заголовка!
app=QtWidgets.QApplication(sys.argv)
window=MessageBox()
window.show()
sys.exit(app.exec_())
Результаты приведены ниже:

This article covers the PyQt5 widget, QMessageBox.
QMessageBox is a useful PyQt5 widget used to create dialogs. These dialogs can be used for a variety of purposes and customized in many ways to display different messages and buttons.
In this PyQt5 tutorial you’ll also find a complete list of all methods, buttons types and options for the QMessageBox widget.
Creating a QMessageBox
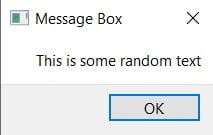
Below we are just going to create a simple QMessageBox widget. It’s going to be a bare-bone messagebox with no added features or customization.
msg = QMessageBox(win)
msg.setWindowTitle("Message Box")
msg.setText("This is some random text")

x = msg.exec_()
And below is the output. If you want to display a simple message on screen, this is the way to do so.
Now compare this simple messagebox to the advanced and feature-rich message-boxes we are going to create below.
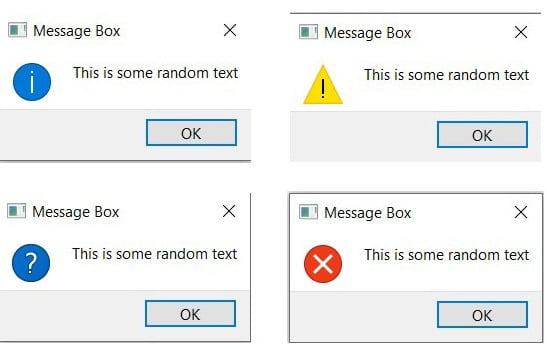
QMessageBox Icons
QMessageBox has 4 different types of icons that can be used by calling the setIcon() function. Decide which one to use depending on type of message you wish to display.
- QMessageBox.Question
- QMessageBox.Information
- QMessageBox.Warning
- QMessageBox.Critical
All you have to do is pass one of the above to the setIcon() function as shown below.
msg.setIcon(QMessageBox.Question)
Below are all four different messages that can be displayed.
QMessageBox Buttons
Uptil now we’ve been using the default “OK” button that QMessageBox offers. However, there are actually over a dozen different buttons that QMessageBox offers for our use. Below is an example of us utilizing some of the buttons.
Using the setStandardButtons() function, we can pass whichever button-type we want. (See the list of complete button types below)
def show_popup():
    msg = QMessageBox(win)
    msg.setWindowTitle("Message Box")
    msg.setText("This is some random text")
    msg.setIcon(QMessageBox.Question)
    msg.setStandardButtons(QMessageBox.Cancel|QMessageBox.Ok
                          |QMessageBox.Retry)
    msg.setInformativeText("This is some extra informative text")
    x = msg.exec_()
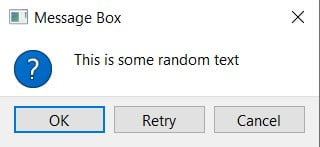
You may have noticed this already, but the order the buttons has no impact on how they appear on the message box.
Default Button
Look at the above image again. You’l have noticed that there is a blue outline around the “OK” button. This is the symbol of the default button.
Using the setDefaultButton() function we can change the default button. Adding the following line to our code will cause the blue highlight to be around the “Cancel” button.
msg.setDefaultButton(QMessageBox.Cancel)
Here’s a complete list of different buttons types you can use with Messages.
- QMessageBox.Ok
- QMessageBox.No
- QMessageBox.Yes
- QMessageBox.Cancel
- QMessageBox.Close
- QMessageBox.Abort
- QMessageBox.open
- QMessageBox.Retry
- QMessageBox.Ignore
- QMessageBox.Save
- QMessageBox.Retry
- QMessageBox.Apply
- QMessageBox.Help
- QMessageBox.Reset
- QMessageBox.SaveAll
- QMessageBox.YesToAll
- QMessageBox.NoToAll
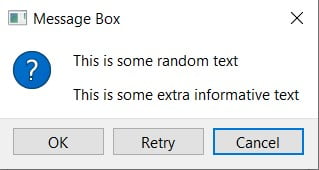
Detailed and Informative Text
By default you only have one area in the QMessageBox where you display Text. However, there are two more additional areas that we can unlock to add more text.
The first is an additional text section on the messagebox window itself. It’s like an additional line of text you can add called informative text. You only need to call the setInformativeText() function to add this new area of text.
The second is displayed on an area that expands from the QMessageBox. This is called “Detailed Text”. Setting up this section will automatically create a button that is used to show this area. You only need the setDetailedText() function to create this area.
def show_popup():
    msg = QMessageBox(win)
    msg.setWindowTitle("Message Box")
    msg.setText("This is some random text")
    msg.setIcon(QMessageBox.Question)

    msg.setStandardButtons(QMessageBox.Cancel|QMessageBox.Ok)
    msg.setDefaultButton(QMessageBox.Ok)

    msg.setDetailedText("Extra details.....")
    msg.setInformativeText("This is some extra informative text")
    x = msg.exec_()

app = QApplication(sys.argv)
win = QMainWindow()
win.setGeometry(400,400,300,300)
win.setWindowTitle("CodersLegacy")

button = QtWidgets.QPushButton(win)
button.setText("A Button")
button.clicked.connect(show_popup)
button.move(100,100)

win.show()
sys.exit(app.exec_())
In case it didn’t make sense before, look the code and compare to how the output below has changed.

Clicking the Hide/Show Details button will hide/show the extra area below the messagebox respectively.
Retrieving QMessageBox Values
We’ve discussed alot of different customizations and features above, but we haven’t actually linked any of these different features and buttons to our code.
For example, if we have 3 different buttons on our messagebox, how will we know which one was pressed? This is what we’ll be exploring in this section. The code for this is shown below. Make sure to read it before moving forward.
from PyQt5 import QtWidgets
from PyQt5.QtWidgets import QApplication, QMainWindow, QMessageBox
import sys

def show_popup():
    msg = QMessageBox()
    msg.setWindowTitle("Message Box")
    msg.setText("This is some random text")

    msg.setIcon(QMessageBox.Question)
    msg.setStandardButtons(QMessageBox.Cancel|QMessageBox.Ok)
    msg.buttonClicked.connect(popup)

    x = msg.exec_()

def popup(i):
    print(i.text())

app = QApplication(sys.argv)
win = QMainWindow()
win.setGeometry(400,400,300,300)
win.setWindowTitle("CodersLegacy")

button = QtWidgets.QPushButton(win)
button.setText("A Button")
button.clicked.connect(show_popup)
button.move(100,100)

win.show()
sys.exit(app.exec_())
Using the buttonClicked.connect() method, we can cause a function to be triggered whenever a button on the message box is clicked. In this case, we’ve linked our messagebox to a function called popup. Notice that popup() takes a parameter i.
When the messagebox button is clicked it automatically passes the button that was clicked to the function declared in buttonClicked.connect(). Calling the text() function on this button will return it’s text value.
Head over to our main PyQt5 section to learn more about the other great widgets!
This marks the end of the PyQt5 QMessageBox article. Any suggestions or contributions for CodersLegacy are more than welcome. Questions regarding the article content can be asked in the comments section below.
5 ответов
Qt включает в себя класс диалога для сообщений об ошибках QErrorMessage который вы должны использовать, чтобы ваш диалог соответствовал системным стандартам. Чтобы показать диалог, просто создайте объект диалога, затем вызовите .showMessage(). Например:
error_dialog = QtWidgets.QErrorMessage()
error_dialog.showMessage('Oh no!')
Вот минимальный рабочий пример скрипта:
import PyQt5
from PyQt5 import QtWidgets

app = QtWidgets.QApplication([])

error_dialog = QtWidgets.QErrorMessage()
error_dialog.showMessage('Oh no!')

app.exec_()
mfitzp
24 окт. 2016, в 19:04
Поделиться
Все вышеперечисленные варианты не работали для меня, используя Komodo Edit 11.0. Просто вернул «1» или, если не был реализован «-1073741819».
Полезным для меня было: решение Ванлока.
def my_exception_hook(exctype, value, traceback):
    # Print the error and traceback
    print(exctype, value, traceback)
    # Call the normal Exception hook after
    sys._excepthook(exctype, value, traceback)
    sys.exit(1)

# Back up the reference to the exceptionhook
sys._excepthook = sys.excepthook

# Set the exception hook to our wrapping function
sys.excepthook = my_exception_hook
ZF007
13 нояб. 2017, в 20:15
Поделиться
Следующее должно работать:
msg = QMessageBox()
msg.setIcon(QMessageBox.Critical)
msg.setText("Error")
msg.setInformativeText(e)
msg.setWindowTitle("Error")
Это не тот же тип сообщения (разные GUI), но довольно близко. e — выражение для ошибки в python3
Надеюсь, что это помогло,
Narusan
24 окт. 2016, в 18:21
Поделиться
Не забудьте вызвать .exec() _ для отображения ошибки:
msg = QMessageBox()
msg.setIcon(QMessageBox.Critical)
msg.setText("Error")
msg.setInformativeText('More information')
msg.setWindowTitle("Error")
msg.exec_()
NShiell
08 янв. 2019, в 12:47
Поделиться
Чтобы показать окно сообщения, вы можете вызвать это определение:
from PyQt5.QtWidgets import QMessageBox

def clickMethod(self):
    QMessageBox.about(self, "Title", "Message")
Karam Qusai
17 апр. 2019, в 10:06
Поделиться
Ещё вопросы
- 1Keras / Tensorflow: комбинированная функция потерь для одного выхода
- 1Не могу установить размер JPanel внутри JDialog
- 1Как я могу обновить свойство скрипта MonoBehaviour?
- 0angular CacheFactory не устанавливает никакого значения
- 0Как показать / скрыть элементы управления при загрузке страницы на основе выбора с универсальным классом?
- 0Безопасно ли вставлять веб-страницы на мою веб-страницу?
- 0Показать только выпадающий список Выбранные строки опций в таблице
- 0результат ввода поля раз 2 появляется в окне не div
- 1Angular 2 — компонент не может правильно отображать теги таблицы
- 0AngularJS в Mongoose params по запросам
- 1Как я могу добиться этого базового макета в Android с надлежащим z-упорядочением представлений
- 0Угловая неосведомленная ошибка провайдера в пользовательском сервисе
- 0Как скрыть класс в условии
- 0Угловая переменная доступа / изменения ng-контроллера?
- 0Как использовать аутентифицированные функции мыла в PHP, приведите любой рабочий пример.
- 0Показывать только подменю после нажатия на родительское меню
- 1индекс в списке панд серии
- 0Как предотвратить $ event for fire дважды
- 0_CRT_SECURE_NO_DEPRECATE глобально?
- 0Подменю Jquery должно иметь выбранный класс при нажатии
- 1Android я могу избежать вызова onCreate ()?
- 1Полностью шкала цветов в обратном направлении
- 0остановить размытие событие от срабатывания в результате нажатия клавиши
- 1использование Sesame для обработки потока SPARQL / XML (вывод из Vitruoso)
- 0Использование нескольких файлов в C ++ для функций и классов
- 1Зашифруйте простой текстовый пароль для связи GAE <> Android
- 0Не удается перенаправить на ту же страницу после использования входа в Google в Joomla
- 0установить фоновое изображение из выпадающего меню — JavaScript
- 1Массив сортировки Javascript по возрастным группам и полу
- 0Доступ к данным массива в объекте
- 0MySQL Проверка, находится ли временной диапазон за пределами заданных временных интервалов для дня
- 0jQuery и PHP получают определенную таблицу из MYSQL для определенного переданного идентификатора через jquery
- 1Как разместить изображение и сообщение на Facebook без использования браузера в Windows Phone7
- 0Проверка формы jQuery: факторизация проверки писем
- 0MySQL вложенный запрос не работает с условием AND
- 1JavaScript-код для отображения предупреждающего сообщения после 15 нажатий клавиш
- 1C # — правильно запустить элемент управления или формы в отдельном потоке
- 0AngularJS — Запуск функции один раз при загрузке
- 1Как решить NoClassDefFoundError в сервлете Java?
- 1FileNotFoundException при попытке прочитать файл, который я написал
- 0VB.Net Удалить выбранную строку в DataGridView MySql
- 0Вставка одной строки MySQL со значениями из нескольких вложенных операторов SELECT
- 1Эффективный SQL-запрос один-ко-многим
- 02 вопроса на Backbone.js MVC
- 0Можно ли ждать ForForMultipleObjects для события и IOCompletionPort с вводом?
- 1Очень простой вопрос меню для Android
- 1Зачем использовать infer_datetime_format при импорте файла CSV?
- 1Как использовать служебное свойство в маршруте?
- 1Значение типа «Стиль» нельзя добавить в коллекцию или словарь типа «UIElementCollection».
- 0Меню jquery имеет белую рамку / фон. Как это покрасить?
Subscribe to Tech With Tim!
This PyQt5 Tutorial will show you how to create message boxes/popup windows using pyqt. We will use the QMessageBox class to accomplish this.
Creating a Basic GUI
I’ve started this tutorial by creating a very minimal GUI that contains one button. This way we can use the button press to trigger a popup/mesagebox.
This is what my GUI looks like:

Importing QMessageBox
To make our lives a little easier we will start by importing the QMessageBox class. This way each time we want to reference it we can use it directly.
from PyQt5.QtWidgets import QMessageBox
Creating a MessageBox
Note: I’m placing the code seen below inside the method that is linked to my button press. This way when the button is clicked a messagebox will appear on the screen.
Everytime we create a new popup window we need to create a new instance of QMessageBox.
Then we can start changing some properties of the messagebox like the title and the text.
msg.setWindowTitle("Tutorial on PyQt5")
msg.setText("This is the main text!")
The method names are pretty intuitive so I’ll pass on explaining them.
We will add some more to our messagebox later but for now lets test it out. To actually see the messagebox when we run the code we need to add one last line to the end of our method:
x = msg.exec_() # this will show our messagebox
And this is what we get when we click the button!

Adding an Icon
A nice feature that our message boxes have it the ability to add an icon!
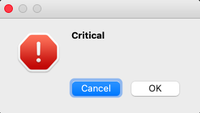
msg.setIcon(QMessageBox.Critical)
List of Icons
— QMessageBox.Critical
— QMessageBox.Warning
— QMessageBox.Information
— QMessageBox.Question
Here’s what our messagebox looks like with the Critical icon.
![]()
Adding/Changing Buttons
Now it’s time to change the buttons that show up in our QMessageBox. To do this we need to first select from a list of buttons that we’d like.
List of Buttons
— QMessageBox.Ok
— QMessageBox.Open
— QMessageBox.Save
— QMessageBox.Cancel
— QMessageBox.Close
— QMessageBox.Yes
— QMessageBox.No
— QMessageBox.Abort
— QMessageBox.Retry
— QMessageBox.Ignore
We can add any combinations of these buttons to our message box by using the following:
msg.setStandardButtons(QMessageBox.Retry | QMessageBox.Ignore | QMessageBox.Cancel) # seperate buttons with "|"
We can also set the button that will be highlighted by default by using:
msg.setDefaultButton(QMessageBox.Ignore) # setting default button to Cancel
Now our messagebox looks like this!

Getting Button Pressed
Now that we’ve learned how to add more than one button is probably important to determine which button the user is clicking.
To do this we need to create a new method/function that takes one argument. This argument will be the button widget that was clicked.
    def popup_clicked(self, i):
        print(i.text())  # will print out the text on the button clicked
No we can link our messagebox to trigger that method when any button is pressed.
msg.buttonClicked.connect(self.popup_clicked)
Now when we click a button on the messagebox it’s text will be printed out to the console.
Other Properties
A few other things we can add are listed below:
Informative Text
This is the text that shows below the main text.
msg.setInformativeText("informative text, ya!")

Detail Text
This will generate a new button that will allow us to expand the message box and view more details.
msg.setDetailedText("details")

Full Code
from PyQt5 import QtCore, QtGui, QtWidgets
from PyQt5.QtWidgets import QMessageBox

class Ui_MainWindow(object):
	...
	def show_popup(self):
		msg = QMessageBox()
		msg.setWindowTitle("Tutorial on PyQt5")
		msg.setText("This is the main text!")
		msg.setIcon(QMessageBox.Question)
		msg.setStandardButtons(QMessageBox.Cancel|QMessageBox.Retry|QMessageBox.Ignore|)
		msg.setDefaultButton(QMessageBox.Retry)
		msg.setInformativeText("informative text, ya!")

		msg.setDetailedText("details")

		msg.buttonClicked.connect(self.popup_button)

	def popup_button(self, i):
		print(i.text())
Dialogs are useful GUI components that allow you to communicate with the user (hence the name dialog). They are commonly used for file Open/Save, settings, preferences, or for functions that do not fit into the main UI of the application. They are small modal (or blocking) windows that sit in front of the main application until they are dismissed. Qt provides a number of ‘special’ built-in dialogs for the most common use-cases, allowing you to provide a platform-native user experience.

Standard GUI features — A search dialog

Standard GUI features — A file Open dialog
In Qt dialog boxes are handled by the QDialog class. To create a new dialog box simply create a new object of QDialog type passing in another widget, e.g. QMainWindow, as its parent.
Let’s create our own QDialog. We’ll start with a simple skeleton app with a button to press hooked up to a slot method.
python
import sys

from PyQt5.QtWidgets import QApplication, QMainWindow, QPushButton


class MainWindow(QMainWindow):
    def __init__(self):
        super().__init__()

        self.setWindowTitle("My App")

        button = QPushButton("Press me for a dialog!")
        button.clicked.connect(self.button_clicked)
        self.setCentralWidget(button)

    def button_clicked(self, s):
        print("click", s)


app = QApplication(sys.argv)

window = MainWindow()
window.show()

app.exec()
In the slot button_clicked (which receives the signal from the button press) we create the dialog instance, passing our QMainWindow instance as a parent. This will make the dialog a modal window of QMainWindow. This means the dialog will completely block interaction with the parent window.
python
import sys

from PyQt5.QtWidgets import QApplication, QDialog, QMainWindow, QPushButton


class MainWindow(QMainWindow):
    def __init__(self):
        super().__init__()

        self.setWindowTitle("My App")

        button = QPushButton("Press me for a dialog!")
        button.clicked.connect(self.button_clicked)
        self.setCentralWidget(button)

    def button_clicked(self, s):
        print("click", s)

        dlg = QDialog(self)
        dlg.setWindowTitle("HELLO!")
        dlg.exec()


app = QApplication(sys.argv)

window = MainWindow()
window.show()

app.exec()
Run it! Click the button and you’ll see an empty dialog appear.
Once we have created the dialog, we start it using .exec() — just like we did for QApplication to create the main event loop of our application. That’s not a coincidence: when you exec the QDialog an entirely new event loop — specific for the dialog — is created.
The QDialog completely blocks your application execution. Don’t start a dialog and expect anything else to happen anywhere else in your app. We’ll see later how you can use threads & processes to get you out of this pickle.

Our empty dialog overlaying the window.
Like our very first window, this isn’t very interesting. Let’s fix that by adding a dialog title and a set of OK and Cancel buttons to allow the user to accept or reject the modal.
To customize the QDialog we can subclass it.
python
class CustomDialog(QDialog):
    def __init__(self):
        super().__init__()

        self.setWindowTitle("HELLO!")

        QBtn = QDialogButtonBox.Ok | QDialogButtonBox.Cancel

        self.buttonBox = QDialogButtonBox(QBtn)
        self.buttonBox.accepted.connect(self.accept)
        self.buttonBox.rejected.connect(self.reject)

        self.layout = QVBoxLayout()
        message = QLabel("Something happened, is that OK?")
        self.layout.addWidget(message)
        self.layout.addWidget(self.buttonBox)
        self.setLayout(self.layout)
In the above code, we first create our subclass of QDialog which we’ve called CustomDialog. As for the QMainWindow we apply our customizations in the class __init__ block so our customizations are applied as the object is created. First we set a title for the QDialog using .setWindowTitle(), exactly the same as we did for our main window.
The next block of code is concerned with creating and displaying the dialog buttons. This is probably a bit more involved than you were expecting. However, this is due to Qt’s flexibility in handling dialog button positioning on different platforms.
You could of course choose to ignore this and use a standard QButton in a layout, but the approach outlined here ensures that your dialog respects the host desktop standards (OK on left vs. right for example). Messing around with these behaviors can be incredibly annoying to your users, so I wouldn’t recommend it.
The first step in creating a dialog button box is to define the buttons want to show, using namespace attributes from QDialogButtonBox. The full list of buttons available is below.
QDialogButtonBox.OkQDialogButtonBox.OpenQDialogButtonBox.SaveQDialogButtonBox.CancelQDialogButtonBox.CloseQDialogButtonBox.DiscardQDialogButtonBox.ApplyQDialogButtonBox.ResetQDialogButtonBox.RestoreDefaultsQDialogButtonBox.HelpQDialogButtonBox.SaveAllQDialogButtonBox.YesQDialogButtonBox.YesToAllQDialogButtonBox.NoQDialogButtonBox.AbortQDialogButtonBox.RetryQDialogButtonBox.IgnoreQDialogButtonBox.NoButton
These should be sufficient to create any dialog box you can think of. You can construct a line of multiple buttons by OR-ing them together using a pipe (|). Qt will handle the order automatically, according to platform standards. For example, to show an OK and a Cancel button we used:
python
buttons = QDialogButtonBox.Ok | QDialogButtonBox.Cancel
The variable buttons now contains an integer value representing those two buttons. Next, we must create the QDialogButtonBox instance to hold the buttons. The flag for the buttons to display is passed in as the first parameter.
To make the buttons have any effect, you must connect the correct QDialogButtonBox signals to the slots on the dialog. In our case we’ve connected the .accepted and .rejected signals from the QDialogButtonBox to the handlers for .accept() and .reject() on our subclass of QDialog.
Lastly, to make the QDialogButtonBox appear in our dialog box we must add it to the dialog layout. So, as for the main window we create a layout, and add our QDialogButtonBox to it (QDialogButtonBox is a widget), and then set that layout on our dialog.
Finally, we launch the CustomDialog in our MainWindow.button_clicked slot.
python
class MainWindow(QMainWindow):

    # ... add the following method after the __init__

    def button_clicked(self, s):
        print("click", s)

        dlg = CustomDialog()
        if dlg.exec():
            print("Success!")
        else:
            print("Cancel!")
Run it! Click to launch the dialog and you will see a dialog box with buttons.

Our dialog with a label and buttons.
When you click the button to launch the dialog, you may notice that it appears away from the parent window — probably in the center of the screen. Normally you want dialogs to appear over their launching window to make them easier for users to find. To do this we need to give Qt a parent for the dialog. If we pass our main window as the parent, Qt will position the new dialog so that the center of the dialog aligns with the center of the window.
We can modify our CustomDialog class to accept a parent parameter.
python
class CustomDialog(QDialog):
    def __init__(self, parent=None):
        super().__init__(parent)

        self.setWindowTitle("HELLO!")

        QBtn = QDialogButtonBox.Ok | QDialogButtonBox.Cancel

        self.buttonBox = QDialogButtonBox(QBtn)
        self.buttonBox.accepted.connect(self.accept)
        self.buttonBox.rejected.connect(self.reject)

        self.layout = QVBoxLayout()
        message = QLabel("Something happened, is that OK?")
        self.layout.addWidget(message)
        self.layout.addWidget(self.buttonBox)
        self.setLayout(self.layout)
We set a default value of parent=None so we can omit the parent if we wish.
Then, when we create our instance of CustomDialog we can pass the main window in as a parameter. In our button_clicked method, self is our main window object.
python
    def button_clicked(self, s):
        print("click", s)

        dlg = CustomDialog(self)
        if dlg.exec():
            print("Success!")
        else:
            print("Cancel!")
Run it! Click to launch the dialog and you should see the dialog pop up right in the middle of the parent window.

Our dialog, centered over the parent window.
Congratulations! You’ve created your first dialog box. Of course, you can continue to add any other content to the dialog box that you like. Simply insert it into the layout as normal.
Simple message dialogs with QMessageBox
There are many dialogs which follow the simple pattern we just saw — a message with buttons with which you can accept or cancel the dialog. While you can construct these dialogs yourself, Qt also provides a built-in message dialog class called QMessageBox. This can be used to create information, warning, about or question dialogs.
The example below creates a simple QMessageBox and shows it.
python
import sys

from PyQt5.QtWidgets import QApplication, QDialog, QMainWindow, QMessageBox, QPushButton


class MainWindow(QMainWindow):
    def __init__(self):
        super().__init__()

        self.setWindowTitle("My App")

        button = QPushButton("Press me for a dialog!")
        button.clicked.connect(self.button_clicked)
        self.setCentralWidget(button)

    def button_clicked(self, s):
        dlg = QMessageBox(self)
        dlg.setWindowTitle("I have a question!")
        dlg.setText("This is a simple dialog")
        button = dlg.exec()

        if button == QMessageBox.Ok:
            print("OK!")

app = QApplication(sys.argv)

window = MainWindow()
window.show()

app.exec()
Run it! You’ll see a simple dialog with an OK button.

A QMessageBox dialog.
As with the dialog button box we looked at already, the buttons shown on a QMessageBox are also configured with the same set of constants which can be combined with | (the binary OR operator) to show multiple buttons. The full list of available button types is shown below.
QMessageBox.OkQMessageBox.OpenQMessageBox.SaveQMessageBox.CancelQMessageBox.CloseQMessageBox.DiscardQMessageBox.ApplyQMessageBox.ResetQMessageBox.RestoreDefaultsQMessageBox.HelpQMessageBox.SaveAllQMessageBox.YesQMessageBox.YesToAllQMessageBox.NoQMessageBox.NoToAllQMessageBox.AbortQMessageBox.RetryQMessageBox.IgnoreQMessageBox.NoButton
You can also tweak the icon shown on the dialog by setting the icon with one of the following.
| Icon state | Description |
|---|---|
QMessageBox.NoIcon |
The message box does not have an icon. |
QMessageBox.Question |
The message is asking a question. |
QMessageBox.Information |
The message is informational only. |
QMessageBox.Warning |
The message is warning. |
QMessageBox.Critical |
The message indicates a critical problem. |
For example, the following creates a question dialog with Yes and No buttons.
python
    def button_clicked(self, s):
        dlg = QMessageBox(self)
        dlg.setWindowTitle("I have a question!")
        dlg.setText("This is a question dialog")
        dlg.setStandardButtons(QMessageBox.Yes | QMessageBox.No)
        dlg.setIcon(QMessageBox.Question)
        button = dlg.exec()

        if button == QMessageBox.Yes:
            print("Yes!")
        else:
            print("No!")
Run it! You’ll see a question dialog with Yes and No buttons.

Question dialog created using QMessageBox.
Over 10,000 developers have bought Create GUI Applications with Python & Qt!
[[ discount.discount_pc ]]% OFF for
the next [[ discount.duration ]]
[[discount.description ]]
with the code [[ discount.coupon_code ]]
Purchasing Power Parity
Developers in [[ country ]] get [[ discount.discount_pc ]]% OFF on all books & courses
with code [[ discount.coupon_code ]]
Built in QMessageBox dialogs
To make things even simpler the QMessageBox has a number of methods which can be used to construct these types of message dialog. These methods are shown below —
python
QMessageBox.about(parent, title, message)
QMessageBox.critical(parent, title, message)
QMessageBox.information(parent, title, message)
QMessageBox.question(parent, title, message)
QMessageBox.warning(parent, title, message)
The parent parameter is the window which the dialog will be a child of. If you’re launching your dialog from your main window, you can just pass in self.
The following example creates a question dialog, as before, with Yes and No buttons.
python
    def button_clicked(self, s):

        button = QMessageBox.question(self, "Question dialog", "The longer message")

        if button == QMessageBox.Yes:
            print("Yes!")
        else:
            print("No!")
Run it! You’ll see the same result, this time using the built in .question() method.

The built-in question dialog.
Notice that rather than call exec() we now simply call the dialog method and the dialog is created. The return value of each of the methods is the button which was pressed. We can detect what has been pressed by comparing the return value to the button constants.
The four information, question, warning and critical methods also accept optional buttons and defaultButton arguments which can be used to tweak the buttons shown on the dialog and select one by default. Generally though you don’t want to change this from the default.
python
    def button_clicked(self, s):

        button = QMessageBox.critical(
            self,
            "Oh dear!",
            "Something went very wrong.",
            buttons=QMessageBox.Discard | QMessageBox.NoToAll | QMessageBox.Ignore,
            defaultButton=QMessageBox.Discard,
        )

        if button == QMessageBox.Discard:
            print("Discard!")
        elif button == QMessageBox.NoToAll:
            print("No to all!")
        else:
            print("Ignore!")
Run it! You’ll see a critical dialog with customized buttons.

Critical error! This is a terrible dialog.
For most situations these simple dialogs are all you need.
5 ответов
Qt включает в себя класс диалога для сообщений об ошибках QErrorMessage который вы должны использовать, чтобы ваш диалог соответствовал системным стандартам. Чтобы показать диалог, просто создайте объект диалога, затем вызовите .showMessage(). Например:
error_dialog = QtWidgets.QErrorMessage()
error_dialog.showMessage('Oh no!')
Вот минимальный рабочий пример скрипта:
import PyQt5
from PyQt5 import QtWidgets

app = QtWidgets.QApplication([])

error_dialog = QtWidgets.QErrorMessage()
error_dialog.showMessage('Oh no!')

app.exec_()
mfitzp
24 окт. 2016, в 19:04
Поделиться
Все вышеперечисленные варианты не работали для меня, используя Komodo Edit 11.0. Просто вернул «1» или, если не был реализован «-1073741819».
Полезным для меня было: решение Ванлока.
def my_exception_hook(exctype, value, traceback):
    # Print the error and traceback
    print(exctype, value, traceback)
    # Call the normal Exception hook after
    sys._excepthook(exctype, value, traceback)
    sys.exit(1)

# Back up the reference to the exceptionhook
sys._excepthook = sys.excepthook

# Set the exception hook to our wrapping function
sys.excepthook = my_exception_hook
ZF007
13 нояб. 2017, в 20:15
Поделиться
Следующее должно работать:
msg = QMessageBox()
msg.setIcon(QMessageBox.Critical)
msg.setText("Error")
msg.setInformativeText(e)
msg.setWindowTitle("Error")
Это не тот же тип сообщения (разные GUI), но довольно близко. e — выражение для ошибки в python3
Надеюсь, что это помогло,
Narusan
24 окт. 2016, в 18:21
Поделиться
Не забудьте вызвать .exec() _ для отображения ошибки:
msg = QMessageBox()
msg.setIcon(QMessageBox.Critical)
msg.setText("Error")
msg.setInformativeText('More information')
msg.setWindowTitle("Error")
msg.exec_()
NShiell
08 янв. 2019, в 12:47
Поделиться
Чтобы показать окно сообщения, вы можете вызвать это определение:
from PyQt5.QtWidgets import QMessageBox

def clickMethod(self):
    QMessageBox.about(self, "Title", "Message")
Karam Qusai
17 апр. 2019, в 10:06
Поделиться
Ещё вопросы
- 1Смущен, почему этот код ничего не печатает
- 0Изменение размера изображения внутри тега заголовка
- 0Передача массива из PHP в JavaScript с использованием JSON
- 1TypeError при отображении столбцов DataFrame с использованием Python dict
- 0Как можно перевести умлауты с jquery.i18n-свойствами?
- 1java.lang.NoClassDefFoundError: Неудачное разрешение параметров: Lio / socket / client / IO $
- 0Включение базовых адресов памяти в C ++
- 1__new__ не вызывается при создании объекта
- 0Переадресация домена в качестве параметра маскированному новому домену
- 0Как добавить действительный класс в зависимый элемент в случае успеха зависимого в плагине jQuery Validate?
- 1Получение строки из ввода в Java
- 1Возврат массива с каждым другим числом
- 1DataBindingUtil.setContentView (this, resource) возвращает значение null
- 0Соединение трех таблиц, чтобы получить список тегов
- 0ngResource get () не появляется для получения каких-либо данных
- 1int binarySearch arrayList
- 1Как широко использовать слова в заданном диапазоне в Python?
- 1Javascript не работает в React-Native WebView для Android (установлено значение javaScriptEnabled = true)
- 1Синтаксическая ошибка в операторе SQL с ключевым словом WITH
- 1Изображение, снятое с камеры, отображается в ImageView всегда горизонтально Android
- 0Сортировка (числового) массива на основе (числовых) значений другого (не тривиального способа)?
- 0Сценарий перенаправления файлов cookie
- 1processMessage запускается дважды
- 0Запросить выбранные столбцы из двух таблиц с условием условия
- 0Основное использование устаревших классов
- 0Каков стандартный способ сортировки std :: vector типа <std :: pair <int, std :: pair <int, int >>> на основе «первого» первой пары
- 1Могу ли я перекомпилировать JAR, созданный с помощью JDK 7, используя JDK 6?
- 0Установка данных $ _POST перед вызовом метода PHP
- 0мой нижний колонтитул не будет сидеть прямо на мобильных телефонах и планшетах
- 1Как смоделировать конкретные методы и направить остальные методы в конкретную реализацию интерфейса?
- 1Как получить всю строку в позиции каретки в RichTextBox?
- 0Пометить работу как нестабильную
- 0Как определить, есть ли у элемента управления валидатор обязательного поля с использованием JQuery
- 1Класс закрытых символов (регулярное выражение)
- 1Затмение дает мне нежелательный XML в консоли вместо запуска программы
- 0PHP для JS — передача значения зацикленного элемента в JS
- 1Возврат объекта EDM без ссылок
- 0инициализация unique_ptr во время выполнения
- 0Установка одинакового фонового изображения для дочерних страниц
- 1подключение базы данных к другой базе данных в Spring
- 1Панорамирование относительно текущего вида с фиксированным FlyToSpeed с GoogleEarth
- 0Многократный условный оператор в запросе MySQL
- 0Кто пользователь в MySQL?
- 1Пружинная электропроводка не работает с lazy-init
- 0Хэш, чтобы скрыть div — прямой доступ к URL страницы
- 1Ошибка алгоритма Javascript 3
- 0Два поля ввода в одной строке, выровняйте одно слева, а другое справа
- 0Как сделать модели динамическими в моем шаблоне angularjs
- 1Плагин Java не появляется в Firefox после установки Java 8
- 1Преобразовать адрес в широту и долготу в Java для предложения на основе расстояния
Код файла Python:
# -*- coding: utf-8 -*-


import sys
from PyQt5 import QtWidgets

class MessageBox(QtWidgets.QWidget):# Унаследовано от родительского класса QtWidgets.QWidget
    def __init__(self,parent = None):#parent = None означает, что этот QWidget принадлежит самому верхнему окну, то есть MainWindows.
        QtWidgets.QWidget.__init__(self)# Из-за отношения наследования для инициализации родительского класса
# Инициализировать родительский класс через super, функция __init __ () не имеет self, если это непосредственно QtWidgets.QWidget .__ init __ (self), в скобках указано self
        self.setGeometry(300, 300, 1000,1000)  Метод # setGeometry () выполняет две функции: устанавливает положение окна на экране и устанавливает размер самого окна. Его первые два параметра - это координаты x и y окна на экране. Последние два параметра - это ширина и высота самого окна.
        self.setWindowTitle(u'окно')  # Задайте заголовок формы, эта строка не обязательна.
        self.button = QtWidgets.QPushButton(u'контрольная работа', self)  # Создайте кнопку для отображения слова "тест"
        self.button.move(300,300)
        self.button.clicked.connect(self.show_message)  # Сигнальный слот

    def show_message(self):
        QtWidgets.QMessageBox.critical(self, "ошибка", «Системная ошибка, выключите и перезапустите»)
# Содержание должно быть длинным, слишком короткое приведет к неполному отображению заголовка!
app=QtWidgets.QApplication(sys.argv)
window=MessageBox()
window.show()
sys.exit(app.exec_())
Результаты приведены ниже:
5 ответов
Qt включает в себя класс диалога для сообщений об ошибках QErrorMessage который вы должны использовать, чтобы ваш диалог соответствовал системным стандартам. Чтобы показать диалог, просто создайте объект диалога, затем вызовите .showMessage(). Например:
error_dialog = QtWidgets.QErrorMessage()
error_dialog.showMessage('Oh no!')
Вот минимальный рабочий пример скрипта:
import PyQt5
from PyQt5 import QtWidgets

app = QtWidgets.QApplication([])

error_dialog = QtWidgets.QErrorMessage()
error_dialog.showMessage('Oh no!')

app.exec_()
mfitzp
Поделиться
Все вышеперечисленные варианты не работали для меня, используя Komodo Edit 11.0. Просто вернул «1» или, если не был реализован «-1073741819».
Полезным для меня было: решение Ванлока.
def my_exception_hook(exctype, value, traceback):
    # Print the error and traceback
    print(exctype, value, traceback)
    # Call the normal Exception hook after
    sys._excepthook(exctype, value, traceback)
    sys.exit(1)

# Back up the reference to the exceptionhook
sys._excepthook = sys.excepthook

# Set the exception hook to our wrapping function
sys.excepthook = my_exception_hook
ZF007
Поделиться
Следующее должно работать:
msg = QMessageBox()
msg.setIcon(QMessageBox.Critical)
msg.setText("Error")
msg.setInformativeText(e)
msg.setWindowTitle("Error")
Это не тот же тип сообщения (разные GUI), но довольно близко. e — выражение для ошибки в python3
Надеюсь, что это помогло,
Narusan
Поделиться
Не забудьте вызвать .exec() _ для отображения ошибки:
msg = QMessageBox()
msg.setIcon(QMessageBox.Critical)
msg.setText("Error")
msg.setInformativeText('More information')
msg.setWindowTitle("Error")
msg.exec_()
NShiell
Поделиться
Чтобы показать окно сообщения, вы можете вызвать это определение:
from PyQt5.QtWidgets import QMessageBox

def clickMethod(self):
    QMessageBox.about(self, "Title", "Message")
Karam Qusai
Поделиться
Ещё вопросы
- 1Что означает судебный процесс Oracle против Google для разработчиков Android?
- 0возвращается значение null при использовании $ location.search
- 1Создание класса Python с обязательными и необязательными атрибутами?
- 1Linq Возвращение случайных объектов после объединения
- 1Регулярное выражение JavaScript игнорирует исключение регистра (недопустимая группа)
- 1Как рассчитать среднее количество в час?
- 0несколько условий внутри функции щелчка не работает
- 0Проблема межсайтового скриптинга
- 0Концепция полиморфизма C ++
- 1Как преобразовать дату, которую пользователь выбирает в формате MM-дд-гггг, в формат гггг-мм-дд в Java
- 0MySQL не использовал индекс в SUM с запросом GROUP BY
- 1Почему TextView не может отображать форматированный текст, ссылающийся на ресурсы Android?
- 0Получение данных из Википедии
- 1Используя Foreach в iQueryable List, найдите значение, если во втором списке
- 1Почему класс YUIJsCompressorProcessor не включен ни в ядро, ни в расширения jar для wro4j?
- 0Получить предыдущий отображаемый вывод из окна cmd
- 0Граница не адаптируется к стилю списка: нет;
- 1Лучше ли стилизовать элемент на основе его состояния с помощью атрибута данных или класса?
- 0Подменю CSS под его родителем
- 1Преобразование имен столбцов в числа?
- 0GLUT взаимодействие с мышью
- 0Пароль проверять всегда возвращая истину
- 1Конвертировать SQL в Entity Framework
- 0SHOW CREATE PROCEDURE имя_процесса не отображает содержание процедуры
- 1Хеширование в Java отрицательных чисел
- 1Как передать параметр в JavaScript найти функцию?
- 1Локализация MVC4 с DisplayName в базе данных
- 1Вызов Python из VBA — возврат значения функции Python
- 0Запустите удаленную команду Mysql с помощью сценария оболочки
- 1Visjs динамически обновляет элемент временной шкалы
- 0Как отобразить поле в корзине с информацией о сумке, в которую был брошен товар, с помощью jquery
- 1Найти объект через окно поиска с помощью Cesium Js
- 1Обновление объекта, сохраненного в одном действии, из другого действия
- 0SQL: Найти всех пользователей, которые имеют свойства в данном списке брендов.
- 0я использую ng-grid, который загружает данные из файла json, я хочу сделать кнопки редактирования и удаления, чтобы редактировать и удалять мои данные, используя угловой js?
- 1Обновление пользовательского интерфейса странного поведения из делегата задачи / действия
- 1Метод, который принимает строго типизированное имя свойства в качестве параметра
- 1Обновление определенных маркеров на картах Google с помощью Firebase
- 0уникальный указатель в связанном стеке
- 1Сортировка вставок со строками
- 1Можно ли передать HTML в таблицу прокрутки в Gojs?
- 1Twitter Bot — node.js — неожиданная ошибка токена
- 0Android Room — Обработка списка объектов в объекте и запрос результатов
- 0как заменить конкретный символ из строки в JQuery
- 1Сохранить порядок значений в двоичной матрице в Python
- 1Пропуск рабочего до готового?
- 1загрузить больше данных на страницу прокрутки
- 0Jquery не воспроизводит последовательность видео
- 1Добавить DataFrame внутри функции
- 0Php preg_replace () используя
Assuming you are in a QWidget from which you want to display an error message, you can simply use QMessageBox.critical(self, "Title", "Message"), replace self by another (main widget for example) if you are not is a QWidget class.
Edit: even if you are not in a QWidget (or don’t want to inherit from it), you can just use None as parent with for instance QMessageBox.critical(None, "Title", "Message").
Edit, here is an example of how to use it:
# -*-coding:utf-8 -*

from PyQt5.QtWidgets import QApplication, QMessageBox
import sys

# In this example, success is False by default, and
#  - If you press Cancel, it will ends with False,
#  - If you press Retry until i = 3, it will end with True


expectedVal = 3


def MyFunction(val: int) -> bool:
    return val == expectedVal


app = QApplication(sys.argv)
i = 1
success = MyFunction(i)
while not success:
    # Popup with several buttons, manage below depending on choice
    choice = QMessageBox.critical(None,
                                  "Error",
                                  "i ({}) is not expected val ({})".format(i, expectedVal),
                                  QMessageBox.Retry | QMessageBox.Cancel)
    if choice == QMessageBox.Retry:
        i += 1
        print("Retry with i = {}".format(i))
        success = MyFunction(i)
    else:
        print("Cancel")
        break

if success:
    # Standard popup with only OK button
    QMessageBox.information(None, "Result", "Success is {}".format(success))
else:
    # Standard popup with only OK button
    QMessageBox.critical(None, "Result", "Success is {}".format(success))
Dialogs are useful GUI components that allow you to communicate with the user (hence the name dialog). They are commonly used for file Open/Save, settings, preferences, or for functions that do not fit into the main UI of the application. They are small modal (or blocking) windows that sit in front of the main application until they are dismissed. Qt provides a number of ‘special’ built-in dialogs for the most common use-cases, allowing you to provide a platform-native user experience.
Standard GUI features — A search dialog
Standard GUI features — A file Open dialog
In Qt dialog boxes are handled by the QDialog class. To create a new dialog box simply create a new object of QDialog type passing in another widget, e.g. QMainWindow, as its parent.
Let’s create our own QDialog. We’ll start with a simple skeleton app with a button to press hooked up to a slot method.
python
import sys

from PyQt5.QtWidgets import QApplication, QMainWindow, QPushButton


class MainWindow(QMainWindow):
    def __init__(self):
        super().__init__()

        self.setWindowTitle("My App")

        button = QPushButton("Press me for a dialog!")
        button.clicked.connect(self.button_clicked)
        self.setCentralWidget(button)

    def button_clicked(self, s):
        print("click", s)


app = QApplication(sys.argv)

window = MainWindow()
window.show()

app.exec()
In the slot button_clicked (which receives the signal from the button press) we create the dialog instance, passing our QMainWindow instance as a parent. This will make the dialog a modal window of QMainWindow. This means the dialog will completely block interaction with the parent window.
python
import sys

from PyQt5.QtWidgets import QApplication, QDialog, QMainWindow, QPushButton


class MainWindow(QMainWindow):
    def __init__(self):
        super().__init__()

        self.setWindowTitle("My App")

        button = QPushButton("Press me for a dialog!")
        button.clicked.connect(self.button_clicked)
        self.setCentralWidget(button)

    def button_clicked(self, s):
        print("click", s)

        dlg = QDialog(self)
        dlg.setWindowTitle("HELLO!")
        dlg.exec()


app = QApplication(sys.argv)

window = MainWindow()
window.show()

app.exec()
Run it! Click the button and you’ll see an empty dialog appear.
Once we have created the dialog, we start it using .exec() — just like we did for QApplication to create the main event loop of our application. That’s not a coincidence: when you exec the QDialog an entirely new event loop — specific for the dialog — is created.
The QDialog completely blocks your application execution. Don’t start a dialog and expect anything else to happen anywhere else in your app. We’ll see later how you can use threads & processes to get you out of this pickle.
Our empty dialog overlaying the window.
Like our very first window, this isn’t very interesting. Let’s fix that by adding a dialog title and a set of OK and Cancel buttons to allow the user to accept or reject the modal.
To customize the QDialog we can subclass it.
python
class CustomDialog(QDialog):
    def __init__(self):
        super().__init__()

        self.setWindowTitle("HELLO!")

        QBtn = QDialogButtonBox.Ok | QDialogButtonBox.Cancel

        self.buttonBox = QDialogButtonBox(QBtn)
        self.buttonBox.accepted.connect(self.accept)
        self.buttonBox.rejected.connect(self.reject)

        self.layout = QVBoxLayout()
        message = QLabel("Something happened, is that OK?")
        self.layout.addWidget(message)
        self.layout.addWidget(self.buttonBox)
        self.setLayout(self.layout)
In the above code, we first create our subclass of QDialog which we’ve called CustomDialog. As for the QMainWindow we apply our customizations in the class __init__ block so our customizations are applied as the object is created. First we set a title for the QDialog using .setWindowTitle(), exactly the same as we did for our main window.
The next block of code is concerned with creating and displaying the dialog buttons. This is probably a bit more involved than you were expecting. However, this is due to Qt’s flexibility in handling dialog button positioning on different platforms.
You could of course choose to ignore this and use a standard QButton in a layout, but the approach outlined here ensures that your dialog respects the host desktop standards (OK on left vs. right for example). Messing around with these behaviors can be incredibly annoying to your users, so I wouldn’t recommend it.
The first step in creating a dialog button box is to define the buttons want to show, using namespace attributes from QDialogButtonBox. The full list of buttons available is below.
QDialogButtonBox.OkQDialogButtonBox.OpenQDialogButtonBox.SaveQDialogButtonBox.CancelQDialogButtonBox.CloseQDialogButtonBox.DiscardQDialogButtonBox.ApplyQDialogButtonBox.ResetQDialogButtonBox.RestoreDefaultsQDialogButtonBox.HelpQDialogButtonBox.SaveAllQDialogButtonBox.YesQDialogButtonBox.YesToAllQDialogButtonBox.NoQDialogButtonBox.AbortQDialogButtonBox.RetryQDialogButtonBox.IgnoreQDialogButtonBox.NoButton
These should be sufficient to create any dialog box you can think of. You can construct a line of multiple buttons by OR-ing them together using a pipe (|). Qt will handle the order automatically, according to platform standards. For example, to show an OK and a Cancel button we used:
python
buttons = QDialogButtonBox.Ok | QDialogButtonBox.Cancel
The variable buttons now contains an integer value representing those two buttons. Next, we must create the QDialogButtonBox instance to hold the buttons. The flag for the buttons to display is passed in as the first parameter.
To make the buttons have any effect, you must connect the correct QDialogButtonBox signals to the slots on the dialog. In our case we’ve connected the .accepted and .rejected signals from the QDialogButtonBox to the handlers for .accept() and .reject() on our subclass of QDialog.
Lastly, to make the QDialogButtonBox appear in our dialog box we must add it to the dialog layout. So, as for the main window we create a layout, and add our QDialogButtonBox to it (QDialogButtonBox is a widget), and then set that layout on our dialog.
Finally, we launch the CustomDialog in our MainWindow.button_clicked slot.
python
class MainWindow(QMainWindow):

    # ... add the following method after the __init__

    def button_clicked(self, s):
        print("click", s)

        dlg = CustomDialog()
        if dlg.exec():
            print("Success!")
        else:
            print("Cancel!")
Run it! Click to launch the dialog and you will see a dialog box with buttons.
Our dialog with a label and buttons.
When you click the button to launch the dialog, you may notice that it appears away from the parent window — probably in the center of the screen. Normally you want dialogs to appear over their launching window to make them easier for users to find. To do this we need to give Qt a parent for the dialog. If we pass our main window as the parent, Qt will position the new dialog so that the center of the dialog aligns with the center of the window.
We can modify our CustomDialog class to accept a parent parameter.
python
class CustomDialog(QDialog):
    def __init__(self, parent=None):
        super().__init__(parent)

        self.setWindowTitle("HELLO!")

        QBtn = QDialogButtonBox.Ok | QDialogButtonBox.Cancel

        self.buttonBox = QDialogButtonBox(QBtn)
        self.buttonBox.accepted.connect(self.accept)
        self.buttonBox.rejected.connect(self.reject)

        self.layout = QVBoxLayout()
        message = QLabel("Something happened, is that OK?")
        self.layout.addWidget(message)
        self.layout.addWidget(self.buttonBox)
        self.setLayout(self.layout)
We set a default value of parent=None so we can omit the parent if we wish.
Then, when we create our instance of CustomDialog we can pass the main window in as a parameter. In our button_clicked method, self is our main window object.
python
    def button_clicked(self, s):
        print("click", s)

        dlg = CustomDialog(self)
        if dlg.exec():
            print("Success!")
        else:
            print("Cancel!")
Run it! Click to launch the dialog and you should see the dialog pop up right in the middle of the parent window.
Our dialog, centered over the parent window.
Congratulations! You’ve created your first dialog box. Of course, you can continue to add any other content to the dialog box that you like. Simply insert it into the layout as normal.
Simple message dialogs with QMessageBox
There are many dialogs which follow the simple pattern we just saw — a message with buttons with which you can accept or cancel the dialog. While you can construct these dialogs yourself, Qt also provides a built-in message dialog class called QMessageBox. This can be used to create information, warning, about or question dialogs.
The example below creates a simple QMessageBox and shows it.
python
import sys

from PyQt5.QtWidgets import QApplication, QDialog, QMainWindow, QMessageBox, QPushButton


class MainWindow(QMainWindow):
    def __init__(self):
        super().__init__()

        self.setWindowTitle("My App")

        button = QPushButton("Press me for a dialog!")
        button.clicked.connect(self.button_clicked)
        self.setCentralWidget(button)

    def button_clicked(self, s):
        dlg = QMessageBox(self)
        dlg.setWindowTitle("I have a question!")
        dlg.setText("This is a simple dialog")
        button = dlg.exec()

        if button == QMessageBox.Ok:
            print("OK!")

app = QApplication(sys.argv)

window = MainWindow()
window.show()

app.exec()
Run it! You’ll see a simple dialog with an OK button.
A QMessageBox dialog.
As with the dialog button box we looked at already, the buttons shown on a QMessageBox are also configured with the same set of constants which can be combined with | (the binary OR operator) to show multiple buttons. The full list of available button types is shown below.
QMessageBox.OkQMessageBox.OpenQMessageBox.SaveQMessageBox.CancelQMessageBox.CloseQMessageBox.DiscardQMessageBox.ApplyQMessageBox.ResetQMessageBox.RestoreDefaultsQMessageBox.HelpQMessageBox.SaveAllQMessageBox.YesQMessageBox.YesToAllQMessageBox.NoQMessageBox.NoToAllQMessageBox.AbortQMessageBox.RetryQMessageBox.IgnoreQMessageBox.NoButton
You can also tweak the icon shown on the dialog by setting the icon with one of the following.
| Icon state | Description |
|---|---|
QMessageBox.NoIcon |
The message box does not have an icon. |
QMessageBox.Question |
The message is asking a question. |
QMessageBox.Information |
The message is informational only. |
QMessageBox.Warning |
The message is warning. |
QMessageBox.Critical |
The message indicates a critical problem. |
For example, the following creates a question dialog with Yes and No buttons.
python
    def button_clicked(self, s):
        dlg = QMessageBox(self)
        dlg.setWindowTitle("I have a question!")
        dlg.setText("This is a question dialog")
        dlg.setStandardButtons(QMessageBox.Yes | QMessageBox.No)
        dlg.setIcon(QMessageBox.Question)
        button = dlg.exec()

        if button == QMessageBox.Yes:
            print("Yes!")
        else:
            print("No!")
Run it! You’ll see a question dialog with Yes and No buttons.
Question dialog created using QMessageBox.
Over 10,000 developers have bought Create GUI Applications with Python & Qt!
[[ discount.discount_pc ]]% OFF for
the next [[ discount.duration ]]
[[discount.description ]]
with the code [[ discount.coupon_code ]]
Purchasing Power Parity
Developers in [[ country ]] get [[ discount.discount_pc ]]% OFF on all books & courses
with code [[ discount.coupon_code ]]
Built in QMessageBox dialogs
To make things even simpler the QMessageBox has a number of methods which can be used to construct these types of message dialog. These methods are shown below —
python
QMessageBox.about(parent, title, message)
QMessageBox.critical(parent, title, message)
QMessageBox.information(parent, title, message)
QMessageBox.question(parent, title, message)
QMessageBox.warning(parent, title, message)
The parent parameter is the window which the dialog will be a child of. If you’re launching your dialog from your main window, you can just pass in self.
The following example creates a question dialog, as before, with Yes and No buttons.
python
    def button_clicked(self, s):

        button = QMessageBox.question(self, "Question dialog", "The longer message")

        if button == QMessageBox.Yes:
            print("Yes!")
        else:
            print("No!")
Run it! You’ll see the same result, this time using the built in .question() method.
The built-in question dialog.
Notice that rather than call exec() we now simply call the dialog method and the dialog is created. The return value of each of the methods is the button which was pressed. We can detect what has been pressed by comparing the return value to the button constants.
The four information, question, warning and critical methods also accept optional buttons and defaultButton arguments which can be used to tweak the buttons shown on the dialog and select one by default. Generally though you don’t want to change this from the default.
python
    def button_clicked(self, s):

        button = QMessageBox.critical(
            self,
            "Oh dear!",
            "Something went very wrong.",
            buttons=QMessageBox.Discard | QMessageBox.NoToAll | QMessageBox.Ignore,
            defaultButton=QMessageBox.Discard,
        )

        if button == QMessageBox.Discard:
            print("Discard!")
        elif button == QMessageBox.NoToAll:
            print("No to all!")
        else:
            print("Ignore!")
Run it! You’ll see a critical dialog with customized buttons.
Critical error! This is a terrible dialog.
For most situations these simple dialogs are all you need.