-
Page 1
647732 US (31/10/2019) MT 625 H 75K ST5 S1 MT 625 H 75K COMFORT ST5 S1 OPERATOR’S MANUAL (ORIGINAL INSTRUCTIONS) -
Page 2
— Descriptions and figures are non binding. — MANITOU reserves the right to change its models and their equipment without being required to update this manual. — The MANITOU network, consisting exclusively of qualified professionals, is at your disposal to answer all your questions. -
Page 3
MANITOU BF. Any violation of the aforementioned may lead to civil and criminal prosecution. The logos as well as the visual identity of the company are the property of MANITOU BF and may not be… -
Page 4
1 — OPERATING AND SAFETY INSTRUCTIONS 2 — DESCRIPTION 3 — MAINTENANCE 4 — OPTIONAL ADAPTABLE ATTACHMENTS FOR THE RANGE… -
Page 5
1 — OPERATING AND SAFETY INSTRUCTIONS 1 — 1… -
Page 6
1 — 2… -
Page 7
1 — 3… -
Page 8: Table Of Contents
1 — OPERATING AND SAFETY INSTRUCTIONS INSTRUCTIONS TO THE COMPANY MANAGER THE SITE THE OPERATOR THE LIFT TRUCK A — SUITABILITY OF THE LIFT TRUCK FOR THE JOB ……….. . . 1-6 B — ADAPTATION OF THE LIFT TRUCK TO STANDARD ENVIRONMENTAL CONDITIONS .
-
Page 9
LIFT TRUCK MAINTENANCE INSTRUCTIONS 1-30 GENERAL INSTRUCTIONS 1-30 PLACING THE BOOM SAFETY WEDGE 1-30 FITTING THE WEDGE …………..1-30 REMOVING THE WEDGE . -
Page 10: Instructions To The Company Manager
A — SUITABILITY OF THE LIFT TRUCK FOR THE JOB — MANITOU has ensured that this lift truck is suitable for use under the standard operating conditions defined in this operator’s manual, with a STATIC TEST COEFFICIENT 1.25 and a DYNAMIC TEST COEFFICIENT OF 1, as specified in harmonised standard EN 1459 for mast trucks.
-
Page 11: C — Modification Of The Lift Truck
Inflate the tyres in accordance with recommendations. • The seat is an essential way of reducing the vibrations transmitted to the operator. In the event of seat replacement, please contact MANITOU. • Ensure that the operators adapt their operating speed to suit the conditions on site.
-
Page 12: Instructions
INSTRUCTIONS — The operator’s manual must always be in good condition and kept in the place provided on the lift truck and in the language used by the operator. — The operator’s manual and any plates or stickers which are no longer legible or are damaged, must be replaced immediately. MAINTENANCE — Maintenance or repairs other than those detailed in Part: 3 — MAINTENANCE must be carried out by qualified personnel (consult your dealer) and in the necessary safety conditions to preserve the health of the operator and any third party.
-
Page 13
1 — 9… -
Page 14: Instructions For The Operator
— At any time, as an operator, you must envisage, within reason, the possible risk to yourself, to others or to the lift truck itself when you use it. IMPORTANT In order to reduce or prevent any danger with a MANITOU-approved attachment, follow the instructions in Paragraph: 4 — ADAPTABLE ATTACHMENTS AS OPTIONS ON THE RANGE: INTRODUCTION. GENERAL INSTRUCTIONS A — OPERATOR’S MANUAL…
-
Page 15: E — Modification Of The Lift Truck
Right-hand column • With a PLATFORM-fitted lift truck, people can only be lifted using platforms designed by MANITOU for the purpose. — MANITOU sells equipment specifically designed for lifting people (OPTION PLATFORM lift truck, contact your dealer). 1 — 11…
-
Page 16: Operating Instructions Unladen And Laden
OPERATING INSTRUCTIONS UNLADEN AND LADEN A — BEFORE STARTING THE LIFT TRUCK — Perform the daily maintenance operations ( 3 — MAINTENANCE). — Make sure that the driver’s cab is clean, particularly the floor and floor mat. Check that no movable object may hinder the operation of the lift truck.
-
Page 17: D — Visibility
— Take into account the lift truck’s dimensions and its load before trying to negotiate a narrow or low passageway. — Never move onto a loading platform without having first checked: • That it is suitably positioned and made fast. •…
-
Page 18: E — Starting The Lift Truck
E — STARTING THE LIFT TRUCK SAFETY INSTRUCTIONS IMPORTANT The lift truck must only be started up or manoeuvred when the operator is sitting in the driver’s cab, with his seat belt adjusted and fastened. — Never try to start the lift truck by pushing or hauling it. Such an operation may cause severe damage to the transmission. If necessary, towing requires the transmission to be put in neutral ( 3 — MAINTENANCE).
-
Page 19: G — Stopping The Lift Truck
— Never drive on the edge of a ditch or steep slope. — It is dangerous to use two lift trucks simultaneously to handle heavy or bulky loads, since this operation requires particular precautions to be taken. It must only be used exceptionally and after risk analysis. — The ignition switch has an emergency stop mechanism in case of an operating anomaly occurring in the case of lift trucks not fitted with a punch-operated cut-out.
-
Page 20: H — Driving The Lift Truck On The Public Highway
H — DRIVING THE LIFT TRUCK ON THE PUBLIC HIGHWAY (or see current legislation in other countries) FRENCH ROAD TRAFFIC RULES — The driving of non EC type-approved tractors on the public highway is subject to the provisions of the highway code relating to special machines, defined in article R311-1 of the highway code, in category B of the Equipment Order of 20 November 1969 that determines the procedures applicable to special machines.
-
Page 21
1 — 17… -
Page 22: Instructions For Handling A Load
INSTRUCTIONS FOR HANDLING A LOAD A — CHOICE OF ATTACHMENTS — Only attachments approved by MANITOU can be used on its lift trucks. — Make sure the attachment is suitable for the work to be done ( 4 — ADAPTABLE ATTACHMENTS AS OPTIONS ON THE RANGE).
-
Page 23: D — Transverse Attitude Of The Lift Truck
D — TRANSVERSE ATTITUDE OF THE LIFT TRUCK Depending on the model of lift truck The transverse attitude is the transverse slope of the chassis with respect to the horizontal. Raising the boom reduces the lift truck’s lateral stability. The transverse attitude must be set with the boom in down position as follows: 1 — …
-
Page 24: F — Picking Up And Putting Down A High Load On Tyres
F — PICKING UP AND PUTTING DOWN A HIGH LOAD ON TYRES IMPORTANT In no circumstances should you raise the boom if you have not checked the transverse attitude of the lift truck INSTRUCTIONS FOR HANDLING A LOAD: D — TRANSVERSE ATTITUDE OF THE LIFT TRUCK). REMINDER: Make sure that the following operations can be performed with good visibility ( OPERATING INSTRUCTIONS UNLADEN AND LADEN:…
-
Page 25
PUTTING DOWN A HIGH LOAD ON TYRES — Approach the load in the transport position in front of the stack (fig. F6). — Apply the parking brake and place the forward/reverse selector in neutral. — Raise and extend the boom (1) (2) until the load is above the stack, while monitoring the longitudinal stability indicator ( INSTRUCTIONS FOR HANDLING A LOAD: C — LONGITUDINAL STABILITY INDICATOR). -
Page 26: G — Picking Up And Putting Down A High Load On Stabilisers
G — PICKING UP AND PUTTING DOWN A HIGH LOAD ON STABILISERS Depending on the model of lift truck IMPORTANT In no circumstances should you raise the boom if you have not checked the transverse attitude of the lift truck INSTRUCTIONS FOR HANDLING A LOAD: D — TRANSVERSE ATTITUDE OF THE LIFT TRUCK). REMINDER: Make sure that the following operations can be performed with good visibility ( OPERATING INSTRUCTIONS UNLADEN AND LADEN:…
-
Page 27
TAKING UP A HIGH LOAD ON STABILISERS — Ensure that the forks will easily pass under the load. — Check the position of the lift truck with respect to the load and make a test run, if necessary, without taking the load. — Raise and extend the boom (1) (2) until the forks are at the level of the load (fig. G5). -
Page 28: H — Picking Up And Putting Down A Suspended Load
H — PICKING UP AND PUTTING DOWN A SUSPENDED LOAD IMPORTANT Failure to follow the above instructions may lead the lift truck to loose stability and overturn. MUST be used with a lift truck equipped with an operational hydraulic movement cut-out device. CONDITIONS OF USE — The length of the sling or the chain shall be as short as possible to limit swinging of the load.
-
Page 29: Instructions For Use As A Loader
INSTRUCTIONS FOR USE AS A LOADER For agricultural-type lift trucks (MLT range) A — LOADING IMPORTANT In no circumstances should you raise the boom if you have not checked the transverse attitude of the lift truck INSTRUCTIONS FOR HANDLING A LOAD: D — TRANSVERSE ATTITUDE OF THE LIFT TRUCK). REMINDER: Make sure that the following operations can be performed with good visibility ( OPERATING INSTRUCTIONS UNLADEN AND LADEN:…
-
Page 30: Platform Operating Instructions
— MANITOU has ensured that this platform is suitable for use under the normal operating conditions provided in this operator’s manual, with a STATIC test coefficient of 1.25 and a DYNAMIC test coefficient of 1.1 as specified in harmonised European standard EN 280:2013+A1 for «mobile elevating work platforms».
-
Page 31: E — Environment
E — ENVIRONMENT IMPORTANT It is forbidden to use the platform close to electricity cables. Maintain the specified safe distances. RATED VOLTAGE SAFETY DISTANCE (METRES) 50 < U < 1,000 2,30 M 1,000 < U < 30,000 2,50 M 30000 < U < 45000 2,60 M 45000 <…
-
Page 32: Instructions For Using The Radio-Control
INSTRUCTIONS FOR USING THE RADIO-CONTROL For lift trucks with RC radio control HOW TO USE THE RADIO-CONTROL SAFETY INSTRUCTIONS — This radio-control consists of electronic and mechanical safety elements. It cannot receive commands from another transmitter because the internal encoding is unique to each radio-control. IMPORTANT If it is used improperly or incorrectly, there is a risk of danger to: — The physical and mental health of the user or others.
-
Page 33
1 — 29… -
Page 34
LIFT TRUCK MAINTENANCE INSTRUCTIONS GENERAL INSTRUCTIONS — Ensure the area is sufficiently ventilated before starting the lift truck. — Wear clothes suitable for the maintenance of the lift truck, avoid wearing jewellery and loose clothes. Tie back and protect your hair, if necessary. — Stop the engine and remove the ignition key, when an intervention is necessary. -
Page 35
LUBRICANT AND FUEL LEVELS — Use the recommended lubricants (never use contaminated lubricants). — Do not fill the fuel tank when the engine is running. — Only fill up the fuel tank in areas specified for this purpose. — Do not fill the fuel tank to the maximum level. — Do not smoke or approach the lift truck with a flame, when the fuel tank is open or is being filled. -
Page 36
IF THE LIFT TRUCK IS NOT TO BE USED FOR A LONG TIME INTRODUCTION The following recommendations are intended to prevent the lift truck from being damaged when it is withdrawn from service for an extended period. IMPORTANT Procedures to follow if the lift truck is not to be used for a long time and for starting it up again afterwards must be performed by your dealership. This period of long-term stoppage must not exceed 12 months. -
Page 37
BRINGING THE LIFT TRUCK BACK INTO SERVICE — Remove the waterproof adhesive tape from all the holes. — Refit and reconnect the battery. — Remove the protection from the cylinder rods. — Perform the daily maintenance operations ( 3 — MAINTENANCE). — Put the handbrake on and remove the axle stands. — Drain and clean the fuel tank ( 3 — MAINTENANCE). -
Page 38
• Glass items can be removed and collected for processing by glaziers. ENVIRONMENTAL PROTECTION By entrusting the maintenance of your lift truck to the MANITOU network, the risk of pollution is limited and the contribution to environmental protection contribution is made. -
Page 39
2 — DESCRIPTION 2 — 1… -
Page 40
2 — 2… -
Page 41
2 — DESCRIPTION SAFETY PLATES AND STICKERS IDENTIFICATION OF THE LIFT TRUCK CHARACTERISTICS 2-10 TYRES 2-12 DIMENSIONS AND LOAD CHARTS 2-14 VISIBILITY 2-16 INSTRUMENTS AND CONTROLS 2-18 TOWING DEVICE 2-40 DESCRIPTION AND USE OF THE OPTIONS 2-42 2 — 3… -
Page 42
SAFETY PLATES AND STICKERS IMPORTANT Clean all stickers and safety plates so that they are legible. Any safety plates and stickers which are illegible or damaged must be replaced. Check that stickers and safety plates are present after replacing any spare parts. EXTERNAL PLATES AND STICKERS REF. -
Page 43
STICKERS AND PLATES UNDER THE ENGINE HOOD REF. PART NO. DESCRIPTION 244130 — Preheat rod (OPTION) 52506370 — Fuses 259398 — Water/diesel separator 52515083 — Anti-freeze 234797 MT 625 H COMFORT 75K ST5 — Air conditioning (OPTION) 52589959 — Rotating fan safety 110 -120 V ;… -
Page 44
PLATES AND STICKERS IN THE CAB REF. PART NO. DESCRIPTION 52611811 — Lubrication sheet 52509004 — Manipulator function sheet 241621 — Safety instruction sheet 52504055 MT 625 H COMFORT 75K ST5 — Fuse sheet 52515060 MT 625 H — Fuse sheet 75K S 52533603 MT 625 H COMFORT 75K ST5 — Relay sheet… -
Page 45
75% handling cycle Maxi Kg CO2/hour 1,00m Maxi 3m Mini Tests carried out by Manitou following the EP-695 internal procedure as approved by DANGER Keep machine at least 25 feet from overhead power lines. Failure to comply may result… -
Page 46
IDENTIFICATION OF THE LIFT TRUCK As our policy is to promote a constant improvement in our products, our range of lift trucks may undergo certain modifications, without any obligation for us to advise our customers. When you order parts, or when you require any technical information, always specify: NOTE: For the owner’s convenience, it is recommended that a note of these numbers is made in the spaces provided, at the time of the delivery of the lift truck. -
Page 47
FRONT AXLE Type Serial number MANITOU part No. REAR AXLE Type Serial number MANITOU part No. «Constructeur» Manufacturer «Type Cabine» Cabin type «Numéro de série» Serial number BOOM MANITOU Part No. Date of manufacture and manufacturer FRAME Serial number/Product identification number ATTACHMENT MANUFACTURER’S PLATE «MODELE»… -
Page 48
CHARACTERISTICS ENGINE Type KUBOTA V3307 Fuel Diesel 4 in line Number of cylinders Supercharged Suction Injection system Direct Ignition sequence 1.3.4.2 Capacity cu.in (cm3) 203.27 (3331) 3.7 x 4.72 (94 x 120) Bore and stroke in (mm) 17,5 Compression ratio Nominal speed laden 2600 Min. -
Page 49
BRAKE SYSTEM Service brake Non-servo hydraulic brake — Type of brake Oil-immersed multi-disc brake — Type of control By foot on front axle Parking brake Low pressure hydraulic brake — Type of brake Oil-immersed multi-disc brake — Type of control Switch-operated electro-hydraulic HYDRAULIC CIRCUIT Hydraulic pump… -
Page 50
TYRES LOAD PER TYRE FRONT UNLADEN FRONT LADEN REAR UNLADEN REAR LADEN PRESSURE 12-16,5 12PR 81,2 SKS 532 ALLIANCE 12-16,5 12PR 1100 2425 3250 7165 1250 2756 81,2 HAULER SKS 305/70 R16,5 MICHELIN 69,6 137A8 BIBSTEEL ALL TERRAIN GROUND CONTACT PRESSURE GROUND CONTACT AREA PRESSURE LOAD HARD GROUND… -
Page 51
2 — 13… -
Page 52
DIMENSIONS AND LOAD CHARTS ft-in (mm) 3-11,2 (1200) ft-in (mm) 7-6,6 (2300) ft-in (mm) (991) ft-in (mm) 3-0,5 (928) ft-in (mm) 12-9,3 (3894) ft-in (mm) 12-6,8 (3831) ft-in (mm) 10-8,9 (3275) ft-in (mm) 16-8,6 (5094) ft-in (mm) 4-10,7 (1492) ft-in (mm) 4-10,7 (1492) (mm) 9,45… -
Page 53
MT625 68° 19ft1in 60° 50° 40° 30° 20° 10° 0° -2° 24in 0 Feet 11ft0in 8ft4in 5ft3in 3ft7in 9ft4in 6ft11in 4ft3in 0 Meters According norme ANSI/ITSDF B56-6-2011 2 — 15… -
Page 54
VISIBILITY We use European standard EN15830 relating to operator visibility. — Adhere to the instructions for optimising operator visibility in the immediate vicinity ( 1 — OPERATING AND SAFETY INSTRUCTIONS: INSTRUCTIONS TO THE OPERATOR: DRIVING INSTRUCTIONS UNLADEN AND LADEN: D — VISIBILITY). DESCRIPTION AND ADJUSTMENT OF REAR-VIEW MIRRORS 1 — LEFT REAR-VIEW MIRROR 2 — MAIN RIGHT REAR-VIEW MIRROR 3 — CENTRAL RIGHT REAR-VIEW MIRROR… -
Page 55
2 — 17… -
Page 56
INSTRUMENTS AND CONTROLS DESCRIPTION NOTE: All the terms such as: RIGHT, LEFT, FRONT, REAR are as seen by an observer occupying the driver’s seat and looking straight ahead. 1 — DRIVER’S CAB ACCESS ………………… . . 2-20 2 — SEAT BELT . -
Page 57
MT 625 H COMFORT 75K ST5 MT 625 H 75K ST5 2 — 19… -
Page 58: Driver’s Cab Access
1 — DRIVER’S CAB ACCESS Use the contact points 1 to get into or out of the driver’s cab. • Mounting at the front. • Descending at the rear. 2 — SEAT BELT IMPORTANT Under no circumstances must the lift truck be used if the seat belt is defective (fixing, locking, cuts, tears, etc.). Immediately repair or replace the safety belt.
-
Page 59: Driver’s Seat
3 — DRIVER’S SEAT DESIGNED FOR MAXIMUM COMFORT, THIS SEAT CAN BE ADJUSTED AS FOLLOWS. WEIGHT ADJUSTMENT Adjust the weight when the driver is sitting on the seat. — Pull the weight adjustment lever 1 fully out. — Move the weight adjustment lever 1 upwards to increase the weight or downwards to reduce it.
-
Page 60: Ignition Switch
4 — IGNITION SWITCH This switch has 5 positions: • P — Not used. • O — Ignition cut-off and engine stopped. • I — Ignition + preheat. • II — Not used. • III — Starting and return to position I as soon as the key is released. 5 — EMERGENCY STOP In the event of danger, it enables the engine to be shut down, thereby cutting-off all hydraulic movements.
-
Page 61: Man-Machine Interface (Mmi)
8 — MAN-MACHINE INTERFACE (MMI) • A — INSTRUMENT CONTROL PANEL • B — SCREEN DISPLAYS A — INSTRUMENT CONTROL PANEL IMPORTANT A permanently lit or flashing warning lamp, with the engine running, is the sign of an operating fault. The lighting of some lamps may be accompanied by an audible signal. Do not ignore this warning, consult your dealer without delay.
-
Page 62: Switches
TRANSMISSION OIL TEMPERATURE WARNING INDICATOR LAMP The lamp and the buzzer come on when the transmission oil temperature is abnormally high. Stop the lift truck and seek the cause of this overheating. ENGINE FAULT INDICATOR LAMP If the indicator lamp comes on or flashes while the lift truck is in operation, a diagnostic fault has been detected. The lift truck will operate in reduced mode.
-
Page 63
PARKING BRAKE FAULT INDICATOR LAMP The indicator lamp comes on when the parking brake is applied ( SWITCHES). BRAKING OIL LEVEL WARNING INDICATOR LAMP If the lamp comes on when the lift truck is running, stop the engine immediately and check the brake fluid level. In the event of an abnormal drop in the level, consult your dealer. -
Page 64
Rev counter Partial hour meter SETTING THE TIME — Display clock screen. — Press the button for 2 seconds, choose the «24 hour» or «12 hour am/pm» clock with the button and confirm — Set the hours with the button and confirm — Set the minutes with the button and confirm RESETTING THE PARTIAL HOUR METER… -
Page 65
9 — SWITCHES NOTE: The location of the switches may vary depending on the options. HAZARD WARNING LIGHTS REAR FOG LIGHT (OPTION) ROTATING BEACON LIGHT FRONT AND REAR WORKING LIGHTS (OPTION) REAR WINDOW DEFROSTER (OPTION) MT 625 H COMFORT 75K ST5 HYDRAULIC MOVEMENT NEUTRALISATION When driving on the road, it is highly recommended (mandatory in Germany) that you cut-off all the hydraulic movements. The indicator lamp shows when it is in use. -
Page 66: Armrest And Storage
PARKING BRAKE To connect the parking brake, press the bottom of the switch. The indicator lamp indicates when it is in use. To disconnect the parking brake, press the top of the switch. ATTACHMENT HYDRAULIC LOCKING (OPTION) BOOM HEAD ELECTROVALVE (OPTION) MT 625 H COMFORT 75K ST5 BOOOM HEAD ELECTROVALVE + ATTACHMENT HYDRAULIC LOCKING (OPTION)
-
Page 67: Fuses And Relays
12 — FUSES AND RELAYS A sticker on the inside of the access panel provides a quick indication of the use of the fuse plate’s components described below. — Remove the access panel 1 to access the fuses and relays. Replace a used fuse with a new fuse of the same quality and capacity.
-
Page 68
2A Control instrument module power supply. * * MT 625 H 75K ST5 Not used. ** 2A Battery power supply (+). * Not used. ** Free. * Not used. ** Free. * Not used. ** 2A Control instrument module power supply. ** 2A Battery power supply (+). -
Page 69: Cigarette Lighter
13 — CIGARETTE LIGHTER For 12 V appliance and max. amperage 15A. 14 — LIGHTING, HORN AND INDICATOR SWITCH The switch controls the visual and sound alarms. • A — All lights are off, the indicator lights do not flash. • B — The right hand indicator lights flash. •…
-
Page 70: Hydraulic Controls
17 — HYDRAULIC CONTROLS IMPORTANT Do not attempt to alter the hydraulic system pressure by interfering with the pressure regulating valve. In the event of suspected malfunction, contact your dealer. ANY ALTERATION MAY RENDER THE WARRANTY NULL AND VOID. Use the hydraulic controls gently without jerking, to avoid incidents caused by shaking the lift truck. NOTE: When driving on the road, it is highly recommended (mandatory in Germany) that all the hydraulic movements are cut off ( SWITCHES).
-
Page 71
ADJUSTMENT OF ATTACHMENT HYDRAULIC FLOW RATE — Switch on lift truck ignition. — Select the attachment circuit hydraulic flow screen with the scroll button . In turn the screen displays the hydraulic flow stored in the memory of circuit B (without «-» sign) and of circuit A (with «-» sign). — Press the button for two seconds, the screen will appear on the… -
Page 72: Accelerator Pedal
18 — ACCELERATOR PEDAL 19 — SERVICE BRAKE PEDAL AND TRANSMISSION CUT-OFF The pedal acts on the front wheels by means of a hydraulic brake system to slow down and stop the lift truck. During free travel it enables the transmission to be cut off progressively thus allowing a gradual approach (delicate handling) with all the engine power.
-
Page 73: Steering Selection
21 — STEERING SELECTION A — GREEN WHEEL ALIGNMENT INDICATOR LAMPS IMPORTANT Before selecting one of the three steering possibilities, align the 4 wheels in relation to the lift truck axis. Never change the steering mode whilst driving. These green indicator lamps come on to indicate the alignment of the wheels in relation to the lift truck.
-
Page 74: Heater Control
22 — HEATER CONTROL A — FAN CONTROL This 3-speed control allows the air to be ventilated through the air vents. B — TEMPERATURE CONTROL Adjusts the temperature inside the cab. • B1 — The fan pumps in the air at ambient temperature. • B2 — The fan pumps in warm air. The intermediate positions allow the temperature to be adjusted.
-
Page 75: Heating Vents
24 — HEATING VENTS These swivelling heating vents, which can be shut off, allow you to direct and adjust the flow inside the cab. 25 — DEMIST VENTS These vents allow the windscreen and side windows to be demisted. For optimum efficiency, close the heating vents. 26 — LEVEL INDICATOR Enables the operator to check that the lift truck is in the horizontal position.
-
Page 76: Front Headlights
34 — FRONT HEADLIGHTS • A — Left front indicator light. • B — Left front dipped beam headlight. • C — Left front main beam. • D — Left front side light. • E — Right front indicator light. • F — Right front dipped beam headlight. • G — Right front main beam headlight. •…
-
Page 77: Boom Safety Wedge
40 — BOOM SAFETY WEDGE IMPORTANT Only use the wedge supplied with the lift truck. The lift truck is equipped with a boom safety wedge which must be installed on the rod of the lifting cylinder when working beneath the boom ( 1 — OPERATING AND SAFETY INSTRUCTIONS).
-
Page 78
TOWING DEVICE 1 — TOWING PIN ………………….. . 2-41 2 — REAR ELECTRIC SOCKET (DEPENDING ON ASSEMBLY) . -
Page 79
1 — TOWING PIN IMPORTANT Be careful not to get your fingers caught or crushed during this operation. Do not forget to put the cotter pin back in place. When uncoupling, make sure that the trailer is supported independently. COUPLING AND UNCOUPLING THE TRAILER — To couple the trailer, position the lift truck as close as possible to the trailer ring. -
Page 80
DESCRIPTION AND USE OF THE OPTIONS 1 — PREHEAT ROD………………….. 2-42 2 — MODCOD ANTI-THEFT SYSTEM . -
Page 81: Modcle Anti-Start System
3 — MODCLE ANTI-START SYSTEM OPERATION — Switch on lift truck ignition, red LED 1 will flash. — Apply key 2 to its base 3, and withdraw it as soon as the system emits a continuous sound signal, and LED 1 turns green. — Start the lift truck within the next 20 seconds; otherwise the anti-theft system will be reactivated and red LED 1 will flash.
-
Page 82: Waterproof Document Holder
7 — WATERPROOF DOCUMENT HOLDER 8 — WINDSCREEN GRILL DESCRIPTION The windscreen grill provides additional protection for the operator from any external elements spattered on the windscreen. This grill must be removable from inside the cab to enable an emergency exit. EMERGENCY EXIT — After breaking the windscreen with the emergency hammer, push (with force) on the windscreen grill at A to remove it.
-
Page 83: Boom Head Electrovalve
10 — BOOM HEAD ELECTROVALVE MT 625 H COMFORT 75K ST5 Enables use of two hydraulic functions on the attachment circuit. IMPORTANT To facilitate connection of the quick couplers, decompress the hydraulic circuit by pressing button 1 on the electrovalve. ATTACHMENT LINE A1/B1 CONTROL — Put switch 1 to position A (indicator lamp off ).
-
Page 84: Attachment Hydraulic Control Forced Operation
12 — ATTACHMENT HYDRAULIC CONTROL FORCED OPERATION MT 625 H COMFORT 75K ST5 IMPORTANT This OPTION must only be used with an attachment requiring continuous hydraulic movement, such as a brush, feeder bucket, mixer, spray etc. It is strictly forbidden for use in handling operations and all other applications (winch, crane jib, crane jib with winch, hook, etc.).
-
Page 85: Lifting Ring On Single Carriage
15 — LIFTING RING ON SINGLE CARRIAGE CONDITIONS OF USE IMPORTANT Follow the instructions given in your lift truck’s instruction manual ( 1 — OPERATING AND SAFETY INSTRUCTIONS FOR HANDLING LOADS), and in addition those given below. — The lifting ring must be used WITHOUT FORKS AND ATTACHMENTS, but the angle of inclination of the carriage must be same as when the forks are used in the horizontal position.
-
Page 86
2 — 48… -
Page 87
3 — MAINTENANCE 3 — 1… -
Page 88
3 — MAINTENANCE ORIGINAL MANITOU SPARE PARTS AND EQUIPMENT FORKLIFT TRUCK MAINTENANCE DAILY AND WEEKLY MAINTENANCE MANDATORY FIRST 500 HOURS OR 6 MONTHS SERVICE PERIODIC SERVICE OCCASIONAL MAINTENANCE AND OPERATION FILTER ELEMENTS AND BELTS LUBRICANTS AND FUEL 3-10 Ü 10H — DAILY SERVICE OR EVERY 10 HOURS OF SERVICE 3-12 Ü… -
Page 89
• Efficient help with diagnosis. • Improvements due to experience feedback. • Operator training. • Only the MANITOU network has detailed knowledge of the design of the lift truck and therefore the best technical ability to provide maintenance. IMPORTANT ORIGINAL REPLACEMENT PARTS ARE DISTRIBUTED EXCLUSIVELY BY MANITOU AND ITS DEALER NETWORK. -
Page 90
This schedule enables the operator to keep up with the periodic service of the lift truck by notifying the total number of hours of operation and the date of the service performed by the professional approved by the MANITOU network. -
Page 91
MANDATORY FIRST 500 HOURS OR 6 MONTHS SERVICE FIRST 500 HOURS BEFORE THE FIRST 6 MONTHS — If the lift truck has reached the first 500 hours of service before the first 6 months have expired, perform both the mandatory ÜŒ service and periodic 500 H service ( … -
Page 92
PERIODIC SERVICE MAINTENANCE SCHEDULE Þ Þ 500 H 1000 H 1500 H 2000 H Ü WHEN DUE FIRST 6 MONTHS FIRST 500 HOURS or 1 YEAR or 2 YEARS or 3 YEARS or 4 YEARS MANDATORY SERVICE Ü Œ Œ Œ Œ Ž PERIODIC SERVICE MANDATORY SERVICE Œ… -
Page 93
Ü 1000H — PERIODIC SERVICE — EVERY 1000 HOURS OF SERVICE OR 2 YEARS ALSO PERFORM THE 500 HOUR PERIODIC MAINTENANCE OPERATIONS. — CHECK Safety belt ………………3-24 — CLEAN Fuel tank . -
Page 94
Ü 3000H — PERIODIC SERVICE — EVERY 3000 HOURS OF SERVICE OR 6 YEARS ALSO PERFORM THE 500 HOUR AND 1000 HOUR PERIODIC MAINTENANCE OPERATIONS. — CHECK Turbocharger **………………3-33 — CHECK Exhaust gas recirculation system «EGR»… -
Page 95
FILTER ELEMENTS AND BELTS ÜŒ 500H — PERIODIC SERVICE — EVERY 500 HOURS OF SERVICE OR 1 YEAR ENGINE OIL FILTER HYDRAULIC RETURN OIL FILTER CARTRIDGE Part number: 279809 Part number: 750098 FUEL PRE-FILTER INTERIOR CAB VENTILATION FILTER Part number: 940729 Part number: 750306 FUEL FILTER HYDRAULIC FLUID TANK FILTER CAP Part number: 52630568 Part number: 794879 Ü… -
Page 96
USE THE RECOMMENDED LUBRICANTS AND FUEL: — For topping up, oils may not be miscible. — For oil changes, MANITOU oils are perfectly appropriate. DIAGNOSTIC ANALYSIS OF OILS If a service or maintenance contract has been set up with the dealer, a diagnostic analysis of engine, transmission and axle oils may be requested depending on the rate of use. -
Page 97
PRODUCT 1.06 US qt 2.11 US qt 5.28 US qt 5.28 US gal 14.53 US gal 55.21 US gal 1 ℓ 2 ℓ 5 ℓ 20 ℓ 55 ℓ 209 ℓ — MANITOU EVOLOGY OIL 10W40 API CJ4 895837 895838 895839 895840 — MANITOU ISO VG 46 HYDRAULIC OIL 545500 582297 546108… -
Page 98: Daily Service Or Every 10 Hours Of Service
Ü 10H — DAILY SERVICE OR EVERY 10 HOURS OF SERVICE CHECK Lift truck environment Carry out a general inspection around the lift truck: — Fluid leaks or stains on the ground. — Additional objects on the lift truck and in the cabin. — Mounting and locking of the attachment.
-
Page 99: Clean
CLEAN Cyclonic pre-filter (option) The cleaning interval is given as a guide, however the pre-filter must be emptied and cleaned as soon as impurities reach the MAX level on the tank. IMPORTANT When cleaning, take care not to let impurities into the dry air filter. — Loosen nut 1 remove cover 2 and empty the tank.
-
Page 100: Weekly Service Or Every 50 Hours Of Service
Ü 50H — WEEKLY SERVICE OR EVERY 50 HOURS OF SERVICE CHECK Alternator/crankshaft belt tension IMPORTANT If the belt is changed, check the tension again after the first 20 hours of service. — Open the engine cover. — Check the belt for signs of wear and cracks, and change if necessary ( FILTER ELEMENTS AND BELTS).
-
Page 101: Check Front Axle Differential Seal
— Telescope the boom several times in order to spread the lubricant evenly. — Remove the surplus lubricant. IMPORTANT If the lift truck is used in an abrasive environment (dust, sand, coal.) use lubricating varnish (MANITOU reference: 483536). Please consult your dealer. 3 — 15…
-
Page 102: Check Hydraulic Oil Level
CHECK Hydraulic oil level Place the lift truck on level ground with the engine stopped, and the boom retracted and lowered as far as possible. IMPORTANT Use a clean funnel and clean the underside of the oil drum before filling. — Check dipstick 1, the correct level must be at the level of the red dot.
-
Page 103: Clean
— Cleaning is completed when there is no more dust on the cartridge. — Clean the cartridge seal surface with a damp, clean lint-free cloth and grease with a silicone lubricant (MANITOU part No.: 479292).
-
Page 104: Lubricate General Lubrication
LUBRICATE General lubrication To be carried out weekly, if the lift truck has been operated for less than 50 hours during the week. IMPORTANT In the event of prolonged use in an extremely dusty or oxidising atmosphere, reduce this interval to 10 hours of service or every day. Clean, then lubricate the following points with grease ( LUBRICANTS AND FUEL) and remove the surplus.
-
Page 105: Replace Engine Oil
REPLACE Engine oil * REPLACE Engine oil filter * Place the lift truck on level ground, let the engine run at idling speed for a few minutes, then stop the engine. IMPORTANT Dispose of the drain oil in an ecological manner. Tighten the oil filter by hand pressure only and lock the filter in place by a quarter turn.
-
Page 106
CHECK Hydraulic oil MANITOU offers a hydraulic oil analysis kit which might make it possible to delay the recommended deadline in the periodic maintenance schedule (2000 hours). In this case we recommend an analysis of the hydraulic oil every 500 hours or 1 year of service. -
Page 107
REPLACE Fuel filter IMPORTANT Carefully clean the outside of the filter and around it, to prevent dust from getting into the system. Tighten the filter by hand only and lock it by a quarter turn. — Switch off the lift truck’s ignition with the ignition key. — Unscrew the filter 1. -
Page 108
REPLACE Front axle differential oil Place the lift truck on level ground with the engine stopped and the still warm differential oil. IMPORTANT Dispose of the drain oil in an ecological manner. — Place a container under drain plug 1 and unscrew the plug. — Remove level and filling plug 2 to ensure correct drainage. -
Page 109
REPLACE Hydraulic fluid tank filter cap Place the lift truck on level ground with the engine stopped. — Unscrew plug 1, remove and replace the filter 2 with a new one ( FILTER ELEMENTS AND BELTS). — Refit and tighten the filter 2 (tightening torque 2,21 ±0,37 ft-lbs 3 ±0,5 N.m). — Refit the filler plug 1. -
Page 110
Ü 1000H — PERIODIC SERVICE — EVERY 1000 HOURS OF SERVICE OR 2 YEARS ALSO PERFORM THE 500 HOUR PERIODIC MAINTENANCE OPERATIONS. CHECK Safety belt IMPORTANT Under no circumstances must the lift truck be used if the seat belt is defective (fixing, locking, cuts, tears, etc.). Immediately repair or replace the safety belt. SEAT BELT WITH TWO ANCHORING POINTS — Check the following points: •… -
Page 111
REPLACE Alternator belt IMPORTANT Check the belt tension again after the first 20 hours of service. REMOVING THE BELT — Undo screws 1 and remove radiator protection grill 2. — Loosen screws 3 by two to three thread turns. — Swivel the alternator assembly so as to free belt 4. — Pass belt 4 behind radiator propeller 5 to remove it and replace with a new one FILTER ELEMENTS AND BELTS). -
Page 112
REPLACE Dry air filter cartridge In case of use in a heavily dust laden atmosphere, there are pre-filtration cartridges, FILTER ELEMENTS AND BELTS). Also, the checking and cleaning periodicity of the cartridge must be reduced (up to 250 hours in a very dusty atmosphere and with pre-filtration). -
Page 113
REPLACE Rear axle differential oil Place the lift truck on level ground with the engine stopped and the still warm differential oil. IMPORTANT Dispose of the drain oil in an ecological manner. — Place a container under drain plug 1 and unscrew the plug. — Remove level and filling plug 2 to ensure correct drainage. -
Page 114
CHECK Silentblocks ** CHECK Valve lash ** CHECK Injectors ** CHECK Exhaust gas recirculation cooler «EGR» ** CHECK Casing gas recycling valve ** CHECK Brake system pressure * CHECK Boom pad wear * CHECK Condition of wiring harnesses and cables * CHECK Lights and signals * CHECK… -
Page 115
REPLACE Oil separator rubber hoses ** REPLACE Exhaust particle filter pressure sensor rubber hoses «DPF» ** REPLACE Intake hose ** REPLACE Pressure detection hoses for the oversupply sensor ** REPLACE Exhaust gas recirculation cooler hoses «EGR» ** REPLACE Water hose ** REPLACE Lubrication hose ** REPLACE… -
Page 116
ÜŽ 2000H — PERIODIC SERVICE — EVERY 2000 HOURS OF SERVICE OR 4 YEARS ALSO PERFORM THE 500 HOUR AND 1000 HOUR PERIODIC MAINTENANCE OPERATIONS. CHECK Wheel nut tightening torques — Check the condition of the tyres, to detect cuts, blisters, wear, etc. — Check the tightening torque of the wheel nuts with a torque wrench. •… -
Page 117
REPLACE Hydraulic oil REPLACE Brake accumulator unit filter Place the lift truck on level ground with the engine stopped. IMPORTANT Raise the boom and place the boom safety wedge on the rod of the lifting cylinder ( 1 — OPERATING AND SAFETY INSTRUCTIONS: LIFT TRUCK MAINTENANCE INSTRUCTIONS). -
Page 118
CHECK Radiator * CHECK Transmission pressures * CHECK Steering * CHECK Steering swivel joints * CHECK Brake pad and brake disk wear * CHECK Condition of boom assembly * CHECK Bearings and bushings * CHECK Condition of hoses and flexible pipes * CHECK Condition of cylinders (leakage, rods) * CHECK… -
Page 119: Check Turbocharger
Ü 3000H — PERIODIC SERVICE — EVERY 3000 HOURS OF SERVICE OR 6 YEARS ALSO PERFORM THE 500 HOUR AND 1000 HOUR PERIODIC MAINTENANCE OPERATIONS. CHECK Turbocharger ** CHECK Exhaust gas recirculation system «EGR» ** CLEAN Exhaust particle filter «DPF» ** ** Engine service, consult your dealer. 3 — 33…
-
Page 120: Occasional Maintenance
Ü OCCASIONAL MAINTENANCE CLEAN «Stationary lift truck» exhaust purification IMPORTANT Exhaust purification is an automated procedure activated by the operator when the following indicator lamps are displayed: — Park the lift truck in a safe and adequately ventilated place. — Check the following points: •…
-
Page 121: Replace Wheels
REPLACE Wheels For this operation, we advise you to use the MANITOU hydraulic jack Part No. 505507 and the MANITOU safety support prop Part No. 554772. IMPORTANT In the event of a wheel being changed on the public highway, secure the lift truck vicinity: — Stop the lift truck, if possible on firm, level ground.
-
Page 122: Replace
REPLACE Battery failure IMPORTANT Operate the battery cut-off for a minimum of 30 seconds after having switched off the ignition with the ignition key. Handling and servicing a battery can be dangerous, take the following precautions: — Wear protective goggles. — Keep the battery horizontal. — Never smoke or work near a naked flame.
-
Page 123
3 — 37… -
Page 124: Occasional Operation
Ü OCCASIONAL OPERATION TOW OR WINCH Lift truck IMPORTANT If the lift truck is not on level ground, chock it so that it does not descend the slope. The lift truck must be towed very slowly (less than 5 km/h) and for as short a distance as possible (less than 100 m). For towing a lift truck, the high pressure limiters must be unlocked to avoid damaging the hydrostatic transmission, and the parking brake on the front axle must be released.
-
Page 125
TRANSPORT Lift truck IMPORTANT Ensure that the safety instructions associated with the flatbed are complied with before loading the lift truck and that the driver of the carrier vehicle is informed of the dimensions and the weight of the lift truck ( 2 — DESCRIPTION: CHARACTERISTICS). -
Page 126
3 — 40… -
Page 127
4 — OPTIONAL ADAPTABLE ATTACHMENTS FOR THE RANGE 4 — 1… -
Page 128
4 — 2… -
Page 129
INTRODUCTION — Your lift truck must be used with interchangeable equipment. These items are called: ATTACHMENTS. — A wide range of attachments is available, guaranteed by MANITOU and designed to fit your lift truck perfectly. IMPORTANT Only attachments approved by MANITOU can be used with their lift trucks ( TECHNICAL SPECIFICATIONS OF ATTACHMENTS). -
Page 130
PICKING UP THE ATTACHMENTS 1 — ATTACHMENT WITHOUT HYDRAULICS AND HAND LOCKING DEVICE FITTING AN ATTACHMENT — Ensure that the attachment is in a position facilitating the locking to the carriage. If it is not correctly oriented, take the necessary precautions in order to move it safely. — Check that the locking pin is in position in the bracket (Fig. -
Page 131
2 — HYDRAULIC ATTACHMENT AND MANUAL LOCKING DEVICE FITTING AN ATTACHMENT — Ensure that the attachment is in a position facilitating the locking to the carriage. If it is not correctly oriented, take the necessary precautions in order to move it safely. — Check that the locking pin is in position in the bracket (Fig. -
Page 132
TECHNICAL SPECIFICATIONS OF ATTACHMENTS STANDARDISED TILTING FORK CARRIAGE PFB 25 N MT-1020 S2 PFB 25 N MT-1260 S2 PART NO. 571958 571959 Rated capacity 2300 kg 2300 kg Width 1020 mm 1260 mm Ground 71 kg 80 kg STANDARDISED SIDE-SHIFT CARRIAGE TDL 2T5 L1020 FEM2 TDL 2T5 L1260 FEM2 PART NO. -
Page 133
FLOATING FORK CARRIAGE TFF 29 MT-1040 PART NO. 653340 Rated capacity 2900 kg Width 1040 mm Ground 285 kg FLOATING FORK PART NO. 211919 Section 125x40x1200 mm Ground 62 kg 4 — 7… -
Page 134
BUILDING BUCKET CBC 650 L1850 PART NO. 654473 Rated capacity 676 l Width 1850 mm Ground 320 kg LOADING BUCKET CBR 730 L1850 PART NO. 571831 Rated capacity 735 l Width 1850 mm Ground 330 kg MULTIPURPOSE BUCKET DISPLAY CB4X1-700 L1950 PART NO. -
Page 135
CONCRETE BUCKET (ADAPTABLE ON FORKS) BB 500 S4 PART NO. 654409 Rated capacity 500 l/1300 kg Width 1100 mm Ground 205 kg CONCRETE BUCKET WITH SPOUT (ADAPTABLE ON FORKS) BBHG 500 S4 PART NO. 751464 Rated capacity 500 l/1300 kg Width 1100 mm Ground… -
Page 136
ATTACHMENT GUARDS FORK GUARD PART NO. 227801 FORK BLOCK FOR FLOATING FORK CARRIAGE PART NO. 261210 BUCKET PROTECTOR Always ensure that the width of the protector you choose is less than or equal to the width of the bucket. PART NO. 206734 206732 206730…
-
Contents
-
Table of Contents
-
Troubleshooting
-
Bookmarks
Quick Links
MT6642XT
MT8044XT
MT10044XT
MT10055XT
MT12042XT
Telescopic Handler
Operator/Service Manual
Catalog 50960025 Revision C
MT6642XT beginning with S/N 27251
MT8044XT beginning with S/N 28251
MT10044XT beginning with S/N 80151
MT10055XT beginning with S/N 80151
MT12042XT beginning with S/N 38101
Related Manuals for Manitou MT6642XT
Summary of Contents for Manitou MT6642XT
-
Page 1
MT6642XT MT8044XT MT10044XT MT10055XT MT12042XT Telescopic Handler Operator/Service Manual Catalog 50960025 Revision C MT6642XT beginning with S/N 27251 MT8044XT beginning with S/N 28251 MT10044XT beginning with S/N 80151 MT10055XT beginning with S/N 80151 MT12042XT beginning with S/N 38101… -
Page 2
Indicator and Operation Symbols Read Operator’s Parking Brake Brake Failure Safety Alert Turn Signals Hazard Flasher Manual Ignition Off Ignition ON Engine Start Hydraulic Oil Horn Engine Oil Pressure Volume Full Volume Half Full Volume Empty Battery Fuel Transmission Temperature Engine Coolant Starting Aid Wiper/Washer… -
Page 3
MT6642XT beginning with S/N 27251 MT8044XT beginning with S/N 28251 MT10044XT beginning with S/N 80151 MT10055XT beginning with S/N 80151 MT12042XT beginning with S/N 38101 For parts orders contact your Manitou Americas Dealer or call: Factory Parts Department (262) 334-6653. Website: www.manitou.com / www.mnadealers.com… -
Page 4
Wash hands after handling battery. IDENTIFICATION INFORMATION Write your Manitou Americas Inc. Telescopic Handler model and serial numbers below. Refer to these numbers when inquiring about parts or service from your Manitou Americas Inc. dealer. MODEL NO. SERIAL NO. -
Page 5
Table of Contents Chapter Description Page Indicator and Operation Symbols ….Inside Front Cover Introduction ……….2 Specifications . -
Page 6
Record the serial number in the space provided on the previous page, as a handy record for quick reference. Please be aware that Manitou Americas Inc. reserves the right to make changes or improvements in the design or construction of any part without incurring the obligation to install such changes on any unit previously delivered. -
Page 7
Identification Operator’s Lift Rear Boom Station Cylinder Access Stabilizer Cylinder Boom Angle Indicator Quick-attach Tilt System Cylinder Rear Lights and Backup Alarm Access Hydraulic Frame Leveling Extend Cylinder Reservoir Cylinder Telescopic (under cover) Lift Boom Slave Cylinder Access Cylinder Covers Auxiliary Hydraulics Fuel Tank… -
Page 8
Chapter 2 SPECIFICATIONS Lifting Performance General Dimensions Instrumentation Based on standard machine equipped with Maximum lift capacity: Gauges: MT6642: 6600 lbs. (2994 kg) listed tires, 48” masonry carriage and 48” pal- Fuel level, hourmeter, coolant temperature, MT8044: 8000 lbs. (3629 kg) let forks. -
Page 9
Service Capacities Front axle: Drive/steer, limited-slip differ- ential with internal SAHR parking brake Cooling System: Overall ratio: 26.21:1 21.2 qts. (20.1 L), 50/50 mixture Rear axle: Drive/steer, open differential Anti-freeze protection: -34°F (-31°C) Overall ratio: 26.21:1 Pressure cap:18 psi (124 kPa) Engine Fuel tank: 47 gallons (178 L) Turbocharged aspiration:… -
Page 10
Chapter 3 CHECKLISTS PRE-DELIVERY I acknowledge that the pre-delivery procedures were per- formed on this unit as outlined above. The following Checklist is an important reminder of the inspections that MUST be made before delivering the Telescopic Handler to the customer. Check off each item Dealership’s Name after the prescribed action is taken. -
Page 11
Chapter 3 CHECKLISTS PRE-DELIVERY I acknowledge that the pre-delivery procedures were per- formed on this unit as outlined above. The following Checklist is an important reminder of the inspections that MUST be made before delivering the Telescopic Handler to the customer. Check off each item Dealership’s Name after the prescribed action is taken. -
Page 12
INTENTIONALLY BLANK (To be removed as Dealer’s file copy) 50960025/CP0514 PRINTED IN U.S.A. -
Page 13
Chapter 4 SAFETY The above Safety Alert Symbol means ATTENTION! Manitou Americas ALWAYS takes the operator’s safe- ALWAYS BE ALERT! YOUR SAFETY IS ty into consideration when designing its machinery, INVOLVED! It stresses an attitude of “safety aware- and guards exposed moving parts for his/her protec- ness”… -
Page 14
SAFETY Additional Safety Reminders WARNING Ü User/operator safety practices, as established by industry standards, are included in this Operator’s U.S. OSHA regulations require employers in Manual and intended to promote safe operation of general industry and the construction, ship- the machine. These guidelines do not, of course, yard and cargo-handling industries (excepting preclude the use of good judgment, care and com- agricultural operations) to ensure that forklift… -
Page 15
SAFETY Ü the rear before backing. ALWAYS wear appropriate personal protective equipment for the job and working conditions. Ü DO NOT raise or drop a loaded fork or bucket Hard hats, goggles, protective shoes, gloves, suddenly. Abrupt movements under load can reflector-type vests, respirators and ear protection cause serious instability. -
Page 16
SAFETY Ü When a forklift / telescopic handler is config- DO NOT turn quickly while traveling on a slope or operate the machine beyond the grade and ured and used for hoisting, the employer must slope limits noted in the Operation and ensure that: Adjustments chapter of the Operator’s Manual. -
Page 17
SAFETY Note: Refer to the full text of the OSHA crane Servicing Safety Reminders regulation (29 CFR Part 1926, Subpart CC) for Ü ALWAYS be aware of and avoid pinch point areas a detailed description of the regulatory on the machine, such as wheels-to-frame, cylin- requirements. -
Page 18
WARNING Ü To ensure continued safe operation, replace dam- aged or worn-out parts with genuine Manitou ser- The machine must not be used to lift or carry vice parts before using this equipment. personnel, or be fitted with any form of per-… -
Page 19
SAFETY 11. Be sure that any required restraining means (rail- The Mandatory Work Platform Safety Rules must be ings, chains, harnesses, etc.) are in place and adhered to at all times while elevating personnel. properly used. These rules are based on ANSI/ITSDF Standard B56.6-2005, “Safety Standard for Rough Terrain 12. -
Page 20
SAFETY 24. The platform must be fully lowered for personnel to enter and exit. Personnel must not climb on Electrical Connection any part of the forklift in attempting to enter and exit. 25. Any harness, body belt, lanyard, or deceleration Remote device that has sustained permanent deformation Shutdown… -
Page 21
SAFETY Floor dimensions, which shall not exceed two have an attachment point provided overhead for times the load center distance of 24 inches (610 freedom of movement, and its length is to limit mm) listed on the forklift nameplate, measured free-fall to 5 feet (1500 mm) measured from the parallel to the longitudinal center plane of the point of attachment to the operator. -
Page 22
SAFETY 808037 808031 808033 808026 808029 808027 808030 808038 50380987 808033 50960025/CP0514 PRINTED IN U.S.A. -
Page 23
SAFETY 808031 808038 808037 808027 808033 808029 808030 50380987 PRINTED IN U.S.A. 50960025/CP0514… -
Page 24
SAFETY 51200535 808034 808036 808033 808033 808033 808033 808032 808031 808035 808035 50960025/CP0514 PRINTED IN U.S.A. -
Page 25
SAFETY 51200535 808031 808032 808036 808033 808034 808035 PRINTED IN U.S.A. 50960025/CP0514… -
Page 26
SAFETY PWP Safety Decals 808041 808040 808039 808039 808042 808041 808039 808040 808042 50960025/CP0514 PRINTED IN U.S.A. -
Page 27
Telescopic Handler BEFORE operating it. special operating procedures. Know how to stop the machine operation BEFORE operating it. This Manitou Americas machine is designed and intended to be used WARNING ONLY with a Manitou Americas attachment… -
Page 28
DASH PANEL AREA INSTRUMENT AND SWITCH PANEL Located to the right of the steering wheel, this panel contains the instrument gauges, indicator lamps and function switches. Ignition Switch, Start and Horn Button A1 — Key Switch OFF: When the key is vertical in the keyswitch, power from the battery is disconnect- ed to the control and instrument panel electrical circuits. -
Page 29
A2 — Engine Coolant Temperature: Press button “B” IMPORTANT: If this lamp comes on during nor- until “TEMP” is displayed. It indicates the temperature mal operation, a problem may exist in the trans- of the engine coolant. Under normal conditions, this mission oil system. -
Page 30
This combination will lead to a illuminated at the same time. This image is only to “Service Only” soot condition, contact your authorized Manitou Americas dealer. illustrate the indicators you may see during oper- ation. C — Engine Emergency Override Switch: The lamp… -
Page 31
Top Row Switches NOTE: This lamp will flash on and off, indicating that the system is not yet fully functional, until the Switches have graphic symbols to indicate function brakes are held on for three or more seconds. and effect. The following descriptions start with the first switch on the left. -
Page 32
G — Hazard: This switch can be activated to make the Fan Speed: This knob is located below the tempera- tail lights flash on and off in case the machine is stalled ture control knob. Rotating the knob clockwise will or temporarily stopped in a traffic area on the road or increase the fan speed for increased air circulation. -
Page 33
Speed Range — MT6642 and MT8044: Twisting the Seat Positioning: The seat is mounted on rails for for- lever end clockwise or counter-clockwise will change ward and rearward reposi- the transmission speed between low, medium and trav- tioning, for comfort and to el ranges. -
Page 34
WARNING following the MANDATORY SAFETY SHUT- DOWN PROCEDURE (page 9). DO NOT attempt repairs. Call your Manitou Americas DO NOT level the frame with the boom raised dealer for assistance. or extended. Only level the frame while… -
Page 35
the function speed of both the attachment tilt and aux- WARNING iliary hydraulics. To extend the boom, move the joystick right; to retract For maximum machine stability, never lower the boom, move the joystick to the left. To raise the the outriggers so that the tires come com- boom, move the joystick rearward;… -
Page 36
Attachment and Auxilliary Hydraulics Pilot-Pressure Apply Valves AUXILIARY HYDRAULICS ATTACHMENT TILT PILOT-PRESSURE APPLY PILOT-PRESSURE APPLY VALVE VALVE LOCKING KNOBS LOCKING KNOBS AUXILIARY L71378 HYDRAULICS SPEED DECAL ATTACHMENT TILT ATTACHMENT TILT CONTROL KNOBS FRONT L71378 REARWARD SPEED FORWARD SPEED DECAL CONTROL KNOB CONTROL KNOB Frame Level Control: This control is located to the rear of the tri-function joystick. -
Page 37
Transmission Dipstick Hydraulic Oil Level Sight Gauge Hydraulic Oil Hydraulic Fill Cap Test Ports Air Cleaner Restriction Indicator: Located in the rubber elbow connector at the rear of the air cleaner, it Engine Oil Level: Dipstick is located on the right side indicates when the air cleaner needs service. -
Page 38
E. 20 AMP relay: Lights F. 20 AMP relay: Top Wiper ATTACHMENT TOOLS Manitou Americas offers a versatile range of attach- ment tools to meet various lifting and material-han- Fuse and dling applications. Contact your Manitou Americas Relay Access dealer for specifications and ordering information. -
Page 39
Chapter 6 OPERATION AND ADJUSTMENTS GENERAL INFORMATION During the first 20 hours, avoid prolonged periods of engine idling or sustained maximum load operation. If engine will idle longer that 5 minutes, stop the engine. CAUTION Consult the Lubrication chapter for the type and grade of oil to use. -
Page 40
Pre-Start Walk-Around Inspection Illustration PRE-START WALK-AROUND INSPECTION Any needed repairs or service noted during the inspec- tion must be performed by a qualified service techni- PROCEDURE cian before operating the machine. Refer to the following illustration and checklist to per- form the inspection. -
Page 41
Pre-Start Walk-Around Inspection Checklist o14. Stabilizer Switch: Properly secured; no visible dam- Note the condition of safety decals during the walk-around inspection. Replace missing or illegible safety decals. age; no loose or disconnected wires. o15. Boom Pivot Assembly: Properly secured; no visible Attachment Tool: Check for broken, missing or damaged parts. -
Page 42
BEFORE STARTING ENGINE Check that indicators are in normal condition. Check that there are no fuel, oil or engine coolant Before mounting the operator’s compartment, walk leaks, and no abnormal noises or vibrations. completely around the machine to be sure no one is under, on, or close to it. -
Page 43
is released before the engine starts, turn the key Place the travel lever in Forward or Reverse and select switch “OFF” and repeat the procedure. a speed range. Switch off the parking brake and move ahead slowly, while testing the steering and brakes. Follow steps 5 -7 as listed in “Starting The Stop and operate all boom, attachment tool functions Engine”. -
Page 44
This service will need to be performed by a authorized Manitou Americas deal- At the High Coolant Temperature SHUTDOWN set- point, the lamp in the engine override switch and the… -
Page 45
specific conditions. During this process the engine cleaning process can be canceled at any time during the speed will be controlled by the ECU. The machine process. must remain parked during this process. Avoid disabling the cleaning process unless absolutely necessary. -
Page 46
Raise the boom slightly and extend it two to three The Telescopic Handler boom nose will accept Quick- feet (600 to 900 mm) for better visibility. Lower attach System Manitou Americas attachment tools. The the boom until the attachment tool is approxi- Quick-attach System has a quick-release hookup and mately 12”… -
Page 47
Modifications, alterations to, or use of attach- dismounting. ment tools NOT authorized by Manitou Americas (or the manufacturer) in writing can NEVER operate the machine with safety void warranty and cause machine damage guards or covers removed. -
Page 48
The amount of forward and rearward tilt to be used is LEVEL, as indicated by the level indicator on the governed by the application. Although use of maxi- ROPS/FOPS cross member. The attachment tool mum rearward tilt is allowable under certain condi- MUST be maintained at the “carry”… -
Page 49
DO NOT move railroad cars and trailers with the Safety Hand Signals Continued Telescopic Handler. DO NOT use the boom and attachment for leverage to push the machine out of mud. IMPORTANT: DO NOT lower boom at high engine speed when attachment tool is at maxi- mum rearward tilt. -
Page 50
Turning corners too fast can tip the machine, During placement, the operator should observe when the boom extension mark number “4” on the boom is or cause a load to slide off the attachment. Sudden slowing or stopping of the machine visible and stop further extension. -
Page 51
For elevated or overhead placement, bring the machine WARNING as close as possible to the landing point, and then: Level the machine BEFORE raising the load. Use Operating conditions reduce extreme caution for high placement. Be sure per- machine’s safe operating capacity. Exceeding sonnel are clear of the area where the load or the the capacity when raising or extending the machine could fall or tip. -
Page 52
Rigging should comply with OSHA regulation Elevated Suspended Load Placement §1910.184, “Slings,” or §1926.251, “Rigging Bring the telehandler as close as possible to the equipment for material handling.” landing point. Be sure the rigging equipment is clear of any part Level the telehandler BEFORE raising the load. -
Page 53
After the forks are fully engaged in the PWP, secure the PWP to the forks. This can be accom- Electrical Connection plished by means of a retaining pin behind the heel of the forks, as shown. Remote Shutdown Switch Remote Shutdown Switch Retaining with Coiled Wire Connector For machines with a 55-foot boom: The remote… -
Page 54
NOT attempt to bring down the boom or make Pressing the red button will disengage the boom repairs. Call your Manitou Americas dealer control joystick and stop all platform movement. immediately. The remote shutdown switch box is a wireless… -
Page 55
A jib or truss boom should ONLY be used to lift and place loads when the machine is sta- tionary and the frame is level. Transporting suspended loads must ALWAYS be done slow- ly and cautiously, with the boom and load as low as possible. -
Page 56
Slowly (at the lowest engine speed possible) and carefully drive the machine down the ramps. THEFT DETERRENTS Manitou Americas has recorded all component part numbers and serial numbers. Users should take as many of the following actions as possible to discour-… -
Page 57
Use Multi-ATF Dexron ® III or equivalent Rear Planetary: 1.90 qts. each (1.80 L) Capacity: All Models 13.75 qts. (12.9 L) Capacity: MT6642XT and MT8044XT Hydraulic System Reservoir Front and Rear Differential: 15.8 qts. (15.0 L) Use Mobil DTE 15M, or an equivalent that Front and Rear Planetary: 2.6 qts. -
Page 58
— CHASSIS AREA — FILTER REFERENCE CHART Brake pedal linkage TYPE PART NUMBER 10. Wheel spindle pins (4 per axle) Engine Oil 808000 11. Stabilizer cylinder pivot pins (3) Engine Fuel Primary 50220174 12. Axle pivot pins (2 per axle) Secondary 50220173 13. -
Page 59
Grease Fittings Locations PRINTED IN U.S.A. 50960025/CP0514… -
Page 60
BEFORE resuming machine operation. The following areas of internal components service replacement and operating adjustments should only be by (or under the direction of) an authorized Manitou NOTE: All service routines, with the exception of Americas Telescopic Handler dealer. those described under the “Dealer Services”… -
Page 61
Manitou access to components located inside the superstructure, Americas dealer or Manitou Americas Service under shields, hoods and covers. The chart on this page Department. Failure to do so may result in notes the components accessed in each particular area. -
Page 62
Replace any cracked or damaged parts. hydraulic, battery or fuel systems; all contain Use only genuine Manitou Americas parts for service. highly flammable liquids or explosive gases, which can cause an explosion or fire if ignited. -
Page 63
CHECKING FUEL TANK LEVEL CHECKING ENGINE OIL LEVEL The fuel level is shown by the fuel level gauge on the With the machine on level ground, and the engine instrument panel. After operation each day, the fuel stopped for ten minutes or more, slide open the right tank should be filled to prevent water from condensing side engine panel and remove the engine dipstick. -
Page 64
CHECKING TRANSMISSION OIL LEVEL Lubricate both the tire beads and rim flanges with a soap solution. DO NOT use The machine must be on level ground. With the engine oil or grease. and transmission at operating temperature, parking DO NOT place fingers on the tire bead or brake on, transmission in neutral and engine speed at rim during inflation. -
Page 65
NOT USE the machine until the cause has switch to “Dis-engaged.” been corrected. Contact your dealer (or The joystick control should now be disabled, so Manitou Americas) for service information and that boom raise/lower and extend/retract will no parts. longer function. -
Page 66
Start the engine and apply the service brakes. The PWP switch lamp and the parking brake switch lamp should go off after approximately three seconds of brake pedal application. If PWP System fails to perform properly, troubleshoot using the chart on page 71. Contact your dealer for ser- vice information and parts. -
Page 67
Firmly grasp the retaining ring (A) and rotate it Fuel Bleeding Procedure clockwise 1/4 turn (when viewed from the top). When the fuel filter is removed and replaced, or if the Remove the ring with filter element (B or E). engine runs out of fuel, air must be bled from the sys- tem. -
Page 68
Open Crankcase Vent Engine Oil Filter IMPORTANT: Filtration of oils is critical to proper CHECKING THE BATTERY lubrication. Always change the filter with every oil change. The battery furnished in the machine is a 12-volt, wet- cell battery. 3. Apply a thin coat of clean engine oil to The top of the battery must always be kept clean. -
Page 69
4. To neutralize acid spilled on the floor, use Connect one end of the (red) positive (+) jumper cable to the positive (+) battery terminal on the one of the following mixtures: disabled machine first. DO NOT allow the posi- a. -
Page 70
Inspect the leaf chains for wear. Run the boom out Two Front One Rear Boom Chains slowly to inspect. Conditions to look for include: Boom Chain cracked or broken plates, protruding or turned pins, and excessive wear. With a steel tape, measure 16 links of the strand that flexes over the sheaves. -
Page 71
If the boom starts to chatter under load, grease the slide Remove the cover to gain access to the condenser pads and wipe off the excess grease. Maintain a clear- (2). ance of 1/16” between the top or side slide pads and the Clean any large debris that may have collect on boom. -
Page 72
CHANGING HYDRAULIC RETURN Service Every 1000 Hours or Yearly FILTER ELEMENT NOTE: Perform all other service requirements WARNING up to this point, as well as the following: CHANGING TRANSMISSION OIL AND When servicing the hydraulic system, lower FILTER the boom to the ground. Operate the machine long enough to warm the trans- mission oil to 150°F-200°F (65°C-93°C). -
Page 73
NOTE: Before replacing the filter element(s), Insert the element(s), making sure that they are seated properly. push the reset button on the indicator. Start the engine and run at full throttle. If the indicator does Secure the end cap to the housing with the three not turn red, do not replace the element(s). -
Page 74
Plug a 3000 psi (207 bar) oil-or liquid-filled gauge into shows wear or cuts, it should be replaced. Order a the test port labeled “MP.” Fully retract the boom over replacement belt from your Manitou Americas dealer. the relief valve. The gauge should read 3000 psi (207 bar). -
Page 75
CHANGING HYDRAULIC RESERVOIR WARNING OIL AND STRAINER Clean all dirt and debris from around the top of the NEVER use your hands to search for hydraulic reservoir, especially around the access cover. Refer to fluid leaks. Escaping hydraulic oil under pres- illustration and use the following procedure: sure can have sufficient force to penetrate the skin. -
Page 76
This professional exhaust fil- bricate the internal parts. Run the engine until the ter service must be performed by an authorized battery is recharged and then shut it off. Manitou Americas dealer. STORAGE After Storage After removing the machine from storage and… -
Page 77
PWP System switch. the end of the boom. PWP System angle sensor is Contact your Manitou Americas unplugged or faulty. dealer for assistance. PWP System mode lamp flash- es when switch is turned “OFF.”… -
Page 78
Chapter 9 DECAL LOCATIONS DECAL KITS GENERAL INFORMATION 51200582 MT6642XT Telescopic Handler with PWP 51200583 MT6642XT Telescopic Handler without PWP CAUTION 51200584 MT8044XT Telescopic Handler with PWP 51200585 MT8044XT Telescopic Handler without PWP ALWAYS read and follow the safety precau- 51200586 MT10044XT Telescopic Handler with PWP tions on decals. -
Page 79
808036 808036 WARNING — PINCH POINT 808033 808033 808033 808033 808033 WARNING — JUMP START 808034 808034 808034 808034 808034 MANITOU LOGO, SMALL 804768 804768 804768 804768 804768 QUICK-ATTACH DIAGRAM 808046 808046 808046 808046 808046 MANITOU LOGO, LARGE 806320 806320… -
Page 80
806319 806319 HYDRAULIC OIL FILL 808057 808057 808057 808057 808057 WARNING — NO RIDERS 808035 808035 808035 808035 808035 MANITOU LOGO, SMALL 103275 103275 103275 103275 103275 DANGER-PERSONNEL INJURY (w/o PWP) 808031 808031 808031 808031 808031 QUICK-ATTACH UNLOCKED 808038 808038… -
Page 81
Dual Joystick Control Tri-function Joystick Control DECAL LOCATIONS — OPERATOR STATION REF. DESCRIPTION MT6642 MT8044 MT10044 MT10055 MT12042 TILT HAZZARD/GENERAL OPERATOR 808027 808027 808027 808027 808027 CARRY LOAD LOW 808026 808026 808026 808026 808026 F-N-R SHIFT 808059 808059 808059 808059 808059 MADE IN USA 808060… -
Page 82
DECAL LOCATIONS — PWP EQUIPPED UNITS REF. DESCRIPTION MT6642 MT8044 MT10044 MT10055 MT12042 PERSONNEL LIFT 808039 808039 808039 808039 808039 WORK PLATFORM RULES 808040 808040 808040 808040 808040 PERSONNEL LIFT SAFETY RULES 808041 808041 808041 808041 808041 PWP LOAD CHART 808014 808007 50380399… -
Page 83
Chapter 10 MAINTENANCE This Maintenance Interval Chart was developed to match the Service and Storage chapter of this manual. Detailed information on each Service Procedure is in the Service and Storage chapter. A Maintenance Log follows the Maintenance Interval Chart for recording the maintenance procedures performed. Recording the 10 Hour (or Daily) service intervals is impractical and is therefore not recommended. -
Page 84
MAINTENANCE INTERVAL CHART (CONT.) SERVICE PROCEDURE Every 250 Every 1000 Every 2000 Service As Hours (or Hours (or Hours (or Required Quarterly) Yearly) Two Years) Check Open Crankcase Vent Checking Battery Checking and Torqueing Boom Leaf Chains Checking Boom Slide Pads Wear and Clearance Clean Air Conditioning Condenser Clean/Change Cab Ventilation Filter Changing Transmission Oil and Filter… -
Page 85
MAINTENANCE LOG Date Hours Service Procedure PRINTED IN U.S.A. 50960025/CP0514… -
Page 86
MAINTENANCE LOG Date Hours Service Procedure 50960025/CP0514 PRINTED IN U.S.A. -
Page 87
MAINTENANCE LOG Date Hours Service Procedure PRINTED IN U.S.A. 50960025/CP0514… -
Page 88
ENGINE DIAGNOSTIC TROUBLE CODES (DTCs) Engine diagnostic trouble codes are displayed in the Always contact your servicing engine dealer for help instrument display panel. in correcting the diagnostic trouble codes that are dis- played for the engine. Stored and active diagnostic trouble codes are dis- played as a two-part code: Suspect Parameter Number The fault code listing in the following tables are in (SPN) and Failure Mode Identifier (FMI), as shown on… -
Page 89
SPN Name SPN Name Code Code 000652 Injector #2 002798 Injector High Voltage Supply #2 000653 Injector #3 003246 DPF Outlet Temperature 000654 Injector #4 003251 DPF Differential Pressure Signal 000676 Cold Start Relay Output Signal 003464 Air Throttle Actuator Drive Circuit 000729 Inlet Air Heater Signal 003471… -
Page 90
FAILURE MODE IDENTIFIER (FMI) CODES FMI Name FMI Name Code Code Extremely High Activated Extremely Low Error Invalid Fault Out Of Range High Incorrect Message Out Of Range Low Slightly High High Resistance Moderately High Low Resistance Slightly Low Mismatch Moderately Low Signal Missing Communication Error… -
Page 91
Hydraulic Schematic for Two-Joystick Control without PWP PRINTED IN U.S.A. 50960025/CP0913… -
Page 92
Hydraulic Schematic for Two-Joystick Control with PWP 50960025/CP0913 PRINTED IN U.S.A. -
Page 93
Hydraulic Schematic for Tri-Function Joystick without PWP PRINTED IN U.S.A. 50960025/CP0913… -
Page 94
Hydraulic Schematic for Tri-Function Joystick with PWP 50960025/CP0913 PRINTED IN U.S.A. -
Page 95
Electrical Schematic with Radio Remote PRINTED IN U.S.A. 50960025/CP0913… -
Page 96
Electrical Schematic without Radio Remote 50960025/CP0913 PRINTED IN U.S.A. -
Page 97
INTENTIONALLY BLANK PRINTED IN U.S.A. 50960025/CP0514… -
Page 98
Load Zone Charts MT6642XT Decal 808019 Decal 808017 Standard Carriage 1.3-Cu.-Yd. Bucket Decal 808018 Decal 808016 Rotating Carriage 12-Ft. Truss Boom 50960025/CP0514 PRINTED IN U.S.A. -
Page 99
Load Zone Charts MT6642XT Decal 808015 Decal 50380927 5-Ft. Winch Boom 90° Swing Carriage Decal 808014 PRINTED IN U.S.A. 50960025/CP0514… -
Page 100
Load Zone Charts MT8044XT Decal 808013 Decal 808011 Standard Carriage 1.3-Cu.-Yd. Bucket Decal 808012 Decal 808010 Rotating Carriage 15-Ft. Truss Boom 50960025/CP0514 PRINTED IN U.S.A. -
Page 101
Load Zone Charts MT8044XT Decal 808009 Decal 808008 5-Ft. Winch Boom 90° Swing Carriage Decal 808007 PRINTED IN U.S.A. 50960025/CP0514… -
Page 102
Load Zone Charts MT10044XT Standard Carriage 1.3-Cu.-Yd. Bucket Decal 50380393 Decal 50380397 Rotating Carriage 15-Ft. Truss Boom Decal 50380398 Decal 50380400 50960025/CP0514 PRINTED IN U.S.A. -
Page 103
Load Zone Charts MT10044XT 90° Swing Carriage Winch Boom Decal 50380394 Decal 50380396 180° Swing Carriage Work Platform Decal 50380395 Decal 50380399 PRINTED IN U.S.A. 50960025/CP0514… -
Page 104
Load Zone Charts MT12042XT Rotate Carriage Standard Carriage Decal 50380403 Decal 50380401 90° Swing Carriage 1.3-Cu.-Yd. Bucket Decal 50380402 Decal 50380404 50960025/CP0514 PRINTED IN U.S.A. -
Page 105
Load Zone Charts MT12042XT 15-Ft. Truss Boom Winch Decal 50380407 Decal 50380405 180° Swing Carriage Work Platform Decal 50380408 Decal 50380406 PRINTED IN U.S.A. 50960025/CP0514… -
Page 106
Load Zone Charts MT10055XT Standard Carriage — Outriggers Down Standard Carriage — Outriggers Up Decal 50380036 Decal 50380035 Rotate Carriage — Outriggers Up Rotate Carriage — Outriggers Down Decal 50380037 Decal 50380038 50960025/CP0514 PRINTED IN U.S.A. -
Page 107
Load Zone Charts MT10055XT 1.3-Cu.-Yd. Bucket Swing Carriage Decal 50380042 Decal 50380039 Winch 15-Ft. Truss Boom Decal 50380040 Decal 50380041 PRINTED IN U.S.A. 50960025/CP0514… -
Page 108
Load Zone Charts MT10055XT Work Platform Decal 50380043 50960025/CP0514 PRINTED IN U.S.A. -
Page 109
Torque Specifications Use these torque values when tightening Manitou Americas hardware (excluding: locknuts and self-tapping, thread-forming and metal screws) unless otherwise specified. Grade 2 Grade 5 Grade 8 Unified National Thread Lubed Lubed Lubed 8-32 8-36 10-24 10-32 1/4-20 1/4-28… -
Page 110
Index Controls Dash ……..24 Access To Components Chart . -
Page 111
Exhaust Filter Cleaning System ….40 Hydraulic Maintenance Automatic Exhaust Filter Cleaning ….40 Oil Filters, replacing . -
Page 112
Shields ……..23 Side View Mirror . -
Page 113
Liability for incidental or consequential damages of any type, including, but not limited to lost profits or expenses of acquiring replacement equipment. No agent, employee or representative of Manitou has any authority to bind Manitou to any war- ranty except as specifically set forth herein. -
Page 114
© 50960025CP0514 2014 Manitou Americas Inc. PRINTED IN U.S.A. All Rights Reserved.
-
Contents
-
Table of Contents
-
Troubleshooting
-
Bookmarks
Troubleshooting
Error Codes
50950436/H0521
Printed in U.S.A.
139
Troubleshooting
Related Manuals for Manitou MUSTANG 1050RT X Series
- Page 1
647732 US (31/10/2019) MT 625 H 75K ST5 S1 MT 625 H 75K COMFORT ST5 S1 OPERATOR’S MANUAL (ORIGINAL INSTRUCTIONS) - Page 2
— Descriptions and figures are non binding. — MANITOU reserves the right to change its models and their equipment without being required to update this manual. — The MANITOU network, consisting exclusively of qualified professionals, is at your disposal to answer all your questions. - Page 3
MANITOU BF. Any violation of the aforementioned may lead to civil and criminal prosecution. The logos as well as the visual identity of the company are the property of MANITOU BF and may not be… - Page 4
1 — OPERATING AND SAFETY INSTRUCTIONS 2 — DESCRIPTION 3 — MAINTENANCE 4 — OPTIONAL ADAPTABLE ATTACHMENTS FOR THE RANGE… - Page 5
1 — OPERATING AND SAFETY INSTRUCTIONS 1 — 1… - Page 6
1 — 2… - Page 7
1 — 3… -
Page 8: Table Of Contents
1 — OPERATING AND SAFETY INSTRUCTIONS INSTRUCTIONS TO THE COMPANY MANAGER THE SITE THE OPERATOR THE LIFT TRUCK A — SUITABILITY OF THE LIFT TRUCK FOR THE JOB ……….. . . 1-6 B — ADAPTATION OF THE LIFT TRUCK TO STANDARD ENVIRONMENTAL CONDITIONS .
- Page 9
LIFT TRUCK MAINTENANCE INSTRUCTIONS 1-30 GENERAL INSTRUCTIONS 1-30 PLACING THE BOOM SAFETY WEDGE 1-30 FITTING THE WEDGE …………..1-30 REMOVING THE WEDGE . -
Page 10: Instructions To The Company Manager
A — SUITABILITY OF THE LIFT TRUCK FOR THE JOB — MANITOU has ensured that this lift truck is suitable for use under the standard operating conditions defined in this operator’s manual, with a STATIC TEST COEFFICIENT 1.25 and a DYNAMIC TEST COEFFICIENT OF 1, as specified in harmonised standard EN 1459 for mast trucks.
-
Page 11: C — Modification Of The Lift Truck
Inflate the tyres in accordance with recommendations. • The seat is an essential way of reducing the vibrations transmitted to the operator. In the event of seat replacement, please contact MANITOU. • Ensure that the operators adapt their operating speed to suit the conditions on site.
-
Page 12: Instructions
INSTRUCTIONS — The operator’s manual must always be in good condition and kept in the place provided on the lift truck and in the language used by the operator. — The operator’s manual and any plates or stickers which are no longer legible or are damaged, must be replaced immediately. MAINTENANCE — Maintenance or repairs other than those detailed in Part: 3 — MAINTENANCE must be carried out by qualified personnel (consult your dealer) and in the necessary safety conditions to preserve the health of the operator and any third party.
- Page 13
1 — 9… -
Page 14: Instructions For The Operator
— At any time, as an operator, you must envisage, within reason, the possible risk to yourself, to others or to the lift truck itself when you use it. IMPORTANT In order to reduce or prevent any danger with a MANITOU-approved attachment, follow the instructions in Paragraph: 4 — ADAPTABLE ATTACHMENTS AS OPTIONS ON THE RANGE: INTRODUCTION. GENERAL INSTRUCTIONS A — OPERATOR’S MANUAL…
-
Page 15: E — Modification Of The Lift Truck
Right-hand column • With a PLATFORM-fitted lift truck, people can only be lifted using platforms designed by MANITOU for the purpose. — MANITOU sells equipment specifically designed for lifting people (OPTION PLATFORM lift truck, contact your dealer). 1 — 11…
-
Page 16: Operating Instructions Unladen And Laden
OPERATING INSTRUCTIONS UNLADEN AND LADEN A — BEFORE STARTING THE LIFT TRUCK — Perform the daily maintenance operations ( 3 — MAINTENANCE). — Make sure that the driver’s cab is clean, particularly the floor and floor mat. Check that no movable object may hinder the operation of the lift truck.
-
Page 17: D — Visibility
— Take into account the lift truck’s dimensions and its load before trying to negotiate a narrow or low passageway. — Never move onto a loading platform without having first checked: • That it is suitably positioned and made fast. •…
-
Page 18: E — Starting The Lift Truck
E — STARTING THE LIFT TRUCK SAFETY INSTRUCTIONS IMPORTANT The lift truck must only be started up or manoeuvred when the operator is sitting in the driver’s cab, with his seat belt adjusted and fastened. — Never try to start the lift truck by pushing or hauling it. Such an operation may cause severe damage to the transmission. If necessary, towing requires the transmission to be put in neutral ( 3 — MAINTENANCE).
-
Page 19: G — Stopping The Lift Truck
— Never drive on the edge of a ditch or steep slope. — It is dangerous to use two lift trucks simultaneously to handle heavy or bulky loads, since this operation requires particular precautions to be taken. It must only be used exceptionally and after risk analysis. — The ignition switch has an emergency stop mechanism in case of an operating anomaly occurring in the case of lift trucks not fitted with a punch-operated cut-out.
-
Page 20: H — Driving The Lift Truck On The Public Highway
H — DRIVING THE LIFT TRUCK ON THE PUBLIC HIGHWAY (or see current legislation in other countries) FRENCH ROAD TRAFFIC RULES — The driving of non EC type-approved tractors on the public highway is subject to the provisions of the highway code relating to special machines, defined in article R311-1 of the highway code, in category B of the Equipment Order of 20 November 1969 that determines the procedures applicable to special machines.
- Page 21
1 — 17… -
Page 22: Instructions For Handling A Load
INSTRUCTIONS FOR HANDLING A LOAD A — CHOICE OF ATTACHMENTS — Only attachments approved by MANITOU can be used on its lift trucks. — Make sure the attachment is suitable for the work to be done ( 4 — ADAPTABLE ATTACHMENTS AS OPTIONS ON THE RANGE).
-
Page 23: D — Transverse Attitude Of The Lift Truck
D — TRANSVERSE ATTITUDE OF THE LIFT TRUCK Depending on the model of lift truck The transverse attitude is the transverse slope of the chassis with respect to the horizontal. Raising the boom reduces the lift truck’s lateral stability. The transverse attitude must be set with the boom in down position as follows: 1 — …
-
Page 24: F — Picking Up And Putting Down A High Load On Tyres
F — PICKING UP AND PUTTING DOWN A HIGH LOAD ON TYRES IMPORTANT In no circumstances should you raise the boom if you have not checked the transverse attitude of the lift truck INSTRUCTIONS FOR HANDLING A LOAD: D — TRANSVERSE ATTITUDE OF THE LIFT TRUCK). REMINDER: Make sure that the following operations can be performed with good visibility ( OPERATING INSTRUCTIONS UNLADEN AND LADEN:…
- Page 25
PUTTING DOWN A HIGH LOAD ON TYRES — Approach the load in the transport position in front of the stack (fig. F6). — Apply the parking brake and place the forward/reverse selector in neutral. — Raise and extend the boom (1) (2) until the load is above the stack, while monitoring the longitudinal stability indicator ( INSTRUCTIONS FOR HANDLING A LOAD: C — LONGITUDINAL STABILITY INDICATOR). -
Page 26: G — Picking Up And Putting Down A High Load On Stabilisers
G — PICKING UP AND PUTTING DOWN A HIGH LOAD ON STABILISERS Depending on the model of lift truck IMPORTANT In no circumstances should you raise the boom if you have not checked the transverse attitude of the lift truck INSTRUCTIONS FOR HANDLING A LOAD: D — TRANSVERSE ATTITUDE OF THE LIFT TRUCK). REMINDER: Make sure that the following operations can be performed with good visibility ( OPERATING INSTRUCTIONS UNLADEN AND LADEN:…
- Page 27
TAKING UP A HIGH LOAD ON STABILISERS — Ensure that the forks will easily pass under the load. — Check the position of the lift truck with respect to the load and make a test run, if necessary, without taking the load. — Raise and extend the boom (1) (2) until the forks are at the level of the load (fig. G5). -
Page 28: H — Picking Up And Putting Down A Suspended Load
H — PICKING UP AND PUTTING DOWN A SUSPENDED LOAD IMPORTANT Failure to follow the above instructions may lead the lift truck to loose stability and overturn. MUST be used with a lift truck equipped with an operational hydraulic movement cut-out device. CONDITIONS OF USE — The length of the sling or the chain shall be as short as possible to limit swinging of the load.
-
Page 29: Instructions For Use As A Loader
INSTRUCTIONS FOR USE AS A LOADER For agricultural-type lift trucks (MLT range) A — LOADING IMPORTANT In no circumstances should you raise the boom if you have not checked the transverse attitude of the lift truck INSTRUCTIONS FOR HANDLING A LOAD: D — TRANSVERSE ATTITUDE OF THE LIFT TRUCK). REMINDER: Make sure that the following operations can be performed with good visibility ( OPERATING INSTRUCTIONS UNLADEN AND LADEN:…
-
Page 30: Platform Operating Instructions
— MANITOU has ensured that this platform is suitable for use under the normal operating conditions provided in this operator’s manual, with a STATIC test coefficient of 1.25 and a DYNAMIC test coefficient of 1.1 as specified in harmonised European standard EN 280:2013+A1 for «mobile elevating work platforms».
-
Page 31: E — Environment
E — ENVIRONMENT IMPORTANT It is forbidden to use the platform close to electricity cables. Maintain the specified safe distances. RATED VOLTAGE SAFETY DISTANCE (METRES) 50 < U < 1,000 2,30 M 1,000 < U < 30,000 2,50 M 30000 < U < 45000 2,60 M 45000 <…
-
Page 32: Instructions For Using The Radio-Control
INSTRUCTIONS FOR USING THE RADIO-CONTROL For lift trucks with RC radio control HOW TO USE THE RADIO-CONTROL SAFETY INSTRUCTIONS — This radio-control consists of electronic and mechanical safety elements. It cannot receive commands from another transmitter because the internal encoding is unique to each radio-control. IMPORTANT If it is used improperly or incorrectly, there is a risk of danger to: — The physical and mental health of the user or others.
- Page 33
1 — 29… - Page 34
LIFT TRUCK MAINTENANCE INSTRUCTIONS GENERAL INSTRUCTIONS — Ensure the area is sufficiently ventilated before starting the lift truck. — Wear clothes suitable for the maintenance of the lift truck, avoid wearing jewellery and loose clothes. Tie back and protect your hair, if necessary. — Stop the engine and remove the ignition key, when an intervention is necessary. - Page 35
LUBRICANT AND FUEL LEVELS — Use the recommended lubricants (never use contaminated lubricants). — Do not fill the fuel tank when the engine is running. — Only fill up the fuel tank in areas specified for this purpose. — Do not fill the fuel tank to the maximum level. — Do not smoke or approach the lift truck with a flame, when the fuel tank is open or is being filled. - Page 36
IF THE LIFT TRUCK IS NOT TO BE USED FOR A LONG TIME INTRODUCTION The following recommendations are intended to prevent the lift truck from being damaged when it is withdrawn from service for an extended period. IMPORTANT Procedures to follow if the lift truck is not to be used for a long time and for starting it up again afterwards must be performed by your dealership. This period of long-term stoppage must not exceed 12 months. - Page 37
BRINGING THE LIFT TRUCK BACK INTO SERVICE — Remove the waterproof adhesive tape from all the holes. — Refit and reconnect the battery. — Remove the protection from the cylinder rods. — Perform the daily maintenance operations ( 3 — MAINTENANCE). — Put the handbrake on and remove the axle stands. — Drain and clean the fuel tank ( 3 — MAINTENANCE). - Page 38
• Glass items can be removed and collected for processing by glaziers. ENVIRONMENTAL PROTECTION By entrusting the maintenance of your lift truck to the MANITOU network, the risk of pollution is limited and the contribution to environmental protection contribution is made. - Page 39
2 — DESCRIPTION 2 — 1… - Page 40
2 — 2… - Page 41
2 — DESCRIPTION SAFETY PLATES AND STICKERS IDENTIFICATION OF THE LIFT TRUCK CHARACTERISTICS 2-10 TYRES 2-12 DIMENSIONS AND LOAD CHARTS 2-14 VISIBILITY 2-16 INSTRUMENTS AND CONTROLS 2-18 TOWING DEVICE 2-40 DESCRIPTION AND USE OF THE OPTIONS 2-42 2 — 3… - Page 42
SAFETY PLATES AND STICKERS IMPORTANT Clean all stickers and safety plates so that they are legible. Any safety plates and stickers which are illegible or damaged must be replaced. Check that stickers and safety plates are present after replacing any spare parts. EXTERNAL PLATES AND STICKERS REF. - Page 43
STICKERS AND PLATES UNDER THE ENGINE HOOD REF. PART NO. DESCRIPTION 244130 — Preheat rod (OPTION) 52506370 — Fuses 259398 — Water/diesel separator 52515083 — Anti-freeze 234797 MT 625 H COMFORT 75K ST5 — Air conditioning (OPTION) 52589959 — Rotating fan safety 110 -120 V ;… - Page 44
PLATES AND STICKERS IN THE CAB REF. PART NO. DESCRIPTION 52611811 — Lubrication sheet 52509004 — Manipulator function sheet 241621 — Safety instruction sheet 52504055 MT 625 H COMFORT 75K ST5 — Fuse sheet 52515060 MT 625 H — Fuse sheet 75K S 52533603 MT 625 H COMFORT 75K ST5 — Relay sheet… - Page 45
75% handling cycle Maxi Kg CO2/hour 1,00m Maxi 3m Mini Tests carried out by Manitou following the EP-695 internal procedure as approved by DANGER Keep machine at least 25 feet from overhead power lines. Failure to comply may result… - Page 46
IDENTIFICATION OF THE LIFT TRUCK As our policy is to promote a constant improvement in our products, our range of lift trucks may undergo certain modifications, without any obligation for us to advise our customers. When you order parts, or when you require any technical information, always specify: NOTE: For the owner’s convenience, it is recommended that a note of these numbers is made in the spaces provided, at the time of the delivery of the lift truck. - Page 47
FRONT AXLE Type Serial number MANITOU part No. REAR AXLE Type Serial number MANITOU part No. «Constructeur» Manufacturer «Type Cabine» Cabin type «Numéro de série» Serial number BOOM MANITOU Part No. Date of manufacture and manufacturer FRAME Serial number/Product identification number ATTACHMENT MANUFACTURER’S PLATE «MODELE»… - Page 48
CHARACTERISTICS ENGINE Type KUBOTA V3307 Fuel Diesel 4 in line Number of cylinders Supercharged Suction Injection system Direct Ignition sequence 1.3.4.2 Capacity cu.in (cm3) 203.27 (3331) 3.7 x 4.72 (94 x 120) Bore and stroke in (mm) 17,5 Compression ratio Nominal speed laden 2600 Min. - Page 49
BRAKE SYSTEM Service brake Non-servo hydraulic brake — Type of brake Oil-immersed multi-disc brake — Type of control By foot on front axle Parking brake Low pressure hydraulic brake — Type of brake Oil-immersed multi-disc brake — Type of control Switch-operated electro-hydraulic HYDRAULIC CIRCUIT Hydraulic pump… - Page 50
TYRES LOAD PER TYRE FRONT UNLADEN FRONT LADEN REAR UNLADEN REAR LADEN PRESSURE 12-16,5 12PR 81,2 SKS 532 ALLIANCE 12-16,5 12PR 1100 2425 3250 7165 1250 2756 81,2 HAULER SKS 305/70 R16,5 MICHELIN 69,6 137A8 BIBSTEEL ALL TERRAIN GROUND CONTACT PRESSURE GROUND CONTACT AREA PRESSURE LOAD HARD GROUND… - Page 51
2 — 13… - Page 52
DIMENSIONS AND LOAD CHARTS ft-in (mm) 3-11,2 (1200) ft-in (mm) 7-6,6 (2300) ft-in (mm) (991) ft-in (mm) 3-0,5 (928) ft-in (mm) 12-9,3 (3894) ft-in (mm) 12-6,8 (3831) ft-in (mm) 10-8,9 (3275) ft-in (mm) 16-8,6 (5094) ft-in (mm) 4-10,7 (1492) ft-in (mm) 4-10,7 (1492) (mm) 9,45… - Page 53
MT625 68° 19ft1in 60° 50° 40° 30° 20° 10° 0° -2° 24in 0 Feet 11ft0in 8ft4in 5ft3in 3ft7in 9ft4in 6ft11in 4ft3in 0 Meters According norme ANSI/ITSDF B56-6-2011 2 — 15… - Page 54
VISIBILITY We use European standard EN15830 relating to operator visibility. — Adhere to the instructions for optimising operator visibility in the immediate vicinity ( 1 — OPERATING AND SAFETY INSTRUCTIONS: INSTRUCTIONS TO THE OPERATOR: DRIVING INSTRUCTIONS UNLADEN AND LADEN: D — VISIBILITY). DESCRIPTION AND ADJUSTMENT OF REAR-VIEW MIRRORS 1 — LEFT REAR-VIEW MIRROR 2 — MAIN RIGHT REAR-VIEW MIRROR 3 — CENTRAL RIGHT REAR-VIEW MIRROR… - Page 55
2 — 17… - Page 56
INSTRUMENTS AND CONTROLS DESCRIPTION NOTE: All the terms such as: RIGHT, LEFT, FRONT, REAR are as seen by an observer occupying the driver’s seat and looking straight ahead. 1 — DRIVER’S CAB ACCESS ………………… . . 2-20 2 — SEAT BELT . - Page 57
MT 625 H COMFORT 75K ST5 MT 625 H 75K ST5 2 — 19… -
Page 58: Driver’s Cab Access
1 — DRIVER’S CAB ACCESS Use the contact points 1 to get into or out of the driver’s cab. • Mounting at the front. • Descending at the rear. 2 — SEAT BELT IMPORTANT Under no circumstances must the lift truck be used if the seat belt is defective (fixing, locking, cuts, tears, etc.). Immediately repair or replace the safety belt.
-
Page 59: Driver’s Seat
3 — DRIVER’S SEAT DESIGNED FOR MAXIMUM COMFORT, THIS SEAT CAN BE ADJUSTED AS FOLLOWS. WEIGHT ADJUSTMENT Adjust the weight when the driver is sitting on the seat. — Pull the weight adjustment lever 1 fully out. — Move the weight adjustment lever 1 upwards to increase the weight or downwards to reduce it.
-
Page 60: Ignition Switch
4 — IGNITION SWITCH This switch has 5 positions: • P — Not used. • O — Ignition cut-off and engine stopped. • I — Ignition + preheat. • II — Not used. • III — Starting and return to position I as soon as the key is released. 5 — EMERGENCY STOP In the event of danger, it enables the engine to be shut down, thereby cutting-off all hydraulic movements.
-
Page 61: Man-Machine Interface (Mmi)
8 — MAN-MACHINE INTERFACE (MMI) • A — INSTRUMENT CONTROL PANEL • B — SCREEN DISPLAYS A — INSTRUMENT CONTROL PANEL IMPORTANT A permanently lit or flashing warning lamp, with the engine running, is the sign of an operating fault. The lighting of some lamps may be accompanied by an audible signal. Do not ignore this warning, consult your dealer without delay.
-
Page 62: Switches
TRANSMISSION OIL TEMPERATURE WARNING INDICATOR LAMP The lamp and the buzzer come on when the transmission oil temperature is abnormally high. Stop the lift truck and seek the cause of this overheating. ENGINE FAULT INDICATOR LAMP If the indicator lamp comes on or flashes while the lift truck is in operation, a diagnostic fault has been detected. The lift truck will operate in reduced mode.
- Page 63
PARKING BRAKE FAULT INDICATOR LAMP The indicator lamp comes on when the parking brake is applied ( SWITCHES). BRAKING OIL LEVEL WARNING INDICATOR LAMP If the lamp comes on when the lift truck is running, stop the engine immediately and check the brake fluid level. In the event of an abnormal drop in the level, consult your dealer. - Page 64
Rev counter Partial hour meter SETTING THE TIME — Display clock screen. — Press the button for 2 seconds, choose the «24 hour» or «12 hour am/pm» clock with the button and confirm — Set the hours with the button and confirm — Set the minutes with the button and confirm RESETTING THE PARTIAL HOUR METER… - Page 65
9 — SWITCHES NOTE: The location of the switches may vary depending on the options. HAZARD WARNING LIGHTS REAR FOG LIGHT (OPTION) ROTATING BEACON LIGHT FRONT AND REAR WORKING LIGHTS (OPTION) REAR WINDOW DEFROSTER (OPTION) MT 625 H COMFORT 75K ST5 HYDRAULIC MOVEMENT NEUTRALISATION When driving on the road, it is highly recommended (mandatory in Germany) that you cut-off all the hydraulic movements. The indicator lamp shows when it is in use. -
Page 66: Armrest And Storage
PARKING BRAKE To connect the parking brake, press the bottom of the switch. The indicator lamp indicates when it is in use. To disconnect the parking brake, press the top of the switch. ATTACHMENT HYDRAULIC LOCKING (OPTION) BOOM HEAD ELECTROVALVE (OPTION) MT 625 H COMFORT 75K ST5 BOOOM HEAD ELECTROVALVE + ATTACHMENT HYDRAULIC LOCKING (OPTION)
-
Page 67: Fuses And Relays
12 — FUSES AND RELAYS A sticker on the inside of the access panel provides a quick indication of the use of the fuse plate’s components described below. — Remove the access panel 1 to access the fuses and relays. Replace a used fuse with a new fuse of the same quality and capacity.
- Page 68
2A Control instrument module power supply. * * MT 625 H 75K ST5 Not used. ** 2A Battery power supply (+). * Not used. ** Free. * Not used. ** Free. * Not used. ** 2A Control instrument module power supply. ** 2A Battery power supply (+). -
Page 69: Cigarette Lighter
13 — CIGARETTE LIGHTER For 12 V appliance and max. amperage 15A. 14 — LIGHTING, HORN AND INDICATOR SWITCH The switch controls the visual and sound alarms. • A — All lights are off, the indicator lights do not flash. • B — The right hand indicator lights flash. •…
-
Page 70: Hydraulic Controls
17 — HYDRAULIC CONTROLS IMPORTANT Do not attempt to alter the hydraulic system pressure by interfering with the pressure regulating valve. In the event of suspected malfunction, contact your dealer. ANY ALTERATION MAY RENDER THE WARRANTY NULL AND VOID. Use the hydraulic controls gently without jerking, to avoid incidents caused by shaking the lift truck. NOTE: When driving on the road, it is highly recommended (mandatory in Germany) that all the hydraulic movements are cut off ( SWITCHES).
- Page 71
ADJUSTMENT OF ATTACHMENT HYDRAULIC FLOW RATE — Switch on lift truck ignition. — Select the attachment circuit hydraulic flow screen with the scroll button . In turn the screen displays the hydraulic flow stored in the memory of circuit B (without «-» sign) and of circuit A (with «-» sign). — Press the button for two seconds, the screen will appear on the… -
Page 72: Accelerator Pedal
18 — ACCELERATOR PEDAL 19 — SERVICE BRAKE PEDAL AND TRANSMISSION CUT-OFF The pedal acts on the front wheels by means of a hydraulic brake system to slow down and stop the lift truck. During free travel it enables the transmission to be cut off progressively thus allowing a gradual approach (delicate handling) with all the engine power.
-
Page 73: Steering Selection
21 — STEERING SELECTION A — GREEN WHEEL ALIGNMENT INDICATOR LAMPS IMPORTANT Before selecting one of the three steering possibilities, align the 4 wheels in relation to the lift truck axis. Never change the steering mode whilst driving. These green indicator lamps come on to indicate the alignment of the wheels in relation to the lift truck.
-
Page 74: Heater Control
22 — HEATER CONTROL A — FAN CONTROL This 3-speed control allows the air to be ventilated through the air vents. B — TEMPERATURE CONTROL Adjusts the temperature inside the cab. • B1 — The fan pumps in the air at ambient temperature. • B2 — The fan pumps in warm air. The intermediate positions allow the temperature to be adjusted.
-
Page 75: Heating Vents
24 — HEATING VENTS These swivelling heating vents, which can be shut off, allow you to direct and adjust the flow inside the cab. 25 — DEMIST VENTS These vents allow the windscreen and side windows to be demisted. For optimum efficiency, close the heating vents. 26 — LEVEL INDICATOR Enables the operator to check that the lift truck is in the horizontal position.
-
Page 76: Front Headlights
34 — FRONT HEADLIGHTS • A — Left front indicator light. • B — Left front dipped beam headlight. • C — Left front main beam. • D — Left front side light. • E — Right front indicator light. • F — Right front dipped beam headlight. • G — Right front main beam headlight. •…
-
Page 77: Boom Safety Wedge
40 — BOOM SAFETY WEDGE IMPORTANT Only use the wedge supplied with the lift truck. The lift truck is equipped with a boom safety wedge which must be installed on the rod of the lifting cylinder when working beneath the boom ( 1 — OPERATING AND SAFETY INSTRUCTIONS).
- Page 78
TOWING DEVICE 1 — TOWING PIN ………………….. . 2-41 2 — REAR ELECTRIC SOCKET (DEPENDING ON ASSEMBLY) . - Page 79
1 — TOWING PIN IMPORTANT Be careful not to get your fingers caught or crushed during this operation. Do not forget to put the cotter pin back in place. When uncoupling, make sure that the trailer is supported independently. COUPLING AND UNCOUPLING THE TRAILER — To couple the trailer, position the lift truck as close as possible to the trailer ring. - Page 80
DESCRIPTION AND USE OF THE OPTIONS 1 — PREHEAT ROD………………….. 2-42 2 — MODCOD ANTI-THEFT SYSTEM . -
Page 81: Modcle Anti-Start System
3 — MODCLE ANTI-START SYSTEM OPERATION — Switch on lift truck ignition, red LED 1 will flash. — Apply key 2 to its base 3, and withdraw it as soon as the system emits a continuous sound signal, and LED 1 turns green. — Start the lift truck within the next 20 seconds; otherwise the anti-theft system will be reactivated and red LED 1 will flash.
-
Page 82: Waterproof Document Holder
7 — WATERPROOF DOCUMENT HOLDER 8 — WINDSCREEN GRILL DESCRIPTION The windscreen grill provides additional protection for the operator from any external elements spattered on the windscreen. This grill must be removable from inside the cab to enable an emergency exit. EMERGENCY EXIT — After breaking the windscreen with the emergency hammer, push (with force) on the windscreen grill at A to remove it.
-
Page 83: Boom Head Electrovalve
10 — BOOM HEAD ELECTROVALVE MT 625 H COMFORT 75K ST5 Enables use of two hydraulic functions on the attachment circuit. IMPORTANT To facilitate connection of the quick couplers, decompress the hydraulic circuit by pressing button 1 on the electrovalve. ATTACHMENT LINE A1/B1 CONTROL — Put switch 1 to position A (indicator lamp off ).
-
Page 84: Attachment Hydraulic Control Forced Operation
12 — ATTACHMENT HYDRAULIC CONTROL FORCED OPERATION MT 625 H COMFORT 75K ST5 IMPORTANT This OPTION must only be used with an attachment requiring continuous hydraulic movement, such as a brush, feeder bucket, mixer, spray etc. It is strictly forbidden for use in handling operations and all other applications (winch, crane jib, crane jib with winch, hook, etc.).
-
Page 85: Lifting Ring On Single Carriage
15 — LIFTING RING ON SINGLE CARRIAGE CONDITIONS OF USE IMPORTANT Follow the instructions given in your lift truck’s instruction manual ( 1 — OPERATING AND SAFETY INSTRUCTIONS FOR HANDLING LOADS), and in addition those given below. — The lifting ring must be used WITHOUT FORKS AND ATTACHMENTS, but the angle of inclination of the carriage must be same as when the forks are used in the horizontal position.
- Page 86
2 — 48… - Page 87
3 — MAINTENANCE 3 — 1… - Page 88
3 — MAINTENANCE ORIGINAL MANITOU SPARE PARTS AND EQUIPMENT FORKLIFT TRUCK MAINTENANCE DAILY AND WEEKLY MAINTENANCE MANDATORY FIRST 500 HOURS OR 6 MONTHS SERVICE PERIODIC SERVICE OCCASIONAL MAINTENANCE AND OPERATION FILTER ELEMENTS AND BELTS LUBRICANTS AND FUEL 3-10 Ü 10H — DAILY SERVICE OR EVERY 10 HOURS OF SERVICE 3-12 Ü… - Page 89
• Efficient help with diagnosis. • Improvements due to experience feedback. • Operator training. • Only the MANITOU network has detailed knowledge of the design of the lift truck and therefore the best technical ability to provide maintenance. IMPORTANT ORIGINAL REPLACEMENT PARTS ARE DISTRIBUTED EXCLUSIVELY BY MANITOU AND ITS DEALER NETWORK. - Page 90
This schedule enables the operator to keep up with the periodic service of the lift truck by notifying the total number of hours of operation and the date of the service performed by the professional approved by the MANITOU network. - Page 91
MANDATORY FIRST 500 HOURS OR 6 MONTHS SERVICE FIRST 500 HOURS BEFORE THE FIRST 6 MONTHS — If the lift truck has reached the first 500 hours of service before the first 6 months have expired, perform both the mandatory ÜŒ service and periodic 500 H service ( … - Page 92
PERIODIC SERVICE MAINTENANCE SCHEDULE Þ Þ 500 H 1000 H 1500 H 2000 H Ü WHEN DUE FIRST 6 MONTHS FIRST 500 HOURS or 1 YEAR or 2 YEARS or 3 YEARS or 4 YEARS MANDATORY SERVICE Ü Œ Œ Œ Œ Ž PERIODIC SERVICE MANDATORY SERVICE Œ… - Page 93
Ü 1000H — PERIODIC SERVICE — EVERY 1000 HOURS OF SERVICE OR 2 YEARS ALSO PERFORM THE 500 HOUR PERIODIC MAINTENANCE OPERATIONS. — CHECK Safety belt ………………3-24 — CLEAN Fuel tank . - Page 94
Ü 3000H — PERIODIC SERVICE — EVERY 3000 HOURS OF SERVICE OR 6 YEARS ALSO PERFORM THE 500 HOUR AND 1000 HOUR PERIODIC MAINTENANCE OPERATIONS. — CHECK Turbocharger **………………3-33 — CHECK Exhaust gas recirculation system «EGR»… - Page 95
FILTER ELEMENTS AND BELTS ÜŒ 500H — PERIODIC SERVICE — EVERY 500 HOURS OF SERVICE OR 1 YEAR ENGINE OIL FILTER HYDRAULIC RETURN OIL FILTER CARTRIDGE Part number: 279809 Part number: 750098 FUEL PRE-FILTER INTERIOR CAB VENTILATION FILTER Part number: 940729 Part number: 750306 FUEL FILTER HYDRAULIC FLUID TANK FILTER CAP Part number: 52630568 Part number: 794879 Ü… - Page 96
USE THE RECOMMENDED LUBRICANTS AND FUEL: — For topping up, oils may not be miscible. — For oil changes, MANITOU oils are perfectly appropriate. DIAGNOSTIC ANALYSIS OF OILS If a service or maintenance contract has been set up with the dealer, a diagnostic analysis of engine, transmission and axle oils may be requested depending on the rate of use. - Page 97
PRODUCT 1.06 US qt 2.11 US qt 5.28 US qt 5.28 US gal 14.53 US gal 55.21 US gal 1 ℓ 2 ℓ 5 ℓ 20 ℓ 55 ℓ 209 ℓ — MANITOU EVOLOGY OIL 10W40 API CJ4 895837 895838 895839 895840 — MANITOU ISO VG 46 HYDRAULIC OIL 545500 582297 546108… -
Page 98: Daily Service Or Every 10 Hours Of Service
Ü 10H — DAILY SERVICE OR EVERY 10 HOURS OF SERVICE CHECK Lift truck environment Carry out a general inspection around the lift truck: — Fluid leaks or stains on the ground. — Additional objects on the lift truck and in the cabin. — Mounting and locking of the attachment.
-
Page 99: Clean
CLEAN Cyclonic pre-filter (option) The cleaning interval is given as a guide, however the pre-filter must be emptied and cleaned as soon as impurities reach the MAX level on the tank. IMPORTANT When cleaning, take care not to let impurities into the dry air filter. — Loosen nut 1 remove cover 2 and empty the tank.
-
Page 100: Weekly Service Or Every 50 Hours Of Service
Ü 50H — WEEKLY SERVICE OR EVERY 50 HOURS OF SERVICE CHECK Alternator/crankshaft belt tension IMPORTANT If the belt is changed, check the tension again after the first 20 hours of service. — Open the engine cover. — Check the belt for signs of wear and cracks, and change if necessary ( FILTER ELEMENTS AND BELTS).
-
Page 101: Check Front Axle Differential Seal
— Telescope the boom several times in order to spread the lubricant evenly. — Remove the surplus lubricant. IMPORTANT If the lift truck is used in an abrasive environment (dust, sand, coal.) use lubricating varnish (MANITOU reference: 483536). Please consult your dealer. 3 — 15…
-
Page 102: Check Hydraulic Oil Level
CHECK Hydraulic oil level Place the lift truck on level ground with the engine stopped, and the boom retracted and lowered as far as possible. IMPORTANT Use a clean funnel and clean the underside of the oil drum before filling. — Check dipstick 1, the correct level must be at the level of the red dot.
-
Page 103: Clean
— Cleaning is completed when there is no more dust on the cartridge. — Clean the cartridge seal surface with a damp, clean lint-free cloth and grease with a silicone lubricant (MANITOU part No.: 479292).
-
Page 104: Lubricate General Lubrication
LUBRICATE General lubrication To be carried out weekly, if the lift truck has been operated for less than 50 hours during the week. IMPORTANT In the event of prolonged use in an extremely dusty or oxidising atmosphere, reduce this interval to 10 hours of service or every day. Clean, then lubricate the following points with grease ( LUBRICANTS AND FUEL) and remove the surplus.
-
Page 105: Replace Engine Oil
REPLACE Engine oil * REPLACE Engine oil filter * Place the lift truck on level ground, let the engine run at idling speed for a few minutes, then stop the engine. IMPORTANT Dispose of the drain oil in an ecological manner. Tighten the oil filter by hand pressure only and lock the filter in place by a quarter turn.
- Page 106
CHECK Hydraulic oil MANITOU offers a hydraulic oil analysis kit which might make it possible to delay the recommended deadline in the periodic maintenance schedule (2000 hours). In this case we recommend an analysis of the hydraulic oil every 500 hours or 1 year of service. - Page 107
REPLACE Fuel filter IMPORTANT Carefully clean the outside of the filter and around it, to prevent dust from getting into the system. Tighten the filter by hand only and lock it by a quarter turn. — Switch off the lift truck’s ignition with the ignition key. — Unscrew the filter 1. - Page 108
REPLACE Front axle differential oil Place the lift truck on level ground with the engine stopped and the still warm differential oil. IMPORTANT Dispose of the drain oil in an ecological manner. — Place a container under drain plug 1 and unscrew the plug. — Remove level and filling plug 2 to ensure correct drainage. - Page 109
REPLACE Hydraulic fluid tank filter cap Place the lift truck on level ground with the engine stopped. — Unscrew plug 1, remove and replace the filter 2 with a new one ( FILTER ELEMENTS AND BELTS). — Refit and tighten the filter 2 (tightening torque 2,21 ±0,37 ft-lbs 3 ±0,5 N.m). — Refit the filler plug 1. - Page 110
Ü 1000H — PERIODIC SERVICE — EVERY 1000 HOURS OF SERVICE OR 2 YEARS ALSO PERFORM THE 500 HOUR PERIODIC MAINTENANCE OPERATIONS. CHECK Safety belt IMPORTANT Under no circumstances must the lift truck be used if the seat belt is defective (fixing, locking, cuts, tears, etc.). Immediately repair or replace the safety belt. SEAT BELT WITH TWO ANCHORING POINTS — Check the following points: •… - Page 111
REPLACE Alternator belt IMPORTANT Check the belt tension again after the first 20 hours of service. REMOVING THE BELT — Undo screws 1 and remove radiator protection grill 2. — Loosen screws 3 by two to three thread turns. — Swivel the alternator assembly so as to free belt 4. — Pass belt 4 behind radiator propeller 5 to remove it and replace with a new one FILTER ELEMENTS AND BELTS). - Page 112
REPLACE Dry air filter cartridge In case of use in a heavily dust laden atmosphere, there are pre-filtration cartridges, FILTER ELEMENTS AND BELTS). Also, the checking and cleaning periodicity of the cartridge must be reduced (up to 250 hours in a very dusty atmosphere and with pre-filtration). - Page 113
REPLACE Rear axle differential oil Place the lift truck on level ground with the engine stopped and the still warm differential oil. IMPORTANT Dispose of the drain oil in an ecological manner. — Place a container under drain plug 1 and unscrew the plug. — Remove level and filling plug 2 to ensure correct drainage. - Page 114
CHECK Silentblocks ** CHECK Valve lash ** CHECK Injectors ** CHECK Exhaust gas recirculation cooler «EGR» ** CHECK Casing gas recycling valve ** CHECK Brake system pressure * CHECK Boom pad wear * CHECK Condition of wiring harnesses and cables * CHECK Lights and signals * CHECK… - Page 115
REPLACE Oil separator rubber hoses ** REPLACE Exhaust particle filter pressure sensor rubber hoses «DPF» ** REPLACE Intake hose ** REPLACE Pressure detection hoses for the oversupply sensor ** REPLACE Exhaust gas recirculation cooler hoses «EGR» ** REPLACE Water hose ** REPLACE Lubrication hose ** REPLACE… - Page 116
ÜŽ 2000H — PERIODIC SERVICE — EVERY 2000 HOURS OF SERVICE OR 4 YEARS ALSO PERFORM THE 500 HOUR AND 1000 HOUR PERIODIC MAINTENANCE OPERATIONS. CHECK Wheel nut tightening torques — Check the condition of the tyres, to detect cuts, blisters, wear, etc. — Check the tightening torque of the wheel nuts with a torque wrench. •… - Page 117
REPLACE Hydraulic oil REPLACE Brake accumulator unit filter Place the lift truck on level ground with the engine stopped. IMPORTANT Raise the boom and place the boom safety wedge on the rod of the lifting cylinder ( 1 — OPERATING AND SAFETY INSTRUCTIONS: LIFT TRUCK MAINTENANCE INSTRUCTIONS). - Page 118
CHECK Radiator * CHECK Transmission pressures * CHECK Steering * CHECK Steering swivel joints * CHECK Brake pad and brake disk wear * CHECK Condition of boom assembly * CHECK Bearings and bushings * CHECK Condition of hoses and flexible pipes * CHECK Condition of cylinders (leakage, rods) * CHECK… -
Page 119: Check Turbocharger
Ü 3000H — PERIODIC SERVICE — EVERY 3000 HOURS OF SERVICE OR 6 YEARS ALSO PERFORM THE 500 HOUR AND 1000 HOUR PERIODIC MAINTENANCE OPERATIONS. CHECK Turbocharger ** CHECK Exhaust gas recirculation system «EGR» ** CLEAN Exhaust particle filter «DPF» ** ** Engine service, consult your dealer. 3 — 33…
-
Page 120: Occasional Maintenance
Ü OCCASIONAL MAINTENANCE CLEAN «Stationary lift truck» exhaust purification IMPORTANT Exhaust purification is an automated procedure activated by the operator when the following indicator lamps are displayed: — Park the lift truck in a safe and adequately ventilated place. — Check the following points: •…
-
Page 121: Replace Wheels
REPLACE Wheels For this operation, we advise you to use the MANITOU hydraulic jack Part No. 505507 and the MANITOU safety support prop Part No. 554772. IMPORTANT In the event of a wheel being changed on the public highway, secure the lift truck vicinity: — Stop the lift truck, if possible on firm, level ground.
-
Page 122: Replace
REPLACE Battery failure IMPORTANT Operate the battery cut-off for a minimum of 30 seconds after having switched off the ignition with the ignition key. Handling and servicing a battery can be dangerous, take the following precautions: — Wear protective goggles. — Keep the battery horizontal. — Never smoke or work near a naked flame.
- Page 123
3 — 37… -
Page 124: Occasional Operation
Ü OCCASIONAL OPERATION TOW OR WINCH Lift truck IMPORTANT If the lift truck is not on level ground, chock it so that it does not descend the slope. The lift truck must be towed very slowly (less than 5 km/h) and for as short a distance as possible (less than 100 m). For towing a lift truck, the high pressure limiters must be unlocked to avoid damaging the hydrostatic transmission, and the parking brake on the front axle must be released.
- Page 125
TRANSPORT Lift truck IMPORTANT Ensure that the safety instructions associated with the flatbed are complied with before loading the lift truck and that the driver of the carrier vehicle is informed of the dimensions and the weight of the lift truck ( 2 — DESCRIPTION: CHARACTERISTICS). - Page 126
3 — 40… - Page 127
4 — OPTIONAL ADAPTABLE ATTACHMENTS FOR THE RANGE 4 — 1… - Page 128
4 — 2… - Page 129
INTRODUCTION — Your lift truck must be used with interchangeable equipment. These items are called: ATTACHMENTS. — A wide range of attachments is available, guaranteed by MANITOU and designed to fit your lift truck perfectly. IMPORTANT Only attachments approved by MANITOU can be used with their lift trucks ( TECHNICAL SPECIFICATIONS OF ATTACHMENTS). - Page 130
PICKING UP THE ATTACHMENTS 1 — ATTACHMENT WITHOUT HYDRAULICS AND HAND LOCKING DEVICE FITTING AN ATTACHMENT — Ensure that the attachment is in a position facilitating the locking to the carriage. If it is not correctly oriented, take the necessary precautions in order to move it safely. — Check that the locking pin is in position in the bracket (Fig. - Page 131
2 — HYDRAULIC ATTACHMENT AND MANUAL LOCKING DEVICE FITTING AN ATTACHMENT — Ensure that the attachment is in a position facilitating the locking to the carriage. If it is not correctly oriented, take the necessary precautions in order to move it safely. — Check that the locking pin is in position in the bracket (Fig. - Page 132
TECHNICAL SPECIFICATIONS OF ATTACHMENTS STANDARDISED TILTING FORK CARRIAGE PFB 25 N MT-1020 S2 PFB 25 N MT-1260 S2 PART NO. 571958 571959 Rated capacity 2300 kg 2300 kg Width 1020 mm 1260 mm Ground 71 kg 80 kg STANDARDISED SIDE-SHIFT CARRIAGE TDL 2T5 L1020 FEM2 TDL 2T5 L1260 FEM2 PART NO. - Page 133
FLOATING FORK CARRIAGE TFF 29 MT-1040 PART NO. 653340 Rated capacity 2900 kg Width 1040 mm Ground 285 kg FLOATING FORK PART NO. 211919 Section 125x40x1200 mm Ground 62 kg 4 — 7… - Page 134
BUILDING BUCKET CBC 650 L1850 PART NO. 654473 Rated capacity 676 l Width 1850 mm Ground 320 kg LOADING BUCKET CBR 730 L1850 PART NO. 571831 Rated capacity 735 l Width 1850 mm Ground 330 kg MULTIPURPOSE BUCKET DISPLAY CB4X1-700 L1950 PART NO. - Page 135
CONCRETE BUCKET (ADAPTABLE ON FORKS) BB 500 S4 PART NO. 654409 Rated capacity 500 l/1300 kg Width 1100 mm Ground 205 kg CONCRETE BUCKET WITH SPOUT (ADAPTABLE ON FORKS) BBHG 500 S4 PART NO. 751464 Rated capacity 500 l/1300 kg Width 1100 mm Ground… - Page 136
ATTACHMENT GUARDS FORK GUARD PART NO. 227801 FORK BLOCK FOR FLOATING FORK CARRIAGE PART NO. 261210 BUCKET PROTECTOR Always ensure that the width of the protector you choose is less than or equal to the width of the bucket. PART NO. 206734 206732 206730…
ERROR CODES
The appearance of the maintenance key
indicate that an anomaly has been detected by one of the lift truck’s Electronic Control Units (ECU).
— Press the button
to display the information
— If there are several error codes, press the button
— Press the button
once more to return to the hour meter screen, the maintenance key
repairs have not been carried out.
— Contact your dealer, stating the error code or codes.
NOTE: A faulty fuse can generate several error codes. When «error codes» and «maintenance interval» are displayed together, the maintenance
reminder time will appear at the end of the list.
ERROR CODE
HYDROSTATIC TRANSMISSION
520201
Hydraulic transmission electronic control unit voltage fault.
520214
Hydraulic transmission electronic control unit fault.
520215
Hydrostatic motor regulator control fault.
520217
Stop light control fault.
520224
Hydrostatic motor operating solenoid valve control fault.
520225
Hydraulic transmission electronic control unit fault.
520226
Hydraulic transmission electronic control unit fault.
520227
Hydraulic transmission electronic control unit fault.
520273
Forward/reverse selector error.
520274
Inching sensor error.
520275
Hydrostatic pump reverse operation control fault.
520276
Hydrostatic pump forward operation control fault.
520277
Hydraulic pump speed sensor fault.
520281
Temperature outside operating range.
ERROR CODE
190
Engine speed data fault.
520400
Network link fault.
520401
Fuel gauge fault.
520402
Engine temperature sensor fault.
520404
Man-Machine Interface fault.
520405
Man-Machine Interface fault.
520406
Man-Machine Interface fault.
520407
Man-Machine Interface fault.
520408
Man-Machine Interface fault.
520409
Man-Machine Interface fault.
520410
Man-Machine Interface fault.
520411
Man-Machine Interface fault.
520412
Hydrostatic transmission network link fault.
520413
Electronic handling controller network connection fault.
on the hour meter screen
to loop through the error codes.
MAN-MACHINE INTERFACE
together with the sounding of an audible beep,
on the upper screen and error code
remains displayed as long the as the required
ERROR CODE
2662
Telescope control setting fault.
2663
Attachment control setting fault.
520300
Seat sensor fault.
520307
Proportional telescope control fault.
520310
Proportional attachment control fault.
520315
Telescope control ON/OFF fault.
520318
Attachment control ON/OFF fault.
520336
Electronic handling controller fault.
520337
Electronic handling controller fault.
520338
Electronic handling controller temperature fault.
520352
Attachment forced operation control fault.
520362
Electronic handling controller 10V output fault.
520363
Attachment forced operation indicator fault.
520364
Attachment hydraulic control button fault.
520365
Attachment easy hydraulic connection button.
520366
Solenoid valve on jib head fault.
520370
Telescope retracted sensor fault (fault detected during test).
520371
Electronic handling controller temperature fault.
520376
Stability indicator fault.
520382
Aggravating hydraulic movement cut-off disable fault
520383
Computer earth output fault.
520384
Telescope retracted senor fault.
520386
Jib angle sensor fault.
520387
Strain gauge fault.
520388
Network communication fault.
520391
Inclination cut-off valve fault.
520392
Angle calibration fault (fault detected during test).
520393
Gauge calibration fault (fault detected during test).
520394
Safety valve fault.
520395
Safety valve cut-off fault (fault detected during test).
520396
Lowering regulating valve fault.
520397
Regulating fault (fault detected during test).
520398
Raising regulating valve fault.
2-22
.
TELESCOPE/ATTACHMENT
![]()
![]()
Manitou M30 40 50 Forklift Truck Wiring Diagrams
Manitou M30 40 50 Forklift Truck Wiring Diagrams
Manitou M30 40 50 Forklift Truck Wiring
Adobe Acrobat Document
408.6 KB
![]()
Manitou Forklift Service Manual
Manitou Fork Service Manual
Manitou Fork Service Manual.pdf
Adobe Acrobat Document
2.1 MB
![]()
Manitou MLT735 Operator Manual
Manitou MLT735 Operator Manual
Manitou MLT735 Operator Manual.pdf
Adobe Acrobat Document
3.3 MB
![]()
Manitou MTL845 945 Telehandler Operator’s Manual PDF
Manitou MTL845 945 Telehandler Operator’s Manual PDF
Manitou MTL845 945 Telehandler Operator’
Adobe Acrobat Document
3.8 MB
![]()
Manitou MLA628 Telehandler Operator’s Manual PDF
Manitou MLA628 Telehandler Operator’s Manual PDF
Manitou MLA628 Telehandler Operator’s Ma
Adobe Acrobat Document
3.3 MB
![]()
Manitou MLT625 Telehandler Operator’s Manual PDF
Manitou MLT625 Telehandler Operator’s Manual PDF
Manitou MLT625 Telehandler Operator’s Ma
Adobe Acrobat Document
4.9 MB
Some MANITOU Forklift Truck and Telehandler Service Manuals PDF, Wiring Diagrams & Error Codes DTC are above the page.
The history of Manitou began in 1958, it was then that the founder of the Manitou concern, Marcel BRO, used an engineering solution that was
quite extraordinary for that time, attaching a lifting mast to an agricultural tractor, and he created the first Manitou mast-lift with off-road capability.
Today, the Company produces more than 300 models of loading equipment, including exclusive models that have no analogues in the world.
Manitou is the world leader in the design and development of telescopic loaders, warehouse equipment and off-road loaders.
The Manitou technique is used in many sectors of the world economy.
Manitou offers unique solutions for the mining industry — the Manitou
Mining line. Manitou telescopic handlers help worldwide to quickly and efficiently repair mining equipment and to perform
mining operations more efficiently and safely.
Manitou Construction, Manitou loaders are designed for lifting, transporting various
types of cargo and personnel to great heights, in areas of construction objects that are difficult to reach for cargo delivery.
With its compact size and high maneuverability, complete with a telescopic boom, Manitou loaders deliver cargo not only vertically, to
certain heights, but also horizontally.
This technical capability of the telescopic boom developed and created by engineers of the Manitou concern can significantly reduce
labor costs associated with moving heavy loads and optimize the construction time of various objects.
![]()
![]()
MANITOU MT1440PE3-MT1840PE3 Fault Codes DTC
MANITOU MT1440PE3-MT1840PE3 Fault Codes DTC
MANITOU MT1440PE3-MT1840PE3 Fault Codes
Adobe Acrobat Document
45.5 KB
MANITOU Forklift Trucks Fault Codes List DTC
Symptom Cause Solution Service Manual Section
Air Loss Schrader Valve leaks Tighten Valve core, replace bad parts as needed. 1 Air Cap O-ring leaks Make sure O-ring is seated properly, replace parts as needed. Air Piston
leaks Check oil volume on top of piston, replace parts as needed. Air Top Cap leaks Check O-ring, tighten cap to proper Torque, and replace parts as needed.
Oil leaks from Wiper Seals Seal not seated properly Remove Casting from Inner Legs, reinstall or replace seals Nicks or scratches on inner legs Replace Crown/Steerer/Inner Leg
Assembly Too much Semi Bath oil Follow instructions for removal and installation of Outer Casting Wear Remove Casting from Inner Legs, reinstall or replace seals
Oil leaks from bottom of Casting Rebound damper shaft leaks Replace Rebound Damping assembly Rebound damper shaft O-ring damaged Replace O-ring on threaded end of Rebound Damping
assembly Compression Rod Bolt leaks Check O-ring on bolt to see if it is damaged and then reinstall
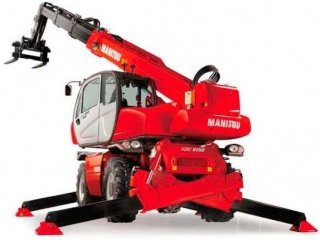
Lack of Travel Tight Bushings Resize bushings or replace with new ones if damaged Hydraulic lock out Replace Rebound Damping assembly Semi Bath oil volume Follow instructions for
removal and installation of Outer Casting Damper oil volume Check oil level, Replace Rebound Damping assembly if needed Fork alignment Visually inspect fork, call Answer Products Customer Service
Fork Top out Loss of Rebound Damping Replace Rebound Damping assembly Top out spring damaged Inspect and replace Top out spring if needed. Damping oil volume not correct Check
oil level, Replace Rebound Damping assembly if needed
Fork Bottom out Too much SAG Refer to SAG Set up in Tuning section of Owners Manual Bottom out Bumper damaged Inspect and replace Bottom out Bumper if needed Damping oil volume
not correct Check oil level, Replace Rebound Damping assembly if needed
Play in Fork Loose bushings Resize bushings or replace with new ones if damaged Loose Compression Rod bolt Tighten bolt to specified torque Loose Rebound damping shaft Tighten
Shaft to specified torque Loose press fit tolerances Call Answer Products Customer Service Air Assist Problems Various See Air Assist Troubleshooting Guide Lock Out Problems Various See Lock Out
Troubleshooting Remote Lockout Problems Various See Remote Lockout Section
- Page 1
647732 US (31/10/2019) MT 625 H 75K ST5 S1 MT 625 H 75K COMFORT ST5 S1 OPERATOR’S MANUAL (ORIGINAL INSTRUCTIONS) - Page 2
— Descriptions and figures are non binding. — MANITOU reserves the right to change its models and their equipment without being required to update this manual. — The MANITOU network, consisting exclusively of qualified professionals, is at your disposal to answer all your questions. - Page 3
MANITOU BF. Any violation of the aforementioned may lead to civil and criminal prosecution. The logos as well as the visual identity of the company are the property of MANITOU BF and may not be… - Page 4
1 — OPERATING AND SAFETY INSTRUCTIONS 2 — DESCRIPTION 3 — MAINTENANCE 4 — OPTIONAL ADAPTABLE ATTACHMENTS FOR THE RANGE… - Page 5
1 — OPERATING AND SAFETY INSTRUCTIONS 1 — 1… - Page 6
1 — 2… - Page 7
1 — 3… -
Page 8: Table Of Contents
1 — OPERATING AND SAFETY INSTRUCTIONS INSTRUCTIONS TO THE COMPANY MANAGER THE SITE THE OPERATOR THE LIFT TRUCK A — SUITABILITY OF THE LIFT TRUCK FOR THE JOB ……….. . . 1-6 B — ADAPTATION OF THE LIFT TRUCK TO STANDARD ENVIRONMENTAL CONDITIONS .
- Page 9
LIFT TRUCK MAINTENANCE INSTRUCTIONS 1-30 GENERAL INSTRUCTIONS 1-30 PLACING THE BOOM SAFETY WEDGE 1-30 FITTING THE WEDGE …………..1-30 REMOVING THE WEDGE . -
Page 10: Instructions To The Company Manager
A — SUITABILITY OF THE LIFT TRUCK FOR THE JOB — MANITOU has ensured that this lift truck is suitable for use under the standard operating conditions defined in this operator’s manual, with a STATIC TEST COEFFICIENT 1.25 and a DYNAMIC TEST COEFFICIENT OF 1, as specified in harmonised standard EN 1459 for mast trucks.
-
Page 11: C — Modification Of The Lift Truck
Inflate the tyres in accordance with recommendations. • The seat is an essential way of reducing the vibrations transmitted to the operator. In the event of seat replacement, please contact MANITOU. • Ensure that the operators adapt their operating speed to suit the conditions on site.
-
Page 12: Instructions
INSTRUCTIONS — The operator’s manual must always be in good condition and kept in the place provided on the lift truck and in the language used by the operator. — The operator’s manual and any plates or stickers which are no longer legible or are damaged, must be replaced immediately. MAINTENANCE — Maintenance or repairs other than those detailed in Part: 3 — MAINTENANCE must be carried out by qualified personnel (consult your dealer) and in the necessary safety conditions to preserve the health of the operator and any third party.
- Page 13
1 — 9… -
Page 14: Instructions For The Operator
— At any time, as an operator, you must envisage, within reason, the possible risk to yourself, to others or to the lift truck itself when you use it. IMPORTANT In order to reduce or prevent any danger with a MANITOU-approved attachment, follow the instructions in Paragraph: 4 — ADAPTABLE ATTACHMENTS AS OPTIONS ON THE RANGE: INTRODUCTION. GENERAL INSTRUCTIONS A — OPERATOR’S MANUAL…
-
Page 15: E — Modification Of The Lift Truck
Right-hand column • With a PLATFORM-fitted lift truck, people can only be lifted using platforms designed by MANITOU for the purpose. — MANITOU sells equipment specifically designed for lifting people (OPTION PLATFORM lift truck, contact your dealer). 1 — 11…
-
Page 16: Operating Instructions Unladen And Laden
OPERATING INSTRUCTIONS UNLADEN AND LADEN A — BEFORE STARTING THE LIFT TRUCK — Perform the daily maintenance operations ( 3 — MAINTENANCE). — Make sure that the driver’s cab is clean, particularly the floor and floor mat. Check that no movable object may hinder the operation of the lift truck.
-
Page 17: D — Visibility
— Take into account the lift truck’s dimensions and its load before trying to negotiate a narrow or low passageway. — Never move onto a loading platform without having first checked: • That it is suitably positioned and made fast. •…
-
Page 18: E — Starting The Lift Truck
E — STARTING THE LIFT TRUCK SAFETY INSTRUCTIONS IMPORTANT The lift truck must only be started up or manoeuvred when the operator is sitting in the driver’s cab, with his seat belt adjusted and fastened. — Never try to start the lift truck by pushing or hauling it. Such an operation may cause severe damage to the transmission. If necessary, towing requires the transmission to be put in neutral ( 3 — MAINTENANCE).
-
Page 19: G — Stopping The Lift Truck
— Never drive on the edge of a ditch or steep slope. — It is dangerous to use two lift trucks simultaneously to handle heavy or bulky loads, since this operation requires particular precautions to be taken. It must only be used exceptionally and after risk analysis. — The ignition switch has an emergency stop mechanism in case of an operating anomaly occurring in the case of lift trucks not fitted with a punch-operated cut-out.
-
Page 20: H — Driving The Lift Truck On The Public Highway
H — DRIVING THE LIFT TRUCK ON THE PUBLIC HIGHWAY (or see current legislation in other countries) FRENCH ROAD TRAFFIC RULES — The driving of non EC type-approved tractors on the public highway is subject to the provisions of the highway code relating to special machines, defined in article R311-1 of the highway code, in category B of the Equipment Order of 20 November 1969 that determines the procedures applicable to special machines.
- Page 21
1 — 17… -
Page 22: Instructions For Handling A Load
INSTRUCTIONS FOR HANDLING A LOAD A — CHOICE OF ATTACHMENTS — Only attachments approved by MANITOU can be used on its lift trucks. — Make sure the attachment is suitable for the work to be done ( 4 — ADAPTABLE ATTACHMENTS AS OPTIONS ON THE RANGE).
-
Page 23: D — Transverse Attitude Of The Lift Truck
D — TRANSVERSE ATTITUDE OF THE LIFT TRUCK Depending on the model of lift truck The transverse attitude is the transverse slope of the chassis with respect to the horizontal. Raising the boom reduces the lift truck’s lateral stability. The transverse attitude must be set with the boom in down position as follows: 1 — …
-
Page 24: F — Picking Up And Putting Down A High Load On Tyres
F — PICKING UP AND PUTTING DOWN A HIGH LOAD ON TYRES IMPORTANT In no circumstances should you raise the boom if you have not checked the transverse attitude of the lift truck INSTRUCTIONS FOR HANDLING A LOAD: D — TRANSVERSE ATTITUDE OF THE LIFT TRUCK). REMINDER: Make sure that the following operations can be performed with good visibility ( OPERATING INSTRUCTIONS UNLADEN AND LADEN:…
- Page 25
PUTTING DOWN A HIGH LOAD ON TYRES — Approach the load in the transport position in front of the stack (fig. F6). — Apply the parking brake and place the forward/reverse selector in neutral. — Raise and extend the boom (1) (2) until the load is above the stack, while monitoring the longitudinal stability indicator ( INSTRUCTIONS FOR HANDLING A LOAD: C — LONGITUDINAL STABILITY INDICATOR). -
Page 26: G — Picking Up And Putting Down A High Load On Stabilisers
G — PICKING UP AND PUTTING DOWN A HIGH LOAD ON STABILISERS Depending on the model of lift truck IMPORTANT In no circumstances should you raise the boom if you have not checked the transverse attitude of the lift truck INSTRUCTIONS FOR HANDLING A LOAD: D — TRANSVERSE ATTITUDE OF THE LIFT TRUCK). REMINDER: Make sure that the following operations can be performed with good visibility ( OPERATING INSTRUCTIONS UNLADEN AND LADEN:…
- Page 27
TAKING UP A HIGH LOAD ON STABILISERS — Ensure that the forks will easily pass under the load. — Check the position of the lift truck with respect to the load and make a test run, if necessary, without taking the load. — Raise and extend the boom (1) (2) until the forks are at the level of the load (fig. G5). -
Page 28: H — Picking Up And Putting Down A Suspended Load
H — PICKING UP AND PUTTING DOWN A SUSPENDED LOAD IMPORTANT Failure to follow the above instructions may lead the lift truck to loose stability and overturn. MUST be used with a lift truck equipped with an operational hydraulic movement cut-out device. CONDITIONS OF USE — The length of the sling or the chain shall be as short as possible to limit swinging of the load.
-
Page 29: Instructions For Use As A Loader
INSTRUCTIONS FOR USE AS A LOADER For agricultural-type lift trucks (MLT range) A — LOADING IMPORTANT In no circumstances should you raise the boom if you have not checked the transverse attitude of the lift truck INSTRUCTIONS FOR HANDLING A LOAD: D — TRANSVERSE ATTITUDE OF THE LIFT TRUCK). REMINDER: Make sure that the following operations can be performed with good visibility ( OPERATING INSTRUCTIONS UNLADEN AND LADEN:…
-
Page 30: Platform Operating Instructions
— MANITOU has ensured that this platform is suitable for use under the normal operating conditions provided in this operator’s manual, with a STATIC test coefficient of 1.25 and a DYNAMIC test coefficient of 1.1 as specified in harmonised European standard EN 280:2013+A1 for «mobile elevating work platforms».
-
Page 31: E — Environment
E — ENVIRONMENT IMPORTANT It is forbidden to use the platform close to electricity cables. Maintain the specified safe distances. RATED VOLTAGE SAFETY DISTANCE (METRES) 50 < U < 1,000 2,30 M 1,000 < U < 30,000 2,50 M 30000 < U < 45000 2,60 M 45000 <…
-
Page 32: Instructions For Using The Radio-Control
INSTRUCTIONS FOR USING THE RADIO-CONTROL For lift trucks with RC radio control HOW TO USE THE RADIO-CONTROL SAFETY INSTRUCTIONS — This radio-control consists of electronic and mechanical safety elements. It cannot receive commands from another transmitter because the internal encoding is unique to each radio-control. IMPORTANT If it is used improperly or incorrectly, there is a risk of danger to: — The physical and mental health of the user or others.
- Page 33
1 — 29… - Page 34
LIFT TRUCK MAINTENANCE INSTRUCTIONS GENERAL INSTRUCTIONS — Ensure the area is sufficiently ventilated before starting the lift truck. — Wear clothes suitable for the maintenance of the lift truck, avoid wearing jewellery and loose clothes. Tie back and protect your hair, if necessary. — Stop the engine and remove the ignition key, when an intervention is necessary. - Page 35
LUBRICANT AND FUEL LEVELS — Use the recommended lubricants (never use contaminated lubricants). — Do not fill the fuel tank when the engine is running. — Only fill up the fuel tank in areas specified for this purpose. — Do not fill the fuel tank to the maximum level. — Do not smoke or approach the lift truck with a flame, when the fuel tank is open or is being filled. - Page 36
IF THE LIFT TRUCK IS NOT TO BE USED FOR A LONG TIME INTRODUCTION The following recommendations are intended to prevent the lift truck from being damaged when it is withdrawn from service for an extended period. IMPORTANT Procedures to follow if the lift truck is not to be used for a long time and for starting it up again afterwards must be performed by your dealership. This period of long-term stoppage must not exceed 12 months. - Page 37
BRINGING THE LIFT TRUCK BACK INTO SERVICE — Remove the waterproof adhesive tape from all the holes. — Refit and reconnect the battery. — Remove the protection from the cylinder rods. — Perform the daily maintenance operations ( 3 — MAINTENANCE). — Put the handbrake on and remove the axle stands. — Drain and clean the fuel tank ( 3 — MAINTENANCE). - Page 38
• Glass items can be removed and collected for processing by glaziers. ENVIRONMENTAL PROTECTION By entrusting the maintenance of your lift truck to the MANITOU network, the risk of pollution is limited and the contribution to environmental protection contribution is made. - Page 39
2 — DESCRIPTION 2 — 1… - Page 40
2 — 2… - Page 41
2 — DESCRIPTION SAFETY PLATES AND STICKERS IDENTIFICATION OF THE LIFT TRUCK CHARACTERISTICS 2-10 TYRES 2-12 DIMENSIONS AND LOAD CHARTS 2-14 VISIBILITY 2-16 INSTRUMENTS AND CONTROLS 2-18 TOWING DEVICE 2-40 DESCRIPTION AND USE OF THE OPTIONS 2-42 2 — 3… - Page 42
SAFETY PLATES AND STICKERS IMPORTANT Clean all stickers and safety plates so that they are legible. Any safety plates and stickers which are illegible or damaged must be replaced. Check that stickers and safety plates are present after replacing any spare parts. EXTERNAL PLATES AND STICKERS REF. - Page 43
STICKERS AND PLATES UNDER THE ENGINE HOOD REF. PART NO. DESCRIPTION 244130 — Preheat rod (OPTION) 52506370 — Fuses 259398 — Water/diesel separator 52515083 — Anti-freeze 234797 MT 625 H COMFORT 75K ST5 — Air conditioning (OPTION) 52589959 — Rotating fan safety 110 -120 V ;… - Page 44
PLATES AND STICKERS IN THE CAB REF. PART NO. DESCRIPTION 52611811 — Lubrication sheet 52509004 — Manipulator function sheet 241621 — Safety instruction sheet 52504055 MT 625 H COMFORT 75K ST5 — Fuse sheet 52515060 MT 625 H — Fuse sheet 75K S 52533603 MT 625 H COMFORT 75K ST5 — Relay sheet… - Page 45
75% handling cycle Maxi Kg CO2/hour 1,00m Maxi 3m Mini Tests carried out by Manitou following the EP-695 internal procedure as approved by DANGER Keep machine at least 25 feet from overhead power lines. Failure to comply may result… - Page 46
IDENTIFICATION OF THE LIFT TRUCK As our policy is to promote a constant improvement in our products, our range of lift trucks may undergo certain modifications, without any obligation for us to advise our customers. When you order parts, or when you require any technical information, always specify: NOTE: For the owner’s convenience, it is recommended that a note of these numbers is made in the spaces provided, at the time of the delivery of the lift truck. - Page 47
FRONT AXLE Type Serial number MANITOU part No. REAR AXLE Type Serial number MANITOU part No. «Constructeur» Manufacturer «Type Cabine» Cabin type «Numéro de série» Serial number BOOM MANITOU Part No. Date of manufacture and manufacturer FRAME Serial number/Product identification number ATTACHMENT MANUFACTURER’S PLATE «MODELE»… - Page 48
CHARACTERISTICS ENGINE Type KUBOTA V3307 Fuel Diesel 4 in line Number of cylinders Supercharged Suction Injection system Direct Ignition sequence 1.3.4.2 Capacity cu.in (cm3) 203.27 (3331) 3.7 x 4.72 (94 x 120) Bore and stroke in (mm) 17,5 Compression ratio Nominal speed laden 2600 Min. - Page 49
BRAKE SYSTEM Service brake Non-servo hydraulic brake — Type of brake Oil-immersed multi-disc brake — Type of control By foot on front axle Parking brake Low pressure hydraulic brake — Type of brake Oil-immersed multi-disc brake — Type of control Switch-operated electro-hydraulic HYDRAULIC CIRCUIT Hydraulic pump… - Page 50
TYRES LOAD PER TYRE FRONT UNLADEN FRONT LADEN REAR UNLADEN REAR LADEN PRESSURE 12-16,5 12PR 81,2 SKS 532 ALLIANCE 12-16,5 12PR 1100 2425 3250 7165 1250 2756 81,2 HAULER SKS 305/70 R16,5 MICHELIN 69,6 137A8 BIBSTEEL ALL TERRAIN GROUND CONTACT PRESSURE GROUND CONTACT AREA PRESSURE LOAD HARD GROUND… - Page 51
2 — 13… - Page 52
DIMENSIONS AND LOAD CHARTS ft-in (mm) 3-11,2 (1200) ft-in (mm) 7-6,6 (2300) ft-in (mm) (991) ft-in (mm) 3-0,5 (928) ft-in (mm) 12-9,3 (3894) ft-in (mm) 12-6,8 (3831) ft-in (mm) 10-8,9 (3275) ft-in (mm) 16-8,6 (5094) ft-in (mm) 4-10,7 (1492) ft-in (mm) 4-10,7 (1492) (mm) 9,45… - Page 53
MT625 68° 19ft1in 60° 50° 40° 30° 20° 10° 0° -2° 24in 0 Feet 11ft0in 8ft4in 5ft3in 3ft7in 9ft4in 6ft11in 4ft3in 0 Meters According norme ANSI/ITSDF B56-6-2011 2 — 15… - Page 54
VISIBILITY We use European standard EN15830 relating to operator visibility. — Adhere to the instructions for optimising operator visibility in the immediate vicinity ( 1 — OPERATING AND SAFETY INSTRUCTIONS: INSTRUCTIONS TO THE OPERATOR: DRIVING INSTRUCTIONS UNLADEN AND LADEN: D — VISIBILITY). DESCRIPTION AND ADJUSTMENT OF REAR-VIEW MIRRORS 1 — LEFT REAR-VIEW MIRROR 2 — MAIN RIGHT REAR-VIEW MIRROR 3 — CENTRAL RIGHT REAR-VIEW MIRROR… - Page 55
2 — 17… - Page 56
INSTRUMENTS AND CONTROLS DESCRIPTION NOTE: All the terms such as: RIGHT, LEFT, FRONT, REAR are as seen by an observer occupying the driver’s seat and looking straight ahead. 1 — DRIVER’S CAB ACCESS ………………… . . 2-20 2 — SEAT BELT . - Page 57
MT 625 H COMFORT 75K ST5 MT 625 H 75K ST5 2 — 19… -
Page 58: Driver’s Cab Access
1 — DRIVER’S CAB ACCESS Use the contact points 1 to get into or out of the driver’s cab. • Mounting at the front. • Descending at the rear. 2 — SEAT BELT IMPORTANT Under no circumstances must the lift truck be used if the seat belt is defective (fixing, locking, cuts, tears, etc.). Immediately repair or replace the safety belt.
-
Page 59: Driver’s Seat
3 — DRIVER’S SEAT DESIGNED FOR MAXIMUM COMFORT, THIS SEAT CAN BE ADJUSTED AS FOLLOWS. WEIGHT ADJUSTMENT Adjust the weight when the driver is sitting on the seat. — Pull the weight adjustment lever 1 fully out. — Move the weight adjustment lever 1 upwards to increase the weight or downwards to reduce it.
-
Page 60: Ignition Switch
4 — IGNITION SWITCH This switch has 5 positions: • P — Not used. • O — Ignition cut-off and engine stopped. • I — Ignition + preheat. • II — Not used. • III — Starting and return to position I as soon as the key is released. 5 — EMERGENCY STOP In the event of danger, it enables the engine to be shut down, thereby cutting-off all hydraulic movements.
-
Page 61: Man-Machine Interface (Mmi)
8 — MAN-MACHINE INTERFACE (MMI) • A — INSTRUMENT CONTROL PANEL • B — SCREEN DISPLAYS A — INSTRUMENT CONTROL PANEL IMPORTANT A permanently lit or flashing warning lamp, with the engine running, is the sign of an operating fault. The lighting of some lamps may be accompanied by an audible signal. Do not ignore this warning, consult your dealer without delay.
-
Page 62: Switches
TRANSMISSION OIL TEMPERATURE WARNING INDICATOR LAMP The lamp and the buzzer come on when the transmission oil temperature is abnormally high. Stop the lift truck and seek the cause of this overheating. ENGINE FAULT INDICATOR LAMP If the indicator lamp comes on or flashes while the lift truck is in operation, a diagnostic fault has been detected. The lift truck will operate in reduced mode.
- Page 63
PARKING BRAKE FAULT INDICATOR LAMP The indicator lamp comes on when the parking brake is applied ( SWITCHES). BRAKING OIL LEVEL WARNING INDICATOR LAMP If the lamp comes on when the lift truck is running, stop the engine immediately and check the brake fluid level. In the event of an abnormal drop in the level, consult your dealer. - Page 64
Rev counter Partial hour meter SETTING THE TIME — Display clock screen. — Press the button for 2 seconds, choose the «24 hour» or «12 hour am/pm» clock with the button and confirm — Set the hours with the button and confirm — Set the minutes with the button and confirm RESETTING THE PARTIAL HOUR METER… - Page 65
9 — SWITCHES NOTE: The location of the switches may vary depending on the options. HAZARD WARNING LIGHTS REAR FOG LIGHT (OPTION) ROTATING BEACON LIGHT FRONT AND REAR WORKING LIGHTS (OPTION) REAR WINDOW DEFROSTER (OPTION) MT 625 H COMFORT 75K ST5 HYDRAULIC MOVEMENT NEUTRALISATION When driving on the road, it is highly recommended (mandatory in Germany) that you cut-off all the hydraulic movements. The indicator lamp shows when it is in use. -
Page 66: Armrest And Storage
PARKING BRAKE To connect the parking brake, press the bottom of the switch. The indicator lamp indicates when it is in use. To disconnect the parking brake, press the top of the switch. ATTACHMENT HYDRAULIC LOCKING (OPTION) BOOM HEAD ELECTROVALVE (OPTION) MT 625 H COMFORT 75K ST5 BOOOM HEAD ELECTROVALVE + ATTACHMENT HYDRAULIC LOCKING (OPTION)
-
Page 67: Fuses And Relays
12 — FUSES AND RELAYS A sticker on the inside of the access panel provides a quick indication of the use of the fuse plate’s components described below. — Remove the access panel 1 to access the fuses and relays. Replace a used fuse with a new fuse of the same quality and capacity.
- Page 68
2A Control instrument module power supply. * * MT 625 H 75K ST5 Not used. ** 2A Battery power supply (+). * Not used. ** Free. * Not used. ** Free. * Not used. ** 2A Control instrument module power supply. ** 2A Battery power supply (+). -
Page 69: Cigarette Lighter
13 — CIGARETTE LIGHTER For 12 V appliance and max. amperage 15A. 14 — LIGHTING, HORN AND INDICATOR SWITCH The switch controls the visual and sound alarms. • A — All lights are off, the indicator lights do not flash. • B — The right hand indicator lights flash. •…
-
Page 70: Hydraulic Controls
17 — HYDRAULIC CONTROLS IMPORTANT Do not attempt to alter the hydraulic system pressure by interfering with the pressure regulating valve. In the event of suspected malfunction, contact your dealer. ANY ALTERATION MAY RENDER THE WARRANTY NULL AND VOID. Use the hydraulic controls gently without jerking, to avoid incidents caused by shaking the lift truck. NOTE: When driving on the road, it is highly recommended (mandatory in Germany) that all the hydraulic movements are cut off ( SWITCHES).
- Page 71
ADJUSTMENT OF ATTACHMENT HYDRAULIC FLOW RATE — Switch on lift truck ignition. — Select the attachment circuit hydraulic flow screen with the scroll button . In turn the screen displays the hydraulic flow stored in the memory of circuit B (without «-» sign) and of circuit A (with «-» sign). — Press the button for two seconds, the screen will appear on the… -
Page 72: Accelerator Pedal
18 — ACCELERATOR PEDAL 19 — SERVICE BRAKE PEDAL AND TRANSMISSION CUT-OFF The pedal acts on the front wheels by means of a hydraulic brake system to slow down and stop the lift truck. During free travel it enables the transmission to be cut off progressively thus allowing a gradual approach (delicate handling) with all the engine power.
-
Page 73: Steering Selection
21 — STEERING SELECTION A — GREEN WHEEL ALIGNMENT INDICATOR LAMPS IMPORTANT Before selecting one of the three steering possibilities, align the 4 wheels in relation to the lift truck axis. Never change the steering mode whilst driving. These green indicator lamps come on to indicate the alignment of the wheels in relation to the lift truck.
-
Page 74: Heater Control
22 — HEATER CONTROL A — FAN CONTROL This 3-speed control allows the air to be ventilated through the air vents. B — TEMPERATURE CONTROL Adjusts the temperature inside the cab. • B1 — The fan pumps in the air at ambient temperature. • B2 — The fan pumps in warm air. The intermediate positions allow the temperature to be adjusted.
-
Page 75: Heating Vents
24 — HEATING VENTS These swivelling heating vents, which can be shut off, allow you to direct and adjust the flow inside the cab. 25 — DEMIST VENTS These vents allow the windscreen and side windows to be demisted. For optimum efficiency, close the heating vents. 26 — LEVEL INDICATOR Enables the operator to check that the lift truck is in the horizontal position.
-
Page 76: Front Headlights
34 — FRONT HEADLIGHTS • A — Left front indicator light. • B — Left front dipped beam headlight. • C — Left front main beam. • D — Left front side light. • E — Right front indicator light. • F — Right front dipped beam headlight. • G — Right front main beam headlight. •…
-
Page 77: Boom Safety Wedge
40 — BOOM SAFETY WEDGE IMPORTANT Only use the wedge supplied with the lift truck. The lift truck is equipped with a boom safety wedge which must be installed on the rod of the lifting cylinder when working beneath the boom ( 1 — OPERATING AND SAFETY INSTRUCTIONS).
- Page 78
TOWING DEVICE 1 — TOWING PIN ………………….. . 2-41 2 — REAR ELECTRIC SOCKET (DEPENDING ON ASSEMBLY) . - Page 79
1 — TOWING PIN IMPORTANT Be careful not to get your fingers caught or crushed during this operation. Do not forget to put the cotter pin back in place. When uncoupling, make sure that the trailer is supported independently. COUPLING AND UNCOUPLING THE TRAILER — To couple the trailer, position the lift truck as close as possible to the trailer ring. - Page 80
DESCRIPTION AND USE OF THE OPTIONS 1 — PREHEAT ROD………………….. 2-42 2 — MODCOD ANTI-THEFT SYSTEM . -
Page 81: Modcle Anti-Start System
3 — MODCLE ANTI-START SYSTEM OPERATION — Switch on lift truck ignition, red LED 1 will flash. — Apply key 2 to its base 3, and withdraw it as soon as the system emits a continuous sound signal, and LED 1 turns green. — Start the lift truck within the next 20 seconds; otherwise the anti-theft system will be reactivated and red LED 1 will flash.
-
Page 82: Waterproof Document Holder
7 — WATERPROOF DOCUMENT HOLDER 8 — WINDSCREEN GRILL DESCRIPTION The windscreen grill provides additional protection for the operator from any external elements spattered on the windscreen. This grill must be removable from inside the cab to enable an emergency exit. EMERGENCY EXIT — After breaking the windscreen with the emergency hammer, push (with force) on the windscreen grill at A to remove it.
-
Page 83: Boom Head Electrovalve
10 — BOOM HEAD ELECTROVALVE MT 625 H COMFORT 75K ST5 Enables use of two hydraulic functions on the attachment circuit. IMPORTANT To facilitate connection of the quick couplers, decompress the hydraulic circuit by pressing button 1 on the electrovalve. ATTACHMENT LINE A1/B1 CONTROL — Put switch 1 to position A (indicator lamp off ).
-
Page 84: Attachment Hydraulic Control Forced Operation
12 — ATTACHMENT HYDRAULIC CONTROL FORCED OPERATION MT 625 H COMFORT 75K ST5 IMPORTANT This OPTION must only be used with an attachment requiring continuous hydraulic movement, such as a brush, feeder bucket, mixer, spray etc. It is strictly forbidden for use in handling operations and all other applications (winch, crane jib, crane jib with winch, hook, etc.).
-
Page 85: Lifting Ring On Single Carriage
15 — LIFTING RING ON SINGLE CARRIAGE CONDITIONS OF USE IMPORTANT Follow the instructions given in your lift truck’s instruction manual ( 1 — OPERATING AND SAFETY INSTRUCTIONS FOR HANDLING LOADS), and in addition those given below. — The lifting ring must be used WITHOUT FORKS AND ATTACHMENTS, but the angle of inclination of the carriage must be same as when the forks are used in the horizontal position.
- Page 86
2 — 48… - Page 87
3 — MAINTENANCE 3 — 1… - Page 88
3 — MAINTENANCE ORIGINAL MANITOU SPARE PARTS AND EQUIPMENT FORKLIFT TRUCK MAINTENANCE DAILY AND WEEKLY MAINTENANCE MANDATORY FIRST 500 HOURS OR 6 MONTHS SERVICE PERIODIC SERVICE OCCASIONAL MAINTENANCE AND OPERATION FILTER ELEMENTS AND BELTS LUBRICANTS AND FUEL 3-10 Ü 10H — DAILY SERVICE OR EVERY 10 HOURS OF SERVICE 3-12 Ü… - Page 89
• Efficient help with diagnosis. • Improvements due to experience feedback. • Operator training. • Only the MANITOU network has detailed knowledge of the design of the lift truck and therefore the best technical ability to provide maintenance. IMPORTANT ORIGINAL REPLACEMENT PARTS ARE DISTRIBUTED EXCLUSIVELY BY MANITOU AND ITS DEALER NETWORK. - Page 90
This schedule enables the operator to keep up with the periodic service of the lift truck by notifying the total number of hours of operation and the date of the service performed by the professional approved by the MANITOU network. - Page 91
MANDATORY FIRST 500 HOURS OR 6 MONTHS SERVICE FIRST 500 HOURS BEFORE THE FIRST 6 MONTHS — If the lift truck has reached the first 500 hours of service before the first 6 months have expired, perform both the mandatory ÜŒ service and periodic 500 H service ( … - Page 92
PERIODIC SERVICE MAINTENANCE SCHEDULE Þ Þ 500 H 1000 H 1500 H 2000 H Ü WHEN DUE FIRST 6 MONTHS FIRST 500 HOURS or 1 YEAR or 2 YEARS or 3 YEARS or 4 YEARS MANDATORY SERVICE Ü Œ Œ Œ Œ Ž PERIODIC SERVICE MANDATORY SERVICE Œ… - Page 93
Ü 1000H — PERIODIC SERVICE — EVERY 1000 HOURS OF SERVICE OR 2 YEARS ALSO PERFORM THE 500 HOUR PERIODIC MAINTENANCE OPERATIONS. — CHECK Safety belt ………………3-24 — CLEAN Fuel tank . - Page 94
Ü 3000H — PERIODIC SERVICE — EVERY 3000 HOURS OF SERVICE OR 6 YEARS ALSO PERFORM THE 500 HOUR AND 1000 HOUR PERIODIC MAINTENANCE OPERATIONS. — CHECK Turbocharger **………………3-33 — CHECK Exhaust gas recirculation system «EGR»… - Page 95
FILTER ELEMENTS AND BELTS ÜŒ 500H — PERIODIC SERVICE — EVERY 500 HOURS OF SERVICE OR 1 YEAR ENGINE OIL FILTER HYDRAULIC RETURN OIL FILTER CARTRIDGE Part number: 279809 Part number: 750098 FUEL PRE-FILTER INTERIOR CAB VENTILATION FILTER Part number: 940729 Part number: 750306 FUEL FILTER HYDRAULIC FLUID TANK FILTER CAP Part number: 52630568 Part number: 794879 Ü… - Page 96
USE THE RECOMMENDED LUBRICANTS AND FUEL: — For topping up, oils may not be miscible. — For oil changes, MANITOU oils are perfectly appropriate. DIAGNOSTIC ANALYSIS OF OILS If a service or maintenance contract has been set up with the dealer, a diagnostic analysis of engine, transmission and axle oils may be requested depending on the rate of use. - Page 97
PRODUCT 1.06 US qt 2.11 US qt 5.28 US qt 5.28 US gal 14.53 US gal 55.21 US gal 1 ℓ 2 ℓ 5 ℓ 20 ℓ 55 ℓ 209 ℓ — MANITOU EVOLOGY OIL 10W40 API CJ4 895837 895838 895839 895840 — MANITOU ISO VG 46 HYDRAULIC OIL 545500 582297 546108… -
Page 98: Daily Service Or Every 10 Hours Of Service
Ü 10H — DAILY SERVICE OR EVERY 10 HOURS OF SERVICE CHECK Lift truck environment Carry out a general inspection around the lift truck: — Fluid leaks or stains on the ground. — Additional objects on the lift truck and in the cabin. — Mounting and locking of the attachment.
-
Page 99: Clean
CLEAN Cyclonic pre-filter (option) The cleaning interval is given as a guide, however the pre-filter must be emptied and cleaned as soon as impurities reach the MAX level on the tank. IMPORTANT When cleaning, take care not to let impurities into the dry air filter. — Loosen nut 1 remove cover 2 and empty the tank.
-
Page 100: Weekly Service Or Every 50 Hours Of Service
Ü 50H — WEEKLY SERVICE OR EVERY 50 HOURS OF SERVICE CHECK Alternator/crankshaft belt tension IMPORTANT If the belt is changed, check the tension again after the first 20 hours of service. — Open the engine cover. — Check the belt for signs of wear and cracks, and change if necessary ( FILTER ELEMENTS AND BELTS).
-
Page 101: Check Front Axle Differential Seal
— Telescope the boom several times in order to spread the lubricant evenly. — Remove the surplus lubricant. IMPORTANT If the lift truck is used in an abrasive environment (dust, sand, coal.) use lubricating varnish (MANITOU reference: 483536). Please consult your dealer. 3 — 15…
-
Page 102: Check Hydraulic Oil Level
CHECK Hydraulic oil level Place the lift truck on level ground with the engine stopped, and the boom retracted and lowered as far as possible. IMPORTANT Use a clean funnel and clean the underside of the oil drum before filling. — Check dipstick 1, the correct level must be at the level of the red dot.
-
Page 103: Clean
— Cleaning is completed when there is no more dust on the cartridge. — Clean the cartridge seal surface with a damp, clean lint-free cloth and grease with a silicone lubricant (MANITOU part No.: 479292).
-
Page 104: Lubricate General Lubrication
LUBRICATE General lubrication To be carried out weekly, if the lift truck has been operated for less than 50 hours during the week. IMPORTANT In the event of prolonged use in an extremely dusty or oxidising atmosphere, reduce this interval to 10 hours of service or every day. Clean, then lubricate the following points with grease ( LUBRICANTS AND FUEL) and remove the surplus.
-
Page 105: Replace Engine Oil
REPLACE Engine oil * REPLACE Engine oil filter * Place the lift truck on level ground, let the engine run at idling speed for a few minutes, then stop the engine. IMPORTANT Dispose of the drain oil in an ecological manner. Tighten the oil filter by hand pressure only and lock the filter in place by a quarter turn.
- Page 106
CHECK Hydraulic oil MANITOU offers a hydraulic oil analysis kit which might make it possible to delay the recommended deadline in the periodic maintenance schedule (2000 hours). In this case we recommend an analysis of the hydraulic oil every 500 hours or 1 year of service. - Page 107
REPLACE Fuel filter IMPORTANT Carefully clean the outside of the filter and around it, to prevent dust from getting into the system. Tighten the filter by hand only and lock it by a quarter turn. — Switch off the lift truck’s ignition with the ignition key. — Unscrew the filter 1. - Page 108
REPLACE Front axle differential oil Place the lift truck on level ground with the engine stopped and the still warm differential oil. IMPORTANT Dispose of the drain oil in an ecological manner. — Place a container under drain plug 1 and unscrew the plug. — Remove level and filling plug 2 to ensure correct drainage. - Page 109
REPLACE Hydraulic fluid tank filter cap Place the lift truck on level ground with the engine stopped. — Unscrew plug 1, remove and replace the filter 2 with a new one ( FILTER ELEMENTS AND BELTS). — Refit and tighten the filter 2 (tightening torque 2,21 ±0,37 ft-lbs 3 ±0,5 N.m). — Refit the filler plug 1. - Page 110
Ü 1000H — PERIODIC SERVICE — EVERY 1000 HOURS OF SERVICE OR 2 YEARS ALSO PERFORM THE 500 HOUR PERIODIC MAINTENANCE OPERATIONS. CHECK Safety belt IMPORTANT Under no circumstances must the lift truck be used if the seat belt is defective (fixing, locking, cuts, tears, etc.). Immediately repair or replace the safety belt. SEAT BELT WITH TWO ANCHORING POINTS — Check the following points: •… - Page 111
REPLACE Alternator belt IMPORTANT Check the belt tension again after the first 20 hours of service. REMOVING THE BELT — Undo screws 1 and remove radiator protection grill 2. — Loosen screws 3 by two to three thread turns. — Swivel the alternator assembly so as to free belt 4. — Pass belt 4 behind radiator propeller 5 to remove it and replace with a new one FILTER ELEMENTS AND BELTS). - Page 112
REPLACE Dry air filter cartridge In case of use in a heavily dust laden atmosphere, there are pre-filtration cartridges, FILTER ELEMENTS AND BELTS). Also, the checking and cleaning periodicity of the cartridge must be reduced (up to 250 hours in a very dusty atmosphere and with pre-filtration). - Page 113
REPLACE Rear axle differential oil Place the lift truck on level ground with the engine stopped and the still warm differential oil. IMPORTANT Dispose of the drain oil in an ecological manner. — Place a container under drain plug 1 and unscrew the plug. — Remove level and filling plug 2 to ensure correct drainage. - Page 114
CHECK Silentblocks ** CHECK Valve lash ** CHECK Injectors ** CHECK Exhaust gas recirculation cooler «EGR» ** CHECK Casing gas recycling valve ** CHECK Brake system pressure * CHECK Boom pad wear * CHECK Condition of wiring harnesses and cables * CHECK Lights and signals * CHECK… - Page 115
REPLACE Oil separator rubber hoses ** REPLACE Exhaust particle filter pressure sensor rubber hoses «DPF» ** REPLACE Intake hose ** REPLACE Pressure detection hoses for the oversupply sensor ** REPLACE Exhaust gas recirculation cooler hoses «EGR» ** REPLACE Water hose ** REPLACE Lubrication hose ** REPLACE… - Page 116
ÜŽ 2000H — PERIODIC SERVICE — EVERY 2000 HOURS OF SERVICE OR 4 YEARS ALSO PERFORM THE 500 HOUR AND 1000 HOUR PERIODIC MAINTENANCE OPERATIONS. CHECK Wheel nut tightening torques — Check the condition of the tyres, to detect cuts, blisters, wear, etc. — Check the tightening torque of the wheel nuts with a torque wrench. •… - Page 117
REPLACE Hydraulic oil REPLACE Brake accumulator unit filter Place the lift truck on level ground with the engine stopped. IMPORTANT Raise the boom and place the boom safety wedge on the rod of the lifting cylinder ( 1 — OPERATING AND SAFETY INSTRUCTIONS: LIFT TRUCK MAINTENANCE INSTRUCTIONS). - Page 118
CHECK Radiator * CHECK Transmission pressures * CHECK Steering * CHECK Steering swivel joints * CHECK Brake pad and brake disk wear * CHECK Condition of boom assembly * CHECK Bearings and bushings * CHECK Condition of hoses and flexible pipes * CHECK Condition of cylinders (leakage, rods) * CHECK… -
Page 119: Check Turbocharger
Ü 3000H — PERIODIC SERVICE — EVERY 3000 HOURS OF SERVICE OR 6 YEARS ALSO PERFORM THE 500 HOUR AND 1000 HOUR PERIODIC MAINTENANCE OPERATIONS. CHECK Turbocharger ** CHECK Exhaust gas recirculation system «EGR» ** CLEAN Exhaust particle filter «DPF» ** ** Engine service, consult your dealer. 3 — 33…
-
Page 120: Occasional Maintenance
Ü OCCASIONAL MAINTENANCE CLEAN «Stationary lift truck» exhaust purification IMPORTANT Exhaust purification is an automated procedure activated by the operator when the following indicator lamps are displayed: — Park the lift truck in a safe and adequately ventilated place. — Check the following points: •…
-
Page 121: Replace Wheels
REPLACE Wheels For this operation, we advise you to use the MANITOU hydraulic jack Part No. 505507 and the MANITOU safety support prop Part No. 554772. IMPORTANT In the event of a wheel being changed on the public highway, secure the lift truck vicinity: — Stop the lift truck, if possible on firm, level ground.
-
Page 122: Replace
REPLACE Battery failure IMPORTANT Operate the battery cut-off for a minimum of 30 seconds after having switched off the ignition with the ignition key. Handling and servicing a battery can be dangerous, take the following precautions: — Wear protective goggles. — Keep the battery horizontal. — Never smoke or work near a naked flame.
- Page 123
3 — 37… -
Page 124: Occasional Operation
Ü OCCASIONAL OPERATION TOW OR WINCH Lift truck IMPORTANT If the lift truck is not on level ground, chock it so that it does not descend the slope. The lift truck must be towed very slowly (less than 5 km/h) and for as short a distance as possible (less than 100 m). For towing a lift truck, the high pressure limiters must be unlocked to avoid damaging the hydrostatic transmission, and the parking brake on the front axle must be released.
- Page 125
TRANSPORT Lift truck IMPORTANT Ensure that the safety instructions associated with the flatbed are complied with before loading the lift truck and that the driver of the carrier vehicle is informed of the dimensions and the weight of the lift truck ( 2 — DESCRIPTION: CHARACTERISTICS). - Page 126
3 — 40… - Page 127
4 — OPTIONAL ADAPTABLE ATTACHMENTS FOR THE RANGE 4 — 1… - Page 128
4 — 2… - Page 129
INTRODUCTION — Your lift truck must be used with interchangeable equipment. These items are called: ATTACHMENTS. — A wide range of attachments is available, guaranteed by MANITOU and designed to fit your lift truck perfectly. IMPORTANT Only attachments approved by MANITOU can be used with their lift trucks ( TECHNICAL SPECIFICATIONS OF ATTACHMENTS). - Page 130
PICKING UP THE ATTACHMENTS 1 — ATTACHMENT WITHOUT HYDRAULICS AND HAND LOCKING DEVICE FITTING AN ATTACHMENT — Ensure that the attachment is in a position facilitating the locking to the carriage. If it is not correctly oriented, take the necessary precautions in order to move it safely. — Check that the locking pin is in position in the bracket (Fig. - Page 131
2 — HYDRAULIC ATTACHMENT AND MANUAL LOCKING DEVICE FITTING AN ATTACHMENT — Ensure that the attachment is in a position facilitating the locking to the carriage. If it is not correctly oriented, take the necessary precautions in order to move it safely. — Check that the locking pin is in position in the bracket (Fig. - Page 132
TECHNICAL SPECIFICATIONS OF ATTACHMENTS STANDARDISED TILTING FORK CARRIAGE PFB 25 N MT-1020 S2 PFB 25 N MT-1260 S2 PART NO. 571958 571959 Rated capacity 2300 kg 2300 kg Width 1020 mm 1260 mm Ground 71 kg 80 kg STANDARDISED SIDE-SHIFT CARRIAGE TDL 2T5 L1020 FEM2 TDL 2T5 L1260 FEM2 PART NO. - Page 133
FLOATING FORK CARRIAGE TFF 29 MT-1040 PART NO. 653340 Rated capacity 2900 kg Width 1040 mm Ground 285 kg FLOATING FORK PART NO. 211919 Section 125x40x1200 mm Ground 62 kg 4 — 7… - Page 134
BUILDING BUCKET CBC 650 L1850 PART NO. 654473 Rated capacity 676 l Width 1850 mm Ground 320 kg LOADING BUCKET CBR 730 L1850 PART NO. 571831 Rated capacity 735 l Width 1850 mm Ground 330 kg MULTIPURPOSE BUCKET DISPLAY CB4X1-700 L1950 PART NO. - Page 135
CONCRETE BUCKET (ADAPTABLE ON FORKS) BB 500 S4 PART NO. 654409 Rated capacity 500 l/1300 kg Width 1100 mm Ground 205 kg CONCRETE BUCKET WITH SPOUT (ADAPTABLE ON FORKS) BBHG 500 S4 PART NO. 751464 Rated capacity 500 l/1300 kg Width 1100 mm Ground… - Page 136
ATTACHMENT GUARDS FORK GUARD PART NO. 227801 FORK BLOCK FOR FLOATING FORK CARRIAGE PART NO. 261210 BUCKET PROTECTOR Always ensure that the width of the protector you choose is less than or equal to the width of the bucket. PART NO. 206734 206732 206730…
ERROR CODES
The appearance of the maintenance key
indicate that an anomaly has been detected by one of the lift truck’s Electronic Control Units (ECU).
— Press the button
to display the information
— If there are several error codes, press the button
— Press the button
once more to return to the hour meter screen, the maintenance key
repairs have not been carried out.
— Contact your dealer, stating the error code or codes.
NOTE: A faulty fuse can generate several error codes. When «error codes» and «maintenance interval» are displayed together, the maintenance
reminder time will appear at the end of the list.
ERROR CODE
HYDROSTATIC TRANSMISSION
520201
Hydraulic transmission electronic control unit voltage fault.
520214
Hydraulic transmission electronic control unit fault.
520215
Hydrostatic motor regulator control fault.
520217
Stop light control fault.
520224
Hydrostatic motor operating solenoid valve control fault.
520225
Hydraulic transmission electronic control unit fault.
520226
Hydraulic transmission electronic control unit fault.
520227
Hydraulic transmission electronic control unit fault.
520273
Forward/reverse selector error.
520274
Inching sensor error.
520275
Hydrostatic pump reverse operation control fault.
520276
Hydrostatic pump forward operation control fault.
520277
Hydraulic pump speed sensor fault.
520281
Temperature outside operating range.
ERROR CODE
190
Engine speed data fault.
520400
Network link fault.
520401
Fuel gauge fault.
520402
Engine temperature sensor fault.
520404
Man-Machine Interface fault.
520405
Man-Machine Interface fault.
520406
Man-Machine Interface fault.
520407
Man-Machine Interface fault.
520408
Man-Machine Interface fault.
520409
Man-Machine Interface fault.
520410
Man-Machine Interface fault.
520411
Man-Machine Interface fault.
520412
Hydrostatic transmission network link fault.
520413
Electronic handling controller network connection fault.
on the hour meter screen
to loop through the error codes.
MAN-MACHINE INTERFACE
together with the sounding of an audible beep,
on the upper screen and error code
remains displayed as long the as the required
ERROR CODE
2662
Telescope control setting fault.
2663
Attachment control setting fault.
520300
Seat sensor fault.
520307
Proportional telescope control fault.
520310
Proportional attachment control fault.
520315
Telescope control ON/OFF fault.
520318
Attachment control ON/OFF fault.
520336
Electronic handling controller fault.
520337
Electronic handling controller fault.
520338
Electronic handling controller temperature fault.
520352
Attachment forced operation control fault.
520362
Electronic handling controller 10V output fault.
520363
Attachment forced operation indicator fault.
520364
Attachment hydraulic control button fault.
520365
Attachment easy hydraulic connection button.
520366
Solenoid valve on jib head fault.
520370
Telescope retracted sensor fault (fault detected during test).
520371
Electronic handling controller temperature fault.
520376
Stability indicator fault.
520382
Aggravating hydraulic movement cut-off disable fault
520383
Computer earth output fault.
520384
Telescope retracted senor fault.
520386
Jib angle sensor fault.
520387
Strain gauge fault.
520388
Network communication fault.
520391
Inclination cut-off valve fault.
520392
Angle calibration fault (fault detected during test).
520393
Gauge calibration fault (fault detected during test).
520394
Safety valve fault.
520395
Safety valve cut-off fault (fault detected during test).
520396
Lowering regulating valve fault.
520397
Regulating fault (fault detected during test).
520398
Raising regulating valve fault.
2-22
.
TELESCOPE/ATTACHMENT
![]()
MANITOU MT1440PE3-MT1840PE3 Fault Codes DTC
MANITOU MT1440PE3-MT1840PE3 Fault Codes DTC
MANITOU MT1440PE3-MT1840PE3 Fault Codes
Adobe Acrobat Document
45.5 KB
MANITOU Forklift Trucks Fault Codes List DTC
Symptom Cause Solution Service Manual Section
Air Loss Schrader Valve leaks Tighten Valve core, replace bad parts as needed. 1 Air Cap O-ring leaks Make sure O-ring is seated properly, replace parts as needed. Air Piston
leaks Check oil volume on top of piston, replace parts as needed. Air Top Cap leaks Check O-ring, tighten cap to proper Torque, and replace parts as needed.
Oil leaks from Wiper Seals Seal not seated properly Remove Casting from Inner Legs, reinstall or replace seals Nicks or scratches on inner legs Replace Crown/Steerer/Inner Leg
Assembly Too much Semi Bath oil Follow instructions for removal and installation of Outer Casting Wear Remove Casting from Inner Legs, reinstall or replace seals
Oil leaks from bottom of Casting Rebound damper shaft leaks Replace Rebound Damping assembly Rebound damper shaft O-ring damaged Replace O-ring on threaded end of Rebound Damping
assembly Compression Rod Bolt leaks Check O-ring on bolt to see if it is damaged and then reinstall
Lack of Travel Tight Bushings Resize bushings or replace with new ones if damaged Hydraulic lock out Replace Rebound Damping assembly Semi Bath oil volume Follow instructions for
removal and installation of Outer Casting Damper oil volume Check oil level, Replace Rebound Damping assembly if needed Fork alignment Visually inspect fork, call Answer Products Customer Service
Fork Top out Loss of Rebound Damping Replace Rebound Damping assembly Top out spring damaged Inspect and replace Top out spring if needed. Damping oil volume not correct Check
oil level, Replace Rebound Damping assembly if needed
Fork Bottom out Too much SAG Refer to SAG Set up in Tuning section of Owners Manual Bottom out Bumper damaged Inspect and replace Bottom out Bumper if needed Damping oil volume
not correct Check oil level, Replace Rebound Damping assembly if needed
Play in Fork Loose bushings Resize bushings or replace with new ones if damaged Loose Compression Rod bolt Tighten bolt to specified torque Loose Rebound damping shaft Tighten
Shaft to specified torque Loose press fit tolerances Call Answer Products Customer Service Air Assist Problems Various See Air Assist Troubleshooting Guide Lock Out Problems Various See Lock Out
Troubleshooting Remote Lockout Problems Various See Remote Lockout Section